Category: Gluten Free

Gluten-Free Indian Recipes: Delicious and Healthy Options

Eating gluten-free doesn’t mean sacrificing flavor, especially with the wide array of gluten free Indian recipes available. Whether you are gluten intolerant or simply looking to reduce gluten in your diet, these gluten free recipes Indian style will delight your taste buds. Let’s explore some delectable gluten free Indian food recipes that you can enjoy for every meal.

Breakfast Recipes

Besan Chilla

Besan Chilla, or chickpea flour pancake, is a high protein vegetarian meals option that fits perfectly within gluten free Indian recipes. This dish is quick to prepare and can be enjoyed with a side of yogurt or chutney. Besan Chilla is also a great example of Indian gluten free recipes that are both nutritious and delicious.

Poha

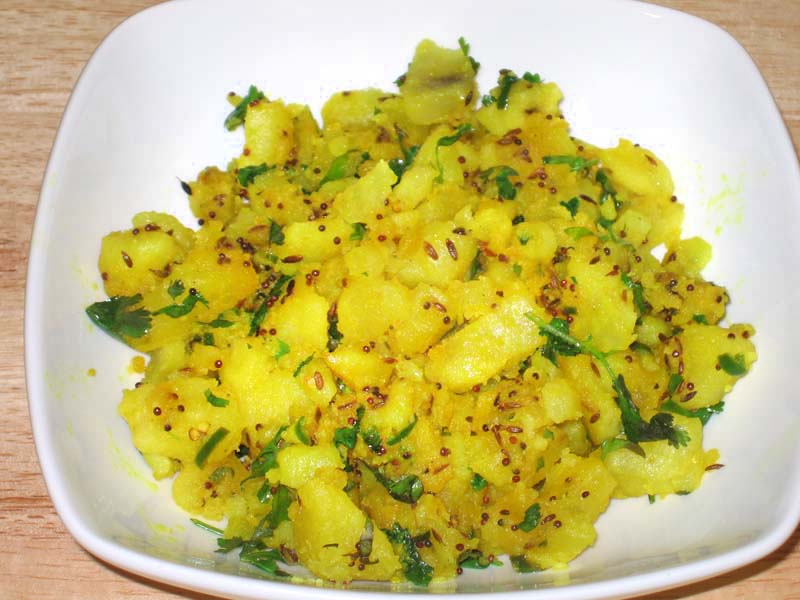
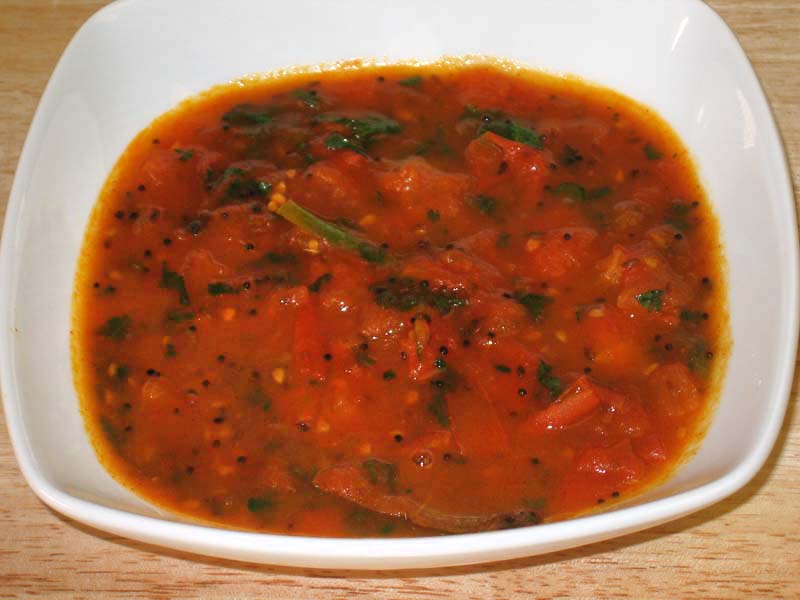
Poha is a light and flavorful dish made from flattened rice, seasoned with turmeric, mustard seeds, and curry leaves. This dish is a staple in many Indian households and is a fantastic gluten free Indian food recipe for Indian breakfast ideas. It’s easy to make and highly customizable.

Lunch Recipes

Rajma Chawal (without the wheat)

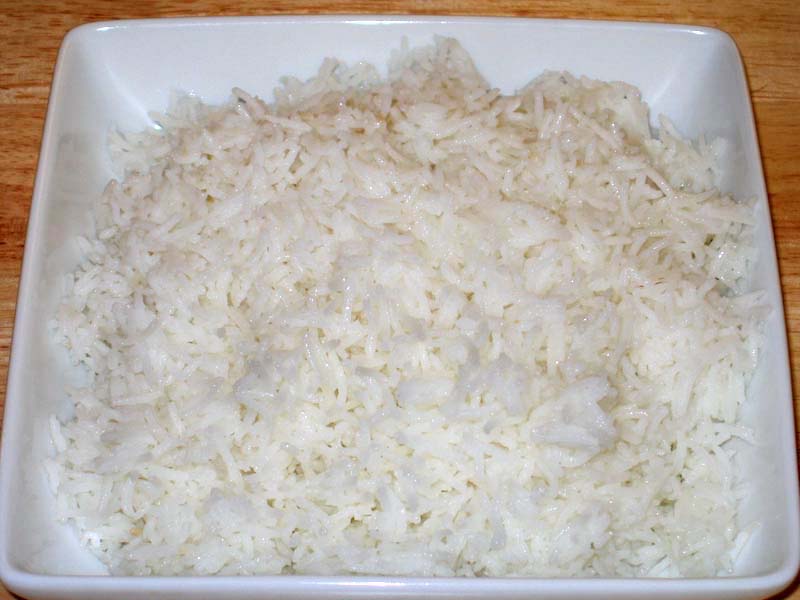
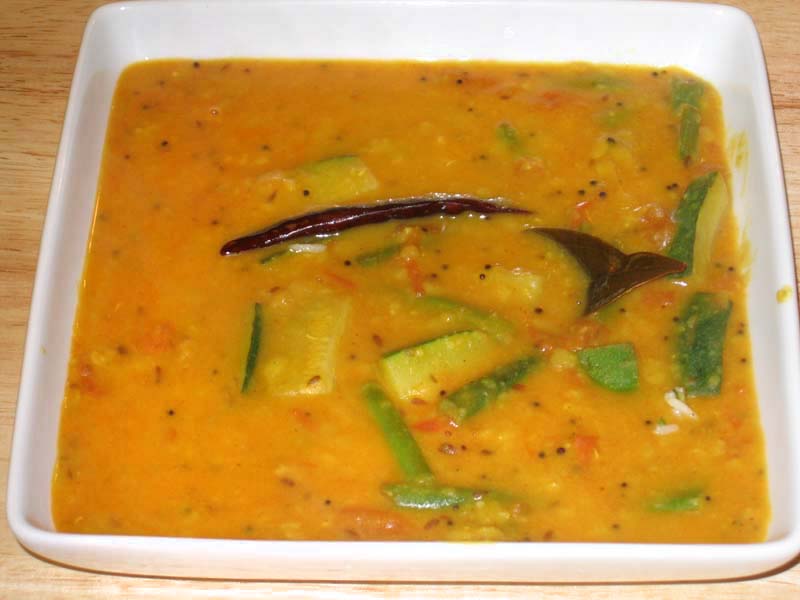
Rajma Chawal is one such beloved north indian recipes made with red kidney beans in a spiced tomato gravy, typically served with rice. By using gluten-free rice, this dish becomes a delightful addition to your collection of gluten free Indian recipes.

Bajra Roti

Bajra Roti is a traditional Indian flatbread made from pearl millet flour. This roti is a staple in the gluten free recipes Indian category and pairs well with various curries and sabzis. It’s nutritious and adds a rustic flavor to your meal.

Dinner Recipes

Paneer Tikka

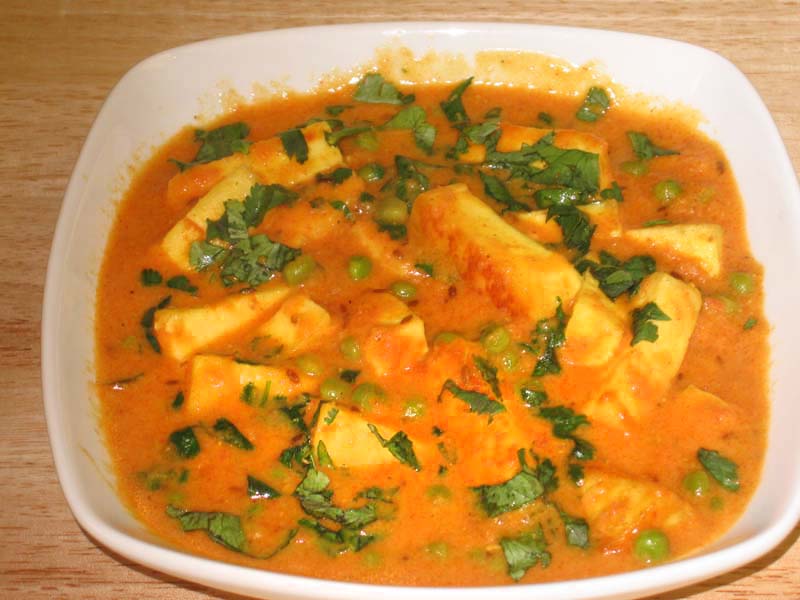
Paneer Tikka is popular in paneer recipes made by marinating paneer cubes in yogurt and spices, then grilling them to perfection. This dish is not only delicious but also fits well within gluten free Indian food recipes. It’s a great starter for any dinner.

Vegetable Pulao

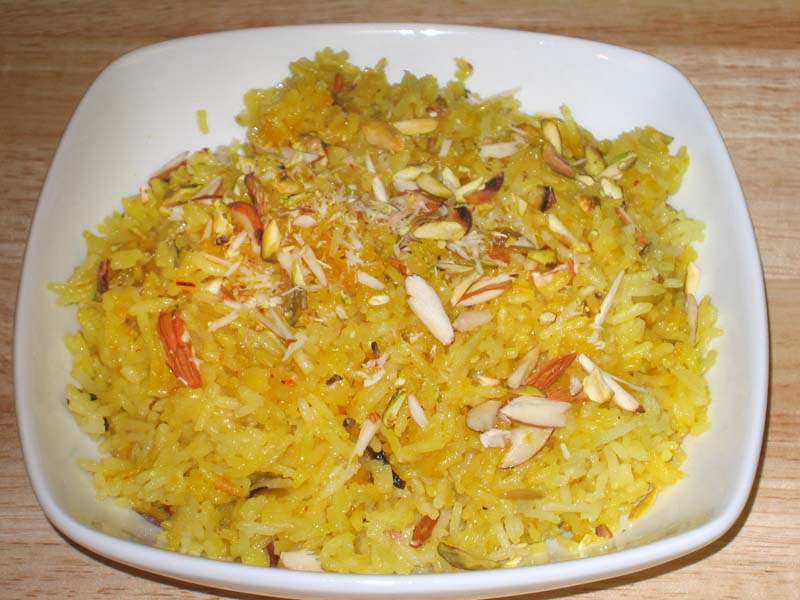
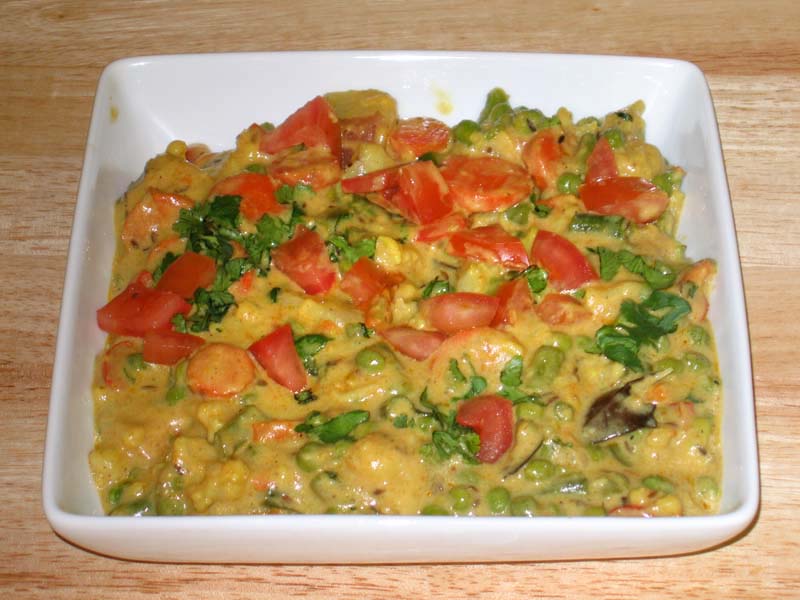
Vegetable Pulao is a one-pot rice dish cooked with mixed vegetables and aromatic spices. This dish is a versatile and satisfying gluten free Indian food recipe that can be enjoyed by everyone. It’s perfect for a quick and nutritious Indian dinner recipes.

Snack Recipes

Bhel Puri (without sev)

Bhel Puri is a popular Indian street food made with puffed rice, vegetables, and tamarind chutney. By omitting sev (which usually contains gluten), this snack becomes a fantastic addition to your gluten free Indian recipes. It’s tangy, spicy, and utterly delicious.

Roasted Makhana

Roasted Makhana are fox nuts that are lightly roasted and seasoned with spices. This snack is not only crunchy and addictive but also fits perfectly into the gluten free recipes Indian category. It’s a healthy option for those mid-day cravings.

Dessert Recipes

Kheer

Kheer is a creamy rice pudding flavored with cardamom and garnished with nuts. This classic Indian dessert is naturally gluten-free and is a beloved part of gluten free Indian food recipes. It’s easy to make and perfect for any festive occasion.

Coconut Ladoo

Coconut Ladoo are sweet balls made from grated coconut and condensed milk, often flavored with cardamom. These ladoos are a delightful example of Indian gluten free recipes that can be enjoyed as a dessert or a snack.

Enhancing Your Gluten-Free Menu

To make your gluten-free menu even more delightful, consider adding dishes from related categories that complement these gluten free Indian recipes. Adding Indian snacks like roasted makhana and bhel puri can provide a variety of flavors and textures. For a sweet ending, explore Indian desserts such as kheer and coconut ladoo, made with gluten-free ingredients. Incorporating healthy recipes like besan chilla and vegetable pulao can offer lighter options for your meals. Hosting a large gathering? The popular party recipe category is filled with dishes that are sure to impress your guests and make your celebration memorable. Including North Indian recipes like rajma chawal or bajra roti can add a touch of authenticity to your meal.

Frequently Asked Questions (FAQs)

Q: What are some popular gluten free Indian recipes? 

A: Some popular gluten free Indian recipes include Besan Chilla, Poha, Rajma Chawal (without wheat), Bajra Roti, Paneer Tikka, Vegetable Pulao, Bhel Puri (without sev), Roasted Makhana, Kheer, and Coconut Ladoo.

Q: How can I make traditional Indian food gluten-free? 

A: To make traditional Indian food for diabetics gluten-free, try recipes like Besan Chilla, Bajra Roti, and Kheer. These recipes are modified to exclude gluten while retaining their authentic flavors.

Q: What are some gluten-free recipes Indian style for a party? 

A: Some gluten free recipes Indian style for a party include Paneer Tikka, Vegetable Pulao, Bhel Puri (without sev), and Coconut Ladoo. These dishes are flavorful and perfect for gatherings while being gluten-free.

Q: Can I prepare gluten-free Indian food in advance? 

A: Yes, many gluten free Indian food recipes can be prepared in advance and stored. Snacks like Roasted Makhana and Bhel Puri can be made ahead of time, while dishes like Vegetable Pulao and Rajma Chawal can be prepped and refrigerated.

Q: What are some healthy options for gluten-free Indian food? 

A: Some healthy options for gluten free Indian recipes include Quinoa Salad, Vegetable Stir Fry, Oats Idli, and Besan Chilla. These dishes are high in fiber and protein, helping to manage blood sugar levels effectively.

Conclusion

Gluten free Indian recipes are a celebration of healthy and flavorful foods. Whether you’re looking for gluten free recipes Indian style or traditional gluten free Indian food recipes, these dishes will bring variety and nutrition to your meals. 

So, gather your ingredients, try out these recipes, and create delicious meals that are mindful of your health needs. Don’t forget to explore related categories for more delightful recipes from Manjula’s Kitchen!

By incorporating these dishes into your diet, you’ll be able to enjoy a wide variety of delicious and nutritious foods. Whether you’re looking for breakfast, snacks, main courses, or desserts, there’s a gluten free Indian recipe to suit every taste. Happy cooking and healthy eating!

  • Pista Kulfi

    Pista Kulfi

    Pista Kulfi

    Pista Kulfi

    Pista Kulfi is a very popular Indian ice cream. Kulfi comes in a variety of different flavors. Traditional kulfi is flavored with cardamom; this recipe is flavored with cardamom and pistachios. its like a summer favorite sweet snack or a dessert which is popular amongst all.
    5 from 1 vote
    Prep Time 10 minutes
    Cook Time 25 minutes
    Freezing time 1 minute
    Total Time 35 minutes
    Course Dessert
    Cuisine Indian
    Servings 6 people

    Ingredients
      

    • 4 cupa whole milk
    • 1 slice white bread
    • 1 tsp corn starch
    • 1/4 cup sugar
    • 1/2 tsp coarsely ground cardamom ilachi
    • 10 pistachios sliced

    Instructions
     

    • Remove the crust from all sides of the bread and cut the bread in small pieces.
    • Blend bread pieces, cornstarch, and a 1/2 cup of milk, making smooth paste and set aside.
    • Boil remaining milk (3.5 cups) in nonstick frying pan on medium high heat. Stir milk as needed to keep milk from burning on the bottom of the frying pan. Stir the sides of the pan to avoid scalding.
    • After milk comes to boil, let the milk boil for another 12 minutes. The goal is to boil the milk from 3 1/2 cups to 2 1/2 cups.
    • Add the bread mixture to the milk in frying the pan and cook for another 4 minutes, reducing the heat to medium. Bread and cornstarch are added to reduce the water crystallizing in kulfi during freezing.
    • Next add sugar and pistachios and cook for 2 more minutes. Turn off the heat and add cardamom powder.
    • Cool the milk to room temperature and pour into a bowl,
    • Take cellophane wrap and place it right over the milk covering it completely. Note: It is important that the cellophane wrap touches the milk.
    • Put it in freezer. It will take about 7 hours for the kulfi to be ready to serve.

    Notes

    Variations
    Replace pistachios with almond or coconut powder.
    Replace pistachios with finally chopped fruits like mangos or strawberries. Add fruits in the end after turning off the heat.
    Many people enjoy eating kulfi like a Popsicle.  Before freezing, pour the milk mixture in to a Popsicle mold.  If you don’t have Popsicle mold use small paper cups and place cellophane wrap on top of the milk and place a Popsicle stick in center of cup and freeze.
    Keyword Home made Ice Cream, Milk Ice Cream, Pista Ice Cream, Summer Dessert
    Tried this recipe?Let us know how it was!


    Delight in the Creamy Goodness of Pista Kulfi

    Pista Kulfi is a traditional Indian ice cream made with pistachios, milk, and aromatic spices. This pista kulfi recipe is perfect for cooling off on a hot day or enjoying a delightful dessert after a meal. The rich, creamy texture and the nutty flavour of pistachios make this dessert a favorite among many.

    The Essence of Pista Kulfi

    The essence of pista kulfi lies in its rich and creamy texture, achieved by slowly simmering milk until it thickens and reduces. The addition of pistachios and a touch of cardamom gives this kulfi its distinctive flavor. This pistachio ice cream is a traditional Indian dessert that brings a touch of authenticity to any occasion, making it a popular choice for festivals and celebrations.

    Origin and Popularity

    Kulfi, often referred to as Indian ice cream, has been a beloved dessert in India for centuries. Unlike regular ice cream, kulfi is denser and creamier due to the slow cooking process of the milk. Pista kulfi, with its rich pistachio flavor, has become one of the most popular variations of this dessert. It’s commonly enjoyed during hot summer months and is a staple in many Indian households.

    Why You’ll Love This Recipe

    • Rich and Creamy: The slow-simmered milk gives the kulfi a rich and creamy texture.
    • Nutty Flavor: The pistachios add a delightful nutty flavor that compliments the creamy base.
    • Easy to Make: Simple ingredients and straightforward steps make this recipe accessible.
    • Perfect for Any Occasion: Ideal for cooling off on a hot day or serving at festive occasions.

    Variations of Indian Ice Cream Recipes

    Exploring Manjula’s Kitchen reveals a treasure trove of other delicious Indian ice cream recipes that you might enjoy. Here are some related desserts that you might find interesting:

    1. Falooda Kulfi: Falooda Kulfi is a refreshing dessert. “Falooda” looks like rice noodles and they are made with cornstarch or arrowroot. “Kulfi” is an Indian ice cream. This is a delicacy with street vendors all over India. One has to experience this delightful dessert to appreciate it. You can also serve Falooda with any ice cream of your choice. Try this recipe to enjoy as one of my favorite summertime treats!
    2. Malai Kulfi: Kulfi is an eggless Indian ice cream. This is a simple and delicious dessert made with milk and sugar. Kulfi is very popular with street vendors, especially in summer. This is an easy recipe to make and Kulfi is an absolute treat for both young and old.
    3. Pineapple Kulfi: Kulfi, a popular summer dessert, is an Indian ice cream. Adding Pineapple here is a delicious twist to traditional kulfi. Pineapple kulfi simply melts in your mouth with its creamy texture and small chunks of pineapple.
    4. Paneer and Rose Kulfi: Paneer and Rose Kulfi is easy to make dessert. Instead of traditionally creamy texture, this is more like a grainy and enjoyable texture.
    5. Rose Kulfi: A fragrant kulfi flavored with rose water and garnished with rose petals.

    Serving Suggestions

    Pista kulfi can be enjoyed in various ways:

    • On a Stick: Serve in traditional kulfi molds or popsicle molds for a fun treat.
    • In a Bowl: Scoop into bowls and garnish with chopped pistachios and saffron strands.
    • With Falooda: Serve with falooda (vermicelli) and rose syrup for a classic combination.
    • As a Dessert: Enjoy as a refreshing dessert after a spicy meal.

    Tips and Tricks

    To perfect your pista kulfi recipe, consider these helpful tips:

    • Use Full-Fat Milk: Full-fat milk gives the kulfi a richer and creamier texture.
    • Simmer Slowly: Simmer the milk on low heat to avoid burning and to achieve the perfect consistency.
    • Grind Pistachios: Grind the pistachios finely for a smoother texture or coarsely for a crunchier bite.
    • Freeze Properly: Ensure the kulfi is frozen solid before serving for the best texture.

    FAQs

    Can I Use Condensed Milk? 

    Yes, you can use condensed milk to speed up the thickening process and add extra sweetness.

    How Long Does Pista Kulfi Last in the Freezer? 

    Pista kulfi can be stored in an airtight container in the freezer for up to 2 weeks.

    Is Pista Kulfi Gluten-Free? 

    Yes, this recipe is naturally gluten-free as it is made with milk, sugar, and pistachios.

    Can I Add Other Nuts? 

    Yes, you can add other nuts like almonds or cashews to enhance the flavor and texture.

    What If I Don’t Have Kulfi Molds? 

    You can use popsicle molds, small bowls, or even paper cups to freeze the kulfi.

  • Ginger Relish

    Ginger Relish

    Ginger Relish Variation

    Ginger Relish

    Ginger Relish is very handy to have in your refrigerator for spicing up many different dishes. It is quick and easy, vegan, gluten free and a versatile recipe.
    No ratings yet
    Course Chutney
    Cuisine Indian
    Servings 0

    Ingredients
      

    • ¼ cup ginger finely chopped
    • 4 green chilies
    • 1 tsp salt
    • 2 Tbsp lemon juice

    Instructions
     

    • Cut the green chilies lengthwise (remove the seeds if you like mild).
    • Chop the green chilies to match the size of the chopped ginger.
    • Mix ginger, chili, salt and lemon juice together and store in glass jar.
    • Before serving refrigerate the relish for 24 hours.
    • Relish can be refrigerated for about 2 weeks. Note: after a couple of days the green chilies will fade in color and will become milder in taste.

    Notes

    Variations
    • Thinly slice the green chilies and ginger about 1 inch lengthwise and mix with salt and lemon juice.
    Serving suggestions
    • Mix the chopped relish with cream cheese and use as a sandwich spread.
    • Lightly spread between grilled cheese sandwiches.
    • Sprinkle over any chat.
    • Use sliced relish to garnish any dal, rice, subji with gravy.
    • The relishes’ juice can be mixed with olive oil to make a salad dressing.
    Keyword chillies, ginger, Gluten Free, lemon, Pickle, relish, Spicy, Vegan
    Tried this recipe?Let us know how it was!
  • Green Chili Pickle

    Green Chili Pickle

    Green Chili Pickle

    Green Chili Pickle

    Green Chili Pickle is a delightful way to spice up any meal. Indian meals are generally served with a variety of condiments, of which pickles are the most common. This is a rather hot and spicy pickle, not for the timid palate by any means. But it goes very well with main course meal
    4 from 3 votes
    Prep Time 10 minutes
    Cook Time 10 minutes
    Total Time 20 minutes
    Course Side Dish
    Cuisine Indian
    Servings 20 people

    Ingredients
      

    • 20 chilies green Serrano chili peppers you may use different chilies
    • 3 tbsp coriander dhania
    • 1-1/2 tbsp fennel seeds saunf
    • 1 tsp fenugreek seeds mathi
    • 1 tsp mustard seeds rai
    • 1/8 tsp asafetida hing
    • 3 tsp salt
    • 1 tsp mango powder amchoor
    • 1/2 tsp turmeric haldi
    • 1 tbsp vinegar
    • 2 tbcp oil, preferred mustard oil

    Instructions
     

    • Wash and dry the chilies and cut a vertical lengthwise slit in each one.
    • Combine coriander, fennel, and fenugreek seeds. Grind coarsely. Add salt, mango powder, and turmeric to the ground spices. Mix well.
    • Heat oil until quite hot, and pour over the dry ingredient mixture. Mix well.
    • Add vinegar and mix well, again.
    • Stuff the spice mix into the green peppers and place in a glass jar.
    • Let the jar sit two days at room temperature or one day in direct sunlight.Pickle is ready to serve.Chili Pickle will keep in the refrigerator up to one month.

    Notes

    Variation 
    As an alternative to stuffing the chilies, you can slice them into 1/8“pieces and mix them in with the spice mixture.
    Tip
    For a milder pickle, remove the pepper seeds prior to stuffing with spices
    Keyword Condiment, Hot Spicy, Pickle
    Tried this recipe?Let us know how it was!

    Green Chilli Pickle Recipe | Hari Mirch ka Aachar By Manjula’s Kitchen 

    Green chili pickle is a popular condiment in many cuisines. It is known for its spicy and tangy flavor, adding a kick to various dishes. This pickle is made by preserving green chilies in a mixture of spices, oil, and vinegar, allowing the chilies to develop a unique taste profile over time. The process of how to make green chili pickles involves carefully selecting fresh, vibrant green chilies washing and drying them thoroughly before they are marinated in a blend of spices.

    Prepare the Green Chilies 

    Start by washing and drying the green chilies thoroughly. To begin the pickle-making process, cut a vertical lengthwise slit in each chili. This step allows the spices to penetrate the chilies, creating a harmonious blend of heat and flavor.

    Spice Blend Creation 

    Combine coriander, fennel, and fenugreek seeds in a grinder and coarsely grind them to release their aromatic essence. This spice blend forms the heart of our green chili pickle recipe. Add a generous amount of salt, mango powder, and turmeric to the ground spices. Mix the ingredients well, ensuring an even distribution of flavors.

    Infuse the Spices 

    In a culinary alchemy, heat oil until it reaches a sizzling hot temperature. Once hot, pour the oil over the dry spice mixture. This step is to infuse the spices with the richness of the heated oil. The resulting aroma is intoxicating, promising a sensory delight in every bite of the green chili achar.

    Incorporate the Vinegar 

    Add a tangy kick and introduce vinegar to the spice-infused mixture to enhance the pickle’s longevity. This step contributes to the chili pickle’s distinctive flavor profile. It acts as a natural preservative, allowing you to savor its taste for an extended period.

    Stuff and Jar 

    With your spice mix ready, it’s time to stuff the green peppers. Gently open the vertical slits and fill each chili with the aromatic blend. Place the stuffed chilies carefully in a glass jar, ensuring they snugly fit without excessive empty spaces. This step is for optimal preservation and flavor development.

    Let it Mature 

    Patience is the key to a truly exceptional green chili pickle. Allow the jar to sit for two days at room temperature or, for an added depth of flavor, let it bask in direct sunlight for one day. This period is crucial as it allows the spices to meld with the chilies, creating a symphony of taste that will tantalize your taste buds.

    Notes and Variations: 

    As you start your green chili pickle-making process, consider these helpful notes and variations to customize the recipe according to your preferences.

    Variation: 

    Instead of stuffing the chilies, experiment with slicing them into 1/8″ pieces and mixing them directly into the spice mixture. This variation offers your pickle a different texture and flavor profile, providing a unique twist to the traditional recipe.

    Tip: 

    If you prefer a milder pickle, take the extra step of removing the pepper seeds before stuffing them with the spice mix. This adjustment allows you to control the heat level, making the pickle more accessible to milder palates.

    With this comprehensive how-to-make green chili pickle recipe, you are now well equipped to create your green chili achar masterpiece. Whether you choose to stuff or slice your chilies, the result is a culinary delight that will add a punch of spice to your meals. Enjoy these homemade green chili pickles with khichdi, aloo paratha, veg pulav

  • How to make Paneer

    How to make Paneer

    Paneer

    How To Make Paneer

    Paneer is a homemade Indian cheese. Paneer is used many different ways making desserts, appetizers and main course dishes.
    5 from 1 vote
    Prep Time 20 minutes
    Cook Time 1 hour
    Total Time 1 hour 20 minutes
    Course Main Course
    Cuisine Indian
    Servings 0

    Ingredients
      

    • 8 cupa milk, half gallon
    • 1/4 cup lemon juice

    Instructions
     

    • Mix lemon juice in half cup of hot water and put aside.
    • Boil the milk in a heavy bottomed pan over medium heat, stirring occasionally, making sure not to burn milk.
    • As the milk comes to a boil, add the lemon juice gradually and stir the milk gently. The curd will start separating from the whey, turn off the heat.
    • Once the milk fat has separated from the whey, drain the whey using a strainer line with cheesecloth, or muslin cloth. Wrap the curds in a muslin cloth, rinse under cold water, and squeeze well. This process takes out the sourness from the lemon.
    • To take out the excess water, press the wrapped paneer under a heavy pan for about 1 hour.

    Notes

    Tips:
    If paneer will be used to make any dessert dish:
    The most important part of making paneer for dessert is how much water to take out from the paneer.
    To check if right amount of  water is out of the paneer, take a little piece of paneer on your palm and rub with your fingers. After rubbing the paneer for about 15-20 seconds, you should be able to make a firm but smooth ball.
    For making sweets, paneer can be refrigerated for 1 to 2 days.
    Paneer from half-gallon milk will make about 15 to 20 rasgullas.
    I suggest 2% milk for rasgullas, ras malai, chamcham or any other dish in that category.
    For sandaish, burfee or any other such dish use regular milk.
    If paneer will be used for making main dishes:
    Before Pressing the paneer knead it enough so paneer is not crumbly.
    Press the paneer instead one hour, two hours making firmer.
    Cut the paneer to desired shape. Paneer can be refrigerated for a few days or kept frozen for months.
    Variations:
    Add salt to the paneer, if you like with your choice of spices one or more, including black pepper, roasted cumin seed, chopped green chilies, chopped cilantro (Hara Dhania) or to your taste.
    Keyword Indian Cheese, Paneer
    Tried this recipe?Let us know how it was!

    Homemade Paneer Recipe By Manjula’s Kitchen 

    Here is a detailed Guide on How to Make Homemade Paneer at Home from Milk. Learning the art of paneer-making at home allows you to enjoy fresh and homemade cheese in your favorite recipes. Learn the art of crafting delightful homemade paneer with this step-by-step guide on how to make paneer at home from milk. Whether you’re a novice or an experienced cook, discover the joy of creating your paneer with this comprehensive walkthrough.

    Section 1: Gathering Ingredients and Tools 

    To embark on your homemade paneer journey, it’s crucial to gather the essential ingredients and tools. Begin with selecting quality milk, a heavy-bottomed pan, fresh lemon juice, and a strainer lined with cheesecloth or muslin cloth. Choosing the right milk is key; opt for 2% milk for desserts like rasgullas and ras malai, and regular milk for savory dishes such as sandaish or peda.

    2.1 Boiling the Milk 

    The first step to creating a homemade paneer is to start by pouring the milk into a heavy-bottomed pan and placing it over medium heat. Stir occasionally to prevent the milk from burning. Maintain a watchful eye until the milk reaches a gentle boil, signaling the beginning of the paneer-making process.

    2.2 Adding Lemon Juice 

    While the milk is heating, mix fresh lemon juice with hot water and set it aside. Once the milk starts boiling, gradually introduce the lemon juice into the mix, all while stirring gently. Witness the magic unfold as the curds separate from the whey, signifying a crucial phase in how to make paneer from milk.

    2.3 Draining and Wrapping 

    Upon achieving the desired separation of curds and whey, turn off the heat. Utilize a strainer lined with cheesecloth or muslin cloth to drain the whey, leaving you with the precious curds. Next, wrap the curds in muslin cloth, rinse under cold water, and give it a good squeeze to remove any excess liquid.

    2.4 Removing Sourness 

    To eliminate the lemony tang, rinse the wrapped paneer under cold water. This step ensures that the paneer remains neutral in flavor, ready to adapt to both sweet and savory culinary creations.

    2.5 Pressing and Shaping 

    The pressing stage is crucial in how to make paneer from the milk recipe to determine the texture of your homemade paneer. Lay the wrapped paneer under a heavy pan, pressing it for about an hour. Before pressing, knead the paneer sufficiently to prevent it from becoming crumbly. Adjust the pressing duration based on your preference for a softer or firmer texture. Once pressed, cut the paneer into the desired shapes, ready to be incorporated into various dishes.

    Section 3: Testing Paneer Consistency 

    A pivotal test to ensure the right water content in your paneer involves rubbing a small piece on your palm. After 15-20 seconds of rubbing, the paneer should form a firm yet smooth ball, indicating the optimal consistency for culinary use.

    Section 4: Tips and Variations  

    4.1 Tips for Dessert Dishes 

    For a truly authentic taste of desserts, many Indian chefs prefer to do paneer make at home, allowing them to control the quality and freshness of the cheese. For those planning to use paneer in desserts, refrigerate it for 1 to 2 days. The choice of 2% milk is recommended for sweets like rasgullas, ras malai, and chamcham, imparting a rich and creamy texture to these delicacies.

    4.2 Tips for Main Dishes 

    When preparing paneer for main dishes, knead it thoroughly before pressing to prevent crumbliness. Vary the pressing time to achieve the desired level of firmness. Paneer for main dishes can be refrigerated for a few days or frozen for long-term storage.

    4.3 Variations in Flavor 

    Elevate the flavor profile of your homemade paneer by experimenting with variations. Add salt to the paneer for a savory twist and incorporate spices such as black pepper, roasted cumin seeds, chopped green chilies, or cilantro to suit your taste preferences.

    Mastering the art of making paneer at home from milk is a rewarding culinary skill that allows you to customize this versatile ingredient for a myriad of dishes. This detailed guide ensures you understand each step involved, from selecting the right ingredients to testing the consistency and exploring variations. Embrace the satisfaction of creating fresh and flavorful homemade paneer, ready to elevate your culinary creations.

  • Cabbage Chana Dal Salad

    Cabbage Chana Dal Salad

    A bowl of Cabbage Chana Dal Salad garnished with fresh coriander

    Cabbage Chana Dal Salad

    Cabbage Chana Dal Salad is a healthy and refreshing colorful salad can brighten up any meal. Perfect for summer brunch or served with any meal.
    Serves 4.
    5 from 1 vote
    Course Salad
    Cuisine Indian
    Servings 4 people

    Ingredients
      

    • 2 cup cabbage very finely chopped
    • 2 medium tomatoes seeded and finely chopped
    • 1 cup cucumber chopped
    • 1 carrot shredded
    • 10 mint leaves minced
    • ¼ cup yellow chana dal

    Salad Dressing:

    • 1 Tbsp olive oil
    • 1 Tbsp vinegar
    • 1 Tbsp lemon juice
    • 1 Tbsp ginger juice
    • 1 tsp salt
    • 1 tsp sugar
    • ½ tsp ground black pepper

    Instructions
     

    • Soak the chana dal for at least 2 hours in lukewarm water.
    • When ready, the dal should be soft all around.
    • Drain the water from chana dal.
    • Mix the chana dal with the chopped vegetables.
    • Mix the ingredients above together to make the salad dressing.
    • Mix the salad and dressing together and let sit for about a half hour so the salad is nicely marinated.

    Notes

    Variations
    • Substitute chana dal with split yellow moong dal or moong dal sprouts.
    • You can substitute the dal with boiled corn and finely chopped bell pepper.
    Suggestions
    • This salad dressing can be used with any salad.
    • Take out the vinegar and use this dressing with fresh fruit, adding chopped mint leaves.
    Keyword brunch, Cabbage, chana, Dal, Gluten Free, Moong, Refreshing, Salad, Spices, summer, Vegan
    Tried this recipe?Let us know how it was!
  • Yogurt Chutney

    Yogurt Chutney

    Yogurt Chutney

    Yogurt Chutney

    Yogurt Chutney is great paired with dosas and pudas. It is a great and less time-consuming variation from the more commonly used chutneys, such as coconut chutney.
    5 from 1 vote
    Course Chutney, Side Dish
    Cuisine Indian
    Servings 0

    Ingredients
      

    • ¼ cup chana dal
    • 1 tsp oil
    • tsp asafetida hing
    • 1 tsp cumin seeds
    • 1 tsp black mustard seeds
    • 4 whole red chilies adjust to taste
    • ¼ tsp fenugreek seeds mathi dana
    • ½ cup yogurt
    • ½ tsp salt
    • Lemon juice as needed

    Instructions
     

    • Dry roast the chana dal on medium heat until the dal has changed color to a light brown. Set the dal aside.
    • Heat the oil in a small frying pan on medium heat.
    • Stir-fry the red chilies until become a dark color.
    • Add asafetida, cumin seeds, mustard seeds, and fenugreek seeds.
    • Stir-fry for few seconds until seeds crack.
    • Next, grind the chana dal and spices to a powder and blend with the yogurt.
    • Add salt and lemon juice if needed.

    Notes

    • Before mixing yogurt, chutney powder can be store for few months in airtight jar.
    • Mix the yogurt just before serving.
    • Mix the chutney powder with cream cheese and use as sandwich spread.
    Keyword chana, chutney, Dal, dosa, Gluten Free, Plain Yogurt, puda
    Tried this recipe?Let us know how it was!
  • Aloo Masala Dosa

    Aloo Masala Dosa

    Aloo Masala

    Aloo (Potato) Masala

    Aloo masala is a nice compliment for any kind of dosa. The Aloo Masala can be rolled in the dosa or served as a side dish. Its a great appetizer that goes well in all kinds of meal be it breakfast, lunch or dinner.
    5 from 2 votes
    Prep Time 5 minutes
    Cook Time 10 minutes
    Total Time 15 minutes
    Servings 4 people

    Ingredients
      

    • 2 large potatoes
    • 1 tbsp oil
    • 1/8 tsp asafetida hing
    • 1/2 tsp cumin seeds jeera
    • 1/2 tsp mustard seeds rai
    • 1/2 tsp turmeric haldi
    • 1 green chili finely chopped
    • 1/2 tsp salt
    • 1 tsp lemon juice
    • 1 tbsp cilantro finely chopped hara dhania

    Instructions
     

    • Boiled the potatoes until they are soft and let cool.
    • Peel and chop the potatoes in small pieces.
    • Heat the oil in a frying pan on medium high. Test the heat by adding one cumin seed to the oil. If it cracks right away, the oil is ready.
    • Add the cumin seeds, mustard seeds and asafetida. As the seeds crack, add turmeric, potatoes, green chili, and salt. Stir-fry for a few minutes.
    • Add lemon juice and cilantro.
    • The potatoes should be slightly moist and not very dry.

    Notes

    Variations
    Try adding 2 tablespoons of shredded carrots and 1/8 cup of green peas to potato mixture.
    Taste best with Dosa, Rava Dosa, Whole wheat Dosa
     
    Tried this recipe?Let us know how it was!

    Aloo Masala Recipe: How to make Aloo Masala for Dosa

    Aloo Potato Masala, a classic gluten free South Indian filling that pairs perfectly with dosa, a popular Indian crepe. This vegan versatile dish combines the earthy goodness of potatoes with aromatic spices, creating a delicious accompaniment that’s loved by all.

    Spicy Potato Masala for Dosa

    Hearty and Satisfying: Aloo Potato Masala is a hearty and satisfying dish that’s perfect for breakfast, brunch, or any time of the day. Its comforting flavors and creamy texture make it a popular choice among both children and adults.

    Versatile Filling: Aloo Potato Masala is incredibly versatile and can be used as a filling for various Indian snacks and dishes, including dosa, samosa, and sandwich. Its bold flavors and creamy texture add depth and richness to any recipe it’s used in.

    Easy to Prepare: Making Aloo Potato Masala at home is quick and easy, requiring just a few simple ingredients and basic cooking techniques. With the right combination of spices and seasoning, you can create a delicious and flavorful filling that’s sure to impress.

    Variations of Aloo

    1. Aloo Gobi: Aloo Gobi is a delicious main dish made with potatoes, cauliflower, and a great blend of spices. Aloo Gobi can be served with various breads, such as rotis, parathas, and puris.
    2. Aloo Baingan: Aloo baingan (potato and eggplant) is a great main dish. It’s easy to make and can be served with any bread.
    3. Aloo Dum: Is an exotic rich and luxurious variant of aloo made in a curry format and incorporates the Indian cooking style of dum. 
    4. Aloo Mattar: Aloo Mattar is a popular curry based north Indian dish. Potatoes and peas with spicy gravy makes a great main course served with puris, rotis and parathas.

    Tips for Making Perfect Aloo Potato Masala:

    Boil Potatoes Until Tender: Boil the potatoes until they are fork-tender before mashing them for the Aloo Potato Masala. This ensures that the potatoes are cooked through and have a smooth and creamy texture.

    Temper the Spices: Temper whole spices such as mustard seeds, cumin seeds, and curry leaves in hot oil before adding other ingredients. This releases their flavors and aromas, enhancing the overall taste of the Aloo Potato Masala.

    Finish with Fresh Herbs: Garnish the Aloo Potato Masala with freshly chopped cilantro or coriander leaves just before serving for a burst of freshness and color. Herbs add a vibrant touch to the dish and elevate its presentation.

    FAQs about Aloo Potato Masala for Dosa:

    Can I make Aloo Potato Masala ahead of time? 

    Yes, you can prepare the Aloo Potato Masala ahead of time and store it in the refrigerator for up to 2-3 days. Reheat it gently on the stovetop or in the microwave before serving with dosa or other dishes.

    Is Aloo Potato Masala gluten-free? 

    Yes, Aloo Potato Masala is naturally gluten-free as it’s made with potatoes, vegetables, and spices, which are all gluten-free ingredients. It’s a safe and delicious option for individuals with gluten intolerance or celiac disease.

    Can I freeze Aloo Potato Masala? 

    While you can freeze Aloo Potato Masala, the texture may change slightly upon thawing. It’s best to freeze the masala in an airtight container for up to 1-2 months and thaw it in the refrigerator overnight before reheating.

    What can I serve with Aloo Potato Masala? 

    Aloo Potato Masala pairs perfectly with dosa, a South Indian crepe made from fermented rice and lentil batter. It can also be served with idli (steamed rice cakes), uttapam (Indian-style savory pancakes), or puri (deep-fried bread).

    Aloo Potato Masala is a delicious and versatile dish that’s perfect for savoring with dosa or as a filling for various Indian snacks and dishes.  Whether enjoyed for breakfast, brunch, or as a comforting meal option, its hearty flavors and creamy texture are sure to delight your taste buds and leave you craving for more. 

    So why not treat yourself to a batch of homemade Aloo Potato Masala and experience the irresistible flavors of South Indian cuisine?

    Stay tuned for more such dishes on Manjula’s Kitchen exploration into the world of culinary delights!

  • Rice

    Rice

    Plain White Rice

    Plain White Rice

    There are many varieties of rice and everyone has their favorite. My favorite is Basmati rice; I like the aroma and texture of Basmati rice. Rice can be very plain or very colorful. Rice is easy to cook and can be served as a side dish or a main dish. Plain rice is served with lentils, dal, or a gravy-based dish.
    Serves 3 to 4.
    5 from 1 vote
    Course Side Dish
    Cuisine Indian
    Servings 0 people

    Ingredients
      

    • 1 cup Basmati rice or long grain rice
    • 2 cups water
    • ½ tsp salt
    • 1 tsp oil

    Instructions
     

    • Wash rice gently changing water several times until the water appears clear.
    • For fluffier rice, the rice should be soaked for at least 15 minutes prior to cooking.
    • Cooked rice expands to about 3 times its original size, so be sure to use the proper size pan.
    • Drain the rice and put into the saucepan. Add the water, oil, and salt, bring to a boil and turn the heat to low, and cover the pan.
    • Cook rice for about 15 minutes, or until the rice is tender and the water has evaporated.
    • Turn off the heat and fluff the rice with a fork.

    Notes

    • If rice has been soaking longer then half an hour use 2 tablespoons water less.
    • Check the rice after about 12 minutes, stirring gently. If rice is not ready cover it again and cook a few more minutes.
    • When rice is ready but you feel it is too wet, turn off the heat and keep the cover open half way.
    • Don’t check the rice repeatedly because water will evaporate faster and rice will not cook right. Also, the grains will break if you stir the rice frequently and then the rice will look and feel mushy.
    Keyword basmati, chawal, Gluten Free, lentils, long grain, plain, Rice, white
    Tried this recipe?Let us know how it was!
  • Chole Tikki

    Chole Tikki

    Chola Tikki

    Chola Tikki, Chickpeas Crispy Patties

    Chola Tikki (chickpeas patties) is a spicy and yummy indian snack. Tikki is a nice chat recipes. Just the smell of Tikki can make you hungry.
    3.67 from 3 votes
    Prep Time 15 minutes
    Cook Time 20 minutes
    Total Time 35 minutes
    Course Appetizer
    Cuisine Indian
    Servings 4 people

    Ingredients
      

    • 1 cup chickpeas boiled garbanzo kable chana
    • 3 medium potatoes
    • 1 tbsp ginger shredded
    • 1 tbsp cilantro chopped
    • 2 green chilies chopped, adjust to taste
    • 1/2 tsp black pepper
    • 1 tsp salt
    • 1 tsp lemon juice
    • oil to shallow fry

    For Serving

    Instructions
     

    • Boil potatoes until they are tender. Once cooked, drain the water and let the potatoes cool down. Note: Do not cool the potatoes under running water because the potatoes will absorb the extra water, making potatoes mushy. After potatoes are cool, peel the skin off and mash the potatoes.
    • Drain the water out of the chickpeas and dry the chickpeas using paper towel making sure there is no access water in chickpeas. Mash the chickpeas coarsely.
    • Mix all the ingredients together; adjust salt and pepper to your taste. With oiled hands, divide the mixture into 8 to 10 equal portions. Make them into the shape of patties keeping them about a half inch thick.
    • Heat the oil in a flat bottom saucepan on medium high heat (oil should cover the surface of the pan generously). To check the oil, place a little piece of tikki in the oil, this should make the oil sizzle.
    • Place the Tikkis in the pan and shallow fry the Tikkis on both sides until both sides are golden brown. If the Tikki is very dry use more oil as needed without making them too greasy.
    • You may have to adjust the heat while cooking as needed.

    Notes

    Serving suggestions:
    Serve Tikki hot. Drizzle some
    , tamarind chutney and hari chutney over the Tikki, or use any combination you prefer. See the recipes for chutney on this site.
    Tips
    Substitute the boiled chickpeas with can chickpeas.
    Also if mixture is too moist Tikki will break.
    Tikki can be made before and refrigerated for two to three days. Before serving, heat the Tikki over the skiltet .
    Tried this recipe?Let us know how it was!

    Savor the Flavor of Chola Tikki

    Chola Tikki are crispy and flavorful patties made from mashed chickpeas (chola) and spices. This chola tikki recipe is perfect snacks or indian appetizers, offering a delightful blend of textures and flavors. Whether served alone or with chutneys, these patties are sure to be a hit with your family and friends.

    The Essence of Chola Tikki

    The essence of chola tikki lies in its crispy exterior and soft, flavorful interior. Chickpeas are mashed and mixed with spices, herbs, and binding agents to form patties, which are then shallow-fried to golden perfection. These Indian chickpea patties are not only delicious but also nutritious, making them a great addition to your indian snack repertoire.

    Origin and Popularity

    Chola tikki, also known as chole tikki, is a popular Indian street food, especially in North India. These chickpea patties are enjoyed for their savory taste and satisfying crunch. They are often served with chutneys and yogurt, making them a flavorful and refreshing snack. This chickpea tikki is a versatile dish that can be enjoyed in various ways, from a standalone snack to a component of chaat (Indian street food).

    Why You’ll Love This Recipe

    • Crispy and Flavorful: The perfect combination of a crispy exterior and a soft, flavorful interior.
    • Nutritious: Packed with protein and fiber from chickpeas.
    • Easy to Make: Simple ingredients and easy preparation.
    • Versatile: Can be served as a snack, appetizer, or part of a larger meal.

    Other Variations of Recipes

    Exploring Manjula’s Kitchen reveals a treasure trove of other delicious vegetable dry recipes that you might enjoy. Here are some related dishes that you might find interesting:

    1. Kadhi Pakora: A tangy yogurt-based curry with gram flour dumplings, seasoned with spices. Recipe: 
    2. Methi Thepla: Spiced flatbreads made with fenugreek leaves, perfect for breakfast or as a snack. Recipe: 
    3. Stuffed Bell Peppers: Bell peppers stuffed with a spiced potato filling and baked to perfection. Recipe: 
    4. Moong Dal Khichdi: A comforting and nutritious one-pot dish made with rice and yellow lentils. Recipe: 
    5. Lobia Curry: Black-eyed peas cooked with tomatoes and spices, offering a hearty and delicious curry.

    Serving Suggestions

    Chola tikki can be enjoyed in various ways:

    • With Chutneys: Serve with mint chutney, tamarind chutney, or yogurt for a burst of flavor.
    • As a Snack: Perfect for tea-time or as an evening snack.
    • In Chaat: Use as a base for chaat with toppings like yogurt, chutneys, and sev.
    • With Salad: Pair with a fresh salad for a healthy meal.

    Tips and Tricks

    To perfect your chola tikki recipe, consider these helpful tips:

    • Use Cooked Chickpeas: Ensure the chickpeas are well-cooked and mashed for a smooth texture.
    • Bind Well: Use enough binding agents like bread crumbs or gram flour to help the patties hold together.
    • Fry Evenly: Fry the patties on medium heat to ensure they are cooked through and golden brown.
    • Season Well: Adjust the spices to your taste preference for the best flavor.

    FAQs

    Can I Bake the Tikkis Instead of Frying? 

    Yes, you can bake the tikkis in a preheated oven at 375°F (190°C) for about 20-25 minutes, flipping halfway through.

    How Long Does Chola Tikki Last? 

    Store leftover tikkis in an airtight container in the refrigerator for up to 2 days. Reheat before serving.

    Is Chola Tikki Gluten-Free? 

    To make it gluten-free, use gluten-free bread crumbs or omit them and use gram flour as a binder.

    Can I Add Vegetables to the Mixture? 

    Yes, you can add finely chopped vegetables like bell peppers, or spinach to the mixture for added nutrition and flavor.

    What Can I Serve with Chola Tikki? 

    Chola tikki pairs well with chutneys, yogurt, salads, and can also be used as a patty in a sandwich or burger.

  • Bengali Rasgulla

    Bengali Rasgulla

    Bengali Rasgulla

    Bengali Rasgulla, Bangali Sweet

    Bengali Rasgullas are homemade paneer (Cottage cheese) sweet dish, round paneer balls soaked in sugar syrup. This is a sweet dessert delicacy from state of Bengal, these are very light and delicious, you can never go wrong with Bangali Rasgulla. This recipe is made using a pressure cooker.
    5 from 3 votes
    Prep Time 10 minutes
    Cook Time 40 minutes
    Total Time 50 minutes
    Course Dessert
    Cuisine Indian
    Servings 6 people

    Ingredients
      

    • 4 cup milk
    • ¼ cup lemon juice
    • 1 ½ cup sugar
    • 4 ½ cup water

    Instructions
     

    Making Paneer

    • Mix lemon juice in half cup of hot water and keep aside.
    • Boil the milk in a heavy bottomed pan over medium heat, stirring occasionally, making sure not to burn milk. As the milk comes to a boil, add the lemon juice gradually and stir the milk gently. The curd will start separating from the whey, turn off the heat.
    • Once the milk fat has separated from the whey, drain the whey using a strainer line with cheesecloth or muslin cloth. Wrap the curd in a muslin cloth, and rince under cold water, and squeeze well. This process takes out the sourness from the lemon.
    • To take out the excess water squeeze the cloth, or press the wrapped paneer under a heavy pan for about one hour.Taking the right amount of water out of the paneer is the most important part of this recipe.
    • To check if enough water is out of the paneer, take a little piece of paneer on your palm and rub with your fingers. After rubbing the paneer for about 15-20 seconds, you should be able to make a firm but smooth ball.
    • Once the paneer is drained, place on a dry, clean surface and knead the paneer for 3-4 minutes until the paneer is almost rolls into smooth soft dough.
    • Knead the paneer by dragging the palm of your hand hard on the paneer. Keep scooping it back to togather and knead more. If the paneer is too crumbly, add a teaspoon of water. Your palm will be little greasy.

    Making Rasgulla

    • Divide the dough into 12 equal parts and roll them into smooth balls. To make the balls apply some pressure at the first and then release when forming the balls.
    • Mix the sugar and water in a pressure cooker on medium high heat and bring to a boil.
    • Add the paneer balls and close the pressure cooker. After the pressure cooker starts steaming, turn the heat to medium and cook for about seven minutes.
    • Make sure the pressure cooker is large enough to accommodate the finished Rasgullas, as they will expand to about double in the volume while cooking in the syrup.
    • Close the heat and wait a few minutes before you opening the pressure cooker. Pour cold water over the pressure cooker before opening.
    • Rasgullas should be little spongy. After rasgullas are refrigerated the sponginess will reduce and will be soft in texture.
    • Serve the Rasgullas chilled.

    Notes

    Suggestions:
    If the Rasgullas don’t turn out exactly the way you want, they are hard or not the right shape, do not worry. There’re many ways to create new dish out of the imperfect Rasgullas!
    For example, if the Rasgullas are too hard or broken, try cutting them into small pieces and mix with soft vanilla ice cream or cover with melted chocolate.
    You can use the Rasgulla pieces to make kheer, replacing rice with the Rasgulla pieces.
    The bottom line is to enjoy your creation!
    Keyword Bangali Dessert, Rosgola
    Tried this recipe?Let us know how it was!

    Bengali Rasgulla: History and Origin

    Bengali Rasgulla, also known as “Roshogolla,” is one of the most beloved and iconic sweets of Bengal. This soft, spongy dessert, made from chhena (an Indian cottage cheese) and soaked in sugar syrup, has a rich history that intertwines with the cultural fabric of Bengal.

    The Origin of Rasgulla

    The origin of Rasgulla is a topic of debate between the states of Odisha and West Bengal, with both laying claim to its invention. However, the version we know today as the Bengali Rasgulla is credited to the ingenious confectioner Nobin Chandra Das of Kolkata.

    Nobin Chandra Das and the Invention

    In the mid-19th century, Nobin Chandra Das, a sweet-maker in Kolkata, perfected the recipe of Rasgulla. The story goes that he experimented tirelessly to create a sweet that was light, spongy, and immersed in a clear syrup. His creation was an instant success and quickly became a staple in Bengali households.

    Popularity and Cultural Significance

    The popularity of Bengali Rasgulla skyrocketed, and it became a symbol of Bengali pride and culinary expertise. The sweet is not just a dessert but a part of various celebrations and rituals in Bengal. It is a common offering to gods during festivals and an essential part of festive feasts.

    Geographical Indication (GI) Tag

    In 2017, the state of West Bengal was awarded the Geographical Indication (GI) tag for “Banglar Rasogolla,” acknowledging its distinctiveness and origin in Bengal. This helped cement its identity and provided recognition to the rich heritage of Bengali sweets.

    Characteristics of Bengali Rasgulla

    Bengali Rasgullas are known for their unique texture and flavor. They are made from freshly curdled chhena, kneaded into smooth balls, and then boiled in a light sugar syrup. The key to their distinct texture lies in the perfect balance of kneading the chhena to the right consistency and cooking it at an optimal temperature. The result is a melt-in-the-mouth, spongy delight that oozes sweetness with every bite.

    Evolution and Variations

    Over time, Rasgulla has evolved, and various regions have introduced their own variations. Some are stuffed with dry fruits, while others are soaked in flavored syrups. Despite these innovations, the traditional Bengali Rasgulla remains the gold standard, revered for its simplicity and purity of taste.

    Here are some variations of paneer-based desserts from Manjula’s Kitchen:

    1. Paneer Burfi: Paneer Burfi is a rich and delicious Indian dessert made with fresh paneer, sugar, and flavoured with cardamom. It’s often garnished with chopped nuts for added texture and flavour.
    2. Ras Malai: Ras Malai is a popular dessert where soft paneer discs are soaked in creamy, flavoured milk and garnished with nuts and saffron. It’s known for its rich, melt-in-the-mouth texture and delightful taste.
    3. Malai Ladoo: Malai Ladoo is a simple yet indulgent dessert made with paneer, condensed milk, and flavored with cardamom. These soft and creamy laddoos are perfect for festive occasions.
    4. Kalakand: Kalakand is a delectable paneer-based dessert that is known for its grainy texture and rich flavor. Made with paneer, condensed milk, and sugar, it is often garnished with pistachios.
    5. Chum Chum: Chum Chum, also known as Cham Cham, is a Bengali sweet made with paneer. It is similar to Rasgulla but is usually stuffed with khoya or mawa and garnished with coconut or dry fruits.

    These variations of paneer-based desserts showcase the versatility and richness of paneer in Indian sweets. Each dessert has its unique flavor and texture, making them perfect for different occasions and preferences.

    Frequently Asked Questions (FAQ) about Bengali Rasgulla

    What is Rasgulla?

    Rasgulla is a traditional Indian dessert made from chhena (Indian cottage cheese) and semolina, formed into balls and soaked in sugar syrup.

    What is the origin of Rasgulla?

    The origin of Rasgulla is contested between Odisha and West Bengal. However, the Bengali version of Rasgulla was popularized by Nobin Chandra Das in Kolkata in the mid-19th century.

    What is the difference between Bengali Rasgulla and Odia Rasgulla?

    Bengali Rasgulla is known for its spongy texture and is soaked in clear, light sugar syrup. Odia Rasgulla, known as “Pahala Rasgulla,” tends to be softer, grainier, and is often brownish due to the use of caramelized sugar syrup.

    How is Rasgulla made?

    Rasgulla is made by curdling milk to get chhena, kneading the chhena into a smooth dough, forming balls, and then boiling them in a light sugar syrup until they become spongy and absorb the syrup.

    What is the key to making perfect Rasgulla?

    The key lies in properly kneading the chhena to achieve a smooth texture, maintaining the right temperature while boiling, and ensuring the syrup’s consistency is light and not too thick.

    Can Rasgulla be stored?

    Yes, Rasgulla can be stored in the refrigerator for up to a week. They should be kept in the syrup to maintain their moisture and sponginess.

    Are there any variations of Rasgulla?

    Yes, there are several variations. Some include stuffed Rasgulla with dry fruits, flavored Rasgulla with rose or saffron, and baked Rasgulla which is a popular modern twist.

    Is Rasgulla gluten-free?

    Traditional Rasgulla is not gluten-free due to the addition of semolina. However, gluten-free versions can be made by omitting semolina or using a gluten-free alternative.

  • Spicy Potatoes

    Spicy Potatoes

    Spicy Potatoes

    Spicy potatoes

    Spicy potatoes are a wonderful dish to serve as an appetizer, snack, or side dish.
    5 from 1 vote
    Prep Time 20 minutes
    Cook Time 10 minutes
    Total Time 30 minutes
    Course Appetizer
    Cuisine Indian
    Servings 4 people

    Ingredients
      

    • 3 medium red potatoes
    • 2 tbsp oil
    • 1/2 tsp cumin seeds jeera
    • 1 tsp crushed coriander seed dhania
    • 1 tsp crushed fennel seed saunf
    • 1/4 tsp fenugreek seeds mathi
    • 1 tsp shredded ginger
    • 1/4 tsp black pepper
    • 2 green chilies, seeded and sliced long ways
    • 1 tsp salt
    • 2 tsp lemon juice
    • 2 tbsp chopped cilantro hara dhania

    Instructions
     

    • Peel strips of skin from the potatoes; leave some of the skin to provide color. Cut the potatoes into bite-size cubes.
    • Put the potatoes and one teaspoon salt into a pot. Cover with water and cook on medium high until tender but not mushy. Once the potatoes are cooked, drain the water and set aside.
    • Heat the oil in a frying pan over medium high heat. Test the heat by adding one cumin seed to the oil; if it cracks right away, the oil is ready. Add cumin seeds. When the cumin seeds crack, add the coriander, fennel, fenugreek seeds, and shredded ginger. Stir-fry for about half a minute.
    • Add potatoes and stir-fry the mixture over medium heat until they are a light golden brown.
    • Add salt, black pepper, and green chili. Roast another two to three minutes. Turn off the heat and add lemon juice and the cilantro mixture. Adjust salt, lemon, and pepper to your taste.

    Notes

    Note
    I use red potatoes because they are firmer and don’t get mushy.
    Serve with Chai or Lemonade
    Keyword Gluten Free, Quick And Easy, Snack, Tea Time Snack, Vegan
    Tried this recipe?Let us know how it was!

    How to Make Spicy Potato Curry

    Spicy Potato Curry is a flavorful dish made with tender potatoes cooked in a spicy and aromatic gravy. It’s a popular appetizer or side dish in Indian cuisine, commonly enjoyed with rice or bread. This gluten-free and vegan recipe is quick and easy to prepare, making it perfect for a delicious and satisfying meal.

    Step 1: Prep the Ingredients 

    Start by gathering all the ingredients needed for the spicy potato curry. You’ll require potatoes, tomatoes, ginger, green chilies, and a blend of spices such as cumin seeds, turmeric, coriander powder, and garam masala. Peel and chop the potatoes into bite-sized pieces, dice the tomatoes, mince the ginger, and slice the green chilies.

    Step 2: Sauté the Aromatics 

    Heat some oil in a pan over medium heat. Add the spices like cumin seeds and let them sizzle for a few seconds until fragrant. Then, toss in the minced ginger and sliced green chilies. Sauté them until they release their aroma and turn golden brown, infusing the oil with their flavors.

    Step 3: Add the Potatoes 

    Now, add the chopped potatoes to the pan. Stir well to coat them evenly with the aromatic oil and spices. Allow the potatoes to cook for a few minutes, stirring occasionally, until they start to lightly brown around the edges.

    Step 4: Incorporate the Tomatoes 

    Once the potatoes are partially cooked, add the diced tomatoes to the pan. Mix everything together gently, ensuring the tomatoes are evenly distributed among the potatoes. The tomatoes will add a tangy sweetness to the dish, balancing out the heat from the spices.

    Step 5: Season and Simmer 

    Now, it’s time to season the spicy potato curry with salt, turmeric, coriander powder, and garam masala. Stir well to combine all the ingredients. Then, cover the pan with a lid and let the curry simmer on low heat until the potatoes are fully cooked and tender, and the flavors have melded together beautifully.

    Step 6: Serve and Enjoy 

    Once the spicy potato curry is ready, remove it from the heat and garnish with freshly chopped cilantro leaves for a burst of freshness and color. Serve the curry hot with steamed rice or warm rotis for a satisfying meal that will surely delight your taste buds.

    Tips for Making the Best Spicy Potato Curry:

    • Adjust the amount of green chilies according to your spice preference. For a milder curry, use fewer chilies, or remove the seeds to reduce the heat.
    • To enhance the flavor, you can add a splash of lemon juice or a dollop of coconut milk towards the end of cooking.
    • For added texture and nutrition, throw in some vegetables like peas, carrots, or bell peppers along with the potatoes.
    • Feel free to customize the spices to suit your taste. You can experiment with adding spices like mustard seeds, fenugreek seeds, or curry leaves for a different flavor profile.

    Variations of Spicy Potato Curry: 

    • Creamy Spicy Potato Curry: Stir in some coconut milk or cashew cream to create a lusciously creamy texture.
    • Spicy Potato and Chickpea Curry: Add cooked chickpeas to the curry for an extra dose of protein and heartiness.
    • Spicy Potato and Spinach Curry: Throw in a handful of fresh spinach leaves during the last few minutes of cooking for a nutritious twist.

    Benefits of Spicy Potato Curry: 

    • Potatoes are a good source of vitamins and minerals, including vitamin C, potassium, and B vitamins.
    • The spices used in this curry, such as turmeric and cumin, are known for their anti-inflammatory and digestive benefits.
    • This dish is vegan-friendly and can be enjoyed by individuals following a plant-based diet.

    FAQs: 

    Q: Can I make this curry ahead of time?

    A: Yes, you can prepare the curry ahead of time and store it in an airtight container in the refrigerator for up to 2-3 days. Reheat it gently on the stovetop or in the microwave before serving.

    Q: Can I freeze leftover curry?

    A: Absolutely! This curry freezes well. Allow it to cool completely, then transfer it to a freezer-safe container and freeze for up to 3 months. Thaw overnight in the refrigerator before reheating.

    Q: Can I use sweet potatoes instead of regular potatoes?

    A: Yes, you can substitute sweet potatoes for regular potatoes if you prefer. Just keep in mind that sweet potatoes have a sweeter flavor, which will slightly alter the taste of the curry.

    Explore More Delectable Recipes 

    For more mouthwatering recipes and culinary inspiration, explore the following links from Manjula’s Kitchen:

    Crispy Spinach Pakoras, Vegetable Biryani, Paneer Tikka Masala, Vegetable Pakoras, Baingan Bharta (Roasted Eggplant) & Matar (Green Peas) Paneer.

  • Sweet Saffron Rice

    Sweet Saffron Rice

    Sweet Saffron Rice

    Sweet Saffron Rice

    The look and smell of saffron rice is delicious and tempting. It makes a perfect dessert for lunch or any kind of get together. You can serve this dish cold or warm.
    Serves 4 to 6.
    3.50 from 2 votes
    Course Dessert
    Cuisine Indian
    Servings 0 people

    Ingredients
      

    • 1 cup basmati rice or long grain rice
    • 2 Tbsp clarified butter ghee
    • 1 ¾ cup water
    • 2 Tbsp milk
    • ½ cup sugar
    • 1 piece of cinnamon stick dalchini
    • ¼ tsp saffron threads kaser
    • 4 whole cloves laung
    • ½ tsp cardamom seeds coarsely crushed, ilachi
    • Pinch of salt
    • 3 Tbsp pistachios and almonds sliced or crushed, pista, badam
    • 1 Tbsp raisins kishmish

    Instructions
     

    • Dry roast the almonds, pistachios and raisins in a pan on medium heat until the raisins puff and the nuts slightly change color. Set aside.
    • Put the rice, water, cinnamom stick, and salt in a sauce pan over medium high heat.
    • When the rice comes to boil, reduce the heat to low and cover.
    • Let the rice cook for about 15 minutes, or until the water has evaporated.
    • While rice is cooking, in a separate saucepan combine milk, butter, sugar, saffron, cloves and cardamom and bring to boil on medium heat, stir until the sugar has dissolved. Remove from the heat and set aside.
    • Add the nuts mixture and sugar syrup over the rice. Fold gently into the rice with a spoon gently to avoid mashing the rice.
    • Put the cover back over the rice and turn the heat on to very low. Let the rice simmer for 3 to 4 minutes. Turn the heat off and leave it covered for another few minutes before serving.
    Keyword Gluten Free, Rice, saffron, Sweet
    Tried this recipe?Let us know how it was!

    Savor the Aromatic Bliss: Sweet Saffron Rice – A Delightful Indian Treat

    Sweet saffron rice is a delectable, gluten free and aromatic dessert that originates from Indian cuisine. It features fragrant basmati rice cooked with saffron-infused syrup and a blend of spices, resulting in a rich and flavorful dessert or sweet treat. The saffron lends a vibrant golden hue and a distinct floral flavor to the dish, while the nuts and dried fruits add texture and depth. This delightful dessert is often served on special occasions, festivals, or as a comforting indulgence any time of the day.

    1. Nutty Roasting: Enhancing Flavor for Sweet Saffron Rice

    Begin your journey of crafting sweet saffron rice by imparting a rich nuttiness to the dish. In a pan over medium heat, dry roast the almonds, pistachios, and raisins until the raisins puff and the nuts undergo a slight color change. This step not only intensifies the flavors of the nuts but also adds a delightful crunch and texture to your saffron sweet rice, elevating its overall appeal.

    2. Indian Sweet Rice Recipe: Setting the Stage for Saffron Sweetness

    In a saucepan, combine rice, water, a cinnamon stick, and a pinch of salt over medium-high heat. As the ingredients come to a gentle boil, prepare the canvas for the infusion of saffron’s golden hue and aromatic essence into your Indian sweet rice recipe.

    3. Simmering Brilliance: Cooking the Rice to Perfection

    Once the rice mixture reaches a boil, reduce the heat to low and cover the saucepan. Allow the rice to simmer for approximately 15 minutes or until the water has evaporated, ensuring each grain is cooked to perfection. This crucial step lays the foundation for the sumptuous texture and delightful flavor profile of your saffron rice Indian delicacy.

    4. Saffron Infusion: Creating the Signature Sweetness

    While the rice undergoes its transformation, prepare the decadent saffron-infused syrup in a separate saucepan. Combine milk, butter, sugar, saffron strands, cloves, and cardamom over medium heat, stirring until the sugar dissolves and the aromatic spices release their essence. This fragrant mixture sets the stage for the indulgent sweetness that defines your kesar rice experience.

    5. Harmonious Fusion: Merging Nutty Goodness and Sweetness

    Once the rice and saffron syrup are ready, it’s time to bring together the elements of your sweet saffron rice. Gently fold the roasted nuts mixture and the fragrant saffron syrup into the cooked rice, using a spoon to ensure even distribution without mashing the grains. This harmonious fusion of flavors and textures creates a symphony of taste in every bite of your Indian sweet rice recipe.

    6. Final Simmer: Infusing Depth of Flavor

    Cover the saucepan once more and allow the saffron sweet rice to simmer over very low heat for an additional 3 to 4 minutes. This final step ensures that the flavors meld together seamlessly, infusing every grain of rice with the richness of saffron and the nutty crunch of almonds and pistachios.

    7. Culinary Crescendo: Serving Sweet Saffron Rice in All its Glory

    Turn off the heat and let the sweet saffron rice rest, covered, for a few more minutes before serving. This brief interlude allows the flavors to further develop, culminating in a dish that’s not just a treat for the taste buds but a celebration of the vibrant culinary heritage of India. Enjoy your saffron rice Indian delicacy or kesar rice as a delightful dessert or a comforting indulgence any time of the day.

    If you loved this indian sweet rice recipe then you must also check out other variants of Rice: Vegetable Biryani, Masala Khichdi, Chhole Biryani, Quinoa Vegetable Pilaf and Lemon Rice

  • Cabbage Pizza

    Cabbage Pizza

    Cabbage Pizza

    Cabbage Pizza

    Cabbage Pizza is a nice twist to traditional pizza with touch of Indian spices as a fusion. Makes 2 medium pizzas. Pizzas are generally a favorite snack of all and is a nice appetizer
    5 from 1 vote
    Course Main Course
    Cuisine Fusion, Indian
    Servings 2 Medium Pizza

    Ingredients
      

    for the Dough:

    • 2 ¾ cup All Purpose flour Plain flour or Maida
    • 1 cup lukewarm water
    • 1 Tbsp dry active yeast
    • 3 Tbsp olive oil
    • 1 tsp salt
    • ½ tsp sugar

    for the White Sauce:

    • 2 Tbsp olive oil
    • 2 ½ Tbsp All Purpose flour Plain flour or Maida
    • ¾ cup milk
    • 1 tsp salt
    • ½ tsp black pepper

    for Cabbage Topping:

    • 3 cup sliced cabbage
    • ½ thinly sliced red bell pepper
    • 2 Tbsp chopped cilantro Green coriander
    • 2 chopped green chilies

    Instructions
     

    Making the Dough:

    • Dissolve yeast in lukewarm water and let it sit for about 20 minutes or until the yeast becomes frothy.
    • Add sugar, salt and oil to the flour and mix well.
    • Add the yeast water and make into a dough. The dough should be soft and a little sticky. Add more water if needed.
    • Cover the dough and let it sit for about four hours. The dough should be double in volume.
    • Knead the dough well using a little dry flour.

    Making White Sauce:

    • Heat the oil in a small heavy saucepan over low-medium heat.
    • Add the flour and cook until the flour changes into a light brown color.
    • Slowly add the milk, stirring constantly. Continue cooking slowly until it is smooth and thick. Add the salt and black pepper.
    • Making Cabbage Topping:
    • Mix the cabbage, bell pepper, cilantro, and green chilies with the white sauce.

    Making the Pizza:

    • Pre-heat the oven to 500 degrees, placing a pizza stone inside for about 30 minutes so the pizza stone will be hot.
    • Divide the dough in to two equal parts and roll into two 8 inch diameter pizzas.
    • Place over greased cookie sheets. Put about a half teaspoon of olive oil over the pizza. Evenly spread the cabbage mixture onto the pizza.
    • Slide the cookie sheet on the pizza stone and let it cook for about five minutes.
    • To make a crispy pizza crust, remove the pizza from the cookie sheet and place over the pizza stone.
    • Let it cook for about 7 minutes, or until the edges are golden-brown.
    Keyword Cabbage, Cheeseless, Flour, Fusion, Maida, Pizza
    Tried this recipe?Let us know how it was!
  • Tamarind Chutney

    Tamarind Chutney

    Homemade Tamarind Chutney served in a bowl

    Tamarind Chutney, Tamarind Sauce

    This exotic sweet and sour chutney is a zesty condiment. This chutney can be called the ketchup of the east and goes best with all kinds of indian snacks, be it pakoras to other snack munchies.
    5 from 3 votes
    Prep Time 5 minutes
    Cook Time 20 minutes
    Total Time 25 minutes
    Course Side Dish
    Cuisine Indian
    Servings 20 people

    Ingredients
      

    • 1/2 lm tamarind seeded imle
    • 2-1/2 cup sugar
    • 2 cups boiling water
    • 1-1/2 tbsp roasted ground cumin seeds
    • 1 tbsp salt
    • 1 tsp black salt
    • 1 tsp red chili powder
    • 1 tsp ground black pepper
    • 1/2 tsp ginger powder

    Instructions
     

    • Break the tamarind into small pieces and soak in boiling water for one hour.
    • Mash it into a pulp and strain, pressing the tamarind into the strainer to remove all the pulp. Add sugar to the pulp. Mix well. Add the remaining ingredients. Mix and taste. Add more sugar, salt or pepper as needed.

    Notes

    Notes
    Chutney can be refrigerated for two to three months.
    Serving Suggestions
    Tamarind chutney is delicious with samosas, pakoras, drizzled over dahi vadas,  or any kind of chat.
    It is also delicious as a dipping sauce for French fries and as a spread over crackers.
    Try drizzling over rice to add a unique flavor to plain rice.
    Variations
    To use as a dip, thicker chutney is ideal. To use as a topping, add water to make the chutney thinner.
    Add water and ice cubes to serve as a cool spicy drink.
    Add equal parts yogurt and chutney to make a dipping sauce.
    Keyword Hot And Spicy, Popular Condiment, Sweet And Sour Sauce
    Tried this recipe?Let us know how it was!

    Tamarind Chutney Recipe: 

    Tamarind Chutney, also known as Imli Chutney, is a sweet and tangy condiment widely used in Indian cuisine. This versatile chutney adds a burst of flavor to a variety of dishes, from savory snacks to appetizers to main courses. 

    Why Tamarind Chutney is so popular:

    • Rich Flavor Profile: Tamarind Chutney is prized for its unique combination of sweet, tangy, and slightly sour flavors. The tartness of tamarind is balanced with sweetness from jaggery or sugar, creating a harmonious blend of tastes that enhances the overall flavor of any dish.
    • Versatile Usage: Tamarind Chutney is incredibly versatile and can be used in various ways. It’s commonly served as a dipping sauce for snacks like samosas be it or pakoras like Spinach Potato Pakora, Cabbage Pakora or Palak Pakora, and Chaat. Its tangy-sweet flavor adds depth and complexity to both savory and sweet dishes.
    • Digestive Properties: Tamarind is known for its digestive properties and is often used in traditional medicine to aid digestion and relieve gastrointestinal issues. Tamarind Chutney, with its natural acidity, can help stimulate digestion and alleviate discomfort after a heavy meal.
    • Easy to Prepare: Making Tamarind Chutney at home is simple and requires only a few basic ingredients. With minimal effort, you can whip up a batch of this flavorful condiment to elevate your favorite dishes and impress your guests.

    Variations of Chutney:

    • Hari Cilantro Chutney: Hari chutney is a blend of fresh cilantro (green coriander) and variety of spices. Hari chutney is a “must” with pakoras, samosas, chaats, and many popular Indian snacks.
    • Date And Raisin Chutney: Date and Raisin chutney! This exotic sweet and sour chutney is mildly spiced, this will complement any meal. This recipe is quick and easy to make.
    • Methi Chutney: Methi Chutney is a popular North Indian condiment. Methi Chutney is packed with flavors, sourness from mango, sweetness from raisins; some bitterness from fenugreek, mixed with spices it has a very unique taste. 
    • Tomato Chutney: Tomato Chutney with freshly grated ginger for a warming and aromatic flavor. It adds a spicy and pungent kick to the chutney, making it ideal for pairing with rich and hearty dishes like kebabs and curries.

    Tips for Making Perfect Tamarind Chutney:

    • Soak Tamarind Properly: Start by soaking tamarind pulp in warm water to soften it before extracting the pulp. This helps to release the natural flavors and acids from the tamarind, resulting in a more flavorful chutney.
    • Adjust Sweetness and Tanginess: Taste the Tamarind Chutney as you go and adjust the sweetness and tanginess according to your preference. Add more jaggery or sugar for a sweeter chutney, or increase the amount of tamarind pulp for a tangier flavor.
    • Strain for Smooth Texture: For a smooth and silky texture, strain the Tamarind Chutney after cooking to remove any fibrous or gritty particles. This ensures a velvety consistency and enhances the overall eating experience.
    • Store Properly: Store Tamarind Chutney in an airtight container in the refrigerator for up to a month. It can also be frozen for longer storage. Allow it to thaw before using and adjust the consistency with a little water if needed.

    FAQs about Tamarind Chutney:

    Is Tamarind Chutney gluten-free? 

    Yes, Tamarind Chutney is naturally gluten-free as it’s made with tamarind pulp, sugar or jaggery, and spices, which are all gluten-free ingredients. It’s safe for individuals with gluten intolerance or celiac disease to consume.

    Can I make Tamarind Chutney without sugar?

    Yes, you can make Tamarind Chutney without sugar by using alternatives like jaggery, honey, or maple syrup. Adjust the amount of sweetener according to your taste preferences and dietary restrictions.

    How long does Tamarind Chutney last? 

    Tamarind Chutney can be stored in the refrigerator for up to a month in an airtight container. If properly stored, it can last even longer. However, always check for signs of spoilage before consuming.

    What can I serve with Tamarind Chutney? 

    Tamarind Chutney pairs well with a variety of dishes, including samosas, pakoras, chaat, grilled meats, and rice dishes. It adds a tangy-sweet flavor and enhances the overall taste of the dish.

    In conclusion, Tamarind Chutney is a delightful and versatile condiment that adds a burst of flavor to a wide range of dishes. Whether enjoyed as a dipping sauce for snacks or as a condiment for main courses, its tangy-sweet taste and aromatic spices are sure to tantalize your taste buds and elevate your dining experience. So why not try making a batch of homemade Tamarind Chutney and discover the joy of this beloved Indian condiment?

    Stay tuned for our next exploration into the world of culinary delights!

  • Butter Paneer Masala

    Butter Paneer Masala

    Butter Paneer Masala

    Butter Paneer Masala

    Butter Paneer Masala is a rich entre made with Indian cheese and a creamy sauce. This dish is tasty when served over white rice or with Naan or Tandoori Roti.
    4.25 from 4 votes
    Prep Time 10 minutes
    Cook Time 15 minutes
    Total Time 25 minutes
    Course Main Course
    Cuisine Indian
    Servings 3 people

    Ingredients
      

    • 1/2 lb paneer cubed in byte size
    • 2 medium tomatoes
    • 1 green chili
    • 1/4 inch ginger
    • 1/2 cup green peas
    • 1/2 cup yogurt, whipped curd, dahi
    • 2 tbsp oil
    • 1/8 tsp asafetida hing
    • 1 tsp cumin seeds jeera
    • 1 tbsp coriander powder dhania
    • 1/2 tsp turmeric haldi
    • 1/2 tsp red chili powder
    • 2 bay leaves tajpat
    • 1 tsp salt
    • 1/2 tsp garam masala
    • 1 tsp corn starch
    • 1 tsp sugar, optional
    • 2 tbsp cilantro finely chopped hara dhania

    Instructions
     

    • Deep-fry the paneer on low-medium heat until the paneer has a little golden- brown color. Set aside.
    • Blend tomatoes, green chilly and ginger to make a puree.
    • Heat the oil in a saucepan. Test the heat by adding one cumin seed to oil; if seed cracks right away oil is ready. Add hing and cumin seeds.
    • After the cumin seeds crack, add the tomato puree, coriander powder, turmeric, red chili powder and bay leaves. Cook for about 4 minutes on medium heat. Tomato mixture will start to leave the oil and will reduce to about half in quantity.
    • Add the whipped yogurt into the gravy. Stir occasionally for about 3 minutes on medium heat.
    • To thicken the gravy, dissolve the cornstarch in 3 tablespoons of water and add to the gravy.
    • Add the green peas and paneer. Let it cook for a few minutes until the peas are tender.
    • Add the garam masala and cilantro. Add a little sugar if the gravy is sour.

    Notes

    Variations
    You can substitute the yogurt with heavy cream for a richer flavor.
    1 tablespoon of fresh or dried methi leaves (Fenugreek leaves) can be added at the end.
    Add in the yogurt powder of 4 to 5 cashews to make it creamier.
    This gravy can be used in any combination of vegetables you desire.
    This recipe is only a method – feel free to be creative and experiment!
    Keyword Kid Friendly, Paneer Dish, Party Food
    Tried this recipe?Let us know how it was!

    How to Make Butter Paneer at Home – Manjula’s Kitchen 

    Butter Paneer Masala, also known as Paneer Butter Masala, is a timeless Gluten vegetable curry-based North Indian dish celebrated for its rich, creamy texture and aromatic flavors. In this Butter Paneer Recipe, we will delve into the intricacies of crafting the perfect Butter Paneer Masala, exploring various recipes, techniques, and customizable options. Whether you are a seasoned chef or a novice in the kitchen, this recipe for butter paneer masala will empower you to master the art of creating this culinary masterpiece.

    Understanding Paneer Butter Masala: 

    Butter Paneer Masala is a vegetarian dish that centers around paneer, or Indian cottage cheese, immersed in a luscious tomato-based gravy enriched with butter and cream. The dish seamlessly blends spices, herbs, and dairy to create a harmonious symphony of flavors. Often enjoyed with naan or rice, Butter Paneer Masala is a favorite among Indian food enthusiasts worldwide.

    Recipe: How to Make Butter Masala Paneer: 

    Step 1: Deep-fry the Paneer

    To initiate the culinary journey, the paneer cubes are deep-fried to perfection. This step is crucial as it imparts a golden-brown color and a slight crispiness to the paneer, enhancing its overall texture.

    Step 2: Prepare Tomato Puree 

    The heart of the paneer masala recipe lies in the vibrant tomato puree. A blend of ripe tomatoes, green chilies, and ginger creates a smooth, flavorful base that serves as the canvas for the ensuing layers of spices and aromatics.

    Step 3: Tempering the Gravy 

    In a hot saucepan, a tempering process begins with the crackling of cumin seeds and the aromatic release of hing (asafoetida). The tomato puree, along with coriander powder, turmeric, red chili powder, and bay leaves, is added to create a robust foundation for the Paneer Butter Masala.

    Step 4: Introduce Yogurt 

    Whipped yogurt is then introduced into the gravy, imparting a creamy and tangy dimension to the dish. Stirring occasionally allows the yogurt to amalgamate seamlessly, contributing to the overall richness of the masala.

    Step 5: Thicken the Gravy 

    To achieve the desired consistency, a cornstarch-water mixture is incorporated into the gravy. This step ensures a velvety and well-coated texture, elevating the dining experience.

    Step 6: Add Paneer and Green Peas 

    The deep-fried paneer cubes, now infused with a golden hue, and vibrant green peas are added to the simmering gravy. This step allows the paneer to absorb the flavors of the aromatic sauce while the green peas contribute a sweet and crisp element.

    Step 7: Seasoning and Final Touches 

    The final touches involve sprinkling garam masala and fresh cilantro into the mixture, providing a burst of aromatic complexity. A hint of sugar may be added to balance the flavors if the gravy tends to lean towards the tangy side.

    Variations and Customizations: 

    Richness Enhancement: For an even more indulgent flavor, consider substituting yogurt with heavy cream. This variation introduces a luxurious creaminess that elevates the dish to a new level of decadence.

    Flavorful Twist with Methi Leaves: To add a unique and slightly bitter note, incorporate 1 tablespoon of fresh or dried methi leaves (fenugreek leaves) towards the end of the cooking process. This variation introduces a depth of flavor that complements the richness of the Butter Paneer Masala.

    Creamy Texture with Cashews: For those seeking an extra creamy consistency, include 1 tablespoon of yogurt powder or crushed cashews. This addition not only enhances the creaminess but also imparts a subtle nutty undertone to the dish.

    Versatility in Vegetable Combinations: The Butter Paneer Masala gravy is a versatile canvas that welcomes a variety of vegetables. Experiment with different combinations to suit your preferences and create a personalized version of this classic dish.

    In the end, you have learned how to make butter masala paneer which involves a meticulous balance of spices, textures, and flavors. This comprehensive how-to-make butter paneer guide has provided a detailed walkthrough of the paneer masala recipe, from deep-frying the paneer to infusing the gravy with aromatic spices. 

    Armed with this knowledge, you are now equipped to embark on this recipe for butter paneer masala in creating a perfect Butter Paneer Masala that is uniquely yours. So, don your apron, gather the ingredients, and let the aroma of this exquisite dish fill your kitchen.

    If you liked this recipe you must also try Kadai Paneer, Malai Kofta, Palak Paneer