Tag: Gluten Free Appetizers

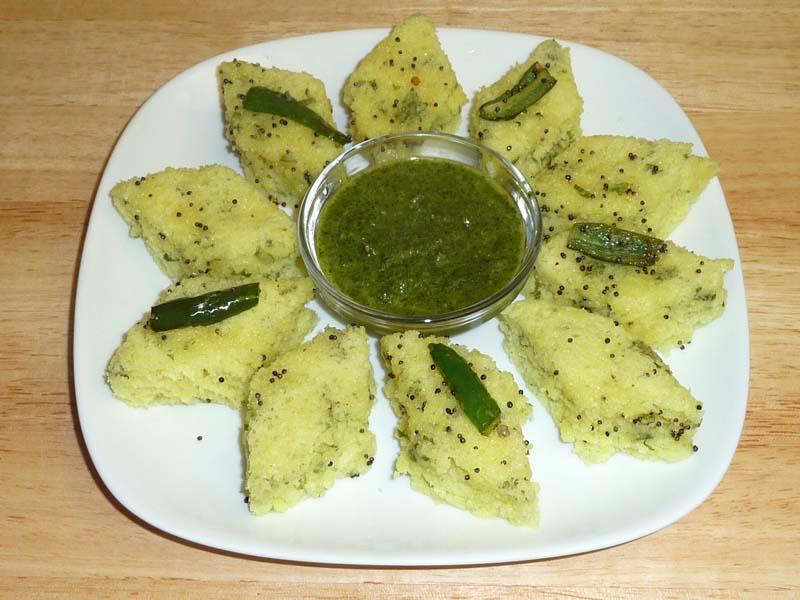
Gluten-Free Appetizers: Delicious Starters for Any Occasion
Gluten-free recipes have gained significant popularity, not only for those with celiac disease or gluten sensitivity but also for individuals looking to adopt a healthier lifestyle. 

Hosting a party or gathering with gluten-free options can seem challenging, but with the right recipes, it can be both easy and enjoyable. Here’s a comprehensive guide to some of the best gluten free appetizers that are sure to impress your guests. 

From easy gluten free appetizers to the best gluten free appetizers, you’ll find something for everyone.
Why Choose Gluten-Free Appetizers?

Health Benefits: Gluten-free diets can help alleviate symptoms for those with gluten intolerance or celiac disease, improving their quality of life.
Inclusivity: Providing gluten-free options ensures that all guests, regardless of dietary restrictions, can enjoy the appetizers without worry.
Variety: Gluten-free appetizers often incorporate a wide range of ingredients, offering diverse flavors and textures that appeal to everyone.

Popular Gluten-Free Appetizers
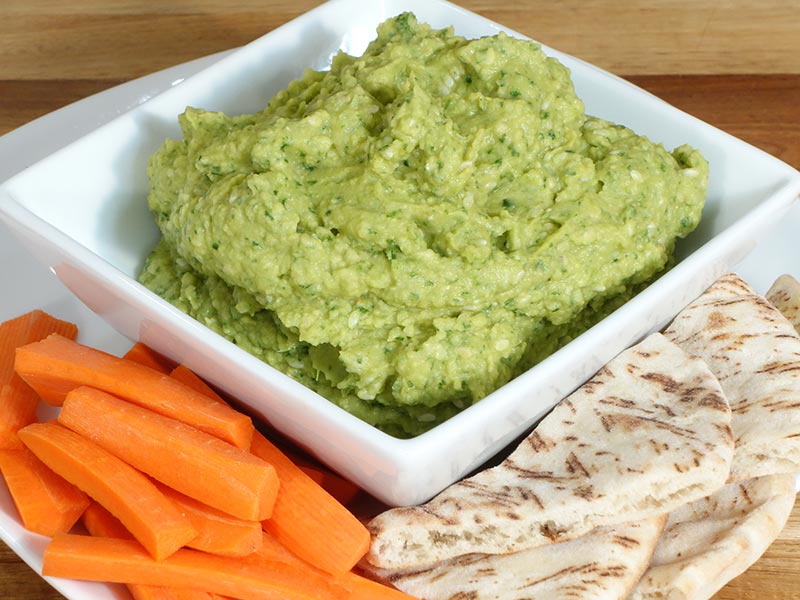
1. Veggie Platter with Hummus
A veggie platter with hummus is a fresh and colorful appetizer that’s easy to prepare. It’s perfect for dipping and provides a healthy, gluten-free option for guests.
2. Stuffed Bell Peppers
Stuffed bell peppers filled with quinoa, black beans, and vegetables make for hearty and satisfying gluten free appetizers. They are nutritious and flavorful, making them a popular choice.
3. Guacamole with Plantain Chips
Guacamole with plantain chips offers a crunchy and creamy combination. It’s a fantastic option for a crowd and easy to prepare in large quantities.
4. Caprese Skewers
Caprese skewers with cherry tomatoes, mozzarella, and basil are not only gluten-free but also incredibly easy to assemble. They are visually appealing and delicious.
Easy Gluten-Free Appetizers
1. Rice Paper Rolls
Rice paper rolls filled with vegetables and tofu are light and refreshing. Serve them with a gluten-free dipping sauce for an easy and healthy appetizer.
2. Sweet Potato Bites
Sweet potato bites topped with avocado and a sprinkle of chili flakes are quick to prepare and delicious. They are a perfect combination of sweet and savory.
3. Cheese and Fruit Platter
A cheese and fruit platter is a no-fuss option that offers a variety of flavors and textures. It’s an easy gluten-free appetizer that everyone will enjoy.
4. Zucchini Fries
Zucchini fries baked until crispy and served with a gluten-free dipping sauce are a hit at any gathering. They are a healthier alternative to traditional fries.
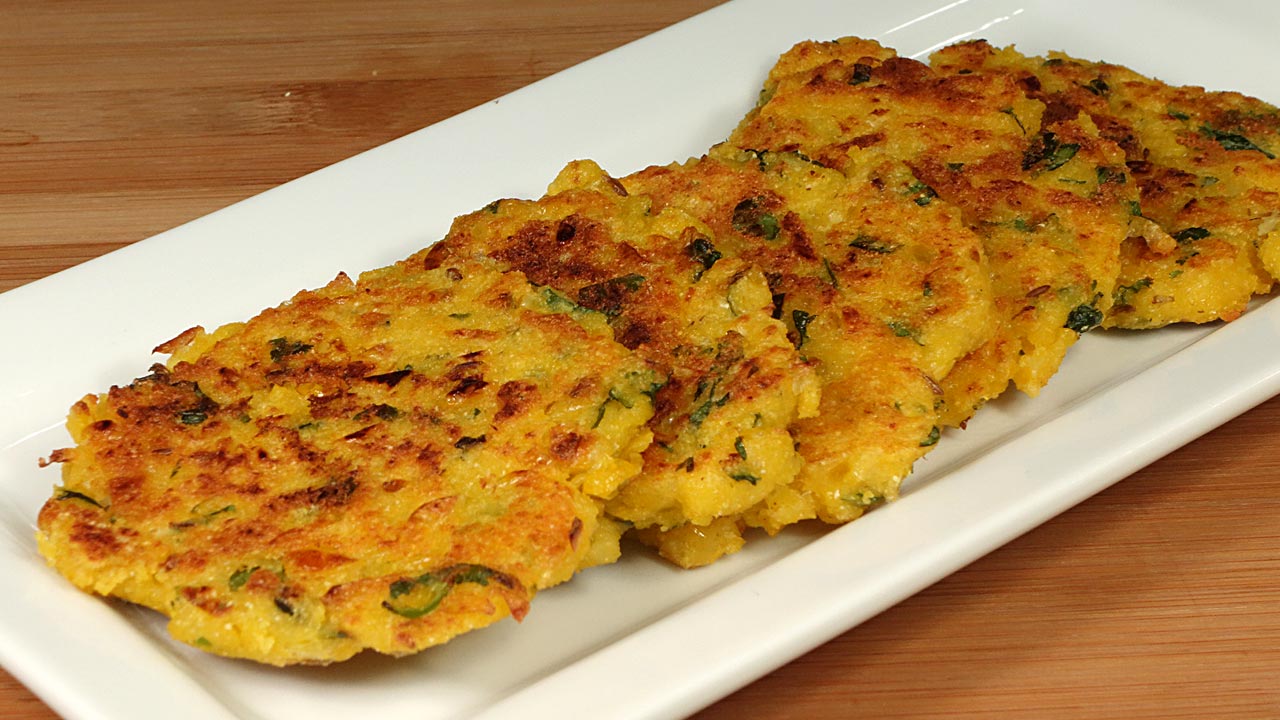
5. Mini Quiches
Mini quiches made with a gluten-free crust and filled with spinach and cheese are a savory delight. They are easy to make and perfect for serving at parties.

Tips for Serving Gluten-Free Appetizers

Clear Labeling: Clearly label gluten-free appetizers to prevent cross-contamination and help guests easily identify safe options.
Separate Serving Utensils: Use separate serving utensils for gluten-free dishes to avoid cross-contamination.
Variety: Offer a variety of gluten-free appetizers to cater to different tastes and dietary needs.
Fresh Ingredients: Use fresh and naturally gluten-free ingredients like vegetables, fruits, and lean proteins.
Gluten-Free Dips: Ensure that any dips or sauces served with appetizers are also gluten-free.

FAQs
Q: What are good snacks for gluten-free? 
A: Good snacks for gluten-free include rice cakes with avocado, popcorn, cheese sticks, gluten-free granola bars, and fruit with nut butter.
Q: What are gluten-free snacks for platters? 
A: Gluten-free snacks for platters can include fresh fruits, vegetables with hummus, gluten-free crackers with cheese, nuts, and dried fruits.
Q: What are gluten-free snacks for platters? 
A: Gluten-free snacks for platters can include fresh fruits, vegetables with hummus, gluten-free crackers with cheese, nuts, and dried fruits.
Q: What are good snacks for gluten-free? 
A: Good snacks for gluten-free include rice cakes with avocado, popcorn, cheese sticks, gluten-free granola bars, and fruit with nut butter.
Conclusion
Offering a selection of gluten free appetizers at your next event ensures that all guests can enjoy delicious and safe options. From easy gluten free appetizers to the best gluten free appetizers, these recipes provide a range of flavors and textures that everyone will love. Keep these tips and recipes in mind, and you’ll be well on your way to hosting a successful gluten-free gathering. 

Enjoy experimenting with these gluten free appetizers recipes and discover new favorites for your menu. Explore more recipes on Manjula’s Kitchen and discover the joy of cooking nutritious and delicious food.

  • Masala Paneer

    Masala Paneer

    Masala Paneer

    Masala Paneer

    Need a simple healthy appetizer that is sure to be enjoyed by all? Try serving my "Masala Paneer Cubes" at your next get together! It is homemade paneer mixed with a variety of spices. Serve with crackers, or fruit plate. Masala paneer can be used for many different ways, like paneer pakoras, paneer paratha.
    No ratings yet
    Course Appetizer
    Cuisine Indian
    Servings 8 people

    Ingredients
      

    • 8 cup milk whole milk
    • 5 tbsp lemon juice
    • 1 tbsp salt
    • 10 black pepper crushed
    • 1/4 tbsp red chili flakes
    • 1 tbsp clarified butter, ghee
    • 1/2 tbsp cumin seeds, jeera
    • 1 tbsp ginger finely shredded, or paste
    • 1 tbsp green chili seeded and finely chopped
    • 1 tbsp lemon juice

    Instructions
     

    • Boil the milk in a heavy-bottomed pan over medium heat, first wet the pan to ensure the milk will not burn. Stir occasionally.
    • When the milk comes to a boil, add the lemon juice gradually and stir gently. The curd will start separating from the whey. Turn off the heat.
    • Once the milk fat has separated from the whey, drain the whey using a strainer lined with muslin cloth.
    • Wrap the curds in a muslin cloth, rinse under cold water, and squeeze well.
    • To test whether enough water has been removed from the paneer, rub a little piece of paneer on your palm with your fingers. After rubbing the paneer 15-20 seconds, you should be able to make a firm, smooth ball.
    • In a small frying pan heat the clarified butter (ghee) over medium heat. When ghee is moderately hot add cumin seeds as seeds crack add green chili and ginger, turn off the heat. Stir fry for few seconds and set aside.
    • In a mixing bowl mix the paneer with all the ingredients fried cumin mix, salt, black pepper, chili flakes, black pepper and lemon juice.
    • Mix it well, do not knead the paneer. Put the paneer in a flat bowl and press it to spread evenly. Cover it and refrigerate for at least two hours.

    Notes

    Notes
    For this recipe full fat milk works better otherwise paneer will be too dry.
    Do not knead the paneer that will make paneer little chew.
    Keyword Masala Paneer
    Tried this recipe?Let us know how it was!

    How To Make Paneer Masala At Home Recipe 

    Explore the perfect fusion of flavors with our delectable masala paneer appetizers and snacks. Satisfy your cravings for gluten-free delights featuring the rich essence of paneer. Indulge in these flavorful snacks that redefine the joy of snacking.

    Preparing Masala Paneer at Home: 

    Indulge in the culinary art of crafting masala paneer by following this easy step-by-step guide on how to make paneer masala at home. Begin the process by boiling milk in a heavy-bottomed pan over medium heat, ensuring the pan is wet to prevent burning. Stir occasionally as the milk comes to a boil. Gradually introduce lemon juice to curdle the milk, separating the curd from the whey. This initial step sets the foundation for a delightful paneer butter masala.

    Draining and Squeezing the Curds for Paneer Butter Masala:

    After successfully curdling the milk, the next crucial step in the paneer butter masala recipe involves draining the whey. Employ a strainer lined with muslin cloth to filter out excess liquid. Wrap the curds in the cloth, rinse under cold water, and squeeze thoroughly. Testing the paneer’s water content is key; a firm, smooth ball should form after rubbing it on your palm for 15-20 seconds. This meticulous process ensures the perfect texture for your homemade paneer butter masala.

    Flavor Infusion with Cumin Mix for Masala Paneer:

    Enhance the taste of your paneer butter masala by preparing a flavorful cumin mix. Heat clarified butter (ghee) in a small pan, adding cumin seeds until they crack. Introduce green chili and ginger, stir-frying for a few seconds. This aromatic blend serves as a crucial ingredient in the masala, imparting a distinct and savory touch to your how to make paneer butter masala adventure.

    Mixing and Chilling for the Best Paneer Butter Masala: 

    In a mixing bowl, combine the prepared paneer with the cumin mix, salt, black pepper, chili flakes, and lemon juice. It’s essential to achieve a thorough mix without kneading the paneer. Place the paneer in a flat bowl, press it evenly, and cover it. Allow it to refrigerate for a minimum of two hours. This cooling period not only solidifies the paneer but also intensifies the flavors for an extraordinary paneer butter masala recipe.

    Savoring the Delight of Homemade Paneer Butter Masala: 

    Once refrigerated, your homemade masala paneer is ready to elevate your culinary experience, especially when preparing the tantalizing paneer butter masala. Explore the rich flavors and follow a simple how to make paneer butter masala recipe to create a dish that delights your taste buds and showcases your culinary prowess. Relish the satisfaction of crafting a delectable paneer butter masala from scratch, bringing the authentic taste of Indian cuisine to your dining table.

    If you liked this recipe you should also try our: Corn Bruschetta, Baklava Rolls, Spicy Cashews, Bread Potato Rolls and Kalmi Vada

  • Gobi (Cauliflower) Manchurian

    Gobi (Cauliflower) Manchurian

    Gobi (Cauliflower) Manchurian

    Gobi (Cauliflower) Manchurian

    Gobi or cauliflower Manchurian is a popular Indo Chinese dish. This is a super delicious appetizer or main dish. Gobi manchurian satisfies both your savory and spicy cravings! It consists of fried gobi (cauliflower) simmered in a flavorful gravy made with soy sauce and red chili sauce.
    3.50 from 6 votes
    Course Appetizer
    Cuisine Indian
    Servings 4 people

    Ingredients
      

    • 20 cauliflower pieces cut into medium size florets

    For Sauce

    • 2 tbsp oil
    • 1 tbsp ginger paste or finely shredded ginger (adrak)
    • 1 green chili chopped
    • 1/4 cup celery finely chopped
    • 2 tbsp red chili sauce
    • 2 tbsp soy sauce
    • 1 tbsp vinegar
    • 2 tbsp tomato paste
    • 1/2 tbsp sugar
    • 2 tbsp corn starch or arrow root powder
    • Approx. ½ cup water

    For Batter

    • 1/3 cup all purpose flour (plain flour, maida)
    • 3 tbsp corn starch or arrow root powder
    • 1/2 tbsp salt
    • 1/8 tbsp black pepper
    • Approx. ½ cup water

    Instructions
     

    • Mix the corn starch with water and set aside.
    • Heat the oil in sauce pan over medium high heat; add ginger, celery and green chili stir for about two minute. Add all the ingredients for sauce except corn starch, (chili sauce, soy sauce, vinegar, tomato paste, and sugar).
    • Stir for 2 minutes add corn starch and cook for another two minutes, sauce should be thick, consistency of a dosa or pancake batter. If needed add more water, sauce gets thicker as it sits.
    • Sauce is ready, set aside.
    • To make batter mix flour, corn starch, salt and pepper in a bowl. Add the water slowly to make a smooth batter (batter should be consistency of pancake batter or dosa batter).
    • Heat at least one inch of oil in a frying pan over medium high heat. Oil should be moderately hot. (If oil is not hot cauliflower will be greasy).
    • Dip the cauliflower into the batter one at a time, making sure it is completely covered by the batter. Then drop the cauliflowers slowly into oil in the frying pan. (do not overlap them)
    • Fry the cauliflowers in small batches, four to five minutes per batch. Fry them turning occasionally, until they are all sides golden brown. Take them out over paper towel.
    • Repeat this process for the remaining cauliflowers.
    • Fold fried cauliflower/ gobies into gravy and serve hot.

    Notes

    Notes
    Manchurian tastes best when cauliflower has some crunch. If you have fried them earlier, refry them before dipping in the sauce as fried cauliflower becomes soft as they cool off.
    Tried this recipe?Let us know how it was!

    Gobi Manchurian Recipe: A Delicious Indo-Chinese Delight 

    Gobi Manchurian is a beloved Indo-Chinese dish that combines the crispiness of cauliflower with a tangy, spicy sauce. It is a delectable fusion appetizer featuring crispy cauliflower florets coated in a savory vegan curry/gravy infused with aromatic vegetables.If you’re craving this flavorful dish and want to recreate it at home, look no further than this gobi manchurian recipe. With simple ingredients and easy-to-follow steps, you’ll be able to whip up a batch of delicious cauliflower manchurian in no time.

    Preparation: 

    Begin by preparing the cauliflower florets. Make sure they are clean and dry before proceeding with the recipe. You can blanch the florets in hot water for a few minutes to soften them slightly, or you can proceed with frying them directly for a crispier texture.

    Frying the Cauliflower (cauliflower manchurian recipe):  

    In a bowl, prepare a batter using all-purpose flour, cornflour, salt, pepper, ginger, and water. Coat each cauliflower floret in the batter, ensuring they are evenly coated.

    Heat oil in a deep pan or wok over medium heat. Once the oil is hot, carefully add the battered cauliflower florets in batches. Fry them until they turn golden brown and crispy. Remove them from the oil and place them on a paper towel-lined plate to drain excess oil.

    Making the Manchurian Sauce (recipe for manchurian cauliflower): 

    In another pan, heat oil over medium heat. Add finely chopped ginger, and green chilies. Sauté them until fragrant.

    Next, add bell peppers. Cook until they turn soft and translucent.

    Now, it’s time to add the sauces. Pour in soy sauce, chili sauce, ketchup, vinegar, and a pinch of sugar. Stir well to combine all the ingredients.

    In a small bowl, prepare a slurry using cornflour and water. Add this slurry to the pan to thicken the sauce. Stir continuously to avoid lumps.

    Once the sauce reaches your desired consistency, add the fried cauliflower florets to the pan. Toss them gently in the sauce until they are well coated.

    Tips for Perfect Gobi Manchurian: 

    • Make sure the cauliflower florets are dry before coating them in the batter to prevent the batter from becoming soggy.
    • Adjust the amount of chili sauce and green chilies according to your spice preference.
    • For a healthier version, you can bake the cauliflower florets instead of frying them. Simply coat them in the batter and place them on a baking sheet lined with parchment paper. Bake in a preheated oven at 400°F (200°C) for 20-25 minutes or until crispy.

    Variations to Try: 

    • Add diced carrots, cabbage, or other vegetables of your choice to make the dish more colorful and nutritious.
    • For a vegan version, use tamari instead of soy sauce and skip the vinegar or use apple cider vinegar.
    • Garnish the gobi manchurian or cilantro for an extra burst of flavor and freshness.

    Benefits of Gobi Manchurian 

    Gobi Manchurian is not only delicious but also packed with nutrients. Cauliflower is a rich source of vitamins, minerals, and antioxidants, making it beneficial for overall health. Additionally, by controlling the ingredients used in the recipe, you can make it healthier compared to the restaurant version.

    FAQs (cauliflower manchurian): 

    Q: Can I use frozen cauliflower for this recipe?

    A: While fresh cauliflower is preferred for its crisp texture, you can use frozen cauliflower if that’s what you have on hand. Make sure to thaw and pat dry the cauliflower before using it in the recipe.

    Q: How can I make the sauce less spicy?

    A: To reduce the spice level of the sauce, you can decrease the amount of chili sauce and green chilies used in the recipe. You can also omit the green chilies altogether for a milder flavor.

    With this comprehensive gobi manchurian recipe, you’ll be able to recreate the flavors of your favorite Indo-Chinese dish right in your own kitchen. Whether you’re cooking for a special occasion or simply craving a tasty snack, this dish is sure to satisfy your cravings. Enjoy the crispy texture of the cauliflower combined with the savory and tangy flavors of the Manchurian sauce—it’s a winning combination that’s sure to become a favorite in your household.

    Other Recipes If you enjoyed this banana rice recipe, you might also like to try these other recipes from Manjula’s Kitchen:

    1.   Vegetable Pulao
    2.   Mango Lassi
    3.   Chickpea Salad
    4.   Coconut Chutney
    5.   Vegetable Pakoras
    6.   Paneer Tikka Masala
    7.   Fruit Chaat

    These recipes are perfect and are sure to satisfy your cravings. Happy cooking!

  • Spicy Indian Chips Recipe

    Spicy Indian Chips Recipe

    Spicy Indian Chips

    Spicy Indian (Flour) Chips

    If you like chips, and you like spicy food, these chips are for you. This is a quick and easy snack recipe. I have used flour tortillas and flavored them with Indian spice mix. They are hard to resist you will say just one more.
    No ratings yet
    Course Appetizer
    Cuisine Indian
    Servings 6 people

    Ingredients
      

    • 4 flour tortillas uncooked I am using 8” diameter tortillas
    • Oil to fry

    Spice Mix

    • 1 tbsp dry mint leaves available at Indian grocery store
    • 1 tbsp roasted cumin seed powder
    • 1/4 tbsp garam masala available Indian grocery store
    • 1/2 tbsp black salt available in Indian grocery store
    • 1/2 tbsp salt
    • 1/2 tbsp red chili powder
    • 1/2 tbsp mango powder (amchoor) available Indian grocery store
    • Generous pinch of citric acid (nimbu ka sat)

    Instructions
     

    • Spice mix, in a bowl mix all the spices really well. Set aside.
    • Prick the tortillas from both sides, this will limit chips from puffing and make them crisp.
    • Cut each tortilla in 8 triangles, like slicing pizza.
    • Heat the oil in a frying pan over medium heat. The frying pan should have about 1 inch of oil. To check if the oil is ready, put a small piece of tortilla in the oil. The tortilla should sizzle and come up slowly.
    • Heat the oil in a frying pan over medium heat. The frying pan should have about 1 inch of oil. To check if the oil is ready, put a small piece of tortilla in the oil. The tortilla should sizzle and come up slowly.
    • Take them out in a plate and sprinkle the spice mix on both sides right away, before they are dry. This will keep the spices on the chips. Repeat the process until all the chips are done.
    • After the chips cool to room temperature they can be stored in airtight container for 1 month.

    Notes

    Suggestions
    1. For Fried Tortillas If you don’t find uncooked tortillas use thin tortillas.
    2. Fried tortillas store well in air tight container for a month.
    3. Fried tortillas can be served in many different ways; a quick and easy way is to make Papdi Chaat. Serve them with Chole Chaat or Matra Chaat and I am sure you can find many other ways to serve them.
    4. For Spice mix Make spice mix in a big batch and use it like Chaat Masala over the sliced fruits, salad, with yogurt. I am sure you can find many other ways to use this spice mix.
    Tried this recipe?Let us know how it was!

    Savor the Crunch: Spicy Indian Flour Chips

    When it comes to irresistible snacks, spicy Indian flour chips top the list. These crunchy delights, known for their bold flavors and satisfying texture, are perfect for any occasion. Whether you’re hosting a party, looking for a quick bite, or craving a spicy snack, these chips are sure to please. In this article, we’ll explore the origins, variations, and tips for making the perfect Indian flour chips at home, along with maximizing the use of internal links to other delicious recipes.

    The Essence of Spicy Indian Flour Chips

    Spicy Indian flour chips are made from a simple dough of flour, spices, and herbs, rolled out thin and fried to crispy perfection. The combination of spices used in the dough gives these chips their distinctive flavor, making them a favorite snack among spice lovers. These chips are often enjoyed with a cup of tea or as an accompaniment to meals, adding a delightful crunch to every bite.

    Origins and Cultural Significance

    These chips have their roots in Indian street food culture, where they are commonly known as “namak pare” or “mathri.” They are especially popular during festivals and celebrations, symbolizing the joy and togetherness of these occasions. The simplicity of the ingredients and the ease of preparation have made spicy Indian flour chips a staple snack in many Indian households.

    Tips for Perfect Spicy Indian Flour Chips

    • Choosing the Right Flour: The base of these chips is typically made from wheat flour, but you can experiment with other flours like chickpea or rice flour for different textures and flavors.
    • Spice Blend: A perfect blend of spices is key. Common spices include cumin, ajwain (carom seeds), chili powder, and turmeric. Adjust the spice levels according to your preference.
    • Rolling the Dough: Roll the dough as thin as possible for the crispiest chips. Thicker chips will be harder and less crispy.
    • Frying: Fry the chips in hot oil until golden brown. Ensure the oil is at the right temperature to prevent the chips from absorbing too much oil and becoming greasy.

    Variations to Try

    While the classic spicy Indian flour chips are delicious on their own, you can try different variations to keep things interesting. For instance, you can add finely chopped spinach or fenugreek leaves to the dough for a nutritious twist. Adding sesame seeds or crushed peanuts can also enhance the flavor and texture. For more creative ideas, check out Sweet and Sour Guava Curry and Dodha Burfi (Punjabi Milk Fudge).

    Pairing and Serving Suggestions

    Spicy Indian flour chips can be enjoyed in various ways. Serve them with a side of tangy tamarind chutney or refreshing yogurt chutney for a flavor contrast. They also make a great addition to a snack platter alongside Sweet Potato Chaat or Moong Dal Halwa (Vegan). These chips are perfect for munching on their own or as a crunchy side to a meal.

    Making Indian flour chips at home allows you to control the ingredients and ensure a healthier snack option. By using whole grain flours and minimal oil, you can enjoy these tasty chips without the guilt. For more healthy homemade snack ideas, explore Millet Soup (Bajra Raab) and Vegetable Biryani (Instant Pot).

    Frequently Asked Questions

    Q: Can I bake these chips instead of frying?

    A: Yes, you can bake the chips for a healthier option. Preheat your oven to 375°F (190°C) and bake the rolled-out dough until crispy and golden brown, about 15-20 minutes.

    Q: How long can these chips be stored?

    A: Store the chips in an airtight container to keep them crispy. They can last for up to two weeks when stored properly.

    Q: Can I make these chips gluten-free?

    A: Absolutely. Substitute the wheat flour with gluten-free flour blends or chickpea flour to make gluten-free spicy Indian flour chips.

    Conclusion

    The spicy Indian flour chips recipe is a fantastic way to enjoy a crunchy and flavorful snack that is easy to make at home. Whether you’re a seasoned cook or a beginner, these chips are sure to become a favorite in your snack repertoire. For more exciting recipes and variations, explore other delightful dishes like [Sweet and Sour Guava Curry, [Dodha Burfi (Punjabi Milk Fudge), and Masala Bell Pepper Curry. Enjoy the journey of flavors and happy cooking!

  • Spicy Bread Pakora

    Spicy Bread Pakora

    A plate of Spicy Bread Pakora

    Spicy Bread Pakora

    Spicy Bread Pakoras, Pakoras are all time favorite snack, at least for me. Bread Pakoras are made so many different ways, but this time I have layered the bread with spicy sweet and sour potatoes like chutney. Before I decided to do this recipe, I have served these pakoras to many friends, the only thig they could say wow. They could not figure out what I have used for filling. Bread Pakora is all time favorite snack; at least for me. I have made these bread pakoras so many ways, but this recipe is different, and taste great. I have layered these pakoras with spicy sweet and sour potato like chutney. Before I decided to do this recipe, I have served these pakoras to many friends, the only thig they could say wow. They could not figure out what I have used for filling. You don’t need any chutney or dipping sauce, but green cilantro or mint chutney enhance the flavor.Recipe will serve 4.
    5 from 1 vote
    Prep Time 10 minutes
    Cook Time 20 minutes
    Total Time 30 minutes
    Course Appetizer
    Cuisine Indian
    Servings 4 people

    Ingredients
      

    • 4 slices of while bread

    For Batter

    • 1 ½ cup besan gram flour
    • 2 Tbsp corn starch
    • ¼ tsp baking soda
    • tsp asafetida hing
    • ½ tsp salt
    • 1 tsp oil
    • About ¾ cup of water

    For Filling

    • 1 cup potato boiled and mashed
    • 1 ½ Tbsp oil
    • 1 tsp cumin seeds jeera
    • tsp asafetida hing
    • 2 tsp coriander powder dhania
    • 1 Tbsp ginger finely chopped
    • 1 Tbsp green chili chopped
    • ½ tsp red chili powder
    • ½ tsp salt
    • ½ tsp black salt
    • 2 Tbsp mango powder amchoor
    • 1 ½ Tbsp sugar
    • ¼ tsp garam masala
    • ¼ cup cilantro chopped

    Instructions
     

    Batter

    • In a bowl mix all the dry ingredients together, besan, corn starch, salt, asafetida and baking soda, mix it well. Add oil and add water slowly to make a thick and smooth batter. Set aside.

    Filling

    • In a frying pan heat the oil over medium heat. When oil is moderately hot add cumin seeds, asafetida, coriander powder, ginger, green chili, and red chili powder stir fry for few seconds.
    • Next add potatoes, salt, black salt, mango powder, garam masala and sugar stir for about 2 minutes, add ½ cup of water keep stirring and keep mashing the mix if needed add little more water. Mix should be very mushy and soft like a spread. Add cilantro and mix it well.
    • Taste the potato mix it should be spicy after you spread the mix to bread and fry with batter spice level will go down. I always keep the mix extra spicy. Mix is ready keep aside.

    Making Pakoras

    • Spread the mix generously on two slices of bread, then close sandwiches with other slices of bread.
    • Remove the crest from the bread all sides and slice them in the shape you like. I am slicing them in 6 pieces because the bread I am using have big slices.
    • Heat about 1 inch of oil in a frying pan on medium high heat moderately. To check if the oil is ready, put one drop of batter in oil. The batter should come up but not change color right away.
    • Dip the bread into the batter one at a time, making sure bread are completely covered with batter. Then, slowly drop them into the frying pan.
    • Turn them quick and take them out quick. We are going to double fry these pakoras. Fry them all then put them back in frying pan and fry the pakoras until they are golden-brown both sides.

    Notes

    Pakoras can be serve with your choice of chutney:
    Off course hot cup of Chai Masala Tea.
    Tried this recipe?Let us know how it was!

    Introduction to Spicy Bread Pakora

    Spicy Bread Pakora is a popular vegan Indian street food snack loved for its crispy exterior and flavorful filling. This spicy bread pakora recipe offers a tantalizing twist to the traditional version, making it a perfect choice for those who enjoy a bit of heat in their appetizers. If you’re wondering how to make spicy bread pakora, look no further! Follow along for a step-by-step guide to creating this delicious treat.

    Step 1: Prepare the Filling

    To start making spicy bread pakora, prepare the filling mixture. Combine mashed potatoes, finely chopped green chilies, chopped cilantro, grated ginger, garam masala, amchur (dry mango) powder, and salt in a bowl. Mix well to ensure all the ingredients are evenly incorporated. This flavorful filling adds a delightful kick to the bread pakora. If you prefer a milder version, you can adjust the amount of green chilies according to your taste preferences.

    Tip: For a variation in filling, you can add crumbled paneer or shredded cheese to the potato mixture for added richness and texture. Check out Manjula’s recipe for Paneer Pakora for inspiration.

    Step 2: Prepare the Batter

    Next, it’s time to prepare the batter for coating the bread slices. In a separate bowl, combine chickpea flour (besan), rice flour, salt, ajwain (carom seeds), turmeric powder, cumin seeds, and red chili powder. Gradually add water to the dry ingredients while whisking to form a smooth, lump-free batter. The consistency should be thick enough to coat the bread slices evenly. This flavorful batter is what gives spicy bread pakora its signature crunchy coating.

    Variation: For a gluten-free option, you can substitute rice flour with cornflour or a gluten-free flour blend. Manjula offers a recipe for Gluten-Free Rice Flour Pakoras that you might find useful.

    Step 3: Assemble the Bread Pakoras

    Now, it’s time to assemble the spicy bread pakoras. Take a slice of bread and spread a generous amount of the prepared potato filling mixture on one side. Place another slice of bread on top to form a sandwich. Carefully cut the sandwich into desired shapes, such as triangles or rectangles. Dip each sandwich piece into the prepared batter, ensuring it is coated evenly on all sides.

    Tip: To enhance the flavor and aroma, you can add a pinch of chaat masala to the batter before dipping the bread slices. Manjula shares her recipe for Chaat Masala, which you can make at home with a blend of aromatic spices.

    Step 4: Fry the Pakoras

    Heat oil in a deep frying pan over medium heat. Once the oil is hot, carefully place the coated bread pakoras into the oil, making sure not to overcrowd the pan. Fry the pakoras until they turn golden brown and crispy on all sides, flipping them occasionally for even cooking. Once done, remove the pakoras from the oil and drain excess oil on paper towels.

    Benefit: While spicy bread pakoras are undoubtedly indulgent and delicious, they are best enjoyed in moderation as a treat due to their deep-fried nature. Pair them with a fresh salad or chutney for a balanced snack.

    Step 5: Serve and Enjoy!

    Once fried to perfection, serve the spicy bread pakoras hot and crispy alongside your favorite chutney or dipping sauce. They make for a delightful appetizer or tea-time snack, perfect for sharing with friends and family. The combination of crunchy exterior and flavorful filling is sure to tantalize your taste buds and leave you craving for more.

    By incorporating these tips and variations, you can elevate the classic bread pakora into a spicy and irresistible snack that’s bound to impress your guests. Check out more appetizer recipes on Manjula’s Kitchen for further culinary inspiration, such as her Vegetable Pakoras or Samosas. Cheers to delicious snacking!

    Explore more appetizer recipes on Manjula’s Kitchen: Vegetable Samosas, Paneer Tikka, Crispy Spinach PakorasMango Lassi, Masala Chai, Gulab Jamun, Kheer (Rice Pudding)

  • Masala Bell Pepper Curry

    Masala Bell Pepper Curry

    A bowl of Masala Bell Pepper Curry garnished with cashews and fresh cilantro

    Masala Bell Pepper Curry

    Masala Bell Pepper Curry, which is a Hyderabadi-style dish. Hyderabad dishes are very spicy and aromatic. For me, bell pepper curry represents these dishes well. I wanted to do a recipe for a side dish for a more formal get together. I happened to have some extra bell peppers in my fridge, so I decided to experiment with those.
    Since this is a dish for a party, I wanted the gravy to be spicy and rich. Of course, I had to try out variations of this recipe a few times to balance the flavor. This dish has a complex flavor. The nuttiness of the cashews, sesame seeds, and coconut blends perfectly together. The gravy for this dish is also very versatile. You can also make a variety of dishes with this gravy. You can try adding potatoes or paneer with this gravy base, comes out delicious.
    Bell Pepper Masala Curry is very aromatic and delicious, in addition to being vegan and gluten-free. If you enjoy hot and spicy food, indulge yourself with this dish! It pairs excellently with naan, puri, or plain white rice. Enjoy!
    Recipe will serve 4.
    4.34 from 12 votes
    Prep Time 10 minutes
    Cook Time 30 minutes
    Course Main Course
    Cuisine Indian
    Servings 4 people

    Ingredients
      

    • 2 medium size green bell pepper cut into bite size pieces

    Spice Mix

    • 1 tsp oil
    • ¼ cup broken cashews
    • 1 Tbsp sesame seeds
    • 1 Tbsp coriander
    • 1 Tbsp coconut powder

    Gravy

    • 1 ½ cup chopped tomato I used 3 medium size tomatoes
    • 1 Tbsp ginger cut into small pieces
    • 1 Tbsp chopped green chili
    • 2 Tbsp oil
    • 8 fenugreek seeds methi dana
    • 1 tsp cumin seeds jeera
    • ¼ tsp turmeric haldi
    • tsp asafetida hing
    • 1 tsp red chili powder lal mirch
    • ½ tsp sugar
    • 1 tsp salt
    • ½ tsp garam masala

    Instructions
     

    • Cut the bell peppers in half and remove the core and discard and cut them in bite size pieces.
    • In a pan, heat 1 teaspoon oil. Add cashews, sesame seeds, coriander seeds, and on a low flame, stir fry them for about 2 minutes. Turn off the heat and add coconut stir together. After the mix comes to room temperature blend the mix using about 1/4 cup of water and make it into a paste and set aside.
    • Blend tomatoes, ginger, and green chili into a paste. Set aside.
    • Use the same frying pan, heat the oil on medium heat, oil should be moderately hot. Add cumin seeds, fenugreek seeds and asafetida stir for a minute add tomato paste. Add turmeric, salt, sugar, and red chili powder. Stir fry for about 2 minutes, oil will start separating.
    • Add the spice paste and cook for 2-3 minutes stirring. The spice mix will start to leave the oil. Add bell pepper stir and 1-1/2 cups of water and bring the gravy to boil.
    • Lower the heat to medium low and let it simmer for about 6-8 minutes. Until bell pepper is tender.
    • Gravy will thicken as it sits, if needed add more water.
    • Sprinkle the garam Masala and cover the pan.
    • Bell pepper curry is ready to serve. I like to serve this with Naan, or over plain rice.
    Tried this recipe?Let us know how it was!
  • Aloo Tikki (Potato Patties)

    Aloo Tikki (Potato Patties)

    Aloo Tikki (Potato Patties)

    Aloo Tikki (Potato Patties)

    Aloo tikki or potato patties are popular snack, traditionally when any snack is served with yogurt and chutney it is known as chaat. This is very popular with road side vendors, the aroma of the hot tikkis are enough to make you hungry.
    No ratings yet
    Course street food
    Cuisine Indian
    Servings 8 tikki

    Ingredients
      

    • 3 medium size potatoes boiled and shredded, this will make 2 cups of shredded potato
    • 2 tablespoon bread crumbs
    • 1 teaspoon salt
    • Oil for cooking

    for Filling

    • 1/3 cup green peas boiled and drained
    • 1 teaspoon chopped ginger
    • 1 tablespoon green chili minced
    • 1 tablespoon minced cilantro (hara dhania)
    • ¼ teaspoon salt
    • 1 teaspoon oil

    for Serving

    Instructions
     

    Making Filling

    • Boil and drain the water from the peas and lightly mash.
    • Heat the oil in a small pan over medium heat; add all the filling ingredients, stir fry for about two minutes. Keep the filling little moist. Set aside.

    Making tikkis

    • Add the salt and bread crumb into the potatoes and knead to make the dough.
    • Divide the potatoes into 8 equal parts.
    • Takes one part of the potato dough, make a ball and flatten over the oiled palm.  Put about 1 teaspoon of filling in the center and wrap around with potato. Lightly flatten the filled balls to patties. Make all the patties.
    • Heat non stick heavy skillet on medium high heat, generously greased the skillet.  Place the tikkies on the skillet, making sure they are not touching each other and has some space all around. Oil the tikkies from the top.
    • Cook them for about 1 minute and turn them over, tikkies should be light golden brown. Oil the tikkies from the top and lightly press with spatula.
    • Turn the tikkies 3-4 times as needed to make sure tikkies are nice and crispy. Brush the oil lightly every time when you turn the tikkies over and also press with spatula.
    • Aloo tikkies taste best when they are served right from over the skillet.
    • You can prepare them in advance, up to five steps and brown them just before serving.
    • Tikkies are served along with tamarind chutney, cilantro chutney and yogurt. You can also serve them with spicy chole.
    Tried this recipe?Let us know how it was!

    Aloo Tikki: A Delectable Indian Potato Patties Recipe 

    In this aloo tikki recipe, we delve into the art of creating these beloved potato patties, a staple in Indian cuisine. These aloo tikkis are not only flavorful but also versatile, making them perfect for various dishes like aloo tikki chaat. Aloo Tiki, a delightful vegan appetizer inspired by street food recipes. If you’re craving a delightful snack or appetizer, look no further than this tikki aloo recipe.

    Preparation: Crafting the Perfect Aloo Tikki 

    To start this aloo tikki recipe, begin by boiling potatoes until they are tender. Once cooled, peel and mash them thoroughly. Now, let’s infuse these mashed potatoes with flavor. Add green chili, ginger, salt, cumin seeds, mango powder, and garam masala to the mashed potatoes. Mix these ingredients well, ensuring they are evenly distributed, creating the base for our aloo tikkis.

    Cooking: Shaping and Pan-Frying the Aloo Tikki 

    Now comes the fun part – shaping the aloo tikkis! Take a portion of the potato mixture and roll it into a ball, then gently flatten it to form a patty. Repeat this process until all the mixture is used. Heat oil in a skillet over medium heat. Once hot, carefully place the aloo tikkis in the skillet, ensuring they don’t overlap. Cook each side until golden brown and crisp, creating a delightful texture that enhances the flavor of the tikki aloo.

    Serving: Enjoying Aloo Tikki in Various Forms 

    Now that your aloo tikkis are ready, it’s time to enjoy them in different ways. One popular option is aloo tikki chaat, where the tikki aloo is topped with a medley of chutneys, yogurt, and spices, creating a burst of flavors with every bite. You can also serve aloo tikkis with a side of mint chutney or tamarind chutney for a refreshing twist. Whether enjoyed as a snack, appetizer, or part of a meal, these aloo tikkis are sure to delight your taste buds.

    Tips for Perfect Aloo Tikki: 

    • Use starchy potatoes: Opt for potatoes like russets or Yukon Gold, as they have a higher starch content, resulting in fluffier aloo tikkis.
    • Keep the oil hot: Ensure the oil is sufficiently hot before frying the aloo tikkis to achieve a crispy exterior.
    • Don’t overcrowd the skillet: Cook the tikki aloo in batches, giving them enough space in the skillet to fry evenly.
    • Add breadcrumbs: If the potato mixture feels too wet, incorporate breadcrumbs to help bind it together.

    Variations of Aloo Tikki: 

    • Paneer-stuffed Aloo Tikki: Elevate your aloo tikki experience by adding a layer of paneer stuffing before shaping and frying them.
    • Vegetable-loaded Aloo Tikki: Mix finely chopped vegetables like carrots, peas, and bell peppers into the potato mixture for added texture and flavor.
    • Spicy Aloo Tikki: Increase the heat by adding extra green chilies or a dash of red chili powder to the potato mixture.

    Benefits of Aloo Tikki: 

    • Rich in carbohydrates: Potatoes are a great source of carbohydrates, providing energy to fuel your day.
    • Versatile: Aloo tikkis can be enjoyed on their own, as part of a meal, or as a base for various chaat dishes, offering endless culinary possibilities.
    • Comfort food: The warm and comforting flavors of aloo tikkis make them a favorite comfort food for many.

    FAQs about Aloo Tikki: 

    Q: Can I make aloo tikkis ahead of time? 

    A: Yes, you can prepare the potato mixture and shape the aloo tikkis in advance. Store them in the refrigerator until ready to fry.

    Q: Can I bake aloo tikkis instead of frying them? 

    A: While frying gives aloo tikkis their characteristic crispiness, you can bake them in the oven for a healthier alternative. Brush them with oil and bake at 400°F (200°C) until golden brown.

    Q: Are aloo tikkis gluten-free? 

    A: Yes, aloo tikkis are naturally gluten-free. However, if you’re adding breadcrumbs for binding, ensure they are gluten-free certified.

    Other Recipes on Manjula’s Kitchen 

    If you’re looking to explore more Indian recipes, appetizers, beverages, and desserts, be sure to check out the following links on Manjula’s Kitchen. Here are some links to recipes on Manjula’s Kitchen official website:

    Paneer Tikka Masala Recipe

    Chana Chaat (Spicy Chickpea Salad) Recipe

    Pav Bhaji (Spicy Vegetable Hash with Buns) Recipe

    Raj Kachori (Crunchy Chaat) Recipe

    Vegetable Biryani Recipe

    These recipes should offer you a flavorful experience straight from Manjula’s Kitchen.

  • Spicy Corn Patties – Fritters

    Spicy Corn Patties – Fritters

    Spicy Corn Patties

    Spicy Corn Patties – Fritters

    Spicy corn Patties makes a healthy and delicious snack. They are also vegan and gluten free. This is a quick and easy recipe.
    No ratings yet
    Course Appetizer
    Cuisine Indian
    Servings 10 patties

    Ingredients
      

    • 2 cups corn frozen
    • 1/2 cup corn meal
    • 2 tablespoons rice flour
    • 1 chopped green chili adjust to taste
    • 2 teaspoon finely chopped ginger
    • 2 tablespoons chopped cilantro (hara dhania)
    • 2 teaspoon lemon juice
    • 1/2 teaspoon cumin seeds (jeera)
    • 1/2 teaspoon salt
    • 2 teaspoons oil

    Instructions
     

    • Thaw the corn in hot water and drain. Blend the corn texture will be creamy and coarse. I like to use food processor.
    • Add all the ingredients to corn, corn meal, rice flour, chili, cilantro, ginger, lemon juice, cumin seeds, and salt, and mix it well. Mixture should be consistency of thick batter. Add little water if needed.
    • Heat a heavy non stick skillet on medium heat and greased the skillet generously.
    • Drop about 2 spoons of batter to make four to five patties into the skillet and flatten with greased back of the spoon lightly, making the patties about 1/4 inch thick and two to three inch circle.
    • Cook for about two minutes until bottom turns golden brown. Flip over and cook from other side both side of the patties should be cook until golden brown.
    • Serve them hot or at room temperature they taste delicious.
    Tried this recipe?Let us know how it was!

  • Chickpea and Spinach Spread – Hummus

    Chickpea and Spinach Spread – Hummus

    Chickpea and Spinach Spread

    Chickpea and Spinach Spread – Hummus

    Chickpea and spinach spread also known as Hummus. This healthy, vegan, gluten free, high protein, low calorie delicious spread also can be served as dip.
    5 from 1 vote
    Course Appetizer
    Cuisine Indian
    Servings 16 oz

    Ingredients
      

    • 1 15 oz can chickpeas (garbanzo beans, kabule chana,)
    • 2 tablespoons roasted sesame seeds (til)
    • 1 cup spinach leaves all the stems removed
    • 1-1/2 teaspoon salt
    • 2 serrano green chili chopped adjust to taste
    • 2 tablespoons lemon juice
    • 2 tablespoons olive oil

    Instructions
     

    • Drain the liquid from can of chickpeas, wash them well and drain the water.
    • In a food processor all the ingredients except oil, blend it to make smooth paste.
    • Add oil and mix it again. Chickpea spread is ready.

    Notes

    Serving Suggestions
    1. Chickpea and Spinach Spread can be served with grilled pita bread, crackers, chips, or with fresh veggies. You can also serve this as chutney.
    Tried this recipe?Let us know how it was!

    Spinach Hummus Recipe: Step-by-Step Guide

    Chickpea and Spinach Spread, a delightful vegan alternative to traditional hummus, combines the freshness of spinach with the creamy texture of chickpeas, perfect for gluten-free appetizers and summer snacking, complemented by a variety of chutneys and pickles.

    Introduction to Spinach Hummus Recipe


    In this spinach hummus recipe, we’ll explore how to combine the traditional flavors of hummus with the nutritious goodness of spinach. This delightful spread offers a unique twist to the classic hummus recipe, incorporating fresh spinach leaves for added flavor and nutrients. If you’re looking to elevate your hummus game and sneak in some extra greens, this recipe is a must-try. Let’s dive into how to make this spinach hummus in a few simple steps.

    Step 1: Prepare Ingredients


    Begin by gathering all the necessary ingredients for this spinach hummus recipe. You’ll need canned chickpeas, fresh spinach leaves, cloves, tahini, lemon juice, olive oil, cumin, salt, and pepper. Ensure your chickpeas are drained and rinsed properly before using them in the recipe. This step sets the foundation for the flavor profile of your spinach chickpea hummus.

    Step 2: Blanch the Spinach


    To incorporate the spinach into the hummus, we’ll blanch it first. Bring a pot of water to a boil and prepare a bowl of ice water. Submerge the spinach leaves in the boiling water for about 30 seconds, then immediately transfer them to the ice water to stop the cooking process. Once cooled, drain the spinach and squeeze out any excess water. This blanching technique helps retain the vibrant green color of the spinach while softening it for blending with the other ingredients.

    Step 3: Blend Ingredients

    In a food processor, combine the blanched spinach, drained chickpeas, cloves, tahini, lemon juice, olive oil, cumin, salt, and pepper. Blend until smooth and creamy, scraping down the sides of the processor as needed. Adjust the consistency by adding more olive oil or a splash of water if necessary. The key is to achieve a velvety texture that’s perfect for spreading or dipping.

    Step 4: Adjust Seasoning


    Taste the spinach hummus and adjust the seasoning according to your preference. Add more salt, pepper, or lemon juice if needed to balance the flavors. You can also customize the seasoning by incorporating additional spices like paprika or cayenne pepper for an extra kick. Don’t hesitate to experiment with different flavor profiles to suit your taste buds.

    Step 5: Serve and Enjoy


    Transfer the spinach hummus to a serving bowl and garnish with a drizzle of olive oil and a sprinkle of cumin or paprika for visual appeal. Serve it with your favorite accompaniments such as pita bread, fresh vegetables, or crackers. This versatile spread is perfect for snacking, appetizers, or as a flavorful addition to sandwiches and wraps. Enjoy the unique blend of flavors and the nutritional benefits of this homemade spinach hummus.

    Tips for Making Spinach Hummus

    • To enhance the flavor of your spinach hummus, consider roasting cloves before adding them to the recipe to add a subtle sweetness and depth of flavor to the spread.
    • Experiment with different variations by incorporating additional ingredients such as roasted red peppers, sun-dried tomatoes, or fresh herbs like parsley or cilantro.
    • For a smoother texture, you can peel the chickpeas before blending them. Simply pinch each chickpea between your fingers to remove the thin outer skin.

    Variations of Spinach Hummus

    • Roasted Red Pepper Spinach Hummus: Add roasted red peppers to the basic spinach hummus recipe for a smoky and slightly sweet flavor profile.
    • Sun-Dried Tomato Spinach Hummus: Incorporate sun-dried tomatoes packed in oil for a rich and tangy twist on traditional hummus.
    • Herbed Spinach Hummus: Blend fresh herbs such as parsley, cilantro, or basil into the spinach hummus for an added burst of freshness.

    Benefits of Spinach Hummus

    • Nutrient-Rich: Spinach is loaded with vitamins, minerals, and antioxidants, making this spinach hummus a nutritious snack option.
    • Fiber-Packed: Chickpeas are a good source of fiber, which helps promote digestive health and keeps you feeling full and satisfied.
    • Versatile: Spinach hummus can be enjoyed in various ways, whether as a dip, spread, or component of a meal, making it a versatile addition to any menu.

    FAQs (Frequently Asked Questions)


    Q: Can I use fresh spinach instead of blanching it?


    A: Blanching the spinach helps soften it and preserve its vibrant green color, but you can certainly use fresh spinach if preferred. Just ensure it’s thoroughly washed and dried before adding it to the recipe.

    Q: How long does spinach hummus last in the refrigerator?

    A: Properly stored in an airtight container, spinach hummus can last in the refrigerator for up to one week. Be sure to give it a stir before serving, as separation may occur over time.

    Q: Can I freeze spinach hummus?

    A: Yes, spinach hummus can be frozen for future use. Transfer it to a freezer-safe container, leaving some room for expansion, and store it for up to three months. Thaw in the refrigerator overnight before serving.

    Q: Is spinach hummus gluten-free? 


    A: Yes, this spinach hummus recipe is gluten-free, making it suitable for individuals with gluten sensitivities or allergies.

    By following this comprehensive guide, you can easily whip up a batch of flavorful and nutritious spinach hummus to enjoy with your favorite snacks or meals. Get creative with your toppings and accompaniments to customize this versatile spread to your liking. Whether you’re hosting a gathering or simply craving a healthy snack, this spinach hummus recipe is sure to be a hit.

    If you’re looking to explore more Indian recipes, appetizers, beverages, and desserts, be sure to check out the following links on Manjula’s Kitchen. Here are some links to recipes on Manjula’s Kitchen official website:

    Paneer Tikka Masala Recipe

    Chana Chaat (Spicy Chickpea Salad) Recipe

    Pav Bhaji (Spicy Vegetable Hash with Buns) Recipe

    Raj Kachori (Crunchy Chaat) Recipe

    Vegetable Biryani Recipe

    These recipes should offer you a flavorful experience straight from Manjula’s Kitchen.

  • Medu Vada

    Medu Vada

    Medu Vada

    Medu Vada

    Medu Vadas are a traditional South Indian dish which can be served as a main course, side dish, or snack. This crispy deliciousness is made with spiced urad dal batter and fried in donut shape dumplings. They are crispy on the outside and soft on the inside. They are served with Sambar and Coconut Chutney.
    No ratings yet
    Course Snack
    Cuisine Indian
    Servings 10 Vadas

    Ingredients
      

    • 1 cup split washed urad dal (available in Indian stores)
    • 1/8 teaspoon asafetida (hing)
    • 2 teaspoon whole coriander seeds (sabut dhania)
    • 1 tablespoon green chili chopped
    • 2 tablespoons cilantro chopped (hara dhania)
    • 1 teaspoon salt
    • Oil to fry

    Instructions
     

    • Wash and soak dal in about 3 cups of water for about 4-6 hours.
    • Drain the water and grind dal to smooth paste using very little water just enough to grind, food processor works good for this. Blend for another 2 minutes to whip dal to make fluffy. Take dal batter out in a wide bowl.
    • Add all the ingredients to the dal batter, cilantro, green chili, coriander, asafetida and salt, beat the batter for 2-3 minutes this will make the batter light and fluffy. To make sure batter is ready put one drop of batter in a bowl of water, batter should float.
    • Keeping the right consistency of batter is very important; add water as needed batter should not be soft but not runny. When you put the batter on your palm batter should hold its shape. Make the Vadas batter when you are ready to fry them, as the batter sit will get soft if you are not ready to fry keep batter refrigerated.
    • Heat the oil in a frying pan over medium high heat.
    • The frying pan should have about 1 inch of oil. To check if the oil is ready, put one drop of batter in oil. The batter should sizzle and come up but not change color right away. If oil is very hot Vadas will not cook through and will not be crispy.
    • Wet the palms and take golf size batter and place over your palm, flatten to round shape and make hole in the center looking like donut now with other hand wet fingers slowly slide Vada into the hot oil.
    • Fry the Vadas from both sides to golden brown. Take them out over a paper towel to drain access oil.
    • Traditionally Medu Vada is served with Coconut Chutney, and sambar (aromatic lentil soup with vegetables).

    Notes

    Notes
    1. If the Medu Vada Batter is too thick: The Vada will shape nicely but they will be hard inside after frying.
    2. If the batter is too soft: it will not be able to hold the shape and will absorb too much oil.
    3. It’s the consistency of the batter that determines how soft and shapely the Vadas turn out.
    Tried this recipe?Let us know how it was!

    Medu Vada: A South Indian Delicacy 

    Medu Vada is a South Indian delicacy often served as an appetizer or snack, especially during festive occasions like Yugadi. It is a gluten-free and vegan dish made primarily from urad dal (black gram lentils) batter, seasoned with spices like cumin seeds, black pepper, and curry leaves. The batter is shaped into round doughnuts and deep-fried until golden brown, resulting in a crispy exterior and a soft, fluffy interior. 

    Medu Vada is commonly enjoyed with coconut chutney or sambar, enhancing its flavor profile and making it a popular choice for those seeking gluten-free and vegan snack options. Medu Vada is a popular South Indian snack known for its crispy exterior and soft interior texture. Originating from the state of Tamil Nadu, it has gained widespread popularity across India and beyond. This medu vada recipe offers a step-by-step guide on how to make this delectable treat right in your kitchen.

    How to Make Medu Vada: Step-by-Step Recipe 

    Preparing the Batter 

    To start making medu vada, you’ll need to prepare the batter first. Begin by soaking urad dal in water for at least 4-5 hours or preferably overnight. The soaked dal should be soft enough to easily break when pressed between your fingers. Once soaked, drain the water and transfer the dal to a blender. Grind it to a smooth paste, adding minimal water as needed. The consistency should be thick, similar to that of a pancake batter. This step is crucial in achieving the perfect texture for your medu vada.

    Shaping the Vadas 

    Once the batter is ready, transfer it to a mixing bowl. Add finely chopped green chilies, ginger, curry leaves, cumin seeds, asafoetida, and salt to taste. Mix all the ingredients thoroughly to ensure an even distribution of flavors. Now, heat oil in a deep frying pan or kadhai on medium heat. To shape the vadas, wet your palms with water to prevent sticking. Take a small portion of the batter and flatten it slightly to form a disc shape with a hole in the center, resembling a donut. Carefully slide the shaped vada into the hot oil and fry until golden brown and crispy on both sides. Repeat the process with the remaining batter, frying a few vadas at a time to avoid overcrowding the pan.

    Frying to Perfection 

    Achieving the perfect medu vada requires frying them to crispy perfection. Make sure the oil is adequately heated before adding the vadas to ensure they cook evenly and develop a crunchy exterior. It’s essential to maintain the oil at a consistent temperature throughout the frying process. Avoid overcrowding the pan, as this can lower the oil temperature and result in soggy vadas. Fry the vadas in small batches, flipping them occasionally to ensure uniform browning on all sides. Once done, remove the vadas from the oil using a slotted spoon and drain the excess oil on paper towels.

    Serving Suggestions

    Medu vada is best enjoyed hot and crispy, served with coconut chutney and sambar. You can also pair it with a tangy tomato chutney or spicy mint chutney for added flavor. Some prefer to enjoy medu vada with a cup of hot filter coffee, making it a perfect breakfast or evening snack option. Experiment with different dipping sauces and accompaniments to find your favorite combination.

    Tips for Making Perfect Medu Vada 

    • Ensure the urad dal is soaked well to achieve a smooth batter texture.
    • Maintain the oil temperature while frying to achieve crispy vadas.
    • Wet your palms with water to prevent the batter from sticking while shaping the vadas.
    • Add chopped green chilies and ginger for an extra kick of flavor.
    • Serve medu vada hot for the best taste and texture.

    Variations of Medu Vada 

    While the traditional medu vada recipe calls for basic ingredients like urad dal, spices, and herbs, you can experiment with variations to suit your taste preferences. Some popular variations include:

    • Masala Medu Vada: Add coriander leaves and grated carrots to the batter for an extra burst of flavor.
    • Rava Medu Vada: Mix semolina (rava) with the urad dal batter to add a crunchy texture to the vadas.
    • Vegetable Medu Vada: Incorporate grated vegetables like carrots, cabbage, and spinach into the batter for a nutritious twist.
    • Cheese Medu Vada: Stuff the vadas with a cheesy filling or sprinkle grated cheese on top before frying for a gooey, indulgent treat.

    Benefits of Medu Vada 

    Medu vada is not only delicious but also offers several health benefits when consumed in moderation. Here are some of the benefits:

    • Rich in Protein: Urad dal, the main ingredient in medu vada, is a good source of protein, essential for muscle repair and growth.
    • Nutrient-Dense: It contains essential nutrients like iron, magnesium, and potassium, which are vital for overall health and well-being.
    • Gluten-Free: Since medu vada is made from urad dal, it is naturally gluten-free, making it suitable for individuals with gluten sensitivities or celiac disease.
    • Good Source of Fiber: Including medu vada in your diet can help improve digestion and promote gut health due to its fiber content.
    • Energizing Snack: It provides a quick energy boost, making it an ideal snack option for busy days or post-workout refueling.

    FAQs about Medu Vada 

    Q: Can I make the batter ahead of time?

    A: Yes, you can soak the urad dal and grind the batter ahead of time. Store it in the refrigerator for up to 1-2 days and fry the vadas when ready to serve.

    Q: Can I freeze the vadas?

    A: While it’s best to consume medu vada fresh for optimal taste and texture, you can freeze the shaped vadas and fry them directly from frozen when needed. However, freshly fried vadas are recommended for the best flavor.

    Q: Can I bake instead of frying?

    A: While traditional medu vada is deep-fried for that crispy texture, you can try baking them in a preheated oven at 375°F (190°C) for 20-25 minutes or until golden brown for a healthier alternative.

    Q: Can I use split urad dal instead of whole urad dal?

    A: Yes, you can use split urad dal (white or black) to make medu vada. However, the texture may vary slightly compared to using whole urad dal.

    Q: Can I make gluten-free medu vada?

    A: Yes, medu vada is naturally gluten-free since it’s made from urad dal. Just ensure that all ingredients used are gluten-free, especially if adding any additional flavorings or seasonings.

    Explore more Indian recipes on Manjula’s Kitchen:

    In conclusion, medu vada is a versatile and flavorful snack that can be enjoyed on its own or paired with a variety of chutneys and dips. With this detailed recipe and helpful tips, you can recreate this South Indian delicacy at home and impress your family and friends with your culinary skills. So, roll up your sleeves, gather your ingredients, and get ready to savor the crispy goodness of homemade medu vada!

  • Peanut Chaat

    Peanut Chaat

    Peanut Chaat

    Peanut Chaat

    Peanut Chaat is a combination of peanuts, tomatoes, cucumbers and spices. It is a delicious and satisfying snack-not to mention healthy and low-fat! It is easy to make. It can be served as an appetizer or anytime spicy snack.
    No ratings yet
    Course Appetizer, Chaat
    Cuisine Indian
    Servings 4 people

    Ingredients
      

    Ingredients:

    • 1/2 cup raw peanuts
    • 1/2+1/2 teaspoon salt adjust to taste
    • 1/8 teaspoon turmeric (haldi)
    • 3/4 cup tomatoes seeded cut in small cubes
    • 3/4 cup cucumber cut in small cubes
    • 1 tablespoon ginger finally chopped
    • 1 green chili finally chopped adjust to taste
    • 1/2 teaspoon roasted cumin seed powder (bhuna jeera)
    • 1/8 teaspoon red chili powder
    • 1/8 teaspoon black pepper
    • 1/4 teaspoon sugar
    • 1/2 teaspoon  mango powder (amchoor)
    • tablespoon lemon juice

    Instructions
     

    Method

    • In a sauce pan add peanuts with 2 cups of water turmeric and 1/2 teaspoon of salt. Cook over medium high heat for about 25 minutes until peanuts are soft.
    • Drain the water and let it cool to room temperature.
    • Mix ginger, chili, 1/2 teaspoon salt, cumin seed powder, red chili powder, black pepper, sugar, mango powder and lemon juice together.
    • Mix the peanuts with tomatoes and cucumbers, add the spice mix and toss.
    • Peanut Chaat is ready to serve.
    Tried this recipe?Let us know how it was!

    Peanut Chaat Recipe 

    Peanut chaat is a delightful appetizer that caters to various dietary preferences, offering a gluten-free and vegan option packed with high protein, yet low in fat, making it an ideal snack choice. Peanut chaat is a delightful and flavorful snack that is popular across India. This peanut chaat recipe combines the nuttiness of peanuts with the tanginess of various spices and chutneys, creating a mouthwatering dish that is perfect for any occasion. Here’s how to make peanut chaat at home.

    • Boiling the Peanuts: Begin by placing the peanuts in a saucepan. Add 2 cups of water, turmeric, and ½ teaspoon of salt. Bring the pot to a medium-high heat. Once boiling, reduce the heat slightly and simmer the peanuts for about 25 minutes. The key here is to cook the peanuts until they are tender and soft throughout. You can test for doneness by taking a peanut out and splitting it in half. If the center is firm, continue cooking for a few more minutes.

    • Cooling and Draining: Once the peanuts are cooked, drain the water from the pot using a colander. It’s important to drain the peanuts thoroughly to prevent a watery chaat. Spread the cooked peanuts on a plate or baking sheet to cool completely. This will take about 30 minutes to an hour, depending on the amount of peanuts. Cooling the peanuts is necessary before adding the other ingredients to ensure they don’t become soggy.

    • Making the Spice Mix: While the peanuts cool, prepare the flavor base for your chaat. In a separate bowl, combine grated ginger, chopped chili pepper (adjust the amount depending on your spice preference), ½ teaspoon of salt, cumin seed powder, red chili powder, black pepper, sugar, mango powder, and lemon juice. Mix all these ingredients into a fragrant and flavorful spice mix. This will be what brings the chaat to life!

    • Assembling the Chaat: Once the peanuts are cool, transfer them to a large mixing bowl. Add chopped tomatoes and cucumbers to the peanuts. Then, pour the prepared spice mix over the peanuts and vegetables. Using a spoon or spatula, gently toss everything together until well combined. This ensures each peanut gets a good coating of the flavorful spice mix.

    • Serving: Your Peanut Chaat is now ready to be enjoyed! Serve immediately for the freshest flavor and best textural contrast between the soft peanuts and the crisp vegetables. You can garnish with chopped fresh cilantro for an extra pop of color and freshness.

    Tips:  

    • You can customize the peanut chaat by adding other ingredients such as boiled potatoes, diced cucumber, or grated carrots for added texture and flavor.
    • For a healthier version, you can use roasted peanuts without any added salt or oil.
    • Adjust the spice levels according to your preference by increasing or decreasing the amount of red chili powder and green chilies.

    Variations: 

    • For a tangier flavor, drizzle some tamarind chutney or mint chutney over the peanut chaat before serving.
    • Experiment with different toppings such as pomegranate seeds, grated cheese, or yogurt for a unique twist on this classic snack.

    Benefits: 

    • Peanuts are a good source of protein, fiber, and essential nutrients such as vitamins and minerals, making peanut chaat a nutritious snack option.
    • This dish is vegetarian and gluten-free, making it suitable for individuals with dietary restrictions.

    FAQs: 

    Can I use pre-roasted peanuts for this recipe? 

    • Yes, you can use pre-roasted peanuts if you prefer. However, roasting the peanuts yourself adds an extra layer of flavor to the chaat.

    How long can I store peanut chaat? 

    • Peanut chaat is best enjoyed fresh but can be stored in an airtight container in the refrigerator for up to 2 days. However, keep in mind that the peanuts may lose their crunchiness over time.

    Can I make peanut chaat ahead of time?

    • While it’s best to assemble the chaat just before serving to maintain its freshness, you can prepare the ingredients in advance and assemble them when ready to serve.

    For more delicious Indian recipes, you can explore other recipes on Manjula’s Kitchen, such as Vegetable Pakoras, Aloo Tikki Chaat, and Pani Puri. These recipes are perfect for any occasion and are sure to impress your family and friends. Enjoy cooking!

  • Masala Peanuts

    Masala Peanuts

    Masala Peanuts

    Masala Peanuts

    Hot and spicy peanuts fried with delicious mix of spices. This makes a great snacks for sitting around watching TV or playing games with family and friends. Recipe serves 6.
    No ratings yet
    Course Snack
    Cuisine Indian
    Servings 6 people

    Ingredients
      

    • 1 ½ cup Peanuts or 1/2 pound shelled peanuts
    • ½ cup gram flour basen
    • ¼ cup rice flour
    • 1 Tbsp coriander powder dhania
    • ½ tsp turmeric haldi
    • 1 tsp red pepper
    • ½ tsp black pepper
    • 1 Tbsp green chili finely chopped
    • ¼ tsp ginger powder soth
    • 1 tsp salt adjust to taste
    • ½ tsp mango powder amchoor
    • tsp citric acid

    Also needed:

    • 1 cup Water as needed
    • Oil to fry

    Instructions
     

    • In a frying pan roast the dry peanuts on medium heat for 3-4 minutes and let it cool for few minutes.
    • Mix all the ingredients together in a large bowl.
    • Add water as needed making sure the spices and flour stick to the peanuts uniformly.
    • Heat the oil in a frying pan on medium heat.
    • The frying pan should have at least 1 inch of oil. To check if the oil is ready, put one drop of batter in the oil. The batter should raise to the top but not change color right away.
    • put few drops of oil in your hand it helps droping the penuts before putting peanuts on the oil.
    • While putting the peanuts into oil, loosen them with your fingers to make sure the peanuts are separated and do not form lumps. Peanuts should be separated while frying.
    • Fry the peanuts until they turn light brown, turning them occasionally.
    • When they are done cooking, take them out of the oil with a slotted spoon. Place them on a paper towel to absorb the extra oil.
    • After cooling to room temperature, the peanuts should be crispy.

    Notes

    • Masala Peanuts can be stored for a month in an airtight container.
    • Also see my recipe for Spicy Cashew, Almond brittle.
    • These make a delicious homemade gift – pack it in a jar or candy bag.
    Keyword basen, chilli, Gluten Free, masala, peanuts, Spicy
    Tried this recipe?Let us know how it was!

    Peanut Masala Recipe: A Spicy Delight

    Masala Peanuts are delightful appetizers perfect for holidays and festivals, offering a crunchy, gluten-free snack option that satisfies both vegan and non-vegan palates alike. Peanut masala recipe is a beloved snack across India, offering a delightful combination of crunchy peanuts and aromatic spices. This masala peanuts recipe is a favorite among snack enthusiasts for its bold flavors and addictive crunch. Whether you’re hosting a gathering or simply craving a savory treat, learning how to make masala peanuts recipe at home is both rewarding and satisfying.

    How to Make Masala Peanuts Recipe: Step-by-Step Guide

    Step 1: Prepare the Peanuts

    Start by selecting fresh, raw peanuts for the best results. Rinse them thoroughly under cold water to remove any dirt or debris. Then, pat them dry using a clean kitchen towel or paper towels.

    Step 2: Dry Roast the Peanuts

    Heat a non-stick pan over medium heat. Once the pan is hot, add the peanuts in a single layer. Dry roast them, stirring occasionally, until they turn golden brown and emit a nutty aroma. This process typically takes about 8 to 10 minutes. Keep a close eye on them to prevent burning.

    Step 3: Prepare the Spice Mixture

    While the peanuts are roasting, prepare the spice mixture. In a small bowl, combine masala peanuts recipe spices such as red chili powder, turmeric powder, cumin powder, chaat masala, and salt according to your taste preferences. Adjust the spice levels to suit your palate.

    Step 4: Coat the Peanuts with Spices

    Once the peanuts are roasted to perfection, transfer them to a large mixing bowl. While they are still warm, sprinkle the prepared spice mixture over the peanuts. Toss them gently to ensure that each peanut is evenly coated with the spices. Allow the peanuts to cool completely before serving.

    Step 5: Serve and Enjoy

    Your homemade masala peanuts are now ready to be enjoyed! Serve them as a standalone snack or pair them with your favorite beverages. Store any leftovers in an airtight container to maintain their freshness and crunchiness.

    Tips for Making Perfect Masala Peanuts

    • Experiment with different spice blends to customize the flavor according to your preferences. 
    • You can add ingredients like amchur powder for tanginess or garam masala for extra warmth.
    • For an extra layer of flavor, consider adding roasted garlic or curry leaves to the spice mixture.
    • Make sure to roast the peanuts evenly to achieve a uniform golden brown color and prevent any burnt spots.
    • Allow the peanuts to cool completely before storing them to maintain their crispiness.

    Variations of Masala Peanuts

    Sweet and Spicy: Add a touch of sweetness to your masala peanuts by incorporating a bit of powdered sugar or jaggery along with the spices.

    Herb Infused: Experiment with fresh herbs like cilantro, mint, or curry leaves to add a refreshing twist to your masala peanuts.

    Nutty Crunch: Enhance the texture of your masala peanuts by tossing them with a handful of toasted cashews, almonds, or pistachios.

    Benefits of Masala Peanuts

    Rich in Protein: Peanuts are an excellent source of plant-based protein, making masala peanuts a nutritious snack option.

    Good Source of Healthy Fats: Peanuts are high in monounsaturated fats, which are beneficial for heart health when consumed in moderation.

    Packed with Essential Nutrients: Peanuts are rich in essential nutrients like vitamins, minerals, and antioxidants, contributing to overall well-being.

    FAQs about Masala Peanuts

    Can I use pre-roasted peanuts for this recipe?

    While you can use pre-roasted peanuts, roasting them yourself allows you to control the level of crunchiness and ensures that they are freshly toasted.

    How long do homemade masala peanuts stay fresh?

    When stored in an airtight container at room temperature, homemade masala peanuts can stay fresh for up to two weeks. However, they are best enjoyed within the first few days to maintain their crispiness.

    Can I make masala peanuts without oil?

    Yes, you can skip the oil and dry roast the peanuts directly in a pan for a healthier alternative. However, using a small amount of oil helps the spices adhere to the peanuts more effectively.

    For more delightful Indian recipes, explore Manjula’s Kitchen, where you’ll find a treasure trove of culinary inspiration ranging from traditional dishes to modern twists on classic favorites. Be sure to check out recipes like Aloo Gobi, Palak Paneer, and Chana Masala for a taste of authentic Indian cuisine.

    If you enjoyed making these masala peanuts, why not try your hand at some other mouthwatering recipes from Manjula’s Kitchen? Vegetable Pakoras, Paneer Tikka, Aloo Gobi (Potato Cauliflower), Samosa, Mango Lassi

    Explore these recipes and more for a culinary journey through the vibrant and diverse flavors of Indian cuisine.

  • Kheer (Rice Pudding)

    Kheer (Rice Pudding)

    Kheer (Rice Pudding)

    Kheer (Rice Pudding)

    Kheer is an Indian version of rice pudding cooked with milk and sugar, flavored with nuts and saffron. Its a nice dessert that is very popular in North India. Recipe serves 4 to 6
    5 from 2 votes
    Course Dessert
    Cuisine Indian

    Ingredients
      

    • ¼ cup rice
    • 4 cup whole milk
    • ¼ cup sugar adjust to taste
    • 6 strands of saffron
    • Pinch of crushed cardamom
    • 2 Tbsp almonds sliced
    • 1 Tbsp pistachios sliced
    • 1 tsp butter

    Instructions
     

    • Use a non-stick frying pan to make kheer.
    • Wash rice, changing water until the water appears clear.
    • Melt the butter in a frying pan on medium heat.
    • Add the rice and stir-fry for 2 minutes.
    • Add the milk, cook until the rice is tender and the milk is creamy and reduced to about half. Stir often to ensure the milk does not burn in the bottom of the pan.
    • Add the sugar, saffron, cardamom, almonds and pistachios and let simmer for a few more minutes.
    • Turn off the heat.
    • As kheer cools of will become thicker in texture.
    • Kheer can be served chilled or warm.

    Notes

    Variation
    • Saffron, almonds and pistachios are optional in this recipe.
    • Instead of rice, make the kheer using only almonds and pistachios and flavor with cardamom and saffron.
    • Rice can be replaced with Vermicelli.
    Tips
    • If you will be serving chilled add 1 teaspoon of extra sugar.
    Keyword Dessert, Ganesh Chaturthi, Gluten Free, Karwa Chauth, Kheer, Krishna Janmashtami, Makar Sankranti, milk, nuts, payasam, Pudding, Rice, Rice Pudding, saffron
    Tried this recipe?Let us know how it was!


  • Dhokla (Suji – Semolina)

    Dhokla (Suji – Semolina)

    Dhokla (Suji – Semolina)

    Dhokla is a traditional gujrati snack, spongy and fluffy in texture. Dhokla makes a great appetizer.
    Makes about 20 pieces.
    5 from 1 vote
    Course Appetizer, Snack
    Cuisine Indian

    Ingredients
      

    • 1 cup sooji semolina flour available in Indian grocery store
    • 1 cup yogurt
    • 1/4 cup water as needed
    • 1/4 tsp salt
    • 2 tsp lemon juice
    • Pinch of turmeric haldi
    • 1 green chili finely chopped
    • 2 Tbsp cilantro hara dhania finely chopped
    • 1 tsp Eno’s fruit salt Sodium Bicarbonate and Citric Acid, available in Indian grocery stores)

    For seasoning:

    • 2 Tbsp of oil
    • 1/2 tsp black mustard seed
    • 2 green peppers chopped into about 1/4 inch pieces

    Utensils to steam Dhokla:

    • Dhokla maker or if you don’t have that, use all three of the following:
    • Covered pan large enough to hold your cake rack
    • Round cake-cooling rack
    • Round 9” cake pan

    Instructions
     

    • Mix the sooji, yogurt, salt, turmeric, lemon juice, green chili, and cilantro together and make a smooth batter of a pouring consistency. Add water if needed.
    • Allow batter to rest 15 to 20 minutes.
    • Grease the cake pan and set aside.
    • Set the cake rack in the pan. Add one cup of water, just enough to touch the cake rack, and bring to a boil. This will be used to steam the dhokla.
    • When the water boils, turn down the heat to medium.
    • Add fruit salt (Eno) to the batter just before baking. The batter will foam up.
    • Quickly pour batter into a greased cake pan. Place the cake pan into the saucepan over the cake rack. Cover the pan. Steam for about 10 minutes on medium heat.
    • Check Dhokla with a knife. If the knife comes out clean, dhokla is ready. Turn off the heat and remove the cake pan from the saucepan.
    • Let it cool to room temperature, then cut into triangle or square shapes.

    Prepare the seasoning:

    • Heat oil in a small pan over medium heat. Test the heat by adding few mustard seeds to the oil; if the seeds crack right away, the oil is ready.
    • Add mustard seeds after seeds cracke add green chili stir for few seconds.
    • Drizzle the seasoning over the dhokla. Serve with Hari cilantro chutney.

    Notes

    Dhokla can be refrigerated for a few days. Before serving, heat Dhokla in a microwave or heat over steam.
    Keyword Dhokla, dokla, Flour, Gujarati, semolina, Sooji, Suji, Yogurt
    Tried this recipe?Let us know how it was!