Category: Spicy Indian Recipes

Best Spicy Indian Food Recipes: Delicious Vegetarian Dishes

Indian cuisine is renowned for its bold flavors and vibrant spices. For those who love a bit of heat, spicy Indian dishes offer a tantalizing culinary experience. Here, we explore some of the best spicy Indian food recipes that are not only vegetarian but also easy to prepare. Let’s dive into the world of spicy Indian food recipes that will ignite your taste buds and leave you craving for more.

Paneer Tikka

Paneer Tikka is a popular appetizer that is a perfect example of spicy Indian food recipes. Cubes of paneer (Indian cottage cheese) are marinated in a blend of yogurt and spices, including chili powder, garam masala, and turmeric. The marinated paneer is then grilled to perfection, creating a smoky, spicy flavor that is irresistible. Serve with mint chutney for an extra kick.

Spicy Vegetable Pulao

Spicy Vegetable Pulao is a fragrant rice dish that includes a medley of vegetables and a generous amount of spices. This dish is a staple in spicy Indian food recipes vegetarian, combining ingredients like green chilies, cumin, and coriander to create a dish that is both flavorful and satisfying. Pair it with a cooling cucumber raita from the Raita Recipes category to balance the heat.

Enhancing Your Spicy Indian Menu

To elevate your spicy Indian meal, consider adding some complementary dishes from other categories. Indian Snacks like spicy samosas or mirchi bajji (stuffed chili fritters) can add an exciting crunch to your meal. For dessert, indulge in Indian Desserts Recipes like gulab jamun or jalebi to provide a sweet contrast to the spice. Including Healthy Recipes like a spiced lentil soup or a tangy tamarind rasam can offer nutritious options that don’t skimp on flavor.

More Best Spicy Indian Food Recipes

Chana Madra

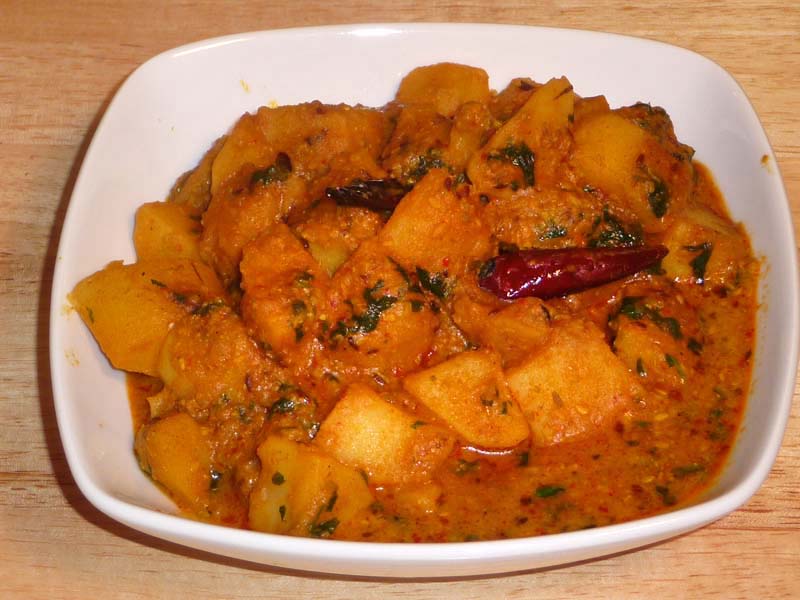
Chana Madra is a spicy chickpea curry that hails from the Himachal region of India. This dish features chickpeas cooked in a yogurt-based gravy, spiced with green chilies, garam masala, and cloves. It’s a fantastic addition to your collection of best spicy Indian food recipes. Serve with steamed basmati rice for a comforting meal.
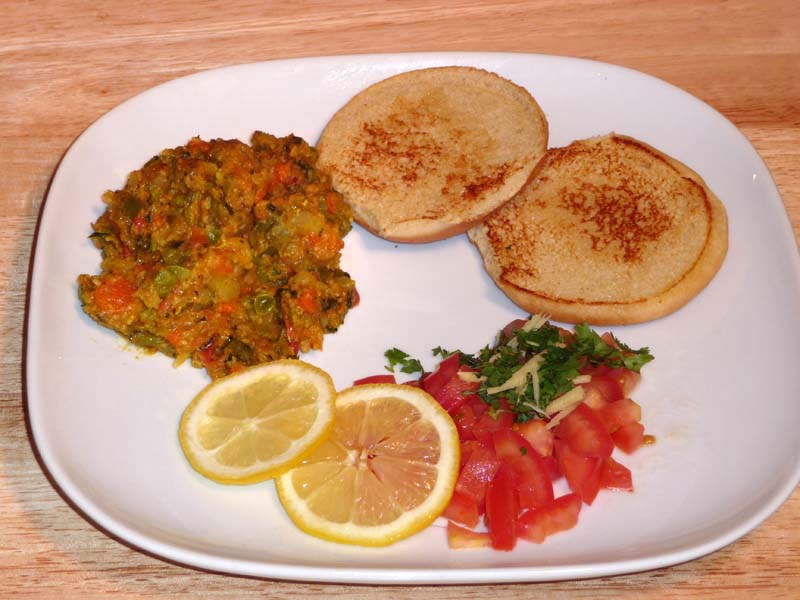
Baingan Bharta

Baingan Bharta is a smoky, spicy eggplant dish that is a favorite in spicy Indian food recipes vegetarian. The eggplant is roasted until soft, then mashed and cooked with tomatoes, and a blend of spices including cumin, coriander, and chili powder. This dish pairs wonderfully with roti or naan.

Sweet and Spicy Endings

Spicy Mango Chutney

Spicy Mango Chutney is a versatile condiment that combines the sweetness of ripe mangoes with the heat of red chili powder and ginger. It’s a delicious accompaniment to any spicy meal and fits perfectly into the category of spicy Indian food recipes.

Masala Chai

For a warming, spicy beverage, Masala Chai is a perfect choice. This tea is brewed with black tea leaves and a mix of spices such as cardamom, cinnamon, ginger, and black pepper. It’s a soothing end to a spicy meal and a staple in many best spicy Indian food recipes collections.

Frequently Asked Questions (FAQs)

Q: What are some popular spicy Indian food recipes? 

A: Some popular spicy Indian food recipes include Paneer Tikka, Spicy Vegetable Pulao, Chana Madra, Baingan Bharta, Spicy Mango Chutney, and Masala Chai. These dishes are full of flavor and perfect for spice lovers.

Q: How can I make traditional Indian food recipes spicy? 

A: To make traditional Indian food recipes spicy, incorporate ingredients like green chilies, red chili powder, black pepper, and garam masala. Adjust the spice levels according to your taste preferences.

Q: What are some easy spicy Indian food recipes vegetarian? 

A: Some easy spicy Indian food recipes vegetarian include Spicy Vegetable Pulao, Baingan Bharta, and Masala Chai. These recipes are straightforward and don’t require advanced cooking skills, making them perfect for those new to spicy Indian cooking.

Q: Can I prepare spicy Indian food recipes in advance? 

A: Yes, many spicy Indian food recipes can be prepared in advance. Dishes like Paneer Tikka and Chana Madra can be marinated or cooked ahead of time and reheated before serving.

Q: What are some sweet dishes that pair well with spicy Indian food? 

A: Some sweet dishes that pair well with spicy Indian food include gulab jamun, jalebi, and Spicy Mango Chutney. These desserts provide a sweet contrast to the heat of the main dishes.

Conclusion

Spicy Indian food recipes offer a thrilling culinary adventure with their bold flavors and vibrant spices. Whether you’re looking for spicy Indian food recipes vegetarian, specific best spicy Indian food recipes, or just want to explore the fiery side of Indian cuisine, these dishes are sure to delight your taste buds. 

So, gather your ingredients, try out these recipes, and enjoy the rich and diverse world of spicy Indian cuisine. Happy cooking and happy eating!

By incorporating these dishes into your menu, you’ll be able to enjoy a wide variety of delicious and nutritious foods.

Whether you’re preparing snacks, main courses, or desserts, or find vegetarian recipes there’s a spicy Indian recipe to suit every taste. Don’t forget to check out Manjula’s Kitchen for more inspiration and culinary delights. Happy cooking and happy eating!

  • Sorghum Dosa (Jowar)

    Sorghum Dosa (Jowar)

    A plate of crispy Sorghum Dosa served with spiced potato filling

    Sorghum Jowar Dosa

    Sorghum Jowar Dosa a tasty twist to Rava Dosa. Lately, I am trying gluten free recipes and exploring the grains I rarely used. Sorghum Dosa is one of those recipes. This is a good alternative to regular dosa it is quick and easy to make. Sorghum Dosa batter does not need to be fermented. Sorghum dosa also vegan and gluten free. It is crispy and has a lacy look like Rava Dosa. You can serve this with traditional Samber and coconut Chutney or serve for a snack with cilantro Chutney.This recipe will serve 3.
    4 from 1 vote

    Ingredients
      

    • ½ cup sorghum Jowar flour
    • ¼ cup rice flour Chawal ka atta
    • ½ tsp cumin seed jeera
    • tsp asafetida hing
    • ¼ tsp salt
    • tsp crushed black pepper
    • 1 Tbsp finely chopped cilantro hara dhania
    • 1 ½ cup water
    • 3 Tbsp of oil for cooking dosa

    Instructions
     

    • Mix all the dry ingredients together, sorghum flour ( Jowar), rice flour, cumin seeds, asafetida, salt, black pepper.
    • Add water slowly to make a thin batter and avoiding any lumps. Batter should have pouring consistency like buttermilk. Let the batter stand for about 30 minutes.
    • Before making dosa add cilantro. Mix it well.
    • Heat the skillet on medium high. To check if the skillet is ready sprinkle a few drops of water over the skillet water should sizzle. Wipe the skillet with few drops of oil.
    • Pour the batter with a ladle, keep the ladle about 4 inches high from the skillet in a circular motion starting from the center. Keep pouring the batter till it is the size you will like the dosa. Notes: dosa will no be perfectly round.
    • Do not try to spread the batter, Dosa should have holes like swiss cheese or have lacy look.
    • Drizzle 1 teaspoon of oil around dosa.
    • Cook Dosa over medium heat for about 2 minutes or until Dosa becomes golden brown. Turn the Dosa using spatula.
    • Let Dosa cook for about 1 minute from another side. Dosa will be golden brown on one side and light color on other side. Thin and crispy Sorghum Dosa is ready to serve.
    • Dosa has a look of Rava dosa but Sorghum Dosa is also gluten free and vegan.

    Notes

    Serving Suggestions
    Traditionally Rava Dosa is served with Sambar (lentil soup cooked with vegetables), and coconut chutney, or serve for snack with cilantro Chutney. I have the recipes for Sambar, Coconut Chutney, and Hari Cilantro Chutney on my web site.
    Tried this recipe?Let us know how it was!

    How to make Instant Sorghum Dosa by Manjula’s Kitchen

    Dosa is a popular south indian delicacy which looks like a crepe. It’s like a crisp and thin pancake made of rice and urad dal batter. Traditionally Dosa is served with sambar, aloo masala and coconut chutney. It is an Indian crepe made usually through rice batter, but here we have experimented and made many alternative dosa such as Oat Dosa, Besan Dosa, Rava Dosa, Sorghum Dosa. This preparation is using sorghum dosa and is a bread based breakfast recipe that is vegan. The preparation entails skillfully combining pan techniques and manual dexterity to achieve the perfect bread cooked on non-stick skillets.

    1. Mixing Dry Ingredients: Crafting the Base for Jowar Dosa

    Embark on the journey of creating an Instant Jowar Dosa by combining all the dry ingredients – sorghum flour (Jowar), rice flour, cumin seeds, asafetida, salt, and black pepper. This harmonious blend sets the foundation for a gluten-free and vegan dosa that promises a delightful culinary experience. Ensure the dry ingredients are well-integrated, setting the stage for the dosa batter.

    2. Creating the Dosa Batter: Achieving the Perfect Consistency

    Gradually add water to the dry mix, creating a thin batter with a pouring consistency akin to buttermilk. The key is to avoid any lumps, ensuring a smooth texture. Let the batter stand for approximately 30 minutes, allowing it to settle and develop optimal flavours. This patient step contributes to the success of your Jowar Dosa, enhancing its taste and texture.

    3. Adding Cilantro: Elevating the Flavor Profile of Jowar Dosa

    Before transforming the batter into dosas, introduce a burst of freshness by adding cilantro. This step not only enhances the flavor profile but also adds a visual appeal to your Jowar Dosa. Gently mix the cilantro into the batter, ensuring an even distribution of this aromatic herb.

    4. Pouring and Cooking Dosa: The Art of Creating Jowar Dosa

    Heat the skillet on medium-high, a crucial step before creating your Jowar Dosa. To test the skillet’s readiness, sprinkle a few drops of water – a sizzle should confirm its optimal temperature. Wipe the skillet with a few drops of oil, creating the perfect non-stick surface. With a ladle, pour the batter in a circular motion, starting from the centre, allowing the dosa to take shape naturally. Resist the urge to spread the batter, as Jowar Dosa is intended to have holes, resembling a swiss cheese or possessing a lacy appearance.

    5. Drizzling Oil and Flipping Dosa: Achieving the Perfect Golden Brown

    Enhance the crispiness and flavour by drizzling a teaspoon of oil around the dosa. Cook the Jowar Dosa over medium heat for about 2 minutes until it attains a golden brown hue. Using a spatula, gently flip the dosa, revealing a light colour on one side and the golden brown perfection on the other. This intricate dance of heat and ingredients results in a thin, crispy, and visually appealing Sorghum Dosa.

    6. Serving Your Gluten-Free Creation: Enjoying the Instant Jowar Dosa

    Your Instant Jowar Dosa, with its distinctive swiss cheese-like appearance, is now ready to grace your table. Savour the gluten-free and vegan goodness of this delectable creation. While reminiscent of Rava dosa in appearance, the uniqueness of Sorghum Dosa shines through. Thin, crispy, and utterly satisfying, this dosa promises a delightful culinary experience that caters to a diverse range of dietary preferences.

  • Crispy French Fries

    Crispy French Fries

    A plate of crispy French Fries served with ketchup

    Crispy French Fries

    Crispy delicious French Fries! Who doesn't enjoy French fries? It's the perfect comfort food! Homemade Fries, it’s actually quite simple and easy to make. In fact, this is a great snack for my grandkids when they come to visit me. My grandson will say very proudly my dadi (grandmother) makes the best fries.This recipe will serve 3
    4 from 1 vote
    Prep Time 5 minutes
    Cook Time 15 minutes
    Course Appetizer
    Cuisine French
    Servings 3 people

    Ingredients
      

    • 2 potatoes use russet potatoes
    • ½ tsp salt
    • Oil to fry

    Instructions
     

    • Wash and peel the potatoes, and slice potatoes into French fries, and place into ice cold water for at about 10 minutes. Soaking in water potatoes some of the starch will come out and water will look fogy. Remove them from water to clean kitchen towel and pat dry.
    • Heat oil in a frying pan over medium-high heat. Put the fries into oil, don’t over crowed them. Notes: overcrowding fries will bring oil temperature to very low and fries can become very oily.
    • Turn the fries occasionally, fry until golden brown it should take about 6-8 minutes. Remove fries from oil with a slotted spoon to drain on paper towel. Sprinkle the salt and fries are ready to serve.

    Notes

    My family and friends enjoy the fries with tamarind chutney, this exotic sweet and sour chutney is a delicious condiment. I always have this in my refrigerator. My grandkids also like to have a lemonade or Mango lassi with French fries.
    Tried this recipe?Let us know how it was!
  • Avocado Paratha

    Avocado Paratha

    Avocado Paratha served with potato curry, yogurt sauce, and avocado slice on a white plate

    Avocado Paratha

    Avocado Paratha, these days I'm spending a lot of time at home, so I decided to experiment in the kitchen. I had one extra avocado left after making some guacamole dip. Avocados seem to be very popular these days most often served as "Avocado Toast". I decided to put an Indian twist and use the extra avocado in delicious flavorful parathas. It actually turned out great and I enjoyed, but I think it needed a few tweaks. I added some extra spices and it turned out even better.
    Avocados have many health benefits, including being a "healthy" fat and they taste great! I like to serve Avocado Parathas as a snack with tea. It can also be served with any gravy-based dish; however, I think its complemented perfectly with "Aloo Tamatar" or "Spinach Raita". This is also a satisfying lunch box meal.
    This recipe will serve 3.
    4.67 from 6 votes
    Prep Time 10 minutes
    Cook Time 15 minutes
    Total Time 25 minutes
    Course Breakfast
    Cuisine Indian
    Servings 3 people

    Ingredients
      

    • 1 large ripe avocado
    • 1 ¼ cup whole wheat flour use as needed
    • ½ tsp salt
    • ½ tsp cumin seeds jeera
    • tsp asafoetida hing
    • 1 Tbsp green chili finely chopped
    • 1 Tbsp cilantro finely chopped
    • 1 tsp ginger finely shredded
    • ½ tsp lemon juice

    Also, need

    • ¼ cup whole wheat flour for rolling the paratha
    • 3 Tbsp oil for cooking the parathas

    Instructions
     

    • Slice avocado in half, remove the pit and skins and scoop them into a mixing bowl. Then use a fork to gently mash, (avocado should be ripe). Add green chili, salt, asafetida, cumin seeds, lemon juice, cilantro and salt, mash all the ingredients together (Lemon juice is added to prevent oxidizing of the Avocados)
    • Add the whole wheat flour gradually, how much flour you will need depends on the avocado, knead all the ingredients together and make a smooth but firm dough. Do not add any water. Grease your palm and roll the dough between your palms basically you are kneading the dough between you palms. Let the dough sit for 10 minutes before making the parathas.
    • Divide the dough into 6 equal parts and roll them into smooth balls. Flatten them with the palm of your hand and roll them in dry flour. Roll the paratha into about 6-inch diameter. Note: if paratha is sticking while rolling sprinkle little more flour this will help rolling.
    • Heat the flat skillet over medium heat. Note: heavy skillet works best. To check if the skillet is ready, put few drops of water on it. If the water sizzles right away, the skillet is ready.
    • Place the Paratha over the skillet. When you see the color change and the paratha will puff in different places. Turn the paratha over.
    • Paratha should have golden-brown spots. Wait a few seconds and put about 1 teaspoon of oil and spread with a spatula. Flip the paratha and put again half teaspoon of oil. Lightly press the paratha with a spatula.
    • Flip again and press with a spatula making sure the paratha is golden-brown on both sides. Repeat for the remaining parathas.
    • Parathas are best served hot and crispy.

    Notes

    Serve them as a snack with cup of chai, or with a meal I like to serve with Aloo Tamatar and Spinach Raita.
    Keyword Avocado Pancake, Avocado Roti, Bread, Chapati, delicious, Easy Cooking, Guacamole Bread, Healthy, Homemade, Jain Food, Lunch Box, Main Meal, Onion Garlic Free Cooking, Roti, Side Dish, Swaminarayan, Teatime Snack, Unleavened Bread, Vegan, Vegetarian, Veshno Cooking, Video Recipe
    Tried this recipe?Let us know how it was!
  • Lauki Vadi Ki Sabji

    A bowl of Lauki Vadi Ki Sabji, a traditional Indian dish made with bottle gourd and spiced gram flour dumplings, garnished with fresh cilantro.

    Lauki Vadi Ki Sabji

    Laucki is also known as Bottle gourd. This is a healthy and wholesome lentil and vegetable main dish. I like making Lauki as it is mild in taste and easy to digest. I usually will serve this with plain rice or rotis.
    5 from 3 votes
    Prep Time 10 minutes
    Cook Time 10 minutes
    Course Main Course
    Cuisine Indian
    Servings 4 people

    Equipment

    Instant Pot

    Ingredients
      

    • 4 cup laucki

      bottle gourd, peeled and cut into byte size cubes

    • 1/3 cup

      moong dal vadi

      broken into small pieces

    • 3/4 cup tomato puree
    • 1 tsp ginger paste
    • 2 tbsp oil
    • 1 tsp cumin seeds jeera
    • 1/8 tsp asafetida hing
    • 1 tbsp coriander powder dhania
    • 1/4 tsp turmeric haldi
    • 1/2 tsp red chili powder
    • 1 tsp salt
    • 1/4 tsp garam masala
    • 1/2 cup water

    Instructions
     

    • I am using instant pot; I am using the instant pot instead of pressure-cooker. Not
      for saving time but ease of use.
    • Heat one tablespoon of oil in instant pot on sautéed mode. Oil should be moderately hot, add moong dal vadi stir-fry till they are light golden brown this should take about 1minute. take out the vadies from instant pot.
    • Add remaining 1 tablespoon of oil, in instant pot keeping on sautéed mode oil should be moderately hot and add cumin seeds. When seeds start to crack, add the asafetida, stir and add tomato puree, ginger, coriander powder, turmeric, salt and chili powder and cook stirring occasional till spice mix start leaving the oil.
    • Add bottle gourd, vadies and 1/2 cup of water. Change the setting to pressure cook on high mode. Set the time for 6 minutes. (At this time instant pot is working just like pressure cooker, it will take same time building the pressure and after cooking releasing the pressure as pressure cooker, advantage is you can take care other work you have to do or even if you have to go out.)
    • Open the instant pot when you are ready. After you open the instant pot adjust the water if you need more, add garam masala.

    Video

    Notes

    I like to serve this with roti or rice. This makes a very satisfying meal.
    Enjoy! Thank you
    Tried this recipe?Let us know how it was!

    Lauki Vadi Ki Sabji: A Flavorful Indian Delight

    Lauki Vadi Ki Sabji is a traditional Indian dish made primarily with bottle gourd (Lauki), lentil nuggets (Vadi), and a variety of spices cooked in a curry or gravy. It is a popular dish among individuals following a vegan, gluten-free, and low-fat diet, making it suitable for those with dietary restrictions such as diabetes.

    The dish typically involves cooking lentil nuggets with bottle gourd and various vegetables in a flavorful curry or gravy made with spices such as cumin, coriander, turmeric, and ginger. It can be easily prepared in an Instant Pot for a quicker cooking process while retaining its nutritional value and flavors.

    Lauki Vadi Ki Sabji provides a wholesome meal option packed with protein from lentils, fibre from vegetables, and essential nutrients, making it a nutritious and satisfying choice for individuals seeking a balanced diet.

    Lauki Vadi Ki Sabji is a traditional Indian dish made with bottle gourd (lauki) and sun-dried lentil dumplings (vadi). This Lauki Vadi Ki Sabji recipe combines the subtle flavors of lauki with the richness of vadi to create a hearty and nutritious dish that’s bursting with flavor. With its simple yet satisfying taste, Lauki Vadi Ki Sabji is a popular choice for everyday meals in Indian households. 

    Step 1: Preparing the Vadi

    To begin, soak the sun-dried lentil dumplings (vadi) in water for about 15-20 minutes until they become soft and pliable. Once softened, squeeze out any excess water from the vadi and set them aside. This step helps ensure that the vadi cook evenly and absorb the flavors of the dish.

    Step 2: Preparing the Lauki

    Peel the bottle gourd (lauki) and cut it into small cubes or slices, depending on your preference. Lauki tends to cook quickly, so it’s essential to cut it into uniform pieces to ensure even cooking. Rinse the chopped lauki under cold water to remove any dirt or impurities before using it in the recipe.

    Step 3: Tempering and Cooking

    In a pan, heat oil or ghee over medium heat and add cumin seeds, mustard seeds, and asafoetida (hing) to the hot oil. Allow the seeds to crackle and release their aroma before adding finely chopped green chilies adding minced ginger for added flavor.

    Step 4: Adding Spices and Lauki

    Once the spices such as turmeric powder, coriander powder, red chili powder, and garam masala to the pan, stirring well to coat with the aromatic spices. Add the chopped lauki to the pan, stirring to combine with the spices. Cover the pan and let the lauki cook until it becomes tender but still retains its shape.

    Step 5: Incorporating the Vadi

    Once the lauki is cooked, add the soaked and squeezed vadi to the pan, gently mixing them with the cooked lauki and spices. Allow the vadi to simmer in the gravy for a few minutes, allowing them to absorb the flavors of the dish. Adjust the consistency of the gravy by adding water as needed to achieve the desired thickness.

    Step 6: Garnishing and Serving

    Before serving, garnish the Lauki Vadi Ki Sabji with freshly chopped cilantro leaves for a burst of freshness and color. Serve the sabji hot with steamed rice or roti for a wholesome and satisfying meal that’s sure to please your taste buds.

    Tips for Perfect Lauki Vadi Ki Sabji

    • Soaking Vadi: Ensure to soak the vadi in water until they become soft and pliable before adding them to the sabji. This step helps prevent the vadi from being too hard or chewy after cooking.
    • Cutting Lauki: Cut the bottle gourd into uniform pieces to ensure even cooking. Avoid overcooking the lauki as it can become mushy and lose its texture.
    • Adjusting Spice Level: Customize the spice level of the sabji according to your taste preferences by adjusting the amount of red chili powder and green chilies used in the recipe.

    Variations of Lauki Vadi Ki Sabji

    • Adding Tomatoes: Enhance the flavor of the sabji by adding chopped tomatoes along with the Tomatoes add a tangy twist to the dish and complement the earthy flavors of the lauki and vadi.
    • Coconut Gravy: For a richer and creamier gravy, add coconut milk or grated coconut to the sabji. Coconut adds a hint of sweetness and depth to the dish, making it more indulgent.

    Benefits of Lauki Vadi Ki Sabji

    • Nutrient-Rich: Lauki is low in calories and rich in essential nutrients such as vitamins, minerals, and dietary fiber, making it a healthy addition to your diet.
    • Protein-Packed: Vadi provides a good source of plant-based protein, essential for muscle repair and growth, making Lauki Vadi Ki Sabji a nutritious meal option for vegetarians.
    • Digestive Aid: Lauki is known for its digestive properties and is often included in Indian cuisine to aid in digestion and promote gut health.

    Frequently Asked Questions (FAQs)

    Can I use store-bought vadi for this recipe?

    • Yes, you can use store-bought sun-dried lentil dumplings (vadi) for convenience. However, homemade vadi may have a fresher flavor and texture.

    Can I make Lauki Vadi Ki Sabji ahead of time?

    • Yes, you can prepare the sabji in advance and store it in the refrigerator for up to 2-3 days. Reheat it gently before serving.

    Is Lauki Vadi Ki Sabji vegan-friendly?

    • Yes, Lauki Vadi Ki Sabji can be made vegan by using oil instead of ghee for tempering and omitting any dairy-based garnishes.

    Explore more delightful Indian recipes on Manjula’s Kitchen, such as Aloo Baingan for another culinary adventure.

  • Idli Chaat (South Indian Appetizer)

    Idli Chaat (South Indian Appetizer)

    A plate of Idli Chaat garnished with sev, diced potatoes, chutneys, and yogurt, creating a colorful and appetizing Indian street food dish.

    Idli Chaat, South Indian Appetizer

    Idli Chaat is a tasty twist to traditional South Indian Idli. This can be served as an appetizer or an afternoon snack. It's quick and easy to make, with the perfect savory flavors! Try this recipe today and you will be satisfied with a great dish! 
    4 from 4 votes
    Prep Time 10 minutes
    Cook Time 15 minutes
    Total Time 25 minutes
    Course Snack
    Cuisine Indian
    Servings 3 people

    Ingredients


    • 6 Idlies
    • 1/2 cup potatoes boiled peeled and cut into small pieces
    • 2 Tbsp oil
    • 1/2 tsp salt
    • 1 Tbsp green chili finely chopped
    • 2/3 cup yogurt whipped dahi,curd
    • 3 Tbsp hari cilantro chutney
    • 3 Tbsp tamarind chutney
    • 1/4 cup fine sev

    Instructions
     

    • I am using store bought frozen idlies or you can also use left over idlies. Make sure though frozen idlies to bring to room temperature.
    • Whip the yogurt until smooth. Add a little milk as needed to make the pourable consistency. 
    • Heat 2 tablespoons of oil in a pan and arrange the idle do not overlap them. Cooked the idlis over medium heat, turn them about 3-4 time, till they are light golden brown both sides. This should take about 4 minutes.
    • Transfer them on a plate and stir-fry the potatoes in the same pan sprinkling the 1/4 teaspoon of salt. Stir-fry the potatoes till they start getting light golden color this should take about 2 minutes.  

    Serving the Idli Chaat

    • Arrange the idlies in a serving plate, sprinkle remaining salt ¼ teaspoon. Put ½ the potatoes drizzle the yogurt, cilantro chutney and tamarind chutney. Garnish with green chilies and fine sev.

    Notes

    Notes
    You can slice the idli in about 6 pieces and stir fry. This is another delicious way to serve to serve left over idlies.
    You will also enjoy Dahi Vada, and Bhel Puri. Links for Cilantro Chutney and tamarind Chutney
    Tried this recipe?Let us know how it was!

    Idli Chaat Recipe: A Delicious Twist to a Classic Dish

    Idli Chaat is a delightful fusion of traditional South Indian idlis with a twist of chaat-inspired flavors, creating a quick and easy snack that tantalizes the taste buds with its irresistible appetizers. Idli chaat is a delightful fusion dish that combines the traditional South Indian snack of idli with the flavors of chaat, a popular street food in India. This unique blend of textures and flavors creates a mouthwatering experience that is sure to please your taste buds. In this article, we’ll explore how to make idli chaat at home, step by step.

    Step 1: Preparing the Idlis

    To begin making idli chaat, you’ll need freshly steamed idlis. If you don’t have idlis ready, you can prepare them using your favorite idli batter recipe. Once the idlis are steamed to perfection, allow them to cool slightly before proceeding to the next step.

    Step 2: Cutting the Idlis

    Once the idlis have cooled down, cut them into bite-sized pieces. This step helps to create a perfect base for the chaat toppings and ensures that each bite is filled with flavor.

    Step 3: Assembling the Dahi Idli Chaat

    Now comes the fun part – assembling the dahi idli chaat! Take the cut idli pieces and arrange them on a serving plate. Next, generously drizzle them with creamy yogurt, ensuring that each piece is well-coated. This adds a refreshing tanginess to the dish.

    Step 4: Adding Toppings

    Now, it’s time to add the toppings that will take your idli chaat to the next level. You can get creative with your toppings, but some classic choices include tomatoes, and cilantro. For an extra kick of flavor, sprinkle some chaat masala and roasted cumin powder on top.

    Step 5: Garnishing

    To finish off your dahi idli chaat, garnish it with a handful of nylon sev and a drizzle of tangy tamarind chutney. These final touches not only add visual appeal but also enhance the overall taste of the dish.

    Tips for Making the Perfect Idli Chaat

    • Use freshly steamed idlis for the best texture and flavor.
    • Be generous with the yogurt and toppings to ensure every bite is bursting with taste.
    • Experiment with different toppings and garnishes to customize the chaat according to your references.

    Variations of Idli Chaat

    • For a spicy twist, add some finely chopped green chilies or a dash of red chili powder.
    • Instead of yogurt, you can use whipped cream or sour cream for a different flavor profile.
    • Try adding some boiled chickpeas or sprouts for added protein and texture.

    Benefits of Idli Chaat

    • Idli chaat is a nutritious dish that provides a good balance of carbohydrates, protein, and vitamins.
    • It’s a great way to use leftover idlis and turn them into a delicious snack or appetizer.
    • The probiotics in yogurt make this dish beneficial for gut health.

    FAQs (Frequently Asked Questions)

    Q: Can I use store-bought idlis for this recipe?

    A: Yes, you can certainly use store-bought idlis if you’re short on time. However, freshly steamed idlis will yield the best results in terms of flavor and texture.

    Q: Can I make idli chaat in advance?

    A: While it’s best enjoyed fresh, you can prepare the components of idli chaat in advance and assemble them just before serving to prevent the idlis from becoming soggy.

    Q: Is idli chaat spicy?

    A: The level of spiciness can be adjusted according to your preference. You can make it as spicy or as mild as you like by controlling the amount of green chilies or chili powder you use.

    Exploring Other Recipes on Manjula’s Kitchen

    If you’re looking to explore more Indian recipes, appetizers, beverages, and desserts, be sure to check out the following links on Manjula’s Kitchen. Here are some links to recipes on Manjula’s Kitchen official website: Paneer Tikka Masala, Chana Chaat (Spicy Chickpea Salad), Pav Bhaji (Spicy Vegetable Hash with Buns), Raj Kachori (Crunchy Chaat), Vegetable Biryani

    Idli Chaat is a delightful dish that brings together the best of both worlds – the comforting flavors of idli and the exciting taste of chaat. With just a few simple ingredients, you can create a dish that is sure to impress your family and friends. So why not give this recipe a try and experience the deliciousness of idli chaat for yourself?

  • Achari Mathri (Masala Mathri)

    Achari Mathri (Masala Mathri)

    Stacks of golden-brown Achari Mathri, a traditional Indian snack, arranged neatly on a white plate.

    Achari Mathri (Masala Mathri)

    Achari Mathries, is a traditional staple snack in North India. They are usually served with spicy pickles, but in this recipe I have added mango pickle spices in the dough instead to add a tangy flavor to the mathri itself. With my family, mathries are a must have while travelling, and now with Achari Mathri, we no longer need the pickle, so it becomes one less thing to carry. 
    5 from 1 vote
    Prep Time 20 minutes
    Cook Time 20 minutes
    resting time 15 minutes
    Total Time 40 minutes
    Course Snack
    Cuisine Indian
    Servings 10 people

    Ingredients


    • 2 cup all purpose flour planin flour, maida
    • 1/2 cup fine sooji samolina
    • 1-1/2 tsp salt
    • 1/4 tsp dry ginger powder saunth
    • 1/4 tsp asafetida hing
    • 1/2 tsp fennel seeds crushed saunf
    • 2 tsp coriander powder dhania
    • 1 tsp yellow mustard seeds powder
    • 1/2 tsp mango powder amchoor
    • 2 tsp red chili flake adjust to taste
    • 4 Tbsp oil
    • 3/4 cup lukewarm water use as needed

    Instructions
     

    • Mix all the ingredients except the water. Add the water little at a time, kneading into a firm dough. Cover the dough and set aside for 15 minutes or more.
      Prick them with a fork all over the rolled dough, so the Mathries do not puff when frying, and Mathries stay crisp.
    • Divide the dough into 3 equal parts. Take each part of the dough and make a flat ball shape. Roll them into about 12-inch circles and thickness of salted crackers.
    • Take a cookie cutter and cut them in rounds. I am using 2-1/2 inch cookie cutter. Use the size and shape to your choice.
    • Heat the oil in a frying pan on medium heat. The frying pan should have at least 1 inch of oil. To check if the oil is ready, put a small piece of dough in the oil. The dough should make the oil sizzle and come up slowly.
    • Make sure to place just enough mathris in the oil it should be easy to turn them. Fry the mathris until both sides are light golden-brown. This should take about 7-8 minutes.

    Notes

    Tip
    • Achari Mathries can be stored for a couple of months in airtight containers. 
    • If the mathries are cooked on high heat, they will be soft.
    • You will also enjoy Gulab Jamuns, Besan Ki Burfi, Mathri
    Tried this recipe?Let us know how it was!

  • Sabudana (Tapicoa) Bhel, Chaat

    Sabudana (Tapicoa) Bhel, Chaat

    A vibrant plate of Sabudana (Tapioca) Bhel Chaat, garnished with crispy toppings and drizzled with tamarind chutney.

    Sabudana (Tapicoa) Bhel, Chaat

    Sabudana Bhel this is a delicious appetizer or also can be served with afternoon tea. Sabudana Bhel or I like to call this chaat is an elegant looking dish, that will sure to impress all your family and friends.
    4 from 1 vote
    Prep Time 10 minutes
    Cook Time 10 minutes
    Total Time 20 minutes
    Course Appetizer
    Cuisine Indian
    Servings 4 people

    Ingredients


    For Sabudana – Tapioca

    • 1/2 cup sabudana tapioca, use the larger pearls
    • 2 tsp oil
    • 1/4 tsp cumin seeds jeera
    • 1/4 tsp mustard seeds rai
    • pinch turmeric haldi
    • 1/2 tsp salt
    • few drops lemon juice

    For Serving

    • 1 cup potato boiled peeled and cut into small cubes
    • 1 Tbsp green chili finely chopped
    • 1/2 tsp salt
    • 1/2 cup peanuts roasted and crushed
    • 2 tsp chaat masala
    • 1/2 cup aloo lacha check existing recipe
    • 1/4 cup tamarind chutney check existing recipe

    Instructions
     

    • Wash sabudana (tapioca) changing the water 2-3 time and soak with one cup of water, soak 8 hours or more. Sabudana will become all most four time in volume and will be soft.
    • Heat the oil in a frying pan on medium heat. Test the heat by adding one cumin seed to the oil; if seed cracks right away oil is ready. Add cumin seeds and mustard seeds after seeds crack add turmeric, lower the heat to low. Add sabudana, and salt. Keep stir frying until sabudana becomes translucence, looks like pearls. This should take about another 4-5 minutes. Stir gently and making sure tapioca doesn’t get sticky and stuck to each other. Turn off the heat, and drizzle 3-4 drops of lemon juice and stir.
    • Transfer sabudana to a wide bowl stir for few minutes with fork making sure sabudana pearls are separated and not sticky. Serve the sabudana at room temperature.
    • Add 1/2 teaspoon of salt and green chilies to cubed potatoes, mix it well and set aside.
    • Assembling the Sabudana Bhel, in a serving platter spread the cooked sabudana, sprinkle the roasted peanuts, over peanuts sprinkle the potatoes, then aloo lacha, some more peanuts and drizzle the chutney.

    Notes

    Suggestion, this is a easy recipe, you can prepare every thing in advance, cooked sabudana can be refrigerator for up to a week. Aloo Lacha and tamarind chutney can be stored for months.  
    Tried this recipe?Let us know how it was!

    Introduction to Sabudana Bhel Chaat

    Sabudana Bhel is a quick & easy, gluten-free, and vegan snack with flavors reminiscent of chaat, perfect for Krishna Janmashtami and Navaratri celebrations, offering a delightful appetizer option. In this recipe, we’ll learn how to make sabudana bhel chaat, a delightful and crunchy snack that’s perfect for any occasion. Sabudana, also known as tapioca pearls, is the star ingredient here, lending its unique texture and taste to create a mouthwatering dish. This sabudana bhel recipe combines the traditional flavors of bhel with the subtle nuttiness of sabudana, resulting in a tantalizing treat that’s sure to please your taste buds. Whether you’re looking for a tasty snack to enjoy with your evening tea or planning a party menu, this crispy sabudana bhel is sure to be a hit.

    Preparing the Sabudana Mixture

    To begin making the sabudana bhel, start by soaking the sabudana pearls in water for a few hours until they turn soft and plump. Once the sabudana pearls have soaked well, drain any excess water and spread them out on a clean kitchen towel to remove any excess moisture. Now, heat oil in a pan and fry the sabudana pearls until they turn crispy and golden brown. This step is crucial for achieving that perfect crunch in your sabudana bhel chaat.

    Adding Crunchy Elements

    Next, it’s time to add some crunchy elements to our sabudana bhel mixture. You can use a variety of ingredients such as roasted peanuts, tomatoes, and crunchy sev. These ingredients not only add texture to the dish but also enhance its flavor profile. Feel free to adjust the quantities according to your preference, but make sure to include a good mix of flavors and textures for the best results.

    Seasoning the Bhel

    Once you’ve assembled all the crunchy elements, it’s time to season your sabudana bhel mixture. You can use a combination of spices such as chaat masala, red chili powder, roasted cumin powder, and black salt to add a burst of flavor to the dish. Additionally, you can squeeze some fresh lemon juice over the mixture to give it a tangy twist. Mix everything together until well combined, ensuring that the sabudana pearls are evenly coated with the seasoning.

    Garnishing and Serving

    Finally, garnish your sabudana bhel chaat with some fresh coriander leaves and a sprinkle of nylon sev for an extra crunch. You can also add some pomegranate arils or grated coconut for a pop of color and flavor. Serve the crispy sabudana bhel immediately in individual serving bowls or plates, garnished with some more sev on top for added crunchiness. Pair it with a cup of hot tea or your favorite chutney for a truly satisfying snacking experience.

    Tips for Perfect Sabudana Bhel

    • Soak the sabudana pearls in water for at least 4-5 hours or overnight to ensure they become soft and plump.
    • Drain the soaked sabudana pearls well and spread them out on a kitchen towel to remove excess moisture before frying.
    • Fry the sabudana pearls in batches to ensure they cook evenly and become crispy.
    • Adjust the seasoning according to your taste preferences. You can make the sabudana bhel spicier by adding more red chili powder or tangier by squeezing extra lemon juice.
    • Garnish the sabudana bhel chaat with fresh ingredients like coriander leaves, pomegranate arils, or grated coconut to enhance its visual appeal and flavor.

    Variations of Sabudana Bhel

    • Fruit Bhel: Add diced fruits such as apples, bananas, and grapes to the sabudana bhel mixture for a refreshing twist.
    • Sprouts Bhel: Incorporate sprouted moong beans or chickpeas into the sabudana bhel for added protein and crunch.
    • Vegetable Bhel: Include finely chopped vegetables like cucumber, carrots, and bell peppers to make the sabudana bhel more nutritious and colorful.
    • Sweet Bhel: For a sweet variation, skip the savory seasonings and instead toss the sabudana pearls with honey, yogurt, and chopped fruits for a delicious dessert option.

    Benefits of Sabudana Bhel

    • Gluten-Free: Sabudana is naturally gluten-free, making this sabudana bhel recipe suitable for individuals with gluten intolerance or celiac disease.
    • Rich in Carbohydrates: Sabudana is a rich source of carbohydrates, providing a quick and sustainable source of energy.
    • Easy to Digest: Sabudana is light on the stomach and easy to digest, making it an ideal ingredient for people with digestive issues or those following a bland diet.
    • Versatile: You can customize the sabudana bhel recipe with your favorite ingredients to suit your taste preferences and dietary requirements.
    • Satisfying Snack: This crispy sabudana bhel is not only delicious but also quite filling, making it a satisfying snack option for any time of the day.

    FAQs about Sabudana Bhel

    Q: Can I make sabudana bhel ahead of time?

    A: While it’s best to serve sabudana bhel chaat immediately after preparing it to enjoy its crispiness, you can prepare the sabudana mixture in advance and assemble the bhel just before serving to prevent it from becoming soggy.

    Q: Can I store leftover sabudana bhel?

    A: It’s not recommended to store leftover sabudana bhel as it tends to lose its crispiness over time. However, if you have any leftover mixture, you can refrigerate it in an airtight container for up to a day and reheat it in the oven before serving.

    Q: Is sabudana bhel suitable for fasting days?

    A: Yes, sabudana bhel is a popular dish consumed during fasting days, especially during festivals like Navratri. Just ensure that you use sendha namak (rock salt) instead of regular salt if you’re making it for fasting purposes.

    Q: Can I make sabudana bhel without frying the sabudana pearls?

    A: While frying the sabudana pearls adds a crispy texture to the sabudana bhel, you can try alternative cooking methods such as roasting or air-frying for a healthier version of the dish.

    Q: Can I serve sabudana bhel as a main dish?

    A: While sabudana bhel chaat is typically served as a snack or appetizer, you can definitely enjoy it as a light meal, especially when paired with some yogurt or a side salad for added nutrition.

    Other Recipes on Manjula’s Kitchen

    If you’re looking to explore more Indian recipes, appetizers, beverages, and desserts, be sure to check out the following links on Manjula’s Kitchen. Here are some links to recipes on Manjula’s Kitchen official website:

    Paneer Tikka Masala Recipe

    Chana Chaat (Spicy Chickpea Salad) Recipe

    Pav Bhaji (Spicy Vegetable Hash with Buns) Recipe

    Raj Kachori (Crunchy Chaat) Recipe

    Vegetable Biryani Recipe

    These recipes should offer you a flavorful experience straight from Manjula’s Kitchen.

  • Spicy Corn Chaat

    Spicy Corn Chaat

    Spicy Corn Chaat

    Spicy Corn Chaat

    Craving something savory and delicious? This Spicy Corn Chaat is the perfect spicy snack that is sure to satisfy your cravings. It's also easy and quick to prepare!
    4.29 from 7 votes
    Prep Time 10 minutes
    Cook Time 10 minutes
    Total Time 20 minutes
    Course Snack
    Cuisine Indian
    Servings 6 people

    Ingredients
      

    • 16 oz frozen corn kernels about 3-1/2 cups
    • 1 cup green and yellow bell pepper finely chopped use any bell pepper you have, I decide to use them for color
    • 1/2 cup finely chopped tomato
    • 1 tsp ginger juice
    • 1 tsp salt
    • 1/2 tsp black salt optional
    • 1 tsp cumin seed powder roasted
    • 1/4 tsp black pepper
    • 1/4 tsp red chili powder
    • 1 tsp green chili finely chopped, adjust to taste
    • 1 Tbsp cilantro finely chopped
    • 1 Tbsp lemon juice

    Instructions
     

    • Mix all the dry ingredients together, salt, black salt, roasted cumin seed powder, black pepper, and chili powder, set aside.
    • Thaw the frozen corn kernels and lightly squeeze some water out.
    • Coat the nonstick frying pan with oil and heat over medium high heat, put the corn kernels and stir fry for 4-5 minutes stirring continuously. Some corn will start popping and they start getting some brown spots. Turn off the heat.
    • After corn comes to room temperature add all the ingredients, bell peppers, tomato, sprinkle the spice mix, ginger juice, cilantro and lemon juice and add the green chili to you taste. Mix them well.
    Tried this recipe?Let us know how it was!

    Spicy Corn Chaat Recipe: Step by Step Process 

    Spicy Corn Chaat is a flavorful appetizer or snack made from boiled corn kernels mixed with a blend of spices and tangy chutneys. It’s a gluten-free, low-cholesterol, and low-fat option, perfect for those looking for a healthy yet satisfying treat. This vegan dish makes for a great lunch box suggestion or a quick bite any time of the day.

    Introduction to Spicy Corn Chaat


    Indulge in the delightful flavors of spicy corn chaat with this easy-to-follow recipe. A popular street food in India, this spicy sweet corn chaat combines the sweetness of corn with tangy and spicy flavors, creating a tantalizing snack or appetizer. Learn how to make spicy corn chaat at home and treat yourself to a burst of deliciousness in every bite.

    Ingredients for Spicy Corn Chaat


    To prepare this lip-smacking spicy corn chaat recipe, you’ll need fresh or frozen corn kernels, finely chopped vegetables tomatoes, and bell peppers, green chilies for heat, chaat masala for that quintessential Indian flavor, and a squeeze of lemon juice to brighten up the dish.

    Step-by-Step Instructions for Making Spicy Corn Chaat


    1. Preparing the Corn

    Start by boiling the corn kernels until they are tender. Drain the water and set aside.

    1. Sautéing the Vegetables
      In a pan, heat some oil and add tomatoes, and bell peppers until they are soft and slightly caramelized. Add finely chopped green chilies for an extra kick of heat.
    2. Mixing the Corn and Vegetables
      Combine the boiled corn kernels with the sautéed vegetables in a mixing bowl. Toss them together gently to ensure even distribution of flavors.
    3. Seasoning with Chaat Masala
      Sprinkle generous amounts of chaat masala over the corn and vegetable mixture. This spice blend adds a burst of tanginess and complexity to the chaat.
    4. Adding Lemon Juice
      Squeeze fresh lemon juice over the chaat to enhance its flavors and add a refreshing citrusy note.
    5. Serving the Spicy Corn Chaat
      Transfer the prepared spicy corn chaat to serving bowls and garnish with fresh cilantro leaves for a pop of color and freshness. Serve immediately and enjoy the irresistible flavors of this delightful chaat.

    Tips for Making the Best Spicy Corn Chaat

    • Use fresh corn kernels for the best taste and texture, but frozen corn works well too.
    • Adjust the spiciness according to your preference by adding or reducing the amount of green chilies.
    • For added crunch, you can toss in some crushed papdi or sev just before serving.

    Variations of Spicy Corn Chaat

    • Cheesy Corn Chaat: Sprinkle grated cheese over the chaat for a creamy and indulgent twist.
    • Avocado Corn Chaat: Add diced avocado to the chaat for a buttery texture and extra creaminess.
    • Spicy Corn Salad: Skip the chaat masala and lemon juice, and toss the corn and vegetables with a zesty vinaigrette for a refreshing salad.

    Benefits of Spicy Corn Chaat


    Spicy corn chaat is not only delicious but also nutritious. Corn is a good source of fiber, vitamins, and minerals, while the vegetables add an array of nutrients. This chaat makes for a wholesome snack or appetizer that is both satisfying and nourishing.

    FAQs (Frequently Asked Questions)


    Q: Can I make spicy corn chaat ahead of time?

    A: While it’s best enjoyed fresh, you can prepare the components ahead of time and assemble the chaat just before serving to maintain its crunchiness and flavors.

    Q: Can I use canned corn for this recipe?

    A: While fresh or frozen corn is preferable, you can use canned corn if that’s what you have on hand. Just make sure to drain and rinse the corn before using it in the chaat.

    Q: Is spicy corn chaat suitable for vegetarians and vegans?

    A: Yes, this recipe is completely vegetarian and vegan-friendly, as it only contains plant-based ingredients.

    If you liked the recipe here are some other recipes that you may like too 

    Vegetable Cheela: A savory Indian pancake made with mixed vegetables and chickpea flour.

    Palak (Spinach) Paneer: A classic North Indian dish made with spinach and paneer cheese cooked in a creamy tomato-based sauce.

    Shahi Pulao (Vegetable Pulao): A flavorful rice dish made with spiced basmati rice and vegetables.

    Gobi (Cauliflower) Manchurian: Crispy cauliflower florets tossed in a tangy and spicy Indo-Chinese sauce.

    Aloo (Potato) Paratha: Whole wheat flatbread stuffed with spiced mashed potatoes and cooked on a griddle.

    Mango Lassi: A refreshing yogurt-based drink flavored with ripe mangoes and a hint of cardamom.

    Besan Ladoo: Traditional Indian sweet made with roasted chickpea flour, ghee, and sugar.

  • Pizza Paratha (Stuffed Vegetable Cheese Paratha)

    Pizza Paratha (Stuffed Vegetable Cheese Paratha)

    Pizza Paratha

    Pizza Paratha (Stuffed Vegetable Cheese Paratha)

    Everyone enjoy pizza. Pizza has become a universal food enjoyed by all. Pizza paratha is perfect for the times when you want to enjoy homemade pizza. This is also quick and easy recipe. Personalize your pizza with your favorite toppings. You can serve this for lunch, snack, or especially good for kids lunch box. This is also my grandkids favorite.
    4.20 from 5 votes
    Prep Time 10 minutes
    Cook Time 10 minutes
    Total Time 1 hour 20 minutes
    Course Snack
    Cuisine Indian
    Servings 2 people

    Ingredients
      

    For Paratha Dough

    • 1 cup all-purpose flour maida or plain flour
    • 1/4 tsp salt
    • 1/4 tsp sugar
    • 1/2 tsp yeast
    • 2 Tbsp oil
    • 1/3 cup lukewarm water use as needed

    For Filling

    • 1-1/2 Tbsp tomato paste
    • 1/4 tsp salt
    • 1/2 tsp chili flakes adjust to taste
    • 1/2 tsp dry basil
    • 1/2 tsp dry oregano
    • 1/2 cup bell pepper finely chopped
    • 1/2 cup mushrooms finely chopped
    • 1 jalapeno pepper finely chopped, adjust to taste
    • 1-1/4 cup mozzarella cheese shredded

    Also need

    • 1/4 cup all-purpose flour maida or plain flour for rolling the paratha
    • 2 Tbsp of oil to cook parathas

    Instructions
     

    • In a bowl mix the flour, salt, yeast, and oil, add the water as needed to make soft and pliable dough. Cover the dough and set aside for about one hour.
    • Squeeze the chopped bell peppers to remove the extra water.
    • In a bowl mix all the ingredients for filling, bell pepper, mushrooms tomato paste, salt, chili flakes, basil, oregano, jalapeno, and cheese, mix it well.
    • Knead the dough and divide in two equal parts. Roll each part of the dough in smooth ball.
    • Roll one part of the dough into about six-inch diameter, use dry flour as needed to roll.
    • Place half a cup of filling in the center. Pull the edges of the dough to wrap it around the filling, making sure it is covered from all around.
    • Meanwhile heat the skillet on medium low heat, skillet should not be very hot, otherwise paratha will not cook through. Heavy skillet works best.
    • Lightly sprinkle the dry flour on the surface you will roll the paratha. Press the filled patty lightly from both sides, with your fingers. Now using a rolling pin, roll the paratha about eight-inch in diameter. If the dough sticks to the rolling pin or rolling surface, lightly dust the parathas with dry flour.
    • Oil the skillet generously, and place the paratha on the skillet. Cook the paratha for 2-3 minutes and flip the paratha. Paratha should be golden brown. It is important to cook paratha on low heat.
    • Again brush the paratha with oil all around and flip it again in about 2 minutes. Paratha should be golden brown both sides for crispness. Paratha should take about five minutes to cook nicely.
    • Take out the pizza paratha over wire rack to keep them from getting soggy.

    Suggestions

    • You can make these pizza parathas in any combinations of filling. When I make for my grand kids I don’t add any peppers.

    Notes

    You will also enjoy Vegetable Pasta, Vegetable Hakka noodles, Gobi Manchurian, and Veggie Hash Browns.
    Tried this recipe?Let us know how it was!

  • Aloo Tikki (Potato Patties)

    Aloo Tikki (Potato Patties)

    Aloo Tikki (Potato Patties)

    Aloo Tikki (Potato Patties)

    Aloo tikki or potato patties are popular snack, traditionally when any snack is served with yogurt and chutney it is known as chaat. This is very popular with road side vendors, the aroma of the hot tikkis are enough to make you hungry.
    No ratings yet
    Course street food
    Cuisine Indian
    Servings 8 tikki

    Ingredients
      

    • 3 medium size potatoes boiled and shredded, this will make 2 cups of shredded potato
    • 2 tablespoon bread crumbs
    • 1 teaspoon salt
    • Oil for cooking

    for Filling

    • 1/3 cup green peas boiled and drained
    • 1 teaspoon chopped ginger
    • 1 tablespoon green chili minced
    • 1 tablespoon minced cilantro (hara dhania)
    • ¼ teaspoon salt
    • 1 teaspoon oil

    for Serving

    Instructions
     

    Making Filling

    • Boil and drain the water from the peas and lightly mash.
    • Heat the oil in a small pan over medium heat; add all the filling ingredients, stir fry for about two minutes. Keep the filling little moist. Set aside.

    Making tikkis

    • Add the salt and bread crumb into the potatoes and knead to make the dough.
    • Divide the potatoes into 8 equal parts.
    • Takes one part of the potato dough, make a ball and flatten over the oiled palm.  Put about 1 teaspoon of filling in the center and wrap around with potato. Lightly flatten the filled balls to patties. Make all the patties.
    • Heat non stick heavy skillet on medium high heat, generously greased the skillet.  Place the tikkies on the skillet, making sure they are not touching each other and has some space all around. Oil the tikkies from the top.
    • Cook them for about 1 minute and turn them over, tikkies should be light golden brown. Oil the tikkies from the top and lightly press with spatula.
    • Turn the tikkies 3-4 times as needed to make sure tikkies are nice and crispy. Brush the oil lightly every time when you turn the tikkies over and also press with spatula.
    • Aloo tikkies taste best when they are served right from over the skillet.
    • You can prepare them in advance, up to five steps and brown them just before serving.
    • Tikkies are served along with tamarind chutney, cilantro chutney and yogurt. You can also serve them with spicy chole.
    Tried this recipe?Let us know how it was!

    Aloo Tikki: A Delectable Indian Potato Patties Recipe 

    In this aloo tikki recipe, we delve into the art of creating these beloved potato patties, a staple in Indian cuisine. These aloo tikkis are not only flavorful but also versatile, making them perfect for various dishes like aloo tikki chaat. Aloo Tiki, a delightful vegan appetizer inspired by street food recipes. If you’re craving a delightful snack or appetizer, look no further than this tikki aloo recipe.

    Preparation: Crafting the Perfect Aloo Tikki 

    To start this aloo tikki recipe, begin by boiling potatoes until they are tender. Once cooled, peel and mash them thoroughly. Now, let’s infuse these mashed potatoes with flavor. Add green chili, ginger, salt, cumin seeds, mango powder, and garam masala to the mashed potatoes. Mix these ingredients well, ensuring they are evenly distributed, creating the base for our aloo tikkis.

    Cooking: Shaping and Pan-Frying the Aloo Tikki 

    Now comes the fun part – shaping the aloo tikkis! Take a portion of the potato mixture and roll it into a ball, then gently flatten it to form a patty. Repeat this process until all the mixture is used. Heat oil in a skillet over medium heat. Once hot, carefully place the aloo tikkis in the skillet, ensuring they don’t overlap. Cook each side until golden brown and crisp, creating a delightful texture that enhances the flavor of the tikki aloo.

    Serving: Enjoying Aloo Tikki in Various Forms 

    Now that your aloo tikkis are ready, it’s time to enjoy them in different ways. One popular option is aloo tikki chaat, where the tikki aloo is topped with a medley of chutneys, yogurt, and spices, creating a burst of flavors with every bite. You can also serve aloo tikkis with a side of mint chutney or tamarind chutney for a refreshing twist. Whether enjoyed as a snack, appetizer, or part of a meal, these aloo tikkis are sure to delight your taste buds.

    Tips for Perfect Aloo Tikki: 

    • Use starchy potatoes: Opt for potatoes like russets or Yukon Gold, as they have a higher starch content, resulting in fluffier aloo tikkis.
    • Keep the oil hot: Ensure the oil is sufficiently hot before frying the aloo tikkis to achieve a crispy exterior.
    • Don’t overcrowd the skillet: Cook the tikki aloo in batches, giving them enough space in the skillet to fry evenly.
    • Add breadcrumbs: If the potato mixture feels too wet, incorporate breadcrumbs to help bind it together.

    Variations of Aloo Tikki: 

    • Paneer-stuffed Aloo Tikki: Elevate your aloo tikki experience by adding a layer of paneer stuffing before shaping and frying them.
    • Vegetable-loaded Aloo Tikki: Mix finely chopped vegetables like carrots, peas, and bell peppers into the potato mixture for added texture and flavor.
    • Spicy Aloo Tikki: Increase the heat by adding extra green chilies or a dash of red chili powder to the potato mixture.

    Benefits of Aloo Tikki: 

    • Rich in carbohydrates: Potatoes are a great source of carbohydrates, providing energy to fuel your day.
    • Versatile: Aloo tikkis can be enjoyed on their own, as part of a meal, or as a base for various chaat dishes, offering endless culinary possibilities.
    • Comfort food: The warm and comforting flavors of aloo tikkis make them a favorite comfort food for many.

    FAQs about Aloo Tikki: 

    Q: Can I make aloo tikkis ahead of time? 

    A: Yes, you can prepare the potato mixture and shape the aloo tikkis in advance. Store them in the refrigerator until ready to fry.

    Q: Can I bake aloo tikkis instead of frying them? 

    A: While frying gives aloo tikkis their characteristic crispiness, you can bake them in the oven for a healthier alternative. Brush them with oil and bake at 400°F (200°C) until golden brown.

    Q: Are aloo tikkis gluten-free? 

    A: Yes, aloo tikkis are naturally gluten-free. However, if you’re adding breadcrumbs for binding, ensure they are gluten-free certified.

    Other Recipes on Manjula’s Kitchen 

    If you’re looking to explore more Indian recipes, appetizers, beverages, and desserts, be sure to check out the following links on Manjula’s Kitchen. Here are some links to recipes on Manjula’s Kitchen official website:

    Paneer Tikka Masala Recipe

    Chana Chaat (Spicy Chickpea Salad) Recipe

    Pav Bhaji (Spicy Vegetable Hash with Buns) Recipe

    Raj Kachori (Crunchy Chaat) Recipe

    Vegetable Biryani Recipe

    These recipes should offer you a flavorful experience straight from Manjula’s Kitchen.

  • Batata Vada – Aloo Bonda (Fried Potato Dumpling)

    Batata Vada – Aloo Bonda (Fried Potato Dumpling)

    Batata Vada - Bhonda

    Batata Vada – Aloo Bonda (Fried Potato Dumpling)

    Batata Vada also known as aloo bonda, deep fried savory appetizer made with spicy potato mix. When they are serve hot they are crispy outside and soft inside. This is a very popular street food in Mumbai.
    No ratings yet
    Course Appetizer
    Cuisine Indian
    Servings 3 people

    Ingredients
      

    • 3 medium potatoes boiled peeled and roughly chopped (this will make 2 cups of chopped potatoes)
    • 1 tablespoon oil
    • 1/2 teaspoon black mustard seeds (rai)
    • 7-10 curry leaves chopped, optional
    • 1/4 teaspoon turmeric (haldi)
    • 1 tablespoon finely chopped ginger
    • 1 green chili finely chopped adjust to taste
    • 2 tablespoons chopped cilantro (hara dhania)
    • 1/2 teaspoon salt adjust to taste

    For Batter

    • 1/2 cup besan, gram flour (available in Indian grocery stores)
    • 1 tablespoon rice flour
    • 1/8 teaspoon asafetida (hing)
    • 1/4 teaspoon baking soda
    • 1/4 teaspoon red pepper
    • 1/2 teaspoon salt adjust to taste
    • About 1/4 cup of water
    • Oil to fry

    Instructions
     

    Batter

    • In a bowl mix besan, rice flour, salt, asafetida, pepper, and baking powder. Add water slowly to make a thick and smooth batter. Set aside.

    Vada

    • Heat oil in a frying pan on medium heat moderately.
    • Add mustard seeds as the seeds crack add curry leaves, (curry leaves splatters) potatoes, ginger, green chili, turmeric, and salt.
    • Stir fry for about 3 minutes over medium heat. Add cilantro mix it well. Turn of the heat.
    • Let the potato mix cool off, divide them into about 12 pieces and make them into smooth round ball, they will be little smaller then golf ball.
    • Heat about 1”of oil in a frying pan on medium high heat. To check if the oil is ready, put one drop of batter in oil. The batter should come up but not change color right away.
    • Dip the potato balls into the batter one at a time, making sure the potato balls are completely covered with batter. Then, slowly drop them into the frying pan.
    • Turn them occasionally. Fry the batata vadas until all sides are golden-brown.
    • Batata vadas will take about four minutes to cook.
    • Serve them hot with cilantro chutney.

    Notes

    Serve them with sandwich buns using cilantro chutney as spread. Now this is known as Vada pav, another famous street food in Mumbai.
    Tried this recipe?Let us know how it was!

    Batata Vada Recipe – An Authentic Indian Delight

    Aloo bonda, a popular Indian street food, is a delectable appetizer consisting of spiced mashed potato balls coated in chickpea flour batter and fried to crispy perfection.

    Introduction to Batata Vada and Aloo Bonda

    Batata Vada, also known as Aloo Bonda, is a popular Indian street food that originated in the state of Maharashtra. This delightful snack consists of spiced mashed potatoes coated in a gram flour batter and deep-fried until golden brown. Loved for its crispy exterior and soft, flavorful interior, batata vada is a beloved snack enjoyed across the country. In this batata vada recipe, we will guide you through the process of making this delicious treat at home.

    How to Make Batata Vada – Step by Step Guide

    • Preparation of Potato Filling: To begin making batata vada, start by boiling potatoes until they are tender. Once boiled, peel and mash them in a bowl. Heat oil in a pan and add mustard seeds, cumin seeds, asafoetida, and curry leaves. Sauté until fragrant, then add mashed potatoes, turmeric powder, red chili powder, salt, and chopped coriander leaves. Mix well and cook for a few minutes. Let the filling cool down.
    •  
    • Making the Gram Flour Batter: In a separate bowl, prepare the gram flour batter by mixing gram flour, rice flour, baking soda, salt, and water. Ensure a smooth consistency without any lumps. Let the batter rest for 10-15 minutes.
    • Assembly of Batata Vada: Take a portion of the potato filling and shape it into small balls. Dip each ball into the prepared gram flour batter, ensuring it is evenly coated.
    •  
    • Deep Frying the Vadas: Heat oil in a deep frying pan over medium heat. Once the oil is hot, carefully drop the coated potato balls into the oil and fry until they turn golden brown and crisp. Remove from oil and place them on paper towels to drain excess oil.
    •  
    • Serve Hot: Your crispy and delicious batata vada or aloo bonda is ready to be served. Enjoy them hot with green chutney or tamarind chutney.
    •  

    Tips for Perfect Batata Vada

    • Ensure that the potato filling is well-spiced to enhance the flavor of the batata vada.
    • Make sure the gram flour batter is of the right consistency; it should coat the potato filling evenly.
    • Fry the vadas in hot oil to achieve a crispy exterior.
    • Serve the vadas hot for the best taste and texture.

    Variations of Batata Vada

    • You can add crushed peanuts or cashews to the potato filling for added crunch.
    • For a spicy kick, add finely chopped green chilies to the potato mixture.
    • Experiment with different spices and herbs to customize the flavor according to your preference.

    Benefits of Batata Vada

    • Batata vada is a filling and satisfying snack that can be enjoyed any time of the day.
    • Potatoes are a good source of carbohydrates, making batata vada an excellent energy booster.
    • This snack is vegetarian and can be enjoyed by people of all ages.

    Frequently Asked Questions (FAQs)

    Q: Can I make batata vada ahead of time?

    A: While batata vada is best enjoyed fresh, you can prepare the potato filling and gram flour batter in advance and fry the vadas just before serving for optimal crispiness.

    Q: Can I bake batata vada instead of deep-frying?

    A: While traditionally batata vada is deep-fried for that crispy texture, you can try baking them in the oven for a healthier alternative. However, the texture may vary slightly.

    Other Recipes on Manjula’s Kitchen

    If you’re looking to explore more Indian recipes, appetizers, beverages, and desserts, be sure to check out the following links on Manjula’s Kitchen. Here are some links to recipes on Manjula’s Kitchen official website:

    Paneer Tikka Masala Recipe

    Chana Chaat (Spicy Chickpea Salad) Recipe

    Pav Bhaji (Spicy Vegetable Hash with Buns) Recipe

    Raj Kachori (Crunchy Chaat) Recipe

    Vegetable Biryani Recipe

    These recipes should offer you a flavorful experience straight from Manjula’s Kitchen.


  • Bhel Puri Chat (Spicy Crunchy Snack)

    Bhel Puri Chat (Spicy Crunchy Snack)

    Bhel Puri Chat

    Bhel Puri Chat(Spicy Crunchy Snack)

    Bhel Puri is a simple spicy snack with a light crunch! This is a popular snack with street vendors in Mumbai. Every vendor has his own twist to bhel puri but two main ingredients remain the same . . . puffed rice (murmura) and fine sev. Bhel Puri is low-fat, nutritious, delicious snack!
    5 from 1 vote
    Course snacks
    Cuisine Indian
    Servings 4 people

    Ingredients
      

    Ingredients:

    • 3 cups puffed rice (murmura, kurmura) available in Indian grocery stores.
    • 1 cup fine sav (vermicelli-like snack made from gram flour) available in Indian grocery stores.
    • 1 cup  papdi broken in small pieces (recipe you can find on my web site) or available in Indian grocery stores.
    • 1/2  cup of chopped boiled potatoes
    • 1/2  cup of chopped cucumber
    • 1/2  cup of chopped tomatoes remove the seeds
    • 2 tablespoons chopped cilantro
    • 1/2 teaspoon salt (adjust to taste)
    • 4 tablespoon of hari cilantro chutney
    • 4 tablespoon of tamarind chutney
    • 1 tablespoon minced green pepper optional

    For Garnish

    • 1/4  cup fine sav
    • 2 tablespoons lemon juice

    Instructions
     

    Method

    • In frying pan over medium heat dry roast the puffed rice for 3 to 4 minutes. Let it cool.
    • Combine the dry ingredients (puffed rice, sev, papdi,and salt) together and mix well. Set aside until ready to serve
    • Mix chopped potatoes, cucumber, tomatoes, cilantro,and minced green pepper if you like it hot, and set aside.
    • When ready to serve, combine the dry ingredients and potato mixture.
    • Add hari cilantro and tamarind chutneys to your taste, making sure the chutneys coat the bhel puri. Garnish with sev and drizzle with lemon juice to taste.
    • Notes: Assemble bhel puri just before serving to prevent the puffed rice and sev from getting soggy

    Notes

    Tips
    1. Puffed rice (murmura) loses some of its crispness with time. Roasting restores the crispness and freshness.
    Tried this recipe?Let us know how it was!

    Introduction to Bhel Puri Chaat Recipe

    Bhel Puri Chaat is a delightful combination of appetizers and snacks, popular as street food, particularly cherished during summer. This vegan dish, rooted in chaat culture, embodies the essence of Indian street food recipes with its refreshing blend of flavors and textures. In this bhel puri chaat recipe, we’ll explore the delightful world of Indian street food with a crunchy, spicy snack that’s bursting with flavor. 

    Bhel puri chaat is a popular dish enjoyed across India, known for its unique blend of textures and tangy taste. Whether you’re craving a savory snack or hosting a gathering, this recipe is sure to impress your taste buds and guests alike.

    Step 1: Gathering Ingredients

    To begin making bhel puri chaat, assemble the following ingredients: puffed rice, sev (thin strands of fried gram flour), tomatoes, boiled potatoes, cilantro, green chilies, tamarind chutney, mint chutney, chaat masala, and salt. These ingredients can be found in most Indian grocery stores or online.

    Step 2: Preparing the Base

    Start by preparing the base of the bhel puri chaat. In a large mixing bowl, combine the puffed rice, tomatoes, boiled potatoes, cilantro, and green chilies. Mix well to ensure all the ingredients are evenly distributed. This step is crucial as it sets the foundation for the flavor profile of the dish.

    Step 3: Adding Crunch with Sev

    Next, add a generous amount of sev to the mixture. Sev not only adds a crunchy texture to the bhel puri chaat but also enhances its visual appeal. Feel free to adjust the amount of sev according to your preference for texture and crunchiness.

    Step 4: Drizzling Chutneys

    Now, it’s time to add the tangy and flavorful chutneys to the bhel puri chaat. Drizzle tamarind chutney and mint chutney over the mixture, ensuring that each bite is infused with the deliciousness of these sauces. The combination of sweet and tangy chutneys elevates the taste of the dish to a whole new level.

    Step 5: Seasoning with Chaat Masala

    Sprinkle chaat masala and salt over the bhel puri chaat to enhance its savory flavor profile. Chaat masala is a blend of spices commonly used in Indian cuisine, adding a unique and aromatic touch to the dish. Be sure to taste the mixture and adjust the seasoning according to your taste preferences.

    Step 6: Mixing Thoroughly

    Using a gentle hand, mix all the ingredients thoroughly, ensuring that the flavors are well incorporated. This step is crucial for achieving a harmonious balance of flavors in the bhel puri chaat. Take your time to mix the ingredients evenly, ensuring that each bite is bursting with flavor.

    Step 7: Serving the Bhel Puri Chaat

    Once the bhel puri chaat is well mixed, transfer it to serving bowls or plates. Garnish with additional cilantro and sev for an extra pop of color and crunch. Serve immediately and enjoy this delightful snack with family and friends.

    Tips for Making the Best Bhel Puri Chaat

    To add an extra kick of heat to the bhel puri chaat, finely chop some green chilies and mix them into the dish.

    For a refreshing twist, squeeze some lemon juice over the bhel puri chaat just before serving to enhance its tanginess.

    Customize the bhel puri chaat according to your taste preferences by adding your favorite toppings such as chopped raw mango, peanuts, or grated carrots.

    Variations of Bhel Puri Chaat

    Aloo Bhel Puri Chaat: Add diced boiled potatoes to the bhel puri chaat mixture for a heartier version of the dish.

    Fruit Bhel Puri Chaat: Incorporate diced fruits such as mangoes, apples, and pomegranate seeds for a sweet and tangy twist on the classic recipe.

    Healthy Bhel Puri Chaat: Substitute puffed rice with roasted murmura (puffed rice) for a healthier alternative without compromising on taste.

    Benefits of Bhel Puri Chaat

    Nutrient-Rich: Bhel puri chaat is packed with essential nutrients from the vegetables and puffed rice, making it a wholesome snack option.

    Quick and Easy: This recipe is quick and easy to prepare, making it perfect for busy weeknights or last-minute gatherings.

    Versatile: Bhel puri chaat can be customized with various toppings and chutneys to suit individual taste preferences, making it a versatile dish for any occasion.

    FAQs about Bhel Puri Chaat

    Q: Can I make bhel puri chaat ahead of time?

    A: While it’s best enjoyed fresh, you can prepare the components of the bhel puri chaat ahead of time and assemble them just before serving to maintain the crunchiness of the dish.

    Q: Can I adjust the spiciness of the bhel puri chaat?

    A: Yes, feel free to adjust the amount of green chilies or skip them altogether if you prefer a milder version of the dish.

    Q: Can I store leftover bhel puri chaat?

    A: Due to the nature of the ingredients, leftover bhel puri chaat may lose its crunchiness over time. It’s best to consume it immediately after preparation for the best taste and texture.

    For more delicious recipes, check out Manjula’s Kitchen. Explore a wide range of authentic Indian dishes to tantalize your taste buds!

    By following these simple steps and tips, you can easily recreate the magic of bhel puri chaat in your own kitchen. Whether you’re craving a flavorful snack or looking to impress your guests, this recipe is sure to be a hit!

    More Recipes to Explore

    If you enjoyed making these masala peanuts, why not try your hand at some other mouthwatering recipes from Manjula’s Kitchen?

    Explore these recipes and more for a culinary journey through the vibrant and diverse flavors of Indian cuisine.