Category: Special Occasion Recipes

Special Occasion Recipes: Celebrate with Delicious Indian Vegetarian Dishes

In Indian culture, food is an integral part of every celebration, festival, and special occasion. Whether it’s a grand wedding, a religious festival, or a simple family get-together, the menu is always elaborate, reflecting the richness of the Indian culinary heritage. Special occasions call for special dishes, and when it comes to Indian cuisine, the options are endless. From mouth-watering appetizers to sumptuous main courses and decadent desserts, Indian vegetarian recipes can make any celebration truly unforgettable.

The Importance of Food in Indian Celebrations

Food plays a central role in Indian celebrations, symbolizing prosperity, happiness, and togetherness. Each dish is thoughtfully prepared, using ingredients that are in harmony with the occasion’s significance. Traditional recipes passed down through generations often take center stage, with a focus on flavors, textures, and presentation.

Indian vegetarian cuisine, in particular, offers a wide range of options that cater to various dietary preferences and religious practices. These recipes are not only delicious but are also steeped in cultural and regional significance, making them ideal for special occasions.

Must-Try Indian Vegetarian Recipes for Special Occasions

Paneer Lababdar

Paneer Lababdar is a rich and creamy dish made with paneer (Indian cottage cheese) cooked in a tomato-based gravy. The addition of cream and butter gives it a luxurious texture, making it perfect for a festive meal. Serve it with naan or pulao for a complete experience.

Dum Aloo

Dum Aloo is a popular dish from North India, where baby potatoes are cooked slowly in a spicy yogurt-based gravy. The slow cooking process, known as “dum,” ensures that the flavors are deeply infused into the potatoes, making it a favorite for special occasions.

Malai Kofta

Malai Kofta is a classic dish that features soft, melt-in-the-mouth koftas (dumplings) made from paneer, potatoes, and nuts, simmered in a creamy tomato gravy. It’s a dish that’s sure to impress your guests and is often served at weddings and celebrations.

Pulao with Nuts and Raisins

A fragrant and flavorful rice dish, pulao is often prepared with a variety of spices, nuts, and raisins. This dish is a staple at Indian weddings and festivals, offering a delightful combination of sweet and savory flavors.

Gajar Ka Halwa

No Indian celebration is complete without dessert, and Gajar Ka Halwa (carrot pudding) is a must-have. Made with grated carrots, milk, sugar, and ghee, this dessert is garnished with nuts and is often served during Diwali and other festive occasions.

Puran Poli

Puran Poli is a traditional Maharashtrian sweet flatbread stuffed with a filling made from chana dal (split chickpeas) and jaggery. This delicacy is commonly prepared during festivals like Holi and Ganesh Chaturthi and is enjoyed by people of all ages.

Kofta Biryani

Biryani is synonymous with celebration, and Kofta Biryani adds a vegetarian twist to this classic dish. Made with spiced koftas, basmati rice, and aromatic spices, this dish is layered and slow-cooked to perfection, making it ideal for festive gatherings.

Dahi Bhalla

Dahi Bhalla is a popular North Indian snack made from deep-fried lentil balls soaked in yogurt and topped with chutneys and spices. This dish is a favorite during festivals like Holi and Diwali and is loved for its tangy and sweet flavors.

Shahi Paneer

Shahi Paneer is a royal dish that lives up to its name. “Shahi” means royal, and this dish is made with paneer cooked in a rich and creamy gravy of cashews, almonds, and cream. It’s a dish that is often reserved for the most special occasions.

Kheer

Kheer, a rice pudding, is one of the most beloved Indian desserts, often prepared for festivals and celebrations. Made with rice, milk, sugar, and flavored with cardamom and saffron, kheer is garnished with nuts and dried fruits, making it a fitting end to a celebratory meal.

Tips for Planning a Special Occasion Menu

Balance the Menu: Ensure that your menu has a good mix of appetizers, main courses, and desserts. Include a variety of flavors and textures to keep your guests engaged.

Consider Dietary Preferences: Indian cuisine offers a range of vegetarian options, but it’s also important to consider other dietary needs, such as vegan or gluten-free preferences.

Plan Ahead: Special occasion meals often require elaborate preparation. Plan your menu in advance and do as much prep work as possible the day before the event.

Presentation Matters: The way you present your food can enhance the dining experience. Use garnishes, elegant serving dishes, and thoughtful plating to make your dishes visually appealing.

Conclusion

Indian vegetarian cuisine offers a rich tapestry of flavors and dishes that are perfect for any special occasion. Whether you’re celebrating a wedding, a festival, or just gathering with loved ones, these recipes will add a touch of festivity and joy to your table. From creamy paneer dishes to decadent desserts, each dish is crafted to make your celebration memorable.

For more special occasion recipes, visit Manjula’s Kitchen – Special Occasion Recipes. Explore a world of flavors and find the perfect dishes to make your celebration truly special.

  • Kela Ki Subji

    Kela Ki Subji

    Kela Ki Subji

    This is a delicious sweet and sour vegetable dish, and a quick and easy only takes few minutes to prepare. Kela Ki Sabji makes a great side dish. You will be amazed with the simplicity of this dish.
    5 from 1 vote
    Course gluten free
    Cuisine Indian
    Servings 3 people

    Ingredients
      

    • 3 ripe bananas peeled and sliced 1/2 inch thick approx. 3 cups of sliced banana
    • 1 tbsp oil
    • 1/2 tbsp cumin seeds (jeere)
    • 1/8 tbsp asafetida (hing)
    • 1 green chili minced, adjust to taste
    • Pinch of turmeric (haldi)
    • 1 tbsp finely chopped ginger
    • 1/2  tbsp salt adjust to taste
    • 1/2 tbsp mango powder (amchoor)
    • 2 tbsp chopped cilantro (hara dhania)
    • 2 tbsp water

    Instructions
     

    • Heat the oil in a sauce pan on medium high. Test the heat by adding one cumin seed to the oil; if seed cracks right away oil is ready.
    • Add cumin seeds after seeds crack add asafetida, green chili and turmeric, stir for a few seconds.
    • Add bananas, ginger, mango powder and water stir gently and cook only for a minute, don’t overcook otherwise banana will become mushy and watery.
    • Turn off the heat and add salt and cilantro mix gently and serve.
    Tried this recipe?Let us know how it was!

    Indulge in Kele Ki Subji: A Unique Indian Dish

    Kele ki Subji, also known as banana curry, is a unique and flavorful Indian dish that combines ripe bananas with a blend of spices to create a sweet and sour vegetable curry. This kele ki subji recipe is perfect Vegetables Curry/Gravy recipe for those looking to try something healthy, vegan, different and delightful.

    The Essence of Kele Ki Subji

    The essence of kele ki subji lies in its balance of sweet and sour flavors, enhanced by a medley of spices. The ripe bananas add a natural sweetness and a creamy texture, while the spices and tangy elements create a harmonious and tantalizing flavor profile. This dish is a staple in Indian Cuisine and is for those having Vegetarian and Gluten-Free diets.

    Origin and Popularity

    Kele ki Subji has its roots in Indian cuisine, where bananas are used in a variety of savory dishes. This banana vegetable recipe is particularly popular in regions where bananas are abundant, and it offers a unique twist on traditional vegetable curries. The simplicity and distinct flavor of this dish have made it a favorite among those who enjoy experimenting with new flavors. 

    Why You’ll Love This Recipe

    • Unique Flavor: Combines the sweetness of bananas with the tanginess of spices for a unique culinary experience.
    • Nutritious: Packed with vitamins and minerals from the bananas and spices.
    • Easy to Make: Simple ingredients and straightforward steps make this recipe accessible.
    • Perfect for Any Occasion: Ideal for everyday meals or special gatherings, fitting well into Family-Friendly and Kid-Friendly categories.

    Variations of Vegetable Recipes

    Exploring Manjula’s Kitchen reveals a treasure trove of other delicious vegetable recipes that you might enjoy. Here are some related dishes that you might find interesting:

    1. Aloo Gobi: A classic Indian dish made with potatoes and cauliflower cooked with spices.
    2. Bhindi Masala: A flavorful dish made with okra and a blend of spices.
    3. Baingan Bharta: A smoky and flavorful dish made with roasted eggplant and spices.
    4. Gajar Matar: A simple and healthy dish made with carrots and green peas.
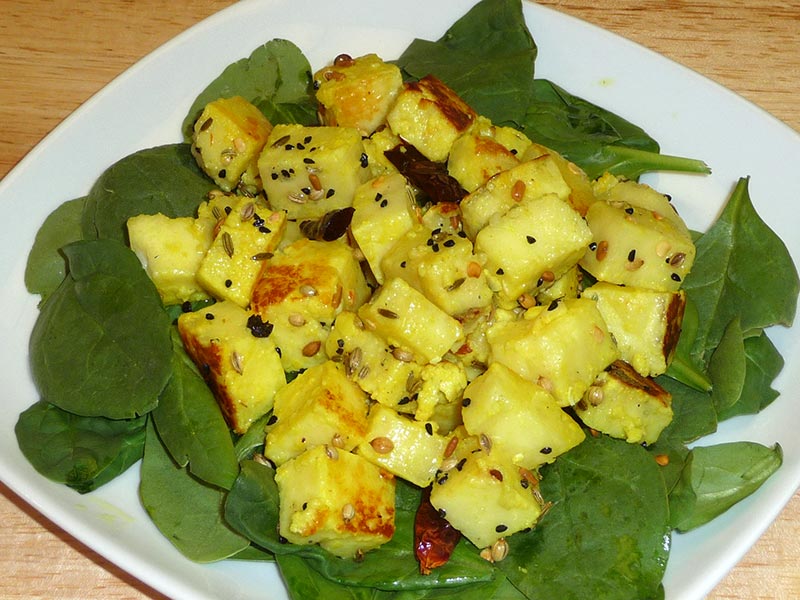
    5. Palak Paneer: A popular dish made with spinach and paneer in a creamy sauce.

    Serving Suggestions

    Kele ki subji can be enjoyed in various ways:

    • With Indian Breads: Serve with roti, naan, or paratha for a satisfying meal.
    • With Rice: Pair with steamed basmati rice or jeera rice.
    • As a Side Dish: Enjoy as a side with other Indian dishes.
    • With Raita: Add a side of plain yogurt or raita to balance the flavors.

    Tips and Tricks

    To perfect your kele ki subji recipe, consider these helpful tips:

    • Use Ripe Bananas: Ripe bananas are essential for achieving the perfect sweetness and texture.
    • Balance Flavors: Adjust the amount of spices and tangy elements to suit your taste preference.
    • Cook Gently: Be careful not to overcook the bananas to maintain their shape and texture.
    • Experiment with Spices: Try adding different spices to customize the flavor of the dish.

    FAQs Frequently Asked Questions

    Can I Use Green Bananas? 

    For this recipe, ripe bananas are recommended to achieve the sweet and creamy texture. Green bananas will not provide the same flavor profile.

    What Can I Serve With Kele Ki Subji? 

    Kele ki subji pairs well with Indian breads like roti, naan, and paratha, as well as with rice dishes like basmati rice or jeera rice.

    Is Kele Ki Subji Vegan? 

    Yes, this recipe is naturally vegan and gluten-free.

    How Long Does Kele Ki Subji Last? 

    Store any leftovers in an airtight container in the refrigerator for up to 2 days. Reheat gently before serving.

    Can I Add Other Vegetables? 

    Yes, you can add other vegetables like bell peppers or carrots for added flavor and nutrition.

  • Mango Ice Cream

    Mango Ice Cream

    Mango Ice Cream

    Mango Ice Cream is a delightful tropical dessert with a refreshing, rich and fruity flavor. Mango Ice Cream is an quick and easy recipe needing few ingredients. This is sure to be a crowd pleaser. I like to make this ice cream using fresh mangoes.
    No ratings yet
    Course Dessert
    Cuisine Indian
    Servings 6 people

    Ingredients
      

    • 1 cup fresh mango pulp
    • 1 tbsp lime zest
    • 1 tbsp lime juice
    • 3/4 cup sugar
    • 1 cup heavy cream
    • 1 tbsp corn starch (arrowroot)

    Instructions
     

    • Peel and slice the mango and scrape out the pulp from the seed.
    • Mix cornstarch with 2 tablespoons of water.
    • Boil heavy cream, cornstarch mix, and sugar over medium-high heat. Stir continuously otherwise cornstarch will become lumpy.
    • After cream mix comes to a boil, reduce the heat to medium low, and then cook for an addition 2 minutes.
    • Let it cool.
    • Mix in mango pulp, lime juice, and lime zest to the cream mix.
    • Transfer the mixture into a bowl or container to freeze; the container shouldn’t be very deep. I like using a glass bowl with a lid.
    • After about 2 hours remove the ice cream from the freezer and mix it until its smooth, this will give it a creamy texture.
    • At this point you can choose to freeze the ice cream in the same bowl or freeze the ice cream in individual serving cups.
    • Ice cream will take 6 to 8 hours to freeze.

    Notes

    Serving Suggestion
    Serve ice cream with slice of freshly sliced mangoes and few pieces of sliced almonds.
    Keyword 2 Minutes Dessert
    Tried this recipe?Let us know how it was!
  • Sambar Recipe

    Sambar Recipe

    Sambar (Spicy Lentil Soup)

    Sambar is a flavorful spicy South Indian lentil soup made with a variety of vegetables. It fits nicely with many South Indian meals, including dosas (pancakes), idlis (savory cakes), and rice. It could be said that a South Indian meal is incomplete without sambar.
    5 from 2 votes
    Course dal
    Cuisine Indian
    Servings 4 people

    Ingredients
      

    • 1/2 cup toor dal/arhar dal available in any Indian grocery store
    • 1/2 tbsp salt
    • 1/4 tbsp turmeric (haldi)
    • 2 tbsp oil
    • 1/2 tbsp cumin seeds (jeera)
    • 1/8 tbsp fenugreek seed (methi)
    • 1/4 tbsp mustard seeds (rai)
    • Pinch of asafetida (hing)
    • 10-12 curry leaves
    • 4 dry whole red chilies
    • 1 large tomato cubed in small pieces
    • 1-½ cups mixed vegetables, cute into bite-size cubes (green beans, carrots, zucchini, radishes)
    • 2 tbsp tamarind pulp
    • 1/2 tbsp salt
    • 1 tbsp sambar powder, available in any Indian grocery store

    Instructions
     

    • Wash and soak the dal in two cups of water for ten minutes or longer.
    • In a pressure cooker combine soaked dal with 2½ cups of water, salt, and turmeric. Cook over medium high heat.
    • When the pressure cooker starts to steam, reduce the heat to medium and cook for another six minutes.
    • Turn off the heat and wait until steam has escaped before opening the pressure cooker. Dal should be soft and mushy.
    • Mix the dal well enough to remove lumps. If the dal is thick, add up to one cup of water.

    Notes

    Prepare Seasoning
    1. Heat the oil in a saucepan. Test the heat by adding one cumin seed to the oil; if it cracks immediately, the oil is ready.
    2. Add cumin seeds, mustard seeds, fenugreek seeds, asafetida, red chilies, and curry leaves. Stir for a few seconds.
    3. Add tomatoes, vegetables, sambar powder, tamarind pulp and ½ cup water.
    4. Cover the pan and let the vegetables cook until they are tender over medium heat.
    5. Combine the vegetables and the dal to make the Sambar.  Sambar should be thin, like soup. If the sambar is thick, add water as needed.
    6. Cook sambar on low heat for 10-15 minutes.
    Serve Sambar with dosa, idli, rice or with any meal as a side.
    Keyword Dal
    Tried this recipe?Let us know how it was!

    How to make Sambar Masala: Sambar Recipe

    Sambar is a quintessential South Indian dish that holds a cherished place in Indian cuisine. This sambar recipe is a delightful combination of sambar dal, vegetables, and aromatic spices, creating a flavorful and nutritious sambar masala. In this comprehensive guide, we’ll explore how to make sambar step by step, incorporating tips, variations, and benefits to elevate your culinary experience.

    Tips for Perfecting Your Sambar Recipe

    • Use Fresh Ingredients: Opt for fresh spices, vegetables, and lentils to ensure the best flavor and texture in your sambar.
    • Balance the Flavors: Adjust the proportions of tamarind paste, jaggery, and salt to achieve the perfect balance of sour, sweet, and savoury notes in your sambar.
    • Experiment with Vegetables: Don’t hesitate to experiment with different combinations of vegetables to create unique variations of sambar tailored to your liking.
    • Temper with Care: Take care not to burn the spices while tempering, as it can impart a bitter taste to the sambar. Maintain medium heat and keep a close eye on the tempering process.
    • Allow for Resting Time: Let the sambar rest for a few minutes after cooking to allow the flavors to develop fully before serving.

    Variations of Sambar

    • Mixed Vegetable Sambar: Incorporate a medley of seasonal vegetables such as pumpkin, beans, and bell peppers for a colorful and nutritious twist on the classic sambar.
    • Tiffin Sambar: Prepare a thinner version of sambar specifically paired with idli, dosa, or vada, featuring a lighter consistency and a higher proportion of tamarind for tanginess.
    • Kadamba Sambar: This variation of sambar includes a diverse range of vegetables along with freshly ground spices, lending it a robust and hearty character ideal for special occasions.

    Benefits of Including Sambar in Your Diet

    • Rich in Protein: Sambar is a rich source of protein due to the inclusion of lentils, making it a nourishing option for vegetarians and vegans.
    • Loaded with Vitamins and Minerals: The array of vegetables in sambar provides essential vitamins, minerals, and dietary fibre, promoting overall health and well-being.
    • Digestive Aid: The spices and herbs in sambar, such as cumin, fenugreek, and curry leaves, possess digestive properties that aid in digestion and alleviate digestive discomfort.
    • Low in Calories: Despite its hearty and satisfying nature, sambar is relatively low in calories, making it a guilt-free indulgence for those watching their calorie intake.
    • Boosts Immunity: The antioxidants present in the spices and vegetables in sambar help strengthen the immune system and protect the body against various infections and diseases.

    FAQs (Frequently Asked Questions) About Sambar

    • Can I make sambar without tamarind paste? 

    • Yes, you can substitute tamarind paste with lemon juice or dried mango powder (amchur) for a tangy flavor in your sambar.
    • Is sambar gluten-free? 

    • Yes, sambar is naturally gluten-free as long as no wheat-based ingredients such as asafoetida powder (hing) are used in the recipe. You can use gluten-free asafoetida or omit it altogether to ensure the dish is gluten-free.
    • Can I make sambar ahead of time? 

    • Yes, you can prepare sambar in advance and store it in an airtight container in the refrigerator for up to 2-3 days. Reheat gently on the stovetop or microwave before serving.
    • Can I freeze leftover sambar? 

    • While it’s technically possible to freeze leftover sambar, the texture of the vegetables and lentils may change upon thawing, resulting in a slightly altered consistency. It’s best to consume fresh sambar for optimal taste and texture.

    If you’re looking to explore more Indian recipes, appetizers, beverages, and desserts, be sure to check out the following links on Manjula’s Kitchen. Here are some links to recipes on Manjula’s Kitchen official website: Vegetable Pakoras, Kaju Katli (Cashew Burfi), Baingan Bharta (Roasted Eggplant), Matar (Green Peas) Paneer, Besan Ladoo.

  • Cold Coffee

    Cold Coffee

    Cold Coffee

    Cold Coffee (Iced Coffee)

    To help beat the heat on a hot summer day, there’s no other better beverages like a tall glass of cold coffee.
    5 from 1 vote
    Prep Time 2 minutes
    Cook Time 5 minutes
    Total Time 7 minutes
    Course Drinks
    Cuisine Indian
    Servings 2 people

    Ingredients
      

    • 8 oz milk
    • 1 tbsp dark roasted instant coffee
    • 3 tbsp sugar
    • 2 cups ice

    Instructions
     

    • Blend the coffee, sugar and milk 30 seconds until the sugar and coffee are mixed well with milk. Add ice and blend at a high speed for a minute, until frothy.
    • Serve in tall glasses and sprinkle with dry coffee powder.

    Notes

    To turn the cold coffee into the dessert, serve it with a scoop of vanilla ice cream and shaved chocolate.
    Tried this recipe?Let us know how it was!

  • Mango Cheese Cake

    Mango Cheese Cake

    Mango Cheese Cake (Egg Less)

    Fresh ripe mangoes are used to make this light and refreshing cheesecake. It makes for an amazing presentation and tastes just as exotic as it looks. The egg-less recipe is delightfully delicious dessert and can be enjoyed by just about everyone. Its a quick and easy recipe
    4.50 from 2 votes
    Course Dessert
    Cuisine Indian
    Servings 8 people

    Ingredients
      

    • 16 graham cracker squares, crushed (approx. 1 cup of crumbs)
    • ¼ cup sugar
    • 1/3 cup melted unsalted butter
    • 12 oz cream cheese at room temperature
    • 2 tbsp cornstarch
    • 3/4 cup sugar
    • 1 large ripe mango
    • 8 thin mango slices
    • 2 strawberries cut into 4 pieces each
    • Few mint leaves

    Instructions
     

    • Crust
    • Preheat oven to 350 degree F.
    • Add broken graham crackers, sugar and butter to a food processor. Mix well until looks nicely crumbled, takes approx. 30 seconds.
    • Place graham cracker mix into a 9” pie plate, spread evenly and press down firmly.
    • Bake at 350 degrees for 6 minutes, on the medium rack.
    • Filling
    • Prepare mango by peeling and chopping into chunks.
    • Add mango chunks, cream cheese, sugar, and cornstarch to the food processor. Mix for 20 seconds, until it is smooth in texture. Do not mix for too long.
    • Pour the mixture over the pie crust and bake for 35 minutes at 350 degrees F. The surface should look dry and cooked.
    • Let the cheesecake cool and then refrigerate for at least 2 hours before serving.
    • Garnish the cheesecake with mango slices, strawberries and mint leaves.
    Keyword 2 Minutes Dessert
    Tried this recipe?Let us know how it was!

  • Sweet And Sour Tofu

    Sweet And Sour Tofu

    Sweet And Sour Tofu

    Tofu and vegetable cooked with the tamarind sauce makes a very unique flavorful dish. This Sweet and Sour Tofu dish is vegan-friendly and it is enjoyable for just about anyone's taste palette.
    4.50 from 2 votes
    Course vegan
    Cuisine Indian
    Servings 2 people

    Ingredients
      

    • 1-1/2 oz of seedless tamarind, available in Indian and Asian grocery stores
    • 1 tbsp roasted cumin seeds powder (jeera)
    • 1 tbsp salt
    • ¼ tbsp turmeric (haldi)
    • ¼ tbsp black pepper
    • ¼ tbsp red chili powder
    • 1 tbsp finely shredded ginger
    • ¼ cup brown sugar

    Instructions
     

    • Soak tamarind in 1/4 cup of warm water for 15 minutes. Squeeze the tamarind mixture well, then discard tamarind pieces leaving a nice thick pulp.
    • Add the remaining sauce ingredients to the tamarind pulp mix well and set aside.
    • Squeeze the Tofu gently keeping between your both palm.
    • Cut tofu into ¾ inch thick slices then and pat dry between paper towels. Then cut slices into ¾ inch cubes.
    • Remove seeds from bell pepper and slice 1/4 inch thick lengthwise.
    • Heat oil in a wide pan over medium heat. Stir fry tofu pieces until golden brown in color, approximately 2-3 minutes. Remove from pan and place on a paper towel.
    • In the remaining oil, first stir-fry bell pepper for a minute and add cabbage continue to stir fry for approx. 2 more minutes over medium heat. Vegetables should still be crunchy.
    • Add tofu and tamarind sauce to the vegetables in the pan, stir well and let simmer over low heat for 4-5 minutes.
    • Sweet and Sour Tofu tastes great served over plain rice.
    Tried this recipe?Let us know how it was!

  • Raj Kachori

    Raj Kachori

    Raj Kachori Chat

    Raj Kachori

    Raj Kachori is a spicy chaat bowl filled with delicious condiments. It has refreshing flavors and makes for a unique food experience. Guests will have fun filling their own Kachories according to their taste palette. Served as a snack or appetizer, Raj Kachories make a beautiful presentation and are thoroughly enjoyed by just about everyone.
    5 from 1 vote
    Prep Time 15 minutes
    Cook Time 30 minutes
    Total Time 45 minutes
    Course Appetizer
    Cuisine Indian
    Servings 6 people

    Ingredients
      

    Kachori Dough

    • 1 cup all-purpose flour plain flour, maida
    • 1 tbsp oil
    • 1/2 tsp salt
    • 1/2 cup approx. lukewarm water

    Kachori Filling

    • 1/3 cup besan gram flour
    • 1/8 tsp asafetide hing
    • 1/2 tsp salt
    • 1/2 tsp chili flakes
    • 1/2 tsp mango powder amchoor
    • 1 tbsp oil

    Condiments to be served With Kachories

    • 1 cup moong sprouts
    • 1 cup boiled and peeled potato cut into small pieces
    • 1 cup whipped yogurt dahi, curd
    • 1/4 cup hari cilantro chutney
    • 1/4 cup tamarind chutney
    • 2 tbsp cilantri finely chopped hara dhania
    • 2 green chilies finely chopped
    • 1/4 cup fine save available in Indian grocery store optional

    Instructions
     

    Making Dough

    • In a mixing bowl add all-purpose flour, salt, and oil; add water slowly while mixing and kneading to make firm, yet pliable dough. Cover and set the dough aside for at least 10 minutes.

    Filling

    • Mix Kachori filling ingredients together, i.e. gram flour, asafetida, salt, chili flakes, mango powder and oil. Set it aside.

    Making Kachori

    • Knead dough for a minute and divide into 12 equal parts.
    • Roll dough ball into a 2-inch diameter circle and place 1 teaspoon of filling in the center. Seal by pulling the edges together to make a ball. Prepare all 12 kachoris and let sit for 3 to 4 minutes.
    • Place a filled kachori with the seam side up, onto a clean surface. Using a rolling pin roll into a circle, approximately 3 inches in diameter.
    • Heat approx. 1 ½ inches of oil in a frying pan over medium heat. To check if the oil is ready, put a little piece of dough into the oil and it should immediately rise to the surface without having changed its color.
    • Slowly drop kachoris into the frying pan making sure they don’t overlap with one another. As kachoris puff up, slowly turn them over and fry them on all sides. Turn kachoris 3-4 times until they are golden brown in color, which will take about 7KacKachorishories should be crisp. If the kachoris are fried over high heat they will be too soft.

    Notes

    Prepare Moong Sprouts
    Add ¼ teaspoon of salt and 2-3 tablespoons of water to the moong sprouts. Cover and cook over medium heat for 3-4 minutes till sprouts are tender. Set aside.
    Serving Kachories
    Gently make an inch sized hole in the center of the kachori.
    Fill with 1 tablespoon of sprouts, 1 tablespoon of potatoes, 2 tablespoons of yogurt and a drizzle with both of the 2 chutneys.
    As an option, add a little cilantro, green chili and 1 tablespoon of fine Sev. These add a little more texture and flavor to the Kachori.
    Tip:
    These Raj Kachories can be prepared in advance and stored up to 2 weeks in an air tight container, making it more convenient to serve. It is even easier if you have the Hari Cilantro and Tamarind chutneys previously stored.
    Keyword Appetizer, Party Food, Street Food, Tea Time Snack
    Tried this recipe?Let us know how it was!

    How To Make Raj Kachori Recipe – Manjula’s Kitchen 

    Raj Kachori Indian appetizer, a popular Indian snack, is a delightful combination of crispy shells filled with flavorful ingredients. Follow this step-by-step guide to create your own Raj Kachori at home, offering a burst of textures and tastes in every bite.

    Making the Dough: 

    Begin by preparing the dough for the kachori. In a mixing bowl, combine all-purpose flour (maida), salt, and oil. Gradually add water while kneading to achieve a firm and pliable consistency. Cover the dough and set it aside for at least 10 minutes to allow it to rest and develop the right texture.

    Preparing the Filling: 

    The filling is a crucial component that adds a distinct taste to Raj Kachori. Mix gram flour, asafetida, salt, chili flakes, mango powder, and oil in a bowl. This flavorful mixture will be the heart of your kachori, providing a savory and aromatic essence.

    Shaping and Filling the Kachori: 

    After the dough has rested, knead it briefly and divide it into 12 equal parts. Roll each portion into a 2-inch diameter circle. Spoon 1 teaspoon of the prepared filling into the center of each circle and seal the edges to form a ball. Let these filled kachories sit for a few minutes. Roll each ball into a 3-inch diameter circle, ensuring an even distribution of the filling.

    Frying the Kachoris: 

    Heat about 1 ½ inches of oil in a frying pan over medium heat. To check if the oil is ready, drop a small piece of dough into it; it should rise immediately without changing its color. Carefully place the filled kachoris in the pan, ensuring they do not overlap. As the kachoris puff up, turn them over slowly, frying on all sides until they achieve a golden-brown color. This process should take approximately 7 minutes, and it’s crucial to maintain medium heat to ensure the kachoris turn out crispy rather than overly soft.

    Preparing Moong Sprouts: 

    For an additional layer of flavor and nutrition, cook moong sprouts with a pinch of salt and a few tablespoons of water over medium heat for 3-4 minutes until they become tender. Set aside these sprouts as they will be used as a topping for your kachori.

    Serving the Kachoris: 

    Once the kachoris are cooked to perfection, it’s time to assemble and serve them. Gently create a small hole in the center of each kachori. Fill the hole with a tablespoon of each of the moong sprouts, mashed potatoes, and yogurt. Drizzle the kachoris with both hari cilantro and tamarind chutneys for a burst of tangy and spicy flavors. For those seeking an extra layer of texture and flavor, consider adding fresh cilantro, green chilies, and a tablespoon of fine Sev as optional toppings.

    Tips for Storage: 

    For convenience, Raj Kachoris can be prepared in advance and stored in an airtight container for up to two weeks. This makes it easy to serve these delightful treats whenever the craving strikes. With this simple yet comprehensive recipe on how to make raj Kachori, create authentic Raj Kachori in your kitchen. Enjoy the delectable experience of this iconic Indian street food without the need to visit a chaat vendor.

  • Milk Cake

    Milk Cake

    Milk Cake

    Milk Cake

    Milk Cake is a delicious, mouthwatering dessert. This is a unique quick and easy “cake” made with just a few ingredients, primarily milk and sugar and has a touch of sourness to it.
    4.60 from 5 votes
    Prep Time 5 minutes
    Cook Time 35 minutes
    Total Time 40 minutes
    Course Dessert
    Cuisine Indian
    Servings 6 people

    Ingredients
      

    • 6 cups whole milk
    • 3 tbsps lemon juice, use as needed
    • 1/2 cup sugar
    • 1/8 tsp cardamom crushed
    • 2 tbsp clarified butter ghee
    • 1 tbsp pistachios sliced for garnishing

    Instructions
     

    • Grease a 6-inch plate and set aside.
    • In a large, wide and heavy saucepan bring the milk to a boil over medium high heat. And let it boil for 2-3 minutes. Add lemon juice to the milk, it will begin to curdle. Use minimum amount of lemon juice to just start the curdling process and prevent the whey (milky water) from completely separating immediately.
    • Boil for 5 minutes and remove approx. 1 ½ cups of the whey. This will help reduce the tartness from the cake.
    • Continue to cook and stir occasionally until the milk is a grainy consistency and the whey is evaporated. This will take an additional 15-20 minutes.
    • Add sugar and cardamom and keep stirring until the mixture starts coming together. This should take approximately 5 minutes. Lower the heat to medium and cook for another 4-5 minutes until mixture changes to a slightly golden brown color.
    • Transfer mixture to the greased plate and press firmly into a square shape, approximately 1 inch high. As an option, sprinkle sliced pistachios on top.
    • Let sit for at least an hour before slicing into individual pieces.

    Notes

    Tips
    this wonderful dessert can be prepared ahead of time and stored at room temperature for a few days.
    It is generally a few inches tall and has different shades of color throughout. However, this recipe will make an even colored cake that is approximately 1 inch thick. The taste of this Milk Cake is identical to what I have grown up enjoying as a delicacy in our home.
     
    Keyword Eggless Milk Cake, Gluten Free, Janmashtmi, Mithai, Sweet
    Tried this recipe?Let us know how it was!

    Milk Cake Recipe: How To Make Milk Cake

    Milk Cake, also known, is a traditional Indian sweet made from milk, sugar, and cardamom. This delectable dessert has a rich, creamy texture and a delightful sweetness that makes it a favorite during festivals such as Diwali, Holi and Janamasthami

    What is a Milk Cake: 

    It is a dense, fudge-like Indian sweet made by simmering milk and sugar for a long time until it thickens and reduces. It has a grainy texture and a caramelised milky flavour. Milk cake is often cut into squares and served at festivals and special occasions.

    Variations of Indian Desserts:

    • Paneer Kheer with Strawberry: Paneer Kheer with Strawberry is a delightful dessert. This Paneer and strawberry dessert is a sure winner when you want to serve a unique paneer delicacy.
    • Flax Seed Burfi: One can call Flax Seed Burfi to be even a health bar. As during winters it’s a great hit for it being high in protein and a good source of vegetarian omega 3. This Burfi is vegan, gluten free and tastes great.
    • Coconut Dream Dessert: Coconut Dream is a vegan delight, it is flavored with cardamom and saffron, very soothing and refreshing. Adding Agar-agar sets this dessert like jelly. It is super easy to make and taste great. I like to serve Coconut Dream chilled.
    • Chum Chum: Chum Chum is a popular Bengali (East Indian) sweet dish that is made with Paneer, (home-made cheese). It is a versatile dish that can be served in many different variations.

    Tips for Making Perfect Milk Cake:

    Use Full-Fat Milk: For the richest and creamiest Milk Cake, use full-fat milk or whole milk. The higher fat content contributes to a smoother texture and a more indulgent flavor. Avoid using skim or low-fat milk, as they may result in a less creamy consistency.

    Stir Constantly: When cooking the Milk Cake mixture, stir it constantly to prevent it from sticking to the bottom of the pan and burning. Use a heavy-bottomed pan to distribute the heat evenly and minimize the risk of scorching.

    Add Sugar Gradually: Add sugar to the Milk Cake mixture gradually, tasting as you go to achieve the desired level of sweetness. Some people prefer their Milk Cake less sweet, while others enjoy it more sugary. Adjust the amount of sugar according to your taste preferences.

    Let it Set Properly: Allow the cooked Milk Cake mixture to cool completely and set before cutting it into squares or slices. Refrigerate the Milk Cake for a few hours or overnight to firm up the texture and enhance the flavors.

    FAQs about Milk Cake:

    How long does Milk Cake last? 

    Milk Cake can be stored in an airtight container in the refrigerator for up to 3-4 days. However, it’s best enjoyed fresh within the first day or two for optimal taste and texture.

    Is Milk Cake Vegetarian?

    Yes, it is traditionally a vegetarian dish. As its is made from milk and uses vegetarian ingredients.

    Can I make Milk Cake without condensed milk? 

    While condensed milk is commonly used to make Milk Cake, you can make it from scratch using whole milk, sugar, and cardamom. Simmer the milk until it thickens and reduces, then sweeten it with sugar and flavor it with cardamom before setting it.

    Is Milk Cake gluten-free? 

    Yes, Milk Cake is naturally gluten-free, as it doesn’t contain any wheat flour or gluten-containing ingredients. However, be cautious of cross-contamination if using any pre-packaged ingredients or equipment that may come into contact with gluten.

    Milk Cake is a delightful dessert that’s cherished by all for its creamy texture, subtle sweetness, and comforting flavors. Whether enjoyed as a festive treat or a simple indulgence, 

    Milk Cake is sure to evoke feelings of joy and satisfaction and happiness with every bite. With its endless variations and simple preparation, Milk Cake is a timeless classic that’s beloved by dessert enthusiasts around the world. Milk Cake is an Indian dessert savoured by every person who has a sweet tooth as happiness is its deep root.

  • Fruit Chaat

    Fruit Chaat

    Fruit Chaat

    Fruit Chaat, Indian Fruit Salad

    This is a bright, colorful, and refreshing fruit chaat (snack) that can also be used as a fruit salad. My siblings and I looked forward to the fruit chaat, served regularly as part of our lunch. It was a delicious way of eating a great variety of fresh, seasonal fruit. This by itself will brighten up any meal, and it tastes great at any time of day.
    5 from 1 vote
    Prep Time 5 minutes
    Cook Time 5 minutes
    Total Time 10 minutes
    Course Salad
    Cuisine Indian
    Servings 4 people

    Ingredients
      

    • 2 oranges skin removed and sliced in ½ inch each segment
    • 1 apple peeled and cubed into ½ inch pieces
    • 1 firm banana sliced into approximately ¼ inch rounds
    • 1/2 cup sliced strawberries
    • 1 cup English or Asian cucumber cubed into ¼ inch pieces
    • 1 green chili finely chopped (optional)
    • 1 tbsp chopped cilantro

    Dressing

    • 1 tbsp lemon juice
    • 1 tbsp ginger juice
    • 1/2 tsp roasted cumin seeds powder
    • 1 tbsp sugar
    • 1/2 tsp black salt
    • 1/4 tsp black pepper

    Instructions
     

    • In a large bowl, combine the fruit and cucumber with the green chili and cilantro. Toss and set aside.
    • Mix all the dressing ingredients together in a small bowl, making sure the sugar is completely dissolved. Pour the dressing over the fruit when ready to serve.

    Notes

    Tips
    I have used many different varieties of fruits in this chaat dish; however, I always keep the oranges and bananas, as they add a lot of color and texture to the dish.
    Tried this recipe?Let us know how it was!

    Tips for Making the Perfect Fruit Chaat:

    Fruit Chaat is a delightful appetizer that satisfies cravings for both freshness and flavor. This gluten-free and vegan snack is a vibrant medley of assorted fruits, skillfully combined with zesty spices and tangy sauces. Bursting with nutrients, it’s a healthy alternative to traditional snacks.

    Whether served as a light meal starter or a refreshing side dish, Fruit Chaat promises a tantalizing blend of sweet, sour, and savory tastes, making it a favorite among those craving a delightful fusion of flavors.

    Choose a Variety of Fruits: Opt for a colorful assortment of fruits to create a visually appealing Fruit Chaat. Mix and match fruits like apples, oranges, bananas, mangoes, and grapes for a diverse flavor profile. One can go for a winter or a summer based recipe depending upon the season.

    Keep it Fresh: These are quick and easy recipes, Use fresh, ripe fruits for the best taste and texture. Avoid overripe fruits, as they may become mushy and affect the overall presentation of the chaat.

    Balance the Flavors: Strike a balance between sweet, tangy, and spicy flavors. Adjust the amount of Fruit Chaat Masala, lemon juice, and green chili according to your taste preferences.

    Add Crunch: Incorporate crunchy elements like cucumber or roasted nuts to add texture and contrast to the Fruit Chaat. This adds an extra dimension to every bite.

    Chill Before Serving: For a refreshing experience, chill the Fruit Chaat in the refrigerator for at least an hour before serving. The cool temperature enhances the flavors and makes it even more enjoyable, especially on hot days.

    Suggestions and Variations:

    Experiment with Spices: Get creative with your Fruit Chaat Masala by adding other spices like chaat masala, amchur (dry mango powder), or even a pinch of garam masala for a unique flavor twist.

    Include Fresh Herbs: Enhance the aroma and freshness of your Fruit Chaat by adding chopped mint leaves or coriander (cilantro) to the mix. These herbs add a burst of flavor and elevate the dish to the next level.

    Try Different Dressings: While the traditional dressing includes lemon juice and spices, you can experiment with other dressings like yogurt-based sauces or tangy tamarind chutney for a variation in taste.

    Add a Sweet Touch: For those with a sweet tooth, drizzle some honey or maple syrup over the Fruit Chaat to enhance the sweetness of the fruits. This adds a delightful richness to the dish.

    Fruit Fiesta: A simply elegant fruit salad paired with sweet yoghurt and tangy honey- lemon-mint dressing makes it a refreshing treat on its own.

    Fruit Smoothie:   This great smoothie consists of cantaloupes, strawberries, and yogurt with a touch of ginger giving a nice and tangy taste. Try this recipe for the perfect almost-summer drink.

    Fruit Cream: Fruit Cream is a colorful chilled dessert made with fruits and cream. This is a perfect dessert for hot summer days.

    Fruit and Cracker Dessert: A quick and easy two minute recipe consisting of fruits and crackers.

    Benefits of Fruit Chaat:

    Nutrient-Rich: Fruit Chaat is packed with vitamins, minerals, and antioxidants from a variety of fruits, making it a nutritious choice for snacking.

    Hydration: Fruits like cucumber and watermelon are high in water content, making Fruit Chaat a hydrating option, especially during hot weather.

    Digestive Aid: The spices used in Fruit Chaat, such as cumin and black salt, aid in digestion and promote gut health, making it a digestive-friendly snack. Being gluten free these dishes are healthy low fat, low cholesterols

    FAQs (Frequently Asked Questions):

    Q: Can I prepare Fruit Chaat in advance?

    A: Yes, you can chop the fruits and prepare the dressing in advance, but it’s best to combine them just before serving to maintain the freshness and texture of the fruits.

    Q: Is Fruit Chaat suitable for weight watchers?

    A: Absolutely! Fruit Chaat is low in calories and high in nutrients, making it an ideal choice for those watching their weight. Just be mindful of portion sizes and avoid adding excessive sweeteners or high-calorie toppings.

    Q: Can I make Fruit Chaat without any spices?

    A: While spices like Fruit Chaat Masala add a unique flavor to the dish, you can certainly adjust the spice level or omit them altogether according to your taste preferences. Experiment with different flavor combinations to find what works best for you.

    Fruit Chaat is a versatile and delicious snack that can be enjoyed on its own or as a side dish. Whether you’re craving something sweet, tangy, or spicy, this refreshing recipe is sure to hit the spot. So, gather your favorite fruits, unleash your creativity, and indulge in the goodness of Fruit Chaat today!

  • Coconut Chutney

    Coconut Chutney

    A bowl of creamy Coconut Chutney with fresh coconut and spices

    Coconut Chutney

    Coconut chutney is a typical condiment that is served with South Indian dishes, especially Idlis and Dosas. It has great texture and a unique taste that compliments many dishes.
    5 from 1 vote
    Prep Time 10 minutes
    Cook Time 10 minutes
    Total Time 20 minutes
    Course Side Dish
    Cuisine Indian
    Servings 8 people

    Ingredients
      

    • 1 cup coconut peeled and cut in small pieces
    • 2 tbsp chana dal bengal gram
    • 1 cup yogurt curd, dahi
    • 1-1/2 tsp salt
    • 2 green chilies,
    • 1/2 inch ginger
    • 1 tsp lemon juice as required

    For seasoning

    • 1 tsp oil
    • 1/8 tsp asafetida hing
    • 1/4 tsp black mustard seeds rai
    • 2 red chilies broken pieces
    • 8 curry leaves

    Instructions
     

    • Peel coconut and cut into small pieces for easy blending.
    • Roast chana dal on medium heat until it is light brown in color and has a roasted aroma.
    • Coarsely grind chana dal in a blender. Add yogurt, green chilies, and salt and continue blending into the paste.
    • Add coconut to the paste, a few pieces at a time and keep blending. Add water, as needed, to help with the grinding. (Adding the coconut in small amounts also helps this process).
    • Before removing from blender, taste chutney to adjust the salt and pepper. Use lemon juice to adjust the tang to suit your taste. Blend well.

    Seasoning

    • Heat oil in small pan. When hot, add black mustard seeds. When the seeds crack, add asafetida, red chilies and curry leaves.
    • Pour the seasoning mixture over the chutney.

    Notes

    Coconut chutney can be refrigerated up to a week.
    Serving suggestion: serve Coconut Chutney with Idli, Rava Dosa, Dosa 
    Tried this recipe?Let us know how it was!

    Coconut Chutney: A Refreshing and Versatile South Indian Condiment

    Coconut chutney is a quintessential South Indian condiment known for its refreshing flavor, creamy texture, and versatility. Made from fresh coconut, green chilies, roasted chana dal (split chickpeas), and a blend of spices, coconut chutney is a delicious accompaniment to various South Indian dishes such as dosa, idli, vada, and uttapam

    This versatile condiment can also be enjoyed with snacks like pakoras, samosas, or even spread on sandwiches for an extra kick of flavor. 

    Benefits of Coconut Chutney:

    • Good Source of Fibre: Coconut chutney contains dietary fibre from coconut and roasted chana dal, which helps support digestive health, regulate blood sugar levels, and promote feelings of fullness. A diet high in fibre is associated with a reduced risk of heart disease, diabetes, and certain cancers.
    • Packed with Flavorful Ingredients: Coconut chutney gets its delicious flavor from a combination of fresh coconut, green chilies, roasted chana dal, ginger, and spices such as cumin seeds, mustard seeds, and curry leaves. These aromatic ingredients come together to create a tantalizing blend of flavours that enhance the taste of various dishes.
    • Vegan and Gluten-Free: Coconut chutney is naturally vegan and gluten-free, making it suitable for individuals following plant-based diets or those with gluten sensitivities or celiac disease. It’s a versatile condiment that can be enjoyed by people with diverse dietary preferences and restrictions.

    Variations of Chutney:

    • Rhubarb Chutney: This Sweet and Sour chutney with a blend of spices tastes great and is very addictive. This is a great complement to any meal
    • Date And Raisin Chutney: Using two major ingredients date and raisin this chutney is sweet and sour and is a great complement to most snacks, pakoras and appetizers
    • Mango Chutney: Mango fruit is a tricky recipe but it’s a chutney that acts as a great side order which can go along with pakoras, snacks, fries and other appetisers.
    • Yogurt Chutney: A quick and easy chutney which can be prepared in no time and is made using yogurt and formed to excite the taste buds of all munchies like appetizers, snacks or pakoras. 

    Tips on How to make Coconut Chutney:

    • Use Fresh Coconut: For the best flavor and texture, use fresh coconut instead of desiccated coconut or coconut powder. Break open a mature coconut, remove the flesh, and chop it into smaller pieces before blending with other ingredients to make the chutney.
    • Adjust Spice Levels: Adjust the quantity of green chilies according to your preference for spice. If you prefer a milder chutney, use fewer green chilies or remove the seeds and membranes before blending. For a spicier chutney, add extra green chilies or include a few dried red chilies.
    • Consistency Matters: Achieve the desired consistency of coconut chutney by controlling the amount of water added during blending. Start with a small quantity of water and gradually add more as needed to reach the desired thickness. The chutney should have a smooth and creamy texture, similar to a thick sauce.
    • Tempering Technique: Master the art of tempering (tadka) to enhance the flavor of coconut chutney. Heat oil in a small pan, add mustard seeds, urad dal, dried red chilies, and curry leaves, and fry until the mustard seeds splutter and the dal turns golden brown. Pour the tempering over the blended chutney and mix well before serving.

    FAQs about Coconut Chutney:

    How long does coconut chutney last? 

    Coconut chutney can be stored in the refrigerator for 3-4 days in an airtight container. However, it’s best enjoyed fresh for optimal flavor and texture.

    Can I freeze coconut chutney? 

    While coconut chutney can be frozen for longer storage, the texture may change slightly upon thawing. It’s best to consume fresh coconut chutney whenever possible for the best taste and texture.

    Is coconut chutney spicy ?

    The spiciness of coconut chutney can be adjusted according to personal preference by varying the quantity of green chilies used. It can range from mild to moderately spicy depending on the amount of chilies added.

    Can I use desiccated coconut instead of fresh coconut? 

    While fresh coconut is preferred for its flavor and texture, desiccated coconut can be used as a substitute by soaking it in warm water for 15-20 minutes before blending.

    With its simple ingredients, customizable variations, and easy preparation, coconut chutney is a must-have in any South Indian kitchen.

  • Chum Chum

    Chum Chum

    Chum Chum

    Chum Chum – Bengali Dessert

    Chum Chum is a popular Bengali (East Indian) sweet dessert that is made with Paneer, (home-made cheese). It is a versatile dish that can be served in many different variations. Here I will show you 3 different ways to serve Chum Chum, either with Pistachios, or with Coconuts or with Malai (cream).
    5 from 1 vote
    Prep Time 5 minutes
    Cook Time 12 minutes
    Making Paneer 25 minutes
    Total Time 17 minutes
    Course Dessert
    Cuisine Indian
    Servings 4 people

    Ingredients
      

    • 4 cups whole milk, paneer
    • 2 cups sugar
    • 5 cups water
    • 1/8 tsp cardamom powder

    Ingredients for different For Different Garnishing

    • 1 tbs pistachio
    • 1 tbs coconut powder
    • 2 tbsp cream

    Instructions
     

    • Prepare paneer according to recipe “How to Make Paneer”. To test if sufficient water has been removed out of the paneer, take a little piece of paneer in your palm and rub with your fingers. You should be able to make a firm but smooth ball, after 15-20 seconds of rubbing.
    • Place the drained paneer on a dry, clean surface and knead it for 3 to 4 minutes until it rolls into smooth soft dough. If the paneer is too crumbly, add a teaspoon of water.
    • Divide the paneer dough into 8 equal parts and roll each one into a smooth oval shaped ball.
    • For the syrup: In a wide saucepan, bring 5 cups of water to a boil. Add sugar and stir to dissolve completely. Use a large pan as the Chum Chums will double in volume while cooking in the syrup.
    • Add the paneer balls to the syrup and bring it back to a boil. Then turn down the heat to medium and cover the pot. Cook for 10 minutes.
    • Open the pot cover, turn the chum chums over and cook for another 15 minutes. Check to see if the chum chums appear firm but sponge-like (with little holes on the surface). Turn off the heat and let sit for 10 more minutes.
    • Remove the chum chums from the syrup. Serve chill!
    • Serving With Pistachios: Cover every Chum Chum with a few pieces of sliced pistachios
    • Serving with Coconut Powder: Roll the chum chums in dry coconut
    • Serving with Malai (cream): Boil the milk over medium heat until it reduces to ½ its volume. Stir the milk continuously so it doesn’t burn on the bottom of the pot. Add sugar, and cardamom powder. Stir for 2 minutes, and then turn off the heat. While milk is still warm pour 1 tablespoon over every Chum Chum and top with a few pieces of pistachios.
    Keyword Bengali Dessert, Paneer Dessert
    Tried this recipe?Let us know how it was!

    How to make Chum Chum Recipe: Chum Chum Sweet

    Chum Chum is a popular Indian sweet delicacy that originates from the state of West Bengal. This soft and spongy dessert is made from paneer (Indian cottage cheese) and soaked in a sugar syrup flavored with saffron and cardamom. 

    Chum Chum is known for its delicate texture, subtle sweetness, and vibrant colors, making it a delightful treat for special occasions and celebrations. 

    Chum Chum are like a luxurious and bigger version of rasgulla although made with richer ingredients such as pistachio and other dry fruits along with garnishing done using cream. 

    Other Dessert Variations:

    1. Ras Malai: Rasmalai is a Bengali dessert consisting of soft paneer balls immersed in chilled creamy milk. Like Rasgullas, Rasmalai is also made with homemade cheese known as “paneer” or “chana”. Instead of being soaked in sugar syrup like Rasgullas, Rasmalai is soaked in sweet, flavored milk.
    1. Kala Jamun: Kala Jamun is a delicious dessert very similar to Gulab Jamun. Kala jamun is an exotic sweet dish served on special occasions. Kala Jamuns have a very unique texture as they are chewy outside and grainy inside.
    1. Bengali Rasgulla: Bengali Rasgullas are homemade paneer (Cottage cheese) sweet dish, round paneer balls soaked in sugar syrup. This is a delicacy from the state of Bengal, these are very light and delicious, you can never go wrong with Bangali Rasgulla.
    1. Jalebi: Jalebi is a warm, crispy, delicious treat. It can best be described as funnel cake. In many places jalebi is still served as a breakfast treat like pancakes. It is a treat to have jalebi and kachori for a hearty breakfast.

    Tips for Making Perfect Chum Chum:

    Use Fresh Paneer: Use fresh and homemade paneer for the best texture and flavor in your Chum Chum. Homemade paneer is softer and creamier than store-bought varieties and yields a more delicate and spongy dessert.

    Knead the Paneer Well: Knead the paneer dough thoroughly to ensure a smooth and uniform texture. Proper kneading helps to remove excess moisture from the paneer and creates a soft and pliable dough that’s easy to shape into rolls.

    Soak in Sugar Syrup: Allow the paneer rolls to soak in the sugar syrup for at least 4-6 hours or overnight for maximum flavor absorption. The longer the Chum Chum sits in the syrup, the softer and more flavorful it will become.

    Garnish Creatively: Get creative with your garnishes and decorations. Sprinkle chopped nuts, edible silver leaf (varak), or dried rose petals on top of your Chum Chum for an elegant and festive presentation.

    FAQs about Chum Chum:

    Can I make Chum Chum without paneer? 

    While paneer is the traditional main ingredient in Chum Chum, you can experiment with alternative fillings such as khoya (reduced milk solids) or ricotta cheese for a different texture and flavor profile.

    How long does Chum Chum stay fresh? 

    Chum Chum can be stored in the refrigerator for up to 3-4 days in an airtight container. However, it’s best enjoyed fresh within the first day or two for optimal taste and texture.

    Can I freeze Chum Chum? 

    While Chum Chum can be frozen, its texture may change slightly upon thawing. If freezing, wrap the Chum Chum tightly in plastic wrap or foil and store them in a freezer-safe container for up to 1-2 months. Thaw the Chum Chum in the refrigerator before serving.

    Is Chum Chum gluten-free? 

    Yes, Chum Chum is gluten-free as it does not contain any wheat or gluten-containing ingredients. However, be cautious of cross-contamination if you have a severe gluten allergy or celiac disease.

    How did Chum Chum got its name?

    The name chum chum comes from Bengal, where it originated as a sweet treat. The name mimics the sound “nom nom,” which is fitting because the sweet is soft and fluffy, and you might munch on it like that.

    Chum Chum is a delightful and versatile Indian dessert that’s perfect for celebrating special occasions or indulging in a sweet treat. With its soft and spongy texture, subtle sweetness, and endless variations, Chum Chum is sure to captivate your taste buds and leave you craving for more. 

    Whether enjoyed as a festive dessert or as a comforting indulgence, Chum Chum is a beloved sweet delicacy that’s cherished by people of all ages.

  • Achari Paneer

    Achari Paneer

    Achari Paneer

    Achari Paneer is flavorful, healthy and high in protein.  Paneer is an Indian cheese, also known as chenna.  Achari paneer is very versatile and can be served as an appetizer or as an accompaniment to a main course.
    No ratings yet
    Course Appetizer
    Cuisine Indian
    Servings 8 people

    Ingredients
      

    • 14oz paneer cut in ½ inch cubes (paneer you can find in Indian grocery store)
    • 1 tbsp salt
    • 1/8 tbsp turmeric (haldi)
    • 1/4 cup  yogurt (dahi)
    • 2 tbsp olive oil
    • 4 whole red chilies Sabut lal mirch)
    • Pinch of asafetida (hing)
    • 1/4 tbsp nigella (onion seeds or kalonji)
    • 1 tbsp coriander seeds (dhania)
    • 1/4  tbsp fenugreek seeds (mathi)
    • 1/2  tbsp black pepper
    • 1/2 tbsp fennel seeds (saunf)
    • 1 ½ cup baby spinach leaves (palak)

    Instructions
     

    • Mix paneer, yogurt, turmeric and salt. Set aside.
    • In a frying pan over medium heat, dry roast nigella, coriander seeds, fenugreek seeds, fennel seeds, and black pepper for 1-2 minutes. Seeds will become darker in color and give off a beautiful aroma.
    • Crush the roasted seeds using a mortar or rolling pin.  Set aside.
    • Add oil to the same pan, at low-medium heat.  Roast red chilies till they turn a darker color.  Remove from pan and break each one into 2-3 pieces.
    • Increase to medium heat; add asafetida, followed by paneer mixture.   Stir fry for 3-4 minutes until most of the moisture has evaporated.  Do not overcook the paneer as it will become dry.The yogurt should coat the paneer nicely so it remains moist. Turn off the heat.
    • Add all the dry spices and mix well.
    • Serve warm achari paneer over a bed of spinach leaves.

    Notes

    Tips
    Achari paneer can be made in advance and refrigerated up to a week.   However, it tastes best when served warm.
    Keyword Achari Paneer
    Tried this recipe?Let us know how it was!

    What is Achari Paneer ?

    Paneer Achari isn’t quite an appetizer or snack, but it can definitely be enjoyed in those settings! It’s a delicious vegetarian dish originating in North India. The star is paneer, a soft Indian cheese, cooked in a creamy, flavorful gravy.

    The “Achari” part comes from the pickling spices used in the recipe, giving it a tangy and slightly spicy kick. It’s often enjoyed with rice or naan, a type of leavened flatbread.

    While the exact origin is unknown, achari paneer tikka recipe is believed to have emerged in North India, particularly in the regions of Punjab and Delhi. Its popularity has spread throughout the country and even internationally, capturing hearts (and taste buds) with its delightful combination of textures and flavors.

    So, while not technically an appetizer, Achari Paneer is a crowd-pleasing dish that’s perfect for sharing with friends and family. Plus, it’s naturally gluten-free thanks to the paneer, making it a great option for those with dietary restrictions.

    How to make Achari Paneer ?

    To make achari paneer masala, first, mix paneer (Indian cheese), yogurt, turmeric, and salt together and set it aside. In a pan over medium heat, dry roast nigella, coriander seeds, fenugreek seeds, fennel seeds, and black pepper for 1-2 minutes until they darken and release a nice smell. Crush these roasted seeds using a mortar or rolling pin and keep them aside.

    In the same pan, add oil over low-medium heat and roast red chilies until they darken. Remove them from the pan and break each chili into 2-3 pieces. Increase the heat to medium, add asafetida, then pour in the paneer mixture. Stir-fry for 3-4 minutes until most of the moisture evaporates, being careful not to overcook the paneer.

    Now, turn off the heat and add the crushed spices, mixing everything well. The paneer needs to be nicely coated with the yogurt to keep it moist. Serve the warm achari paneer tikka over a bed of spinach leaves for a delicious and flavorful dish. Enjoy!

    Other Paneer Variants

    Diving into Manjula’s Kitchen, a treasure trove of Indian recipes, we can discover a delectable world of paneer dishes! Here are 5 enticing paneer variations that will tantalize your taste buds:

    Butter Paneer: This classic dish features paneer cubes deep-fried to a golden crisp. Manjula’s recipe guides you through creating a rich and creamy tomato gravy infused with aromatic spices like coriander, turmeric, and red chili powder. The addition of whipped yogurt adds a touch of tang, perfectly complementing the melt-in-your-mouth paneer.

    Paneer Tikka Masala: This vibrant dish takes inspiration from the tandoor oven. Here, marinated paneer pieces are pan-fried until slightly browned, then bathed in a luxurious gravy. The gravy boasts a symphony of flavors – the sweetness of tomatoes, the warmth of red chili powder, and a hint of smokiness. A touch of cornstarch lends a delightful silky texture, making it an ideal main course with rice or naan.

    Paneer Methi (Methi Malai Paneer): This comfort food features paneer simmered in a creamy and flavorful fenugreek sauce. Manjula’s recipe uses dried fenugreek leaves (kasoori methi) to impart a unique, slightly bitter taste that beautifully complements the creamy cashew and tomato base. The addition of milk further enhances the smooth texture, making it a perfect dip for roti or a comforting side dish.

    Paneer Tomato Curry: This vibrant curry showcases the beauty of simplicity. Fresh tomatoes are blended into a smooth puree, then cooked with aromatic spices like cumin and coriander. Chunks of paneer are added to the gravy, allowing them to soak up all the delicious flavors. Bell peppers add a touch of sweetness and crunch, making this a wholesome and satisfying meal.

    Palak Paneer: This vibrant green curry is a nutritional powerhouse. Fresh spinach forms the base of the gravy, providing a rich source of iron and vitamins. Manjula’s recipe guides you through incorporating spices like ginger, garlic, and garam masala, creating a flavorful and aromatic sauce. Paneer cubes nestled in this emerald green gravy make for a visually stunning and incredibly delicious dish.

    FAQs Frequently Asked Question for Achari Paneer

    Is Achari Paneer Spicy?

    Achari paneer can range from mild to spicy, depending on the recipe. The “achari masala” itself has a kick, but the level of heat can be adjusted by controlling the amount of red chili powder used.

    What Does Achari Paneer Taste Like?

    The dominant flavors are tangy and savory, thanks to the pickling spices. You’ll also experience hints of spice, creaminess (often from yogurt or cashews), and the mild flavor of paneer itself.

    Is Achari Paneer Vegetarian?

    Yes, achari paneer is traditionally a vegetarian dish. Paneer is made from milk and the masala typically uses vegetarian ingredients.

    Is Achari Paneer Vegan?

    Not always. Some recipes incorporate yogurt or cream in the gravy. You can find vegan versions that use plant-based yogurt alternatives or coconut milk for creaminess.

  • Aloo Mattar

    Aloo Mattar

    Aloo Mattar

    Aloo Mattar

    Aloo Mattar is a popular north Indian dish. Potatoes and peas with spicy gravy makes a great main dish.
    4.34 from 3 votes
    Prep Time 10 minutes
    Cook Time 15 minutes
    Total Time 25 minutes
    Course Main Course
    Cuisine Indian
    Servings 3 people

    Ingredients
      

    • 3 medium boiled potatoes
    • 3/4 cup green peas I am using frozen
    • 2 tbsp oil
    • 1 tsp cumin seeds jeera
    • 1/8 tsp asafetida hing
    • 1 tsp ginger paste
    • 1 green chili finely chopped
    • 2 tbsp coriander powder dhania
    • 1 tsp fennel seed powder
    • 1/4 tsp turmeric haldi
    • 1 tsp paprika dagi mirch
    • 1 tsp salt
    • 1 tsp mango powder amchoor
    • 1/2 tsp garam masala
    • 2 medium tomatoes sliced
    • 2 tbsp chopped cilantro hara dhania

    Instructions
     

    • Peel the potatoes cut them in byte size pieces.
    • In a small bowl mix ginger, green chili, coriander, fennel seed, turmeric, and paprika with ¼ cup of water.
    • Heat the oil in a saucepan. Test the heat by adding one cumin seed to the oil. If the cumin seed cracks right away, the oil is ready. Add the cumin seeds, and asafetida, after cumin seeds crack add the spice mix cook until spices start leaving the oil this should take about one minute.
    • Next add green peas and half a cup of water and let it cook until they are tender.
    • Add potatoes and salt mix it well, while mixing mash few pieces of potatoes that will give thickness to gravy.
    • Add about 1-1/4 cups of water after it comes to boil lower the heat to medium and let it cook for about five minutes.
    • Add mango powder, garam masala, chopped cilantro, and slice of tomatoes mix it gently after gravy comes to boil turn off the heat and cover the pot. Tomatoes will cook with the steam.
    • Aloo matter is ready to serve.

    Notes

    Serving Suggestions
    Aloo matter can be served with Dal Puri, Urad Dal Kachori, Kuttu Puri and side of Salted Mint Lassi.
    Enjoy it!
    Keyword Everyday Meal, Gluten Free, Potato With Peas, Vegan
    Tried this recipe?Let us know how it was!

  • Corn Bruschetta

    Corn Bruschetta

    Corn Bruschetta

    Corn Bruschetta

    This is a quick and easy delicious recipe. Serving creamed corn over toasted bread makes a great appetizer. This can also be served as a side dish.
    No ratings yet
    Course Appetizer
    Cuisine Indian
    Servings 4 people

    Ingredients
      

    • 2 1/2 cup corn kernels
    • 2 cup milk
    • 1 tbsp all purpose flour (maida or plain flour)
    • 1/2 cup finally chopped red bell pepper (capsicum or shimla mirch)
    • 1 tbsp oil
    • 1/2 tbsp cumin seeds (jeera)
    • 1/4 tbsp black pepper
    • 1 tbsp salt
    • 1 tbsp lemon juice
    • 2 tbsp shredded parmesan cheese or Italian mix cheese
    • 1 seeded and minced green chili
    • Some fresh cilantro leaves
    • Bread of your choice (I like French or sourdough bread)

    Instructions
     

    • In a sauce pan cook the milk and corn kernels until corn is tender. Stir the corn occasionally making sure it doesn’t burn in the bottom of the pan.
    • Add the all purpose flour and lightly mash the corn using the food processor or blender, (do not make the paste).
    • Heat the oil in a saucepan on medium-high heat. Test the heat by adding one cumin seed to the oil; if seed cracks right away oil is ready.
    • When the cumin seeds crack add the corn mixture, black pepper, salt and red bell pepper.
    • Stir and reduce the heat to medium. This should take 2 to 3 minutes.
    • Next stir the cheese and close the heat.
    • Corn should be in the consistency of a spread not very dry.
    • Serve over toasted bread and garnish with minced green chili and cilantro.

    Notes

    Serving Suggestion
    Serve the creamed corn as a side dish.
    Tried this recipe?Let us know how it was!

  • How To Make Yogurt

    How To Make Yogurt

    Step-by-step guide to making homemade yogurt

    How To Make Yogurt – Homemade Dahi

    Homemade Yogurt tastes delicious and is very refreshing. Yogurt is high in protein and calcium. It is easy to make, you only need milk and the right culture / starter.
    No ratings yet
    Prep Time 2 minutes
    Cook Time 20 minutes
    Total Time 22 minutes
    Course Side Dish
    Cuisine Indian
    Servings 6 people

    Ingredients
      

    • 3-1/2 cups milk
    • 2 tbsp yogurt or use the dry starter you can buy

    Instructions
     

    • Boil the milk and let it cool down to 110 to 120 degree. You can use a candy thermometer to check the temperature, if the milk gets too hot it kills the bacteria in the culture.
    • After milk cools down pour the milk into a bowl that you want to make the yogurt in.
    • Add 2 tablespoons of yogurt from previously home made yogurt or use the dry yogurt starter. Package will tell you how much dry starter to use. Don’t follow the other directions from the dry starter package. Mix the yogurt with milk by stirring gently.
    • Cover the bowl with a light blanket or folded sheet, and keep it in warm place for about 4 hours.
    • After yogurt is set, refrigerate for at least an hour before using.

    Notes

    Tips
    If you prefer more creamy mix ¼ cup of half & half milk or boil the full milk for about 5 minutes longer to reduce the milk in volume to give more creamy texture to the yogurt.
    I have tried using starters from many store bought yogurt including organic or Greek yogurt, and they don’t work. I think because store bought yogurt has many artificial additives.
    Store bought yogurt is more firm because of the pectin.
    Yogurt can be made using 1%, 2% or full milk and full milk yogurt will have more body to it.
    There are two ways to make yogurt creamier. 1) With 3 cups of milk use 1 cup of half & half milk OR 2) boil the full milk for about 5 minutes longer to reduce the milk in volume to give more creamy texture to the yogurt.
    Keyword Ghar Ka Bana Dahi, Plain Yogurt
    Tried this recipe?Let us know how it was!