Category: Special Occasion Recipes

Special Occasion Recipes: Celebrate with Delicious Indian Vegetarian Dishes

In Indian culture, food is an integral part of every celebration, festival, and special occasion. Whether it’s a grand wedding, a religious festival, or a simple family get-together, the menu is always elaborate, reflecting the richness of the Indian culinary heritage. Special occasions call for special dishes, and when it comes to Indian cuisine, the options are endless. From mouth-watering appetizers to sumptuous main courses and decadent desserts, Indian vegetarian recipes can make any celebration truly unforgettable.

The Importance of Food in Indian Celebrations

Food plays a central role in Indian celebrations, symbolizing prosperity, happiness, and togetherness. Each dish is thoughtfully prepared, using ingredients that are in harmony with the occasion’s significance. Traditional recipes passed down through generations often take center stage, with a focus on flavors, textures, and presentation.

Indian vegetarian cuisine, in particular, offers a wide range of options that cater to various dietary preferences and religious practices. These recipes are not only delicious but are also steeped in cultural and regional significance, making them ideal for special occasions.

Must-Try Indian Vegetarian Recipes for Special Occasions

Paneer Lababdar

Paneer Lababdar is a rich and creamy dish made with paneer (Indian cottage cheese) cooked in a tomato-based gravy. The addition of cream and butter gives it a luxurious texture, making it perfect for a festive meal. Serve it with naan or pulao for a complete experience.

Dum Aloo

Dum Aloo is a popular dish from North India, where baby potatoes are cooked slowly in a spicy yogurt-based gravy. The slow cooking process, known as “dum,” ensures that the flavors are deeply infused into the potatoes, making it a favorite for special occasions.

Malai Kofta

Malai Kofta is a classic dish that features soft, melt-in-the-mouth koftas (dumplings) made from paneer, potatoes, and nuts, simmered in a creamy tomato gravy. It’s a dish that’s sure to impress your guests and is often served at weddings and celebrations.

Pulao with Nuts and Raisins

A fragrant and flavorful rice dish, pulao is often prepared with a variety of spices, nuts, and raisins. This dish is a staple at Indian weddings and festivals, offering a delightful combination of sweet and savory flavors.

Gajar Ka Halwa

No Indian celebration is complete without dessert, and Gajar Ka Halwa (carrot pudding) is a must-have. Made with grated carrots, milk, sugar, and ghee, this dessert is garnished with nuts and is often served during Diwali and other festive occasions.

Puran Poli

Puran Poli is a traditional Maharashtrian sweet flatbread stuffed with a filling made from chana dal (split chickpeas) and jaggery. This delicacy is commonly prepared during festivals like Holi and Ganesh Chaturthi and is enjoyed by people of all ages.

Kofta Biryani

Biryani is synonymous with celebration, and Kofta Biryani adds a vegetarian twist to this classic dish. Made with spiced koftas, basmati rice, and aromatic spices, this dish is layered and slow-cooked to perfection, making it ideal for festive gatherings.

Dahi Bhalla

Dahi Bhalla is a popular North Indian snack made from deep-fried lentil balls soaked in yogurt and topped with chutneys and spices. This dish is a favorite during festivals like Holi and Diwali and is loved for its tangy and sweet flavors.

Shahi Paneer

Shahi Paneer is a royal dish that lives up to its name. “Shahi” means royal, and this dish is made with paneer cooked in a rich and creamy gravy of cashews, almonds, and cream. It’s a dish that is often reserved for the most special occasions.

Kheer

Kheer, a rice pudding, is one of the most beloved Indian desserts, often prepared for festivals and celebrations. Made with rice, milk, sugar, and flavored with cardamom and saffron, kheer is garnished with nuts and dried fruits, making it a fitting end to a celebratory meal.

Tips for Planning a Special Occasion Menu

Balance the Menu: Ensure that your menu has a good mix of appetizers, main courses, and desserts. Include a variety of flavors and textures to keep your guests engaged.

Consider Dietary Preferences: Indian cuisine offers a range of vegetarian options, but it’s also important to consider other dietary needs, such as vegan or gluten-free preferences.

Plan Ahead: Special occasion meals often require elaborate preparation. Plan your menu in advance and do as much prep work as possible the day before the event.

Presentation Matters: The way you present your food can enhance the dining experience. Use garnishes, elegant serving dishes, and thoughtful plating to make your dishes visually appealing.

Conclusion

Indian vegetarian cuisine offers a rich tapestry of flavors and dishes that are perfect for any special occasion. Whether you’re celebrating a wedding, a festival, or just gathering with loved ones, these recipes will add a touch of festivity and joy to your table. From creamy paneer dishes to decadent desserts, each dish is crafted to make your celebration memorable.

For more special occasion recipes, visit Manjula’s Kitchen – Special Occasion Recipes. Explore a world of flavors and find the perfect dishes to make your celebration truly special.

  • Mango Mousse with Raspberry Pearls

    Mango Mousse with Raspberry Pearls

    Mango Mousse with Strawberry Pearls

    Mango Mousse with raspberry pearls

    My new recipe is called Mango Mousse with raspberry pearls. This is a delicious, delicate dessert that is sure to be enjoyed by all. Mangoes are my favorite fruit so I like to incorporate them in my various recipes. This was my first time making Raspberry pearls for the garnish. I did this with a special guest, Avani, who is currently a participant on Master Chef Junior! These delicate looking pearls are simply gorgeous on desserts!
    4.80 from 5 votes
    Prep Time 10 minutes
    Cook Time 30 minutes
    Total Time 40 minutes
    Course Dessert
    Servings 4 people

    Ingredients
      

    For Mousse

    • 2 cup Mango pulp
    • 1/2 tsp lemon juice
    • 1/4 cup fine sugar
    • 2 1/2 tsp Agar-Agar
    • 1/4 cup water
    • 3/4 cup whipping cream

    For Raspberry Pearls

    • 2 cups fresh raspberries
    • 2 Tbsp sugar
    • 1 Tbsp lemon juice
    • 1 1/4 tsp agar-agar powder
    • 1/2 cup oil

    Instructions
     

    Mousse

    • Whip the whipping cream on low speed until it forms stiff peaks. Make sure cream is cold. Set aside.
    • In a sauce pan add the mango puree, sugar and lemon juice and bring it to boil over medium heat. Boil for about one minutes, until sugar is dissolve.
    • Dissolve agar-agar in 1/4 cup of water, add agar-agar to the mango pulp, bring it boil mixing continuously. Turn off the heat, and whisk for few minutes, making sure there are no lumps.
    • Pour the mango puree in a bowl and bring it to room temperature. Fold the cream gently, do not whip you should be able to see both colors. Refrigerate for about two hours before serving.

    For Raspberry pearls

    • Put 1/2 cup of oil in a small bowl and keep it in freezer till it is very chill it should take about half an hour.
    • In a sauce pan add raspberries, 1-1.2 tablespoons of sugar, lemon juice and about half cup of water bring to simmer over low medium heat till all the berries are soft. Note: do not overcook the berries they will become little bitter.
    • Strain the berry mixture through sieve to get raspberry sauce.
    • Add agar-agar and remaining sugar to half cup of water and bring it to boil over low medium heat for few minutes, keep stirring making sure there is no lumps and agar-agar do not stick to bottom of the pan.
    • Add agar-agar to raspberry sauce. Note: raspberry should be warm.
    • Fill in pipette, or oral syringe, or straw, or squeezed bottle with juice. Drop, one drop at a time, into the cold oil. Little caviar orbs will form on contact with the cold oil and fall to the bottom.
    • Strain caviar using a fine mesh strainer. Rinse well with water.
    • Store caviar in water until ready to use.
    • Lay on a paper towel-lined plate and pat dry

    Notes

    This looks complicated but it is not.
    Enjoy!
    Tried this recipe?Let us know how it was!


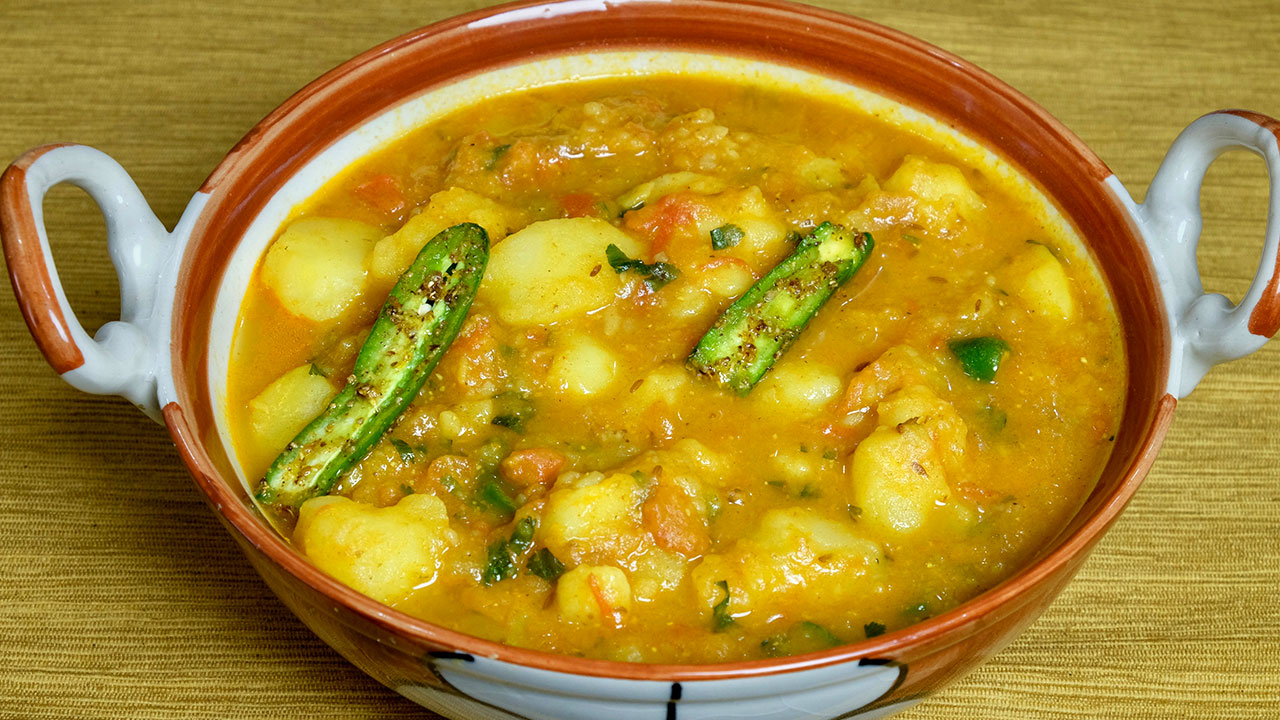
  • Aloo Tamatar Ki Sabji (Potato with Spicy Tomato Gravy)

    Aloo Tamatar Ki Sabji (Potato with Spicy Tomato Gravy)

    Aloo Tamatar ki Sabji

    Aloo Tamatar ki Sabji (Potatoes with Spicy Tomato Gravy)

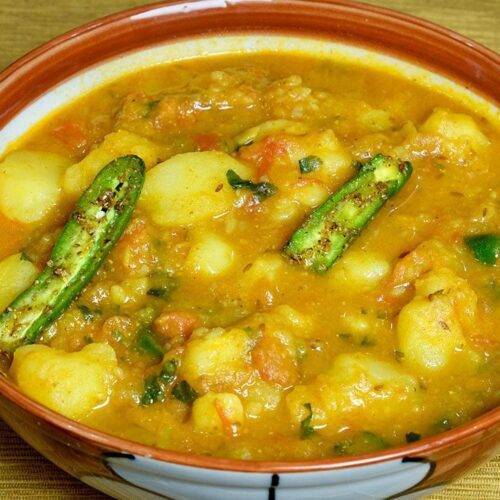
    Aloo Tamatar ki Sabji or Potatoes with spicy tomato gravy is a classic combination and a popular North Indian dish. Aloo Tamatar, is flavorful and delicious and the best part is that it goes well with all different kinds of bread and rice.
    4.88 from 8 votes
    Course Main Course
    Cuisine Indian
    Servings 4 people

    Ingredients
      

    • 3 medium-sized potatoes boiled and peeled
    • 1 cup tomatoes finely chopped
    • 2 Tbsp oil (canola or vegetable)
    • 1 tsp cumin seeds jeera
    • 1/8 tsp asafetida hing
    • 3 tsp coriander powder dhania
    • 1/2 tsp red chili powder
    • 1/4 tsp turmeric haldi
    • 1 tsp finely grated ginger
    • 1 tsp salt
    • 2 cups water approx. 2 cups
    • 1/4 tsp garam masala
    • 2 Tbsp finely chopped cilantro dhania
    • 1 pieces green chili seeded and cut into small , optional

    Instructions
     

    • Break the potatoes by hand in bite size pieces and roughly mash them, this should make about 3 cups.
    • Heat the oil in a saucepan over medium high heat. Oil should be moderately hot, when you add the cumin seeds they should crack right of way. Add cumin seeds, and asafetida, as cumin seeds crack add the tomatoes.
    • Cook the tomatoes until they are soft and mushy. Add the other spices coriander powder, turmeric, chili powder and ginger, stir fry until tomato start separating from oil. This should take about 2 minutes.
    • Add potatoes and salt mix them well with spices, add water, as potatoes come to boil cover the pan and lower the heat to medium and let it cook for about ten minutes.
    • Mix the potatoes and mash some potatoes as mixing the potatoes, this will thickness to gravy. Adjust the water in gravy to your liking; gravy will thicken as it will cool.
    • Add garam masala and cilantro, and green chilies this is optional. Mix it well turn off the heat and cover the pan.

    Notes

    Aloo Tamatar Sabji is ready. Serve this with Paratha, Purie, Plain Rice, or you choice of bread.
    Tried this recipe?Let us know how it was!
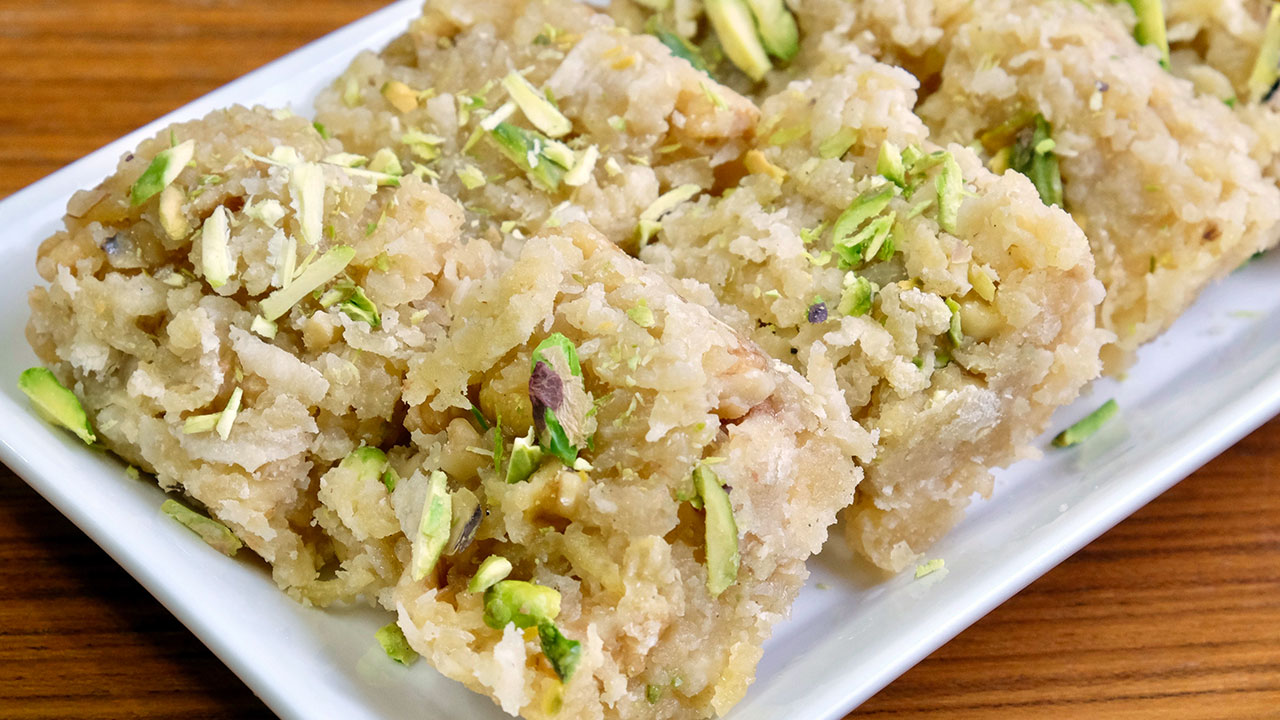
  • Apple Coconut Barfi

    Apple Coconut Barfi

    Apple Coconut Barfi

    Apple Coconut Barfi

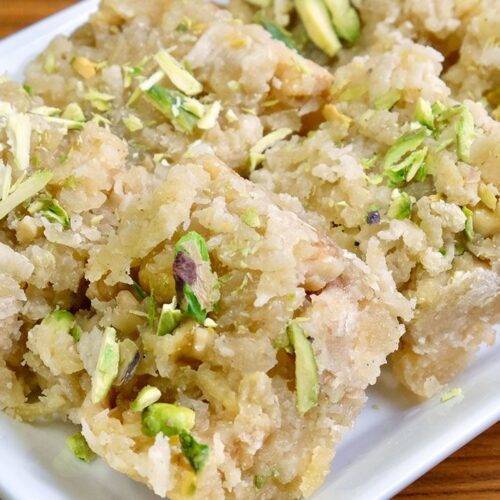
    Apple Coconut Barfi is a delicious treat. This fudge-like barfi super easy to make. It's also vegan and gluten-free. The fruity taste makes for a great sweet snack without the guilt!
    4.63 from 8 votes
    Prep Time 10 minutes
    Cook Time 30 minutes
    Total Time 30 minutes
    Course Dessert
    Cuisine Indian
    Servings 6 people

    Ingredients
      

    • 3 cup apple peeled and shredded
    • 1 cup freshly grated coconut I am using frozen coconut
    • 1 1/2 cup sugar
    • 1/2 cup chopped walnuts
    • 1/4 tsp crushed cardamom
    • 1 Tbsp sliced pistachios for garnishing

    Instructions
     

    • In a non-stick frying pan add coconut, apple, and sugar, cook over medium heat, until mixture start coming together and apples should be very tender. This should take about 7-10 minutes.
    • Add cardamom powder and walnut, mix it well cook stirring continually until mix should becomes consistency of soft dough, this should take about 2-3 minutes, turn of the heat.
    • Pour the mixture into greased plate while Burfi mixture is still hot spread it evenly about 3/4-inch-thick in a square shape. Press the mixture with spatula to make it firm. Sprinkle the pistachios and lightly press.
    • While Burfi is still warm cut them in about one inch square.
    • Allow the Burfi to cool for about two hours to dry and hold its shape. Now you can remove the burfi from the plate.

    Notes

    Burfi can be stored for 2 weeks in air tight container.
    Tried this recipe?Let us know how it was!
  • Chai Latte

    Chai Latte

    Chai Latte Recipe

    Chai Tea Latte

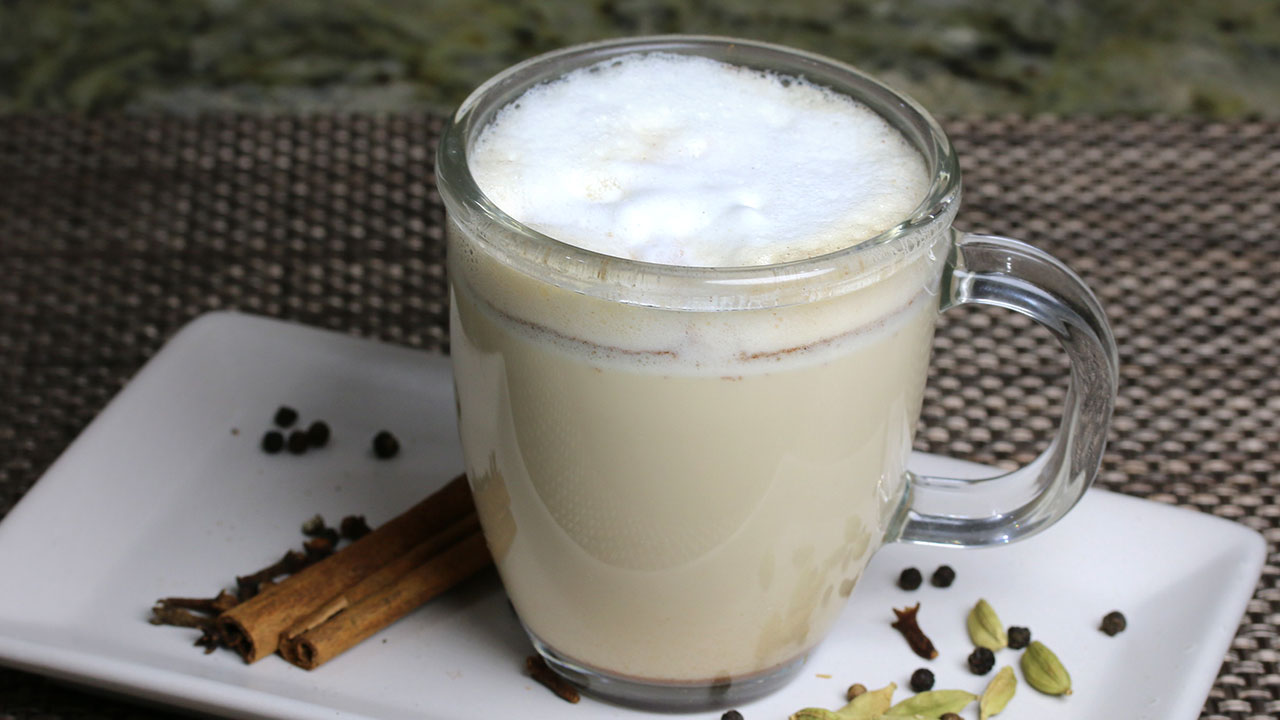
    Don’t have time to stop at your favorite coffee shop for some Chai Latte? Let’s try making my delicious and easy to prepare Chai Tea Latte at home instead! It's a great way to start off your morning! As the beverage is refreshing and goes along with all kinds of munchy snacks
    5 from 1 vote
    Prep Time 5 minutes
    Cook Time 10 minutes
    Total Time 15 minutes
    Course Drinks
    Cuisine Indian
    Servings 2 people

    Ingredients
      

    • 1 cup water
    • 2 black tea bags I am using Lipton tea bags
    • 4 whole cloves laung
    • 4 black peppers kali mirch
    • 1/2 tsp cinnamon powder dal cheeni
    • 1 tsp grated ginger adrak
    • 2 crushed cardamom ilachi
    • 2 tsp sugar

    Latte

    • 1 cup chai tea recipe above
    • 1-1/2 cup whole milk
    • 1 Tbsp sugar
    • 1/8 tsp cinnamon powder

    Instructions
     

    For the chai tea

    • In a medium saucepan, bring all the chai ingredient to boil over medium high heat, water, cloves, black pepper, cinnamon, ginger, cardamom, sugar, and teabags. Once boiling, let it boil for 1 minute, turn off the heat, cover the pot and let it sit for about five minutes. Remove the tea bags and strain the tea through a fine mesh strainer.

    For the latte

    • In a medium-size saucepan, note: (I boil the milk in microwave ovebring the milk, sugar, and pinch of cinnamon to a boil Using an immersion blender (this is the trick to a frothy homemade latte), blend the milk until it’s frothy.
    • Pour 1/2 cup of chai tea in a mug. Slowly add half of the warm, frothy milk to the tea. Sprinkle the top of the chai latte with an extra pinch of cinnamon, if desired.

    Notes

    Serve hot!
    Tried this recipe?Let us know how it was!
  • Palak (Spinach Curry)

    Palak (Spinach Curry)

    Palak (Spinach Curry) Recipe

    Palak – Spinach Curry

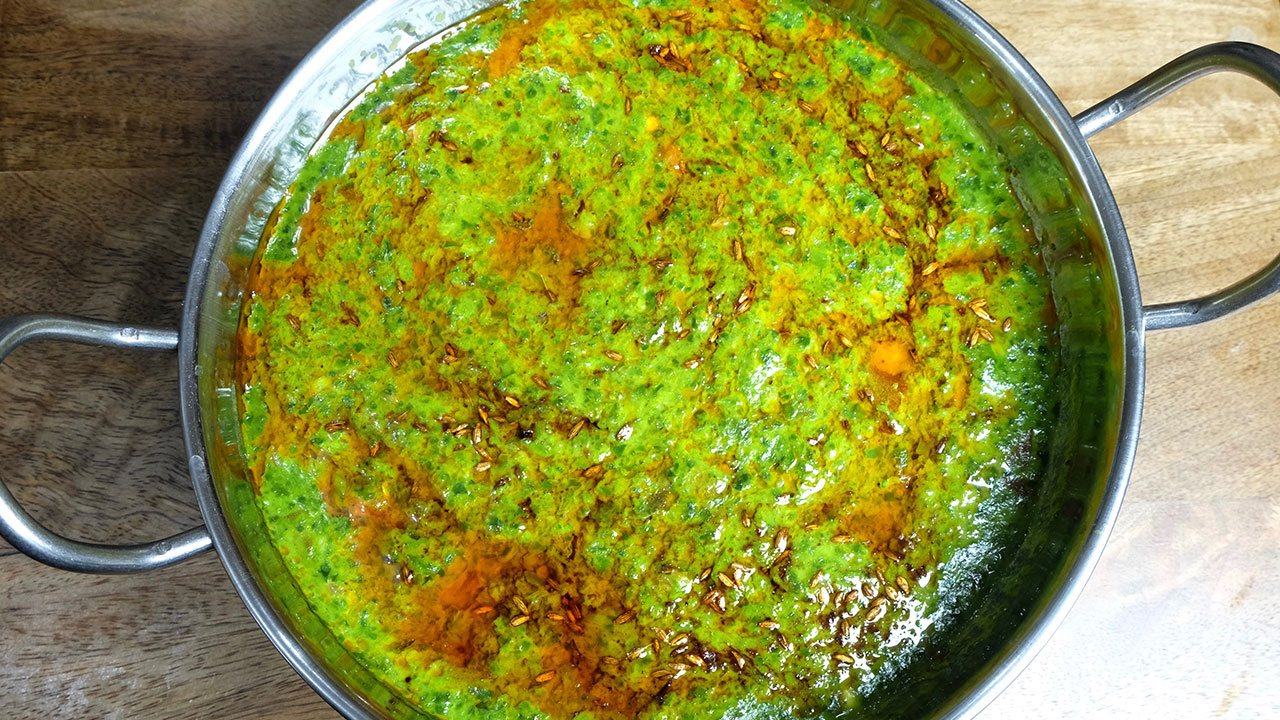
    This is a simple spinach curry, cooked with milk and has a delicious unique taste. This was my father’s favorite dish in winter time. A creamy savory dish with mild spices. Serve with
    , Makki ki Roti or
    Naan
    4.82 from 22 votes
    Prep Time 10 minutes
    Cook Time 30 minutes
    Total Time 40 minutes
    Course Main Course
    Cuisine Indian
    Servings 4 people

    Ingredients
      

    • 12 oz spinach washed and remove the stems this should be about 8 cups of packed spinach
    • 1 Tbsp ghee clarified butter
    • 1/2 tsp fenugreek seeds mathi seeds
    • 1/2 tsp turmeric haldi
    • 1 Tbsp chopped ginger adrak
    • 2 Tbsp green chili chopped, I prefer serrano chili
    • 1 tsp salt
    • 2 Tbsp besan gram flour
    • 1/2 cup chopped tomato in small pieces
    • 4 cups whole milk

    For Seasoning

    • 2 Tbsp ghee clarified butter
    • 1/2 tsp cumin seeds jeera
    • 1/2 tsp red chili powder

    Instructions
     

    • In a small bowl, mix the besan with half cup of milk to make a lump free batter and set aside.
    • Blend the spinach, ginger and green chilies using about 1/2 cup of milk. Spinach should not be pasty. I prefer to use food processor.
    • Heat the ghee in a saucepan over medium high moderately. Add fenugreek seeds, and turmeric. Stir for a few seconds.
    • Add the spinach, and milk and turn the heat to medium. Bring spinach to boil. Lower the heat to medium low and let it cook for about 15-20 minutes, stir occasionally, scraping the sides.
    • Add besan batter, and salt, and let it cook for about 10-15 minutes, stir occasionally, scraping the sides.
    • Spinach curry should be thick batter consistency. Add chopped tomatoes cook for 1-2 minutes. Turn off the heat.

    Seasoning

    • In a small sauce pan heat the ghee over medium heat. Test the heat by adding one cumin seed to the oil. If the cumin seeds crack right away, the oil is ready. Add cumin seeds and turn off the heat and add red chili powder and about 2 tablespoons of water this will prevent spices to burn.
    • Pour the seasoning over spinach curry.

    Notes

    Spinach curry is ready to serve. Serve hot with Naan, Roti, Paratha.
    Tried this recipe?Let us know how it was!
  • Kachori with Kadhi

    Kachori with Kadhi

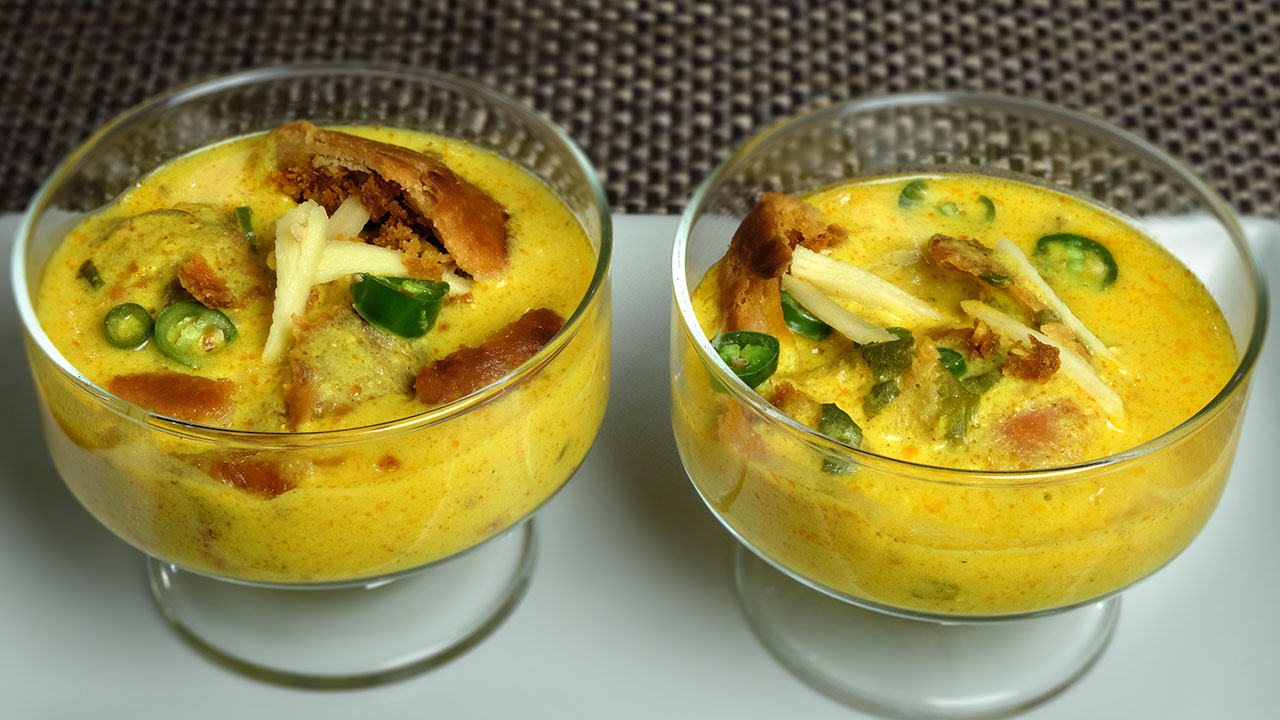
    Kachori topped with Kadhi

    Kachori topped with Kadhi

    Kachori topped with Kadhi this is a Rajasthani specialty appetizer that is simply delicious. There are times that we like to indulge ourselves or want to make a special treat for guests at parties, but there is not enough time in the day to prepare such dishes. For times like this, I like to make semi-homemade recipes. This dish is perfect for this and can be presented beautifully.
    5 from 2 votes
    Prep Time 10 minutes
    Cook Time 30 minutes
    Total Time 40 minutes
    Course Appetizer, Snack
    Cuisine Indian
    Servings 2 people

    Ingredients
      

    For Kachori

    • 4 peices Dal Kachori Using frozen Kachori, which are readily available in Indian grocery stores.

    For Kadhi

    • 1 cup yogurt
    • 1/4 cup besan gram flour
    • 2 Tbsp oil canola or vegetable oil
    • 1/2 tsp cumin seeds jeera
    • 1/8 tsp asafetida hing
    • 1/2 tsp fenugreek seeds mathi
    • 1/2 tsp turmeric haldi
    • 1/2 tsp red chili powder
    • 1 tsp salt
    • 2 Tbsp cilantro finely chopped, hara dhania
    • 1/4 tsp gram masala
    • 4 cups water

    For garnishing

    • 1 Tbsp ginger thinly sliced
    • 1 Tbsp green chilies thinly sliced
    • 2 tsp lemon juice
    • 1/4 tsp salt

    Instructions
     

    • For garnishing mix all the ingredients together before we start the Kadhi, this will get enough time to marinate ginger and green chili. Set aside.
    • Mix besan and turmeric with yogurt until smooth, this should be lump free. Add three cups of water slowly and mix well.
    • Heat the oil in a saucepan. Test the heat by adding one cumin seed to the oil. If the cumin seeds crack right away, the oil is ready. Add cumin seeds and asafetida.
    • When the cumin seeds crack, turn off the heat and add fenugreek seeds, and red chili powder. Stir for a few seconds. Add the yogurt mixture and turn the heat to medium. Keep stirring until the kadhi comes to a boil.
    • Add remaining water and let it come to boil. Add salt. Turn the heat to medium low. Let the kadhi cook about 20-30 minutes, stir occasionally. If needed to adjust thickness, add boiled water. Kadhi should be pourable consistency. Add garam masala, and cilantro, mix and turn off the heat.
    • While the Kadhi is cooking bake, or fry the kachories per the instructions on the box. I have baked the kachori. Let them cool of then break it open.
    • Serve Kadhi over Kachori and garnish with marinated green chili and ginger pieces.

    Notes

    Instead of frozen kachori, you can also make these fresh Kachori at home using my recipe.
    Tried this recipe?Let us know how it was!

    Rajasthani Kadhi Kachori Recipe: A Delectable Fusion Dish Rajasthani semi-homemade

    Kachori Kadhi is a versatile dish perfect for various occasions, whether as an appetizer, a flavorful addition to a lunch box suggestion, a delightful option for party recipes, or a quick & easy chaat. Rajasthani kadhi kachori is a beloved delicacy that combines the richness of kadhi with the crispiness of kachori. This recipe brings together the tangy flavors of the kadhi gravy with the spicy and aromatic kachoris, creating a symphony of taste that will tantalize your taste buds. Let’s delve into how to prepare this mouthwatering dish step by step.

    Preparing the Kadhi for Kachori Kadhi: A Flavorful Base

    To begin with, let’s prepare the kadhi kachori base, the kadhi. In a mixing bowl, whisk together yogurt, gram flour, and water until smooth. This mixture forms the base of the kadhi gravy, providing a creamy texture and tangy flavor.

    Next, heat oil in a pan and add mustard seeds, cumin seeds, fenugreek seeds, and asafoetida. These tempering ingredients infuse the kadhi with aromatic flavors and add depth to the dish. Stir in chopped ginger, green chilies, and curry leaves for an extra kick of spice and fragrance.

    Now, pour the yogurt mixture into the pan and let it simmer over medium heat. Stir continuously to prevent lumps from forming and to ensure that the kadhi thickens evenly. As it cooks, the kadhi will develop a rich consistency and absorb the flavors of the spices.

    Frying the Kachoris: Adding Crunch to the Kadhi Kachori

    While the kadhi simmers, let’s move on to preparing the kachoris. Heat oil in a separate pan for deep frying. Meanwhile, take the kachori dough and divide it into small balls. Flatten each ball with your palms to form discs, then fill them with a spicy lentil mixture made of soaked and ground lentils mixed with spices like rajasthani kachori with kadhi.

    Once the oil is hot, carefully slide the stuffed kachoris into the pan and fry until golden brown and crisp. The kachoris will puff up beautifully as they cook, creating a delightful contrast of textures when paired with the creamy kadhi gravy.

    Serving the Rajasthani Kadhi Kachori: A Gastronomic Delight

    Once both the kadhi and kachoris are ready, it’s time to assemble this divine dish. Ladle the hot kadhi into serving bowls and place a couple of freshly fried kachoris on the side. Garnish with chopped cilantro and serve hot.

    The combination of the tangy, creamy kadhi and the crispy, flavorful kachoris is sure to impress your taste buds and leave you craving more. Enjoy this Rajasthani delicacy with steamed rice or as a standalone meal for a truly satisfying culinary experience.

    Tips for Perfect Kadhi Kachori: Enhancing Flavor and Texture

    • Ensure that the yogurt is fresh and not too sour for a balanced flavor in the kadhi.
    • Fry the kachoris on medium heat to ensure they cook through evenly without burning.
    • You can customize the spice level of the kadhi and kachoris according to your preference by adjusting the amount of green chilies and red chili powder.

    Variations of Kadhi Kachori: Experimenting with Flavors

    • For a healthier twist, you can bake the kachoris instead of deep frying them.
    • Add finely chopped vegetables like carrots, and peas to the kachori filling for added nutrition and flavor.
    • Experiment with different types of lentils for the kachori stuffing, such as moong dal or chana dal, to create unique variations of this dish.

    Benefits of Kadhi Kachori: Nutritious and Delicious

    • Yogurt, the main ingredient in kadhi, is rich in probiotics that promote gut health and digestion.
    • Gram flour used in the kadhi is a good source of protein and fiber, making this dish filling and nutritious.
    • Lentils used in the kachori filling provide a healthy dose of plant-based protein and essential nutrients.

    FAQs About Kadhi Kachori: Answering Your Queries

    Q: Can I make the kadhi ahead of time?

    A: Yes, you can prepare the kadhi in advance and reheat it before serving. Just make sure to adjust the consistency by adding water if it thickens too much upon reheating.

    Q: Can I freeze leftover kachoris?

    A: Yes, you can freeze leftover kachoris for up to a month. Reheat them in a preheated oven until crispy before serving.

    Q: Can I use store-bought kachoris instead of making them from scratch?

    A: While homemade kachoris are ideal for the best flavor and texture, you can certainly use store-bought ones as a time-saving option.

    If you’re looking to explore more Indian recipes, appetizers, beverages, and desserts, be sure to check out the following links on Manjula’s Kitchen. Here are some links to recipes on Manjula’s Kitchen’s official website: Vegetable Pakoras, Kaju Katli (Cashew Burfi), Baingan Bharta (Roasted Eggplant), Matar (Green Peas) Paneer, Besand and Ladoo.

  • Taco Samosa

    Taco Samosa

    Taco Samosa

    Taco Samosa

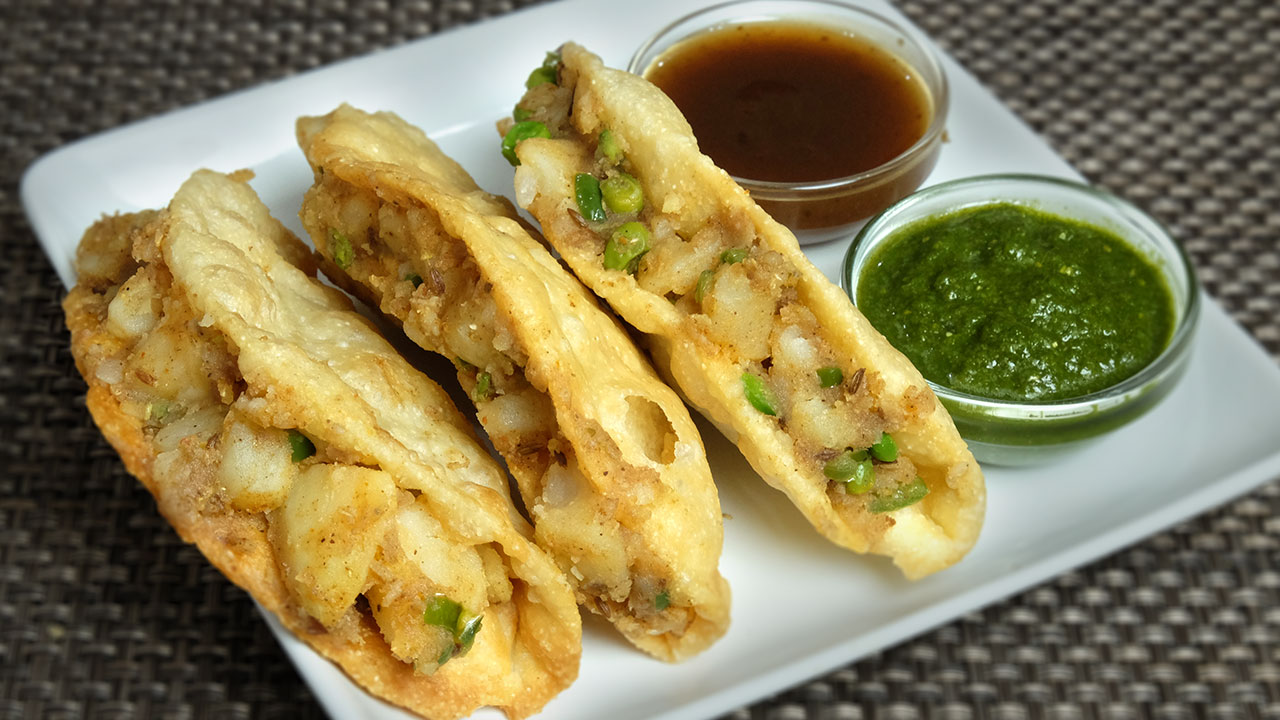
    This exciting recipe for Taco Samosa is exactly what it sounds like – a twist to the traditional Samosa. Taco Samosas are delicious and savory with the perfect crisp. When I had my family do the initial taste test, the reaction was WOW! These Taco Samosas should be in your must try list. Not only are these snacks delicious, but will be the conversation piece for your next party or get together. One thing good about these Samosas is that you can prepare them in advance and simply assemble before serving.
    This recipe will make 8 Taco Samosas.
    4.82 from 11 votes
    Prep Time 10 minutes
    Cook Time 30 minutes
    Total Time 40 minutes
    Course Appetizer, Snack
    Cuisine Fusion, Indian, Mexican
    Servings 4 people

    Ingredients
      

    For Shell

    • 1 cup all-purpose flour plain flour, maida
    • 1/4 cup fine sooji semolina
    • 1/4 tsp salt
    • 1 1/2 Tbsp oil
    • 1/3 cup lukewarm water

    for the Filling

    • 2 cups Potatoes boiled, peeled and chopped into very small cubes
    • 1/2 cup green peas I am using frozen green peas
    • 2 Tbsp oil canola or vegetable oil
    • 1/2 tsp cumin seeds
    • 1 tsp coriander powder
    • 1/4 tsp red chili powder
    • 1/4 tsp garam masala
    • 1 tsp mango powder amchur
    • 1 tsp salt
    • 2 Tbsp green chilies chopped, adjust to taste
    • Oil to Fry

    For Serving

    Instructions
     

    Making the Dough

    • Mix the flour, sooji, salt, and oil add water as needed to make a firm dough.
    • knead the dough for about 1 minutes to make the dough smooth and pliable.
    • Let the dough sit for at least 15 minutes.

    Making the Filling

    • Heat the oil in a frying pan on medium heat. Test the heat by adding one cumin seed to the oil; if it cracks right away oil is ready.
    • Add cumin seeds as cumin seeds crack, add green peas stir-fry for about 2 minutes.
    • Add all the other ingredients, potatoes, coriander powder, red chili powder, garam masala, mango powder, salt and green chili. Stir-fry for about 2 minutes, potato filling should be moist not very dry.

    Making Taco Shells

    • Knead the dough for few seconds. Divide the dough into 8 equal parts, and roll them into balls.
    • Roll each dough ball into about 4-inch diameter. Prick each rolled up Taco with a fork in several places both sides, this will prevent Taco from puffing and make them crisp.
    • Heat the oil in a frying pan over medium heat. The frying pan should have about 1 inch of oil. To check if the oil is ready, put a small piece of dough in the oil. The dough should sizzle and come up slowly.
    • Place one rolled Taco in the frying pan and press with a skimmer, turn and fold in half. Doing this it will become taco shape. Do not press, between the fold there should be space to fill the potatoes filling. Gently do the next one same way do not over crowd the frying pan. Fry them until light golden brown on both sides. This should take about 2-3 minutes. Take the Taco out and place them on paper towels to absorb the excess oil. Repeat the process for remaining Taco.
    • You can prepare the taco shells in advance and store them in air tight container.

    Assembling the Tacos

    • Fill the taco shell with potato filling (filling should be hot) and drizzle with chutney.

    Notes

    Suggestions
    Taco Samosa you can prepare in advance and assemble before serving. Taco shells should be good for two weeks or more. Potato filling also can be refrigerated for 3-4 days just heat the filling before serving. Chutneys I always have ready.
    Tried this recipe?Let us know how it was!

    How to make Fried Taco Samosas – Manjula’s Kitchen

    Instructions:

    Start on a culinary adventure with this innovative fried taco samosas recipe that transforms the beloved samosa into a delightful fusion appetizer – introducing fried tacos samosas! These savory treats boast a perfect crispiness that will surely captivate your taste buds. Impress your family and friends with a unique twist of mexican indian cuisine into samosa taco that is not only delicious but also a guaranteed conversation starter at your next gathering. The best part? You can prepare these fried taco samosas ahead of time and simply assemble before serving, making them a convenient yet impressive addition to your menu.

    Dough Preparation:

    The inception of fried taco samosas recipe involves the careful assembly of flour, sooji, salt, and oil in a mixing bowl. The combination of these elements lays the groundwork for a versatile and flavorful dough that will contribute to the overall texture and taste of the fried tacos samosas. Gradually add water, kneading the ingredients for about 1 minute until a firm and pliable dough is formed. Allow the dough to rest for a minimum of 15 minutes, allowing the flavors to meld and the texture to become more workable.

    Filling Creation:

    Heat oil in a frying pan over medium heat. Confirm the oil’s readiness by adding a cumin seed – if it cracks immediately, the oil is ready. Introduce cumin seeds to the hot oil, followed by green peas. Stir-fry for approximately 2 minutes. Add potatoes, coriander powder, red chili powder, garam masala, mango powder, salt, and green chili to the pan. Stir-fry for an additional 2 minutes, ensuring the potato filling maintains a moist consistency without becoming overly dry.

    Taco Shell Crafting:

    Knead the dough briefly and divide it into 8 equal portions, rolling each into a ball.

    Roll out each dough ball into a 4-inch diameter circle. Use a fork to prick both sides of the rolled taco to prevent puffing during frying, ensuring a crisp texture.

    Heat oil in a frying pan with approximately 1 inch of oil. To check readiness, drop a small piece of dough into the oil – it should sizzle and rise slowly.

    Place a rolled taco in the pan, pressing with a skimmer, turning, and folding it in half to create a taco shape. Ensure there is space between the folds for the potato filling. Fry until light golden brown on both sides, taking about 2-3 minutes per taco. Drain excess oil by placing the fried tacos on paper towels. Repeat the process for the remaining tacos.

    Assembling the Tacos:

    The final step in crafting these delectable Fried Taco Samosas is the art of assembling.

    While the taco shells are still warm, fill each with the hot potato filling.

    Drizzle with your favorite chutney to add a burst of flavor to the taco samosas.

    Notes and Suggestions:

    Prepare taco shells and potato filling in advance for a convenient assembly before serving.

    Taco shells can be stored in an airtight container for up to two weeks or more.

    Potato filling can be refrigerated for 3-4 days; reheat before serving.

    Keep chutneys ready to enhance the flavor of your fried taco samosas.

    Embark on a culinary journey with this Fried Taco Samosas Recipe, blending the best of samosas and tacos for a delightful fusion experience!
    You may also like: Whole Wheat Almond Eggless Cookies, Mango Salsa, Mint Lemonade, Dhokla (Suji – Semolina)

  • Shahi Kheer – Makhana Pudding

    Shahi Kheer – Makhana Pudding

    Shahi Kheer

    Shahi Kheer (Makhana Pudding)

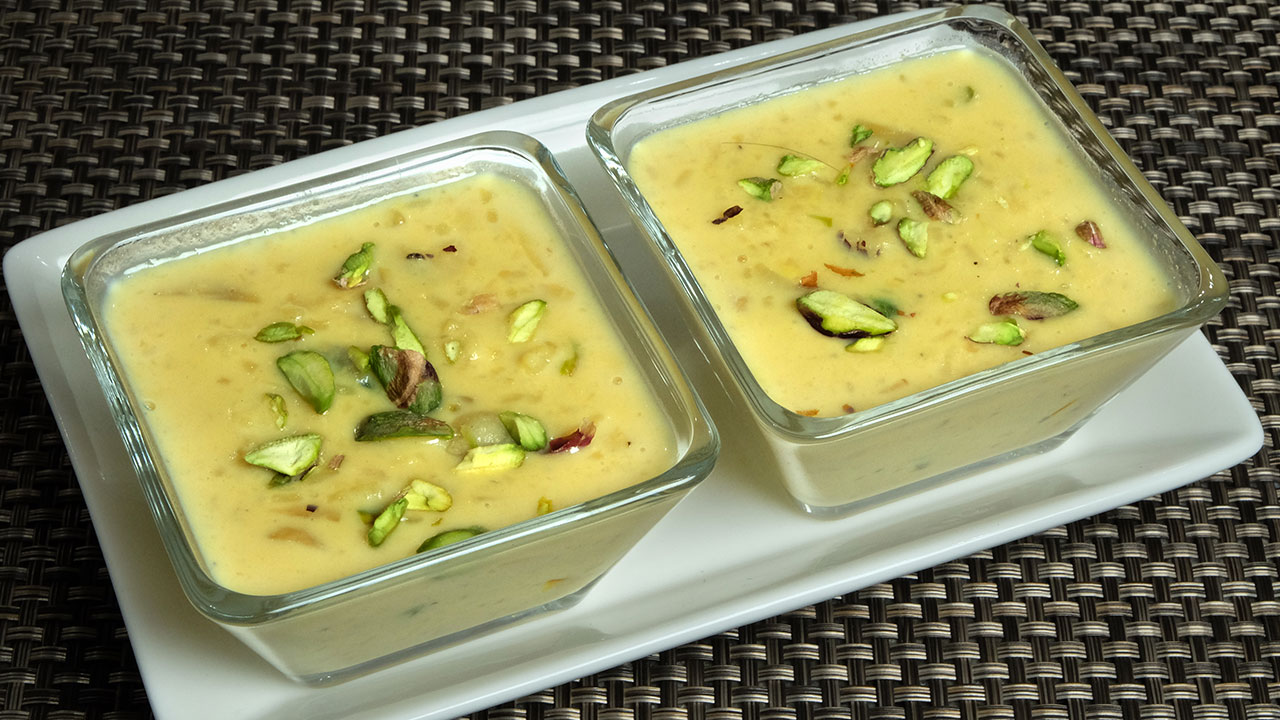
    Shahi Kheer, also called Makahana Pudding is a very traditional pudding-like dessert. Makhana is puffed lotus flower seed and looks like popcorn. Shahi means rich and royal and this dish is a royal sweet snack. The textures of the nuts, and the creaminess of the milk makes this a super dessert. Adding the caramelize sugar with saffron and cardamom adds a very subtle and unique taste to the kheer.
    5 from 1 vote
    Prep Time 10 minutes
    Cook Time 30 minutes
    Total Time 40 minutes
    Course Dessert
    Cuisine Indian
    Servings 6 people

    Ingredients
      

    • 4 cups whole milk
    • 1 1/2 cups makhana puffed lotus seeds
    • 1/2 cup rice cooked and mashed
    • 1/2 cup sugar
    • 2 Tbsp almonds blanched and sliced, approx. 2 Tbsp
    • 2 Tbsp pistachios blanched and sliced, approx. 2 Tbsp
    • 1/4 Tsp cardamom crushed
    • saffron Few strands
    • 2 teaspoons ghee clarified butter

    Instructions
     

    • Microwave the makhana for 1/2-minute. Makhana will become crisp. After microwave slice them in 2-3 pieces.
    • In a heavy bottom pan over low medium heat melt the ghee, add the makhana and sliced almonds and roast them for about 2 minute.
    • Add the milk, and rice, turn the heat to medium high, bring the milk to boil. After milk comes to boil lower the heat to medium. let it boil for about 18-20 minutes, stir the milk and scrape the sides occasionally.
    • Add cardamom. Saffron and half the pistachios other half we will use for garnishing.
    • To caramelize the sugar, in a heavy bottom sauce pan, over medium heat grease the pan generously, add sugar. Keep stirring the sugar continuously till sugar start melting and change the color to light brown. Turn off the heat as soon it comes to golden brown in color. This should take 4-6 minutes. Note: when sugar starts melting it changes the color very quickly and it can easily burn.
    • Add the caramelize sugar to the hot kheer and put the kheer back over the low medium heat, keep stirring the kheer making sure caramelized sugar has mixed completely. Caramelizing the sugar adds a unique taste to Kheer.
    • Add the caramelize sugar to the hot kheer and put the kheer back over the low medium heat, keep stirring the kheer making sure caramelized sugar has mixed completely. Caramelizing the sugar adds a unique taste to Kheer. Boil for 2-3 more minutes, Shahi Kheer should be consistency of soft pudding. Garnish with pistachios, 
    • Serve warm.

    Notes

    You will also like, Kheer (Rice Pudding), Pineapple Coconut Kheer – Pina Colada Pudding, Laucki Kheer (Bottle Gourd Pudding)
    Tried this recipe?Let us know how it was!

  • Rava Mint Paratha

    Rava Mint Paratha

    Rava Mint Paratha

    Rava Mint Paratha

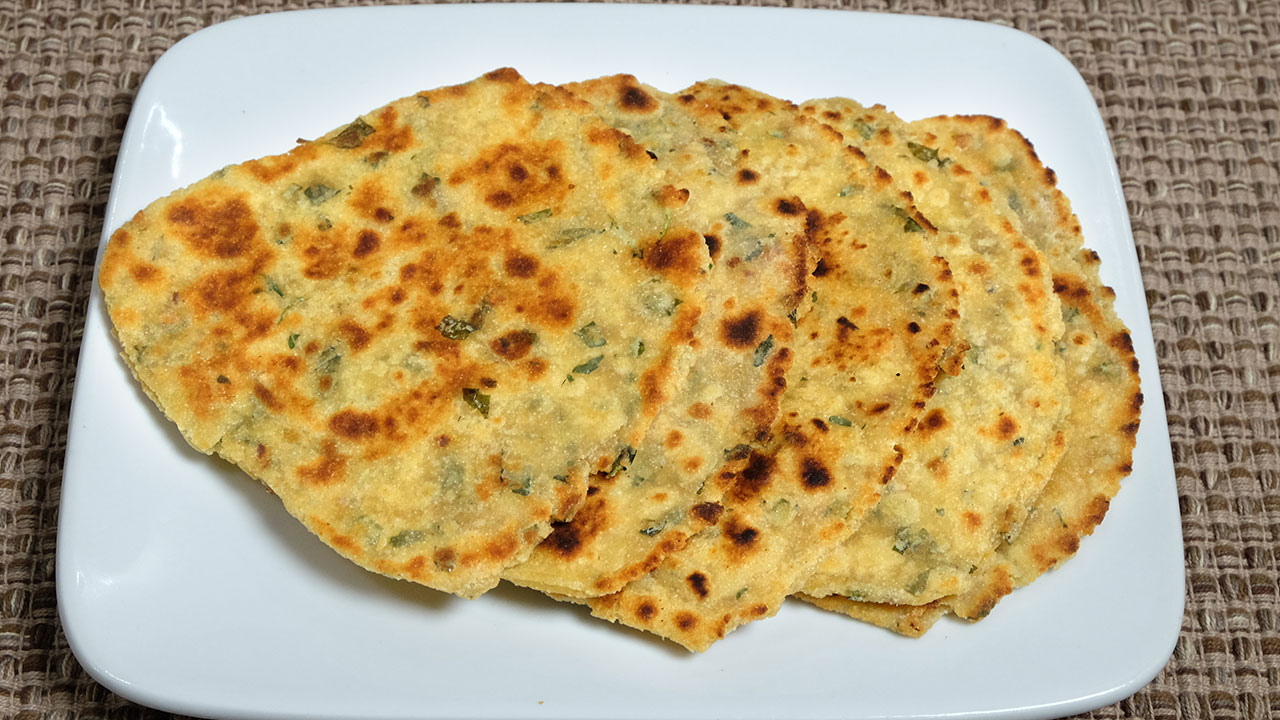
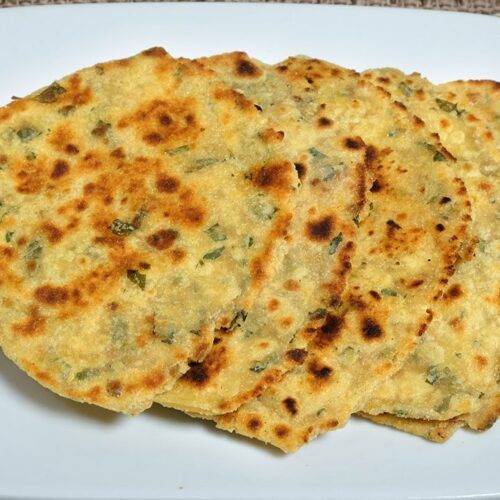
    Rava Mint Parathas consists of bread made with mixing different flours and flavored with fresh mint leaves. These mint parathas are unique with its own fresh flavor. It can be served as a breakfast treat or with any meal. I think it pairs well with Tadka Urad Dal. This recipe will make 8 parathas and will serve 4.
    3.67 from 3 votes
    Prep Time 25 minutes
    Cook Time 20 minutes
    Total Time 45 minutes
    Course Breakfast
    Cuisine Indian
    Servings 4 people

    Ingredients
      

    • 1/2 cup fine sooji semolina
    • 1/2 cup Besan Bengal gram flour
    • 1/2 cup whole wheat flour
    • 1 tsp chili flakes
    • 1/2 tsp salt
    • 1/8 tsp asafetida
    • 1/4 cup mint leaves finely chopped
    • 2 Tbsp oil canola or vegetable oil
    • 1/2 cup luke warm water Approximately

    Also, need

    • 1/4 cup whole wheat flour for rolling the paratha
    • 3 Tbsp oil for cooking the parathas

    Instructions
     

    • Combine all the ingredients in a bowl except water, sooji, besan, whole wheat flour, salt chili flakes, asafetida, mint leaves, and oil mix it well. This will become very crumbly. Add water as needed to make the soft dough. Knead the dough for a minute. Set aside for at least 15 minutes. Note: dough will absorb the water and will become firm.
    • Divide the dough into 8 equal parts and roll them into smooth balls. Roll them into about four-inch diameter, spread about 3-4 drops of oil and fold into two again put another 2-3 drops of oil and fold into triangle.
    • Lightly flour the surface you will roll the paratha and roll it into about 5-inch diameter. Note: if paratha is sticking while rolling sprinkle little more flour this will help rolling.
    • Heat the flat skillet on medium high. Note: heavy skillet works best. To check if the skillet is ready, put few drops of water on it. If the water sizzles right away, the skillet is ready.
    • Place the Paratha over the skillet. When you see the color change and the paratha will puff in different places. Turn the paratha over.
    • Paratha should have golden-brown spots. Wait a few seconds and put about 1 teaspoon of oil and spread with a spatula. Flip the paratha and put again half teaspoon of oil. Lightly press the paratha with a spatula.
    • Flip again and press with a spatula making sure the paratha is golden-brown on both sides. Repeat for the remaining parathas.
    • Parathas are best served hot and crispy. Serve them with Potato Curry with Yogurt Gravy.

    Notes

    Serving Suggestions
    Serve these Rava Mint Paratha for breakfast with hot cup of chai. This goes well with any meal. I like to serve this with Potato Curry with Yogurt Gravy.
    Tried this recipe?Let us know how it was!

  • Whole Wheat Dosa (Atta Ka Cheela)

    Whole Wheat Dosa (Atta Ka Cheela)

    Whole Wheat Dosa

    Whole Wheat Dosa (Atta Ka Cheela)

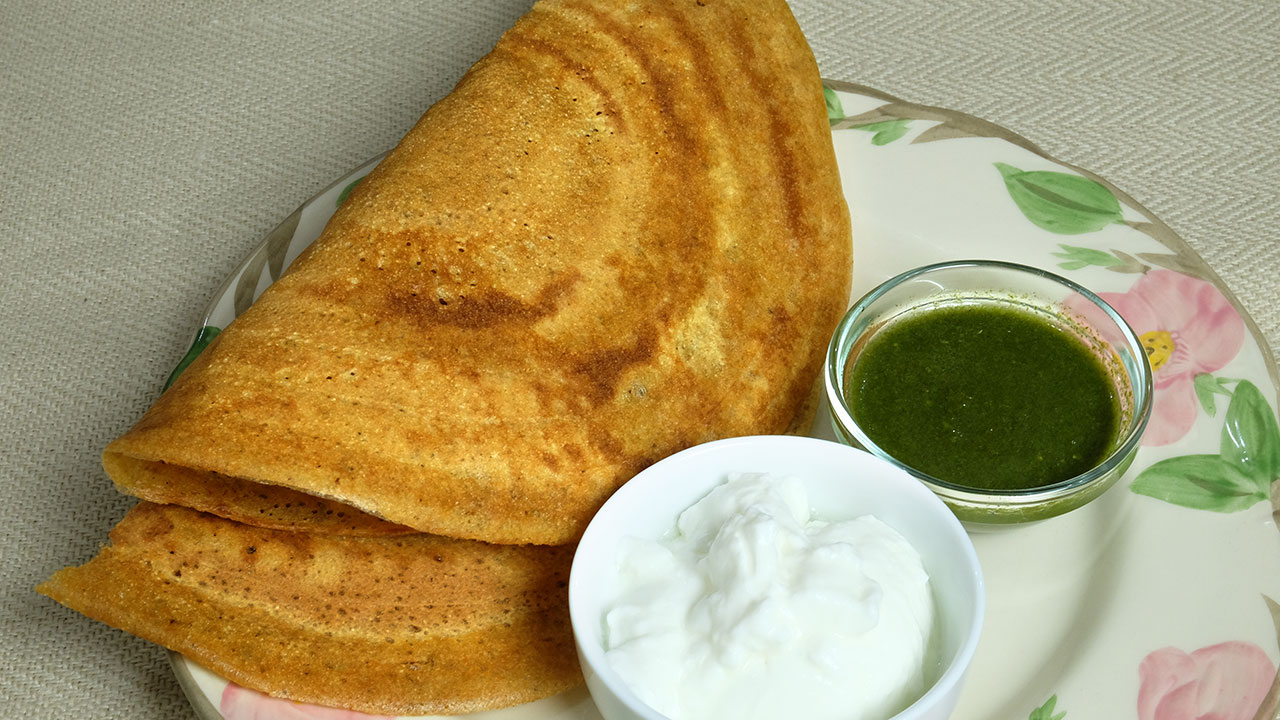
    Whole Wheat Dosa is a super quick and easy recipe. It is another version of the South Indian dosa. This recipe is a special one as it was my mother’s favorite, although this was known as Atta Ka Cheela in my home. Whole wheat dosa is tasty with the perfect amount of crispy deliciousness! You can serve this as my mother did, as Roti. She liked to pair it with her favorite side dishes of mint chutney, and Lauki Chana Dal
    This recipe will make 8 dosa and will serve 4.
    4.60 from 5 votes
    Prep Time 4 minutes
    Cook Time 15 minutes
    Total Time 19 minutes
    Course Breakfast
    Cuisine Indian
    Servings 4 people

    Ingredients
      

    • 1 cup whole wheat flour atta
    • 2 Tbsp sooji fine semolina
    • 1/2 tsp salt
    • 1 tsp sugar
    • 1 Tbsp oil canola or vegetable oil
    • 1/4 tsp black pepper
    • 1/2 tsp carom seeds ajwain
    • 1/2 tsp baking soda
    • 1-1/4 cups water
    • 4 Tbsp oil for cooking canola or vegetable oil

    Instructions
     

    • Mix all the dry ingredients together, whole wheat, sooji, salt, black pepper, carom seeds, and baking soda, mix it well. Add water slowly to make a smooth batter, add water as needed, batter should be pouring consistency.
    • Use a non-stick skillet and place on medium heat. Test by sprinkling a few drops of water on it. Water should sizzle right away. Wipe the skillet with moist towel.
    • Pour 1/4 cup of the batter mixture into the center of the skillet and spread evenly with the back of a spoon. Starting from the center, spiral outward until evenly spread, about 7” inches in diameter thin circle.
    • When the batter starts drying, smear about 2 teaspoons of oil over dosa, and cook till dosa turns golden brown in color. Flip dosa using a flat spatula, and cook for about 1 minute from other side until dosa is golden brown.
    • Crispy Whole Wheat Dosa is ready, repeat with remaining batter. Every time wipe the skillet. that helps spreading the dosa.

    Notes

    • Whole wheat dosa is looking nice and crisp.
    • You can use whole wheat dosa as eggless crepe.
    Tried this recipe?Let us know how it was!

    Elevate Your Culinary Experience with Our Whole Wheat Dosa Recipe 

    Dosa is a popular South Indian delicacy that looks like a crepe. It’s like a crisp and thin pancake made of rice and urad dal batter. Traditionally Dosa is served with sambar, aloo masala, and coconut chutney. It is an Indian crepe made usually through rice batter, but here we have experimented and made many alternative dosa such as Oat Dosa, Besan Dosa, Rava Dosa, Sorghand um Dosa. This preparation uses whole wheat dosa and is a bread-based breakfast recipe that is vegan. The preparation entails skillfully combining pan techniques and manual dexterity to achieve the perfect bread cooked on non-stick skillets.

    Creating the Whole Wheat Dosa Batter:

    In the first step of the whole wheat dosa recipe, begin by meticulously blending all the dry components – whole wheat, sooji, salt, black pepper, carom seeds, and baking soda. Achieve a seamless amalgamation to ensure a well-balanced flavor profile. Gradually incorporate water into the mixture, stirring continuously until a smooth batter with a pourable consistency is attained.

    Setting the Skillet for Whole Wheat Dosa:

    The second step of the recipe for wheat dosa for making optimum whole wheat dosa requires initiating the cooking process with a non-stick skillet placed over medium heat. To gauge its readiness, conduct a water test – if droplets sizzle upon contact, the skillet is primed. To prevent sticking during cooking, maintain a skillet surface free of residue by wiping it with a moist towel.

    Pouring and Spreading the Whole Wheat Dosa Batter:

    The next step in the recipe for wheat dosa is the artistic phase of crafting a perfect whole wheat dosa by taking 1/4 cup of the batter and pouring it gracefully into the skillet’s center. Utilize the back of a spoon to delicately spread the batter, commencing from the center and spiraling outward. Strive for a delicate, 7-inch diameter circle to ensure the desired thinness and crispiness in the final whole wheat dosa.

    Cooking and Flipping the Whole Wheat Dosa:

    As the whole wheat dosa batter begins to set, introduce about 2 teaspoons of oil, spreading it evenly over the surface. Allow the dosa to cook until it transforms into a luscious golden brown. Employ a flat spatula to skillfully flip the dosa, ensuring an additional minute of cooking on the other side until a uniform golden brown hue is achieved. Repeat this process with each dosa, while adhering to the essential skillet-wiping ritual for consistent dosa spreading.

    Finalizing the Whole Wheat Dosa Delight:

    Celebrate the fruition of your culinary endeavors with the satisfying crunch of a well-prepared whole wheat dosa. Replicate the cooking process with the remaining batter, guaranteeing each dosa mirrors the deliciousness of the initial ones. Keep in mind the importance of diligently wiping the skillet after each use to facilitate uniform spreading.

    Observations on Whole Wheat Dosa:

    Appreciate the aesthetic appeal and delectable crispiness that the whole wheat dosa brings to the table, making it an ideal choice for a wholesome and delightful meal. Explore the versatility of this whole wheat dosa by incorporating it seamlessly into your culinary repertoire as an eggless crepe alternative, enhancing your dining experiences with its wholesome goodness.

  • Idli Manchurian

    Idli Manchurian

    Idli Manchurian

    Idli Manchurian

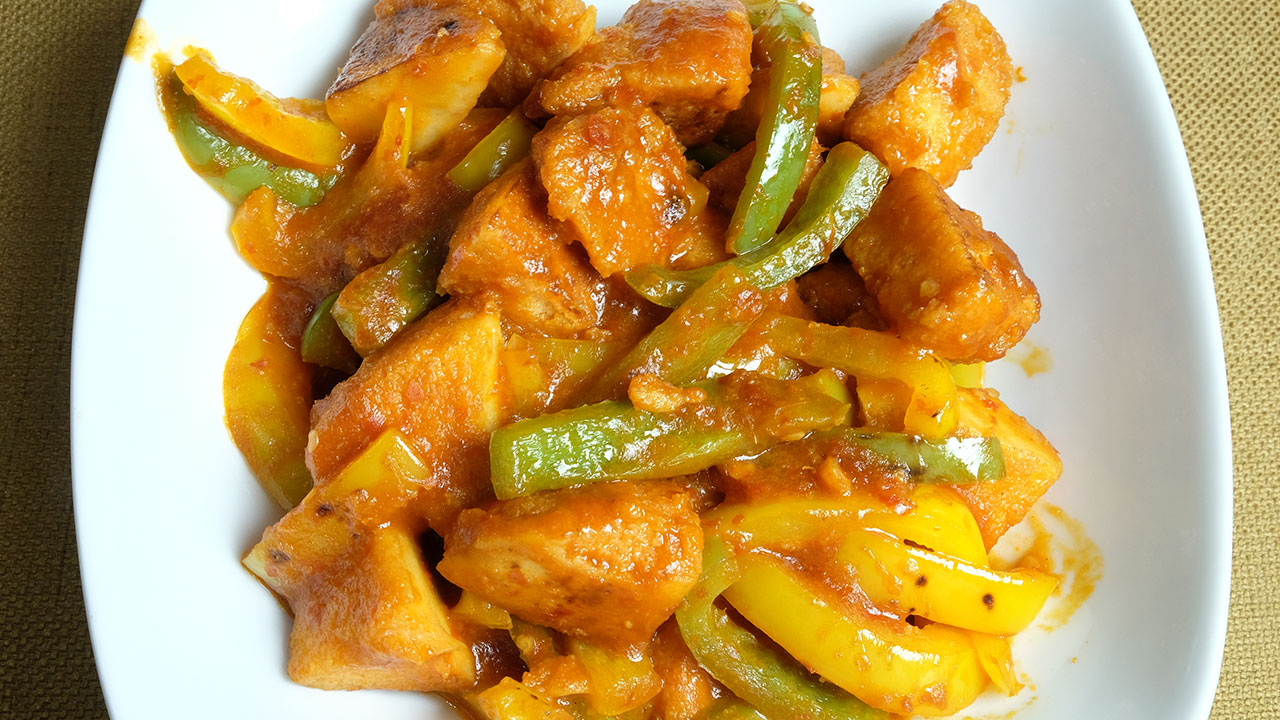
    Idli Manchurian is a popular Indo-Chinese dish, and made several different ways. Idli Manchurian is a super delicious appetizer or main dish. I prepare this dish when I have leftover idlies. Idli Manchurian satisfies your savory and spicy cravings!
    4.75 from 4 votes
    Prep Time 10 minutes
    Cook Time 20 minutes
    Total Time 30 minutes
    Course Appetizer, Breakfast
    Cuisine Indian
    Servings 3 people

    Ingredients
      

    • 4 idlies I am using left over idlies, I do have the recipe for idli
    • 2 cups sliced yellow and green bell pepper use any color bell pepper
    • ¼ tsp salt
    • 2 Tbsp oil for stir-frying idlies and bell pepper

    For Sauce

    • 6 whole red chilies
    • 2 Tbsp oil canola or vegetable oil
    • 2 Tbsp soy sauce
    • 1 Tbsp vinegar
    • 1 Tbsp ginger paste or finely grated ginger adrak
    • 1 Tbsp tomato paste
    • ½ tsp sugar
    • 2 tsp corn starch or arrow root powder
    • 1 cup water

    Instructions
     

    • Boil the red chilies in about 1/2 cup of water until they are tender. Let them cool off. In a blender blend all the sauce ingredients together oil, soy sauce, vinegar, ginger, tomato paste, sugar, and corn starch if needed add more water.
    • Boil the sauce over medium heat. Sauce should be pouring consistency. Set aside.
    • Cut the idlies into bite size pieces, I have cut the idlies in 6 pieces. Heat the oil in frying pan over medium high heat. Add idlies and sprinkle the salt. Stir-fry for 2-3 minutes until idlies are lightly golden brown, take them out and set aside.
    • In the same pan stir fry bell pepper 2-3 minutes, do not overcook the bell pepper, they taste better when they are still crisp. Add the stir-fry idlies to bell peppers. Pour the sauce and stir gently making sure idlies are coated well. Turn off the heat.
    • Idli Manchurian is ready. Take them out in a serving bowl.

    Notes

    Manchurian makes a delicious lunch box meal. Also, try Gobi Manchurian, Masala Idli, and Rava Idli.
    Tried this recipe?Let us know how it was!

    How to Make Idli Manchurian: A Flavorful Fusion Delight

    Idli Manchurian is a delightful fusion dish that combines the softness of idlis with the zingy flavors of Indo-Chinese Manchurian sauce. If you’re looking to tantalize your taste buds with a unique twist on traditional idlis, this recipe is perfect for you. Here’s how to make idli manchurian at home, transforming simple idlis into a mouthwatering delicacy.

    Step 1: Preparing Idlis

    Start by making idlis using your preferred method. You can either use leftover idlis or make fresh ones specifically for this recipe. Idlis are a staple South Indian dish made from fermented rice and lentil batter. Their soft and fluffy texture serves as an excellent base for absorbing the flavors of the Manchurian sauce.

    Step 2: Cutting Idlis into Bite-sized Pieces

    Once the idlis are ready, cut them into small, bite-sized pieces. This step ensures that the idlis are evenly coated with the Manchurian sauce, allowing for maximum flavor infusion in every bite. The size of the idli pieces can vary based on your preference, but smaller pieces tend to work best for this dish.

    Step 3: Making Manchurian Sauce

    Next, prepare the Manchurian sauce. This tangy and spicy sauce is the highlight of the dish, adding depth and complexity to the idlis. The sauce typically consists of a combination of ingredients such as soy sauce, ginger, green chilies, and cornstarch for thickening. You can adjust the spice level according to your taste preferences, making it as mild or as fiery as you like.

    Step 4: Frying Idli Pieces

    Heat oil in a pan and gently fry the idli pieces until they turn golden brown and crispy on the outside. Frying the idlis adds a delicious crunch to the dish, contrasting with the softness of the idlis and complementing the texture of the Manchurian sauce.

    Step 5: Tossing Idlis in Manchurian Sauce

    Once the idlis are fried to perfection, add them to the prepared Manchurian sauce. Toss the idlis gently until they are evenly coated with the sauce, ensuring that each piece is infused with the delicious flavors of the sauce.

    Step 6: Garnishing and Serving

    Garnish the Idli Manchurian wor cilantro for a pop of freshness and color. Serve hot and enjoy this tantalizing fusion dish as a snack or appetizer.

    Tips for Perfect Idli Manchurian:

    • Adjust Spice Level: If you prefer a milder flavor, reduce the amount of green chilies or chili sauce in the Manchurian sauce. For those who enjoy a spicier kick, feel free to increase the quantity of these ingredients.
    • Experiment with Additions: Get creative with your Idli Manchurian by adding diced bell peppers or other vegetables to the sauce for added texture and flavor.
    • Serve Immediately: Idli Manchurian is best enjoyed fresh and hot, so serve it immediately after tossing the idlis in the Manchurian sauce to preserve its crispy texture.
    • Use Leftover Idlis: This recipe is a great way to use up leftover idlis from previous meals, giving them a delicious makeover with the flavors of Manchurian sauce.
    •  

    Variations to Explore:

    • Paneer Idli Manchurian: Substitute paneer cubes for idlis to create a delectable Paneer Manchurian dish with a twist.
    • Gobi Idli Manchurian: Replace idlis with crispy cauliflower florets for a vegetarian version of Gobi Manchurian with a South Indian flair.

    Benefits of Idli Manchurian:

    • Rich in Flavor: Idli Manchurian combines the best of South Indian and Chinese cuisines, offering a burst of flavors in every bite.
    • Versatile Dish: This dish can be served as a snack, appetizer, or even a main course, making it perfect for any occasion.
    • Easy to Make: With simple ingredients and straightforward steps, Idli Manchurian is easy to prepare at home, even for beginners in the kitchen.
    • Customizable: You can adjust the ingredients and spice levels according to your taste preferences, making it a versatile dish that everyone can enjoy.

    Frequently Asked Questions (FAQs):

    Can I use store-bought idlis for this recipe?

    • Yes, you can use store-bought idlis if you don’t have time to make them from scratch. Simply cut them into pieces and proceed with the recipe as directed.

    Is Idli Manchurian spicy?

    • The spice level of Idli Manchurian can be adjusted according to your preference. You can make it mild or spicy by controlling the amount of green chilies or chili sauce added to the Manchurian sauce.

    Can I make Idli Manchurian ahead of time?

    • While Idli Manchurian is best enjoyed fresh, you can prepare the components ahead of time and assemble them just before serving to maintain the crispy texture of the idlis.

    Can I freeze leftover Idli Manchurian?

    • It’s not recommended to freeze Idli Manchurian as the texture of the idlis may become soggy upon reheating. It’s best to enjoy it fresh for the best taste and texture.

    Explore More Delectable Recipes

    For more mouthwatering recipes and culinary inspiration, explore the following links from Manjula’s Kitchen:Crispy Spinach Pakoras, Vegetable Biryani, Paneer Tikka Masala, Vegetable Pakoras Recipe, Baingan Bharta (Roasted Eggplant) Recipe & Matar (Green Peas) Paneer Recipe. Dive into the world of authentic Indian cuisine and elevate your cooking skills with these delightful recipes.

  • Paneer Pasanda (Paneer Curry)

    Paneer Pasanda (Paneer Curry)

    Paneer Pasanda (Curry)

    Paneer Pasanda

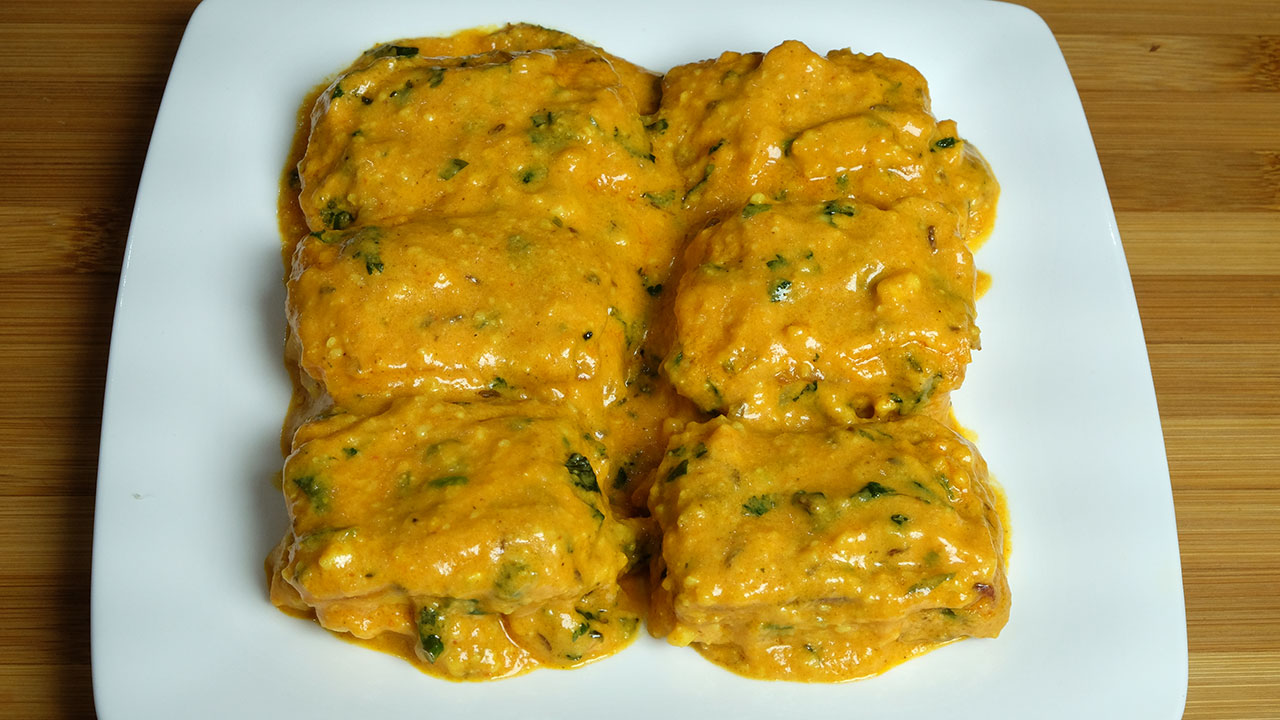
    Paneer Pasanda is a delicacy consisting of stuffed paneer with rich creamy gravy. Paneer Pasanda is a delicious and perfect dish for formal get-togethers or when you simply want to indulge yourself. This is the ultimate Paneer dish.
    5 from 5 votes
    Prep Time 25 minutes
    Cook Time 25 minutes
    Total Time 50 minutes
    Course Main Course
    Cuisine Indian
    Servings 4 people

    Ingredients
      

    For Pasanda

    • 8 oz Paneer 9 thin slices of paneer, they are about 1×3 inch of slices, I am using store bought paneer
    • 2 Tbsp fresh shredded coconut I am using frozen shredded coconut
    • 1/4 tsp salt
    • 1 Tbsp cilantro finely chopped, hara dhania
    • 2 tsp green chili finely chopped, adjust to taste

    For Batter

    • 1/4 cup corn starch or arrowroot power
    • 3 Tbsp water
    • 3 Tbsp oil to shallow fry

    For Gravy

    • 2 cups chopped tomatoes about 3 medium size tomatoes
    • 1 Tbsp ginger chopped
    • 1 Tbsp coriander powder dhania
    • 1 Tbsp oil
    • 1/2 tsp cumin seeds jeera
    • 1/8 tsp asafetida hing
    • 1/4 tsp turmeric haldi
    • 1 tsp red chili powder adjust to taste
    • 1/4 cup cashew powder
    • 1 tsp salt
    • 1/4 cup heavy cream or cream
    • 1/4 tsp garam masala
    • 2 Tbsp cilantro chopped, hara dhania

    Instructions
     

    • Mash one of the paneer piece, and mix it well with coconut, salt, cilantro, and green chili.
    • Spread this mixture on 4 paneer slices and cover them with remaining 4 slices. Cut them inti two, and press it lightly. Set aside.
    • Mix corn starch in 2-3 tablespoons of water to make a thick batter.
    • Heat the flat frying pan with about 3 tablespoons of oil over medium heat. When oil is moderately hot dip the stuffed paneer pieces one at a time, gently dip in the batter and put in the frying pan, leaving some space in between. Shallow fried the paneer until they are light golden brown, from both sides.
    • Take them out over paper towel, to drain the extra oil. Set aside.

    Making Gravy

    • Blend tomatoes, ginger, coriander powder to fine paste, and strain the tomato mix. Set aside.
    • Heat the oil in a sauce pan on medium heat. When the oil is moderately hot add cumin seeds. (Cumin seeds should crack right of way). Lower the heat too low, add asafetida, turmeric, chili powder and cashew powder stir for a minute.
    • Add tomato paste cook for 3-4 minutes stirring till tomato start leaving the side of the pan. Add salt and cream and about half cup of water. Cook for 2-3 minutes. Add cilantro and garam masala stir and turn off the heat. Gravy should be pouring consistency.
    • Pour the gravy over Paneer Pasanda.

    Notes

    Paneer Pasanda is delicious. For my upcoming holiday dinner I will be serving Paneer Pasanda with Punjabi Chole, Jeera Aloo, Boondi Ka Raita, Cumin Rice and Naan.
    The one good thing with this dish you can prepare this in pieces and assemble when ready to serve.
    Enjoy!
    Tried this recipe?Let us know how it was!

    Paneer Pasanda Recipe: How to make Paneer Pasanda

    Paneer Pasanda, a gourmet delight, features sumptuously stuffed paneer immersed in a luscious creamy gravy. Ideal for formal gatherings or when you crave indulgence, Paneer Pasanda stands as the ultimate paneer dish. Elevate your party with this delectable and easy-to-make vegetable curry, making it a perfect addition to your repertoire of party recipes.

    Prepare the Paneer Filling: Mash one piece of paneer cheese and combine it thoroughly with desiccated coconut, salt, chopped cilantro, and chopped green chili. Spread this mixture evenly over four paneer slices. Carefully top these slices with the remaining four paneer slices to create a sandwich. Cut each sandwich in half and gently press down to secure the filling.

    Create the Coating: In a separate bowl, whisk cornstarch with 2-3 tablespoons of water until a thick batter forms.

    Shallow Fry the Paneer: Heat approximately 3 tablespoons of oil in a flat pan over medium heat. Once the oil reaches moderate heat, carefully dip each stuffed paneer piece into the cornstarch batter. Gently transfer the coated paneer to the pan, ensuring enough space between them. Shallow fry the paneer until they turn a light golden brown on both sides. Drain any excess oil by placing the fried paneer on a paper towel-lined plate.

    Make the Gravy: Blend chopped tomatoes, ginger, and coriander powder into a smooth paste. Strain the tomato mixture and set it aside.

    Cook the Aromatics: Heat oil in a saucepan over medium heat. Once moderately hot, add cumin seeds and wait for them to crackle. Reduce heat to low and add asafetida, turmeric powder, chili powder, and cashew powder. Sauté the spices for one minute.

    Simmer the Tomato Base: Introduce the strained tomato paste and cook for 3-4 minutes, stirring constantly until the tomato mixture separates from the sides of the pan. Season with salt and cream, then add approximately half a cup of water. Allow the gravy to simmer for 2-3 minutes.

    Finalize the Gravy: Stir in chopped cilantro and garam masala before turning off the heat. The finished gravy should have a pouring consistency.

    Assemble the Dish: Pour the prepared gravy over the fried paneer pieces.

  • Rava Kesari (Kesari Halwa)

    Rava Kesari (Kesari Halwa)

    Rava Kesari

    Rava Kesari (Kesari Halwa)

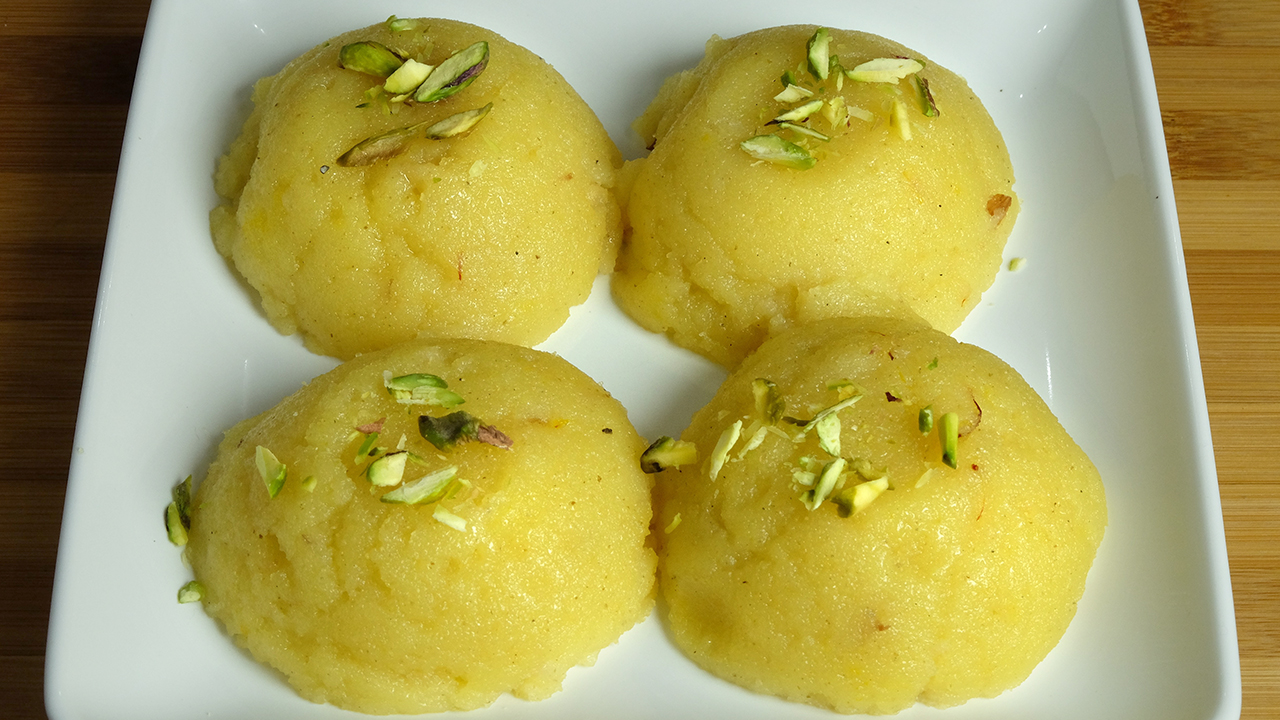
    Rava Kesari (Kesari Halwa) is a popular South Indian sweet dish which is a different version of Sooji ka Halwa. Rava Kesari is delicious and easy to make, usually made on festive occasions. This is a quick fix sweet for parties as it is quick & easy to make especially if you have unexpected guests.
    5 from 1 vote
    Prep Time 5 minutes
    Cook Time 15 minutes
    Total Time 20 minutes
    Course Dessert, Snack
    Cuisine Indian
    Servings 8 people

    Ingredients
      

    • 1 cup fine sooji semolina
    • 3/4 cup sugar
    • 4 Tbsp ghee clarified butter
    • 2 Tbsp sliced almonds
    • 8 drops yellow food color
    • Pinch of saffron kesar
    • 1/8 tsp cardamom crushed, ilachi
    • 3-1/3 cups water
    • 1 Tbsp sliced pistachios pista for garnishing

    Instructions
     

    • Boil the water with sugar, and cardamom powder in a pot over medium heat. Bring the syrup to boil, mix it making sure sugar is dissolve add the food color and mix. Set aside
    • Melt 1 tablespoon of ghee in a frying pan on low medium heat. Add the sooji, and almonds and roast stirring continuously, sooji should be light golden brown in color and will have a light sweet aroma. This should take about 7-8 minutes.
    • Add the syrup slowly, as you add the syrup to sooji water will splatter. Make sure there are no lumps. Cook for 2-3 minutes, stirring continuously. Add more water if halwa becomes very thick.
    • Add the remaining ghee 1 tablespoon at a time and cook for 3-4 minutes stirring continuously. Rava Kesari will start leaving the sides of frying pan. Rava Kesari will have a texture of thick batter.
    • Garnish the Rava Kesari with sliced pistachios, serve warm or at room temperature.

    Notes

    Treat yourself, serve Rava Kesari for breakfast with Aloo Puri , Dal Puri
    Tried this recipe?Let us know how it was!

  • Masala Puri (Spicy Crackers)

    Masala Puri (Spicy Crackers)

    Masala Puri

    Masala Puri (Spicy Crackers)

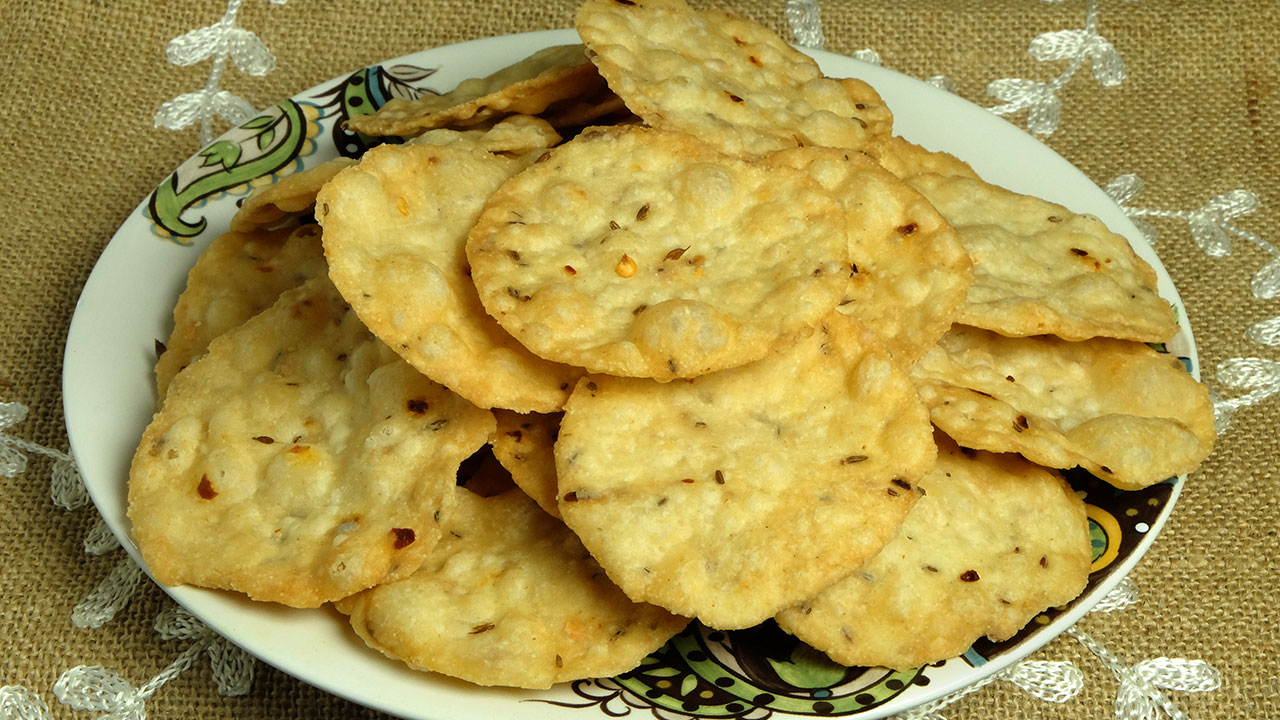
    Masala puri is a delicious, crispy snack. You can also serve them as spicy crackers or chips. They can be quite addicting so be careful. Masala puri is one of my favorite snack with hot cup of chai. This simple and delicious recipe will make a great holiday gift!
    4.25 from 8 votes
    Prep Time 15 minutes
    Cook Time 20 minutes
    Total Time 35 minutes
    Course Appetizer, Snack
    Cuisine Indian
    Servings 40 masala puri

    Ingredients
      

    • 1 cup all-purpose flour maida, plain flour
    • 1/2 cup fine sooji semolina
    • 1 tsp salt
    • 1/2 tsp cumin seed jeera
    • 1/2 tsp carom seed ajwain
    • 1/8 tsp asafetida hing
    • 1 tsp red chili flakes
    • 2 Tbsp oil
    • 1/2 cup water
    • Also need oil to fry

    Instructions
     

    • In a bowl mix all the dry ingredients all-purpose flour, sooji, Salt, Cumin seeds, carom seeds, asafetida, and red chili flakes.
    • Add oil to the flour mix and rub with your fingers to mix it well. Add the water little at a time, making into a firm dough.
    • Cover the dough and set aside for about 10 minutes or more.
    • Divide the dough into about 40 equal parts, and roll them between your palms.
    • Roll the puries into 3 inch circles.
    • Prick each puri with a fork in 3 to 4 places, this will prevent the puries not to puff while frying.
    • Heat the oil in a frying pan on medium heat.
    • The frying pan should have about 1 inch of oil. To check if the oil is ready, put a small piece of dough in the oil. The dough should make the oil sizzle and come up slowly.
    • Fry few puries at a time, make sure to place just enough puries to cover the oil. Fry them until both sides are a light golden-brown. Take them out over paper towel and repeat the process.

    Tips

    • Masala Puries can be stored for a couple of months in airtight containers.
    • If the puries are cooked on high heat, they will be soft.

    Notes

    Here are some more gift ideas! Spicy Cashews, Almond Brittle, Flax Seed Burfi
    Tried this recipe?Let us know how it was!