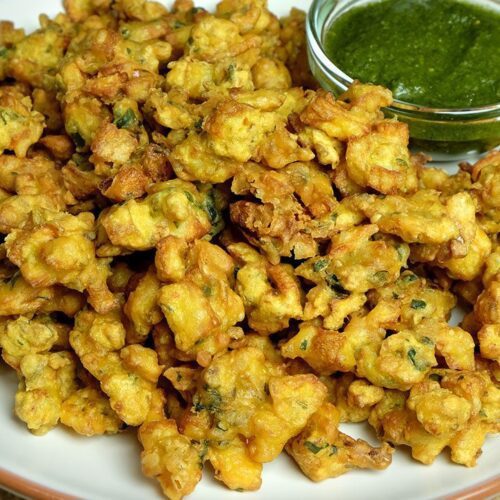
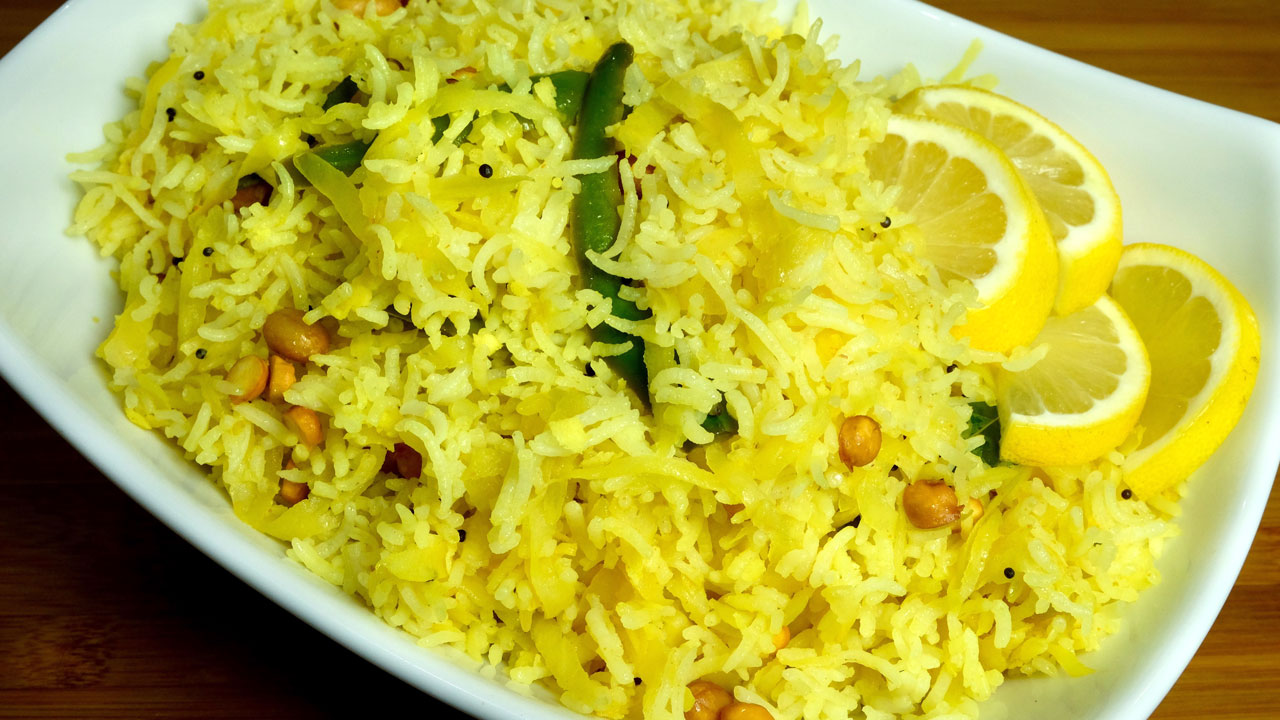
Category: Quick & Easy

Easy Indian Recipes: Quick and Delicious Vegetarian Dishes

In today’s fast-paced world, we often find ourselves seeking meals that are quick to prepare but still bursting with flavor. Indian cuisine, known for its rich and aromatic spices, offers a plethora of options that are both easy to make and incredibly satisfying. Let’s explore some easy Indian recipes vegetarian, perfect for any occasion, ensuring that you can enjoy delicious easy Indian recipes without spending hours in the kitchen.

Paneer Bhurji

Paneer Bhurji is a delightful scramble made with crumbled paneer (Indian cottage cheese) and a mix of vegetables and spices. This dish is a staple in many Indian households and is a fantastic example of easy Indian recipes. It comes together quickly, making it ideal for a weeknight dinner or a hearty breakfast. Serve it with a side of warm roti or toast for a complete meal.

Vegetable Pulao

For a one-pot wonder, Vegetable Pulao is a go-to choice. This dish features rice cooked with a medley of vegetables and fragrant spices. It’s a shining star among easy Indian food recipes due to its simplicity and the minimal effort required. Pair it with a cooling cucumber raita from the Raita Recipes category for a refreshing touch.

Aloo Jeera

Aloo Jeera, or cumin-spiced potatoes, is a quick and flavorful dish that exemplifies Indian food recipes easy. The potatoes are sautéed with cumin seeds and a handful of spices, resulting in a dish that’s both comforting and satisfying. This recipe is perfect for those times when you need something delicious without a lot of fuss.

Enhancing Your Quick and Easy Menu

To elevate your menu, why not include some delectable options from other categories? Indian Breads like chapati or naan can be quickly prepared and make a perfect accompaniment to any meal. For those with a sweet tooth, Indian Desserts Recipes such as a speedy coconut burfi or a delightful mango lassi can provide a sweet finish to your meal. Incorporating dishes from the Healthy Recipes section, such as a simple and nutritious palak dal or a crisp salad from the Soups and Salads Recipe category, can add a healthy balance to your table.

More Easy Indian Recipes

Chana Masala

Chana Masala is a popular dish featuring chickpeas cooked in a spiced tomato gravy. This dish is not only delicious but also quick to prepare, making it a favorite in the realm of easy Indian recipes vegetarian. Serve it with basmati rice or naan for a complete meal.

Moong Dal Khichdi

For a comforting and nourishing option, Moong Dal Khichdi is a must-try. This simple dish made from rice and yellow moong dal (split yellow lentils) is seasoned with basic spices and is incredibly easy to make. It’s perfect for those days when you want something light yet satisfying.

Sweet and Simple Endings

Sheera

Sheera is a traditional Indian dessert made with semolina, ghee, and sugar. It’s a quick and easy dessert that fits perfectly into the category of easy Indian food recipes. The best part? It takes just a few minutes to prepare, making it a great option for last-minute sweet cravings.

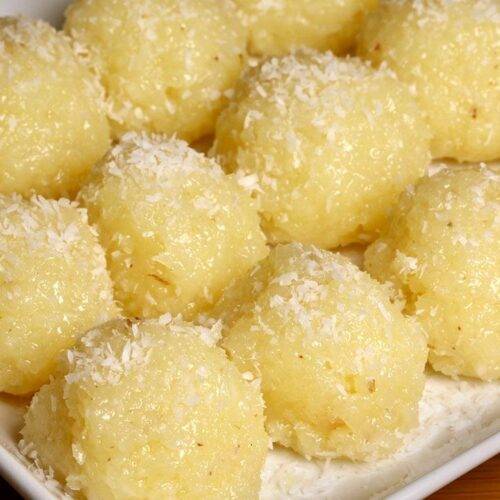
Coconut Ladoo

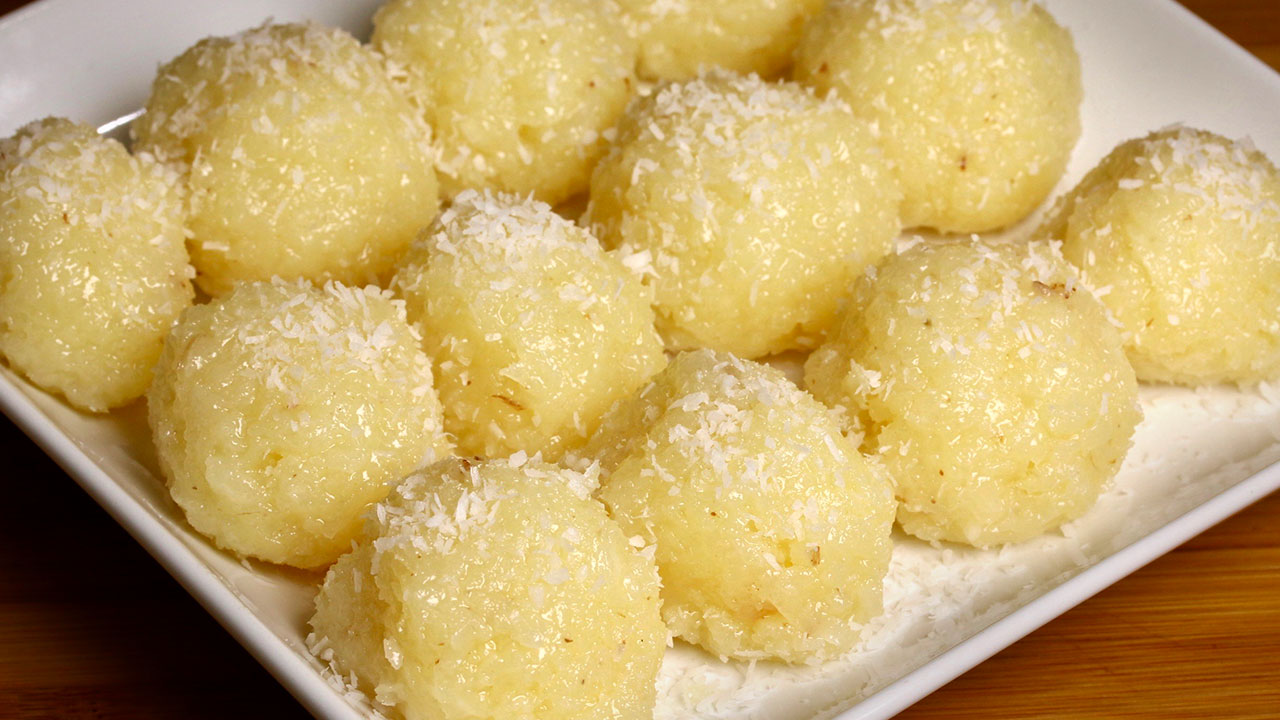
Another sweet treat that’s both simple and delightful is Coconut Ladoo. Made with grated coconut and condensed milk, these sweet balls are a favorite among easy Indian recipes vegetarian. They’re perfect for festivals or just as a quick dessert to satisfy your sweet tooth.

Frequently Asked Questions (FAQs)

Q: What are some popular easy Indian recipes vegetarian? 

A: Some popular easy Indian recipes vegetarian include Paneer Bhurji, Vegetable Pulao, Aloo Jeera, Chana Masala, Moong Dal Khichdi, Sheera, and Coconut Ladoo. These dishes are quick to prepare and full of flavor.

Q: How can I make traditional Indian food recipes easy? 

A: To make traditional Indian food recipes easy, look for recipes that require minimal ingredients and cooking time. Dishes like Paneer Bhurji, Aloo Jeera, and Moong Dal Khichdi are great examples of easy and quick Indian recipes.

Q: What are some easy Indian food recipes for beginners? 

A: Some easy Indian food recipes for beginners include Vegetable Pulao, Chana Masala, and Coconut Ladoo. These recipes are straightforward and don’t require advanced cooking skills, making them perfect for those new to Indian cooking.

Q: Can I prepare easy Indian recipes in advance? 

A: Yes, many easy Indian recipes can be prepared in advance. Dishes like Vegetable Pulao and Chana Masala can be made ahead of time and stored in the refrigerator. Simply reheat before serving.

Q: What are some quick Indian desserts? 

A: Some quick Indian desserts recipes include Sheera and Coconut Ladoo. These desserts are easy to make and require minimal preparation time, making them perfect for when you need a sweet treat in a hurry.

Conclusion

Easy Indian recipes vegetarian offer a world of flavors and aromas without the lengthy preparation time. 

Whether you’re looking for easy Indian recipes, easy Indian food recipes, or specific Indian food recipes easy, these dishes bring convenience and deliciousness to your table. 

So, gather your ingredients, try out these recipes, and enjoy the rich and diverse world of Indian cuisine. Happy cooking and happy eating!

By incorporating these dishes into your menu, you’ll be able to enjoy a wide variety of delicious and nutritious foods. Whether you’re looking for quick snacks, main courses, or desserts, there’s an easy Indian recipe to suit every taste. 

Don’t forget to check out Manjula’s Kitchen for more inspiration and culinary delights. Happy cooking and happy eating!

  • Nariyal Ka Ladoo – Coconut Ladoo

    Nariyal Ka Ladoo – Coconut Ladoo

    Nariyal ka Ladoo

    Nariyal Ka Ladoo

    Nariyal Ka Ladoo or Coconut Ladoo, a delicious homemade sweet also can be serve as a candy. This dessert is easy to prepare. One of the simplest recipe to make with few ingredients.
    4.43 from 7 votes
    Prep Time 5 minutes
    Cook Time 20 minutes
    Total Time 25 minutes
    Course Dessert
    Cuisine Indian
    Servings 12 pieces

    Ingredients
      

    • 2 cups fresh grated coconut I am using frozen grated coconut, easily available in Indian grocery stores
    • 1 cup heavy cream
    • 1/2 cup milk
    • 1/2 cup sugar
    • 1 Tbsp coconut powder for garnishing, optional

    Instructions
     

    • In a non-stick heavy bottom frying pan add all the ingredients, cream, milk, coconut and sugar, bring it to boil over medium high heat, stir occasionally. After coconut mix comes to boil reduce the heat to medium.
    • Lower the heat to medium and let it cook for about 5 minutes stirring occasionally, scraping the sides (otherwise sides will start browning the mix), until mixture start coming together.
    • Lower the heat to low medium, and stir continually this will be consistency of soft dough. This should take about 5 minutes. Turn of the heat.
    • Transfer mixture to the plate, let the mix sit for about 10 minutes, then divide into 12 equal parts or make the size of ladoo you prefer. Roll them between you palm and shape them in round balls.

    Notes

    Suggestion
    You can also make this as burfi. To make burfi pour the coconut mix over flat plate and press it half inch thick in square shape. Let it sit for five to six hours and cut them in square shape. Nariyal burfi will be little soft in texture.
    If you like coconut you will love this delicious burfi.
    Enjoy! With your family and friends.
    Tried this recipe?Let us know how it was!
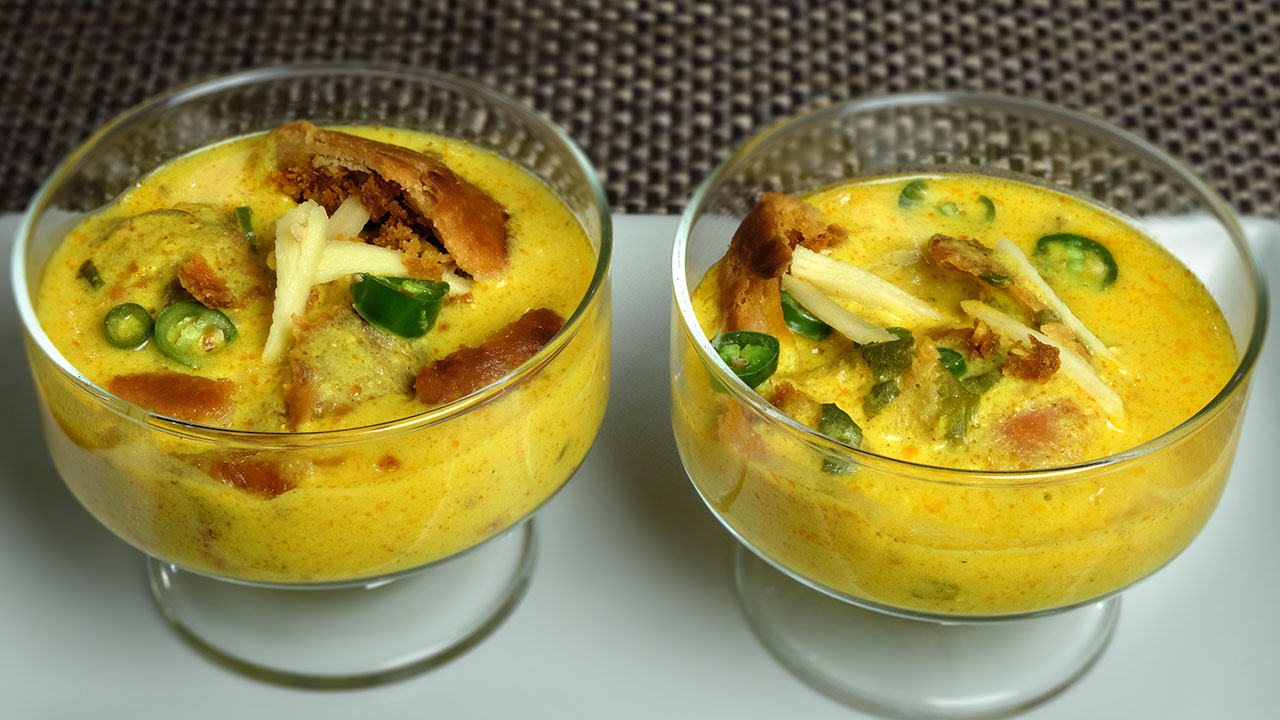
  • Kachori with Kadhi

    Kachori with Kadhi

    Kachori topped with Kadhi

    Kachori topped with Kadhi

    Kachori topped with Kadhi this is a Rajasthani specialty appetizer that is simply delicious. There are times that we like to indulge ourselves or want to make a special treat for guests at parties, but there is not enough time in the day to prepare such dishes. For times like this, I like to make semi-homemade recipes. This dish is perfect for this and can be presented beautifully.
    5 from 2 votes
    Prep Time 10 minutes
    Cook Time 30 minutes
    Total Time 40 minutes
    Course Appetizer, Snack
    Cuisine Indian
    Servings 2 people

    Ingredients
      

    For Kachori

    • 4 peices Dal Kachori Using frozen Kachori, which are readily available in Indian grocery stores.

    For Kadhi

    • 1 cup yogurt
    • 1/4 cup besan gram flour
    • 2 Tbsp oil canola or vegetable oil
    • 1/2 tsp cumin seeds jeera
    • 1/8 tsp asafetida hing
    • 1/2 tsp fenugreek seeds mathi
    • 1/2 tsp turmeric haldi
    • 1/2 tsp red chili powder
    • 1 tsp salt
    • 2 Tbsp cilantro finely chopped, hara dhania
    • 1/4 tsp gram masala
    • 4 cups water

    For garnishing

    • 1 Tbsp ginger thinly sliced
    • 1 Tbsp green chilies thinly sliced
    • 2 tsp lemon juice
    • 1/4 tsp salt

    Instructions
     

    • For garnishing mix all the ingredients together before we start the Kadhi, this will get enough time to marinate ginger and green chili. Set aside.
    • Mix besan and turmeric with yogurt until smooth, this should be lump free. Add three cups of water slowly and mix well.
    • Heat the oil in a saucepan. Test the heat by adding one cumin seed to the oil. If the cumin seeds crack right away, the oil is ready. Add cumin seeds and asafetida.
    • When the cumin seeds crack, turn off the heat and add fenugreek seeds, and red chili powder. Stir for a few seconds. Add the yogurt mixture and turn the heat to medium. Keep stirring until the kadhi comes to a boil.
    • Add remaining water and let it come to boil. Add salt. Turn the heat to medium low. Let the kadhi cook about 20-30 minutes, stir occasionally. If needed to adjust thickness, add boiled water. Kadhi should be pourable consistency. Add garam masala, and cilantro, mix and turn off the heat.
    • While the Kadhi is cooking bake, or fry the kachories per the instructions on the box. I have baked the kachori. Let them cool of then break it open.
    • Serve Kadhi over Kachori and garnish with marinated green chili and ginger pieces.

    Notes

    Instead of frozen kachori, you can also make these fresh Kachori at home using my recipe.
    Tried this recipe?Let us know how it was!

    Rajasthani Kadhi Kachori Recipe: A Delectable Fusion Dish Rajasthani semi-homemade

    Kachori Kadhi is a versatile dish perfect for various occasions, whether as an appetizer, a flavorful addition to a lunch box suggestion, a delightful option for party recipes, or a quick & easy chaat. Rajasthani kadhi kachori is a beloved delicacy that combines the richness of kadhi with the crispiness of kachori. This recipe brings together the tangy flavors of the kadhi gravy with the spicy and aromatic kachoris, creating a symphony of taste that will tantalize your taste buds. Let’s delve into how to prepare this mouthwatering dish step by step.

    Preparing the Kadhi for Kachori Kadhi: A Flavorful Base

    To begin with, let’s prepare the kadhi kachori base, the kadhi. In a mixing bowl, whisk together yogurt, gram flour, and water until smooth. This mixture forms the base of the kadhi gravy, providing a creamy texture and tangy flavor.

    Next, heat oil in a pan and add mustard seeds, cumin seeds, fenugreek seeds, and asafoetida. These tempering ingredients infuse the kadhi with aromatic flavors and add depth to the dish. Stir in chopped ginger, green chilies, and curry leaves for an extra kick of spice and fragrance.

    Now, pour the yogurt mixture into the pan and let it simmer over medium heat. Stir continuously to prevent lumps from forming and to ensure that the kadhi thickens evenly. As it cooks, the kadhi will develop a rich consistency and absorb the flavors of the spices.

    Frying the Kachoris: Adding Crunch to the Kadhi Kachori

    While the kadhi simmers, let’s move on to preparing the kachoris. Heat oil in a separate pan for deep frying. Meanwhile, take the kachori dough and divide it into small balls. Flatten each ball with your palms to form discs, then fill them with a spicy lentil mixture made of soaked and ground lentils mixed with spices like rajasthani kachori with kadhi.

    Once the oil is hot, carefully slide the stuffed kachoris into the pan and fry until golden brown and crisp. The kachoris will puff up beautifully as they cook, creating a delightful contrast of textures when paired with the creamy kadhi gravy.

    Serving the Rajasthani Kadhi Kachori: A Gastronomic Delight

    Once both the kadhi and kachoris are ready, it’s time to assemble this divine dish. Ladle the hot kadhi into serving bowls and place a couple of freshly fried kachoris on the side. Garnish with chopped cilantro and serve hot.

    The combination of the tangy, creamy kadhi and the crispy, flavorful kachoris is sure to impress your taste buds and leave you craving more. Enjoy this Rajasthani delicacy with steamed rice or as a standalone meal for a truly satisfying culinary experience.

    Tips for Perfect Kadhi Kachori: Enhancing Flavor and Texture

    • Ensure that the yogurt is fresh and not too sour for a balanced flavor in the kadhi.
    • Fry the kachoris on medium heat to ensure they cook through evenly without burning.
    • You can customize the spice level of the kadhi and kachoris according to your preference by adjusting the amount of green chilies and red chili powder.

    Variations of Kadhi Kachori: Experimenting with Flavors

    • For a healthier twist, you can bake the kachoris instead of deep frying them.
    • Add finely chopped vegetables like carrots, and peas to the kachori filling for added nutrition and flavor.
    • Experiment with different types of lentils for the kachori stuffing, such as moong dal or chana dal, to create unique variations of this dish.

    Benefits of Kadhi Kachori: Nutritious and Delicious

    • Yogurt, the main ingredient in kadhi, is rich in probiotics that promote gut health and digestion.
    • Gram flour used in the kadhi is a good source of protein and fiber, making this dish filling and nutritious.
    • Lentils used in the kachori filling provide a healthy dose of plant-based protein and essential nutrients.

    FAQs About Kadhi Kachori: Answering Your Queries

    Q: Can I make the kadhi ahead of time?

    A: Yes, you can prepare the kadhi in advance and reheat it before serving. Just make sure to adjust the consistency by adding water if it thickens too much upon reheating.

    Q: Can I freeze leftover kachoris?

    A: Yes, you can freeze leftover kachoris for up to a month. Reheat them in a preheated oven until crispy before serving.

    Q: Can I use store-bought kachoris instead of making them from scratch?

    A: While homemade kachoris are ideal for the best flavor and texture, you can certainly use store-bought ones as a time-saving option.

    If you’re looking to explore more Indian recipes, appetizers, beverages, and desserts, be sure to check out the following links on Manjula’s Kitchen. Here are some links to recipes on Manjula’s Kitchen’s official website: Vegetable Pakoras, Kaju Katli (Cashew Burfi), Baingan Bharta (Roasted Eggplant), Matar (Green Peas) Paneer, Besand and Ladoo.

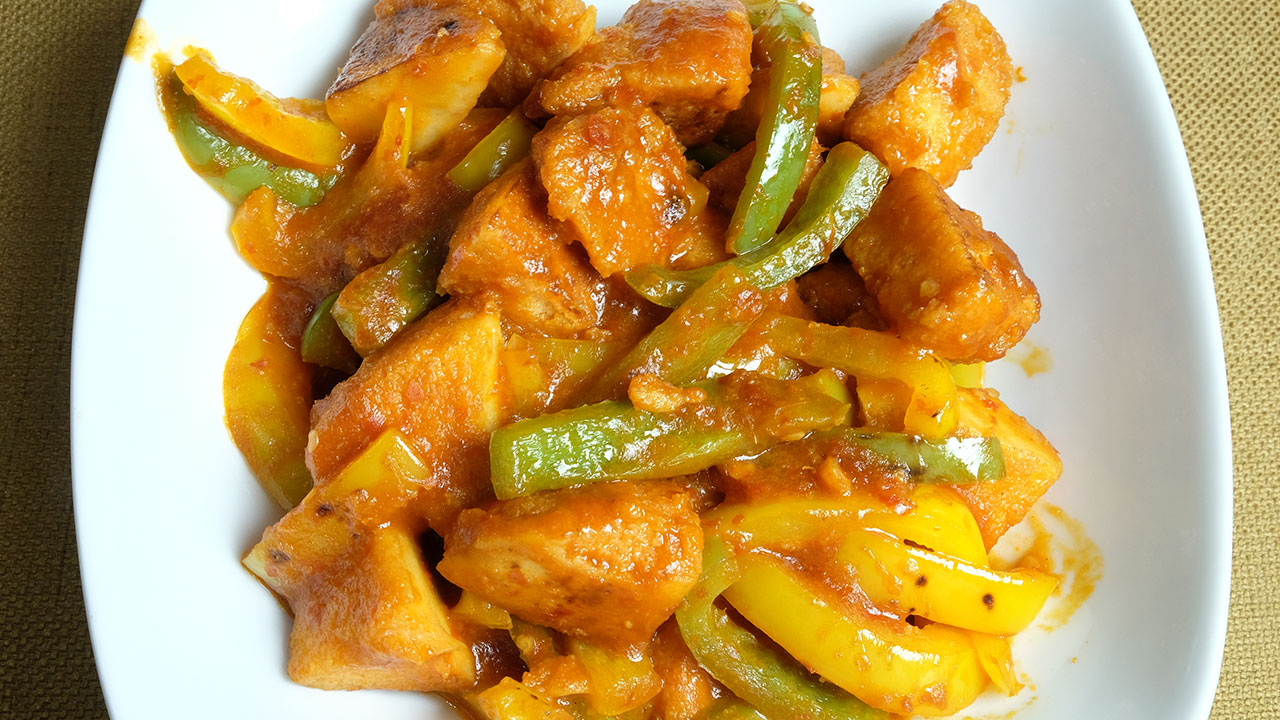
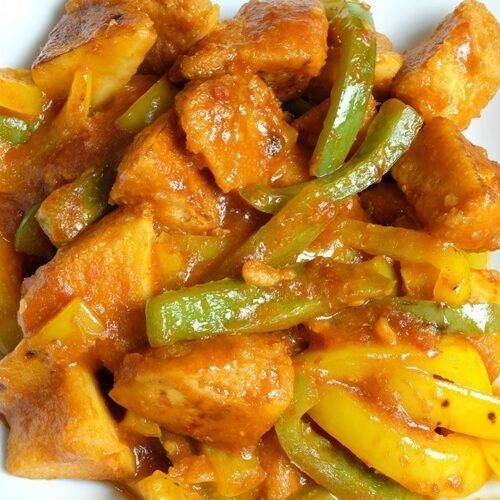
  • Idli Manchurian

    Idli Manchurian

    Idli Manchurian

    Idli Manchurian

    Idli Manchurian is a popular Indo-Chinese dish, and made several different ways. Idli Manchurian is a super delicious appetizer or main dish. I prepare this dish when I have leftover idlies. Idli Manchurian satisfies your savory and spicy cravings!
    4.75 from 4 votes
    Prep Time 10 minutes
    Cook Time 20 minutes
    Total Time 30 minutes
    Course Appetizer, Breakfast
    Cuisine Indian
    Servings 3 people

    Ingredients
      

    • 4 idlies I am using left over idlies, I do have the recipe for idli
    • 2 cups sliced yellow and green bell pepper use any color bell pepper
    • ¼ tsp salt
    • 2 Tbsp oil for stir-frying idlies and bell pepper

    For Sauce

    • 6 whole red chilies
    • 2 Tbsp oil canola or vegetable oil
    • 2 Tbsp soy sauce
    • 1 Tbsp vinegar
    • 1 Tbsp ginger paste or finely grated ginger adrak
    • 1 Tbsp tomato paste
    • ½ tsp sugar
    • 2 tsp corn starch or arrow root powder
    • 1 cup water

    Instructions
     

    • Boil the red chilies in about 1/2 cup of water until they are tender. Let them cool off. In a blender blend all the sauce ingredients together oil, soy sauce, vinegar, ginger, tomato paste, sugar, and corn starch if needed add more water.
    • Boil the sauce over medium heat. Sauce should be pouring consistency. Set aside.
    • Cut the idlies into bite size pieces, I have cut the idlies in 6 pieces. Heat the oil in frying pan over medium high heat. Add idlies and sprinkle the salt. Stir-fry for 2-3 minutes until idlies are lightly golden brown, take them out and set aside.
    • In the same pan stir fry bell pepper 2-3 minutes, do not overcook the bell pepper, they taste better when they are still crisp. Add the stir-fry idlies to bell peppers. Pour the sauce and stir gently making sure idlies are coated well. Turn off the heat.
    • Idli Manchurian is ready. Take them out in a serving bowl.

    Notes

    Manchurian makes a delicious lunch box meal. Also, try Gobi Manchurian, Masala Idli, and Rava Idli.
    Tried this recipe?Let us know how it was!

    How to Make Idli Manchurian: A Flavorful Fusion Delight

    Idli Manchurian is a delightful fusion dish that combines the softness of idlis with the zingy flavors of Indo-Chinese Manchurian sauce. If you’re looking to tantalize your taste buds with a unique twist on traditional idlis, this recipe is perfect for you. Here’s how to make idli manchurian at home, transforming simple idlis into a mouthwatering delicacy.

    Step 1: Preparing Idlis

    Start by making idlis using your preferred method. You can either use leftover idlis or make fresh ones specifically for this recipe. Idlis are a staple South Indian dish made from fermented rice and lentil batter. Their soft and fluffy texture serves as an excellent base for absorbing the flavors of the Manchurian sauce.

    Step 2: Cutting Idlis into Bite-sized Pieces

    Once the idlis are ready, cut them into small, bite-sized pieces. This step ensures that the idlis are evenly coated with the Manchurian sauce, allowing for maximum flavor infusion in every bite. The size of the idli pieces can vary based on your preference, but smaller pieces tend to work best for this dish.

    Step 3: Making Manchurian Sauce

    Next, prepare the Manchurian sauce. This tangy and spicy sauce is the highlight of the dish, adding depth and complexity to the idlis. The sauce typically consists of a combination of ingredients such as soy sauce, ginger, green chilies, and cornstarch for thickening. You can adjust the spice level according to your taste preferences, making it as mild or as fiery as you like.

    Step 4: Frying Idli Pieces

    Heat oil in a pan and gently fry the idli pieces until they turn golden brown and crispy on the outside. Frying the idlis adds a delicious crunch to the dish, contrasting with the softness of the idlis and complementing the texture of the Manchurian sauce.

    Step 5: Tossing Idlis in Manchurian Sauce

    Once the idlis are fried to perfection, add them to the prepared Manchurian sauce. Toss the idlis gently until they are evenly coated with the sauce, ensuring that each piece is infused with the delicious flavors of the sauce.

    Step 6: Garnishing and Serving

    Garnish the Idli Manchurian wor cilantro for a pop of freshness and color. Serve hot and enjoy this tantalizing fusion dish as a snack or appetizer.

    Tips for Perfect Idli Manchurian:

    • Adjust Spice Level: If you prefer a milder flavor, reduce the amount of green chilies or chili sauce in the Manchurian sauce. For those who enjoy a spicier kick, feel free to increase the quantity of these ingredients.
    • Experiment with Additions: Get creative with your Idli Manchurian by adding diced bell peppers or other vegetables to the sauce for added texture and flavor.
    • Serve Immediately: Idli Manchurian is best enjoyed fresh and hot, so serve it immediately after tossing the idlis in the Manchurian sauce to preserve its crispy texture.
    • Use Leftover Idlis: This recipe is a great way to use up leftover idlis from previous meals, giving them a delicious makeover with the flavors of Manchurian sauce.
    •  

    Variations to Explore:

    • Paneer Idli Manchurian: Substitute paneer cubes for idlis to create a delectable Paneer Manchurian dish with a twist.
    • Gobi Idli Manchurian: Replace idlis with crispy cauliflower florets for a vegetarian version of Gobi Manchurian with a South Indian flair.

    Benefits of Idli Manchurian:

    • Rich in Flavor: Idli Manchurian combines the best of South Indian and Chinese cuisines, offering a burst of flavors in every bite.
    • Versatile Dish: This dish can be served as a snack, appetizer, or even a main course, making it perfect for any occasion.
    • Easy to Make: With simple ingredients and straightforward steps, Idli Manchurian is easy to prepare at home, even for beginners in the kitchen.
    • Customizable: You can adjust the ingredients and spice levels according to your taste preferences, making it a versatile dish that everyone can enjoy.

    Frequently Asked Questions (FAQs):

    Can I use store-bought idlis for this recipe?

    • Yes, you can use store-bought idlis if you don’t have time to make them from scratch. Simply cut them into pieces and proceed with the recipe as directed.

    Is Idli Manchurian spicy?

    • The spice level of Idli Manchurian can be adjusted according to your preference. You can make it mild or spicy by controlling the amount of green chilies or chili sauce added to the Manchurian sauce.

    Can I make Idli Manchurian ahead of time?

    • While Idli Manchurian is best enjoyed fresh, you can prepare the components ahead of time and assemble them just before serving to maintain the crispy texture of the idlis.

    Can I freeze leftover Idli Manchurian?

    • It’s not recommended to freeze Idli Manchurian as the texture of the idlis may become soggy upon reheating. It’s best to enjoy it fresh for the best taste and texture.

    Explore More Delectable Recipes

    For more mouthwatering recipes and culinary inspiration, explore the following links from Manjula’s Kitchen:Crispy Spinach Pakoras, Vegetable Biryani, Paneer Tikka Masala, Vegetable Pakoras Recipe, Baingan Bharta (Roasted Eggplant) Recipe & Matar (Green Peas) Paneer Recipe. Dive into the world of authentic Indian cuisine and elevate your cooking skills with these delightful recipes.

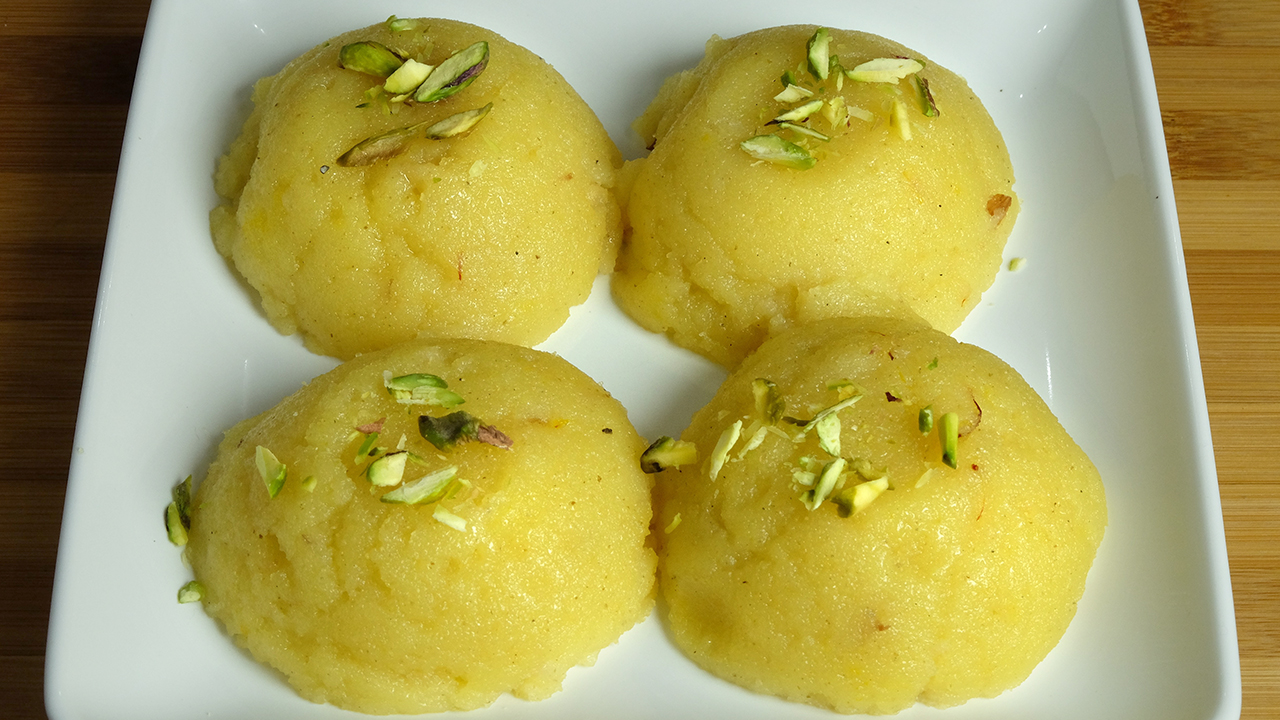
  • Rava Kesari (Kesari Halwa)

    Rava Kesari (Kesari Halwa)

    Rava Kesari

    Rava Kesari (Kesari Halwa)

    Rava Kesari (Kesari Halwa) is a popular South Indian sweet dish which is a different version of Sooji ka Halwa. Rava Kesari is delicious and easy to make, usually made on festive occasions. This is a quick fix sweet for parties as it is quick & easy to make especially if you have unexpected guests.
    5 from 1 vote
    Prep Time 5 minutes
    Cook Time 15 minutes
    Total Time 20 minutes
    Course Dessert, Snack
    Cuisine Indian
    Servings 8 people

    Ingredients
      

    • 1 cup fine sooji semolina
    • 3/4 cup sugar
    • 4 Tbsp ghee clarified butter
    • 2 Tbsp sliced almonds
    • 8 drops yellow food color
    • Pinch of saffron kesar
    • 1/8 tsp cardamom crushed, ilachi
    • 3-1/3 cups water
    • 1 Tbsp sliced pistachios pista for garnishing

    Instructions
     

    • Boil the water with sugar, and cardamom powder in a pot over medium heat. Bring the syrup to boil, mix it making sure sugar is dissolve add the food color and mix. Set aside
    • Melt 1 tablespoon of ghee in a frying pan on low medium heat. Add the sooji, and almonds and roast stirring continuously, sooji should be light golden brown in color and will have a light sweet aroma. This should take about 7-8 minutes.
    • Add the syrup slowly, as you add the syrup to sooji water will splatter. Make sure there are no lumps. Cook for 2-3 minutes, stirring continuously. Add more water if halwa becomes very thick.
    • Add the remaining ghee 1 tablespoon at a time and cook for 3-4 minutes stirring continuously. Rava Kesari will start leaving the sides of frying pan. Rava Kesari will have a texture of thick batter.
    • Garnish the Rava Kesari with sliced pistachios, serve warm or at room temperature.

    Notes

    Treat yourself, serve Rava Kesari for breakfast with Aloo Puri , Dal Puri
    Tried this recipe?Let us know how it was!

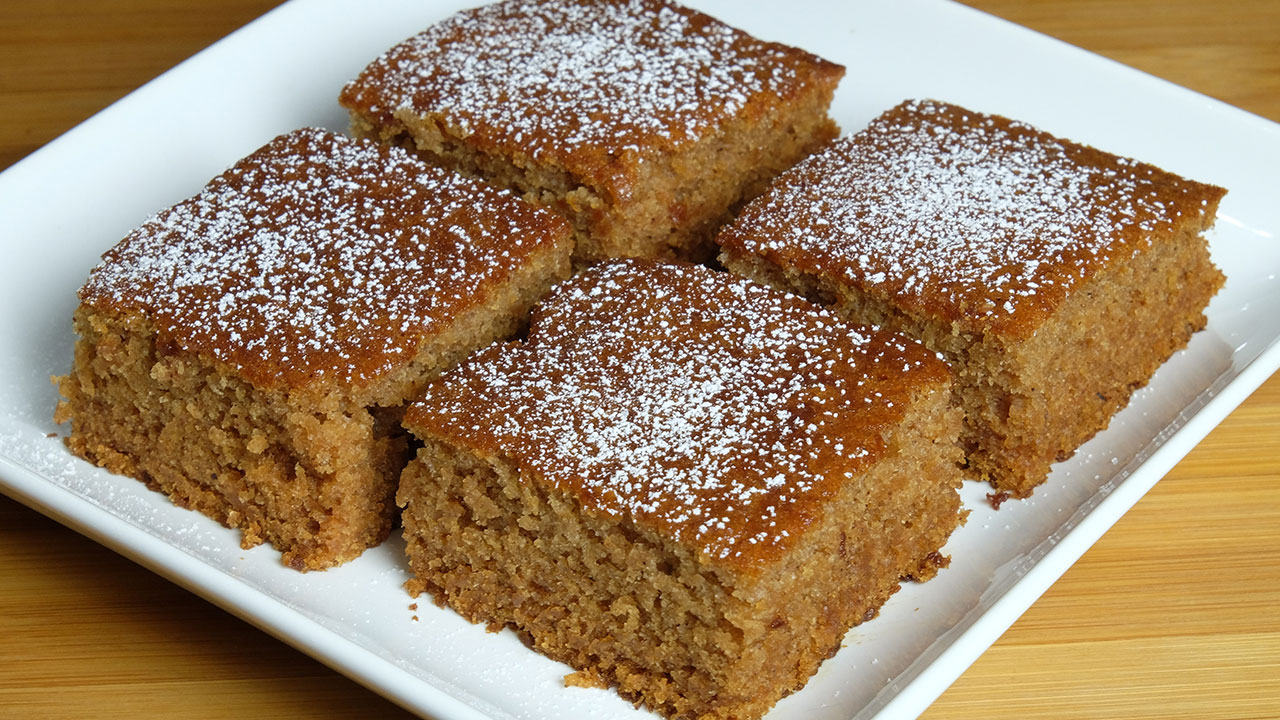
  • Apple Vegan Cake

    Apple Vegan Cake

    Apple Vegan Cake

    Apple vegan cake

    Apple vegan cake is a delicious, egg-less and dairy-free cake. Apple Vegan Cake is easy and basic. Cake has a soft and moist texture. It is hard to believe that this is vegan.
    4.32 from 16 votes
    Prep Time 10 minutes
    Cook Time 30 minutes
    Total Time 40 minutes
    Course Dessert
    Servings 8 people

    Ingredients
      

    • 1 cup all-purpose flour maida, plain flour
    • 1-1/2 Tbsp corn starch corn flour
    • 1 tsp baking soda
    • 1/8 tsp salt
    • 1/2 tsp cinnamon powder
    • 1/4 tsp nutmeg
    • 1/3 cup oil canola or any vegetable oil
    • 3/4 cup sugar
    • 1-1/2 cups apple sauce
    • 1 tsp vanilla extract
    • 1 Tbsp powdered sugar for garnishing

    Instructions
     

    • Pre heat the oven to 350°F
    • Square 8- inch cake pan, line with parchment paper and grease bottom and sides of the pan.
    • Mix the dry ingredients together except sugar, flour, corn starch, baking soda, nutmeg, cinnamon, and salt.
    • In a different bowl whisk oil and sugar together for about 2 minutes add apple sauce and vanilla extract mix it well.
    • Add the dry ingredients to apple mix and mix it together gently making sure all the ingredients mix together well.
    • Pour the mixture to cake pan and bake around 28 minutes, until cake begins to pull away from sides and/or toothpick inserted in the center pulls out clean.
    • Let it sit for about 20 minutes bring to room temperature and slice the cake into 16 square pieces.
    • Before serving lightly dust with powder sugar.
    Tried this recipe?Let us know how it was!

  • Masala Puri (Spicy Crackers)

    Masala Puri (Spicy Crackers)

    Masala Puri

    Masala Puri (Spicy Crackers)

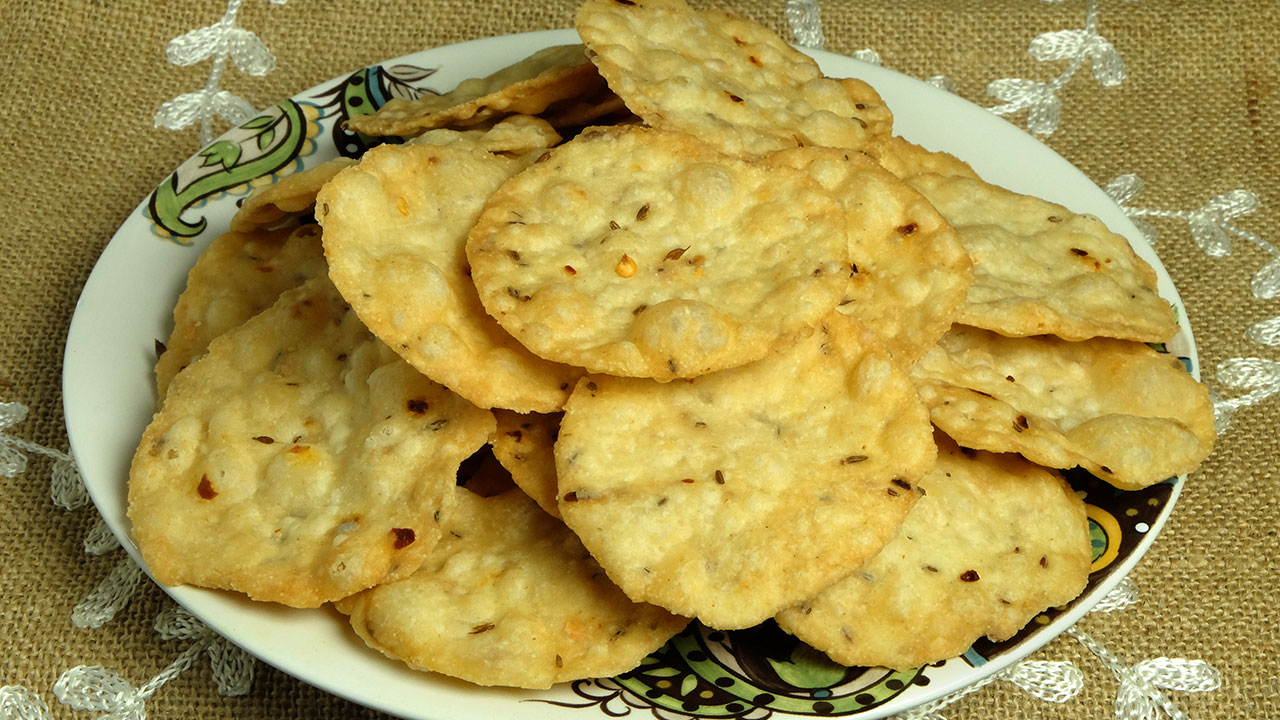
    Masala puri is a delicious, crispy snack. You can also serve them as spicy crackers or chips. They can be quite addicting so be careful. Masala puri is one of my favorite snack with hot cup of chai. This simple and delicious recipe will make a great holiday gift!
    4.25 from 8 votes
    Prep Time 15 minutes
    Cook Time 20 minutes
    Total Time 35 minutes
    Course Appetizer, Snack
    Cuisine Indian
    Servings 40 masala puri

    Ingredients
      

    • 1 cup all-purpose flour maida, plain flour
    • 1/2 cup fine sooji semolina
    • 1 tsp salt
    • 1/2 tsp cumin seed jeera
    • 1/2 tsp carom seed ajwain
    • 1/8 tsp asafetida hing
    • 1 tsp red chili flakes
    • 2 Tbsp oil
    • 1/2 cup water
    • Also need oil to fry

    Instructions
     

    • In a bowl mix all the dry ingredients all-purpose flour, sooji, Salt, Cumin seeds, carom seeds, asafetida, and red chili flakes.
    • Add oil to the flour mix and rub with your fingers to mix it well. Add the water little at a time, making into a firm dough.
    • Cover the dough and set aside for about 10 minutes or more.
    • Divide the dough into about 40 equal parts, and roll them between your palms.
    • Roll the puries into 3 inch circles.
    • Prick each puri with a fork in 3 to 4 places, this will prevent the puries not to puff while frying.
    • Heat the oil in a frying pan on medium heat.
    • The frying pan should have about 1 inch of oil. To check if the oil is ready, put a small piece of dough in the oil. The dough should make the oil sizzle and come up slowly.
    • Fry few puries at a time, make sure to place just enough puries to cover the oil. Fry them until both sides are a light golden-brown. Take them out over paper towel and repeat the process.

    Tips

    • Masala Puries can be stored for a couple of months in airtight containers.
    • If the puries are cooked on high heat, they will be soft.

    Notes

    Here are some more gift ideas! Spicy Cashews, Almond Brittle, Flax Seed Burfi
    Tried this recipe?Let us know how it was!

  • How To Make Chocolate Fudge

    How To Make Chocolate Fudge


    Chocolate Fudge

    Chocolate Fudge

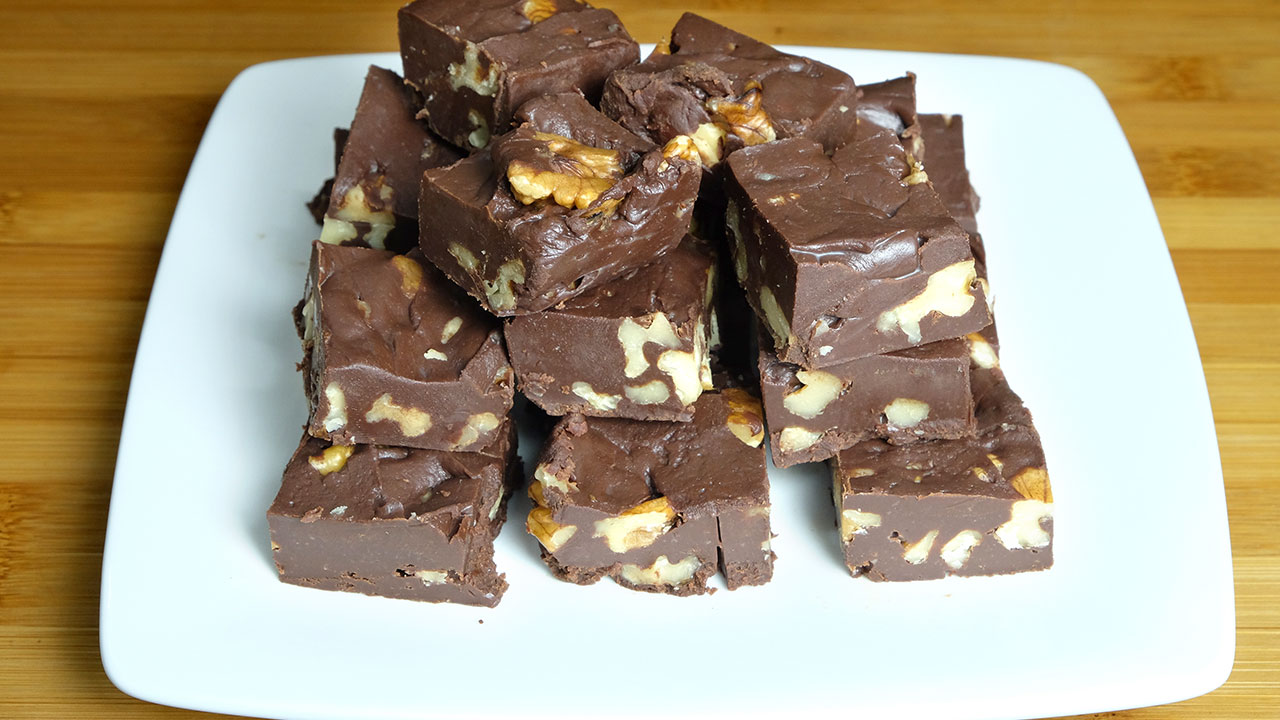
    This Chocolate Fudge recipe is a huge hit with my grandchildren! Who doesn’t love rich creamy chocolate? I like this dessert because it allows me to let my grand-kids take the role of lead chef. I get to be the sous chef for the day! This recipe is super simple and delicious!
    5 from 4 votes
    Prep Time 5 minutes
    Cook Time 10 minutes
    Total Time 15 minutes
    Course Dessert, Snack
    Servings 48 pieces

    Ingredients
      

    • 1 14 oz sweetened condensed milk canned
    • 1 Tbsp butter
    • 4 oz dark chocolate chopped in small pieces
    • 6 oz sweetened milk chocolate chopped in small pieces
    • 1 Tbsp vanilla extract
    • 1-1/2 cups walnuts chopped

    Instructions
     

    • First line 8-inch square pan with buttered parchment paper or use aluminum foil.
    • Microwave condensed milk, and butter for 1-1/2 minute. Stir to combine the butter and condense milk.
    • Add chocolate stir lightly till chocolate is melted, if needed microwave for about 20 seconds again.
    • Add chopped nuts and vanilla extract, mix it well. Spread in prepared pan.
    • Refrigerate for about three hours then cut into squares.

    Notes

    Fudge also makes a great homemade gift to share with family and friends.
    You will also like to see the recipes for Date and Nut Ladoo, Eggless pancake, Peanut chikki, Chocolate Almond Candy.
    Tried this recipe?Let us know how it was!


  • Homemade Cream Cheese

    Homemade Cream Cheese

    Homemade Cream Cheese

    Homemade Cream Cheese

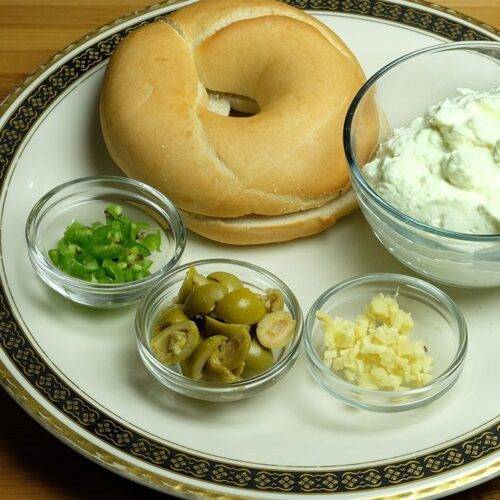
    This recipe for Homemade Cream Cheese is an easy recipe to make. Cream cheese is delicious as a spread on crackers, bread and also for making cheese cake. This recipe will make about 3/4 cup of cream cheese.
    5 from 2 votes
    Prep Time 5 minutes
    Cook Time 20 minutes
    Total Time 25 minutes
    Course Side Dish
    Servings 2 people

    Ingredients
      

    • 4 cups whole milk
    • 3 Tbsp lemon juice
    • Pinch of salt

    Instructions
     

    • Heat the milk in a heavy bottom pan over medium heat, after milk is hot but not boiling add lemon juice. As milk will start coming to boil the curd will start separating from the whey, slowly it will separate into thick curds and whey will separate. Don’t let the milk come to full boil.
    • Once the milk fat has separated from the whey, drain the whey using a strainer line with cheesecloth, or muslin cloth.
    • Wrap the curds in a muslin cloth, and squeeze lightly, keeping it soft.
    • Cream cheese should be soft, add the salt and whip it to make it smooth.

    Suggestions

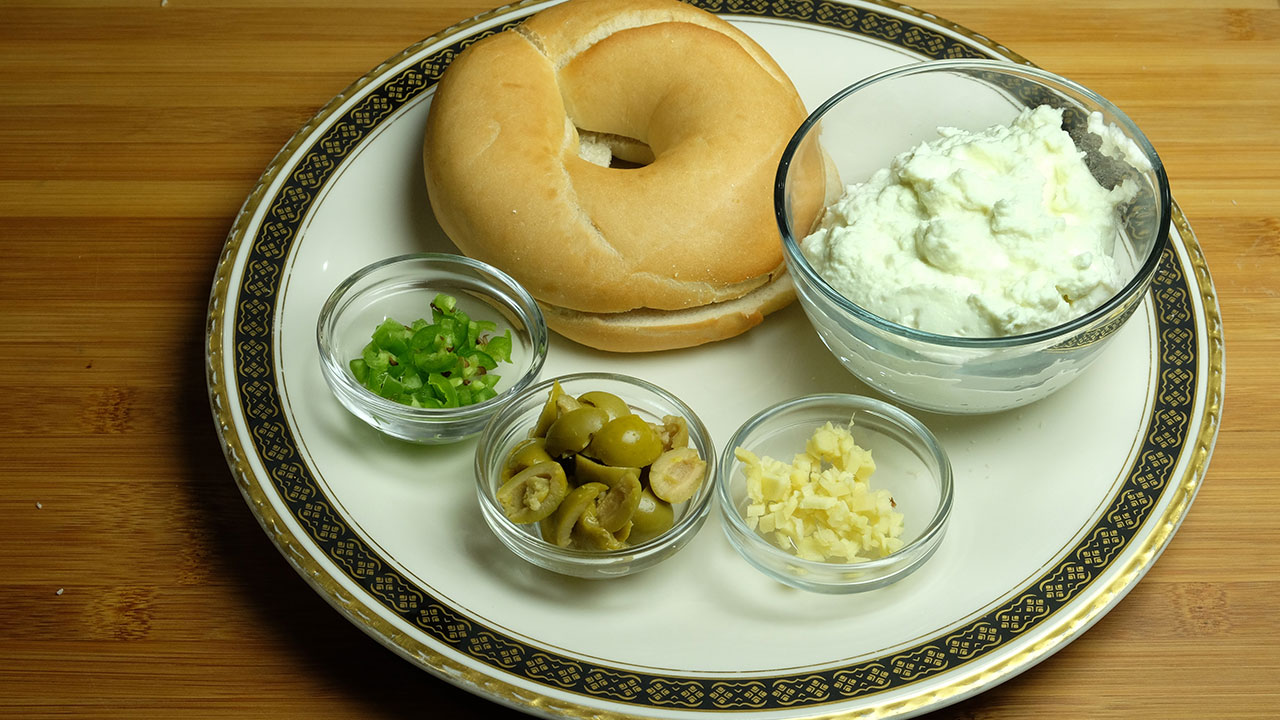
    •  You can also flavor this to your taste. These are my favorites for flavoring the cream cheese: black pepper, finely chopped ginger, finely chopped green chili, chopped olives.

    Notes

    Use cream cheese to make mango cheese cake, Cream Cheese Sandwiches, Finger sandwiches Enjoy!
    Tried this recipe?Let us know how it was!

    Indulge in Creamy Perfection: Homemade Cream Cheese with Paneer 

    Discover a quick & easy homemade cream cheese recipe added with paneer that not only caters to gluten-free preferences but is also kid-friendly. Elevate your culinary experience with this easy-to-follow creation that guarantees deliciousness for all.

    1. Creating Homemade Cream Cheese

    Indulge in the art of crafting exquisite Homemade Cream Cheese by following these simple steps. Begin by heating milk in a heavy-bottomed pan over medium heat. Take care not to let it reach a full boil. Once the milk is hot but not boiling, introduce lemon juice. As the milk approaches boiling, witness the magical separation of curds from whey. The delicate process ensures the formation of thick curds without letting the milk boil over, preserving the essence of this homemade cream cheese recipe.

    1. Draining Whey and Wrapping Curds

    After the milk fat has successfully separated from the whey, the next crucial step involves draining the whey. Employ a strainer lined with cheesecloth or muslin cloth for this purpose. Carefully wrap the curds in the cloth and give a gentle squeeze, maintaining a soft and luscious texture for your cream cheese. This meticulous step contributes to the ultimate success of achieving a velvety Cream Cheese.

    1. Whipping and Flavoring Your Cream Cheese

    With the freshly formed cream cheese curds, it’s time to enhance the flavor and texture. Add salt to the cream cheese and whip it until it achieves a smooth consistency. This step is crucial in ensuring that your Cream Cheese is not only soft but also irresistibly creamy. This homemade cream cheese recipe provides the perfect canvas for customization, allowing you to flavor it according to your taste preferences.

    1. Personalizing Your Cream Cheese Creation

    To take your Cream Cheese to the next level, consider incorporating your favorite flavors. Some delightful suggestions for flavoring include black pepper for a subtle kick, finely chopped ginger for a hint of warmth, finely chopped green chili for a spicy twist, or chopped olives for a Mediterranean touch. These options allow you to tailor your homemade cream cheese, making it uniquely yours.

    Embark on the journey of creating a luscious cream cheese with paneer that stands out for its homemade charm and personalized flavors. The careful steps outlined in this cream cheese recipe ensure a delightful culinary experience, bringing the joy of crafting this classic dairy delight to your kitchen.

    If you liked this recipe you must try these quick & easy recipe too: Crispy French Fries, Gulab Jamun, Basil Pesto Sauce, Bread Pudding with Chocolate Sauce & Microwave Milk Cake

  • Mexican Rice

    Mexican Rice

    Mexican Rice

    Mexican Rice

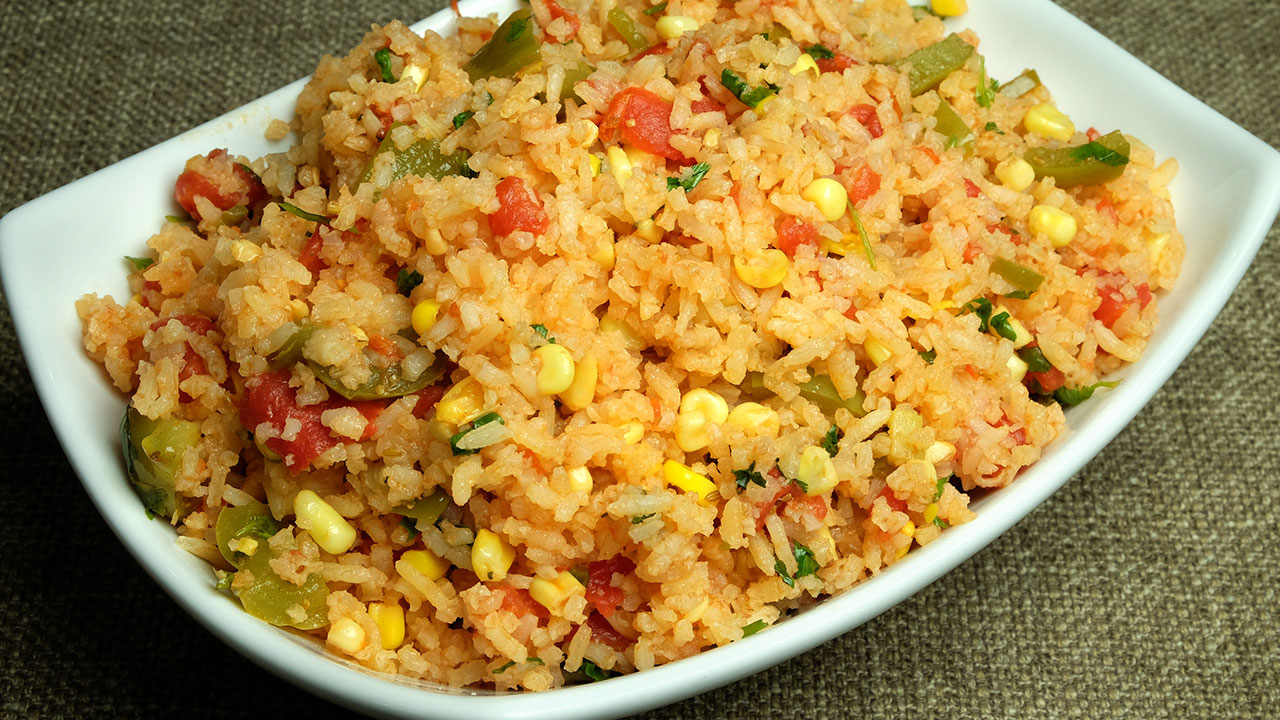
    When I first came to the United States, one of the first cuisines I was introduced to was Mexican. I really enjoyed it then just as much as I enjoy it now. My first experience with Mexican cuisine was a little mom and pop restaurant that really made an extra effort and catered to our vegetarian preference. I decided to try out a recipe for a Mexican rice which is typically served as a side dish with Mexican meals. I especially enjoy this rice with refried beans. Enjoy!
    5 from 3 votes
    Prep Time 5 minutes
    Cook Time 12 minutes
    Total Time 17 minutes
    Course Main Course
    Cuisine Mexican
    Servings 4 people

    Ingredients
      

    • 1 cup long grain rice you can use any long grain rice
    • 3 Tbsp oil
    • 1 14 oz can tomatoes chopped
    • 1 cup corn kernels I am using frozen corn
    • 1 cup green bell pepper cut in small pieces
    • 1 tsp cumin seeds ground, jeera
    • 1 tsp salt
    • 1 Tbsp jalapeno pepper finely chopped
    • 2 cups of water
    • 1/4 cup cilantro finely chopped hara dhania
    • 2 Tbsp lime juice I prefer lime juice but lemon juice will work

    Instructions
     

    • Wash the rice and drain the water and pat dry.
    • In a frying pan heat the oil over medium high heat, when oil is moderately hot add the rice and stir fry for about 4-5 minutes till rice is lightly toasted.
    • Add vegetables, corn bell pepper and jalapeno pepper sauté, stirring frequently for about 2 minutes.
    • Add cumin powder, salt and tomato sauté, stirring frequently for about 3-4 minutes. Until most of the moisture from tomatoes has evaporated.
    • Add water stir and bring it to boil, lower the heat to low. Cover the pan and let it cook for about 10 minutes, or until all the water has evaporated. Uncover the pan let it sit for about 2-3 minutes without stirring.
    • Add cilantro and lime juice and fluff the rice gently. Rice is ready to serve.
    Tried this recipe?Let us know how it was!

    Delicious Vegetarian Mexican Rice Recipe: A Flavorful Twist on a Classic Dish 

    Mexican rice is a delectable dish that combines the vibrant flavors of traditional Mexican cuisine with the aromatic spices of Indian cooking. This fusion is a gluten free, kid friendly, quick & easy, vegan choice of culinary influences resulting in a unique and savory recipe of veg Mexican rice that caters to vegetarian preferences. Commonly known as vegetarian Mexican rice recipe or Mexican rice vegetarian, this dish is a delightful medley of fluffy rice grains, assorted vegetables, and a tantalizing blend of Mexican spices. 

    When preparing this recipe for vegetarian Mexican rice, cooks infuse the dish with a harmonious combination of flavors, creating a truly satisfying and flavorful meal. Whether enjoyed as a standalone dish or as a flavorful accompaniment to other Mexican-inspired delicacies, this vegetable Mexican rice recipe is sure to tantalize taste buds and delight diners with its rich and aromatic profile.

    Preparing the Rice: Washing and Toasting 

    To initiate the process of crafting this recipe of veg Mexican rice, carefully wash the rice, ensuring thorough rinsing to remove any impurities. Drain the water completely and then gently pat the rice dry to eliminate excess moisture. Heat oil in a frying pan over medium-high heat until it reaches a moderate temperature. Once the oil is adequately heated, introduce the rice to the pan and stir-fry it for approximately 4-5 minutes until it achieves a light toasty texture.

    Adding Vegetables: Sautéing with Flavor

    For this enticing vegetarian Mexican rice recipe, introduce an array of vibrant vegetables into the pan. Incorporate sweet corn, crisp bell peppers, and spicy jalapeno peppers to infuse the dish with an explosion of flavors. Saute the medley of vegetables, ensuring frequent stirring, for about 2 minutes until they soften and release their aromatic essence.

    Seasoning and Cooking: Infusing Mexican Flavors 

    Elevate the essence of this Mexican rice vegetarian delight by introducing a blend of quintessential Mexican spices and ingredients. Sprinkle cumin powder, salt, and diced tomatoes into the pan, creating a harmonious symphony of flavors. Allow the ingredients to sauté together, ensuring regular stirring, for approximately 3-4 minutes until the tomatoes release their moisture, contributing to a rich and flavorful base.

    Simmering and Steaming: Cooking the Rice 

    Transition into the next phase of cooking by incorporating water into the pan, ensuring thorough mixing to integrate all the ingredients seamlessly. Bring the mixture to a gentle boil, then reduce the heat to low. Cover the pan, allowing the rice to simmer and absorb the flavorful essence of the ingredients for approximately 10 minutes or until all the water has evaporated. Once cooked, leave the pan uncovered for an additional 2-3 minutes, allowing the rice to rest and further develop its texture without disturbing its delicate balance.

    Final Touches: Adding Freshness

    Conclude the culinary journey by adding the finishing touches to this tantalizing recipe for vegetarian Mexican rice. Sprinkle freshly chopped cilantro over the rice, infusing it with a burst of refreshing aroma and vibrant color. Squeeze a hint of lime juice, enhancing the dish with a subtle tangy zest. Gently fluff the rice to distribute the flavors evenly, ensuring each bite is a delightful fusion of Mexican-inspired taste and wholesome goodness. Your masterpiece of vegetable Mexican rice is now prepared to be savored and enjoyed, brimming with vibrancy and culinary excellence. Bon appétit!

    If you loved our vegetarian mexican rice recipe then you must also check out other variants of Rice: Vegetable Biryani, Masala Khichdi, Chhole Biryani, Quinoa Vegetable Pilaf and Lemon Rice.

  • Pizza Paratha (Stuffed Vegetable Cheese Paratha)

    Pizza Paratha (Stuffed Vegetable Cheese Paratha)

    Pizza Paratha

    Pizza Paratha (Stuffed Vegetable Cheese Paratha)

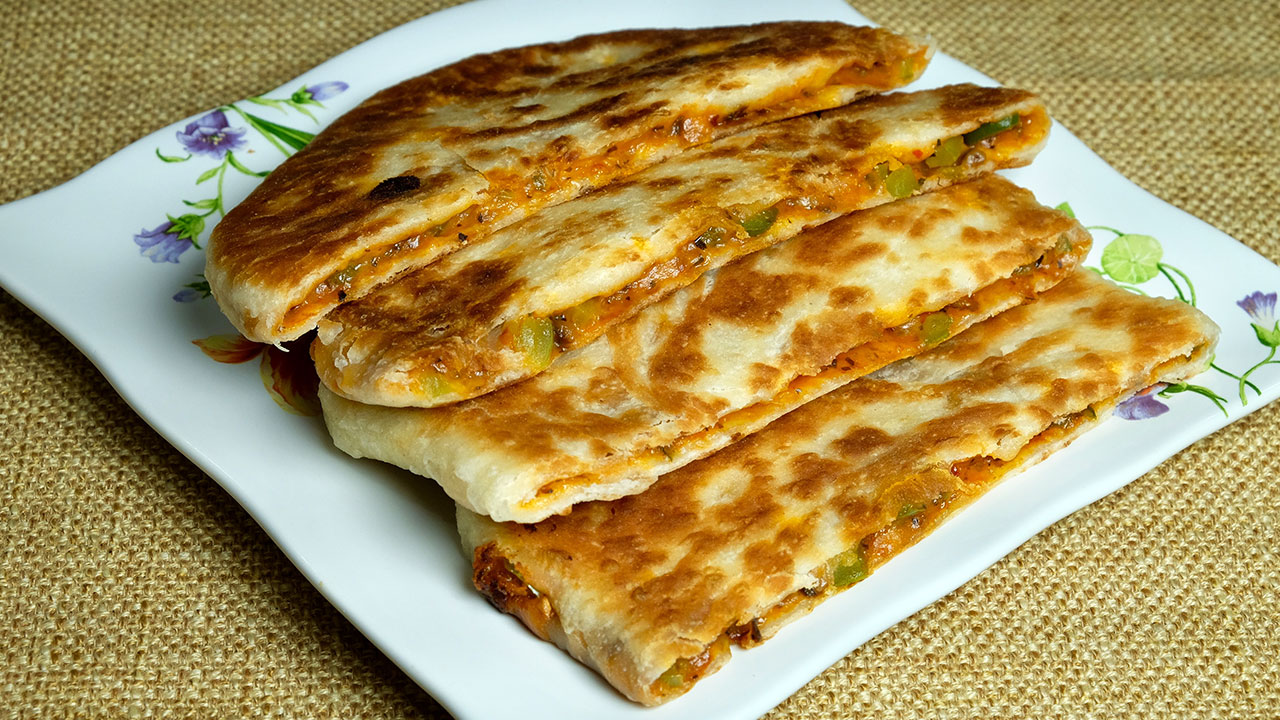
    Everyone enjoy pizza. Pizza has become a universal food enjoyed by all. Pizza paratha is perfect for the times when you want to enjoy homemade pizza. This is also quick and easy recipe. Personalize your pizza with your favorite toppings. You can serve this for lunch, snack, or especially good for kids lunch box. This is also my grandkids favorite.
    4.20 from 5 votes
    Prep Time 10 minutes
    Cook Time 10 minutes
    Total Time 1 hour 20 minutes
    Course Snack
    Cuisine Indian
    Servings 2 people

    Ingredients
      

    For Paratha Dough

    • 1 cup all-purpose flour maida or plain flour
    • 1/4 tsp salt
    • 1/4 tsp sugar
    • 1/2 tsp yeast
    • 2 Tbsp oil
    • 1/3 cup lukewarm water use as needed

    For Filling

    • 1-1/2 Tbsp tomato paste
    • 1/4 tsp salt
    • 1/2 tsp chili flakes adjust to taste
    • 1/2 tsp dry basil
    • 1/2 tsp dry oregano
    • 1/2 cup bell pepper finely chopped
    • 1/2 cup mushrooms finely chopped
    • 1 jalapeno pepper finely chopped, adjust to taste
    • 1-1/4 cup mozzarella cheese shredded

    Also need

    • 1/4 cup all-purpose flour maida or plain flour for rolling the paratha
    • 2 Tbsp of oil to cook parathas

    Instructions
     

    • In a bowl mix the flour, salt, yeast, and oil, add the water as needed to make soft and pliable dough. Cover the dough and set aside for about one hour.
    • Squeeze the chopped bell peppers to remove the extra water.
    • In a bowl mix all the ingredients for filling, bell pepper, mushrooms tomato paste, salt, chili flakes, basil, oregano, jalapeno, and cheese, mix it well.
    • Knead the dough and divide in two equal parts. Roll each part of the dough in smooth ball.
    • Roll one part of the dough into about six-inch diameter, use dry flour as needed to roll.
    • Place half a cup of filling in the center. Pull the edges of the dough to wrap it around the filling, making sure it is covered from all around.
    • Meanwhile heat the skillet on medium low heat, skillet should not be very hot, otherwise paratha will not cook through. Heavy skillet works best.
    • Lightly sprinkle the dry flour on the surface you will roll the paratha. Press the filled patty lightly from both sides, with your fingers. Now using a rolling pin, roll the paratha about eight-inch in diameter. If the dough sticks to the rolling pin or rolling surface, lightly dust the parathas with dry flour.
    • Oil the skillet generously, and place the paratha on the skillet. Cook the paratha for 2-3 minutes and flip the paratha. Paratha should be golden brown. It is important to cook paratha on low heat.
    • Again brush the paratha with oil all around and flip it again in about 2 minutes. Paratha should be golden brown both sides for crispness. Paratha should take about five minutes to cook nicely.
    • Take out the pizza paratha over wire rack to keep them from getting soggy.

    Suggestions

    • You can make these pizza parathas in any combinations of filling. When I make for my grand kids I don’t add any peppers.

    Notes

    You will also enjoy Vegetable Pasta, Vegetable Hakka noodles, Gobi Manchurian, and Veggie Hash Browns.
    Tried this recipe?Let us know how it was!

  • Mediterranean Quinoa Salad

    Mediterranean Quinoa Salad

    Quinoa Salad

    Mediterranean Quinoa Salad

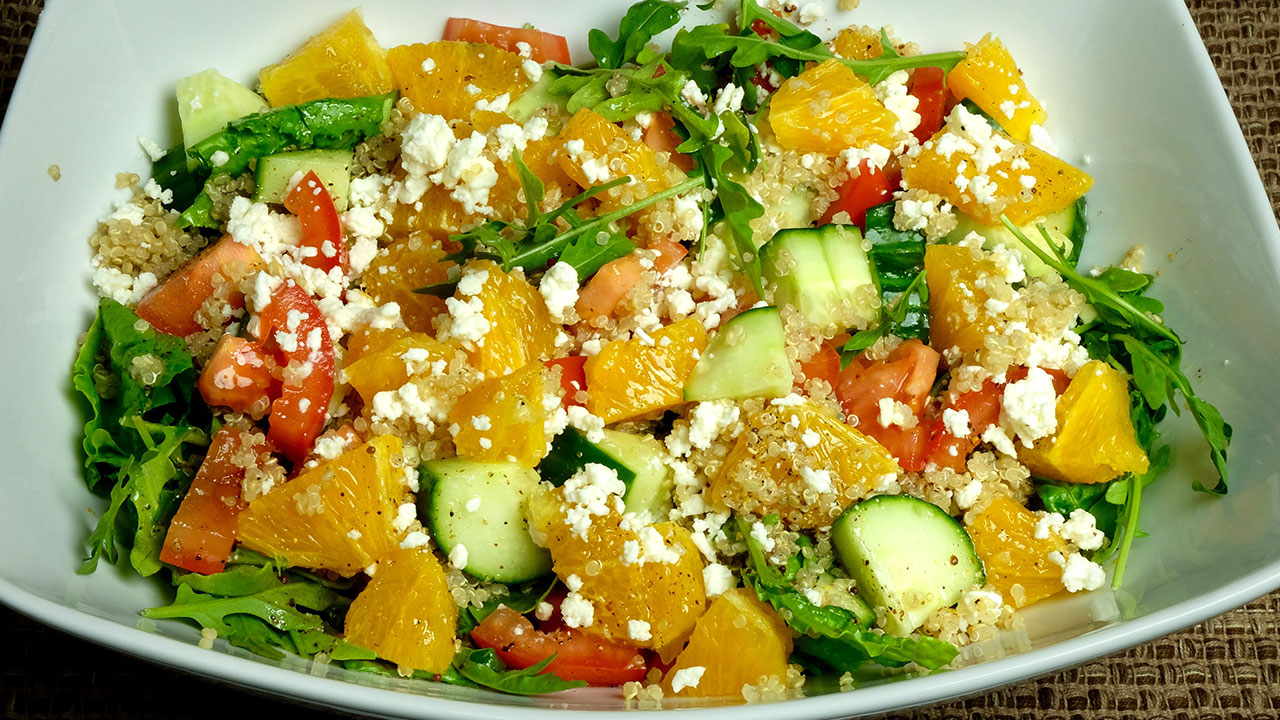
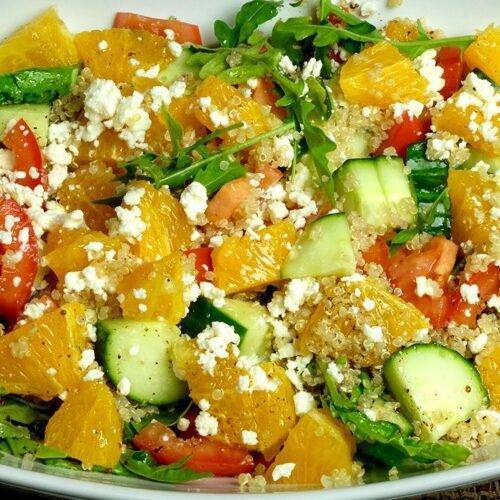
    Quinoa salad is a healthy and delicious salad. This bright and colorful salad is also a great summertime recipe. For this particular salad, I made my own homemade dressing with ginger. Ginger gives a refreshing kick to the salad. Quinoa is naturally gluten free and also high in protein.
    No ratings yet
    Prep Time 10 minutes
    Cook Time 20 minutes
    Course Salad, Soup
    Cuisine Indian
    Servings 4 people

    Ingredients
      

    • 1/2 cup quinoa
    • 1 cup water
    • 1 large romaine lettuce chopped, discard the outside leaves
    • 2 cup arugula
    • 1 cup English cucumber cut into 1/4-inch cubes
    • 1 medium size tomato diced
    • 1 orange peeled and diced
    • About 1/4 cup feta cheese

    Dressing

    • 1 tablespoon vinegar, I am using rice vinegar
    • 2 tablespoons lemon juice
    • 2 tablespoons olive oil
    • 1 teaspoon sugar
    • 1/2 teaspoon salt
    • 1/4 teaspoon black pepper
    • 1/4 teaspoon mustard (rai) powder
    • 1 teaspoon ginger juice*

    Instructions
     

    • For dressing: add all the dressing ingredients together mix it well making sure sugar is dissolved. Set aside. * To make ginger juice shred the ginger using fine shredder or zester, and squeeze the juice with fingers.
    • Bring quinoa and water to a boil in a saucepan. Reduce heat to medium-low, cover, and simmer until all the water has been absorbed, this will take about 12 minutes. Set aside to cool.
    • In a salad bowl layered all the ingredients, spread the lettuce, arugula, quinoa save about 1/4 cup, then cucumber, tomatoes, and orange. Drizzle the salad dressing, sprinkle the saved quinoa and the last spread the feta cheese.
    Tried this recipe?Let us know how it was!

  • Paneer Jalfrezi

    Paneer Jalfrezi

    Paneer Jalfrezi

    Paneer Jalfrezi

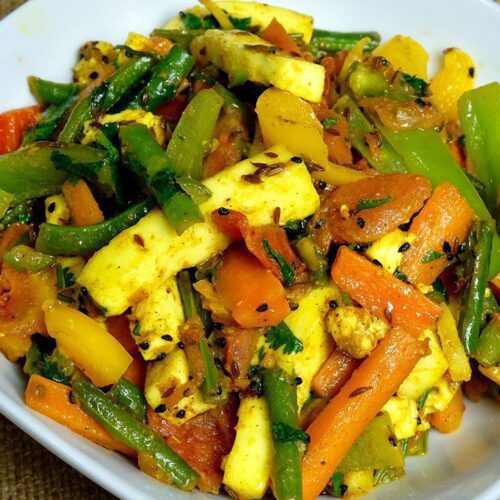
    Paneer Jalfrezi is an Indian-style stir-fry dish that tastes delicious and looks beautiful. This is also a popular restaurant dish. Paneer Jalfrezi is a quick and easy recipe to make. Serve Paneer Jalfrezi with paratha, naan, or plain rice.
    4.67 from 3 votes
    Prep Time 15 minutes
    Cook Time 15 minutes
    Course paneer
    Cuisine Indian
    Servings 3 people

    Ingredients
      

    • About 1 cup paneer cut in long strips about 1/4”
    • About 1 cup bell pepper cut in long strips about 1/4” – capsicum (I am using different color bell pepper for color)
    • About 1 cup of carrots cut into long strips
    • About 1 cup green beans cut into about 1” pieces
    • 1 tomato medium size cut into bite-size pieces
    • 3 tablespoons Oil
    • 1 teaspoon cumin seeds
    • 1/2 teaspoon nigella seeds, kalonji
    • 1 tablespoon ginger thinly sliced
    • 1 tablespoon green chili chopped
    • 1/4 teaspoon turmeric
    • About 3/4 teaspoon salt
    • 1/4 teaspoon garam masala
    • 2 tablespoons Cilantro chopped

    Instructions
     

    Paneer jalfrezi vegetables should not be very soft, to taste best vegetables should be a little crisp. Vegetables are added in steps as all the vegetables take different time in cooking.

    • Heat the oil in a frying pan over medium-high heat. Oil should be moderately hot, add cumin seeds, and nigella as the seeds crack, add carrots, beans, and salt. Stir-fry for three to four minutes.
    • Add bell pepper, ginger, green chili, turmeric, and red chili powder, and stir fry for two to three minutes. Add paneer and tomatoes stir gently and cook until all the vegetables are tender.
    • Add garam masala and cilantro and stir gently until everything is mixed well. vegetables should be crisp, do not overcook.
    • Turn off the heat.
    Tried this recipe?Let us know how it was!

    Paneer Jalfrezi Recipe Unveiled for a Flavorful Veg Experience 

    Delight in the flavorful experience of Paneer Jalfrezi, a quick & easy Indian stir-fry dish. This vegetable-sautéed party recipe not only tastes delicious but also presents a beautiful culinary creation.

    1. Mastering the Art of Veg Paneer Jalfrezi: 

    Embark on a tantalizing journey as you delve into the intricacies of mastering the “Veg Paneer Jalfrezi Recipe.” Achieve a symphony of flavors and textures by exploring the artistry behind this exquisite dish. To perfect the ideal crispness, introduce a medley of vegetables in stages, ensuring each one acknowledges its distinct cooking time within the veg paneer jalfrezi recipe.

    In this culinary adventure, the meticulous orchestration of vegetable introduction contributes to the harmonious balance that defines the Veg Paneer Jalfrezi. Each step is an integral part of a carefully choreographed dance, ensuring that every element is brought to perfection, creating a delightful sensory experience.

    1. Sautéing Vegetables for Paneer Jalfrezi Perfection: 

    Elevate your cooking prowess by immersing yourself in the intricacies of sautéing vegetables for the perfect “Paneer Jalfrezi.” Begin this gastronomic escapade by heating a frying pan with oil over medium-high heat, a pivotal step in the Paneer Jalfrezi Recipe. Let the oil attain a moderately hot state before introducing the symphony of cumin seeds and nigella.

    As these seeds crackle, the infusion of carrots, beans, and a pinch of salt initiates a transformative three to four-minute stir-fry. This culinary alchemy ensures the vegetables retain their crispiness, unveiling a sensory delight in every bite of the paneer jalfrezi. The sizzle in the pan becomes a testament to the artful creation of a dish that transcends ordinary flavors.

    1. Elevating Flavors with Spice Blend in Veg Paneer Jalfrezi:

    Transform your kitchen into a haven of aromatic delights with the artful crafting of “Veg Paneer Jalfrezi.” Elevate the flavor profile by infusing a burst of spices into this captivating recipe. Add bell pepper, ginger, green chili, turmeric, and red chili powder, stirring this aromatic blend for an additional two to three minutes. This nuanced process sets the stage for the introduction of paneer and tomatoes, an essential act in the Veg Paneer Jalfrezi Recipe.

    Stir gently to orchestrate a dance of flavors and succulence, ensuring that every vegetable attains a tender state. The amalgamation of spice and succulence in the veg paneer jalfrezi recipe is an artful creation, promising a culinary experience that transcends the ordinary.

    1. Achieving Harmony with Garam Masala and Cilantro in Paneer Jalfrezi: 

    In the pursuit of culinary excellence, achieve a harmonious symphony in your “Paneer Jalfrezi.” Introduce the enchanting notes of garam masala and cilantro, stirring gently to ensure a uniform distribution. With a keen focus on preserving the crispiness of the vegetables, this meticulous step guarantees that every bite is a delightful balance of flavors.

    The interplay of garam masala and cilantro in the veg paneer jalfrezi recipe becomes the crescendo of a flavorful masterpiece. The result is a dish that not only tantalizes the taste buds but also showcases the expertise needed for a delectable paneer jalfrezi experience.

    1. Culmination and Perfection in Veg Paneer Jalfrezi:

    As you approach the culmination of your culinary endeavor, revel in the zenith of flavors in your perfectly crafted “Veg Paneer Jalfrezi.” A culmination was achieved by turning off the heat, marking the completion of this flavorful dish. This delightful creation, guided by a meticulous approach at every step, not only delights the senses but also exemplifies the expertise needed for an unparalleled paneer jalfrezi experience. Every detail, from the sizzling pan to the final turn of the heat, contributes to the creation of a dish that transcends ordinary expectations.

    If you liked this recipe. You must also try: Mirchi Vada, Kachori with Kadi, Palak Kadhi, Palak & Spinach Kofta Curry

  • Vegetable Hakka Noodles (Chow Mein)

    Vegetable Hakka Noodles (Chow Mein)

    Vegetable Hakka Noodles

    Vegetable Hakka Noodles (Chow Mein)

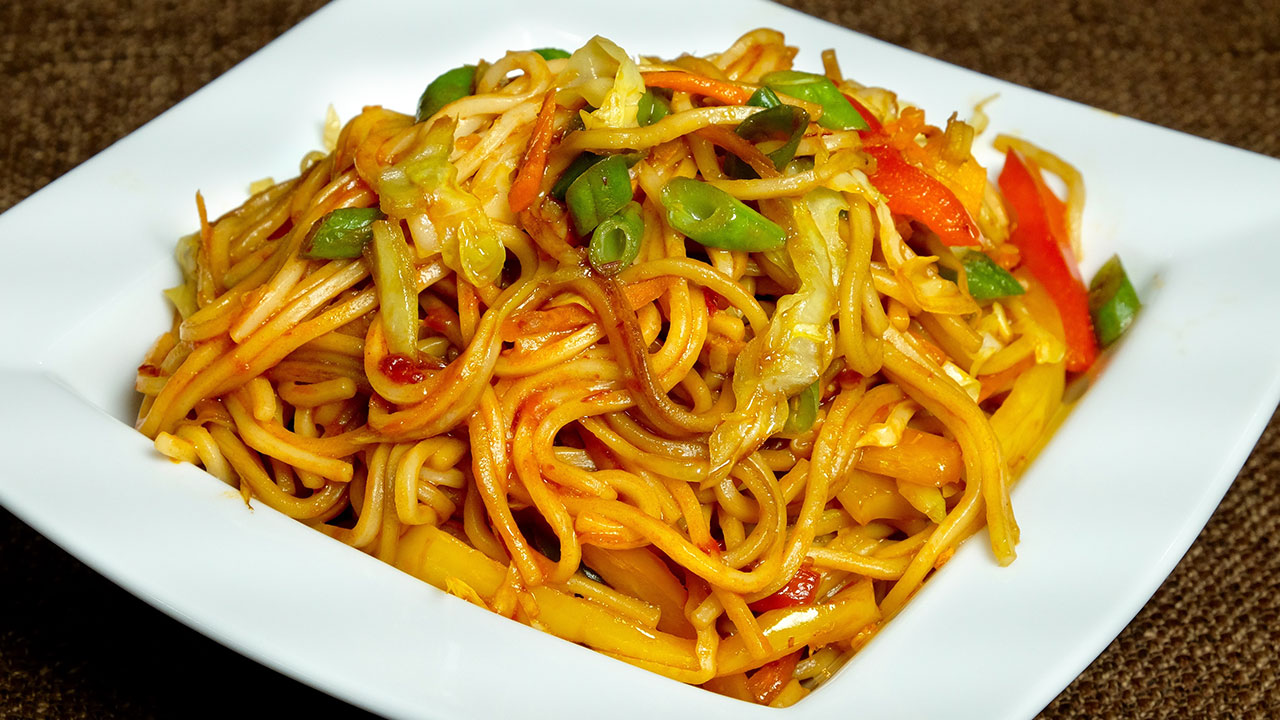
    Vegetable Hakka noodles are also more commonly known as Vegetable Chow Mein. This is a popular Indo-Chinese dish. Vegetable hakka noodles consists of stir fry noodles with a variety of vegetables. This is a quick and easy recipe to make. Hakka noodles is a delicious and flavorful dish and very popular with street vendors. This also makes a great one-dish meal.
    No ratings yet
    Course fusion
    Cuisine Indian
    Servings 2 people

    Ingredients
      

    • About 4oz whole wheat noodles
    • 2 tablespoons oil
    • 2 cups cabbage thinly sliced
    • 1/2 cup carrots grated or thinly sliced
    • 1 cup bell pepper thinly sliced, use the different color bell pepper, capsic
    • 1/2 cup finely chopped French green beans
    • 1 tablespoon ginger finely chopped
    • 1 tablespoon rice vinegar
    • 3 tablespoons soy sauce
    • 2 tablespoons chili sauce, adjust to taste
    • 1/2 teaspoon salt

    Instructions
     

    • Cook noodles according to the package instructions. Drain the cooked noodles in a colander, and rinse them with cold water. Set aside.
    • Heat oil in a wide pan or wok on medium high heat, first sauté the green beans, and ginger for about 1 minutes.
    • Traditionally vegetables are tossed while cooking, I find it is easier just to stir fry
    • Add grated carrots, shredded cabbage and sliced bell pepper. Stir fry for about two minutes, do not overcook the vegetables. Vegetables should have some crunch.
    • Add noodles, salt, soy sauce, vinegar, and chili sauce, toss them together and stir-fry them for about a minute.
    • Hakka noodles are ready.
    Tried this recipe?Let us know how it was!

  • Crispy Aloo Pakoras (Potato Fritters)

    Crispy Aloo Pakoras (Potato Fritters)

    Crispy Aloo Pakoras Recipe by Manjula

    Crispy Aloo Pakoras (Potato Fritters)

    Crispy aloo pakoras, or crispy potato fritters are a flavorful and delicious snack specially when it is served with cilantro chutney, and hot cup of chai. They are easy and quick to make. Welcome your surprise guest and treat them with these mouthwatering crispy aloo pakoras.
    5 from 1 vote
    Course Appetizer
    Cuisine Indian
    Servings 4 people

    Ingredients
      

    • 2 cups potatoes wash, peeled and finely chopped, aloo
    • 1/2 cup besan
    • 2 tablespoons rice flour
    • 2 tablespoons corn starch
    • 1 tablespoon fennel seeds crushed, saunf
    • 1 tablespoon coriander seed crushed, dhania
    • 1/4 teaspoon turmeric, haldi
    • 1/4 teaspoon mango powder, amchoor
    • 1/8 teaspoon asafetida, hing
    • 1-1/2 teaspoons red chili flakes
    • 1 tablespoon ginger finely chopped, adrak
    • 2 tablespoons cilantro chopped, hara dhania
    • 1 tablespoon oil
    • 1 teaspoon salt
    • Also need oil to fry

    Instructions
     

    • Wash and peel the potatoes and cut them in very small cubes, and soak them in cold water.
    • Mix all the ingredients together except salt and potatoes.
    • Drain the water from potatoes, add the spice mix and mix it well. Add water as needed making sure the spice mix stick to the potatoes uniformly.
    • Now add the salt and mix it well.
    • Heat the oil in a frying pan on medium high heat.
    • The frying pan should have at least 1 inch of oil. To check if the oil is ready, put one piece of potato in the oil. The potato should raise to the top but not change color right away.
    • Oil your fingers it helps dropping the potatoes in the frying pan.
    • While putting the potatoes into oil, loosen them with your fingers to make sure the potatoes are separated and do not form clutter. Potatoes should be separated while frying.
    • Fry the potatoes until they turn light brown, turning them occasionally.
    • When they are done cooking, take them out of the oil with a slotted spoon. Place them on a paper towel to absorb the extra oil.
    Tried this recipe?Let us know how it was!

    How to Make Crispy Aloo Pakora: A Step-by-Step Guide

    Crispy Aloo Pakoras are delightful appetizers that cater to various dietary preferences and occasions. These gluten-free treats are perfect for both kids and adults alike, offering a quick and easy snack option, ideal for street food cravings. Made with vegan ingredients, these pakoras are not only delicious but also suitable for those following a plant-based diet. Enjoy the crispy goodness of these flavorful potato fritters without any worries about gluten, making them a versatile and inclusive snack for everyone to relish.

    Introduction to Crispy Aloo Pakora Recipe

    In this crispy aloo pakora recipe, we’ll explore the secrets to achieving the perfect texture and flavor for these beloved Indian snacks. Aloo pakora is crispy on the outside and soft on the inside, these pakoras are a delightful treat for any occasion. Whether you’re looking for a quick snack or planning a party menu, these pakoras are sure to impress. Let’s dive into how to make crispy aloo pakora with this step-by-step guide.

    Step 1: Prepare the Ingredients

    To start making crispy aloo pakoras, gather the following ingredients: potatoes, chickpea flour (besan), rice flour, salt, cumin seeds, chili powder, asafoetida (hing), and water. Peel and slice the potatoes thinly, ensuring they’re uniform in thickness for even frying. Mix the chickpea flour, rice flour, salt, cumin seeds, chili powder, and asafoetida in a bowl. These ingredients will ensure your aloo pakoras crispy and full of flavor.

    Step 2: Coat the Potatoes

    Dip the potato slices into the prepared batter, ensuring each slice is thoroughly coated. The batter will help create that signature crispy texture when fried. Make sure the batter evenly covers each slice to achieve crispy aloo pakoras.

    Step 3: Heat the Oil

    In a deep frying pan, heat oil over medium heat. The key to how to make aloo pakora crispy is ensuring the oil is hot enough before frying. To test if the oil is ready, drop a small amount of batter into the oil; if it sizzles and rises to the surface, the oil is hot enough for frying.

    Step 4: Fry the Pakoras

    Carefully place the coated potato slices into the hot oil, ensuring not to overcrowd the pan. Fry the pakoras in batches, flipping them occasionally to ensure even cooking. Fry until they turn golden brown and crispy on all sides. Once done, remove them from the oil and place them on a paper towel to drain excess oil.

    Step 5: Serve and Enjoy

    Your crispy aloo pakoras are now ready to be served! Enjoy them hot with your favorite chutney or sauce. These pakoras make for a perfect appetizer or snack, guaranteed to please everyone with their irresistible crunchiness and delicious flavor.

    Tips for Making Crispy Aloo Pakoras

    • Thinly slice the potatoes: Slicing the potatoes thinly ensures they cook evenly and become crispy when fried.
    • Maintain the oil temperature: Keep an eye on the oil temperature to ensure it remains hot throughout the frying process, resulting in crispy pakoras.
    • Use a slotted spoon: When frying the pakoras, use a slotted spoon to carefully flip them and remove them from the oil, ensuring they cook evenly and are not soggy.
    •  

    Variations of Aloo Pakora Recipe

    • Mixed Vegetable Pakoras: Add other vegetables like spinach, or cauliflower to the batter for a variation in flavor and texture.
    • Spice Level: Adjust the amount of chili powder according to your spice preference. You can also add finely chopped green chilies for an extra kick.
    • Cheese Stuffed Pakoras: Place a small cube of cheese between two potato slices before dipping them in the batter for a gooey and indulgent twist.

    Benefits of Aloo Pakoras

    • Rich in Carbohydrates: Potatoes are a good source of carbohydrates, providing energy to keep you feeling full and satisfied.
    • High in Fiber: Chickpea flour used in the batter is high in fiber, aiding in digestion and promoting gut health.
    • Vitamins and Minerals: Potatoes contain essential vitamins and minerals such as vitamin C, potassium, and B vitamins, contributing to overall health and well-being.
    •  

    FAQs about Aloo Pakoras

    • Can I make aloo pakoras ahead of time? 

    • Yes, you can prepare the batter and slice the potatoes ahead of time. Fry the pakoras just before serving for the best results.


    • Can I bake aloo pakoras instead of frying them? 

    • While frying gives the pakoras their characteristic crispiness, you can try baking them for a healthier alternative. However, the texture may differ slightly.


    • How do I store leftover pakoras? 

    • Allow them to cool completely, then store them in an airtight container in the refrigerator. Reheat them in the oven or microwave before serving for the best taste and texture.


    Explore more mouthwatering recipes on Manjula’s Kitchen: Paneer Tikka Masala, Vegetable Biryani, Aloo Paratha, Mango Lassi, Palak Paneer

  • Mango Rice

    Mango Rice

    Mango Rice

    Mango Rice

    Mango rice is just one style of South Indian rice dish among many different variations. Mango rice has a very unique flavor due to the tartness of the mangoes, the sweetness of the coconut, and the heat of the chilies all being mixed together. This is a simple but flavorful and satisfying light lunch!
    No ratings yet
    Course rice
    Cuisine Indian

    Ingredients
      

    For Rice

    • 1 cup long-grain rice, I am using basmati rice
    • 1 tablespoon oil
    • 1/2 teaspoon salt
    • 2 cups water

    For mango seasoning

    • 2 cups raw mango peeled and shredded
    • 3 tablespoons oil
    • 1/2 teaspoon mustard seeds, rai
    • About 10 curry leaves
    • 2 tablespoons peanuts
    • 2 tablespoons roasted chana, optional
    • 1 tablespoon ginger sliced, adrak
    • 2 green chili seeded and sliced lengthwise
    • 1/4 teaspoon turmeric, haldi
    • 1/4 teaspoon red chili powder
    • 1 teaspoon salt
    • 1/4 cup coconut freshly shredded, I am using frozen shredded coconut
    • 1 tablespoon sugar
    • 2 teaspoons lemon juice, use as needed

    Instructions
     

    • Wash and soak the rice in about 3 cups of water for at least 15 minutes.
    • Drain the rice. In the saucepan cook, the rice with 2 cups of water, salt, and oil over medium-high heat, bring rice to a boil then turn the heat to low, cover the pan, and cook the rice for about 15 minutes, or until the rice is tender and the water has evaporated. Turn off the heat and fluff the rice with a fork. Note: Cooked rice expands to about 4 times its original size, so be sure to use the proper size pan.
    • Heat the oil in a saucepan over medium heat, oil should be moderately hot, add mustard seeds.
    • When the seeds crack adds peanuts, and roasted chana, stir fry for one minute until peanuts are lightly brown.
    • Add green chili, curry leaves, and ginger, and stir for a few seconds.
    • Next add coconut, mango, sugar, salt, turmeric, and red chili mix it well and cook over low heat for 3-4 minutes until the mango is just tender, do not overcook the mango.
    • Gently fold the rice with mango and turn off the heat. Mango rice is ready to serve.
    • Turn off the heat and if needed drizzle some lemon juice.
    Tried this recipe?Let us know how it was!

    Indulge in taste of South Indian Mango Rice: mango rice Indian recipe 

    Mango rice is a vegan, gluten-freekid-friendly, quick & easy delectable South Indian dish that features the vibrant flavors of ripe mangoes combined with aromatic spices and cooked rice. Typically served as part of festive meals or enjoyed as a quick and flavorful lunch option, mango rice showcases the culinary diversity and richness of South Indian cuisine. Whether you’re looking to explore new flavors or simply craving a taste of home, this mango rice recipe is sure to delight your taste buds with its unique blend of sweet, tangy, and savory flavors.

    1. Preparing the Rice: Washing and Soaking 

    Start the process of making this flavorful South Indian mango rice by washing and soaking the rice in about 3 cups of water for at least 15 minutes. This step ensures that the rice grains absorb enough water to cook evenly and achieve the desired texture. Proper soaking also helps to reduce cooking time and enhances the overall taste and fluffiness of the dish.

    1. Cooking the Rice: Simmering to Perfection 

    After draining the soaked rice, cook it in a saucepan with 2 cups of water, salt, and oil over medium-high heat. Bring the rice to a boil, then reduce the heat to low, cover the pan, and let the rice cook for about 15 minutes until tender and the water has evaporated. It’s important to use the correct size pan as the cooked rice expands to about 4 times its original size. Once cooked, fluff the rice with a fork to ensure it is light and fluffy.

    1. Tempering the Spices: Enhancing Flavor 

    In another saucepan, begin the preparation for this delightful South Indian mango rice by heating oil over medium heat until it reaches a moderately hot temperature. Once the oil is hot, add mustard seeds to the pan, allowing them to crackle and pop in the sizzling oil. This process not only enhances the aroma of the dish but also imparts a nutty flavor to the oil, elevating the overall taste profile of the Indian mango rice. As the mustard seeds crackle and release their essence into the oil, they add depth and complexity to the dish, complementing the sweet and tangy flavors of the mango and the aromatic spices used in this mango rice recipe. The infusion of mustard seed flavor is a quintessential element of mango rice Indian recipe, contributing to its authentic taste and traditional appeal.

    1. Adding Crunchy Elements: Peanuts and Roasted Chana 

    Once the mustard seeds crackle, add peanuts and roasted chana to the saucepan. Stir-fry for about a minute until the peanuts are lightly browned, adding a delightful crunch to the dish. This combination of crunchy elements adds texture and flavor to the mango rice recipe.

    1. Infusing Aromatics: Green Chili, Curry Leaves, and Ginger 

    To enhance the aroma and flavor of the Indian mango rice, add green chili, curry leaves, and ginger to the saucepan. Stir-fry for a few seconds, allowing the spices to release their fragrant essence and infuse the oil.

    1. Incorporating Mango and Coconut: Adding Sweetness and Freshness 

    Next, add coconut, diced mango, sugar, salt, turmeric, and red chili to the saucepan. Mix well and cook over low heat for 3-4 minutes until the mango is just tender. It’s important not to overcook the mango to retain its freshness and natural sweetness, maintaining the integrity of the dish.

    1. Combining Rice and Mango Mixture: Creating Harmony 

    Gently fold the cooked rice with the mango mixture, ensuring that the flavors are evenly distributed throughout the dish. This step brings together the sweetness of the mango, the nuttiness of the rice, and the aromatic spices, creating a harmonious blend of flavors and textures.

    1. Finishing Touches: Drizzling Lemon Juice 

    If desired, turn off the heat and drizzle some lemon juice over the South Indian mango rice for an added burst of freshness and tanginess. This final touch elevates the flavors of the dish, balancing the sweetness of the mango with a hint of acidity. Your delicious mango rice Indian recipe is now ready to be served and enjoyed.

    If you loved our recipe of mango rice then you must also check out other variants of Rice: Vegetable Biryani, Masala Khichdi, Chhole Biryani, Quinoa Vegetable Pilaf, and Lemon Rice