Search results for: “dal”

  • Litti Chokha

    Litti Chokha

    Litti Chokha

    Litti Chokha (Bihari Sattu Litti)

    Litti Chokha is an appetizer from the state of Bihar made with stuffed whole wheat dough balls with roasted chana dal and spices inside. These stuffed balls are known as Litties are usually roasted over charcoal but can also be baked. Litties are served with Chokha. Chokha is a dip prepared with mashing potato, tomato or eggplant with spices, but at my home it was always served with Dal Tadka.
    This recipe will make 8 litties.
    5 from 2 votes
    Prep Time 10 minutes
    Cook Time 30 minutes
    Total Time 40 minutes
    Course Main Course
    Cuisine Indian
    Servings 4 people

    Ingredients
      

    Dough

    • 1 cup whole wheat flour chapatti atta
    • 2 Tbsp ghee clarified butter
    • 1/2 tsp salt
    • cup About 1/3 lukewarm water

    Filling

    • 3/4 cup sattu flour of roasted chana dal, available in Indian grocery stores
    • 1/2 tsp salt adjust to taste
    • 1/8 tsp asafetida hing
    • 1/8 tsp turmeric haldi
    • 1/2 tsp red chili powder
    • 1 tsp mango powder amchoor
    • 1 tsp grated ginger
    • 1 Tbsp green chili finely chopped, adjust to taste
    • 1 tsp ghee clarified butter
    • 1/4 cup water approximately

    Potato, and Tomato Chokha

    • 1 cup medium size potato boiled peeled and roughly mashed
    • 2 medium size tomato roasted peeled and mashed, I have roasted them over the skillet
    • 1 tsp salt
    • Spices we will use half and half to make both Potato and Tomato Chokha
    • 1/4 tsp black pepper
    • 1 tsp lemon juice just for Potato Chokha
    • 2 tsp grated ginger
    • 2 Tbsp finely chopped green chilies
    • 2 Tbsp finely chopped cilantro
    • 2 Tbsp olive oil or mustard oil I prefer olive oil
    • 2 Tbsp ghee or clarified butter for serving the Litties.

    Instructions
     

    For Tomato Chokha

    • To prepare the Tomato Chokha add the spices to mashed tomatoes about 1/2 tsp salt, pinch of black pepper, 1/2 tsp ginger, 1 Tbsp green chili. 1 Tbsp cilantro and 1 Tbsp of oil mix it together. Tomato Chokha is ready set aside.

    For Potato Chokha

    • Add all the remaining spices with mashed potatoes, salt, pinch of black pepper, lemon juice, ginger, cilantro and oil, mix it well. Potato Chokha is ready, set aside.

    To Make Dough

    • Mix the flour, salt and ghee. Add water slowly to make dough. Dough should be firm but do not knead the dough. Cover the dough and let it sit for at least fifteen minutes.

    Filling

    • Mix all the ingredients together except water, sattu, salt, asafetida, turmeric, red chili powder, mango powder, ginger, green chili, and ghee, now add little water to make firm dough, dough will be little crumbly.

    Making Litti

    • Pre-heat the oven at 400 degree Fahrenheit. I am using a toaster oven or you can also use oven.
    • Divide the dough into 8 equal parts and roll them into balls. They will not be very smooth dough ball. Also, divide the filling in 8 parts filling should be little smaller then dough balls.
    • Roll the dough balls into 3-inch circle. Place one part of the filling in the center of each rolled dough, and pull the edges of the dough to wrap the filling. Proceed to make all 8 balls. Grease your palms and roll the filled balls gently between your palms.
    • Arrange the litties over greased baking sheet about one inch apart and place in toaster oven, for 10-12 minutes, turn them over and bake again for 10-12 minutes. Litties should be golden brown all around.

    Serving

    • need about 2 Tbsp ghee or clarified butter for serving the Litties.

    Notes

    I like to eat these Litties with Dal Tadka and Potato or Tomato Chokha.
    Tried this recipe?Let us know how it was!

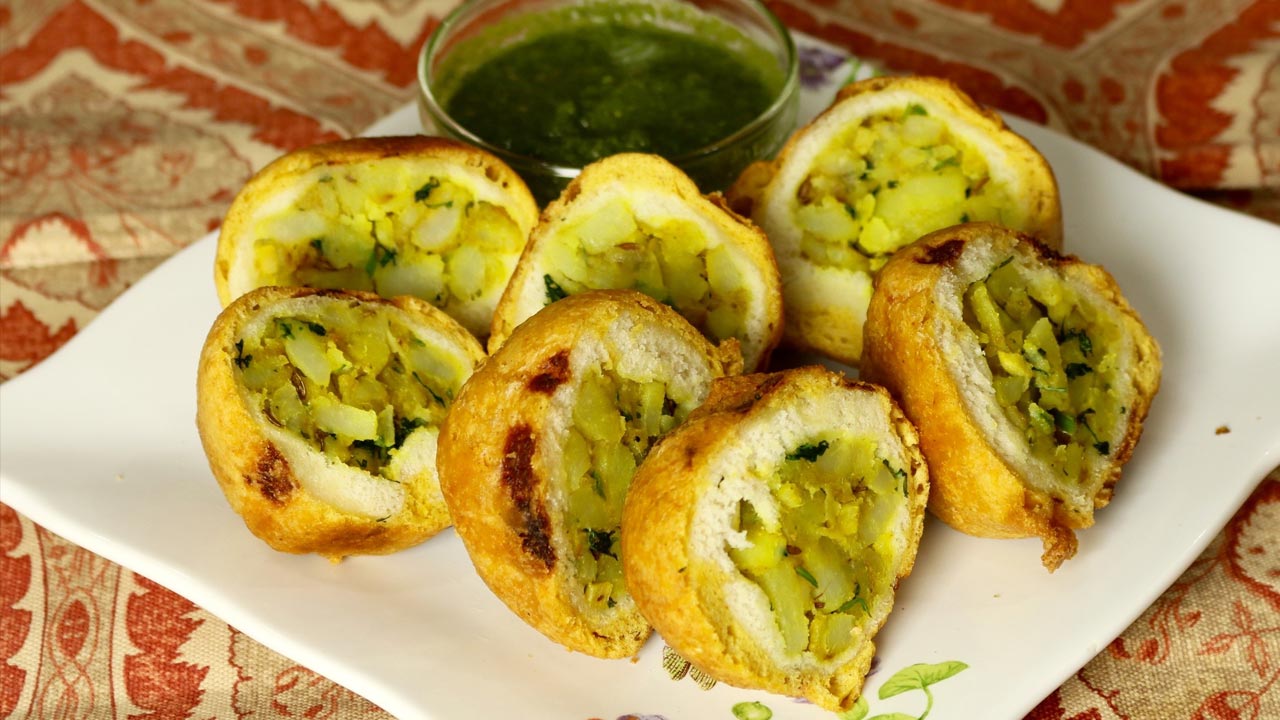
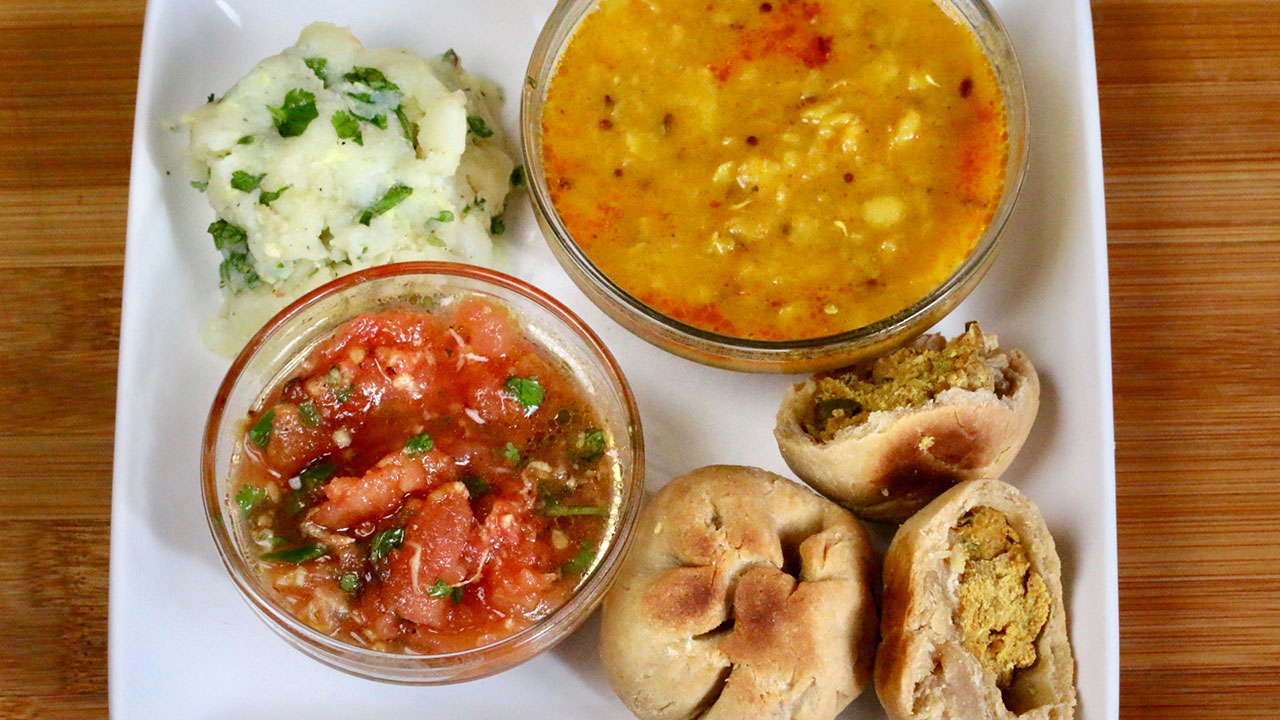
    Litti Chokha Recipe: How to make Litti Chokha

    Litti Chokha is a traditional and an iconic appetiser and a bread format of dish from the state of Bihar in India. It consists of stuffed whole wheat dough balls (litti) served with spicy mashed vegetable mixture or chokha. This rustic and flavorful dish is a staple in Bihari cuisine and is enjoyed as a hearty meal or snack

    Litti Chokha: A traditional Bihari food

    High in Fiber: Litti Chokha is made primarily from whole wheat flour, which is rich in dietary fiber. Fiber aids in digestion, promotes gut health, and helps regulate blood sugar levels. Consuming fiber-rich foods like Litti Chokha can contribute to overall health and well-being.

    Vitamins and Minerals: Litti Chokha is often served with chokha, a spicy mashed vegetable mixture made from ingredients such as roasted eggplant, tomatoes, and potatoes. These vegetables are rich in vitamins, minerals, and antioxidants, which support immune function and promote overall health.

    Satiating and Flavorful: Litti Chokha is a satisfying and flavorful dish that combines the earthy taste of roasted wheat dough with the spicy and tangy flavors of chokha. The contrast in textures and flavors creates a delightful eating experience that is both comforting and nourishing.

    Variations of Litti Chokha:

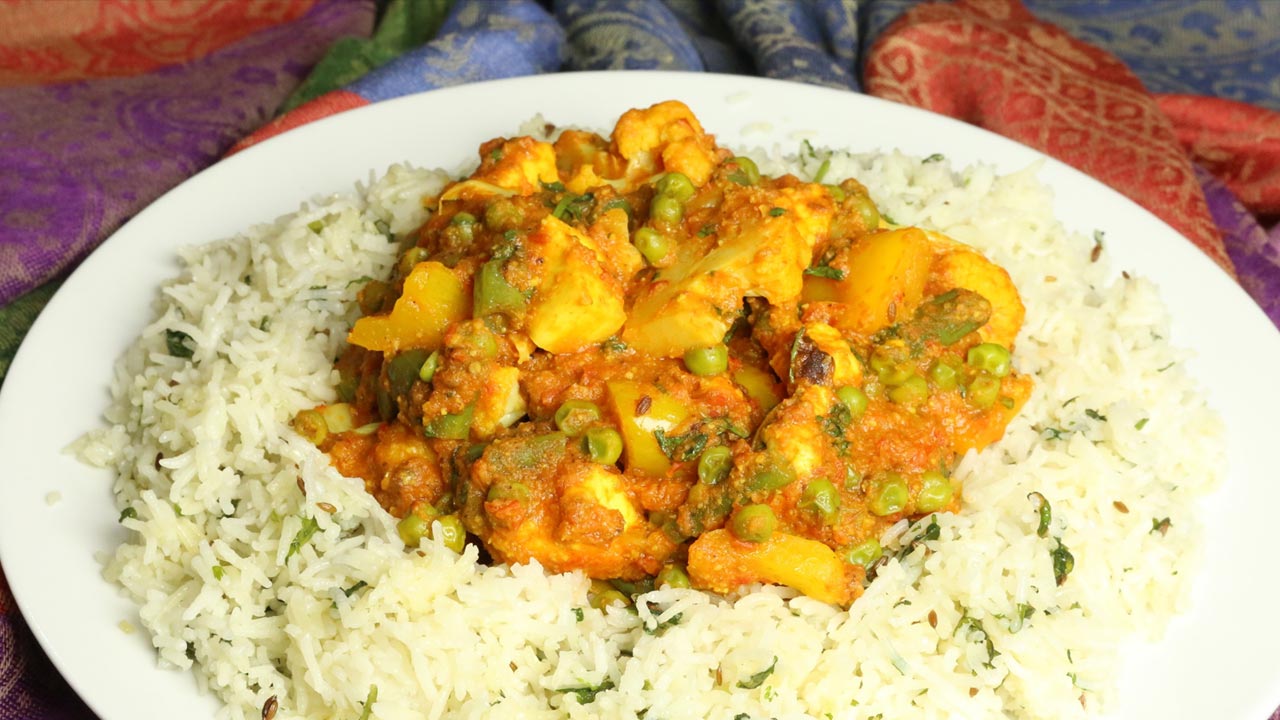
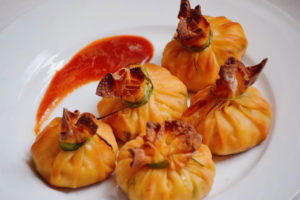
    • Mattar Ke Kachori: Mattar Kachori is a delicious, fried puff pastry filled with spicy green peas. This mouthwatering snack also can be served as part of any main meal.
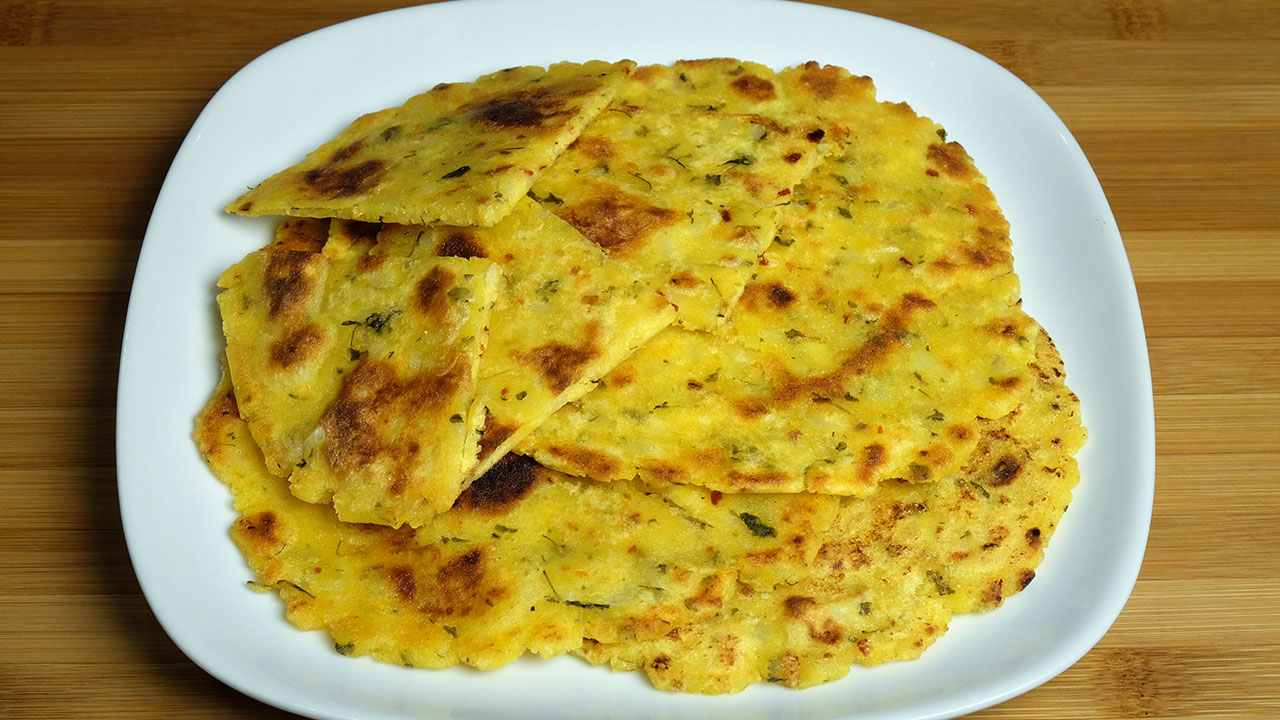
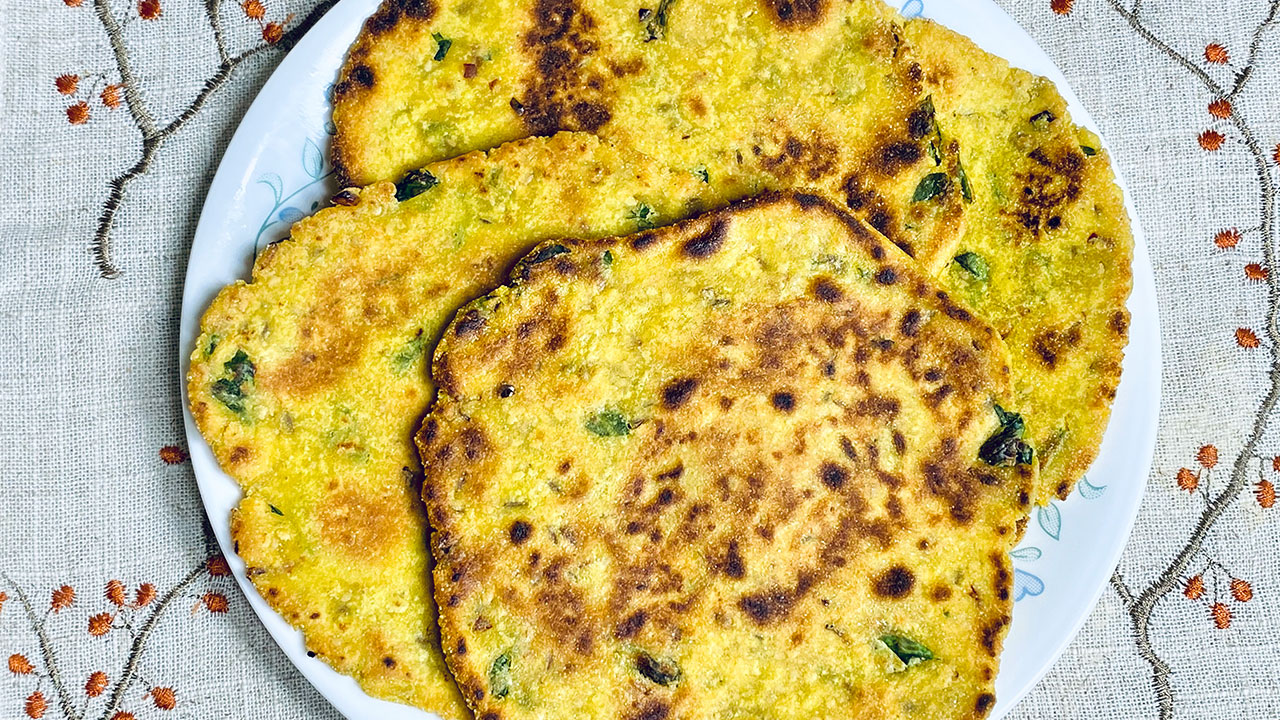
    • Pizza Paratha: Pizza has become a universal food enjoyed by all. Pizza paratha is perfect for the times when you want to enjoy homemade pizza. This is also a quick and easy recipe.
    • Dal Bati: Dal bati is a popular Rajasthani delicacy. Dal is simply soup of mixed lentils, cooked with spices. Bati is a baked, whole wheat bread roll and the combination is known as dal bati.
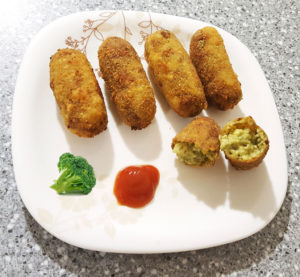
    • Khasta Kachori: Khasta kachori is a delicious, spicy, fried puffed pastry. Khasta Kachori is filled with spicy moong dal mixture and then deep fried. Kachori is flakey from outside and hollow inside. Kachori should be fried on low heat so it can cook through to have a nice crunch.

    Tips for Making Perfect Litti Chokha:

    Knead the Dough Well: For soft and fluffy litti, knead the dough thoroughly until it becomes smooth and elastic. Properly kneaded dough ensures that the litti hold their shape and cook evenly without becoming too dense or chewy.

    Roast Litti Over Charcoal: Traditional litti are cooked over a charcoal or wood fire, which imparts a smoky flavor and crispy texture to the outer crust. If using an oven, you can achieve a similar effect by placing the litti directly on a grill rack or using a barbecue grill.

    Use Fresh Ingredients: Use fresh and high-quality ingredients, especially for the chokha, to enhance the flavor and nutritional value of the dish. Choose ripe, firm vegetables and aromatic spices for the best results.

    Serve with Ghee: Litti Chokha is traditionally served with a generous drizzle of melted ghee (clarified butter) on top. The rich and buttery flavor of ghee complements the earthy taste of litti and adds a touch of indulgence to the dish.

    FAQs about Litti Chokha:

    Can I make Litti Chokha without sattu? 

    While sattu is the traditional filling for litti, you can substitute it with other ingredients such as besan (gram flour), crushed roasted peanuts, or mashed lentils. Experiment with different fillings to create unique variations of Litti Chokha.

    Is Litti Chokha gluten-free? 

    Litti Chokha is not gluten-free as it is made from whole wheat flour, which contains gluten. However, you can explore gluten-free alternatives for the dough, such as using a combination of gluten-free flours like rice flour, chickpea flour, and tapioca flour.

    Can I make Litti Chokha spicy? 

    Yes, you can adjust the level of spiciness in Litti Chokha according to your taste preferences by adding more or fewer green chilies or red chili powder to the chokha mixture. You can also serve Litti Chokha with a side of spicy pickle or chutney for extra heat.

    Can I make Litti Chokha ahead of time? 

    Yes, you can prepare the dough and filling for litti in advance and assemble them just before cooking. Store the prepared dough and filling separately in the refrigerator until ready to use. Leftover chokha can be stored in an airtight container in the refrigerator for up to 2-3 days.

    Litti Chokha is a delicious and wholesome dish that captures the essence of traditional Bihari cuisine. With its rich flavors, nourishing ingredients, and endless variations, Litti Chokha is sure to become a favorite among food enthusiasts. 

  • Boondi Ka Raita

    Boondi Ka Raita

    Boondi Ka Raita

    Boondi Ka Raita

    Boondi Ka Raita is a delicious and easy to make side dish which compliments any meal. Boondi ka raita is a yogurt based Indian condiment. Raita is an integral part of Indian cuisine.
    No ratings yet
    Prep Time 5 minutes
    Cook Time 5 minutes
    Course Raita
    Cuisine Indian
    Servings 4 people

    Ingredients
      

    • 1 cup boondi, boondies you can buy in indian grocery stores or use the recipe I have for sweet boondi just do not soak them in syrup.
    • 1-1/2 cup yogurt
    • 1/2 tbsp Salt
    • 1/2 tbsp Black salt
    • 1/2 tbsp roasted cumin seed powder
    • 1/4 tbsp red chili powder
    • About 1 tbsp mint leaves chopped
    • Few mint leaves to garnish

    Instructions
     

    • Soak boondi in the warm water for about 10 minutes.
    • Lightly squeeze the boondies in your palms, don't mash them.
    • whisk the yogurt in a bowl. If yogurt if too thick add water as needed. Yogurt should be the consistency of pancake or dosa batter.
    • Add all the spices salt, black salt cumin seed powder, chili powder, and chopped mint leaves mix it well.
    • Add the boondi and mix.
    • Garnish boondi raita with mint leaves.

    Notes

    Boondi raita can be served cold or at room temperature. I especially like boondi rita with aloo  paratha or with Urad Dal Puri.
    Keyword Bondi Raita
    Tried this recipe?Let us know how it was!

    Lets Learn How To Make The Best Boondi Raita Recipe Manjula’s Kitchen 

    What is Raita: Raita is an accompaniment for any Indian meal and can be created in the form of Vegetable Raita, Spinach Raita, Boondi ka Raita, Cucumber Raita & Lauki ka Raita. Here we are focussing on making boondi raita, it is a simple quick & easy, gluten free, kid friendly and nutritious yogurt-based recipe featuring boondi and a selection of Indian spice powders. 

    1. Soaking Boondi: The Essential First Step in Boondi Raita Recipe 

    Embark on creating the best Boondi Raita by beginning with a crucial step: soaking boondi in warm water for approximately 10 minutes. This ensures the boondi achieves the ideal texture for a delectable raita. Allow the boondi to absorb the water, undergoing a softening process that enhances its ability to meld seamlessly with the yogurt.

    1. Gently Squeezing Boondi: Preserving Texture for Perfect Boondi Raita 

    Following the soaking period, delicately squeeze the boondi in your palms, emphasising the importance of preserving its individual texture. Avoid mashing the boondies, ensuring they retain a distinct shape and a pleasant, slightly chewy consistency. This step contributes to the overall appeal and mouthfeel of the boondi raita.

    1. Whisking Yogurt: Achieving the Right Consistency for Boondi Raita Recipe

    In a bowl, whisk the yogurt, a pivotal step in mastering the art of the best Boondi Raita. Adjust the yogurt’s thickness by adding water as needed, aiming for a consistency resembling pancake or dosa batter. This meticulous process ensures that the yogurt provides the perfect base, allowing the other ingredients to harmonise in creating a flavorful raita.

    1. Seasoning with Spices: Elevating Flavour in Boondi Raita Recipe 

    Once the yogurt reaches the desired consistency, add a medley of spices to elevate the flavour profile of your Boondi Raita. Incorporate salt, black salt, cumin seed powder, chilli powder, and finely chopped mint leaves. The combination of these spices creates a symphony of tastes, enhancing the overall richness and depth of the raita.

    1. Mixing Boondi with Yogurt: Creating the Perfect Boondi Raita Blend 

    With the spices seamlessly integrated into the yogurt, introduce the soaked and gently squeezed boondi into the mixture. Thoroughly mix the boondi with the flavoured yogurt, ensuring an even distribution of spices and a cohesive blend. This step is crucial in achieving a balanced and well-infused Boondi Raita.

    1. Garnishing with Mint Leaves: Final Touch to Boondi Raita Recipe

    Elevate the visual appeal and freshness of your Boondi Raita by garnishing it with additional mint leaves. This final touch not only adds a burst of colour but also enhances the aromatic quality of the raita. The mint leaves serve as a delightful finishing touch, making your Boondi Raita an inviting and flavorful addition to any meal.

  • Makki Ki Roti

    Makki Ki Roti

    Makki Ki Roti

    Makki Ki Roti – Paratha

    Makki Ki Roti is a popular Punjabi bread made with corn flour and served with Sarson Ka Saag. Maki ki roti is also a Gluten Free flat bread.
    No ratings yet
    Course Bread
    Cuisine Indian
    Servings 3 people

    Ingredients
      

    • 2 cup Makki ka atta, corn flour
    • 1 cup potato, boiled peeled and grated
    • 1 tbsp salt
    • 1 tbsp chili flakes
    • 2 tbsp dry fenugreek leaves, kasuri methi
    • 1/8 tbsp asafetida, hing
    • ¾ cup warm water
    • 3 tbsp of ghee or clarified butter for cooking rotis

    We also need a plastic sheet about 8” x 12” to roll the rotis I am using a zip lock bag.

    Instructions
     

    • Combine all the dry ingredients in a bowl, corn flour, salt chili flakes, fenugreek leaves, and asafetida mix it well. Add potato to the mixture and mix. This will become very crumbly. Add water as needed to make the firm dough. Knead the dough for a minute. For Makki ki roti make the dough when ready to make roti.
    • Note: Makki ki roti is little hard to roll, that is the reason I decided to use potatoes. Potatoes help to bind the dough.
    • Divide the dough into 6 equal parts. Make them in smooth balls.
    • Take one ball press it between the plastic sheet plastic sheet help rolling the roti, roll the roti into about 6-inch circle. Note: maybe the edges will not be as clean as other rotis.
    • Heat the skillet over medium heat. Skillet should not be very hot. Otherwise rotis will not cook through.
    • Place the roti in the skillet. As it cooks, the dough will change color and have a dryer look. Turn the roti over using a spatula. You should see golden-brown spots on the semi-cooked side.
    • After a few seconds, spread 1 teaspoon ghee onto the roti using a spatula. Turn the roti over. Using your spatula, lightly press the entire surface of the roti to help it cook all the way through. Put the ghee on both sides of the roti while cooking. Grill the roti from both sides making sure it is golden-brown on both sides.  Remove from heat.
    • Repeat with the remaining dough, until they are all done.

    Notes

    Serve them hot. Makki ki roti is traditionally served with sarson ka saag or dal makhani. If you are vegan use the oil for cooking the rotis.
    Keyword Roti
    Tried this recipe?Let us know how it was!
  • Papad Ki Subji

    Papad Ki Subji

    Papad ki Subji

    Papad Ki Subji (Rajasthani Dish)

    Papad ki sabzi this is a traditional Rajasthani dish. Papad ki subji is delicious and flavorful. Papad ki sabji has a distinct flavor and easy to make.  Serve this hot with roti, paratha or plain rice.
    No ratings yet
    Prep Time 5 minutes
    Cook Time 22 minutes
    Course curry
    Cuisine Indian
    Servings 3 people

    Ingredients
      

    • 4 plain papad I am using plain urad dal 8” diameter- Papadam
    • 2 tbsp oil
    • 1 tbsp cumin seeds – jeera
    • 1/8 tbsp asafetida – hing
    • 2 whole red chili dried
    • 2 cup of plain yogurt, sour yogurt works better – curd, dahi
    • 2 tbsp finely shredded ginger
    • 1 tbsp red chili powder – lal mirch
    • 1/2 tbsp turmeric – haldi
    • 2 tbsp coriander powder – dhania
    • 1/2 tbsp fenugreek seeds – mathi dana
    • 1 tbsp salt
    • 2 tbsp finely chopped cilantro – hara dhania

    Instructions
     

    • Wash and soak fenugreek seeds for about 5 minutes, and change the water 3-4 times, this will reduce the bitterness from the fenugreek seeds. Drain the water and set aside.
    • Break the papad in small pieces. Set aside.
    • In a bowl beat the yogurt until it is smooth. Add ginger, chili powder, turmeric, coriander powder, and fenugreek seeds and mix it well.
    • Heat the oil in a sauce pan over medium heat, oil should be moderately hot. Add cumin seeds as seeds crack add asafetida and whole red chilies, lower the heat.
    • Add yogurt mix and cook over low heat stir continuously. Let it boil for 2-3 minutes. Add about 1 cup of water and cook for 3-4 minutes after gravy comes to boil.
    • Add salt and papad mix it and let it cook for 3-4 minutes. Turn off the heat add cilantro. Papad ki sabji is ready to serve.
    Keyword curry, Subji
    Tried this recipe?Let us know how it was!

  • Shahi Pulao Recipe

    Shahi Pulao Recipe

    Hyderabadi Biryani

    Shahi Pulao (Vegetable Pulao)

    Shahi Pulao or Vegetable Pulao is an exotic rice dish made for parties that combines spicy and aromatic vegetables served over rice. Rich with flavor, this is an extraordinary dish. You may also call this Biryani. This dish is made in two parts. First I prepare the rice with cumin seeds and cilantro. Then the vegetables are cooked separately with tomatoes, cashews, beans, green peas, cauliflower, and paneer. Top these vegetables over the rice and you have a mouth-watering dish!
    No ratings yet
    Course rice
    Cuisine Indian
    Servings 4 people

    Ingredients
      

    For rice

    • 1 cup rice preferred basmati rice available in Indian grocery stores
    • 2 tbsp clarified butter or ghee
    • 1/2 tbsp cumin seeds (jeera)
    • About 1 inch piece cinnamon stick (dal chini)
    • 1/2 tbsp salt
    • About 1/4 cup cilantro finely chopped (hara dhania)
    • 2 cup water

    For vegetables

    • About 3 cup mix vegetables I am using cauliflower cut into small floret, green beans cut into small pieces, bell pepper cut into cubes, and frozen green peas,
    • 1/2 cup paneer cut into about 1/2 inch cubes
    • 4 cup tomatoes chopped
    • 1 green chili cut into pieces
    • About 2 tbsp ginger cut into small pieces
    • 3 tbsp oil
    • 1 tbsp cumin seeds (jeera)
    • 1/8 tbsp asafetida (hing)
    • 2 tbsp coriander powder (dhania)
    • 1/2 tbsp turmeric
    • 1/2 tbsp red chili powder
    • 1-1/2 tbsp salt
    • 1 tbsp sugar
    • 1/4 cup cashew powder
    • 1/4 cup cilantro chopped
    • 1/4 tbsp garam masala

    Instructions
     

    Rice:

    • Wash rice gently changing water several times until the water appears clear.
    • For fluffier rice, the rice should be soaked for at least 15 minutes prior to cooking.
    • Heat the oil in a saucepan. Oil is the right temperature when one cumin seed dropped into the oil cracks immediately.
    • Add the cumin seeds. When they crack, add the cinnamon stick and stir for a few seconds. Add the rice, cilantro, and salt. Stir-fry one minute.
    • Add the water and bring to a boil, turn the heat to low. Cover the pan, and Cook 15 minutes, or until the rice is tender and the water has evaporated. Turn off the heat and fluff the rice with a fork.

    Vegetables

    • Blend tomatoes, green chilies and ginger to make a puree. If you prefer mild take the seeds out of green chili before blending.
    • Heat the oil in a saucepan. Over medium high heat oil should be moderately hot, add the cumin seeds, and asafetida, as seeds crack add tomato puree, coriander, turmeric, sugar and salt.
    • Lower the heat to medium, stir the spice paste occasionally when it start thickening add cashew powder and cook until paste become the thick and start leaving the oil from side.
    • Add all the vegetables and 1/4 cup of water, mix it well. Cover the pan and let it cook for about 5-6 minutes over medium heat stir few times in between. Add paneer mix and cover the pan, cook for another 3-4 minutes. Vegetables should be tender not mushy.
    • Turn off the heat add garam masala and cilantro, stir and cover the pan for few minutes before serving.
    • Serve the vegetable over hot rice.
    Keyword pulao
    Tried this recipe?Let us know how it was!

    Savour the Essence of Shahi Pulao: Mixed Vegetable Pulao or Biryani Pulav 

    Shahi pulao is a fragrant and rich rice dish from Indian cuisine. “Shahi” translates to “royal,” indicating the dish’s royal and luxurious nature. It is typically made with basmati rice cooked with a blend of aromatic spices, such as cardamom, cloves, and cinnamon, along with saffron for a distinctive golden color and aroma.

    Rice Preparation: Creating the Perfect Base for Pulav

    Washing and Soaking Rice to Enhance Texture 

    Kickstart your culinary journey of biryani pulav or mixed vegetable pulao by ensuring the rice is immaculately clean and primed for cooking. Begin by delicately washing the rice, changing the water multiple times until it achieves crystal clarity. For an impeccable fluffiness characteristic of pulav Indian dishes, soak the rice grains for a minimum of 15 minutes before cooking, allowing them to absorb moisture and expand, ready to absorb the delightful flavors of your shahi  pulao recipe.

    1. Tempering Oil with Aromatic Spices 

    In a saucepan, elevate the essence of your pulav by heating the oil to the perfect temperature. Gauge the oil’s readiness by dropping a cumin seed – it should crackle instantaneously upon contact, signalling the ideal heat level for infusing flavors. Once the oil reaches the desired temperature, introduce cumin seeds and a cinnamon stick, allowing them to crackle and permeate the oil with their delightful aroma, setting the stage for a tantalizing pulav experience.

    1. Incorporating Rice and Seasonings for Flavorful Base 

    After the spices have crackled to perfection, introduce the washed and soaked rice into the saucepan, along with freshly chopped cilantro and a dash of salt. Stir-fry the rice for about a minute, ensuring each grain is enveloped in the aromatic oil and spices, laying the foundation for a flavorful shahi pulao base that will elevate your biryani pulav or mixed vegetable pulao to new heights of deliciousness.

    1. Cooking Rice to Perfection for Pulav Indian Delight 

    Pour water into the saucepan, ensuring the rice is fully immersed, and bring it to a gentle boil. Once the water reaches a steady boil, reduce the heat to low and cover the pan, allowing the rice to simmer gently for approximately 15 minutes or until it reaches the desired tenderness and the water has evaporated. This slow and meticulous cooking process ensures that each grain of rice is cooked to perfection, ready to absorb the rich flavors of the accompanying vegetables in your mix vegetable pulao recipe.

    1. Fluffing Rice to Achieve Light Texture

    Once the rice has achieved the ideal level of tenderness, turn off the heat and delicately fluff the grains with a fork. This crucial step helps to separate the rice and prevent it from clumping together, ensuring a light and fluffy texture that is characteristic of a delectable pulav Indian masterpiece like biryani pulav or mixed vegetable pulao.

    Vegetable Preparation: Infusing Flavor into Mixed Vegetable Pulao 

    1. Creating a Flavorful Tomato Puree 

    Begin the vegetable preparation for your mix vegetable pulao by blending fresh tomatoes, green chilies, and ginger into a smooth puree. For a milder flavor, remove the seeds from the green chilies before blending, adjusting the spice level to your preference.

    1. Tempering the Oil with Aromatic Spices 

    In a separate saucepan, heat oil over medium-high heat until moderately hot. Add cumin seeds and a pinch of asafetida, allowing them to crackle and release their flavors into the oil.

    1. Cooking the Spices and Creating the Base 

    Once the cumin seeds crackle, add the freshly prepared tomato puree to the saucepan, along with ground coriander, turmeric powder, a hint of sugar, and salt to taste. Stir the spice paste occasionally until it thickens and the oil starts to separate from the sides of the pan.

    1. Adding Vegetables and Cooking Until Tender 

    Incorporate a variety of vegetables into the spice paste, along with a quarter cup of water, ensuring they are evenly coated with the flavorful mixture. Cover the saucepan and allow the vegetables to cook over medium heat for about 5-6 minutes, stirring occasionally to prevent sticking. Add paneer mix and cook for another 3-4 minutes until the vegetables are tender yet firm.

    1. Flavoring the Vegetable Mixture and Allowing to Rest 

    Once the vegetables are cooked to perfection, turn off the heat and sprinkle garam masala and freshly chopped cilantro over the mixture. Stir gently to incorporate the spices, then cover the pan and let the flavors meld together for a few minutes before serving atop the hot, fluffy rice.  

    This meticulous step-by-step approach ensures that each component of your biryani pulav or mixed vegetable pulao is prepared with care and attention, resulting in a flavorful and aromatic dish that will delight your senses. If you loved this mix vegetable pulao recipe then you must also check out other variants of Rice: Vegetable Biryani, Masala Khichdi, Chhole Biryani, Quinoa Vegetable Pilaf and Lemon Rice.

  • Aloo Bread Pakora Recipe

    Aloo Bread Pakora Recipe

    Potato Bread Pakoras

    Aloo (Potatoes) Bread Pakora

    Aloo bread pakora, bread stuffed with spicy potatoes, coated with gram flour and deep fry. Spicy hot aloo bread pakora is a tasty compliment for afternoon tea or served as an appetizer. Aloo bread pakora is crunchy outside, spicy and soft inside.
    5 from 1 vote
    Course Appetizer
    Cuisine Indian
    Servings 4 people

    Ingredients
      

    • 8 bread slices, I have already trim the edges of the bread slices
    • 3 medium potatoes boiled peeled and finely chopped (this will make 2 cups of chopped potatoes)
    • 1 tbsp oil
    • 1/2 tbsp cumin seeds (jeera)
    • 1/8 tbsp turmeric (haldi)
    • 1/4 tbsp mango powder (amchoor)
    • 1 tbsp finely chopped ginger
    • 1 green chili finely chopped adjust to taste
    • 2 tbsp chopped cilantro (hara dhania)
    • 1/2 tbsp salt adjust to taste

    For Batter

    • 3/4 cup besan, gram flour
    • 1/8 tbsp asafetida (hing)
    • 1/4 tbsp baking soda
    • 1/4 tbsp red pepper
    • 1/2 tbsp salt adjust to taste
    • 1 tbsp oil
    • About 3/4 cup of water

    Instructions
     

    Batter

    • In a bowl mix besan, salt, asafetida, pepper, baking powder and oil. Add water slowly to make a thick and smooth batter. Set aside.

    Filling

    • Heat oil in a frying pan on medium heat moderately.
    • Add cumin seeds as the seeds crack add potatoes, ginger, green chili, turmeric, mango powder, and salt.
    • Stir fry for about 3 minutes over medium heat. Add cilantro mix it well. Turn of the heat.

    Making the Pakoras

    • Trim the edges of the bread slices.
    • Wet your palms with water, place the slice between your palms and press lightly making sure bread is moist, not wet.
    • Roll 1½ tablespoons of the mixture at a time into round balls. (The size of the potato balls will depend on the size of the bread.)
    • Place the filling in the center of the bread and mold the bread to completely cover the potatoes all around, giving a round shape. Repeat to make all the rolls. Before frying.
    • Heat about 1 inch of oil in a frying pan on medium high heat moderately. To check if the oil is ready, put one drop of batter in oil. The batter should come up but not change color right away.
    • Dip the potato balls into the batter one at a time, making sure the potato balls are completely covered with batter. Then, slowly drop them into the frying pan.
    • Turn them occasionally. Fry the pakoras until all sides are golden-brown.
    • Aloo bread pakoras will take about four minutes to cook.
    • Cut them in half before serving. Serve them with mint chutney.
    Keyword bread pakora
    Tried this recipe?Let us know how it was!

    Bread Potato Pakora: A Delicious Snack for Any Occasion 

    Bread potato pakora is a popular vegan Indian snack made by coating bread slices with a spiced potato mixture and then deep-frying them until crispy and golden brown. It’s a versatile dish that can be enjoyed as a tea-time snack or as an appetizer for parties and gatherings. In this recipe, we’ll explore how to make delicious bread potato pakoras at home.

    How to Make Potato Bread Pakora 

    To make potato bread pakora, start by preparing the potato stuffing. Boil potatoes until they are soft, then mash them and mix them with spices such as turmeric, cumin, coriander, and salt. Next, take slices of bread and spread a layer of the potato mixture between two slices to form sandwiches. Cut the sandwiches into triangles or rectangles. Prepare a batter using gram flour (besan), water, salt, and spices such as chili powder and ajwain. Dip the potato-stuffed bread sandwiches into the batter, ensuring they are fully coated. Deep fry the pakoras until they are golden brown and crispy. Serve hot with chutney or ketchup.

    Potato Stuffed Bread Pakora Recipe: Tips for Success 

    • Use fresh bread: Fresh bread works best for making bread potato pakoras as it holds its shape better during frying.
    • Adjust the spices: Feel free to adjust the spices in the potato mixture and batter according to your taste preferences. You can make it spicier by adding more chili powder or milder by reducing the amount of spices.
    • Ensure even frying: Make sure the oil is hot enough before frying the pakoras to ensure they cook evenly and become crispy.
    • Serve immediately: Bread potato pakoras are best enjoyed hot and crispy, so serve them immediately after frying for the best taste and texture.

    Variations of Bread Potato Pakora 

    • Cheese-filled: For an indulgent twist, you can add a slice of cheese along with the potato mixture between the bread slices before frying.
    • Vegetable-packed: Add finely chopped vegetables such as bell peppers, or spinach to the potato mixture for added flavor and nutrition.
    • Sauce-dipped: Serve the pakoras with a tangy tamarind chutney or mint yogurt sauce for a burst of flavor.

    How to Make Potato Bread Pakora: Serving Suggestions 

    Bread potato pakoras can be served as a standalone snack with green chutney, tamarind chutney, or ketchup. They also pair well with a hot cup of tea or coffee, making them perfect for afternoon gatherings or rainy-day munching. Additionally, you can serve them alongside other Indian snacks such as samosas, pakoras, or chaat for a complete spread.

    Benefits of Bread Potato Pakora 

    • Quick and easy: Bread potato pakoras can be made in a relatively short amount of time, making them perfect for when you need a quick snack or appetizer.
    • Kid-friendly: Children tend to love the crispy texture and flavorful filling of bread potato pakoras, making them a great way to sneak in some veggies.
    • Customizable: You can customize the spices and fillings in bread potato pakoras to suit your taste preferences or dietary restrictions.

    FAQs about Bread Potato Pakora 

    Q: Can I make bread potato pakoras ahead of time?

    A: While bread potato pakoras are best enjoyed fresh, you can prepare the potato stuffing and batter ahead of time and assemble and fry the pakoras just before serving.

    Q: Can I bake bread potato pakoras instead of frying them?

    A: While traditionally bread potato pakoras are deep-fried for a crispy texture, you can try baking them in the oven for a healthier alternative. Simply brush them with oil and bake at a high temperature until they are golden brown and crispy.

    Q: Can I freeze bread potato pakoras?

    A: While bread potato pakoras are best enjoyed fresh, you can freeze them after frying. Allow them to cool completely, then place them in an airtight container or freezer bag and freeze for up to one month. To reheat, simply bake them in a preheated oven until heated through.

    If you’re interested in exploring more recipes similar to aloo bread pakora, be sure to check out Manjula’s Kitchen for a wide range of Indian snacks, appetizers, and main courses. From samosas to chaat to curries, you’ll find delicious and authentic Indian recipes to try at home.

    Explore more recipes on Manjula’s Kitchen: Vegetable Samosas, Paneer Tikka, Crispy Spinach Pakoras, Mango Lassi, Masala Chai, Gulab Jamun, Kheer (Rice Pudding)

  • Masala Bell Pepper Recipe

    Masala Bell Pepper Recipe

    Masala Bell Pepper

    Masala Bell Pepper (Capsicum)

    Bell pepper is also known as capsicum or shimla mirch. Masala bell pepper with great blend of spices, makes a very enjoyable side dish. This can complement any meal. Masala bell pepper can be served with roti, paratha or puries. I enjoy this with side of dal fry and plain rice.
    3.50 from 2 votes
    Course vegan
    Cuisine Indian
    Servings 4 people

    Ingredients
      

    • 3 medium Green bell pepper seeded and cubed in 1/2” pieces this will make about 3 cup cubed bell pepper (capsicum, shimla mirch)
    • 2 tbsp oil
    • 1/2 tbsp cumin seeds (jeera)
    • 1/8 tbsp asafetida (hing)
    • 1-1/2 tbsp coconut powder (gola)
    • 1-1/2 tbsp sesame Seed powder (til)
    • 2 tbsp teaspoons coriander powder (dhania)
    • 2 tbsp fennel seeds powder (saunf)
    • 1/2 tbsp Red Chili Powder (lal mirch)
    • 1/4 tbsp Turmeric Powder (haldi)
    • 3/4 tbsp salt
    • 1 tbsp sugar
    • 1/2 tbsp mango powder (amchoor)
    • 1 tbsp Lemon Juice

    Instructions
     

    • In a small bowl mix most of the spices, coconut powder, sesame powder, coriander powder, fennel seeds powder, red chili, turmeric, salt, and sugar. Set aside.
    • In a wide frying pan heat the oil moderately over medium high heat, add cumin seeds as seeds crack add asafetida. Add bell pepper mix well lower the heat to low medium. Cover the pan and let it cook for about 3 minutes.
    • Sprinkle the spice mix. Mix it well coating all the bell pepper. Let it cook about 3-4 minutes covered, do stir in between. Cook the bell peppers until they are tender but still little crisp.
    • Turn off the heat, add the mango powder and lemon juice mix well.
    • Masala bell pepper is ready.
    Tried this recipe?Let us know how it was!


  • Tawa Naan Recipe

    Tawa Naan Recipe

    Tawa Naan (Naan without Tandoor)

    Tawa Naan, Naan Without Tandoor

    Naan is definitely the most popular bread in Indian restaurants. Traditionally, naan is cooked in a tandoor (hot clay oven). I have already done a naan recipe using the oven and I used pizza stone to give a tandoor texture. But I find at home "tawa naan" is much easier to make. Tawa Naan turns out really soft and it tastes great. It's hassle free because you don't need a tandoor or oven. Naan Goes well with chole, palak paneer or any gravy based dish.
    4.08 from 13 votes
    Prep Time 10 minutes
    Cook Time 10 minutes
    Total Time 20 minutes
    Course Main Course
    Cuisine Indian
    Servings 2 people

    Ingredients
      

    • 1 cup all-purpose flour plain flour, Maida
    • 1/4 tsp baking soda
    • 1/4 tsp salt
    • 1/4 tsp sugar
    • 1/4 cup yogurt room temperature
    • 1-1/2 tsp oil canola, vegetable
    • 1/4 cup look warm water use as needed

    Garnishing

    • 1 tbsp clear butter or ghee
    • 1 tbsp chopped cilantro
    • 1 tbsp green chili finely chopped
    • 1/4 tsp sea salt

    Instructions
     

    • We also need tawa or skillet to make naan, nonstick skillet will not work for this recipe. Iron tawa or skiller works the best for making Tawa Naan.

    Making Naan

    • For garnishing mix all the ingredients, butter, salt, cilantro, and green chili Set aside.
    • Mix the dry ingredients together, add 1 tablespoon of oil and yogurt mix it well. Then add the water gradually to make very soft dough but not sticky. Knead the dough on a lightly floured surface, knead the dough well. Apply light oil to the dough and cover. Let the dough sit for about 3 hours in warm place.
    • Dough should be about 1-1/2 time, knead the dough again on floured surface. Divide the dough in four parts, lightly roll into the flour, cover the balls and let it sit for about five minutes before rolling.
    • Roll the naan one at a time on a lightly floured surface little less than 1/4 inch thick. Sprinkle the water lightly on one side of the naan.
    • Heat the tawa on medium heat, to check if tawa is ready sprinkle the few drops of water on tawa, water should sizzle.
    • Put water side naan over tawa, once the naan start bubbling and dough start drying, turn the tawa over flames keeping about 2 inch away from the flames to cook the naan from top. Note: yes naan will stick to tawa and will not fall of, this the reason you cannot use the nonstick skillet.
    • Once naan browned to your satisfaction, remove, and spread the butter mix over. Place in a on a plate and cover with a cloth to keep warm until serving. Naan is ready!

    Notes

    Serving Suggestion
    Taste best with Punjabi Chole or Palak Paneer
     
    Keyword 50 Favorites
    Tried this recipe?Let us know how it was!

    How to make Naan at Home on Tawa Recipe – Manjula’s Kitchen 

    Tawa or Skillet: 

    Let’s dive into crafting the perfect Tawa Naan (Indian bread) at home with this easy Tawa Naan recipe. Begin by selecting the right equipment – an essential iron tawa or skillet. Forgo the nonstick skillet; the traditional iron one is crucial for achieving that perfect stickiness in your Tawa Naan.

    Garnishing: 

    Elevate your Tawa Naan with a delightful mix of clear butter, sea salt, chopped cilantro, and finely chopped green chili. This straightforward concoction adds richness, freshness, and a hint of heat, transforming your naan into a culinary masterpiece with our special naan on the tawa recipe.

    Mixing the Dry Ingredients: 

    At the heart of our Tawa Naan recipe lies the meticulous combination of dry ingredients. In a mixing bowl, blend Maida, baking soda, salt, and sugar. Add oil and yogurt – the oil ensures a smooth integration of flavors, and the yogurt contributes a creamy richness and subtle tanginess to the dough in this How to make naan at Home on Tawa guide.

    Gradual Addition of Water: 

    As you gradually add water to the dry mixture, witness the alchemy of dough creation. Water acts as the binding agent, transforming the dry ingredients into a soft, pliable dough. Aim for a texture that is soft yet not sticky, setting the stage for a naan that strikes the perfect balance between chewiness and tenderness in our naan on tawa recipe.

    Kneading and Resting the Dough: 

    The art of kneading takes center stage. On a lightly floured surface, the dough transforms. Well-kneaded and coated with a touch of oil, it is covered and left to rest for a patient for three hours. This period of repose allows the dough to rise, making it 1-1/2 times its original size, imparting a lightness that will be evident in the final Tawa Naan.

    Division and Resting: 

    Post-resting, knead again and divide the dough into four equal parts. Lightly roll the dough balls in flour, cover them, and grant them a five-minute interlude before the next act in our naan on the tawa recipe. This resting period allows the dough to gather its composure, ensuring a smooth rolling process.

    Rolling and Sprinkling: 

    Each naan takes shape individually, rolled on a lightly floured surface to a thickness slightly less than 1/4 inch. A sprinkle of water on one side adds subtle moisture, a touch that will contribute to the naan’s characteristic texture as per our how to make naan at home on Tawa guide.

    Cooking on the Tawa: 

    The Tawa, heated to a medium temperature with a few drops of water sprinkled on the surface sizzling, signals the readiness of the Tawa. The naan, waterside down, meets the hot surface. As it begins to bubble and the dough dries, a flip of the tawa over flames cooks the naan from the top. A crucial note underscores the unique nature of this process: the naan sticks to the Tawa, a characteristic that needs the use of a traditional iron surface rather than a nonstick skillet.

    Final Touch: 

    As the naan achieves the desired golden-brown hue, it exits the stage. A generous spread of the previously prepared butter mix crowns the naan with a final change of richness and flavor. Placed on a plate and covered with a cloth, the naan awaits its moment of glory, ready to be served warm and relished in our naan on tawa recipe.

    Serving Suggestion: 

    Completing our culinary symphony, the serving suggestion recommends pairing the Tawa Naan with Dal Makhani, Punjabi Chole, Palak Paneer, Butter Paneer Masala & Malai Kofta. This is not merely a suggestion but a curated experience, inviting us to savor the naan’s texture and flavor alongside these iconic accompaniments, creating a culinary ensemble that transcends the ordinary according to our how-to-make naan at home on tawa guide. 

  • Mysore Bonda

    Mysore Bonda

    Mysore Bonda

    Mysore bondas

    Mysore bondas are south indian fried dumplings dish made with flour, yogurt and spices. They are crispy outside and fluffy inside. They make a delightful treat for any party or snack for tea time. Serve them with coconut chutney.
    No ratings yet
    Prep Time 10 minutes
    Cook Time 10 minutes
    Total Time 20 minutes
    Course Appetizer
    Cuisine Indian
    Servings 4 people

    Ingredients
      

    • 1 cup all purpose flour maida, plain flour
    • 1/4 cup rice flour
    • 1 tsp salt 1
    • 1/2 tsp baking soda
    • 1/2 tsp cumin seeds jeera
    • 1/2 cup yogurt, dahai sour curd works best
    • 3/3 cup water
    • 1 tsp finely chopped ginger
    • 1 tbsp finely chopped green chilies
    • 2 tbsp finely chopped cilantro hara dhania

    Oil to fry

    Instructions
     

    • To make batter, mix all the dry ingredients together, all-purpose flour, rice flour, salt, baking soda, and cumin seeds. Add yogurt mix it well add the water to make thick batter. Add remaining ingredients ginger, green chili, and cilantro. Set aside for about 15-20 minutes. Batter will be light and fluffy.
    • Heat the oil on medium heat. The frying pan should have about 1 inch of oil. To check if the oil is ready, put little batter in oil. The batter should sizzle and come up but not change color right away. If oil is very hot bondas will not cook through and will not be crispy.
    • Place about 2 tablespoon of batter into the oil with your fingers. Fry bondas in small batches. Fry them until golden-brown all around. This should take about 3-4 minutes.
    • Mysore bond a should be crispy from outside and should be soft inside.

    Notes

    Serve them with coconut Chutney.
    You will also enjoy Rava Idli another quick South Indian dish.
    Tried this recipe?Let us know how it was!

    Exploring the Delights of Mysore Bonda: A Flavorful South Indian Treat 

    Originating from the vibrant culinary landscape of South India, Mysore bonda is a delectable snack cherished for its crispy exterior and soft, fluffy interior. This beloved dish is a favorite among locals and has gained popularity worldwide for its irresistible taste and unique texture. Traditionally served as a tea-time snack or as part of a festive spread, Mysore bonda captivates food enthusiasts with its distinct flavors and comforting appeal.

    Directions: 

    To embark on the delightful journey of preparing Mysore bonda, follow these simple steps:

    • Gathering Ingredients: Start by assembling the necessary ingredients. You’ll need urad dal (black gram lentils), rice flour, finely chopped green chilies, chopped cilantro (coriander leaves), ginger paste, salt, and asafoetida (hing).
    • Preparing Batter: Begin by soaking urad dal in water for a few hours. Once soaked, drain the water and grind the urad dal into a smooth paste using minimal water. Transfer the paste into a mixing bowl and add rice flour, chopped green chilies, cilantro, ginger paste, salt, and a pinch of asafoetida. Mix the ingredients thoroughly to form a thick batter.
    • Frying Bonda: Heat oil in a deep frying pan or kadhai over medium heat. Once the oil is hot, take small portions of the batter and gently drop them into the oil using your fingers or a spoon. Fry the bondas until they turn golden brown and crispy on the outside, ensuring they are evenly cooked.
    • Draining Excess Oil: Once fried to perfection, remove the bondas from the oil using a slotted spoon and place them on a paper towel-lined plate to drain excess oil.
    • Serve Hot: Your crispy and fluffy Mysore bondas are now ready to be served. Enjoy them hot with coconut chutney or a tangy tomato sauce for a delightful culinary experience.

    Tips: 

    • For best results, ensure the consistency of the batter is thick enough to hold its shape when dropped into the hot oil.
    • Adding a pinch of baking soda to the batter can enhance the fluffiness of the bondas.
    • Use freshly ground urad dal for optimal taste and texture.

    Variations: 

    • Spice it up by adding grated carrots to the batter for extra flavor and crunch.
    • Experiment with different spices such as cumin seeds or curry leaves to customize the taste according to your preference.
    • For a healthier twist, try air-frying the bondas instead of deep-frying them.

    Suggestions: 

    • Serve Mysore bonda as a delightful appetizer or snack during gatherings or festive occasions.
    • Pair it with a piping hot cup of masala chai or filter coffee for an authentic South Indian culinary experience.
    • Garnish with freshly grated coconut or chopped cilantro for added visual appeal.

    FAQs: 

    Q: Can I use store-bought rice flour instead of grinding rice at home?

    A: Yes, you can use store-bought rice flour as a convenient alternative to grinding rice at home. However, freshly ground rice flour may yield better results in terms of texture and flavor.

    Q: Can I make the batter in advance and fry the bondas later?

    A: While it’s best to fry the bondas immediately after preparing the batter to retain their crispiness, you can refrigerate the batter for a few hours before frying. Just ensure to bring the batter to room temperature before frying.

    Q: Can I freeze leftover bondas for later consumption?

    A: Yes, you can freeze leftover bondas in an airtight container for up to a month. When ready to enjoy, simply reheat them in a preheated oven until heated through.

    Explore more appetizer recipes on Manjula’s Kitchen: Vegetable Samosas, Paneer Tikka, Crispy Spinach Pakoras, Mango Lassi, Masala Chai, Gulab Jamun, Kheer (Rice Pudding)

  • Kurkuri Bhindi Recipe ( Okra )

    Kurkuri Bhindi Recipe ( Okra )

    Kurkuri Bhindi (Spicy Crispy Okra)

    Kurkuri Bhindi (Spicy Crispy Okra)

    Kurkuri Bhindi is a delicious twist to Masala Bhindi. Kurkuri means crispy and Bhindi means okra. This spicy, crispy okra is simply delicious. The okra is marinated in spices, coated with flour, and then deep fried for a satisfying crunch. Kurkuri bhindi especially goes well with Moong Dal Soup and Rice. Kurkuri bhindi can also be served as a snack, or appetizer.
    5 from 1 vote
    Prep Time 15 minutes
    Cook Time 19 minutes
    Course vegan
    Cuisine Indian
    Servings 4 people

    Ingredients
      

    • Approx. 1/2 pound okra (bhindi)
    • 1 tbsp salt
    • 1/2 tbsp cumin seed (jeera)
    • 1 tbsp coriander powder (dhania)
    • 1 tbsp red chili flakes
    • 1/2 tbsp mango powder (amchoor)
    • 1/4 tbsp turmeric (haldi)
    • 2 tbsp besan (gram flour) available in Indian grocery stores
    • 1 tbsp rice flour
    • Oil to fry

    Instructions
     

    • Wash and pat dry the okra, cut off the tops and bottom of the okra. Cut the okras vertically into thin slices.
    • Lightly massage the okra with fingers, doing this some of the seeds will come out of the okras remove the seeds; it is not necessary to remove all the seeds.
    • Sprinkle all the spice salt, cumin seeds, coriander powder, chili flakes, mango powder, and turmeric over okra and mix it well. Okras should be well coated with spices. Let it sit for about 10 minutes. Okras will become moist because of the salt.
    • Sprinkle besan, and rice flour over bhinidies, mix slowly and keep mixing by lightly rubbing them until okras are coated well.
    • Heat the oil in frying pan moderately over medium high heat. Fry the okras in batches without over crowding. Fry them till they are golden brown this should take about seven minutes. Take the okra out and place them on paper towels to absorb the excess oil.
    • Kurkuri bhindi, crispy okra is ready to be served.
    Tried this recipe?Let us know how it was!

  • Spicy Indian Chips Recipe

    Spicy Indian Chips Recipe

    Spicy Indian Chips

    Spicy Indian (Flour) Chips

    If you like chips, and you like spicy food, these chips are for you. This is a quick and easy snack recipe. I have used flour tortillas and flavored them with Indian spice mix. They are hard to resist you will say just one more.
    No ratings yet
    Course Appetizer
    Cuisine Indian
    Servings 6 people

    Ingredients
      

    • 4 flour tortillas uncooked I am using 8” diameter tortillas
    • Oil to fry

    Spice Mix

    • 1 tbsp dry mint leaves available at Indian grocery store
    • 1 tbsp roasted cumin seed powder
    • 1/4 tbsp garam masala available Indian grocery store
    • 1/2 tbsp black salt available in Indian grocery store
    • 1/2 tbsp salt
    • 1/2 tbsp red chili powder
    • 1/2 tbsp mango powder (amchoor) available Indian grocery store
    • Generous pinch of citric acid (nimbu ka sat)

    Instructions
     

    • Spice mix, in a bowl mix all the spices really well. Set aside.
    • Prick the tortillas from both sides, this will limit chips from puffing and make them crisp.
    • Cut each tortilla in 8 triangles, like slicing pizza.
    • Heat the oil in a frying pan over medium heat. The frying pan should have about 1 inch of oil. To check if the oil is ready, put a small piece of tortilla in the oil. The tortilla should sizzle and come up slowly.
    • Heat the oil in a frying pan over medium heat. The frying pan should have about 1 inch of oil. To check if the oil is ready, put a small piece of tortilla in the oil. The tortilla should sizzle and come up slowly.
    • Take them out in a plate and sprinkle the spice mix on both sides right away, before they are dry. This will keep the spices on the chips. Repeat the process until all the chips are done.
    • After the chips cool to room temperature they can be stored in airtight container for 1 month.

    Notes

    Suggestions
    1. For Fried Tortillas If you don’t find uncooked tortillas use thin tortillas.
    2. Fried tortillas store well in air tight container for a month.
    3. Fried tortillas can be served in many different ways; a quick and easy way is to make Papdi Chaat. Serve them with Chole Chaat or Matra Chaat and I am sure you can find many other ways to serve them.
    4. For Spice mix Make spice mix in a big batch and use it like Chaat Masala over the sliced fruits, salad, with yogurt. I am sure you can find many other ways to use this spice mix.
    Tried this recipe?Let us know how it was!

    Savor the Crunch: Spicy Indian Flour Chips

    When it comes to irresistible snacks, spicy Indian flour chips top the list. These crunchy delights, known for their bold flavors and satisfying texture, are perfect for any occasion. Whether you’re hosting a party, looking for a quick bite, or craving a spicy snack, these chips are sure to please. In this article, we’ll explore the origins, variations, and tips for making the perfect Indian flour chips at home, along with maximizing the use of internal links to other delicious recipes.

    The Essence of Spicy Indian Flour Chips

    Spicy Indian flour chips are made from a simple dough of flour, spices, and herbs, rolled out thin and fried to crispy perfection. The combination of spices used in the dough gives these chips their distinctive flavor, making them a favorite snack among spice lovers. These chips are often enjoyed with a cup of tea or as an accompaniment to meals, adding a delightful crunch to every bite.

    Origins and Cultural Significance

    These chips have their roots in Indian street food culture, where they are commonly known as “namak pare” or “mathri.” They are especially popular during festivals and celebrations, symbolizing the joy and togetherness of these occasions. The simplicity of the ingredients and the ease of preparation have made spicy Indian flour chips a staple snack in many Indian households.

    Tips for Perfect Spicy Indian Flour Chips

    • Choosing the Right Flour: The base of these chips is typically made from wheat flour, but you can experiment with other flours like chickpea or rice flour for different textures and flavors.
    • Spice Blend: A perfect blend of spices is key. Common spices include cumin, ajwain (carom seeds), chili powder, and turmeric. Adjust the spice levels according to your preference.
    • Rolling the Dough: Roll the dough as thin as possible for the crispiest chips. Thicker chips will be harder and less crispy.
    • Frying: Fry the chips in hot oil until golden brown. Ensure the oil is at the right temperature to prevent the chips from absorbing too much oil and becoming greasy.

    Variations to Try

    While the classic spicy Indian flour chips are delicious on their own, you can try different variations to keep things interesting. For instance, you can add finely chopped spinach or fenugreek leaves to the dough for a nutritious twist. Adding sesame seeds or crushed peanuts can also enhance the flavor and texture. For more creative ideas, check out Sweet and Sour Guava Curry and Dodha Burfi (Punjabi Milk Fudge).

    Pairing and Serving Suggestions

    Spicy Indian flour chips can be enjoyed in various ways. Serve them with a side of tangy tamarind chutney or refreshing yogurt chutney for a flavor contrast. They also make a great addition to a snack platter alongside Sweet Potato Chaat or Moong Dal Halwa (Vegan). These chips are perfect for munching on their own or as a crunchy side to a meal.

    Making Indian flour chips at home allows you to control the ingredients and ensure a healthier snack option. By using whole grain flours and minimal oil, you can enjoy these tasty chips without the guilt. For more healthy homemade snack ideas, explore Millet Soup (Bajra Raab) and Vegetable Biryani (Instant Pot).

    Frequently Asked Questions

    Q: Can I bake these chips instead of frying?

    A: Yes, you can bake the chips for a healthier option. Preheat your oven to 375°F (190°C) and bake the rolled-out dough until crispy and golden brown, about 15-20 minutes.

    Q: How long can these chips be stored?

    A: Store the chips in an airtight container to keep them crispy. They can last for up to two weeks when stored properly.

    Q: Can I make these chips gluten-free?

    A: Absolutely. Substitute the wheat flour with gluten-free flour blends or chickpea flour to make gluten-free spicy Indian flour chips.

    Conclusion

    The spicy Indian flour chips recipe is a fantastic way to enjoy a crunchy and flavorful snack that is easy to make at home. Whether you’re a seasoned cook or a beginner, these chips are sure to become a favorite in your snack repertoire. For more exciting recipes and variations, explore other delightful dishes like [Sweet and Sour Guava Curry, [Dodha Burfi (Punjabi Milk Fudge), and Masala Bell Pepper Curry. Enjoy the journey of flavors and happy cooking!

  • Contest 2017 April Winners

    Thank you all for your efforts, I truly enjoy reviewing all the entries. There were so many great entries.  I go through the entries many times to choose the winner. I have selected the top three entries based on the ingredients, written instructions, and of course presentation.  I love reading your creative recipes as it gives me ideas for my own! Thank you so much for your efforts! Congratulations to the winners and all participants:

    1st Place: Easy Cheesy Paneer Potli by Abirami
    Easy to prepare, gives you the idea can be prepared with different filling and different shapes.

    1st Runner Up: Paneer and Rose Kulfi by Kiran Haldia
    Easy to make, instead of traditionally creamy texture, more like a grainy and enjoyable texture.

    2nd Runner Up: Paneer Broccoli Fritters by Anshu Shah
    Good combination of ingredients and well explained.

    Congratulations to all three of you!!

    Thank you to everyone else that also participated in the contest:

    • Hanzala
    • pushpanjali kumari
    • Samaksh Behl
    • Farida Kaka
    • Samta Sharma
    • sowjanya
    • Ridhz Modi
    • Manjula s Shetty
    • Uma Pandit
    • Amina Khaleel
    • Mrs.NEHA SHARMA
    • Shilpi Singh
    • prachi jindal
    • Riddhi Modi
    • Aarti Sharma
    • Kanu
    • Fasila Naim Thayyil
    • Swagata Mukherjee
    • Nupur muley
    • Muthulakshmi Madhavakrishnan
    • priya agarwal
    • Hina Kabra
    • Drashti Dholakia
    • vijayalakshmialagappan
    • SABEERA MAVADI
    • suman prakash
    • Riu Vatwani
    • k.Aruna
    • Shirin
    • Dhara Shah
    • Ch.Navneetha
  • Masala Street: A Fresh Dining Concept

    Masala Street: A Fresh Dining Concept

    I typically don’t do restaurant reviews but with this new Indian restaurant, Masala Street, here in San Diego, I simply had to! I recently had a great evening out with my family – both sons and their families, along with my daughter-in-law’s mother, who is visiting from Jaipur, India. We decided to try out the latest hot spot, Masala Street in the beach front La Jolla area.

    The whole experience was wonderful – the ambiance, food, top-notch service and especially the exquisite food presentation. The chef had really gone out of his way to please everyone. My family has many food restrictions – vegetarian, vegan dairy free, some don’t eat peppers, and my husband and I don’t eat onions and garlic. Others in my family love hot and spicy food. With all these restrictions, I was not expecting the food to meet our expectations. I was happily surprised that the restaurant was more than willing to accommodate all of our requests! Yes, I am talking about Chef Saransh and his wife Megha Oberoi!

    Chef Saransh explained that his unique menu is based on simple Indian street food with a California twist. These are few dishes we all really enjoyed:

    Starters

    • Quinoa Chaat, was really unique and delicious
    • Tacosa (which is a crunchy combinations of a Samosa and Taco)
    • Kursi Chaat, (Papdi chaat served over mango roll ups – the presentation is to die for!)

    Entrées

    • Spinach with chole (This was a delicious vegan dish prepared especially for us!)
    • Khatte Aloo Baingan, and Dal Tadka

    Desserts

    • Mango Kufi
    • Tira Gulla.
    • I loved both of these desserts.

    The menu options are endless! This is the restaurant I highly recommend. If you are in San Diego check it out:

    Masala Street
    915 Pearl St.
    La Jolla, CA 92037

  • Summer Salads

    Summer Salads

    It is officially summertime!  It’s gorgeous outside with bright blue sunny skies.  This year of course, is a little different.  I am really missing my weekly trips to the Farmer’s Market.  I miss people-watching with the bustling crowds, sampling tasty treats, and all the colorful fruits, vegetables, and flowers!

    During the summer, a lot of us feel like eating simple, light and refreshing food. Salads are perfect and make for great lunches! Why not try a bowl of salad to satisfy those fresh and healthy cravings? Salads are super simple to assemble. You can use whatever you have on hand paired with your favorite dressing. I prefer a salad with a light homemade dressing. Try some of my favorite salads listed here and let me know what you think: 


  • Methi Bajra Paratha (Millet Gluten Free and Vegan Bread)

    Methi Bajra Paratha (Millet Gluten Free and Vegan Bread)

    A plate of Methi Bajra Paratha, golden and crispy, garnished with fresh fenugreek leaves

    Methi Bajra Paratha

    Parathas always have been a family-favorite treat. Lately I have been trying to make gluten-free breads. A combination of bajra and besan with methi parathas taste delicious. These spicy Methi Bajra Parathas have a biscuit texture, which makes it very enjoyable. They also pair well with gravy-based dishes like Mixed Dal, Aloo Tamatar or you can serve with plain yogurt. You can enjoy these as a proper meal, or even as a great on-the-go lunch! I also enjoy these parathas with just hot cup of chai.
    This recipe will serve 2, and make 4 Parathas.
    5 from 1 vote
    Prep Time 10 minutes
    Cook Time 10 minutes
    Total Time 20 minutes
    Course Breakfast
    Cuisine Indian
    Servings 2 people

    Ingredients
      

    • ½ cup millet flour bajra atta
    • ½ cup besan
    • ½ tsp cumin seeds jeera
    • ½ tsp salt
    • 1 tsp chili flakes
    • ¼ tsp turmeric haldi
    • tsp asafetida hing
    • 1 Tbsp sesame seeds til
    • 1 Tbsp oil
    • ¼ cup fenugreek leaves option is using dry leaves
    • ½ cup hot water use as needed

    Also Need

    • 4 tsp oil to cook the parathas

    Instructions
     

    • Mix all the ingredients for paratha together, millet flour, besan. Cumin, salt, chili flakes, turmeric, asafetida, sesame seeds, oil, and fenugreek leaves. Notes: if you don’t have fresh fenugreek leaves use dry methi known as Kasuri Methi.
    • Make the dough using hot water, you will need about 1/2 cup of water. Dough should be firm and pliable. Notes: dough should be prepare just before making paratha.
    • Dived the dough into 4 equal parts, oil your palm and roll them between your palms, to make them round petites.
    • Heat the skillet on medium high heat. To test, sprinkle a couple of drops of water on the skillet. The water should sizzle right away.
    • Roll the paratha in about 6” circle, roll them between two pieces of plastic that makes the rolling easy, I am using zip log bag.
    • Place the methi bajra paratha over the skillet. When start to change color, flip it over. You will notice some golden-brown spots.
    • After a few seconds, spread one teaspoon of oil on the aratha. Flip it again and lightly press the with a spatula. Flip again and press with the spatula making sure the paratha is golden-brown on both sides.
    • Repeat same process for the remaining.
    Tried this recipe?Let us know how it was!