Indian Snacks: Flavorful and Irresistible Bites
Indian snacks are known for their diverse flavors, textures, and ingredients. These Indian snacks are perfect for any occasion, whether you’re hosting a party, looking for a healthy option, or simply craving something delicious. Let’s explore some popular Indian snacks recipes that you can easily prepare at home. Popular Indian Snacks
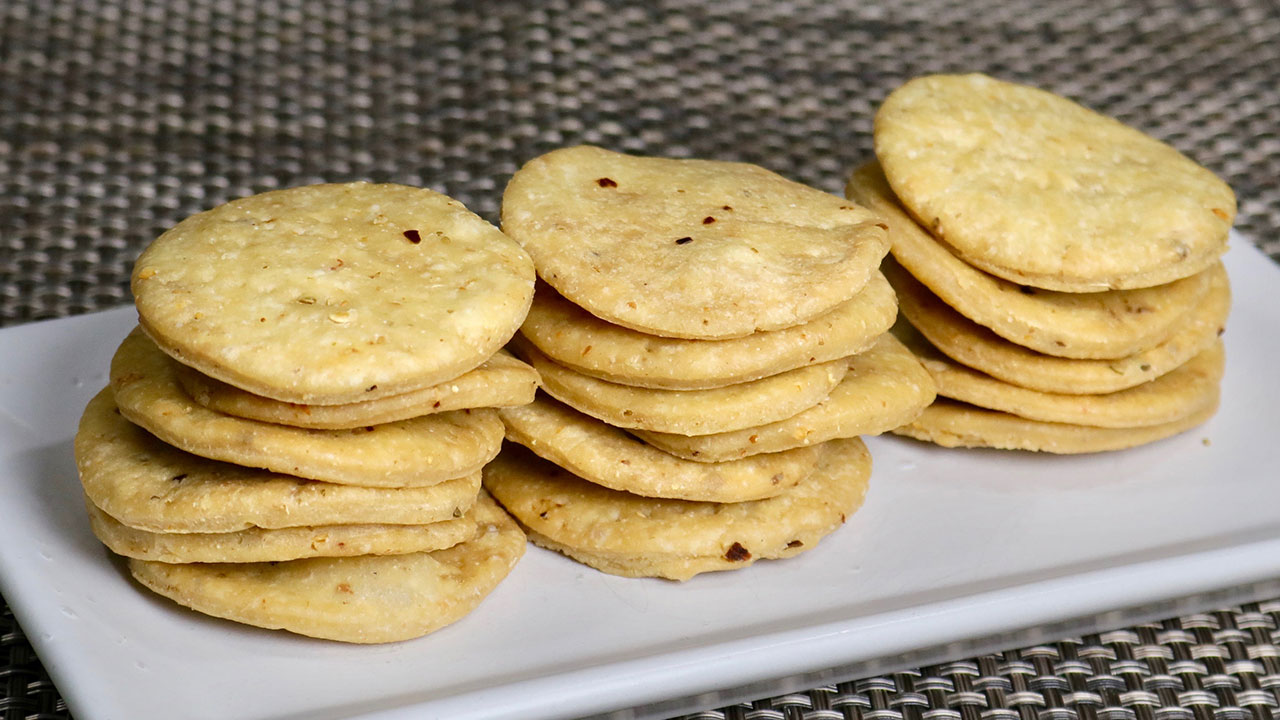
 Samosas Samosas are classic Indian snacks made with a crispy pastry filled with a spiced potato and pea mixture. These snacks are perfect for parties and gatherings, offering a flavorful bite that everyone loves. Samosas are a staple in Indian snacks for party menus and are known for their satisfying crunch. It’s a famous north indian food recipes
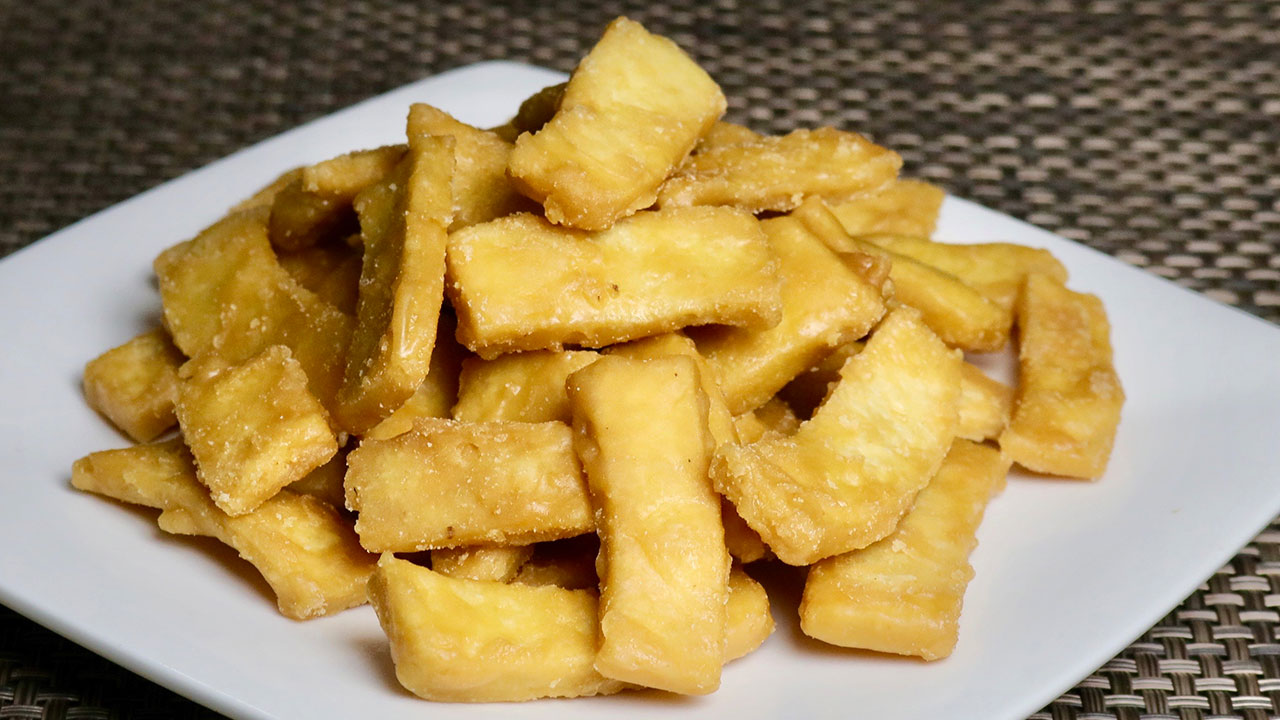
 Pakoras Pakoras are delicious fritters made by dipping vegetables like potatoes, or spinach in a seasoned gram flour batter and deep-frying them until golden brown. These snacks Indian style are perfect for rainy days or festive occasions. Pakoras are a favorite in easy indian recipes and are loved for their crispy texture.
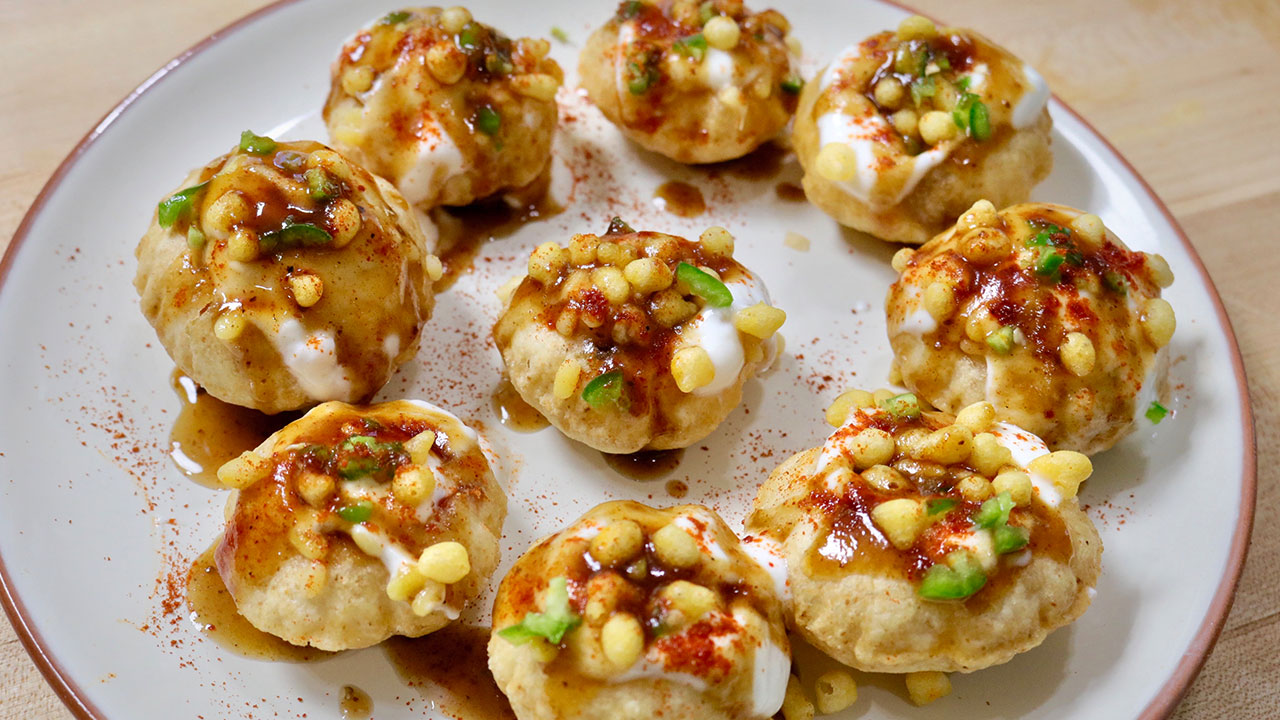
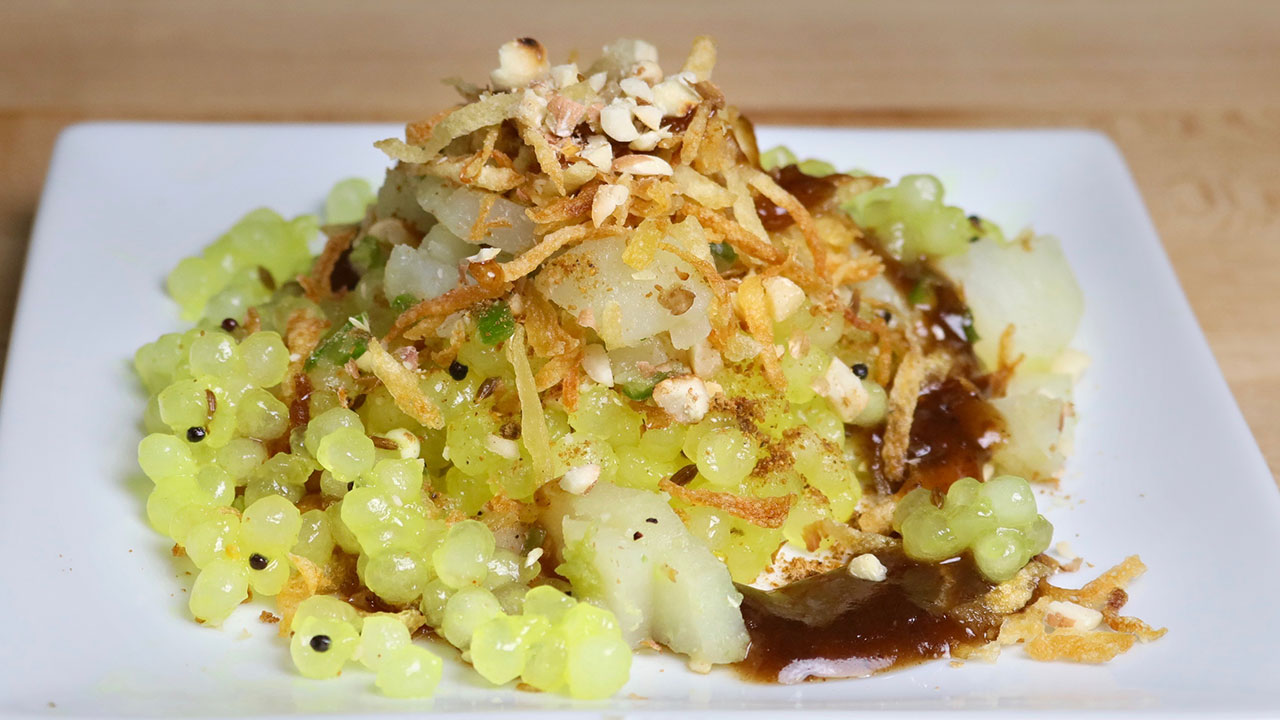
 Bhel Puri Bhel Puri is a popular street food recipes made with puffed rice, sev, vegetables, and tangy tamarind chutney. This healthy Indian snack is light and refreshing, making it a great option for a quick and tasty bite. Bhel Puri is one of the best indian dishes which is a staple in Indian vegetarian snacks for party menus and is known for its delightful mix of flavors and textures.
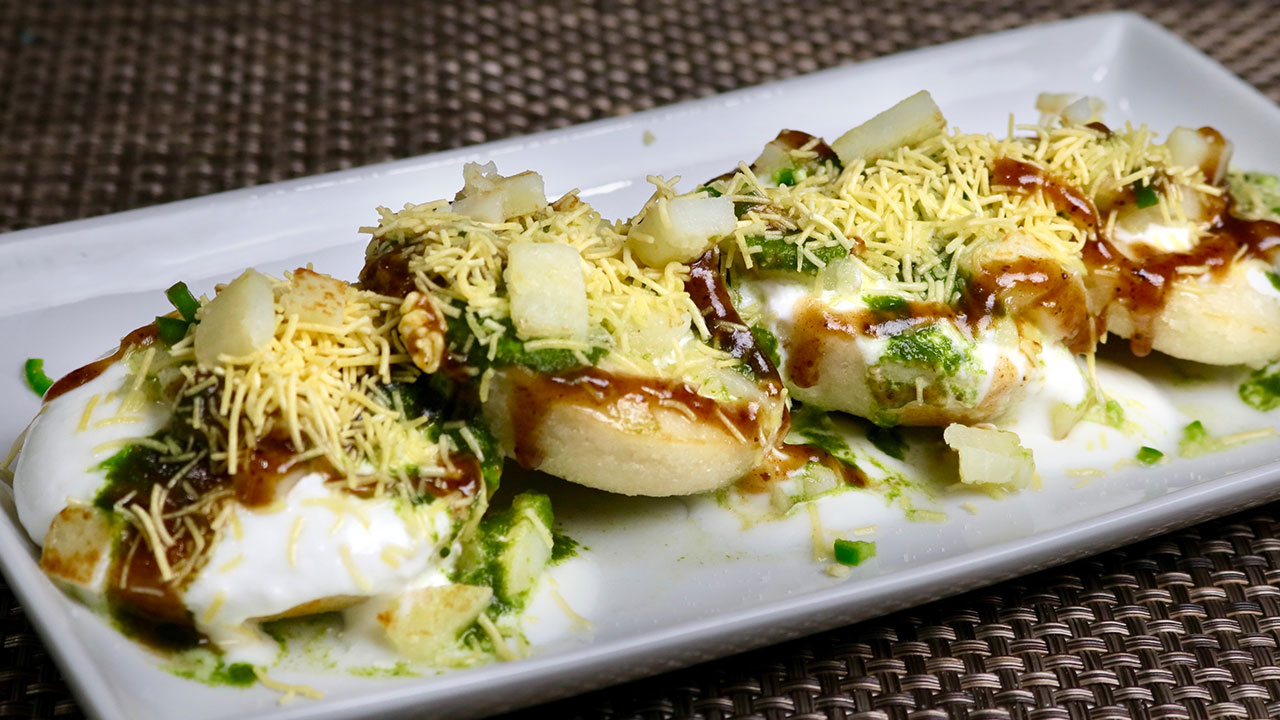
 Aloo Tikki Aloo Tikki is a savory potato patty made with mashed potatoes, spices, and herbs, shallow-fried to perfection. This Indian snack is often served with chutneys and yogurt, making it a hit at any gathering. Aloo Tikki is an excellent addition to your collection of Indian snacks recipes. It’s one of the most popular Indian street food recipes. Dhokla Dhokla is a steamed cake made from fermented rice and chickpea batter, known for its light and fluffy texture. This healthy Indian snack is typically garnished with mustard seeds, curry leaves, and grated coconut. Dhokla is perfect for breakfast or as a snack and is a popular choice in easy recipes for snacks. Enhancing Your Snack Experience
To enhance your snack experience, consider exploring related categories that complement these Indian snacks. Adding Indian desserts like gulab jamun and jalebi can provide a sweet ending to your snack time. Incorporating healthy Indian recipes like roasted nuts and fruit chaat can offer lighter options for your guests. Hosting a large gathering?
The popular party recipe category is filled with dishes that are sure to impress your guests and make your celebration memorable. Including easy Indian recipes like dal makhani or biryani can add a touch of authenticity to your meal. Frequently Asked Questions (FAQs) Q: What are some popular Indian snacks recipes?
A: Some popular Indian snacks recipes include Samosas, Pakoras, Bhel Puri, Aloo Tikki, and Dhokla. Q: How can I make easy recipes for snacks at home?
A: To make easy recipes for snacks at home, try dishes like Pakoras and Dhokla. These recipes are simple to prepare and require minimal ingredients. Q: What are some healthy Indian snacks?
A: Some healthy Indian snacks include Dhokla and Bhel Puri. These dishes are nutritious and offer a great way to enjoy snacks without excess calories. Q: Can I prepare Indian snacks for the party in advance?
A: Yes, many Indian snacks for a party can be prepared in advance. Prepare the components ahead of time and assemble the snacks just before serving to ensure freshness. Q: What are some traditional Indian recipes to serve with snacks?
A: Some traditional Indian recipes to serve with snacks include Samosas, Pakoras, and Chutneys. These dishes pair perfectly with snacks, adding balance and flavor to the meal. Conclusion Indian snacks are a delightful way to enjoy flavorful and versatile bites. Whether you’re looking for easy recipes for snacks or healthy options, these dishes will bring joy and satisfaction to your table. So, gather your ingredients, try out these Indian snacks recipes, and create unforgettable snacks with your loved ones. Don’t forget to find vegetarian recipes related categories for more delightful recipes from Manjula’s Kitchen!
By incorporating these snack dishes into your culinary repertoire, you’ll be able to enjoy a wide variety of delicious and nutritious foods. Whether you’re looking for a quick snack, a party favorite, or a healthy option, there’s an Indian snack recipe to suit every taste. Happy cooking!
Mango panna cotta is a delicious, easy, light and refreshing dessert. Mango and coconut milk together makes it a layered, tempting vegan delight that is hard to resist.
1-1/2 cup mango puree, (I used 1-1/2 mango, mango should not be over ripe)
2tbsplemon juice
1/4 cup sugar use as needed depend on sweetness of mango
1-1/2tbsp agar-agar
Also need a setting/serving dish
I am using 5-1/2” x 7-1/2” pyrex/glass rectangle dish. You can also make them in individual serving bowls or glasses.
Instructions
For Cream Layer
In a sauce pan add the coconut milk and sugar, bring it to boil over medium heat. Boil for 3-4 minutes.
Dissolve agar-agar in two tablespoons of luke warm water, add agar-agar and vanilla to coconut milk, boil for about 2 minutes, mixing continuously making sure there are no lumps. Turn off the heat.
Whisk the milk for a few minutes and pour into the dish. Let this sit for about 25 minutes before adding the mango layer. Note: as coconut will cool it will be getting firm like jello, before adding the mango layer coconut layer should be firm but not settled all the way completely.
For Mango Layer
In a sauce pan add the mango puree, sugar and lemon juice and bring it to boil over medium heat. Boil for 2-3 minutes.
Dissolve agar-agar in two tablespoons of luke warm water, add agar-agar to the mango pulp, boil for about 2 minutes mixing continuously, making sure there are no lumps.
Turn off the heat, whisk for few minutes.
Pour the mango puree over coconut, coconut milk should be little firm.
Refrigerate for about three hours before serving. Slice the panna cotta in individual serving pieces. White and yellow makes this look beautiful.
Mango panna cotta can be refrigerated for 5-6 days. Enjoy!
Spinach Potato Pakoras are great as an appetizer, a tasty compliment for your afternoon tea and a spicy delicious snack anytime. They are made with spinach, potatoes, besan and spices and then fried till crispy golden.
2 large potatoes peeled and cubed in small pieces, (will make 2 cups of cubed potatoes)
2 cuppacked spinach roughly chopped
2 green chilies finely chopped, adjust to taste
1cup besan (gram flour, available in Indian grocery stores)
2tbsprice flour
1/2tbspred pepper, adjust to taste
2tbspcoriander crushed (dhania)
1 tbspmango powder (amchoor, available in Indian grocery stores)
1tbsp cumin seeds (jeera)
2tbspsalt
¼tbspasafetida (hing)
Approx. 2tbspof water adjust as needed
Also need oil to fry
Instructions
Combine all the dry ingredients, besan, rice flour, coriander, cumin seeds, red pepper, salt, mango powder, and asafetida in a bowl. Mix it well.
Add potatoes, spinach, and green chilies into dry mix, mix it well and add water as needed to make soft and sticky dough. When you are ready to fry pakoras mix the veggies with dry ingredients, otherwise spinach and potatoes will leave the water because of salt.
Heat at least one inch of oil in a frying pan over medium high heat. To test, put one drop of batter in the oil. The batter should come up and not change color instantly.
Place about one tablespoon of mix holding with your fingers into the oil. Do not over lap the pakoras.
Fry the pakoras in small batches; this will take three to four minutes per batch. Fry the pakoras, turning occasionally, until both sides are golden brown.
Repeat this process for the remaining batches.
The crispy, delicious pakoras are now ready to serve.
Notes
TipsIf the oil is too hot the pakoras will not be crisp; if the oil is not hot enough, the pakoras will be greasy.
How to Make Aloo Palak Pakora: A Step-by-Step Guide
Aloo Palak Pakora is a delightful gluten freevegansnack that combines the goodness of spinach (palak) with the earthy flavor of potatoes (aloo), all encased in a crispy, golden-brown batter. This popular appetizer is perfect for rainy days or as a tea-time snack. In this comprehensive guide, we will walk you through the process of making delicious Aloo Palak Pakoras step-by-step.
Preparation and Ingredients for Aloo Palak Pakora
Before diving into the cooking process, it’s essential to gather all the necessary ingredients. For this recipe, you will need fresh spinach leaves, potatoes, chickpea flour (besan), rice flour, cornstarch, green chilies, ginger, cumin seeds, carom seeds (ajwain), salt, and oil for frying. Ensure that the spinach leaves and potatoes are thoroughly washed and dried before use.
Tips for Perfect Aloo Palak Pakoras
To achieve the ideal texture and flavor for your Aloo Palak Pakoras, here are some useful tips:
Use Fresh Ingredients: Fresh spinach and potatoes are key to a vibrant and flavorful dish.
Maintain the Oil Temperature: Keep the oil at a consistent temperature while frying to ensure even cooking and crispy pakoras.
Adjust Spice Levels: Customize the spiciness of the pakoras according to your preference by adding or reducing the amount of green chilies.
Experiment with Seasonings: Feel free to add your favorite spices or herbs to the batter for extra flavor.
Serve Immediately: Aloo Palak Pakoras are best enjoyed hot and crispy, so serve them immediately after frying for the ultimate taste experience.
Variations of Aloo Palak Pakoras
While the classic Aloo Palak Pakora recipe is delicious on its own, you can also experiment with various ingredients and flavors to create unique variations:
Cheese-Stuffed Pakoras: Add a savory twist to your pakoras by stuffing them with cheese before frying.
Paneer Palak Pakoras: Replace potatoes with paneer (Indian cottage cheese) for a rich and creamy texture.
Spicy Mint Chutney: Serve your Aloo Palak Pakoras with a zesty mint chutney for an extra kick of flavor.
Mixed Vegetable Pakoras: Incorporate a variety of vegetables like cauliflower, and bell peppers for a colorful assortment of pakoras.
Gluten-Free Option: Substitute chickpea flour with gluten-free flour for a gluten-free version of this recipe.
Benefits of Aloo Palak Pakoras
Aloo Palak Pakoras not only satisfy your taste buds but also offer several health benefits: (H2)
Rich in Nutrients: Spinach is packed with vitamins, minerals, and antioxidants, while potatoes provide a good source of carbohydrates and potassium.
Boosts Immunity: The combination of spinach and potatoes helps strengthen the immune system and protect against infections.
Digestive Aid: The spices used in the pakora batter, such as cumin and ginger, aid digestion and promote gut health.
Energy Boost: Aloo Palak Pakoras are a satisfying and energizing snack, making them perfect for a quick bite or appetizer.
Easy to Make: With simple ingredients and easy preparation steps, Aloo Palak Pakoras are a convenient snack option for any occasion.
FAQs about Aloo Palak Pakoras
Q: Can I make Aloo Palak Pakoras ahead of time?
A: While Aloo Palak Pakoras are best enjoyed fresh, you can prepare the batter in advance and fry them just before serving to maintain their crispiness.
Q: Can I bake Aloo Palak Pakoras instead of frying them?
A: While frying yields the crispiest results, you can try baking the pakoras in a preheated oven at 400°F (200°C) for approximately 20-25 minutes or until golden brown.
Q: Can I freeze leftover Aloo Palak Pakoras?
A: Yes, you can freeze the leftover pakoras in an airtight container for up to one month. Reheat them in the oven or air fryer until heated through before serving.
Q: Can I use frozen spinach for this recipe?
A: While fresh spinach is preferred for its vibrant flavor and texture, you can use thawed frozen spinach as a substitute if fresh spinach is not available.
Q: What can I serve with Aloo Palak Pakoras?
A: Aloo Palak Pakoras pair well with mint chutney, tamarind chutney, or ketchup. They also make a delicious accompaniment to hot chai or masala tea.
Aloo Palak Pakoras are a delightful and versatile snack that can be enjoyed on any occasion. Whether you’re hosting a party or simply craving a savory treat, these crispy pakoras are sure to impress. With the guidance provided in this step-by-step recipe, you can easily recreate the authentic flavors of Aloo Palak Pakoras in your own kitchen. So gather your ingredients, heat up the oil, and get ready to indulge in the irresistible crunchiness of these delectable snacks. Explore more recipes on Manjula’s Kitchen: Vegetable Samosas, Paneer Tikka, Crispy Spinach Pakoras, Mango Lassi, Masala Chai, Gulab Jamun, Kheer (Rice Pudding)
This is a quick, yummy homemade candy dessert. This is a very simple quick and easy recipe with few ingredients. These candies will be loved by kids and adults alike.
1-1/4 cup baking chocolate semi-sweet, chopped in small pieces
3tbspcondense milk sweetened
Instructions
Grease a 12 inch flat plate or wax paper and set aside.
I am using microwave to melt the chocolate this is easy and quick way to melt, but be careful and, don’t over cook the chocolate. Make sure every utensil you are using to melt the chocolate is dry. If any water comes in contact with the chocolate, it will become grainy and unusable
Use microwaveable bowl that doesn't retain too much heat.
Microwave chocolate at 30 seconds interval, three times and mix it every time with spoon. If you are able to mix most of the chocolate smoothly, don’t heat any more, keep mixing till all the chocolate melts.
In a bowl add almonds, condense milk and 1 tablespoons of melted chocolate.
Grease your palms and make the mix into dough. Divide it into 16 equal parts or your preferred size. Roll them into balls.
Dip one almond ball into the chocolate, pick using a fork making sure it is coated all around, tip it lightly to drip the extra chocolate and put it over a greased plate. Repeat the same process with remaining balls.
Set aside it takes 7-8 hours before chocolate is completely dry.
Malpuas are Indian version of pancake topped with reduced flavored milk known as rabdi… This is a mouth watering classic Indian dessert made for festive occasions.
Boil milk in heavy bottom pan over medium high heat till it reduces to about 1 cup, stir the milk occasionally and keep scrapping the sides. Add the cardamom and mix. This should take about 15 minutes after milk comes to boil. This is known as rabdi.
In a bowl mix flour, 4 tablespoons of sugar, 1/3 cup of milk (rabdi), and about 1/3 cup or as needed water to make a smooth batter of pouring consistency. Keep the batter for about four to five hours before making the malpua.
Add the remaining sugar to remaining milk (rabdi) and mix, set aside. This will be used for garnishing.
Heat the non stick skillet over medium heat and grease it generously. Let the skillet get moderately hot.
Pour approx. 1-1/4 tablespoons batter to the skillet and gently spread to 2-1/2 inch circle, to form a pancake. After top of the batter start drying spread about ½ teaspoon of clarified butter. Wait another minute and flip the malpua.
Malpua should be golden brown on both sides.
Set the malpuas in serving plate and pour about 1 teaspoon of reduced milk over and garnish with pistachios.
This is healthy and delicious sandwich. A flavorful patty made with a tasty combination of chickpeas, potatoes, and spices. Placed over Kaiser roll and paired with tangy yogurt spread.
1 15 oz can of chickpeas or 1-1/2 cup boiled chickpeas, chola, kabulichana, garbanzo beans
1/2 cup potatoes boiled and mashed
1/4cup plain bread crumbs
1tbsp salt
1/2tbspcumin seeds, jeera
1/4tbspblack pepper
2tbspchopped cilantro, hara dhania
1 green finely chopped, adjust to taste
1tbspfinely shredded ginger
4 tbspof oil
Yogurt Spread
1/2cup Greek yogurt
1/2cup spinach finely chopped
1tbspginger finely shredded
1/8tbspblack pepper
1 green chili finely chopped, adjust to taste
1/4tbspsalt
Also need
Some lettuce leaf of your choice
8-10 thinly sliced tomatoes
Instructions
For the spread mix all the ingredients together yogurt, spinach, ginger, black pepper, green chili and salt. Set aside.
Drain and wash the canned chickpeas, drain all the water out, in a large bowl mash the chickpeas until almost smooth. Except the oil, add all the patty ingredients to the chickpeas ( mashed potatoes, bread crumb, salt, cumin seeds, black pepper, cilantro green chili, ginger and salt).
Mix it well and bring it together, like dough, divide the mix into 4 equal parts making them into about 1/2 inch thick patties. Patty size should be about the size of the sandwich rolls.
Grease the flat frying pan generously, and heat the pan on medium high heat. After the pan is moderately hot, place the patty in the pan and oil the top of the patties generously.
Shallow fry the patties from both sides until golden brown, this should take about 4-5 minutes.
Slice the rolls through the center and lightly oil them on both sides. Toast the buns from both sides over the skillet on medium high heat.
Spread yogurt mix on both sides of the bun, top it with chickpea Pattie, tomato slices and lettuce. Cover with the top bun.
If you like chips, and you like spicy food, these chips are for you. This is a quick and easysnack recipe. I have used flour tortillas and flavored them with Indian spice mix. They are hard to resist you will say just one more.
4 flour tortillas uncooked I am using 8” diameter tortillas
Oil to fry
Spice Mix
1tbspdry mint leaves available at Indian grocery store
1tbsproasted cumin seed powder
1/4 tbspgaram masala available Indian grocery store
1/2tbspblack salt available in Indian grocery store
1/2tbspsalt
1/2tbspred chili powder
1/2tbspmango powder (amchoor) available Indian grocery store
Generous pinch of citric acid (nimbu ka sat)
Instructions
Spice mix, in a bowl mix all the spices really well. Set aside.
Prick the tortillas from both sides, this will limit chips from puffing and make them crisp.
Cut each tortilla in 8 triangles, like slicing pizza.
Heat the oil in a frying pan over medium heat. The frying pan should have about 1 inch of oil. To check if the oil is ready, put a small piece of tortilla in the oil. The tortilla should sizzle and come up slowly.
Take them out in a plate and sprinkle the spice mix on both sides right away, before they are dry. This will keep the spices on the chips. Repeat the process until all the chips are done.
After the chips cool to room temperature they can be stored in airtight container for 1 month.
Notes
Suggestions
For Fried Tortillas If you don’t find uncooked tortillas use thin tortillas.
Fried tortillas store well in air tight container for a month.
Fried tortillas can be served in many different ways; a quick and easy way is to make Papdi Chaat. Serve them with Chole Chaat or Matra Chaat and I am sure you can find many other ways to serve them.
For Spice mix Make spice mix in a big batch and use it like Chaat Masala over the sliced fruits, salad, with yogurt. I am sure you can find many other ways to use this spice mix.
When it comes to irresistible snacks, spicy Indian flour chips top the list. These crunchy delights, known for their bold flavors and satisfying texture, are perfect for any occasion. Whether you’re hosting a party, looking for a quick bite, or craving a spicy snack, these chips are sure to please. In this article, we’ll explore the origins, variations, and tips for making the perfect Indian flour chips at home, along with maximizing the use of internal links to other delicious recipes.
The Essence of Spicy Indian Flour Chips
Spicy Indian flour chips are made from a simple dough of flour, spices, and herbs, rolled out thin and fried to crispy perfection. The combination of spices used in the dough gives these chips their distinctive flavor, making them a favorite snack among spice lovers. These chips are often enjoyed with a cup of tea or as an accompaniment to meals, adding a delightful crunch to every bite.
Origins and Cultural Significance
These chips have their roots in Indian street food culture, where they are commonly known as “namak pare” or “mathri.” They are especially popular during festivals and celebrations, symbolizing the joy and togetherness of these occasions. The simplicity of the ingredients and the ease of preparation have made spicy Indian flour chips a staple snack in many Indian households.
Tips for Perfect Spicy Indian Flour Chips
Choosing the Right Flour: The base of these chips is typically made from wheat flour, but you can experiment with other flours like chickpea or rice flour for different textures and flavors.
Spice Blend: A perfect blend of spices is key. Common spices include cumin, ajwain (carom seeds), chili powder, and turmeric. Adjust the spice levels according to your preference.
Rolling the Dough: Roll the dough as thin as possible for the crispiest chips. Thicker chips will be harder and less crispy.
Frying: Fry the chips in hot oil until golden brown. Ensure the oil is at the right temperature to prevent the chips from absorbing too much oil and becoming greasy.
Variations to Try
While the classic spicy Indian flour chips are delicious on their own, you can try different variations to keep things interesting. For instance, you can add finely chopped spinach or fenugreek leaves to the dough for a nutritious twist. Adding sesame seeds or crushed peanuts can also enhance the flavor and texture. For more creative ideas, check out Sweet and Sour Guava Curry and Dodha Burfi (Punjabi Milk Fudge).
Pairing and Serving Suggestions
Spicy Indian flour chips can be enjoyed in various ways. Serve them with a side of tangy tamarind chutney or refreshing yogurt chutney for a flavor contrast. They also make a great addition to a snack platter alongside Sweet Potato Chaat or Moong Dal Halwa (Vegan). These chips are perfect for munching on their own or as a crunchy side to a meal.
Making Indian flour chips at home allows you to control the ingredients and ensure a healthier snack option. By using whole grain flours and minimal oil, you can enjoy these tasty chips without the guilt. For more healthy homemade snack ideas, explore Millet Soup (Bajra Raab) and Vegetable Biryani (Instant Pot).
Frequently Asked Questions
Q: Can I bake these chips instead of frying?
A: Yes, you can bake the chips for a healthier option. Preheat your oven to 375°F (190°C) and bake the rolled-out dough until crispy and golden brown, about 15-20 minutes.
Q: How long can these chips be stored?
A: Store the chips in an airtight container to keep them crispy. They can last for up to two weeks when stored properly.
Q: Can I make these chips gluten-free?
A: Absolutely. Substitute the wheat flour with gluten-free flour blends or chickpea flour to make gluten-free spicy Indian flour chips.
Conclusion
The spicy Indian flour chips recipe is a fantastic way to enjoy a crunchy and flavorful snack that is easy to make at home. Whether you’re a seasoned cook or a beginner, these chips are sure to become a favorite in your snack repertoire. For more exciting recipes and variations, explore other delightful dishes like [Sweet and Sour Guava Curry, [Dodha Burfi (Punjabi Milk Fudge), and Masala Bell Pepper Curry. Enjoy the journey of flavors and happy cooking!
Sweet Paratha is whole wheat flat bread. This Paratha is filled with a delicious combination of nuts, cinnamon and sugar. It makes a great and easy breakfast or a snack with cup of tea or coffee!
Approx. 1-1/2tablespoons oil for cooking the Paratha
Instructions
In a bowl mix the flour, salt, and oil. Add about 1/3 cup of water to make dough add remaining water as needed to make smooth and pliable dough. Knead the dough on a lightly greased surface. Cover the dough and keep it aside for at least 15 minutes.
For the filling mix the almonds, walnuts coconut, cinnamon, and sugar, set aside.
Knead the dough again and divide into 4 equal parts.
Roll the dough into 3-inch diameter circles. Place about 3 tablespoons filling mix in the center. Seal by pulling the edges of the rolled dough together to make a ball. Proceed to make all four balls.
Let them settle for 3 to 4 minutes before rolling.
Heat the skillet on medium high. Note: An iron skillet works best. To check if the skillet is hot enough, sprinkle a couple of drops of water on it. When the water sizzles right away, the skillet is ready.
First lightly roll the filled ball in dry whole-wheat flour.
Lightly press the ball on the sealed side and keep it on the topside when rolling. Roll the ball lightly into about 7-inch circles. Whenever the dough sticks to the rolling pin or rolling surface, lightly sprinkle dry whole-wheat flour on both sides of the semi-rolled Paratha.
Place the Paratha over the skillet. After a few seconds you will see the Paratha change color and puff in different places.
10. At this point flip the Paratha over. You should see some golden-brown spots on the topside. After a few seconds, spread about 1 teaspoon of oil on the Paratha. Again, flip the Paratha and lightly press the puffed areas with a spatula.
Flip again and press with the spatula making sure the Paratha is golden-brown on both sides.
Sweet Paratha can be served hot or at room temperature. Paratha can be kept at room temperature for about week.
Sweet Paratha is a delightful and indulgent Indian dessert that combines the savoury goodness of paratha with the sweetness of sugar, jaggery, or other sweet fillings.
This versatile dish can be enjoyed as a treat on its own or paired with a dollop of yogurt, a drizzle of honey, or a sprinkle of powdered sugar.
Sweet Paratha is loved for its crispy exterior, soft interior, and irresistible sweetness, making it a favorite among both children and adults.
Benefits of Sweet Paratha:
Energy Boost: Sweet Paratha is a rich source of carbohydrates, which provide a quick and sustained source of energy. Whether enjoyed as a breakfast dish or a midday snack, Sweet Paratha can help fuel your body and keep you feeling energized throughout the day.
Comfort Food: The warm and comforting flavors of Sweet Paratha make it the perfect indulgence for chilly mornings or cozy evenings. The combination of sweet fillings and savory dough creates a satisfying and heartwarming dish that’s sure to lift your spirits and tantalize your taste buds.
Customizable: Sweet Paratha is incredibly versatile and can be customized to suit individual taste preferences. From traditional fillings like sugar and jaggery to more exotic options like chocolate, fruit compote, or nut butter, the possibilities for creating unique and delicious Sweet Paratha variations are endless.
Variations of Paratha:
Paneer Paratha: Paneer Paratha is whole-wheat flat bread filled with mildly spiced paneer Indian Cheese). This is a good breakfast option. Paneer paratha can be served by itself or enjoyed with any gravy-based dish.
Pizza Paratha : Pizza has become a universal food enjoyed by all. Pizza paratha is perfect for the times when you want to enjoy homemade pizza.
Masala Paratha: This paratha is a combination of whole wheat flour and besan with a mix of delicious spices. Masala Paratha is a great breakfast treat and also a great lunch box option.
Matar Ka Paratha: Matar Ka Paratha is stuffed paratha with spicy green peas and is a delicacy. Matar Ka Paratha can be part of any main meal, making it a special treat.
Tips for Making Perfect Sweet Paratha:
Knead the Dough Well: Properly kneaded dough is the key to soft and pliable parathas. Ensure that the dough is smooth, elastic, and free of lumps to achieve the perfect texture in your Sweet Paratha.
Roll Out Evenly: Roll out the dough into thin, even circles to ensure that the Sweet Parathas cook evenly and develop a crispy exterior. Use a rolling pin and a dusting of flour to prevent sticking and achieve uniform thickness.
Seal the Edges: Seal the edges of the rolled-out dough tightly to prevent the filling from spilling out during cooking. Press the edges firmly together and pinch them closed to create a secure seal.
FAQs about Sweet Paratha:
Can I make Sweet Paratha ahead of time?
Yes, you can prepare the dough and filling for Sweet Paratha in advance and store them separately in the refrigerator. When ready to cook, simply assemble the parathas and cook them fresh for the best taste and texture.
Is Sweet Paratha suitable for vegetarians?
Yes, Sweet Paratha is vegetarian-friendly as it does not contain any meat, poultry, or fish. However, be mindful of the ingredients used in the filling, especially if using commercial products like chocolate spread that may contain animal-derived ingredients.
Can I make Sweet Paratha without sugar?
Yes, you can adjust the sweetness of Sweet Paratha according to your taste preferences or dietary restrictions. Substitute sugar with natural sweeteners like honey, maple syrup, or date syrup, or omit the sweet filling altogether for a less sweet version of the dish.
Sweet Paratha is a delectable and versatile dessert that offers a perfect balance of sweetness and indulgence. Whether enjoyed on its own or paired with your favorite accompaniments, Sweet Paratha is sure to delight your taste buds and satisfy your cravings for something sweet.
With its simple preparation, customizable fillings, and irresistible flavor, Sweet Paratha is a must-try dish for anyone looking to explore the rich and diverse world of Indian cuisine.
Mango pickle is a spicy and tangy gluten free condiment. Almost every Indian household has their own favorite recipes for Mango Pickle. It is a popular condiment adds the extra "oomph" to every meal.
1 large green mango raw pickling mango/about 2-1/2 cup cubed mango (they are available at Indian and Asian grocery store)
1 tablespoons salt
1teaspoon red chili powder, adjust to taste (lal mirch)
1/4teaspoons turmeric (haldi)
1tablespoons coriander seeds crushed(dhania)
1tablespoon fennel seeds crushed(Saunf)
1 teaspoon fenugreek seeds (sabut mathi)
1 teaspoon nigella seeds/kalonji
2tablespoons mustard oil or olive oil
Instructions
Wash and dry the mango, cut in small cubes with skin.
In a glass bowl put the mango with salt and mix it well.
Set aside for about 3-4 hour. Mix and by this time there will be some salt water. Squeeze the mango, and save the water, as we will use later.
Spread the mango slices over dry surface and let it dry out preferably in sun light for 4-5 hours. Mango slices should be little dry but still moist. Note: Mangoes will reduce in volume.
Add all the spices to salt water and keep it aside.
Mix spices, water and oil to mango slices.
Keep the Mango pickle in glass jar with lid on. Pickle should be ready in 4-7 days. Mango slices are nicely marinated with spices.
Spicy Bread Pakoras, Pakoras are all time favorite snack, at least for me. Bread Pakoras are made so many different ways, but this time I have layered the bread with spicy sweet and sour potatoes like chutney. Before I decided to do this recipe, I have served these pakoras to many friends, the only thig they could say wow. They could not figure out what I have used for filling. Bread Pakora is all time favorite snack; at least for me. I have made these bread pakoras so many ways, but this recipe is different, and taste great. I have layered these pakoras with spicy sweet and sour potato like chutney. Before I decided to do this recipe, I have served these pakoras to many friends, the only thig they could say wow. They could not figure out what I have used for filling. You don’t need any chutney or dipping sauce, but green cilantro or mint chutney enhance the flavor.Recipe will serve 4.
In a bowl mix all the dry ingredients together, besan, corn starch, salt, asafetida and baking soda, mix it well. Add oil and add water slowly to make a thick and smooth batter. Set aside.
Filling
In a frying pan heat the oil over medium heat. When oil is moderately hot add cumin seeds, asafetida, coriander powder, ginger, green chili, and red chili powder stir fry for few seconds.
Next add potatoes, salt, black salt, mango powder, garam masala and sugar stir for about 2 minutes, add ½ cup of water keep stirring and keep mashing the mix if needed add little more water. Mix should be very mushy and soft like a spread. Add cilantro and mix it well.
Taste the potato mix it should be spicy after you spread the mix to bread and fry with batter spice level will go down. I always keep the mix extra spicy. Mix is ready keep aside.
Making Pakoras
Spread the mix generously on two slices of bread, then close sandwiches with other slices of bread.
Remove the crest from the bread all sides and slice them in the shape you like. I am slicing them in 6 pieces because the bread I am using have big slices.
Heat about 1 inch of oil in a frying pan on medium high heat moderately. To check if the oil is ready, put one drop of batter in oil. The batter should come up but not change color right away.
Dip the bread into the batter one at a time, making sure bread are completely covered with batter. Then, slowly drop them into the frying pan.
Turn them quick and take them out quick. We are going to double fry these pakoras. Fry them all then put them back in frying pan and fry the pakoras until they are golden-brown both sides.
Spicy Bread Pakora is a popular vegan Indian street foodsnack loved for its crispy exterior and flavorful filling. This spicy bread pakora recipe offers a tantalizing twist to the traditional version, making it a perfect choice for those who enjoy a bit of heat in their appetizers. If you’re wondering how to make spicy bread pakora, look no further! Follow along for a step-by-step guide to creating this delicious treat.
Step 1: Prepare the Filling
To start making spicy bread pakora, prepare the filling mixture. Combine mashed potatoes, finely chopped green chilies, chopped cilantro, grated ginger, garam masala, amchur (dry mango) powder, and salt in a bowl. Mix well to ensure all the ingredients are evenly incorporated. This flavorful filling adds a delightful kick to the bread pakora. If you prefer a milder version, you can adjust the amount of green chilies according to your taste preferences.
Tip: For a variation in filling, you can add crumbled paneer or shredded cheese to the potato mixture for added richness and texture. Check out Manjula’s recipe for Paneer Pakora for inspiration.
Step 2: Prepare the Batter
Next, it’s time to prepare the batter for coating the bread slices. In a separate bowl, combine chickpea flour (besan), rice flour, salt, ajwain (carom seeds), turmeric powder, cumin seeds, and red chili powder. Gradually add water to the dry ingredients while whisking to form a smooth, lump-free batter. The consistency should be thick enough to coat the bread slices evenly. This flavorful batter is what gives spicy bread pakora its signature crunchy coating.
Variation: For a gluten-free option, you can substitute rice flour with cornflour or a gluten-free flour blend. Manjula offers a recipe for Gluten-Free Rice Flour Pakoras that you might find useful.
Step 3: Assemble the Bread Pakoras
Now, it’s time to assemble the spicy bread pakoras. Take a slice of bread and spread a generous amount of the prepared potato filling mixture on one side. Place another slice of bread on top to form a sandwich. Carefully cut the sandwich into desired shapes, such as triangles or rectangles. Dip each sandwich piece into the prepared batter, ensuring it is coated evenly on all sides.
Tip: To enhance the flavor and aroma, you can add a pinch of chaat masala to the batter before dipping the bread slices. Manjula shares her recipe for Chaat Masala, which you can make at home with a blend of aromatic spices.
Step 4: Fry the Pakoras
Heat oil in a deep frying pan over medium heat. Once the oil is hot, carefully place the coated bread pakoras into the oil, making sure not to overcrowd the pan. Fry the pakoras until they turn golden brown and crispy on all sides, flipping them occasionally for even cooking. Once done, remove the pakoras from the oil and drain excess oil on paper towels.
Benefit: While spicy bread pakoras are undoubtedly indulgent and delicious, they are best enjoyed in moderation as a treat due to their deep-fried nature. Pair them with a fresh salad or chutney for a balanced snack.
Step 5: Serve and Enjoy!
Once fried to perfection, serve the spicy bread pakoras hot and crispy alongside your favorite chutney or dipping sauce. They make for a delightful appetizer or tea-time snack, perfect for sharing with friends and family. The combination of crunchy exterior and flavorful filling is sure to tantalize your taste buds and leave you craving for more.
By incorporating these tips and variations, you can elevate the classic bread pakora into a spicy and irresistible snack that’s bound to impress your guests. Check out more appetizer recipes on Manjula’s Kitchen for further culinary inspiration, such as her Vegetable Pakoras or Samosas. Cheers to delicious snacking!
Crispy delicious French Fries! Who doesn't enjoy French fries? It's the perfect comfort food! Homemade Fries, it’s actually quite simple and easy to make. In fact, this is a great snack for my grandkids when they come to visit me. My grandson will say very proudly my dadi (grandmother) makes the best fries.This recipe will serve 3
Wash and peel the potatoes, and slice potatoes into French fries, and place into ice cold water for at about 10 minutes. Soaking in water potatoes some of the starch will come out and water will look fogy. Remove them from water to clean kitchen towel and pat dry.
Heat oil in a frying pan over medium-high heat. Put the fries into oil, don’t over crowed them. Notes: overcrowding fries will bring oil temperature to very low and fries can become very oily.
Turn the fries occasionally, fry until golden brown it should take about 6-8 minutes. Remove fries from oil with a slotted spoon to drain on paper towel. Sprinkle the salt and fries are ready to serve.
Notes
My family and friends enjoy the fries with tamarind chutney, this exotic sweet and sour chutney is a delicious condiment. I always have this in my refrigerator. My grandkids also like to have a lemonade or Mango lassi with French fries.
I have been wanting to do a video it should be easy and more versatile, ingredients maybe you have in your pantry. Utttapam a South Indian popular dish. Traditionally Uttapam is made with rice and lentil batter, which can be a long process, soaking, grinding then fermenting the batter. Rava Uttappam, on the other hand is instant and easy to make, with a variety of vegetables of your choice. It tastes delicious also can be served for breakfast, as a snack or for dinner. Rava Uttapam will be enjoyed by all ages.Uttapam is like a thick Dosa or Spicy pancake topped with vegetables. If you are serving this as a traditional Uttapam serve this with sambar and coconut chutney. But Rava Uttapam can be served with any chutney or condiment. Many times, I prefer this as a light dinner and enjoy with sprinkling samber powder, giving a traditional touch. The other reason I wanted to do this recipe as I said before I wanted to do the recipe more versatile you can use this batter for making Idli, because Rava Idli can be used for making so many recipes.I have many related recipes on my website like Masala Idli, Idli Manchurian.This recipe will serve 4.
In a bowl mix sooji, salt, green chili, ginger, cilantro, cabbage, yogurt, and add water as needed batter should be little thicker than dosa batter.
In a small bowl heat the oil over medium heat, oil should be moderately hot, add cumin seeds and mustard seeds as seeds crack add to the batter, mix it well. Let the batter set aside for at least 15 minutes.
Add Eno Fruit Salt to the batter just before you are ready to make Uttapam and mix well. The mixture will begin light and foaming.
Heat the skillet over medium heat and lightly grease the skillet. Pour about 2 large spoons of batter and spread consistency should be of thick then dosa. Sprinkle about 2 tablespoons of bell pepper and tomatoes press it lightly into the batter.
Pour about 1 teaspoon of oil around uttapam and cover it and let it cook for about 2 minutes and turn them over, uttapam should be golden brown from bottom making crisper, and top should be cooked well but not brown. Uttapam should be cooked over low medium heat.
Uttapam is ready to serve. I like to sprinkle lightly samber powder to add extra flavor.
Notes
Serving suggestions
You can serve the Rava Uttapam with sambar, coconut chutney or your choice of condiment.
Additional Notes
Adding tomatoes and bell pepper gives a traditional look to Uttapam.
I add green chilies and cilantro in the batter to keep the colors better.
You can choose your choice of vegetables like shredded carrots, finely chopped green beans, corn, finely chopped spinach (these are the veggies I have tried).
Do not cook on high heat, uttapam will not cook through.
If I am making Uttapam to serve as a starter I make the uttapam in small sizes, otherwise make it in about 7-inch diameter. What size you want to make it is your choice.
Keyword Appetizers, Bhartia Khana, Bread Uttapam, Coconut Chutney, Halwa, Healthy, Homemade, Idli, Jain Food, Mandir Food, No Garlic, No Onion, Quick And Easy, Rava Dosa, Samber, Savory Pancake, Sheera, Snack, South Indian Cuisine, Swami Narayan, Vegetarian, Video Recipe
Rava Uttapam is a delightful quick & easy south indian bread that makes for a wholesome breakfast or a light meal. Made from semolina (rava or sooji), this dish is not only delicious but also easy to prepare. In this rava uttapam recipe, we’ll walk through the steps to create this flavorful snack. Whether you’re a beginner or a seasoned cook, how to make rava uttapam will become a breeze with this simple yet detailed recipe.
Ingredients Preparation for Rava Uttapam
Before we dive into the cooking process, it’s essential to gather and prepare all the necessary ingredients. For this recipe for rava uttapam, you’ll need semolina, yogurt, water, salt, asafoetida (hing), ginger, green chilies, cilantro, and vegetables like bell peppers, tomatoes.
Tips for Ingredients Preparation:
Ensure the semolina is fresh for the best texture.
Use thick yogurt for better consistency.
Chop vegetables finely for even distribution.
Making the Batter for Rava Uttapam
To start making rava uttapam batter, take a mixing bowl and add semolina and yogurt. Gradually pour water and whisk the mixture to form a smooth batter. The batter should have a pouring consistency, neither too thick nor too thin. Add salt, asafoetida, finely chopped ginger, green chilies, and cilantro to enhance the flavor.
Tips for Making the Batter:
Let the batter rest for at least 10-15 minutes to allow semolina to absorb moisture.
Adjust water quantity as needed to achieve the desired consistency.
Variations for Rava Uttapam Batter:
For a healthier option, you can add grated carrots, spinach, or grated zucchini to the batter.
Experiment with spices like cumin seeds or mustard seeds for added flavor.
Cooking Rava Uttapam on the Griddle
Heat a non-stick skillet or griddle on medium heat and lightly grease it with oil. Once the griddle is hot, pour a ladleful of batter onto it and spread it evenly to form a small circle. Sprinkle chopped vegetables like bell peppers, tomatoes, on top of the uttapam.
Tips for Cooking Rava Uttapam:
Cook on low to medium heat to ensure even cooking without burning.
Cover the uttapam with a lid to cook the top layer thoroughly.
Drizzle oil around the edges to make them crispier.
Variations in Toppings for Rava Uttapam:
You can customize the toppings according to your preference. Try adding grated cheese or paneer for a richer taste.
For a spicy kick, sprinkle some red chili flakes or chaat masala on top.
Serving and Presentation of Rava Uttapam
Once the rava uttapam is cooked to perfection and turns golden brown on both sides, transfer it to a plate. Serve hot with coconut chutney, tomato chutney, or sambar for a complete South Indian breakfast experience.
Benefits of Rava Uttapam:
Rava Uttapam is a nutritious breakfast option as it is made from semolina, which is rich in carbohydrates and protein.
It’s light on the stomach and easy to digest, making it suitable for all age groups.
The addition of vegetables makes it a wholesome meal, providing essential vitamins and minerals.
FAQs (Frequently Asked Questions) about Rava Uttapam:
Dahi Puri is a very commonly found Indian street food! I have been wanting to do this recipe for my channel for quite some time, but I wanted to put my own twist on it. After experimenting with different fillings, I was finally able to come up with a combination that my family approved of – ahealthy and delicious salad style filling.
Spread the puries on microwave safe plate and microwave for about 20 seconds, this will make the puries crispier and give the freshness. Set aside.
Wash moong dal changing water 3-4 times and boil it in 2 cups of water over low medium heat until dal is very soft and tender but not mushy.
After dal is at room temperature mix all the filling ingredients together, dal, potatoes, tomatoes, cucumber, green chili, ginger, salt, cumin powder, lemon juice
Assemble Dahi Puri
Whip the yogurt and add the water as needed to make it consistency of thick batter.
Mix tamarind sauce and soy sauce together.
First make a hole with you thumb center of the golgapa, fill with 1 tablespoon of filling. drizzle with yogurt tamarind chutney, few pieces of green chili, and few boondi, red chili powder and drizzle some more tamarind chutney.
Notes
Assemble Dahi Puries just before serving. You can have every thing ready day before.Filling also can be served as salad.Dahi Puri with salad like filling is very light and refreshing. I have done the recipe for Tamarind Chutney Before. you will also like to see some other easy chaat recipes, like Bread Dahi Vada, Aloo Chana Chaat, Sabudana Bhel.
Keyword Appetizer, Party Food, Street Food, Tea Time Snack
Dahi puri chaat is a beloved Indian street food that tantalizes taste buds with its burst of flavors and textures. Dahi puri chaat combines crispy puris (hollow fried bread), tangy yogurt, spicy chutneys, and various toppings to create a harmonious symphony of sweet, sour, and savory flavors. Dahi Puri Chaat, a delightful combination of crispy puris filled with tangy yogurt, savory chutneys, and fresh toppings, embodies the essence of appetizers, chaat, quick & easysnacks, street food recipes, and summer delights.
This delightful snack is perfect for any occasion, whether it’s a casual evening at home or a festive gathering with friends and family. In this article, we will explore the recipe for dahi puri chaat, offering step-by-step guidance on how to recreate this iconic dish in your own kitchen.
Step 1: Prepare the Ingredients
Before diving into the preparation process, it’s essential to gather all the necessary ingredients. The key components include puris (hollow fried bread), yogurt, tamarind chutney, green chutney, boiled potatoes, sprouted mung beans, and sev (crunchy chickpea flour noodles). You can easily find these ingredients at your local Indian grocery store or prepare them at home using basic pantry staples. For those who prefer a spicy kick, finely chopped green chilies can be added to the mix. Once you have all the ingredients assembled, you’re ready to embark on your dahi puri chaat recipe journey.
Step 2: Prepare the Yogurt Mixture
The recipe for dahi puri chaat hinges on the creamy and tangy yogurt mixture that serves as the base for this delectable snack. To prepare the yogurt mixture, whisk together fresh yogurt, sugar, and a pinch of salt until smooth and creamy. Adjust the sweetness and tanginess according to your preference by adding more sugar or lemon juice as needed. The yogurt mixture should have a velvety texture that coats the back of a spoon. Once prepared, set aside the yogurt mixture while you assemble the remaining components of the chaat.
Step 3: Assemble the Dahi Puri Chaat
Now comes the fun part – assembling the dahi puri chaat! Start by gently tapping a hole in the center of each puri to create a cavity for the fillings. Place a spoonful of boiled potatoes and sprouted mung beans inside each puri, followed by a generous dollop of the prepared yogurt mixture. Drizzle tamarind chutney and green chutney over the yogurt, ensuring a balanced distribution of sweet and spicy flavors. Top off the chaat with a generous sprinkle of sev and finely chopped cilantro for added crunch and freshness. Repeat this process for each puri until all are assembled and ready to be devoured.
Step 4: Serve and Enjoy
Once assembled, dahi puri chaat should be served immediately to preserve its crispiness and freshness. Arrange the chaat on a serving platter and garnish with additional sev and cilantro for visual appeal. Encourage your guests to dig in and savor the explosion of flavors with each bite. Whether enjoyed as a standalone snack or as part of a larger meal, dahi puri chaat is sure to be a crowd-pleaser that leaves everyone craving for more.
Tips for Perfect Dahi Puri Chaat
To enhance the flavor profile of the dahi puri chaat recipe, consider adding finely tomatoes, and grated carrots as additional toppings.
For a healthier twist, opt for baked puris instead of fried ones. You can find baked puris at specialty grocery stores or make them at home using whole wheat flour.
Experiment with different chutney variations to customize the flavor profile of the chaat. Mango chutney, mint chutney are excellent options to explore.
For a refreshing twist, add a handful of pomegranate arils to the chaat for bursts of juicy sweetness.
If you’re short on time, you can prepare the components of the chaat in advance and assemble them just before serving to ensure maximum freshness and crunchiness.
Variations of Dahi Puri Chaat
Ragda Puri Chaat: Replace the boiled potatoes and sprouted mung beans with ragda (spiced yellow peas) for a heartier version of dahi puri chaat.
Bhel Puri Chaat: Substitute puris with crispy puffed rice (bhel) and toss them with chopped vegetables, chutneys, and spices for a crunchy and flavorful snack.
Papdi Chaat: Swap puris with bite-sized pieces of papdi (crispy fried dough) and layer them with yogurt, chutneys, and toppings for a delicious twist on the classic chaat.
Benefits of Dahi Puri Chaat
Rich in Flavor: Dahi puri chaat is bursting with a myriad of flavors, ranging from tangy and spicy to sweet and savory, making it a delight for the taste buds.
Nutrient-Rich: This iconic street food is packed with essential nutrients from various ingredients such as yogurt, sprouted mung beans, and vegetables, offering a wholesome snacking option.
Easy to Customize: With endless possibilities for customization, dahi puri chaat can be tailored to suit individual preferences and dietary restrictions, making it suitable for all palates.
FAQs (Frequently Asked Questions)
Can I make dahi puri chaat in advance?
While it’s best to assemble dahi puri chaat just before serving to maintain its crispiness, you can prepare the individual components such as yogurt mixture, chutneys, and toppings in advance and store them separately in the refrigerator.
Can I use store-bought puris for this recipe?
Yes, you can use store-bought puris for convenience. However, if you prefer homemade puris, you can find recipes online or explore Manjula’s Kitchen for a step-by-step guide.
How long does dahi puri chaat stay fresh?
Dahi puri chaat is best enjoyed immediately after assembly to prevent the puris from becoming soggy. If you have leftovers, store them in an airtight container in the refrigerator and consume them within a day for the best taste and texture.
Can I make this recipe vegan-friendly?
Yes, you can make dahi puri chaat vegan-friendly by using dairy-free yogurt and omitting any dairy-based toppings such as sev. You can also explore Manjula’s Kitchen for vegan alternatives and recipes.
By following this comprehensive guide, you can master the art of making dahi puri chaat at home and impress your friends and family with this flavorful and indulgent street food favorite. Don’t forget to explore more tantalizing recipes on Manjula’s Kitchen, ranging from appetizers and beverages to desserts, to elevate your culinary repertoire and embark on a gastronomic adventure.
Spicy Corn is a very enjoyable snack and not only that, but this is a quick and easy recipe to make. Make it as spicy or as mild as your heart desires. Best of all, you can also serve this as a side dish. Enjoy the spicy corn for a beautiful picnic or outdoor get together. You can also serve this over crisp slices of bread.
2cupcorn kernelsI am using frozen corn, you can use fresh
1tspoil
½tspsalt
½tspcumin seedsroasted, bhuna jeera
2tbspcilantrofinely chopped
1tbspgreen chilifinely chopped, adjust to taste
2tbspred bell pepperfinely chopped
1tsplemon juice
¼cupcream cheesesoft
For Garnishing
¼cupfeta cheese
Instructions
Use the flat bottom-heavy frying pan, lightly oil it and heat over medium high heat, put the corn kernels and stir fry for 4-5 minutes stirring continuously. While stir frying kernels will be getting some light and some dark brown color, some of the kernels will pop like you are grilling.
Turn off the heat, and add salt, cumin seed powder, cilantro, green chili, red bell pepper, lemon juice, and cream cheese mix it well. Sprinkle feta cheese.
Spicy corn taste best when it is served warm but can be served at room temperature.
Notes
Spicy Corn works great for picnic or outdoor get together. Also try Aloo Poori, Lemonade, or Watermelon Cooler
IdliChaat is a tasty twist to traditional South Indian Idli. This can be served as an appetizer or an afternoon snack. It's quick and easy to make, with the perfect savory flavors! Try this recipe today and you will be satisfied with a great dish!
I am using store bought frozen idlies or you can also use left over idlies. Make sure though frozen idlies to bring to room temperature.
Whip the yogurt until smooth. Add a little milk as needed to make the pourable consistency.
Heat 2 tablespoons of oil in a pan and arrange the idle do not overlap them. Cooked the idlis over medium heat, turn them about 3-4 time, till they are light golden brown both sides. This should take about 4 minutes.
Transfer them on a plate and stir-fry the potatoes in the same pan sprinkling the 1/4 teaspoon of salt. Stir-fry the potatoes till they start getting light golden color this should take about 2 minutes.
Serving the Idli Chaat
Arrange the idlies in a serving plate, sprinkle remaining salt ¼ teaspoon. Put ½ the potatoes drizzle the yogurt, cilantro chutney and tamarind chutney. Garnish with green chilies and fine sev.
Notes
NotesYou can slice the idli in about 6 pieces and stir fry. This is another delicious way to serve to serve left over idlies.You will also enjoy Dahi Vada, and Bhel Puri. Links for Cilantro Chutney and tamarind Chutney
Idli Chaat Recipe: A Delicious Twist to a Classic Dish
Idli Chaat is a delightful fusion of traditional South Indian idlis with a twist of chaat-inspired flavors, creating a quick and easysnack that tantalizes the taste buds with its irresistible appetizers. Idli chaat is a delightful fusion dish that combines the traditional South Indian snack of idli with the flavors of chaat, a popular street food in India. This unique blend of textures and flavors creates a mouthwatering experience that is sure to please your taste buds. In this article, we’ll explore how to make idli chaat at home, step by step.
Step 1: Preparing the Idlis
To begin making idli chaat, you’ll need freshly steamed idlis. If you don’t have idlis ready, you can prepare them using your favorite idli batter recipe. Once the idlis are steamed to perfection, allow them to cool slightly before proceeding to the next step.
Step 2: Cutting the Idlis
Once the idlis have cooled down, cut them into bite-sized pieces. This step helps to create a perfect base for the chaat toppings and ensures that each bite is filled with flavor.
Step 3: Assembling the Dahi Idli Chaat
Now comes the fun part – assembling the dahi idli chaat! Take the cut idli pieces and arrange them on a serving plate. Next, generously drizzle them with creamy yogurt, ensuring that each piece is well-coated. This adds a refreshing tanginess to the dish.
Step 4: Adding Toppings
Now, it’s time to add the toppings that will take your idli chaat to the next level. You can get creative with your toppings, but some classic choices include tomatoes, and cilantro. For an extra kick of flavor, sprinkle some chaat masala and roasted cumin powder on top.
Step 5: Garnishing
To finish off your dahi idli chaat, garnish it with a handful of nylon sev and a drizzle of tangy tamarind chutney. These final touches not only add visual appeal but also enhance the overall taste of the dish.
Tips for Making the Perfect Idli Chaat
Use freshly steamed idlis for the best texture and flavor.
Be generous with the yogurt and toppings to ensure every bite is bursting with taste.
Experiment with different toppings and garnishes to customize the chaat according to your references.
Variations of Idli Chaat
For a spicy twist, add some finely chopped green chilies or a dash of red chili powder.
Instead of yogurt, you can use whipped cream or sour cream for a different flavor profile.
Try adding some boiled chickpeas or sprouts for added protein and texture.
Benefits of Idli Chaat
Idli chaat is a nutritious dish that provides a good balance of carbohydrates, protein, and vitamins.
It’s a great way to use leftover idlis and turn them into a delicious snack or appetizer.
The probiotics in yogurt make this dish beneficial for gut health.
FAQs (Frequently Asked Questions)
Q: Can I use store-bought idlis for this recipe?
A: Yes, you can certainly use store-bought idlis if you’re short on time. However, freshly steamed idlis will yield the best results in terms of flavor and texture.
Q: Can I make idli chaat in advance?
A: While it’s best enjoyed fresh, you can prepare the components of idli chaat in advance and assemble them just before serving to prevent the idlis from becoming soggy.
Q: Is idli chaat spicy?
A: The level of spiciness can be adjusted according to your preference. You can make it as spicy or as mild as you like by controlling the amount of green chilies or chili powder you use.
Idli Chaat is a delightful dish that brings together the best of both worlds – the comforting flavors of idli and the exciting taste of chaat. With just a few simple ingredients, you can create a dish that is sure to impress your family and friends. So why not give this recipe a try and experience the deliciousness of idli chaat for yourself?
Achari Mathries, is a traditional staple snack in North India. They are usually served with spicy pickles, but in this recipe I have added mango pickle spices in the dough instead to add a tangy flavor to the mathri itself. With my family, mathries are a must have while travelling, and now with Achari Mathri, we no longer need the pickle, so it becomes one less thing to carry.
Mix all the ingredients except the water. Add the water little at a time, kneading into a firm dough. Cover the dough and set aside for 15 minutes or more.Prick them with a fork all over the rolled dough, so the Mathries do not puff when frying, and Mathries stay crisp.
Divide the dough into 3 equal parts. Take each part of the dough and make a flat ball shape. Roll them into about 12-inch circles and thickness of salted crackers.
Take a cookie cutter and cut them in rounds. I am using 2-1/2 inch cookie cutter. Use the size and shape to your choice.
Heat the oil in a frying pan on medium heat. The frying pan should have at least 1 inch of oil. To check if the oil is ready, put a small piece of dough in the oil. The dough should make the oil sizzle and come up slowly.
Make sure to place just enough mathris in the oil it should be easy to turn them. Fry the mathris until both sides are light golden-brown. This should take about 7-8 minutes.
Notes
Tip
Achari Mathries can be stored for a couple of months in airtight containers.
If the mathries are cooked on high heat, they will be soft.