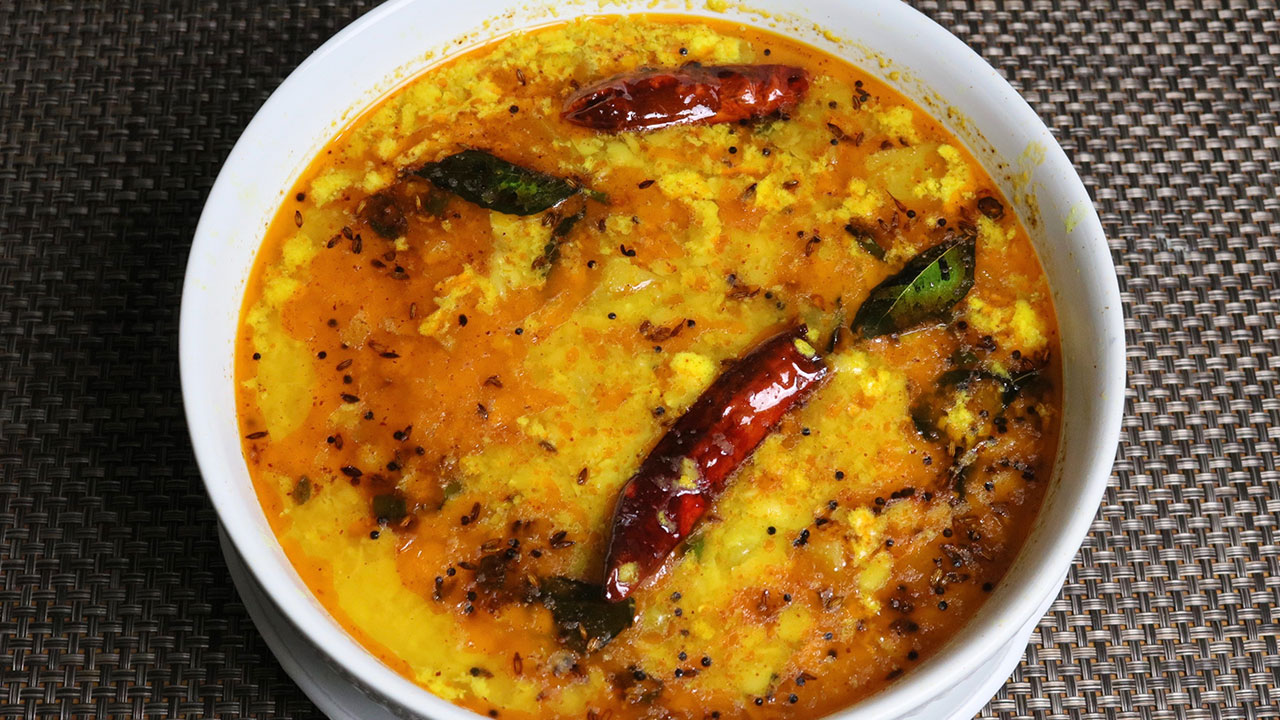
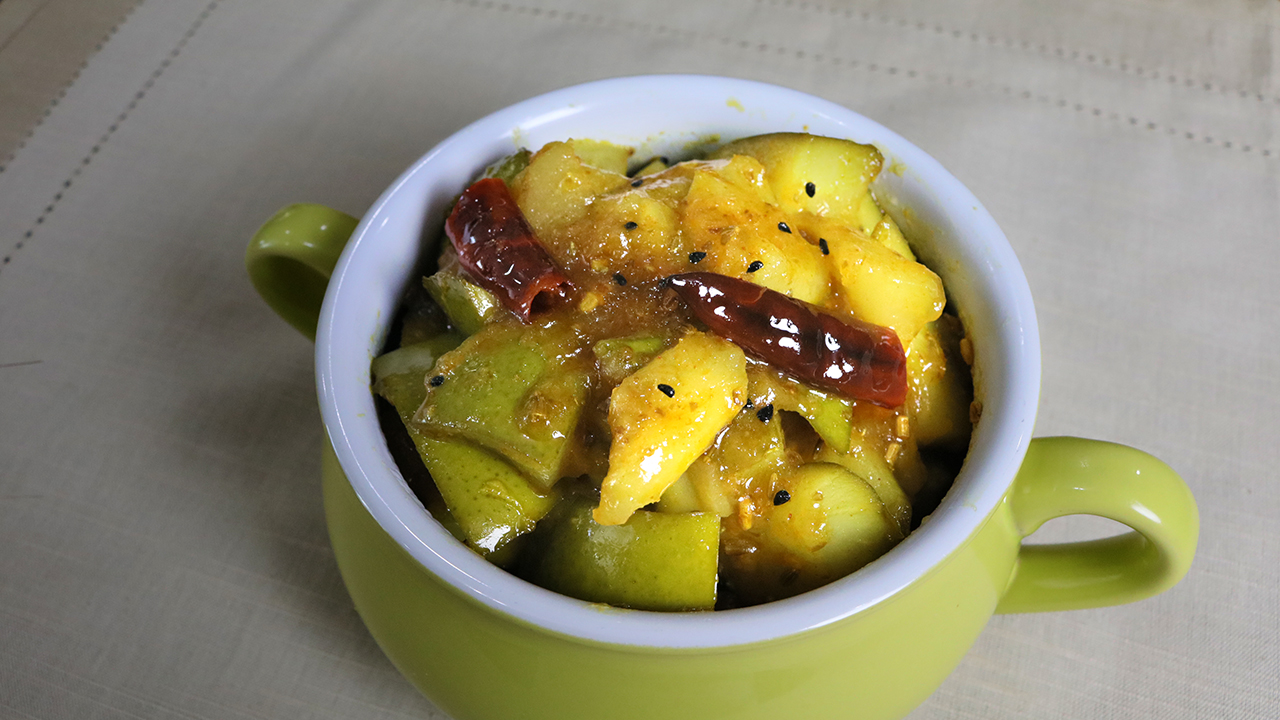
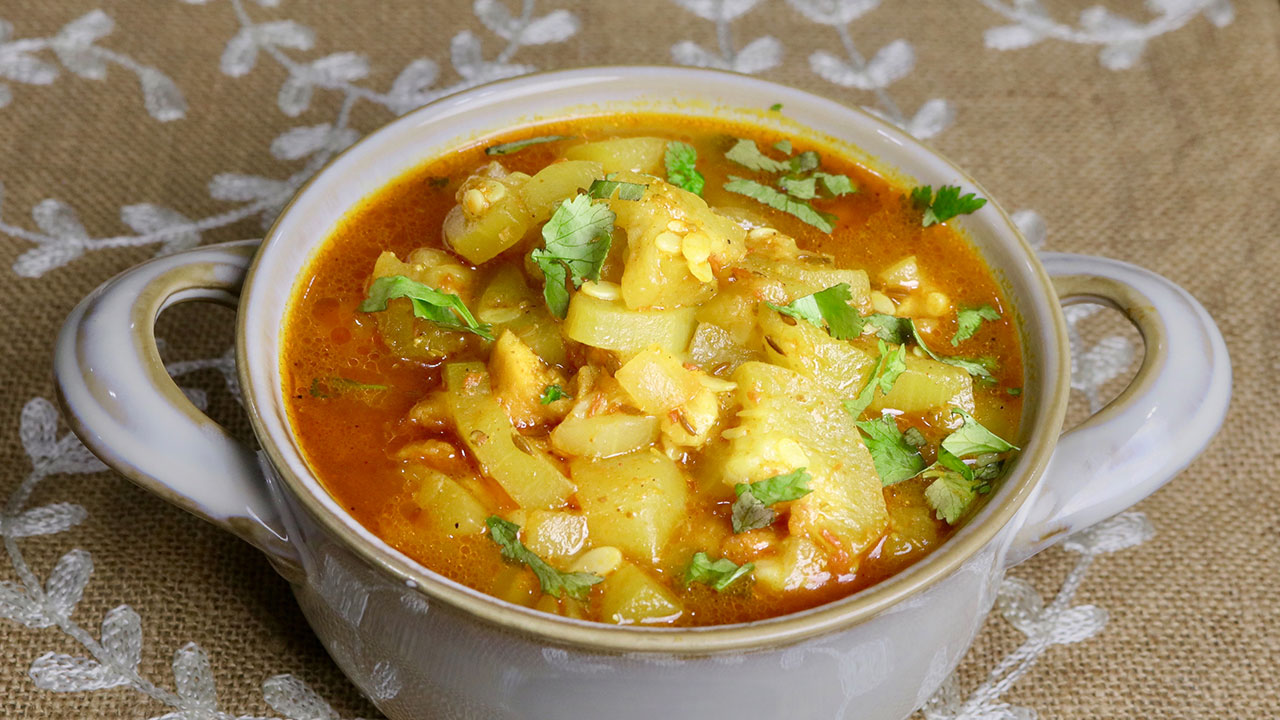
Category: Gluten Free

Gluten-Free Indian Recipes: Delicious and Healthy Options

Eating gluten-free doesn’t mean sacrificing flavor, especially with the wide array of gluten free Indian recipes available. Whether you are gluten intolerant or simply looking to reduce gluten in your diet, these gluten free recipes Indian style will delight your taste buds. Let’s explore some delectable gluten free Indian food recipes that you can enjoy for every meal.

Breakfast Recipes

Besan Chilla

Besan Chilla, or chickpea flour pancake, is a high protein vegetarian meals option that fits perfectly within gluten free Indian recipes. This dish is quick to prepare and can be enjoyed with a side of yogurt or chutney. Besan Chilla is also a great example of Indian gluten free recipes that are both nutritious and delicious.

Poha

Poha is a light and flavorful dish made from flattened rice, seasoned with turmeric, mustard seeds, and curry leaves. This dish is a staple in many Indian households and is a fantastic gluten free Indian food recipe for Indian breakfast ideas. It’s easy to make and highly customizable.

Lunch Recipes

Rajma Chawal (without the wheat)

Rajma Chawal is one such beloved north indian recipes made with red kidney beans in a spiced tomato gravy, typically served with rice. By using gluten-free rice, this dish becomes a delightful addition to your collection of gluten free Indian recipes.

Bajra Roti

Bajra Roti is a traditional Indian flatbread made from pearl millet flour. This roti is a staple in the gluten free recipes Indian category and pairs well with various curries and sabzis. It’s nutritious and adds a rustic flavor to your meal.

Dinner Recipes

Paneer Tikka

Paneer Tikka is popular in paneer recipes made by marinating paneer cubes in yogurt and spices, then grilling them to perfection. This dish is not only delicious but also fits well within gluten free Indian food recipes. It’s a great starter for any dinner.

Vegetable Pulao

Vegetable Pulao is a one-pot rice dish cooked with mixed vegetables and aromatic spices. This dish is a versatile and satisfying gluten free Indian food recipe that can be enjoyed by everyone. It’s perfect for a quick and nutritious Indian dinner recipes.

Snack Recipes

Bhel Puri (without sev)

Bhel Puri is a popular Indian street food made with puffed rice, vegetables, and tamarind chutney. By omitting sev (which usually contains gluten), this snack becomes a fantastic addition to your gluten free Indian recipes. It’s tangy, spicy, and utterly delicious.

Roasted Makhana

Roasted Makhana are fox nuts that are lightly roasted and seasoned with spices. This snack is not only crunchy and addictive but also fits perfectly into the gluten free recipes Indian category. It’s a healthy option for those mid-day cravings.

Dessert Recipes

Kheer

Kheer is a creamy rice pudding flavored with cardamom and garnished with nuts. This classic Indian dessert is naturally gluten-free and is a beloved part of gluten free Indian food recipes. It’s easy to make and perfect for any festive occasion.

Coconut Ladoo

Coconut Ladoo are sweet balls made from grated coconut and condensed milk, often flavored with cardamom. These ladoos are a delightful example of Indian gluten free recipes that can be enjoyed as a dessert or a snack.

Enhancing Your Gluten-Free Menu

To make your gluten-free menu even more delightful, consider adding dishes from related categories that complement these gluten free Indian recipes. Adding Indian snacks like roasted makhana and bhel puri can provide a variety of flavors and textures. For a sweet ending, explore Indian desserts such as kheer and coconut ladoo, made with gluten-free ingredients. Incorporating healthy recipes like besan chilla and vegetable pulao can offer lighter options for your meals. Hosting a large gathering? The popular party recipe category is filled with dishes that are sure to impress your guests and make your celebration memorable. Including North Indian recipes like rajma chawal or bajra roti can add a touch of authenticity to your meal.

Frequently Asked Questions (FAQs)

Q: What are some popular gluten free Indian recipes? 

A: Some popular gluten free Indian recipes include Besan Chilla, Poha, Rajma Chawal (without wheat), Bajra Roti, Paneer Tikka, Vegetable Pulao, Bhel Puri (without sev), Roasted Makhana, Kheer, and Coconut Ladoo.

Q: How can I make traditional Indian food gluten-free? 

A: To make traditional Indian food for diabetics gluten-free, try recipes like Besan Chilla, Bajra Roti, and Kheer. These recipes are modified to exclude gluten while retaining their authentic flavors.

Q: What are some gluten-free recipes Indian style for a party? 

A: Some gluten free recipes Indian style for a party include Paneer Tikka, Vegetable Pulao, Bhel Puri (without sev), and Coconut Ladoo. These dishes are flavorful and perfect for gatherings while being gluten-free.

Q: Can I prepare gluten-free Indian food in advance? 

A: Yes, many gluten free Indian food recipes can be prepared in advance and stored. Snacks like Roasted Makhana and Bhel Puri can be made ahead of time, while dishes like Vegetable Pulao and Rajma Chawal can be prepped and refrigerated.

Q: What are some healthy options for gluten-free Indian food? 

A: Some healthy options for gluten free Indian recipes include Quinoa Salad, Vegetable Stir Fry, Oats Idli, and Besan Chilla. These dishes are high in fiber and protein, helping to manage blood sugar levels effectively.

Conclusion

Gluten free Indian recipes are a celebration of healthy and flavorful foods. Whether you’re looking for gluten free recipes Indian style or traditional gluten free Indian food recipes, these dishes will bring variety and nutrition to your meals. 

So, gather your ingredients, try out these recipes, and create delicious meals that are mindful of your health needs. Don’t forget to explore related categories for more delightful recipes from Manjula’s Kitchen!

By incorporating these dishes into your diet, you’ll be able to enjoy a wide variety of delicious and nutritious foods. Whether you’re looking for breakfast, snacks, main courses, or desserts, there’s a gluten free Indian recipe to suit every taste. Happy cooking and healthy eating!

  • Lauki Vadi Ki Sabji

    A bowl of Lauki Vadi Ki Sabji, a traditional Indian dish made with bottle gourd and spiced gram flour dumplings, garnished with fresh cilantro.

    Lauki Vadi Ki Sabji

    Laucki is also known as Bottle gourd. This is a healthy and wholesome lentil and vegetable main dish. I like making Lauki as it is mild in taste and easy to digest. I usually will serve this with plain rice or rotis.
    5 from 3 votes
    Prep Time 10 minutes
    Cook Time 10 minutes
    Course Main Course
    Cuisine Indian
    Servings 4 people

    Equipment

    Instant Pot

    Ingredients
      

    • 4 cup laucki

      bottle gourd, peeled and cut into byte size cubes

    • 1/3 cup

      moong dal vadi

      broken into small pieces

    • 3/4 cup tomato puree
    • 1 tsp ginger paste
    • 2 tbsp oil
    • 1 tsp cumin seeds jeera
    • 1/8 tsp asafetida hing
    • 1 tbsp coriander powder dhania
    • 1/4 tsp turmeric haldi
    • 1/2 tsp red chili powder
    • 1 tsp salt
    • 1/4 tsp garam masala
    • 1/2 cup water

    Instructions
     

    • I am using instant pot; I am using the instant pot instead of pressure-cooker. Not
      for saving time but ease of use.
    • Heat one tablespoon of oil in instant pot on sautéed mode. Oil should be moderately hot, add moong dal vadi stir-fry till they are light golden brown this should take about 1minute. take out the vadies from instant pot.
    • Add remaining 1 tablespoon of oil, in instant pot keeping on sautéed mode oil should be moderately hot and add cumin seeds. When seeds start to crack, add the asafetida, stir and add tomato puree, ginger, coriander powder, turmeric, salt and chili powder and cook stirring occasional till spice mix start leaving the oil.
    • Add bottle gourd, vadies and 1/2 cup of water. Change the setting to pressure cook on high mode. Set the time for 6 minutes. (At this time instant pot is working just like pressure cooker, it will take same time building the pressure and after cooking releasing the pressure as pressure cooker, advantage is you can take care other work you have to do or even if you have to go out.)
    • Open the instant pot when you are ready. After you open the instant pot adjust the water if you need more, add garam masala.

    Video

    Notes

    I like to serve this with roti or rice. This makes a very satisfying meal.
    Enjoy! Thank you
    Tried this recipe?Let us know how it was!

    Lauki Vadi Ki Sabji: A Flavorful Indian Delight

    Lauki Vadi Ki Sabji is a traditional Indian dish made primarily with bottle gourd (Lauki), lentil nuggets (Vadi), and a variety of spices cooked in a curry or gravy. It is a popular dish among individuals following a vegan, gluten-free, and low-fat diet, making it suitable for those with dietary restrictions such as diabetes.

    The dish typically involves cooking lentil nuggets with bottle gourd and various vegetables in a flavorful curry or gravy made with spices such as cumin, coriander, turmeric, and ginger. It can be easily prepared in an Instant Pot for a quicker cooking process while retaining its nutritional value and flavors.

    Lauki Vadi Ki Sabji provides a wholesome meal option packed with protein from lentils, fibre from vegetables, and essential nutrients, making it a nutritious and satisfying choice for individuals seeking a balanced diet.

    Lauki Vadi Ki Sabji is a traditional Indian dish made with bottle gourd (lauki) and sun-dried lentil dumplings (vadi). This Lauki Vadi Ki Sabji recipe combines the subtle flavors of lauki with the richness of vadi to create a hearty and nutritious dish that’s bursting with flavor. With its simple yet satisfying taste, Lauki Vadi Ki Sabji is a popular choice for everyday meals in Indian households. 

    Step 1: Preparing the Vadi

    To begin, soak the sun-dried lentil dumplings (vadi) in water for about 15-20 minutes until they become soft and pliable. Once softened, squeeze out any excess water from the vadi and set them aside. This step helps ensure that the vadi cook evenly and absorb the flavors of the dish.

    Step 2: Preparing the Lauki

    Peel the bottle gourd (lauki) and cut it into small cubes or slices, depending on your preference. Lauki tends to cook quickly, so it’s essential to cut it into uniform pieces to ensure even cooking. Rinse the chopped lauki under cold water to remove any dirt or impurities before using it in the recipe.

    Step 3: Tempering and Cooking

    In a pan, heat oil or ghee over medium heat and add cumin seeds, mustard seeds, and asafoetida (hing) to the hot oil. Allow the seeds to crackle and release their aroma before adding finely chopped green chilies adding minced ginger for added flavor.

    Step 4: Adding Spices and Lauki

    Once the spices such as turmeric powder, coriander powder, red chili powder, and garam masala to the pan, stirring well to coat with the aromatic spices. Add the chopped lauki to the pan, stirring to combine with the spices. Cover the pan and let the lauki cook until it becomes tender but still retains its shape.

    Step 5: Incorporating the Vadi

    Once the lauki is cooked, add the soaked and squeezed vadi to the pan, gently mixing them with the cooked lauki and spices. Allow the vadi to simmer in the gravy for a few minutes, allowing them to absorb the flavors of the dish. Adjust the consistency of the gravy by adding water as needed to achieve the desired thickness.

    Step 6: Garnishing and Serving

    Before serving, garnish the Lauki Vadi Ki Sabji with freshly chopped cilantro leaves for a burst of freshness and color. Serve the sabji hot with steamed rice or roti for a wholesome and satisfying meal that’s sure to please your taste buds.

    Tips for Perfect Lauki Vadi Ki Sabji

    • Soaking Vadi: Ensure to soak the vadi in water until they become soft and pliable before adding them to the sabji. This step helps prevent the vadi from being too hard or chewy after cooking.
    • Cutting Lauki: Cut the bottle gourd into uniform pieces to ensure even cooking. Avoid overcooking the lauki as it can become mushy and lose its texture.
    • Adjusting Spice Level: Customize the spice level of the sabji according to your taste preferences by adjusting the amount of red chili powder and green chilies used in the recipe.

    Variations of Lauki Vadi Ki Sabji

    • Adding Tomatoes: Enhance the flavor of the sabji by adding chopped tomatoes along with the Tomatoes add a tangy twist to the dish and complement the earthy flavors of the lauki and vadi.
    • Coconut Gravy: For a richer and creamier gravy, add coconut milk or grated coconut to the sabji. Coconut adds a hint of sweetness and depth to the dish, making it more indulgent.

    Benefits of Lauki Vadi Ki Sabji

    • Nutrient-Rich: Lauki is low in calories and rich in essential nutrients such as vitamins, minerals, and dietary fiber, making it a healthy addition to your diet.
    • Protein-Packed: Vadi provides a good source of plant-based protein, essential for muscle repair and growth, making Lauki Vadi Ki Sabji a nutritious meal option for vegetarians.
    • Digestive Aid: Lauki is known for its digestive properties and is often included in Indian cuisine to aid in digestion and promote gut health.

    Frequently Asked Questions (FAQs)

    Can I use store-bought vadi for this recipe?

    • Yes, you can use store-bought sun-dried lentil dumplings (vadi) for convenience. However, homemade vadi may have a fresher flavor and texture.

    Can I make Lauki Vadi Ki Sabji ahead of time?

    • Yes, you can prepare the sabji in advance and store it in the refrigerator for up to 2-3 days. Reheat it gently before serving.

    Is Lauki Vadi Ki Sabji vegan-friendly?

    • Yes, Lauki Vadi Ki Sabji can be made vegan by using oil instead of ghee for tempering and omitting any dairy-based garnishes.

    Explore more delightful Indian recipes on Manjula’s Kitchen, such as Aloo Baingan for another culinary adventure.

  • Aam Ki Dal (Toor dal With Raw Mango)

    Aam Ki Dal (Toor dal With Raw Mango)

    indian dal

    Aam Ki Dal – Toor Dal with Raw Mango – Instant Pot

    Kacche Aam Ki Dal is a very simple dal recipe but delicious. This is Toor dal with raw mango. The tanginess of raw mangoes gives a delicious flavor to dal. Today I am using Instant Pot, that’s what I have been using instead pressure cooker. 
    4.20 from 5 votes
    Prep Time 5 minutes
    Cook Time 20 minutes
    Total Time 25 minutes
    Course Main Course
    Cuisine Indian
    Servings 4 people

    Ingredients


    • 1 cup toor dal arhar dal
    • 1/2 cup raw mango peeled and cut into small pieces
    • 1 tsp salt
    • 1/2 tsp turmeric haldi
    • 3 cups water

    Seasoning

    • 2 tbsp ghee clarified butter
    • 1/2 tsp cumin seeds jeera
    • 1/2 tsp mustard seeds rai
    • 1/8 tsp asafetida hing
    • 8 curry leaves
    • 1 tbsp green chili cut into small pieces
    • 2 dry red chilies
    • 1/4 tsp red chili powder

    Instructions
     

    • Wash dal changing water few times. 
    • Put dal with 2 cups water into instant pot and add salt, turmeric, and mango. Close the cover and cook on high heat for 8 minutes. Recently I have been using instant pot instead pressure-cooker. It takes the same time as pressure cooker advantage is you don’t have to watch over when it starts steaming and when it is time to turn off. You can take care other things.
    • After dal is done it should be soft. If needed add more water, dal should not be very thick. Dal will thicken as it sits. Make it more liquid than you want it to be.

    seasoning

    • Heat ghee in a small saucepan. Test the heat by adding one cumin seed to the ghee; if it cracks immediately, the oil is ready. Turn off the heat, add the cumin seeds, and mustard seeds. When they begin to crack, add the asafetida, curry leaves, and green chilies. Stir for a few seconds. Add red chili powder and 1 tablespoon of water to prevent the spices from burning. Pour spice mix chaunk over hot dal, before serving.

    Notes

    Notes, I have been using instant pot instead of pressure-cooker. Many people think it is a time saver, no it takes the same time as pressure cooker,  but it is hassle free you start and do other things you need to do, no watching over. it is also easy to clean.
    Tried this recipe?Let us know how it was!

    Raw Mango Dal Fry Recipe: A Tangy Twist to Traditional Dal

    Raw Mango Dal Fry, also known as Aam Ki Dal, is a delightful Indian dish that combines the tangy flavor of raw mangoes with the richness of lentils. This Instant Pot Raw Mango Dal Fry recipe offers a refreshing twist to traditional dal, adding a burst of tanginess and freshness to every bite. With its perfect balance of flavors and nutritious ingredients, Raw Mango Dal Fry is gluten free during the summer months when raw mangoes are in season.

    Step 1: Preparing the Lentils

    Start by rinsing the toor dal (pigeon peas) thoroughly and soaking it in water for about 30 minutes to soften the lentils. Once soaked, drain the water and transfer the dal to a pressure cooker or a large pot. Add fresh water, turmeric powder, and salt to the dal, and cook until it becomes soft and mushy. Cooking the dal until it’s well-cooked ensures a creamy and smooth texture for the dal fry.

    Step 2: Preparing the Raw Mango

    Peel the raw mango and cut it into small pieces, discarding the seed. The raw mango adds a tangy flavor to the dal fry and brings a refreshing twist to the dish. Adjust the amount of raw mango according to your taste preferences and the tartness of the mango.

    Step 3: Tempering the Dal

    In a separate pan, heat oil or ghee over medium heat and add cumin seeds, mustard seeds, and dried red chilies. Allow the seeds to crackle and release their aroma before adding until they turn golden brown and aromatic, enhancing the flavor of the tempering.

    Step 4: Adding Aromatics and Spices

    Add minced ginger, green chilies, and chopped tomatoes to the pan, stirring to combine with the tempering. Cook the mixture until the tomatoes are soft and mushy, adding ground spices such as coriander powder, cumin powder, and red chili powder for additional flavor and depth.

    Step 5: Incorporating the Raw Mango

    Once the tempering is ready, add the chopped raw mango pieces to the pan, stirring gently to coat the mangoes with the aromatic spices. Let the raw mango cook for a few minutes until it becomes soft and releases its juices, infusing the dal fry with its tangy flavor.

    Step 6: Combining the Lentils and Mango

    Once the raw mango is cooked, add the cooked toor dal to the pan, stirring well to combine with the mango and spice mixture. Adjust the consistency of the dal fry by adding water as needed to achieve the desired thickness. Let the dal simmer for a few more minutes to allow the flavors to meld together.

    Step 7: Garnishing and Serving

    Before serving, garnish the Raw Mango Dal Fry with freshly chopped cilantro leaves for a burst of freshness and color. Serve the dal fry hot with steamed rice or roti for a wholesome and satisfying meal that’s sure to please your taste buds.

    Tips for Perfect Raw Mango Dal Fry

    Adjusting Tartness: Taste the raw mango before adding it to the dal fry and adjust the quantity according to its tartness. If the mango is too sour, you can reduce the amount used or balance it with a pinch of sugar.

    Consistency of Dal: Cook the toor dal until it’s well-cooked and soft, ensuring a creamy texture for the dal fry. If the dal is too thick, you can add more water to achieve the desired consistency.

    Balancing Flavors: Adjust the amount of spices and seasoning according to your taste preferences. You can increase or decrease the spice level to suit your palate.

    Variations of Raw Mango Dal Fry

    Coconut Mango Dal: Add grated coconut or coconut milk to the dal fry for a creamy texture and a hint of sweetness that complements the tanginess of the raw mango.

    Spicy Mango Dal: Increase the heat level of the dal fry by adding more green chilies or red chili powder for an extra kick of spice.

    Benefits of Raw Mango Dal Fry

    Rich in Vitamin C: Raw mangoes are a good source of vitamin C, which helps boost immunity and promote overall health.

    Digestive Aid: The tangy flavor of raw mangoes aids in digestion and can help alleviate digestive issues such as bloating and indigestion.

    Nutrient-Dense: Raw Mango Dal Fry is a nutritious dish that provides a good balance of protein, fiber, and essential vitamins and minerals, making it a wholesome meal option for all.

    Frequently Asked Questions (FAQs)

    Can I use other lentils for this recipe?

    Yes, you can use other lentils such as masoor dal (red lentils) or moong dal (split mung beans) instead of toor dal for variation.

    Can I make aam ki dal ahead of time?

    Yes, you can prepare the dal fry in advance and store it in the refrigerator for up to 2-3 days. Reheat it gently before serving.

    Can I freeze aam ki dal?

    Yes, you can freeze the dal fry in an airtight container for up to 1 month. Thaw it in the refrigerator overnight and reheat it before serving.

    Explore more delightful Rajasthani recipes on Manjula’s Kitchen, Explore more appetiser recipes on Manjula’s Kitchen: Vegetable Samosas, Paneer Tikka, Crispy Spinach Pakoras, Mango Lassi, Masala Chai, Gulab Jamun, Kheer (Rice Pudding)

  • Makhana Matar Curry

    Makhana Matar Curry

    A bowl of Makhana Matar Curry, a creamy Indian dish made with lotus seeds (makhana) and green peas, garnished with fresh cilantro.

    Makhana Matar Curry

    Makhana Matar Curry is a delicious gravy-based dish. This can be a tasty side dish for formal dinner or even a quiet dinner with a few friends. Makhana and matar is made with a spicy tomato and cashew gravy. I like to serve with fresh hot puris or white rice
    4.10 from 11 votes
    Prep Time 5 minutes
    Cook Time 25 minutes
    Total Time 30 minutes
    Course Main Course
    Cuisine Indian
    Servings 4 people

    Ingredients


    • 3 cup makhana fox nut, phool makhana
    • 3 Tbsp oil
    • 1/4 cup green peas I am using frozen peas

    For Garvy

    • 2 cup tomatoes chopped
    • 1/4 cup cashew kaju
    • 1 Tbsp ginger chopped
    • 1 Tbsp oil
    • 1/2 tsp cumin seeds jeera
    • 1/8 tsp asafetida hing
    • 2 tsp coriander powder dhania
    • 1/2 tsp red chili powder lal mirch
    • 1 tsp salt
    • 1 tsp sugar
    • 1/4 tsp garam masala
    • 1/4 cup cilantro finely chopped, hara dhania

    Instructions
     

    • Heat 3 tablespoon of oil in frying pan over low medium heat, add the makhana and roast them stirring continuously until they are crisp, this should take about 3-4 minutes. Keep aside.
    • Blend tomatoes, cashews and ginger to make a pure.
    • Heat the oil in a sauce pan, test the heat by adding one cumin seed. If the seed cracks right away, the oil is ready. Add asafetida and cumin seeds, as the cumin seeds crack add tomato paste, coriander, chili powder, salt and sugar.
    • Stir-fry for two to three minutes, until the oil begins to separate from the mixture. Add roasted makhana and green peas mix it well add about 1-1/2 cups of water. Cover the pan and let it cook for 6-7 minutes over low medium heat, until peas are tender. Note: add more water if you like more gravy.
    • Turn off the heat add garam masala and cilantro mix it well. 

    Notes

    Adjust thickness of gravy to your liking, with time Makhana Matar Curry becomes thick.
    Serve Makhana Matar Curry with your choice of bread I like to serve with Paratha, Puri or with Plain Rice
    Tried this recipe?Let us know how it was!
  • Sabudana (Tapicoa) Bhel, Chaat

    Sabudana (Tapicoa) Bhel, Chaat

    A vibrant plate of Sabudana (Tapioca) Bhel Chaat, garnished with crispy toppings and drizzled with tamarind chutney.

    Sabudana (Tapicoa) Bhel, Chaat

    Sabudana Bhel this is a delicious appetizer or also can be served with afternoon tea. Sabudana Bhel or I like to call this chaat is an elegant looking dish, that will sure to impress all your family and friends.
    4 from 1 vote
    Prep Time 10 minutes
    Cook Time 10 minutes
    Total Time 20 minutes
    Course Appetizer
    Cuisine Indian
    Servings 4 people

    Ingredients


    For Sabudana – Tapioca

    • 1/2 cup sabudana tapioca, use the larger pearls
    • 2 tsp oil
    • 1/4 tsp cumin seeds jeera
    • 1/4 tsp mustard seeds rai
    • pinch turmeric haldi
    • 1/2 tsp salt
    • few drops lemon juice

    For Serving

    • 1 cup potato boiled peeled and cut into small cubes
    • 1 Tbsp green chili finely chopped
    • 1/2 tsp salt
    • 1/2 cup peanuts roasted and crushed
    • 2 tsp chaat masala
    • 1/2 cup aloo lacha check existing recipe
    • 1/4 cup tamarind chutney check existing recipe

    Instructions
     

    • Wash sabudana (tapioca) changing the water 2-3 time and soak with one cup of water, soak 8 hours or more. Sabudana will become all most four time in volume and will be soft.
    • Heat the oil in a frying pan on medium heat. Test the heat by adding one cumin seed to the oil; if seed cracks right away oil is ready. Add cumin seeds and mustard seeds after seeds crack add turmeric, lower the heat to low. Add sabudana, and salt. Keep stir frying until sabudana becomes translucence, looks like pearls. This should take about another 4-5 minutes. Stir gently and making sure tapioca doesn’t get sticky and stuck to each other. Turn off the heat, and drizzle 3-4 drops of lemon juice and stir.
    • Transfer sabudana to a wide bowl stir for few minutes with fork making sure sabudana pearls are separated and not sticky. Serve the sabudana at room temperature.
    • Add 1/2 teaspoon of salt and green chilies to cubed potatoes, mix it well and set aside.
    • Assembling the Sabudana Bhel, in a serving platter spread the cooked sabudana, sprinkle the roasted peanuts, over peanuts sprinkle the potatoes, then aloo lacha, some more peanuts and drizzle the chutney.

    Notes

    Suggestion, this is a easy recipe, you can prepare every thing in advance, cooked sabudana can be refrigerator for up to a week. Aloo Lacha and tamarind chutney can be stored for months.  
    Tried this recipe?Let us know how it was!

    Introduction to Sabudana Bhel Chaat

    Sabudana Bhel is a quick & easy, gluten-free, and vegan snack with flavors reminiscent of chaat, perfect for Krishna Janmashtami and Navaratri celebrations, offering a delightful appetizer option. In this recipe, we’ll learn how to make sabudana bhel chaat, a delightful and crunchy snack that’s perfect for any occasion. Sabudana, also known as tapioca pearls, is the star ingredient here, lending its unique texture and taste to create a mouthwatering dish. This sabudana bhel recipe combines the traditional flavors of bhel with the subtle nuttiness of sabudana, resulting in a tantalizing treat that’s sure to please your taste buds. Whether you’re looking for a tasty snack to enjoy with your evening tea or planning a party menu, this crispy sabudana bhel is sure to be a hit.

    Preparing the Sabudana Mixture

    To begin making the sabudana bhel, start by soaking the sabudana pearls in water for a few hours until they turn soft and plump. Once the sabudana pearls have soaked well, drain any excess water and spread them out on a clean kitchen towel to remove any excess moisture. Now, heat oil in a pan and fry the sabudana pearls until they turn crispy and golden brown. This step is crucial for achieving that perfect crunch in your sabudana bhel chaat.

    Adding Crunchy Elements

    Next, it’s time to add some crunchy elements to our sabudana bhel mixture. You can use a variety of ingredients such as roasted peanuts, tomatoes, and crunchy sev. These ingredients not only add texture to the dish but also enhance its flavor profile. Feel free to adjust the quantities according to your preference, but make sure to include a good mix of flavors and textures for the best results.

    Seasoning the Bhel

    Once you’ve assembled all the crunchy elements, it’s time to season your sabudana bhel mixture. You can use a combination of spices such as chaat masala, red chili powder, roasted cumin powder, and black salt to add a burst of flavor to the dish. Additionally, you can squeeze some fresh lemon juice over the mixture to give it a tangy twist. Mix everything together until well combined, ensuring that the sabudana pearls are evenly coated with the seasoning.

    Garnishing and Serving

    Finally, garnish your sabudana bhel chaat with some fresh coriander leaves and a sprinkle of nylon sev for an extra crunch. You can also add some pomegranate arils or grated coconut for a pop of color and flavor. Serve the crispy sabudana bhel immediately in individual serving bowls or plates, garnished with some more sev on top for added crunchiness. Pair it with a cup of hot tea or your favorite chutney for a truly satisfying snacking experience.

    Tips for Perfect Sabudana Bhel

    • Soak the sabudana pearls in water for at least 4-5 hours or overnight to ensure they become soft and plump.
    • Drain the soaked sabudana pearls well and spread them out on a kitchen towel to remove excess moisture before frying.
    • Fry the sabudana pearls in batches to ensure they cook evenly and become crispy.
    • Adjust the seasoning according to your taste preferences. You can make the sabudana bhel spicier by adding more red chili powder or tangier by squeezing extra lemon juice.
    • Garnish the sabudana bhel chaat with fresh ingredients like coriander leaves, pomegranate arils, or grated coconut to enhance its visual appeal and flavor.

    Variations of Sabudana Bhel

    • Fruit Bhel: Add diced fruits such as apples, bananas, and grapes to the sabudana bhel mixture for a refreshing twist.
    • Sprouts Bhel: Incorporate sprouted moong beans or chickpeas into the sabudana bhel for added protein and crunch.
    • Vegetable Bhel: Include finely chopped vegetables like cucumber, carrots, and bell peppers to make the sabudana bhel more nutritious and colorful.
    • Sweet Bhel: For a sweet variation, skip the savory seasonings and instead toss the sabudana pearls with honey, yogurt, and chopped fruits for a delicious dessert option.

    Benefits of Sabudana Bhel

    • Gluten-Free: Sabudana is naturally gluten-free, making this sabudana bhel recipe suitable for individuals with gluten intolerance or celiac disease.
    • Rich in Carbohydrates: Sabudana is a rich source of carbohydrates, providing a quick and sustainable source of energy.
    • Easy to Digest: Sabudana is light on the stomach and easy to digest, making it an ideal ingredient for people with digestive issues or those following a bland diet.
    • Versatile: You can customize the sabudana bhel recipe with your favorite ingredients to suit your taste preferences and dietary requirements.
    • Satisfying Snack: This crispy sabudana bhel is not only delicious but also quite filling, making it a satisfying snack option for any time of the day.

    FAQs about Sabudana Bhel

    Q: Can I make sabudana bhel ahead of time?

    A: While it’s best to serve sabudana bhel chaat immediately after preparing it to enjoy its crispiness, you can prepare the sabudana mixture in advance and assemble the bhel just before serving to prevent it from becoming soggy.

    Q: Can I store leftover sabudana bhel?

    A: It’s not recommended to store leftover sabudana bhel as it tends to lose its crispiness over time. However, if you have any leftover mixture, you can refrigerate it in an airtight container for up to a day and reheat it in the oven before serving.

    Q: Is sabudana bhel suitable for fasting days?

    A: Yes, sabudana bhel is a popular dish consumed during fasting days, especially during festivals like Navratri. Just ensure that you use sendha namak (rock salt) instead of regular salt if you’re making it for fasting purposes.

    Q: Can I make sabudana bhel without frying the sabudana pearls?

    A: While frying the sabudana pearls adds a crispy texture to the sabudana bhel, you can try alternative cooking methods such as roasting or air-frying for a healthier version of the dish.

    Q: Can I serve sabudana bhel as a main dish?

    A: While sabudana bhel chaat is typically served as a snack or appetizer, you can definitely enjoy it as a light meal, especially when paired with some yogurt or a side salad for added nutrition.

    Other Recipes on Manjula’s Kitchen

    If you’re looking to explore more Indian recipes, appetizers, beverages, and desserts, be sure to check out the following links on Manjula’s Kitchen. Here are some links to recipes on Manjula’s Kitchen official website:

    Paneer Tikka Masala Recipe

    Chana Chaat (Spicy Chickpea Salad) Recipe

    Pav Bhaji (Spicy Vegetable Hash with Buns) Recipe

    Raj Kachori (Crunchy Chaat) Recipe

    Vegetable Biryani Recipe

    These recipes should offer you a flavorful experience straight from Manjula’s Kitchen.

  • Spring Quinoa Fruit Salad

    Spring Quinoa Fruit Salad

    A vibrant and colorful Spring Quinoa Fruit Salad featuring mixed greens, quinoa, watermelon, mango, cucumber, and avocado.

    Spring Quinoa Fruit Salad

    Spring Quinoa Fruit Salad just perfect for the start of Spring! This is a vibrant, fresh fruit salad with quinoa and homemade ginger and lemon dressing. It is the perfect go-to recipe if you are looking for something simple, light and refreshing in this warmer weather. The quinoa and fruit make it a healthy choice for those who want to eat clean. It also makes for a beautiful presentation, with the watermelon, mangoes, and avocado!
    5 from 1 vote
    Prep Time 10 minutes
    Cook Time 15 minutes
    Total Time 25 minutes
    Course Salad
    Cuisine Indian
    Servings 2 people

    Ingredients


    • 2 cup spring salad this is mix of several greens
    • 1/3 cup quinoa cooked quinoa is cooked just like rice
    • 1 cup watermelon cut into byte size cubes
    • 1 cup mango cut into byte size cubes
    • 1/2 cup cucumber cut into byte size cubes
    • 1/2 avocado cut in small pieces

    For Dressing

    • 1 Tbsp vinegar I am using rice vinegar
    • 1 Tbsp lemon juice
    • 1 Tbsp olive oil
    • 1 tsp sugar
    • 1/2 tsp salt
    • 1/4 tsp black pepper
    • 1 tsp ginger juice*

    Instructions
     

    • For dressing: add all the dressing ingredients together mix it well making sure sugar is dissolved. Set aside. * To make ginger juice shred the ginger using fine shredder or zester and squeeze the juice with fingers.
    • Cook the quinoa like rice 1-part quinoa to 2 parts of water. After quinoa and water comes to boil reduce heat to medium-low, cover, and simmer until all the water has been absorbed, this will take about 12 minutes. Set aside to cool.
    • In a salad bowl layered all the ingredients, spread the greens, watermelon, mango n cucumber, avocado sprinkle the quinoa and drizzle the salad dressing. 

    Notes

    Suggestions:  use your choice of fruits, salad measurements are just for suggestion,
    Quinoa, can be prepared in advance, I make quinoa always extra and I use the quinoa with almost every salad I make.
    Salad dressing also can be prepare in advance, this is very light dressing. I make this dressing in large quantity, I always have ready to use.
    Tried this recipe?Let us know how it was!

  • Mango Salsa (Fresh Mango Salad)

    Mango Salsa (Fresh Mango Salad)

    Fresh Mango Salsa

    Mango Salsa (Fresh Mango Salad)

    Who doesn't enjoy chips & salsa? This simple and colorful mango salsa is super easy to make! It’s sweet, spicy and absolutely delicious. Serve this fresh mango salsa with chips or with a plate of tacos. You can even serve this as a fresh salad which will compliment a variety of meals be it lunch breakfast or dinner !  
    4.50 from 2 votes
    Prep Time 15 minutes
    Total Time 15 minutes
    Course Side Dish
    Cuisine Fusion
    Servings 4

    Ingredients
      

    • 1 ripe mango peeled and cut into small cubes
    • 1/4 cup red bell pepper cut into small cubes
    • 1/2 cup cucumber peeled and cut into small pieces
    • 1 Tbsp jalapeno seeded and minced
    • 1/4 cup fresh cilantro finely chopped
    • 1 Tbsp lime juice
    • 1/4 tsp cumin seed powder
    • 1/4 tsp salt adjust to taste

    Instructions
     

    • In a serving bowl, combine mango, bell pepper, cucumber, cilantro and jalapeño. Drizzle with salt, cumin powder and lime juice, mix well. For best flavor, let the salsa rest for about 10 minutes.

    Notes

    Notes: Mango salsa also can be served as salad and will compliment any meal. I enjoy Mango Salsa with Puries, and side of Mexican Rice.
    Tried this recipe?Let us know how it was!

  • Roasted Caramelized Makhana

    Roasted Caramelized Makhana

    Roasted Caramelized Makhana

    Roasted Caramelize Makhana Snack

    Caramelized Makhana is the perfect snack for all ages, especially kids. My grandchildren absolutely love this recipe and my youngest even calls it kettle corn. This is not just quick and easy to make, but it is a healthy snack because it is high in protein and has many nutritional values. This recipe is the perfect tea time munchie and will be a hit with everyone who enjoys a sweet and crunchy snack.
    No ratings yet
    Prep Time 5 minutes
    Cook Time 15 minutes
    Total Time 20 minutes
    Course Appetizer
    Cuisine Indian
    Servings 4 people

    Ingredients


    • 4 cup makhana fox nuts, lotus seeds
    • 3 Tbsp oil
    • 1 tsp salt
    • 6 Tbsp sugar
    • 2 Tbsp almonds sliced

    Instructions
     

    • Use a larger frying pan then you think you need, because it makes it easy to roast otherwise when you are roasting makhana will be dropping all over. Use heavy frying pan.
    • In a frying pan take the makhana and drizzle with the oil, (save 2 teaspoons of oil and set this oil aside we will use later) and sprinkle the salt. Using your fingers mix it well until makhanas are coated well with oil and salt.
    • Open the heat to medium low keep stirring till they are very light gold this should take about 6-8 minutes, try one makhana to make sure they are crispy. As they cool of, they will become crunchier.
    • Remove them from frying pan, you will notice most of the salt will remain in the frying pan, wipe the frying pan, we will use it again.
    • Use the same pan, heat over low medium heat. Put the oil we have saved in the frying pan, and sprinkle all the sugar, wait till you see sugar has start melting, now stir the sugar and keep stirring till the sugar has melted turn off the heat quick otherwise sugar will burn.
    • Add almonds and roasted makhana, keep stirring till all the makhanas are coated with caramelize sugar and almonds. Spread it over non-stick surface and with spatula keep separating or separate with your fingers. Carnalized Makhanas are ready.

    Notes

    Notes: keep them air tight container they will stay good for month or more.
    I make them for holiday season, because they also make good homemade gift.
    Keyword High In Protien, Kid Friendly, Kurmura Makhana
    Tried this recipe?Let us know how it was!

    Roasted Caramelized Makhana Recipe

    Roasted Caramelized Makhana is a delectable snack perfect for winter recipes and festive occasions like Krishna Janmashtami and Navaratri, offering a gluten-free, high-protein option that satisfies both vegan and non-vegan appetizers cravings. Roasted Caramelized Makhana is a delightful treat that combines the earthy crunch of makhana (fox nuts) with the sweet allure of caramel. This Caramel Makhana Recipe transforms simple ingredients into a gourmet snack that’s perfect for any occasion.

    Step 1: Preparing the Makhana

    To begin this Caramel Roasted Makhana Recipe, start by heating a pan over medium heat. Add a tablespoon of ghee, allowing it to melt and warm up. Then, add the makhana to the pan, ensuring they are in a single layer. Roast them gently, stirring occasionally to ensure even cooking. This step helps to enhance the nutty flavor of the makhana and prepare them for the caramel coating.

    Step 2: Making the Caramel

    Now, let’s move on to the star of this Caramel Roasted Makhana Recipe: the caramel. In a separate pan, melt butter over low heat. Once the butter has melted, add in sugar and stir continuously until the sugar dissolves completely. Keep a close eye on the mixture to prevent it from burning. As the sugar melts, it will gradually turn into a golden brown caramel, infusing the butter with its rich flavor.

    Step 3: Coating the Makhana

    Once the caramel reaches a beautiful golden hue, carefully pour it over the roasted makhana. Use a spatula to gently toss the makhana, ensuring that each piece is coated evenly with the caramel. Work quickly but cautiously, as the caramel will begin to harden upon contact with the makhana.

    Step 4: Allowing to Cool

    After coating the makhana with caramel, spread them out on a parchment-lined baking sheet to cool. Allow them to sit undisturbed for at least 10-15 minutes, giving the caramel ample time to set. Once cooled, the makhana will form a delectable caramelized crust, adding an irresistible sweetness to every bite.

    Step 5: Serving and Enjoying 

    Your Caramel Roasted Makhana is now ready to be enjoyed! Serve them as a standalone snack or incorporate them into your favorite dishes for a touch of sweetness and crunch. These caramelized makhana make for a perfect accompaniment to tea or coffee, or simply enjoy them as a guilt-free indulgence anytime you crave a delicious treat.

    Tips for Perfect Caramelized Makhana:

    • Ensure that the makhana are roasted until they are crisp but not browned before adding the caramel. This helps to prevent them from becoming too crunchy or overcooked.
    • Work quickly when coating the makhana with caramel, as it can harden rapidly upon contact with the cooler makhana. Use a spatula to toss them gently and evenly coat each piece.
    • Allow the caramelized makhana to cool completely before serving to ensure that the caramel has fully set and formed a crunchy crust.

    Variations of Caramel Makhana:

    • For a savory twist, you can add a pinch of salt or your favorite spices to the caramel mixture before coating the makhana. This adds depth of flavor and balances out the sweetness of the caramel.
    • Experiment with different coatings such as melted chocolate or flavored syrups for a unique twist on this classic recipe. Drizzle the melted chocolate over the cooled makhana and allow it to set before serving.

    Benefits of Caramel Makhana:

    Makhana, or fox nuts, are not only delicious but also offer a range of health benefits. They are low in calories and fat, making them an ideal snack for those looking to maintain a healthy diet. Makhana are also rich in protein, fiber, and antioxidants, which can help support overall health and well-being. Additionally, they are gluten-free and hypoallergenic, making them suitable for individuals with dietary restrictions or food sensitivities.

    FAQs:

    Q: Can I store caramelized makhana for later use?

    A: Yes, you can store caramelized makhana in an airtight container at room temperature for up to a week. Just make sure they are completely cooled and the caramel has set before storing them.

    Q: Can I use other nuts instead of makhana for this recipe?

    A: Absolutely! While this recipe specifically calls for makhana, you can easily substitute other nuts such as almonds, cashews, or peanuts for a different flavor and texture.

    Q: Can I reheat caramelized makhana if they become soft?

    A: Yes, if the caramelized makhana become soft or lose their crunchiness, you can reheat them in a low oven (around 250°F) for a few minutes until they become crisp again. Be sure to keep an eye on them to prevent burning.

    Other Recipes on Manjula’s Kitchen

    If you’re looking to explore more Indian recipes, appetizers, beverages, and desserts, be sure to check out the following links on Manjula’s Kitchen. Here are some links to recipes on Manjula’s Kitchen official website:

    Paneer Tikka Masala Recipe

    Chana Chaat (Spicy Chickpea Salad) Recipe

    Pav Bhaji (Spicy Vegetable Hash with Buns) Recipe

    Raj Kachori (Crunchy Chaat) Recipe

    Vegetable Biryani Recipe

    These recipes should offer you a flavorful experience straight from Manjula’s Kitchen.

  • Aam Ki Launji, Sweet And Sour Mango Chutney

    Aam Ki Launji, Sweet And Sour Mango Chutney

    Aam Ki Launji

    Aam Ki Launji, Sweet and Sour Mango Chutney

    Aam Ki Launji is packed full of flavors, creating a wonderful combination of sweet, spicy, and sour. This can be used as a side dish or as a condiment. My favorite way to serve Aam Ki Launji is with stuffed parathas. This is a quick and easy recipe that adds a lot to your palette!
    5 from 1 vote
    Prep Time 10 minutes
    Cook Time 15 minutes
    Total Time 25 minutes
    Course Side Dish
    Cuisine Indian
    Servings 6 people

    Ingredients


    • 2-1/2 cup raw cooking mango cut into byte size pieces, I used 1 mango
    • 2 Tbsp oil
    • 3 dry red chilies cut into pieces
    • 1/8 tsp asafetida hing
    • 1/4 tsp nigella seeds kalonji
    • 1/4 tsp fenugreek seeds methi dana
    • 1 tsp fennel seed saunf
    • 2 tsp coriander powder dhania
    • 1/4 tsp turmeric haldi
    • 1/2 tsp red chili powder
    • 1 tsp salt
    • 3 Tbsp sugar use as needed
    • 1/4 cup water

    Instructions
     

    • Heat the oil in a heavy bottom pan, over low heat. When oil is just warm add all the ingredients except sugar, red chilies and asafetida, fennel seeds, nigella seeds, fenugreek seeds, coriander powder, red chili, turmeric, sugar and salt sauté for few seconds.
    • Add the mango cubes, mix well add about 1/4 cup of water mix it well cover the pan. And let it cook on a medium heat for 7-8 minutes, while stirring occasionally.
    • After mangoes are cooked they are soft and tender add sugar and turn off the heat and cover the pan for few minutes.
    • Once Aam Ki Launji is cooled, you can refrigerate. For up to a week.

    Notes

    Notes
    For this recipe, raw cooking mango works the best. These mangoes are now available year around in most Indian grocery stores. You may find that sometimes the mangoes have already started ripening and the color is not white when you slice inside, but it will still work. You can also use mangoes that are not ripe enough and too sour to eat for this recipe. If you think that the mango still needs some sourness, add in mango powder.
    Keyword Gluten Free, Khatti Methi Aam Subji, Taja Aam Ka Achar, Vegan
    Tried this recipe?Let us know how it was!

  • Tawa Pulao Mumbai Style (Pav Bhaji Pulao)

    Tawa Pulao Mumbai Style (Pav Bhaji Pulao)

    Tawa Pulao Mumbai Style

    Tawa Pulao Mumbai Style, Pav Bhaji Pulao

    Tawa Pulao is a popular street dish of Mumbai that is very similar in style to Pav Bhaji. The secret behind this flavorful Tawa Pulao is that it’s mixture of spices that creates the perfect balance of flavors. The recipe incorporates vegetables that are still crunchy and not mushy like Pav Bhaji. This is a one dish meal and also a good lunch box meal.
    5 from 5 votes
    Prep Time 10 minutes
    Cook Time 20 minutes
    Total Time 30 minutes
    Course Main Course
    Cuisine Indian
    Servings 4 people

    Ingredients


    • 3 cup plain rice cooked
    • 2 cup tomatoes chopped
    • 1 cup potatoes cubed into small pieces
    • 1 cup cauliflower floret in small pieces
    • 1/2 cup green peas I am using frozen peas
    • 1/4 cup carrots cubed into small pieces
    • 1 Tbsp ginger thinly sliced
    • 1 Tbsp green chili cut into small pieces
    • 3 Tbsp oil
    • 1 tsp cumin seeds jeera
    • 1/2 tsp red chili powder
    • 1/4 tsp turmeric haldi
    • 1-1/2 tsp salt
    • 1-1/2 Tbsp fennel seed powder saunf
    • 2 tsp garam masala
    • 1 Tbsp lemon juice
    • 1/4 cup cilantro chopped, hara dhania

    Instructions
     

    • Boil the vegetables, potatoes, cauliflower, carrot, and green peas in 2 cups of water till they are tender and not mushy. Drain the water and set aside.
    • Heat the oil in a wide flat frying pan, on medium heat, oil should be moderately hot add cumin seeds, as cumin seeds crack add tomatoes, and cook till they are very soft and tender.
    • Add all the spices except garam masala, add turmeric, red chili powder, fennel seeds, ginger, green chili, and salt mix it well.
    • Add the vegetables, mix it and let it cook for few minutes.
    • Add the cooked rice mix it well, if it looks dry add little water and mix it very gently and let it cook for few minutes, keep stirring.
    • Turn off the heat, add garam masala, cilantro, and lemon juice, and stir gently making sure rice and vegetables are coated with spices evenly. 

    Notes

    Notes: I said I am making Pav Bhaji Pulao, then where is Pav Bhaji masala, fennel seed powder and garam masala together makes a Pav Bhaji Masala.
    Most of the time I add garam masala in the end, I don’t like to add the garam masala in beginning and cook with. When you add garam masala in the end it gives batter taste and aroma. 
    I like to serve Tawa Pulao with yogurt.
    This recipe is so convenient that you can even use left over rice to make it.
    Tried this recipe?Let us know how it was!

    Mumbai Style Tawa Pulao Recipe: Mastering Art of Pav Bhaji Pulao

    Tawa Pulao, a beloved street food from Mumbai, bears a resemblance to Pav Bhaji but stands out with its unique blend of spices, offering a perfect balance of flavors. Tawa Pulao is a gluten-free, quick & easy rice-based vegan street food that is ideal as a lunch box option.

    1. Vegetable Preparation: Boiling and Draining for Perfect Tawa Pulao

    To embark on your journey of how to make pav bhaji pulao, start by boiling a medley of vegetables – potatoes, cauliflower, carrot, and green peas – in 2 cups of water until they reach a tender yet firm consistency, ensuring they don’t become mushy. Once cooked to perfection, drain the water and set the vegetables aside, ready to infuse their flavors into the tantalizing tawa pulao.

    2. Flavorful Sauté: Tawa Pulao Recipe Mumbai Style

    In a wide flat frying pan, heat oil over medium heat until moderately hot. Infuse the essence of Mumbai into your tawa pulao by adding cumin seeds to the sizzling oil. As the cumin seeds crackle, introduce tomatoes and cook until they reach a soft and tender state, releasing their rich flavors into the mix.

    3. Spiced Symphony: Seasoning Your Tava Pulao with Mumbai’s Flavors

    Elevate the aroma and taste of your tawa pulao by adding an array of spices. Sprinkle turmeric, red chili powder, and fennel seeds into the pan, along with ginger, green chilli, and salt. Stirring well, ensure the spices coat the ingredients evenly, infusing the pulao with Mumbai’s signature spice profile.

    4. Vegetable Fusion: Introducing the Cooked Vegetables into Tava Pulao

    Once the spices have melded into a fragrant blend, introduce the boiled vegetables into the pan. Mix them gently with the spice-infused base and allow them to cook together for a few minutes, allowing the flavors to intermingle and elevate the essence of Mumbai-style tawa pulao.

    5. Rice Integration: Blending Cooked Rice for the Perfect Tawa Pulav Texture

    Add the cooked rice to the pan, gently folding it into the vegetable-spice mixture. If the pulao appears dry, add a splash of water to achieve the desired consistency. Allow the rice and vegetables to cook together for a few minutes, stirring continuously to ensure even distribution of flavors.

    6. Final Touch: Infusing Mumbai’s Essence with Garam Masala and Fresh Herbs

    As the aroma of your tawa pulao fills the air, turn off the heat and add a dash of garam masala, freshly chopped cilantro, and a squeeze of lemon juice. Gently stir the pulao, ensuring every grain of rice and every vegetable is coated with the aromatic blend of spices. This final touch infuses your pav bhaji pulao with Mumbai’s essence, ready to tantalize your taste buds.

    Unlock the flavors of Mumbai with this authentic tawa pulao recipe, perfect for any occasion. Whether you call it tava pulao, tawa pulav, or tawa pulao, this Mumbai-style delicacy is sure to become a favorite in your culinary repertoire. Enjoy the convenience of this versatile recipe, perfect for using leftover rice and satisfying your craving for Mumbai’s street food delights. 

    If you loved this tawa pulao recipe mumbai style then you must also check out other variants of Rice: Vegetable Biryani, Masala Khichdi, Chhole Biryani, Quinoa Vegetable Pilaf and Lemon Rice

  • Baked Vegetable Idli

    Baked Vegetable Idli

    Baked Vegetable Idli Recipe by Manjula

    Baked Vegetable Idli

    Baked vegetable Idli makes for a healthy and delicious appetizer or side dish. They are very eye-catching and great to present at a gathering for guests to pop into their mouth. They are the perfect addition to any menu because they are so easy to make. Idlies have a unique texture because they are soft but also slightly crisp on the bottom. Baked vegetable idli are best served with coconut chutney if served as an appetizer or with sambar if served with the main meal.
    4.84 from 12 votes
    Prep Time 10 minutes
    Cook Time 20 minutes
    Fermenting Time 30 minutes
    Total Time 30 minutes
    Course Side Dish
    Cuisine Indian
    Servings 6 people

    Ingredients


    • 1 cup coarse sooji semolina
    • 1/2 cup yogurt dahi, curd
    • 1/2 cup bell pepper finely chopped, capsicum, I am using green and yellow for color
    • 1 green chili finely chopped
    • 1 piece ginger finely grated
    • 2 Tbsp cilantro chopped, hara dhania
    • 1 cup water as needed
    • 1 tsp ENO fruit salt
    • 1 tsp salt

    For Seasoning

    • 1 Tbsp oil
    • 1/4 tsp cumin seeds jeera
    • 1/4 tsp mustard seeds rai

    Instructions
     

    • Preheat the oven at 350 degrees (F).
    • Seasoning: heat the oil moderately in a saucepan. Add mustard and cumin seeds, as the seeds crack turn off the heat and set aside.
    • I am using mini cupcake tray, will make 24 idli, oil it and set aside.
    • Mix sooji, salt, yogurt, and water (as needed) to make a pancake-like batter. Set aside for at least 30 minutes.
    • Add the vegetables bell pepper, carrots, ginger, green chili, and cilantro. Add the seasoning and mix. The batter thickens as the semolina absorbs the water. At this point, add a little more water if it is too thick.
    • Add Eno Fruit Salt to the batter and mix well. The mixture will begin foaming. Immediately begin pouring into the cupcake tray. Place the tray in oven.
    • Bake the idlies for five minutes, then lay over the aluminum foil. Bake it again for 15 minutes. Idlies should be lightly brown from the sides.
    • Cool for few minutes before removing each individual idli. They should come out easily and not stick to the tray. The idlis should be spongy, and light golden color from the sides and bottom.

    Notes

    Notes: 
    First, I baked the idlies without covering, then after 5 minutes I covered the Idlies, if you don’t cover Idlies, they will be dry and will lose the softness and texture.
    you can prepare Idlies 2-3 days in advance, after they cool of refrigerate them in air tight container.
    Before serving heat the Idlies in microwave for about two minutes. Idlies will be soft. Baked vegetable idli are best served with coconut chutney if served as an appetizer or with sambar if served with the main meal.
    Keyword Kid Friendly, Rava Idli, Snack, South Indian Cuisine
    Tried this recipe?Let us know how it was!

    Baked Vegetable Idli Recipe: A Healthy Twist to Classic South Indian Cuisine

    Baked Vegetable Idli is a versatile dish that perfectly fits various occasions and preferences. It serves as an ideal choice for appetizers, breakfast recipes, and even as a lunch box suggestion. During festive seasons like Diwali and Navaratri, it can be a delightful addition to the menu. Its kid-friendly nature makes it a hit among children, while its ease of preparation qualifies it as a quick and easy snack option. Additionally, its nutritious blend of vegetables adds a healthy touch, making it suitable for party recipes as well.

    Introduction to Baked Vegetable Idli Recipe

    If you’re looking to add a nutritious twist to your traditional South Indian breakfast, look no further than this delightful baked vegetable idli recipe. Vegetable idli is a beloved dish in Indian cuisine, cherished for its soft texture and aromatic flavors. In this rendition, we’ll explore how to make vegetable idli even healthier by baking it instead of the traditional steaming method. Packed with the goodness of assorted vegetables and aromatic spices, these baked vegetable idlis are not only delicious but also a wholesome treat for the entire family.

    Step-by-Step Guide on How to Make Vegetable Idli

    Preparing the Batter for Baked Vegetable Idli

    To start making baked vegetable idli, begin by soaking idli rice and split urad dal separately for about 4-6 hours. Once soaked, drain the water and grind them separately to a smooth consistency. Mix both the batters together in a large bowl and add some salt. Allow the batter to ferment overnight, ensuring it doubles in volume. Fermentation is crucial for the characteristic fluffy texture of idlis.

    Incorporating Assorted Vegetables for Added Nutrition

    While the batter ferments, prepare your choice of vegetables. Carrots, peas, bell peppers, and corn work wonderfully in this recipe. Finely chop or grate the vegetables and sauté them lightly with some mustard seeds, curry leaves, and green chilies for a burst of flavor. Once the vegetables are tender, mix them into the fermented idli batter.

    Baking the Vegetable Idlis to Perfection

    Preheat your oven to 350°F (175°C) and grease an idli tray with some oil. Pour the vegetable-laden batter into the idli molds, filling them about three-fourths of the way. Place the tray in the preheated oven and bake for 20-25 minutes or until the idlis are cooked through and have a golden hue on top. Once done, remove the tray from the oven and allow the idlis to cool slightly before unmolding them.

    Serve and Enjoy the Baked Vegetable Idlis

    Once cooled, gently remove the baked vegetable idlis from the molds and serve them warm with a side of coconut chutney or sambar for an authentic South Indian experience. These idlis make for a nutritious breakfast option or a wholesome snack any time of the day. Their vibrant colors and enticing aroma are sure to make them a hit with your family and friends.

    Tips for Making Perfect Baked Vegetable Idlis

    • Ensure the batter is well-fermented for soft and fluffy idlis.
    • Don’t overmix the batter after adding vegetables to retain their crunchiness.
    • Adjust the baking time according to your oven as the temperature may vary.

    Variations of Baked Vegetable Idli Recipe

    • Cheese-Stuffed Baked Vegetable Idlis: Add a surprise element by stuffing the idlis with cheese before baking for a gooey, indulgent twist.
    • Spinach and Fenugreek Baked Idlis: Boost the nutritional value by adding finely chopped spinach and fenugreek leaves to the batter for an extra dose of vitamins and minerals.
    • Masala Baked Idlis: Infuse the idlis with the flavors of garam masala, cumin, and coriander for a spicier variation.

    Benefits of Including Baked Vegetable Idlis in Your Diet

    • Nutrient-Rich: Packed with vitamins, minerals, and fiber from assorted vegetables, baked vegetable idlis make for a wholesome and balanced meal.
    • Low in Calories: Baking eliminates the need for excess oil, making these idlis a healthier alternative to their fried counterparts.
    • Suitable for All Ages: From toddlers to seniors, everyone can enjoy these soft and easily digestible idlis as part of a well-rounded diet.

    Frequently Asked Questions (FAQs) About Baked Vegetable Idlis

    Q: Can I use any other vegetables apart from the ones mentioned in the recipe?

    A: Absolutely! Feel free to experiment with your favorite vegetables or whatever you have on hand. Just ensure they are finely chopped or grated for even distribution.

    Q: Can I make the batter in advance and store it for later use?

    A: Yes, you can prepare the batter in advance and store it in the refrigerator for up to 2-3 days. Remember to bring it to room temperature before baking the idlis.

    Q: Can I freeze the baked vegetable idlis?

    A: While it’s best to consume them fresh, you can freeze the baked idlis in an airtight container for up to a month. Reheat them in the microwave or oven before serving.

    Explore More Recipes from Manjula’s Kitchen

    • Appetizers: Try out the flavorful Spinach Cheese Balls for a delectable appetizer that’s sure to impress your guests.
    • Beverages: Quench your thirst with the refreshing Mango Lassi, a classic Indian yogurt-based drink bursting with tropical flavors.
    • Desserts: Indulge your sweet tooth with the decadent Gulab Jamun, soft and spongy milk dumplings soaked in a fragrant sugar syrup.

    With this comprehensive guide, you’re all set to whip up a batch of wholesome baked vegetable idlis that are as nutritious as they are delicious. Whether enjoyed for breakfast, as a snack, or even as part of a meal, these idlis are sure to become a favorite in your culinary repertoire.

    If you enjoyed making these masala peanuts, why not try your hand at some other mouthwatering recipes from Manjula’s Kitchen? Vegetable Pakoras, Paneer Tikka, Aloo Gobi (Potato Cauliflower), Samosa, Mango Lassi

    Explore these recipes and more for a culinary journey through the vibrant and diverse flavors of Indian cuisine.

  • Gobi Pakoras (Crispy Cauliflower Fritters)

    Gobi Pakoras (Crispy Cauliflower Fritters)

    Gobi Pakora

    Gobi Pakoras (Crispy Cauliflower Fritters)

    Gobi Pakoras or Crispy Cauliflower fritters are a mouthwatering appetizer. Crispy on the outside and soft on the inside, these pakoras are addicting! These work as a tasty pairing with your afternoon tea or a spicy delicious snack before any meal.
    5 from 2 votes
    Prep Time 10 minutes
    Cook Time 20 minutes
    Total Time 30 minutes
    Course Appetizer
    Cuisine Indian
    Servings 4 people

    Ingredients
      

    • 3 cup cauliflower florets cut into about 1 inch florets
    • 1/3 cup besan gram flour
    • 3 Tbsp corn starch arrow root
    • 2 tsp coriander powder dhania
    • 1/2 tsp cumin seeds jeera
    • 1/4 tsp red chili powder
    • 1/8 tsp baking soda
    • 1/2 tsp salt
    • 1 tsp ginger paste
    • 1 green chili finely chopped
    • 2 Tbsp cilantro finely chopped, hara dhania

    Instructions
     

    • Boil the cauliflowers, add just enough water to cover the cauliflowers. After water comes to boil, cook for about 5 minutes over medium heat. Turn off the heat and drain the water. Let cauliflowers come to room temperature. Cauliflower should be just little tender, not soft.
    • In a bowl mix all the ingredients together, besan, corn starch, coriander powder, cumin seeds, red chili powder, salt, baking soda, ginger, green chili and cilantro. Mix it well.
    • Sprinkle the dry mix over cauliflower, gently mix it coating all the cauliflower with spices, add water little at a time as needed, I used about ¼ cup of water.
    • Heat the oil in a frying pan on medium high heat. The frying pan should have about 1 inch of oil. To check if the oil is ready, put little batter in the oil. The batter should raise to the top but not change color right away.
    • Drop the cauliflower slowly in the oil making sure don’t overlap them.
    • Fry the cauliflowers until they turn golden brown, turning them occasionally. This should take about 6-8 minutes.
    • When they are golden brown, take them out with a slotted spoon. Place them on a paper towel to absorb the extra oil.  

    Notes

    Note: We are not making a batter, use just enough water to coat the cauliflower florets evenly with spice mix.
    If you fry them on high heat Pakoras will not be crispy and if they are fried on very low heat Pakoras will be greasy.
    They especially taste delicious when they are served with Tamarind Chutney and hot cup of tea. They are also easy and quick to make. Surprise your guests and treat them with these mouthwatering crispy gobi pakoras.
    You will also like to see the recipe for Paneer Pakora and Chai.
    Enjoy!
    Keyword Appetizer, Party Food, Tea Time Snack
    Tried this recipe?Let us know how it was!

    Gobi Pakora Recipe: A Crispy Delight

    Introduction to Gobi Pakora:

    Gobi Pakora, also known as cauliflower pakoda, is a delectable Indian snack that boasts a perfect blend of crispiness and flavor. These crunchy fritters are made by coating cauliflower florets in a spiced chickpea flour batter and then deep-frying them to golden perfection. Whether you’re hosting a party or simply craving a savory snack, gobi pakoras are sure to satisfy your taste buds. Let’s delve into the delightful world of gobi pakora and learn how to make this irresistible snack.

    How to Make Gobi Pakora: A Step-by-Step Guide

    Preparing the Cauliflower:

    Before diving into the preparation process, it’s essential to start with fresh cauliflower. Rinse the cauliflower thoroughly under running water to remove any dirt or impurities. Next, cut the cauliflower into bite-sized florets, ensuring they are uniform in size. This step is crucial as it ensures even cooking and allows the pakora batter to coat each floret evenly.

    Making the Pakora Batter:

    The key to achieving crispy and flavorful gobi pakoras lies in the preparation of the batter. In a mixing bowl, combine chickpea flour (besan), rice flour, and a selection of aromatic spices such as turmeric, cumin, coriander, and garam masala. Whisk the dry ingredients together until well combined. Gradually add water to the mixture, whisking continuously to form a smooth and thick batter. The consistency of the batter should coat the back of a spoon without dripping off.

    Coating the Cauliflower:

    Once the batter is ready, gently toss the cauliflower florets into the bowl, ensuring each piece is evenly coated with the spicy chickpea flour mixture. For an extra kick of flavor, you can also add finely chopped cilantro or mint leaves to the batter. Allow the cauliflower to marinate in the batter for a few minutes to absorb the flavors fully.

    Frying the Pakoras:

    In a deep frying pan or kadai, heat oil over medium-high heat. To check if the oil is hot enough for frying, drop a small amount of batter into the oil – if it sizzles and rises to the surface immediately, the oil is ready. Carefully place the coated cauliflower florets into the hot oil, ensuring not to overcrowd the pan. Fry the pakoras in batches, if necessary, to maintain the oil temperature and ensure even cooking.

    Cooking Until Golden Brown:

    Allow the gobi pakoras to fry undisturbed for a few minutes, allowing them to develop a golden brown crust. Use a slotted spoon to flip the pakoras occasionally, ensuring they cook evenly on all sides. Once the pakoras are crisp and golden brown, carefully remove them from the oil and transfer them to a plate lined with paper towels to drain off any excess oil.

    Serving Gobi Pakoras:

    Gobi pakoras are best enjoyed hot and crispy, straight out of the fryer. Serve them alongside your favorite chutneys or sauces, such as mint chutney, tamarind chutney, or spicy tomato ketchup, for dipping. These addictive cauliflower fritters make for a perfect appetizer or tea-time snack, guaranteed to please both kids and adults alike.

    Tips for Perfect Gobi Pakoras:

    • Ensure the cauliflower florets are dried thoroughly before coating them in the batter to prevent the pakoras from becoming soggy.
    • Adjust the spices in the batter according to your taste preferences. You can increase or decrease the amount of chili powder for a milder or spicier flavor.
    • For a gluten-free version, substitute rice flour with cornstarch or any gluten-free flour of your choice.
    • Add a tablespoon of hot oil to the batter for extra crispiness.
    • Serve the pakoras immediately to retain their crunchiness.

    Variations of Gobi Pakora:

    • Cheese-Stuffed Gobi Pakora: Add a cube of cheese to the center of each cauliflower floret before coating them in the batter for a gooey and indulgent twist.
    • Masala Gobi Pakora: Sprinkle chaat masala or amchur (dried mango powder) over the fried pakoras for a tangy flavor boost.
    • Palak Gobi Pakora: Incorporate finely chopped spinach leaves into the batter for a nutritious spin on traditional gobi pakoras.

    Benefits of Gobi Pakoras:

    • Cauliflower is a nutrient-rich vegetable that is high in fiber, vitamins, and antioxidants.
    • Chickpea flour (besan) used in the batter is a good source of protein and gluten-free, making gobi pakoras suitable for individuals with gluten sensitivities.
    • Gobi pakoras are a satisfying and wholesome snack option that can be enjoyed as part of a balanced diet when consumed in moderation.

    Frequently Asked Questions (FAQs) About Gobi Pakoras:

    Q: Can I make gobi pakoras ahead of time?

    A: While gobi pakoras are best enjoyed fresh and crispy, you can prepare the batter and coat the cauliflower in advance and fry them just before serving to ensure maximum crunchiness.

    Q: Can I bake gobi pakoras instead of frying them?

    A: While traditional gobi pakoras are deep-fried for a crispy texture, you can certainly try baking them in the oven for a healthier alternative. However, the texture may differ slightly, and they may not be as crunchy as the fried version.

    Q: How long do gobi pakoras stay fresh?

    A: Gobi pakoras are best consumed immediately for optimal taste and texture. If you have leftovers, store them in an airtight container in the refrigerator for up to 2-3 days and reheat them in the oven or air fryer before serving.

    For more appetizer recipes, you can explore Manjula’s Kitchen website. Here are some recommendations: Paneer Tikka, Vegetable Samosa, Spinach Pakora, Dahi Vada, Aloo Tikki. Whether you’re a fan of spicy appetizers, refreshing beverages, or indulgent desserts, Manjula’s Kitchen offers a wide range of authentic Indian recipes to suit every palate.

  • Cucumber (Kheera) Raita

    Cucumber (Kheera) Raita

    Cucumber Raita

    Cucumber (kheera) Raita

    Cucumber Raita is a delightful refreshing side dish and compliment to any meal. Raita is made so many ways, but the main ingredient is always the yogurt. Cucumber raita is one of my favorites especially during the summer. This is a quick and easy recipe. I also like to serve cucumber raita as a spread or dipping sauce. 
    5 from 2 votes
    Prep Time 5 minutes
    Cook Time 5 minutes
    Total Time 10 minutes
    Course Side Dish
    Cuisine Indian
    Servings 4 people

    Ingredients


    • 1 cup yogurt curd, dahi
    • 1 cup cucumber shredded
    • 1/2 tsp salt
    • 1/2 tsp black salt
    • 1/2 tsp cumin seeds roasted
    • 1/8 tsp black pepper
    • 1/2 tsp green chili finely chopped
    • 1 Tbsp mint leaves finely chopped
    • 1/8 tsp red chili pepper for garnishing

    Instructions
     

    • In a bowel beat the yogurt until it is smooth and creamy.
    • Peel and shred the cucumber.
    • Mix shredded cucumber, salt, black salt, cumin powder, green chili, mint leaves to yogurt and mix it well.
    • Garnish with chili powder and few mint leaves. Serve chill.

    Notes

    Notes
    Use the measurements for your guide line, especially in this recipe you can adjust all the ingredients to your taste easily.
     
    Keyword Homemade, Kheera Raita, Quick And Easy
    Tried this recipe?Let us know how it was!

    How to Make Cucumber Raita Manjula’s Kitchen

    What is Raita: Raita is an accompaniment for any Indian meal and can be created in the form of Vegetable Raita, Spinach Raita, Boondi ka Raita, Pumpkin Raita & Lauki ka Raita. Here we are focussing on making Cucumber Raita alternatively referred to as Kheera Raita, it is a simple quick & easy, gluten free, kid friendly, and nutritious yogurt-based recipe featuring cucumber (either chopped or grated) and a selection of Indian spice powders. 

    Raita Preparation: 

    In this essential step of creating cucumber raita, start by taking a bowl, a fundamental vessel in the art of crafting this versatile condiment. Vigorously beat the yogurt until it achieves a smooth and creamy consistency, as outlined in the cucumber raita recipe. This initial phase not only sets the stage for the delightful texture that characterizes well-prepared raita but also forms the cornerstone of what is raita – a harmonious blend of yogurt and flavorful ingredients.

    Cucumber Preparation for Raita: 

    Begin by peeling and shredding the cucumber, a crucial element in the cucumber raita recipe. The cucumber, when finely shredded, contributes a refreshing and hydrating quality to the raita, enhancing both its taste and texture.

    Assembling Cucumber Raita:

    Combine the shredded cucumber with a blend of essential ingredients to form the heart of the cucumber raita recipe. Add a pinch of salt, black salt, cumin powder, finely chopped green chili, and mint leaves to the beaten yogurt. Gently mix these components, ensuring a harmonious amalgamation that brings out the unique flavors of each ingredient.

    Exploring Raita’s Culinary Roots: 

    For individuals unacquainted with the culinary world of India, raita stands as a venerable traditional condiment, with its foundation resting on the velvety canvas of yogurt. This versatile accompaniment holds a distinguished place in Indian cuisine, offering a cooling and harmonious contrast to the robust flavors of spicy or highly seasoned main courses. Raita, in its various forms, serves as a multifaceted companion, enriching the dining experience by not only providing a soothing respite but also enhancing the overall gastronomic journey.

    Among the diverse array of raita variations, cucumber raita emerges as a particularly popular and refreshing choice. This delightful rendition introduces the crispness and succulence of cucumber into the creamy tapestry of yogurt, creating a harmonious fusion of textures and flavors. The cool and hydrating properties of cucumber perfectly complement the tanginess of the yogurt, offering a palate-cleansing experience that balances and enhances the overall meal.

    Cucumber raita is not only a culinary delight but also serves as a testament to the artistry inherent in Indian gastronomy. Its simplicity is deceptive, for within the seemingly uncomplicated blend of yogurt and cucumber lies a symphony of tastes and textures that elevate the dining experience. Whether enjoyed alongside aromatic biryanis, spicy curries, or as a refreshing dip for flatbreads, cucumber raita stands as a testament to the ingenious ways in which Indian cuisine balances and enhances flavors, making it a cherished and indispensable element of the culinary tapestry.

    Final Touch and Presentation: 

    As a finishing touch to your cucumber raita, garnish it with a sprinkle of chili powder and a few additional mint leaves. This not only enhances the visual appeal of the raita but also adds a subtle kick of spice and an extra burst of freshness. Serve the cucumber raita chilled to maximize its cooling effect, making it a perfect pair well with Vegetable Pulao, Veg Biryani, Chole Biryani, Paneer Pulao, or any other rice preparation. 

  • Nariyal Burfi (Coconut Fudge)

    Nariyal Burfi (Coconut Fudge)

    Nariyal Burfi

    Nariyal Burfi (Coconut Fudge)

    Nariyal Burfi is simple and delicious dessert that only requires a few ingredients! It is super easy to make, and you can serve this as sweet snack in the form of candy. I make this burfi with caramelized sugar which gives a nice twist to the burfi itself. 
    No ratings yet
    Prep Time 5 minutes
    Cook Time 20 minutes
    Total Time 25 minutes
    Course Dessert
    Cuisine Indian
    Servings 6 people

    Ingredients


    • 1-3/4 cup milk
    • 3/4 cup coconut powder
    • 1/2 cup sugar
    • 1/8 tsp cardamom powder
    • 4 tsp butter
    • 1 Tbsp pistachios sliced

    Instructions
     

    • Soak the coconut in boiling milk for about 30 minutes.
    • In a flat heavy bottom pan, over medium high heat melt one teaspoon of butter, add sugar, spread evenly in pan.
    • After sugar start melting, keep stirring the sugar continuously till sugar start melting and changing the color to light brown. Turn off the heat as soon it comes to golden brown in color. This should take 4 minutes. Note: when sugar starts melting it changes the color very quickly and it can easily burn.
    • Slowly add milk mixture sugar will become lumpy open the heat to medium and keep stirring sugar will dissolve and will give nice light brown color.
    • Keep stirring and scraping the sides about 15 minutes mixture will become lumpy add the remaining butter and keep stirring until mixture become soft dough consistency.
    • Pour it over greased plate and flatten with the greased back side of the spoon. Garnish with sliced pistachios.
    • Leave for 3-4 hours before cutting them into pieces. Cut them into your desired shape. I like to cut them in 1’ squares.

    Notes

    Notes
    Caramelizing the sugar adds a very unique taste to Burfi, something every one talk about.
    Leave for 3-4 hours before cutting them into pieces. Cut them into your desired shape. I like to cut them in 1 inch squares.
    You will also enjoy few of these recipes, they are easy, has a long shelf life and also great gift ideas, Moong Dal Ladoo, Almond Brittle, Spicy Cashews, 
    Keyword Coconut Candy, Gola Ki Burfi, Kid Friendly
    Tried this recipe?Let us know how it was!

  • Paneer Methi (Methi Malai Paneer) Recipe by Manjula

    Paneer Methi (Methi Malai Paneer) Recipe by Manjula

    Paneer Methi

    Paneer Methi (Methi Malai Paneer)

    Paneer Methi is a delicacy of Northern India. This recipe is paneer with creamy gravy flavored with dry fenugreek leaves known as Fasoori Methi. Paneer Methi is a perfect side dish for formal dinner or even a quiet dinner where you want to impress someone. Any way or time you serve this, it is delicious.
    4.60 from 20 votes
    Prep Time 10 minutes
    Cook Time 20 minutes
    Total Time 30 minutes
    Course Main Course
    Cuisine Indian
    Servings 3 people

    Ingredients
      

    • 1-1/2 cups paneer cubed in about 1/2 inch pieces used 8oz paneer
    • 1-1/2 cups tomatoes chopped
    • 1 Tbsp ginger chopped
    • 1 green chili chopped
    • 2 Tbsp oil
    • 1/2 tsp cumin seeds jeera
    • 1/8 tsp asafetida hing
    • 1/4 tsp turmeric haldi
    • 1/4 tsp red chili powder lal mirch
    • 2 Tbsp cashew powder kaju
    • 2 tsp coriander powder dhania
    • 1 tsp fennel seed powder saunf
    • 1 Tbsp dry fenugreek leaves kasoori methi
    • 1 tsp salt
    • 1-1/2 cup milk
    • 1/4 tsp garam masala

    Instructions
     

    • Rub the kasoori methi between your palms and remove the stems if there is any, set aside.
    • Blend tomatoes, ginger, green chili to fine paste. Set aside.
    • Heat one teaspoon of oil in a pan on low heat stir fry the paneer until they are light gold in color, take them out.
    • Heat the remaining oil in a sauce pan on medium heat. When the oil is moderately hot add cumin seeds. (Cumin seeds should crack right of way). Lower the heat too low, add asafetida, turmeric, chili powder, and cashew powder stir for a minute.
    • Add tomato paste, coriander, fennel seed powder, salt and kasoori methi, keep stirring till tomato start leaving the side of the pan, this should take 3-4 minutes. Add milk, and cook for 2-3 minutes. Add paneer and let it cook over low heat for 2-3 minutes. This is the time you can add water as needed if gravy is too thick. Add garam masala stir and turn off the heat.
    • Paneer Methi is ready. 

    Notes

    To make vegan, Substitute paneer with tofu and milk with coconut milk
    Serve Paneer Methi with Naan, or Lacha Paratha.
    Keyword Gluten Free, No Garlic, No Onion, Paneer In Creamy Gravy, Paneer With Fenugreek, Party Food
    Tried this recipe?Let us know how it was!

    Methi Paneer Recipe: A Palate-Pleasing Dish 

    Methi Malai Paneer Recipe is a popular party recipe in Indian cuisine. This flavorful veg gravy dish is rich in high protein and gluten-free combining the richness of paneer (Indian cottage cheese) with the distinct taste of kasuri methi (fenugreek leaves), creating a harmonious blend of textures and aromas.

    Kasuri Methi Preparation: Unlocking Aromatic Richness 

    To commence the Methi Malai Paneer recipe start with the preparation of kasuri methi. This involves a tactile step of rubbing fenugreek leaves between the palms to unlock their aromatic flavors, carefully removing any stems present. Once this initial step is completed, the kasuri methi takes center stage, ready to infuse its unique essence into the dish.

    Tomato-Based Foundation: Crafting Depth and Color 

    The methi malai paneer recipe continues by creating a robust base for the dish. Tomatoes, ginger, and green chili unite in a harmonious blend, resulting in a fine paste that serves as a fundamental component. This tomato-based paste contributes not only vibrant color but also imparts a deep, layered flavor profile to the Methi Paneer. After blending, the mixture patiently awaits its turn to seamlessly integrate into the unfolding cooking process.

    Paneer’s Golden Prelude: A Textural Symphony Begins 

    Transitioning to the cooking phase as we go further in the methi malai paneer recipe add a teaspoon of oil is heat in a pan over low flame. Paneer cubes take center stage as we gently stir-fry until achieving a light golden hue. This initial culinary dance ensures that the paneer attains a delightful texture, priming it to absorb the forthcoming flavors with grace and precision.

    Spiced Elevation: Building a Fragrant Foundation 

    Post-paneer preparation, add the remaining oil in a saucepan over medium heat. Include Cumin seeds as they start to crackle and release their earthy aroma. Lower the heat, while a symphony of asafetida, turmeric, chili powder, and cashew powder join the stage, creating a fragrant and flavorful foundation for the paneer methi.

    Tomato Tapestry: Melding Flavors with Precision 

    The tomato paste, a star player prepared earlier, enters the culinary arena as part of the methi paneer recipe. Coriander, fennel seed powder, salt, and the patiently waiting kasuri methi are added. The ensemble is stirred diligently until tomatoes gracefully release from the pan’s sides, a visual and flavorful indication of the meticulous incorporation of diverse elements. This nuanced cooking process takes approximately 3-4 minutes, allowing flavors to intertwine and harmonize.

    Creamy Symphony: Milk’s Contribution to Indulgence

    To further elevate the dish, milk makes its entrance, contributing a creamy texture that enhances the overall indulgence of paneer methi. The mixture is allowed to simmer, a gentle dance of flavors taking place over 2-3 minutes. The paneer absorbs the creamy richness of the sauce, with the flexibility to adjust the consistency by adding water if the gravy proves too thick.

    Paneer’s Reunion: Absorbing Creamy Richness 

    The previously stir-fried paneer cubes re-enter the pan, allowing them to luxuriate in the creamy tomato and spice-infused gravy. Over low heat, this reunion lasts for an additional 2-3 minutes, ensuring the paneer absorbs the full spectrum of flavors, resulting in a well-balanced and delectable paneer methi.

    Garam Masala Finale: Aromatic Culmination 

    As a grand finale, garam masala is introduced to the dish, enhancing the overall aromatic profile and weaving together the diverse flavors into a harmonious conclusion. A final stir marks the end of the culinary symphony, and the heat is turned off, signaling the completion of the Methi Paneer recipe. The result is a tantalizing masterpiece that marries the succulence of paneer with the unique bitterness of fenugreek leaves, promising to delight the fortunate taste buds that savor this culinary creation of paneer methi.

    If you liked this recipe, try our other recipes such as Shahi Paneer, Paneer Sandwich, Masala Bell Pepper, Masala Paneer & Mattar Paneer


  • Lal Mirch Ka Achar (Red Chili Pickle)

    Lal Mirch Ka Achar (Red Chili Pickle)

    Red Chili Pickle

    Lal Mirch Ka Achar, Red Chili Pickle

    Red Chili Pickle is a delightful way to spice up any meal. Indian meals are generally served with a variety of condiments, of which pickles are the most common. This one is a rather hot and spicy pickle, not for the timid palette by any means. It tastes great with lunch or main course.
    4.34 from 6 votes
    Prep Time 10 minutes
    Cook Time 10 minutes
    Total Time 20 minutes
    Course Side Dish
    Cuisine Indian
    Servings 20 people

    Ingredients


    • 10 whole red chili jalapeno or cayenne
    • 3 Tbsp coriander dhania
    • 1-1/2 Tbsp fennel seeds saunf
    • 1 tsp fenugreek seed dana methi
    • 1 tsp yellow mustard seeds peele sarso
    • 1 tsp nigella seeds kalongi
    • 1/8 tsp asafetida hing
    • 1 tsp mango powder amchoor
    • 1/2 tsp turmeric haldi
    • 1 Tbsp salt
    • 3 Tbsp oil, I prefer mustard oil can use olive oil

    Instructions
     

    • Wash and dry the chilies and cut the chilies in 1/8-inch pieces.
    • Combine coriander, fennel, fenugreek seeds, mustard seeds, and nigella seeds roast them over low heat for 1-2 minutes till spices becomes aromatic. Grind coarsely.
    • Heat the oil on medium heat, after oil is very turn off the heat and let it come to the room temperature. Set aside.
    • Mix the roasted spices, salt, mango powder, and turmeric to the red chilies, and mix it well. Pour oil over the mixture and mix well.
    • Keep the pickle in a glass jar. Let the jar sit two days at room temperature or few hours in direct sunlight. Pickle is ready to serve. 

    Notes

    Chili Pickle will be good for a week at room temperature or keep in the refrigerator up to one month.
    Suggestion For a milder pickle, remove the pepper seeds, or sometimes chilies are not hot then add some red chili powder.
    Keyword Condiment, Hot And Spicy, Lal Mirch Ka Achar, Pickle, Red Jalapeno
    Tried this recipe?Let us know how it was!