Category: Vegan Recipes

10 Easy Vegan Recipes | Vegan Indian Foods by Manjula’s Kitchen

Embracing a vegan lifestyle doesn’t mean you have to give up on the rich and flavorful experience of Indian cuisine. Here at Manjula’s Kitchen, we bring you a collection of vegan Indian food that is both delicious and easy to prepare. Let’s dive into 10 easy vegan recipes that will make your meals exciting and nutritious. These vegan Indian recipes are perfect for anyone looking to incorporate more plant-based meals into their diet.

1. Vegan Aloo Gobi

Aloo Gobi is a classic Indian dish made with potatoes and cauliflower. This flavorful and hearty dish is a staple in many Indian households and is a great example of vegan Indian food that is both satisfying and healthy. The combination of tender potatoes and cauliflower florets cooked with aromatic spices like cumin, turmeric, and garam masala makes this dish irresistible. Aloo Gobi is not only delicious but also easy indian recipes to prepare, making it a perfect choice for busy weeknights. Serve it with roti or rice for a complete meal.

2. Chana Masala

Chana Masala is a spicy and tangy chickpea curry that is a favorite among many. It’s one of the 10 easy vegan recipes that you can prepare quickly, and it’s packed with protein and flavor, making it a perfect vegan food recipe. Chickpeas are simmered in a rich tomato sauce flavored with an array of spices like coriander, cumin, and chili powder. This dish is hearty and comforting, ideal for lunch or dinner. Pair it with steamed basmati rice or warm naan for a satisfying meal.

3. Vegan Palak Tofu

Palak Tofu is a delicious twist on the traditional Palak Paneer. Instead of paneer, tofu is used to keep this dish vegan. The creamy spinach sauce pairs perfectly with the tofu, creating a nutritious and tasty vegan Indian recipe. Spinach is blended into a smooth puree and cooked with spices, then combined with tofu cubes to create a delightful dish. This vegan version retains all the flavors of the original and is a fantastic way to enjoy spinach and tofu in a new and exciting way. Serve it with jeera rice or chapati.

4. Baingan Bharta

Baingan Bharta is a smoky and flavorful eggplant dish that is popular in north indian recipes. This dish is made by roasting eggplants and cooking them with tomatoes, and spices, making it a delightful addition to your collection of vegan food recipes. The roasting process gives the eggplant a unique smoky flavor, which is then enhanced by the addition of spices like cumin, coriander, and garam masala. Baingan Bharta is perfect as a side dish or a main course when served with roti or rice.

5. Vegan Vegetable Biryani

Vegetable Biryani is a fragrant and flavorful rice dish cooked with a variety of vegetables and spices. This vegan version is just as delicious as the traditional one, making it a must-try among vegan Indian recipes. The rice is layered with a mixture of vegetables like carrots, peas, and bell peppers, along with aromatic spices such as cardamom, cinnamon, and cloves. Biryani is a complete meal in itself and can be enjoyed with a side of raita or salad.

6. Tofu Tikka Masala

Tofu Tikka Masala is a vegan take on the classic Chicken Tikka Masala. Tofu is marinated in spices and yogurt, then cooked in a rich and creamy tomato sauce. This dish is perfect for those looking for vegan food recipes that are both hearty and flavorful. The tofu absorbs the flavors of the marinade and the sauce, resulting in a dish that is rich and satisfying. Serve it with basmati rice or naan to soak up the delicious sauce.

7. Vegan Rajma

Rajma is a kidney bean curry that is a staple in North Indian cuisine. This vegan version is just as delicious and comforting, making it a great choice for anyone seeking vegan Indian food that is both nutritious and satisfying. Kidney beans are cooked in a spiced tomato gravy, flavored with a blend of spices like cumin, coriander, and garam masala. Rajma is traditionally served with rice, making it a wholesome and filling meal.

8. Masoor Dal

Masoor Dal is a simple yet flavorful red lentil curry. It’s one of the easiest vegan Indian recipes to prepare and is packed with protein and fiber, making it a healthy addition to your meal rotation. Red lentils are cooked with tomatoes, and spices, creating a comforting and nourishing dish. Masoor Dal is perfect for a quick lunch or indian dinner recipes and can be enjoyed with rice or chapati.

9. Vegan Korma

Vegan Korma is a creamy and mildly spiced curry made with a variety of vegetables and a rich coconut-based sauce. This dish is perfect for those looking for 10 easy vegan recipes that are both luxurious and easy to make. The vegetables are simmered in a sauce made from coconut milk, cashews, and spices, resulting in a dish that is rich and flavorful. Vegan Korma can be served with rice or naan for a complete meal.

10. Vegan Pulao

Vegan Pulao is a simple and flavorful rice dish cooked with vegetables and aromatic spices. It’s a versatile dish that can be enjoyed on its own or as a side, making it a great addition to your list of vegan Indian food recipes. The rice is cooked with vegetables like peas, carrots, and bell peppers, along with spices such as cumin, cinnamon, and bay leaves. Vegan Pulao is perfect for a quick and easy meal and can be paired with raita or a salad.

Conclusion

These 10 easy vegan recipes showcase the versatility and richness of vegan Indian food. From hearty curries to flavorful rice dishes, these recipes are sure to bring joy and nutrition to your table. Explore more vegan Indian recipes and discover the delicious possibilities of plant-based cooking with Manjula’s Kitchen. Happy cooking and enjoy your journey with vegan food recipes!

By incorporating these dishes into your diet, you’ll be able to enjoy a wide variety of delicious and nutritious foods. Whether you’re looking for breakfast, snacks, main courses, or desserts, there’s a vegan Indian recipe to suit every taste. Don’t forget to check out Manjula’s Kitchen for more inspiration and culinary delights. Happy cooking and happy eating!

  • Spicy Cashews

    Spicy Cashews

    Spicy Cashews

    Spicy cashews are great as a holiday party snack or simply to munch on anytime. Spicy cashews can be quite addicting – they are that good. This simple and delicious recipe will make a great holiday gift too!
    No ratings yet
    Course Appetizer
    Cuisine Indian

    Ingredients
      

    • 2 cups raw cashew nuts
    • 2 tbsp oil
    • 1 tbsp salt
    • 1/4 tbsp black salt
    • 1/8 tbsp black pepper
    • 1/4 tbsp red pepper
    • 1 tbsp roasted ground cumin seeds powder
    • 1/2 tbsp mango powder

    Instructions
     

    • In a large skillet, roast the cashew nuts in oil over low to medium heat, stirring continuously, until golden brown (seven to eight minutes).
    • Transfer the cashews to a bowl and let them cool until they are warm (not room temperature, or the spices will not coat cashews).
    • Mix all the spices in a small bowl. Sprinkle over the warm cashews and toss to coat them evenly.
    • Store  the cashews in an airtight container once they cool to room temperature.

    Notes

    Note: These cashews can be stored up to a month.
    Variation
    Substitute peanuts for cashews in the above recipe.
    Tried this recipe?Let us know how it was!

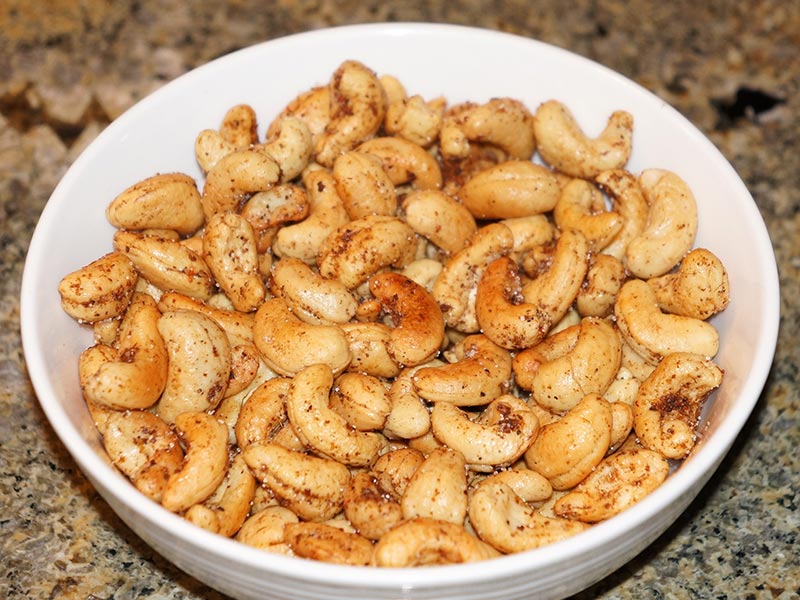
    Spicy Cashew A Perfect flavorful Snack 

    Spicy Cashews are the perfect snack for those who crave a little heat and crunch. These spicy roasted cashews are coated in a delicious blend of spices, making them a flavorful and addictive treat. Whether you’re looking for a healthy snack or a tasty addition to your dishes, this spicy cashew recipe is quick & easy to follow and sure to satisfy your taste buds.

    The Essence of Spicy Cashews

    The key to making the best spicy cashew nuts lies in the right combination of spices. By roasting the cashews, you enhance their natural flavor and crunch, while the spices add a kick that makes them irresistible. This recipe is versatile and can be adjusted to suit your spice tolerance.

    Origin and Popularity

    Nuts have been a staple in many cuisines around the world, valued for their nutritional benefits and versatility. Spicy roasted cashews have gained popularity as a healthy snack option that combines the rich, buttery flavor of cashews with the boldness of spices. This snack is perfect for parties, movie nights, or even as a quick, nutritious snack on the go.

    Why You’ll Love This Recipe

    • Healthy Snack: Cashews are packed with nutrients, including healthy fats, protein, and vitamins.
    • Easy to Make: This recipe is simple and quick, perfect for busy schedules.
    • Flavorful: The blend of spices creates a deliciously bold flavor that complements the natural taste of cashews.
    • Versatile: Can be enjoyed on their own or added to various dishes for an extra kick.

    How to Make Spicy Cashews

    Here’s a step-by-step guide on how to make spicy cashews:

    1. Prepare the Cashews: Start with raw, unsalted cashews for the best results. Preheat your oven to 350°F (175°C).
    2. Mix the Spices: In a bowl, combine spices such as cayenne pepper, paprika, garlic powder, salt, and a touch of sugar. Adjust the quantities based on your spice preference.
    3. Coat the Cashews: Add the cashews to the spice mixture and toss to coat evenly. You can use a bit of olive oil or melted butter to help the spices stick to the nuts.
    4. Roast the Cashews: Spread the coated cashews on a baking sheet in a single layer. Roast in the preheated oven for about 15-20 minutes, stirring occasionally to ensure even roasting.
    5. Cool and Store: Once golden and fragrant, remove the cashews from the oven and let them cool completely. Store in an airtight container to keep them fresh and crunchy.

    Variations of the Recipe

    Exploring Manjula’s Kitchen reveals a treasure trove of other delicious snack recipes that you might enjoy. Here are some related variations that you might find interesting:

    1. Masala Peanuts: A spicy and crunchy snack made with roasted peanuts coated in a blend of Indian spices.
    2. Roasted Chickpeas: A healthy and crunchy snack made with chickpeas tossed in spices and roasted until crispy.
    3. Methi Mathri: A crispy and savory Indian snack made with fenugreek leaves and spices.
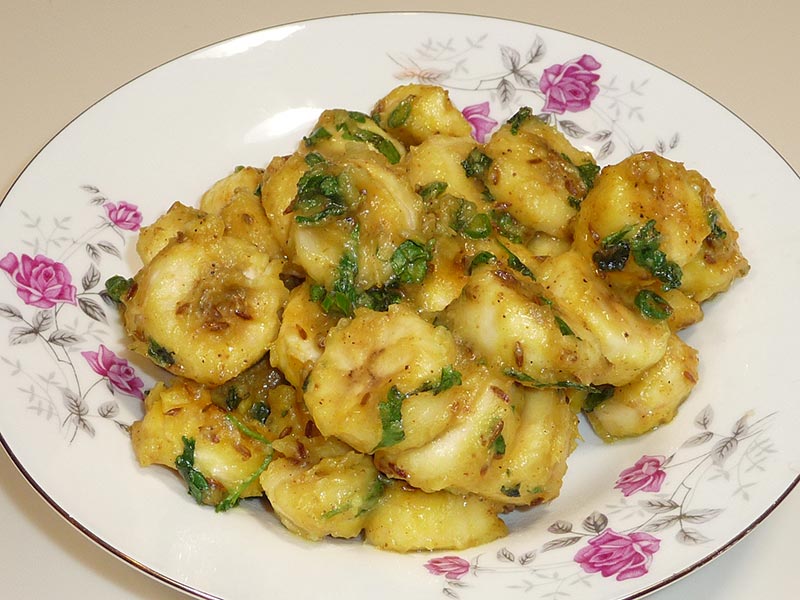
    4. Aloo Bhujia: A spicy and crispy potato-based snack that is perfect for munching.
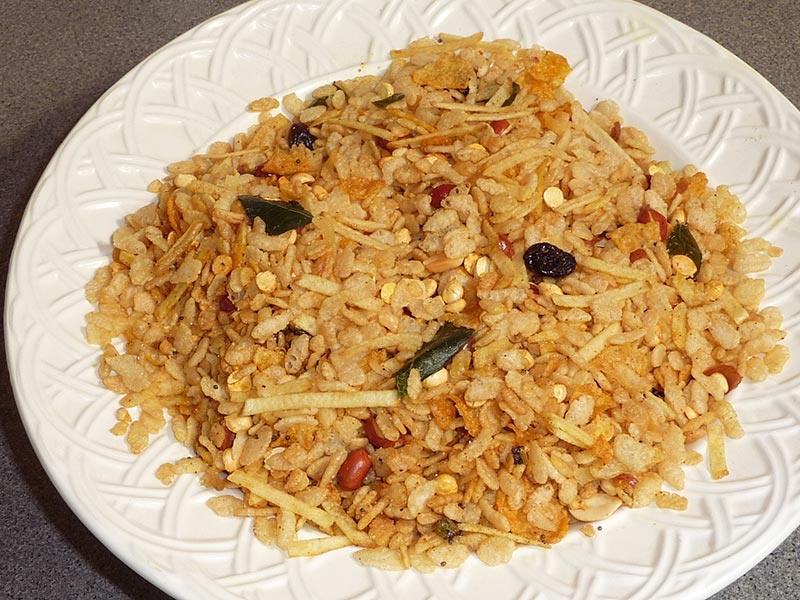
    5. Spicy Bhel Puri: A flavorful and spicy mixture of puffed rice, vegetables, and chutneys.

    Serving Suggestions

    Spicy cashew nuts can be enjoyed in various ways:

    • As a Snack: Perfect for a quick and healthy snack on the go.
    • With Drinks: Serve as a spicy accompaniment to your favorite beverages.
    • In Salads: Add a handful of spicy roasted cashews to your salads for an extra crunch and flavor.
    • In Stir-Fries: Toss them into stir-fries for a spicy twist.

    Tips and Tricks

    To perfect your spicy cashew recipe, consider these helpful tips:

    • Use Fresh Spices: Fresh spices will enhance the flavor of your cashews.
    • Roast Evenly: Stir the cashews occasionally while roasting to ensure they are evenly cooked.
    • Adjust Spice Level: Tailor the spice level to your preference by adjusting the amount of cayenne pepper and other spices.

    FAQs

    Are Spicy Cashews Vegan?

    Yes, they can be made vegan by using olive oil or another plant-based oil instead of butter.

    Can I Make It Ahead of Time?

    Yes, these cashews can be made ahead of time and stored in an airtight container for up to two weeks.

    What Can I Serve with These Cashews?

    They can be served with a variety of dishes, including salads, stir-fries, or as a standalone snack.

    How Long Does It Take to Make?

    The preparation and cooking time for this recipe is about 30 minutes.

  • Cranberry Relish, Pickle

    Cranberry Relish, Pickle

    Cranberry Relish

    Cranberry Relish is a spicy and tangy pickle that is a perfect addition to many dishes. Cranberry Relish can spice up any meal. It tastes especially great with sandwiches and perfect for the upcoming holidays!
    5 from 1 vote
    Course Chutney
    Cuisine Indian

    Ingredients
      

    • 2 cup fresh cranberries cut in halved
    • 2 chopped green chili adjust to taste
    • 2 tbsp shredded ginger
    • 2-1/2 tbsp salt
    • 1/4 tbsp red chili powder, adjust to taste
    • 1 tbsp black mustard seeds ground (rai)
    • 1 tbsp fennel seeds crushed (saunf)
    • 1/8 tbsp asafetida
    • 2 tbsp mustard oil

    Instructions
     

    • In a glass bowl mix all the ingredients.
    • Heat the oil moderately in a small bowl, add asafetida and pour the oil over the cranberry mix, and mix it well.
    • Keep the relish in a glass jar or glass bowl.
    • You may serve this same day but it taste batter after it has marinated for a day.
    • Cranberry Relish can be made in large batches; it has a long shelf life.
    • This can stay out at room temperature for a week or refrigerate for about 2 months.
    Tried this recipe?Let us know how it was!

    A Delightful Condiment with Tartness of Cranberry

    Cranberry Relish Pickle is a delightful gluten free condiment that combines the tartness of cranberries with a sweet and spicy blend of flavors. This cranberry relish pickle recipe is perfect for adding a burst of freshness to any dish its an indian fusion recipe. Whether you are looking to enhance your holiday meals or add a unique twist to your everyday dishes, this homemade cranberry relish is easy to make and incredibly versatile.

    The Essence of Cranberry Relish Pickle

    The key to this cranberry relish recipe is the perfect balance of tart cranberries, sweetness, and spices. Fresh cranberries are combined with sugar, spices, and a hint of citrus to create a relish that is both tangy and flavorful. This easy cranberry relish can be made in advance and stored, making it a convenient addition to your culinary repertoire.

    Origin and Popularity

    Cranberry relish has been a staple in American cuisine, especially during the holiday season. Its popularity has grown due to its unique flavor profile and versatility. The homemade cranberry relish is a modern twist on traditional recipes, offering a fresher and more vibrant taste.

    Why You’ll Love This Recipe

    • Simple Ingredients: Uses fresh, easily available ingredients.
    • Burst of Flavor: Combines tart, sweet, and spicy flavors in one condiment.
    • Versatile: Can be used as a condiment, spread, or side dish.
    • Easy to Make: Requires minimal preparation and cooking time.

    How to Make Cranberry Relish Pickle

    Here’s a step-by-step guide on how to make cranberry relish pickle:

    1. Prepare the Cranberries: Start with fresh or frozen cranberries. Rinse them well and remove any stems or bad berries.
    2. Combine Ingredients: In a saucepan, combine the cranberries with sugar, water, a pinch of salt, and your choice of spices such as cinnamon, cloves, and ginger. Add a splash of orange juice or zest for a citrusy note.
    3. Cook the Mixture: Bring the mixture to a boil over medium heat, then reduce to a simmer. Cook until the cranberries burst and the mixture thickens, about 10-15 minutes.
    4. Cool and Store: Allow the relish to cool to room temperature before transferring it to a sterilized jar. Store in the refrigerator for up to two weeks.

    Variations of Recipes from Manjula’s Kitchen reveal a treasure trove of other delicious recipes that you might enjoy. Here are some related recipes that you might find interesting:

    1. Gatte Ki Sabzi: Gram flour dumplings cooked in a spicy yogurt-based gravy, a Rajasthani specialty. 
    2. Pindi Chole: A dry and tangy chickpea curry cooked with a blend of aromatic spices. Recipe: 
    3. Aloo Tamatar: Potatoes cooked in a tomato-based gravy with a blend of spices, perfect for pairing with puris or rotis.
    4. Masala Paratha: Spiced whole wheat flatbreads that are flavorful and perfect for breakfast or lunch. 
    5. Toor Dal: A simple and comforting pigeon pea lentil curry, seasoned with spices. Recipe: 

    Serving Suggestions

    Cranberry relish pickle can be enjoyed in various ways:

    • As a Spread: Use it as a spread on sandwiches or wraps.
    • With Cheese: Serve it with a cheese platter for a tangy twist.
    • As a Side: Enjoy it as a side dish with your favorite meals.

    Tips and Tricks

    To perfect your cranberry relish recipe, consider these helpful tips:

    • Use Fresh Ingredients: Fresh cranberries and quality spices make a big difference in flavor.
    • Adjust Sweetness: Tailor the amount of sugar to your taste preference.
    • Add Texture: For added texture, mix in some finely chopped nuts or dried fruits.

    FAQs

    Is Cranberry Relish Pickle Vegan? 

    Yes, this recipe comes under vegan indian recipes as it uses plant-based ingredients.

    Can I Make It Ahead of Time? 

    Yes, this relish can be made ahead of time and stored in the refrigerator for up to two weeks.

    What Can I Serve with This Relish? 

    This relish pairs well with cheese platters, and can be used as a spread for sandwiches.

    How Long Does It Take to Make? 

    The preparation and cooking time for this relish is about 30 minutes.

  • Cereal Chivda (Snack)

    Cereal Chivda (Snack)

    Cereal Chivda (Snack)

    Cereal Chivda is a great substitute for original chivda. This is a quick and easy recipe to make. Mix of different cereals, mildly spiced makes an enjoyable crunchy snack.
    5 from 1 vote
    Course Snack
    Cuisine Indian

    Ingredients
      

    • 4 cups rice crispy cereal
    • 1/2 cup  corn flakes
    • 1/2 cup  fine potato sticks
    • 1 tbsp tablespoon raisins
    • 1/2  cup roasted peanuts
    • 1/2 cup  roasted chana dal
    • 3 tbsp oil
    • 1/2 tbsp mustard seeds (rai)
    • Pinch of asafetida (hing)
    • 1 green chili chopped adjust to taste
    • About 10 curry leaves
    • 1/2  tbsp fennel seeds (saunf)
    • 1/4 tbsp turmeric (haldi)
    • 1/4  spoon red chili powder adjust to taste
    • 1/2 tbsp salt adjust to taste
    • 1/4 tbsp mango powder (amchoor)

    Instructions
     

    • Heat the oil in a wide saucepan over medium high heat. After oil is moderately hot add mustard seeds.
    • As mustard seeds crack add asafetida, green chili, and curry leaves. As precaution cover the pan immediately for few seconds because as you add curry leaves to oil it will splatter.
    • Lower the heat to medium low, stir-fry for about 30 seconds; add raisins, peanuts and chana dal, stir-fry for one minute.
    • Add fennel seeds, chili powder, turmeric, and salt mix it well.
    • Add rice crispy cereal and corn flakes (crush the corn flakes before adding to the mix) stir the mixture gently, add potato sticks mix it well quick and turn off the heat. Chivda is ready.
    • Let the cereal chivda cool of to room temperature before serving.
    • Cereal chivda can be kept for several days in airtight container.
    Tried this recipe?Let us know how it was!

    A Delightful Crunch: Exploring the Versatility of Cereal Chivda

    Cereal Chivda is a delightful, crispy snack that combines the crunch of cereals with the flavors of traditional Indian spices. This cereal chivda recipe is perfect for those looking for a diet-friendly snack that doesn’t compromise on taste. Whether you’re enjoying it with your afternoon tea or packing it for a quick snack on the go, this homemade chivda cereal snack is sure to satisfy your cravings.

    The Essence of Cereal Chivda

    Cereal Chivda is a modern twist on the traditional Indian chivda, a savory snack mix. By incorporating cereals, this snack becomes lighter and perfect for those watching their calorie intake. The blend of spices, nuts, and dried fruits adds layers of flavor and texture, making it a versatile snack that can be enjoyed any time of the day.

    Origin and Popularity

    Chivda has been a popular snack in Indian households for generations. Traditionally made with flattened rice (poha), it has evolved to include a variety of ingredients, such as cereals, to cater to modern dietary preferences. This diet chivda with cereal is a testament to its adaptability, offering a healthier option without losing its deliciousness.

    Why You’ll Love This Recipe

    • Healthy Snack: Made with wholesome cereals, nuts, and spices, this chivda is both nutritious and delicious.
    • Easy to Make: Simple steps and readily available ingredients make this recipe easy to follow.
    • Flavorful: A perfect balance of spices and textures ensures every bite is packed with flavor.
    • Versatile: Can be enjoyed on its own or paired with other dishes.

    How to Make Cereal Chivda

    Here’s a step-by-step guide on making cereal chivda:

    1. Prepare the Ingredients: Gather your choice of cereals (cornflakes, puffed rice, or any diet-friendly cereal), nuts (peanuts, cashews), curry leaves, and spices (turmeric, mustard seeds, green chilies, and salt).
    2. Roast the Nuts: In a large pan, dry roast the peanuts and cashews until they are golden brown. Remove and set aside.
    3. Toast the Cereals: In the same pan, add the cereals and toast them lightly until they become crispy. Remove and set aside.
    4. Prepare the Spice Mix: Heat a small amount of oil in the pan. Add mustard seeds and allow them to splutter. Then add curry leaves, finely chopped green chilies, and turmeric powder. Sauté until the curry leaves are crispy.
    5. Combine and Mix: Add the roasted nuts and toasted cereals back into the pan. Sprinkle salt and mix everything well, ensuring the cereals and nuts are evenly coated with the spice mix.
    6. Cool and Store: Let the mixture cool completely before transferring it to an airtight container. This ensures the chivda remains crispy.

    Variations of the Recipe

    Exploring Manjula’s Kitchen reveals a treasure trove of other delicious snack recipes that you might enjoy. Here are some related variations that you might find interesting:

    1. Spicy Chivda: Spicy chivda crunchy savory snack is quick and easy to make. Chivda, also known as poha, is flattened rice that is flavored with spices.
    2. Masala Peanuts: Spicy and crunchy peanuts that make for a perfect snack.
    3. Spicy Sev: Thin, crispy strands made from chickpea flour and spices, perfect for munching.
    4. Roasted Chickpeas: A healthy and crunchy snack made with chickpeas tossed in spices and roasted until crispy.
    5. Methi Mathri: Crispy, savory crackers made with fenugreek leaves and spices.

    Serving Suggestions

    Cereal chivda can be enjoyed in various ways:

    • As a Snack: Enjoy it as a standalone snack during tea time or as a healthy mid-day treat.
    • With Yogurt: Pair it with a bowl of yogurt for a delicious and satisfying snack.
    • As a Topping: Use it as a crunchy topping for salads or soups.
    • For Travel: Pack it as a travel-friendly snack for road trips or flights.

    Tips and Tricks

    To perfect your chivda cereal recipe, consider these helpful tips:

    • Use Fresh Ingredients: Fresh nuts and cereals will enhance the flavor and crunchiness of your chivda.
    • Adjust Spices: Tailor the amount of green chilies and turmeric to your spice preference.
    • Store Properly: Ensure the chivda is completely cool before storing to maintain its crispiness.

    FAQs

    Is Cereal Chivda Vegan? 

    Yes, this recipe is vegan as it uses plant-based ingredients.

    Can I Make It Ahead of Time? 

    Yes, this chivda can be made ahead of time and stored in an airtight container for up to two weeks.

    What Can I Serve with This Chivda? 

    This chivda pairs well with yogurt, can be used as a topping for salads, or enjoyed on its own as a snack.

    How Long Does It Take to Make? 

    The preparation and cooking time for this chivda is about 30 minutes.

  • Kela Ki Subji

    Kela Ki Subji

    Kela Ki Subji

    This is a delicious sweet and sour vegetable dish, and a quick and easy only takes few minutes to prepare. Kela Ki Sabji makes a great side dish. You will be amazed with the simplicity of this dish.
    5 from 1 vote
    Course gluten free
    Cuisine Indian
    Servings 3 people

    Ingredients
      

    • 3 ripe bananas peeled and sliced 1/2 inch thick approx. 3 cups of sliced banana
    • 1 tbsp oil
    • 1/2 tbsp cumin seeds (jeere)
    • 1/8 tbsp asafetida (hing)
    • 1 green chili minced, adjust to taste
    • Pinch of turmeric (haldi)
    • 1 tbsp finely chopped ginger
    • 1/2  tbsp salt adjust to taste
    • 1/2 tbsp mango powder (amchoor)
    • 2 tbsp chopped cilantro (hara dhania)
    • 2 tbsp water

    Instructions
     

    • Heat the oil in a sauce pan on medium high. Test the heat by adding one cumin seed to the oil; if seed cracks right away oil is ready.
    • Add cumin seeds after seeds crack add asafetida, green chili and turmeric, stir for a few seconds.
    • Add bananas, ginger, mango powder and water stir gently and cook only for a minute, don’t overcook otherwise banana will become mushy and watery.
    • Turn off the heat and add salt and cilantro mix gently and serve.
    Tried this recipe?Let us know how it was!

    Indulge in Kele Ki Subji: A Unique Indian Dish

    Kele ki Subji, also known as banana curry, is a unique and flavorful Indian dish that combines ripe bananas with a blend of spices to create a sweet and sour vegetable curry. This kele ki subji recipe is perfect Vegetables Curry/Gravy recipe for those looking to try something healthy, vegan, different and delightful.

    The Essence of Kele Ki Subji

    The essence of kele ki subji lies in its balance of sweet and sour flavors, enhanced by a medley of spices. The ripe bananas add a natural sweetness and a creamy texture, while the spices and tangy elements create a harmonious and tantalizing flavor profile. This dish is a staple in Indian Cuisine and is for those having Vegetarian and Gluten-Free diets.

    Origin and Popularity

    Kele ki Subji has its roots in Indian cuisine, where bananas are used in a variety of savory dishes. This banana vegetable recipe is particularly popular in regions where bananas are abundant, and it offers a unique twist on traditional vegetable curries. The simplicity and distinct flavor of this dish have made it a favorite among those who enjoy experimenting with new flavors. 

    Why You’ll Love This Recipe

    • Unique Flavor: Combines the sweetness of bananas with the tanginess of spices for a unique culinary experience.
    • Nutritious: Packed with vitamins and minerals from the bananas and spices.
    • Easy to Make: Simple ingredients and straightforward steps make this recipe accessible.
    • Perfect for Any Occasion: Ideal for everyday meals or special gatherings, fitting well into Family-Friendly and Kid-Friendly categories.

    Variations of Vegetable Recipes

    Exploring Manjula’s Kitchen reveals a treasure trove of other delicious vegetable recipes that you might enjoy. Here are some related dishes that you might find interesting:

    1. Aloo Gobi: A classic Indian dish made with potatoes and cauliflower cooked with spices.
    2. Bhindi Masala: A flavorful dish made with okra and a blend of spices.
    3. Baingan Bharta: A smoky and flavorful dish made with roasted eggplant and spices.
    4. Gajar Matar: A simple and healthy dish made with carrots and green peas.
    5. Palak Paneer: A popular dish made with spinach and paneer in a creamy sauce.

    Serving Suggestions

    Kele ki subji can be enjoyed in various ways:

    • With Indian Breads: Serve with roti, naan, or paratha for a satisfying meal.
    • With Rice: Pair with steamed basmati rice or jeera rice.
    • As a Side Dish: Enjoy as a side with other Indian dishes.
    • With Raita: Add a side of plain yogurt or raita to balance the flavors.

    Tips and Tricks

    To perfect your kele ki subji recipe, consider these helpful tips:

    • Use Ripe Bananas: Ripe bananas are essential for achieving the perfect sweetness and texture.
    • Balance Flavors: Adjust the amount of spices and tangy elements to suit your taste preference.
    • Cook Gently: Be careful not to overcook the bananas to maintain their shape and texture.
    • Experiment with Spices: Try adding different spices to customize the flavor of the dish.

    FAQs Frequently Asked Questions

    Can I Use Green Bananas? 

    For this recipe, ripe bananas are recommended to achieve the sweet and creamy texture. Green bananas will not provide the same flavor profile.

    What Can I Serve With Kele Ki Subji? 

    Kele ki subji pairs well with Indian breads like roti, naan, and paratha, as well as with rice dishes like basmati rice or jeera rice.

    Is Kele Ki Subji Vegan? 

    Yes, this recipe is naturally vegan and gluten-free.

    How Long Does Kele Ki Subji Last? 

    Store any leftovers in an airtight container in the refrigerator for up to 2 days. Reheat gently before serving.

    Can I Add Other Vegetables? 

    Yes, you can add other vegetables like bell peppers or carrots for added flavor and nutrition.

  • Moong Dal Vada

    Moong Dal Vada

    Moong Dal Vada

    Moong Dal Vadas – Freiiers – Bhajias

    Moong Dal Vadas are also known as pakoras, bhajias or fritters. This is a spicy delicious appetizer and a snack which is crispy outside and soft inside. Moong dal vada is a popular tasty treat.
    No ratings yet
    Prep Time 10 minutes
    Cook Time 15 minutes
    Total Time 25 minutes
    Course Appetizer
    Cuisine Indian
    Servings 4 peaple

    Ingredients
      

    • 1 cup split wash moong dal
    • 1 cup potatoes boiled peeled and shredded
    • 2 tbsps cilantro finely chopped hara dhania
    • 1 tbsp green chili minced
    • 1 tbsp ginger finely shredded
    • 1 tsp cumin seeds jeera
    • 1/8 tsp asafetida hing
    • 1/8 tsp baking soda
    • 1 tsp salt

    Also need oil to fry

    Instructions
     

    • Wash and soak dal in about 3 cups of water for four hours or longer. Grind dal coarsely using very little water.
    • Add all the ingredients to the dal batter, potatoes, cilantro, green chili, ginger, cumin seeds, asafetida and salt, beat the batter for 2-3 minutes this will make the batter light. Add the water if needed, batter should be soft. If batter is too thick Vadas will be hard.
    • Heat the oil in a frying pan on medium high heat. The frying pan should have about 1 inch of oil. To check if the oil is ready, put one drop of batter in oil. The batter should sizzle and come up but not change color right away. If oil is very hot vadas will not cook through and will not be crispy.
    • Place about 1 tablespoon of batter into the oil. Fry the vada in small batches. Fry vadas until golden-brown all around. Moong Dal Vada should be crispy from outside and should be soft inside.

    Notes

    Serve Moong Dal Pakoras Mint Chutney, or
    Keyword Crispy Bhajia, Favorite Snack, Gluten Free, Vegan
    Tried this recipe?Let us know how it was!

    Moong Dal Vada A Crispy Delight

    Moong Dal Vada, a beloved Indian snack, is a crispy and flavorful fritter that is enjoyed by people across India, particularly during the monsoon season. This delightful snack, made from split green gram (moong dal), is known for its light and crunchy texture. 

    Perfectly spiced and golden brown, Moong Dal Vada is a treat that pairs wonderfully with a cup of hot tea. Whether you’re looking for a savory appetizer for a gathering or a simple snack to enjoy on a rainy day, this moong dal vada recipe is sure to become a favorite.

    Cultural and Traditional Importance 

    Moong Dal Vada holds a special place in Indian cuisine, especially in regions like Gujarat and Rajasthan, where it is a popular street food and home-cooked snack. This dish is often prepared during festivals, family get-togethers, or even as a quick evening snack. The crispy exterior and the soft, fluffy interior make it a crowd-pleaser, especially when served with tangy chutneys or yogurt dips.

    In Indian households, Moong Dal Vada is more than just a snack; it’s a symbol of warmth and hospitality. Offering these vadas to guests, especially during the festive season, is a tradition that has been passed down through generations. The simplicity of the ingredients combined with the robust flavors of Indian spices makes this dish a timeless classic.

    Health Benefits and Dietary Considerations 

    Moong Dal Vada is not just delicious but also packed with nutritional benefits. Moong dal is known for being a good source of protein, fiber, and essential vitamins. This makes the vada not only tasty but also a healthier alternative to other fried snacks. Since this recipe does not include onion or garlic, it is suitable for those following a Jain diet or those who prefer to avoid these ingredients for personal or religious reasons.

    The use of moong dal also makes these vadas easier to digest compared to other lentils, making them a great option for those with sensitive stomachs. Moreover, Moong Dal Vada is naturally gluten-free, making it an excellent choice for people with gluten sensitivities.

    Recipe Variations 

    While the traditional moong dal vada recipe is delightful on its own, there are several variations that you can explore to suit your taste preferences:

    Paneer Pakora: Paneer Pakora is a tasty tea-time snack. Marinated paneer dipped in a batter and deep-fried makes a crispy mouth-watering snack.

    Palak Pakora: This version adds spinach to the batter, giving the pakoras a vibrant green color and an additional nutritional boost.

    Aloo Pakora: Made with thin slices of potatoes, these pakoras are crispy on the outside and soft on the inside, making them a favorite among potato lovers.

    Mixed Vegetable Pakora: A more colorful and varied version, this pakora includes a mix of different vegetables, offering a delightful medley of flavors in each bite.

    Serving Suggestions 

    Moong Dal Vada is best enjoyed fresh and hot, right out of the frying pan. It can be served as an appetizer or snack, accompanied by a variety of chutneys such as Mint Chutney or Tamarind Chutney. For a more complete experience, pair the vadas with a cup of hot masala chai. These vadas are also perfect for serving at parties or gatherings, as they are easy to make in large batches and are sure to impress your guests.

    For a more filling meal, you can serve Moong Dal Vada alongside a light salad or with Curd Rice, providing a refreshing contrast to the spicy and crunchy vadas. Another great option is to serve them with a bowl of warm soup, making for a comforting and satisfying meal.

    Conclusion 

    Moong Dal Vada is a quintessential Indian snack that brings together the best of flavors and textures. Its crispy exterior and soft interior make it a delightful treat that is hard to resist. Whether you’re enjoying it on a rainy day, serving it to guests, or simply indulging in a snack craving, this easy pakora recipe will never disappoint. The versatility of the moong dal vada recipe also means that you can easily adapt it to your taste preferences, ensuring that it remains a favorite in your kitchen.

    Frequently Asked Questions (FAQs)

    How to make moong dal vada?

    Moong Dal Vada is made by grinding soaked moong dal into a batter, which is then spiced and fried until golden and crispy. It’s a simple and straightforward recipe that delivers delicious results every time.

    What are the variations of pakoras I can try?

    You can try variations such as Chana Dal Pakora, Palak Pakora, Aloo Pakora, and Mixed Vegetable Pakora.

    Is Moong Dal Vada gluten-free?

    Yes, Moong Dal Vada is naturally gluten-free, making it an excellent snack option for those with gluten sensitivities.

    What is the best way to serve Moong Dal Vada?

    Serve Moong Dal Vada hot with chutneys like Mint Chutney or Tamarind Chutney, and enjoy with a cup of hot tea for a perfect snack.

    Can I store leftover Moong Dal Vada?

    While Moong Dal Vada is best enjoyed fresh, you can store leftovers in an airtight container for up to a day. Reheat in an oven to regain some of the crispiness before serving.

  • Sambar Recipe

    Sambar Recipe

    Sambar (Spicy Lentil Soup)

    Sambar is a flavorful spicy South Indian lentil soup made with a variety of vegetables. It fits nicely with many South Indian meals, including dosas (pancakes), idlis (savory cakes), and rice. It could be said that a South Indian meal is incomplete without sambar.
    5 from 2 votes
    Course dal
    Cuisine Indian
    Servings 4 people

    Ingredients
      

    • 1/2 cup toor dal/arhar dal available in any Indian grocery store
    • 1/2 tbsp salt
    • 1/4 tbsp turmeric (haldi)
    • 2 tbsp oil
    • 1/2 tbsp cumin seeds (jeera)
    • 1/8 tbsp fenugreek seed (methi)
    • 1/4 tbsp mustard seeds (rai)
    • Pinch of asafetida (hing)
    • 10-12 curry leaves
    • 4 dry whole red chilies
    • 1 large tomato cubed in small pieces
    • 1-½ cups mixed vegetables, cute into bite-size cubes (green beans, carrots, zucchini, radishes)
    • 2 tbsp tamarind pulp
    • 1/2 tbsp salt
    • 1 tbsp sambar powder, available in any Indian grocery store

    Instructions
     

    • Wash and soak the dal in two cups of water for ten minutes or longer.
    • In a pressure cooker combine soaked dal with 2½ cups of water, salt, and turmeric. Cook over medium high heat.
    • When the pressure cooker starts to steam, reduce the heat to medium and cook for another six minutes.
    • Turn off the heat and wait until steam has escaped before opening the pressure cooker. Dal should be soft and mushy.
    • Mix the dal well enough to remove lumps. If the dal is thick, add up to one cup of water.

    Notes

    Prepare Seasoning
    1. Heat the oil in a saucepan. Test the heat by adding one cumin seed to the oil; if it cracks immediately, the oil is ready.
    2. Add cumin seeds, mustard seeds, fenugreek seeds, asafetida, red chilies, and curry leaves. Stir for a few seconds.
    3. Add tomatoes, vegetables, sambar powder, tamarind pulp and ½ cup water.
    4. Cover the pan and let the vegetables cook until they are tender over medium heat.
    5. Combine the vegetables and the dal to make the Sambar.  Sambar should be thin, like soup. If the sambar is thick, add water as needed.
    6. Cook sambar on low heat for 10-15 minutes.
    Serve Sambar with dosa, idli, rice or with any meal as a side.
    Keyword Dal
    Tried this recipe?Let us know how it was!

    How to make Sambar Masala: Sambar Recipe

    Sambar is a quintessential South Indian dish that holds a cherished place in Indian cuisine. This sambar recipe is a delightful combination of sambar dal, vegetables, and aromatic spices, creating a flavorful and nutritious sambar masala. In this comprehensive guide, we’ll explore how to make sambar step by step, incorporating tips, variations, and benefits to elevate your culinary experience.

    Tips for Perfecting Your Sambar Recipe

    • Use Fresh Ingredients: Opt for fresh spices, vegetables, and lentils to ensure the best flavor and texture in your sambar.
    • Balance the Flavors: Adjust the proportions of tamarind paste, jaggery, and salt to achieve the perfect balance of sour, sweet, and savoury notes in your sambar.
    • Experiment with Vegetables: Don’t hesitate to experiment with different combinations of vegetables to create unique variations of sambar tailored to your liking.
    • Temper with Care: Take care not to burn the spices while tempering, as it can impart a bitter taste to the sambar. Maintain medium heat and keep a close eye on the tempering process.
    • Allow for Resting Time: Let the sambar rest for a few minutes after cooking to allow the flavors to develop fully before serving.

    Variations of Sambar

    • Mixed Vegetable Sambar: Incorporate a medley of seasonal vegetables such as pumpkin, beans, and bell peppers for a colorful and nutritious twist on the classic sambar.
    • Tiffin Sambar: Prepare a thinner version of sambar specifically paired with idli, dosa, or vada, featuring a lighter consistency and a higher proportion of tamarind for tanginess.
    • Kadamba Sambar: This variation of sambar includes a diverse range of vegetables along with freshly ground spices, lending it a robust and hearty character ideal for special occasions.

    Benefits of Including Sambar in Your Diet

    • Rich in Protein: Sambar is a rich source of protein due to the inclusion of lentils, making it a nourishing option for vegetarians and vegans.
    • Loaded with Vitamins and Minerals: The array of vegetables in sambar provides essential vitamins, minerals, and dietary fibre, promoting overall health and well-being.
    • Digestive Aid: The spices and herbs in sambar, such as cumin, fenugreek, and curry leaves, possess digestive properties that aid in digestion and alleviate digestive discomfort.
    • Low in Calories: Despite its hearty and satisfying nature, sambar is relatively low in calories, making it a guilt-free indulgence for those watching their calorie intake.
    • Boosts Immunity: The antioxidants present in the spices and vegetables in sambar help strengthen the immune system and protect the body against various infections and diseases.

    FAQs (Frequently Asked Questions) About Sambar

    • Can I make sambar without tamarind paste? 

    • Yes, you can substitute tamarind paste with lemon juice or dried mango powder (amchur) for a tangy flavor in your sambar.
    • Is sambar gluten-free? 

    • Yes, sambar is naturally gluten-free as long as no wheat-based ingredients such as asafoetida powder (hing) are used in the recipe. You can use gluten-free asafoetida or omit it altogether to ensure the dish is gluten-free.
    • Can I make sambar ahead of time? 

    • Yes, you can prepare sambar in advance and store it in an airtight container in the refrigerator for up to 2-3 days. Reheat gently on the stovetop or microwave before serving.
    • Can I freeze leftover sambar? 

    • While it’s technically possible to freeze leftover sambar, the texture of the vegetables and lentils may change upon thawing, resulting in a slightly altered consistency. It’s best to consume fresh sambar for optimal taste and texture.

    If you’re looking to explore more Indian recipes, appetizers, beverages, and desserts, be sure to check out the following links on Manjula’s Kitchen. Here are some links to recipes on Manjula’s Kitchen official website: Vegetable Pakoras, Kaju Katli (Cashew Burfi), Baingan Bharta (Roasted Eggplant), Matar (Green Peas) Paneer, Besan Ladoo.

  • Sweet And Sour Tofu

    Sweet And Sour Tofu

    Sweet And Sour Tofu

    Tofu and vegetable cooked with the tamarind sauce makes a very unique flavorful dish. This Sweet and Sour Tofu dish is vegan-friendly and it is enjoyable for just about anyone's taste palette.
    4.50 from 2 votes
    Course vegan
    Cuisine Indian
    Servings 2 people

    Ingredients
      

    • 1-1/2 oz of seedless tamarind, available in Indian and Asian grocery stores
    • 1 tbsp roasted cumin seeds powder (jeera)
    • 1 tbsp salt
    • ¼ tbsp turmeric (haldi)
    • ¼ tbsp black pepper
    • ¼ tbsp red chili powder
    • 1 tbsp finely shredded ginger
    • ¼ cup brown sugar

    Instructions
     

    • Soak tamarind in 1/4 cup of warm water for 15 minutes. Squeeze the tamarind mixture well, then discard tamarind pieces leaving a nice thick pulp.
    • Add the remaining sauce ingredients to the tamarind pulp mix well and set aside.
    • Squeeze the Tofu gently keeping between your both palm.
    • Cut tofu into ¾ inch thick slices then and pat dry between paper towels. Then cut slices into ¾ inch cubes.
    • Remove seeds from bell pepper and slice 1/4 inch thick lengthwise.
    • Heat oil in a wide pan over medium heat. Stir fry tofu pieces until golden brown in color, approximately 2-3 minutes. Remove from pan and place on a paper towel.
    • In the remaining oil, first stir-fry bell pepper for a minute and add cabbage continue to stir fry for approx. 2 more minutes over medium heat. Vegetables should still be crunchy.
    • Add tofu and tamarind sauce to the vegetables in the pan, stir well and let simmer over low heat for 4-5 minutes.
    • Sweet and Sour Tofu tastes great served over plain rice.
    Tried this recipe?Let us know how it was!

  • Fruit Chaat

    Fruit Chaat

    Fruit Chaat

    Fruit Chaat, Indian Fruit Salad

    This is a bright, colorful, and refreshing fruit chaat (snack) that can also be used as a fruit salad. My siblings and I looked forward to the fruit chaat, served regularly as part of our lunch. It was a delicious way of eating a great variety of fresh, seasonal fruit. This by itself will brighten up any meal, and it tastes great at any time of day.
    5 from 1 vote
    Prep Time 5 minutes
    Cook Time 5 minutes
    Total Time 10 minutes
    Course Salad
    Cuisine Indian
    Servings 4 people

    Ingredients
      

    • 2 oranges skin removed and sliced in ½ inch each segment
    • 1 apple peeled and cubed into ½ inch pieces
    • 1 firm banana sliced into approximately ¼ inch rounds
    • 1/2 cup sliced strawberries
    • 1 cup English or Asian cucumber cubed into ¼ inch pieces
    • 1 green chili finely chopped (optional)
    • 1 tbsp chopped cilantro

    Dressing

    • 1 tbsp lemon juice
    • 1 tbsp ginger juice
    • 1/2 tsp roasted cumin seeds powder
    • 1 tbsp sugar
    • 1/2 tsp black salt
    • 1/4 tsp black pepper

    Instructions
     

    • In a large bowl, combine the fruit and cucumber with the green chili and cilantro. Toss and set aside.
    • Mix all the dressing ingredients together in a small bowl, making sure the sugar is completely dissolved. Pour the dressing over the fruit when ready to serve.

    Notes

    Tips
    I have used many different varieties of fruits in this chaat dish; however, I always keep the oranges and bananas, as they add a lot of color and texture to the dish.
    Tried this recipe?Let us know how it was!

    Tips for Making the Perfect Fruit Chaat:

    Fruit Chaat is a delightful appetizer that satisfies cravings for both freshness and flavor. This gluten-free and vegan snack is a vibrant medley of assorted fruits, skillfully combined with zesty spices and tangy sauces. Bursting with nutrients, it’s a healthy alternative to traditional snacks.

    Whether served as a light meal starter or a refreshing side dish, Fruit Chaat promises a tantalizing blend of sweet, sour, and savory tastes, making it a favorite among those craving a delightful fusion of flavors.

    Choose a Variety of Fruits: Opt for a colorful assortment of fruits to create a visually appealing Fruit Chaat. Mix and match fruits like apples, oranges, bananas, mangoes, and grapes for a diverse flavor profile. One can go for a winter or a summer based recipe depending upon the season.

    Keep it Fresh: These are quick and easy recipes, Use fresh, ripe fruits for the best taste and texture. Avoid overripe fruits, as they may become mushy and affect the overall presentation of the chaat.

    Balance the Flavors: Strike a balance between sweet, tangy, and spicy flavors. Adjust the amount of Fruit Chaat Masala, lemon juice, and green chili according to your taste preferences.

    Add Crunch: Incorporate crunchy elements like cucumber or roasted nuts to add texture and contrast to the Fruit Chaat. This adds an extra dimension to every bite.

    Chill Before Serving: For a refreshing experience, chill the Fruit Chaat in the refrigerator for at least an hour before serving. The cool temperature enhances the flavors and makes it even more enjoyable, especially on hot days.

    Suggestions and Variations:

    Experiment with Spices: Get creative with your Fruit Chaat Masala by adding other spices like chaat masala, amchur (dry mango powder), or even a pinch of garam masala for a unique flavor twist.

    Include Fresh Herbs: Enhance the aroma and freshness of your Fruit Chaat by adding chopped mint leaves or coriander (cilantro) to the mix. These herbs add a burst of flavor and elevate the dish to the next level.

    Try Different Dressings: While the traditional dressing includes lemon juice and spices, you can experiment with other dressings like yogurt-based sauces or tangy tamarind chutney for a variation in taste.

    Add a Sweet Touch: For those with a sweet tooth, drizzle some honey or maple syrup over the Fruit Chaat to enhance the sweetness of the fruits. This adds a delightful richness to the dish.

    Fruit Fiesta: A simply elegant fruit salad paired with sweet yoghurt and tangy honey- lemon-mint dressing makes it a refreshing treat on its own.

    Fruit Smoothie:   This great smoothie consists of cantaloupes, strawberries, and yogurt with a touch of ginger giving a nice and tangy taste. Try this recipe for the perfect almost-summer drink.

    Fruit Cream: Fruit Cream is a colorful chilled dessert made with fruits and cream. This is a perfect dessert for hot summer days.

    Fruit and Cracker Dessert: A quick and easy two minute recipe consisting of fruits and crackers.

    Benefits of Fruit Chaat:

    Nutrient-Rich: Fruit Chaat is packed with vitamins, minerals, and antioxidants from a variety of fruits, making it a nutritious choice for snacking.

    Hydration: Fruits like cucumber and watermelon are high in water content, making Fruit Chaat a hydrating option, especially during hot weather.

    Digestive Aid: The spices used in Fruit Chaat, such as cumin and black salt, aid in digestion and promote gut health, making it a digestive-friendly snack. Being gluten free these dishes are healthy low fat, low cholesterols

    FAQs (Frequently Asked Questions):

    Q: Can I prepare Fruit Chaat in advance?

    A: Yes, you can chop the fruits and prepare the dressing in advance, but it’s best to combine them just before serving to maintain the freshness and texture of the fruits.

    Q: Is Fruit Chaat suitable for weight watchers?

    A: Absolutely! Fruit Chaat is low in calories and high in nutrients, making it an ideal choice for those watching their weight. Just be mindful of portion sizes and avoid adding excessive sweeteners or high-calorie toppings.

    Q: Can I make Fruit Chaat without any spices?

    A: While spices like Fruit Chaat Masala add a unique flavor to the dish, you can certainly adjust the spice level or omit them altogether according to your taste preferences. Experiment with different flavor combinations to find what works best for you.

    Fruit Chaat is a versatile and delicious snack that can be enjoyed on its own or as a side dish. Whether you’re craving something sweet, tangy, or spicy, this refreshing recipe is sure to hit the spot. So, gather your favorite fruits, unleash your creativity, and indulge in the goodness of Fruit Chaat today!

  • Coconut Chutney

    Coconut Chutney

    A bowl of creamy Coconut Chutney with fresh coconut and spices

    Coconut Chutney

    Coconut chutney is a typical condiment that is served with South Indian dishes, especially Idlis and Dosas. It has great texture and a unique taste that compliments many dishes.
    5 from 1 vote
    Prep Time 10 minutes
    Cook Time 10 minutes
    Total Time 20 minutes
    Course Side Dish
    Cuisine Indian
    Servings 8 people

    Ingredients
      

    • 1 cup coconut peeled and cut in small pieces
    • 2 tbsp chana dal bengal gram
    • 1 cup yogurt curd, dahi
    • 1-1/2 tsp salt
    • 2 green chilies,
    • 1/2 inch ginger
    • 1 tsp lemon juice as required

    For seasoning

    • 1 tsp oil
    • 1/8 tsp asafetida hing
    • 1/4 tsp black mustard seeds rai
    • 2 red chilies broken pieces
    • 8 curry leaves

    Instructions
     

    • Peel coconut and cut into small pieces for easy blending.
    • Roast chana dal on medium heat until it is light brown in color and has a roasted aroma.
    • Coarsely grind chana dal in a blender. Add yogurt, green chilies, and salt and continue blending into the paste.
    • Add coconut to the paste, a few pieces at a time and keep blending. Add water, as needed, to help with the grinding. (Adding the coconut in small amounts also helps this process).
    • Before removing from blender, taste chutney to adjust the salt and pepper. Use lemon juice to adjust the tang to suit your taste. Blend well.

    Seasoning

    • Heat oil in small pan. When hot, add black mustard seeds. When the seeds crack, add asafetida, red chilies and curry leaves.
    • Pour the seasoning mixture over the chutney.

    Notes

    Coconut chutney can be refrigerated up to a week.
    Serving suggestion: serve Coconut Chutney with Idli, Rava Dosa, Dosa 
    Tried this recipe?Let us know how it was!

    Coconut Chutney: A Refreshing and Versatile South Indian Condiment

    Coconut chutney is a quintessential South Indian condiment known for its refreshing flavor, creamy texture, and versatility. Made from fresh coconut, green chilies, roasted chana dal (split chickpeas), and a blend of spices, coconut chutney is a delicious accompaniment to various South Indian dishes such as dosa, idli, vada, and uttapam

    This versatile condiment can also be enjoyed with snacks like pakoras, samosas, or even spread on sandwiches for an extra kick of flavor. 

    Benefits of Coconut Chutney:

    • Good Source of Fibre: Coconut chutney contains dietary fibre from coconut and roasted chana dal, which helps support digestive health, regulate blood sugar levels, and promote feelings of fullness. A diet high in fibre is associated with a reduced risk of heart disease, diabetes, and certain cancers.
    • Packed with Flavorful Ingredients: Coconut chutney gets its delicious flavor from a combination of fresh coconut, green chilies, roasted chana dal, ginger, and spices such as cumin seeds, mustard seeds, and curry leaves. These aromatic ingredients come together to create a tantalizing blend of flavours that enhance the taste of various dishes.
    • Vegan and Gluten-Free: Coconut chutney is naturally vegan and gluten-free, making it suitable for individuals following plant-based diets or those with gluten sensitivities or celiac disease. It’s a versatile condiment that can be enjoyed by people with diverse dietary preferences and restrictions.

    Variations of Chutney:

    • Rhubarb Chutney: This Sweet and Sour chutney with a blend of spices tastes great and is very addictive. This is a great complement to any meal
    • Date And Raisin Chutney: Using two major ingredients date and raisin this chutney is sweet and sour and is a great complement to most snacks, pakoras and appetizers
    • Mango Chutney: Mango fruit is a tricky recipe but it’s a chutney that acts as a great side order which can go along with pakoras, snacks, fries and other appetisers.
    • Yogurt Chutney: A quick and easy chutney which can be prepared in no time and is made using yogurt and formed to excite the taste buds of all munchies like appetizers, snacks or pakoras. 

    Tips on How to make Coconut Chutney:

    • Use Fresh Coconut: For the best flavor and texture, use fresh coconut instead of desiccated coconut or coconut powder. Break open a mature coconut, remove the flesh, and chop it into smaller pieces before blending with other ingredients to make the chutney.
    • Adjust Spice Levels: Adjust the quantity of green chilies according to your preference for spice. If you prefer a milder chutney, use fewer green chilies or remove the seeds and membranes before blending. For a spicier chutney, add extra green chilies or include a few dried red chilies.
    • Consistency Matters: Achieve the desired consistency of coconut chutney by controlling the amount of water added during blending. Start with a small quantity of water and gradually add more as needed to reach the desired thickness. The chutney should have a smooth and creamy texture, similar to a thick sauce.
    • Tempering Technique: Master the art of tempering (tadka) to enhance the flavor of coconut chutney. Heat oil in a small pan, add mustard seeds, urad dal, dried red chilies, and curry leaves, and fry until the mustard seeds splutter and the dal turns golden brown. Pour the tempering over the blended chutney and mix well before serving.

    FAQs about Coconut Chutney:

    How long does coconut chutney last? 

    Coconut chutney can be stored in the refrigerator for 3-4 days in an airtight container. However, it’s best enjoyed fresh for optimal flavor and texture.

    Can I freeze coconut chutney? 

    While coconut chutney can be frozen for longer storage, the texture may change slightly upon thawing. It’s best to consume fresh coconut chutney whenever possible for the best taste and texture.

    Is coconut chutney spicy ?

    The spiciness of coconut chutney can be adjusted according to personal preference by varying the quantity of green chilies used. It can range from mild to moderately spicy depending on the amount of chilies added.

    Can I use desiccated coconut instead of fresh coconut? 

    While fresh coconut is preferred for its flavor and texture, desiccated coconut can be used as a substitute by soaking it in warm water for 15-20 minutes before blending.

    With its simple ingredients, customizable variations, and easy preparation, coconut chutney is a must-have in any South Indian kitchen.

  • Achari Paneer

    Achari Paneer

    Achari Paneer

    Achari Paneer is flavorful, healthy and high in protein.  Paneer is an Indian cheese, also known as chenna.  Achari paneer is very versatile and can be served as an appetizer or as an accompaniment to a main course.
    No ratings yet
    Course Appetizer
    Cuisine Indian
    Servings 8 people

    Ingredients
      

    • 14oz paneer cut in ½ inch cubes (paneer you can find in Indian grocery store)
    • 1 tbsp salt
    • 1/8 tbsp turmeric (haldi)
    • 1/4 cup  yogurt (dahi)
    • 2 tbsp olive oil
    • 4 whole red chilies Sabut lal mirch)
    • Pinch of asafetida (hing)
    • 1/4 tbsp nigella (onion seeds or kalonji)
    • 1 tbsp coriander seeds (dhania)
    • 1/4  tbsp fenugreek seeds (mathi)
    • 1/2  tbsp black pepper
    • 1/2 tbsp fennel seeds (saunf)
    • 1 ½ cup baby spinach leaves (palak)

    Instructions
     

    • Mix paneer, yogurt, turmeric and salt. Set aside.
    • In a frying pan over medium heat, dry roast nigella, coriander seeds, fenugreek seeds, fennel seeds, and black pepper for 1-2 minutes. Seeds will become darker in color and give off a beautiful aroma.
    • Crush the roasted seeds using a mortar or rolling pin.  Set aside.
    • Add oil to the same pan, at low-medium heat.  Roast red chilies till they turn a darker color.  Remove from pan and break each one into 2-3 pieces.
    • Increase to medium heat; add asafetida, followed by paneer mixture.   Stir fry for 3-4 minutes until most of the moisture has evaporated.  Do not overcook the paneer as it will become dry.The yogurt should coat the paneer nicely so it remains moist. Turn off the heat.
    • Add all the dry spices and mix well.
    • Serve warm achari paneer over a bed of spinach leaves.

    Notes

    Tips
    Achari paneer can be made in advance and refrigerated up to a week.   However, it tastes best when served warm.
    Keyword Achari Paneer
    Tried this recipe?Let us know how it was!

    What is Achari Paneer ?

    Paneer Achari isn’t quite an appetizer or snack, but it can definitely be enjoyed in those settings! It’s a delicious vegetarian dish originating in North India. The star is paneer, a soft Indian cheese, cooked in a creamy, flavorful gravy.

    The “Achari” part comes from the pickling spices used in the recipe, giving it a tangy and slightly spicy kick. It’s often enjoyed with rice or naan, a type of leavened flatbread.

    While the exact origin is unknown, achari paneer tikka recipe is believed to have emerged in North India, particularly in the regions of Punjab and Delhi. Its popularity has spread throughout the country and even internationally, capturing hearts (and taste buds) with its delightful combination of textures and flavors.

    So, while not technically an appetizer, Achari Paneer is a crowd-pleasing dish that’s perfect for sharing with friends and family. Plus, it’s naturally gluten-free thanks to the paneer, making it a great option for those with dietary restrictions.

    How to make Achari Paneer ?

    To make achari paneer masala, first, mix paneer (Indian cheese), yogurt, turmeric, and salt together and set it aside. In a pan over medium heat, dry roast nigella, coriander seeds, fenugreek seeds, fennel seeds, and black pepper for 1-2 minutes until they darken and release a nice smell. Crush these roasted seeds using a mortar or rolling pin and keep them aside.

    In the same pan, add oil over low-medium heat and roast red chilies until they darken. Remove them from the pan and break each chili into 2-3 pieces. Increase the heat to medium, add asafetida, then pour in the paneer mixture. Stir-fry for 3-4 minutes until most of the moisture evaporates, being careful not to overcook the paneer.

    Now, turn off the heat and add the crushed spices, mixing everything well. The paneer needs to be nicely coated with the yogurt to keep it moist. Serve the warm achari paneer tikka over a bed of spinach leaves for a delicious and flavorful dish. Enjoy!

    Other Paneer Variants

    Diving into Manjula’s Kitchen, a treasure trove of Indian recipes, we can discover a delectable world of paneer dishes! Here are 5 enticing paneer variations that will tantalize your taste buds:

    Butter Paneer: This classic dish features paneer cubes deep-fried to a golden crisp. Manjula’s recipe guides you through creating a rich and creamy tomato gravy infused with aromatic spices like coriander, turmeric, and red chili powder. The addition of whipped yogurt adds a touch of tang, perfectly complementing the melt-in-your-mouth paneer.

    Paneer Tikka Masala: This vibrant dish takes inspiration from the tandoor oven. Here, marinated paneer pieces are pan-fried until slightly browned, then bathed in a luxurious gravy. The gravy boasts a symphony of flavors – the sweetness of tomatoes, the warmth of red chili powder, and a hint of smokiness. A touch of cornstarch lends a delightful silky texture, making it an ideal main course with rice or naan.

    Paneer Methi (Methi Malai Paneer): This comfort food features paneer simmered in a creamy and flavorful fenugreek sauce. Manjula’s recipe uses dried fenugreek leaves (kasoori methi) to impart a unique, slightly bitter taste that beautifully complements the creamy cashew and tomato base. The addition of milk further enhances the smooth texture, making it a perfect dip for roti or a comforting side dish.

    Paneer Tomato Curry: This vibrant curry showcases the beauty of simplicity. Fresh tomatoes are blended into a smooth puree, then cooked with aromatic spices like cumin and coriander. Chunks of paneer are added to the gravy, allowing them to soak up all the delicious flavors. Bell peppers add a touch of sweetness and crunch, making this a wholesome and satisfying meal.

    Palak Paneer: This vibrant green curry is a nutritional powerhouse. Fresh spinach forms the base of the gravy, providing a rich source of iron and vitamins. Manjula’s recipe guides you through incorporating spices like ginger, garlic, and garam masala, creating a flavorful and aromatic sauce. Paneer cubes nestled in this emerald green gravy make for a visually stunning and incredibly delicious dish.

    FAQs Frequently Asked Question for Achari Paneer

    Is Achari Paneer Spicy?

    Achari paneer can range from mild to spicy, depending on the recipe. The “achari masala” itself has a kick, but the level of heat can be adjusted by controlling the amount of red chili powder used.

    What Does Achari Paneer Taste Like?

    The dominant flavors are tangy and savory, thanks to the pickling spices. You’ll also experience hints of spice, creaminess (often from yogurt or cashews), and the mild flavor of paneer itself.

    Is Achari Paneer Vegetarian?

    Yes, achari paneer is traditionally a vegetarian dish. Paneer is made from milk and the masala typically uses vegetarian ingredients.

    Is Achari Paneer Vegan?

    Not always. Some recipes incorporate yogurt or cream in the gravy. You can find vegan versions that use plant-based yogurt alternatives or coconut milk for creaminess.

  • Aloo Mattar

    Aloo Mattar

    Aloo Mattar

    Aloo Mattar

    Aloo Mattar is a popular north Indian dish. Potatoes and peas with spicy gravy makes a great main dish.
    4.34 from 3 votes
    Prep Time 10 minutes
    Cook Time 15 minutes
    Total Time 25 minutes
    Course Main Course
    Cuisine Indian
    Servings 3 people

    Ingredients
      

    • 3 medium boiled potatoes
    • 3/4 cup green peas I am using frozen
    • 2 tbsp oil
    • 1 tsp cumin seeds jeera
    • 1/8 tsp asafetida hing
    • 1 tsp ginger paste
    • 1 green chili finely chopped
    • 2 tbsp coriander powder dhania
    • 1 tsp fennel seed powder
    • 1/4 tsp turmeric haldi
    • 1 tsp paprika dagi mirch
    • 1 tsp salt
    • 1 tsp mango powder amchoor
    • 1/2 tsp garam masala
    • 2 medium tomatoes sliced
    • 2 tbsp chopped cilantro hara dhania

    Instructions
     

    • Peel the potatoes cut them in byte size pieces.
    • In a small bowl mix ginger, green chili, coriander, fennel seed, turmeric, and paprika with ¼ cup of water.
    • Heat the oil in a saucepan. Test the heat by adding one cumin seed to the oil. If the cumin seed cracks right away, the oil is ready. Add the cumin seeds, and asafetida, after cumin seeds crack add the spice mix cook until spices start leaving the oil this should take about one minute.
    • Next add green peas and half a cup of water and let it cook until they are tender.
    • Add potatoes and salt mix it well, while mixing mash few pieces of potatoes that will give thickness to gravy.
    • Add about 1-1/4 cups of water after it comes to boil lower the heat to medium and let it cook for about five minutes.
    • Add mango powder, garam masala, chopped cilantro, and slice of tomatoes mix it gently after gravy comes to boil turn off the heat and cover the pot. Tomatoes will cook with the steam.
    • Aloo matter is ready to serve.

    Notes

    Serving Suggestions
    Aloo matter can be served with Dal Puri, Urad Dal Kachori, Kuttu Puri and side of Salted Mint Lassi.
    Enjoy it!
    Keyword Everyday Meal, Gluten Free, Potato With Peas, Vegan
    Tried this recipe?Let us know how it was!

  • Cauliflower Pickle

    Cauliflower Pickle

    Cauliflower Pickle

    Cauliflower pickle is a great condiment to serve with any meal or with sandwiches.
    5 from 1 vote
    Course Chutney
    Cuisine Indian

    Ingredients
      

    • 1 large cauliflower
    • 3 green chili sliced
    • 1 1/2 tbsp salt
    • 1 1/2 tbsp coarsely ground mustard seeds (rai)
    • 1 tbsp coarsely ground fennel seeds
    • 1/2 tbsp red chili powder (adjust to taste)
    • 1/4 tbsp turmeric (haldi)
    • 1/8 tbsp asafetida (hing)
    • 1 tbsp lemon juice
    • 3 tbsp mustard oil or olive oil

    Instructions
     

    • Cut the cauliflower in small florets, (Should be about four cups of cauliflower).
    • Wash the cauliflower and pat dry, spread the cauliflower over the towel for at least an hour to air dry, ensuring the cauliflower don’t have any excess water.
    • Mix all the ingredients together with the cauliflower and let it marinate for 2 to 3 hours before serving.
    • Pickle can be refrigerated for about one week.
    Keyword Cauliflower Pickle
    Tried this recipe?Let us know how it was!

  • Falafel Sandwich

    Falafel Sandwich

    Falafel

    Falafel Sandwich

    Falafel is a popular Middle Eastern chick pea patty sandwich. Falafel is stuffed in pita bread with salad and sauce.
    No ratings yet
    Prep Time 15 minutes
    Cook Time 30 minutes
    Course sandwich
    Cuisine Indian
    Servings 4 people

    Ingredients
      

    • 1 cup dried chick peas (garbanzo, kabli chana)
    • 2 tbsp chopped parsley
    • 2 tbsp chopped cilantro
    • 1 green chili
    • 1/4 inch piece of ginger
    • 1 1/2 tbsp salt adjust to taste
    • 1 tbsp cumin seeds
    • 1 tbsp red chili flakes
    • 1/4 cup all purpose flour (plain flour, maida)
    • Also need oil to fry
    • 1/4 cup sesame seeds
    • 1 1/4 tbsp salt adjust to taste
    • 2 tbsp lemon juice
    • 2 tbsp olive oil
    • 1/2 tbsp cumin seeds
    • 2 tbsp chopped parsley
    • 2 tbsp chopped cilantro
    • 1 green chili adjust to taste
    • 1/4 cup water use as needed
    • 2 cup of thinly sliced lettuce
    • 2 medium size chopped tomatoes
    • 1/2 cup chopped cucumber
    • 4 pocket pita bread

    Instructions
     

    • In a small frying pan dry roast the sesame seeds on medium heat for 2-3 minutes.
    • mix all the ingredients and blend to make a pourable paste use water as needed
    • Keep it aside.
    • Soak the chickpeas in 4 cups of water over night. After soaking chickpeas will be about 2 and half time in volume.
    • In pressure cooker add chickpeas with the 3 cups of water. Close the cooker and put the pressure on.
    • Cook on medium high heat.
    • As pressure cooker starts steaming turn the heat down to medium and cook for about 4 minutes.
    • Close the heat and wait until steam has stopped before opening the pressure cooker. Chickpeas should be just tender not very soft.
    • Drain the water and let it cool; combine all the ingredients for falafel grind using food processor, mixture should be grainy. If needed add few spoons of water.
    • Divide the mixture in 24 equal parts or make them as desired size patties.
    • Heat oil in a frying pan on medium high heat.
    • The frying pan should have at least 1 ½ inch of oil. To check if the oil is ready, put small piece of dough in oil. The dough should come up but not change color right away.
    • Slowly drop the falafel patties in the oil and fry until they are brown in color both sides. It should take about 5-6 minutes to cook each batch.
    • Keep the patties aside.

    Notes

    Serving suggestion
    1. Take pita bread and heat over the skillet on medium high heat both sides lightly.
    2. Slice the pita bread from center in half take one part and open from center looking like a pocket.
    3. Fill the pita pocket with chopped lettuce so it 1/3 full. Next add some chopped tomatoes and cucumber.
    4. Pour about one tablespoon of tahini sauce, 3 to 4 pieces of falafel and again tahini sauce.
    5. It’s best to serve the sandwich with hot falafels. Falafels can be easily re-heated before serving using an oven or toaster oven.
     
    Variation
    Serve the falafel over green salad use the tahini sauce as a dressing.
    Keyword sandwiches
    Tried this recipe?Let us know how it was!

  • Mango Chutney

    Mango Chutney

    Mango Chutney

    Mango Chutney (Mango Relish, Aam Ka Lacha)

    Mango chutney is a lightly spiced, sweet and sour relish with a chunky texture that makes a perfect vegan condiment.
    5 from 1 vote
    Course Chutney
    Cuisine Indian

    Ingredients
      

    • 2 raw green cooking mangos peeled and shredded (about 3 cups of shredded mango)
    • 2 tbsp oil
    • 1 tbsp nigella (onion seeds or kalonji)
    • 4 whole dry red chilies
    • About 1 tbsp thinly sliced ginger
    • About 2 tbsp golden raisins
    • 1/2  tbsp chili powder
    • 2 tbsp salt
    • 1 cup sugar

    Instructions
     

    • Wash and dry the mangos. Peel the skins off and shred the fruit.
    • Heat oil in a sauce pan over medium heat. Add nigella (kalonji) and whole red chili, stir for few seconds.
    • Add raisins and stir for a few seconds.  Then add remaining ingredients shredded mango, sliced ginger, chili powder, salt and sugar. Mix well.
    • When the mango mix comes to a boil, cover the pot and turn the heat down to low medium.
    • Cook for ten minutes, until mangos are tender but not mushy.
    • The finished Chutney has a lovely color.
    • Cool  the chutney and store it in a glass jar.
    • Refrigerated, the chutney will last for months.

    Notes

    Tips
    It is important to get the right mangos for chutney. Cooking mangos are different from the mangos we eat.  For best results, the mangos should be very firm.  Slices should be white and sour.
    Tried this recipe?Let us know how it was!
  • Aloo Naan

    Aloo Naan


    Aloo Naan

    Aloo Naan (Stuffed Potato Naan)

    Naan is very popular bread. This recipe is a tasty twist to naan stuffed with spicy mashed potatoes. Aloo naan can be served by itself or any gravy based vegetable dish.
    5 from 2 votes
    Course Bread
    Cuisine Indian

    Ingredients
      

    • 2 cup of All Purpose flour (Plain flour or maida)
    • 1 tbsp active dry yeast
    • 1 tbsp salt
    • 1 tbsp sugar
    • Pinch of baking soda
    • 2 tbsp of oil
    • 2 tbsp yogurt (curd or dahi)
    • About 3/4 cup lukewarm water use as needed
    • 2 medium potatoes
    • 1 tbsp salt adjust to taste
    • 1/2  tbsp cumin seeds (Jeera)
    • 1/2 tbsp mango powder (amchoor)
    • 1 chopped green pepper
    • 2 tbsp chopped cilantro (hara dhania)
    • 1/2  tbsp garam masala – optional
    • 2 tbsp of oil
    • 2 tbsp of clear butter or ghee to butter the Naan
    • 1/4  cup All Purpose flour for rolling

    Instructions
     

    • Dissolve yeast in 2 tablespoons of lukewarm water and let it sit for 10 minutes or until the mixture becomes frothy.
    • Add sugar, salt and baking soda to the flour and mix well.
    • Add the oil and yogurt mix it well, this will become crumbly dough.
    • Add the water/yeast mixture and add water as needed to make the dough firm. Note: After dough rises, it will become a little softer.
    • Knead until the dough is smooth. Cover the dough with damp cloth and keep it in a warm place for 3-4 hours. The dough should almost double in volume.
    • Boil 2 medium potatoes until they are tender.
    • Once cooked, drain the water and let the potatoes cool down. Note: Do not cool the potatoes under running water. Potatoes will absorb the water and become soft.
    • Next peel the skin off and mash the potatoes.
    • Add green pepper, cilantro, cumin seeds, mango powder, garam masala, and salt to the mashed potatoes and mix it well.

    Notes

    Making Naan
    1. Preheat the oven to 500 degrees with pizza stone (baking stone) for about thirty minutes so stone is hot. Using a baking/pizza stone helps get Naan close to same kind of heat as a clay tandoor.
    2. Knead the dough for about two minutes and divide the dough into six equal parts, and divide the potato mix in six parts. Potato mix should be little smaller then dough balls.
    3. Roll the dough into a 3-inch circle. Place one potato ball in the center. Pull the edges of the dough to wrap the potato filling. Proceed to make all six balls.
    4. Let the filled balls settle for 3 to 4 minutes before rolling them.
    5. Next turn the oven to high broil.
    6. Before putting the Naan in oven, oil your palms with oil and flip naan between your palms and place onto your baking/pizza stone into the oven.
    7. You can place about 2 to 3 naan on the baking/pizza stone at a time. The naan will take about 2 to 3 minutes to cook, depending upon your oven. After the naan is baked, it should become golden brown color on top.
    8. Take naan out of the oven and brush lightly with clear butter (ghee).
    9. Wait for 2 to 3 minutes before baking the next naan. It gives oven the chance to get heated again to max.
     
    Notes
    1. If you are doubling the recipe yeast should instead of two teaspoon it should be 1 ½ teaspoon same thing applies with sugar.
    2. If pizza stone is not available use baking sheet. After naan is cooked from top turn them over to cook from other side.
     
    Serving Suggestions
    Serve Naan with dal makhni, raita, chola, palak paneer. Enjoy!
    Keyword naan
    Tried this recipe?Let us know how it was!