Category: Party Recipes

Best Indian Dishes for a Party: Delicious and Easy Party Foods

Hosting a party is all about creating memorable experiences, and what better way to do that than with delicious food? Indian cuisine offers some of the best Indian dishes that are perfect for any celebration. Whether you’re looking for easy party foods, party food ideas, or the best Indian dishes for a party, Manjula’s Kitchen has a range of recipes to impress your guests. Let’s explore some fantastic dishes that will make your next gathering a hit.

Classic Indian Party Food Ideas

Samosas

Samosas are one of the best Indian dishes that you can serve at a party. These crispy pastries filled with spiced potatoes and peas are a favorite among many. They are easy to make and can be prepared in advance, making them one of the best Indian dishes for a party. Serve them with indian chutney such as mint and tamarind sauce for an added burst of flavor.
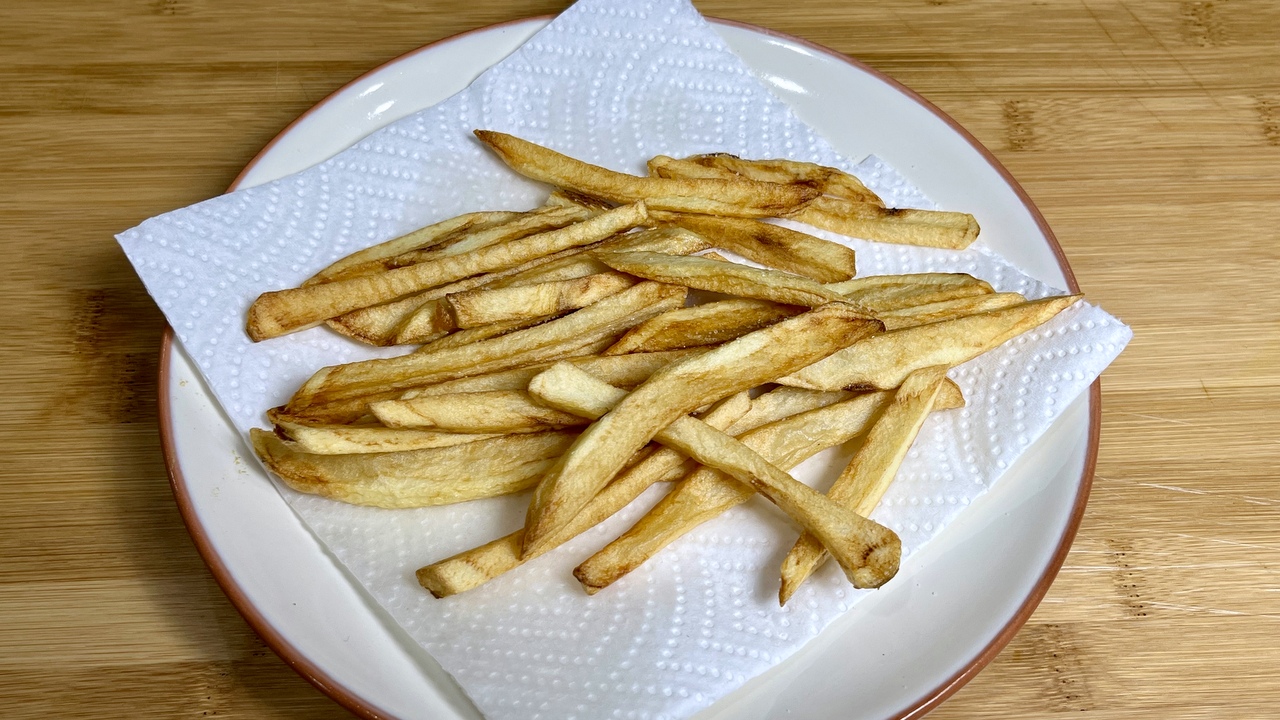
Pakoras

Pakoras are another popular choice for easy party foods. These deep-fried fritters made with vegetables like spinach, and potatoes are perfect for any occasion. The crunchy exterior and flavorful interior make them a hit with guests. Pair them with a spicy chutney for the perfect party snack.

Easy Party Foods: Indian Style
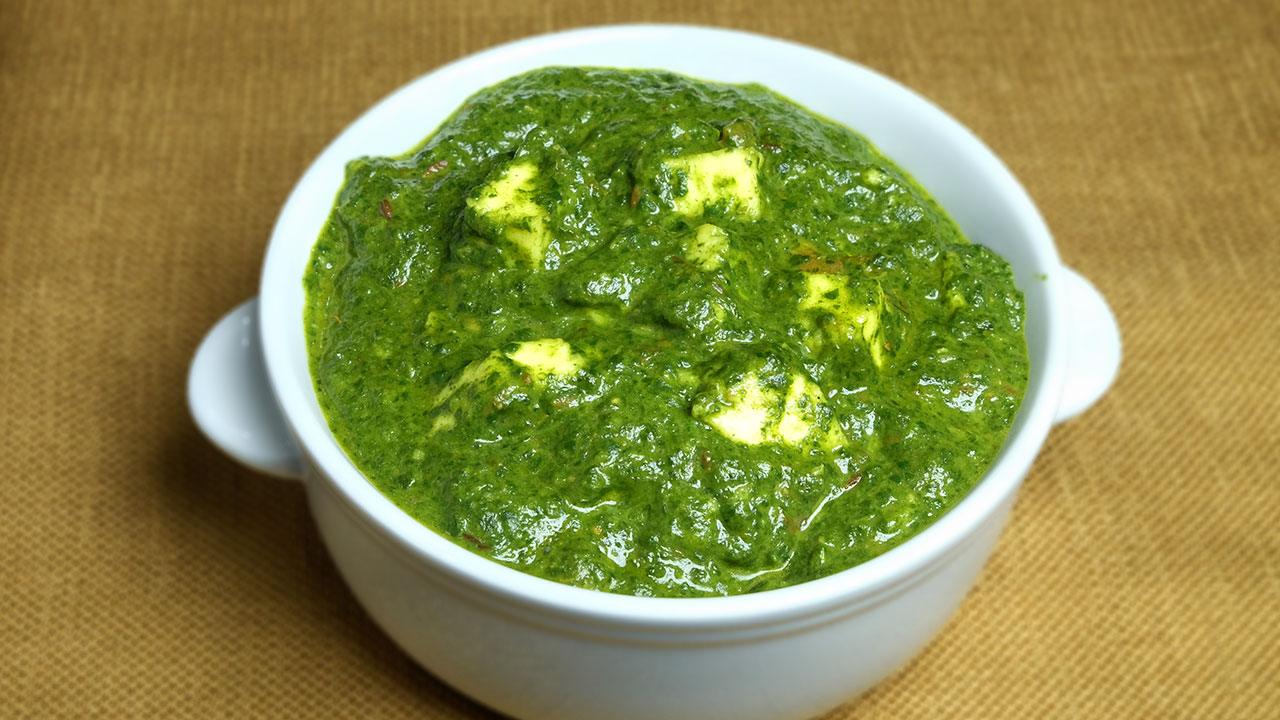
Paneer Tikka

Paneer Tikka is a delicious and healthy Indian veg appetizer that fits well within easy party foods. Marinated paneer cubes are grilled to perfection, creating a smoky and flavorful dish. This dish is not only easy to prepare but also a crowd-pleaser, making it one of the best Indian dishes for a party.
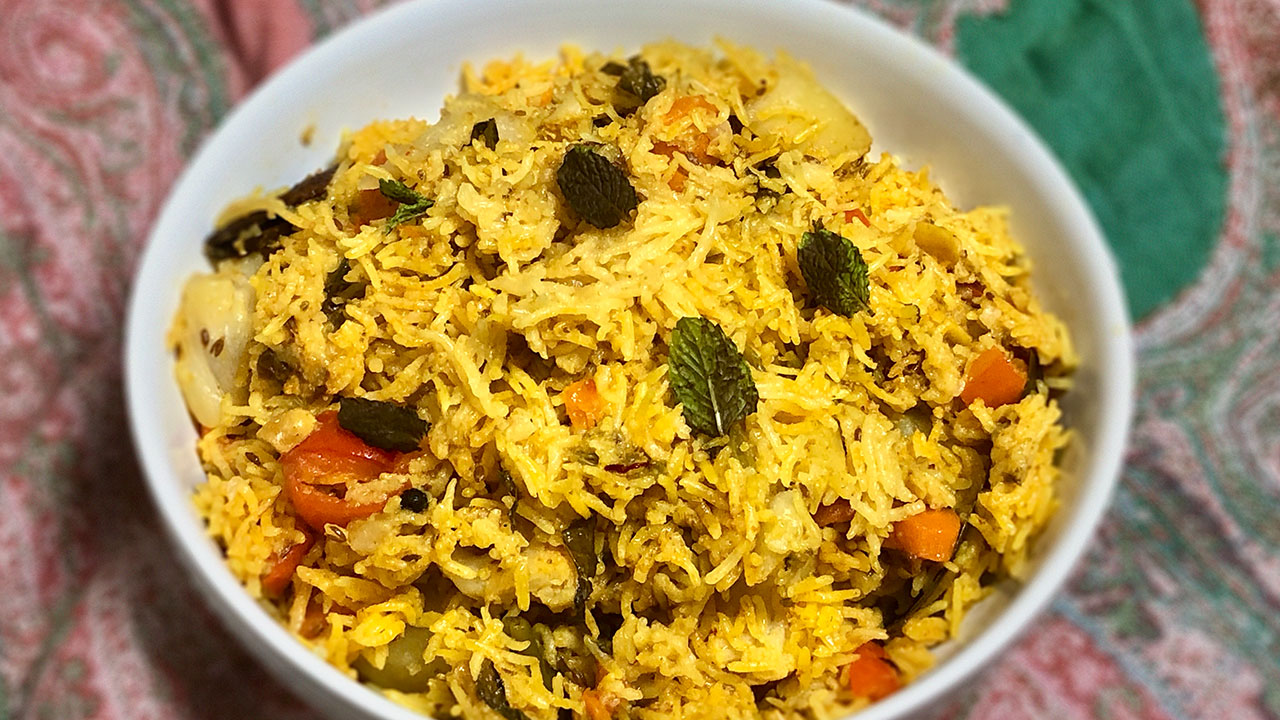
Vegetable Biryani

Vegetable Biryani is a fragrant and flavorful rice dish cooked with a variety of vegetables and aromatic spices. This dish is perfect for large gatherings as it can be made in large quantities. Biryani is always a hit at parties, making it one of the top party food ideas.

Best Indian Dishes for a Party

Chole Bhature

Chole Bhature is a classic North Indian dish that is perfect for parties. Spicy chickpea curry served with fluffy deep-fried bread is a combination that is hard to resist. This dish is filling and delicious, making it one of the best Indian dishes for a party. Serve it with a side of pickles and yogurt for a complete meal.

Aloo Tikki

Aloo Tikki are spiced potato patties that are crispy on the outside and soft on the inside. These are perfect as appetizers or snacks at a party. They are easy to prepare and can be served with various chutneys, making them one of the top party food ideas.

Vegetarian Party Food Ideas

Hara Bhara Kabab

Hara Bhara Kabab is a nutritious and delicious vegetarian kabab made with spinach, peas, and potatoes. These kababs are a great addition to your list of best Indian dishes for a party. They are healthy, tasty, and easy to make, making them perfect for any gathering.
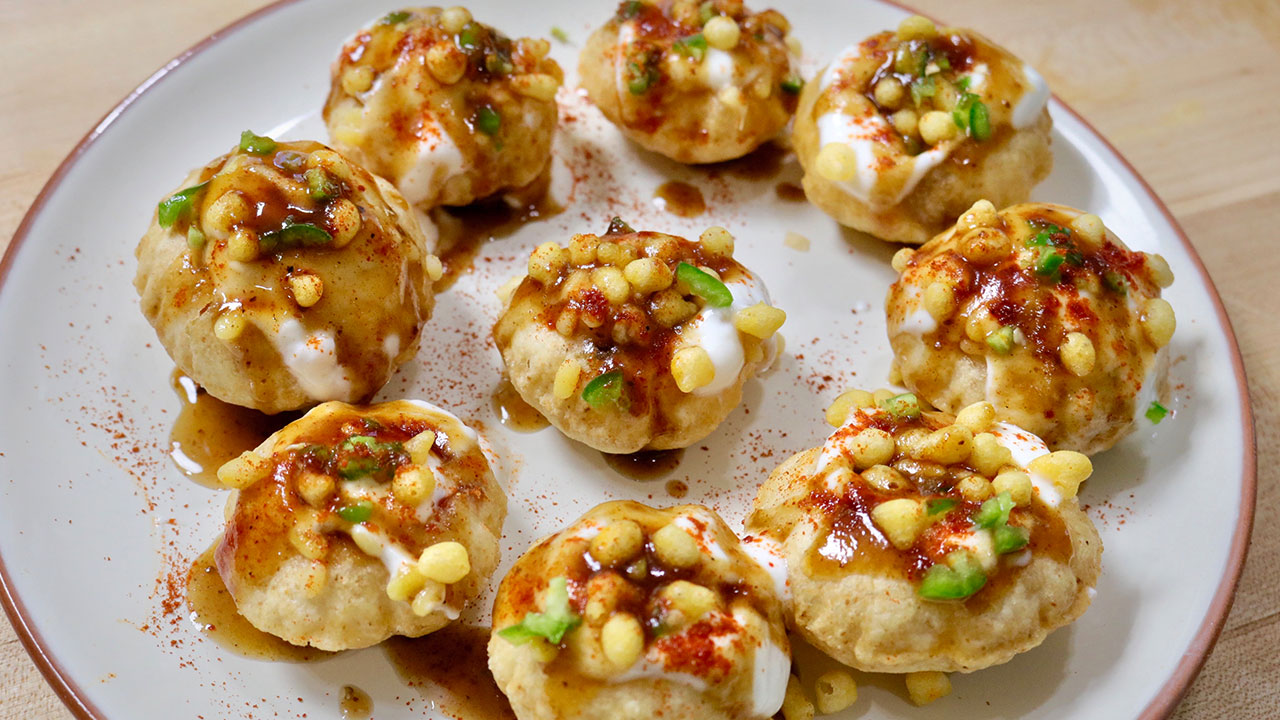
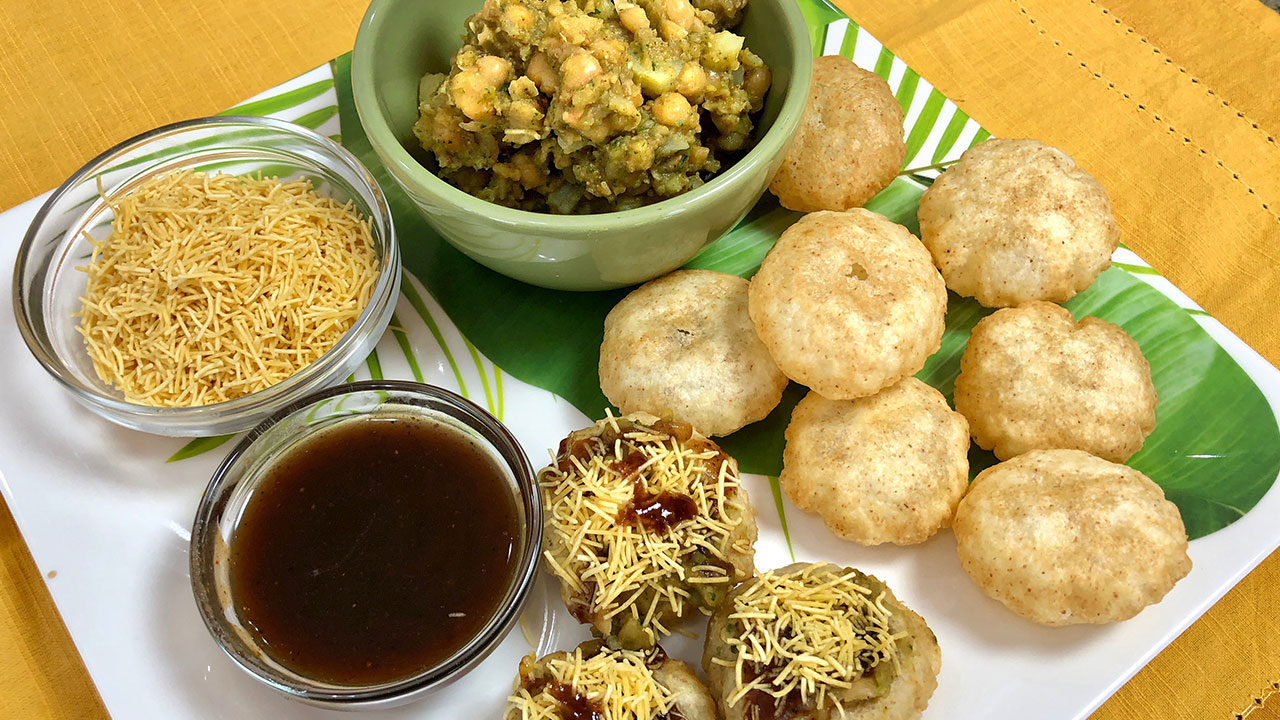
Dahi Puri

Dahi Puri is a popular Indian street food that is perfect for parties. Crisp puris are filled with spiced potatoes, chickpeas, yogurt, and chutneys, creating a burst of flavors in every bite. This dish is easy to assemble and always a hit with guests, making it one of the best Indian dishes for a party.

Indian Desserts for Parties
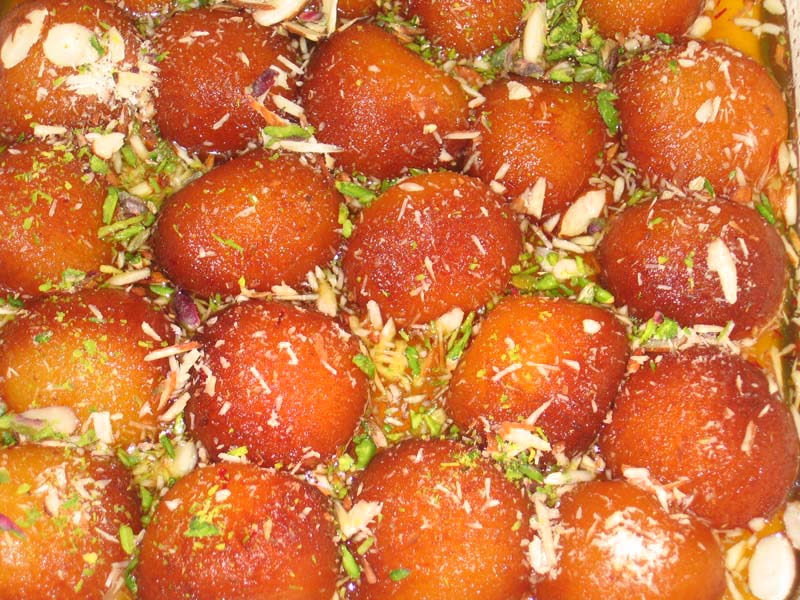
Gulab Jamun

Gulab Jamun are soft, deep-fried balls made from khoya (dried milk) soaked in a sweet syrup flavored with cardamom and rose water. This Indian dessert is a favorite among many and is perfect for any celebration. The melt-in-your-mouth texture and sweet flavor make it one of the best party food ideas for dessert.
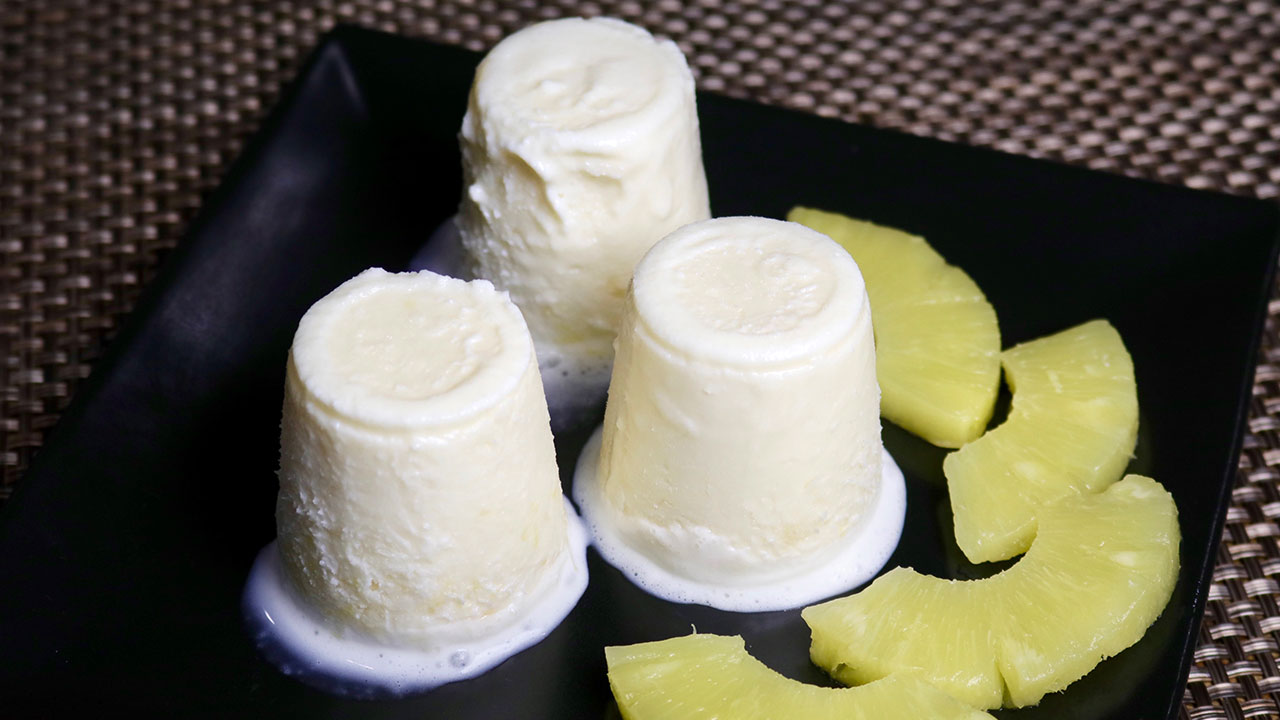
Kheer

Kheer is a creamy rice pudding flavored with cardamom and garnished with nuts and raisins. This dessert is a classic in Indian cuisine and is easy to prepare in large quantities, making it one of the best Indian dishes for a party.

Elevating Your Party Menu

To enhance your party menu, consider incorporating dishes from related categories that complement these best Indian dishes. Adding Indian snacks like samosas and pakoras can offer a delightful variety of flavors and textures.

For a sweet ending, explore Indian desserts such as gulab jamun and kheer. Including healthy options like hara bhara kabab and paneer tikka can provide lighter choices for your meals.

Planning a large gathering? The popular party recipe category is filled with dishes that are sure to impress your guests and make your celebration memorable. Adding North Indian recipes like chole bhature or vegetable biryani can bring an authentic touch to your meal.

Frequently Asked Questions (FAQs)

Q: What are some popular easy party foods? 

A: Some popular easy party foods include Samosas, Pakoras, Paneer Tikka, Aloo Tikki, and Vegetable Biryani. These dishes are flavorful, easy to prepare, and perfect for any gathering.

Q: How can I make traditional Indian dishes suitable for a party? 

A: To make traditional Indian dishes suitable for a party, try recipes like Chole Bhature, Hara Bhara Kabab, and Dahi Puri. These recipes are modified to be easy to serve and can be made in large quantities.

Q: What are some vegetarian Indian dishes for a party? 

A: Some vegetarian Indian dishes for a party include Hara Bhara Kabab, Dahi Puri, Paneer Tikka, and Aloo Tikki. These dishes are healthy, delicious, and sure to impress your guests.

Q: Can I prepare Indian party recipes in advance? 

A: Yes, many Indian party recipes can be prepared in advance and stored. Dishes like Vegetable Biryani and Chole Bhature can be made ahead of time and refrigerated, while appetizers like Samosas and Pakoras can be prepped and frozen.

Q: What are some sweet Indian dishes for a party? 

A: Some sweet Indian dishes for a party include Gulab Jamun and Kheer. These desserts are classic, easy to prepare, and perfect for any celebration.

Conclusion

Best Indian dishes for a party are a celebration of diverse flavors and nutritious ingredients. Whether you’re looking for easy party foods, party food ideas, or the best Indian dishes for a party, these recipes will bring variety and flavor to your celebrations. So, gather your ingredients, try out these recipes, and enjoy the rich and diverse world of Indian party foods. Happy cooking and happy entertaining!

By incorporating these dishes into your party menu, you’ll be able to enjoy a wide variety of delicious and nutritious foods. Whether you’re hosting a small gathering or a large celebration, there’s an Indian party recipe to suit every taste. Don’t forget to check out Manjula’s Kitchen for more inspiration and culinary delights. Happy cooking and happy eating!

  • Gulab Jamun

    Gulab Jamun

    Gulab Jamun Recipe by Manjula

    Gulab Jamun

    Gulab Jamun is a delicious Indian version of donuts immersed in warm sweet syrup. As India’s most popular dessert, gulab jamun is a staple in most parts of the country. Gulab jamuns are served for almost every celeberations. Gulab jamuns can be served warm or at room temperature. Gulab jamun is one of the desserts I make the more often, because this is an easy recipe to make and in my family everyone like them especially my grandkids.
    4.37 from 11 votes
    Prep Time 15 minutes
    Cook Time 30 minutes
    Total Time 45 minutes
    Course Dessert
    Cuisine Indian
    Servings 10 Gulab Jamuns

    Ingredients
      

    • 1 cup nonfat milk powder
    • 1/4 cup All Purpose flour plain flour, maida
    • 3 Tbsp unsalted butter at room temperature
    • 1/4 cup room temperature whole milk
    • Pinch of baking soda
    • 1 3/4 cup sugar
    • 1 1/2 cup water
    • 4 cardamom pods (ilachi) coarsely ground
    • 1 Tbsp sliced almonds and pistachio
    • Oil for deep-frying

    Instructions
     

    Syrup

    • In a large pan, combine the water, sugar, and ground cardamom seeds and bring to a boil. Let the syrup boil for another minute to completely dissolve the sugar. Turn off the heat.
    • Set the syrup aside.

    Gulab Jamun

    • In a bowl, mix the milk powder, flour and baking soda.
    • Add the butter and mix well.
    • Add milk to make soft dough. The dough will be sticky. The milk powder will absorb the extra milk.
    • If the dough is dry, add more milk to make it soft. Let the dough sit for a few minutes.
    • Grease your palms with butter and knead the dough.
    • Divide the dough into about ten equal parts and roll them into round balls.
    • Heat at least one inch of oil in a frying pan over medium heat. To test, place a small piece of dough into the oil; the oil should sizzle and the dough should take a minute to rise. If the dough rises faster, the oil is too hot; if oil does not sizzle, it is not hot enough.
    • Place the gulab jamuns in the frying pan. Do not crowd them, as the gulab jamuns will expand to about double their original volume.
    • Fry the gulab jamuns on medium heat for about seven minutes, rolling them around for even browning until dark brown.
    • Let the gulab jamuns cool a few minutes before placing into the hot (not boiling) syrup.
    • Let the gulab jamuns sit in the syrup for at least 20 minutes prior to serving.

    Notes

    Gulab jamuns can be kept at room temperature for about a week and up to one month when refrigerated. They can be frozen for months.
    Tips
    If the gulab jamuns are fried on high heat, they will be hard inside and not fully cooked.
    Too much baking soda will make the gulab jamuns too soft or cause them to break when frying.
    Don’t place the gulab jamuns in the syrup immediately after frying, or they will lose their shape and be  chewy.
    Serving suggestions
    Gulab jamuns can be served warm or at room temperature. They can also be served with ice cream.
    You may also like  Balushai and Jalebi
    Tried this recipe?Let us know how it was!


  • Basil Pesto Sauce

    Basil Pesto Sauce

    A bowl of vibrant green Basil Pesto Sauce

    Basil Pesto Sauce

    Lately pesto has become one of my favorite condiments to keep. Basil Pesto is an Italian delicacy. It is super easy to make, and you can use it in so many ways, making variations of dishes. My grandkids enjoy pesto pasta, my son's favorite is making pesto sandwiches, and I like salad and roasted vegetables with pesto. Pesto has a vibrant color and brightens up any dish you make. Basil is a very aromatic herb. I have basil plants in my backyard. Because basil is the main ingredient for this recipe, I am always prepared. This is also vegan and gluten free recipe.
    This recipe will make about 8 oz of Pesto.
    5 from 2 votes
    Prep Time 10 minutes
    Cook Time 0 minutes
    Total Time 10 minutes
    Course Chutney
    Cuisine Italian
    Servings 8 oz

    Ingredients
      

    • ½ cup toasted pine nuts
    • 2 cup fresh basil leaves
    • ½ cup spinach
    • 1 tsp lemon juice
    • ½ tsp salt
    • ¼ tsp fresh black pepper
    • ¼ cup olive oil

    Instructions
     

    • In a food processor, pulse the basil, spinach, pine nuts, black pepper, lemon juice, and salt.
    • Blend until the mixture is well blended but still has some texture, pausing to scrape down the sides, as necessary.
    • Now add the olive oil in the food processor and pulse for a few seconds, scrape the sides, and pulse it again.
    • I like to use a rubber spatula to scrape the sides. Pesto is now ready.
    • Adjust the ingredients to your taste.

    Notes

    Notes:
    I usually will make pesto in a larger quantity for later use. Freeze the pesto in an ice cube tray and make sure a few hours later to transfer the frozen cubes of pesto out and place in freezer zip lock baggies.
    Serving Suggestions:
    Toss with pasta as a sauce, over baked potatoes or grilled vegetables, toss it with salad, or spread it onto crackers or toasted slices of bread.
    You will also enjoy these related recipes, Grilled Caprese Sandwich, Vegan Macaroni and Cheese, Zucchini Pasta, Creamy Butternut squash, Creamy Spinach Pasta
    Tried this recipe?Let us know how it was!
  • Masala Bell Pepper Curry

    Masala Bell Pepper Curry

    A bowl of Masala Bell Pepper Curry garnished with cashews and fresh cilantro

    Masala Bell Pepper Curry

    Masala Bell Pepper Curry, which is a Hyderabadi-style dish. Hyderabad dishes are very spicy and aromatic. For me, bell pepper curry represents these dishes well. I wanted to do a recipe for a side dish for a more formal get together. I happened to have some extra bell peppers in my fridge, so I decided to experiment with those.
    Since this is a dish for a party, I wanted the gravy to be spicy and rich. Of course, I had to try out variations of this recipe a few times to balance the flavor. This dish has a complex flavor. The nuttiness of the cashews, sesame seeds, and coconut blends perfectly together. The gravy for this dish is also very versatile. You can also make a variety of dishes with this gravy. You can try adding potatoes or paneer with this gravy base, comes out delicious.
    Bell Pepper Masala Curry is very aromatic and delicious, in addition to being vegan and gluten-free. If you enjoy hot and spicy food, indulge yourself with this dish! It pairs excellently with naan, puri, or plain white rice. Enjoy!
    Recipe will serve 4.
    4.34 from 12 votes
    Prep Time 10 minutes
    Cook Time 30 minutes
    Course Main Course
    Cuisine Indian
    Servings 4 people

    Ingredients
      

    • 2 medium size green bell pepper cut into bite size pieces

    Spice Mix

    • 1 tsp oil
    • ¼ cup broken cashews
    • 1 Tbsp sesame seeds
    • 1 Tbsp coriander
    • 1 Tbsp coconut powder

    Gravy

    • 1 ½ cup chopped tomato I used 3 medium size tomatoes
    • 1 Tbsp ginger cut into small pieces
    • 1 Tbsp chopped green chili
    • 2 Tbsp oil
    • 8 fenugreek seeds methi dana
    • 1 tsp cumin seeds jeera
    • ¼ tsp turmeric haldi
    • tsp asafetida hing
    • 1 tsp red chili powder lal mirch
    • ½ tsp sugar
    • 1 tsp salt
    • ½ tsp garam masala

    Instructions
     

    • Cut the bell peppers in half and remove the core and discard and cut them in bite size pieces.
    • In a pan, heat 1 teaspoon oil. Add cashews, sesame seeds, coriander seeds, and on a low flame, stir fry them for about 2 minutes. Turn off the heat and add coconut stir together. After the mix comes to room temperature blend the mix using about 1/4 cup of water and make it into a paste and set aside.
    • Blend tomatoes, ginger, and green chili into a paste. Set aside.
    • Use the same frying pan, heat the oil on medium heat, oil should be moderately hot. Add cumin seeds, fenugreek seeds and asafetida stir for a minute add tomato paste. Add turmeric, salt, sugar, and red chili powder. Stir fry for about 2 minutes, oil will start separating.
    • Add the spice paste and cook for 2-3 minutes stirring. The spice mix will start to leave the oil. Add bell pepper stir and 1-1/2 cups of water and bring the gravy to boil.
    • Lower the heat to medium low and let it simmer for about 6-8 minutes. Until bell pepper is tender.
    • Gravy will thicken as it sits, if needed add more water.
    • Sprinkle the garam Masala and cover the pan.
    • Bell pepper curry is ready to serve. I like to serve this with Naan, or over plain rice.
    Tried this recipe?Let us know how it was!
  • Crispy French Fries

    Crispy French Fries

    A plate of crispy French Fries served with ketchup

    Crispy French Fries

    Crispy delicious French Fries! Who doesn't enjoy French fries? It's the perfect comfort food! Homemade Fries, it’s actually quite simple and easy to make. In fact, this is a great snack for my grandkids when they come to visit me. My grandson will say very proudly my dadi (grandmother) makes the best fries.This recipe will serve 3
    4 from 1 vote
    Prep Time 5 minutes
    Cook Time 15 minutes
    Course Appetizer
    Cuisine French
    Servings 3 people

    Ingredients
      

    • 2 potatoes use russet potatoes
    • ½ tsp salt
    • Oil to fry

    Instructions
     

    • Wash and peel the potatoes, and slice potatoes into French fries, and place into ice cold water for at about 10 minutes. Soaking in water potatoes some of the starch will come out and water will look fogy. Remove them from water to clean kitchen towel and pat dry.
    • Heat oil in a frying pan over medium-high heat. Put the fries into oil, don’t over crowed them. Notes: overcrowding fries will bring oil temperature to very low and fries can become very oily.
    • Turn the fries occasionally, fry until golden brown it should take about 6-8 minutes. Remove fries from oil with a slotted spoon to drain on paper towel. Sprinkle the salt and fries are ready to serve.

    Notes

    My family and friends enjoy the fries with tamarind chutney, this exotic sweet and sour chutney is a delicious condiment. I always have this in my refrigerator. My grandkids also like to have a lemonade or Mango lassi with French fries.
    Tried this recipe?Let us know how it was!
  • Palak Paneer

    Palak Paneer

    Palak Paneer

    Palak Paneer (2016)

    Palak Paneer is likely the most popular paneer dish from North India. Creamy spinach with tasty paneer makes a delicious main dish. This recipe was one of my favorite. After so many years of cooking, my family has decided my cooking skills have improved! I wanted to do this recipe again as with modified cooking method. Also I will like to thank you to all of my viewers who have encouraged me over the years. You guys truly inspire me!
    4.66 from 23 votes
    Prep Time 10 minutes
    Cook Time 25 minutes
    Total Time 35 minutes
    Course Main Course
    Cuisine Indian
    Servings 3 people

    Ingredients
      

    • 10 oz spinach washed and clean, about 6 cups packed spinach
    • 1-1/2 cups paneer cubed into bite size, about 1/3 pound of paneer
    • 1 tomato finely chopped, this will make 3/4 of chopped tomato
    • 1 green chili chopped
    • 1 Tbsp ginger chopped
    • 1 Tbsp oil
    • 1/2 tsp cumin seeds jeera
    • 1/8 tsp asafetida hing
    • 1 tsp coriander powder dhania
    • 1/4 tsp turmeric haldi
    • 1/2 tsp red chili powder
    • 1/2 tsp salt adjust to taste
    • 1/2 tsp sugar
    • 1 Tbsp whole wheat flour
    • 1/3 cup heavy cream

    Instructions
     

    • First blanch the spinach, this helps to keep the spinach color bright. To blanch the spinach, boil about 6 cups of water in a saucepan, and let the spinach boil for one minutes. Drain the water and put the spinach in ice cold water for about two minutes. Drain the water.
    • Blend the spinach, ginger and green chili. Spinach should be creamy but not pasty.
    • Soak the cubed paneer in about three cups of hot water, for about 5 minutes or more. This helps to give the paneer soft texture. Set aside.
    • While cooking, spinach can splatter, use larger sauce pan. Heat the oil in a sauce pan, over medium high heat. Test the heat by adding one cumin seed to the oil; if it cracks right away it is ready.
    • Add cumin seed, and asafetida. After cumin seeds crack, add the tomatoes and stir fry for 1-2 minutes. Tomatoes should be tender not mushy. Add coriander, turmeric, red chili powder, salt, and sugar, stir and add the spinach.
    • After spinach comes to boil lower the heat to low, and let the spinach cook for about 5-6 minutes do not cover the pot. This helps keeping the green color of spinach.
    • Mix the flour to 1/2 cup of water and add to the spinach, also add the cream. Mix it well and let it cook for five minutes. If needed add little more water.
    • Drain the paneer and fold it gently with spinach and let it simmer for about five minutes.

    Notes

    Palak paneer is ready, serve with naan, tandoori roti, Paratha.
    Tried this recipe?Let us know how it was!

  • Vegetable Biryani (Instant Pot)

    Vegetable Biryani (Instant Pot)

    A bowl of Vegetable Biryani garnished with fresh mint leaves

    Vegetable Biryani (Instant Pot)

    This next recipe is due to many of you requesting I do a tasty and delicious recipe using the Instant Pot. I decided to try a recipe for "Vegetable Biryani". I have been a little hesitant to do recipes using the Instant Pot. Maybe it's because I have been cooking for so long and I'm set in my habits, or maybe it's my age! I will say I have loved using my Instant Pot more as a pressure cooker and love using it for that purpose! I make lentils and legumes using the Instant Pot and think it's great. Once I use the Instant Pot more and get used to the timings, I think it will allow me to give more precise times for my recipes.
    Vegetable Biryani is a complete, satisfying, one-dish meal. My mother would often say this dish is a fancy name for vegetable pulao. However, I think it is more than that. The secret behind this flavorful Vegetable Biryani is a spice mixture that creates the perfect balance of flavors. Basmati rice with a mix of fresh vegetables combined with this spice mixture turns into a dish of perfection! If you follow my steps, you'll see I try to make this recipe as simple as possible. Vegetable Biryani also makes a great lunch box meal. Make sure to check out the footnotes to see how you can make this dish vegan.
    Hope you enjoy!
    This recipe will serve 3
    5 from 3 votes
    Prep Time 10 minutes
    Cook Time 30 minutes
    Total Time 40 minutes
    Course Main Course
    Cuisine Indian
    Servings 3 people

    Ingredients
      

    • 1 cup long grain rice I preferred Basmati Rice
    • 3 Tbsp Milk
    • 1 pinch Saffron Kesar few strands
    • 2 Tbsp oil or ghee
    • ¼ cup cashews
    • 15 Raisins
    • 1 Tbsp ginger thinly sliced
    • 2 cup mixed vegetables cubed potatoes, carrots, bell pepper, green beans cut into 1-inch pieces, cauliflower florets
    • ¼ cup Plain Yogurt whisked
    • ¼ cup Mint leaves Pudhina finely chopped
    • 1 ¼ cup Water

    Spices

    • 3 whole Green Cardamom Elaichi
    • 6 Cloves Laung
    • 8 Black Peppercorns
    • 1 inch long cinnamon stick Dalchini
    • 2 Bay leaf Tej Patta
    • 1 tsp Cumin seeds Jeera
    • 1 tsp coriander powder
    • 1 tsp fennel seed powder
    • 1 tsp red chili powder adjust to taste
    • ¼ tsp Turmeric Haldi
    • 1 tsp Salt adjust to taste

    Instructions
     

    • In warm milk soak the saffron and keep aside.
    • Soak the rice for about 10 minutes, then drain the water and keep aside.
    • Use the instant pot on sauté mode add ghee after half a minute add cashews and raisins and sauté lightly roast them for about 1 minutes.
    • Add all the whole spices and sauté for 30 seconds, they will become aromatic.
    • Add all the dry spices, coriander powder, fennel seed powder, turmeric, red chili powder and salt stir for few seconds, add vegetables and yogurt mix it well, cleaning sides and making sure vegetable mix spread evenly in the pot.
    • Next spread the rice evenly over the veggies. Spread the mint leaves evenly over rice. Sprinkle saffron milk on top of the rice.
    • Add the water for cooking on top of the rice. Rice should be just immersed under water.
    • You are layering the ingredients do not stir in between the steps. Close the lid with vent in sealing position.
    • Change the instant pot setting to pressure cook mode. Secure the lid, close the pressure valve and cook for 9 minutes at high pressure.
    • After the instant pot beeps, on the instant pot panel you will notice keep warm mode. Cancel the keep warm mode and wait until it releases the pressure and open the pot, that will take about 12 minutes.
    • Open the pot and fluff the rice gently with a fork.

    Notes

    Serve hot with Plain yogurt, Spinach Raita, and my favorite is Salted Mint Lassi
    Making Vegan:
    This is a easy recipe to make vegan, soak saffron in water instead of milk and yogurt you can replace with vegan yogurt or tomato puree.
    Keyword Bhojan, Bondi Raita, cooking shows, Cooking Video, Delicacy, delicious, Desi Khana, Gluten Free, Gourmet food, Homemade, Instant Pot, Jain Cooking, Khana, Lunch Box, Mint Lassi, One Pot Meal, Onion Garlic Free Cooking, Recipe videos, Rice Dish, Sattvic Food, Swaminarayan
    Tried this recipe?Let us know how it was!
  • Pineapple Kulfi (Ice Cream)

    Pineapple Kulfi (Ice Cream)

    Three pineapple kulfis served on a black plate with a few slices of fresh pineapple on the side.

    Pineapple Kulfi (Ice Cream)

    Kulfi, a popular summer dessert, is an Indian ice cream. Adding Pineapple here is a delicious twist to traditional kulfi. Pineapple kulfi simply melts in your mouth with its creamy texture and small chunks of pineapple. Pineapple Kulfi is delicious and easy to make. This is my friend Raj's recipe and for this recipe we don’t need an ice cream maker. I served this to my friends and they were surprised to know this was homemade and they all enjoyed it thoroughly.
    5 from 2 votes
    Course Dessert
    Cuisine Indian
    Servings 8 people

    Ingredients


    • 14 oz can of condensed milk sweetened
    • 1 ½ cup cream
    • 1 ½ cup milk
    • ½ tsp agar-agar
    • 8 oz can pineapple crushed, unsweetened

    Instructions
     

    • Drain the syrup from pineapple. Do not squeeze and keep aside. Keep it in freeze till we are ready to use.
    • In a heavy saucepan add condense milk, cream and milk, mix them well.
    • Bring the milk mix to boil over medium heat, stirring occasionally. When milk hot but not boiling take out 1/4 cup of milk in a bowl and add agar-agar, mix it well making sure there are no lumps. Adding agar-agar, you will avoid the water crystal and kulfi will have smooth texture.
    • Add the agar-agar mix to milk. Keep stirring till milk comes to boil, making sure agar- agar has mixed well and no lumps. Turn off the heat.
    • Transfer the milk to glass bowl and freeze it for 3-4 hours, ice cream should be half the way freeze mix it in blender on highspeed for about 30 seconds. Take them out in a bowl add the pineapple chunks and mix it the well.
    • You can freeze the Kulfi in a glass bowl and cover it. You can also freeze in small containers, kulfi molds, or popsicle molds. I am using 4-1/2 oz cups. Freeze them, how long it will take depends on the size of containers or mold you are using.

    Notes

    Do not use, more than recommended amount of agar-agar, it will change the texture of Kulfi and will make it firm. Fresh pineapple does not work well for this recipe.
    Keyword Ananas Kulfi, Candance Milk, Creamy, Dessert, Gluten Free, Homemade, Ice Cream, Party Food, Street Food, Summer Treat
    Tried this recipe?Let us know how it was!

    You will also enjoy Falooda Kulfi , Mango Ice Cream, Mango Cheese Cake,


  • Dahi Puri Chaat (Street Food)

    Dahi Puri Chaat (Street Food)

    A plate of Dahi Puri Chaat, topped with yogurt, tamarind chutney, sev, and finely chopped green chilies.

    Dahi Puri, Chaat, Street Food

    Dahi Puri is a very commonly found Indian street food! I have been wanting to do this recipe for my channel for quite some time, but I wanted to put my own twist on it. After experimenting with different fillings, I was finally able to come up with a combination that my family approved of – ahealthy and delicious salad style filling.
    5 from 2 votes
    Prep Time 15 minutes
    Cook Time 15 minutes
    Course Appetizer, Snack
    Cuisine Indian
    Servings 4 people

    Ingredients
      

    • 16 crispy puffed puries golgpa available in India grocery store

    Filling

    • ½ cup yellow moong dal
    • ½ cup potatoes boiled peeled and cut into small pieces
    • ½ cup tomatoes chopped in small pieces
    • ½ cup cucumber chopped in small pieces
    • 1 tbsp green chili finely chopped
    • 1 tsp ginger finely chopped
    • ½ tsp salt
    • ½ tsp roasted cumin seed powder
    • 1 tsp lemon juice

    For Garnishing

    • 1 cup yogurt whipped
    • ¼ cup tamarind chutney find the recipe on web site
    • 1 tbsp soy sauce
    • ¼ cup boondi
    • 1 tbsp green chili finely chopped
    • ¼ tsp red chili powder

    Instructions
     

    • Spread the puries on microwave safe plate and microwave
      for about 20 seconds, this will make the puries crispier and give the
      freshness. Set aside.
    • Wash moong dal changing water 3-4 times and boil it in
      2 cups of water over low medium heat until dal is very soft and tender but not
      mushy.
    • After dal is at room temperature mix all the filling ingredients together, dal, potatoes, tomatoes, cucumber, green chili, ginger, salt, cumin powder, lemon juice

    Assemble Dahi Puri

    • Whip the yogurt and add the water as needed to make it consistency of thick batter.
    • Mix tamarind sauce and soy sauce together.
    • First make a hole with you thumb center of the golgapa, fill with 1 tablespoon of filling. drizzle with yogurt tamarind chutney, few pieces of green chili, and few boondi, red chili powder and drizzle some more tamarind chutney.

    Notes

    Assemble Dahi Puries just before serving. You can have every thing ready day before.
    Filling also can be served as salad.
    Dahi Puri with salad like filling is very light and refreshing. 
    I have done the recipe for Tamarind Chutney Before. you will also like to see some other easy chaat recipes, like Bread Dahi Vada, Aloo Chana Chaat, Sabudana Bhel.  
    Keyword Appetizer, Party Food, Street Food, Tea Time Snack
    Tried this recipe?Let us know how it was!

    Introduction to Dahi Puri Chaat

    Dahi puri chaat is a beloved Indian street food that tantalizes taste buds with its burst of flavors and textures. Dahi puri chaat combines crispy puris (hollow fried bread), tangy yogurt, spicy chutneys, and various toppings to create a harmonious symphony of sweet, sour, and savory flavors. Dahi Puri Chaat, a delightful combination of crispy puris filled with tangy yogurt, savory chutneys, and fresh toppings, embodies the essence of appetizers, chaat, quick & easy snacks, street food recipes, and summer delights.

    This delightful snack is perfect for any occasion, whether it’s a casual evening at home or a festive gathering with friends and family. In this article, we will explore the recipe for dahi puri chaat, offering step-by-step guidance on how to recreate this iconic dish in your own kitchen.

    Step 1: Prepare the Ingredients

    Before diving into the preparation process, it’s essential to gather all the necessary ingredients. The key components include puris (hollow fried bread), yogurt, tamarind chutney, green chutney, boiled potatoes, sprouted mung beans, and sev (crunchy chickpea flour noodles). You can easily find these ingredients at your local Indian grocery store or prepare them at home using basic pantry staples. For those who prefer a spicy kick, finely chopped green chilies can be added to the mix. Once you have all the ingredients assembled, you’re ready to embark on your dahi puri chaat recipe journey.

    Step 2: Prepare the Yogurt Mixture

    The recipe for dahi puri chaat hinges on the creamy and tangy yogurt mixture that serves as the base for this delectable snack. To prepare the yogurt mixture, whisk together fresh yogurt, sugar, and a pinch of salt until smooth and creamy. Adjust the sweetness and tanginess according to your preference by adding more sugar or lemon juice as needed. The yogurt mixture should have a velvety texture that coats the back of a spoon. Once prepared, set aside the yogurt mixture while you assemble the remaining components of the chaat.

    Step 3: Assemble the Dahi Puri Chaat

    Now comes the fun part – assembling the dahi puri chaat! Start by gently tapping a hole in the center of each puri to create a cavity for the fillings. Place a spoonful of boiled potatoes and sprouted mung beans inside each puri, followed by a generous dollop of the prepared yogurt mixture. Drizzle tamarind chutney and green chutney over the yogurt, ensuring a balanced distribution of sweet and spicy flavors. Top off the chaat with a generous sprinkle of sev and finely chopped cilantro for added crunch and freshness. Repeat this process for each puri until all are assembled and ready to be devoured.

    Step 4: Serve and Enjoy

    Once assembled, dahi puri chaat should be served immediately to preserve its crispiness and freshness. Arrange the chaat on a serving platter and garnish with additional sev and cilantro for visual appeal. Encourage your guests to dig in and savor the explosion of flavors with each bite. Whether enjoyed as a standalone snack or as part of a larger meal, dahi puri chaat is sure to be a crowd-pleaser that leaves everyone craving for more.

    Tips for Perfect Dahi Puri Chaat

    • To enhance the flavor profile of the dahi puri chaat recipe, consider adding finely tomatoes, and grated carrots as additional toppings.
    • For a healthier twist, opt for baked puris instead of fried ones. You can find baked puris at specialty grocery stores or make them at home using whole wheat flour.
    • Experiment with different chutney variations to customize the flavor profile of the chaat. Mango chutney, mint chutney are excellent options to explore.
    • For a refreshing twist, add a handful of pomegranate arils to the chaat for bursts of juicy sweetness.
    • If you’re short on time, you can prepare the components of the chaat in advance and assemble them just before serving to ensure maximum freshness and crunchiness.

    Variations of Dahi Puri Chaat

    • Ragda Puri Chaat: Replace the boiled potatoes and sprouted mung beans with ragda (spiced yellow peas) for a heartier version of dahi puri chaat.
    • Bhel Puri Chaat: Substitute puris with crispy puffed rice (bhel) and toss them with chopped vegetables, chutneys, and spices for a crunchy and flavorful snack.
    • Papdi Chaat: Swap puris with bite-sized pieces of papdi (crispy fried dough) and layer them with yogurt, chutneys, and toppings for a delicious twist on the classic chaat.

    Benefits of Dahi Puri Chaat

    • Rich in Flavor: Dahi puri chaat is bursting with a myriad of flavors, ranging from tangy and spicy to sweet and savory, making it a delight for the taste buds.
    • Nutrient-Rich: This iconic street food is packed with essential nutrients from various ingredients such as yogurt, sprouted mung beans, and vegetables, offering a wholesome snacking option.
    • Easy to Customize: With endless possibilities for customization, dahi puri chaat can be tailored to suit individual preferences and dietary restrictions, making it suitable for all palates.

    FAQs (Frequently Asked Questions)

    Can I make dahi puri chaat in advance?

    • While it’s best to assemble dahi puri chaat just before serving to maintain its crispiness, you can prepare the individual components such as yogurt mixture, chutneys, and toppings in advance and store them separately in the refrigerator.

    Can I use store-bought puris for this recipe?

    • Yes, you can use store-bought puris for convenience. However, if you prefer homemade puris, you can find recipes online or explore Manjula’s Kitchen for a step-by-step guide.

    How long does dahi puri chaat stay fresh?

    • Dahi puri chaat is best enjoyed immediately after assembly to prevent the puris from becoming soggy. If you have leftovers, store them in an airtight container in the refrigerator and consume them within a day for the best taste and texture.

    Can I make this recipe vegan-friendly?

    • Yes, you can make dahi puri chaat vegan-friendly by using dairy-free yogurt and omitting any dairy-based toppings such as sev. You can also explore Manjula’s Kitchen for vegan alternatives and recipes.

    By following this comprehensive guide, you can master the art of making dahi puri chaat at home and impress your friends and family with this flavorful and indulgent street food favorite. Don’t forget to explore more tantalizing recipes on Manjula’s Kitchen, ranging from appetizers and beverages to desserts, to elevate your culinary repertoire and embark on a gastronomic adventure.

    Explore more appetizer recipes on Manjula’s Kitchen: Vegetable Samosas, Paneer Tikka, Crispy Spinach Pakoras, Mango Lassi, Masala Chai, Gulab Jamun, Kheer (Rice Pudding)

  • Mexican Bhel (Indian Fusion Street Food)

    Mexican Bhel (Indian Fusion Street Food)

    A vibrant plate of Mexican Bhel, topped with black beans, corn, diced vegetables, shredded cheese, and sliced jalapenos.

    Mexican Bhel – Indian Fusion Street Food

    Mexican Bhel! Today I will be making a twist on classic street food Bhel Puri. Bhel Puri is a popular Mumbai roadside snack. To make this dish unique and interesting I am using all classic Mexican ingredients – such as tortilla chips, salsa, Mexican cheese and more! Mexican Bhel Puri can be served as a snack or light lunch for your next get together.
    4 from 9 votes
    Prep Time 10 minutes
    Cook Time 10 minutes
    Total Time 30 minutes
    Course Snack
    Cuisine Fusion
    Servings 4 people

    Ingredients
      

    For Chips

    • 2 flour tortillas 8 inch, uncooked

    For The Bean Mix

    • 15 oz can black beans drained and rinsed
    • 1 cup potato boiled peeled and finely diced
    • 1 cup bell pepper finely diced, I am using mix of different colors
    • ½ cup frozen corn thaw and pat dry
    • 1 tbsp jalapeño finely diced
    • 2 tbsp cilantro finely chopped
    • 2 tsp lime juice
    • ½ tsp salt

    For Salsa

    • 2 cup tomatoes chopped
    • ¼ cup cilantro chopped
    • 1 jalapeño chopped
    • ½ tsp salt
    • ½ tsp cumin seed powder

    For Hot Sauce

    • 10 dry whole red chilies
    • ½ cup tomatoes roughly chopped
    • ½ tsp salt
    • ½ tsp cumin seed powder

    For Serving

    • 1 ½ cup lettuce thinly sliced
    • 1 jalapeño thinly sliced
    • ¼ cup shredded Mexican blended cheeses cheddar/Monterey

    Instructions
     

    For Bean Mixture

    • Toss all the ingredients together, beans, potatoes, bell peppers, corn, cilantro, jalapeno, salt, cilantro, and lemon juice , and set aside.

    For Tortilla Chips

    • Cut the tortillas into 1/2-inch square to use as the "papdi". Heat the oil in frying pan oil should be about 1/2-inch-deep, on medium high heat. Fry the tortillas until they are light golden brown.

    For Hot Sauce

    • Boil the chilies in about 1 cup of water, till they are soft and tender. If needed add more water. Blend all the ingredients together, tomatoes, chilies, salt and cumin seed powder.  make it into paste.

    For Salsa

    • Blend all the ingredients tomatoes, cilantro, jalapeno, salt and cumin seeds powder, making into chunky.

    Assembling

    • Spread lettuce in the bowl, put the bean mix over, spread some chips, cheese some taco sauce. I will leave on individual how much they want to add the hot sauce.

    Notes

    The bean mixture can be made two days ahead (just don’t add the taco sauce)
    The taco sauce and hot sauce also can be made two days ahead and refrigerate until needed.
    The fried tortillas can be prepared few days before and kept in an airtight container.
    also try Mexican Rice and Vegetarian Enchilada 
    Tried this recipe?Let us know how it was!

    Mexican Bhel Recipe: Introduction to Mexican Bhel Recipe

    Mexican bhel is a delightful fusion dish that combines the flavors of Mexican cuisine with the crunch and zest of Indian street food. This Mexican bhel recipe offers a unique twist on the traditional Indian bhel puri by incorporating ingredients like beans, potatoes, bell peppers, corn, and jalapenos, along with classic Mexican spices and flavors. It’s a perfect appetizer or snack for gatherings or parties, offering a burst of flavors and textures in every bite.

    Preparing the Bean Mixture 

    Start by preparing the bean mixture. In a large mixing bowl, toss together the black beans, diced potatoes, bell peppers, corn kernels, chopped cilantro, finely chopped jalapeno, salt, cilantro, and lemon juice. Ensure all the ingredients are evenly coated with the lemon juice and salt mixture, as it helps to enhance the flavors.

    Preparing the Tortilla Chips 

    Next, let’s make tortilla chips. Cut the flour tortillas into 1/2-inch squares to use as the base for our Mexican bhel. Heat oil in a frying pan until it’s about 1/2-inch-deep, over medium-high heat. Fry the tortilla squares until they turn light golden brown and crisp. Remove them from the oil and drain them on paper towels to remove excess oil.

    Preparing the Hot Sauce 

    For those who like an extra kick of heat, let’s make the hot sauce. Boil the chilies in about 1 cup of water until they are soft and tender. If needed, you can add more water to ensure the chilies are fully cooked. Once they are soft, blend all the ingredients together, including tomatoes, chilies, salt, and cumin seed powder, to make it into a smooth paste. This hot sauce will add a fiery flavor to your Mexican bhel.

    Preparing the Salsa 

    No Mexican-inspired dish is complete without salsa. Let’s prepare a chunky salsa to add freshness and tanginess to our Mexican bhel. Blend together tomatoes, cilantro, jalapeno, salt, and cumin seeds powder, ensuring it remains chunky in texture. This salsa will complement the other flavors in the bhel and add a refreshing contrast.

    Assembling the Mexican Bhel 

    Now, let’s assemble our Mexican bhel. Start by spreading lettuce leaves in a serving bowl. This creates a crisp and fresh base for our bhel. Then, layer the bean mixture over the lettuce, ensuring an even distribution of all the colorful ingredients. Sprinkle some fried tortilla chips over the bean mixture to add crunch and texture. Top it off with grated cheese for a creamy and indulgent touch. Drizzle some taco sauce over the bhel to add a burst of flavor.

    For those who enjoy an extra kick of spice, serve the hot sauce on the side, allowing individuals to add it according to their preference. This customizable aspect adds an element of fun to the dish, as everyone can adjust the spice level to suit their taste buds.

    Tips for Making Mexican Bhel 

    • To save time, you can use canned beans instead of cooking them from scratch. Just make sure to rinse them thoroughly before using to remove excess salt.
    • Feel free to customize the bean mixture by adding other ingredients like diced avocado, black olives for added flavor and texture.
    • For a healthier alternative, you can bake the tortilla chips instead of frying them. Simply brush the tortilla squares with a little oil and bake them in a preheated oven until crispy.
    • Adjust the spice level of the hot sauce according to your preference by adding more or fewer chilies.
    • You can make a large batch of the bean mixture and store it in the refrigerator for up to two days, making it a convenient option for meal prep or quick snacks.

    Variations of Mexican Bhel 

    • Vegetarian Variation: Omit the cheese and use vegan-friendly ingredients to make this dish suitable for vegetarians.
    • Grilled Variation: Instead of frying the tortilla chips, you can grill them for a smoky flavor. Simply brush the tortilla squares with oil and grill them until crispy.

    Benefits of Mexican Bhel 

    • Packed with nutrients from the variety of vegetables and beans, this Mexican bhel is a wholesome and nutritious snack option.
    • It offers a burst of flavors and textures, making it a satisfying dish to all.
    • The customizable nature of this recipe allows individuals to tailor it according to their taste preferences, making it suitable for gatherings and parties with diverse palates.
    • By incorporating ingredients like beans and vegetables, this Mexican bhel is a great way to add more plant-based protein and fiber to your diet.

    FAQs about Mexican Bhel

    Q: Can I make this dish ahead of time?

    A: Yes, you can prepare the bean mixture, tortilla chips, hot sauce, and salsa ahead of time and assemble the Mexican bhel just before serving to maintain the crunchiness of the chips.

    Q: Can I adjust the spiciness of the dish?

    A: Absolutely! You can control the heat level by adjusting the amount of jalapeno peppers used in the bean mixture and hot sauce. You can also remove the seeds from the jalapenos for a milder flavor.

    Q: Is there a gluten-free option for this recipe?

    A: Yes, you can use gluten-free corn tortillas instead of flour tortillas to make the chips, ensuring the entire dish is gluten-free.

    Q: Can I make a larger batch of hot sauce and salsa for future use?

    A: Definitely! You can prepare a larger batch of hot sauce and salsa and store them in airtight containers in the refrigerator for up to a week. Just give them a good stir before using.

    Other Recipes on Manjula’s Kitchen

    If you’re looking to explore more Indian recipes, appetizers, beverages, and desserts, be sure to check out the following links on Manjula’s Kitchen. Here are some links to recipes on Manjula’s Kitchen official website: Paneer Tikka Masala, Chana Chaat (Spicy Chickpea Salad), Pav Bhaji (Spicy Vegetable Hash with Buns), Raj Kachori (Crunchy Chaat), Vegetable Biryani. These recipes should offer you a flavorful experience straight from Manjula’s Kitchen.

  • Spicy Corn, Corn Salad, (Tasty Snack)

    Spicy Corn, Corn Salad, (Tasty Snack)

    A bowl of spicy corn salad with roasted corn kernels, diced bell peppers, fresh cilantro, and crumbled cheese.

    Spicy Corn (Tasty Snack)

    Spicy Corn is a very enjoyable snack and not only that, but this is a quick and easy recipe to make. Make it as spicy or as mild as your heart desires. Best of all, you can also serve this as a side dish. Enjoy the spicy corn for a beautiful picnic or outdoor get together. You can also serve this over crisp slices of bread.
    4.80 from 5 votes
    Prep Time 10 minutes
    Cook Time 10 minutes
    Course Appetizer, Salad
    Cuisine Indian
    Servings 4 people
    Calories 153 kcal

    Ingredients


    • 2 cup corn kernels I am using frozen corn, you can use fresh
    • 1 tsp oil
    • ½ tsp salt
    • ½ tsp cumin seeds roasted, bhuna jeera
    • 2 tbsp cilantro finely chopped
    • 1 tbsp green chili finely chopped, adjust to taste
    • 2 tbsp red bell pepper finely chopped
    • 1 tsp lemon juice
    • ¼ cup cream cheese soft

    For Garnishing

    • ¼ cup feta cheese

    Instructions
     

    • Use the flat bottom-heavy frying pan, lightly oil it and heat over medium high heat, put the corn kernels and stir fry for 4-5 minutes stirring continuously. While stir frying kernels will be getting some light and some dark brown color, some of the kernels will pop like you are grilling.
    • Turn off the heat, and add salt, cumin seed powder, cilantro, green chili, red bell pepper, lemon juice, and cream cheese mix it well. Sprinkle feta cheese.
    • Spicy corn taste best when it is served warm but can be served at room temperature.

    Notes

    Spicy Corn works great for picnic or outdoor get together. Also try  Aloo Poori, Lemonade, or Watermelon Cooler

    Nutrition

    Calories: 153kcalCarbohydrates: 17gProtein: 4gFat: 9gSaturated Fat: 4gCholesterol: 24mgSodium: 607mgPotassium: 152mgFiber: 2gSugar: 4gVitamin A: 560IUVitamin C: 14.1mgCalcium: 63mgIron: 0.7mg
    Tried this recipe?Let us know how it was!

  • Makhana Matar Curry

    Makhana Matar Curry

    A bowl of Makhana Matar Curry, a creamy Indian dish made with lotus seeds (makhana) and green peas, garnished with fresh cilantro.

    Makhana Matar Curry

    Makhana Matar Curry is a delicious gravy-based dish. This can be a tasty side dish for formal dinner or even a quiet dinner with a few friends. Makhana and matar is made with a spicy tomato and cashew gravy. I like to serve with fresh hot puris or white rice
    4.10 from 11 votes
    Prep Time 5 minutes
    Cook Time 25 minutes
    Total Time 30 minutes
    Course Main Course
    Cuisine Indian
    Servings 4 people

    Ingredients


    • 3 cup makhana fox nut, phool makhana
    • 3 Tbsp oil
    • 1/4 cup green peas I am using frozen peas

    For Garvy

    • 2 cup tomatoes chopped
    • 1/4 cup cashew kaju
    • 1 Tbsp ginger chopped
    • 1 Tbsp oil
    • 1/2 tsp cumin seeds jeera
    • 1/8 tsp asafetida hing
    • 2 tsp coriander powder dhania
    • 1/2 tsp red chili powder lal mirch
    • 1 tsp salt
    • 1 tsp sugar
    • 1/4 tsp garam masala
    • 1/4 cup cilantro finely chopped, hara dhania

    Instructions
     

    • Heat 3 tablespoon of oil in frying pan over low medium heat, add the makhana and roast them stirring continuously until they are crisp, this should take about 3-4 minutes. Keep aside.
    • Blend tomatoes, cashews and ginger to make a pure.
    • Heat the oil in a sauce pan, test the heat by adding one cumin seed. If the seed cracks right away, the oil is ready. Add asafetida and cumin seeds, as the cumin seeds crack add tomato paste, coriander, chili powder, salt and sugar.
    • Stir-fry for two to three minutes, until the oil begins to separate from the mixture. Add roasted makhana and green peas mix it well add about 1-1/2 cups of water. Cover the pan and let it cook for 6-7 minutes over low medium heat, until peas are tender. Note: add more water if you like more gravy.
    • Turn off the heat add garam masala and cilantro mix it well. 

    Notes

    Adjust thickness of gravy to your liking, with time Makhana Matar Curry becomes thick.
    Serve Makhana Matar Curry with your choice of bread I like to serve with Paratha, Puri or with Plain Rice
    Tried this recipe?Let us know how it was!

  • Sabudana (Tapicoa) Bhel, Chaat

    Sabudana (Tapicoa) Bhel, Chaat

    A vibrant plate of Sabudana (Tapioca) Bhel Chaat, garnished with crispy toppings and drizzled with tamarind chutney.

    Sabudana (Tapicoa) Bhel, Chaat

    Sabudana Bhel this is a delicious appetizer or also can be served with afternoon tea. Sabudana Bhel or I like to call this chaat is an elegant looking dish, that will sure to impress all your family and friends.
    4 from 1 vote
    Prep Time 10 minutes
    Cook Time 10 minutes
    Total Time 20 minutes
    Course Appetizer
    Cuisine Indian
    Servings 4 people

    Ingredients


    For Sabudana – Tapioca

    • 1/2 cup sabudana tapioca, use the larger pearls
    • 2 tsp oil
    • 1/4 tsp cumin seeds jeera
    • 1/4 tsp mustard seeds rai
    • pinch turmeric haldi
    • 1/2 tsp salt
    • few drops lemon juice

    For Serving

    • 1 cup potato boiled peeled and cut into small cubes
    • 1 Tbsp green chili finely chopped
    • 1/2 tsp salt
    • 1/2 cup peanuts roasted and crushed
    • 2 tsp chaat masala
    • 1/2 cup aloo lacha check existing recipe
    • 1/4 cup tamarind chutney check existing recipe

    Instructions
     

    • Wash sabudana (tapioca) changing the water 2-3 time and soak with one cup of water, soak 8 hours or more. Sabudana will become all most four time in volume and will be soft.
    • Heat the oil in a frying pan on medium heat. Test the heat by adding one cumin seed to the oil; if seed cracks right away oil is ready. Add cumin seeds and mustard seeds after seeds crack add turmeric, lower the heat to low. Add sabudana, and salt. Keep stir frying until sabudana becomes translucence, looks like pearls. This should take about another 4-5 minutes. Stir gently and making sure tapioca doesn’t get sticky and stuck to each other. Turn off the heat, and drizzle 3-4 drops of lemon juice and stir.
    • Transfer sabudana to a wide bowl stir for few minutes with fork making sure sabudana pearls are separated and not sticky. Serve the sabudana at room temperature.
    • Add 1/2 teaspoon of salt and green chilies to cubed potatoes, mix it well and set aside.
    • Assembling the Sabudana Bhel, in a serving platter spread the cooked sabudana, sprinkle the roasted peanuts, over peanuts sprinkle the potatoes, then aloo lacha, some more peanuts and drizzle the chutney.

    Notes

    Suggestion, this is a easy recipe, you can prepare every thing in advance, cooked sabudana can be refrigerator for up to a week. Aloo Lacha and tamarind chutney can be stored for months.  
    Tried this recipe?Let us know how it was!

    Introduction to Sabudana Bhel Chaat

    Sabudana Bhel is a quick & easy, gluten-free, and vegan snack with flavors reminiscent of chaat, perfect for Krishna Janmashtami and Navaratri celebrations, offering a delightful appetizer option. In this recipe, we’ll learn how to make sabudana bhel chaat, a delightful and crunchy snack that’s perfect for any occasion. Sabudana, also known as tapioca pearls, is the star ingredient here, lending its unique texture and taste to create a mouthwatering dish. This sabudana bhel recipe combines the traditional flavors of bhel with the subtle nuttiness of sabudana, resulting in a tantalizing treat that’s sure to please your taste buds. Whether you’re looking for a tasty snack to enjoy with your evening tea or planning a party menu, this crispy sabudana bhel is sure to be a hit.

    Preparing the Sabudana Mixture

    To begin making the sabudana bhel, start by soaking the sabudana pearls in water for a few hours until they turn soft and plump. Once the sabudana pearls have soaked well, drain any excess water and spread them out on a clean kitchen towel to remove any excess moisture. Now, heat oil in a pan and fry the sabudana pearls until they turn crispy and golden brown. This step is crucial for achieving that perfect crunch in your sabudana bhel chaat.

    Adding Crunchy Elements

    Next, it’s time to add some crunchy elements to our sabudana bhel mixture. You can use a variety of ingredients such as roasted peanuts, tomatoes, and crunchy sev. These ingredients not only add texture to the dish but also enhance its flavor profile. Feel free to adjust the quantities according to your preference, but make sure to include a good mix of flavors and textures for the best results.

    Seasoning the Bhel

    Once you’ve assembled all the crunchy elements, it’s time to season your sabudana bhel mixture. You can use a combination of spices such as chaat masala, red chili powder, roasted cumin powder, and black salt to add a burst of flavor to the dish. Additionally, you can squeeze some fresh lemon juice over the mixture to give it a tangy twist. Mix everything together until well combined, ensuring that the sabudana pearls are evenly coated with the seasoning.

    Garnishing and Serving

    Finally, garnish your sabudana bhel chaat with some fresh coriander leaves and a sprinkle of nylon sev for an extra crunch. You can also add some pomegranate arils or grated coconut for a pop of color and flavor. Serve the crispy sabudana bhel immediately in individual serving bowls or plates, garnished with some more sev on top for added crunchiness. Pair it with a cup of hot tea or your favorite chutney for a truly satisfying snacking experience.

    Tips for Perfect Sabudana Bhel

    • Soak the sabudana pearls in water for at least 4-5 hours or overnight to ensure they become soft and plump.
    • Drain the soaked sabudana pearls well and spread them out on a kitchen towel to remove excess moisture before frying.
    • Fry the sabudana pearls in batches to ensure they cook evenly and become crispy.
    • Adjust the seasoning according to your taste preferences. You can make the sabudana bhel spicier by adding more red chili powder or tangier by squeezing extra lemon juice.
    • Garnish the sabudana bhel chaat with fresh ingredients like coriander leaves, pomegranate arils, or grated coconut to enhance its visual appeal and flavor.

    Variations of Sabudana Bhel

    • Fruit Bhel: Add diced fruits such as apples, bananas, and grapes to the sabudana bhel mixture for a refreshing twist.
    • Sprouts Bhel: Incorporate sprouted moong beans or chickpeas into the sabudana bhel for added protein and crunch.
    • Vegetable Bhel: Include finely chopped vegetables like cucumber, carrots, and bell peppers to make the sabudana bhel more nutritious and colorful.
    • Sweet Bhel: For a sweet variation, skip the savory seasonings and instead toss the sabudana pearls with honey, yogurt, and chopped fruits for a delicious dessert option.

    Benefits of Sabudana Bhel

    • Gluten-Free: Sabudana is naturally gluten-free, making this sabudana bhel recipe suitable for individuals with gluten intolerance or celiac disease.
    • Rich in Carbohydrates: Sabudana is a rich source of carbohydrates, providing a quick and sustainable source of energy.
    • Easy to Digest: Sabudana is light on the stomach and easy to digest, making it an ideal ingredient for people with digestive issues or those following a bland diet.
    • Versatile: You can customize the sabudana bhel recipe with your favorite ingredients to suit your taste preferences and dietary requirements.
    • Satisfying Snack: This crispy sabudana bhel is not only delicious but also quite filling, making it a satisfying snack option for any time of the day.

    FAQs about Sabudana Bhel

    Q: Can I make sabudana bhel ahead of time?

    A: While it’s best to serve sabudana bhel chaat immediately after preparing it to enjoy its crispiness, you can prepare the sabudana mixture in advance and assemble the bhel just before serving to prevent it from becoming soggy.

    Q: Can I store leftover sabudana bhel?

    A: It’s not recommended to store leftover sabudana bhel as it tends to lose its crispiness over time. However, if you have any leftover mixture, you can refrigerate it in an airtight container for up to a day and reheat it in the oven before serving.

    Q: Is sabudana bhel suitable for fasting days?

    A: Yes, sabudana bhel is a popular dish consumed during fasting days, especially during festivals like Navratri. Just ensure that you use sendha namak (rock salt) instead of regular salt if you’re making it for fasting purposes.

    Q: Can I make sabudana bhel without frying the sabudana pearls?

    A: While frying the sabudana pearls adds a crispy texture to the sabudana bhel, you can try alternative cooking methods such as roasting or air-frying for a healthier version of the dish.

    Q: Can I serve sabudana bhel as a main dish?

    A: While sabudana bhel chaat is typically served as a snack or appetizer, you can definitely enjoy it as a light meal, especially when paired with some yogurt or a side salad for added nutrition.

    Other Recipes on Manjula’s Kitchen

    If you’re looking to explore more Indian recipes, appetizers, beverages, and desserts, be sure to check out the following links on Manjula’s Kitchen. Here are some links to recipes on Manjula’s Kitchen official website:

    Paneer Tikka Masala Recipe

    Chana Chaat (Spicy Chickpea Salad) Recipe

    Pav Bhaji (Spicy Vegetable Hash with Buns) Recipe

    Raj Kachori (Crunchy Chaat) Recipe

    Vegetable Biryani Recipe

    These recipes should offer you a flavorful experience straight from Manjula’s Kitchen.

  • Ragda Puri Chaat

    Ragda Puri Chaat

    A plate of Ragda Puri Chaat with crispy puris, spiced chickpea mixture, sev, and tamarind chutney.

    Ragda Puri Chaat

    Ragda Puri is a chaat dish that will leave you licking your fingers. Made with crunchy puris, ragda, and chutney, this recipe is the perfect addition to any chaat menu. This appetizer is easy to make and tastes delicious. 
    5 from 3 votes
    Prep Time 10 minutes
    Cook Time 20 minutes
    Total Time 30 minutes
    Course Appetizer
    Cuisine Indian
    Servings 6 people

    Ingredients


    • 24 Puries I am using store bought
    • 1 cup vatana
    • 1 cup potato boiled peeled and cubed in small pieces
    • 1 tsp salt
    • 1 tsp black salt
    • 1/4 tsp black pepper
    • 2 tsp sugar
    • 1 Tbsp dry roasted cumin seed powder bhuna jeera
    • 1 Tbsp dry roasted coriander powder bhuna dhania
    • 2 Tbsp ginger chopped
    • 1 small green chili chopped
    • 1/2 cup cilantro chopped
    • 1 Tbsp tamarind chutney
    • 1 Tbsp lemon juice
    • 1 Tbsp green chili finely chopped, optional

    For Serving

    Instructions
     

    • Wash and soak vatana in three cups of water for at least 8 hours. After soaking vatana will be about 2 1/2 times the volume of the original.
    • Put the vatana in a pressure cooker with 2½ cups of water. When the pressure cooker starts to steam, turn the heat down to medium and cook for 10 minutes. Turn off the heat and wait until steam has stopped before opening the pressure cooker. Vatana should be soft and tender. I have used instant pot, because it is more convenient.
    • Blend cilantro, green chilies, and ginger, tamarind chutney, and lemon juice.
    • Mix cilantro paste and all the spices, salt, black salt, sugar, black pepper and finely chopped green chili this is optional, to boiled vatana mix the spices well. This is known Ragda. Add hot water if needed Ragda should not be very dry it should have thick gravy, Ragda thickens in consistency as it cools.
    • For serving, make a small hole on top of each puri and arrange them on a platter. Stuff them with the ragda. Drizzle with tamarind chutney and sev.

    Notes

    Ragda Puri Chaat can be prepared few days in advance When you are craving for chaat.
    This is a Healthy Chaat, Ragda has no oil, and can be served by itself, over crackers, over bread, roll with any indian flat bread, or make sandwich .
    Check the recipe for Pani Puri , and Tamarind Chutney 
     
    Tried this recipe?Let us know how it was!

    Ragda Puri Chaat Recipe: A Burst of Flavor in Every Bite

    Ragda Puri Chaat is a popular vegan quick & easy  street food in India, beloved for its medley of flavors and textures. This delectable appetizer consists of crispy puris (fried dough balls) served with ragda, a spicy and tangy curry made from dried white peas. Topped with an assortment of chutneys and sev (crispy chickpea flour noodles), This Chaat is a true delight for the taste buds. In this recipe, we’ll explore how to make it at home, bringing the authentic flavors of the streets right to your kitchen.

    Preparation of Ragda Puri Chaat:

    Begin by soaking dried white peas in water for at least 8 hours or overnight until they become soft. Once soaked, drain the peas and rinse them thoroughly. Then, in a pressure cooker, cook the soaked peas with water, salt, turmeric, and a pinch of baking soda until they are tender and well-cooked. Allow the pressure to release naturally before opening the cooker.

    Tips for Making Perfect Ragda Puri:

    • Soaking the dried white peas overnight ensures that they cook evenly and become tender.
    • Adding a pinch of baking soda while cooking the peas helps to soften them faster.
    • Be sure to cook the peas until they are completely tender but not mushy.
    • Adjust the consistency of the ragda according to your preference by adding more or less water during cooking.

    Assembly of Ragda Puri Chaat:

    Once the ragda is ready, it’s time to assemble the chaat. Take crispy puris and gently crack them open to create a cavity for the filling. Place a spoonful of ragda inside each puri, ensuring that it fills the cavity generously. Next, drizzle some green chutney and tamarind chutney over the ragda-filled puris for a burst of flavor. Sprinkle tomatoes, and cilantro on top for added freshness and crunch. Finally, garnish with sev and a squeeze of lemon juice to complete.

    Variations of Ragda Puri Chaat:

    • Spicy Ragda Puri: If you prefer a spicier chaat, add more green chilies or red chili powder to the ragda mixture. You can also top the puris with finely chopped green chilies for an extra kick.
    • Healthy Ragda Puri: For a healthier version, you can use baked puris instead of fried ones. You can also add boiled sprouts or boiled potatoes to the ragda for added nutrition.
    • Cheese Ragda Puri: For a decadent twist, sprinkle some grated cheese on top of the assembled chaat. The melted cheese adds a creamy and indulgent touch to the dish.

    Benefits of Ragda Puri Chaat:

    It is not only delicious but also nutritious. The dried white peas used in the ragda are rich in protein and fiber, making this dish a filling and satisfying option. Additionally, the assortment of fresh vegetables and chutneys adds essential vitamins and minerals to the chaat, making it a wholesome snack or appetizer.

    FAQs about Ragda Puri Chaat:

    Q: Can I make Ragda Puri Chaat in advance?

    A: While you can prepare the ragda and chutneys in advance, it’s best to assemble the chaat just before serving to ensure that the puris remain crispy.

    Q: Can I customize the toppings in Ragda Puri Chaat?

    A: Absolutely! Feel free to experiment with different toppings such as grated carrots, boiled chickpeas, or chopped bell peppers to create your own unique version of Ragda Puri Chaat.

    Q: Is Ragda Puri Chaat suitable for vegetarians?

    A: Yes, it is a vegetarian dish that is enjoyed by people of all dietary preferences.

    With its vibrant colors, bold flavors, and irresistible crunch is sure to become a favorite among your family and friends. Whether you’re serving it as a snack, appetizer, or light meal, this iconic street food is guaranteed to leave everyone craving for more. So why wait? Gather your ingredients and treat yourself to a taste of India with Ragda Puri Chaat today!

    Other Recipes on Manjula’s Kitchen

    If you’re looking to explore more Indian recipes, appetizers, beverages, and desserts, be sure to check out the following links on Manjula’s Kitchen. Here are some links to recipes on Manjula’s Kitchen official website:

    Paneer Tikka Masala Recipe, Chana Chaat (Spicy Chickpea Salad) Recipe, Pav Bhaji (Spicy Vegetable Hash with Buns) Recipe, Raj Kachori (Crunchy Chaat) Recipe, Vegetable Biryani Recipe

    These recipes should offer you a flavorful experience straight from Manjula’s Kitchen.

  • Grilled Caprese Sandwich (Veggie Sandwich With Pesto)

    Grilled Caprese Sandwich (Veggie Sandwich With Pesto)

    Grilled Caprese Sandwich

    Grilled Caprese Sandwich, Veggie Sandwich with Pesto

    For this delicious Caprese Sandwich, I have been experimenting with pesto lately and tried out this sandwich after my granddaughter requested me to make it for her. This recipe is super easy to put together on the go and it makes for the perfect lunchbox or tiffin meal.
    5 from 2 votes
    Prep Time 10 minutes
    Cook Time 10 minutes
    Total Time 20 minutes
    Course Main Course
    Cuisine Fusion
    Servings 2 people

    Ingredients


    • 4 slices French bread
    • 1 ½ Tbsp olive oil
    • 4 slices mozzarella cheese
    • 1/4 cup sun-dried tomatoes
    • 16 spinach leaves remove the stems

    Pesto

    • 1/3 cup toasted pine nuts
    • 2 cups fresh basil loosely packed
    • 1 tsp lime juice
    • 1/2 tsp salt
    • 1/4 tsp black pepper
    • 1/4 cup olive oil

    Instructions
     

    • To make the pesto, combine the basil, pine nuts, black pepper, salt and oil in a food processor. Blend until the mixture is well blended but still has some texture, pausing to scrape down the sides as necessary. Now add the lemon juice mix it and set aside.
    • Spread pesto over 2 slices of bread, put 2 slices of mozzarella cheese, sun dried tomatoes, and few spinach leaves and cover with other slice of bread, already has pesto.
    • Lightly oil on top side of the sandwich, other side we will oil after putting the sandwich in sandwich maker. I am using electric sandwich maker you can make it over skillet. It took me about 3 minutes to grill the sandwich.

    Notes

    Notes: I usually make extra pesto, pesto can be refrigerated for about a week. You can also freeze pest, I like to freeze in ice cube try. Once frozen, transfer to a freezer bag, then you can thaw only as much as you need later.
    Use your choice of bread.
    Tried this recipe?Let us know how it was!

  • Palak (Spinach) Puri

    Palak (Spinach) Puri

    Palak (Spinach) Puri

    Palak (Spinach) Puri

    Palak (Spinach) Puri is a whole wheat fried bread made with many different flavors. Adding the spinach with a few spices makes the Puri very yummy and healthy. These puris can be served with any meal and add a nice green color to any menu. You can also serve them with afternoon tea or even pack them up for a lunch box meal.
    4 from 5 votes
    Prep Time 10 minutes
    Cook Time 20 minutes
    resting time 15 minutes
    Total Time 30 minutes
    Course Main Course
    Cuisine Indian
    Servings 3 people

    Ingredients


    • 1 cup whole wheat flour
    • 1/4 cup besan gram flour
    • 2 cup spinach leaves remove all the stems
    • 1 green chili
    • 1/2 inch ginger
    • 1/2 tsp salt
    • 1/2 tsp cumin seeds
    • 1/8 tsp asafetida hing
    • 1 Tbsp oil

    Also need oil to fry

    Instructions
     

    • Blend the spinach, ginger and green chili with about 1/4 cup of water, use more if needed.
    • In a bowl mix with whole wheat flour all the ingredient except spinach besan, cumin seeds, asafetida, salt, and oil, mix it well.
    • Add the spinach paste to the flour mix and form into a firm and pliable dough add water as needed. Grease your palm and knead the dough. Cover the dough and let it sit for 10 minutes or more.
    • Divide the dough into 12 equal parts and roll them into smooth balls. Lightly oil the surface you want to roll the puries. Roll them into about six-inch circle.
    • Heat at least one inch of oil in a frying pan over medium high heat. To check if oil is ready drop a small piece of dough into the oil this should come up without changing the color.
    • Place one puri at a time in the frying pan and press it with a skimmer. The puris should puff up slowly. Turn the puris over. Puries should be light golden color both sides.
    • Take the puris out and place them on paper towels to absorb the excess oil. Repeat the process for remaining puries.

    Notes

    Try this menu for next get together with using Palak Puri, Cabbage Kofta, Aloo Gobhi, Boondi Ka Raita, Jeera Rice.
    Keyword Fried Bread, Hari Puri, Lunch Box
    Tried this recipe?Let us know how it was!