Category: Gluten Free

Gluten-Free Indian Recipes: Delicious and Healthy Options

Eating gluten-free doesn’t mean sacrificing flavor, especially with the wide array of gluten free Indian recipes available. Whether you are gluten intolerant or simply looking to reduce gluten in your diet, these gluten free recipes Indian style will delight your taste buds. Let’s explore some delectable gluten free Indian food recipes that you can enjoy for every meal.

Breakfast Recipes

Besan Chilla

Besan Chilla, or chickpea flour pancake, is a high protein vegetarian meals option that fits perfectly within gluten free Indian recipes. This dish is quick to prepare and can be enjoyed with a side of yogurt or chutney. Besan Chilla is also a great example of Indian gluten free recipes that are both nutritious and delicious.

Poha

Poha is a light and flavorful dish made from flattened rice, seasoned with turmeric, mustard seeds, and curry leaves. This dish is a staple in many Indian households and is a fantastic gluten free Indian food recipe for Indian breakfast ideas. It’s easy to make and highly customizable.

Lunch Recipes

Rajma Chawal (without the wheat)

Rajma Chawal is one such beloved north indian recipes made with red kidney beans in a spiced tomato gravy, typically served with rice. By using gluten-free rice, this dish becomes a delightful addition to your collection of gluten free Indian recipes.

Bajra Roti

Bajra Roti is a traditional Indian flatbread made from pearl millet flour. This roti is a staple in the gluten free recipes Indian category and pairs well with various curries and sabzis. It’s nutritious and adds a rustic flavor to your meal.

Dinner Recipes

Paneer Tikka

Paneer Tikka is popular in paneer recipes made by marinating paneer cubes in yogurt and spices, then grilling them to perfection. This dish is not only delicious but also fits well within gluten free Indian food recipes. It’s a great starter for any dinner.

Vegetable Pulao

Vegetable Pulao is a one-pot rice dish cooked with mixed vegetables and aromatic spices. This dish is a versatile and satisfying gluten free Indian food recipe that can be enjoyed by everyone. It’s perfect for a quick and nutritious Indian dinner recipes.

Snack Recipes

Bhel Puri (without sev)

Bhel Puri is a popular Indian street food made with puffed rice, vegetables, and tamarind chutney. By omitting sev (which usually contains gluten), this snack becomes a fantastic addition to your gluten free Indian recipes. It’s tangy, spicy, and utterly delicious.

Roasted Makhana

Roasted Makhana are fox nuts that are lightly roasted and seasoned with spices. This snack is not only crunchy and addictive but also fits perfectly into the gluten free recipes Indian category. It’s a healthy option for those mid-day cravings.

Dessert Recipes

Kheer

Kheer is a creamy rice pudding flavored with cardamom and garnished with nuts. This classic Indian dessert is naturally gluten-free and is a beloved part of gluten free Indian food recipes. It’s easy to make and perfect for any festive occasion.

Coconut Ladoo

Coconut Ladoo are sweet balls made from grated coconut and condensed milk, often flavored with cardamom. These ladoos are a delightful example of Indian gluten free recipes that can be enjoyed as a dessert or a snack.

Enhancing Your Gluten-Free Menu

To make your gluten-free menu even more delightful, consider adding dishes from related categories that complement these gluten free Indian recipes. Adding Indian snacks like roasted makhana and bhel puri can provide a variety of flavors and textures. For a sweet ending, explore Indian desserts such as kheer and coconut ladoo, made with gluten-free ingredients. Incorporating healthy recipes like besan chilla and vegetable pulao can offer lighter options for your meals. Hosting a large gathering? The popular party recipe category is filled with dishes that are sure to impress your guests and make your celebration memorable. Including North Indian recipes like rajma chawal or bajra roti can add a touch of authenticity to your meal.

Frequently Asked Questions (FAQs)

Q: What are some popular gluten free Indian recipes? 

A: Some popular gluten free Indian recipes include Besan Chilla, Poha, Rajma Chawal (without wheat), Bajra Roti, Paneer Tikka, Vegetable Pulao, Bhel Puri (without sev), Roasted Makhana, Kheer, and Coconut Ladoo.

Q: How can I make traditional Indian food gluten-free? 

A: To make traditional Indian food for diabetics gluten-free, try recipes like Besan Chilla, Bajra Roti, and Kheer. These recipes are modified to exclude gluten while retaining their authentic flavors.

Q: What are some gluten-free recipes Indian style for a party? 

A: Some gluten free recipes Indian style for a party include Paneer Tikka, Vegetable Pulao, Bhel Puri (without sev), and Coconut Ladoo. These dishes are flavorful and perfect for gatherings while being gluten-free.

Q: Can I prepare gluten-free Indian food in advance? 

A: Yes, many gluten free Indian food recipes can be prepared in advance and stored. Snacks like Roasted Makhana and Bhel Puri can be made ahead of time, while dishes like Vegetable Pulao and Rajma Chawal can be prepped and refrigerated.

Q: What are some healthy options for gluten-free Indian food? 

A: Some healthy options for gluten free Indian recipes include Quinoa Salad, Vegetable Stir Fry, Oats Idli, and Besan Chilla. These dishes are high in fiber and protein, helping to manage blood sugar levels effectively.

Conclusion

Gluten free Indian recipes are a celebration of healthy and flavorful foods. Whether you’re looking for gluten free recipes Indian style or traditional gluten free Indian food recipes, these dishes will bring variety and nutrition to your meals. 

So, gather your ingredients, try out these recipes, and create delicious meals that are mindful of your health needs. Don’t forget to explore related categories for more delightful recipes from Manjula’s Kitchen!

By incorporating these dishes into your diet, you’ll be able to enjoy a wide variety of delicious and nutritious foods. Whether you’re looking for breakfast, snacks, main courses, or desserts, there’s a gluten free Indian recipe to suit every taste. Happy cooking and healthy eating!

  • Lauki ka Raita Recipe

    Lauki ka Raita Recipe

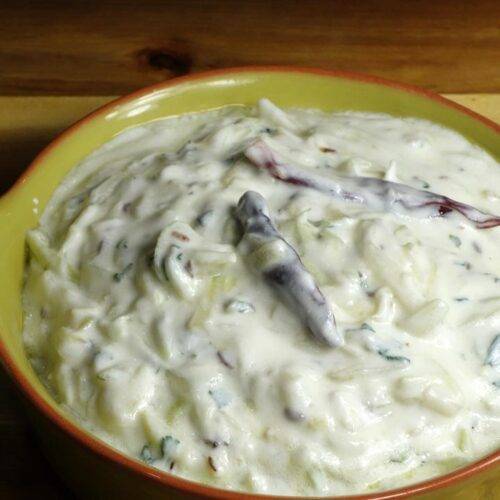
    Lauki Ka Raita

    Lauki ka Raita – Bottle Gourd with Yogurt

    Lauki raita is a refreshing yogurt-based dish made with spiced lauki and yogurt. Lauki is also known as bottle gourd, doodhi, or ghia. Lauki raita is healthy and tastes delicious. Serve this as a side dish with any Indian flatbread or over the rice.
    No ratings yet
    Course Raita
    Cuisine Indian
    Servings 2 people

    Ingredients
      

    • 1 cup yogurt (curd, dahi)
    • Approx. ½ cup milk, use as needed
    • 1 cup lauki grated (bottle gourd, doodhi, ghia)
    • 2 tbsp oil
    • 1 tbsp cumin seeds (jeera)
    • 1/8 tbsp asafetida (hing)
    • 2 whole red chilies (lal mirch)
    • 1 tbsp ginger finely chopped (adrak)
    • 1 tbsp green chilies finely chopped
    • 3 tbsp cilantro finely chopped (hara dhania)
    • 1/2 tbsp salt

    Instructions
     

    • Whip the yogurt and add the milk as needed to make the consistency of pancake batter, set aside.
    • Heat the oil in a saucepan on medium-high heat.
    • Add the cumin seeds and asafetida. After the cumin seeds crack, add red chilies. Stir-fry a few seconds.
    • Add lauki, ginger, green chilies, and cilantro, and stir-fry until most of the water has evaporated and the lauki is tender. This should take about four to five minutes.
    • After the lauki cools, mix it well into the yogurt.
    • Add more milk if needed.
    • For best results, serve chilled.
    Keyword lauki, raita
    Tried this recipe?Let us know how it was!

    How To Make Lauki Ka Raita Manjula’s Kitchen 

    What is Raita: Raita is an accompaniment for any Indian meal and can be created in the form of Vegetable Raita, Spinach Raita, Boondi ka Raita, Cucumber Raita & Lauki ka Raita. Here we are focussing on making lauki ka raita, it’s a simple, quick & easy, gluten free, kid friendly and nutritious yogurt-based recipe featuring lauki and a selection of Indian spice powders. 

    Embark on a culinary journey through the vibrant flavors of India with the creation of lauki ka raita, a delightful yogurt-based dish infused with the subtle essence of bottle gourd. As you delve into the intricacies of preparing this luscious accompaniment, each step unveils a symphony of flavors and textures, culminating in a harmonious blend that tantalizes the taste buds. Let’s explore the art of making lauki raita in the following steps, from whipping the yogurt to adjusting the consistency and serving it chilled.

    Step 1: Preparing the Creamy Base 

    Begin the culinary adventure by whipping the yogurt to perfection, creating a creamy base that serves as the canvas for the upcoming infusion of flavors. Adjust the consistency with milk, aiming for a texture resembling pancake batter—smooth and velvety, yet with a slight thickness that holds its form. This foundational process is key to understanding how to make lauki raita, setting the stage for the transformative journey ahead.

    Step 2: Heating Oil and Infusing Flavors 

    In a saucepan, the culinary symphony commences as the oil sizzles to life over medium-high heat, signaling the start of a flavorful escapade. Introduce cumin seeds and asafetida to the shimmering oil, allowing their fragrant essence to permeate the air—a prelude to the aromatic dance of lauki. As the spices release their captivating aroma, add red chilies, igniting a fiery overture in the process of how to make lauki raita. This flavorful blend sets the stage for the starring ingredient, the humble bottle gourd.

    Step 3: Stir-Frying Lauki and Aromatic Elements 

    Harmonize the flavors within the saucepan by adding lauki, ginger, green chilies, and cilantro, each ingredient adding its unique melody to the culinary composition. Stirring diligently, allow the ingredients to intertwine, coaxing out their inherent flavors as the lauki tenderizes and most of its water evaporates. In just four to five minutes, this vibrant medley becomes a pivotal step in the process of making lauki ka raita, infusing the dish with the rich essence of bottle gourd.

    Step 4: Blending Lauki into Yogurt 

    Once the stir-fried lauki has cooled to a gentle warmth, seamlessly blend it into the whipped yogurt—a transformative moment in the journey of how to make lauki raita. This integration forms the heart of lauki ka raita, marrying creamy textures with vibrant flavors in a harmonious union. Ensure a seamless amalgamation by thoroughly mixing the cooled lauki into the yogurt, allowing the flavors to meld and evolve.

    Step 5: Adjusting Consistency and Chilling 

    Fine-tune the lauki raita’s consistency to perfection by adding more milk if necessary, a meticulous detail in perfecting the lauki ka raita recipe. This adjustment ensures a harmonious blend of ingredients, resulting in a delectable texture that is neither too thick nor too thin. For an optimal dining experience, allow the flavors to meld and intensify by serving the raita chilled—a refreshing conclusion to the culinary journey of how to make lauki raita.

    In conclusion, the art of crafting the perfect lauki raita transcends mere culinary skill—it is a testament to the harmony of flavors and textures, the balance of spices and aromatics, and the meticulous attention to detail. Each step in the process, from whipping the yogurt to adjusting the consistency and serving it chilled, contributes to the creation of a dish that delights the senses and nourishes the soul. So, gather your ingredients, ignite the flames of your culinary creativity, and embark on a flavorful voyage through the enchanting world of lauki ka raita.

  • Mushroom Corn Cashew Curry

    Mushroom Corn Cashew Curry

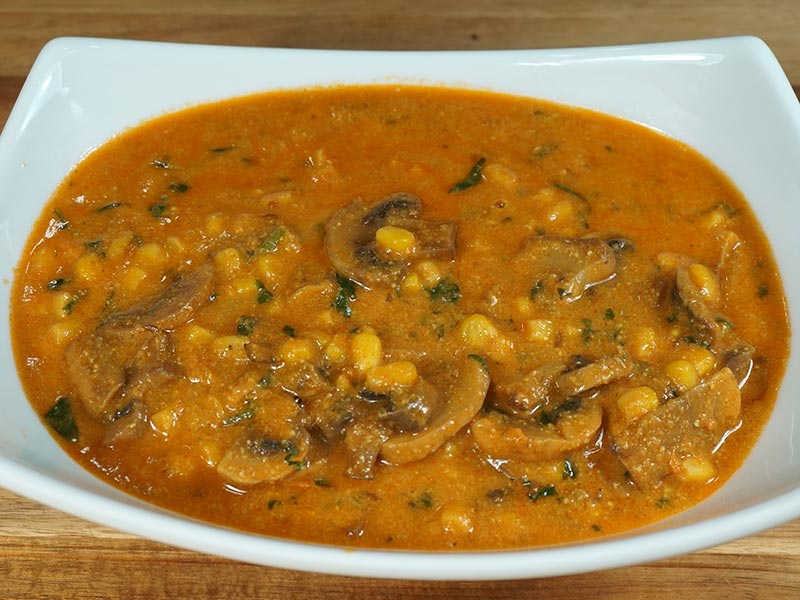
    Mushroom Corn Cashew Curry

    Mushroom Corn Cashew Curry

    Corn and mushroom in tomato and spicy cashew gravy makes a delicious main dish. Cashews add a creamy and rich texture to the dish. This is a quick and easy recipe. This goes well with any Indian flat bread or plain rice.
    3 from 3 votes
    Course curry
    Cuisine Indian
    Servings 2 people

    Ingredients
      

    • 3 cup sliced mushrooms
    • 1 cup corn kernel/ bhuta ka dana (I am using frozen corn kernels)
    • 1/4 cup cashews (kaju)
    • 2 cup tomato chopped
    • 1 tbsp ginger chopped
    • 1 tbsp green chili chopped
    • 2 tbsp oil
    • 1/2 tbsp cumin seed (jeera)
    • 1/8 tbsp asafetida (hing)
    • 1/4 tbsp turmeric (haldi)
    • 1/4 tbsp red chili powder (lal mirch)
    • 2 tbsp coriander powder (dhania)
    • 1 tbsp salt
    • 2 tbsp cilantro chopped (hara dhania)
    • Approx. 1-1/2 cup water

    Instructions
     

    • Blend the tomatoes, cashews, ginger and green chili to make creamy paste. Set aside.
    • Heat the oil in a saucepan over medium high heat. Test the heat by adding one cumin seed to the oil. If the cumin seed cracks right away, the oil is ready.
    • Add cumin seeds, asafetida as cumin seeds crack add tomato paste.
    • Next add coriander; red chili powder, turmeric and salt. Lower the heat to medium and cook the spice mix for about 4-5 minutes until mix start leaving the side of the pan.
    • Add corn and mushrooms, mix it well and add about 1-1/2 cups of water. Cook for about 10-12 minutes, stirring occasionally. Corn and mushrooms should be tender and gravy should be thick in consistency.
    • Mushroom Corn Curry is ready serve hot with Roti or plain rice.
    Tried this recipe?Let us know how it was!
  • Okra Tomato Curry ( Bhindi )

    Okra Tomato Curry ( Bhindi )

    Okra (Bhindi) Tomato Curry

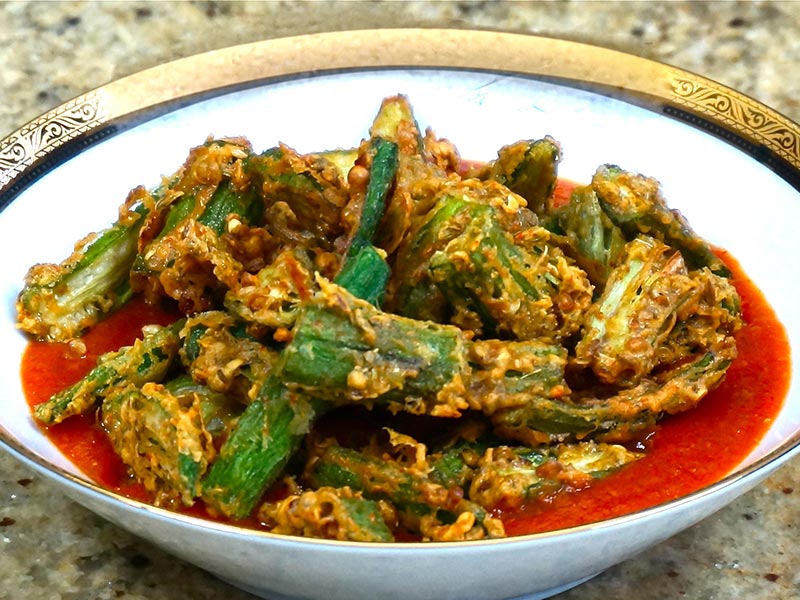
    Okra Tomato Curry

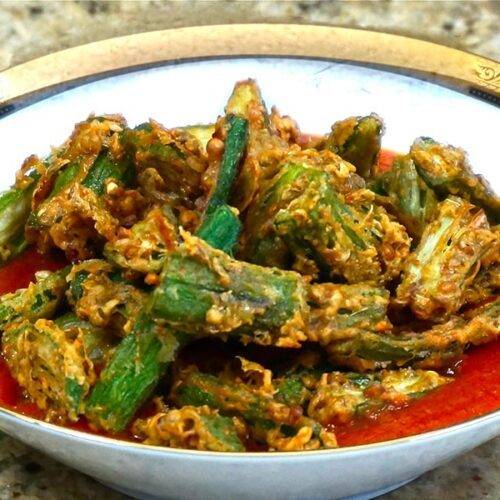
    Crispy okra (bhindi) served with a flavorful tomato curry is a mouthwatering side dish. You will be sure to impress your guests with this unique vegetable dish!
    5 from 1 vote
    Course curry
    Cuisine Indian

    Ingredients
      

    For Gravy

    • 4 medium tomato puree will make approx. 1-1/2 cup
    • 1/4 -inch piece of ginger
    • 1 tablespoon oil
    • 1/2 teaspoon cumin seeds (Jeera)
    • Pinch of asafetida (Hing)
    • 1 teaspoon coriander powder (dhania)
    • 1/4 teaspoon turmeric (Haldi)
    • 1/2 teaspoon  red chili powder
    • 1/2 teaspoon  salt
    • 1 teaspoon sugar
    • 1 teaspoon corn starch/arrowroot powder

    Fried Okra

    • Approx. ½ pond okra sliced from the center and cut in half to make about 1-3/4 cup cut okra (bhindi)
    • 1/4 cup  besan gram flour
    • 1/2  teaspoon salt
    • 1/2  teaspoon cumin seeds (jeera)
    • 1/2 teaspoon mango powder (amchur)
    • 1 teaspoon fennel seeds coarsely ground (sonff)
    • 1-1/2 teaspoons coriander seeds coarsely ground (dhania)
    • 1/2  teaspoon red chili powder
    • Approx. 3 tablespoons water
    • Oil to fry

    Instructions
     

    Gravy

    • Mix cornstarch with three tablespoons of water and keep aside.
    • Blend the tomatoes and ginger to make tomato puree.
    • Heat the oil in a saucepan over medium high. Test the heat by adding one cumin seed to the oil. If the cumin seed cracks right away, the oil is ready.
    • Add cumin seeds, and asafetida and stir for a few seconds now add coriander; turmeric, red chili, salt, and sugar stir fry for a few seconds and add tomato puree.
    • Cook the tomatoes for about 4-5 minutes, add cornstarch, and cook for about 3 minutes. Gravy should be pourable consistency. Gravy is ready to keep aside.

    Fried Okra

    • In a bowl put the okra and add all the dry ingredients, salt, cumin, mango powder, fennel, coriander, red chili powder and besan (gram flour) mix it well. Add the water slowly okra should be nicely coated with spices but the mix should not be runny.
    • Heat the oil in a frying pan over medium-high heat, the frying pan should have about 1 inch of oil. Oil should be moderately hot when you put okra in oil it should float right away but not change color.
    • Put one okra at a time into the oil and fry till they are golden brown on both sides this should take about four minutes.
    • Take them out over a paper towel.
    • Serve the Okra over gravy; don’t mix it as you should pick up the okra with gravy.

    Notes

    Suggestions
    1. You can prepare the gravy and okra in advance; gravy can be refrigerated for 4-5 days. Fried okra should be stored at room temperature for 3-4 days. Before serving heat, the gravy and heat the gravy in a frying pan like stir fry so they become crunchy and serve over the gravy.
    2. You can serve the fried okra without gravy as a side dish they taste great
    Tried this recipe?Let us know how it was!

  • Pistachio Phirni Recipe

    Pistachio Phirni Recipe

    Pistachio Phirni

    Pistachio Phirni (Rice Pudding)

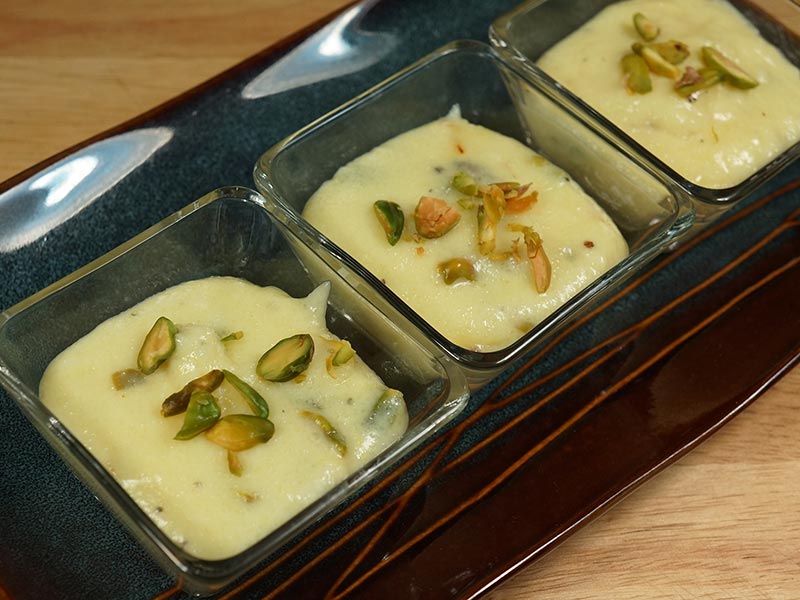
    Pistachio Phirni is a popular North Indian dessert. This is a delicious creamy eggless pudding. Phirni is made with rice, milk and sugar, and has wonderful creamy texture. Ingredients are the same as Rice Kheer but the taste is very different. This is an easy recipe to make.
    No ratings yet
    Course Dessert
    Cuisine Indian
    Servings 6 people

    Ingredients
      

    • 1/4 cup rice
    • 3-1/4 cup of milk
    • 1/2 cup  sugar
    • Few strings of saffron
    • 6 cardamom pods shelled and crushed
    • 1/4 cup  pistachios

    Instructions
     

    • Wash rice and soak it for about half an hour.
    • Drain the water. Blend rice to a fine texture adding few spoons of milk as needed to blend. Add about ¼ cup of milk to make a runny batter. Keep aside.
    • Soak the pistachios in hot water for at least 10 minutes, while water is still warm drain the water and rub the pistachio with paper towel and remove the skin and dry them. Slice or crush the pistachios and keep aside.
    • Boil the milk on heavy bottom pan over medium high heat; wet the pan before adding the milk to avoid the milk burning in bottom of the pan.
    • After milk start to boil lower the heat to medium and let it simmer for about 12 minutes.
    • 6. Add rice to the boiling milk slowly and keep stirring continuously, making sure rice does not become lumpy, milk will become thick. Let it boil for about 3-4 minutes stirring continuously.
    • Next add the sugar, cardamom powder, saffron and pistachios save about 1 tablespoon of pistachios for garnishing.
    • Let it boil for another 4-5 minutes over low medium heat while stirring continuously, it will be consistency of thick batter. Turn off the heat.
    • Shift the Phirni to the serving bowl while it is still hot as Phirni start getting thick as it cools. Garnish with pistachios.
    • Serve chill!
    Keyword 2 Minutes Dessert
    Tried this recipe?Let us know how it was!

  • Mango Pickle (Aam ka Achar)

    Mango Pickle (Aam ka Achar)

    Mango Pickle

    Mango Pickle (Aam ka Achar)

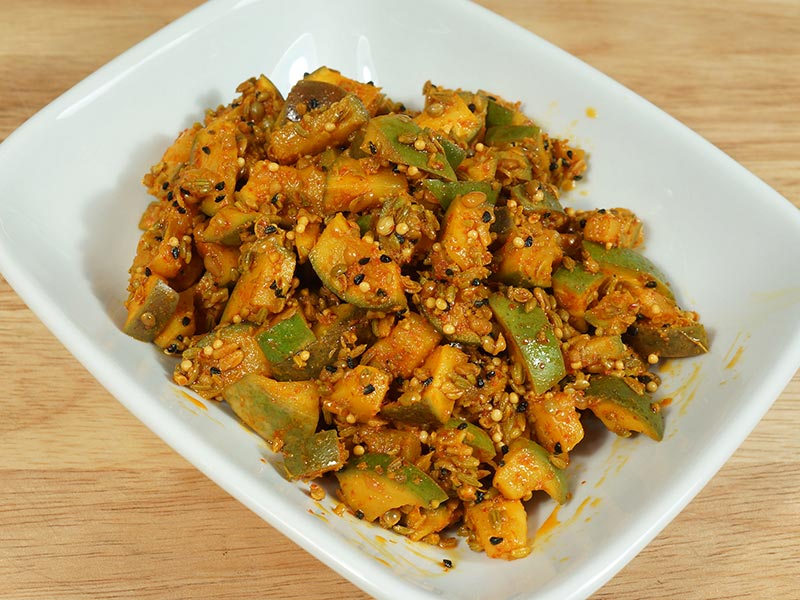
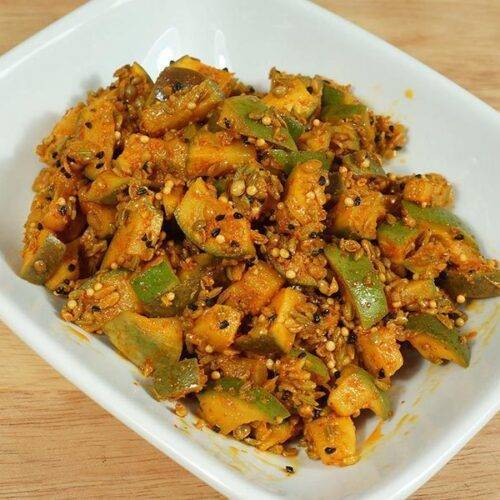
    Mango pickle is a spicy and tangy gluten free condiment. Almost every Indian household has their own favorite recipes for Mango Pickle. It is a popular condiment adds the extra "oomph" to every meal.
    5 from 1 vote
    Course Pickle
    Cuisine Indian
    Servings 12 oz pickle

    Ingredients
      

    • 1 large green mango raw pickling mango/about 2-1/2 cup cubed mango (they are available at Indian and Asian grocery store)
    • 1 tablespoons salt
    • 1 teaspoon red chili powder, adjust to taste (lal mirch)
    • 1/4 teaspoons turmeric (haldi)
    • 1 tablespoons coriander seeds crushed(dhania)
    • 1 tablespoon fennel seeds crushed(Saunf)
    • 1 teaspoon fenugreek seeds (sabut mathi)
    • 1 teaspoon nigella seeds/kalonji
    • 2 tablespoons mustard oil or olive oil

    Instructions
     

    • Wash and dry the mango, cut in small cubes with skin.
    • In a glass bowl put the mango with salt and mix it well.
    • Set aside for about 3-4 hour. Mix and by this time there will be some salt water. Squeeze the mango, and save the water, as we will use later.
    • Spread the mango slices over dry surface and let it dry out preferably in sun light for 4-5 hours. Mango slices should be little dry but still moist. Note: Mangoes will reduce in volume.
    • Add all the spices to salt water and keep it aside.
    • Mix spices, water and oil to mango slices.
    • Keep the Mango pickle in glass jar with lid on. Pickle should be ready in 4-7 days. Mango slices are nicely marinated with spices.
    Keyword Pickle
    Tried this recipe?Let us know how it was!

  • Basil Pesto Sauce

    Basil Pesto Sauce

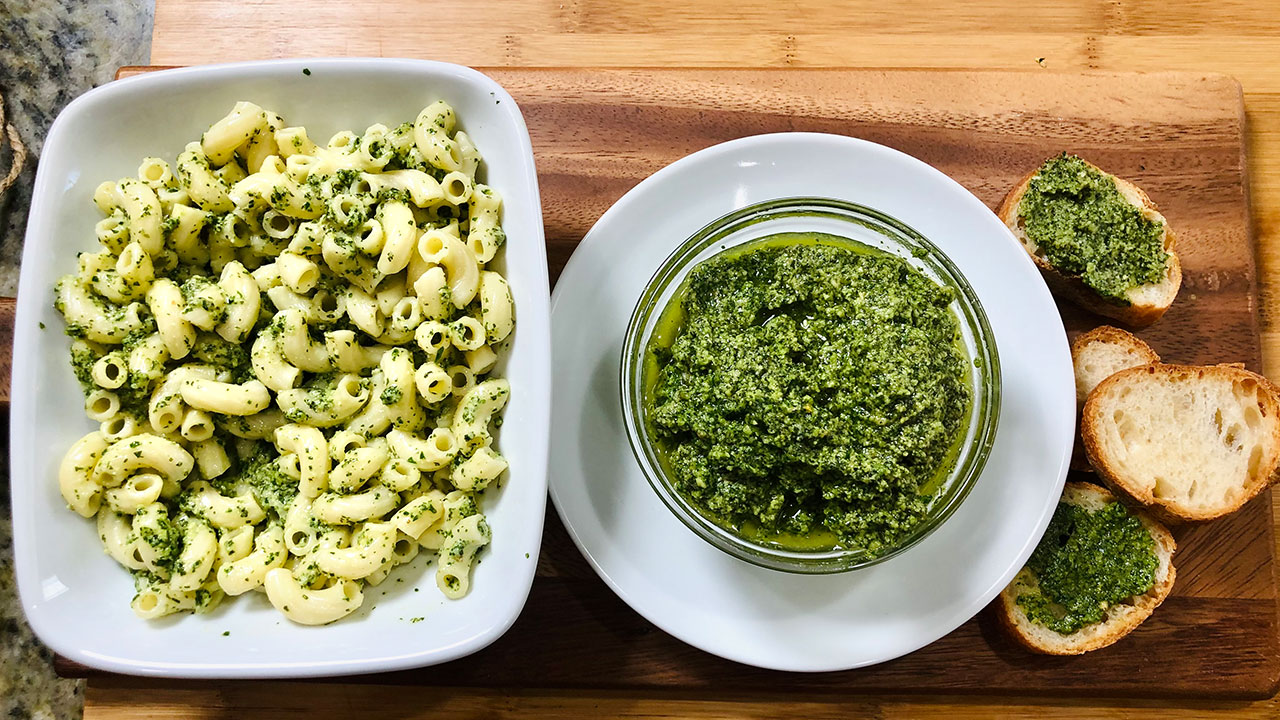
    A bowl of vibrant green Basil Pesto Sauce

    Basil Pesto Sauce

    Lately pesto has become one of my favorite condiments to keep. Basil Pesto is an Italian delicacy. It is super easy to make, and you can use it in so many ways, making variations of dishes. My grandkids enjoy pesto pasta, my son's favorite is making pesto sandwiches, and I like salad and roasted vegetables with pesto. Pesto has a vibrant color and brightens up any dish you make. Basil is a very aromatic herb. I have basil plants in my backyard. Because basil is the main ingredient for this recipe, I am always prepared. This is also vegan and gluten free recipe.
    This recipe will make about 8 oz of Pesto.
    5 from 2 votes
    Prep Time 10 minutes
    Cook Time 0 minutes
    Total Time 10 minutes
    Course Chutney
    Cuisine Italian
    Servings 8 oz

    Ingredients
      

    • ½ cup toasted pine nuts
    • 2 cup fresh basil leaves
    • ½ cup spinach
    • 1 tsp lemon juice
    • ½ tsp salt
    • ¼ tsp fresh black pepper
    • ¼ cup olive oil

    Instructions
     

    • In a food processor, pulse the basil, spinach, pine nuts, black pepper, lemon juice, and salt.
    • Blend until the mixture is well blended but still has some texture, pausing to scrape down the sides, as necessary.
    • Now add the olive oil in the food processor and pulse for a few seconds, scrape the sides, and pulse it again.
    • I like to use a rubber spatula to scrape the sides. Pesto is now ready.
    • Adjust the ingredients to your taste.

    Notes

    Notes:
    I usually will make pesto in a larger quantity for later use. Freeze the pesto in an ice cube tray and make sure a few hours later to transfer the frozen cubes of pesto out and place in freezer zip lock baggies.
    Serving Suggestions:
    Toss with pasta as a sauce, over baked potatoes or grilled vegetables, toss it with salad, or spread it onto crackers or toasted slices of bread.
    You will also enjoy these related recipes, Grilled Caprese Sandwich, Vegan Macaroni and Cheese, Zucchini Pasta, Creamy Butternut squash, Creamy Spinach Pasta
    Tried this recipe?Let us know how it was!
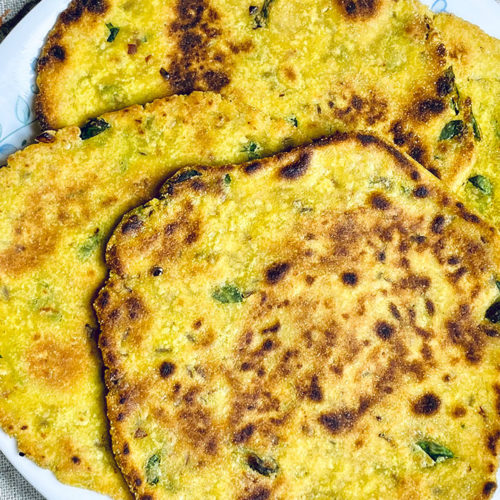
  • Methi Bajra Paratha (Millet Gluten Free and Vegan Bread)

    Methi Bajra Paratha (Millet Gluten Free and Vegan Bread)

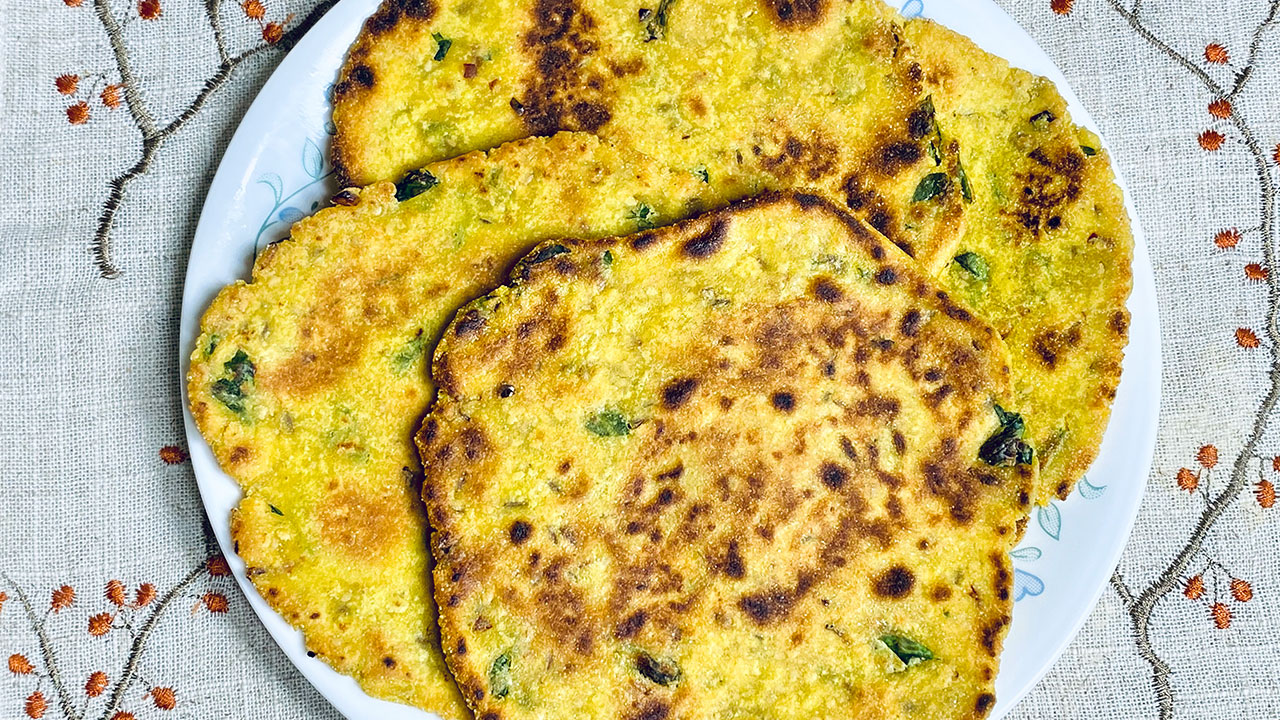
    A plate of Methi Bajra Paratha, golden and crispy, garnished with fresh fenugreek leaves

    Methi Bajra Paratha

    Parathas always have been a family-favorite treat. Lately I have been trying to make gluten-free breads. A combination of bajra and besan with methi parathas taste delicious. These spicy Methi Bajra Parathas have a biscuit texture, which makes it very enjoyable. They also pair well with gravy-based dishes like Mixed Dal, Aloo Tamatar or you can serve with plain yogurt. You can enjoy these as a proper meal, or even as a great on-the-go lunch! I also enjoy these parathas with just hot cup of chai.
    This recipe will serve 2, and make 4 Parathas.
    5 from 1 vote
    Prep Time 10 minutes
    Cook Time 10 minutes
    Total Time 20 minutes
    Course Breakfast
    Cuisine Indian
    Servings 2 people

    Ingredients
      

    • ½ cup millet flour bajra atta
    • ½ cup besan
    • ½ tsp cumin seeds jeera
    • ½ tsp salt
    • 1 tsp chili flakes
    • ¼ tsp turmeric haldi
    • tsp asafetida hing
    • 1 Tbsp sesame seeds til
    • 1 Tbsp oil
    • ¼ cup fenugreek leaves option is using dry leaves
    • ½ cup hot water use as needed

    Also Need

    • 4 tsp oil to cook the parathas

    Instructions
     

    • Mix all the ingredients for paratha together, millet flour, besan. Cumin, salt, chili flakes, turmeric, asafetida, sesame seeds, oil, and fenugreek leaves. Notes: if you don’t have fresh fenugreek leaves use dry methi known as Kasuri Methi.
    • Make the dough using hot water, you will need about 1/2 cup of water. Dough should be firm and pliable. Notes: dough should be prepare just before making paratha.
    • Dived the dough into 4 equal parts, oil your palm and roll them between your palms, to make them round petites.
    • Heat the skillet on medium high heat. To test, sprinkle a couple of drops of water on the skillet. The water should sizzle right away.
    • Roll the paratha in about 6” circle, roll them between two pieces of plastic that makes the rolling easy, I am using zip log bag.
    • Place the methi bajra paratha over the skillet. When start to change color, flip it over. You will notice some golden-brown spots.
    • After a few seconds, spread one teaspoon of oil on the aratha. Flip it again and lightly press the with a spatula. Flip again and press with the spatula making sure the paratha is golden-brown on both sides.
    • Repeat same process for the remaining.
    Tried this recipe?Let us know how it was!
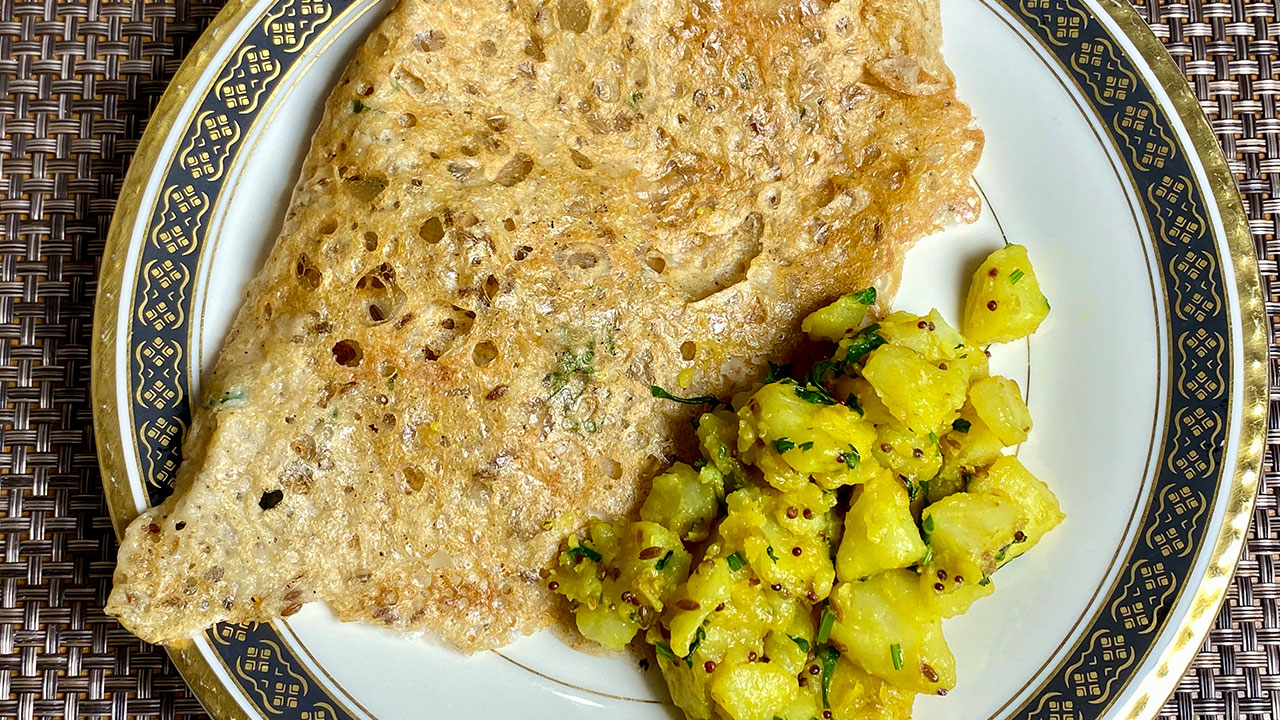
  • Sorghum Dosa (Jowar)

    Sorghum Dosa (Jowar)

    A plate of crispy Sorghum Dosa served with spiced potato filling

    Sorghum Jowar Dosa

    Sorghum Jowar Dosa a tasty twist to Rava Dosa. Lately, I am trying gluten free recipes and exploring the grains I rarely used. Sorghum Dosa is one of those recipes. This is a good alternative to regular dosa it is quick and easy to make. Sorghum Dosa batter does not need to be fermented. Sorghum dosa also vegan and gluten free. It is crispy and has a lacy look like Rava Dosa. You can serve this with traditional Samber and coconut Chutney or serve for a snack with cilantro Chutney.This recipe will serve 3.
    4 from 1 vote

    Ingredients
      

    • ½ cup sorghum Jowar flour
    • ¼ cup rice flour Chawal ka atta
    • ½ tsp cumin seed jeera
    • tsp asafetida hing
    • ¼ tsp salt
    • tsp crushed black pepper
    • 1 Tbsp finely chopped cilantro hara dhania
    • 1 ½ cup water
    • 3 Tbsp of oil for cooking dosa

    Instructions
     

    • Mix all the dry ingredients together, sorghum flour ( Jowar), rice flour, cumin seeds, asafetida, salt, black pepper.
    • Add water slowly to make a thin batter and avoiding any lumps. Batter should have pouring consistency like buttermilk. Let the batter stand for about 30 minutes.
    • Before making dosa add cilantro. Mix it well.
    • Heat the skillet on medium high. To check if the skillet is ready sprinkle a few drops of water over the skillet water should sizzle. Wipe the skillet with few drops of oil.
    • Pour the batter with a ladle, keep the ladle about 4 inches high from the skillet in a circular motion starting from the center. Keep pouring the batter till it is the size you will like the dosa. Notes: dosa will no be perfectly round.
    • Do not try to spread the batter, Dosa should have holes like swiss cheese or have lacy look.
    • Drizzle 1 teaspoon of oil around dosa.
    • Cook Dosa over medium heat for about 2 minutes or until Dosa becomes golden brown. Turn the Dosa using spatula.
    • Let Dosa cook for about 1 minute from another side. Dosa will be golden brown on one side and light color on other side. Thin and crispy Sorghum Dosa is ready to serve.
    • Dosa has a look of Rava dosa but Sorghum Dosa is also gluten free and vegan.

    Notes

    Serving Suggestions
    Traditionally Rava Dosa is served with Sambar (lentil soup cooked with vegetables), and coconut chutney, or serve for snack with cilantro Chutney. I have the recipes for Sambar, Coconut Chutney, and Hari Cilantro Chutney on my web site.
    Tried this recipe?Let us know how it was!

    How to make Instant Sorghum Dosa by Manjula’s Kitchen

    Dosa is a popular south indian delicacy which looks like a crepe. It’s like a crisp and thin pancake made of rice and urad dal batter. Traditionally Dosa is served with sambar, aloo masala and coconut chutney. It is an Indian crepe made usually through rice batter, but here we have experimented and made many alternative dosa such as Oat Dosa, Besan Dosa, Rava Dosa, Sorghum Dosa. This preparation is using sorghum dosa and is a bread based breakfast recipe that is vegan. The preparation entails skillfully combining pan techniques and manual dexterity to achieve the perfect bread cooked on non-stick skillets.

    1. Mixing Dry Ingredients: Crafting the Base for Jowar Dosa

    Embark on the journey of creating an Instant Jowar Dosa by combining all the dry ingredients – sorghum flour (Jowar), rice flour, cumin seeds, asafetida, salt, and black pepper. This harmonious blend sets the foundation for a gluten-free and vegan dosa that promises a delightful culinary experience. Ensure the dry ingredients are well-integrated, setting the stage for the dosa batter.

    2. Creating the Dosa Batter: Achieving the Perfect Consistency

    Gradually add water to the dry mix, creating a thin batter with a pouring consistency akin to buttermilk. The key is to avoid any lumps, ensuring a smooth texture. Let the batter stand for approximately 30 minutes, allowing it to settle and develop optimal flavours. This patient step contributes to the success of your Jowar Dosa, enhancing its taste and texture.

    3. Adding Cilantro: Elevating the Flavor Profile of Jowar Dosa

    Before transforming the batter into dosas, introduce a burst of freshness by adding cilantro. This step not only enhances the flavor profile but also adds a visual appeal to your Jowar Dosa. Gently mix the cilantro into the batter, ensuring an even distribution of this aromatic herb.

    4. Pouring and Cooking Dosa: The Art of Creating Jowar Dosa

    Heat the skillet on medium-high, a crucial step before creating your Jowar Dosa. To test the skillet’s readiness, sprinkle a few drops of water – a sizzle should confirm its optimal temperature. Wipe the skillet with a few drops of oil, creating the perfect non-stick surface. With a ladle, pour the batter in a circular motion, starting from the centre, allowing the dosa to take shape naturally. Resist the urge to spread the batter, as Jowar Dosa is intended to have holes, resembling a swiss cheese or possessing a lacy appearance.

    5. Drizzling Oil and Flipping Dosa: Achieving the Perfect Golden Brown

    Enhance the crispiness and flavour by drizzling a teaspoon of oil around the dosa. Cook the Jowar Dosa over medium heat for about 2 minutes until it attains a golden brown hue. Using a spatula, gently flip the dosa, revealing a light colour on one side and the golden brown perfection on the other. This intricate dance of heat and ingredients results in a thin, crispy, and visually appealing Sorghum Dosa.

    6. Serving Your Gluten-Free Creation: Enjoying the Instant Jowar Dosa

    Your Instant Jowar Dosa, with its distinctive swiss cheese-like appearance, is now ready to grace your table. Savour the gluten-free and vegan goodness of this delectable creation. While reminiscent of Rava dosa in appearance, the uniqueness of Sorghum Dosa shines through. Thin, crispy, and utterly satisfying, this dosa promises a delightful culinary experience that caters to a diverse range of dietary preferences.

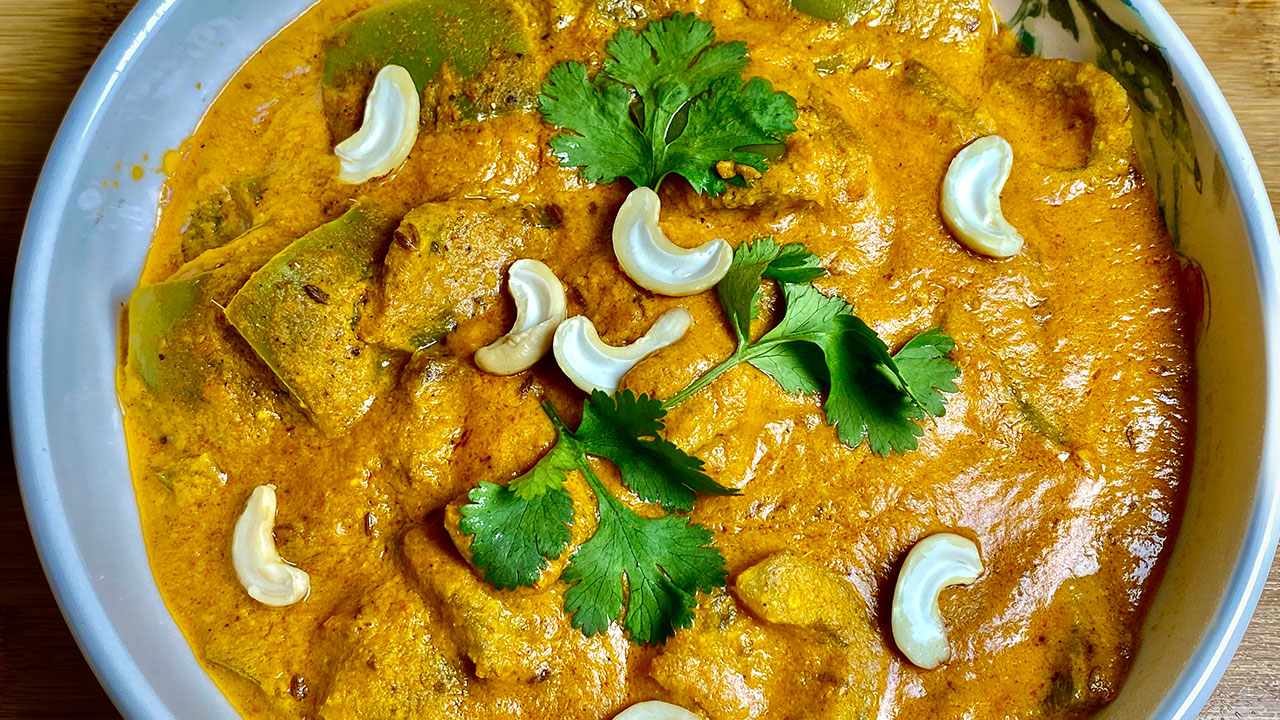
  • Masala Bell Pepper Curry

    Masala Bell Pepper Curry

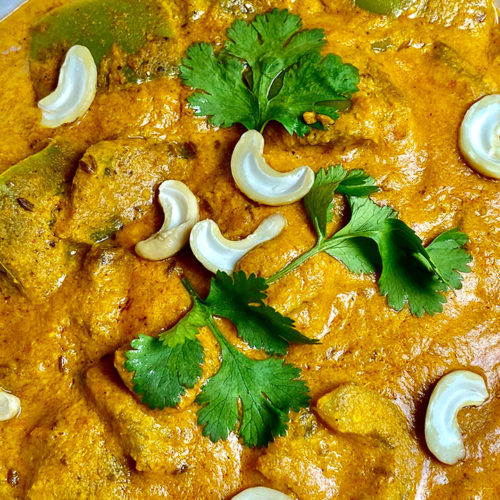
    A bowl of Masala Bell Pepper Curry garnished with cashews and fresh cilantro

    Masala Bell Pepper Curry

    Masala Bell Pepper Curry, which is a Hyderabadi-style dish. Hyderabad dishes are very spicy and aromatic. For me, bell pepper curry represents these dishes well. I wanted to do a recipe for a side dish for a more formal get together. I happened to have some extra bell peppers in my fridge, so I decided to experiment with those.
    Since this is a dish for a party, I wanted the gravy to be spicy and rich. Of course, I had to try out variations of this recipe a few times to balance the flavor. This dish has a complex flavor. The nuttiness of the cashews, sesame seeds, and coconut blends perfectly together. The gravy for this dish is also very versatile. You can also make a variety of dishes with this gravy. You can try adding potatoes or paneer with this gravy base, comes out delicious.
    Bell Pepper Masala Curry is very aromatic and delicious, in addition to being vegan and gluten-free. If you enjoy hot and spicy food, indulge yourself with this dish! It pairs excellently with naan, puri, or plain white rice. Enjoy!
    Recipe will serve 4.
    4.34 from 12 votes
    Prep Time 10 minutes
    Cook Time 30 minutes
    Course Main Course
    Cuisine Indian
    Servings 4 people

    Ingredients
      

    • 2 medium size green bell pepper cut into bite size pieces

    Spice Mix

    • 1 tsp oil
    • ¼ cup broken cashews
    • 1 Tbsp sesame seeds
    • 1 Tbsp coriander
    • 1 Tbsp coconut powder

    Gravy

    • 1 ½ cup chopped tomato I used 3 medium size tomatoes
    • 1 Tbsp ginger cut into small pieces
    • 1 Tbsp chopped green chili
    • 2 Tbsp oil
    • 8 fenugreek seeds methi dana
    • 1 tsp cumin seeds jeera
    • ¼ tsp turmeric haldi
    • tsp asafetida hing
    • 1 tsp red chili powder lal mirch
    • ½ tsp sugar
    • 1 tsp salt
    • ½ tsp garam masala

    Instructions
     

    • Cut the bell peppers in half and remove the core and discard and cut them in bite size pieces.
    • In a pan, heat 1 teaspoon oil. Add cashews, sesame seeds, coriander seeds, and on a low flame, stir fry them for about 2 minutes. Turn off the heat and add coconut stir together. After the mix comes to room temperature blend the mix using about 1/4 cup of water and make it into a paste and set aside.
    • Blend tomatoes, ginger, and green chili into a paste. Set aside.
    • Use the same frying pan, heat the oil on medium heat, oil should be moderately hot. Add cumin seeds, fenugreek seeds and asafetida stir for a minute add tomato paste. Add turmeric, salt, sugar, and red chili powder. Stir fry for about 2 minutes, oil will start separating.
    • Add the spice paste and cook for 2-3 minutes stirring. The spice mix will start to leave the oil. Add bell pepper stir and 1-1/2 cups of water and bring the gravy to boil.
    • Lower the heat to medium low and let it simmer for about 6-8 minutes. Until bell pepper is tender.
    • Gravy will thicken as it sits, if needed add more water.
    • Sprinkle the garam Masala and cover the pan.
    • Bell pepper curry is ready to serve. I like to serve this with Naan, or over plain rice.
    Tried this recipe?Let us know how it was!
  • Grilled Veggie Healthy Bowl (Air Fryer Recipe)

    Grilled Veggie Healthy Bowl (Air Fryer Recipe)

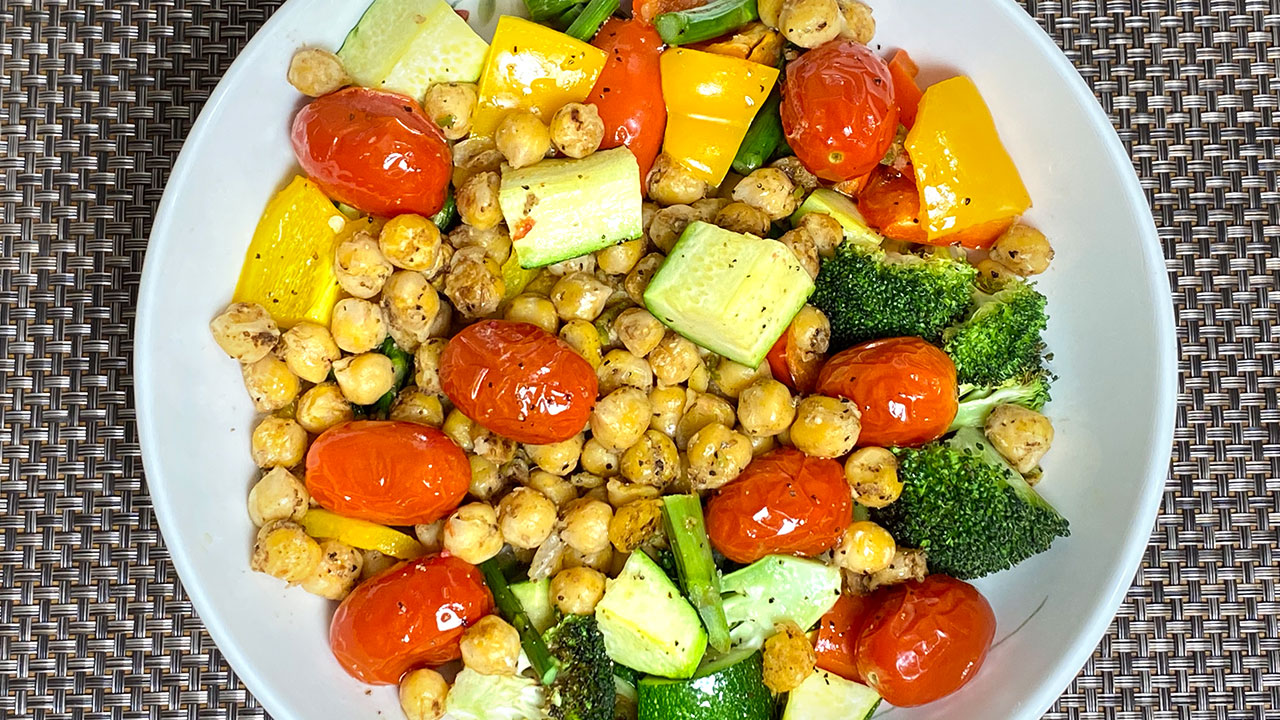
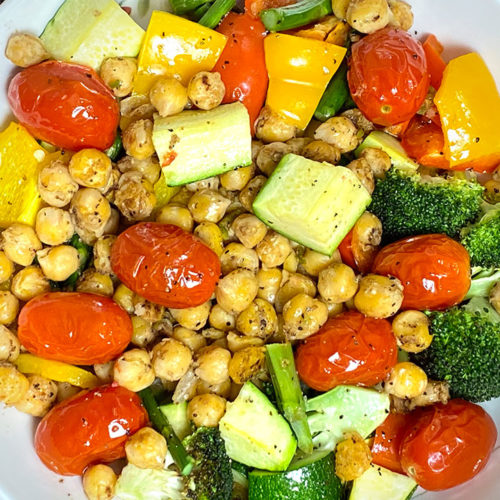
    A bowl of grilled vegetables including cherry tomatoes, bell peppers, zucchini, broccoli, and chickpeas

    Grilled Veggie Healthy Bowl

    "Grilled Veggie Healthy Bowl" is inspired by my daughter-in-law, who enjoys light, fresh, and healthy meals. She suggested I do this video after trying my recipe out. It's hard to believe something this healthy makes such a delicious and filling meal! In this recipe, I grilled asparagus, broccoli, bell pepper, zucchini, and cherry tomatoes. I then toss the grilled veggies with spiced chickpeas and a homemade ginger dressing. The ginger dressing definitely adds a kick to the flavor. This bowl is also pleasing to the eyes as it's filled with colorful vegetables and the chickpeas add some texture, in addition to protein! This dish vegan and gluten-free. This makes for a great lunch. Or you can serve this as a side dish or make a wrap using tortillas or flatbread.
    Recipe will serve 2 people.
    5 from 1 vote
    Prep Time 10 minutes
    Cook Time 15 minutes
    Course Salad
    Cuisine Indian
    Servings 2 people

    Ingredients
      

    For Chickpeas

    • 15 ounce can of chickpeas
    • 2 tsp oil
    • ½ tsp salt
    • ½ tsp roasted cumin seed powder
    • tsp black pepper
    • 1 tsp finely chopped green chili
    • 1 Tbsp shredded ginger
    • 1 tsp lemon juice

    Vegetables

    • 8 cherry tomatoes
    • ½ zucchini cut in four length wise
    • ½ red bell pepper quartered seeds and ribs removed
    • ½ yellow bell pepper quartered seeds and ribs removed
    • 6 florets of broccoli
    • 10 asparagus trimmed
    • Use the vegetables to your choice

    Dressing

    • 1 Tbsp vinegar I am using rice vinegar
    • 1 Tbsp lemon juice
    • 2 Tbsp olive oil
    • 1 tsp sugar
    • ½ tsp salt
    • ¼ tsp black pepper
    • 1 Tbsp ginger juice

    Instructions
     

    • Prepare the dressing mix all the ingredients together, vinegar, lemon juice, olive oil, sugar, salt, black pepper, and ginger juice set aside. You can prepare the dressing even a few days earlier. This is my go-to dressing and I make this extra, so it is always ready.
    • Grilling the Vegetables: preheat the air fryer at 350-degree F. Spread the vegetables evenly on a tray, spray lightly with oil. Air fry for about 6 minutes. If you don’t have air fryer grill the veggies in the oven or on the stove.
    • Prepare the chickpeas, while vegetables are roasting, rinse the chickpeas few times changing the water. In a frying pan heat, the oil moderately, add chickpeas, stir fry for about 3 minutes. Chickpeas will catch some color. Add roasted cumin seed, black pepper, green chilies, ginger, and lemon juice cook and stir fry for about 2 minutes stirring occasionally, set aside. Chickpeas also can be prepared in advance.
    • Toss the vegetables and chickpeas together and drizzle the dressing.

    Notes

    Do not overcook the vegetables, otherwise the vegetables will become too soft or mushy and will lose the colors.
    Keyword Air Fryer Recipe, Diabetic, Gluten Free, Grilled Vegetables, Healthy, Healthy Bowl, Healthy Lunch, Home Made, Low Cholesterol, Lunch Box Meal, Masala Chola, Refreshing, Salad, Spicy Chickpea, Vegan
    Tried this recipe?Let us know how it was!
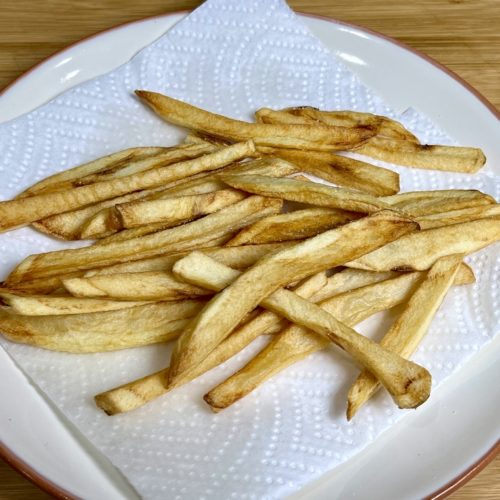
  • Crispy French Fries

    Crispy French Fries

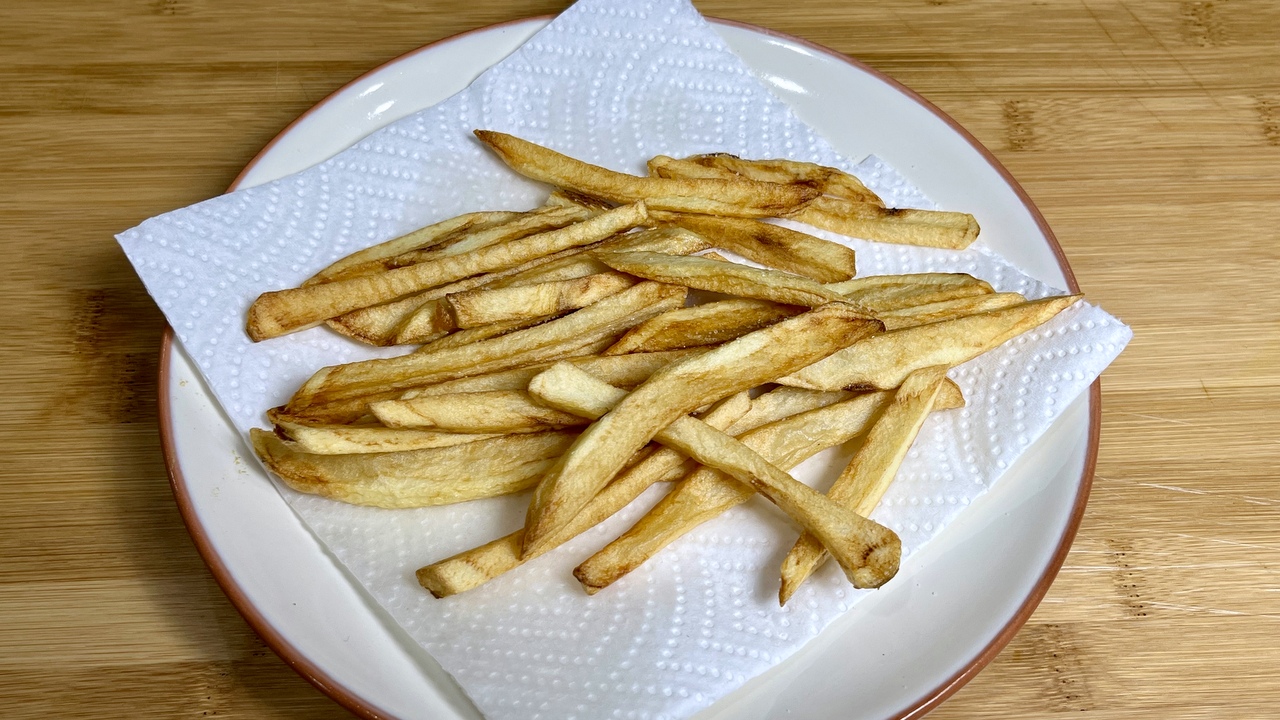
    A plate of crispy French Fries served with ketchup

    Crispy French Fries

    Crispy delicious French Fries! Who doesn't enjoy French fries? It's the perfect comfort food! Homemade Fries, it’s actually quite simple and easy to make. In fact, this is a great snack for my grandkids when they come to visit me. My grandson will say very proudly my dadi (grandmother) makes the best fries.This recipe will serve 3
    4 from 1 vote
    Prep Time 5 minutes
    Cook Time 15 minutes
    Course Appetizer
    Cuisine French
    Servings 3 people

    Ingredients
      

    • 2 potatoes use russet potatoes
    • ½ tsp salt
    • Oil to fry

    Instructions
     

    • Wash and peel the potatoes, and slice potatoes into French fries, and place into ice cold water for at about 10 minutes. Soaking in water potatoes some of the starch will come out and water will look fogy. Remove them from water to clean kitchen towel and pat dry.
    • Heat oil in a frying pan over medium-high heat. Put the fries into oil, don’t over crowed them. Notes: overcrowding fries will bring oil temperature to very low and fries can become very oily.
    • Turn the fries occasionally, fry until golden brown it should take about 6-8 minutes. Remove fries from oil with a slotted spoon to drain on paper towel. Sprinkle the salt and fries are ready to serve.

    Notes

    My family and friends enjoy the fries with tamarind chutney, this exotic sweet and sour chutney is a delicious condiment. I always have this in my refrigerator. My grandkids also like to have a lemonade or Mango lassi with French fries.
    Tried this recipe?Let us know how it was!
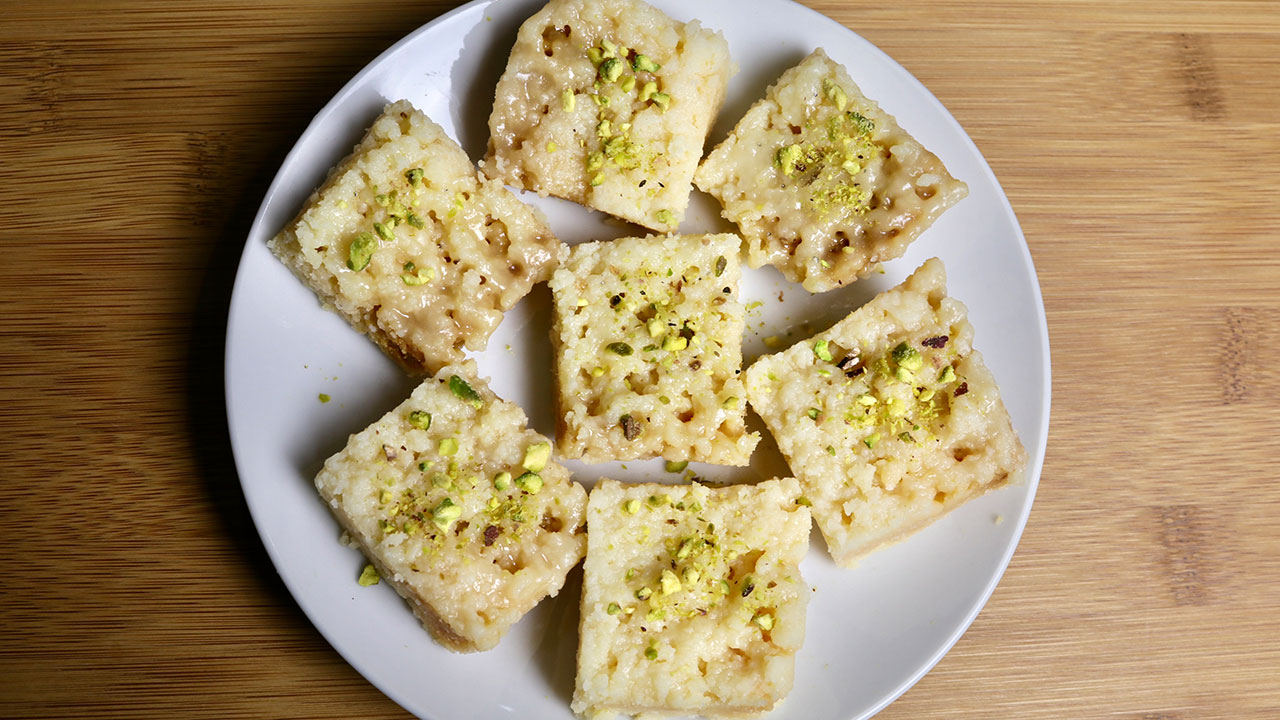
  • Microwave Milk Cake

    Microwave Milk Cake

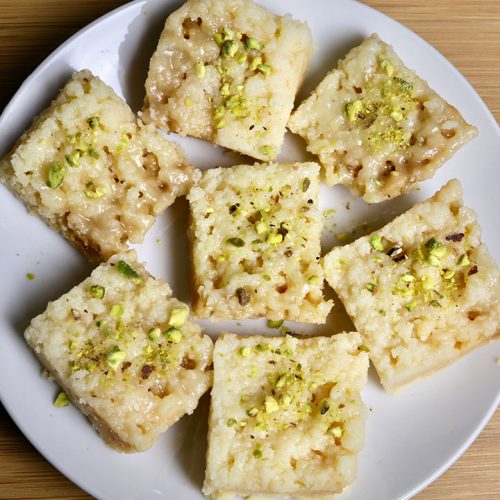
    Eight pieces of microwave milk cake garnished with chopped pistachios, served on a white plate.

    Microwave Milk Cake

    Milk cake is a sweet delicacy. Despite having posted this recipe before, I decided to do this recipe again, because it was just too good! it’s nice to have quick and easy recipes that taste delicious. I make this version of milk cake in the microwave instead. How much easier can it get? It only requires 4 ingredients, one microwave-safe pan and makes absolutely no mess! It took me about 10 minutes tops. This recipe is a must-try and the perfect dessert for the holidays!
    This recipe will serve 8.
    4.41 from 10 votes
    Prep Time 5 minutes
    Cook Time 10 minutes
    Course Dessert
    Cuisine Indian
    Servings 8 people

    Ingredients
      

    • 1 cup ricotta cheese use whole milk ricotta
    • 1 cup milk powder
    • ½ cup sugar
    • ¼ tsp cardamom powder
    • 1 Tbsp butter

    Instructions
     

    • I am using 5×7 Pyrex pan.
    • Grease the Pyrex pan with butter and mix all the ingredients. Clean the sides and cook for 3 minutes in microwave.
    • Stir it and cook again for 2 minutes. Stir it and cook again for another 2 minutes. If cake is soft cook again for 1 more minute without stirring. It took me 8 minutes to make it. Let it cool of and cut into squares and enjoy.

    Notes

    You will also enjoy these quick dessert recipes, Rava Kesari, Chocolate Fudge, Rava ladoo
    Keyword Dessert, Gluten Free, Microwave Cooking, Mithai, Party Food, Quick And Easy, Ricotta Burfi, Vaishno Cooking
    Tried this recipe?Let us know how it was!
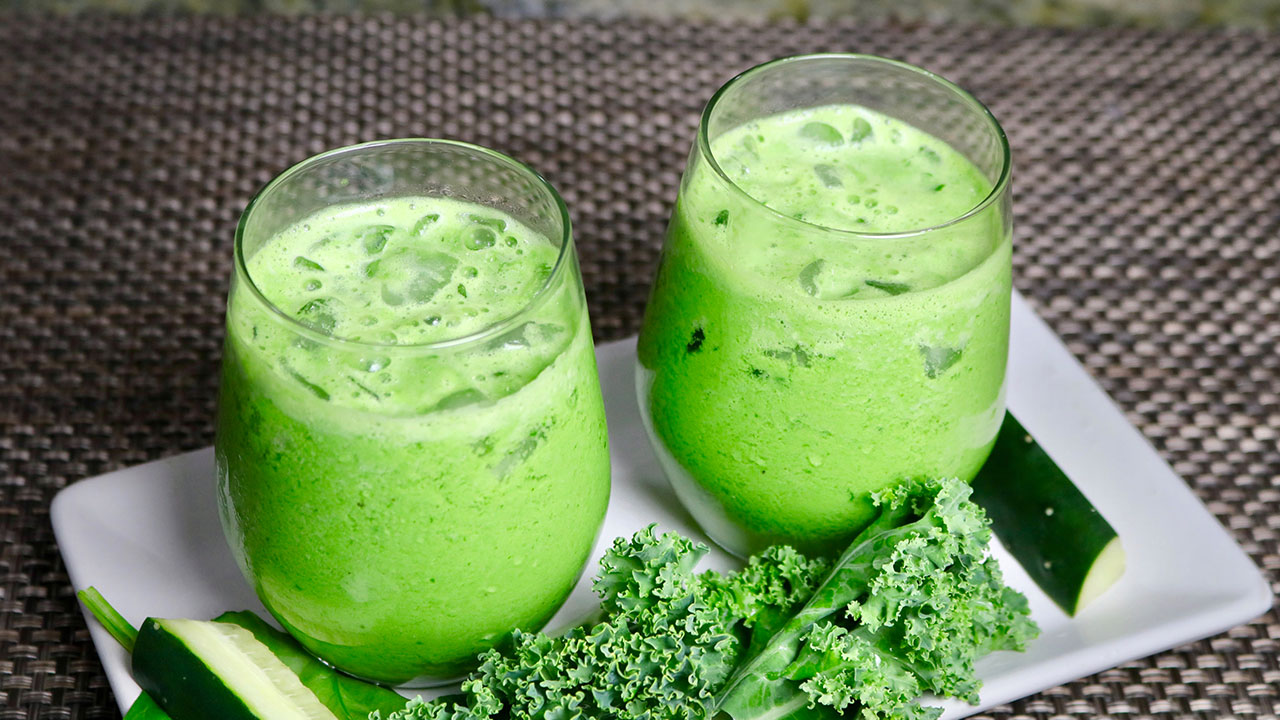
  • Kale and Spinach Smoothie

    Kale and Spinach Smoothie

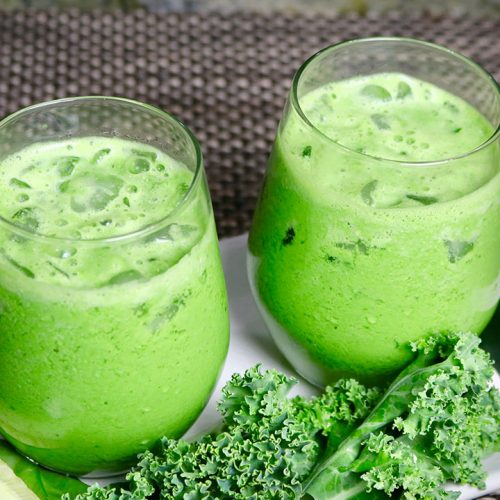
    Two glasses filled with vibrant green Kale & Spinach smoothie, garnished with ice cubes and accompanied by fresh kale leaves and cucumber slices on a white plate.

    Spinach Kale Smoothie (Healthy Drink with Yogurt)

    Kale and spinach smoothie, is a healthy way to start your day! This is a delicious and refreshing drink. This is a great way my Dadi showed me to get my greens in for the day! Its tastes better than I was expecting! It tastes good!
    4.75 from 4 votes
    Servings 4 people

    Ingredients


    • 1 cup kale chopped, and remove all the stems
    • 1 cup spinach chopped, and remove all the stems
    • ½ cup cucumber cut into small pieces
    • ½ cup yogurt
    • ½ tsp salt
    • 1 tsp sugar
    • Pinch black pepper
    • ½ cup water

    Instructions
     

    • Boil the kale in 2 cups of water over medium heat for about 2-3 minutes. Turn off the heat and add the spinach. Keep the spinach in hot water for one minute. Strain the water and put the kale and spinach leaves in ice cold water for 3-4 minutes. Remove the kale and spinach from the cold water.
    • Blend all the ingredients together, kale, spinach, cucumber, yogurt, water, salt, sugar and black pepper on high speed in a blender until it is very smooth. Add more water to your taste.
    • Pour kale and spinach smoothie over ice and serve!

    Notes

    Here is the blender I used for this recipe:
    Blendtec Twister Jar (37 oz), Professional-Grade Blender Jar
    Keyword Besan Cheela, Breakfast, Carrot Halwa, Chhaachh, Cucumber, Delicacy, Dessert, Detox Smoothie, Gajrela, Gluten Free, Green Buttermilk, Green Smoothie, Healthy, Healthy Breakfast, Kale Buttermilk, Quick And Easy, Spicy Chhaach, Yogurt Smoothie
    Tried this recipe?Let us know how it was!

    You will also enjoy Mango Lassi , Chai, Mint Lemonade,

    ,


  • Pineapple Kulfi (Ice Cream)

    Pineapple Kulfi (Ice Cream)

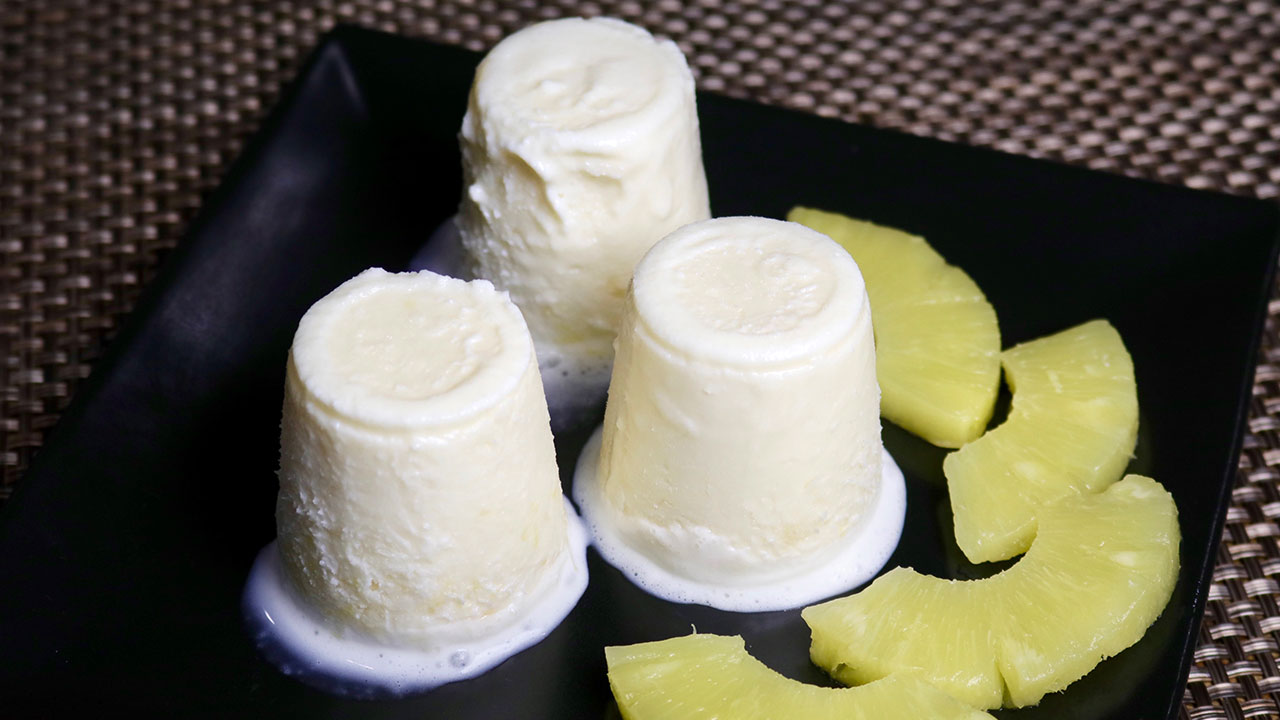
    Three pineapple kulfis served on a black plate with a few slices of fresh pineapple on the side.

    Pineapple Kulfi (Ice Cream)

    Kulfi, a popular summer dessert, is an Indian ice cream. Adding Pineapple here is a delicious twist to traditional kulfi. Pineapple kulfi simply melts in your mouth with its creamy texture and small chunks of pineapple. Pineapple Kulfi is delicious and easy to make. This is my friend Raj's recipe and for this recipe we don’t need an ice cream maker. I served this to my friends and they were surprised to know this was homemade and they all enjoyed it thoroughly.
    5 from 2 votes
    Course Dessert
    Cuisine Indian
    Servings 8 people

    Ingredients


    • 14 oz can of condensed milk sweetened
    • 1 ½ cup cream
    • 1 ½ cup milk
    • ½ tsp agar-agar
    • 8 oz can pineapple crushed, unsweetened

    Instructions
     

    • Drain the syrup from pineapple. Do not squeeze and keep aside. Keep it in freeze till we are ready to use.
    • In a heavy saucepan add condense milk, cream and milk, mix them well.
    • Bring the milk mix to boil over medium heat, stirring occasionally. When milk hot but not boiling take out 1/4 cup of milk in a bowl and add agar-agar, mix it well making sure there are no lumps. Adding agar-agar, you will avoid the water crystal and kulfi will have smooth texture.
    • Add the agar-agar mix to milk. Keep stirring till milk comes to boil, making sure agar- agar has mixed well and no lumps. Turn off the heat.
    • Transfer the milk to glass bowl and freeze it for 3-4 hours, ice cream should be half the way freeze mix it in blender on highspeed for about 30 seconds. Take them out in a bowl add the pineapple chunks and mix it the well.
    • You can freeze the Kulfi in a glass bowl and cover it. You can also freeze in small containers, kulfi molds, or popsicle molds. I am using 4-1/2 oz cups. Freeze them, how long it will take depends on the size of containers or mold you are using.

    Notes

    Do not use, more than recommended amount of agar-agar, it will change the texture of Kulfi and will make it firm. Fresh pineapple does not work well for this recipe.
    Keyword Ananas Kulfi, Candance Milk, Creamy, Dessert, Gluten Free, Homemade, Ice Cream, Party Food, Street Food, Summer Treat
    Tried this recipe?Let us know how it was!

    You will also enjoy Falooda Kulfi , Mango Ice Cream, Mango Cheese Cake,


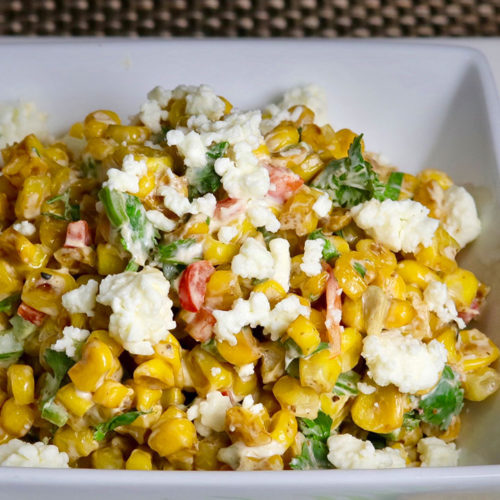
  • Spicy Corn, Corn Salad, (Tasty Snack)

    Spicy Corn, Corn Salad, (Tasty Snack)

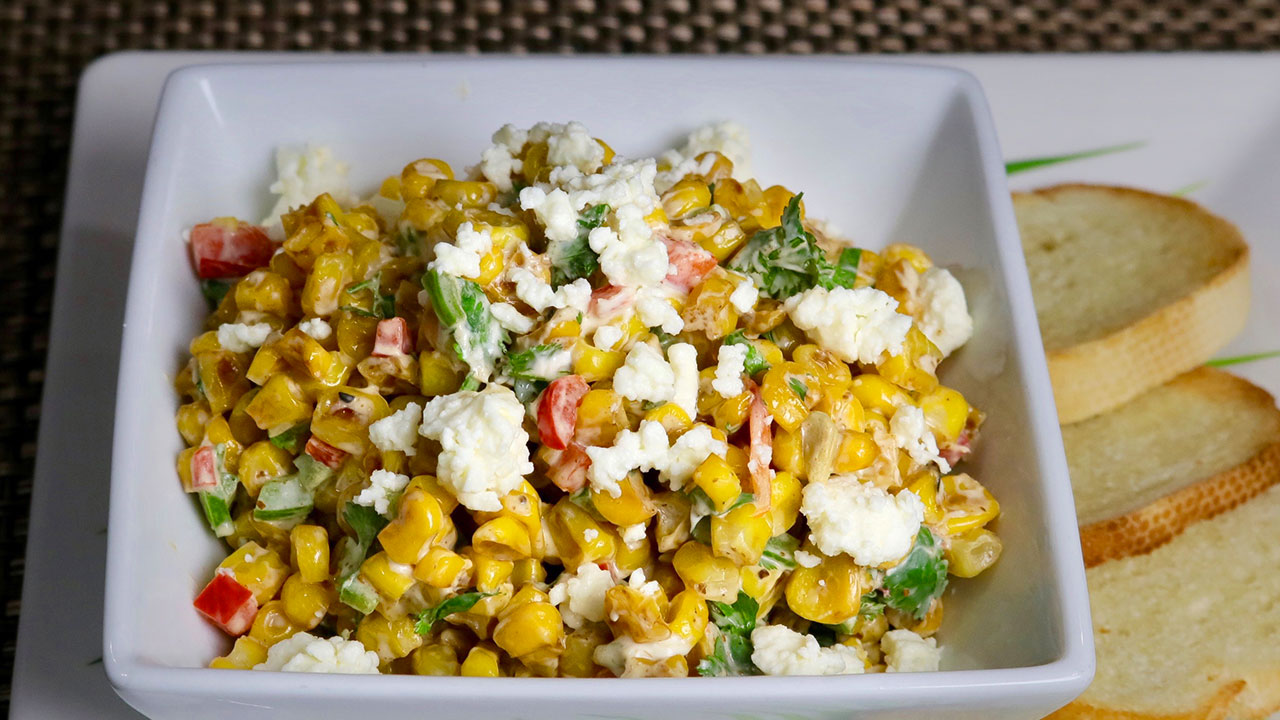
    A bowl of spicy corn salad with roasted corn kernels, diced bell peppers, fresh cilantro, and crumbled cheese.

    Spicy Corn (Tasty Snack)

    Spicy Corn is a very enjoyable snack and not only that, but this is a quick and easy recipe to make. Make it as spicy or as mild as your heart desires. Best of all, you can also serve this as a side dish. Enjoy the spicy corn for a beautiful picnic or outdoor get together. You can also serve this over crisp slices of bread.
    4.80 from 5 votes
    Prep Time 10 minutes
    Cook Time 10 minutes
    Course Appetizer, Salad
    Cuisine Indian
    Servings 4 people
    Calories 153 kcal

    Ingredients


    • 2 cup corn kernels I am using frozen corn, you can use fresh
    • 1 tsp oil
    • ½ tsp salt
    • ½ tsp cumin seeds roasted, bhuna jeera
    • 2 tbsp cilantro finely chopped
    • 1 tbsp green chili finely chopped, adjust to taste
    • 2 tbsp red bell pepper finely chopped
    • 1 tsp lemon juice
    • ¼ cup cream cheese soft

    For Garnishing

    • ¼ cup feta cheese

    Instructions
     

    • Use the flat bottom-heavy frying pan, lightly oil it and heat over medium high heat, put the corn kernels and stir fry for 4-5 minutes stirring continuously. While stir frying kernels will be getting some light and some dark brown color, some of the kernels will pop like you are grilling.
    • Turn off the heat, and add salt, cumin seed powder, cilantro, green chili, red bell pepper, lemon juice, and cream cheese mix it well. Sprinkle feta cheese.
    • Spicy corn taste best when it is served warm but can be served at room temperature.

    Notes

    Spicy Corn works great for picnic or outdoor get together. Also try  Aloo Poori, Lemonade, or Watermelon Cooler

    Nutrition

    Calories: 153kcalCarbohydrates: 17gProtein: 4gFat: 9gSaturated Fat: 4gCholesterol: 24mgSodium: 607mgPotassium: 152mgFiber: 2gSugar: 4gVitamin A: 560IUVitamin C: 14.1mgCalcium: 63mgIron: 0.7mg
    Tried this recipe?Let us know how it was!