Indian Festival Foods: A Celebration of Tradition and Taste
Indian festivals are a time of joy, togetherness, and, most importantly, a feast of flavors. Indian festival foods are an integral part of the celebrations, bringing families and communities together to enjoy delicious and diverse dishes. From sweet to savory, these foods are deeply rooted in tradition and offer a taste of India’s rich culinary heritage. Let’s explore some of the best Indian festival recipes that you can prepare to make your festivities even more special. Popular Indian Festival Recipes Gulab Jamun Gulab Jamun is one of the most cherished Indian festival foods. These soft, spongy balls made from khoya (dried milk) are deep-fried and soaked in a fragrant sugar syrup. They are a must-have during festivals like Diwali and Holi. As a favorite Indian dessert, Gulab Jamun is beloved by all ages and adds a sweet touch to any celebration. Other popular Indian desserts for festivals include Shakar Paare and Namkeen Paare, which are enjoyed during various celebrations. Samosa Samosas are another staple in Indian festival recipes. These crispy, savory pastries are filled with a spiced mixture of potatoes and peas, making them a perfect indian snack for any festive gathering. Samosas are versatile and can be enjoyed as part of a meal or as a standalone treat. They are often served with tangy chutneys, adding a burst of flavor to your festive spread. Samosas are also popular Indian street food recipes and can be part of your party recipes collection. Puran Poli Puran Poli is a traditional sweet flatbread from Maharashtra, commonly prepared during festivals like Holi and Ganesh Chaturthi. This Indian festival food is made by stuffing a dough with a sweet filling made from chana dal (split chickpeas), jaggery, and cardamom. The result is a delicious, aromatic bread that is enjoyed by everyone. Puran Poli is one of the best Indian festival recipes that embodies the spirit of Indian festivals. It can also be enjoyed as part of Indian breakfast recipes on festive mornings. Kheer Kheer is a classic Indian dessert made with rice, milk, and sugar, flavored with cardamom, saffron, and nuts. This creamy and rich pudding is a staple at many Indian festivals, including Eid and Raksha Bandhan. Kheer is easy to prepare and can be served either warm or chilled, making it a versatile addition to any festive menu. It is also a delightful addition to traditional Indian recipes and gluten-free dessert recipes. Chole Bhature Chole Bhature is a popular North Indian dish often enjoyed during festivals and special occasions. This combination of spicy chickpea curry (chole) and deep-fried bread (bhature) is hearty and satisfying. Chole Bhature is one of the best Indian festival recipes for those who love bold, robust flavors. It is commonly served with pickles, and yogurt, enhancing the overall experience. This dish can also be included in dinner recipes for festive feasts. Enhance Your Festival Feast
To make your festival feast even more delightful, consider exploring related categories that complement these Indian festival foods. Adding Indian snacks like pakoras and vadas can provide a variety of flavors and textures. For a sweet ending, explore Indian desserts such as barfi and jalebi. Incorporating healthy recipes like roasted nuts and fruit chaat can offer lighter options for your guests. Hosting a large gathering? The popular party recipe category is filled with dishes that are sure to impress your guests and make your celebration memorable. Including fusion dishes like Indo-Chinese Manchurian can add a unique twist to your festival spread. Frequently Asked Questions (FAQs) Q: What are some popular Indian festival foods?
A: Some popular Indian festival foods include Gulab Jamun, Samosas, Puran Poli, Kheer, and Chole Bhature. Q: What types of festivals are celebrated in India?
A: India celebrates a wide variety of festivals including Diwali, Holi, Eid, Christmas, Raksha Bandhan, Navratri, and Ganesh Chaturthi. Each festival has its own unique traditions and foods. Q: How can I make my festival feast healthier?
A: To make your festival feast healthier, you can include healthy Indian snacks like roasted nuts, fruit chaat, and baked samosas. Opting for desserts made with natural sweeteners and using less oil in savory dishes can also help. Q: What is the significance of food in Indian festivals?
A: Food plays a central role in Indian festivals, symbolizing prosperity, togetherness, and cultural heritage. Each festival has its own traditional dishes that are prepared and enjoyed with family and friends. Q: Can I prepare these recipes in advance?
A: Yes, many Indian festival recipes can be prepared in advance. For example, Gulab Jamun and Kheer can be made a day ahead and stored in the refrigerator. Samosas can be prepped and frozen, then fried fresh on the day of the festival. Q: Are there vegetarian options for Indian festival foods?
A: Absolutely! Most Indian festival foods are vegetarian. From savory dishes like Samosas and Chole Bhature to sweet treats like Puran Poli and Kheer, there are plenty of vegetarian options to choose from. Conclusion Indian festival foods are a testament to the rich culinary traditions of India. Whether you’re celebrating Diwali, Holi, Eid, or any other festival, these best Indian festival recipes will add flavor and joy to your festivities. So, gather your ingredients, try out these Indian festival recipes, and create unforgettable memories with your loved ones. Don’t forget to find vegetarian recipes for more delightful recipes from Manjula’s Kitchen!
By incorporating these dishes into your festival celebrations, you’ll be able to enjoy a wide variety of delicious and traditional foods. Whether you’re looking for a quick snack, a hearty meal, or a sweet treat, there’s an Indian festival food to suit every occasion. Happy cooking and happy festivities!
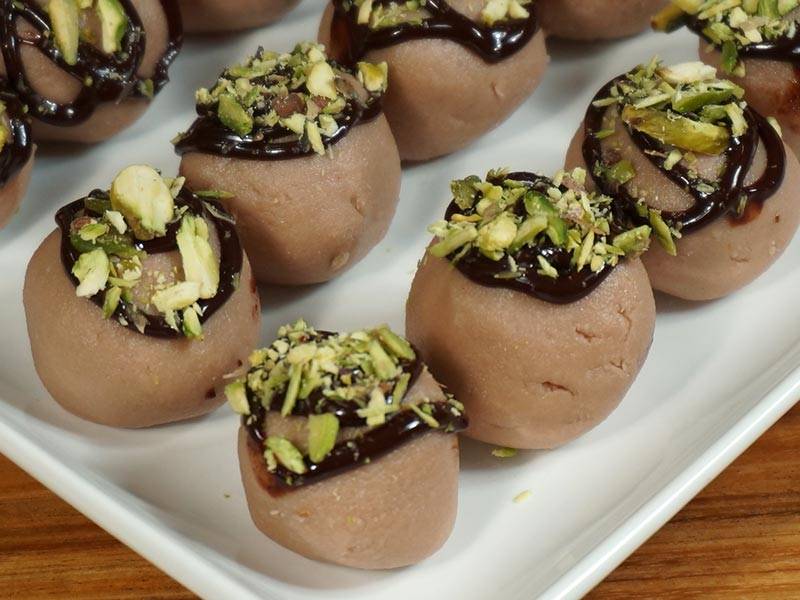
Sandesh is a delicacy of Bengal. Chocolate flavored Sandesh is truly unique. This is very simple to make with few ingredients, milk, sugar and the flavor of your choice. Its is sugary snack or a milky dessert which soothes every sweet tooth and craving of every delight. Perfect for festive occasions such as diwali or holi.
Mix lemon juice in half cup of hot water and keep aside.
Boil the milk in a heavy bottomed pan over medium high heat, stirring occasionally.
As the milk comes to a boil, add the lemon juice gradually and stir the milk gently. The curd will start separating from the whey, turn off the heat.
Once the milk fat has separated from the whey, drain the whey using a strainer line with cheesecloth, or muslin cloth.
Wrap the curds in a muslin cloth, rinse under cold water, and squeeze well.
To take excess water out, press the wrapped paneer under a heavy pan for about 1 hour.
Making Sandesh:
Once the paneer is drained, place on a dry, clean surface and knead the paneer until the paneer is almost rolls into smooth soft dough.
Add the sugar and coco powder into the paneer and knead the paneer again until sugar and coco powder is mixed well.
Next on low heat cook the paneer mixture stirring continuously until paneer starts coming together as soft dough. This should take about 6 to 7 minutes. This is most important step to this dish; you are just cooking paneer enough to take out the rawness. If you over cook the paneer it will become grainy.
Turn off the heat and refrigerate the paneer for about an hour.
Divide the paneer into 18 equal parts and roll them making them in ball shape.
Refrigerate the Sandesh while preparing the chocolate Ganache for topping.
Chocolate Ganache:
Heat the heavy cream, do hot boil, pour it over chocolate chips and mix it well for about a minute until it is smooth and shiny chocolate syrup consistency.
Pour the syrup in one corner of zip log bag and make a very small hole to drizzle the syrup on Sandesh, or use the icing bag.
Take out the Sandesh from refrigerator and drizzle the chocolate syrup over and garnish with few slices of pistachios.
Sandesh is ready
Refrigerate them for few hours before serving. Serve them chilled! And Enjoy delicious Sandesh
Notes
NoteSandesh can be refrigerated for about one week.
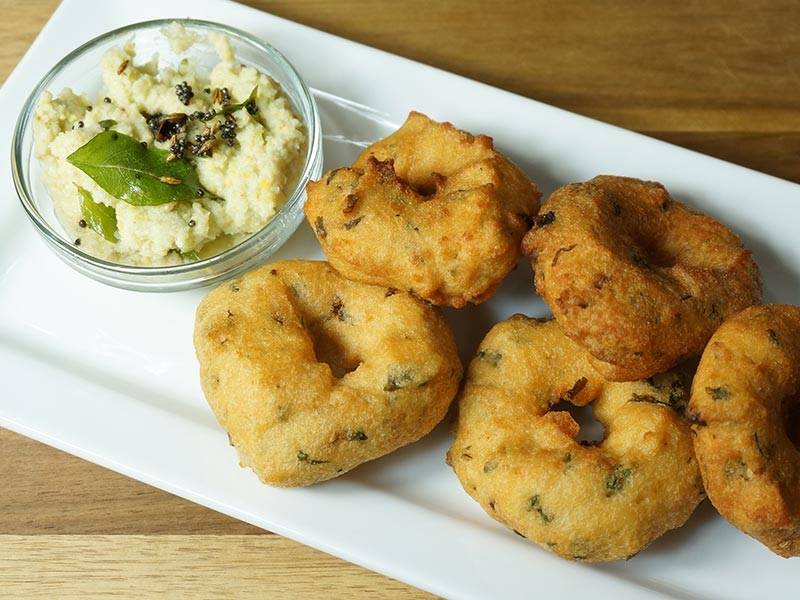
Medu Vadas are a traditional South Indian dish which can be served as a main course, side dish, or snack. This crispy deliciousness is made with spiced urad dal batter and fried in donut shape dumplings. They are crispy on the outside and soft on the inside. They are served with Sambar and Coconut Chutney.
1cup split washed urad dal (available in Indian stores)
1/8 teaspoon asafetida (hing)
2 teaspoon whole coriander seeds (sabut dhania)
1tablespoon green chili chopped
2tablespoons cilantro chopped (hara dhania)
1teaspoon salt
Oil to fry
Instructions
Wash and soak dal in about 3 cups of water for about 4-6 hours.
Drain the water and grind dal to smooth paste using very little water just enough to grind, food processor works good for this. Blend for another 2 minutes to whip dal to make fluffy. Take dal batter out in a wide bowl.
Add all the ingredients to the dal batter, cilantro, green chili, coriander, asafetida and salt, beat the batter for 2-3 minutes this will make the batter light and fluffy. To make sure batter is ready put one drop of batter in a bowl of water, batter should float.
Keeping the right consistency of batter is very important; add water as needed batter should not be soft but not runny. When you put the batter on your palm batter should hold its shape. Make the Vadas batter when you are ready to fry them, as the batter sit will get soft if you are not ready to fry keep batter refrigerated.
Heat the oil in a frying pan over medium high heat.
The frying pan should have about 1 inch of oil. To check if the oil is ready, put one drop of batter in oil. The batter should sizzle and come up but not change color right away. If oil is very hot Vadas will not cook through and will not be crispy.
Wet the palms and take golf size batter and place over your palm, flatten to round shape and make hole in the center looking like donut now with other hand wet fingers slowly slide Vada into the hot oil.
Fry the Vadas from both sides to golden brown. Take them out over a paper towel to drain access oil.
Traditionally Medu Vada is served with Coconut Chutney, and sambar (aromatic lentil soup with vegetables).
Notes
Notes
If the Medu Vada Batter is too thick: The Vada will shape nicely but they will be hard inside after frying.
If the batter is too soft: it will not be able to hold the shape and will absorb too much oil.
It’s the consistency of the batter that determines how soft and shapely the Vadas turn out.
Medu Vada is a South Indian delicacy often served as an appetizer or snack, especially during festive occasions like Yugadi. It is a gluten-free and vegan dish made primarily from urad dal (black gram lentils) batter, seasoned with spices like cumin seeds, black pepper, and curry leaves. The batter is shaped into round doughnuts and deep-fried until golden brown, resulting in a crispy exterior and a soft, fluffy interior.
Medu Vada is commonly enjoyed with coconut chutney or sambar, enhancing its flavor profile and making it a popular choice for those seeking gluten-free and vegan snack options. Medu Vada is a popular South Indian snack known for its crispy exterior and soft interior texture. Originating from the state of Tamil Nadu, it has gained widespread popularity across India and beyond. This medu vada recipe offers a step-by-step guide on how to make this delectable treat right in your kitchen.
How to Make Medu Vada: Step-by-Step Recipe
Preparing the Batter
To start making medu vada, you’ll need to prepare the batter first. Begin by soaking urad dal in water for at least 4-5 hours or preferably overnight. The soaked dal should be soft enough to easily break when pressed between your fingers. Once soaked, drain the water and transfer the dal to a blender. Grind it to a smooth paste, adding minimal water as needed. The consistency should be thick, similar to that of a pancake batter. This step is crucial in achieving the perfect texture for your medu vada.
Shaping the Vadas
Once the batter is ready, transfer it to a mixing bowl. Add finely chopped green chilies, ginger, curry leaves, cumin seeds, asafoetida, and salt to taste. Mix all the ingredients thoroughly to ensure an even distribution of flavors. Now, heat oil in a deep frying pan or kadhai on medium heat. To shape the vadas, wet your palms with water to prevent sticking. Take a small portion of the batter and flatten it slightly to form a disc shape with a hole in the center, resembling a donut. Carefully slide the shaped vada into the hot oil and fry until golden brown and crispy on both sides. Repeat the process with the remaining batter, frying a few vadas at a time to avoid overcrowding the pan.
Frying to Perfection
Achieving the perfect medu vada requires frying them to crispy perfection. Make sure the oil is adequately heated before adding the vadas to ensure they cook evenly and develop a crunchy exterior. It’s essential to maintain the oil at a consistent temperature throughout the frying process. Avoid overcrowding the pan, as this can lower the oil temperature and result in soggy vadas. Fry the vadas in small batches, flipping them occasionally to ensure uniform browning on all sides. Once done, remove the vadas from the oil using a slotted spoon and drain the excess oil on paper towels.
Serving Suggestions
Medu vada is best enjoyed hot and crispy, served with coconut chutney and sambar. You can also pair it with a tangy tomato chutney or spicy mint chutney for added flavor. Some prefer to enjoy medu vada with a cup of hot filter coffee, making it a perfect breakfast or evening snack option. Experiment with different dipping sauces and accompaniments to find your favorite combination.
Tips for Making Perfect Medu Vada
Ensure the urad dal is soaked well to achieve a smooth batter texture.
Maintain the oil temperature while frying to achieve crispy vadas.
Wet your palms with water to prevent the batter from sticking while shaping the vadas.
Add chopped green chilies and ginger for an extra kick of flavor.
Serve medu vada hot for the best taste and texture.
Variations of Medu Vada
While the traditional medu vada recipe calls for basic ingredients like urad dal, spices, and herbs, you can experiment with variations to suit your taste preferences. Some popular variations include:
Masala Medu Vada: Add coriander leaves and grated carrots to the batter for an extra burst of flavor.
Rava Medu Vada: Mix semolina (rava) with the urad dal batter to add a crunchy texture to the vadas.
Vegetable Medu Vada: Incorporate grated vegetables like carrots, cabbage, and spinach into the batter for a nutritious twist.
Cheese Medu Vada: Stuff the vadas with a cheesy filling or sprinkle grated cheese on top before frying for a gooey, indulgent treat.
Benefits of Medu Vada
Medu vada is not only delicious but also offers several health benefits when consumed in moderation. Here are some of the benefits:
Rich in Protein: Urad dal, the main ingredient in medu vada, is a good source of protein, essential for muscle repair and growth.
Nutrient-Dense: It contains essential nutrients like iron, magnesium, and potassium, which are vital for overall health and well-being.
Gluten-Free: Since medu vada is made from urad dal, it is naturally gluten-free, making it suitable for individuals with gluten sensitivities or celiac disease.
Good Source of Fiber: Including medu vada in your diet can help improve digestion and promote gut health due to its fiber content.
Energizing Snack: It provides a quick energy boost, making it an ideal snack option for busy days or post-workout refueling.
FAQs about Medu Vada
Q: Can I make the batter ahead of time?
A: Yes, you can soak the urad dal and grind the batter ahead of time. Store it in the refrigerator for up to 1-2 days and fry the vadas when ready to serve.
Q: Can I freeze the vadas?
A: While it’s best to consume medu vada fresh for optimal taste and texture, you can freeze the shaped vadas and fry them directly from frozen when needed. However, freshly fried vadas are recommended for the best flavor.
Q: Can I bake instead of frying?
A: While traditional medu vada is deep-fried for that crispy texture, you can try baking them in a preheated oven at 375°F (190°C) for 20-25 minutes or until golden brown for a healthier alternative.
Q: Can I use split urad dal instead of whole urad dal?
A: Yes, you can use split urad dal (white or black) to make medu vada. However, the texture may vary slightly compared to using whole urad dal.
Q: Can I make gluten-free medu vada?
A: Yes, medu vada is naturally gluten-free since it’s made from urad dal. Just ensure that all ingredients used are gluten-free, especially if adding any additional flavorings or seasonings.
In conclusion, medu vada is a versatile and flavorful snack that can be enjoyed on its own or paired with a variety of chutneys and dips. With this detailed recipe and helpful tips, you can recreate this South Indian delicacy at home and impress your family and friends with your culinary skills. So, roll up your sleeves, gather your ingredients, and get ready to savor the crispy goodness of homemade medu vada!
This coconut halwa turns out very soft and yummy and you will love it as much as my family and friends. Its a nice sweet snack or as a dessert served best during festive occasions.
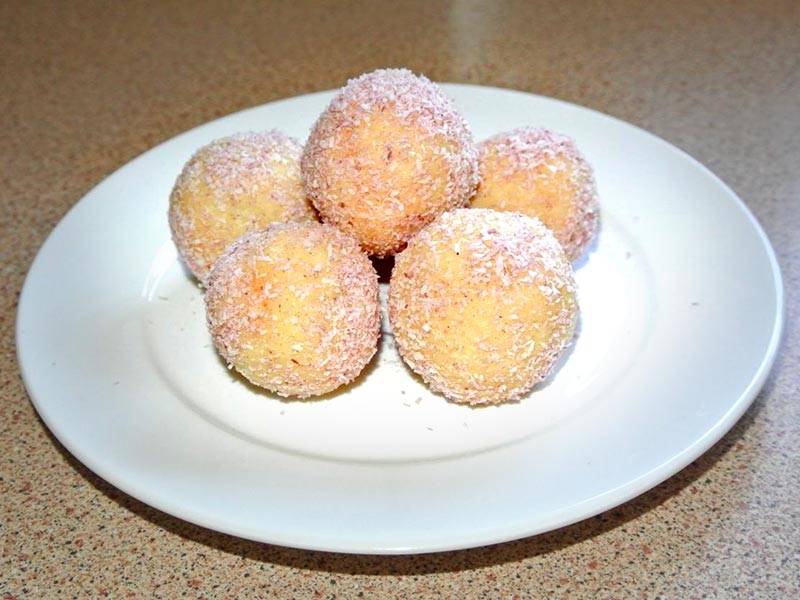
I made this beautiful kids friendly delicious snowman coconut ladoos for last year Christmasparty and it was a top hit. As soon as I placed them on the table, all I heard was “WOW!” and that’s it. They got vanished in a glimpse of a second and of course, they were generous enough to leave me with a plate at least. This was the talk for a while among my family and friends. I had so much fun decorating them and that’s the time I got the idea of recreating this with my baby nephew. He was as thrilled as I was and we had an awesome aunt-nephew time together which is ineffable. Let your precious moment begins with your little ones as well! Its a fun sweet snack that would be enjoyable to eat and treat to people of all ages.
Heat 1tsp ghee in a low-medium flame on a non-stick pan and lightly roast 1 cup of desiccated coconut in it for 5 secs. DO NOT Burn them! (Remaining ½ cup of desiccated coconut will be used to roll in the ladoos.)
Remove the ghee-coconut aromatic mixture from the fire and let it cool completely.
Notes
Snowman Edible Accessories (Refer to the picture for ideas)
Hat ———- Mini Reese’s chocolates or mini Rolo or any chocolates that look like mini hat.
Eyes ———Chocolate vermicelli candies or Oreo cookie crumbs
Nose ——– Mini bead candies
Mouth —— Mini vermicelli candies
Scarf ——– Sour belts candy (Cut them into thin strips)
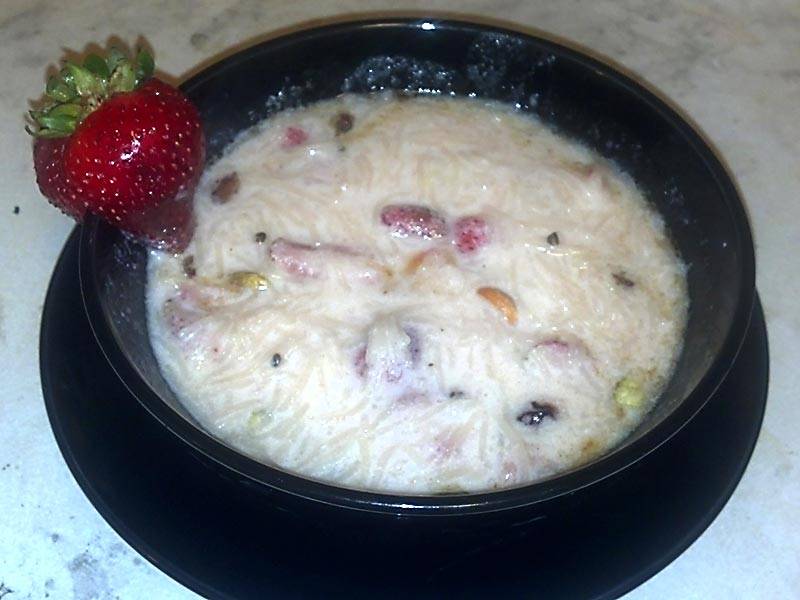
Strawberry Payasam is a delicious dessert that is made with semolina grains. It's very easy to make and the strawberries add some extra flavor. Its a nice healthy sweet snack that is fun to eat.
Then add the strawberries and cook for about 5 mins
Add cardamom powder
Fry the cashew and raisins in ghee and add on top.
Serve chilled!
Additional:
Even rice can be used instead of semolina!
Notes
Father’s Day Note:My father’s name is Ravindran. I am proud to be his daughter. The most precious moment with my dad is the day when I got married he gave me so many advises and counselled me on so many stuffs that I was responsible to manage after my marriage. Without his advises I would not have been able to cope up with the post marriage tasks meant to be for a perfect house wife!! Thanks appa for making me feel so proud of you.
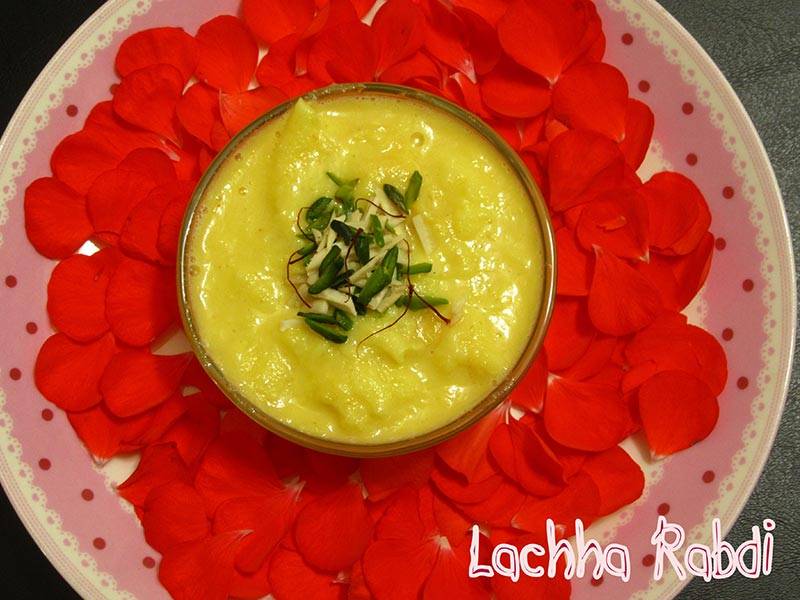
When milk start boiling ,a layer of malai will start forming over the milk.
Now take the malai with help of spatula and keep collecting it on the sides of the pan.
Collect malai on all the sides and keep stirring the milk in between so that it will not stick in the bottom.
Keep repeating the process till the milk reduced to almost 1/3 .
Now add sugar and boil for 5 minutes.
Add saffron,cardamom and chopped nuts and switch off the flame.
Now scrape the malai from the sides of the pan and add in the milk.
Let it come to room temperature.
Garnish with some nuts and saffron.
Refrigerate it for 1-2 hours and serve chilled.
Notes
Father’s Day note:When I was a kid, I used to sit on small swing in my home and my father used to feed me with his hands everyday. He will never eat before feeding me and used to feed with so love that I can still vividly remember those sweet days.
For stuffing, in a non-stick pan mix condensed milk, milk powder and Thandai masala cook on low flame until the mixture leaves the sides of the pan and turn into dough consistency. Remove from fire and set it aside for cooling.
For Coating, in a same pan Mix condensed milk, crushed paneer, Milk Powder and mawa. same way cook until the mixture leaves the sides of the pan and turn into dough consistency. Remove from fire and set it aside for cooling
Now grease your hand with ghee and make small balls out of stuffing Mixture.
Take hand full dough of coating press with your hand than stuff with one ball of stuffing and cover it, make a round ball.
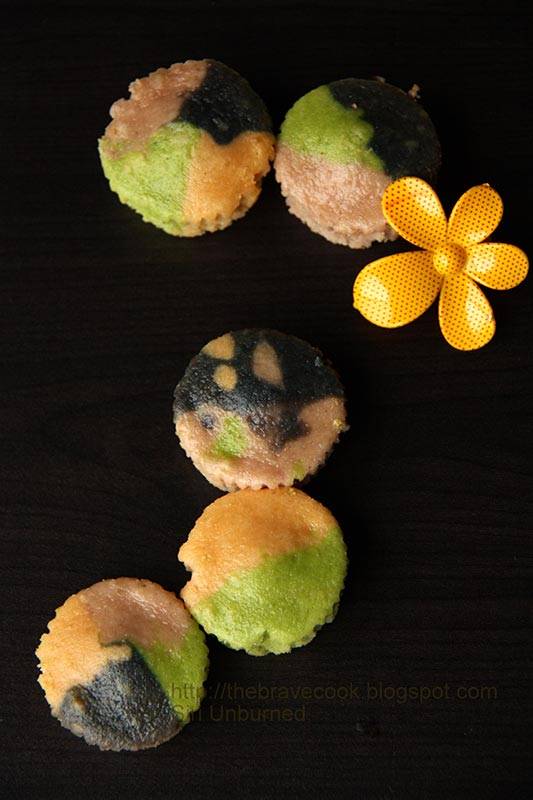
Rainbow cupcakes are colorful cakes perfect for spring time. The colors are all natural made with real fruit juice. My daughter loved them. Its a healthydessert option made with love and passion.
Stir together milk and vinegar and set aside for 5 minutes. The milk should be curdled by the end of it.
Sift together the flour, baking powder, baking soda and salt and set aside.
Once milk is curdled, whisk oil, vanilla extract and sugar into it till well combined and runny.
Make a well in the center of the dry ingredients and pour the wet ingredients into it. Mix till smooth. Do not overmix. A little lumpy is fine as long as everything is mixed well.
Making the colours (Orange Colour)
Juice the grated carrot with 1 tbsp of water. I used a regular Indian mixer to do this.
Strain the carrot juice to get the fibrous part out.
Keep 2 tbsp of orange juice aside.
Making the colours (Green Colour)
Juice the spinach leaves with 1 tbsp of water
Strain the spinach juice.
Keep 2 tbsp of green juice aside.
Making the colours (Red/Pink Colour)
Juice the strawberries with 1 tbsp of water
Keep 2 tbsp of red/pink juice aside.
Making the colours (Blue Colour)
Place frozen blueberries in a microwave safe bowl and microwave in 30 second intervals till the blueberries burst and the juice starts oozing out. It took me 3 intervals.
Allow it to cool.
Strain the blueberries juice.
Keep 2 tbsp of blue juice aside.
Putting it all together
Method
Divide the basic Vanilla cupcake batter into 5 cups. I scooped out 4 heaped tsps per cup.
To the batter in the first cup add 1 tbsp of carrot juice and mix well to get orange coloured batter.
To the batter in the second cup add 1 tbsp of spinach juice and mix well to get green coloured batter.
To the batter in the third cup add 1 tbsp of strawberry juice and mix well to get pink coloured batter.
To the batter in the fourth cup add 1 tbsp of blueberry juice and mix well to get blue coloured batter.
Keep the batter in the fifth cup uncoloured. This can be used to improve consistency in the other batters or to get a cream layer in the cupcake.
Add more juice to improve colour adjusting the consistency so that it doesnt become watery.
There are many ways of making the cupcakes clourful.
The easiest method is to layer different coloured batters one on top of the other in the cupcake liner.
Alternatively place separators in the paper liner and pour different coloured batters in each section.
I started out making the separators using card. I made a 4 section one and a 3 section like that. But I found it problematic because the batters bled into other sections easily.
Then the hubby gave an idea which turned out to be brilliant. Use crackers/biscuits as dividers. I had Parle-G gluco biscuits on hand and used them. I got 2 sections and 4 section ones using this method.
Preheat the oven to 350°F
Whatever the method fill the liners to 3/4 full and bake at 350°F for 18 minutes.
Cool the cupcakes in the pan for 5 minutes before removing them onto a wire rack and allowing them to cool completely.
Decorate with frosting or ganache as desired. The cupcakes turned out so wonderfully coloured that I did not want to cover that up at all.
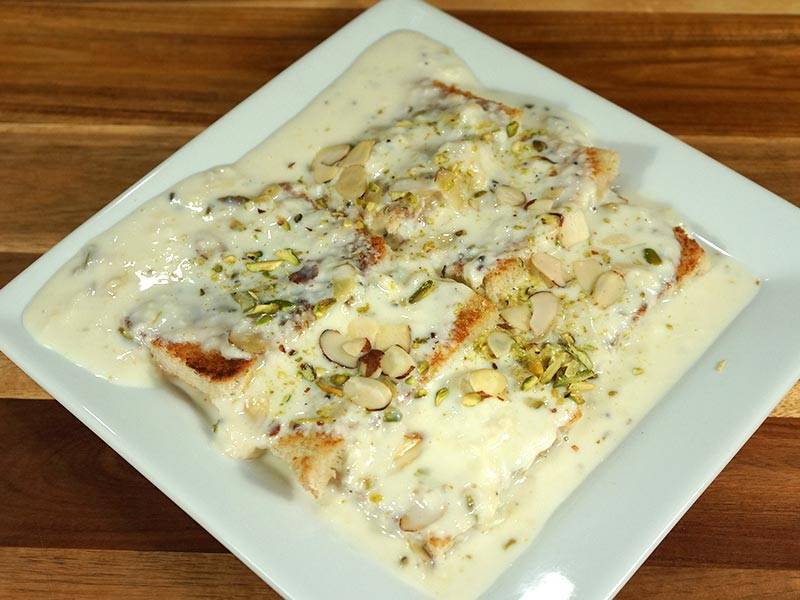
Shahi Toast is rich bread pudding. Toasted bread covered with creamy milk known as Malai its a rich and royal form of dessert. This is delicious quick and easy recipe to make.
4Green Cardamoms – shelled and the seeds crushed1tbsp
1tbspsliced almonds
1tbspsliced pistachios
Instructions
Remove the crust from all sides of bread and butter the bread slices from both sides generously. Cut the slices in two.
Toast the bread from both sides on the skillet over medium heat until bread is toasted on both sides golden brown and crispy. Set aside.
In a heavy bottom pan boil milk over medium high heat until the milk reduces to about 1cup. After milk comes to boil this should take about 20 minutes. Wet the pan and have few spoons of water before putting the milk in pan, this will reduce the chances of milk to burn. Make sure frequently stir the milk and scrapes the sides.
Add sugar cardamom powder, half the almonds and half the pistachios. Boil for about 3 more minutes, stirring occasionally. Turn off the heat.
Assembling Shahi Toast: In serving plate arrange the bread slices; pour the milk over bread covering all sides. Notes: you may prepare the toast and milk in advance but assemble just before serving otherwise toast will become very soft.
Next garnish with remaining nuts.
Notes
Suggestion:Shahi Toast can be served for breakfast or as a dessert. Any way you serve it will taste fabulous.
1/4cup split moong dal (washed) available at Indian grocery store
3 cups of water
1tablespoon oil
1-1/2 teaspoons salt
1 cup yogurt (curd or dahi)
1/4 cup shredded cucumber (kheera)
1/4cup shredded carrots (gajar)
1 tablespoon finely chopped ginger (adrak)
For Seasoning
2tablespoons oil
1/2teaspoon mustard seeds (rai)
1/2 teaspoon cumin seeds (jeera)
2 whole red peppers
1tablespoon finely chopped green pepper, adjust to taste
8-10 curry leaves available at Indian grocery store, optional
2tablespoons chopped cilantro (hara dhania)
Instructions
Wash rice and moong dal changing water several times until the water appears clear.
Drain the rice and moong dal and put it into the saucepan. Add water, oil, ginger, and salt, and bring to a boil over high heat.
Once the water is boiling reduce the heat to low, do not cover the pan. Cook for 10-12 minutes rice and dal will be soft cover the pan and cook for about 15 minutes, or until the rice is very soft and mushy.
Mix the rice and dal whipping making them mushy; if rice is dry add little more hot water as needed. Mix should be consistency of portage.
Let the rice cool down to room temperature, add the yogurt and mix it well. Adding the yogurt to hot rice will make yogurt sour and watery. Next add cucumber, carrot and ginger and mix.
Prepare the seasoning: In a small sauce pan heat the oil over medium high heat. Add the mustard seeds and cumin seeds as seeds crack add red pepper, green chili, curry leaves and cilantro stir for about a minute. As you will add curry leaves oil will splatter, so be careful.
Turn off the heat and mix the seasoning with rice mix. Yogurt Rice is ready to serve.
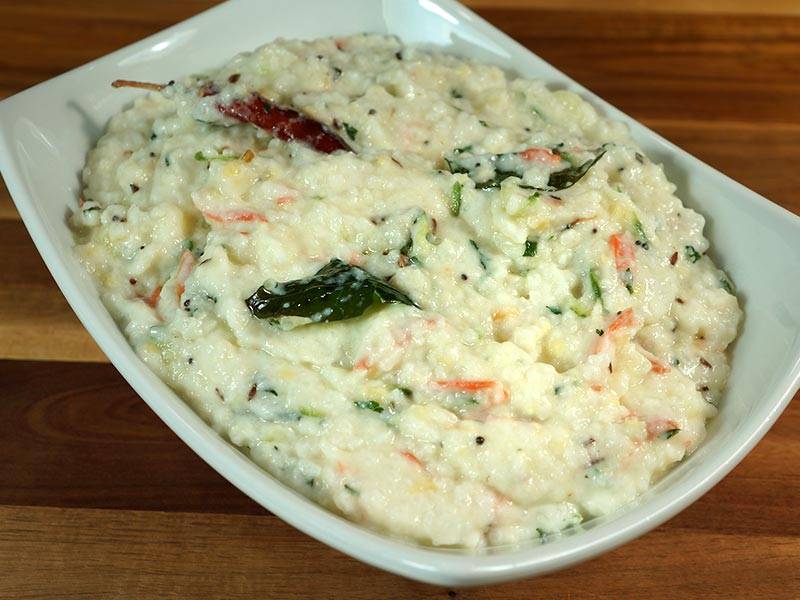
Curd rice, also known as yogurt rice, is a popular gluten free South Indian dish made by mixing cooked rice with yogurt (curd). It is typically served as a main dish or as part of a meal, especially during hot summers, as it is cool and soothing to the palate. To prepare curd rice is quick & easy , cooked rice is mixed with fresh yogurt and seasoned with ingredients such as mustard seeds, curry leaves, green chilies, ginger, and sometimes grated vegetables like carrots or cucumber. Curd rice is known for its creamy texture, tangy flavor from the yogurt, and refreshing taste, making it a comforting and satisfying dish.
Preparing Curd Rice: Soaking and Draining the Rice
To begin the recipe curd rice, start by ensuring the rice is clean and ready for cooking. Wash the rice thoroughly and then soak it in about 3 cups of water for at least 15 minutes. This soaking process helps to soften the rice grains, ensuring a creamy texture once cooked. After soaking, drain the water and set the rice aside, ready to be transformed into a delightful dish of curd rice.
Tempering and Stir-Frying: Infusing Flavor into Curd Rice
In a saucepan heated over medium heat, add oil and mustard seeds. Allow the mustard seeds to crackle, releasing their aromatic essence into the oil. Once the seeds crackle, add peanuts to the pan and stir-fry for about a minute until they turn lightly golden brown. This step adds a delightful crunch and nutty flavor to the curd rice, enhancing its overall taste and texture.
Cooking the Rice Mixture: Blending Ingredients for Curd Rice
To create the base for your curd rice, add chopped tomatoes, green chili, turmeric, sambar powder, salt, and cilantro to the saucepan. Cook the mixture until the tomatoes are tender, which typically takes about 2 minutes. These flavorful ingredients infuse the rice with deliciousness, setting the stage for a delectable dish of curd rice.
Simmering and Finalizing: Perfecting the Curd Rice
Once the tomato mixture is cooked, add the soaked and drained rice along with 2 cups of water to the saucepan. Mix everything well and bring it to a boil. Then, lower the heat to low, cover the pan, and let the rice cook for about 18-20 minutes, or until the rice is soft and the water has evaporated. After cooking, gently stir the rice and add the remaining tomatoes, stirring them in gently. Cover the pan once again and let it cook for an additional 2 minutes to ensure all the flavors meld together perfectly.
Serving Curd Rice: Enjoying the Creamy Delight
Once the curd rice is cooked to perfection, it’s time to serve and savor this creamy delight. Serve the curd rice either on its own or accompanied by yogurt for a refreshing and satisfying meal. Whether enjoyed as a main dish or a side, curd rice is sure to delight your taste buds with its creamy texture and flavorful ingredients.
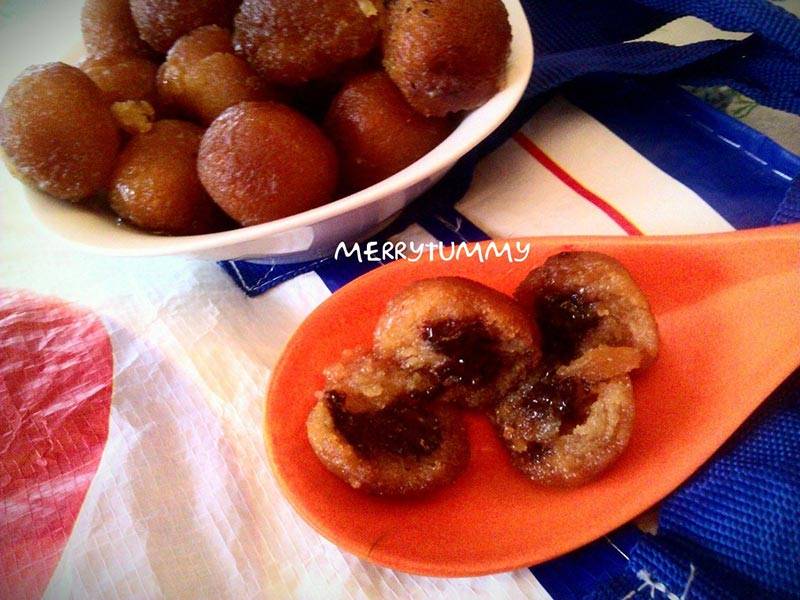
This recipe is the old sweet dish Gulab Jamun but with a new twist: Chocolate Gulab Jamuns. The bitter dark chocolate insides is a perfect balance to the sweetness of Gulab jamuns outside. Also I made these with milk powder which was new for me, and they turned out to be very soft and spongy. All were surprised and asked me for the recipe. So here it is a sweety savory juicy snack which a favorite dessert of all added with a fusion of western chocolate and Indian Gulab jamun !
Mix the milk powder with baking powder, maida, ghee and little water, make a smooth dough. Cover it with a lid and set aside for 15 minutes.
Divide the dough into small smooth balls. Fill chocolate chips in it and cover it with the mixture and make a ball.
For preparing sugar syrup add 2 cups of water and cardamom powder to sugar and make half thread sugar syrup.
For the syrup after the sugar dissolves in the water, boil the sugar syrup for a few minutes. The syrup is ready.
Heat oil in a pan for deep fry the jamuns. Fry the jamuns on a low flame stirring them constantly for even browning. When they turn to golden brown color, remove from the oil and put them into sugar syrup. Soak for 30 minutes.
Serve hot or chilled.
Notes
Tips
Remember softer the dough, softer will be the Gulab Jamuns.
You can also fill jam, gulkand, or any nuts in between.
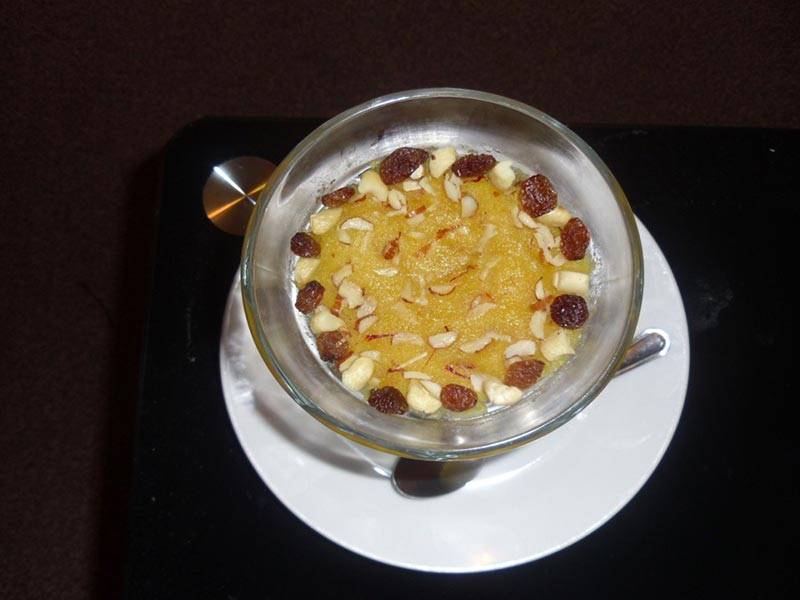
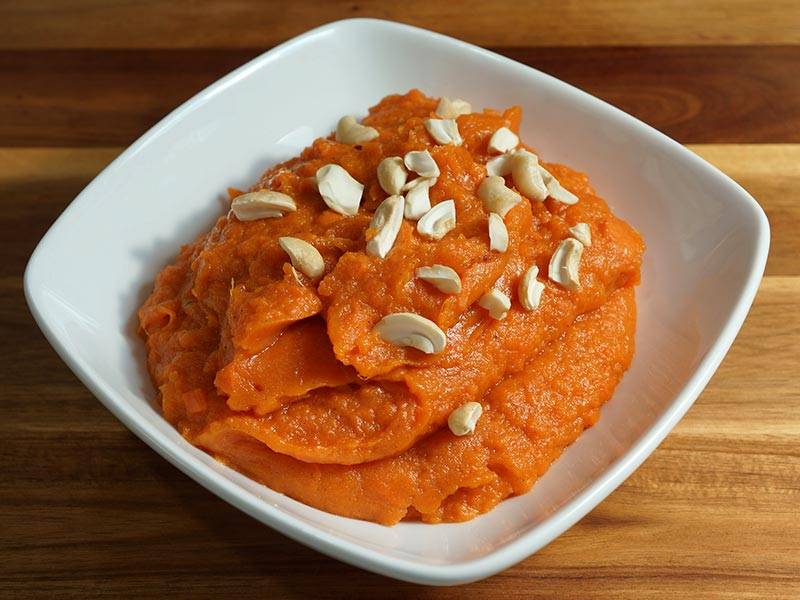
Sweet Potato Halwa (eggless pudding) is one of the easiest Halwa recipes to make. Cardamom and Cinnamon spices give it a delicate and unique flavor. This is a tasty, warm dessert for cold winter months.
5tablespoons unsalted butter or ghee clarified butter
1cup milk
1 cup sugar
1/4teaspoon freshly ground cardamom (ilachi)
1/4 teaspoon cinnamon powder (dal chini)
1/8 teaspoon of nutmeg (jaifel)
8 cashews broken in small pieces for garnishing (kaju)
Instructions
Method
Boil the sweet potato peel and mash; Sweet potatoes can be cooked in a microwave. Wrap the potatoes in wet paper towel and cook for 7-8 minutes.
Heat butter in heavy bottom pan over medium heat. Add sweet potatoes and stir fry by stirring continuously and pressing down for about 8-10 minutes.
Add milk and mix it well. After milk comes to a boil cook for 2 minutes, add sugar and cook for additional 6-8 minutes or until Halwa should start leaving the side of the pan. Halwa should be very moist.
Turn off the heat and add cardamom, cinnamon, and nutmeg. Mix it well.
Serve hot or at room temperature. Garnish with cashews. Halwa tastes best when served hot.
Notes
Serving suggestionsYou can serve this as pudding. Serve with vanilla ice cream or over a plain cookies/ biscuits.
Almond brittle also known as Chikki in India this is quick and easy recipe to make. This old fashioned candy every body will enjoy a tasty sweet savory snack that is most popular during winters.
In a heavy bottom sauce pan, over medium high heat melt the butter, then add sugar, and salt.
Keep stirring the sugar continuously till sugar start melting and changing the color to light brown. Turn off the heat as soon it comes to golden brown in color. This should take 4-5 minutes. Note: when sugar starts melting it changes the color very quickly and it can easily burn.
Add almonds and sesame seeds, stir quickly. Pour over the greased sheet and spread evenly.
After brittle comes to room temperature brake them in pieces.
Store them in air tight container.
Notes
Suggestions
Almond Brittle makes a delicious homemade gift. Pack it in a jar or candy bag.
Garnish ice cream and kheer to give a gourmet look with few pieces of Brittle.
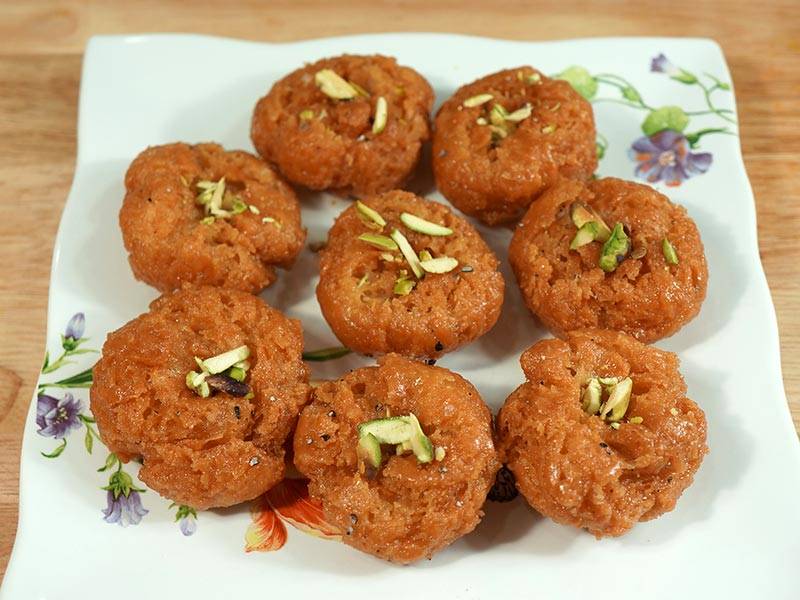
Balushahi! This is a North Indian delicacy- a classic dessert which can be found in every street corner sweet shop. Balushahi is flakey from the outside and soft from inside. They literally just melt in your mouth. This is a perfect sweet for any festive occasion!
1/4cup unsalted butter cold cut into small pieces or cold clarified butter ghee
1/4cup yogurt cold(curd, dahi)
Syrup
1cups sugar
1/3cup water
4 cardamom pods crushed
For Garnish
About 1 tablespoons sliced pistachios
Instructions
Syrup
In a sauce pan add water, sugar, and cardamom over medium heat, bring it to a boil. Let it simmer until syrup is almost to one thread on candy thermometer it should be 215 degree. Set aside.
Balushahi
In a bowl mix the flour, baking soda and baking powder.
Add butter mix with your fingers, mixture should be crumby.
Add the yogurt slowly as needed making into soft dough. Do not knead the dough.
Cover the dough and let it sit for about half an hour.
Take the dough and knead just enough to hold it together.
Divide the dough into 12 equal parts.
Make the dough balls, Balls will not be very smooth and will have cracks all around; make a deep dent in the center of the balls.
Heat the oil in a flat frying pan over low heat.
The frying pan should have about 1 ½ inch of oil. To check if oil is ready put a little piece of dough in the oil. It should make oil lightly sizzle, if dough float oil is too hot.
Place the Balushahi in the frying pan don’t overcrowd as Balushahi will expend to about 1-1/2 time and they should not overlap.
It should take about 2 minutes before Balushahi will come up. Wait another 3-4 minutes before turning over Balushahi should be light brown from bottom. Fry the Balushahi until they are golden brown from both sides; do not turn more then three times. This should take about 10 minutes. Balushahi will look very flakey If the Balushahi are fried on high heat, they will not be cooked inside.
Take them out over layered of paper towel so it can absorb the extra oil.
Dip Balushahi in the syrup all around and remove them. Don’t leave them in syrup.
Mouthwatering flaky Balushahis are ready and looking great read. Garnish them with pistachios.
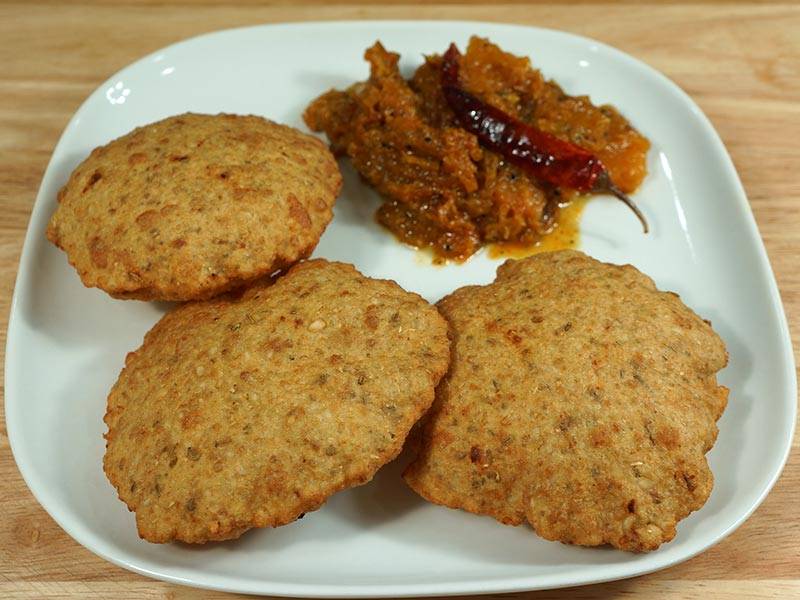
Urad Dal Puri, also known as Bedmi Kachori, is a hearty dish of fried puffed bread with a mix of lentils and spices. Urad Dal Puri is a North Indian delicacy. Delicious and festive, it is an excellent option with any meal and sure to be a crowd-pleaser!
1/4cup urad dal (available in Indian grocery stores)
1cup whole wheat flour (roti atta)
1 tablespoon fennel seed powder (Saunf)
1tablespoon coriander powder (dhania)
1/8teaspoon asafetida (hing)
1/4 teaspoon dry ginger powder (sonth)
1/2teaspoon red chili flakes adjust to taste
1/2 teaspoon salt
2tablespoon oil
Oil to fry
Instructions
Method
Wash and soak urad dal four hours or more. Drain the water. Blend dal coarsely into a thick paste, preferably in a food processor, using as little water as possible.
In a bowl mix all the spices. Add to the flour and mix well.
Add the dal paste (pithi) to the flour and form into a soft dough using lukewarm water as needed. Dough will be a little sticky. Grease your palm. Spread one teaspoon of oil over the dough and knead for one minute. Cover the dough with a damp cloth and let it sit half an hour or more.
Oil your palm and knead the dough again and divide into eight equal parts. Oil palm again and roll the eight parts into smooth balls. Set aside five minutes.
Oil the rolling pin and rolling surface. Roll the balls gently into 6” circles.
You can roll two or three puris before start frying, but do not roll all the puris at once or they will begin to dry out and fail to puff.
Heat at least one of oil in a frying pan over medium high heat. To test, place a small piece of dough in the oil. If the oil is hot enough, the dough will rise quickly to the top.
Fry one puri at a time. Place the puri in the frying pan and press with a skimmer. The puri should puff up. Turn puri over and cook until light golden brown on both sides. Take the puri out and place them on paper towels to absorb the excess oil. Repeat the process for remaining piries.
Urad dal puris are best served hot and crisp. Store in a covered container after they cool to room temperature.