Indian Festival Foods: A Celebration of Tradition and Taste
Indian festivals are a time of joy, togetherness, and, most importantly, a feast of flavors. Indian festival foods are an integral part of the celebrations, bringing families and communities together to enjoy delicious and diverse dishes. From sweet to savory, these foods are deeply rooted in tradition and offer a taste of India’s rich culinary heritage. Let’s explore some of the best Indian festival recipes that you can prepare to make your festivities even more special. Popular Indian Festival Recipes Gulab Jamun Gulab Jamun is one of the most cherished Indian festival foods. These soft, spongy balls made from khoya (dried milk) are deep-fried and soaked in a fragrant sugar syrup. They are a must-have during festivals like Diwali and Holi. As a favorite Indian dessert, Gulab Jamun is beloved by all ages and adds a sweet touch to any celebration. Other popular Indian desserts for festivals include Shakar Paare and Namkeen Paare, which are enjoyed during various celebrations. Samosa Samosas are another staple in Indian festival recipes. These crispy, savory pastries are filled with a spiced mixture of potatoes and peas, making them a perfect indian snack for any festive gathering. Samosas are versatile and can be enjoyed as part of a meal or as a standalone treat. They are often served with tangy chutneys, adding a burst of flavor to your festive spread. Samosas are also popular Indian street food recipes and can be part of your party recipes collection. Puran Poli Puran Poli is a traditional sweet flatbread from Maharashtra, commonly prepared during festivals like Holi and Ganesh Chaturthi. This Indian festival food is made by stuffing a dough with a sweet filling made from chana dal (split chickpeas), jaggery, and cardamom. The result is a delicious, aromatic bread that is enjoyed by everyone. Puran Poli is one of the best Indian festival recipes that embodies the spirit of Indian festivals. It can also be enjoyed as part of Indian breakfast recipes on festive mornings. Kheer Kheer is a classic Indian dessert made with rice, milk, and sugar, flavored with cardamom, saffron, and nuts. This creamy and rich pudding is a staple at many Indian festivals, including Eid and Raksha Bandhan. Kheer is easy to prepare and can be served either warm or chilled, making it a versatile addition to any festive menu. It is also a delightful addition to traditional Indian recipes and gluten-free dessert recipes. Chole Bhature Chole Bhature is a popular North Indian dish often enjoyed during festivals and special occasions. This combination of spicy chickpea curry (chole) and deep-fried bread (bhature) is hearty and satisfying. Chole Bhature is one of the best Indian festival recipes for those who love bold, robust flavors. It is commonly served with pickles, and yogurt, enhancing the overall experience. This dish can also be included in dinner recipes for festive feasts. Enhance Your Festival Feast
To make your festival feast even more delightful, consider exploring related categories that complement these Indian festival foods. Adding Indian snacks like pakoras and vadas can provide a variety of flavors and textures. For a sweet ending, explore Indian desserts such as barfi and jalebi. Incorporating healthy recipes like roasted nuts and fruit chaat can offer lighter options for your guests. Hosting a large gathering? The popular party recipe category is filled with dishes that are sure to impress your guests and make your celebration memorable. Including fusion dishes like Indo-Chinese Manchurian can add a unique twist to your festival spread. Frequently Asked Questions (FAQs) Q: What are some popular Indian festival foods?
A: Some popular Indian festival foods include Gulab Jamun, Samosas, Puran Poli, Kheer, and Chole Bhature. Q: What types of festivals are celebrated in India?
A: India celebrates a wide variety of festivals including Diwali, Holi, Eid, Christmas, Raksha Bandhan, Navratri, and Ganesh Chaturthi. Each festival has its own unique traditions and foods. Q: How can I make my festival feast healthier?
A: To make your festival feast healthier, you can include healthy Indian snacks like roasted nuts, fruit chaat, and baked samosas. Opting for desserts made with natural sweeteners and using less oil in savory dishes can also help. Q: What is the significance of food in Indian festivals?
A: Food plays a central role in Indian festivals, symbolizing prosperity, togetherness, and cultural heritage. Each festival has its own traditional dishes that are prepared and enjoyed with family and friends. Q: Can I prepare these recipes in advance?
A: Yes, many Indian festival recipes can be prepared in advance. For example, Gulab Jamun and Kheer can be made a day ahead and stored in the refrigerator. Samosas can be prepped and frozen, then fried fresh on the day of the festival. Q: Are there vegetarian options for Indian festival foods?
A: Absolutely! Most Indian festival foods are vegetarian. From savory dishes like Samosas and Chole Bhature to sweet treats like Puran Poli and Kheer, there are plenty of vegetarian options to choose from. Conclusion Indian festival foods are a testament to the rich culinary traditions of India. Whether you’re celebrating Diwali, Holi, Eid, or any other festival, these best Indian festival recipes will add flavor and joy to your festivities. So, gather your ingredients, try out these Indian festival recipes, and create unforgettable memories with your loved ones. Don’t forget to find vegetarian recipes for more delightful recipes from Manjula’s Kitchen!
By incorporating these dishes into your festival celebrations, you’ll be able to enjoy a wide variety of delicious and traditional foods. Whether you’re looking for a quick snack, a hearty meal, or a sweet treat, there’s an Indian festival food to suit every occasion. Happy cooking and happy festivities!
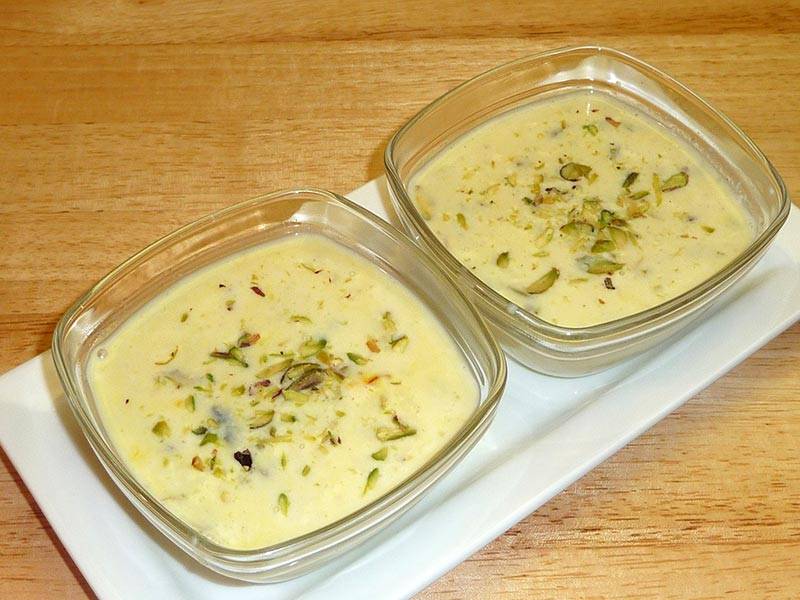
I love phirnis, but this time I wanted to make them with a twist using fresh pineapple chunks. I had some leftover fresh pineapple chunks and also home made caramel syrup, so I decided to combine both together to create this beautiful looking phirni, which is a rich and wonderful dessert. If you are a bit lazy or don't prefer to make your own caramel syrup, you can definitely get a store bought one. This fruity rice phirni tastes amazing when they served chilled, but you can also enjoy them warm. Adding cream is completely optional.
Appalu are an Authentic dessert in Andhra Cuisine which are famous for their soft texture and color and of course being not overly sweet snack. This is an item the whole family can relish and forces you to make again… I bet!. Its often made during festive seasons such as Ganesh Chaturthi.
Wash and soak the tapioca in about 1/3 cups of water for at least two hour, Sabudana will soak up most of the water and become light and fluffy.
Boil the milk in heavy bottom pan after milk comes to boil let it boil for about another 8 to 10 minutes making sure stirring occasionally so milk does not burn in bottom of the pan.
Add the tapioca cook until tapioca is soft and has become translucent this should take about 4 minutes.
Next add sugar, cardamom, pistachios, and saffron and boil for 2 to 3 minutes. Turn off the heat. As kheer will cool become little thicker in consistency.
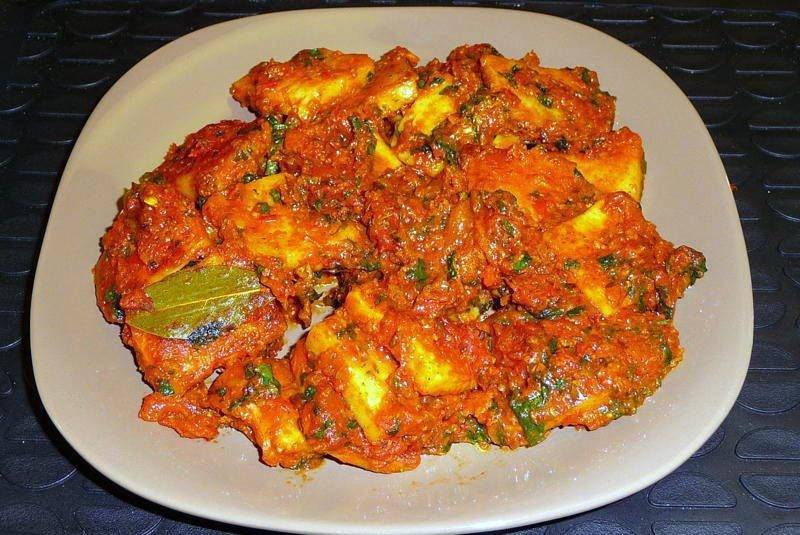
Paneer Tikka Masala is a gourmet main course dish that is simple to cook but very flavorful. Marinated paneer with tomato gravy makes a delightful dish for a formal dinner.
Slice the paneer in about 1/8-inch-thick and about in one inch squares.
Mix ginger, salt, pepper, coriander, and yogurt with sliced paneer in a bowl, cover it and let the mixture marinate for at least an hour. It is better to have the paneer marinate in a refrigerator.
Blend tomatoes and green chilies to make a puree and keep aside.
Dissolve the corn starch in 2 tablespoons of water and keep aside. Corn starch is used to give thickness to gravy.
Heat 1 tablespoon of oil in flat frying pan on medium heat, making sure to oil the entire surface of the pan.
Next put the marinated paneer in frying pan and gently stir-fry for about 3 to 4 minutes until paneer becomes light brown. Take out the paneer in a bowl and use the same frying pan to make the gravy.
To prepare the gravy, add 1 table spoon of oil in a frying pan. Test the heat by adding one cumin seed to the oil; if seed cracks right away oil is ready. Add cumin seeds and asafetida after seeds crack add bay leaves and stir for a few seconds.
Add the tomato puree, coriander powder, turmeric, red chili powder, sugar, and cook for about 4 minutes on medium heat.
Add the corn starch mix stir for few minutes till the sauce thickens.
Add the stir-fry paneer in the tomato gravy and let it cook for 3 to 4 minutes on low medium heat.
Turn off the heat and add cilantro and garam masala stir slowly and cover the pan for few minutes.
How To Make Paneer Tikka Masala – Manjula’s Kitchen
Paneer Tikka Masala, a gluten-free delight, is a delectable gravy-based dish known for its simplicity in preparation and remarkable flavor profile. The essence of this culinary masterpiece lies in marinated paneer cubes immersed in a flavorful tomato-based gravy. The straightforward cooking process belies the rich and complex taste it imparts, making Paneer Tikka Masala an ideal choice for those seeking a straightforward yet exquisite dish. It is best served with Roti, Naan, Jeera Rice and Lacha Paratha
1. Preparing the Jain Paneer Tikka for the Ultimate Flavor:
The meticulous process of How To Make Paneer Tikka Masala recipe involves slicing the paneer into 1/8-inch-thick squares, each measuring approximately one inch. This precise cutting ensures that the paneer absorbs the myriad flavors during marination, contributing to the dish’s overall richness. In a mixing bowl, the amalgamation of ginger, salt, pepper, coriander, and yogurt transforms the paneer into a delightful canvas for the forthcoming culinary masterpiece. It is imperative to cover and refrigerate the marinated paneer for at least an hour, allowing time for the ingredients to harmonize and elevate the essence of Jain Paneer Tikka Masala.
Perfecting the Tomato Puree for the Heart of the Dish:
The soul of the Jain Paneer Tikka Masala recipe lies in the sumptuous tomato puree. To concoct this essential element, a harmonious blend of tomatoes and green chilies is created, resulting in a smooth and vibrant puree. This puree serves as the foundation upon which the entire paneer tikka masala recipe thrives. It encapsulates the essence of freshness and spice, complementing the marinated paneer and enhancing the overall gastronomic experience.
Elevating the Texture with Corn Starch Elegance:
To achieve the desired thickness in the gravy, dissolve cornstarch in two tablespoons of water, a crucial step in perfecting the Jain Paneer Tikka Masala recipe. This corn starch infusion contributes not only to the visual appeal of the dish but also imparts a luxurious texture to the gravy. The meticulous attention to this detail ensures that every bite of the paneer tikka masala is a symphony of flavors and textures.
Transformative Sautéing of Marinated Paneer:
The journey to create the perfect Jain Paneer Tikka Masala takes a transformative turn as the marinated paneer meets the heat of a well-oiled frying pan. The sizzle and aroma that fill the kitchen during the 3 to 4 minutes of gentle stir-frying mark the inception of the dish’s visual and aromatic allure. The light browning of the paneer adds a subtle crunch, creating a delightful contrast to the impending velvety tomato gravy.
Crafting an Aromatic Gravy Symphony:
The artistry of making Jain Paneer Tikka Masala reaches its zenith with the crafting of the aromatic gravy. In the sizzling oil, cumin seeds, asafetida, and bay leaves engage in a flavorful dance, infusing the base with a tantalizing aroma. The introduction of the tomato puree, combined with coriander powder, turmeric, red chili powder, and a hint of sugar, creates a symphony of flavors that defines the essence of paneer tikka masala.
Culminating in Jain Paneer Tikka Masala Perfection:
As the final act in the culinary saga, the integration of the corn starch mix imparts the desired thickness to the gravy, harmonizing all elements of the Jain Paneer Tikka Masala. The reunion of the stir-fried paneer with the flavorful tomato gravy is a moment of gastronomic alchemy. The careful simmering over low-medium heat for 3 to 4 minutes allows the paneer to absorb the essence of the gravy, resulting in a dish that is the epitome of Jain paneer tikka perfection. Concluding with the gentle addition of cilantro and garam masala, the pan is covered, giving the flavors a moment to intertwine before presenting the masterpiece – a delectable Jain Paneer Tikka Masala ready to captivate the palate.
Arbi is stir-fry and mildly spiced with light crunch makes a great side dish or also can be served as an appetizer. Aroma of carom seeds (ajwain) makes this dish a very inviting snack.
6 medium size Taro roots (arbi) or about 3 cups sliced taro roots
3 tablespoons oil
4 whole dry red pepper
1 teaspoon carom seeds (ajwain seeds)
2 teaspoon coriander powder
1/4 teaspoon turmeric
1/4 teaspoon red chili powder
1 teaspoon salt adjust to taste
1/2 teaspoon mango powder (amchoor) adjust to taste
Instructions
Method
Wash the taro roots and pat dry. Peel them and slice them about 1/8” thick.
Heat the oil in a frying pan over medium high heat.
Add carom seeds (ajwain) and whole red pepper, stir-fry for few seconds until red pepper has become little dark in color.
Add sliced taro roots stir-fry for 2 to 3 minutes and cover.
Let it cook for 5 to 6 minutes or until they are tender (stir once or twice in between) and cover it back until they are tender.
Next add salt stir and cover for about 2 minutes.
Now add coriander powder, red chili powder, and turmeric stir fry until taro roots are light golden brown this will take about 4 minutes. Add mango powder and stir.
Peel and wash laucki (bottle gourd). Cut into half-inch cubes.
Heat the oil in a saucepan. Test the heat by adding one cumin seed to the oil; if the seed cracks right away, the oil is ready. Add the cumin seeds. When seeds start to crack, add the asafetida and whole red chilies. Stir for a few seconds. Add ginger, turmeric, and chili powder and stir for a few seconds.
Add the chana dal, bottle gourd, salt, and one cup of water (adjust as needed to desired gravy thickness; bottle guard varies in moisture content).
Cook the chana dal until soft. About fifteen minutes. Turn off the heat and add the mango powder, garam masala, and cilantro. Stir and cover the pan for a few minutes before serving.
Notes
Serving suggestionServe with roti (whole wheat flat bread), paratha (flat bread), or plain rice.VariationsMango powder can be replaced with lemon juice.Add two tablespoons dry fenugreek leaves or two tablespoons of fresh chopped fenugreek leaves when adding the bottle gourd.
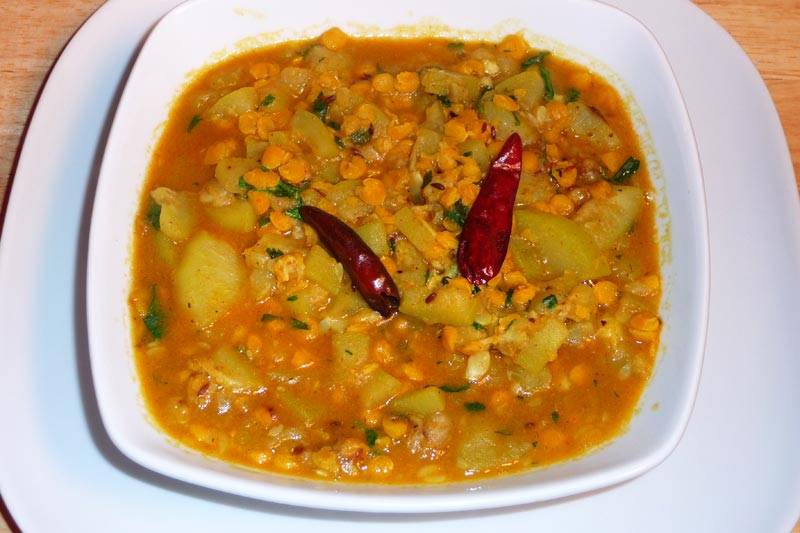
Lauki Chana Dal, also known as bottle gourd with split chickpeas, is a nutritious gluten free and flavorful dish that is popular in Indian cuisine. This wholesome recipe combines tender bottle gourd (lauki) with protein-rich split chickpeas (chana dal) to create a comforting and satisfying dish. In this Lauki Chana Dal recipe, we’ll show you how to make this delicious sabzi (vegetable dish) step by step, so you can enjoy its goodness at home.
Step 1: Preparing the Ingredients:
To start, gather all the necessary ingredients for making Lauki Chana Dal. Rinse the chana dal under cold water and soak it for a few hours or overnight to soften. Meanwhile, peel the bottle gourd and chop it into small cubes. Finely chopped tomatoes, green chilies, garlic, and ginger. Having all the ingredients prepped and ready will make the cooking process smoother.
Step 2: Cooking the Chana Dal:
In a pressure cooker or a pot, add the soaked chana dal along with water, turmeric, and salt. Pressure cook or simmer until the dal is soft and cooked through. Cooking the dal separately ensures that it’s tender and retains its shape when combined with the other ingredients later. Once the dal is cooked, set it aside while we prepare the rest of the dish.
Step 3: Tempering the Spices:
In a separate pan, heat ghee or oil over medium heat. Add cumin seeds and let them splutter. Next, add ginger, followed by chopped green chilies. Sauté until the raw aroma of the spices disappears and the mixture becomes fragrant.
Step 4: Adding the Bottle Gourd:
Once the spices are tempered, add the chopped bottle gourd to the pan. Stir well to coat the gourd pieces with the aromatic spices. Cook the bottle gourd for a few minutes until it starts to soften slightly. The gentle cooking process allows the flavors to meld together, resulting in a delicious and well-balanced dish.
Step 5: Combining with Chana Dal:
Now, add the cooked chana dal to the pan with the bottle gourd and spices. Stir gently to combine all the ingredients. Allow the mixture to simmer for a few more minutes, allowing the flavors to mingle and the bottle gourd to cook through completely. Adjust the seasoning with salt and add a pinch of garam masala for extra flavor if desired.
Step 6: Finishing Touches:
Once the Lauki Chana Dal is cooked to perfection, garnish it with freshly chopped cilantro leaves for a burst of freshness and color. You can also squeeze a bit of lemon juice over the dish to enhance its flavor. Serve the Lauki Chana Dal hot with steamed rice or roti for a wholesome and satisfying meal.
Tips for Making Perfect Lauki Chana Dal:
Soak Chana Dal: Soaking the chana dal beforehand helps reduce cooking time and ensures that it cooks evenly.
Don’t Overcook Bottle Gourd: Be careful not to overcook the bottle gourd, as it can become mushy. Cook until it’s tender but still retains its shape.
Adjust Spice Level: Customize the spice level according to your preference by adjusting the amount of green chilies or adding red chili powder.
Variations of Lauki Chana Dal:
Lauki Chana Dal Curry: Add coconut milk or tomato puree to create a creamy curry version of the dish.
Spicy Lauki Chana Dal: Increase the amount of green chilies or add dried red chili flakes for extra heat.
Lauki Chana Dal Soup: Blend the cooked ingredients with some vegetable broth to create a hearty and nutritious soup.
Benefits of Including Lauki Chana Dal in Your Diet
Rich in Protein: Chana dal is an excellent source of plant-based protein, making Lauki Chana Dal a nutritious option for vegetarians and vegans.
High in Fiber: Both chana dal and bottle gourd are rich in fiber, which aids digestion and helps keep you feeling full and satisfied.
Loaded with Vitamins and Minerals: Lauki Chana Dal is packed with essential nutrients such as vitamin C, vitamin B6, iron, and potassium, contributing to overall health and well-being.
Frequently Asked Questions (FAQs) about Lauki Chana Dal:
Q: Can I use other lentils instead of chana dal?
A: Yes, you can use other lentils such as masoor dal or moong dal if you prefer. Keep in mind that cooking times may vary.
Q: Can I make Lauki Chana Dal ahead of time?
A: Yes, Lauki Chana Dal can be made ahead of time and stored in the refrigerator for up to 3 days. Reheat gently on the stovetop before serving.
Q: Is Lauki Chana Dal gluten-free?
A: Yes, Lauki Chana Dal is naturally gluten-free, making it suitable for those with gluten intolerance or celiac disease.
For more delicious Indian vegetable recipes, visit Manjula’s Kitchen. Explore a variety of vegetarian dishes featuring seasonal vegetables, lentils, and spices to add variety and flavor to your meals.
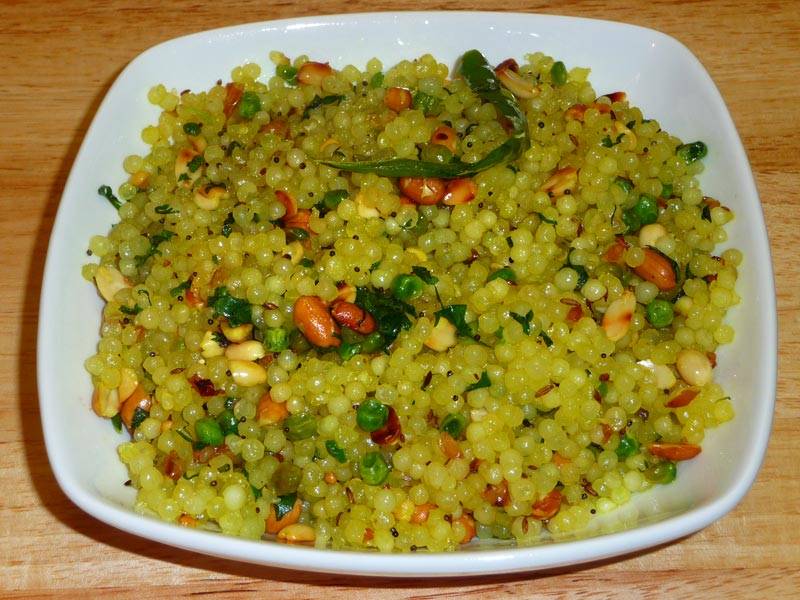
Sabudana also known as Tapioca makes a great Khichdi. This recipe is mildly spiced and peanuts give it a light crunch. Tapioca khichdi is great for breakfast or as a snack and it tastes delicious.
Gently wash then soak tapioca (sabudana) in about 1/2 cup of water for 6 to 8 hours.
Roast the peanuts on medium heat, until they are lightly brown. Keep aside.
Heat the oil in a frying pan on medium heat. Test the heat by adding one cumin seed to the oil; if seed cracks right away then oil is ready. Add cumin seeds and mustard seeds after seeds crack add green chilies and stir for a few seconds.
Next add the green peas and stir fry until peas are tender.
Add the soaked tapioca (sabudana) and stir fry for 3 to 4 minutes ,
Add turmeric, and salt and stir fry on medium heat continuously until tapioca (sabudana) becomes translucence, looks like pearls. Stir gently and making sure tapioca doesn’t get sticky and stuck to each other. This should take about 6 to 7 minutes.
Add peanuts, lemon juice and cilantro (hara dhania), stir gently. Serve hot.
Notes
To save time soak the tapioca in warm water for about 2 to 3 hours water should not be hot.If you don’t stir continuously tapioca will stick to each other.
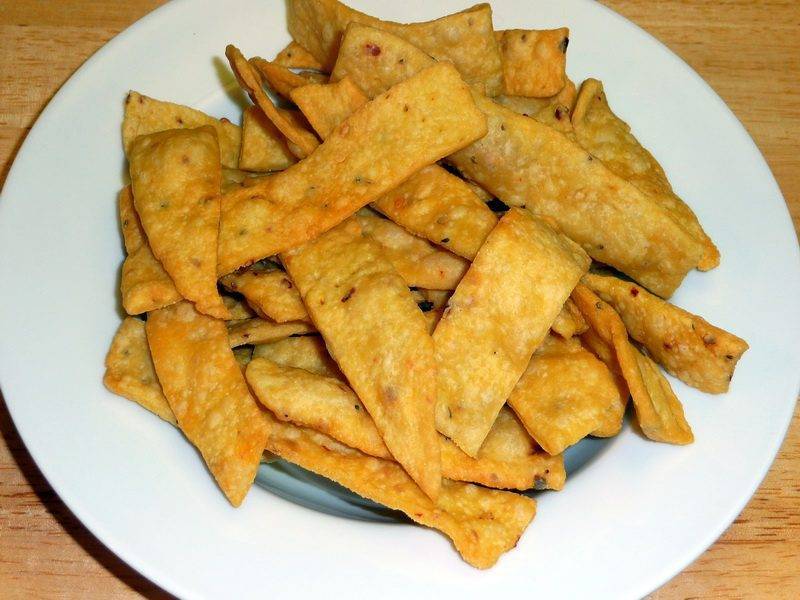
Mix flour, semolina (sooji), gram flour (besan), salt, carom seeds, asafetida, chili flakes, and oil, together.
Add water as needed to make firm but smooth dough. Cover with damp cloth and set aside at least for ten minutes.
Knead the dough for another minute and divide into four equal parts.Take each part of the dough and make a flat ball shape.
Roll them thin into about 9-inch circles. Prick them with a fork all over the rolled dough, the Paree do not puff when frying.
Cut each of the rolled dough into about half inch wide and 3 inch long pieces. Note: you can cut them in your desire shape.
Heat the oil in a frying pan on medium heat. The frying pan should have at least 1 inch of oil. To check if the oil is ready, put a small piece of dough in the oil. The dough should make the oil sizzle and come up slowly.
Make sure to place just enough Paara so you can turn them over easily when frying. Fry the Paara until both sides are light golden-brown.
After Besan Paara come to room temperature they should become crisp.
Notes
Suggestions:Try replacing carom (ajwain) seed with dry fenugreek leaves.you will also like Besan Sev, Atta Ka Ladoo
Aloo Dum is an exotic delicious main course dish. Just the smell of aloo dum can make you hungry! To make this dish, potatoes are fried and then soaked in the spicy aromatic gravy. This is a perfect dish for any dinnerparty.
Heat the oil in a frying pan over medium high heat.
Frying pan should have at least 1 inch of oil. To check if the oil is ready, put one piece of potato in the oil. The potato should sizzle right away. If potatoes are fried on low heat, they will be very oily.
Fry the potatoes till they are cooked through; turn the potatoes a few times while frying. Take out potatoes with a slotted spoon (this allows excess oil to drip back into the frying pan) and place on a paper towel. Keep it aside.
Heat the pan on medium heat and stir-fry the sesame seeds for about a minute until seeds lightly change color. Take them out and keep aside.
Blend sesame seeds, coconut, ginger, green chili, and make it into a paste. Use water as needed to blend into paste.
In a small bowl mix, sesame paste, yogurt, ginger, green chili, coriander powder, funnels seed powder, paprika, red chili powder, and turmeric into a paste. Keep it aside.
Heat the oil in a saucepan. Test the heat by adding one cumin seed to the oil; if seed cracks right away oil is ready. Add the cumin asafetida and cumin seeds. After the cumin seeds crack, add whole red chili and besan (gram flour). Stir-fry for about half a minute until the besan (gram flour) is golden-brown.
Add the spice paste and stir-fry for about 2 minutes on medium heat until the spices start to separate from the oil.
Add the potatoes, mix it well and add about 1cup of water. After the gravy boils, let it cook on low-medium heat for 8 to 10 minutes. Adjust the gravy to your liking.
Add the cilantro and garam masala, cover the pan, and turn off the heat. Let it sit for a few minutes before taking off the cover. This helps bring the color to the top of the dish.
Keyword Exotic, Party Food, Side Dish, Spicy Potatoes
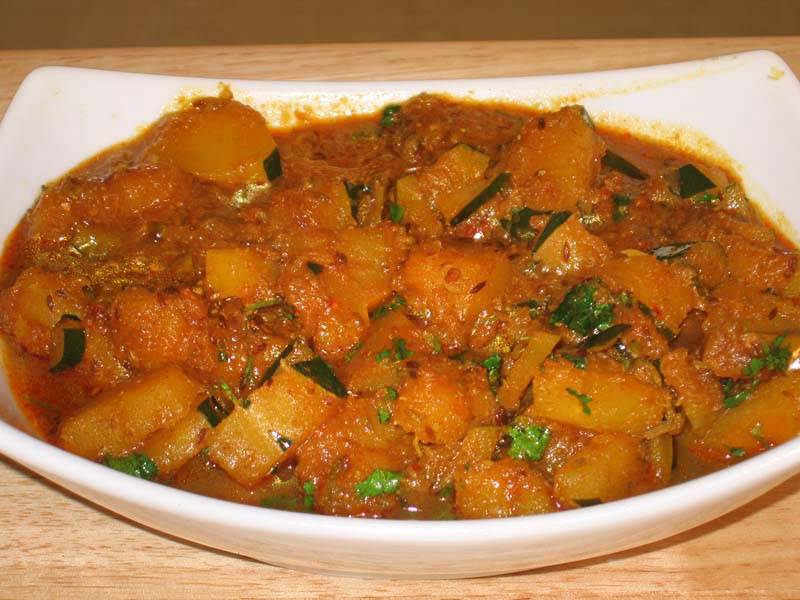
Peel and cut the squash into cubes. Save about ¼ of the squash peel and chop them.
In a small bowl, mix the shredded ginger, coriander powder, funnel, red chili powder, paprika, turmeric, and ¼ cup of water to make a paste.
Heat the oil in a pan. Test the heat by adding one cumin seed to the oil; if seed cracks right away oil is ready. Add cumin seeds and asafetida after seeds crack add fenugreek seeds and red chilies and stir for a few seconds.
Add the spice paste and stir-fry for a minute until spices start leaving the oil.
Add the squash, squash peels, salt, and ¼ cup of water. Mix well. Cover the pan and let it cook on medium heat until the vegetables are tender. Squash will be semi mushy.
Make sure to stir gently every 3 to 4 minutes. Check if more water is needed.
Lastly, add the mango powder, sugar and chopped cilantro. Mix everything and cover for a minute. Adjust the salt to your taste.
Notes
Tips: I have used acorn squash but any squash can be used whatever is available for example banana squash, butternut squash, buttercup squash etc. The only one I know does not work is spaghetti squash and pumpkin.Suggestion: The recipe is with many blends of spices and great aroma makes a great dish to serve with plain rice. Just make the dish with extra gravy by adding more water on step 9. Serve with Puri, in North India Spicy Squash served with Urad Dal Puri.
Indian Squash Recipe | Butternut Squash Indian Recipes | Manjula’s Kitchen
Indian cuisine is renowned for its rich and diverse flavors, one such delightful gluten-free vegetable curry-based Indian Squash Recipe is spicy squash Indian curry a dish that embraces the vibrant colors and aromatic spices synonymous with Indian cooking. To start select a fresh squash, preferably Butternut or Acorn Squash, though other options like banana squash or buttercup squash can also be employed. It’s worth noting that spaghetti squash and pumpkin are not recommended for this particular squash recipe Indian.
The first step involves the preparation of the squash, a crucial task to ensure the perfect texture in the final dish. Peel and cut the squash into cubes, reserving about ¼ of the squash peel for later use. This unique touch adds both texture and visual appeal to the Butternut Squash Sabzi.
The heart of the dish lies in the aromatic spice blend that brings the Indian flavors to life. In a small bowl, combine shredded ginger, coriander powder, funnel, red chili powder, paprika, turmeric, and water to create a flavorful paste. This amalgamation of spices forms the base, infusing the squash with a medley of tastes that are quintessentially Indian.
As the pan sizzles with anticipation, heat the oil to the right temperature. A simple test with cumin seeds determines the readiness of the oil; a crackling cumin seed indicates the perfect moment. Add cumin seeds, asafetida, fenugreek seeds, and red chilies to the hot oil. The ensuing aroma is a testament to the robust flavors that will unfold.
The spice paste takes center stage as it sizzles in the pan. Stir-fry for a minute until the spices release their essence into the oil, creating a tantalizing blend. Now, it’s time for the star of the show – the cubed squash, along with the reserved squash peels. Sprinkle salt, add water, and cover the pan, allowing the vegetables to simmer and tenderize. The squash transforms into a semi-mushy consistency, absorbing the myriad spices infused in the dish.
A gentle stir every few minutes ensures even cooking, and periodic checks determine if more water is needed to maintain the desired texture. The Butternut Squash Sabzi takes shape, with the kitchen filled with the heady aroma of Indian spices.x
In the final act, add mango powder, sugar, and chopped cilantro, elevating the dish with a burst of tanginess and freshness. The amalgamation of flavors is perfected as everything melds together under the lid for a minute. A final adjustment of salt ensures the dish is tailored to individual taste preferences.
As the Butternut Squash Sabzi graces the dining table, it presents a feast for the senses. The blend of spices, the semi-mushy texture of the squash, and the infusion of mango powder create a symphony of flavors that captivate the palate. This Indian squash recipe is not just a dish; it’s a celebration of culinary prowess and cultural richness amongst all other butternut squash Indian recipes.
For those seeking variety in acorn squash recipes, this recipe seamlessly transitions to accommodate Acorn Squash. The versatility of this Indian squash recipe allows for a delightful twist using acorn squash, offering a slightly different flavor profile while still capturing the essence of Indian cuisine. Acorn squash recipes in Indian households often mirror the steps of this Butternut Squash Sabzi, proving that the charm of this dish transcends the specific type of squash used.
In the realm of squash recipes Indian cuisine has a lot to offer, this Butternut Squash Sabzi stands out as a testament to the creativity and depth of flavor inherent in Indian cooking. Its adaptability with various types of squash ensures that households can explore the rich tapestry of Indian cuisine, savoring the distinctive tastes and aromas that make every bite a culinary adventure. Whether served with plain rice or accompanied by Urad DalPuriin North India, this spicy squash dish is a gastronomic delight that bridges the gap between tradition and innovation in the realm of Indian cooking.
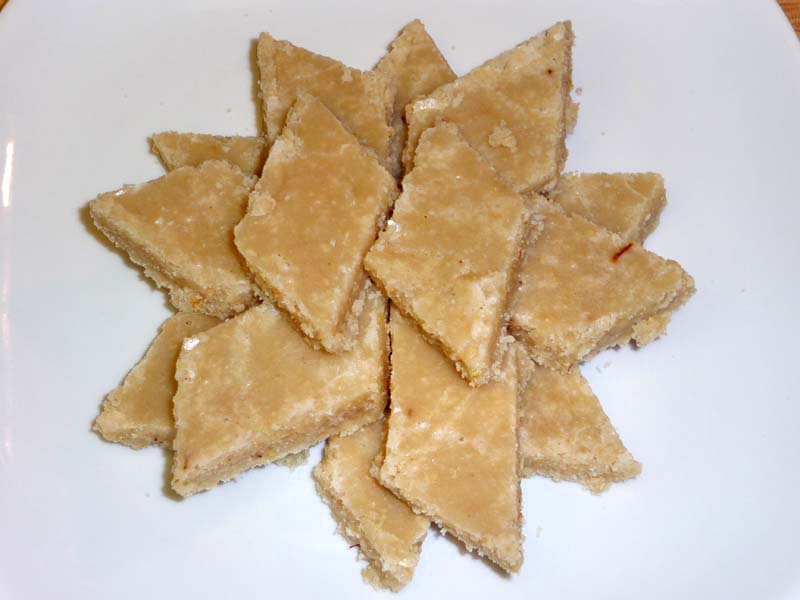
Kaju burfi is probably the most favorite Indian dessert. Kaju burfi is a delicious treat for any occasion. This can also be served as a fudge or candy. This is also a great vegan treat.
Grind the cashew nuts to powder. Dry grinder or a coffee grinder works the best.
On very low heat in a heavy bottom pan roast the cashew nut powder for about 4 minutes or until powder just get warm. Do not heat for any longer otherwise powder will start getting oily.
In a saucepan, boil the sugar and water together on medium heat until syrup is 1 thread or 225 degrees F on a candy thermometer.
Next add the saffron to the syrup mix it well. Saffron is optional. Turn off the heat.
Add the cashew powder to the syrup and mix it well, making sure there are no lumps.
To check the right consistency take a little mix in a spoon, you should be able to roll this into softball.
Next spread the mix quick to the greased plate. Spread before the mix cools off.
Allow burfi to cool and then cut them in the shapes you will like.
Enjoy!
Notes
Notes:
Grind small portion at a time if you grind for too long nuts start getting oily.
Store at room temperature for a week or in the fridge for longer.
Tips:
If the burfi remains soft, you can cook the mixture on low heat for few minutes.
If the mixture is too dry add the boiling water 1 spoon at a time making sue it comes to right consistency.
As you see you can never go wrong with this recipe.
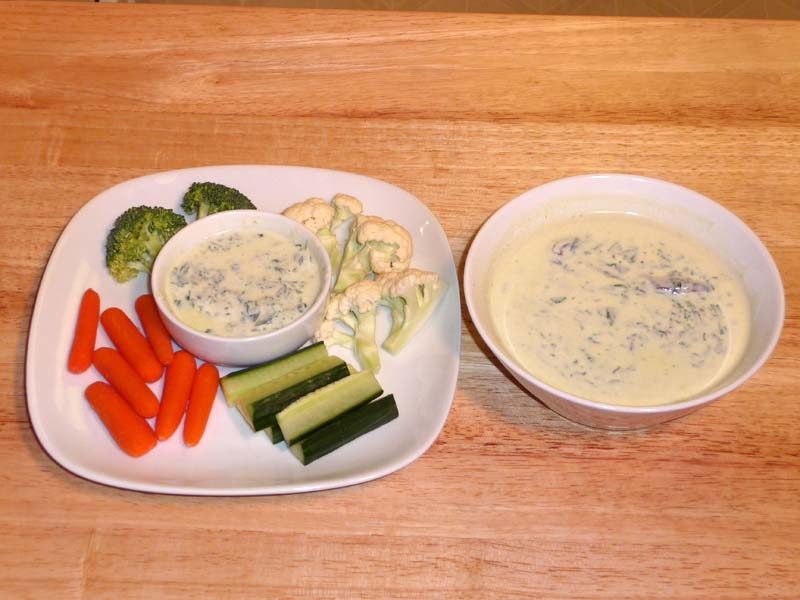
Spinach raita is a refreshing yogurt-based dish made with spiced spinach and yogurt. By adjusting its thickness, you can also serve spinach raita as a sandwich spread or as a dip for fresh veggies. Spinach raita tastes delicious any way you serve it.
Heat the oil in a saucepan on medium high heat. Test the heat by adding one cumin seed to the oil; if seed cracks right away, oil is ready.
Add the asafetida and cumin seeds. After the cumin seeds crack, add red chilies stir-fry for few seconds.
Add spinach, salt, and black pepper and stir-fry, pressing the spinach down to allow most of the water to evaporate but still leaving the spinach moist.
After the spinach cools off, mix it well into the yogurt.
Add milk to the raita about half a cup adjust to the desire consistency.
For best result serve chill.
Notes
Tips:Frozen chopped spinach can be used instead of fresh spinach.Variations:
Spinach raita also can be served as a spread with bread or crackers keep the consistency thick do not need to add any milk.
To serve as a dip add about ¼ cup of milk but keep thicker then raita.
Serving suggestion: Serve over plain rice or as a side dish with any meal.
1. Heating Oil and Infusing Flavours: Initiating Palak Raita Preparation
Begin the palatable journey of creating Palak Raita by heating oil in a saucepan over medium-high heat. A simple test, featuring the crackling of a cumin seed, confirms the readiness of the oil for the culinary symphony about to unfold. With the aromatic base established, infuse the oil with the distinctive essence of asafetida and cumin seeds. As the cumin seeds crackle, introduce red chilies, stirring the mix for a tantalizing burst of flavour that sets the stage for the vibrant palak raita.
Sautéing Spinach with Seasonings: Crafting the Palak Raita Base
Add the star ingredient, spinach, to the fragrant mix, along with a dash of salt and black pepper. Engage in a thorough stir-fry, applying gentle pressure to the spinach, coaxing it to release its moisture. The objective is to strike a balance, allowing most of the water to evaporate while retaining the spinach’s inherent moisture. This meticulous step forms the foundation of the palak raita, infusing it with the earthy essence of spinach.
Blending Spinach with Yogurt and Milk: Achieving Palak Raita Consistency
Once the sautéed spinach cools off, seamlessly integrate it into the waiting yogurt. This integration creates a symphony of textures and flavours, transforming the yogurt into the creamy canvas for the palak raita. To achieve the desired consistency, introduce milk gradually, adjusting until reaching the perfect balance. This harmonious blend of yogurt and milk ensures a palak raita that is not only flavorful but also luxuriously creamy.
Chilling for Optimal Enjoyment: Perfecting the Palak Raita Experience
For optimal results, serve the palak raita chilled. This step enhances the overall sensory experience, allowing the flavours to meld and intensify. The coolness complements the earthy spinach and the tanginess of the yogurt, resulting in a refreshing and delightful palak raita that is sure to tantalize the taste buds.
Tips and Variations: Enhancing the Palak Raita Recipe
Consider using frozen chopped spinach as a convenient alternative to fresh spinach. Additionally, palak raita transforms into a versatile spread when served with bread or crackers, maintaining a thick consistency without the need for additional milk. For a dip, add approximately ¼ cup of milk, ensuring a thicker texture than traditional raita. These variations allow palak raita to shine in diverse culinary roles, catering to a spectrum of taste preferences.
Serving Suggestions: Palak Raita as a Versatile Accompaniment
Experience the versatility of Palak Raita by serving it over plain rice or as a side dish accompanying any meal. Its dynamic flavours and creamy texture make it a perfect accompaniment to a variety of dishes, contributing a touch of freshness and vibrancy to the overall dining experience.
2 tablespoons chana dal, pre-soaked in water for at least half an hour
1/4 cup unsalted roasted peanuts
1 teaspoon salt adjust to taste
1/4 cup lemon juice
Instructions
Method
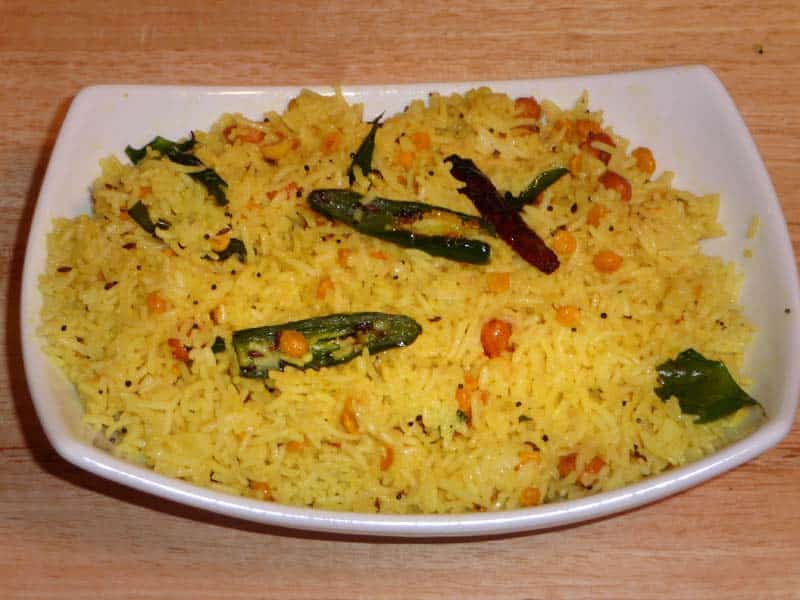
Wash rice gently changing water several times until the water appears clear.
For fluffier rice, the rice should be soaked for at least 15 minutes prior to cooking.
Drain the rice and put it into the saucepan. Add water, oil, and salt, and bring to a boil. Once the water is boiling reduce the heat to low and cover the pan.
Cook about 15 minutes, or until the rice is tender and the water has evaporated. Turn off the heat and fluff the rice with a fork.
Preparing The Seasoning:
Heat the oil in a frying pan on medium heat; stir-fry the peanuts for about 2 minutes until peanuts changes the color to light brown.
Take out the peanuts from oil and use the same oil for rest of the seasoning.
Add cumin seeds and mustard seeds after seeds crack add red chili, curry leaves, and green chilies, and stir for a few seconds.
Add the chana dal, stir-fry for about a minute.
Add turmeric and mix it well.
Add the pre-cooked rice, peanuts and sprinkle salt and lemon juice over the rice.
Mix gently, making sure do not break the rice and stir-fry for about 2 minutes. Rice is ready, Enjoy!
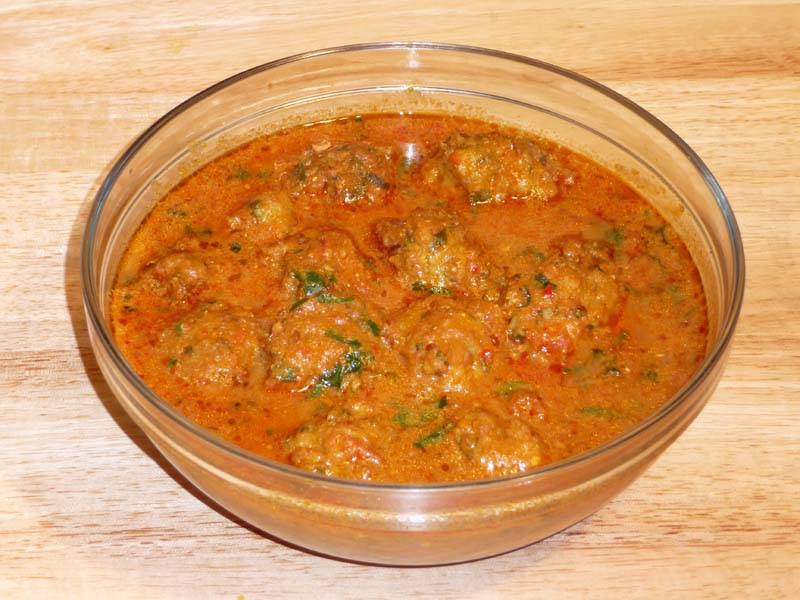
Cabbage Koftas are fried dumplings in a variety of spicy gravies. The dumplings can be made using a variety of vegetables and some popular ones are cabbage, laucki (bottle guard), zucchini, or a potato-paneer mix. This particular recipe uses cabbage.
Mix together all the kofta (dumpling) ingredients. Adjust besen as needed to make a texture of very soft dough. Note: make this mix just before you are ready to fry the kofta otherwise it will become watery.
Heat the oil in a frying pan on medium-high heat. The frying pan should have at least 1 inch of oil. To check if the oil is ready, just put one small piece of the mix in the oil, it should sizzle and come up right away. Slowly drop about 1 tablespoon of the dumpling mixture into the frying pan one at a time.
Fry the koftas in small batches, avoid overcrowding the frying pan.
Turn the koftas occasionally. Fry the koftas until they turn golden-brown all around.
For Gravy
Blend the tomatoes, green chilies and ginger to make a puree. If you prefer a milder version, take the seeds out of the green chili before blending.
Heat the oil in a saucepan on medium-high. Test the heat by adding one cumin seed to the oil; if it cracks right away oil is ready. Add the asafetida, cumin seeds and gram flour (basen). Stir-fry for a minutes.
Add the tomato puree, coriander powder, turmeric, paprika, and cook on medium heat until the tomato mixture starts leaving the oil and reduces to about half in quantity.
Next add yogurt and cook for another minute.
Add about 1½ cups of water and the salt. As it comes to boil reduce the heat to medium-low and let the gravy cook for few minutes.
Adjust the thickness of the gravy to your taste by adjusting the water. Add the prepared koftas and let it simmer for another 7 to 8 minutes. Turn of the heat and add the cilantro and cover the pot.
Notes
Variations:Using the same recipe you can make these koftas replacing cabbage with laucki (bottle guard) or zucchini.Tips:
Koftas can be refrigerated for 5 days or freeze for a month.
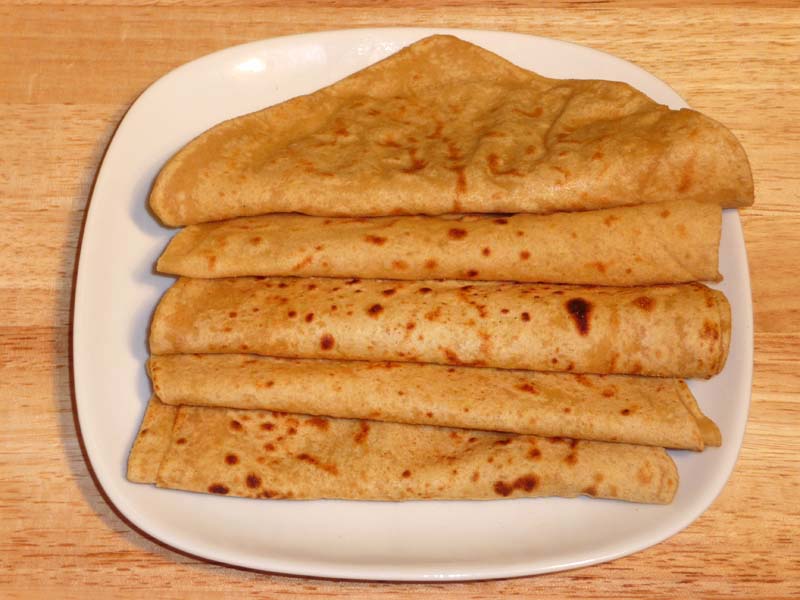
Parathas are whole-wheat Indian flat-bread, a staple bread in north India. Parathas can be made plain or stuffed with different fillings.Makes 5 parathas.
In a bowl, mix the flour, salt and water. Mix well until it forms to soft dough (adjust the water as needed).
Knead the dough on a lightly greased surface. The dough should be very smooth and soft.
Set the dough aside and cover. Let the dough rest for at least ten minutes before.
Heat the skillet on medium high. Note: An iron skillet works best. To check if the skillet is ready, put a couple of drops of water on it. If the water sizzles right away, the skillet is ready.
Divide the dough into 5 equal parts. Roll the dough into about 3 inch diameter circles. Spread about 2 drops of oil and fold into two again put another drop of oil and food now you have a triangle.
Roll the patty in dry whole-wheat flour. Press it a little and start rolling on a clean surface to about 6 inches in diameter.
Place the Paratha over the skillet. When you see the color change and the paratha will puff in different places. Turn the paratha over.
The paratha should have golden-brown spots. Wait a few seconds and put about 1/2 teaspoon of oil and spread with a spatula.
Flip the paratha and lightly press the puffed areas of the paratha with a spatula that will help paratha to puff up.
Flip again and press with the spatula making sure the paratha is golden-brown on both sides.
Notes
Serving Suggestions:
Paratha can be served with any gravy vegetable or dry spiced vegetable.