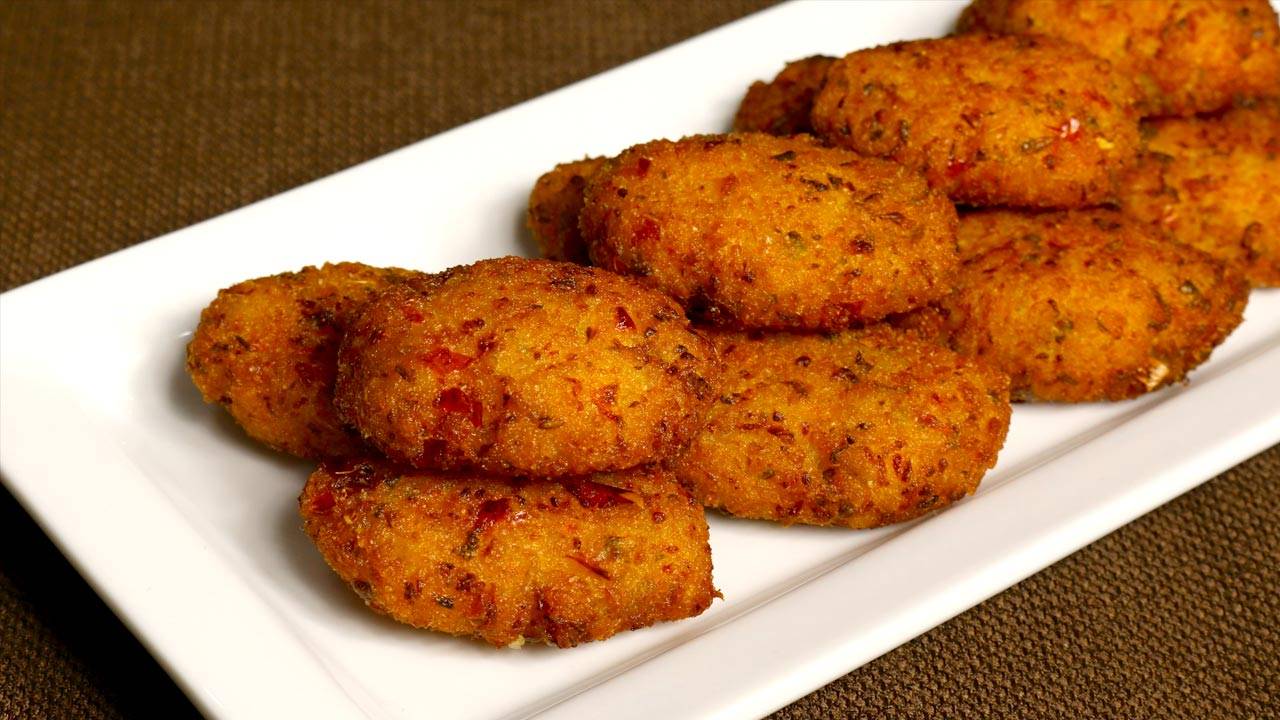
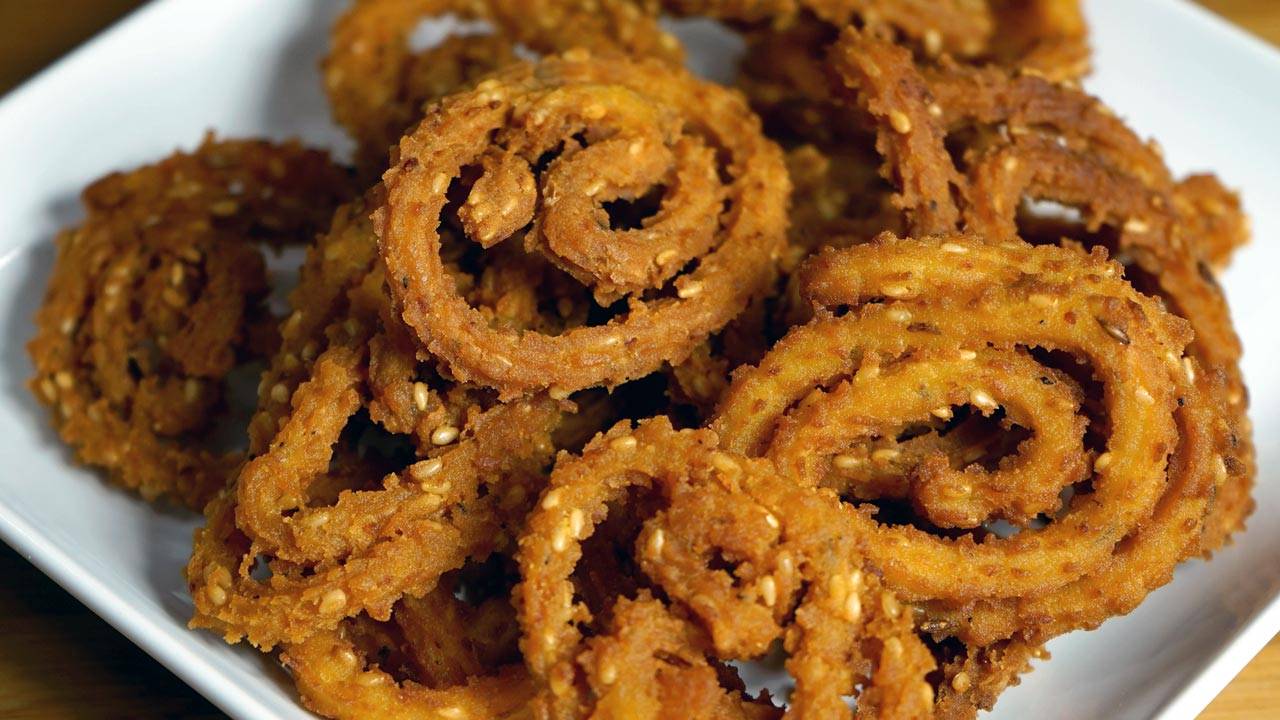
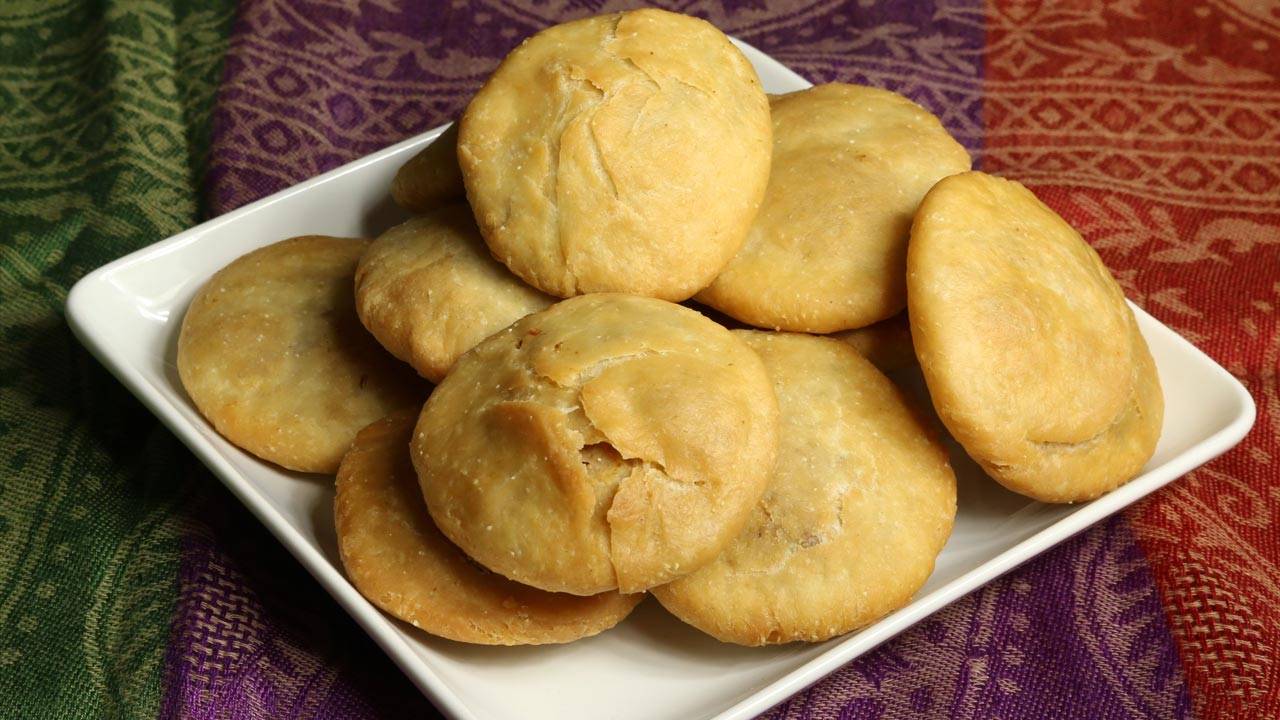
Category: Festival & Holiday Recipes

Indian Festival Foods: A Celebration of Tradition and Taste
Indian festivals are a time of joy, togetherness, and, most importantly, a feast of flavors. Indian festival foods are an integral part of the celebrations, bringing families and communities together to enjoy delicious and diverse dishes. From sweet to savory, these foods are deeply rooted in tradition and offer a taste of India’s rich culinary heritage. Let’s explore some of the best Indian festival recipes that you can prepare to make your festivities even more special.
Popular Indian Festival Recipes
Gulab Jamun
Gulab Jamun is one of the most cherished Indian festival foods. These soft, spongy balls made from khoya (dried milk) are deep-fried and soaked in a fragrant sugar syrup. They are a must-have during festivals like Diwali and Holi. As a favorite Indian dessert, Gulab Jamun is beloved by all ages and adds a sweet touch to any celebration. Other popular Indian desserts for festivals include Shakar Paare and Namkeen Paare, which are enjoyed during various celebrations.
Samosa
Samosas are another staple in Indian festival recipes. These crispy, savory pastries are filled with a spiced mixture of potatoes and peas, making them a perfect indian snack for any festive gathering. Samosas are versatile and can be enjoyed as part of a meal or as a standalone treat. They are often served with tangy chutneys, adding a burst of flavor to your festive spread. Samosas are also popular Indian street food recipes and can be part of your party recipes collection.
Puran Poli
Puran Poli is a traditional sweet flatbread from Maharashtra, commonly prepared during festivals like Holi and Ganesh Chaturthi. This Indian festival food is made by stuffing a dough with a sweet filling made from chana dal (split chickpeas), jaggery, and cardamom. The result is a delicious, aromatic bread that is enjoyed by everyone. Puran Poli is one of the best Indian festival recipes that embodies the spirit of Indian festivals. It can also be enjoyed as part of Indian breakfast recipes on festive mornings.
Kheer
Kheer is a classic Indian dessert made with rice, milk, and sugar, flavored with cardamom, saffron, and nuts. This creamy and rich pudding is a staple at many Indian festivals, including Eid and Raksha Bandhan. Kheer is easy to prepare and can be served either warm or chilled, making it a versatile addition to any festive menu. It is also a delightful addition to traditional Indian recipes and gluten-free dessert recipes.
Chole Bhature
Chole Bhature is a popular North Indian dish often enjoyed during festivals and special occasions. This combination of spicy chickpea curry (chole) and deep-fried bread (bhature) is hearty and satisfying. Chole Bhature is one of the best Indian festival recipes for those who love bold, robust flavors. It is commonly served with pickles, and yogurt, enhancing the overall experience. This dish can also be included in dinner recipes for festive feasts.
Enhance Your Festival Feast
To make your festival feast even more delightful, consider exploring related categories that complement these Indian festival foods. Adding Indian snacks like pakoras and vadas can provide a variety of flavors and textures. For a sweet ending, explore Indian desserts such as barfi and jalebi. Incorporating healthy recipes like roasted nuts and fruit chaat can offer lighter options for your guests. Hosting a large gathering? The popular party recipe category is filled with dishes that are sure to impress your guests and make your celebration memorable. Including fusion dishes like Indo-Chinese Manchurian can add a unique twist to your festival spread.
Frequently Asked Questions (FAQs)
Q: What are some popular Indian festival foods? 
A: Some popular Indian festival foods include Gulab Jamun, Samosas, Puran Poli, Kheer, and Chole Bhature.
Q: What types of festivals are celebrated in India? 
A: India celebrates a wide variety of festivals including Diwali, Holi, Eid, Christmas, Raksha Bandhan, Navratri, and Ganesh Chaturthi. Each festival has its own unique traditions and foods.
Q: How can I make my festival feast healthier? 
A: To make your festival feast healthier, you can include healthy Indian snacks like roasted nuts, fruit chaat, and baked samosas. Opting for desserts made with natural sweeteners and using less oil in savory dishes can also help.
Q: What is the significance of food in Indian festivals? 
A: Food plays a central role in Indian festivals, symbolizing prosperity, togetherness, and cultural heritage. Each festival has its own traditional dishes that are prepared and enjoyed with family and friends.
Q: Can I prepare these recipes in advance? 
A: Yes, many Indian festival recipes can be prepared in advance. For example, Gulab Jamun and Kheer can be made a day ahead and stored in the refrigerator. Samosas can be prepped and frozen, then fried fresh on the day of the festival.
Q: Are there vegetarian options for Indian festival foods? 
A: Absolutely! Most Indian festival foods are vegetarian. From savory dishes like Samosas and Chole Bhature to sweet treats like Puran Poli and Kheer, there are plenty of vegetarian options to choose from.
Conclusion
Indian festival foods are a testament to the rich culinary traditions of India. Whether you’re celebrating Diwali, Holi, Eid, or any other festival, these best Indian festival recipes will add flavor and joy to your festivities. So, gather your ingredients, try out these Indian festival recipes, and create unforgettable memories with your loved ones. Don’t forget to find vegetarian recipes for more delightful recipes from Manjula’s Kitchen!

By incorporating these dishes into your festival celebrations, you’ll be able to enjoy a wide variety of delicious and traditional foods. Whether you’re looking for a quick snack, a hearty meal, or a sweet treat, there’s an Indian festival food to suit every occasion. Happy cooking and happy festivities!

  • Urad Dal Kachori

    Urad Dal Kachori

    Urad Dal Kachori

    Urad Dal Kachori

    Dal kachori is a delicacy from north India. Dal kachori is a spicy puffed pastry. Traditionally kachories are sold at HALWAI (a sweet and snack shop). Today, I will use urad dal lentils (skinned black gram) for the inside filling. These mouthwatering Dal kachories can be served as a snack, chaat or part of main meal, making the meal exotic.
    No ratings yet
    Course Appetizer, Bread
    Cuisine Indian
    Servings 4 people

    Ingredients
      

    Dough

    • 1 cup All Purpose flour (plain flour or maida)
    • 1 tablespoon fine sooji (semolina)
    • 1/4 teaspoon salt
    • 2 tablespoons ghee / clarified butter
    • 1/4 cup lukewarm water

    Filling

    • 1/4 cup washed urad dal lentils (skinned black gram)
    • 1 tablespoon fennel seeds coarsely grinded (saunf)
    • 1 tablespoon coriander seeds coarsely grinded (dhania)
    • 1 teaspoon red chili flakes
    • 1/2 teaspoon mango powder (amchoor)
    • 1/4 teaspoon asafetida (hing)
    • 1/2 teaspoon salt (adjust to your taste)
    • 1 tablespoon ghee / clarified butter

    Also need oil to fry

    Instructions
     

    To Make Dough

    • Mix the flour, semolina, salt and ghee. Add water slowly to make dough. Dough should be firm but pliable. Cover the dough and let it sit for at least fifteen minutes.

    To make filling

    • Boil dal in about 2 cups of water, until dal is soft not mushy. Drain the access water.
    • Heat the ghee (clarified butter) over low medium heat add all the spices for filling fennel, coriander, red chili, mango powder, asafetida and salt, stir and add boiled dal.
    • Stir continuously, and keep pressing dal, until water from dal has evaporated, notes, dal should not be powdery.
    • Turn off the heat. Let the mixture cool off.

    To make the Kachoris

    • Take the dough and knead it for a minutes. Divide the dough in twelve equal parts.
    • Take one part of the dough and with your fingers flatten the edges and make into 3-inch circle. Leaving center little thicker than edges.
    • Mold the dough into a cup and place about 2 teaspoons of filling in the center. Pull the edges of the dough to wrap the dal filling. Proceed to make all 12 balls.
    • Let the filled ball sit for three to four minutes before rolling.
    • Set the kachoris on a surface with the seams facing up. Roll it slowly about three inches in diameter.
    • Heat the oil in frying pan over medium heat frying pan should have about one inch of oil. To check if oil is ready put a little piece of dough in the oil. Dough should sizzle, and come up very slow.
    • Fry them on medium-low heat. After they start to puff, slowly turn them over. Fry until golden-brown on both sides. This should take about five minutes. If the kachoris are fried on high heat, they will get soft and will not be crispy.
    • Kachories can be stored for at least a week in an airtight container.

    Notes

    If kachories get soft warm up the kachoris in an oven on 200 degree F for about 7 to 10 minutes, this will bring back the freshness and crispyness.
    Serving suggestion: serve them plain, or with tamarind chutney and yogurt as chaat, or serve the kachories as main meal and serve them with aloo dum
    Tried this recipe?Let us know how it was!

    Urad Dal Kachori Recipe: A Delectable Indian Snack 

    Urad Dal Kachori is a delectable Indian snack that perfectly fits into categories like appetizers, party recipes, and snacks. With its crispy exterior and flavorful filling, it’s an ideal addition to festive occasions like Diwali and Holi, where indulging in savory treats is a tradition. This traditional dish combines the richness of urad dal (black gram lentils) with a blend of spices encased in a golden, fried dough shell, making it a beloved choice among food enthusiasts. 

    Enjoyed hot and fresh, Urad Dal Kachori offers a delightful burst of flavors and textures, making it a popular choice for gatherings and celebrations alike. Urad Dal Kachori is a traditional Indian snack enjoyed by many across the country. This flavorful delicacy is a popular choice for breakfast, snacks, or even as a side dish. In this comprehensive guide, I will walk you through how to make urad dal kachori step by step, ensuring that you achieve the perfect blend of flavors and textures in every bite.

    How to Make Urad Dal Kachori: Step-by-Step Instructions 

    Prepare the Dough:

    Combine flour, semolina, salt, and ghee in a bowl. Gradually incorporate water while mixing until a firm but pliable dough forms. Cover the dough and allow it to rest for at least 15 minutes.

    Cook the Lentils:

    Boil the lentils in approximately 2 cups of water until softened but not mushy. Drain any excess water.

    Make the Filling:

    Heat ghee over low-medium heat. Add all the filling spices (fennel seeds, coriander seeds, red chili powder, mango powder, and asafetida) and stir briefly. Add the cooked lentils and continue stirring while mashing the lentils to remove excess moisture. The filling should not be dry or powdery. Turn off the heat and let the mixture cool.

    Assemble the Kachoris:

    Knead the rested dough for a minute and divide it into 12 equal portions. Roll each portion into a 3-inch circle, keeping the center slightly thicker than the edges. Gently cup the dough to form a small pocket. Add approximately 2 teaspoons of the cooled lentil filling to the center. Pull the edges of the dough together to enclose the filling securely. Repeat this process to create 12 filled balls.

    Shape and Fry:

    Allow the filled balls to rest for 3-4 minutes. Gently roll each ball out to a 3-inch diameter circle, ensuring the seam faces upwards. Heat oil (about 1 inch deep) in a frying pan over medium heat. To test the oil temperature, drop a small piece of dough; it should sizzle and rise slowly to the surface. Carefully place the kachoris in the hot oil and fry over medium-low heat. Once they begin to puff up, gently flip them over. Fry until golden brown on both sides, which should take approximately 5 minutes. Avoid high heat, as this will result in soft rather than crispy kachoris.

    Storage:

    Once cool, kachoris can be stored in an airtight container for up to a week.

    Variations of Urad Dal Kachori 

    While the traditional urad dal kachori recipe is delightful on its own, you can experiment with various fillings and flavors to create unique variations. Instead of urad dal, you can use mashed potatoes, green peas, or lentils for the filling. Additionally, you can add a touch of sweetness by incorporating raisins or dates into the filling mixture. Get creative with spices and herbs to customize the flavor according to your preference.

    Benefits of Urad Dal Kachori

    Urad dal, the main ingredient in urad dal kachori, is a rich source of protein, fiber, and various nutrients. Including kachoris in your diet provides you with essential nutrients and energy, making it a wholesome snack option. Moreover, homemade kachoris allow you to control the quality of ingredients and avoid unhealthy additives commonly found in store-bought snacks.

    FAQs (Frequently Asked Questions) 

    Q: Can I make urad dal kachoris in advance?

    A: Yes, you can prepare the filling and dough in advance and store them separately in the refrigerator. When ready to serve, assemble the kachoris and fry them fresh for the best taste and texture.

    Q: Can I bake kachoris instead of frying them?

    A: While traditional kachoris are deep-fried for a crispy texture, you can certainly try baking them for a healthier alternative. Brush the assembled kachoris with oil and bake in a preheated oven until they turn golden brown and crisp.

    Q: Can I freeze leftover kachoris?

    A: Yes, you can freeze leftover kachoris in an airtight container for up to 2-3 weeks. When ready to eat, reheat them in a preheated oven or toaster oven until heated through.

    For more delicious recipes, visit Manjula’s Kitchen and explore other Recipes. If you’re looking to explore more Indian recipes, appetizers, beverages, and desserts, be sure to check out the following links on Manjula’s Kitchen. Here are some links to recipes on Manjula’s Kitchen official website: Paneer Tikka Masala Recipe, Chana Chaat (Spicy Chickpea Salad) Recipe, Pav Bhaji (Spicy Vegetable Hash with Buns) Recipe, Raj Kachori (Crunchy Chaat) Recipe, Vegetable Biryani Recip. These recipes should offer you a flavorful experience straight from Manjula’s Kitchen.

  • Date and Nut Ladoo

    Date and Nut Ladoo

    Date and Nut Ladoo (Healthy Indian Candy) Recipe by Manjula

    Date and Nut Ladoo

    This recipe is for Date and Nut Ladoo, or Candy as we call them at home. For my grand kids they are like candy and they love it. Adapted from my friend Renu’s recipe, when I tried this ladoo for the first time, I said WOW. I could not believe the main ingredient was only dates. That surprised me because I am not very fond of dates. This was the first time I have tasted date ladoos flavored with coco powder. This is a quick and easy recipe. Like me if you are using roasted nuts then there is a little or no cooking involved? This is a guilt free healthy snack (no sugar or butter added). Date ladoos are also vegan and gluten free. It's hard to eat just one!
    5 from 2 votes
    Prep Time 5 minutes
    Cook Time 10 minutes
    Course Dessert
    Cuisine Indian
    Servings 18 ladoos

    Ingredients
      

    • 1 cup dates pitted and chopped (khajoor)
    • 1-1/2 cups mixed nuts roasted and roughly chopped, I am using almonds, pistachios, cashews, and pecans
    • 2 tablespoons coco powder
    • 1/2 teaspoon instant coffee
    • Pinch of salt
    • 1/4 teaspoon oil to oil your palms

    Instructions
     

    • Soften the chopped dates in microwave for 30 seconds.
    • Blend the dates in the food processor until they become to the paste, this should take about 10 seconds, add coffee, coco, and salt blend it again until all the ingredients nicely incorporated about 10 seconds. Add the nuts to the food processor and blend it for about 15 seconds. Nuts should be still chunky.
    • Remove from food processor, oil your palm and knead the mix into dough, and divide them into 18 equal parts and roll them into ladoos.
    • Dates and nuts ladoos can be stored in air tight container for a month or more.

    Notes

    Notes: if you do not have roasted nuts dry roast them individually for about 3 minutes on medium heat and use your choice of nuts.
    Tried this recipe?Let us know how it was!
  • Besan Sev (Crispy Indian Snack)

    Besan Sev (Crispy Indian Snack)

    Besan Sev

    Besan Sev (Crispy Indian Snack)

    Besan sev is a popular savory crispy snack, which is made in almost every household in India. These noodle-like Sev are so tasty that when you start munching, it's often difficult to stop.  This is a quick and easy recipe. Besan Sev is a great snack to make in bulk as it stays fresh for months.  They are made on all festive occasions. How you serve these sev often depends on how thick sev are. Fine sev are used for garnishing chaat. Thicker sev are served alone as a snack.   My favorite way to serve sev drizzeled with cilantro chutney. To make sev you do need to use sev maker, which is a small gadget like for making noodles.
    No ratings yet
    Prep Time 10 minutes
    Cook Time 14 minutes
    Course snacks
    Cuisine Indian
    Servings 4 people

    Ingredients
      

    • 2 cups besan (gram flour)
    • 1 teaspoon carom seeds crushed (ajwain)
    • 1-1/2 salt
    • 1/2 teaspoon red chili powder, adjust to taste
    • 1/4 teaspoon black pepper
    • 1/4 teaspoon asafetida (hing)
    • 3 tablespoons oil
    • 1/2 cup lukewarm water
    • Oil to fry

    Also need sev maker

    Instructions
     

    • Mix all the dry ingredients together, besan carom seeds, red chili, black pepper, and asafetida. Add the oil and mix it well.
    • Add the water slowly to make soft and smooth dough. Dough is very sticky, I used a spoon to mix the dough in the beginning. Then oil the palm and knead the dough. Cover the dough and allow to rest for about 15 minutes.
    • Greased sev maker with attachment. Place enough dough to fill the cylinder of sev maker and close. On other side, heat the oil in a frying pan on medium heat, frying pan should have about one inch of oil.
    • Oil should be moderately hot, Note: when you place little piece of dough oil should sizzle and dough should come up slowly without changing color.
    • Now hold the sev maker over frying pan, press the handle, sev will start coming out in to the oil. As sev is coming, slowly move the sev maker in circular motion.
    • As you complete one circle stop. Fry both sides till they become light golden brown, and oil will stop sizzling. Sev is ready. Remove it using slotted spoon.
    • Take them out over paper towel lined plate. And continue the same process for remaining dough.
    • Let the sev cool completely, as it cools they will become crispy. Break sev lightly with your hand and sev is ready to serve.
    Tried this recipe?Let us know how it was!
  • Aloo Chaat (Spicy Potato Snack)

    Aloo Chaat (Spicy Potato Snack)

    Aloo Chaat

    Aloo Chaat (Spicy Potato Snack)

    Aloo Chaat, which is a spicy potato snack. Aloo chaat is a popular snack found at north Indian road side vendors. This is one of the very few chaats served without any chutney. However you can always add cilantro and tamarind chutney. This recipe is inspired by the chaat I used to enjoy near my childhood home in India. I incorporated a special spice mix also known as chaat masala and would suggest trying this recipe without chutney. This mouthwatering chaat is just perfect for anyone who loves spicy food.
    No ratings yet
    Prep Time 10 minutes
    Cook Time 19 minutes
    Course Chaat
    Cuisine Indian
    Servings 4 people

    Ingredients
      

    • About 4 cups cubed potatoes, firmly boiled peeled and cut into bite size
    • 3 tablespoons oil
    • 1 teaspoon salt adjust to taste
    • 1/4 cup cilantro finely chopped
    • 1 tablespoon ginger thinly sliced
    • 1 tablespoon green chili finely chopped, adjust to taste
    • 2 teaspoons lemon juice

    Spice Mix for Chaat Masala

    • 1 tablespoon roasted cumin seed powder (bhuna jeera)
    • 1 teaspoon red chili powder
    • 1 teaspoon mango powder (amchoor)
    • 1/4 teaspoon black pepper
    • 1 teaspoons black salt
    • 1/8 teaspoon asafetida
    • 1/8 teaspoon citric acid
    • 1/2 teaspoon ginger powder (saunth)
    • 2 teaspoons sugar

    Instructions
     

    • To make spice mix all the spice mix together really well and set aside.
    • Heat heavy flat frying pan on medium high heat, add the oil in to warm frying pan. Place the cubed potatoes on the frying pan and sprinkle the salt over the potatoes.
    • Stir fry the potatoes; turn them occasionally until all sides are golden brown. This process should take 8-10 minutes.
    • Turn off the heat and sprinkle ginger, cilantro, green chilies, lemon juice and about 1-1/2 tablespoons of spice mix. Mix it well, making sure all the pieces of potatoes are coated.
    • Taste one of the potato and add more spice mix if needed according to your taste.

    Notes

    Note: This spice mix known as chaat masala can also be used to spice up any food. It especially tastes good when it is sprinkled over sliced cucumber and tomato or over pakoras. You can make the chaat masala in a larger quantity and keep it ready to go whenever you need it.
    Tried this recipe?Let us know how it was!

    Aloo Chat Recipe: A Tangy Delight 

    Aloo Chaat is a popular Indian street food snack that can be prepared quickly and easily. It’s typically gluten-free and vegan, making it suitable for those with dietary restrictions. This appetizer is perfect for Navaratri or any occasion when you’re craving delicious chaat. With its blend of spices and tangy flavors, Aloo Chaat offers a delightful taste experience that’s loved by many.

    Introduction to Aloo Chat Recipe 

    Indulge in the tantalizing flavors of aloo chat with this delightful recipe that promises to tantalize your taste buds. A quintessential street food favorite, aloo chat is loved for its spicy, tangy, and savory taste. This recipe provides a step-by-step guide on how to make aloo chat at home, allowing you to enjoy this beloved snack anytime you crave it.

    Step 1: Prepare the Aloo Tikki 

    Begin by preparing the star ingredient of this dish – the aloo tikki. Boil potatoes until they are tender, then mash them and mix in spices such as cumin powder, coriander powder, and amchur (dry mango) powder for that authentic flavor. Shape the mixture into small patties and shallow fry them until golden brown and crispy. These flavorful aloo tikkis will serve as the base of your aloo chat, providing a satisfying crunch with every bite.

    Step 2: Assemble the Ingredients 

    Gather all the ingredients you’ll need to assemble your aloo chat. Apart from the prepared aloo tikkis,  tomatoes, green chilies, and fresh cilantro for added freshness and crunch. Additionally, prepare tamarind chutney and mint chutney to drizzle over the aloo chat, adding layers of tanginess and flavor to the dish.

    Step 3: Arrange the Aloo Tikki on a Plate 

    Place the crispy aloo tikkis on a serving plate, ensuring they are evenly spaced apart to allow for easy topping and garnishing. The golden-brown hue of the aloo tikkis will entice your senses, promising a delightful culinary experience ahead.

    Step 4: Add Toppings and Chutneys 

    Now comes the fun part – adding the toppings and chutneys to elevate the flavors of your aloo chat. Sprinkle  tomatoes, and green chilies generously over the aloo tikkis, ensuring each bite is bursting with freshness. Drizzle tamarind chutney and mint chutney over the toppings, allowing the tangy and spicy flavors to meld together harmoniously.

    Step 5: Garnish with Fresh Cilantro 

    To add a final flourish of freshness and color to your aloo chat, garnish it with a generous handful of freshly chopped cilantro. Not only does cilantro lend a vibrant green hue to the dish, but it also imparts a refreshing burst of flavor that perfectly complements the spiciness of the aloo tikkis and the tanginess of the chutneys.

    Step 6: Serve and Enjoy 

    Your delicious aloo chat is now ready to be served and savored. Whether enjoyed as a snack, appetizer, or even a light meal, this flavorful dish is sure to delight your taste buds with its irresistible combination of textures and flavors. Serve it hot and fresh, garnished with a sprinkle of chaat masala for an extra burst of zestiness.

    Tips for Making the Perfect Aloo Chat 

    • Ensure the aloo tikkis are crispy on the outside and soft on the inside by frying them over medium heat until golden brown.
    • Customize the level of spiciness in your aloo chat by adjusting the amount of green chilies used in the recipe.
    • Experiment with different chutney flavors, such as sweet date chutney or  to create unique variations of aloo chat.

    Variations of Aloo Chat 

    • Aloo Tikki Chat: Transform this recipe into a heartier dish by topping the aloo tikkis with a generous serving of chickpea curry, yogurt, and chutneys, creating a wholesome and satisfying meal.
    • Aloo Chat with Ragda: Incorporate ragda, a flavorful white pea curry, into your aloo chat for an extra dose of protein and richness.

    Benefits of Aloo Chat 

    • Nutrient-Rich: Potatoes, the main ingredient in aloo chat, are rich in vitamins, minerals, and antioxidants, making this dish not only delicious but also nutritious.
    • Quick and Easy: With simple ingredients and minimal preparation, aloo chat is a convenient snack or meal option for busy days.

    FAQs (Frequently Asked Questions) 

    Q: Can I make the aloo tikkis ahead of time?

    A: Yes, you can prepare the aloo tikkis in advance and store them in the refrigerator. Simply reheat them in a preheated oven or on a skillet before assembling the aloo chat.

    Q: Can I make this recipe vegan-friendly?

    A: Absolutely! This recipe is inherently vegan, as it does not contain any animal products. Just ensure that the chutneys you use are also vegan-friendly.

    Q: Can I add other toppings to my aloo chat?

    A: Certainly! Get creative with your toppings by adding ingredients such as sev (crispy chickpea flour noodles), pomegranate seeds, or grated cheese for additional flavor and texture.

    For more delicious recipes, explore more Indian recipes, appetizers, beverages, and desserts, be sure to check out the following links on Manjula’s Kitchen. Here are some links to recipes on Manjula’s Kitchen official website: Paneer Tikka Masala Recipe, Chana Chaat (Spicy Chickpea Salad) Recipe, Pav Bhaji (Spicy Vegetable Hash with Buns) Recipe, Raj Kachori (Crunchy Chaat) Recipe, Vegetable Biryani Recip. These recipes should offer you a flavorful experience straight from Manjula’s Kitchen.

  • Rabri (Malai – Kerchan)

    Rabri (Malai – Kerchan)

    Rabri

    Rabri (Malai – Kerchan)

    Rabri or rabadi is a North Indian delicacy. It is served as a dessert. Rabri is a reduced milk, cooked little differently instead of creamy rubri is lumpy.  I like this dish because you can serve alone or over malpua, jalebi, gulab jamun, or waffles. There are countless combinations you can come up with.
    No ratings yet
    Prep Time 5 minutes
    Cook Time 39 minutes
    Course Dessert
    Cuisine Indian
    Servings 4 people

    Ingredients
      

    • 4 cups of milk
    • 2 tablespoons sugar
    • 1/4 teaspoon crushed cardamom
    • 2 teaspoon sliced almonds
    • 2 teaspoon sliced pistachios

    Instructions
     

    • To make rabri use wide heavy frying pan. Boil the milk over medium high heat as milk comes to boil reduce the heat to low medium.
    • Move the layer of foaming from boiling milk towards the rim, do the same as milk foams again. Keep doing this until milk is about 3/4 in volume. This should take about 30 minutes after milk first comes to boil. Note: it is important to keep the heat low otherwise milk on the rim will start burning.
    • After about 20 minutes of boiling milk add the sugar and cardamom, continue to boil, until it is 3/4 in volume. Add almonds and keep pistachios for garnishing. Turn of the heat, remove the cream from the rim and fold it into milk.
    • Rabri is ready, taste best when it is served chilled. But if you are serving rubric with part of other dessert use warm.
    Tried this recipe?Let us know how it was!
    1. To make rabri use wide heavy frying pan. Boil the milk over medium high heat as milk comes to boil reduce the heat to low medium.
  • Atta Ka Ladoo

    Atta Ka Ladoo

    Atta Ka Ladoo

    Atta Ka Ladoo

    Atta Ka Ladoo, is a rich, sweet dessert or snack. There are so many variations of Ladoos. They are made using different flours, milk and nuts.  Atta Ka Ladoo is commonly made in every house hold with some variations. It is a simple recipe with few ingredients, but the texture and taste is amazing!
    No ratings yet
    Prep Time 5 minutes
    Cook Time 29 minutes
    Course Dessert
    Cuisine Indian
    Servings 18 ladoos

    Ingredients
      

    • 1 cup whole wheat flour (roti ka atta)
    • 1/2 cup ghee, clarified butter
    • 1 cup sugar fine
    • 1/3 cup roughly crushed almonds
    • 1/4 teaspoon cardamom powder

    Instructions
     

    • Dry roast atta, on low medium heat until lightly colored this should take about 6-7 minutes. Add almonds and roast for about 3 more minutes. Important to keep stirring continuously, to roast evenly.
    • Add ghee and keep roasting, keep stirring continuously, atta will be light brown and will have sweet aroma of roasting. This should take about 4-5 minutes.
    • Turn off the heat and transfer the mix to another bowl. Wait until mix is lightly warm add sugar and cardamom powder. Mix well until sugar is incorporated nicely.
    • To make the ladoos, take about 2 tablespoons of atta mix into your palm. Gently press the mixture between your palms to form a smooth, round ball. The ladoos should be little smaller then golf ball, but you can adjust the as you prefer.
    • Leave the ladoos on a plate to cool to room temperature before putting into a covered container. The ladoos can be stored in an airtight container for 2 to 3 weeks.
    Tried this recipe?Let us know how it was!
  • Peanut Chikki (Peanut Brittle)

    Peanut Chikki (Peanut Brittle)

    Peanut Chikki

    Peanut Chikki (Peanut Brittle)

    Peanut chikki or peanut brittle is a delicious homemade sweet snack. This recipe is super simple and easy with very few ingredients, peanuts, sugar and touch of ginger and salt. Ginger adds a very nice tanginess to the chikki.
    No ratings yet
    Prep Time 5 minutes
    Cook Time 19 minutes
    Course Dessert
    Cuisine Indian
    Servings 12 peanut chikkies

    Ingredients
      

    • 1 cup peanuts shelled unsalted raw
    • 1 cup sugar
    • 2 teaspoons of clarified butter or ghee
    • 1/4 teaspoon salt
    • 2 teaspoons ginger juice

    Instructions
     

    • Grease about 5×7 plate and set aside.
    • Dry roast the peanuts on medium heat stirring continuously for about 6 to 7 minutes until golden brown. Remove from pan, wait till they cool off rub between your palms and remove most of the skin. Lightly crush the peanuts.
    • In a heavy bottom sauce pan, over medium high heat melt the butter, then add sugar, ginger, and salt.
    • Keep stirring the sugar continuously till sugar start melting and changing the color to light brown. Turn off the heat as soon it comes to golden brown in color. Note: when sugar starts melting it changes the color very quickly and it can easily burn.
    • Add peanuts stir quickly. Pour over the greased plate and spread evenly.
    • Cool for a few minutes chikki should be warm, cut them in about 1-1/2 inch square.
    • Store them in air tight container

    Notes

     Note: To make the ginger juice grate the ginger using fine shredder and then press it between your fingers to yield the juice.
    Tried this recipe?Let us know how it was!

  • Vegetable Rice Cutlets

    Vegetable Rice Cutlets

    Vegetable Rice Cutlets

    Vegetable Rice Cutlets

    Vegetable rice cutlets are great as an appetizer or snack for any get together. These cutlets are made with rice blended with mixed vegetables. This is an easy and quick recipe to make. Vegetable rice cutlets are crisp outside and soft inside. Try it!
    No ratings yet
    Prep Time 20 minutes
    Cook Time 15 minutes
    Course Appetizer
    Cuisine Indian
    Servings 16 cutlets

    Ingredients
      

    • 2 cups cooked rice
    • 1 small potato peeled and cut in small pieces
    • 1 cup mixed vegetables cut into very small pieces (green beans, bell pepper and carrot)
    • 2 teaspoon ginger chopped
    • 1/2 teaspoon red chili powder, adjust to taste
    • 1-1/2 teaspoons salt
    • 1 teaspoon cumin seeds
    • 1 tablespoon corn starch
    • Oil to fry

    Instructions
     

    • Pat dry all the vegetables.
    • Put all the ingredients in food processer and mix for about half a minutes. Mix should not become like paste and you should be able to see all the vegetables.
    • Remove from the food processer, rice mix will be textured of chunky soft dough. Divide the mix into 16 pieces and roll them into flat patties about 1/2 inch thick.
    • Heat the oil in a frying pan on medium high heat. Drop the cutlets slowly into it, taking care not to overlap them.
    • Fry the cutlets until they are golden brown, turning occasionally. This should take about 5 to 6 minutes. Take them out over a paper towel.
    • For best taste serve them hot. Cutlets taste great with cilantro chutney.
    Tried this recipe?Let us know how it was!

    Vegetable Rice Cutlet Recipe

    Vegetable Rice Cutlet is a delectable appetizer that is not only gluten-free but also suitable for both Krishna Janmashtami and Navaratri celebrations. This snack is prepared by combining cooked rice with various finely chopped vegetables, forming a mixture that is then shaped into patties and fried until golden brown.

    Being vegan-friendly, these cutlets cater to a wide range of dietary preferences. 

    They serve as delightful snacks or appetizers, perfect for any occasion or gathering. In this guide, we will explore the delightful world of Vegetable Rice Cutlets. These savory treats are perfect for any occasion, whether you’re hosting a party or simply craving a flavorful snack.

    Packed with wholesome ingredients and bursting with flavor, these cutlets are sure to be a hit with your family and friends.

    How to Make Vegetable Rice Cutlet: A Step-by-Step Guide

    Prep the Vegetables: For perfect texture, ensure all vegetables are meticulously dried. Pat them dry to remove excess moisture that can affect the final consistency.

    Combine Ingredients: Assemble all ingredients in a food processor. Pulse carefully to achieve a cohesive mixture with some texture. Avoid over-processing into a paste.

    Shape the Cutlets: Transfer the mixture – it should be a chunky, pliable dough. Divide it into 16 equal portions. Shape each portion into a flat patty, about half an inch thick, for even cooking.

    Fry to Golden Perfection: Heat oil in a frying pan over medium-high heat. Add enough oil to submerge half the patty. Gently place patties in the hot oil, ensuring they don’t touch. Fry for 5-6 minutes, turning occasionally, until golden brown.

    Drain and Serve: Transfer the golden cutlets to absorbent paper towels to remove excess oil while maintaining crispness.

    Variations:

    You can customize Vegetable Rice Cutlets according to your preferences and dietary restrictions. Here are some variations to try:

    Spicy Variation: Add chopped green chilies or a dash of chili powder to the mixture for an extra kick of heat.

    Cheesy Variation: Mix in grated cheese to the filling mixture for a gooey and indulgent twist.

    Vegan Variation: Replace potatoes with mashed chickpeas or sweet potatoes for a vegan-friendly option.

    Gluten-Free Variation: Use gluten-free bread crumbs or crushed cornflakes for coating to make the cutlets suitable for those with gluten intolerance.

    FAQs:

    Can I bake the cutlets instead of frying them?

    Yes, you can bake the cutlets in a preheated oven at 375°F (190°C) for 20-25 minutes or until they are golden brown and crispy.

    Can I use leftover rice?

    Absolutely! Vegetable rice cutlets are a great way to use leftover rice. Just make sure it’s cooked and cooled completely.

    Can I freeze the cutlets for later use?

    Yes, you can freeze the uncooked cutlets in a single layer on a baking sheet until firm, then transfer them to a freezer-safe bag or container for up to 3 months. Thaw them in the refrigerator before frying or baking.

    How long will they stay fresh?

    Store leftover cutlets in an airtight container in the refrigerator for up to 3 days. Reheat in a pan or oven until warmed through.

    For more delicious recipes, visit Manjula’s Kitchen and explore other Recipes. If you’re looking to explore more Indian recipes, appetizers, beverages, and desserts, be sure to check out the following links on Manjula’s Kitchen. Here are some links to recipes on Manjula’s Kitchen official website: Paneer Tikka Masala Recipe, Chana Chaat (Spicy Chickpea Salad) Recipe, Pav Bhaji (Spicy Vegetable Hash with Buns) Recipe, Raj Kachori (Crunchy Chaat) Recipe, Vegetable Biryani Recip. These recipes should offer you a flavorful experience straight from Manjula’s Kitchen.

  • Eggless Vanilla Cake with Strawberry Sauce

    Eggless Vanilla Cake with Strawberry Sauce

    Eggless Vanilla Cake with Strawberry Sauce

    Eggless Vanilla Cake with Strawberry Sauce

    Eggless Vanilla Mini Cakes, they are simply delicious sweet snack. These cakes are moist and soft with the perfect amount of sweetness. The vanilla cake is nicely paired with hot strawberry sauce as a dessert.https://manjulaskitchen.com/category/recipes/desserts/
    No ratings yet
    Prep Time 20 minutes
    Cook Time 24 minutes
    Course Dessert
    Cuisine Indian
    Servings 6 mini Cakes.

    Ingredients
      

    • 1-3/4 cup all-purpose flour (maida or plain flour)
    • 4 tablespoons corn starch
    • 1 1/2 teaspoon baking powder
    • 1 teaspoon baking soda
    • 1/4 teaspoon salt
    • 1 cup unsalted butter room temperature
    • 1 cup sugar
    • 2 teaspoons vanilla extract
    • 1/2 cup yogurt room temperature
    • 1 cup milk room temperature

    Strawberry Sauce

    • 1 cup raspberry, use fresh or frozen
    • 1-1/2 cup strawberry, use fresh or frozen
    • 1/4 cup fresh orange juice
    • 1 tablespoon corn starch
    • 3/4 cup sugar

    Also Need

    • Cake molds

    Instructions
     

    • Preheat oven to 350 degree F.
    • Sieve flour, corn starch, baking soda, baking powder and salt, set aside.
    • In a bowl, cream the butter and sugar until creamy using the electric mixer on low speed. Do not over beat.
    • Add yogurt and vanilla essence to the butter mix keep mixing on low speed and add the milk slowly. Mix will not be very smooth.
    • Add the flour few spoons at a time into the batter. Keep folding using the whisk, until all the flour is incorporated in to the butter mix, Do not over beat.
    • Scoop the batter into baking molds filling them about 2/3 full.
    • Bake for 20 minutes check the cakes inserting a knife in the center and it should come out clean. It took me 22 minutes.
    • After cakes come to the room temperature take them out from the molds.

    Strawberry Sauce

    • First wash strawberries, and raspberries hulled and slice the strawberries.
    • Combine all the ingredients except corn starch, in a small pot over medium high heat, bring to boil. Mix the corn starch with about 2 tablespoons of water making smooth paste and add to strawberries. This will make sauce creamy and will give thickness to the sauce.
    • Lower the heat to medium cook for 2-3 minutes, stir continually. Turn off the heat and sauce ready.
    • Top the cake with hot sauce. Enjoy!

    Notes

    Notes
    Strawberry sauce is a great sauce for topping pancakes, waffles, ice cream, cakes and more.
    Tried this recipe?Let us know how it was!

  • Hara Bhara Kabab – Vegetable Cutlet

    Hara Bhara Kabab – Vegetable Cutlet

    Hara Bhara Kabab (Vegetable Cutlet)

    Hara Bhara Kabab – Vegetable Cutlet

    Hara bhara kabab is a popular tasty snacks in Indian restaurants. This spicy delicious snack is deep fried made with spinach and potatoes flavored with spice mix. Hara bhara kabab is crispy outside and soft inside. Hara Bhara Kebabs are absolutely delicious appetizer and looks like cutlets.
    No ratings yet
    Prep Time 20 minutes
    Cook Time 30 minutes
    Course Appetizer
    Cuisine Indian
    Servings 20 kababs

    Ingredients
      

    • 6 cup spinach finely chopped, (do remove all the stems)
    • 1-1/2 cup potatoes boiled, peeled and shredded
    • 2 teaspoons oil
    • ½ teaspoon cumin seeds (jeera)
    • 1 teaspoon ginger finely chopped
    • 3/4 teaspoon salt
    • 3 tablespoons corn starch
    • ¼ cup finely chopped cilantro (hara dhania)
    • 2 tablespoons green chili finely chopped
    • Also need oil to fry

    Instructions
     

    • Heat the oil in a saucepan on medium-high heat. Oil should be moderately hot add cumin seeds. After the cumin seeds crack, add the spinach.
    • Stir-fry, making sure to press the spinach down so the water can evaporate. Cook the spinach until most of the water has evaporated. Spinach still should be moist not dry.
    • After spinach is at room temperature, add to the potatoes with all other ingredients, ginger, cilantro, green chilies, salt, and corn starch. Mix will be the consistency of soft dough.
    • Divided the mix to 20 equal parts and roll them into oval shapes.
    • Heat the oil in a frying pan on medium heat. The frying pan should have about 1 inch of oil. To check if the oil is ready, put small piece of the mix in oil. It should sizzle and come up slowly. If oil is very hot kababs will not cook through and will not be crispy.
    • Fry the kababs in small batches. Fry kababs until golden-brown all around, this should take about 6-7 minutes.
    • Serve them hot with sweet and sour tamarind chutney.
    Tried this recipe?Let us know how it was!

    Hara Bhara Kabab Recipe – A Delicious Veggie Treat 

    Hara Bhara Kabab is a delightful appetizer commonly enjoyed during Diwali celebrations. These gluten-free and vegan kababs are perfect for parties and gatherings, offering a flavorful snack option. Made with a mix of spinach, potatoes, peas, and spices, Hara Bhara Kabab is not only delicious but also caters to dietary preferences, making it an inclusive choice for various guests.

    Are you craving a delightful snack that’s not only tasty but also healthy? Look no further than hara bhara kabab! These delightful vegetable cutlets are packed with the goodness of spinach, peas, and potatoes, making them a wholesome treat for any occasion. In this hara bhara kabab recipe, I’ll walk you through the steps to create these crispy delights at home, ensuring you achieve the perfect texture and flavor every time.

    How to Make Hara Bhara Kabab – Step by Step Guide 

    • Preparing the Vegetables: Begin by blanching spinach leaves and peas until they are tender. Drain them well and set aside. Boil and mash the potatoes until they are smooth and lump-free.
    • Making the Kabab Mixture: In a mixing bowl, combine the blanched spinach, peas, and mashed potatoes. Add finely chopped green chilies, ginger, and coriander leaves for a burst of flavor. Season the mixture with salt, garam masala, and chaat masala to enhance the taste.
    • Binding the Ingredients: To bind the mixture together, add breadcrumbs or roasted chickpea flour (besan). This will help absorb excess moisture and give the kababs a nice texture. Mix everything thoroughly until well combined.
    • Shaping the Kababs: Take small portions of the mixture and shape them into round or oval patties. Press them gently between your palms to ensure they hold their shape. You can also coat the kababs with additional breadcrumbs for extra crispiness.
    • Frying the Kababs: Heat oil in a pan for shallow frying or deep frying, depending on your preference. Once the oil is hot, carefully place the kababs in the pan and fry them until they turn golden brown and crispy on both sides.

    Tips for Perfect Hara Bhara Kababs 

    • Use Fresh Ingredients: For the best flavor and texture, use fresh spinach, peas, and potatoes. Avoid using frozen vegetables as they may contain excess moisture, affecting the consistency of the kababs.
    • Adjust Spices to Taste: Feel free to adjust the amount of green chilies, ginger, and spices according to your taste preferences. You can make the kababs milder or spicier to suit your palate.
    • Add Nutritional Boost: Sneak in additional veggies like grated carrots or finely chopped bell peppers for added nutrition and flavor. These kababs are a great way to get picky eaters to consume their vegetables.
    • Make Ahead and Freeze: You can prepare the kabab mixture in advance and freeze it for later use. Simply shape the mixture into patties, arrange them on a baking sheet, and freeze until firm. Once frozen, transfer the patties to a freezer bag or container and store them for up to a month. When ready to enjoy, thaw the kababs in the refrigerator and fry as directed.

    Variations of Hara Bhara Kabab 

    • Paneer Hara Bhara Kabab: Add crumbled paneer (Indian cottage cheese) to the kabab mixture for a creamy and rich texture. Paneer adds protein and enhances the taste of the kababs.
    • Corn and Spinach Kabab: Replace peas with sweet corn kernels for a slightly sweet flavor and crunchy texture. Corn and spinach complement each other beautifully, making these kababs a crowd-pleaser.
    • Quinoa and Vegetable Kabab: For a healthier twist, substitute a portion of the potatoes with cooked quinoa. Quinoa adds protein, fiber, and a nutty flavor to the kababs, making them a nutritious snack option.

    Benefits of Hara Bhara Kabab 

    • Rich in Nutrients: Hara bhara kababs are loaded with vitamins, minerals, and antioxidants from the spinach, peas, and other vegetables. They make for a nutritious snack or appetizer option.
    • Vegetarian Protein Source: These kababs are an excellent source of plant-based protein, especially when made with ingredients like peas, chickpea flour, and paneer. They are perfect for vegetarians and vegans looking to increase their protein intake.
    • Low in Calories: When shallow fried or baked, hara bhara kababs are relatively low in calories compared to traditional fried snacks. They offer a guilt-free indulgence without compromising on taste.

    FAQs About Hara Bhara Kabab 

    Can I Bake Hara Bhara Kababs Instead of Frying Them?

    • Yes, you can bake hara bhara kababs in a preheated oven at 375°F (190°C) for 20-25 minutes or until they are golden brown and crispy. Remember to brush or spray the kababs with oil before baking to help them brown evenly.

    Can I Make Hara Bhara Kababs Gluten-Free?

    • Absolutely! Simply replace breadcrumbs with crushed cornflakes or gluten-free oats to make the kababs gluten-free. You can also use chickpea flour (besan) instead of breadcrumbs for binding.

    Are Hara Bhara Kababs Suitable for Kids?

    • Yes, hara bhara kababs are kid-friendly and a great way to sneak in some vegetables into their diet. You can adjust the spiciness level to suit their taste preferences and serve them with their favorite dipping sauce or chutney.

    Can I Freeze Hara Bhara Kabab Mixture?

    • Yes, you can prepare the kabab mixture in advance and freeze it for later use. Simply shape the mixture into patties, arrange them on a baking sheet, and freeze until firm. Once frozen, transfer the patties to a freezer bag or container and store them for up to a month. Thaw them in the refrigerator before frying.
    • Other Recipes on Manjula’s Kitchen

    If you’re looking to explore more Indian recipes, appetizers, beverages, and desserts, be sure to check out the following links on Manjula’s Kitchen. Here are some links to recipes on Manjula’s Kitchen official website: Paneer Tikka Masala Recipe, Chana Chaat (Spicy Chickpea Salad) Recipe, Pav Bhaji (Spicy Vegetable Hash with Buns) Recipe, Raj Kachori (Crunchy Chaat) Recipe, Vegetable Biryani Recipe. These recipes should offer you a flavorful experience straight from Manjula’s Kitchen.

  • Seviyan (Vermicelli) Kheer Dessert

    Seviyan (Vermicelli) Kheer Dessert

    Seviyan (Vermicelli) Kheer

    Seviyan (Vermicelli) Kheer Dessert

    Seviyan or vermicelli kheer, is a traditional popular dessert. Seviyans are thin long strings that looks very much like spaghetti however process if different. Seviyan is a delicious and an easy recipe to make. Basic seviyan is made with milk, seviyan and sugar, and then flavored with cardamom. Garnish with sliced almonds and pistachios and you have a delicious dish!
    5 from 1 vote
    Prep Time 5 minutes
    Cook Time 39 minutes
    Course Dessert
    Cuisine Indian
    Servings 6 people

    Ingredients
      

    • 1/2 cup sevia roasted and broken (vermicelli) available Indian grocery stores
    • 7 cups milk
    • 1/2 cup sugar
    • 1/8 teaspoon cardamom powder (ilachi)
    • Pinch nutmeg (jaiphel)
    • About 10-12 saffron strings
    • 2 tablespoons sliced or crushed almonds
    • 1 tablespoons sliced or crushed pistachios for garnishing

    Instructions
     

    • Use a nonstick or heavy bottom frying pan to make a seviyan kheer. Add the seviyan and roast them for about two minutes on medium low heat.
    • Add the milk and increase the heat to medium high. After milk comes to boil reduce the heat to medium. Let the milk boil for about 30 minutes, until the milk is creamy and reduced to almost half. Stir often to ensure the milk does not burn in the bottom of the pan, and also keep scraping the sides of the frying pan.
    • Add the sugar, saffron, cardamom, nutmeg, and almonds. Let the seviyan kheer simmer over low heat for about 5 minutes.
    • Turn off the heat.
    • As seviyan kheer cools it will become thicker in texture.
    • Garnish with pistachios. Seviyan can be served chilled or warm.
    Tried this recipe?Let us know how it was!

  • Chakli (Crispy Rice Snack)

    Chakli (Crispy Rice Snack)

    Crispy Chakli

    Chakli (Crispy Rice Snack)

    Chakli a popular snack all throughout India. Chakli is a crispy and delicious snack that is prepared for holidays. It is perfect with a hot cup of Chai. In my opinion, chakli is a must-have munchie! Chakli is prepared many different ways using different pulses with rice.  I plan on making Chakli with rice flour and moong dal.
    No ratings yet
    Prep Time 20 minutes
    Cook Time 24 minutes
    Course snacks
    Cuisine Indian
    Servings 6 people

    Ingredients
      

    • 1 cup rice flour
    • 1/4 cup washed yellow moong dal
    • 1/4 cup all-purpose flour (maida, plain flour)
    • 2 tablespoons sesame seeds (til)
    • 1/2 teaspoon red chili powder
    • 1/4 teaspoon black papper
    • 1/2 teaspoon cumin seeds (jeere)
    • 1/8 teaspoon asafetida (hing)
    • 1/4 teaspoon turmeric (haldi)
    • 1 teaspoon salt
    • 1 teaspoon lemon juice
    • 2 tablespoons hot oil
    • Approx., 1/4 cup hot water use as needed
    • Oil to fry

    Also need chakli maker, available in Indian grocery stores

    Instructions
     

    • Mix all the dry ingredients in a bowl rice flour, all-purpose, sesame seeds, chili powder, black pepper, cumin seeds, asafetida, turmeric, and salt. Set aside.
    • Cook the moong dal with 2 cups of water over medium high heat till it is very soft, and mushy, if needed add more water.
    • Add hot dal to rice flour mix and mix with spoon, add lemon juice, and hot oil, and mix it well. First use the spoon to mix because mix will be quite hot.
    • Add hot water as needed to make soft and firm dough. Cover the dough and set aside for five minutes.
    • Knead the dough well. Divide the dough into 3 parts and roll them into long rolls. Put one of the roll into chakli maker, and close.  Press the chakli maker, making the chackli into spiral’s (roll them 3 to 4 times) over flat plate.
    • Heat the oil in a frying pan over medium heat, frying pan should have about one inch of oil. Oil should be moderately hot. Put few chaklies at a time just enough to cover the surface of the oil.
    • Fry them both sides until they are light brown, this should take 4 to 5 minutes.
    • Serve them after they cool off so chaklies are nice and crispy. Or store them in air tight container for later use.

    Notes

    Notes
    1. If dough is too soft add little more rice flour.
    2. If they are braking it is ok don’t worry still it will taste great, need some practice.
    Tried this recipe?Let us know how it was!

  • Rava Laddu (Sooji Ladoo)

    Rava Laddu (Sooji Ladoo)

    Rava Ladoo

    Rava Ladoo

    Rava ladoo is a traditional Maharashtrian sweet snack. This is a popular ladoo prepared almost in every household for all the festivals. Rava ladoo is a simple and easy recipe but still exotic. Rava ladoo is made with roasted rava (sooji), coconut, ghee, sugar and nuts.
    4 from 3 votes
    Prep Time 10 minutes
    Cook Time 20 minutes
    Total Time 30 minutes
    Course Dessert
    Cuisine Indian
    Servings 6 people

    Ingredients
      

    • 1 cup sooji coarse rava, samolina
    • 1/3 cup coconut powder
    • 1/4 cup clarified butter ghee
    • 3/4 cup fine sugar
    • 2 tbsp cashew crushed
    • 1 tbsp raisins
    • 1/4 tsp cardamom
    • 1/4 cup milk boiling hot

    Instructions
     

    • Heat one tablespoon of clarified butter in a small pan over medium low heat; roast the cashews for about 2 minutes until light golden brown. Add raisins and roast for another minute, raisins will be puffed. Turn off the heat and transfer them in a bowl. Set aside.
    • Heat the remaining clarified butter in a frying pan over low medium heat; add rava and roast until it changes the color lightly this should take 6-7 minutes. It is important to stir continuously making sure rava roast evenly.
    • Add coconut and roast stirring continually for about 2 more minutes. Add nuts, cardamom, and sugar stir until everything mix well. Turn off the heat.
    • Add about 2 tablespoons of hot milk, mix it well mix should be moist add more milk as needed.
    • Allow the mixture to cool slightly. Make about 14 ladoos little smaller then golf ball, pressing about 1-1/2 tablespoon mixture between your palms. Add little more milk if you are enable to hold the mixture.

    Notes

    Serve them after at least one hour. Ladoos can be stored in air tight container for about 10 days.
    You will also enjoy! Puran Poli Maharashtrian specialty, Cereal Chivda a quick snack.
    Tried this recipe?Let us know how it was!

  • Carrot Burfi (Gajar Ki Burfi)

    Carrot Burfi (Gajar Ki Burfi)

    Carrot Burfi (Gajar Ki Burfi)

    Carrot Burfi (Gajar Ki Burfi)

    Carrot Burfi or carrot fudge is a classic Indian dessert made with carrot and milk. This burfi is packed with all the goodness of carrots. Carrot burfi tastes absolutely divine. Everyone, young and old enjoys traditional homemade methai (sweet snack). Carrot burfi is perfect for all occasions. Gajar Burfi-Delicious fudge made from carrots and milk.
    4 from 1 vote
    Course Dessert
    Cuisine Indian

    Ingredients
      

    • 2 cups carrot shredded
    • 2 cups milk
    • 1/3 cup heavy cream
    • 1/2 cup sugar
    • 2 tablespoons clarified butter or ghee
    • 1/4 teaspoon cardamom powder
    • 2 tablespoons chopped cashews to garnish

    Instructions
     

    • In a large heavy frying pan bring the milk, cream and carrots to boil over medium high heat.  Do stir occasionally, making sure milk does not burn in bottom of the pan. After milk comes to boil reduce the heat to medium.
    • Let carrot cook for about 25 minutes, until carrot mix become like a lumpy dough. Keep stirring occasionally at the same time keep scraping the sides. Last ten minutes stir continuously otherwise mix will burn from the bottom.
    • Add sugar, after adding sugar mix will become very soft. Cook for about 10 minutes stirring continuously. Mix should be consistency of soft dough, add butter, cardamom and keep stirring for about another 4 minutes. Mix will be very lumpy.
    • Transfer mixture to the greased plate and press firmly into a square shape, approximately 1/2 inch high.
    • Let the burfi sit for at least two hour before slicing I prefer cutting in about 1-1/2 inch squares.
    • For garnishing put one cashew in center of every piece.
    Tried this recipe?Let us know how it was!