Quick & Easy Vegetarian Meals Recipes
Seeking vegetarian meals that are both delicious and easy to prepare is a common desire for many. With the wealth of resources available today, platforms like Manjula’s Kitchen make it incredibly convenient to discover a variety of vegetarian recipes that cater to different tastes and dietary needs. Manjula’s Kitchen: A Hub for Vegetarian Meals Delights Manjula’s Kitchen is a treasure trove for anyone looking to explore vegetarian cuisine. The platform offers an extensive collection of recipes that are perfect for all occasions. Here’s a detailed look at what you can find on each platform associated with Manjula’s Kitchen: YouTube Channel
Manjula’s Kitchen on YouTube has a massive following with over 1 million subscribers and more than 500 videos. These videos range from traditional Indian dishes to modern vegetarian meals.
The channel has garnered millions of views, with some popular videos like the Tawa naan reaching over 1 million views. The step-by-step video tutorials make it easy for beginners to follow along and create authentic Indian dishes at home. Facebook Page
The Facebook page for Manjula’s Kitchen is another popular platform where you can find a plethora of indian vegetarian recipes. With over 200,000 followers, the page is regularly updated with new recipes, cooking tips, and engaging content. It also serves as a community hub where followers can share their cooking experiences and ask for advice. Website
The official website of Manjula’s Kitchen is a comprehensive resource with hundreds of vegetarian recipes categorized under various sections like breakfast, lunch, dinner, snacks, and desserts.
Each recipe is detailed with ingredients, cooking instructions, and nutritional information. The website also features a blog where Manjula shares her cooking journey, tips, and tricks. Pinterest
Manjula’s Kitchen on Pinterest is a visual delight for those who love to browse through food photos. The page has over 50,000 followers and features pins of beautiful food photography, linking back to the detailed recipes on the website. It’s a great place to find inspiration for vegetarian meals and plan your meals visually. TikTok
Although relatively new, the TikTok presence of Manjula’s Kitchen is growing rapidly. With short, engaging videos that showcase quick recipes and cooking hacks, it’s perfect for those who prefer bite-sized content. The TikTok account has already amassed thousands of followers and millions of views. Popular Vegetarian Meals from Manjula’s Kitchen
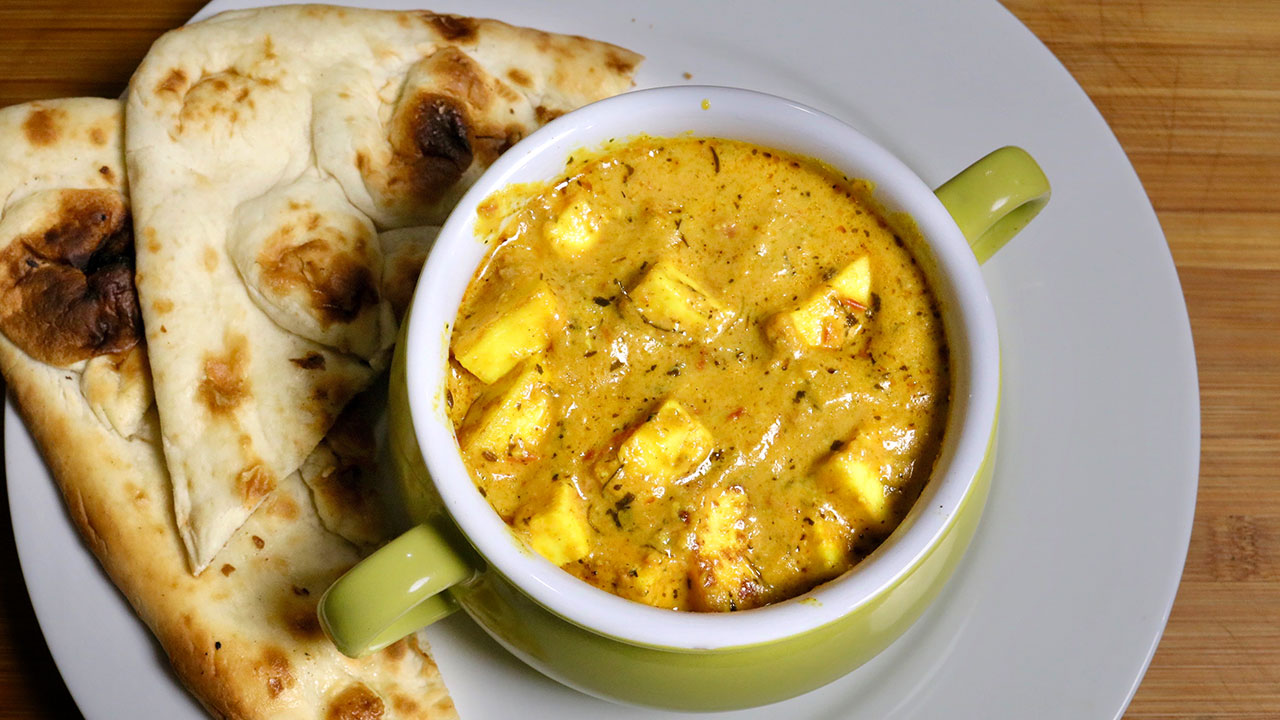
Paneer Butter Masala: A rich and creamy dish made with paneer (Indian cottage cheese) and a blend of spices. It’s a favorite among vegetarians and pairs well with naan or rice. A great delicacy coming from paneer recipes. Chole Bhature: This classic dish comes from North Indian recipes consisting of spicy chickpeas (chole) served with deep-fried bread (bhature). It’s a hearty and satisfying meal that’s perfect for brunch or dinner. 
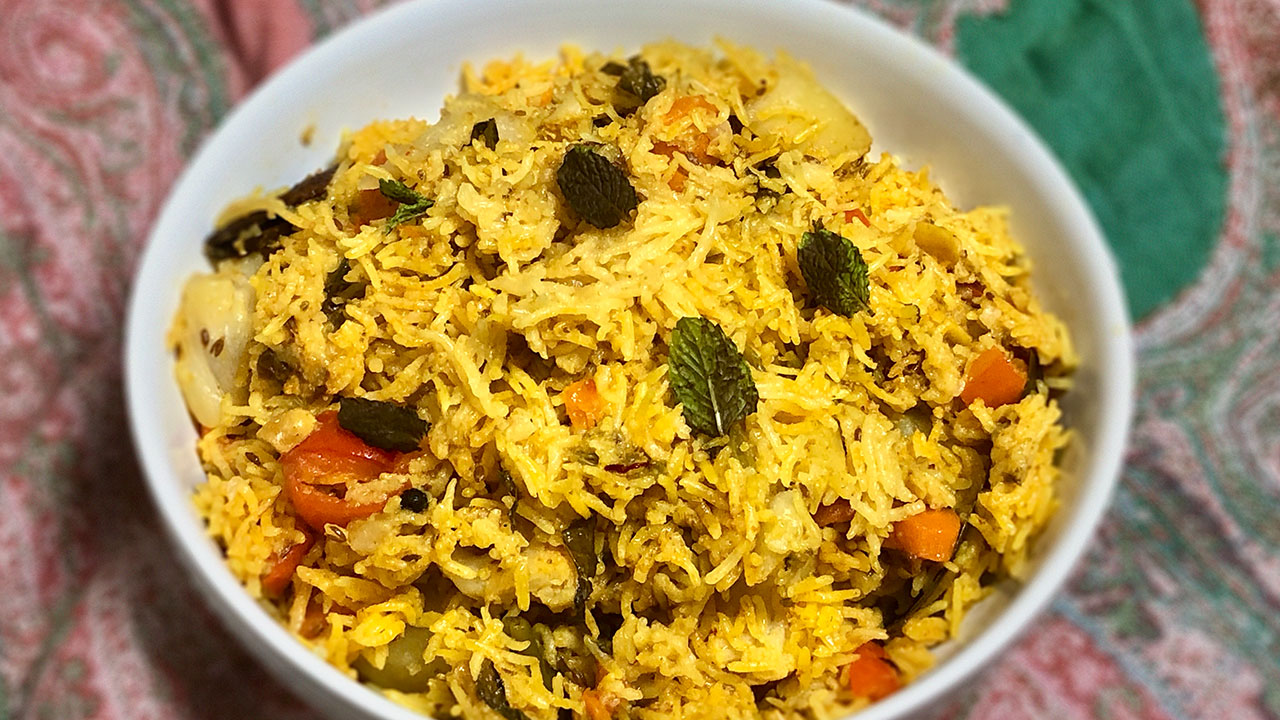
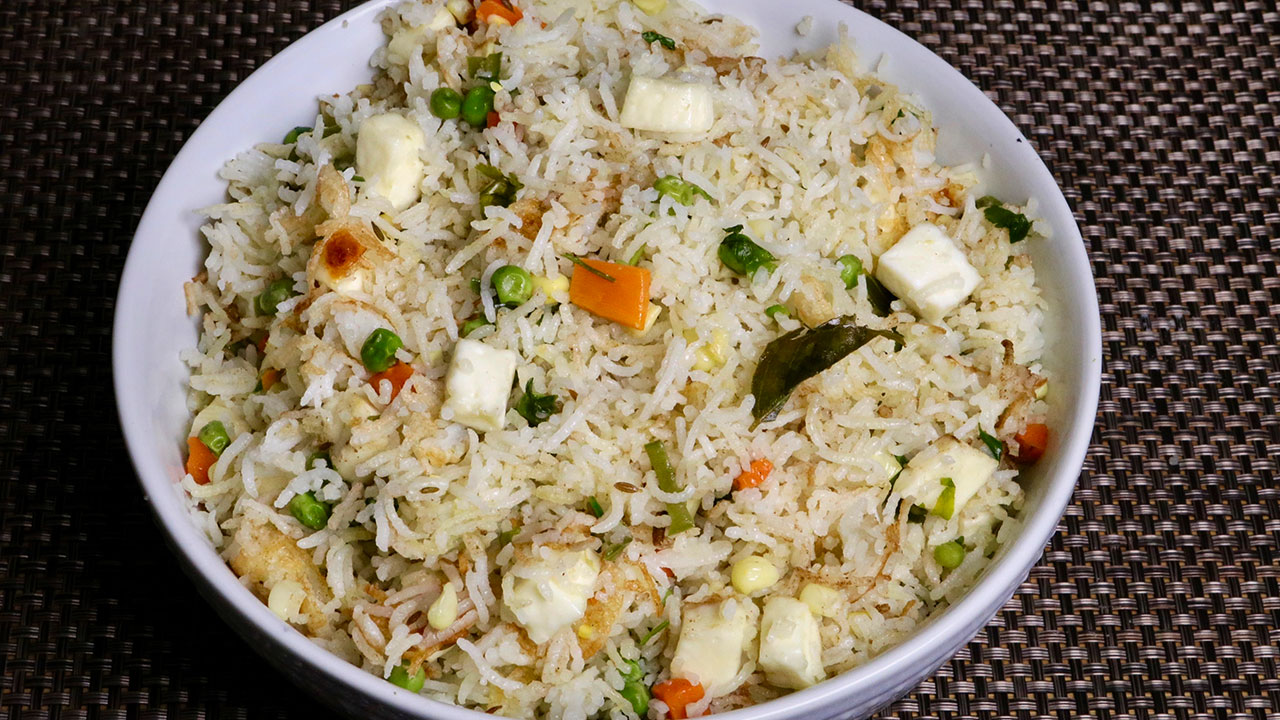
Vegetable Biryani: A fragrant rice dish cooked with a variety of vegetables and aromatic spices. It’s a complete meal in itself and can be enjoyed with raita (yogurt sauce). A special rice recipe that is great to taste and amazing to feast. 
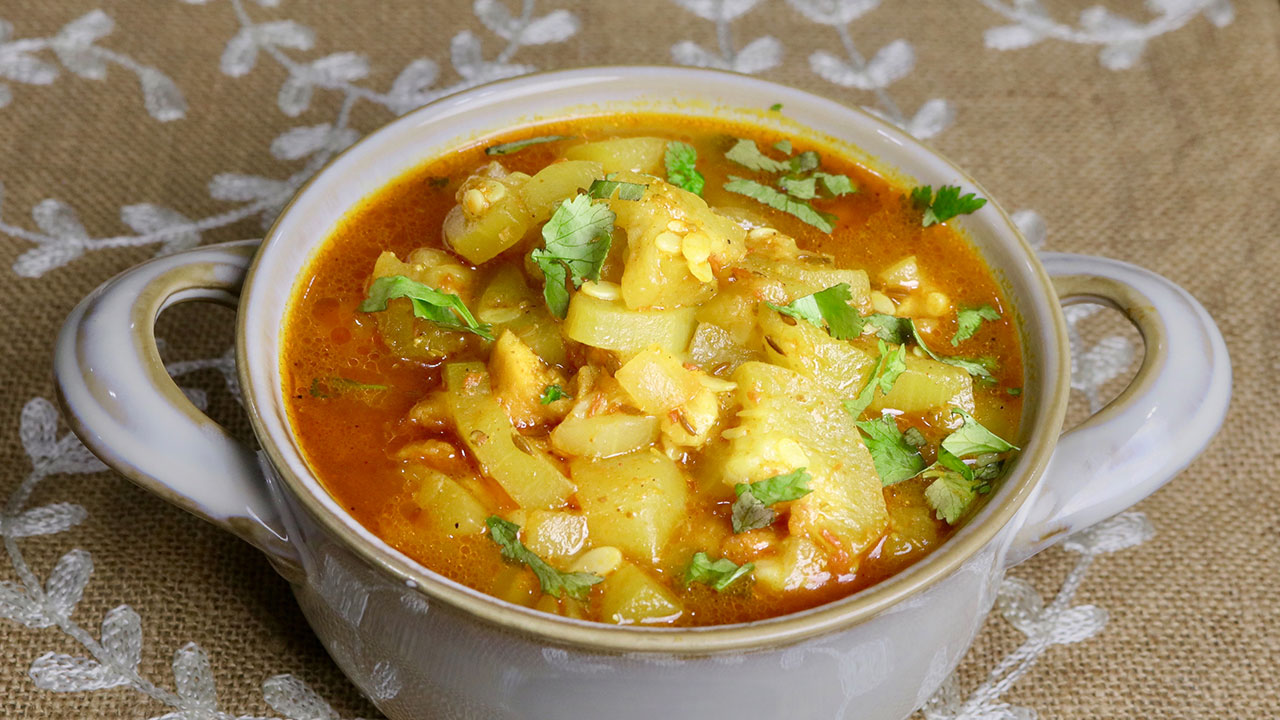
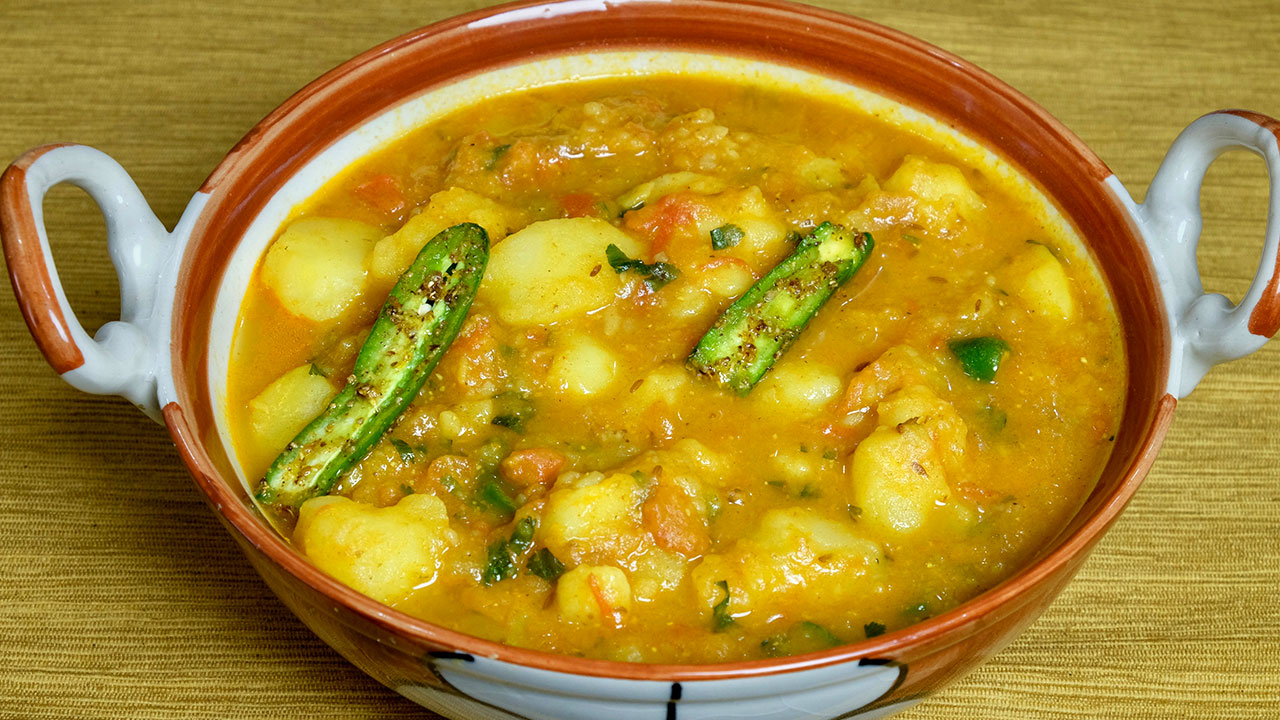
Aloo Gobi: A simple yet flavorful dish made with potatoes (aloo) and cauliflower (gobi). It’s a staple in many Indian households and can be served with roti or rice. 
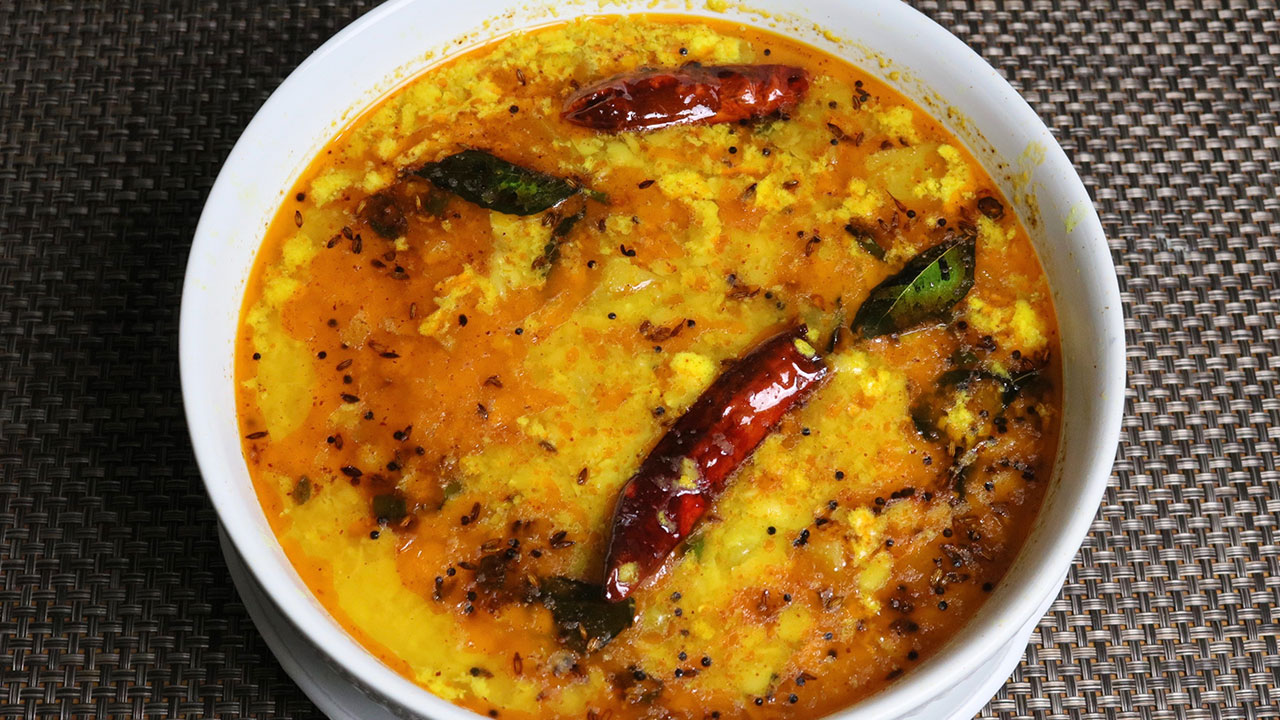
Dal Tadka: A comforting indian dal lentil dish tempered with spices. It’s a protein-rich meal that pairs well with steamed rice or roti.
Quick and Easy Vegetarian Meals
For those looking for quick easy vegetarian meals, Manjula’s Kitchen offers several options that can be prepared in under 30 minutes:
Vegetable Stir-Fry: A mix of colorful vegetables stir-fried with soy sauce and spices. It’s a healthy and quick meal that can be served over rice or noodles. 
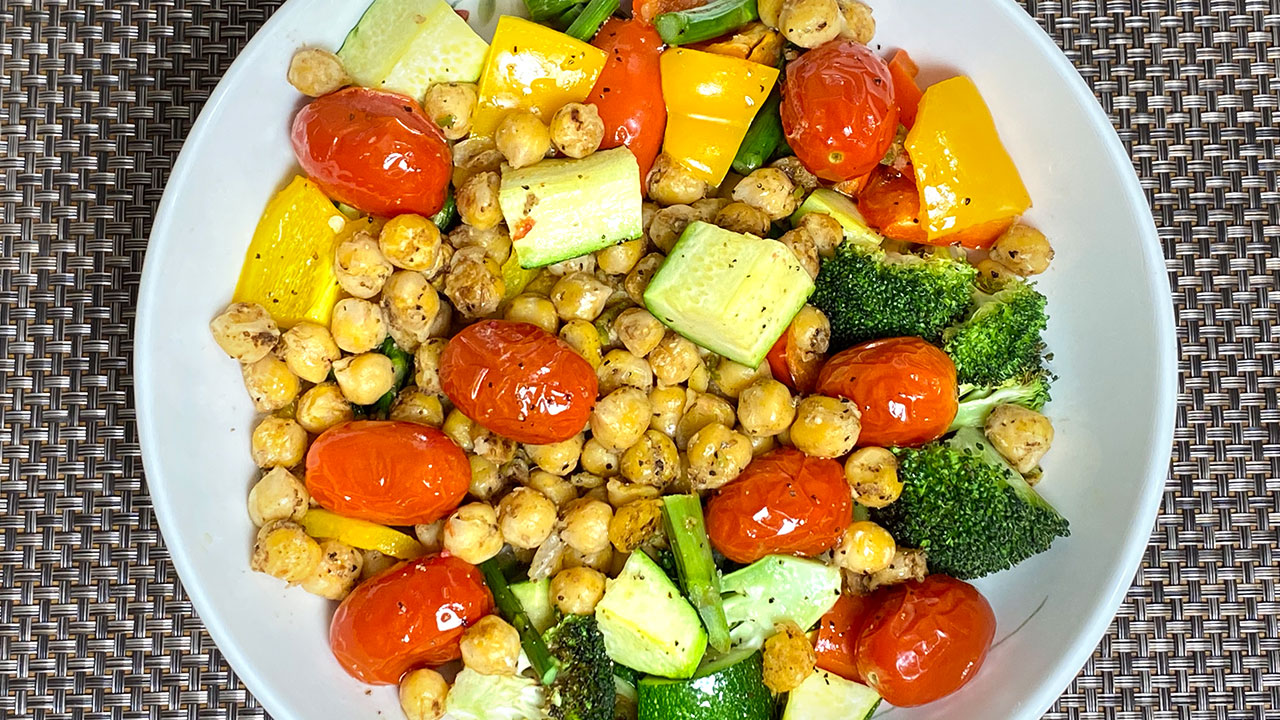
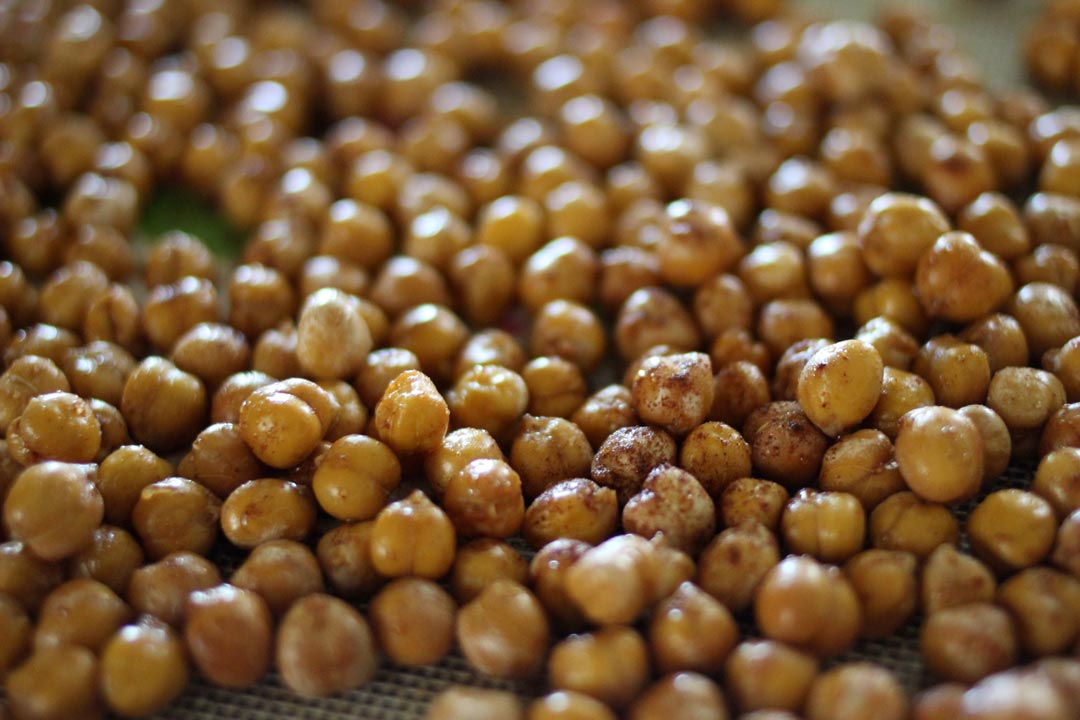
Chickpea Salad: A refreshing salad made with chickpeas, vegetables, and a tangy dressing. It’s perfect for a light lunch or a side dish. 
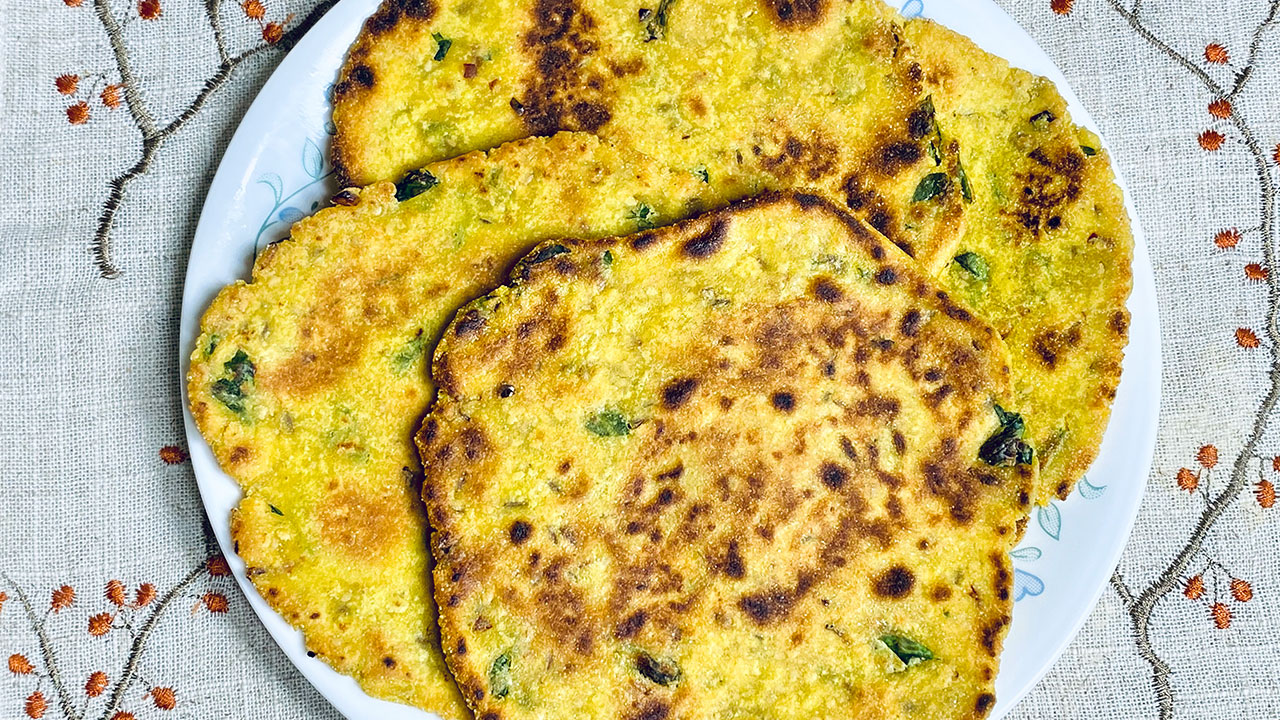
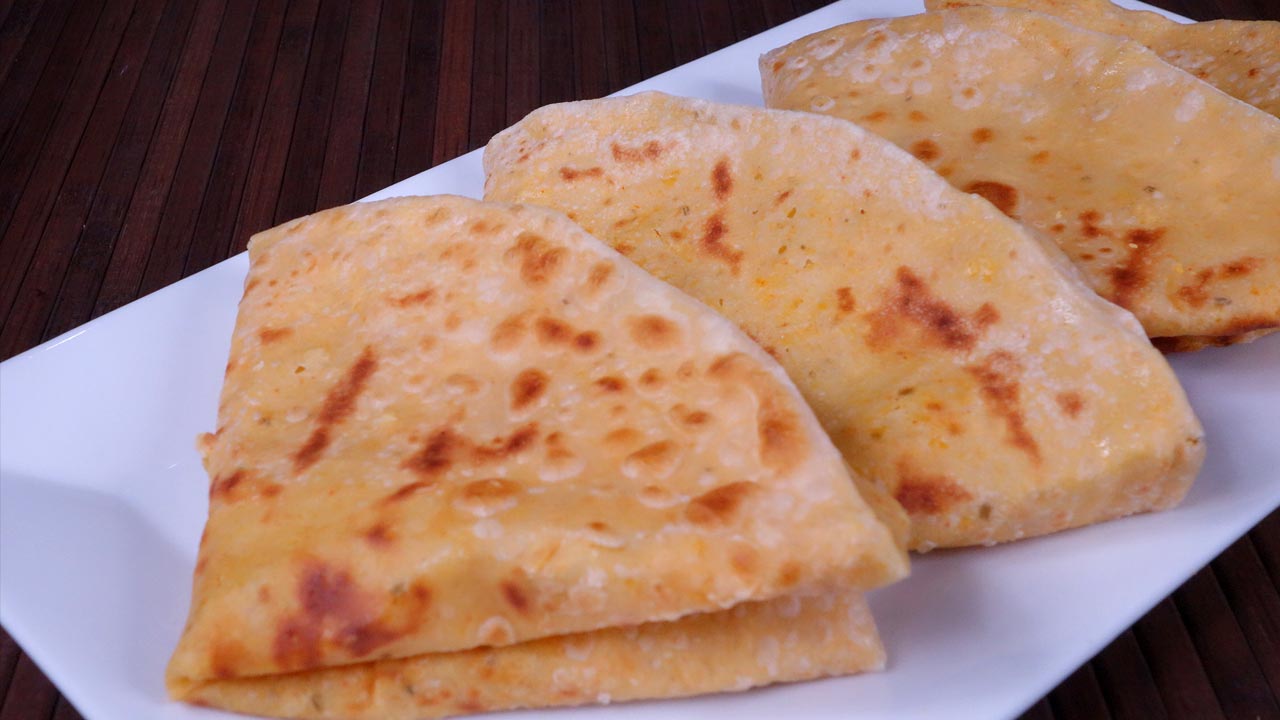
Spinach Paratha: Whole wheat flatbreads stuffed with spiced spinach. They are nutritious and can be served with yogurt or pickle. Mango Smoothie: A delicious and healthy smoothie made with fresh mangoes, yogurt, and a touch of honey. It’s a great breakfast option or a refreshing snack.
Engaging with the Community
Engaging with the community on platforms like YouTube, Facebook, and TikTok is a great way to discover new recipes and get cooking tips. The comments section often has valuable insights and variations of recipes shared by other users. Manjula herself is very responsive and often answers questions from her followers. Conclusion
Manjula’s Kitchen is an excellent resource for anyone looking to explore the world of vegetarian cooking. Whether you’re a seasoned cook or a beginner, you’ll find a wealth of recipes and cooking tips that will make your culinary journey enjoyable. So, dive into the delicious world of vegetarian meals with Manjula’s Kitchen and discover the joy of cooking wholesome, flavorful dishes.
Corn and mushroom in tomato and spicy cashew gravy makes a delicious main dish. Cashews add a creamy and rich texture to the dish. This is a quick and easy recipe. This goes well with any Indian flat bread or plain rice.
1cup corn kernel/ bhuta ka dana (I am using frozen corn kernels)
1/4 cup cashews (kaju)
2 cup tomato chopped
1tbsp ginger chopped
1tbsp green chili chopped
2 tbspoil
1/2tbsp cumin seed (jeera)
1/8tbsp asafetida (hing)
1/4tbspturmeric (haldi)
1/4 tbspred chili powder (lal mirch)
2 tbspcoriander powder (dhania)
1 tbspsalt
2tbspcilantro chopped (hara dhania)
Approx. 1-1/2cup water
Instructions
Blend the tomatoes, cashews, ginger and green chili to make creamy paste. Set aside.
Heat the oil in a saucepan over medium high heat. Test the heat by adding one cumin seed to the oil. If the cumin seed cracks right away, the oil is ready.
Next add coriander; red chili powder, turmeric and salt. Lower the heat to medium and cook the spice mix for about 4-5 minutes until mix start leaving the side of the pan.
Add corn and mushrooms, mix it well and add about 1-1/2 cups of water. Cook for about 10-12 minutes, stirring occasionally. Corn and mushrooms should be tender and gravy should be thick in consistency.
Mushroom Corn Curry is ready serve hot with Roti or plain rice.
Tomatoes filled with flavorful mixed vegetables simmered with spicy sauce makes a gourmet, delectable and mouthwatering dish. Serve this with roti, paratha or any flat bread. This flavorful dish is sure to be a crowd pleaser!
1/4 cup paneer cut into very small cubes (available in Indian grocery store)
1tbspginger finely chopped
2tbspoil
1/2tbspcumin seed (jeera)
1/8tbspasafetida (hing)
1tbspcoriander powder (dhania)
1/4tbspred chili powder
1/2tbspsalt
Gravy
1tbsp oil
1/4tbsp cumin seeds (jeera)
1-1/2tablespoon all purpose flour (plain flour, maida)
1 teaspoon coriander powder (dhania)
1teaspoon ginger finely chopped
1 teaspoon green chili finely chopped
1/4teaspoon salt
1-1/4 cup milk
2tablespoon chopped cilantro
Instructions
Slice tomatoes in half and scoop out pulp, pulp will be used for filling. Set aside.
For Filling: heat the oil in a saucepan over medium high, Test the heat by adding one cumin seed to the oil. If the cumin seed cracks right away, the oil is ready.
Add cumin seeds, asafetida as cumin seeds crack, add, ginger, coriander; turmeric, red chili, and salt stir for few seconds and add tomatoes.
Cook the tomatoes for about 2-3 minutes; add corn, green beans, green peas and paneer. Cook till vegetables are tender and the liquid from gravy has evaporated, this should take about 4-5 minutes. Vegetables should be very moist.
Stuff the tomatoes with filling, don’t over fill them. Set aside.
For Gravy: heat the oil in flat saucepan over medium heat, pan should be large enough to hold all the tomatoes in single layer, can not overlap the tomatoes.
Add cumin seeds as seeds crack add all purpose flour and stir fry for about one minute.
Add the milk slowly and keep stirring making sure there are no lumps. Add coriander, green chili, ginger, half the cilantro and salt, stir for few seconds.
After gravy comes to boil stir and put the filled tomatoes slowly in single layer. Cover the pan and lower the heat low medium. Let it cook for about 4 minutes, check the tomatoes, gently stirring gravy. If needed let it cook as needed, tomatoes should not be very soft as they will loose the shape.
Crispy okra (bhindi) served with a flavorful tomato curry is a mouthwatering side dish. You will be sure to impress your guests with this unique vegetable dish!
Mix cornstarch with three tablespoons of water and keep aside.
Blend the tomatoes and ginger to make tomato puree.
Heat the oil in a saucepan over medium high. Test the heat by adding one cumin seed to the oil. If the cumin seed cracks right away, the oil is ready.
Add cumin seeds, and asafetida and stir for a few seconds now add coriander; turmeric, red chili, salt, and sugar stir fry for a few seconds and add tomato puree.
Cook the tomatoes for about 4-5 minutes, add cornstarch, and cook for about 3 minutes. Gravy should be pourable consistency. Gravy is ready to keep aside.
Fried Okra
In a bowl put the okra and add all the dry ingredients, salt, cumin, mango powder, fennel, coriander, red chili powder and besan (gram flour) mix it well. Add the water slowly okra should be nicely coated with spices but the mix should not be runny.
Heat the oil in a frying pan over medium-high heat, the frying pan should have about 1 inch of oil. Oil should be moderately hot when you put okra in oil it should float right away but not change color.
Put one okra at a time into the oil and fry till they are golden brown on both sides this should take about four minutes.
Take them out over a paper towel.
Serve the Okra over gravy; don’t mix it as you should pick up the okra with gravy.
Notes
Suggestions
You can prepare the gravy and okra in advance; gravy can be refrigerated for 4-5 days. Fried okra should be stored at room temperature for 3-4 days. Before serving heat, the gravy and heat the gravy in a frying pan like stir fry so they become crunchy and serve over the gravy.
You can serve the fried okra without gravy as a side dish they taste great
Mango pickle is a spicy and tangy gluten free condiment. Almost every Indian household has their own favorite recipes for Mango Pickle. It is a popular condiment adds the extra "oomph" to every meal.
1 large green mango raw pickling mango/about 2-1/2 cup cubed mango (they are available at Indian and Asian grocery store)
1 tablespoons salt
1teaspoon red chili powder, adjust to taste (lal mirch)
1/4teaspoons turmeric (haldi)
1tablespoons coriander seeds crushed(dhania)
1tablespoon fennel seeds crushed(Saunf)
1 teaspoon fenugreek seeds (sabut mathi)
1 teaspoon nigella seeds/kalonji
2tablespoons mustard oil or olive oil
Instructions
Wash and dry the mango, cut in small cubes with skin.
In a glass bowl put the mango with salt and mix it well.
Set aside for about 3-4 hour. Mix and by this time there will be some salt water. Squeeze the mango, and save the water, as we will use later.
Spread the mango slices over dry surface and let it dry out preferably in sun light for 4-5 hours. Mango slices should be little dry but still moist. Note: Mangoes will reduce in volume.
Add all the spices to salt water and keep it aside.
Mix spices, water and oil to mango slices.
Keep the Mango pickle in glass jar with lid on. Pickle should be ready in 4-7 days. Mango slices are nicely marinated with spices.
Parathas always have been a family-favorite treat. Lately I have been trying to make gluten-free breads. A combination of bajra and besan with methi parathas taste delicious. These spicy Methi Bajra Parathas have a biscuit texture, which makes it very enjoyable. They also pair well with gravy-based dishes like Mixed Dal, Aloo Tamatar or you can serve with plain yogurt. You can enjoy these as a proper meal, or even as a great on-the-go lunch! I also enjoy these parathas with just hot cup of chai.This recipe will serve 2, and make 4 Parathas.
Mix all the ingredients for paratha together, millet flour, besan. Cumin, salt, chili flakes, turmeric, asafetida, sesame seeds, oil, and fenugreek leaves. Notes: if you don’t have fresh fenugreek leaves use dry methi known as Kasuri Methi.
Make the dough using hot water, you will need about 1/2 cup of water. Dough should be firm and pliable. Notes: dough should be prepare just before making paratha.
Dived the dough into 4 equal parts, oil your palm and roll them between your palms, to make them round petites.
Heat the skillet on medium high heat. To test, sprinkle a couple of drops of water on the skillet. The water should sizzle right away.
Roll the paratha in about 6” circle, roll them between two pieces of plastic that makes the rolling easy, I am using zip log bag.
Place the methi bajra paratha over the skillet. When start to change color, flip it over. You will notice some golden-brown spots.
After a few seconds, spread one teaspoon of oil on the aratha. Flip it again and lightly press the with a spatula. Flip again and press with the spatula making sure the paratha is golden-brown on both sides.
"Grilled Veggie Healthy Bowl" is inspired by my daughter-in-law, who enjoys light, fresh, and healthy meals. She suggested I do this video after trying my recipe out. It's hard to believe something this healthy makes such a delicious and filling meal! In this recipe, I grilled asparagus, broccoli, bell pepper, zucchini, and cherry tomatoes. I then toss the grilled veggies with spiced chickpeas and a homemade ginger dressing. The ginger dressing definitely adds a kick to the flavor. This bowl is also pleasing to the eyes as it's filled with colorful vegetables and the chickpeas add some texture, in addition to protein! This dish vegan and gluten-free. This makes for a great lunch. Or you can serve this as a side dish or make a wrap using tortillas or flatbread. Recipe will serve 2 people.
½yellow bell pepper quarteredseeds and ribs removed
6florets of broccoli
10asparagus trimmed
Use the vegetables to your choice
Dressing
1TbspvinegarI am using rice vinegar
1Tbsplemon juice
2Tbspolive oil
1tspsugar
½tspsalt
¼tspblack pepper
1Tbspginger juice
Instructions
Prepare the dressing mix all the ingredients together, vinegar, lemon juice, olive oil, sugar, salt, black pepper, and ginger juice set aside. You can prepare the dressing even a few days earlier. This is my go-to dressing and I make this extra, so it is always ready.
Grilling the Vegetables: preheat the air fryer at 350-degree F. Spread the vegetables evenly on a tray, spray lightly with oil. Air fry for about 6 minutes. If you don’t have air fryer grill the veggies in the oven or on the stove.
Prepare the chickpeas, while vegetables are roasting, rinse the chickpeas few times changing the water. In a frying pan heat, the oil moderately, add chickpeas, stir fry for about 3 minutes. Chickpeas will catch some color. Add roasted cumin seed, black pepper, green chilies, ginger, and lemon juice cook and stir fry for about 2 minutes stirring occasionally, set aside. Chickpeas also can be prepared in advance.
Toss the vegetables and chickpeas together and drizzle the dressing.
Notes
Do not overcook the vegetables, otherwise the vegetables will become too soft or mushy and will lose the colors.
Keyword Air Fryer Recipe, Diabetic, Gluten Free, Grilled Vegetables, Healthy, Healthy Bowl, Healthy Lunch, Home Made, Low Cholesterol, Lunch Box Meal, Masala Chola, Refreshing, Salad, Spicy Chickpea, Vegan
Palak Paneer is likely the most popular paneer dish from North India. Creamy spinach with tasty paneer makes a delicious main dish. This recipe was one of my favorite. After so many years of cooking, my family has decided my cooking skills have improved! I wanted to do this recipe again as with modified cooking method. Also I will like to thank you to all of my viewers who have encouraged me over the years. You guys truly inspire me!
10ozspinachwashed and clean, about 6 cups packed spinach
1-1/2cupspaneercubed into bite size, about 1/3 pound of paneer
1tomatofinely chopped, this will make 3/4 of chopped tomato
1green chilichopped
1Tbspgingerchopped
1Tbspoil
1/2tspcumin seedsjeera
1/8tspasafetidahing
1tspcoriander powderdhania
1/4tspturmerichaldi
1/2tspred chili powder
1/2tspsaltadjust to taste
1/2tspsugar
1Tbspwhole wheat flour
1/3cupheavy cream
Instructions
First blanch the spinach, this helps to keep the spinach color bright. To blanch the spinach, boil about 6 cups of water in a saucepan, and let the spinach boil for one minutes. Drain the water and put the spinach in ice cold water for about two minutes. Drain the water.
Blend the spinach, ginger and green chili. Spinach should be creamy but not pasty.
Soak the cubed paneer in about three cups of hot water, for about 5 minutes or more. This helps to give the paneer soft texture. Set aside.
While cooking, spinach can splatter, use larger sauce pan. Heat the oil in a sauce pan, over medium high heat. Test the heat by adding one cumin seed to the oil; if it cracks right away it is ready.
Add cumin seed, and asafetida. After cumin seeds crack, add the tomatoes and stir fry for 1-2 minutes. Tomatoes should be tender not mushy. Add coriander, turmeric, red chili powder, salt, and sugar, stir and add the spinach.
After spinach comes to boil lower the heat to low, and let the spinach cook for about 5-6 minutes do not cover the pot. This helps keeping the green color of spinach.
Mix the flour to 1/2 cup of water and add to the spinach, also add the cream. Mix it well and let it cook for five minutes. If needed add little more water.
Drain the paneer and fold it gently with spinach and let it simmer for about five minutes.
This next recipe is due to many of you requesting I do a tasty and delicious recipe using the Instant Pot. I decided to try a recipe for "Vegetable Biryani". I have been a little hesitant to do recipes using the Instant Pot. Maybe it's because I have been cooking for so long and I'm set in my habits, or maybe it's my age! I will say I have loved using my Instant Pot more as a pressure cooker and love using it for that purpose! I make lentils and legumes using the Instant Pot and think it's great. Once I use the Instant Pot more and get used to the timings, I think it will allow me to give more precise times for my recipes. Vegetable Biryani is a complete, satisfying, one-dish meal. My mother would often say this dish is a fancy name for vegetable pulao. However, I think it is more than that. The secret behind this flavorful Vegetable Biryani is a spice mixture that creates the perfect balance of flavors. Basmati rice with a mix of fresh vegetables combined with this spice mixture turns into a dish of perfection! If you follow my steps, you'll see I try to make this recipe as simple as possible. Vegetable Biryani also makes a great lunch box meal. Make sure to check out the footnotes to see how you can make this dish vegan. Hope you enjoy!This recipe will serve 3
2cupmixed vegetablescubed potatoes, carrots, bell pepper, green beans cut into 1-inch pieces, cauliflower florets
¼cupPlain Yogurtwhisked
¼cupMint leavesPudhina finely chopped
1 ¼cupWater
Spices
3whole Green CardamomElaichi
6ClovesLaung
8Black Peppercorns
1inchlong cinnamon stickDalchini
2Bay leafTej Patta
1tspCumin seedsJeera
1tspcoriander powder
1tspfennel seed powder
1tspred chili powderadjust to taste
¼tspTurmericHaldi
1tspSaltadjust to taste
Instructions
In warm milk soak the saffron and keep aside.
Soak the rice for about 10 minutes, then drain the water and keep aside.
Use the instant pot on sauté mode add ghee after half a minute add cashews and raisins and sauté lightly roast them for about 1 minutes.
Add all the whole spices and sauté for 30 seconds, they will become aromatic.
Add all the dry spices, coriander powder, fennel seed powder, turmeric, red chili powder and salt stir for few seconds, add vegetables and yogurt mix it well, cleaning sides and making sure vegetable mix spread evenly in the pot.
Next spread the rice evenly over the veggies. Spread the mint leaves evenly over rice. Sprinkle saffron milk on top of the rice.
Add the water for cooking on top of the rice. Rice should be just immersed under water.
You are layering the ingredients do not stir in between the steps. Close the lid with vent in sealing position.
Change the instant pot setting to pressure cook mode. Secure the lid, close the pressure valve and cook for 9 minutes at high pressure.
After the instant pot beeps, on the instant pot panel you will notice keep warm mode. Cancel the keep warm mode and wait until it releases the pressure and open the pot, that will take about 12 minutes.
Open the pot and fluff the rice gently with a fork.
Notes
Serve hot with Plain yogurt, Spinach Raita, and my favorite is Salted Mint LassiMaking Vegan:This is a easy recipe to make vegan, soak saffron in water instead of milk and yogurt you can replace with vegan yogurt or tomato puree.
Vegetable Kathi Rolls are a popular Mumbai street food. Vegetable Kathi rolls are the perfect meal for any time. These are also a great vegan treat. This recipe is super easy to put together and it makes for the perfect lunchbox or tiffin meal. Also, this is my version of Spring Roll.
½cupred bell pepper thinly sliced and remove the seeds
1cupcabbagethinly sliced
¼cupcarrotsshredded
½cupcucumberthinly sliced
2Tbspcilantro leavesfinely chopped
Peanut Sauce
¼cuppeanut butter
2Tbspsoy sauce
1Tbspginger juice
1Tbspsugar
2Tbsplime juice
1Tbspsesame oiloptional
3whole red chilies
Instructions
Sauce
Remove the seeds from red chili and soak in 2 tablespoons of hot water for few minutes. Blend all the ingredients together except peanut butter, soy sauce, ginger juice, sugar, lime juice, and sesame oil. After spices are blended to paste add peanut butter and blend enough to mix t well. Note: don’t over blend peanut butter will leave the oil.
Check if the salt is needed, soy sauce is quite salty.
Kathi Roll
Heat the skillet over medium high, lightly oil the skillet, place the tortilla over skillet for about half a minute, it will change in the color lightly and puff different places. Flip the tortilla over, and lightly brush the oil, flip it again and lightly brush the tortilla. tortilla should have light golden color on both sides.
Remove the tortilla from the skillet, make both tortilla same way. And set it aside. You can cook the tortillas in advance.
Assembling the Frankie
Take one tortilla and put it over a flat surface. Spread about 2 tablespoons of peanut sauce over tortilla, leaving 1/2 inch around. Center of the tortilla spread the vegetables moderately, spinach, carrot, bell pepper, cucumber, cabbage, and cilantro. Roll them tightly like burrito.
Use extra peanut sauce as a dip.
Notes
SuggestionsInstead of tortilla you may use left over Roti, Paratha. Serve Peanut Sauce as a dipping sauce with vegetable salad, French fries or with variety of bread.You may also enjoy Idli Manchurian, Veggie Hash Browns
Keyword Appetizer, Healthy, Homemade, Jain Food, Lunch Box, No Garlic, No Onion, Picnic Food, Sattvik Food, Snack, Spring Roll, Street Food, Vegan, Vegetable Roll, Vegetarian
Welcome to our comprehensive recipe for vegetable kathi roll. Whether you’re a seasoned cook or a beginner in the kitchen, this recipe promises to deliver a delicious and satisfying appetizer. Kathi Rolls, a popular street food in India, are versatile and customizable, making them perfect for any occasion.
Paired with our homemade peanut sauce, they are sure to impress your family and friends. In this guide, we’ll walk you through each step of the process, providing clear instructions, helpful tips, and suggestions for variations. Let’s get started!
Step-by-Step Instructions: Preparing the Sauce
To start, let’s prepare the flavorful peanut sauce that will elevate your Kathi Rolls to the next level.
Begin by removing the seeds from the red chili and soaking them in two tablespoons of hot water for a few minutes. This step helps to soften the chili and enhance its flavor.
Once the chili is soaked, blend all the ingredients together in a blender, excluding the peanut butter, soy sauce, ginger juice, sugar, lime juice, and sesame oil. This will create a fragrant and spicy paste.
After blending the spices into a paste, add the peanut butter to the mixture. Be careful not to overblend, as this can cause the peanut butter to release its oil.
Taste the sauce and adjust the salt if necessary. Remember that soy sauce is quite salty, so proceed with caution.
Cooking the Kathi Rolls
Now that the sauce is ready, let’s move on to assembling the Kathi Rolls.
Heat a skillet over medium-high heat and lightly oil the surface. This will prevent the tortillas from sticking.
Once the skillet is hot, place a tortilla on it for about half a minute. You’ll notice the tortilla changing color slightly and puffing up in different places.
Flip the tortilla over and lightly brush it with oil. Repeat this process, flipping the tortilla again and brushing it with oil until it achieves a light golden color on both sides.
Remove the tortilla from the skillet and repeat the process with the remaining tortillas. You can cook the tortillas in advance and set them aside for later use.
Assembling the Kathi Rolls
Now it’s time to assemble the Kathi Rolls with our delicious peanut sauce.
Take one tortilla and lay it flat on a clean surface. Spread approximately two tablespoons of peanut sauce evenly over the tortilla, leaving about half an inch of space around the edges.
In the center of the tortilla, layer the vegetables generously. You can use a combination of spinach, carrots, bell peppers, cucumbers, cabbage, and cilantro for a colorful and nutritious filling.
Once the vegetables are in place, carefully roll the tortilla tightly like a burrito, ensuring that the filling is secure inside.
Repeat this process with the remaining tortillas until all the Kathi Rolls are assembled and ready to serve.
Serving Suggestions
Here are some suggestions for serving your Kathi Rolls with Peanut Sauce:
Serve the rolls with extra peanut sauce on the side for dipping.
Instead of tortillas, you can use leftover Roti or Paratha for a more traditional twist.
Pair the rolls with a side of vegetable salad, French fries, or a variety of bread for a complete meal.
Notes and Tips
Be mindful not to overblend the peanut butter when preparing the sauce, as it can release its oil and affect the texture.
Adjust the salt level in the sauce according to your preference, keeping in mind the saltiness of the soy sauce.
You can customize the filling of the Kathi Rolls according to your taste preferences. Try addingpaneer, or tofu for added protein.
If you’re preparing the rolls in advance, store them in an airtight container in the refrigerator and reheat them in the oven or microwave before serving for best results.
Frequently Asked Questions (FAQ)
Q: Can I make the peanut sauce ahead of time?
A: Yes, you can prepare the peanut sauce in advance and store it in the refrigerator for up to a week. Just make sure to stir it well before using.
Q: Can I make the Kathi Rolls with gluten-free tortillas?
A: Absolutely! You can use gluten-free tortillas or even lettuce wraps as a substitute for traditional tortillas.
Q: Can I freeze the assembled Kathi Rolls?
A: While it’s possible to freeze the assembled rolls, the texture of the vegetables may change upon thawing. It’s best to assemble the rolls just before serving for the freshest taste.
Benefits of Kathi Rolls with Peanut Sauce
Kathi Rolls are a convenient and portable meal option, perfect for on-the-go lunches or picnics.
The peanut sauce adds a rich and creamy texture to the rolls while providing a good source of protein and healthy fats.
With a variety of vegetables in the filling, Kathi Rolls are a nutritious option that can help you meet your daily intake of vitamins and minerals.
By making your own Kathi Rolls at home, you can control the ingredients and customize them to suit your dietary preferences and restrictions.
Laucki is also known as Bottle gourd. This is a healthy and wholesome lentil and vegetable main dish. I like making Lauki as it is mild in taste and easy to digest. I usually will serve this with plain rice or rotis.
I am using instant pot; I am using the instant pot instead of pressure-cooker. Not for saving time but ease of use.
Heat one tablespoon of oil in instant pot on sautéed mode. Oil should be moderately hot, add moong dal vadi stir-fry till they are light golden brown this should take about 1minute. take out the vadies from instant pot.
Add remaining 1 tablespoon of oil, in instant pot keeping on sautéed mode oil should be moderately hot and add cumin seeds. When seeds start to crack, add the asafetida, stir and add tomato puree, ginger, coriander powder, turmeric, salt and chili powder and cook stirring occasional till spice mix start leaving the oil.
Add bottle gourd, vadies and 1/2 cup of water. Change the setting to pressure cook on high mode. Set the time for 6 minutes. (At this time instant pot is working just like pressure cooker, it will take same time building the pressure and after cooking releasing the pressure as pressure cooker, advantage is you can take care other work you have to do or even if you have to go out.)
Open the instant pot when you are ready. After you open the instant pot adjust the water if you need more, add garam masala.
Video
Notes
I like to serve this with roti or rice. This makes a very satisfying meal.Enjoy! Thank you
Lauki Vadi Ki Sabji is a traditional Indian dish made primarily with bottle gourd (Lauki), lentil nuggets (Vadi), and a variety of spices cooked in a curry or gravy. It is a popular dish among individuals following a vegan, gluten-free, and low-fat diet, making it suitable for those with dietary restrictions such as diabetes.
The dish typically involves cooking lentil nuggets with bottle gourd and various vegetables in a flavorful curry or gravy made with spices such as cumin, coriander, turmeric, and ginger. It can be easily prepared in an Instant Pot for a quicker cooking process while retaining its nutritional value and flavors.
Lauki Vadi Ki Sabji provides a wholesome meal option packed with protein from lentils, fibre from vegetables, and essential nutrients, making it a nutritious and satisfying choice for individuals seeking a balanced diet.
Lauki Vadi Ki Sabji is a traditional Indian dish made with bottle gourd (lauki) and sun-dried lentil dumplings (vadi). This Lauki Vadi Ki Sabji recipe combines the subtle flavors of lauki with the richness of vadi to create a hearty and nutritious dish that’s bursting with flavor. With its simple yet satisfying taste, Lauki Vadi Ki Sabji is a popular choice for everyday meals in Indian households.
Step 1: Preparing the Vadi
To begin, soak the sun-dried lentil dumplings (vadi) in water for about 15-20 minutes until they become soft and pliable. Once softened, squeeze out any excess water from the vadi and set them aside. This step helps ensure that the vadi cook evenly and absorb the flavors of the dish.
Step 2: Preparing the Lauki
Peel the bottle gourd (lauki) and cut it into small cubes or slices, depending on your preference. Lauki tends to cook quickly, so it’s essential to cut it into uniform pieces to ensure even cooking. Rinse the chopped lauki under cold water to remove any dirt or impurities before using it in the recipe.
Step 3: Tempering and Cooking
In a pan, heat oil or ghee over medium heat and add cumin seeds, mustard seeds, and asafoetida (hing) to the hot oil. Allow the seeds to crackle and release their aroma before adding finely chopped green chilies adding minced ginger for added flavor.
Step 4: Adding Spices and Lauki
Once the spices such as turmeric powder, coriander powder, red chili powder, and garam masala to the pan, stirring well to coat with the aromatic spices. Add the chopped lauki to the pan, stirring to combine with the spices. Cover the pan and let the lauki cook until it becomes tender but still retains its shape.
Step 5: Incorporating the Vadi
Once the lauki is cooked, add the soaked and squeezed vadi to the pan, gently mixing them with the cooked lauki and spices. Allow the vadi to simmer in the gravy for a few minutes, allowing them to absorb the flavors of the dish. Adjust the consistency of the gravy by adding water as needed to achieve the desired thickness.
Step 6: Garnishing and Serving
Before serving, garnish the Lauki Vadi Ki Sabji with freshly chopped cilantro leaves for a burst of freshness and color. Serve the sabji hot with steamed rice or roti for a wholesome and satisfying meal that’s sure to please your taste buds.
Tips for Perfect Lauki Vadi Ki Sabji
Soaking Vadi: Ensure to soak the vadi in water until they become soft and pliable before adding them to the sabji. This step helps prevent the vadi from being too hard or chewy after cooking.
Cutting Lauki: Cut the bottle gourd into uniform pieces to ensure even cooking. Avoid overcooking the lauki as it can become mushy and lose its texture.
Adjusting Spice Level: Customize the spice level of the sabji according to your taste preferences by adjusting the amount of red chili powder and green chilies used in the recipe.
Variations of Lauki Vadi Ki Sabji
Adding Tomatoes: Enhance the flavor of the sabji by adding chopped tomatoes along with the Tomatoes add a tangy twist to the dish and complement the earthy flavors of the lauki and vadi.
Coconut Gravy: For a richer and creamier gravy, add coconut milk or grated coconut to the sabji. Coconut adds a hint of sweetness and depth to the dish, making it more indulgent.
Benefits of Lauki Vadi Ki Sabji
Nutrient-Rich: Lauki is low in calories and rich in essential nutrients such as vitamins, minerals, and dietary fiber, making it a healthy addition to your diet.
Protein-Packed: Vadi provides a good source of plant-based protein, essential for muscle repair and growth, making Lauki Vadi Ki Sabji a nutritious meal option for vegetarians.
Digestive Aid: Lauki is known for its digestive properties and is often included in Indian cuisine to aid in digestion and promote gut health.
Frequently Asked Questions (FAQs)
Can I use store-bought vadi for this recipe?
Yes, you can use store-bought sun-dried lentil dumplings (vadi) for convenience. However, homemade vadi may have a fresher flavor and texture.
Can I make Lauki Vadi Ki Sabji ahead of time?
Yes, you can prepare the sabji in advance and store it in the refrigerator for up to 2-3 days. Reheat it gently before serving.
Is Lauki Vadi Ki Sabji vegan-friendly?
Yes, Lauki Vadi Ki Sabji can be made vegan by using oil instead of ghee for tempering and omitting any dairy-based garnishes.
Explore more delightful Indian recipes on Manjula’s Kitchen, such as Aloo Baingan for another culinary adventure.
Aam Ki Dal – Toor Dal with Raw Mango – Instant Pot
Kacche Aam Ki Dal is a very simple dal recipe but delicious. This is Toor dal with raw mango. The tanginess of raw mangoes gives a delicious flavor to dal. Today I am using Instant Pot, that’s what I have been using instead pressure cooker.
Put dal with 2 cups water into instant pot and add salt, turmeric, and mango. Close the cover and cook on high heat for 8 minutes. Recently I have been using instant pot instead pressure-cooker. It takes the same time as pressure cooker advantage is you don’t have to watch over when it starts steaming and when it is time to turn off. You can take care other things.
After dal is done it should be soft. If needed add more water, dal should not be very thick. Dal will thicken as it sits. Make it more liquid than you want it to be.
seasoning
Heat ghee in a small saucepan. Test the heat by adding one cumin seed to the ghee; if it cracks immediately, the oil is ready. Turn off the heat, add the cumin seeds, and mustard seeds. When they begin to crack, add the asafetida, curry leaves, and green chilies. Stir for a few seconds. Add red chili powder and 1 tablespoon of water to prevent the spices from burning. Pour spice mix chaunk over hot dal, before serving.
Notes
Notes, I have been using instant pot instead of pressure-cooker. Many people think it is a time saver, no it takes the same time as pressure cooker, but it is hassle free you start and do other things you need to do, no watching over. it is also easy to clean.
Raw Mango Dal Fry Recipe: A Tangy Twist to Traditional Dal
Raw Mango Dal Fry, also known as Aam Ki Dal, is a delightful Indian dish that combines the tangy flavor of raw mangoes with the richness of lentils. This Instant Pot Raw Mango Dal Fry recipe offers a refreshing twist to traditional dal, adding a burst of tanginess and freshness to every bite. With its perfect balance of flavors and nutritious ingredients, Raw Mango Dal Fry is gluten free during the summer months when raw mangoes are in season.
Step 1: Preparing the Lentils
Start by rinsing the toor dal (pigeon peas) thoroughly and soaking it in water for about 30 minutes to soften the lentils. Once soaked, drain the water and transfer the dal to a pressure cooker or a large pot. Add fresh water, turmeric powder, and salt to the dal, and cook until it becomes soft and mushy. Cooking the dal until it’s well-cooked ensures a creamy and smooth texture for the dal fry.
Step 2: Preparing the Raw Mango
Peel the raw mango and cut it into small pieces, discarding the seed. The raw mango adds a tangy flavor to the dal fry and brings a refreshing twist to the dish. Adjust the amount of raw mango according to your taste preferences and the tartness of the mango.
Step 3: Tempering the Dal
In a separate pan, heat oil or ghee over medium heat and add cumin seeds, mustard seeds, and dried red chilies. Allow the seeds to crackle and release their aroma before adding until they turn golden brown and aromatic, enhancing the flavor of the tempering.
Step 4: Adding Aromatics and Spices
Add minced ginger, green chilies, and chopped tomatoes to the pan, stirring to combine with the tempering. Cook the mixture until the tomatoes are soft and mushy, adding ground spices such as coriander powder, cumin powder, and red chili powder for additional flavor and depth.
Step 5: Incorporating the Raw Mango
Once the tempering is ready, add the chopped raw mango pieces to the pan, stirring gently to coat the mangoes with the aromatic spices. Let the raw mango cook for a few minutes until it becomes soft and releases its juices, infusing the dal fry with its tangy flavor.
Step 6: Combining the Lentils and Mango
Once the raw mango is cooked, add the cooked toor dal to the pan, stirring well to combine with the mango and spice mixture. Adjust the consistency of the dal fry by adding water as needed to achieve the desired thickness. Let the dal simmer for a few more minutes to allow the flavors to meld together.
Step 7: Garnishing and Serving
Before serving, garnish the Raw Mango Dal Fry with freshly chopped cilantro leaves for a burst of freshness and color. Serve the dal fry hot with steamed rice or roti for a wholesome and satisfying meal that’s sure to please your taste buds.
Tips for Perfect Raw Mango Dal Fry
Adjusting Tartness: Taste the raw mango before adding it to the dal fry and adjust the quantity according to its tartness. If the mango is too sour, you can reduce the amount used or balance it with a pinch of sugar.
Consistency of Dal: Cook the toor dal until it’s well-cooked and soft, ensuring a creamy texture for the dal fry. If the dal is too thick, you can add more water to achieve the desired consistency.
Balancing Flavors: Adjust the amount of spices and seasoning according to your taste preferences. You can increase or decrease the spice level to suit your palate.
Variations of Raw Mango Dal Fry
Coconut Mango Dal: Add grated coconut or coconut milk to the dal fry for a creamy texture and a hint of sweetness that complements the tanginess of the raw mango.
Spicy Mango Dal: Increase the heat level of the dal fry by adding more green chilies or red chili powder for an extra kick of spice.
Benefits of Raw Mango Dal Fry
Rich in Vitamin C: Raw mangoes are a good source of vitamin C, which helps boost immunity and promote overall health.
Digestive Aid: The tangy flavor of raw mangoes aids in digestion and can help alleviate digestive issues such as bloating and indigestion.
Nutrient-Dense: Raw Mango Dal Fry is a nutritious dish that provides a good balance of protein, fiber, and essential vitamins and minerals, making it a wholesome meal option for all.
Frequently Asked Questions (FAQs)
Can I use other lentils for this recipe?
Yes, you can use other lentils such as masoor dal (red lentils) or moong dal (split mung beans) instead of toor dal for variation.
Can I make aam ki dal ahead of time?
Yes, you can prepare the dal fry in advance and store it in the refrigerator for up to 2-3 days. Reheat it gently before serving.
Can I freeze aam ki dal?
Yes, you can freeze the dal fry in an airtight container for up to 1 month. Thaw it in the refrigerator overnight and reheat it before serving.
Makhana Matar Curry is a delicious gravy-based dish. This can be a tasty side dish for formal dinner or even a quiet dinner with a few friends. Makhana and matar is made with a spicy tomato and cashew gravy. I like to serve with fresh hot puris or white rice.
Heat 3 tablespoon of oil in frying pan over low medium heat, add the makhana and roast them stirring continuously until they are crisp, this should take about 3-4 minutes. Keep aside.
Blend tomatoes, cashews and ginger to make a pure.
Heat the oil in a sauce pan, test the heat by adding one cumin seed. If the seed cracks right away, the oil is ready. Add asafetida and cumin seeds, as the cumin seeds crack add tomato paste, coriander, chili powder, salt and sugar.
Stir-fry for two to three minutes, until the oil begins to separate from the mixture. Add roasted makhana and green peas mix it well add about 1-1/2 cups of water. Cover the pan and let it cook for 6-7 minutes over low medium heat, until peas are tender. Note: add more water if you like more gravy.
Turn off the heat add garam masala and cilantro mix it well.
Notes
Adjust thickness of gravy to your liking, with time Makhana Matar Curry becomes thick.Serve Makhana Matar Curry with your choice of bread I like to serve with Paratha, Puri or with Plain Rice.
Sabudana Bhel this is a delicious appetizer or also can be served with afternoon tea. Sabudana Bhel or I like to call this chaat is an elegant looking dish, that will sure to impress all your family and friends.
Wash sabudana (tapioca) changing the water 2-3 time and soak with one cup of water, soak 8 hours or more. Sabudana will become all most four time in volume and will be soft.
Heat the oil in a frying pan on medium heat. Test the heat by adding one cumin seed to the oil; if seed cracks right away oil is ready. Add cumin seeds and mustard seeds after seeds crack add turmeric, lower the heat to low. Add sabudana, and salt. Keep stir frying until sabudana becomes translucence, looks like pearls. This should take about another 4-5 minutes. Stir gently and making sure tapioca doesn’t get sticky and stuck to each other. Turn off the heat, and drizzle 3-4 drops of lemon juice and stir.
Transfer sabudana to a wide bowl stir for few minutes with fork making sure sabudana pearls are separated and not sticky. Serve the sabudana at room temperature.
Add 1/2 teaspoon of salt and green chilies to cubed potatoes, mix it well and set aside.
Assembling the Sabudana Bhel, in a serving platter spread the cooked sabudana, sprinkle the roasted peanuts, over peanuts sprinkle the potatoes, then aloo lacha, some more peanuts and drizzle the chutney.
Notes
Suggestion, this is a easy recipe, you can prepare every thing in advance, cooked sabudana can be refrigerator for up to a week. Aloo Lacha and tamarind chutney can be stored for months.
Sabudana Bhel is a quick & easy, gluten-free, and vegansnack with flavors reminiscent of chaat, perfect for Krishna Janmashtami and Navaratri celebrations, offering a delightful appetizer option. In this recipe, we’ll learn how to make sabudana bhel chaat, a delightful and crunchy snack that’s perfect for any occasion. Sabudana, also known as tapioca pearls, is the star ingredient here, lending its unique texture and taste to create a mouthwatering dish. This sabudana bhel recipe combines the traditional flavors of bhel with the subtle nuttiness of sabudana, resulting in a tantalizing treat that’s sure to please your taste buds. Whether you’re looking for a tasty snack to enjoy with your evening tea or planning a party menu, this crispy sabudana bhel is sure to be a hit.
Preparing the Sabudana Mixture
To begin making the sabudana bhel, start by soaking the sabudana pearls in water for a few hours until they turn soft and plump. Once the sabudana pearls have soaked well, drain any excess water and spread them out on a clean kitchen towel to remove any excess moisture. Now, heat oil in a pan and fry the sabudana pearls until they turn crispy and golden brown. This step is crucial for achieving that perfect crunch in your sabudana bhel chaat.
Adding Crunchy Elements
Next, it’s time to add some crunchy elements to our sabudana bhel mixture. You can use a variety of ingredients such as roasted peanuts, tomatoes, and crunchy sev. These ingredients not only add texture to the dish but also enhance its flavor profile. Feel free to adjust the quantities according to your preference, but make sure to include a good mix of flavors and textures for the best results.
Seasoning the Bhel
Once you’ve assembled all the crunchy elements, it’s time to season your sabudana bhel mixture. You can use a combination of spices such as chaat masala, red chili powder, roasted cumin powder, and black salt to add a burst of flavor to the dish. Additionally, you can squeeze some fresh lemon juice over the mixture to give it a tangy twist. Mix everything together until well combined, ensuring that the sabudana pearls are evenly coated with the seasoning.
Garnishing and Serving
Finally, garnish your sabudana bhel chaat with some fresh coriander leaves and a sprinkle of nylon sev for an extra crunch. You can also add some pomegranate arils or grated coconut for a pop of color and flavor. Serve the crispy sabudana bhel immediately in individual serving bowls or plates, garnished with some more sev on top for added crunchiness. Pair it with a cup of hot tea or your favorite chutney for a truly satisfying snacking experience.
Tips for Perfect Sabudana Bhel
Soak the sabudana pearls in water for at least 4-5 hours or overnight to ensure they become soft and plump.
Drain the soaked sabudana pearls well and spread them out on a kitchen towel to remove excess moisture before frying.
Fry the sabudana pearls in batches to ensure they cook evenly and become crispy.
Adjust the seasoning according to your taste preferences. You can make the sabudana bhel spicier by adding more red chili powder or tangier by squeezing extra lemon juice.
Garnish the sabudana bhel chaat with fresh ingredients like coriander leaves, pomegranate arils, or grated coconut to enhance its visual appeal and flavor.
Variations of Sabudana Bhel
Fruit Bhel: Add diced fruits such as apples, bananas, and grapes to the sabudana bhel mixture for a refreshing twist.
Sprouts Bhel: Incorporate sprouted moong beans or chickpeas into the sabudana bhel for added protein and crunch.
Vegetable Bhel: Include finely chopped vegetables like cucumber, carrots, and bell peppers to make the sabudana bhel more nutritious and colorful.
Sweet Bhel: For a sweet variation, skip the savory seasonings and instead toss the sabudana pearls with honey, yogurt, and chopped fruits for a delicious dessert option.
Benefits of Sabudana Bhel
Gluten-Free: Sabudana is naturally gluten-free, making this sabudana bhel recipe suitable for individuals with gluten intolerance or celiac disease.
Rich in Carbohydrates: Sabudana is a rich source of carbohydrates, providing a quick and sustainable source of energy.
Easy to Digest: Sabudana is light on the stomach and easy to digest, making it an ideal ingredient for people with digestive issues or those following a bland diet.
Versatile: You can customize the sabudana bhel recipe with your favorite ingredients to suit your taste preferences and dietary requirements.
Satisfying Snack: This crispy sabudana bhel is not only delicious but also quite filling, making it a satisfying snack option for any time of the day.
FAQs about Sabudana Bhel
Q: Can I make sabudana bhel ahead of time?
A: While it’s best to serve sabudana bhel chaat immediately after preparing it to enjoy its crispiness, you can prepare the sabudana mixture in advance and assemble the bhel just before serving to prevent it from becoming soggy.
Q: Can I store leftover sabudana bhel?
A: It’s not recommended to store leftover sabudana bhel as it tends to lose its crispiness over time. However, if you have any leftover mixture, you can refrigerate it in an airtight container for up to a day and reheat it in the oven before serving.
Q: Is sabudana bhel suitable for fasting days?
A: Yes, sabudana bhel is a popular dish consumed during fasting days, especially during festivals like Navratri. Just ensure that you use sendha namak (rock salt) instead of regular salt if you’re making it for fasting purposes.
Q: Can I make sabudana bhel without frying the sabudana pearls?
A: While frying the sabudana pearls adds a crispy texture to the sabudana bhel, you can try alternative cooking methods such as roasting or air-frying for a healthier version of the dish.
Q: Can I serve sabudana bhel as a main dish?
A: While sabudana bhel chaat is typically served as a snack or appetizer, you can definitely enjoy it as a light meal, especially when paired with some yogurt or a side salad for added nutrition.
Other Recipes on Manjula’s Kitchen
If you’re looking to explore more Indian recipes, appetizers, beverages, and desserts, be sure to check out the following links on Manjula’s Kitchen. Here are some links to recipes on Manjula’s Kitchen official website:
Paneer Methi is a delicacy of Northern India. This recipe is paneer with creamy gravy flavored with dry fenugreek leaves known as Fasoori Methi. Paneer Methi is a perfect side dish for formal dinner or even a quiet dinner where you want to impress someone. Any way or time you serve this, it is delicious.
1-1/2cupspaneer cubed in about 1/2 inch piecesused 8oz paneer
1-1/2cupstomatoeschopped
1Tbspgingerchopped
1green chilichopped
2Tbspoil
1/2tspcumin seedsjeera
1/8tspasafetidahing
1/4tspturmerichaldi
1/4tspred chili powderlal mirch
2Tbspcashew powderkaju
2tspcoriander powderdhania
1tspfennel seed powdersaunf
1Tbspdry fenugreek leaveskasoori methi
1tspsalt
1-1/2cupmilk
1/4tspgaram masala
Instructions
Rub the kasoori methi between your palms and remove the stems if there is any, set aside.
Blend tomatoes, ginger, green chili to fine paste. Set aside.
Heat one teaspoon of oil in a pan on low heat stir fry the paneer until they are light gold in color, take them out.
Heat the remaining oil in a sauce pan on medium heat. When the oil is moderately hot add cumin seeds. (Cumin seeds should crack right of way). Lower the heat too low, add asafetida, turmeric, chili powder, and cashew powder stir for a minute.
Add tomato paste, coriander, fennel seed powder, salt and kasoori methi, keep stirring till tomato start leaving the side of the pan, this should take 3-4 minutes. Add milk, and cook for 2-3 minutes. Add paneer and let it cook over low heat for 2-3 minutes. This is the time you can add water as needed if gravy is too thick. Add garam masala stir and turn off the heat.
Paneer Methi is ready.
Notes
To make vegan, Substitute paneer with tofu and milk with coconut milkServe Paneer Methi with Naan, or Lacha Paratha.
Keyword Gluten Free, No Garlic, No Onion, Paneer In Creamy Gravy, Paneer With Fenugreek, Party Food
Methi Malai Paneer Recipe is a popular party recipe in Indian cuisine. This flavorful veg gravy dish is rich in high protein and gluten-free combining the richness of paneer (Indian cottage cheese) with the distinct taste of kasuri methi (fenugreek leaves), creating a harmonious blend of textures and aromas.
To commence the Methi Malai Paneer recipe start with the preparation of kasuri methi. This involves a tactile step of rubbing fenugreek leaves between the palms to unlock their aromatic flavors, carefully removing any stems present. Once this initial step is completed, the kasuri methi takes center stage, ready to infuse its unique essence into the dish.
Tomato-Based Foundation: Crafting Depth and Color
The methi malai paneer recipe continues by creating a robust base for the dish. Tomatoes, ginger, and green chili unite in a harmonious blend, resulting in a fine paste that serves as a fundamental component. This tomato-based paste contributes not only vibrant color but also imparts a deep, layered flavor profile to the Methi Paneer. After blending, the mixture patiently awaits its turn to seamlessly integrate into the unfolding cooking process.
Paneer’s Golden Prelude: A Textural Symphony Begins
Transitioning to the cooking phase as we go further in the methi malai paneer recipe add a teaspoon of oil is heat in a pan over low flame. Paneer cubes take center stage as we gently stir-fry until achieving a light golden hue. This initial culinary dance ensures that the paneer attains a delightful texture, priming it to absorb the forthcoming flavors with grace and precision.
Spiced Elevation: Building a Fragrant Foundation
Post-paneer preparation, add the remaining oil in a saucepan over medium heat. Include Cumin seeds as they start to crackle and release their earthy aroma. Lower the heat, while a symphony of asafetida, turmeric, chili powder, and cashew powder join the stage, creating a fragrant and flavorful foundation for the paneer methi.
Tomato Tapestry: Melding Flavors with Precision
The tomato paste, a star player prepared earlier, enters the culinary arena as part of the methi paneer recipe. Coriander, fennel seed powder, salt, and the patiently waiting kasuri methi are added. The ensemble is stirred diligently until tomatoes gracefully release from the pan’s sides, a visual and flavorful indication of the meticulous incorporation of diverse elements. This nuanced cooking process takes approximately 3-4 minutes, allowing flavors to intertwine and harmonize.
Creamy Symphony: Milk’s Contribution to Indulgence
To further elevate the dish, milk makes its entrance, contributing a creamy texture that enhances the overall indulgence of paneer methi. The mixture is allowed to simmer, a gentle dance of flavors taking place over 2-3 minutes. The paneer absorbs the creamy richness of the sauce, with the flexibility to adjust the consistency by adding water if the gravy proves too thick.
Paneer’s Reunion: Absorbing Creamy Richness
The previously stir-fried paneer cubes re-enter the pan, allowing them to luxuriate in the creamy tomato and spice-infused gravy. Over low heat, this reunion lasts for an additional 2-3 minutes, ensuring the paneer absorbs the full spectrum of flavors, resulting in a well-balanced and delectable paneer methi.
Garam Masala Finale: Aromatic Culmination
As a grand finale, garam masala is introduced to the dish, enhancing the overall aromatic profile and weaving together the diverse flavors into a harmonious conclusion. A final stir marks the end of the culinary symphony, and the heat is turned off, signaling the completion of the Methi Paneer recipe. The result is a tantalizing masterpiece that marries the succulence of paneer with the unique bitterness of fenugreek leaves, promising to delight the fortunate taste buds that savor this culinary creation of paneer methi.
Paneer Pulao, Vegetable Pulav, Rice with Indian Cottage Cheese Pulao
Paneer Pulao is an exotic rice dish, super easy to make and tastes delicious. This is a great side dish for party and get-togethers. Paneer Pulao goes well with yogurt or soup. This is also a satisfying lunch box meal. Recipe will serve 4.
For fluffier rice, the rice should be soaked for at least 15 minutes prior to cooking.
Heat the oil in a saucepan over medium heat. Oil should be moderately hot. Add the cumin seeds. When they crack, add curry leaves, ginger, and green chili, stir for few seconds.
Add green peas, carrots, and corn, stir and add paneer, and salt stir for about one minute, add the rice and water. Increase the heat to high and bring it to boil. Turn the heat to low and cover the pan and cook for 15 minutes or until rice is tender and water has evaporated.
Turn off the heat add cilantro, and garam masala and fluff the pulao with a fork. Cover the pan for few minutes before serving.
Delicious Paneer Pulao: A Flavorful Blend of Paneer and Rice Recipes
Paneer pulao is a delightful and flavorful gluten free, quick & easy dish that originates from Indian cuisine. It is a popular variation of traditional rice dishes, blending the rich, creamy texture of paneer (Indian cottage cheese) with fragrant basmati rice and an array of aromatic spices. As a beloved recipe of paneer pulao, this dish offers a harmonious combination of flavors and textures, making it a favorite among vegetarians and paneer enthusiasts alike.
Whether enjoyed as a standalone meal or served alongside other Indian delicacies, such as dal or raita, paneer pulao stands out as a versatile and delicious addition to any dining table. Its aromatic essence and delightful blend of paneer and rice make it a quintessential choice for those seeking a comforting and flavorful dish, earning its place among cherished paneer and rice recipes in Indian cuisine.
Preparing the Rice: Washing and Soaking
To commence the preparation of this enticing paneer pulao recipe, it is essential to start with the rice. Gently washing the rice is the initial step, ensuring thorough rinsing to eliminate any impurities that may compromise the flavor and texture of the paneer pulao. It is recommended to change the water 2-3 times during this process to guarantee optimal cleanliness. Moreover, to achieve the desired fluffiness in the paneer and rice recipe, it is advisable to soak the rice in water for a minimum of 15 minutes before proceeding with the cooking process. This soaking period allows the rice grains to absorb moisture, resulting in even cooking and a delightful texture in the final paneer pulav dish.
Heating the Oil and Spices: Flavorful Aromatics
In a saucepan set over medium heat, begin the process of preparing the flavorful paneer pulao by heating the oil until it achieves a moderate temperature, ensuring it’s adequately hot before incorporating the aromatic spices essential for this enticing recipe of paneer pulao. Introduce the vibrant cumin seeds to the oil, and patiently wait for them to crackle, signifying the initiation of the flavor infusion process characteristic of authentic paneer and rice recipes. Once the cumin seeds crackle, it’s time to add the delightful trio of fragrant curry leaves, finely chopped ginger, and vibrant green chilies to the pan, enhancing the aroma and taste of the paneer pulao. Stir the aromatic blend gently for a few seconds, allowing the spices to intermingle harmoniously, releasing their distinct flavors and permeating the oil with their essence. This crucial step ensures that every bite of the paneer rice recipe is imbued with the rich and aromatic flavors characteristic of traditional paneer pulav, promising a delightful culinary experience for all who partake.
Adding Vegetables and Paneer: Creating a Colorful Medley
Incorporate an assortment of vibrant vegetables such as green peas, carrots, and corn into the saucepan, stirring them alongside the paneer cubes and a pinch of salt. Sauté the mixture for about a minute, allowing the vegetables and paneer to absorb the aromatic flavors of the spices.
Cooking the Pulao: Simmering to Perfection
After introducing the soaked rice into the pan, carefully measure and add the appropriate amount of water to ensure the perfect consistency of the paneer pulao. With the heat turned up too high, bring the flavorful mixture to a vigorous boil, allowing the aromatic spices and tender paneer to infuse every grain of rice with its delectable essence. As the mixture reaches its boiling point, reduce the heat to low and gently cover the pan, allowing the paneer pulao to simmer gently. This crucial step allows the rice to absorb the rich flavors of the spices and vegetables, while the paneer adds a creamy texture to the dish. Patiently let the paneer pulao simmer for approximately 15 minutes, ensuring that the rice cooks to perfection and absorbs all the flavors of the aromatic spices. As the cooking process unfolds, the water gradually evaporates, leaving behind a fragrant and flavorful dish that embodies the essence of this beloved paneer and rice recipe. With each forkful, savor the delicate balance of flavors and textures, knowing that you’ve created a culinary masterpiece that perfectly captures the essence of paneer pulav.
Final Touches: Garnishing and Fluffing
Upon completion of cooking, turn off the heat and add freshly chopped cilantro and a dash of garam masala to the paneer pulao, enhancing its aroma and flavor profile. Using a fork, gently fluff the pulao to ensure the ingredients are evenly distributed. Cover the pan for a few minutes to allow the flavors to meld together before serving this delicious and aromatic paneer and rice recipe.