Diverse Vegetarian Lunch Ideas to Keep Your Meals Exciting Introduction
Finding diverse and exciting vegetarian lunch ideas can be a challenge, but Indian cuisine offers a plethora of options that are both delicious and nutritious. From hearty veg gravy to refreshing salads, Indian lunch ideas vegetarian are full of flavors and easy to prepare. This article will explore a variety of easy vegetarian lunch ideas that are perfect for your everyday meals. Quick and Easy Vegetarian Lunch Ideas
Vegetable Biryani: A fragrant rice dish cooked with mixed vegetables and aromatic spices, making it one of the easy vegetarian lunch ideas that can be prepared in advance and enjoyed throughout the week. Paneer Bhurji: Crumbled paneer cooked with tomatoes, and spices. This dish is quick to prepare and pairs well with whole wheat chapatis or as a filling for sandwiches. Chickpea Salad: A refreshing Indian salad recipes made with boiled chickpeas, chopped vegetables, and a tangy lemon dressing. This is one of the simple vegetarian lunch ideas that is both filling and nutritious. 
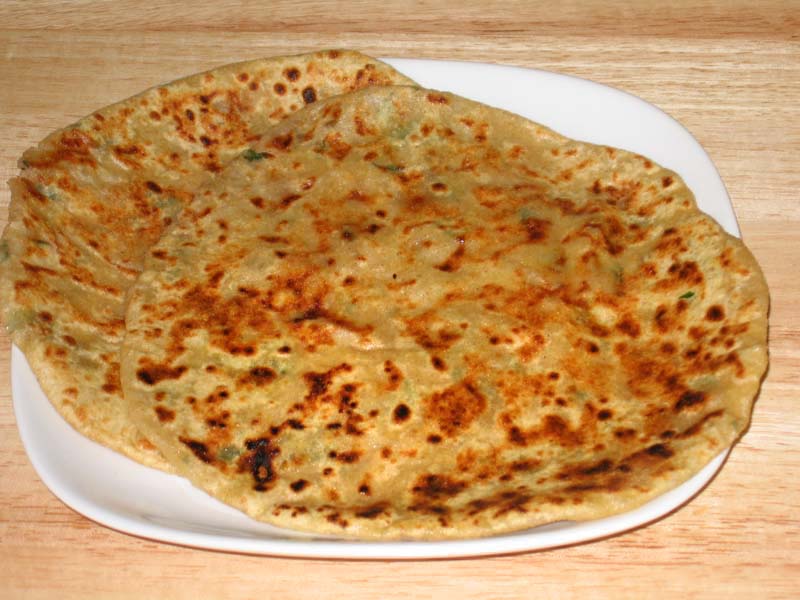
Aloo Paratha: Stuffed whole wheat flatbreads filled with spiced mashed potatoes. These parathas are perfect for a satisfying lunch and can be paired with yogurt or pickles. Vegetable Stir-Fry: A quick stir-fry using seasonal vegetables and flavored with soy sauce, ginger. Serve it with brown rice or noodles for a complete meal.
Traditional Indian Vegetarian Lunch Ideas
Rajma Chawal: Kidney beans cooked in a rich tomato gravy, served with steamed rice. This classic main course combination is not only comforting but also a great source of protein and fiber. Baingan Bharta: Smoked eggplant mashed and cooked with tomatoes, and spices. Serve it with roti or paratha for a delicious and unique lunch. Chole Puri: Spicy chickpea curry served with deep-fried bread. This dish is a favorite in many Indian households and is perfect for a weekend lunch. Kadhi Pakora: Gram flour dumplings cooked in a tangy yogurt-based gravy. Pair it with steamed rice for a complete and satisfying meal. 
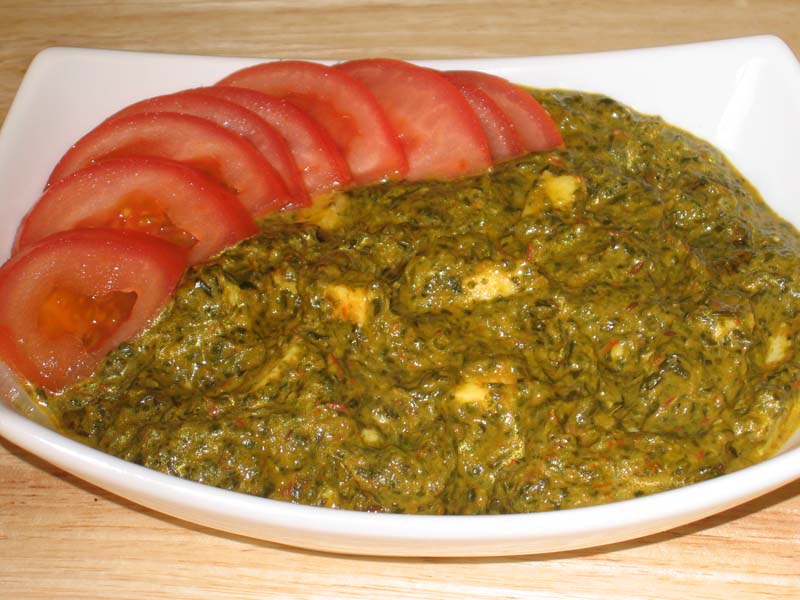
Palak Paneer: Spinach and paneer cooked together in a creamy sauce. This dish is not only nutritious but also one of the best vegetarian meals for lunch.
Healthy and Simple Vegetarian Lunch Ideas
Lentil Soup: A simple and nourishing soup made with indian dal or red lentils, vegetables, and spices. It’s easy to make and perfect for a light lunch. Quinoa Salad: Cooked quinoa mixed with vegetables, beans, and a lemon dressing. This salad is high in protein and can be prepared in advance. Vegetable Wrap: Whole wheat wraps filled with hummus, fresh vegetables, and greens. These wraps are quick to assemble and make for a portable lunch option. Methi Thepla: Fenugreek leaf flatbreads that are not only healthy but also flavorful. Pair them with yogurt or a pickle for a complete meal. Sprout Salad: A nutritious salad made with sprouted mung beans, chopped vegetables, and a tangy dressing. This salad is a great way to add protein to your diet.
Vegetarian Lunch Ideas for Special Occasions
Dum Aloo: Baby potatoes cooked in a rich and creamy tomato gravy. This dish is a bit indulgent and perfect for special lunches. Paneer Tikka: Marinated paneer cubes grilled to perfection. Serve it with a side of mint chutney and salad for a delightful meal. Stuffed Bell Peppers: Bell peppers stuffed with a mixture of vegetables, paneer, and spices, then baked until tender. This dish is visually appealing and delicious. Veg Pulao: A mixed vegetable rice dish that is both aromatic and flavorful. It can be paired with a raita or a simple cucumber salad. Kofta Curry: Vegetable or paneer balls cooked in a creamy tomato-based gravy. This dish is rich and perfect for festive lunches.
Tips for Preparing Vegetarian Lunches
Meal Prep: Preparing ingredients like chopped vegetables, cooked beans, and grains in advance can save a lot of time during the week. Batch Cooking: Making larger quantities of dishes like curries and soups can ensure you have leftovers for the next day. Variety: Keep your lunches exciting by rotating different cuisines and trying new recipes regularly. Balance: Aim to include a balance of protein, carbohydrates, and healthy fats in your lunches to keep you energized throughout the day. Storage: Use airtight containers to store your meals to maintain freshness and flavor.
75 vegetarian lunch ideas, categorized for easier selection: Indian Lunch Ideas
Paneer Butter Masala with Naan
Chole Bhature
Vegetable Biryani
Palak Paneer with Rice
Aloo Gobi with Paratha
Rajma Chawal
Baingan Bharta with Roti
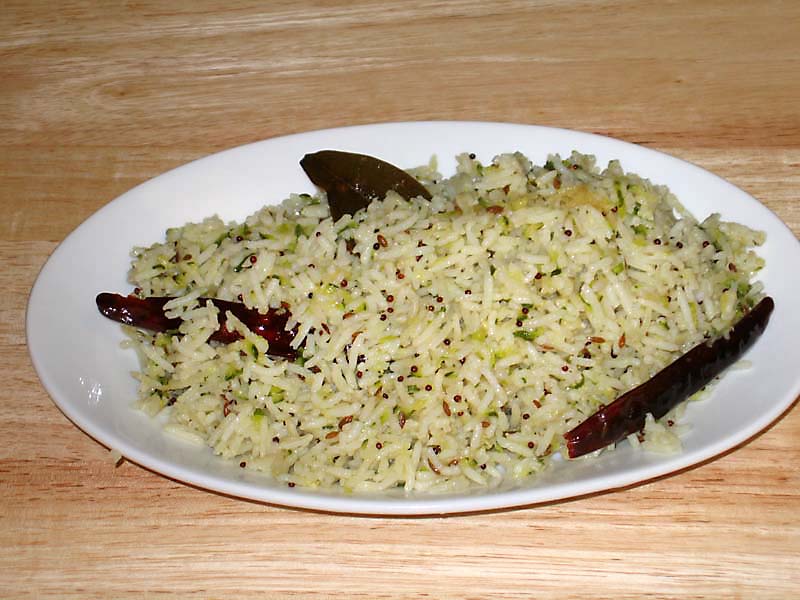
Dal Tadka with Jeera Rice
Bhindi Masala with Chapati
Kadhi Pakora with Rice
Matar Paneer with Pulao
Aloo Paratha with Yogurt
Methi Thepla with Pickle
Paneer Tikka Wrap
Vegetable Pulao
Masoor Dal with Roti
Paneer Bhurji with Bread
Sambar with Rice
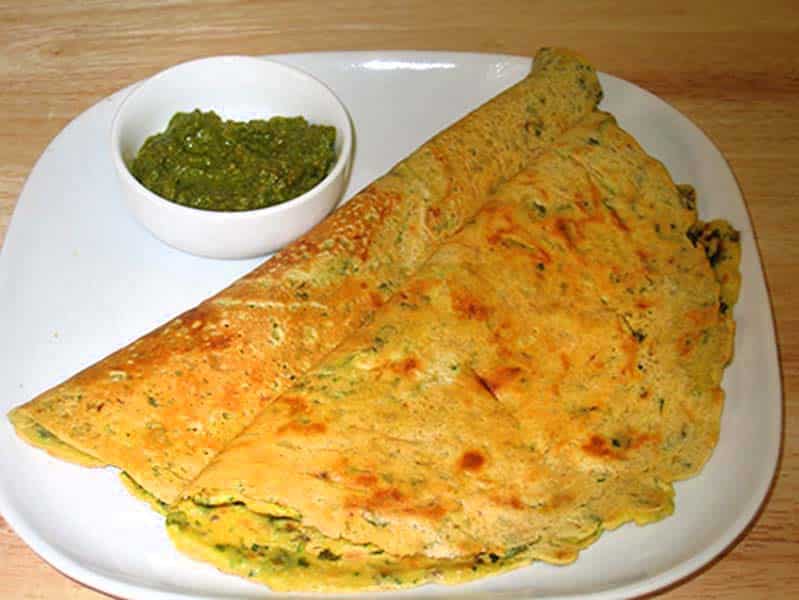
Rava Idli with Coconut Chutney
Mixed Vegetable Curry with Rice
Aloo Methi with Roti
Dum Aloo with Rice
Vegetable Kofta with Naan
Chana Masala with Rice
Mushroom Masala with Roti
Fusion & International Lunch Ideas
Veggie Sushi Rolls
Falafel Wrap with Hummus
Vegetarian Tacos
Quinoa Salad with Veggies
Veggie Burger with Sweet Potato Fries
Margherita Pizza
Vegetable Stir-Fry with Rice
Mushroom Risotto
Caprese Sandwich
Veggie Pasta Salad
Stuffed Bell Peppers
Greek Salad with Pita Bread
Vegetarian Pho
Veggie Lasagna
Chickpea Salad Sandwich
Tofu Pad Thai
Veggie Quesadilla
Eggplant Parmesan
Black Bean Burrito Bowl
Thai Green Curry with Rice
Vegetarian Sushi Bowl
Spinach and Feta Stuffed Mushrooms
Roasted Vegetable Sandwich
Avocado Toast with Cherry Tomatoes
Vegetarian Moussaka
Light & Healthy Lunch Ideas
Lentil Soup with Whole Grain Bread
Stuffed Zucchini Boats
Grilled Veggie Skewers with Quinoa
Spinach and Mushroom Quiche
Beetroot and Chickpea Salad
Kale and Sweet Potato Salad
Cauliflower Rice Bowl
Zucchini Noodles with Pesto
Cucumber and Hummus Sandwich
Avocado and Black Bean Salad
Roasted Chickpea and Veggie Wrap
Tomato and Mozzarella Salad
Chickpea and Spinach Curry
Stuffed Portobello Mushrooms
Mediterranean Buddha Bowl
Broccoli and Almond Salad
Quinoa and Black Bean Tacos
Green Pea and Mint Soup
Roasted Veggie Grain Bowl
Spaghetti Squash with Marinara
Cabbage and Carrot Slaw
Vegetable Lentil Stew
Sweet Potato and Black Bean Enchiladas
Butternut Squash Soup with Toasted Seeds
Tempeh and Vegetable Stir-Fry
These ideas cover a wide range of cuisines and dietary preferences, ensuring a variety of tasty and nutritious vegetarian lunch options. FAQs Q: What are some quick vegetarian lunch ideas?
A: Some quick vegetarian lunch ideas include vegetable stir-fry, chickpea salad, paneer bhurji, and quinoa salad. These dishes are easy to prepare and nutritious. Q: Can I make vegetarian lunches in advance?
A: Yes, many vegetarian dishes like biryani, lentil soup, and wraps can be prepared in advance and stored in the refrigerator for a few days. Q: What are some healthy vegetarian lunch options?
A: Healthy vegetarian lunch ideas include lentil soup, sprout salad, vegetable wrap, and methi thepla. These meals are nutritious and easy to make. Q: Are Indian vegetarian meals suitable for a balanced diet?
A: Absolutely. Indian vegetarian meals are rich in vegetables, legumes, and whole grains, providing a balanced mix of essential nutrients. Q: How can I add variety to my vegetarian lunches?
A: You can add variety by trying different recipes, using seasonal vegetables, and incorporating various grains and legumes into your meals. Conclusion
Exploring vegetarian lunch ideas can open up a world of flavors and nutritional benefits. From easy vegetarian lunch ideas to simple vegetarian lunch ideas, Indian cuisine offers a wide range of options to keep your meals exciting and healthy. Whether you are looking for a quick lunch on a busy day or a special meal for an occasion, these vegetarian meals will not disappoint.
Enjoy the rich and diverse flavors of Indian vegetarian cuisine and make your lunchtime a delightful experience.
Explore more recipes on Manjula’s Kitchen and discover the joy of cooking nutritious and delicious food.
Eggplant and Mushroom Wrap with Roasted Red Pepper and Sun Dried Tomato Chutney
I was inspired by the ingredient: Bell Pepper and Eggplant. Red Bell Peppers are so delicious and sweet and roasting them brings out even more flavor and sweetness. Adding Sun Dried Tomatoes adds even more intense flavor. I’m trying to get my husband to stop eating meat, so I have to cook things with a lot of flavor and meaty textures. This chutney has very bold and robust flavor, the eggplant and mushrooms provide the meaty consistency, while the crumbled paneer adds protein.
2 red bell (capsicum) peppers, roasted, peeled, chopped
1/4 teaspoon mustard seeds (rai)
1/4 teaspoon cumin seeds (jeera)
1 pinch asafetida (hing)
1 teaspoon ginger paste
1 green chili, chopped
1/4 teaspoon turmeric (haldi)
1/2 teaspoon paprika (dagi mirch), for color
2 tablespoons peanuts
1/4 cup sun dried tomatoes in oil, chopped
1 walnut sized tamarind pulp (imli) , soaked in 1/4 cup hot water to soften
1 tablespoon brown sugar, or to taste
salt, to taste
For the CHUTNEY
2 Tablespoons Ghee or oil
10 baby eggplants, washed and sliced into 1/4” thick coins
1/2 pound button or crimini mushrooms, washed and cut into 1/4” thick slices
1-3 green chilies, chopped fine
1 inch piece ginger, chopped fine/divided
Salt to taste
1/2 teaspoon cumin seeds (jeera), ground
1/2 teaspoon coriander seed (dhania), ground
1/4 teaspoon turmeric (haldi)
2 tablespoons yogurt
1/2 teaspoon garam masala
1 carrot, washed, peeled and shredded (adds crunch)
1/2 cup crumbled paneer
1/4 cup chopped fresh cilantro
Roasted Red Pepper Chutney
4 warm rotis
Instructions
Method
Wash and dry bell peppers. Coat lightly with oil. Set oven rack to highest position and broil peppers, turning as needed to blacken skin on all sides. Remove from oven, place in a bowl and cover with plastic wrap to let steam for 15 minutes. Remove blackened skin with fingers (don’t rinse peppers as it rinses away flavor). Set aside.
In sauté pan, heat 1 tablespoon of oil (use oil sun dried tomatoes are packed in for more flavor) over medium-high heat. Add mustard seeds and cook until they start to splutter. Add cumin seeds and hing, cook for a few seconds. Add ginger paste, chopped green chili, peanuts, turmeric, paprika, tamarind pulp, and sun dried tomatoes, cook for 1-2 minutes. Remove from heat and allow to cool a bit, then put in food processor with roasted red peppers, and blend until smooth. Add Brown Sugar and Salt to taste. Can be made a couple of days ahead.
For the CHUTNEY
Melt ghee in large sauté pan, over medium heat. Add sliced eggplant, mushrooms, chopped green chilies, chopped ginger and salt. Cook until eggplant and mushrooms are soft. Add ground cumin, ground coriander, and turmeric, mix well and cook for 2 minutes. Turn off heat and add garam masala and yogurt. Stir to combine.
Assemble wraps:
On each warm roti, spread 2-3 tablespoons of the Roasted Red Pepper Chutney. Add 1/4 of the Eggplant, Mushroom mixture and top with 1/4 of the shredded carrots, a small bit of chopped fresh ginger (optional), chopped cilantro, and crumbled paneer. Roll into a wrap and serve with fresh tomato slices and more chutney if desired. These would also be good served with some raita on the side.
I bought a new small Indoor Electric grill (George Foreman grill) this summer and have tried several grilling recipes – the most hit was the Pineapple grilled with Honey sauce – which was actually my own accidental invention. So I have used it for the eggplant-tomato-green peppers filling. The dressing is the sauce filtered out from the grill machine spread over the tortilla before putting the filling! The wrap is filled with fresh romaine lettuce and pepper jack cheese! Hope you will like this appetizer or snack recipe.
1 1/2 tablespoon fresh pineapple juice (you can substitute with lemon juice – I consume a lot of fresh pineapple juice almost everyday so I have it handy!!!)
2 teaspoon garlic paste
2 teaspoon ginger paste
1/4 teaspoon red cayenne pepper (you can add adjust for hotness)
1/4 teaspoon sea salt (adjust per taste)
1/4 teaspoon ajwain seeds
1/2 teaspoon dried parsley leaves
For the tortilla wrap filling:
1/2 inch thick Round Eggplant slices – 3
2 medium tomatoes – cubed
1/4 cup finely chopped green peppers
1/2 cup fresh romaine lettuce
1/4 cup shredded cheese (I used Weight watchers Pepper Jack cheese)
Instructions
For Tortilla:
Turn on the tortilla maker on medium-high setting – Optionally you can also cook these on the tawa/griddle like roti/parathas.
Take the flour in a bowl big enough to knead the dough. Add salt and olive oil- mix well. Add sprouted moong and mix well. Add 1 tablespoon water at a time and bind into firm and smooth dough – firm enough to not use extra dry flour while rolling – this will avoid brushing more oil while making the tortilla.
Divide the dough into two pieces.
Roll the dough into 7 inch diameter circles and place on the tortilla maker – do not close the top. Once you see few areas bubbled up on the roti – after 1-2 minutes. Flip over the tortilla-roti and cook the other side similarly. Then turn back-over and press the top side of the tortilla maker to press it well – just 1-2 seconds. Flip back over and do the same for 1-2 seconds. Take out the tortilla and place covered in paper napkin in a roti casserole bowl to avoid from being dry and firm.
For the dressing and grill marinate:
Add well the ingredients as listed above in a wide bowl and keep aside.
For the filling:
Turn on the grill (or just do the entire process on the tawa/griddle on stove)
Roll the eggplant pieces in the prepared dressing and leave it in the bowl until the grill is ready
Put the eggplant pieces on the grill and let stand for 30 seconds. Then cover and grill for 2-3 minutes.
Meanwhile add the chopped tomatoes and peppers into the remaining dressing/marinate mix and keep it aside
Flip over the eggplant pieces and continue grilling for another 2 minutes. Then remove and keep aside
Now add the tomato-pepper mixture on the grill and add all the remaining sauce over it.
Grill similarly for 2-3 minutes on each side. While flipping over take some of the collected sauce out of the grill and pour it back on the grill.
Save the collected-drained sauce while grilling to apply on the tortilla as dressing!
Notes
Serving Instructions:
Take the tortilla roti and apply the drained dressing sauce all over. Then spread with shredded cheese and lettuce. Chop the eggplant pieces and place over the lettuce with the tomato-pepper mixture. Wrap the tortilla and “pin-up” using the tooth-pick.
Use the remaining tomato-pepper mixture and the drained sauce mixture combined as “salsa on the side”. ENJOY!!!!
Variations to prepare the sauce without the grill:
Heat the ingredients of the dressing sauce in microwave or on medium heat on stove in double-sized bowl for 4 minutes – checking not to spill it over and stirring every minute.
Grill the eggplant and tomato-pepper on the hot griddle/tawa once rolled in the dressing sauce or on gas grill pan.
Aloo Dum is an exotic delicious main course dish. Just the smell of aloo dum can make you hungry! To make this dish, potatoes are fried and then soaked in the spicy aromatic gravy. This is a perfect dish for any dinnerparty.
Heat the oil in a frying pan over medium high heat.
Frying pan should have at least 1 inch of oil. To check if the oil is ready, put one piece of potato in the oil. The potato should sizzle right away. If potatoes are fried on low heat, they will be very oily.
Fry the potatoes till they are cooked through; turn the potatoes a few times while frying. Take out potatoes with a slotted spoon (this allows excess oil to drip back into the frying pan) and place on a paper towel. Keep it aside.
Heat the pan on medium heat and stir-fry the sesame seeds for about a minute until seeds lightly change color. Take them out and keep aside.
Blend sesame seeds, coconut, ginger, green chili, and make it into a paste. Use water as needed to blend into paste.
In a small bowl mix, sesame paste, yogurt, ginger, green chili, coriander powder, funnels seed powder, paprika, red chili powder, and turmeric into a paste. Keep it aside.
Heat the oil in a saucepan. Test the heat by adding one cumin seed to the oil; if seed cracks right away oil is ready. Add the cumin asafetida and cumin seeds. After the cumin seeds crack, add whole red chili and besan (gram flour). Stir-fry for about half a minute until the besan (gram flour) is golden-brown.
Add the spice paste and stir-fry for about 2 minutes on medium heat until the spices start to separate from the oil.
Add the potatoes, mix it well and add about 1cup of water. After the gravy boils, let it cook on low-medium heat for 8 to 10 minutes. Adjust the gravy to your liking.
Add the cilantro and garam masala, cover the pan, and turn off the heat. Let it sit for a few minutes before taking off the cover. This helps bring the color to the top of the dish.
Keyword Exotic, Party Food, Side Dish, Spicy Potatoes
Fresh vegetables and whole grain pasta with savory tomato sauce makes a very colorful and delicious pasta dish. This is a simple pasta dinner. Serve with a side of salad and bread.
In a large pot boil the water with salt and oil. After water comes to the boil add the pasta.
Cook the pasta until it is just tender, not too soft. Drain the water and set pasta aside.
making Vegetables:
Heat the oil in a frying pan over medium high heat.
Add vegetables (carrot, green beans, bell pepper, mushrooms, and zucchini) to skillet and sauté until they are nearly tender.
Marinara Sauce
Mix the cornstarch in ¼ cup of water and keep aside.
Heat the olive oil in a saucepan and add the basil, Italian herbs, and chili flakes stir and add tomatoes.
Let the tomatoes cook until they become pasty.
Next add cornstarch, salt and sugar to the tomato sauce, cornstarch will give thickness to the sauce.
Next add the sauté vegetables to the sauce and cook for few minutes on medium heat until sauce come to the desirable thickness.
Prepare The Pasta
Heat the oil in a saucepan and add basil and chili flakes stir for few seconds.
Next add the drained pasta and sauté for a minute until pasta is well coated with oil.
Pour the vegetable sauce over the pasta, serve hot with slice of French bread and salad.
Notes
Variations:For this recipe you need about 5 cups of vegetable, replace the vegetables to your choice.Serving suggestion:Serve pasta with slice of toasted bread and green salad.Additional Notes:I like to serve pasta with slice toasted and spiced French bread. Before toasting the bread spread the olive oil and sprinkle basil, chili flakes and salt.
Keyword Pasta With Marinara Sauce, Pasta Without Onion Garlic
1medium purple eggplantbaingan, un-peeled, cut into 1/2″ cubes
2medium russet potatoesaloo, peeled and cut into 1/2″ cubes
4medium tomatoestamatar cut into 1/2″ cubes
2Tbspcilantrochopped, hara dhania
1Tbspoil
Pinchof asafetidahing
1tspcumin seed
1green chilichopped, adjust to taste
1tspginger pasteadrek
1Tbspcoriander powderdhania powder
½tspturmerichaldi
½tsppaprikadagi mirch
1tspsaltadjust to taste
2Tbspwater
Also needed
Oil to fry
Instructions
Heat the oil in a frying pan over medium high heat.
Frying pan should have at least 1 ½ inch of oil. To check if the oil is ready, put one piece of potato in the oil. The potato should sizzle right away. If vegetables are fried in low heat they will be very oily.
Fry the potatoes till they are cooked through, turn the potatoes few times while frying. Take out potatoes with a slotted spoon (this allows excess oil to drip back into the frying pan) and place on a paper towel.
Test the oil again with a piece of eggplant. Fry the eggplant pieces same way.
In a small bowl, mix the shredded ginger, green pepper, coriander powder, paprika, turmeric, and 2 tablespoons of water to make a paste.
Heat the 1 tablespoon of oil in a pan. Test the heat by adding one cumin seed to the oil; if seed cracks right away oil is ready.
Add cumin seeds and asafetida after seeds crack add the spice mixture and stir-fry for a minute until you see the oil start to separate from the spice mixture.
Add chopped tomatoes stir-fry for a minute.
Add fried potatoes and eggplant mix it gently, let it simmer for three to four minute on medium low heat.
Subji should be not very dry if needed add three to four spoons of water.
Turn off the heat and add chopped cilantro mix it well.
Mix flour, salt and water together to make a soft dough (add water as needed). Knead the dough for about 2 minutes on a lightly greased surface to make soft, smooth and pliable dough.
Set the dough aside and cover it with a damp cloth. Let the dough rest for at least ten minutes.
Making the Filling
Shred the cauliflower using a shredder (electric or manual). Do not use a food processor to blend the cauliflower, as it will become too moist and hard to work with.
Squeeze the cauliflower take out as much water as possible. Add all filling ingredients together, mix it well.
Making the Paratha
Divide the dough and cauliflower mixture into 6 equal parts. Roll one part of the dough into a three inch circle. Place one part of the filing in the center. To wrap, pull the edges of the rolled dough together to cover the filling. Repeat to make all six balls.
Allow each ball to settle for two minutes before rolling. (Timing is critical here. If you roll paratha just after filling, or if you leave them longer than two minutes before rolling, the cauliflower mixture will seep through the edges when rolling).
Heat an iron skillet or heavy skillet on medium high heat. Test by sprinkling it with a couple of drops of water. If the water sizzles right away, the skillet is ready.
Press the filled ball lightly on both sides on a surface covered with dry whole wheat flour. Keep the sealed side of the filled ball on top. Roll the ball with a light hand into 6” circles. When the dough sticks to the rolling pin or rolling surface, lightly dust with dry flour.
Place rolled paratha on the skillet. After a few seconds, the paratha will start to change color and puff up. Flip the paratha over. You will notice some golden-brown spots on it.
After a few seconds, spread one teaspoon of oil over the paratha. Flip the paratha again and lightly press the puffed areas with a spatula. Flip again and press with the spatula making sure the parathas are golden-brown on both sides.
Repeat for the remaining parathas. Cool the parathas on a wire rack so they don’t get soggy.
Notes
NotesAllow each ball to settle for two minutes before rolling. (Timing is critical here. If you roll paratha just after filling, or if you leave them longer than two minutes before rolling, the cauliflower mixture will seep through the edges when rolling).Parathas can be kept unrefrigerated up to two days,wrapped in aluminum foil or stored in a covered container. For later use, parathas can be refrigerated five to six days or frozen (wrapped in aluminum foil) for a month. Re-heat in a skillet or toaster oven.Serving SuggestionsGobhi Paratha goes well with Salted Mint Lassi, Carrot Pickle, Aloo Mattar.
Keyword Breakfast, Cauliflower Paratha, Homemade, Video Recipe
Kadhi, a blend of yogurt and besan (gram flour) with besan pakoras, this is served with rice. This dish is popular throughout India specially in North India.
pinchcitric acid if needed to give more sourness to kadhi
For Pakoras
3/4 cupbesan,gram flour
2/3cupwater use as needed
For Garnish
1tspgheclarified butter
1tspred chili powder
Instructions
Making Kadhi
Mix gram flour and turmeric with yogurt until smooth. Add three cups of water slowly and mix well.
Heat the oil in a saucepan. Test the heat by adding one cumin seed to the oil. If the cumin seeds crack right away, the oil is ready. Add the asafetida, fenugreek seeds, cumin seeds, stir and add bay leaves, whole red chilies, and red chili powder. Stir for a few seconds. Add the yogurt mixture and keep stirring until the kadhi comes to a boil.
Add three cups of water and let it come to boil. Add salt. Turn the heat to medium low. Let the kadhi cook an hour and a half, stir occasionally. To adjust thickness, add boiled water.
Making Pakoras
Add water slowly to the besan to make a smooth and thick batter. Whip the besan batter two to three minutes in a circular motion using a spoon, until light and fluffy.
Fry the pakoras in ½ inch of oil in a flat frying pan over medium heat. (Don’t use enough oil to cover the pakoras; they will be softer and fluffier if fried in shallow oil.
To test, drop one drop of batter into the oil. The batter should form a ball on the surface of the pan, but not change color right away.
Place about one tablespoon of batter into the oil. Fry the pakoras in small batches until golden-brown.
After frying, soak the pakoras in room-temperature water for ten minutes. Squeeze the pakoras gently to remove the water, taking care not to break them.
Add the pakoras to the kadhi and boil on low to medium heat for ten minutes.
Making the Seasoning
Heat the ghee (clarified butter) lightly in a small saucepan. Add chili powder and/or paprika (adjust to taste). Pour over the kadhi when ready to serve.
Notes
Variations Add one cup chopped spinach to the kadhi just before adding the pakoras for extra flavor and color. Add one tablespoon dry fenugreek leaves (dry mathi leaves) to the pakora batter.My favrait way to Serve Kadhi Pakoras is with Rice, Roti, Jeera Aloo, Spicy Green Peas
Kadhi Pakora is a gluten-freesummer recipe featuring a savory vegetable curry with dal (lentils) and crispy fried pakoras, creating a delightful and flavorful dish. Kadhi Pakora, a popular North Indian dish, is a comforting and flavorful yogurt-based curry with gram flour dumplings. This traditional dish is known for its tangy and savory taste, making it a favorite among many households. In this kadhi recipe, we’ll show you how to make authentic Punjabi Kadhi Pakora step by step, so you can enjoy its deliciousness at home. Whether you’re craving a comforting meal or planning a special dinner, Kadhi Pakora is sure to satisfy your taste buds.
Step 1: Preparation of Ingredients for kadhi pakora punjabi style
Start by gathering all the necessary ingredients for making Kadhi Pakora. For the pakoras, prepare a batter using gram flour, spices, and water. Slice and chop green chilies, cilantro, and ginger for the pakora batter. For the kadhi, whisk yogurt and gram flour together until smooth, and set aside. Finely tomatoes and ginger for the kadhi gravy. Having all the ingredients ready will streamline the cooking process.
Step 2: Making Pakoras:
To make the pakoras, heat oil in a deep-frying pan. Drop Spoonfuls of the pakora batter into the hot oil and fry until golden brown and crispy. Remove the pakoras from the oil and place them on a paper towel to drain excess oil. Repeat the process until all the batter is used. The crispy pakoras will add texture and flavor to the kadhi.
Step 3: Preparing the Kadhi Base:
In a large pot or saucepan, heat oil or ghee over medium heat. Add cumin seeds, mustard seeds, and fenugreek seeds, and let them splutter. Next, add ginger, and cook until fragrant. The aromatic base will form the foundation of the kadhi gravy, imparting depth of flavor to the dish.
Step 4: Cooking the Kadhi:
Once the aromatics are sautéed, it’s time to add the chopped tomatoes to the pot. Cook the tomatoes until they soften and break down, forming a thick gravy. Then, add the whisked yogurt and gram flour mixture to the pot, stirring continuously to prevent lumps from forming. Bring the mixture to a gentle boil, then reduce the heat and let it simmer.
Step 5: Adding Pakoras:
Once the kadhi base is cooked and thickened, add the fried pakoras to the pot. Gently stir to coat the pakoras with the flavorful kadhi gravy. Allow the pakoras to simmer in the kadhi for a few minutes to absorb the flavors. The combination of soft pakoras and tangy kadhi creates a harmonious and satisfying dish.
Step 6: Finishing Touches:
Before serving, garnish the Kadhi Pakora with freshly chopped cilantro leaves for a burst of freshness and color. You can also sprinkle some roasted cumin powder on top for extra flavor. Serve the Kadhi Pakora hot with steamed rice or roti for a comforting and wholesome meal.
Tips for Making Perfect Kadhi Pakora:
Consistency: Adjust the consistency of the kadhi by adding more water if it’s too thick or simmering longer if it’s too thin.
Fresh Ingredients: Use fresh yogurt and spices for the best flavor in the kadhi gravy.
Frying Pakoras: Fry the pakoras in batches to ensure even cooking and crispiness.
Variations of Kadhi Pakora:
Vegetarian Variation: Skip the addition of pakoras and add vegetables like potatoes, carrots, or bell peppers to the kadhi for a vegetarian version.
Gluten-Free Option: Use chickpea flour (besan) instead of wheat flour for the pakora batter to make it gluten-free.
Spicy Version: Add extra green chilies or red chili powder for a spicier kadhi.
Benefits of Including Kadhi Pakora in Your Diet:
Probiotic-rich: Yogurt used in kadhi is rich in probiotics, which promote gut health and digestion.
Good Source of Protein: Gram flour used in pakoras adds protein to the dish, making it a satisfying meal option.
Balanced Meal: Kadhi Pakora is a balanced meal that provides carbohydrates, protein, and fats, along with essential vitamins and minerals.
Frequently Asked Questions (FAQs) about Kadhi Pakora:
Q: Can I make kadhi without pakoras?
A: Yes, you can skip adding pakoras and enjoy the kadhi as a creamy yogurt-based curry with a tempering of spices.
Q: How long does kadhi pakora last in the refrigerator?
A: Kadhi Pakora can be stored in the refrigerator for up to 3-4 days. Reheat gently on the stovetop before serving.
Q: Can I freeze kadhi pakora?
A: While you can freeze kadhi pakora, the texture of the pakoras may change slightly upon thawing. It’s best enjoyed fresh or stored in the refrigerator for a few days.
For more delicious Indian curry recipes, visit Manjula’s Kitchen. Explore a variety of vegetarian curry dishes featuring a range of spices, vegetables, and legumes to add flavor and variety to your meals.
Dal Makhani is a popular dish from state of Punjab and across North India. Rich and hearty, dal makhani is a combination of whole urad (an Indian lentil)and red kidney beans. It goes well with Naan, and Tandoori Roti (oven-baked flat bread).
Wash urad dal and kidney beans well. Soak the dal in six cups of water at least for eight hours. After soaking, dal will be about two and a half times the volume of the original.
Place the dal in a pressure cooker with four cups of water. Add the salt, turmeric, ginger, and green chili, and cook over medium high heat. When it begins to steam, turn the heat down to medium. Cook 25 minutes.
Turn off the heat. Wait until steam has stopped before opening the pressure cooker. The dal and kidney beans should be soft and tender.
Lightly mash the kidney beans and dal. Cook for another five minutes on low-to-medium heat.
Add cream, garam masala, and amchoor powder. Cook for ten minutes on low heat.
For Seasoning
Heat the ghee in a small saucepan. Test the heat by adding one cumin seed to the oil; if it cracks right away, the oil is ready. Add cumin seeds. When they crack, add the asafetida, red chilies, and red chili powder. Stir for a few seconds.
Add one teaspoon of water to keep the spices from burning. Pour the spiced ghee over the dal.
Garnish with shredded ginger.
Notes
Serving suggestion, taste best with Naan, or Tandoori Roti
Punjabi Dal Makhani: A Step by Step Urad Dal Makhani Recipe
Dal Makhani is a rich and creamy lentil dish that originates from the Punjab region of India. Made with black lentils (urad dal), kidney beans, and a blend of aromatic spices, this dal makhani recipe is a staple in Punjabi cuisine. Known for its luscious texture and indulgent flavors, Dal Makhani is a popular Indian dish made primarily from lentils (dal) and typically enjoyed during the winter months.
It is a rich and creamy dish that is usually gluten-free, as lentils themselves are naturally gluten-free. The main ingredients for making Dal Makhani include black lentils (urad dal), red kidney beans (rajma), butter, cream, and various spices such as cumin, coriander, turmeric, and garam masala. It is traditionally cooked slowly over a low flame, allowing the flavors to meld together and the lentils to become tender. Dal Makhani is often served with rice or Indian bread like naan or roti.
Step 1: Preparation of Ingredients:
Begin by gathering all the necessary ingredients for making Dal Makhani. Rinse the black lentils and kidney beans under cold water and soak them for at least 8 hours or overnight to soften. Finely chop tomatoes, ginger, and green chilies to prepare the base for the dal. Having all the ingredients prepped and ready will make the cooking process smoother.
Step 2: Cooking the Lentils:
In a pressure cooker or a pot, add the soaked black lentils and kidney beans along with fresh water, salt, and a pinch of turmeric powder. Pressure cook or simmer until the lentils and beans are soft and fully cooked. Cooking them until tender is essential for achieving the creamy texture of Dal Makhani. Once cooked, set them aside while we prepare the gravy.
Step 3: Preparing the Gravy:
In a large pot or saucepan, heat oil or ghee over medium heat. Add whole spices such as cinnamon, cloves, and cardamom pods, and let them sizzle. Then, add finely chopped ginger and green chilies, and sauté until fragrant. The aromatic base will infuse the gravy with depth of flavor.
Step 4: Adding Tomatoes:
Once the aromatics are sautéed, it’s time to add the chopped tomatoes to the pot. Cook the tomatoes until they soften and break down, forming a thick gravy. You can also add tomato puree for a smoother texture. Stir in spices such as coriander powder, cumin powder, red chili powder, and garam masala, and cook until the oil separates from the mixture.
Step 5: Cooking the Lentils with Gravy:
Now, add the cooked black lentils and kidney beans to the pot with the tomato gravy. Stir well to combine all the ingredients. Allow the mixture to simmer for a while, allowing the flavors to meld together. This slow cooking process helps develop the rich and indulgent flavors of Dal Makhani.
Step 6: Adding Cream and Butter:
To finish off the dish, add a generous amount of cream and butter to the pot. Stir well to incorporate the cream and butter into the dal, creating a velvety and luxurious texture. Adjust the seasoning with salt and add a pinch of sugar to balance the acidity of the tomatoes if needed.
Step 7: Garnishing and Serving:
Before serving, garnish the Dal Makhani with freshly chopped cilantro leaves for a burst of freshness and color. You can also drizzle a little more cream on top for added richness. Serve the Dal Makhani hot with steamed rice, naan, or roti for a comforting and satisfying meal.
Tips for Making Perfect Dal Makhani:
Soak Lentils and Beans: Soaking the black lentils and kidney beans overnight helps reduce cooking time and ensures they cook evenly.
Slow Cooking: Allow the dal to simmer on low heat for a longer time to develop the flavors and achieve the desired creamy consistency.
Use Fresh Cream and Butter: Using fresh cream and butter adds richness and depth of flavor to the dish.
Variations of Dal Makhani:
Spicy Dal Makhani: Add extra green chilies or red chili powder for a spicier version of the dish.
Restaurant-style Dal Makhani: For a restaurant-style flavor, add a tadka (tempering) of cumin seeds and dried red chilies in ghee and pour it over the prepared dal before serving.
Benefits of Including Dal Makhani in Your Diet:
High in Protein: Dal Makhani is rich in protein from black lentils and kidney beans, making it a nutritious option for vegetarians and vegans.
Rich in Iron: Black lentils are a good source of iron, which is essential for maintaining healthy blood cells and preventing anemia.
Source of Healthy Fats: The addition of cream and butter provides healthy fats, which are important for overall health and satiety.
Frequently Asked Questions (FAQs) about Dal Makhani:
Q: Can I make Dal Makhani in advance?
A: Yes, Dal Makhani tastes even better when made in advance as it allows the flavors to develop. It can be stored in the refrigerator for up to 3-4 days and reheated before serving.
Q: Can I freeze Dal Makhani?
A: Yes, Dal Makhani freezes well. Allow it to cool completely, then transfer it to airtight containers or freezer bags and freeze for up to 3 months. Thaw overnight in the refrigerator before reheating.
Q: Is Dal Makhani gluten-free?
A: Yes, Dal Makhani is naturally gluten-free, making it suitable for those with gluten intolerance or celiac disease.
For more delicious Indian dal recipes, visit Manjula’s Kitchen. Explore a variety of vegetarian dal dishes featuring a range of lentils, spices, and vegetables to add flavor and variety to your meals.
Punjabi chole are the best compliment with Baturas, and Naan. The combination is known as Chola Battura. This is a mouth-watering dish, popular with all ages. Popular street food.
Boil 5 cups of water with tea bags; after tea comes to boil turn down the heat to medium low. Let it boil for another 2 to 3 minutes. Take out the tea bags and keep aside.
Wash chickpeas well and soak in tea water for about 8 hours. Chickpeas after soaking will become about 2 1/2 times the volume of the original.
In pressure cooker add chickpeas with the water they were soaked in, plus 2 more cups of water. Close the cooker and put the pressure on. Cook on medium high heat.
As pressure cooker starts steaming turn the heat down to medium and cook for about 15 minutes.
Close the heat and wait until steam has stopped before opening the pressure cooker. Chickpeas should be soft and tender.
Blend the tomatoes, ginger and green chili to make paste.
Heat the oil in a saucepan. Test the heat by adding one cumin seed to the oil; if it cracks right away oil is ready. Add cumin seeds, and as the cumin seeds crack add basen stir-fry until basen is light gold brown.
Next add tomato paste, coriander powder, and black pepper. Stir-fry for 2 to 3 minutes until the oil is separating from the mixture and tomato mixture should be about half in volume.
Add spice mix, salt, garam masala, and mango powder to chickpeas. While mixing, lightly mash the chickpeas. Adjust salt, pepper, and sourness to your taste.
Cook on medium high heat. After choles come to boil lower the heat to medium low and put the lid on.
Choles are ready to eat in as little as ten minutes, but for best taste let simmer for 30 minutes, stirring every 5 or 6 minutes.
Garnish choles with shredded ginger and sliced green chili.
Homestyle Punjabi Chola Curry: A Flavorful Delight
Chola, also known as chole or chana, refers to a popular North Indian dish made from dal (lentils), specifically chickpeas, which are simmered in a flavorful blend of spices and herbs. This dish is typically enjoyed with rice, naan, or bhature.
Chola is naturally gluten-free, making it suitable for individuals with gluten sensitivities or celiac disease. It’s often included in party recipes due to its rich, hearty flavor and versatility in serving large gatherings. Additionally, chola is a favorite among vegans, as it contains no animal products and provides a substantial source of plant-based protein.
Step 1: Preparation – Punjabi Chola Recipe
Before diving into cooking the Punjabi chola, it’s essential to prepare all the ingredients. Gather punjabi chola, chickpeas, tomatoes, ginger, green chilies, and spices like cumin, coriander powder, garam masala, and amchur. Rinse the chickpeas thoroughly and soak them overnight or for at least 8 hours. Soaking helps in softening the chickpeas and reduces the cooking time. Also, finely chop tomatoes, ginger and green chilies.
Step 2: Cooking the Chickpeas – Punjabi Chole Recipe
In a pressure cooker, add the soaked chickpeas along with water, salt, and tea bags. The tea bags impart a dark color to the chickpeas, giving them an authentic Punjabi chole look. Pressure cook the chickpeas until they are soft and cooked through. Once cooked, discard the tea bags and set the chickpeas aside.
Step 3: Preparing the Base – Chola Curry Recipe
Heat oil in a pan and add cumin seeds. Let them crackle, then add Add finely chopped ginger and green chilies, and sauté for a few more minutes until the raw smell disappears. Now, add tomatoes and cook until they are soft and mushy.
Step 4: Adding Spices – Punjabi Chole Recipe
Once the tomatoes are cooked, it’s time to add the spices. Add coriander powder, cumin powder, garam masala, red chili powder, and amchur (dry mango powder). These spices lend the authentic flavors to the Punjabi chola. Stir well to combine and cook the spices for a couple of minutes until they release their aroma.
Step 5: Incorporating Chickpeas – Chola Curry Recipe
Now, add the cooked chickpeas to the pan along with a little water. Stir well to coat the chickpeas with the masala mixture. Allow the chola curry to simmer on low heat for about 10-15 minutes, allowing the flavors to meld together.
Step 6: Garnishing and Serving – Punjabi Chole Recipe
Once the chola curry has thickened to your desired consistency, garnish it with freshly chopped coriander leaves. Serve the piping hot Punjabi chole with bhature, naan, or rice for a hearty and satisfying meal.
Tips for Perfect Punjabi Chole:
Soaking Chickpeas: Ensure you soak the chickpeas for an adequate amount of time to soften them, reducing the cooking time.
Using Tea Bags: Adding tea bags while cooking the chickpeas gives them a rich, dark color characteristic of authentic Punjabi chole.
Spice Levels: Adjust the amount of red chili powder and green chilies according to your preference for spice levels.
Garnish: Freshly chopped coriander leaves add a burst of freshness to the chola curry. Don’t skip this step for the best flavor.
Variations of Punjabi Chola:
Creamy Chola Curry: Add a splash of cream or coconut milk towards the end of cooking for a creamy texture and milder flavor.
Benefits of Punjabi Chola:
Rich in Protein: Chickpeas are an excellent source of plant-based protein, making Punjabi chola a nutritious option for vegetarians and vegans.
Fiber-Rich: Chickpeas are high in dietary fiber, promoting digestive health and aiding in weight management.
Vitamins and Minerals: Chola curry is packed with essential vitamins and minerals like iron, folate, and vitamin C from tomatoes and spices.
FAQs – Punjabi Chole Recipe:
Can I use canned chickpeas instead of dried ones?
Yes, you can use canned chickpeas for convenience, but the texture may vary slightly from using dried chickpeas.
How long can I store leftover Punjabi chole?
Leftover chola curry can be stored in an airtight container in the refrigerator for up to 3-4 days. Reheat before serving.
Aloo Gobi is a delicious main dish made with potatoes, cauliflower, and a great blend of spices. Aloo Gobi can be served with various breads, such as rotis, parathas, and puris.
In a small bowl, mix the shredded ginger, coriander powder, cayenne pepper, turmeric, and 3 tablespoons of water to make a paste.
Heat the oil in a pan. Test the heat by adding one cumin seed to the oil; if seed crack right away oil is ready. Add hing and cumin seeds to the oil after seeds crack add the bay leaves and green chilies and stir for a few seconds.
Next, add the spice paste and stir for a minute until spices start leaving the oil.
Add cauliflower, potatoes, 2 tablespoons of water and salt. Mix well. Cover the pan and let it cook on medium heat for about 15 to 20 minutes until the vegetables are tender. Make sure to stir gently every 3 to 4 minutes.
Lastly, add the mango powder and fresh cilantro (green coriander). Mix everything and cover for a minute. Adjust the salt to your taste.
Notes
Variations:Add some green peas and/or sliced red bell peppers. The red bell peppers should be added at the end of the recipe as they cook quickly.Tips:Making a paste with the spices will prevent the spices from burning.Serve with Paratha, Puri
Boil the potatoes until they are tender. Peel and cut them in bite size pieces.
Mix the yogurt, ginger, green chilies, turmeric powder, coriander powder and paprika into a paste. Set aside.
Heat the oil in a saucepan. Test the heat by adding one cumin seed to the oil. If the cumin seed cracks right away, the oil is ready. Add the cumin seeds and asafetida. After the cumin seeds crack, add the bay leaf and besan (gram flour). Stir for about half a minute until the besan (gram flour) is golden-brown.
Add the yogurt paste and stir-fry for about 2 minutes on medium heat until the paste starts leaving the oil from the sides.
Add about one cup of water. After the gravy boils, let it cook on low-medium heat for 4 to 5 minutes. Adjust the water in gravy to your liking.dd the potatoes and let it cook for 2-3 minutes.
Add the cilantro and salt and continue to cook for a few minutes. Serve with any kind of bread.
Notes
SuggestionsUse variety of vegetables, such as green peas, carrots, and cauliflowers, as a substitute for the potatoes. The recipe for the gravy remains the same. Serve with Matar Paratha, Gobi Paratha.
Keyword Aloo With Dahi, Easy, Kid Friendly, Spicy Potatoes
Cube the paneer into half inch pieces and deep-fry them on medium high heat. Fry until the paneer becomes a light golden color. Take the paneer out and place on a paper towel so the extra oil is absorbed.
Mix cornstarch with three tablespoons of water and keep aside.
Blend the tomatoes and ginger to make a puree.
Heat the oil in a saucepan. Test the heat by adding one cumin seed to the oil. If the cumin seed cracks right away, the oil is ready. Add the asafetida (hing), cumin seeds, bay leaves and cinnamon and stir-fry for a few seconds.
Add the tomato paste, coriander, turmeric, chili powder and paprika. Cook until the mixture reduces to half.
Add the green peas and 1/4 cup of water. cook on medium heat pan should be covered. When the peas are tender, add the salt and paneer.
To thicken the gravy add corn starch mix. Cover the pan and let it cook for 3-4 minutes.
Notes
Suggestion: Add 1 tablespoon fresh chopped fenugreek leaves or 1/2 tablespoon dried fenugreek leaves to the gravy when cooking.
Indulge in the perfect gluten-free, kid-friendly matar paneer recipe, specially crafted to elevate any occasion as this dish is a mouthwatering party recipe that’s popular among all individuals from children to adults. This delightful dish boasts a rich and flavorful gravy that will captivate both young and adult palates, ensuring a memorable dining experience.
Begin the journey of How To Make Matar Paneer by meticulously cubing the paneer into half-inch pieces. The key is to deep-fry these paneer cubes over medium-high heat until they attain a delicate golden hue. This crucial step not only imparts a delightful texture to the paneer but also sets the foundation for the indulgent experience that Matar Paneer promises. Once fried to perfection, transfer the paneer cubes onto a paper towel, allowing any excess oil to be absorbed, ensuring a balanced and flavorful outcome for this Matar Paneer sabji.
Step 2: Creating a Thickening Agent – Essential in Matar Paneer Masala
In the second step of the Matar Paneer masala preparation, take a moment to mix cornstarch with three tablespoons of water, creating a thickening agent that will contribute to the luscious consistency of the dish. This clever addition enhances the overall texture of the Matar Paneer gravy, ensuring it coats the paneer cubes and green peas harmoniously. The cornstarch mix, now prepared and set aside, is a key player in perfecting the Matar Paneer sabzi.
Step 3: Crafting a Tomato-Ginger Puree – Essence of Matar Paneer
Embark on the flavorful journey of Matar Paneer by crafting a tomato and ginger puree. This vibrant mixture lays the groundwork for the dish’s aromatic essence, infusing it with the natural sweetness of tomatoes and the subtle warmth of ginger. As the soul of the Matar Paneer recipe, this puree forms the base of the rich gravy that envelops the paneer and peas, creating a delightful symphony of flavors in this quintessential Matar Paneer masala.
Step 4: Infusing Flavorful Elements – Matar Paneer Unleashed
Heat oil in a saucepan to initiate the fourth step in the Matar Paneer saga. The aromatic journey begins by testing the oil’s readiness with a cumin seed. Once it crackles, add a melange of flavorful elements, including asafetida (hing), cumin seeds, bay leaves, and cinnamon. This infusion of spices elevates the Matar Paneer sabzi, creating a fragrant and appetizing atmosphere that sets the stage for the subsequent layers of taste in this Matar Paneer recipe.
Step 5: Crafting the Tomato Base – Foundation of Matar Paneer Recipe
As the oil embraces the aromatic symphony, introduce the tomato paste, coriander, turmeric, chili powder, and paprika to the saucepan. This marks a pivotal step where the foundation of the Matar Paneer recipe takes shape. Cook this amalgamation until it reduces to half its volume, allowing the tomatoes to release their inherent sweetness and harmonize with the array of spices. This transformative process is integral to achieving the distinctive taste that defines Matar Paneer masala.
Step 6: Introducing Green Peas – Matar Paneer Masala Symphony
For the sixth step in perfecting Matar Paneer, introduce the green peas and a quarter cup of water to the pan. Let this vibrant combination simmer on medium heat, ensuring the pan is covered. The green peas, tenderized to perfection, contribute a burst of color and freshness to the Matar Paneer masala. As the peas become tender, add salt and the previously prepared paneer cubes, creating a symphony of textures that makes Matar Paneer a delightful and wholesome sabzi.
Step 7: Thickening the Gravy – Culmination of Matar Paneer Recipe
Concluding the Matar Paneer journey, focus on thickening the gravy by incorporating the cornstarch mix. Cover the pan, allowing the Matar Paneer to simmer for an additional 3-4 minutes. This final step ensures that the Matar Paneer masala reaches its optimal thickness, creating a cohesive and flavorful gravy that clings to the paneer and peas. With this last flourish, the Matar Paneer recipe unfolds into a hearty and satisfying dish, ready to be savored in all its aromatic glory.
Vegetable pulav is a mix of spicy vegetables with rice. This is a great dish for lunch. If you are not in the mood to prepare a big meal, use vegetable pulav as a one-dish meal. Serve with yogurt, pickle, papadam or chutney.
Heat the oil in a saucepan. Test the oil by adding one cumin seed; if seed cracks right away oil is ready. Add cumin seeds after cumin seeds crack add bay leaves and stir for few seconds. Next add the rice. Stir-fry for 2 minutes.
Add water and salt, bring to a boil and turn the heat to low. Cover the pan. Cook about 15 minutes, or until the rice is tender and the water has evaporated. Turn off the heat and fluff the rice with a fork.
Preparing the vegetables:
Use a frying pan to cook the vegetables. Add the vegetables in steps, the vegetables that need the most time to cook are added first and the vegetables that need the least time will be added last.
Heat the oil in frying pan. Test the heat by adding one cumin seed to the oil; if it cracks right away oil is ready. Add cumin seeds after cumin seeds crack, add potatoes, stir-fry them for about 2 minutes.
Add cauliflower and carrots. Let them cook for about another 3 minutes, stirring occasionally.
Next add green peas, bell pepper, ginger and green chilies. Let the vegetables cook for a few minutes till vegetables are tender. Turn off the heat.
Add garam masala and lemon juice.
Next gently fold the rice into the vegetables. Transfer to a serving dish and garnish the rice dish with cilantro.
Vegetable pulao is a flavorful gluten-freevegan blend of spicy vegetables combined with rice, making it an excellent lunch option. This dish proves particularly convenient when you prefer a quick & easy meal. Utilize vegetable pulav as a standalone one-dish meal, or complement it with yogurt, pickle, papadam, or chutney for a satisfying and well-rounded dining experience.
Preparing Pulav Rice:
Embark on a culinary adventure as you delve into the meticulous process of crafting a delightful pulav rice recipe. Begin by heating oil in a saucepan, creating a canvas for the infusion of rich flavors. Ensure the oil is at the optimal temperature by conducting a cumin seed test; the satisfying crackle indicates readiness. Enrich the aromatic foundation by introducing additional cumin seeds and fragrant bay leaves, setting the stage for an enticing pulav rice experience.
As you add the rice to the pan, engage in a 2-minute stir-fry, allowing each grain to absorb the essence of the spices—a vital step in mastering the art of how to make pilav rice. The introduction of water and salt transforms the mixture into a bubbling concoction, simmering on low heat for 15 minutes until the rice attains a tender texture, releasing a fragrant aroma that defines the pulav rice recipe. Conclude this flavorful journey by delicately fluffing the rice with a fork, achieving a light and fluffy consistency crucial to the essence of the rice pulav recipe.
Preparing Vegetables for Pulav Rice:
In the intricate process of creating pulav rice, wield a frying pan as your culinary orchestra, orchestrating a symphony of vibrant colors and enticing textures. Elevate the aromatic canvas by heating oil to the perfect temperature, validated by the distinctive crackle of a cumin seed—the quintessential initiation into the pulav rice recipe. With each addition of cumin seeds, establish a fragrant base that paves the way for the culinary dance that follows.
Immerse potatoes into this aromatic blend, conducting a 2-minute stir-fry, a pivotal step in unraveling the secrets of how to make pulav rice. Introduce cauliflower and carrots, orchestrating an additional 3 minutes of cooking to gradually enhance their tenderness, a crucial aspect in the art of rice pulav. The crescendo of this culinary symphony includes green peas, bell pepper, ginger, and green chilies, creating a vibrant medley that transforms the pulav rice recipe into a visual and flavorful masterpiece. Conclude this vegetable overture by introducing garam masala and lemon juice, harmoniously blending the spices before gently folding the aromatic rice into the vegetable symphony, shaping the pulav rice recipe.
Final Assembly of Rice Pulav:
Culminate the gastronomic masterpiece that is the pulav rice recipe by seamlessly merging the meticulously prepared rice and vegetables. Gently fold the aromatic rice into the medley of colorful vegetables, ensuring an even distribution of flavors—a key element in the intricate art of making pulav rice. As the harmonious blend takes shape, transfer it to a serving dish, where the vibrant hues of the vegetables complement the inviting warmth of the rice pulav.
Elevate the presentation by adorning the dish with sprigs of fresh cilantro, adding a final touch of both freshness and visual appeal—a crucial finale in the rice pulav recipe. This assembly not only showcases the meticulous steps involved in creating a pulav rice dish that tantalizes taste buds but also captivates with its aesthetic allure. Serve and savor the culmination of the pulav rice recipe—a delightful union of fragrant rice and flavorful vegetables—embodied in the artistry of pulav preparation.
Basen Ka Puda is a tasty low fat, quick & easy, vegan dish for breakfast or a light lunch. This recipe is quick to prepare and can be served many different ways. In my house this is a favorite dish for breakfast, folded with cheese.
Mix all the dry ingredients together: besan, rice flour, cumin seeds, and salt. Add the water slowly to make a smooth batter, the consistency of pancake batter or Dosa batter. Add the green chilies, cilantro, and zucchini. Mix well.
Use a non-stick skillet and place on medium-high heat. Test by sprinkling a few drops of water on it. Water should sizzle right away. Pour about 1/2 cup of the batter into the skillet and spread evenly with a back of spoon. Starting from the center, spiral the batter outward evenly to form a circle about 7″ in diameter.
When batter starts to dry, gently spread one teaspoon of oil over it. Wait about 30 seconds; flip the puda using a flat spatula.
Press the puda lightly all around with the spatula to make the puda cook evenly. Turn the puda three to four time, until crisp and brown on both sides.
Repeat for the remaining pudas.
Notes
Tips:Spread the batter quickly, or it will begin to dry and will be difficult to spread.Serving Suggestions:You can serve the puda with yogurt, hari chutney, spicy pickles.Pudas can also be served as quesadillas. Fold the pudda with shredded cheddar cheese, sliced tomatoes, or roasted vegetables.VariationsZucchini can be replaced with finely chopped spinach, shredded potatoes, or finely shredded cabbage.If you make the puda without vegetables, do not use rice flour. This will cause the pudas to be very dry.Cilantro can be replaced with ground coriander powder.
Keyword Besan Cheela, Healthy Breakfast, Quick And Easy
How to Make Besan Cheela: Crafting a Delightful Indian Pancake
Besan Cheela is a quick & easy bread based breakfast recipe ideal for those on a gluten free and looking for low fatvegan alternative. Besan cheela, also known as chilla or besan chilla, is a savory Indian pancake that’s not only delicious but also packed with nutrients. Made primarily from gram flour (besan), this versatile dish can be customized with various ingredients to suit individual tastes. From shredded vegetables to aromatic spices, each component contributes to the overall flavor and texture of the cheela. Let’s delve deeper into the art of crafting the perfect besan cheela, step by step.
Step 1: Shredding Zucchini for Besan Cheela
The journey to creating the perfect besan cheela begins with the humble zucchini. Its vibrant green hue and delicate flavor make it an ideal addition to this traditional recipe. Start by carefully shredding the zucchini, ensuring to retain its nutritious skin. This step not only adds a delightful texture to the besan cheela but also enhances its nutritional value. Once the zucchini is finely shredded, set it aside, eagerly awaiting its incorporation into the besan cheela batter.
Step 2: Preparing Dry Ingredients for Besan Chilla
The foundation of a perfect besan chilla lies in the precise combination of dry ingredients. In a mixing bowl, amalgamate besan, rice flour, cumin seeds, and salt, creating the essential base for the besan cheela batter. Gradually introduce water, achieving a smooth consistency akin to that of pancake or dosa batter. The inclusion of finely chopped green chilies, fresh cilantro, and the shredded zucchini further enriches the mixture, imparting a burst of flavors and a harmonious medley of textures.
Step 3: Heating the Skillet for Making Besan Cheela
An indispensable element in the besan cheela-making process is a well-heated skillet. Place a non-stick skillet over medium-high heat and confirm its readiness by performing the quintessential water droplet test – the sizzle upon contact indicates the skillet’s optimum temperature for crafting the perfect besan chilla.
Step 4: Pouring and Spreading Batter for Besan Chilla
With the skillet primed and ready, it’s time to pour approximately 1/2 cup of the besan cheela batter onto its surface. Using the back of a spoon, adeptly spread the batter evenly, starting from the center and spiraling outward. This technique ensures the formation of a well-rounded besan chilla, approximately 7 inches in diameter, ready to be adorned with flavorful toppings.
Step 5: Cooking the Besan Cheela to Perfection
As the besan cheela begins to set on the heated skillet, delicately spread a teaspoon of oil over its surface. After a brief interval of about 30 seconds, gracefully flip the cheela using a flat spatula. Applying gentle pressure with the spatula ensures uniform cooking, and this process is repeated three to four times until the besan chilla attains a crisp, golden-brown exterior on both sides, tantalizing the senses with its aroma and visual appeal.
Step 6: Repeating the Process for Besan Cheela
The besan cheela-making process is a delightful rhythm that beckons for subsequent rounds. Repeat the aforementioned steps for the remaining batter, creating a succession of besan chillas, each promising a savory and gratifying experience. Whether enjoyed as a snack or a light meal, besan chillas stand as a testament to their versatility and irresistible charm.
In conclusion, mastering the art of making besan cheela is not only a culinary feat but also a journey of exploration and creativity. With each step carefully executed and each ingredient thoughtfully incorporated, you can create a dish that delights the palate and nourishes the body. So, gather your ingredients, heat up your skillet, and embark on the flavorful adventure of making besan chillas – a dish that’s sure to become a favorite in your kitchen repertoire.
Aloo Paratha, is a whole wheat flat bread stuffed with spicy potato mix. Parathas are made plain or variety of different fillings, but potato filling is most popular. This delicious Aloo Paratha is very popular in north India, for any time of the day. Specially in Punjab Aloo Paratha is staple for breakfast.
Mix flour, salt, and water together to make a soft dough (add water as needed).
Knead dough for two minutes on a lightly greased surface to make the dough soft, smooth and pliable. Set the dough aside and cover it with a damp cloth. Let the dough rest at least ten minutes.
Filling
Boil 2 medium potatoes until tender. Once cooked, drain the water and let the potatoes cool down. Note: Do not cool the potatoes under running water, as they will absorb the water and come out too soft.
Once the potatoes are cool enough to handle, peel and mash them. Add green chilies, cilantro, cumin seeds, garam masala, mango powder, and salt to mashed potatoes. Mix well.
Making Paratha
Divide the dough into six equal parts and form into balls.
Then divide the potato filling into six parts and shape into balls. Potato balls should be 1½ times larger than the dough balls.
Roll dough ball into a 3” circle. Place a filling ball in the center. Pull the edges of the dough to wrap it around the potato filling. Repeat to make all six balls. Let the filled balls settle three to four minutes.
Meanwhile heat an iron or other heavy skillet on medium high heat until moderately hot. To test, sprinkle water on the skillet. If the water sizzles right away, the skillet is ready.
Press the filled ball lightly on dry whole wheat flour from both sides. Using a rolling pin, roll the balls lightly to make six-inch circles, keeping the sealed side of the balls on top. If the dough sticks to the rolling pin or rolling surface, lightly dust the parathas with dry flour.
Place the paratha on the skillet. When the paratha start to change color and begins to puff up, flip it over. You will notice some golden-brown spots.
After After a few seconds, drizzle one teaspoon of oil over the paratha. Flip the paratha again and lightly press the puffed areas with a spatula.
Flip again and press with a spatula making sure the paratha is golden-brown on both sides. Repeat for the remaining parathas.
Paratha are best served hot and crispy. They will be soft if not served hot. If you are not going to serve them right away, cool them on a wire rack to keep them from getting soggy.
Notes
NotesParathas can be kept unrefrigerated for up to two days wrapped in aluminum foil or in a covered container. For later use, parathas can be refrigerated three to four days or frozen for up to a month. Re-heat using a skillet or oven.Variations Substitute chopped cilantro with ¼ cup finely chopped mint leaves, or experiment with your favorite herb. Be sure to pat the herbs dry before adding to the mixture.Serving SuggestionsParathas can be served with Tomato Chutney, Plain Yogurt, mattar Paneer, or Green Chilli pickle.Serve it like a Mexican quesadilla by topping it with cheese and sliced tomatoes, then folding it in half.