Tag: Low Carb Snacks

Delicious Low Carb Snacks: Indian Vegetarian Options
Low carb diets have gained significant popularity for their potential health benefits, including weight loss and improved blood sugar control. For those who enjoy easy Indian recipes and follow a low carb lifestyle, there are plenty of delicious and nutritious snack options to consider. 

Indian snacks can be both satisfying and low in carbohydrates, making them perfect for maintaining a healthy diet without sacrificing flavor. Here are some of the best low carb snacks that fit perfectly into an Indian vegetarian diet.
Paneer Tikka
Paneer Tikka is a classic Indian veg appetizers made from marinated paneer (Indian cottage cheese) and grilled to perfection. Paneer is high in protein and low in carbs, making it an ideal choice for low carb snacks. The marinade typically includes yogurt, turmeric, chili powder, and garam masala, which not only adds flavor but also has numerous health benefits.
Spiced Nuts
Spiced Nuts are another excellent option for those seeking healthy low carb snacks. Almonds, walnuts, and pecans can be roasted with Indian spices like cumin, coriander, and cayenne pepper to create a savory and crunchy snack that is rich in healthy fats and protein.
Veggie Sticks with Hummus
Vegetable sticks paired with hummus can be a refreshing and satisfying snack. Choose low carb indian recipes like cucumber, bell peppers, and celery. Hummus made from chickpeas, tahini, and lemon juice provides a creamy dip that is low in carbs and high in fiber and protein.
Masala Roasted Chickpeas
Masala Roasted Chickpeas are a crunchy and flavorful snack that can easily be made at home. Chickpeas are tossed with olive oil and spices such as paprika, cumin, and coriander, then roasted until crispy. This snack is not only low in carbs but also high in fiber and protein.
Cucumber Slices with Mint Yogurt
Cucumber slices topped with mint yogurt make for a refreshing and easy low carb snack. Yogurt is mixed with fresh mint, a pinch of salt, and a dash of cumin powder, then spread over cucumber slices. This snack is light, cooling, and perfect for hot days.
Cauliflower Bhajji
Cauliflower Bhajji, or fritters, are a popular Indian street food that can be adapted for a low carb diet. Cauliflower florets are dipped in a spiced gram flour batter and fried until crispy. Using cauliflower instead of traditional potatoes significantly reduces the carb content.
Zucchini Fritters
Zucchini fritters are another great option for low carb snacks recipes. Grated zucchini is mixed with chickpea flour, spices, and herbs, then shallow fried until golden brown. These fritters are not only low in carbs but also packed with vitamins and minerals.
Spinach and Cheese Stuffed Mushrooms
Stuffed mushrooms are a versatile and delicious snack. Large mushroom caps are filled with a mixture of spinach, ricotta, and spices, then baked until tender. This snack is both nutritious and satisfying.
Coconut Chutney with Flaxseed Crackers
Coconut chutney served with flaxseed crackers is a unique and tasty snack option. The chutney is made from grated coconut, green chilies, and a splash of lemon juice, while the flaxseed crackers provide a crunchy and low carb base.
Avocado Chaat
Avocado chaat is a modern twist on a traditional Indian snack. Diced avocados are mixed with chopped tomatoes, green chilies, cilantro, and a squeeze of lime juice. This refreshing chaat is high in healthy fats and low in carbs, making it an excellent choice for those on a low carb diet.
Roasted Moong Dal
Roasted Moong Dal is a crunchy and savory snack that is both high in protein and low in carbs. Moong dal is roasted with spices like turmeric, chili powder, and salt, creating a delicious and nutritious snack that can be enjoyed at any time of the day.
Keto Idli
For those who miss traditional Indian breakfast items, Keto Idli is a fantastic low carb alternative. Made with almond flour, yogurt, and spices, these idlis are steamed to perfection and served with coconut chutney or sambar.
Low Carb Dhokla
Dhokla is a popular Gujarati snack that can be made low carb by using chickpea flour instead of the traditional rice and lentil batter. This steamed cake is spiced with ginger, green chilies, and garnished with mustard seeds and fresh cilantro.
Tofu Stir-Fry
A tofu stir-fry with colorful vegetables like bell peppers, broccoli, and snap peas can be a quick and satisfying low carb snack. Tofu is high in protein and can be seasoned with soy sauce, and ginger for added flavor.
Methi Thepla
Methi Thepla is a traditional Gujarati flatbread that can be made low carb by using almond flour and fresh fenugreek leaves. These flatbreads are perfect for snacking and can be enjoyed with yogurt or pickle.
Conclusion
Incorporating low carb snacks into an Indian vegetarian diet is easier than you might think. From paneer tikka to methi thepla, there are plenty of delicious options that are both satisfying and nutritious. By choosing snacks that are high in protein and healthy fats, you can enjoy a variety of flavors while sticking to your low carb goals. Whether you’re looking for easy low carb snacks or healthy low carb snacks, these recipes offer something for everyone.

For more delicious low carb snack ideas and recipes, visit Manjula’s Kitchen.

These suggestions ensure you can enjoy a variety of tasty, low carb snacks that fit your dietary needs and keep you satisfied throughout the day.

  • Roasted Cauliflower with Tomato Gravy

    Roasted Cauliflower with Tomato Gravy

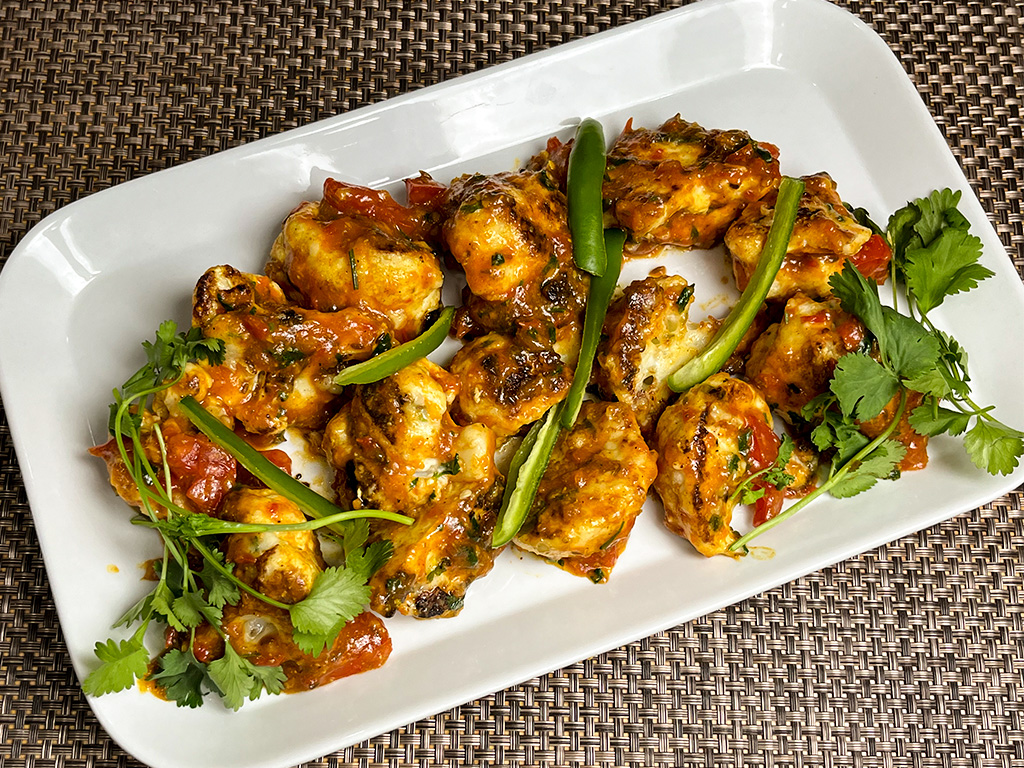
    A plate of golden brown roasted cauliflower florets

    Roasted Cauliflower with Tangy Tomato Gravy

    This is simply a delightful indian appetizer or side dish. Cauliflower florets are tossed with yogurt and spices, then shallow-fried. The crispy cauliflower has the perfect bite bursting with flavors, covered in tangy tomato gravy. It makes a mouthwatering appetizer.
    You can also serve them without tomato gravy, you can choose how spicy you want to make these roasted cauliflower florets. There are so many ways to enjoy this tangy cauliflower dish; they're all delicious!
    One of my favorite recipe published at Manjula's Kitchen, it can be enjoyed on its own with just a drizzle of oil and with your favorite spices. Some of my favorite dishes with cauliflower, Aloo Gobhi (potato with cauliflower), Pakoras, Paratha, and rice pulav with cauliflower, Gobhi Manchurian.
    4.30 from 10 votes
    Prep Time 10 minutes
    Cook Time 20 minutes
    Course Appetizer
    Cuisine Indian
    Servings 4

    Ingredients
      

    For the Roasted Cauliflower:

    • 1 medium cauliflower cut into florets (phool Gobhi), about 18 florates
    • 1 cup yogurt
    • 2 tbsp corn starch
    • 1 tsp cumin seeds (jeera)
    • 2 tbsp finely chopped cilantro (dhania)
    • 1 tsp finely chopped green chilies optional
    • 2 tsp finely shredded ginger
    • ½ tsp salt
    • 3 tbsp oil for shallow frying

    For the Tomato Gravy:

    • 2 tbsp oil
    • 1 tsp cumin seeds (jeera)
    • 2 tsp ginger finely shredded
    • 1 cup tomatoes pureed, I used 3 medium size tomatoes
    • ¼ tsp turmeric powder
    • ½ tsp red chili powder (adjust to taste)
    • 2 tsp coriander powder
    • 1 tsp garam masala
    • 1 tsp salt
    • 1 tsp sugar
    • 2 tbsp coriander leaves, finely chopped
    • ¼ cup chopped tomatoes

    For Garnishing:

    • 2 green chilies, slit for garnishing

    Instructions
     

    • In a large bowl: Mix the yogurt, corn starch, cumin seeds, cilantro, and green chilies until well combined.
    • Add the cauliflower florets to the yogurt mixture and toss well to coat each floret evenly.
    • Shallow Fry the Cauliflower: Heat oil in a skillet over medium heat, adding just enough to cover the pan.
    • Add the cauliflower florets in batches and shallow fry them until they are golden brown and crispy on all sides.
    • Remove and drain on paper towels to remove excess oil.
    • Tomato Gravy: Mix the corn starch with 1/4 cup of water in a small bowl and set aside.
    • Heat oil in a pan over medium heat.
    • Add cumin seeds until they crack. Add tomato puree and ginger, stirring for a few seconds.
    • Add red chili powder, coriander powder, turmeric, and sauté for another 2-3 minutes until the tomatoes release oil on the sides.
    • Add the corn starch paste and cook until the gravy reaches a pourable consistency, adding water if needed.
    • Add chopped tomatoes, sugar, garam masala, and cilantro, stir well, and turn off the heat.
    • Serve the crispy cauliflower with the tangy tomato gravy and garnish with slit green chilies.
    • Enjoy! Roasted cauliflower with tangy tomato sauce.

    Notes

    For serving: Arrange the cauliflowers on serving plates and pour the tomato sauce and garnish with cilantro and green chilies. serve hot as an appetizer or side dish.
    Enjoy your Roasted Cauliflower with Tangy Tomato Gravy!
    Choosing Cauliflower: look for cauliflower with firm and white and firmly attached green leaves. You can store uncut cauliflower in the refrigerator for up to five days
    How to Cut & Prepare Cauliflower: To separate the cauliflower florets from the core, halve and then quarter the head. This exposes the core, making it easy to cut out the florets. 
    Health Benefits of Cauliflower: Cauliflower is full of dietary fiber, vitamin C, and folic acid. Cauliflower is great for digestion and iron absorption as well. It’s a total vegetable all-star and helps round out a healthy meal!
    Keyword cauliflower appetizer, tomato gravy
    Tried this recipe?Let us know how it was!

    How to Make Roasted Cauliflower in Tangy Tomato Gravy: A Healthy and Flavorful Curry Recipe

    Roasted Cauliflower with Tangy Tomato Gravy is a flavorful and nutritious dish that combines the earthy taste of roasted cauliflower with a tangy, spiced tomato gravy. This cauliflower tomato curry is perfect for those looking to enjoy a healthy delicious meal, this simple indian vegetarian recipe is easy to prepare and packed with flavor. Whether served with plain indian rice or flatbread, this dish is sure to become a favorite in your household.

    The Essence of Roasted Cauliflower with Tangy Tomato Gravy

    The essence of this dish lies in its balance of flavors and textures. The cauliflower is roasted to perfection, bringing out its natural sweetness and adding a delightful crunch can  be served with Indian main course recipes. The tangy tomato gravy is made with ripe tomatoes and a blend of aromatic spices, creating a rich and flavorful sauce that complements the roasted cauliflower beautifully.

    Origin and Popularity

    Cauliflower is a versatile vegetable used in various cuisines around the world. Roasting cauliflower enhances its flavor and texture, making it a popular method of preparation. This roasted cauliflower recipe with tangy tomato gravy draws inspiration from Indian cuisine, where tomato-based gravies are commonly used to create rich, flavorful dishes.

    Why You’ll Love This Recipe

    • Flavorful and Nutritious: Combines the goodness of roasted cauliflower with a tangy, spiced tomato gravy.
    • Easy to Make: Simple ingredients and straightforward steps make this recipe accessible to everyone.
    • Versatile: Can be served with rice, flatbread, or as a standalone dish.
    • Perfect for Any Occasion: Ideal for everyday meals or special gatherings.

    How to Make Roasted Cauliflower with Tangy Tomato Gravy

    To make this delightful roasted cauliflower with tangy tomato gravy, start by mixing yogurt, corn starch, cumin seeds, cilantro, and green chilies in a large bowl. Coat cauliflower florets in this mixture. Heat oil in a skillet over medium heat and shallow fry the florets until golden brown and crispy. Drain excess oil using paper towels.

    For the tomato gravy, mix corn starch with 1/4 cup water. Heat oil in a pan, add cumin seeds, and once they crackle, add tomato puree and ginger. Stir in red chili powder, coriander powder, turmeric, and sauté for 2-3 minutes until the tomatoes release oil. Add the corn starch paste and cook until the gravy is of pourable consistency, adding water if needed. Stir in chopped tomatoes, sugar, garam masala, and cilantro, then turn off the heat.

    Serve the crispy cauliflower florets with the tangy tomato gravy, garnished with slit green chilies. This dish is very good indian appetizer or can be served hot as an side dish, garnished with cilantro and green chilies.

    When choosing cauliflower, look for firm, white heads with firmly attached green leaves. Store uncut cauliflower in the refrigerator for up to five days. Cauliflower is rich in dietary fiber, vitamin C, and folic acid, promoting digestion and iron absorption, making it a nutritious addition to any meal. Enjoy!

    Variations of Cauliflower Dishes

    Exploring Manjula’s Kitchen reveals a treasure trove of other delicious cauliflower recipes that you might enjoy. Here are some related dishes that you might find interesting:

    1. Aloo Gobi: A classic Indian dish made with potatoes and cauliflower cooked with spices.
    2. Baked Cauliflower: Cauliflower Spinach Bake is a healthy indian recipe which is nutrition-rich side dish that is easy and quick to make.
    3. Cauliflower Manchurian: An Indo-Chinese dish featuring crispy cauliflower florets in a tangy sauce.
    4. Cauliflower Crust Pizza: This is a yummy and healthy cauliflower crusted pizza, made with fresh ingredients and also egg-less. Pizza sauce and Indian cheese was made from scratch using fresh ingredients. Its a nice appetizer..
    5. Gobi Paratha: A stuffed flatbread or gobi paratha with a spicy cauliflower filling.

    Serving Suggestions

    Roasted cauliflower with tangy tomato gravy can be enjoyed in various ways:

    • With Rice: Serve it with steamed basmati rice or jeera rice for a complete meal.
    • With Flatbread: Pair it with naan, roti, or paratha for a satisfying lunch or dinner.
    • As a Side Dish: Serve it alongside other Indian vegetarian recipes for a flavorful spread.
    • On Its Own: Enjoy it as a standalone dish for a light and healthy meal.

    Tips and Tricks

    To perfect your roasted cauliflower with tangy tomato gravy recipe, consider these helpful tips:

    • Roast Evenly: Ensure the cauliflower florets are evenly coated with oil and spread out on the baking sheet for even roasting.
    • Use Fresh Tomatoes: Fresh, ripe tomatoes provide the best flavor for the gravy.
    • Adjust Spices: Tailor the amount of spices to suit your taste preference.
    • Simmer Slowly: Let the gravy simmer slowly to develop a rich and deep flavor.

    FAQs

    Can I Use Frozen Cauliflower?

    Yes, you can use frozen cauliflower. Thaw it and pat it dry before roasting to prevent excess moisture.

    How Long Does This Dish Last?

    Store any leftovers in an airtight container in the refrigerator for up to 3 days. Reheat before serving.

    Is This Recipe Vegan?

    Yes, this recipe is naturally vegan and gluten-free.

    Can I Add Other Vegetables?

    Absolutely, you can add other vegetables like bell peppers, peas, or carrots to the dish.

    What If I Don’t Have Fresh Tomatoes?

    You can use canned tomatoes or tomato puree as a substitute for fresh tomatoes.

  • Sweet & Sour Bell Pepper

    Sweet & Sour Bell Pepper

    Sweet & Sour Bell Pepper

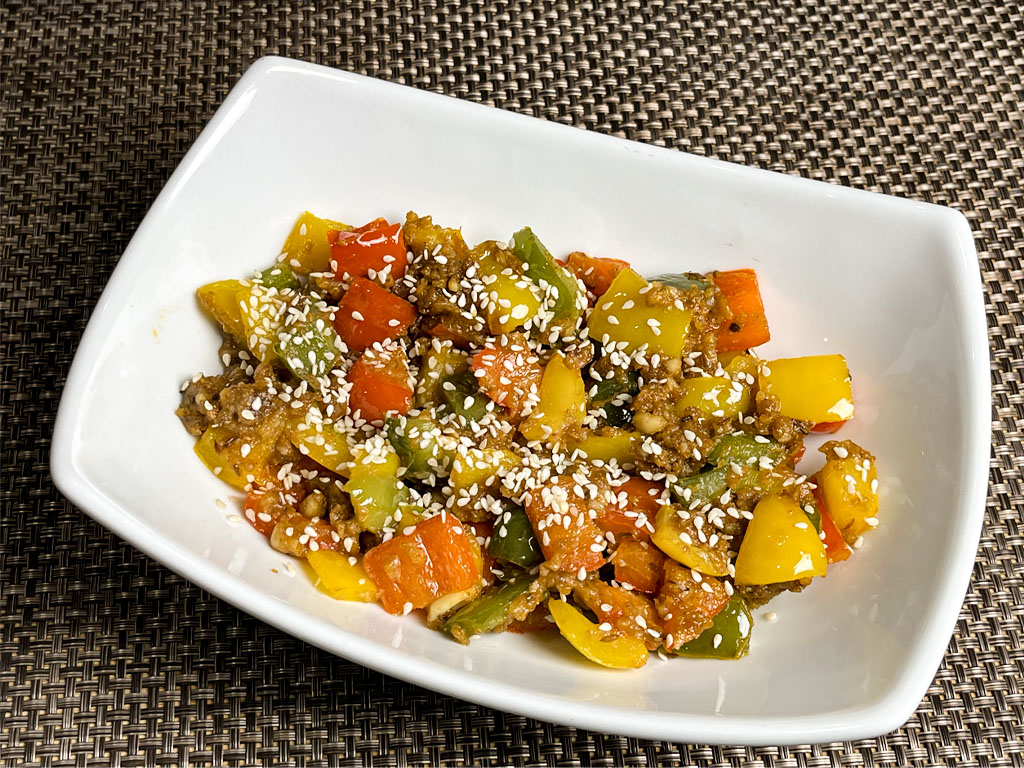
    Sweet and Sour Bell Pepper

    Sweet and sour bell pepper is colorful, sweet, sour, and nutty—all the flavors blend into one delicious taste. It tastes great when served as a side dish with paratha, roti or rice.
    I make this quite often upon request of my family because it can be used for making sandwiches or rolled up in any Indian flatbread or tortillas. For making sandwiches, add cheese to make a complete meal. This recipe is also versatile, keeping everything the same, you can change the bell pepper with potatoes or any squash.
    5 from 1 vote
    Prep Time 10 minutes
    Cook Time 20 minutes
    Servings 2 people

    Ingredients
      

    • 3 cups bite-cubed bell pepper, I am using green, yellow, and red bell peppers to make it colorful.
    • 1/4 cup peanuts coarsely powder
    • 2 tbsp besan
    • 2 tbsp oil
    • 1/2 tsp cumin seeds (jeera)
    • 2 tsp coriander powder (dhania)
    • 1 tsp salt
    • ¼ tsp red chili powder
    • 1 tsp mango powder (amchoor)
    • 2 tsp lemon juice
    • 3 tbsp brown sugar or jaggery
    • 2 tsp sesame seeds

    Instructions
     

    • Cut the bell peppers into bite-size cubes and remove all the seeds.
    • Heat the oil in a saucepan. Test the heat by adding one cumin seed to the oil. If the cumin seed cracks right away, the oil is ready. Add the cumin seeds. After the cumin seeds crack, add peanuts, besan, and 1 teaspoon of sesame seeds. Stir for about half a minute until the besan (gram flour) is golden-brown.
    • Reduce the heat to medium-low, add the bell peppers and stir. Add coriander powder, red chili powder, and salt, then stir. Add about ¼ cup of water and cover the pan. Cook over low-medium heat for 6 to 8 minutes. Open and stir to check if the bell peppers are tender but still have some crispness to it.
    • Add the mango powder and brown sugar. Stir and taste to adjust salt and lemon juice according to your taste.
    • Turn the heat to low and cook for about 2 minutes, stirring gently.
    • Before serving, garnish with the saved sesame seeds. Enjoy
    Tried this recipe?Let us know how it was!

    Easy Bell Pepper Recipe: How to make Sweet & Sour Bell Pepper 

    Bell peppers are versatile vegetables that add vibrant color and flavor to dishes. While commonly used in savory recipes, they also shine in sweet and sour preparations. 

    Sweet and sour bell peppers offer a delightful appetizer with an added combination of tangy sweetness, making them a favorite among food enthusiasts. 

    Tips for Easy Bell Pepper Recipe:

    Selecting Bell Peppers: For bell pepper recipes, Choose bell peppers that are firm, glossy, and free from wrinkles or blemishes. Look for peppers with vibrant colors, such as red, yellow, or orange, as they tend to be sweeter than green bell peppers.

    Preparing Bell Peppers: Wash the bell peppers thoroughly under running water and pat them dry with a paper towel. Remove the stem, seeds, and white membrane from the inside of the peppers before slicing them into uniform strips or cubes.

    Balancing Sweetness and Sourness: Achieving the perfect balance of sweetness and sourness is key to a delicious sweet and sour bell pepper dish. Adjust the amount of brown sugar or jaggery and lemon juice according to your taste preferences, keeping in mind that the sweetness should complement the tanginess without overpowering it.

    Cooking Techniques: Sweet and sour bell peppers can be cooked using various methods, including stir-frying, sautéing, or roasting. Stir-frying is a quick and convenient method that retains the peppers’ crisp texture, while roasting enhances their natural sweetness and adds depth of flavor.

    Suggestions for Spicy Bell Pepper Recipe:

    Side Dish: Sweet and sour bell peppers make a flavorful side dish that pairs well with a variety of main courses, such as grilled tofu. Serve them alongside steamed rice or noodles for a complete meal.

    Topping: Use sweet and sour bell peppers as a topping for pizza, sandwiches, or burgers to add a burst of flavor and color. They can also be layered onto wraps or quesadillas for a tasty twist.

    Dip or Relish: Turn sweet and sour bell peppers into a dip or relish by blending them with herbs, spices, and a touch of olive oil. Serve it with crunchy crackers, tortilla chips, or crusty bread for a delicious appetizer or snack.

    Variations to Sweet & Sour Bell Pepper:

    Spicy Kick: Add diced jalapeños or red chili flakes to the sweet and sour bell pepper mixture for a spicy kick. The heat from the peppers will complement the sweet and tangy flavors, creating a delicious contrast.

    Herb Infusion: Enhance the flavor of sweet and sour bell peppers by infusing them with fresh herbs such as basil, thyme, or cilantro. Simply add the herbs to the cooking process or sprinkle them over the dish before serving for a burst of freshness.

    Protein Addition: Incorporate tofu into the sweet and sour bell pepper dish to make it more hearty and satisfying. Cook the protein separately and then combine it with the peppers during the final stages of cooking.

    Frequently Asked Questions (FAQs):

    Q: How long can I store leftover sweet and sour bell peppers?

    A: Leftover sweet and sour bell peppers can be stored in an airtight container in the refrigerator for up to 3-4 days. Reheat them gently on the stovetop or in the microwave before serving.

    Q: Can I make sweet and sour bell peppers ahead of time?

    A: Yes, you can prepare sweet and sour bell peppers ahead of time and reheat them when ready to serve. However, keep in mind that the texture may slightly change upon reheating.

    Q: Is this dish vegan/vegetarian-friendly?

    A: Of course this dish is absolutely vegan/vegetarian-friendly for it doesn’t incorporate any non veg ingredients.

    Q: How spicy is this dish?

    A: Sweet and Sour Bell Pepper is typically not spicy, but you can adjust the heat level by adding chili flakes or fresh chili peppers if desired.

    Q: Can I make this dish ahead of time?

    Yes, you can make the sauce ahead of time and store it in the refrigerator for up to a week. When ready to serve, simply reheat the sauce and stir in freshly cooked bell peppers.

    Q: What can I serve with Sweet and Sour Bell Pepper?

    This dish pairs well with steamed rice or noodles. You can also serve it alongside other Asian-inspired dishes like stir-fried vegetables or tofu.

    Q: How long will leftovers last?

    Leftovers can be stored in an airtight container in the refrigerator for up to 3-4 days. Reheat gently on the stove or in the microwave before serving.

    Q: Can I freeze Sweet and Sour Bell Pepper?

    While you can freeze this dish, the texture of the bell peppers may change slightly upon thawing. It’s best enjoyed fresh, but if you do freeze it, store it in an airtight container for up to 2-3 months.

    Q: How can I make this dish gluten-free?

    Use tamari or a gluten-free soy sauce instead of regular soy sauce, and ensure all other ingredients are gluten-free as well.

  • Spicy Cashews

    Spicy Cashews

    Spicy Cashews

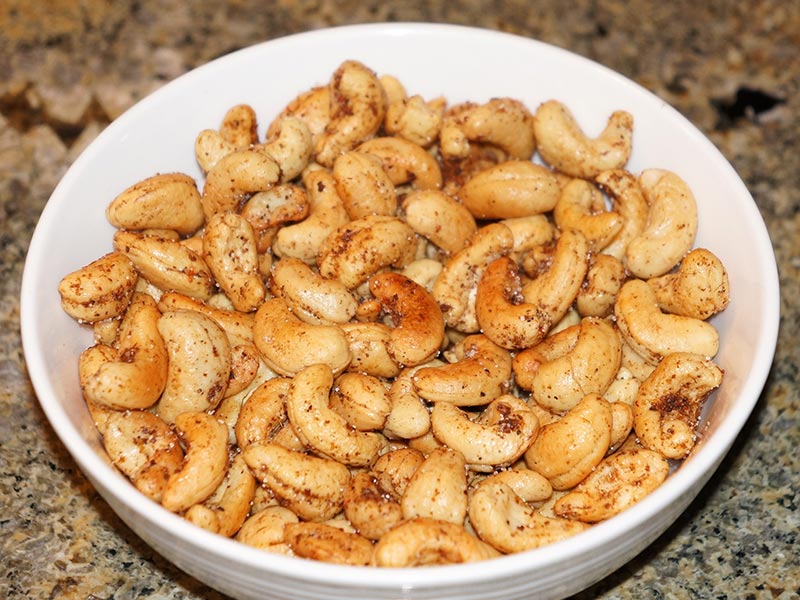
    Spicy cashews are great as a holiday party snack or simply to munch on anytime. Spicy cashews can be quite addicting – they are that good. This simple and delicious recipe will make a great holiday gift too!
    No ratings yet
    Course Appetizer
    Cuisine Indian
    Servings 0

    Ingredients
      

    • 2 cups raw cashew nuts
    • 2 tbsp oil
    • 1 tbsp salt
    • 1/4 tbsp black salt
    • 1/8 tbsp black pepper
    • 1/4 tbsp red pepper
    • 1 tbsp roasted ground cumin seeds powder
    • 1/2 tbsp mango powder

    Instructions
     

    • In a large skillet, roast the cashew nuts in oil over low to medium heat, stirring continuously, until golden brown (seven to eight minutes).
    • Transfer the cashews to a bowl and let them cool until they are warm (not room temperature, or the spices will not coat cashews).
    • Mix all the spices in a small bowl. Sprinkle over the warm cashews and toss to coat them evenly.
    • Store  the cashews in an airtight container once they cool to room temperature.

    Notes

    Note: These cashews can be stored up to a month.
    Variation
    Substitute peanuts for cashews in the above recipe.
    Tried this recipe?Let us know how it was!

    Spicy Cashew A Perfect flavorful Snack 

    Spicy Cashews are the perfect snack for those who crave a little heat and crunch. These spicy roasted cashews are coated in a delicious blend of spices, making them a flavorful and addictive treat. Whether you’re looking for a healthy snack or a tasty addition to your dishes, this spicy cashew recipe is quick & easy to follow and sure to satisfy your taste buds.

    The Essence of Spicy Cashews

    The key to making the best spicy cashew nuts lies in the right combination of spices. By roasting the cashews, you enhance their natural flavor and crunch, while the spices add a kick that makes them irresistible. This recipe is versatile and can be adjusted to suit your spice tolerance.

    Origin and Popularity

    Nuts have been a staple in many cuisines around the world, valued for their nutritional benefits and versatility. Spicy roasted cashews have gained popularity as a healthy snack option that combines the rich, buttery flavor of cashews with the boldness of spices. This snack is perfect for parties, movie nights, or even as a quick, nutritious snack on the go.

    Why You’ll Love This Recipe

    • Healthy Snack: Cashews are packed with nutrients, including healthy fats, protein, and vitamins.
    • Easy to Make: This recipe is simple and quick, perfect for busy schedules.
    • Flavorful: The blend of spices creates a deliciously bold flavor that complements the natural taste of cashews.
    • Versatile: Can be enjoyed on their own or added to various dishes for an extra kick.

    How to Make Spicy Cashews

    Here’s a step-by-step guide on how to make spicy cashews:

    1. Prepare the Cashews: Start with raw, unsalted cashews for the best results. Preheat your oven to 350°F (175°C).
    2. Mix the Spices: In a bowl, combine spices such as cayenne pepper, paprika, garlic powder, salt, and a touch of sugar. Adjust the quantities based on your spice preference.
    3. Coat the Cashews: Add the cashews to the spice mixture and toss to coat evenly. You can use a bit of olive oil or melted butter to help the spices stick to the nuts.
    4. Roast the Cashews: Spread the coated cashews on a baking sheet in a single layer. Roast in the preheated oven for about 15-20 minutes, stirring occasionally to ensure even roasting.
    5. Cool and Store: Once golden and fragrant, remove the cashews from the oven and let them cool completely. Store in an airtight container to keep them fresh and crunchy.

    Variations of the Recipe

    Exploring Manjula’s Kitchen reveals a treasure trove of other delicious snack recipes that you might enjoy. Here are some related variations that you might find interesting:

    1. Masala Peanuts: A spicy and crunchy snack made with roasted peanuts coated in a blend of Indian spices.
    2. Roasted Chickpeas: A healthy and crunchy snack made with chickpeas tossed in spices and roasted until crispy.
    3. Methi Mathri: A crispy and savory Indian snack made with fenugreek leaves and spices.
    4. Aloo Bhujia: A spicy and crispy potato-based snack that is perfect for munching.
    5. Spicy Bhel Puri: A flavorful and spicy mixture of puffed rice, vegetables, and chutneys.

    Serving Suggestions

    Spicy cashew nuts can be enjoyed in various ways:

    • As a Snack: Perfect for a quick and healthy snack on the go.
    • With Drinks: Serve as a spicy accompaniment to your favorite beverages.
    • In Salads: Add a handful of spicy roasted cashews to your salads for an extra crunch and flavor.
    • In Stir-Fries: Toss them into stir-fries for a spicy twist.

    Tips and Tricks

    To perfect your spicy cashew recipe, consider these helpful tips:

    • Use Fresh Spices: Fresh spices will enhance the flavor of your cashews.
    • Roast Evenly: Stir the cashews occasionally while roasting to ensure they are evenly cooked.
    • Adjust Spice Level: Tailor the spice level to your preference by adjusting the amount of cayenne pepper and other spices.

    FAQs

    Are Spicy Cashews Vegan?

    Yes, they can be made vegan by using olive oil or another plant-based oil instead of butter.

    Can I Make It Ahead of Time?

    Yes, these cashews can be made ahead of time and stored in an airtight container for up to two weeks.

    What Can I Serve with These Cashews?

    They can be served with a variety of dishes, including salads, stir-fries, or as a standalone snack.

    How Long Does It Take to Make?

    The preparation and cooking time for this recipe is about 30 minutes.

  • Muthia

    Muthia

    Muthia (Steamed Dumpling)

    Muthia (Steamed Dumpling)

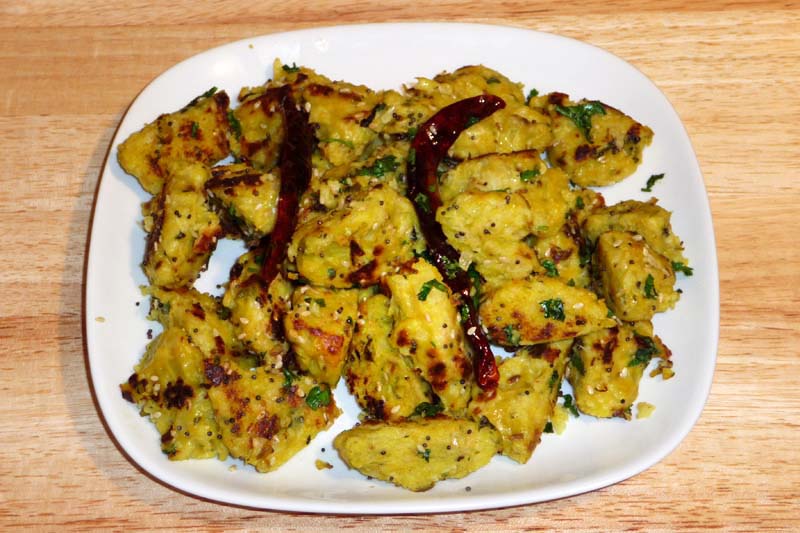
    Muthias are steamed spiced dumplings, made with gram flour (besan), cabbage, and spices. They make a tasty appetizer or snack.
    Serves 4.
    3.67 from 3 votes
    Course Appetizer
    Cuisine Indian
    Servings 4 people

    Ingredients
      

    For Muthia

    • ½ tsp sugar
    • tsp citric acid
    • 4 cup cabbage very fine shredded
    • 1 cup gram flour basen (available in Indian grocery stores)
    • 2 Tbsp whole wheat flour
    • 2 Tbsp chopped fenugreek leaves can be substitute with 2 tablespoons of dry fenugreek leaves or kastoori mathi fenugreek can also be replaced with chopped cilantro (hara dhania)
    • 2 chopped green chili adjust to taste
    • 1 tsp cumin seed jeera
    • ½ tsp turmeric haldi
    • 1 tsp salt adjust to taste
    • 2 Tbsp oil

    For Seasoning and Garnish

    • 2 Tbsp oil
    • ½ tsp mustard seeds
    • 1 Tbsp sesame seeds til
    • 4 whole red chili
    • 2 Tbsp chopped cilantro hara dhania

    Instructions
     

    • Combine gram flour, whole wheat flour, fenugreek, cumin seed, turmeric, green chili, sugar, citric acid, oil, and salt in a bowl.
    • Add the cabbage to the flour mixture and mix well to make soft dough. Add water if needed .
    • Grease your fingers and divide the mixture into 14 pieces. Drop slowly onto the steamer and steam, covered, 18 to 20 minutes. Test by inserting a knife; blade should come out clean.
    • Let the muthias cool. Cut each one into two pieces off and then slice them in two pieces.

    Making Seasoning

    • Heat the oil in the frying pan over medium high heat. Add the mustard seeds. Once they crack, add the sesame seeds and red chili and stir-fry the mixture a few seconds.
    • Add muthias and stir-fry them for three to four minutes until they are light brown.Garnish them with chopped cilantro.
    • Serve them hot or at room temperature.

    Notes

    Additional Notes
    • Steam immediately after preparing the mixture. If you allow it to sit, it will be too soft. If you have more than one batch, hold the salt and add it one batch at a time or it will be too soft.
    • Muthias can be refrigerated for 3 to 4 days.
    • Muthias can be frozen before seasoning. When ready to serve, thaw the frozen muthias and season them.
    Variation
    You can substitute zucchini or bottled gourd (also known as doodhi, loki or ghia) for the cabbage. Because theses vegetables have more water content, after shredding lightly squeeze them between your palms to remove the excess water before making the mixture.
    Serving suggestions
    • Muthias are great with cilantro chutney.
    • Muthias can be served just after steaming, but before seasoning, with cilantro chutney.
    Keyword Cabbage, Cabbage Dumpling, Healthy, Muthia, Muthiya, Steamed, Vegan
    Tried this recipe?Let us know how it was!
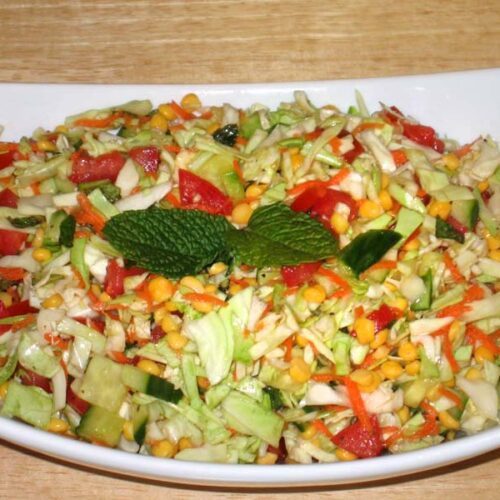
  • Cabbage Chana Dal Salad

    Cabbage Chana Dal Salad

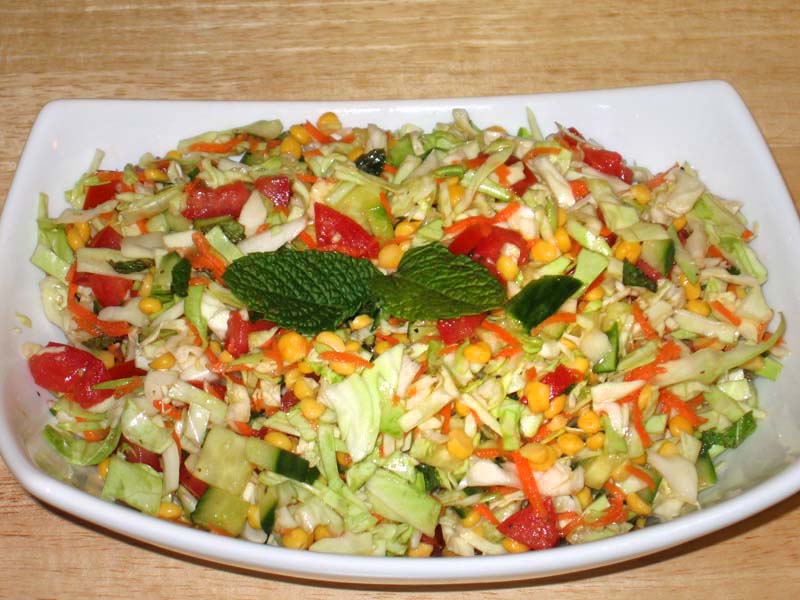
    A bowl of Cabbage Chana Dal Salad garnished with fresh coriander

    Cabbage Chana Dal Salad

    Cabbage Chana Dal Salad is a healthy and refreshing colorful salad can brighten up any meal. Perfect for summer brunch or served with any meal.
    Serves 4.
    5 from 1 vote
    Course Salad
    Cuisine Indian
    Servings 4 people

    Ingredients
      

    • 2 cup cabbage very finely chopped
    • 2 medium tomatoes seeded and finely chopped
    • 1 cup cucumber chopped
    • 1 carrot shredded
    • 10 mint leaves minced
    • ¼ cup yellow chana dal

    Salad Dressing:

    • 1 Tbsp olive oil
    • 1 Tbsp vinegar
    • 1 Tbsp lemon juice
    • 1 Tbsp ginger juice
    • 1 tsp salt
    • 1 tsp sugar
    • ½ tsp ground black pepper

    Instructions
     

    • Soak the chana dal for at least 2 hours in lukewarm water.
    • When ready, the dal should be soft all around.
    • Drain the water from chana dal.
    • Mix the chana dal with the chopped vegetables.
    • Mix the ingredients above together to make the salad dressing.
    • Mix the salad and dressing together and let sit for about a half hour so the salad is nicely marinated.

    Notes

    Variations
    • Substitute chana dal with split yellow moong dal or moong dal sprouts.
    • You can substitute the dal with boiled corn and finely chopped bell pepper.
    Suggestions
    • This salad dressing can be used with any salad.
    • Take out the vinegar and use this dressing with fresh fruit, adding chopped mint leaves.
    Keyword brunch, Cabbage, chana, Dal, Gluten Free, Moong, Refreshing, Salad, Spices, summer, Vegan
    Tried this recipe?Let us know how it was!
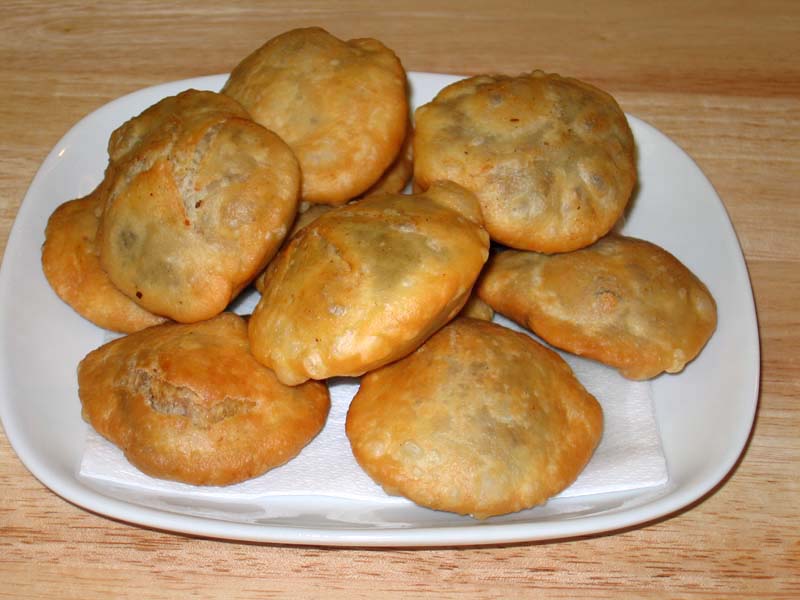
  • Khasta Kachori

    Khasta Kachori

    Khasta Kachori

    Khasta Kachori

    Khasta kachori is a delicious, spicy, fried puffed pastry. Khasta Kachori is filled with spicy moong dal mixture and then deep fried. Kachori is flakey from outside and hollow inside. Kachori should be fried on low heat so it can cook through to have a nice crunch. Khasta kachori is one of the dish you can eat for any meal! Serve them for breakfast with potato curry with yogurt. kachori makes a mouthwatering appetizer and can be served with, Green Chutney, and tamarind chutney. How about serving for dinner with Aloo Dum. This is one of those recipe you make when you want to impress someone. Kachories can also be stored in air tight container for a week.
    4.16 from 13 votes
    Prep Time 15 minutes
    Cook Time 40 minutes
    Total Time 55 minutes
    Course Appetizer
    Servings 4 people

    Ingredients
      

    Dough

    • 1 cup all purpose flour maida, plain flour
    • ¼ tsp salt
    • 2 Tbsp oil canola, or vegetable
    • ¼ cup cold water more or less as needed

    Filling

    • ¼ cup washed moong dal, yellow
    • 1 tsp fennel seeds coarsely ground saunf
    • 1 tsp red chilly flakes
    • ¼ tsp ginger powder saunth
    • ½ tsp mango powder amchoor
    • tsp asafetida hing
    • ½ tsp salt
    • 2 Tbsp water

    Instructions
     

    Making Dough

    • Mix the flour, salt and oil. Add the chilled water slowly, mixing with your fingers as you pour. Do not knead the dough. The dough should be soft. Cover the dough and let it sit for at least fifteen minutes.

    Filling

    • Grind the moong dal dry, almost to a powder.
    • Mix one tablespoon of oil to the ground dal in a frying pan and roast over medium heat for about two to three minutes or until dal changes color slightly. Stir continuously. Turn off the heat. Add all the spices mix well. Let the mixture cool off. Add two tablespoons of warm water and mix it well. Let it sit for ten minutes and cover with demp cloth.

    Making Kachories

    • Take the dough and knead it for a minutes. Divide the dough in twelve equal parts.
    • Take one part of the dough and with your fingers flatten the edges and make into 3-inch circle. Leaving center little thicker then edges. Mold the dough into a cup and place 1 teaspoon of filling in the center. Pull the edges of the dough to wrap the dal filling. Proceed to make all 12 balls.
    • Let the filled ball sit for three to four minutes before rolling.
    • Set the kachoris on a surface with the seams facing up. Using the base of your palm, slowly flatten them into about three inches in diameter.
    • Heat the oil in frying pan over medium heat frying pan should have about one inch of oil. To check if oil is ready put a little piece of dough in the oil. Dough should sizzle, and come up very slow.
    • Fry them on medium-low heat. After they start to puff, slowly turn them over. Fry until golden-brown on both sides. If the kachoris are fried on high heat, they will get soft and will not be crispy.
    • Kachories can be stored for at least a week in an airtight container

    Notes

    Additional Tips
    Don’t roll the kachoris with a rolling pin. Rolling pins can create small holes in the dough that let the oil seep into the kachoris, and they can also cause the kachoris to come out with one side thicker than the other.
    Variation
    Instead of using moong dal, you can use washed urad dal or chana dal. The rest of the recipe stays the same.
    Serving suggestions:
    Kachoris can be served plain, with Tamarind Chutneys, chola, or with Aloo Dum.  Serve them as a chat, pouring plain yogurt and chutney on top.
    Tried this recipe?Let us know how it was!

    Khasta Kachori Recipe: How to make Khasta Kachori

    Khasta Kachori, a popular Indian street food delicacy, is a deep-fried pastry filled with a spicy and flavorful stuffing. This crispy and indulgent snack is loved for its rich taste and satisfying crunch, making it a favorite among food enthusiasts.

    Khasta Kachori Recipe: 

    Rich Flavor Profile: Khasta Kachori is bursting with a medley of spices and aromatics, creating a symphony of flavors with every bite. The combination of ingredients like lentils, spices, and herbs provides a unique and indulgent taste experience.

    Satiating Snack: Despite its small size, Khasta Kachori is incredibly filling and satiating, making it an ideal snack option to curb hunger pangs between meals or as a satisfying accompaniment to tea or coffee.

    Versatile: While traditionally served as a snack, Khasta Kachori can also be enjoyed as a part of a larger meal. It pairs well with various chutneys, sauces, and accompaniments, allowing for endless culinary creativity.

    Convenience: Khasta Kachori can be prepared in advance and stored for later consumption, making it a convenient snack option for busy days or entertaining guests.

    Variations of Kachori:

    1. Mattar Ke Kachori: Mattar Kachori is a delicious, fried puff pastry filled with spicy green peas. This mouthwatering snack also can be served as part of any main meal.
    2. Raj Kachori: Raj Kachori is a spicy chaat bowl filled with delicious condiments. It has refreshing flavors and makes for a unique food experience. Guests will have fun filling their own Kachoris according to their taste palette. Served as a snack or appetizer, Raj Kachories make a beautiful presentation and are thoroughly enjoyed by just about everyone.
    3. Mawa Kachori: Mawa Kachori is an exotic dessert. This is a delicacy from the state of Rajasthan. Rajasthan is known for its rich food and culture. Pastry filled with an aromatic mixture of Mawa and nuts makes a very festive dessert.
    4. Urad Dal Kachori: Dal kachori is a delicacy from north India. Dal kachori is a spicy puffed pastry. Traditionally kachoris are sold at a sweet and snack shop. These mouthwatering Dal kachoris can be served as a snack, chaat or part of main meal, making the meal exotic.

    Tips for Making Perfect Khasta Kachori

    Prepare the Dough with Care: The key to crispy and flaky Khasta Kachori lies in the dough preparation. Use a combination of all-purpose flour (maida) and semolina (sooji) to achieve the desired texture. Ensure that the dough is firm yet pliable to prevent it from becoming too soft during frying.

    Fry at the Right Temperature: Fry the kachoris in hot oil over medium-high heat to ensure that they cook evenly and develop a golden-brown crust. Avoid overcrowding the frying pan to maintain the oil temperature and prevent the kachoris from absorbing too much oil.

    Seal the Edges Properly: To prevent the filling from leaking out during frying, seal the edges of the kachoris tightly before frying. Press the edges together firmly and ensure that there are no gaps or openings.

    Serve Fresh and Hot: Khasta Kachori is best enjoyed fresh and hot, straight out of the frying pan. Serve it with your favorite chutneys, sauces, or accompaniments for a delightful snacking experience.

    FAQs about Khasta Kachori:

    Can I make Khasta Kachori ahead of time? 

    While Khasta Kachori is best enjoyed fresh, you can prepare the dough and filling in advance and assemble the kachoris just before frying to save time.

    Can I bake Khasta Kachori instead of frying? 

    While traditional Khasta Kachori is deep-fried for that signature crispy texture, you can try baking them for a healthier alternative. However, the texture and taste may differ slightly.

    What are the best accompaniments for Khasta Kachori? 

    Khasta Kachori pairs well with a variety of chutneys such as tamarind chutney, mint chutney, or coriander chutney. It also tastes delicious with a dollop of yogurt and a sprinkle of chaat masala.

    Is Khasta Kachori suitable for vegetarians? 

    Yes, Khasta Kachori is a vegetarian dish as it contains no meat or animal products. It’s a popular choice among vegetarians and vegans alike.

    Khasta Kachori is not just a snack; it’s a culinary delight that excites your taste buds with its crispy exterior and flavorful filling. Whether enjoyed as a street food treat or homemade snack, its rich taste and versatility make it a beloved favorite in Indian cuisine. 

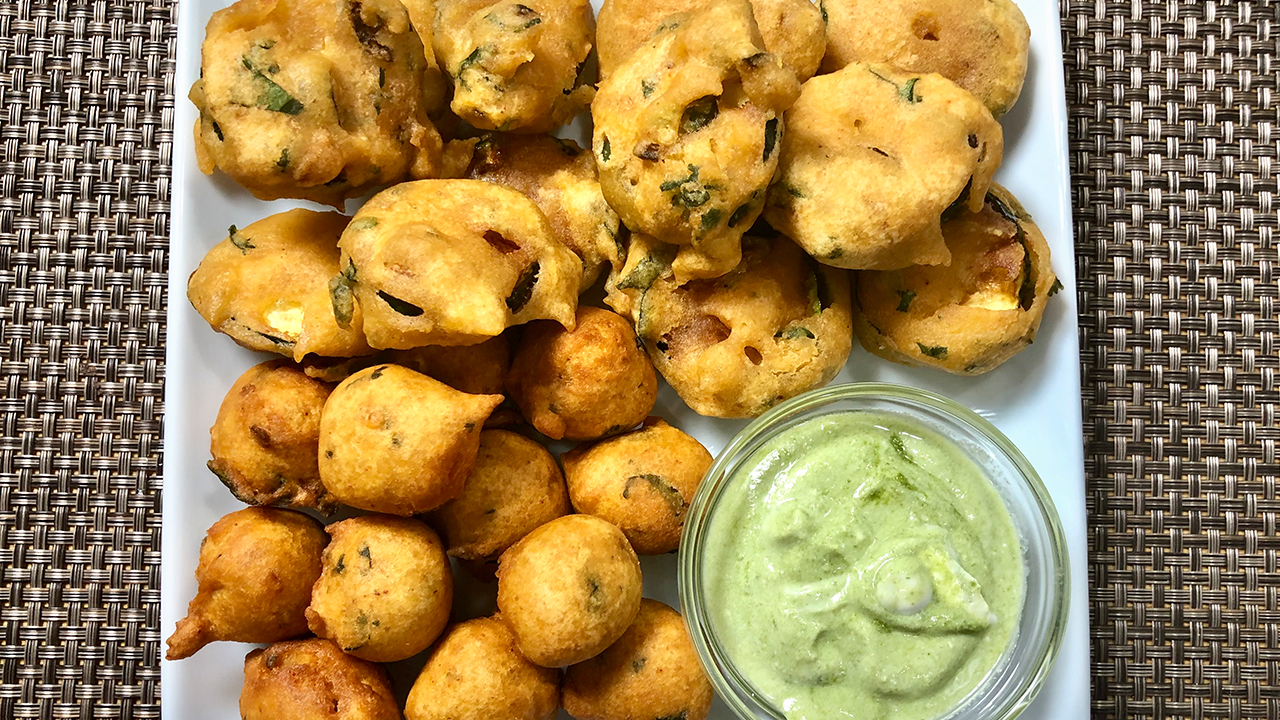
  • Zucchini Lentil Pakoras

    Zucchini Lentil Pakoras

    A plate of crispy Zucchini Lentil Pakoras served with chutney

    Zucchini Lentil Pakoras

    As pakoras are one of the most welcoming snacks all over India. It is a popular street food. Everyone has their own favorites and there are countless recipes. Pakoras are a very comforting snack especially when it is cold, and it is raining. Here, we are experiencing both and I am wishing for pakoras with a hot cup of chai, blanket and a good TV show or movie. In a particular magazine, I saw a fusion pakora recipe. Instead of using traditional beasn batter, the chef had used red lentil batter. Several times, I have used moong dal batter, but I never even thought about using red lentil. I was ready to give it a try with another pakora recipe using lentil batter. I made some changes and added chopped ginger that added a nice kick to the pakoras. They turned out to be mouthwatering appetizers: crispy on the outside and soft on the inside. These pakoras are addicting! These work as a tasty pairing with your afternoon tea or a spicy delicious snack before any meal. These pakoras have a different crispness but are very delightful. Give these pakoras a try and enjoy! These Pakoras are also vegan and gluten-free.
    This recipe will serve 4.
    5 from 1 vote
    Prep Time 10 minutes
    Cook Time 15 minutes
    Total Time 25 minutes
    Course Appetizer
    Cuisine Indian
    Servings 4 people

    Ingredients
      

    • 1 cup red lentils washed masoor dal
    • 1 zucchini medium sized, cut into thick rounds
    • 2 Tbsp green chili chopped
    • 2 Tbsp ginger finely chopped
    • 2 Tbsp cilantro chopped
    • 1 ½ tsp salt adjust to taste
    • ½ tsp red chili powder
    • Pinch of baking soda
    • 2 Tbsp corn starch

    Instructions
     

    • Soak red lentil at least for 1hours or more.
    • Pet dry zucchini slices and keep aside.
    • Blend dal to smooth batter, using just enough water needed to blend.
    • To make Pakora batter add corn starch, salt, chili powder and salt together, mix it well, whipping for few seconds. Add all the other ingredients to the batter, ginger, green chili, cilantro and mix all the ingredient well. Batter should be consistency of pancake mix, if needed add little water.
    • Heat the oil in a frying pan on medium-high heat. The frying pan should have about 1 inch of oil. To check if the oil is ready, put one drop of batter in the oil. The batter should come up but not change color right away.
    • Dip the zucchini slices into the batter one at a time, making sure it is covered by the batter completely. Then, slowly drop into the frying pan.
    • Fry the pakoras in small batches, not overlapping. The pakoras will take about 4-5 minutes to cook.
    • Turn them occasionally. Fry the pakoras until both sides are golden brown. If the oil is too hot, the pakoras will brown too fast and not get crispy.
    • Left over batter, place about one tablespoon of batter into the oil. Fry the pakoras in small batches until golden-brown.
    • The crispy, delicious pakoras are now ready to serve. I like to serve these both pakoras side by side.

    Notes

    Serving Suggestions
    Tried this recipe?Let us know how it was!
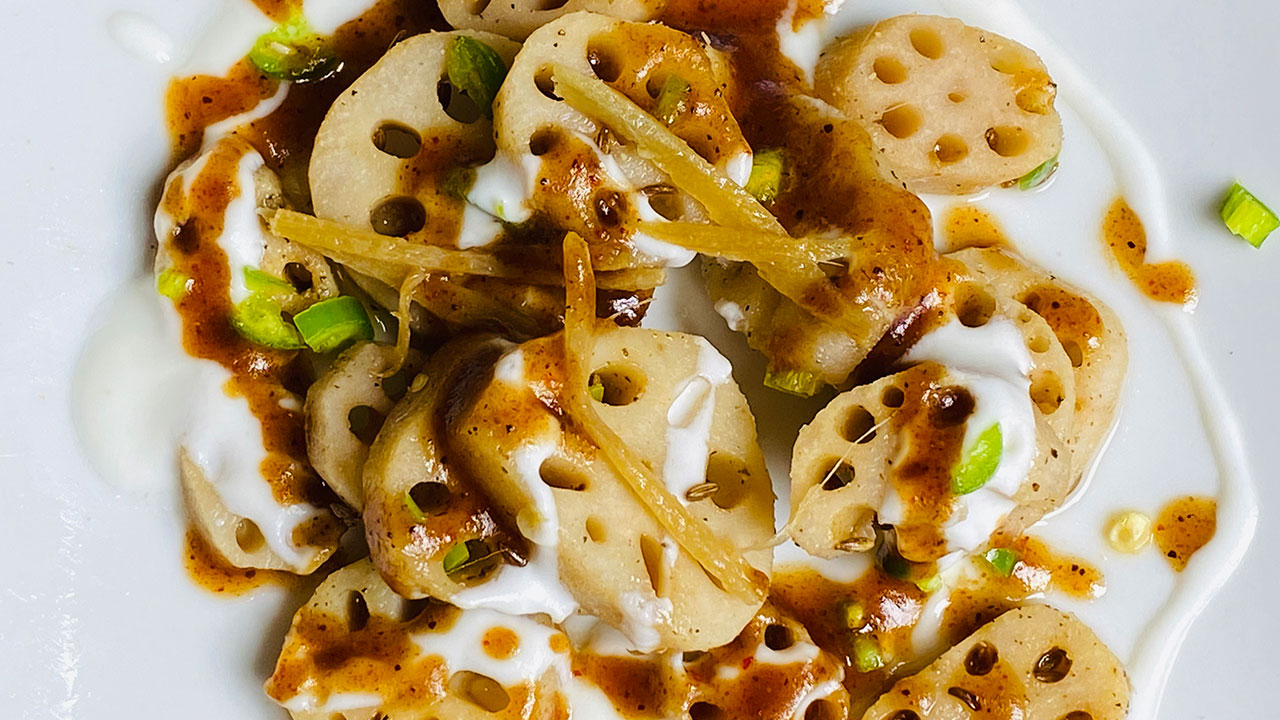
  • Kamal Kakdi Ki Chaat

    Kamal Kakdi Ki Chaat

    A plate of Kamal Kakdi Ki Chaat

    Kamal Kakdi Ki Chaat

    Kamal Kakdi Chaat is a truly unique and tasty dish. I wanted to make something new and delicious but also healthy and easy to make. kamal kakdi, is an edible lotus root that has a crunchy texture and slightly sweet taste. After doing some research, I was surprised at how much nutrients kamal kakdi has. I was excited to try out a spicy chat recipe using it. An added plus is that this recipe requires no frying and is a nice healthy savory snack. My family really enjoyed this new dish! Hope you give this recipe a try and enjoy!
    This recipe will serve 6.
    5 from 1 vote
    Prep Time 5 minutes
    Cook Time 5 minutes
    Total Time 10 minutes
    Course Chaat
    Cuisine Indian
    Servings 6 people

    Ingredients
      

    • 2 cup sliced lotus stem I am using frozen, Kamal Kakdi
    • 1 Tbsp oil
    • 1 Tbsp ginger thinly sliced, adrak
    • ½ tsp cumin seeds jeera
    • ½ tsp salt
    • ¼ tsp black pepper kali mirch
    • 1 tsp green chili finely chopped, Hari mirch
    • ½ tsp lemon juice

    Also Need for Serving

    • ½ cup whipped yogurt for serving
    • 2 Tbsp tamarind chutney please add the link check the recipe

    Instructions
     

    • pressure cook the Kamal Kakdi in an instant pot for five minutes in two cups of water. I also drained the water. Kamal Kakdi should be tender. Notes: you can also, use the pressure cooker and cook at the same time, or you can also cook in a pot for 20 minutes.
    • Drain the water and pat dry.
    • In a frying pan heat the oil over low medium heat. Add the oil, oil should be just warm add sliced ginger. Stir fry for about 2 minutes and take it out in a bowl. I will use this ginger later for garnishing. Note: I feel adding ginger later it gives a nice kick to chaat.
    • Use the same pan and it already has some left-over oil. Oil should be moderately hot, add cumin seeds. As cumin seeds crack add kamal kakdi, stir and sprinkle salt and black pepper.
    • Stir fry for one minute add about 1 teaspoon of chopped green chiles and lemon juice stir fry for about 2 minutes, turn off the heat. Kamal Kakdi is ready to be served.
    • Plating the chaat, drizzle yogurt over kamal kakdi also drizzle tamarind chutney. And finish it off with some green chilies and roasted ginger.

    Notes

    Serving suggestions: You can also serve this kamal kakdi as is as a masla kamal kakdi, sprinkle little chaat masala.
    You will also enjoy the recipes for, Bread Pudding With Chocolate Sauce, Sabudana (Tapioca) Bhel, Dahi Puri Chaat
    Tried this recipe?Let us know how it was!
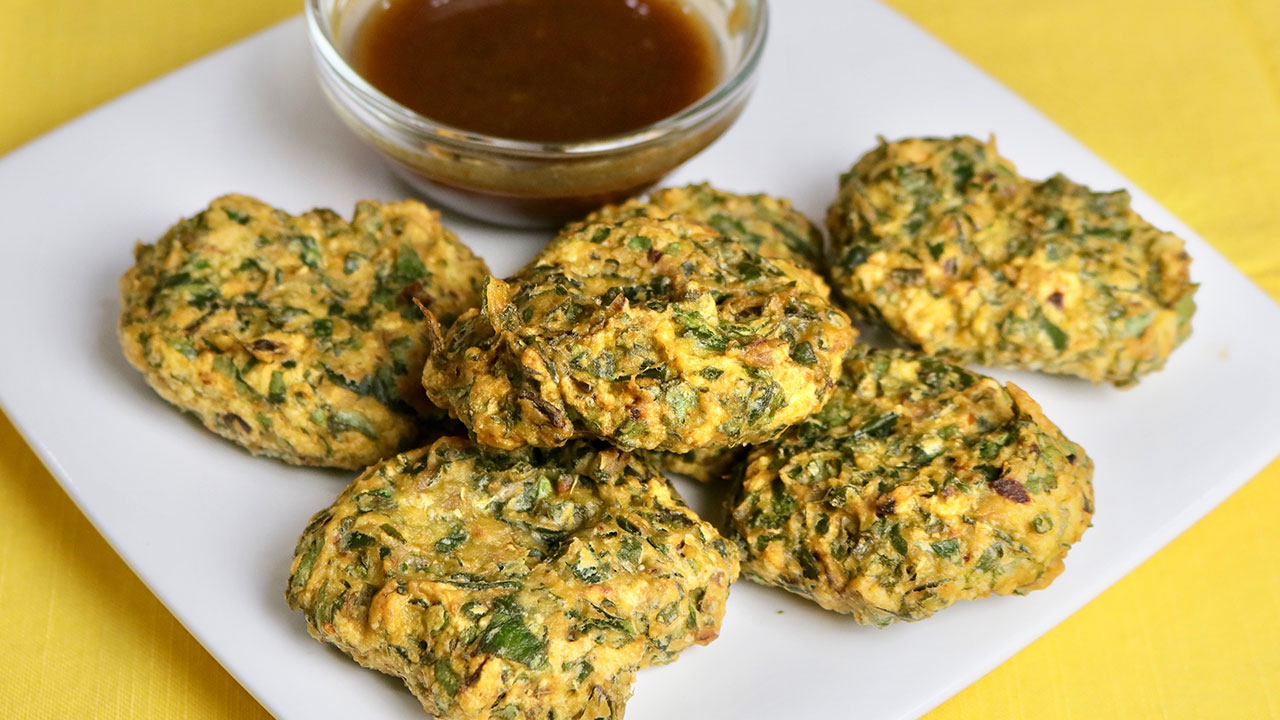
  • Palak Pakora

    Palak Pakora

    Six palak pakoras served with a bowl of tamarind chutney on a white plate.

    Palak Pakora (Crispy Spinach Fritters)

    Palak Pakoras are a crispy and flavorful snack, and quite possibly the tastiest compliment for your afternoon tea.
    Warning: These pakoras are highly addicting! Eat at your own risk!
    This recipe will serve 4.
    5 from 2 votes
    Prep Time 10 minutes
    Cook Time 10 minutes
    Course Appetizer, Snack
    Cuisine Indian
    Servings 4 people

    Ingredients
      

    • 2 cup packed spinach roughly chopped
    • 1 cup besan gram flour
    • 2 Tbsp corn starch
    • 2 tsp chili flakes adjust to taste
    • 2 tsp coriander crushed dhania
    • ½ tsp mango powder amchoor
    • ½ tsp cumin seeds jeera
    • ½ tsp salt
    • tsp asafetida hing
    • 1 tsp oil

    Instructions
     

    • Combine all the dry ingredients, with spinach, besan, corn starch, coriander, cumin seeds, chili flakes, salt, mango powder, and asafetida in a bowl. Mix it well.
    • Add water as needed to make sticky dough.
    • Heat at least one inch of oil in a frying pan over medium high heat. To test, put one drop of batter in the oil. The batter should come up slowly.
    • Oil your palm lightly, take about 2 tablespoons of dough and roll them in patties, but not very thin. Make all the patties and put them over greased plate.
    • Drop the patties slowly in oil, do not overlap the pakoras. Fry the pakoras this will take three to four minutes per batch. Fry the pakoras, turning occasionally, until both sides are golden brown.
    • Repeat this process for the remaining batches.

    Notes

    They taste best when they are served hot. Palak Pakoras taste delicious specially when they are served with sweet and sour tamarind chutney, and hot cup of chai. You can also serve them as a chaat drizzling whipped yogurt, tamarind chutney and cilantro chutney
    If you have prepared them before, the best way to heat the pakoras fry them again or heat them in oven at 350 for about 10 minutes.
    Enjoy! And thank you
    Keyword Appetizer, Gluten Free, Homemade, Jain Food, No Garlic, No Onion, Sattvik Food, Snack, Spinach Fritters, Tasty, Tea Time Snack, Vegan
    Tried this recipe?Let us know how it was!
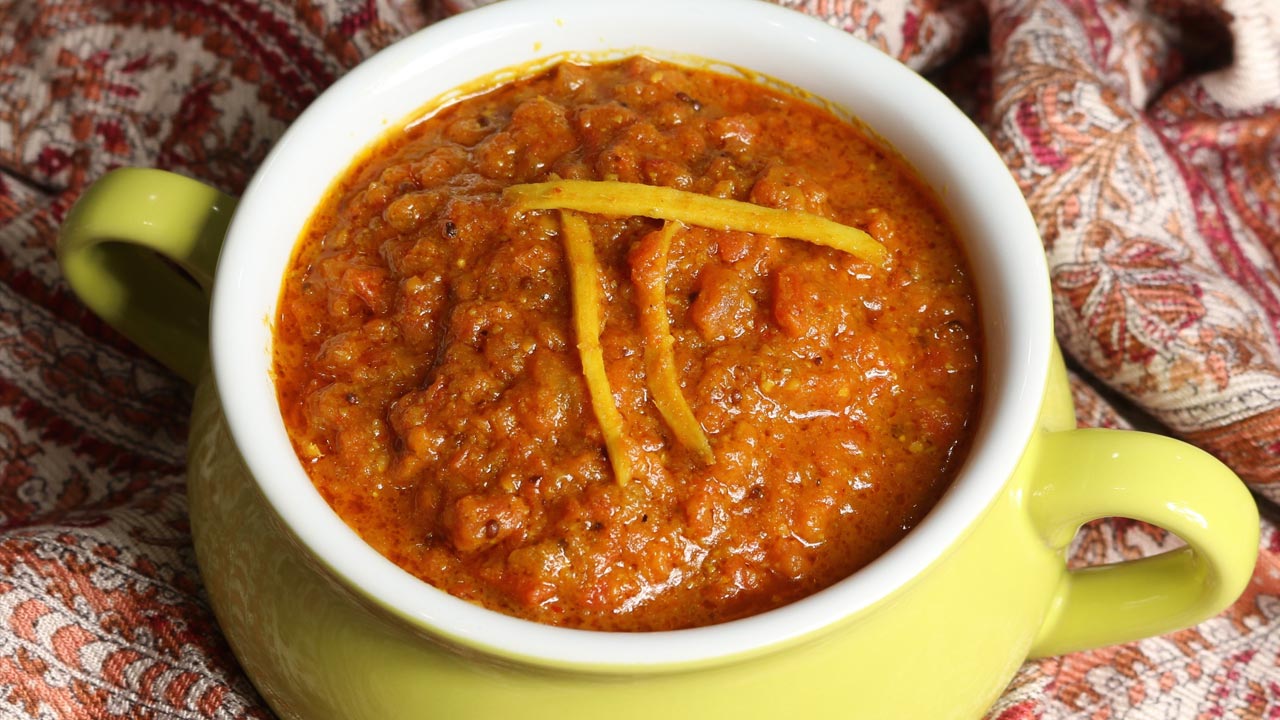
  • Tomato Chutney Recipe

    Tomato Chutney Recipe

    Tomato Chutney

    Tomato Chutney (Pickle)

    Tomato Chutney is tangy and spicy. I was inspired to make this particular tomato chutney from the south Indian cuisine. Chutneys and pickles are a common component of Indian meals. This unique blend of spices gives an amazing unforgettable flavor to chutney. It goes well with breads and rice or can be used as a spread for sandwiches. Tomato chutney is very easy to make and can be refrigerated for up to a month.
    5 from 1 vote
    Prep Time 10 minutes
    Cook Time 30 minutes
    Total Time 40 minutes
    Course Side Dish
    Cuisine Indian
    Servings 10 people

    Ingredients
      

    • 4 cups tomatoes cubed in small pieces
    • 3 tbsp tamarind paste
    • 1/4 cup oil
    • 1 tsp mustard seeds rai
    • 1 tsp asafetide hing
    • 1/4 tsp turmeric haldi
    • 2 tbsp sesame seeds til
    • 2 tbsp coriander seed
    • 1 tsp fenugreek seeds
    • 10 whole dry red chilies
    • 1/4 cup sliced ginger optional
    • 1 tsp salt
    • 2 tsp sugar

    Instructions
     

    • In a small frying pan dry roast red chilies, over low medium heat, stirring continuously to cook evenly till they are darker in color, this should take about 2 minutes. Remove from the frying pan.
    • In the same pan, dry roast sesame seeds, coriander seeds, and fenugreek seeds over low medium heat individually stirring continuously to cook evenly for about less than a minutes. Don’t over roast.
    • In a same pan add 2 teaspoons of oil when oil is moderately hot add ginger and stir-fry on low medium heat for about 3 minutes until ginger start catching the light brown color from the sides. Set aside.
    • After spices cool of grind them into the powder. Set aside.
    • In a blender crush the tomatoes do not make a paste. Set aside.
    • In a pan heat remaining oil over medium high heat, oil should be moderately hot add mustard seeds, after they crack add asafetida. Now add tomatoes, and tamarind paste. Stir and cook for about 10 minutes semi covered (after tomato comes to boil start splattering) or until oil start separating.
    • Add the roasted spice powder, ginger, turmeric, salt and sugar, reduce the heat to low medium and cook for about another 8 minutes or until chutney is thick and oil is separated.

    Notes

    I like to serve tomato chutney with rava dosa, vada or spread on sandwich.
    Tried this recipe?Let us know how it was!

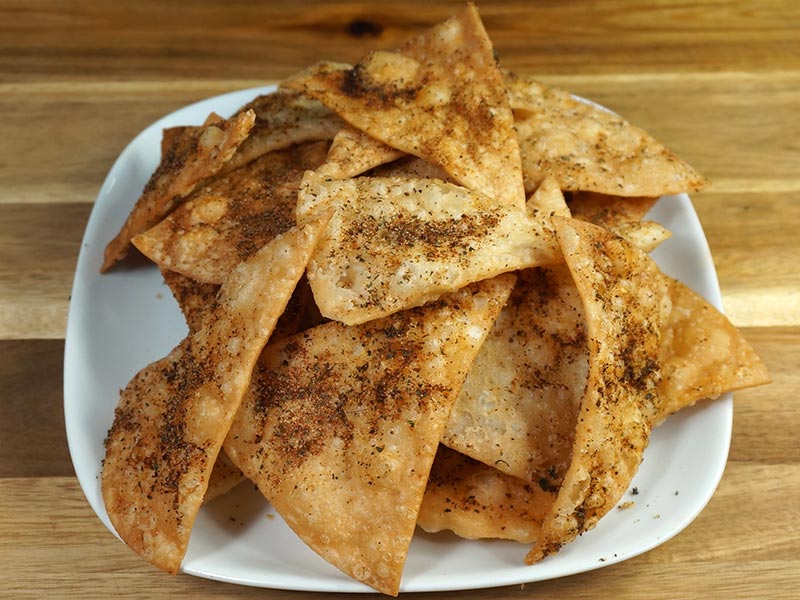
  • Spicy Indian Chips Recipe

    Spicy Indian Chips Recipe

    Spicy Indian Chips

    Spicy Indian (Flour) Chips

    If you like chips, and you like spicy food, these chips are for you. This is a quick and easy snack recipe. I have used flour tortillas and flavored them with Indian spice mix. They are hard to resist you will say just one more.
    No ratings yet
    Course Appetizer
    Cuisine Indian
    Servings 6 people

    Ingredients
      

    • 4 flour tortillas uncooked I am using 8” diameter tortillas
    • Oil to fry

    Spice Mix

    • 1 tbsp dry mint leaves available at Indian grocery store
    • 1 tbsp roasted cumin seed powder
    • 1/4 tbsp garam masala available Indian grocery store
    • 1/2 tbsp black salt available in Indian grocery store
    • 1/2 tbsp salt
    • 1/2 tbsp red chili powder
    • 1/2 tbsp mango powder (amchoor) available Indian grocery store
    • Generous pinch of citric acid (nimbu ka sat)

    Instructions
     

    • Spice mix, in a bowl mix all the spices really well. Set aside.
    • Prick the tortillas from both sides, this will limit chips from puffing and make them crisp.
    • Cut each tortilla in 8 triangles, like slicing pizza.
    • Heat the oil in a frying pan over medium heat. The frying pan should have about 1 inch of oil. To check if the oil is ready, put a small piece of tortilla in the oil. The tortilla should sizzle and come up slowly.
    • Heat the oil in a frying pan over medium heat. The frying pan should have about 1 inch of oil. To check if the oil is ready, put a small piece of tortilla in the oil. The tortilla should sizzle and come up slowly.
    • Take them out in a plate and sprinkle the spice mix on both sides right away, before they are dry. This will keep the spices on the chips. Repeat the process until all the chips are done.
    • After the chips cool to room temperature they can be stored in airtight container for 1 month.

    Notes

    Suggestions
    1. For Fried Tortillas If you don’t find uncooked tortillas use thin tortillas.
    2. Fried tortillas store well in air tight container for a month.
    3. Fried tortillas can be served in many different ways; a quick and easy way is to make Papdi Chaat. Serve them with Chole Chaat or Matra Chaat and I am sure you can find many other ways to serve them.
    4. For Spice mix Make spice mix in a big batch and use it like Chaat Masala over the sliced fruits, salad, with yogurt. I am sure you can find many other ways to use this spice mix.
    Tried this recipe?Let us know how it was!

    Savor the Crunch: Spicy Indian Flour Chips

    When it comes to irresistible snacks, spicy Indian flour chips top the list. These crunchy delights, known for their bold flavors and satisfying texture, are perfect for any occasion. Whether you’re hosting a party, looking for a quick bite, or craving a spicy snack, these chips are sure to please. In this article, we’ll explore the origins, variations, and tips for making the perfect Indian flour chips at home, along with maximizing the use of internal links to other delicious recipes.

    The Essence of Spicy Indian Flour Chips

    Spicy Indian flour chips are made from a simple dough of flour, spices, and herbs, rolled out thin and fried to crispy perfection. The combination of spices used in the dough gives these chips their distinctive flavor, making them a favorite snack among spice lovers. These chips are often enjoyed with a cup of tea or as an accompaniment to meals, adding a delightful crunch to every bite.

    Origins and Cultural Significance

    These chips have their roots in Indian street food culture, where they are commonly known as “namak pare” or “mathri.” They are especially popular during festivals and celebrations, symbolizing the joy and togetherness of these occasions. The simplicity of the ingredients and the ease of preparation have made spicy Indian flour chips a staple snack in many Indian households.

    Tips for Perfect Spicy Indian Flour Chips

    • Choosing the Right Flour: The base of these chips is typically made from wheat flour, but you can experiment with other flours like chickpea or rice flour for different textures and flavors.
    • Spice Blend: A perfect blend of spices is key. Common spices include cumin, ajwain (carom seeds), chili powder, and turmeric. Adjust the spice levels according to your preference.
    • Rolling the Dough: Roll the dough as thin as possible for the crispiest chips. Thicker chips will be harder and less crispy.
    • Frying: Fry the chips in hot oil until golden brown. Ensure the oil is at the right temperature to prevent the chips from absorbing too much oil and becoming greasy.

    Variations to Try

    While the classic spicy Indian flour chips are delicious on their own, you can try different variations to keep things interesting. For instance, you can add finely chopped spinach or fenugreek leaves to the dough for a nutritious twist. Adding sesame seeds or crushed peanuts can also enhance the flavor and texture. For more creative ideas, check out Sweet and Sour Guava Curry and Dodha Burfi (Punjabi Milk Fudge).

    Pairing and Serving Suggestions

    Spicy Indian flour chips can be enjoyed in various ways. Serve them with a side of tangy tamarind chutney or refreshing yogurt chutney for a flavor contrast. They also make a great addition to a snack platter alongside Sweet Potato Chaat or Moong Dal Halwa (Vegan). These chips are perfect for munching on their own or as a crunchy side to a meal.

    Making Indian flour chips at home allows you to control the ingredients and ensure a healthier snack option. By using whole grain flours and minimal oil, you can enjoy these tasty chips without the guilt. For more healthy homemade snack ideas, explore Millet Soup (Bajra Raab) and Vegetable Biryani (Instant Pot).

    Frequently Asked Questions

    Q: Can I bake these chips instead of frying?

    A: Yes, you can bake the chips for a healthier option. Preheat your oven to 375°F (190°C) and bake the rolled-out dough until crispy and golden brown, about 15-20 minutes.

    Q: How long can these chips be stored?

    A: Store the chips in an airtight container to keep them crispy. They can last for up to two weeks when stored properly.

    Q: Can I make these chips gluten-free?

    A: Absolutely. Substitute the wheat flour with gluten-free flour blends or chickpea flour to make gluten-free spicy Indian flour chips.

    Conclusion

    The spicy Indian flour chips recipe is a fantastic way to enjoy a crunchy and flavorful snack that is easy to make at home. Whether you’re a seasoned cook or a beginner, these chips are sure to become a favorite in your snack repertoire. For more exciting recipes and variations, explore other delightful dishes like [Sweet and Sour Guava Curry, [Dodha Burfi (Punjabi Milk Fudge), and Masala Bell Pepper Curry. Enjoy the journey of flavors and happy cooking!

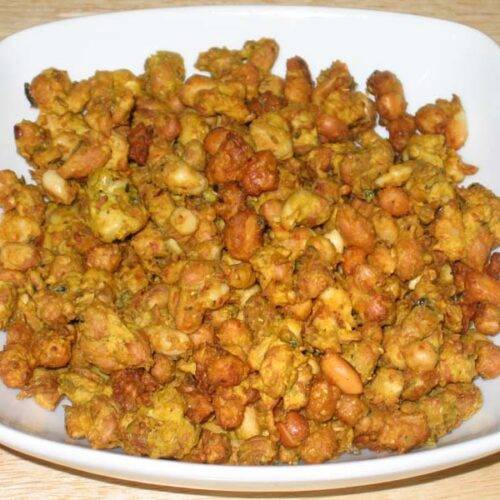
  • Masala Peanuts

    Masala Peanuts

    Masala Peanuts

    Masala Peanuts

    Hot and spicy peanuts fried with delicious mix of spices. This makes a great snacks for sitting around watching TV or playing games with family and friends. Recipe serves 6.
    No ratings yet
    Course Snack
    Cuisine Indian
    Servings 6 people

    Ingredients
      

    • 1 ½ cup Peanuts or 1/2 pound shelled peanuts
    • ½ cup gram flour basen
    • ¼ cup rice flour
    • 1 Tbsp coriander powder dhania
    • ½ tsp turmeric haldi
    • 1 tsp red pepper
    • ½ tsp black pepper
    • 1 Tbsp green chili finely chopped
    • ¼ tsp ginger powder soth
    • 1 tsp salt adjust to taste
    • ½ tsp mango powder amchoor
    • tsp citric acid

    Also needed:

    • 1 cup Water as needed
    • Oil to fry

    Instructions
     

    • In a frying pan roast the dry peanuts on medium heat for 3-4 minutes and let it cool for few minutes.
    • Mix all the ingredients together in a large bowl.
    • Add water as needed making sure the spices and flour stick to the peanuts uniformly.
    • Heat the oil in a frying pan on medium heat.
    • The frying pan should have at least 1 inch of oil. To check if the oil is ready, put one drop of batter in the oil. The batter should raise to the top but not change color right away.
    • put few drops of oil in your hand it helps droping the penuts before putting peanuts on the oil.
    • While putting the peanuts into oil, loosen them with your fingers to make sure the peanuts are separated and do not form lumps. Peanuts should be separated while frying.
    • Fry the peanuts until they turn light brown, turning them occasionally.
    • When they are done cooking, take them out of the oil with a slotted spoon. Place them on a paper towel to absorb the extra oil.
    • After cooling to room temperature, the peanuts should be crispy.

    Notes

    • Masala Peanuts can be stored for a month in an airtight container.
    • Also see my recipe for Spicy Cashew, Almond brittle.
    • These make a delicious homemade gift – pack it in a jar or candy bag.
    Keyword basen, chilli, Gluten Free, masala, peanuts, Spicy
    Tried this recipe?Let us know how it was!

    Peanut Masala Recipe: A Spicy Delight

    Masala Peanuts are delightful appetizers perfect for holidays and festivals, offering a crunchy, gluten-free snack option that satisfies both vegan and non-vegan palates alike. Peanut masala recipe is a beloved snack across India, offering a delightful combination of crunchy peanuts and aromatic spices. This masala peanuts recipe is a favorite among snack enthusiasts for its bold flavors and addictive crunch. Whether you’re hosting a gathering or simply craving a savory treat, learning how to make masala peanuts recipe at home is both rewarding and satisfying.

    How to Make Masala Peanuts Recipe: Step-by-Step Guide

    Step 1: Prepare the Peanuts

    Start by selecting fresh, raw peanuts for the best results. Rinse them thoroughly under cold water to remove any dirt or debris. Then, pat them dry using a clean kitchen towel or paper towels.

    Step 2: Dry Roast the Peanuts

    Heat a non-stick pan over medium heat. Once the pan is hot, add the peanuts in a single layer. Dry roast them, stirring occasionally, until they turn golden brown and emit a nutty aroma. This process typically takes about 8 to 10 minutes. Keep a close eye on them to prevent burning.

    Step 3: Prepare the Spice Mixture

    While the peanuts are roasting, prepare the spice mixture. In a small bowl, combine masala peanuts recipe spices such as red chili powder, turmeric powder, cumin powder, chaat masala, and salt according to your taste preferences. Adjust the spice levels to suit your palate.

    Step 4: Coat the Peanuts with Spices

    Once the peanuts are roasted to perfection, transfer them to a large mixing bowl. While they are still warm, sprinkle the prepared spice mixture over the peanuts. Toss them gently to ensure that each peanut is evenly coated with the spices. Allow the peanuts to cool completely before serving.

    Step 5: Serve and Enjoy

    Your homemade masala peanuts are now ready to be enjoyed! Serve them as a standalone snack or pair them with your favorite beverages. Store any leftovers in an airtight container to maintain their freshness and crunchiness.

    Tips for Making Perfect Masala Peanuts

    • Experiment with different spice blends to customize the flavor according to your preferences. 
    • You can add ingredients like amchur powder for tanginess or garam masala for extra warmth.
    • For an extra layer of flavor, consider adding roasted garlic or curry leaves to the spice mixture.
    • Make sure to roast the peanuts evenly to achieve a uniform golden brown color and prevent any burnt spots.
    • Allow the peanuts to cool completely before storing them to maintain their crispiness.

    Variations of Masala Peanuts

    Sweet and Spicy: Add a touch of sweetness to your masala peanuts by incorporating a bit of powdered sugar or jaggery along with the spices.

    Herb Infused: Experiment with fresh herbs like cilantro, mint, or curry leaves to add a refreshing twist to your masala peanuts.

    Nutty Crunch: Enhance the texture of your masala peanuts by tossing them with a handful of toasted cashews, almonds, or pistachios.

    Benefits of Masala Peanuts

    Rich in Protein: Peanuts are an excellent source of plant-based protein, making masala peanuts a nutritious snack option.

    Good Source of Healthy Fats: Peanuts are high in monounsaturated fats, which are beneficial for heart health when consumed in moderation.

    Packed with Essential Nutrients: Peanuts are rich in essential nutrients like vitamins, minerals, and antioxidants, contributing to overall well-being.

    FAQs about Masala Peanuts

    Can I use pre-roasted peanuts for this recipe?

    While you can use pre-roasted peanuts, roasting them yourself allows you to control the level of crunchiness and ensures that they are freshly toasted.

    How long do homemade masala peanuts stay fresh?

    When stored in an airtight container at room temperature, homemade masala peanuts can stay fresh for up to two weeks. However, they are best enjoyed within the first few days to maintain their crispiness.

    Can I make masala peanuts without oil?

    Yes, you can skip the oil and dry roast the peanuts directly in a pan for a healthier alternative. However, using a small amount of oil helps the spices adhere to the peanuts more effectively.

    For more delightful Indian recipes, explore Manjula’s Kitchen, where you’ll find a treasure trove of culinary inspiration ranging from traditional dishes to modern twists on classic favorites. Be sure to check out recipes like Aloo Gobi, Palak Paneer, and Chana Masala for a taste of authentic Indian cuisine.

    If you enjoyed making these masala peanuts, why not try your hand at some other mouthwatering recipes from Manjula’s Kitchen? Vegetable Pakoras, Paneer Tikka, Aloo Gobi (Potato Cauliflower), Samosa, Mango Lassi

    Explore these recipes and more for a culinary journey through the vibrant and diverse flavors of Indian cuisine.