Search results for: “dal”

  • Contest 2017 February Winners

    Contest 2017 February Winners

    It was a real pleasure to do the monthly contest again after couple of years. I asked for a healthy appetizer and you all really delivered some delicious and healthy recipes. I enjoyed reviewing all the entries, but there were too many good ones. It really did take me some time to choose the winners this month. Here are the top three entries. Congratulations to the winners and all participants:

    1st Place: Crispy Quinoa Spinach Patties by Aarti Sharma
    I liked this recipe because not only is it healthy, but also easy to prepare.

    1st Runner Up: Stuffed Mushrooms with Tomatoes and Oats by Dhara Shah
    This was a beautiful presentation, very tempting, and no fuss appetizer.

    2nd Runner Up: Baked Moong dal Kachori by Khalid Shaikh
    This recipe looks very tempting also, especially as many are trying to avoid fried food.

    Congratulations to all three of you!!

    Thank you to everyone else that also participated in the contest:

    • Sasi K
    • Jyoti Moghe
    • Prachi Mishra
    • Sharada Tiwari
    • Kellie
    • Jennifer Walters
    • Shab
    • FaNay
    • Asha Sharma
    • Mukund
    • Shivang Bhatnagar
    • Yoshiharu Sogi
    • Ketaki Toye
    • Chris Morrill
    • Divya Rajesh
    • Mrs Kalaimathi Rajesh
    • Nikita Kale
    • Navneetha
    • Soumya Komuravelli
    • Kelly
    • Lakshmi Aggarwal
    • Jay
    • Poornima Shandilya
    • Lubna
    • FN
    • Vaishali Leuva
    • Rajesh Karthikeyan
    • Poonam Bachhav
    • Darshana Shah
    • Donna-Marie Ryan
    • Vandana
    • Ayushi Garg
    • Karkuzhali Praveen
    • Dr.Farhat
    • Madhavilatha Jonnadula
    • Uma Pandit
    • Sundari Nathan
    • Madhavilatha Jonnadula
    • Drashti Dholakia
    • Garima Tyagi
    • Meena Mohan
    • Mansi Kamboj Verma
    • Richa Jain
    • bhakti pande
    • deepu krishnan
    • ruchi srivastava
    • Pavithra M Adiga
    • Divya Ravindran
    • Hidemi Walsh
    • Mamatha Gampa
    • Geetha Ss
    • Suguna Shivananda
    • Aarti Sojitra
    • Sapna Nichani
    • Upasana Bir
    • Pratibha Veerisetty
    • Nitesh Agrawal
    • padmalatha padmalatha
    • nimi haroon
    • Rejani Deepu
    • Muthulakshmi Madhavakrishnan
    • megha patil
    • Bhavya
    • Smitha H
    • Jyoti Jain
    • Priyanka Patil
    • Aayushi Manish
  • Kachori with Kadhi

    Kachori with Kadhi

    Kachori topped with Kadhi

    Kachori topped with Kadhi

    Kachori topped with Kadhi this is a Rajasthani specialty appetizer that is simply delicious. There are times that we like to indulge ourselves or want to make a special treat for guests at parties, but there is not enough time in the day to prepare such dishes. For times like this, I like to make semi-homemade recipes. This dish is perfect for this and can be presented beautifully.
    5 from 2 votes
    Prep Time 10 minutes
    Cook Time 30 minutes
    Total Time 40 minutes
    Course Appetizer, Snack
    Cuisine Indian
    Servings 2 people

    Ingredients
      

    For Kachori

    • 4 peices Dal Kachori Using frozen Kachori, which are readily available in Indian grocery stores.

    For Kadhi

    • 1 cup yogurt
    • 1/4 cup besan gram flour
    • 2 Tbsp oil canola or vegetable oil
    • 1/2 tsp cumin seeds jeera
    • 1/8 tsp asafetida hing
    • 1/2 tsp fenugreek seeds mathi
    • 1/2 tsp turmeric haldi
    • 1/2 tsp red chili powder
    • 1 tsp salt
    • 2 Tbsp cilantro finely chopped, hara dhania
    • 1/4 tsp gram masala
    • 4 cups water

    For garnishing

    • 1 Tbsp ginger thinly sliced
    • 1 Tbsp green chilies thinly sliced
    • 2 tsp lemon juice
    • 1/4 tsp salt

    Instructions
     

    • For garnishing mix all the ingredients together before we start the Kadhi, this will get enough time to marinate ginger and green chili. Set aside.
    • Mix besan and turmeric with yogurt until smooth, this should be lump free. Add three cups of water slowly and mix well.
    • Heat the oil in a saucepan. Test the heat by adding one cumin seed to the oil. If the cumin seeds crack right away, the oil is ready. Add cumin seeds and asafetida.
    • When the cumin seeds crack, turn off the heat and add fenugreek seeds, and red chili powder. Stir for a few seconds. Add the yogurt mixture and turn the heat to medium. Keep stirring until the kadhi comes to a boil.
    • Add remaining water and let it come to boil. Add salt. Turn the heat to medium low. Let the kadhi cook about 20-30 minutes, stir occasionally. If needed to adjust thickness, add boiled water. Kadhi should be pourable consistency. Add garam masala, and cilantro, mix and turn off the heat.
    • While the Kadhi is cooking bake, or fry the kachories per the instructions on the box. I have baked the kachori. Let them cool of then break it open.
    • Serve Kadhi over Kachori and garnish with marinated green chili and ginger pieces.

    Notes

    Instead of frozen kachori, you can also make these fresh Kachori at home using my recipe.
    Tried this recipe?Let us know how it was!

    Rajasthani Kadhi Kachori Recipe: A Delectable Fusion Dish Rajasthani semi-homemade

    Kachori Kadhi is a versatile dish perfect for various occasions, whether as an appetizer, a flavorful addition to a lunch box suggestion, a delightful option for party recipes, or a quick & easy chaat. Rajasthani kadhi kachori is a beloved delicacy that combines the richness of kadhi with the crispiness of kachori. This recipe brings together the tangy flavors of the kadhi gravy with the spicy and aromatic kachoris, creating a symphony of taste that will tantalize your taste buds. Let’s delve into how to prepare this mouthwatering dish step by step.

    Preparing the Kadhi for Kachori Kadhi: A Flavorful Base

    To begin with, let’s prepare the kadhi kachori base, the kadhi. In a mixing bowl, whisk together yogurt, gram flour, and water until smooth. This mixture forms the base of the kadhi gravy, providing a creamy texture and tangy flavor.

    Next, heat oil in a pan and add mustard seeds, cumin seeds, fenugreek seeds, and asafoetida. These tempering ingredients infuse the kadhi with aromatic flavors and add depth to the dish. Stir in chopped ginger, green chilies, and curry leaves for an extra kick of spice and fragrance.

    Now, pour the yogurt mixture into the pan and let it simmer over medium heat. Stir continuously to prevent lumps from forming and to ensure that the kadhi thickens evenly. As it cooks, the kadhi will develop a rich consistency and absorb the flavors of the spices.

    Frying the Kachoris: Adding Crunch to the Kadhi Kachori

    While the kadhi simmers, let’s move on to preparing the kachoris. Heat oil in a separate pan for deep frying. Meanwhile, take the kachori dough and divide it into small balls. Flatten each ball with your palms to form discs, then fill them with a spicy lentil mixture made of soaked and ground lentils mixed with spices like rajasthani kachori with kadhi.

    Once the oil is hot, carefully slide the stuffed kachoris into the pan and fry until golden brown and crisp. The kachoris will puff up beautifully as they cook, creating a delightful contrast of textures when paired with the creamy kadhi gravy.

    Serving the Rajasthani Kadhi Kachori: A Gastronomic Delight

    Once both the kadhi and kachoris are ready, it’s time to assemble this divine dish. Ladle the hot kadhi into serving bowls and place a couple of freshly fried kachoris on the side. Garnish with chopped cilantro and serve hot.

    The combination of the tangy, creamy kadhi and the crispy, flavorful kachoris is sure to impress your taste buds and leave you craving more. Enjoy this Rajasthani delicacy with steamed rice or as a standalone meal for a truly satisfying culinary experience.

    Tips for Perfect Kadhi Kachori: Enhancing Flavor and Texture

    • Ensure that the yogurt is fresh and not too sour for a balanced flavor in the kadhi.
    • Fry the kachoris on medium heat to ensure they cook through evenly without burning.
    • You can customize the spice level of the kadhi and kachoris according to your preference by adjusting the amount of green chilies and red chili powder.

    Variations of Kadhi Kachori: Experimenting with Flavors

    • For a healthier twist, you can bake the kachoris instead of deep frying them.
    • Add finely chopped vegetables like carrots, and peas to the kachori filling for added nutrition and flavor.
    • Experiment with different types of lentils for the kachori stuffing, such as moong dal or chana dal, to create unique variations of this dish.

    Benefits of Kadhi Kachori: Nutritious and Delicious

    • Yogurt, the main ingredient in kadhi, is rich in probiotics that promote gut health and digestion.
    • Gram flour used in the kadhi is a good source of protein and fiber, making this dish filling and nutritious.
    • Lentils used in the kachori filling provide a healthy dose of plant-based protein and essential nutrients.

    FAQs About Kadhi Kachori: Answering Your Queries

    Q: Can I make the kadhi ahead of time?

    A: Yes, you can prepare the kadhi in advance and reheat it before serving. Just make sure to adjust the consistency by adding water if it thickens too much upon reheating.

    Q: Can I freeze leftover kachoris?

    A: Yes, you can freeze leftover kachoris for up to a month. Reheat them in a preheated oven until crispy before serving.

    Q: Can I use store-bought kachoris instead of making them from scratch?

    A: While homemade kachoris are ideal for the best flavor and texture, you can certainly use store-bought ones as a time-saving option.

    If you’re looking to explore more Indian recipes, appetizers, beverages, and desserts, be sure to check out the following links on Manjula’s Kitchen. Here are some links to recipes on Manjula’s Kitchen’s official website: Vegetable Pakoras, Kaju Katli (Cashew Burfi), Baingan Bharta (Roasted Eggplant), Matar (Green Peas) Paneer, Besand and Ladoo.

  • Rava Mint Paratha

    Rava Mint Paratha

    Rava Mint Paratha

    Rava Mint Paratha

    Rava Mint Parathas consists of bread made with mixing different flours and flavored with fresh mint leaves. These mint parathas are unique with its own fresh flavor. It can be served as a breakfast treat or with any meal. I think it pairs well with Tadka Urad Dal. This recipe will make 8 parathas and will serve 4.
    3.67 from 3 votes
    Prep Time 25 minutes
    Cook Time 20 minutes
    Total Time 45 minutes
    Course Breakfast
    Cuisine Indian
    Servings 4 people

    Ingredients
      

    • 1/2 cup fine sooji semolina
    • 1/2 cup Besan Bengal gram flour
    • 1/2 cup whole wheat flour
    • 1 tsp chili flakes
    • 1/2 tsp salt
    • 1/8 tsp asafetida
    • 1/4 cup mint leaves finely chopped
    • 2 Tbsp oil canola or vegetable oil
    • 1/2 cup luke warm water Approximately

    Also, need

    • 1/4 cup whole wheat flour for rolling the paratha
    • 3 Tbsp oil for cooking the parathas

    Instructions
     

    • Combine all the ingredients in a bowl except water, sooji, besan, whole wheat flour, salt chili flakes, asafetida, mint leaves, and oil mix it well. This will become very crumbly. Add water as needed to make the soft dough. Knead the dough for a minute. Set aside for at least 15 minutes. Note: dough will absorb the water and will become firm.
    • Divide the dough into 8 equal parts and roll them into smooth balls. Roll them into about four-inch diameter, spread about 3-4 drops of oil and fold into two again put another 2-3 drops of oil and fold into triangle.
    • Lightly flour the surface you will roll the paratha and roll it into about 5-inch diameter. Note: if paratha is sticking while rolling sprinkle little more flour this will help rolling.
    • Heat the flat skillet on medium high. Note: heavy skillet works best. To check if the skillet is ready, put few drops of water on it. If the water sizzles right away, the skillet is ready.
    • Place the Paratha over the skillet. When you see the color change and the paratha will puff in different places. Turn the paratha over.
    • Paratha should have golden-brown spots. Wait a few seconds and put about 1 teaspoon of oil and spread with a spatula. Flip the paratha and put again half teaspoon of oil. Lightly press the paratha with a spatula.
    • Flip again and press with a spatula making sure the paratha is golden-brown on both sides. Repeat for the remaining parathas.
    • Parathas are best served hot and crispy. Serve them with Potato Curry with Yogurt Gravy.

    Notes

    Serving Suggestions
    Serve these Rava Mint Paratha for breakfast with hot cup of chai. This goes well with any meal. I like to serve this with Potato Curry with Yogurt Gravy.
    Tried this recipe?Let us know how it was!
  • Whole Wheat Dosa (Atta Ka Cheela)

    Whole Wheat Dosa (Atta Ka Cheela)

    Whole Wheat Dosa

    Whole Wheat Dosa (Atta Ka Cheela)

    Whole Wheat Dosa is a super quick and easy recipe. It is another version of the South Indian dosa. This recipe is a special one as it was my mother’s favorite, although this was known as Atta Ka Cheela in my home. Whole wheat dosa is tasty with the perfect amount of crispy deliciousness! You can serve this as my mother did, as Roti. She liked to pair it with her favorite side dishes of mint chutney, and Lauki Chana Dal
    This recipe will make 8 dosa and will serve 4.
    4.60 from 5 votes
    Prep Time 4 minutes
    Cook Time 15 minutes
    Total Time 19 minutes
    Course Breakfast
    Cuisine Indian
    Servings 4 people

    Ingredients
      

    • 1 cup whole wheat flour atta
    • 2 Tbsp sooji fine semolina
    • 1/2 tsp salt
    • 1 tsp sugar
    • 1 Tbsp oil canola or vegetable oil
    • 1/4 tsp black pepper
    • 1/2 tsp carom seeds ajwain
    • 1/2 tsp baking soda
    • 1-1/4 cups water
    • 4 Tbsp oil for cooking canola or vegetable oil

    Instructions
     

    • Mix all the dry ingredients together, whole wheat, sooji, salt, black pepper, carom seeds, and baking soda, mix it well. Add water slowly to make a smooth batter, add water as needed, batter should be pouring consistency.
    • Use a non-stick skillet and place on medium heat. Test by sprinkling a few drops of water on it. Water should sizzle right away. Wipe the skillet with moist towel.
    • Pour 1/4 cup of the batter mixture into the center of the skillet and spread evenly with the back of a spoon. Starting from the center, spiral outward until evenly spread, about 7” inches in diameter thin circle.
    • When the batter starts drying, smear about 2 teaspoons of oil over dosa, and cook till dosa turns golden brown in color. Flip dosa using a flat spatula, and cook for about 1 minute from other side until dosa is golden brown.
    • Crispy Whole Wheat Dosa is ready, repeat with remaining batter. Every time wipe the skillet. that helps spreading the dosa.

    Notes

    • Whole wheat dosa is looking nice and crisp.
    • You can use whole wheat dosa as eggless crepe.
    Tried this recipe?Let us know how it was!

    Elevate Your Culinary Experience with Our Whole Wheat Dosa Recipe 

    Dosa is a popular South Indian delicacy that looks like a crepe. It’s like a crisp and thin pancake made of rice and urad dal batter. Traditionally Dosa is served with sambar, aloo masala, and coconut chutney. It is an Indian crepe made usually through rice batter, but here we have experimented and made many alternative dosa such as Oat Dosa, Besan Dosa, Rava Dosa, Sorghand um Dosa. This preparation uses whole wheat dosa and is a bread-based breakfast recipe that is vegan. The preparation entails skillfully combining pan techniques and manual dexterity to achieve the perfect bread cooked on non-stick skillets.

    Creating the Whole Wheat Dosa Batter:

    In the first step of the whole wheat dosa recipe, begin by meticulously blending all the dry components – whole wheat, sooji, salt, black pepper, carom seeds, and baking soda. Achieve a seamless amalgamation to ensure a well-balanced flavor profile. Gradually incorporate water into the mixture, stirring continuously until a smooth batter with a pourable consistency is attained.

    Setting the Skillet for Whole Wheat Dosa:

    The second step of the recipe for wheat dosa for making optimum whole wheat dosa requires initiating the cooking process with a non-stick skillet placed over medium heat. To gauge its readiness, conduct a water test – if droplets sizzle upon contact, the skillet is primed. To prevent sticking during cooking, maintain a skillet surface free of residue by wiping it with a moist towel.

    Pouring and Spreading the Whole Wheat Dosa Batter:

    The next step in the recipe for wheat dosa is the artistic phase of crafting a perfect whole wheat dosa by taking 1/4 cup of the batter and pouring it gracefully into the skillet’s center. Utilize the back of a spoon to delicately spread the batter, commencing from the center and spiraling outward. Strive for a delicate, 7-inch diameter circle to ensure the desired thinness and crispiness in the final whole wheat dosa.

    Cooking and Flipping the Whole Wheat Dosa:

    As the whole wheat dosa batter begins to set, introduce about 2 teaspoons of oil, spreading it evenly over the surface. Allow the dosa to cook until it transforms into a luscious golden brown. Employ a flat spatula to skillfully flip the dosa, ensuring an additional minute of cooking on the other side until a uniform golden brown hue is achieved. Repeat this process with each dosa, while adhering to the essential skillet-wiping ritual for consistent dosa spreading.

    Finalizing the Whole Wheat Dosa Delight:

    Celebrate the fruition of your culinary endeavors with the satisfying crunch of a well-prepared whole wheat dosa. Replicate the cooking process with the remaining batter, guaranteeing each dosa mirrors the deliciousness of the initial ones. Keep in mind the importance of diligently wiping the skillet after each use to facilitate uniform spreading.

    Observations on Whole Wheat Dosa:

    Appreciate the aesthetic appeal and delectable crispiness that the whole wheat dosa brings to the table, making it an ideal choice for a wholesome and delightful meal. Explore the versatility of this whole wheat dosa by incorporating it seamlessly into your culinary repertoire as an eggless crepe alternative, enhancing your dining experiences with its wholesome goodness.

  • Rava Kesari (Kesari Halwa)

    Rava Kesari (Kesari Halwa)

    Rava Kesari

    Rava Kesari (Kesari Halwa)

    Rava Kesari (Kesari Halwa) is a popular South Indian sweet dish which is a different version of Sooji ka Halwa. Rava Kesari is delicious and easy to make, usually made on festive occasions. This is a quick fix sweet for parties as it is quick & easy to make especially if you have unexpected guests.
    5 from 1 vote
    Prep Time 5 minutes
    Cook Time 15 minutes
    Total Time 20 minutes
    Course Dessert, Snack
    Cuisine Indian
    Servings 8 people

    Ingredients
      

    • 1 cup fine sooji semolina
    • 3/4 cup sugar
    • 4 Tbsp ghee clarified butter
    • 2 Tbsp sliced almonds
    • 8 drops yellow food color
    • Pinch of saffron kesar
    • 1/8 tsp cardamom crushed, ilachi
    • 3-1/3 cups water
    • 1 Tbsp sliced pistachios pista for garnishing

    Instructions
     

    • Boil the water with sugar, and cardamom powder in a pot over medium heat. Bring the syrup to boil, mix it making sure sugar is dissolve add the food color and mix. Set aside
    • Melt 1 tablespoon of ghee in a frying pan on low medium heat. Add the sooji, and almonds and roast stirring continuously, sooji should be light golden brown in color and will have a light sweet aroma. This should take about 7-8 minutes.
    • Add the syrup slowly, as you add the syrup to sooji water will splatter. Make sure there are no lumps. Cook for 2-3 minutes, stirring continuously. Add more water if halwa becomes very thick.
    • Add the remaining ghee 1 tablespoon at a time and cook for 3-4 minutes stirring continuously. Rava Kesari will start leaving the sides of frying pan. Rava Kesari will have a texture of thick batter.
    • Garnish the Rava Kesari with sliced pistachios, serve warm or at room temperature.

    Notes

    Treat yourself, serve Rava Kesari for breakfast with Aloo Puri , Dal Puri
    Tried this recipe?Let us know how it was!
  • Breakfast Suggestions

    Breakfast Suggestions

    Breakfast is unarguably the most important meal of the day. So why not start your day off right with a healthy and delicious meal?  Many people skip breakfast because they’re rushing to get out the door – either to get to work, drop kids off the school, or both! Breakfast kick-starts your day.  Below are some easy-to-prepare breakfast suggestions that will give you the energy you need to tackle the day. Much of the preparation for these meals can be done in advance.

    Besan ka Puda
    This is an all-time favorite with my family. This dish is both vegan and gluten free. Besan is also good for diabetics. Serve this dish with yogurt, pickle or hari cilantro chutney.  You can prepare the batter in advance and add the shredded zucchini just before making the puda.  Puda batter can be refrigerated for 3-4 days.

    Moong Dal Dosa

    This is another vegan and gluten free healthy breakfast. You can serve this with aloo masala, sambar, and your choice of pickle or chutney.  This is another dish where the batter can be prepared in advance and stored in the fridge for 3-4 days.

    Yogurt Sandwich

    If you are tired of the usual toast or bagel, this is a good replacement.  The filling can be prepared in advance and stored in the fridge for up to 2 days.  This can also be a quick lunch dish.

    Upma Sooji
    This is another family favorite.  You can prepare part of this dish in advance.  Follow steps 4, 5, and 6 to prepare the sooji mix.  You can refrigerate this for about one week.  Simply add boiling water with peas when ready to serve.

    Enjoy!

  • Mexican Rice

    Mexican Rice

    Mexican Rice

    Mexican Rice

    When I first came to the United States, one of the first cuisines I was introduced to was Mexican. I really enjoyed it then just as much as I enjoy it now. My first experience with Mexican cuisine was a little mom and pop restaurant that really made an extra effort and catered to our vegetarian preference. I decided to try out a recipe for a Mexican rice which is typically served as a side dish with Mexican meals. I especially enjoy this rice with refried beans. Enjoy!
    5 from 3 votes
    Prep Time 5 minutes
    Cook Time 12 minutes
    Total Time 17 minutes
    Course Main Course
    Cuisine Mexican
    Servings 4 people

    Ingredients
      

    • 1 cup long grain rice you can use any long grain rice
    • 3 Tbsp oil
    • 1 14 oz can tomatoes chopped
    • 1 cup corn kernels I am using frozen corn
    • 1 cup green bell pepper cut in small pieces
    • 1 tsp cumin seeds ground, jeera
    • 1 tsp salt
    • 1 Tbsp jalapeno pepper finely chopped
    • 2 cups of water
    • 1/4 cup cilantro finely chopped hara dhania
    • 2 Tbsp lime juice I prefer lime juice but lemon juice will work

    Instructions
     

    • Wash the rice and drain the water and pat dry.
    • In a frying pan heat the oil over medium high heat, when oil is moderately hot add the rice and stir fry for about 4-5 minutes till rice is lightly toasted.
    • Add vegetables, corn bell pepper and jalapeno pepper sauté, stirring frequently for about 2 minutes.
    • Add cumin powder, salt and tomato sauté, stirring frequently for about 3-4 minutes. Until most of the moisture from tomatoes has evaporated.
    • Add water stir and bring it to boil, lower the heat to low. Cover the pan and let it cook for about 10 minutes, or until all the water has evaporated. Uncover the pan let it sit for about 2-3 minutes without stirring.
    • Add cilantro and lime juice and fluff the rice gently. Rice is ready to serve.
    Tried this recipe?Let us know how it was!

    Delicious Vegetarian Mexican Rice Recipe: A Flavorful Twist on a Classic Dish 

    Mexican rice is a delectable dish that combines the vibrant flavors of traditional Mexican cuisine with the aromatic spices of Indian cooking. This fusion is a gluten free, kid friendly, quick & easy, vegan choice of culinary influences resulting in a unique and savory recipe of veg Mexican rice that caters to vegetarian preferences. Commonly known as vegetarian Mexican rice recipe or Mexican rice vegetarian, this dish is a delightful medley of fluffy rice grains, assorted vegetables, and a tantalizing blend of Mexican spices. 

    When preparing this recipe for vegetarian Mexican rice, cooks infuse the dish with a harmonious combination of flavors, creating a truly satisfying and flavorful meal. Whether enjoyed as a standalone dish or as a flavorful accompaniment to other Mexican-inspired delicacies, this vegetable Mexican rice recipe is sure to tantalize taste buds and delight diners with its rich and aromatic profile.

    Preparing the Rice: Washing and Toasting 

    To initiate the process of crafting this recipe of veg Mexican rice, carefully wash the rice, ensuring thorough rinsing to remove any impurities. Drain the water completely and then gently pat the rice dry to eliminate excess moisture. Heat oil in a frying pan over medium-high heat until it reaches a moderate temperature. Once the oil is adequately heated, introduce the rice to the pan and stir-fry it for approximately 4-5 minutes until it achieves a light toasty texture.

    Adding Vegetables: Sautéing with Flavor

    For this enticing vegetarian Mexican rice recipe, introduce an array of vibrant vegetables into the pan. Incorporate sweet corn, crisp bell peppers, and spicy jalapeno peppers to infuse the dish with an explosion of flavors. Saute the medley of vegetables, ensuring frequent stirring, for about 2 minutes until they soften and release their aromatic essence.

    Seasoning and Cooking: Infusing Mexican Flavors 

    Elevate the essence of this Mexican rice vegetarian delight by introducing a blend of quintessential Mexican spices and ingredients. Sprinkle cumin powder, salt, and diced tomatoes into the pan, creating a harmonious symphony of flavors. Allow the ingredients to sauté together, ensuring regular stirring, for approximately 3-4 minutes until the tomatoes release their moisture, contributing to a rich and flavorful base.

    Simmering and Steaming: Cooking the Rice 

    Transition into the next phase of cooking by incorporating water into the pan, ensuring thorough mixing to integrate all the ingredients seamlessly. Bring the mixture to a gentle boil, then reduce the heat to low. Cover the pan, allowing the rice to simmer and absorb the flavorful essence of the ingredients for approximately 10 minutes or until all the water has evaporated. Once cooked, leave the pan uncovered for an additional 2-3 minutes, allowing the rice to rest and further develop its texture without disturbing its delicate balance.

    Final Touches: Adding Freshness

    Conclude the culinary journey by adding the finishing touches to this tantalizing recipe for vegetarian Mexican rice. Sprinkle freshly chopped cilantro over the rice, infusing it with a burst of refreshing aroma and vibrant color. Squeeze a hint of lime juice, enhancing the dish with a subtle tangy zest. Gently fluff the rice to distribute the flavors evenly, ensuring each bite is a delightful fusion of Mexican-inspired taste and wholesome goodness. Your masterpiece of vegetable Mexican rice is now prepared to be savored and enjoyed, brimming with vibrancy and culinary excellence. Bon appétit!

    If you loved our vegetarian mexican rice recipe then you must also check out other variants of Rice: Vegetable Biryani, Masala Khichdi, Chhole Biryani, Quinoa Vegetable Pilaf and Lemon Rice.

  • E-Book: Best of Indian Vegetarian Recipes (2nd Edition)

    E-Book: Best of Indian Vegetarian Recipes (2nd Edition)

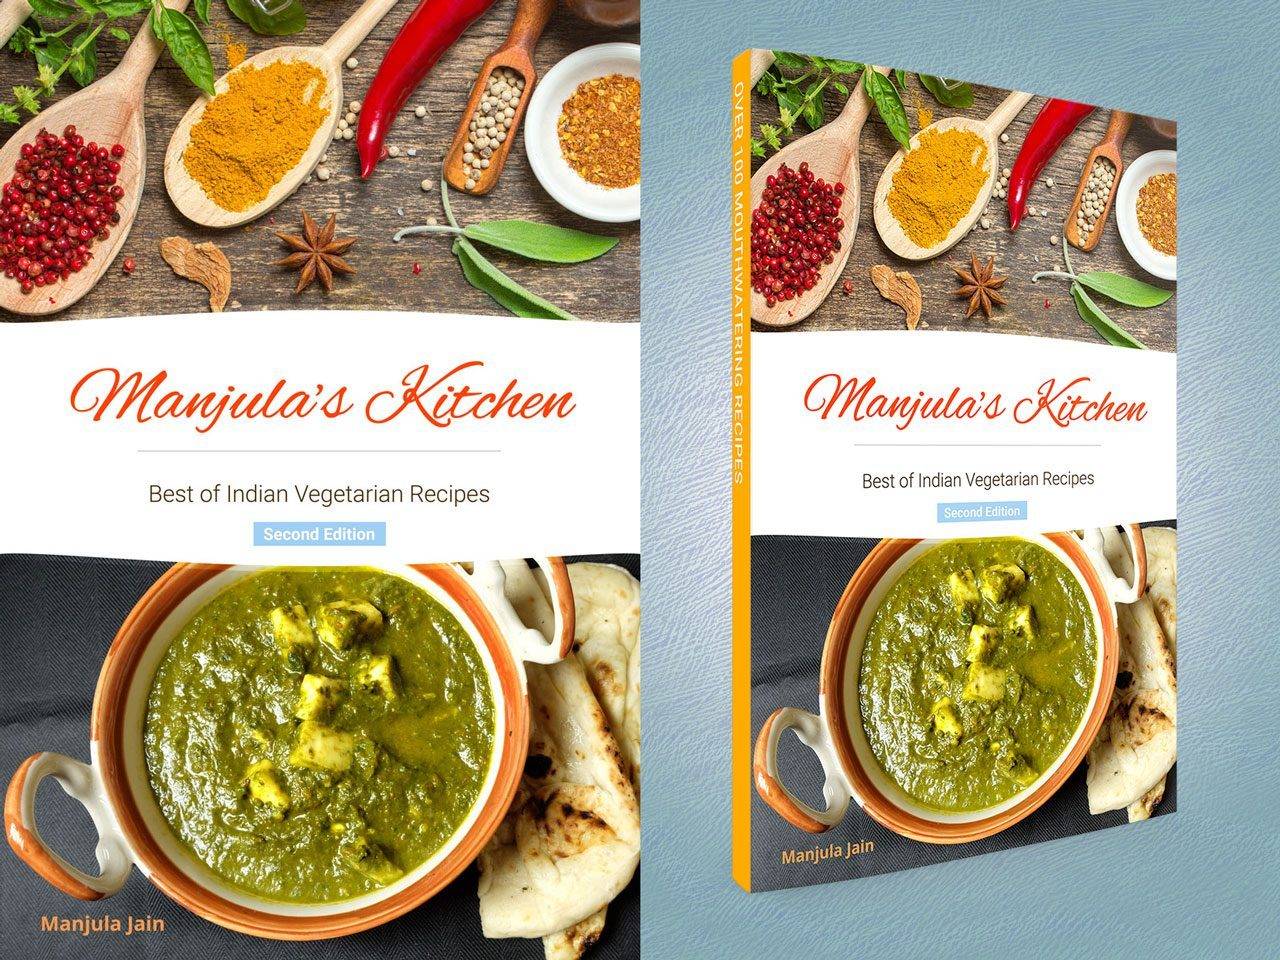
    You’ve watched all of the videos and followed all of Manjula’s time tested Recipes on the website. Now, you can have the best of Manjula’s Delicious Recipes, all in one book.

    This beautiful 2nd Edition is now available as a PDF ebook with updated and revised recipes, full color photos, and embedded links to the online videos.

    If you love Indian vegetarian cooking and wish you knew how to create magnificent dishes for your friends and family, this book of delicious recipes is for you.

    You will learn how to make over ONE HUNDRED mouthwatering Indian vegetarian dishes including Samosas, Naan, Roti, Palak Paneer, Vegetable Korma, Gulab Jamun, and many more. Best of all, you can follow my time-tested recipes without any prior cooking knowledge and feel confident of surprising yourself and impressing your friends with your achievement.

    Buy this e-book

    Buy this e-book

    Buy this e-book

    Celebrating the Richness of Indian Vegetarian Cuisine: Manjula Jain’s Culinary Journey
    Indian vegetarian cuisine is renowned for its diverse flavors, vibrant colors, and nutritional benefits. Manjula Jain’s e-book, “Best Indian Vegetarian Recipes,” Second Edition, serves as a testament to the rich culinary heritage of India. This collection offers an exquisite array of recipes that cater to both novice cooks and seasoned chefs, enabling them to create authentic Indian dishes with ease and confidence.

    The Essence of Indian Vegetarian Cooking
    Indian vegetarian cooking is more than just food; it is an art form that combines tradition, culture, and health. Each region in India brings its own unique flavors and cooking techniques, resulting in a wide variety of dishes that are both delicious and nutritious. The spices used in Indian cuisine not only enhance the taste but also offer numerous health benefits. From appetizers and snacks to main courses and desserts, the recipes in Manjula’s e-book showcase the versatility and richness of Indian vegetarian food.

    About the Author: Manjula Jain
    Manjula Jain, born in a vegetarian family in North India, has been passionate about cooking from a young age. Her mother, an excellent cook, taught her the intricacies of using spices and fresh ingredients to create flavorful dishes. After moving to the United States in the late 1960s, Manjula continued to follow a vegetarian lifestyle, adhering to the principles of Jainism, which emphasizes non-violence and compassion towards all living beings.

    Manjula’s love for cooking led her to start a YouTube channel, where she has shared over 350 video recipes, many of which are vegan and gluten-free. Her dedication to sharing the traditional cuisine of India in a practical format has inspired millions of viewers worldwide.

    Exploring the Recipes
    Manjula’s e-book is organized into several sections, each offering a variety of recipes that highlight the diversity of Indian vegetarian cuisine.

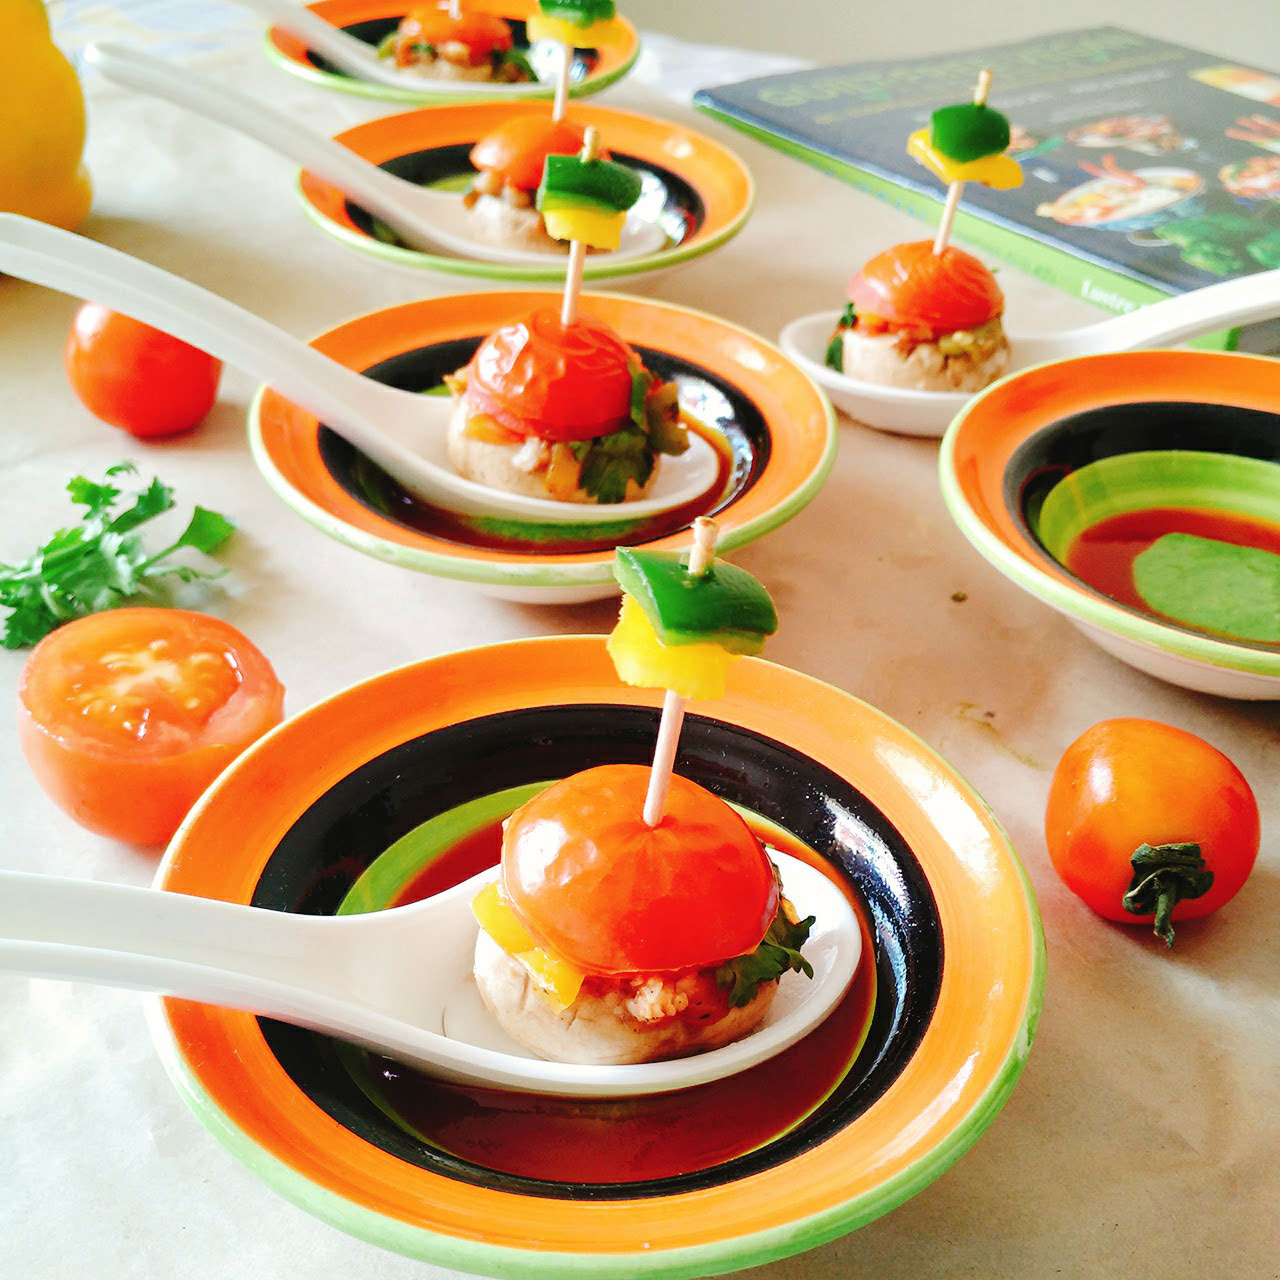
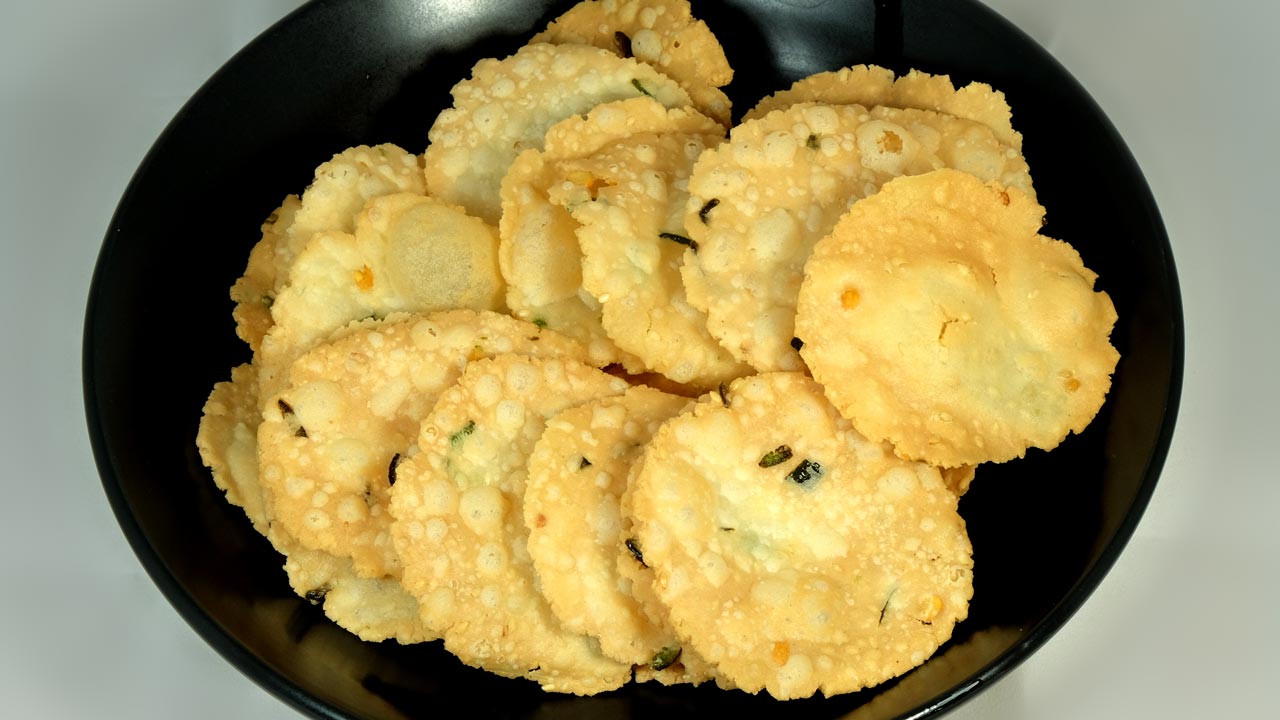
    Appetizers, Snacks, & Chaat:

    Bhel Puri: A popular street food from Mumbai, Bhel Puri is a simple, spicy snack made with puffed rice, sev (vermicelli-like snack made from gram flour), and a mix of vegetables and chutneys. It is a low-fat, nutritious, and delicious treat.
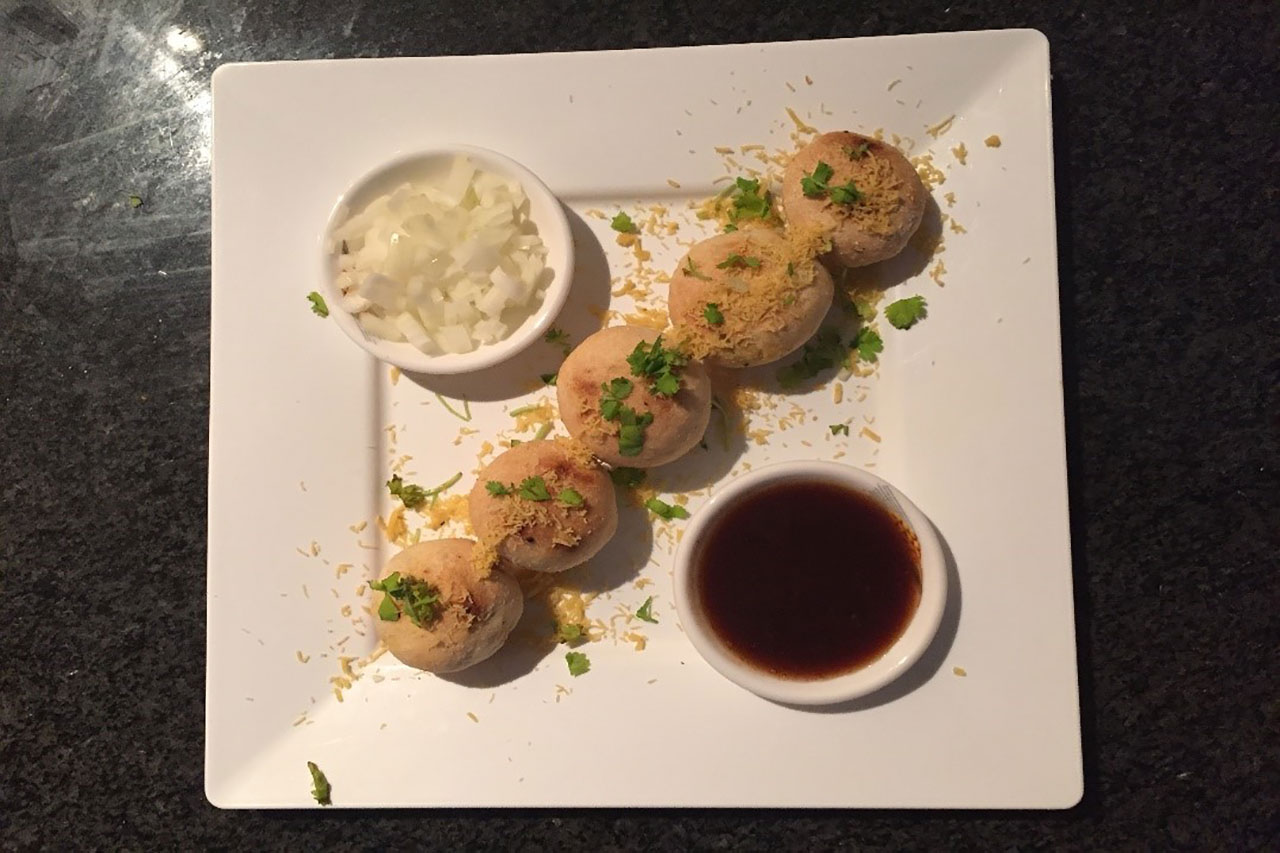
    Bread Potato Rolls: These crunchy rolls with a spicy potato filling make a perfect snack or appetizer. They are easy to prepare and can be served with hari cilantro chutney and tamarind sweet and sour chutney.
    Chole Chaat: A zesty snack made with chickpeas, potatoes, and a blend of spices. This aromatic dish is easy to prepare and can be served warm as a snack or as a lettuce wrap for a crunchy twist.

    Beverages:

    Mango Lassi: A refreshing yogurt-based drink blended with ripe mangoes, sugar, and a hint of cardamom. This cooling beverage is perfect for hot summer days.
    Chai: A traditional Indian tea made with a mix of spices such as cardamom, cinnamon, and cloves. It is a comforting beverage enjoyed by millions across India.
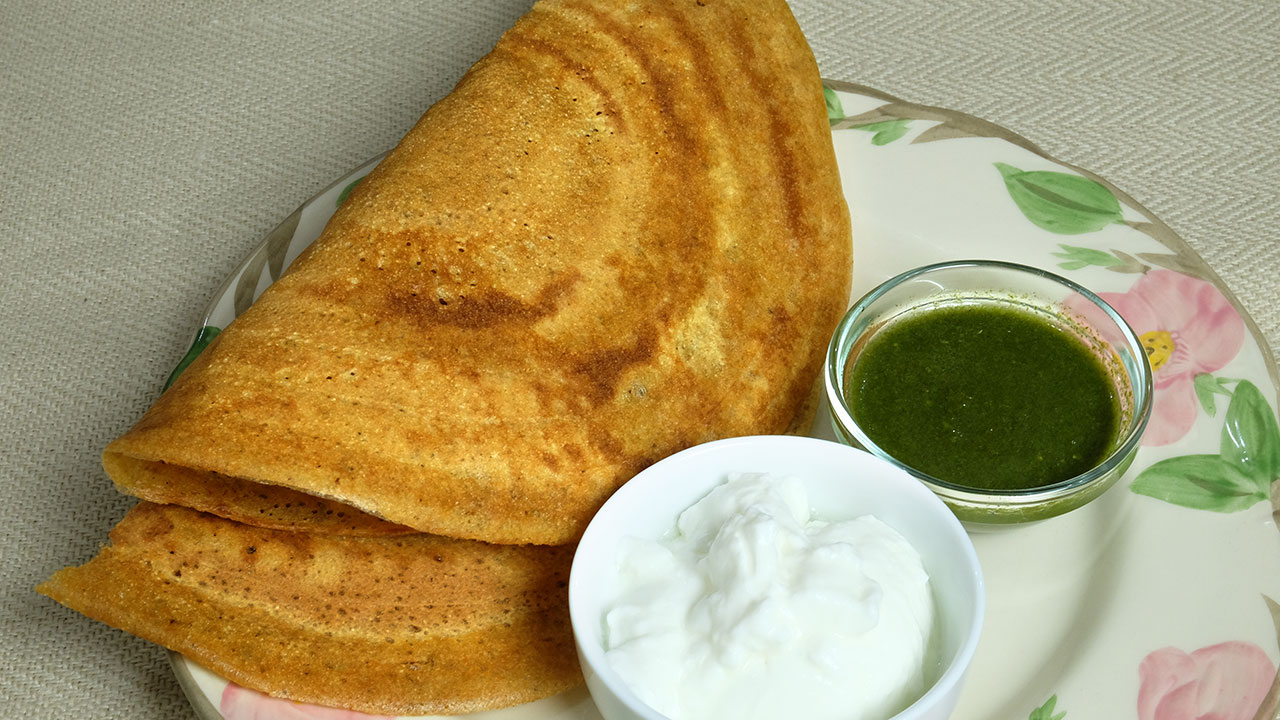
    Breads | Puda:

    Naan: A soft and fluffy bread that is a staple in Indian cuisine. It can be enjoyed with a variety of curries and gravies.
    Aloo Paratha: A popular North Indian bread stuffed with a spicy potato filling. It is often served with yogurt, pickle, and butter.

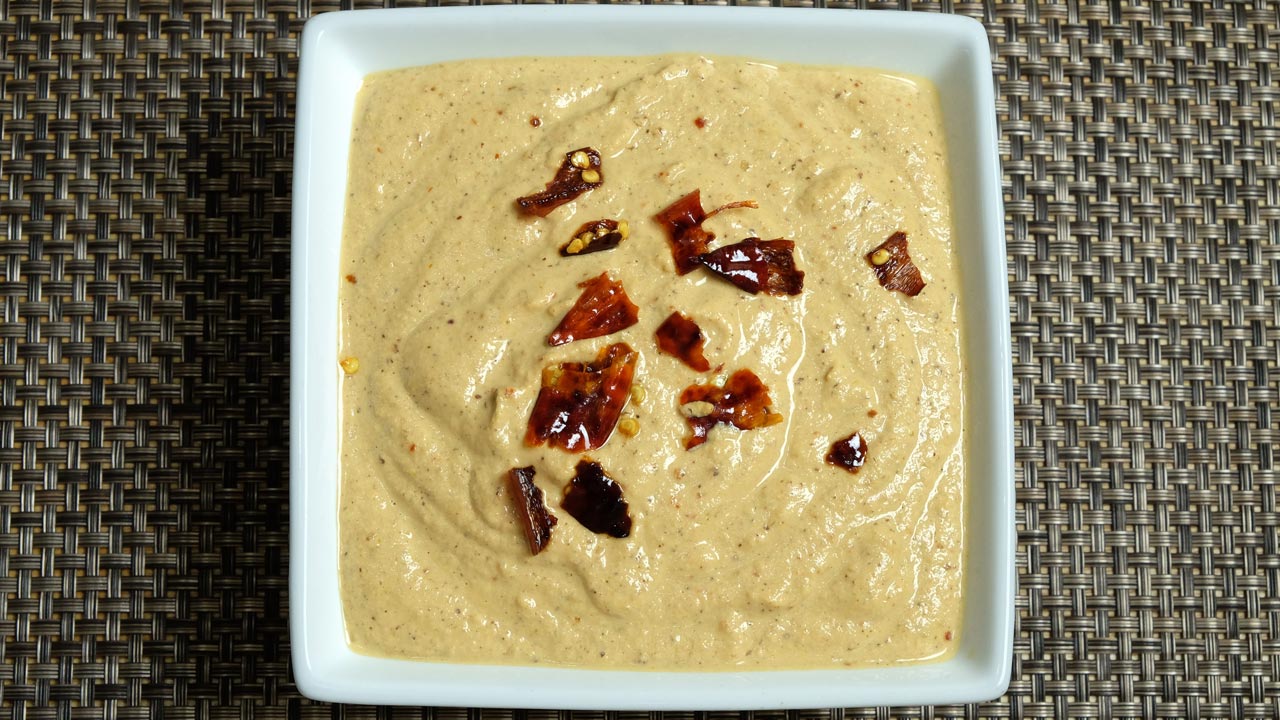
    Chutney, Pickle, Raita, & Condiments:

    Hari Cilantro Chutney: A vibrant green chutney made with fresh cilantro, green chilies, and lime juice. It adds a burst of flavor to any dish.
    Tamarind Sweet and Sour Chutney: A tangy and sweet chutney made with tamarind pulp and jaggery. It pairs well with snacks and appetizers.
    Dals, Soups, & Salads:

    Dal Makhani: A creamy and flavorful lentil dish made with black lentils and kidney beans, simmered with butter and cream.
    Tomato Soup: A simple and comforting soup made with fresh tomatoes, flavored with Indian spices.
    Desserts:

    Gulab Jamun: Soft and spongy milk-based balls soaked in a sugar syrup flavored with cardamom and rose water.
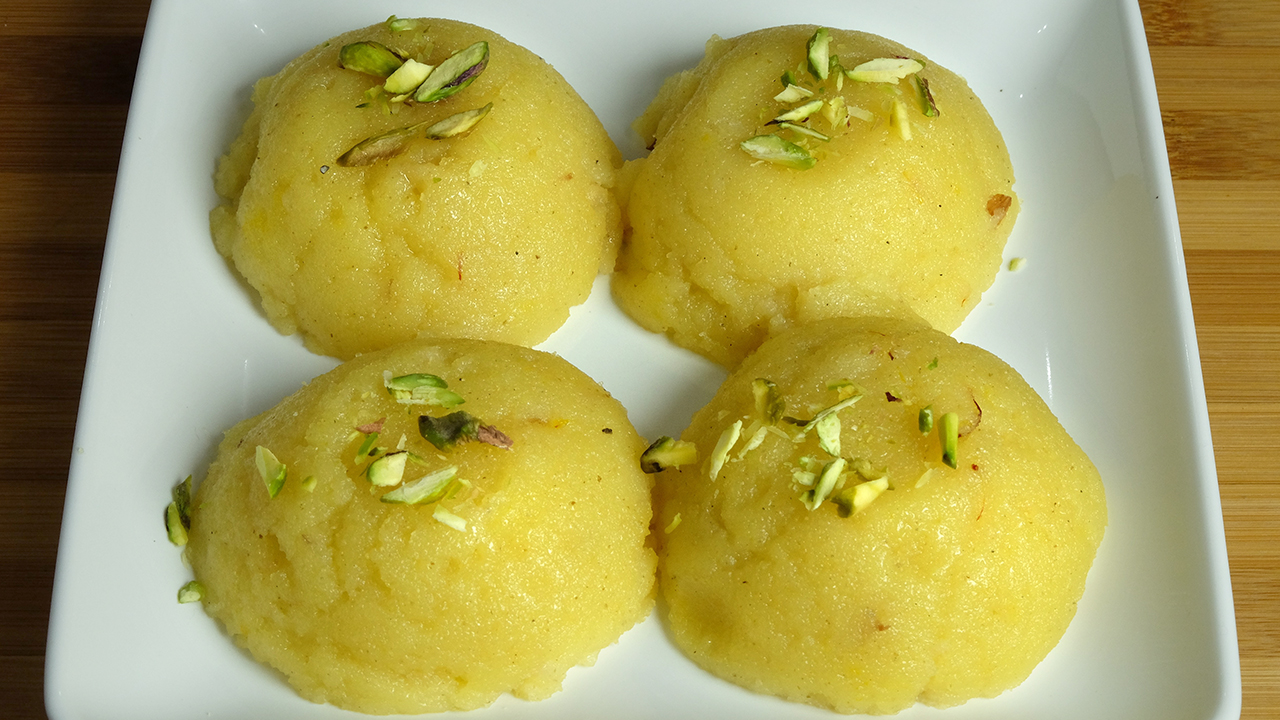
    Rasmalai: Soft paneer (Indian cottage cheese) dumplings soaked in sweetened, thickened milk, flavored with cardamom and saffron.
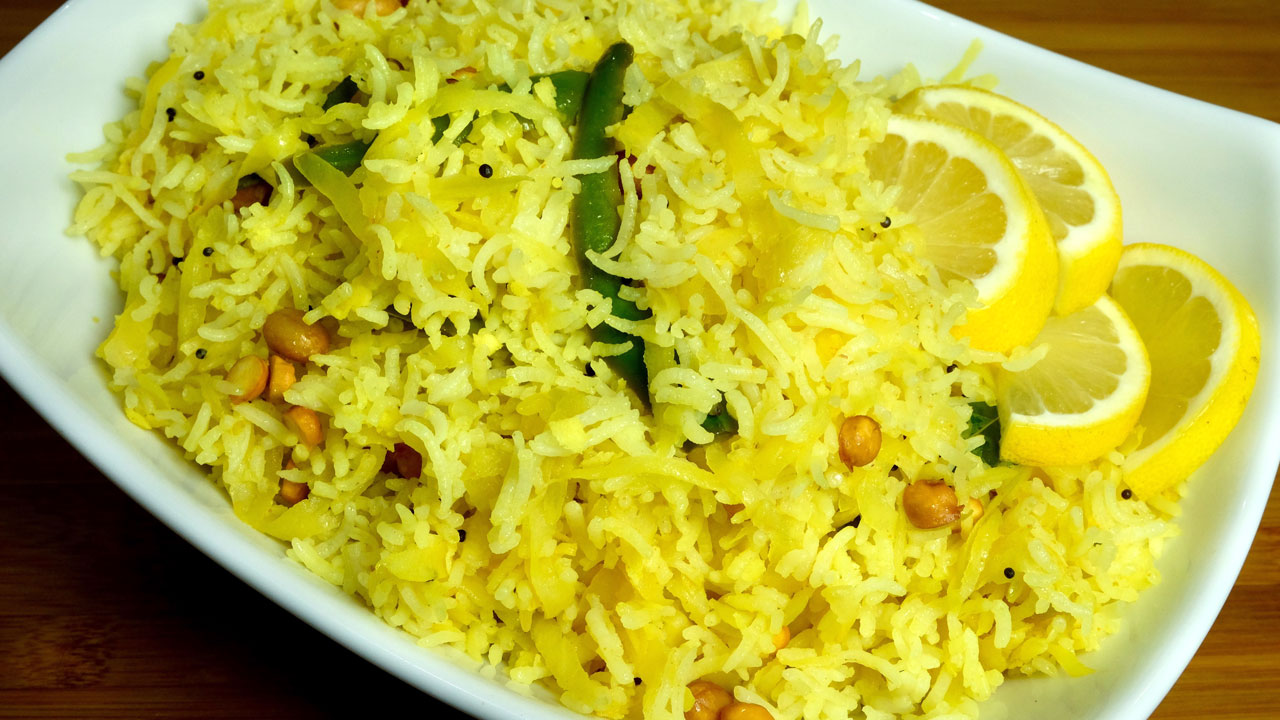
    Rice & Quinoa:

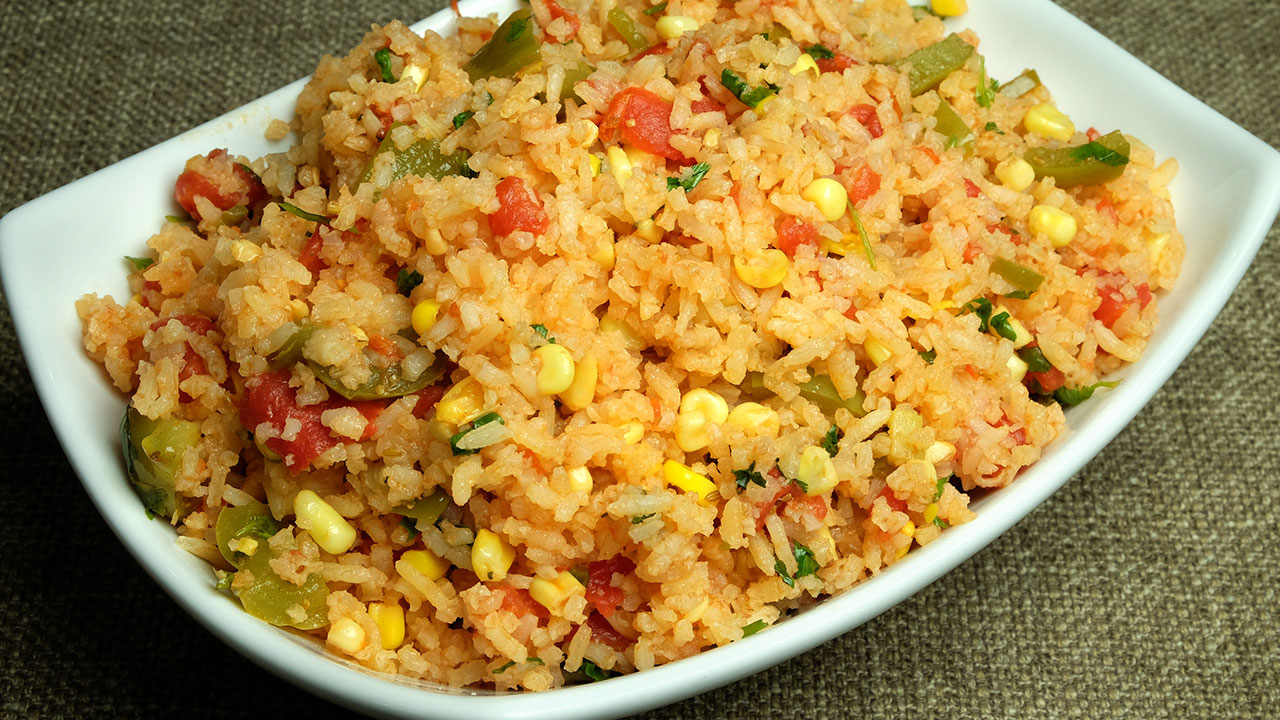
    Vegetable Biryani: A fragrant rice dish cooked with a mix of vegetables, spices, and herbs. It is a complete meal in itself.
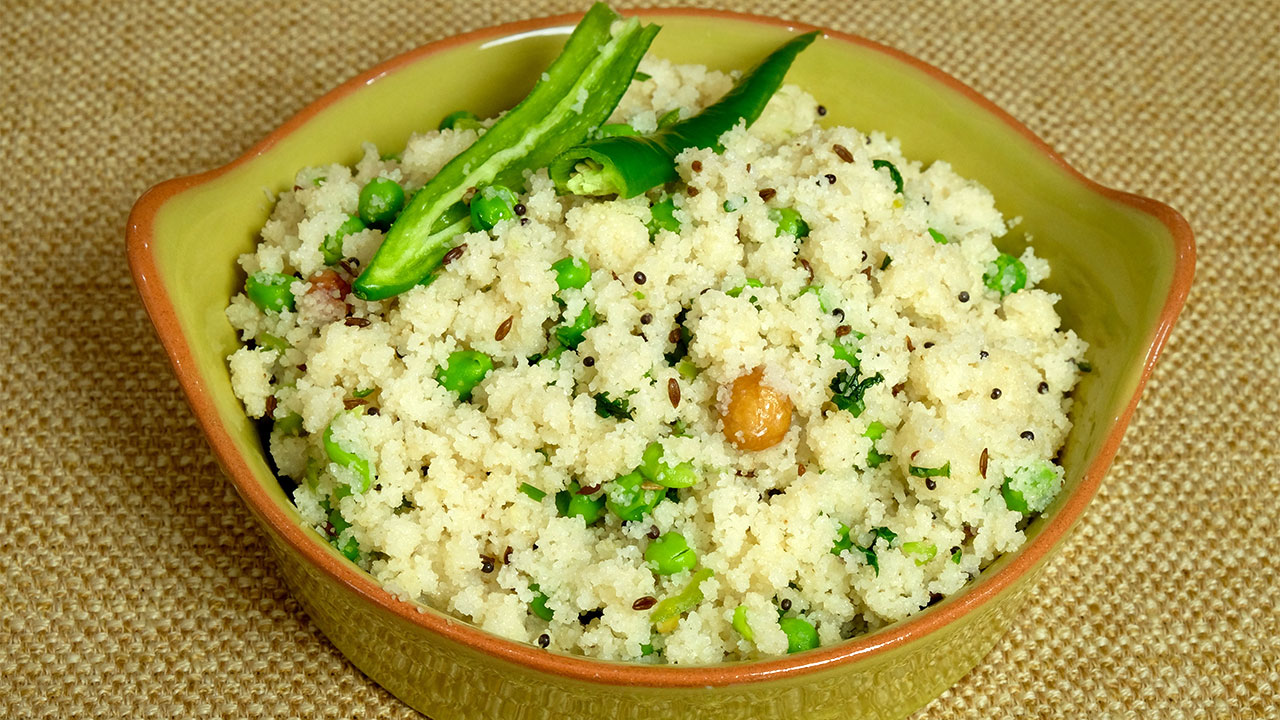
    Quinoa Vegetable Pilaf: A healthy and nutritious dish made with quinoa and mixed vegetables, flavored with Indian spices.
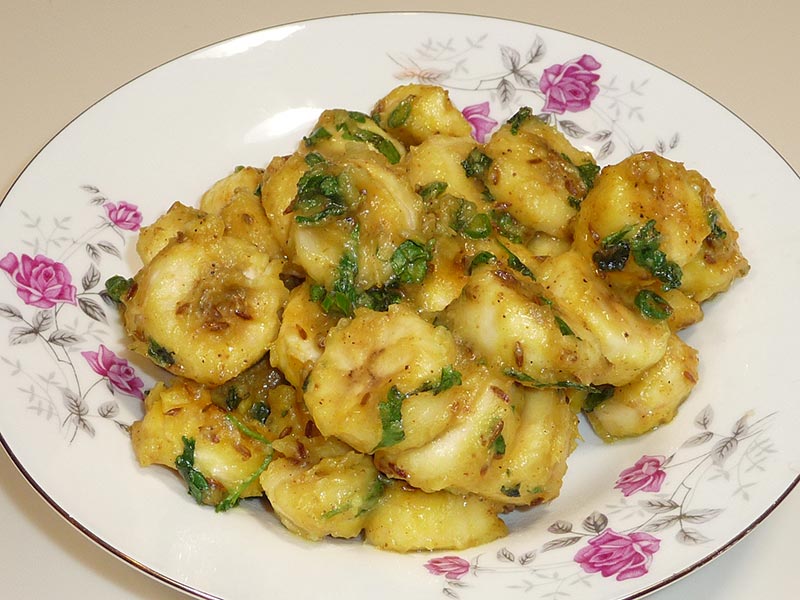
    Vegetables:

    Aloo Gobi: A classic Indian dish made with potatoes and cauliflower, cooked with a blend of spices.
    Palak Paneer: A creamy spinach curry with paneer (Indian cottage cheese), flavored with garlic and spices.
    Testimonials and Acknowledgements
    Manjula’s e-book includes testimonials from her fans who have successfully tried her recipes and appreciated the simplicity and authenticity of her cooking style. She acknowledges the support of her family, friends, and website viewers who have encouraged her to share her culinary skills with the world.

    Conclusion
    Manjula Jain’s “Best Indian Vegetarian Recipes” is a treasure trove of mouthwatering recipes that celebrate the essence of Indian vegetarian cuisine. Whether you are new to cooking or an experienced chef, this e-book offers a wealth of knowledge and inspiration to create delightful dishes that will impress your family and friends. Embrace the flavors of India and embark on a culinary adventure with Manjula’s tried-and-tested recipes.

    For more recipes and cooking videos, visit Manjula’s Kitchen.

  • Mango Rice

    Mango Rice

    Mango Rice

    Mango Rice

    Mango rice is just one style of South Indian rice dish among many different variations. Mango rice has a very unique flavor due to the tartness of the mangoes, the sweetness of the coconut, and the heat of the chilies all being mixed together. This is a simple but flavorful and satisfying light lunch!
    No ratings yet
    Course rice
    Cuisine Indian

    Ingredients
      

    For Rice

    • 1 cup long-grain rice, I am using basmati rice
    • 1 tablespoon oil
    • 1/2 teaspoon salt
    • 2 cups water

    For mango seasoning

    • 2 cups raw mango peeled and shredded
    • 3 tablespoons oil
    • 1/2 teaspoon mustard seeds, rai
    • About 10 curry leaves
    • 2 tablespoons peanuts
    • 2 tablespoons roasted chana, optional
    • 1 tablespoon ginger sliced, adrak
    • 2 green chili seeded and sliced lengthwise
    • 1/4 teaspoon turmeric, haldi
    • 1/4 teaspoon red chili powder
    • 1 teaspoon salt
    • 1/4 cup coconut freshly shredded, I am using frozen shredded coconut
    • 1 tablespoon sugar
    • 2 teaspoons lemon juice, use as needed

    Instructions
     

    • Wash and soak the rice in about 3 cups of water for at least 15 minutes.
    • Drain the rice. In the saucepan cook, the rice with 2 cups of water, salt, and oil over medium-high heat, bring rice to a boil then turn the heat to low, cover the pan, and cook the rice for about 15 minutes, or until the rice is tender and the water has evaporated. Turn off the heat and fluff the rice with a fork. Note: Cooked rice expands to about 4 times its original size, so be sure to use the proper size pan.
    • Heat the oil in a saucepan over medium heat, oil should be moderately hot, add mustard seeds.
    • When the seeds crack adds peanuts, and roasted chana, stir fry for one minute until peanuts are lightly brown.
    • Add green chili, curry leaves, and ginger, and stir for a few seconds.
    • Next add coconut, mango, sugar, salt, turmeric, and red chili mix it well and cook over low heat for 3-4 minutes until the mango is just tender, do not overcook the mango.
    • Gently fold the rice with mango and turn off the heat. Mango rice is ready to serve.
    • Turn off the heat and if needed drizzle some lemon juice.
    Tried this recipe?Let us know how it was!

    Indulge in taste of South Indian Mango Rice: mango rice Indian recipe 

    Mango rice is a vegan, gluten-freekid-friendly, quick & easy delectable South Indian dish that features the vibrant flavors of ripe mangoes combined with aromatic spices and cooked rice. Typically served as part of festive meals or enjoyed as a quick and flavorful lunch option, mango rice showcases the culinary diversity and richness of South Indian cuisine. Whether you’re looking to explore new flavors or simply craving a taste of home, this mango rice recipe is sure to delight your taste buds with its unique blend of sweet, tangy, and savory flavors.

    1. Preparing the Rice: Washing and Soaking 

    Start the process of making this flavorful South Indian mango rice by washing and soaking the rice in about 3 cups of water for at least 15 minutes. This step ensures that the rice grains absorb enough water to cook evenly and achieve the desired texture. Proper soaking also helps to reduce cooking time and enhances the overall taste and fluffiness of the dish.

    1. Cooking the Rice: Simmering to Perfection 

    After draining the soaked rice, cook it in a saucepan with 2 cups of water, salt, and oil over medium-high heat. Bring the rice to a boil, then reduce the heat to low, cover the pan, and let the rice cook for about 15 minutes until tender and the water has evaporated. It’s important to use the correct size pan as the cooked rice expands to about 4 times its original size. Once cooked, fluff the rice with a fork to ensure it is light and fluffy.

    1. Tempering the Spices: Enhancing Flavor 

    In another saucepan, begin the preparation for this delightful South Indian mango rice by heating oil over medium heat until it reaches a moderately hot temperature. Once the oil is hot, add mustard seeds to the pan, allowing them to crackle and pop in the sizzling oil. This process not only enhances the aroma of the dish but also imparts a nutty flavor to the oil, elevating the overall taste profile of the Indian mango rice. As the mustard seeds crackle and release their essence into the oil, they add depth and complexity to the dish, complementing the sweet and tangy flavors of the mango and the aromatic spices used in this mango rice recipe. The infusion of mustard seed flavor is a quintessential element of mango rice Indian recipe, contributing to its authentic taste and traditional appeal.

    1. Adding Crunchy Elements: Peanuts and Roasted Chana 

    Once the mustard seeds crackle, add peanuts and roasted chana to the saucepan. Stir-fry for about a minute until the peanuts are lightly browned, adding a delightful crunch to the dish. This combination of crunchy elements adds texture and flavor to the mango rice recipe.

    1. Infusing Aromatics: Green Chili, Curry Leaves, and Ginger 

    To enhance the aroma and flavor of the Indian mango rice, add green chili, curry leaves, and ginger to the saucepan. Stir-fry for a few seconds, allowing the spices to release their fragrant essence and infuse the oil.

    1. Incorporating Mango and Coconut: Adding Sweetness and Freshness 

    Next, add coconut, diced mango, sugar, salt, turmeric, and red chili to the saucepan. Mix well and cook over low heat for 3-4 minutes until the mango is just tender. It’s important not to overcook the mango to retain its freshness and natural sweetness, maintaining the integrity of the dish.

    1. Combining Rice and Mango Mixture: Creating Harmony 

    Gently fold the cooked rice with the mango mixture, ensuring that the flavors are evenly distributed throughout the dish. This step brings together the sweetness of the mango, the nuttiness of the rice, and the aromatic spices, creating a harmonious blend of flavors and textures.

    1. Finishing Touches: Drizzling Lemon Juice 

    If desired, turn off the heat and drizzle some lemon juice over the South Indian mango rice for an added burst of freshness and tanginess. This final touch elevates the flavors of the dish, balancing the sweetness of the mango with a hint of acidity. Your delicious mango rice Indian recipe is now ready to be served and enjoyed.

    If you loved our recipe of mango rice then you must also check out other variants of Rice: Vegetable Biryani, Masala Khichdi, Chhole Biryani, Quinoa Vegetable Pilaf, and Lemon Rice

  • Kache Kele Ki Sabji, Spicy Plantain, Raw Banana Sabji

    Kache Kele Ki Sabji, Spicy Plantain, Raw Banana Sabji

    Kele Ki Sabji (Banana Curry)

    Kache Kele Ki Sabji

    Spicy plantain, Kachhe Kele ki Sabzi , makes a delicious side dish. Plantain is green raw banana that is used for cooking. They do not have the sweetness or flavor as regular bananas, but taste amazing when cooked with  spices. I like to serve them with dal and rice.
    5 from 1 vote
    Course vegan
    Cuisine Indian
    Servings 4 people

    Ingredients
      

    • 2 cups plantain boiled peeled and sliced –green raw banana
    • 4 tablespoons oil
    • 1/8 teaspoon fenugreek seeds (mathi)
    • 1/2 teaspoon cumin seeds (jeera)
    • 2 tablespoons coriander powder (dhania)
    • 1/4 teaspoon turmeric (haldi)
    • 1/2 teaspoon red chili powder (lal mirch)
    • 1 teaspoon ginger shredded (adrak)
    • 1-1/4 teaspoon salt
    • 2 green chilies seeded and cut length wise in fours
    • 2 tablespoons cilantro finely chopped (hara dhania)
    • 1/2 teaspoon mango powder (amchoor)

    Instructions
     

    • Boil the plantain in pressure cooker with four cups of water over medium high heat. After pressure cooker start steaming lower the heat medium low and cook for 10 minutes. Turn off the heat and open the pressure cooker after all the steam has escaped. Plantain do not get very soft and mushy.
    • Peel the plantain and slice them about 1/8-inch-thick in half moon.
    • In a small bowl, mix the shredded ginger, coriander powder, chili powder, turmeric, and about 1/4 cup of water to make a paste.
    • Heat the oil in a frying pan over medium high heat. Test the heat by adding one cumin seed to the oil; if seed crack right away oil is ready.
    • Add cumin seeds, and fenugreek seeds to the oil after seeds crack add spice mix and green chilies and stir for a minute until spices start leaving the oil. Lower the heat to medium.
    • Add bananas, and salt, and mix well with Masala. Stir fry for 4-5 minutes. While stir frying keep mashing the bananas in small pieces. All the bananas should be coated with the spices.
    • Add about 1/4 cup of water and cook again for 2-3 minutes, bananas should be little moist. Turn off the heat’
    • Lastly, add the mango powder and fresh cilantro, mix it well. Adjust the salt to your taste.
    • Spicy plantain is ready to serve.
    Tried this recipe?Let us know how it was!
  • Peanut Chutney

    Peanut Chutney

    Peanut Chutney

    Peanut Chutney

    Peanut chutney is a delicious condiment that compliments many South Indian dishes such as dosa, idli, and Medu Vada. This chutney also makes a great spicy spread for sandwiches. I often use this as a dip with pita chips. This is a quick and easy recipe to make!
    No ratings yet
    Course Chutney
    Cuisine Indian
    Servings 6 people

    Ingredients
      

    • 1/2 cup raw peanuts
    • 2 tablespoons oil
    • 8 whole dry red chilies
    • 1/2 teaspoon mustard seeds
    • 1 tablespoon sesame seeds, til
    • 1/4 teaspoon asafetida, hing
    • 1/4 teaspoon fenugreek seed, mathi
    • About 10 curry leaves
    • 1 teaspoon salt
    • 2 tablespoons tamarind paste
    • About 1 cup of water

    Instructions
     

    • Heat the oil in a small frying pan over medium heat. Add mustard seeds, as mustard seeds crack add whole red chilies, and peanuts stir-fry them for about 2 minutes.
    • Lower the heat to low. Add fenugreek seeds. Sesame seeds, asafetida, and curry leaves stir for about 30 seconds. Take out 4 red chilies, set aside.
    • Add tamarind paste, and salt mix it well. Add one cup of water. Turn the heat to medium, cook for about 2 minutes. Turn off the heat and let it cool off to room temperature.
    • Grind the peanut mixture to a smooth but not make it paste.
    • Check the salt and pepper add more if required.
    Tried this recipe?Let us know how it was!
  • Thattai (Rice Crackers)

    Thattai (Rice Crackers)

    Thattai (Rice Crackers)

    Thattai (Rice Crackers)

    Thattai is a popular south Indian snack. You may call them crispy rice crackers. This is made with rice flour and a few spices. It is both vegan and gluten free. Thattai is a great snack to have on hand in your pantry.
    No ratings yet
    Course Snack
    Cuisine Indian
    Servings 30 thattai

    Ingredients
      

    • 1 cup rice flour
    • 1 tablespoons sesame seeds, til
    • 1 teaspoon chana dal
    • 3/4 teaspoon salt
    • 1/8 teaspoon asafetida, hing
    • 2 tablespoons oil
    • 1/2 teaspoon ginger paste
    • 1 green chili finely chopped
    • 1/3 cup of water
    • Also need oil to fry

    Instructions
     

    • Combine all the ingredients in a bowl, except water, rice flour, salt, asafetida, sesame seeds, chana dal, ginger, green chili, and oil mix it well. Add water as needed to make the firm dough.
    • Divide the dough in about 30 equal parts.
    • Take 2 plastic sheet, I am using zip lock bags this makes it easy to roll. Place one part of the dough between two bags and flatten it thin. Heat oil in a heavy frying pan on medium heat. Check the oil temperature by dropping a small piece of dough into the oil, if it sizzle and rises to the surface slowly, without changing the color, oil is ready for frying.
    • Gently transfer the flattened dough into the oil. Do not over crowed the frying pan. Fry them until they are light golden brown both sides. This should take about four minutes.
    • Take them out over paper towed to drain the excess oil.
    • Repeat the same process for the rest of the dough.
    • Thattai should be crisp. After it cools, store it in an air tight container.
    Tried this recipe?Let us know how it was!
  • Jeera Rice (Cumin Rice)

    Jeera Rice (Cumin Rice)

    Jeera Rice (Cumin Rice)

    Jeera Rice (Cumin Rice)

    Jeera rice is a simple rice dish flavored with cumin seeds. Jeera Rice or Cumin Rice makes a delicious side dish that can be served with any kind of gravy meal and makes it festive.
    5 from 1 vote
    Course rice
    Cuisine Indian
    Servings 4 people

    Ingredients
      

    • 1 cup rice I preferred basmati rice
    • 2 tablespoons oil
    • 1 teaspoon cumin seeds (jeera)
    • 4 whole dried red chili (sabut lal mirch)
    • 1 inch piece of cinnamon stick (dal chini)
    • 2 cardamoms crushed (Malachi)
    • 2 bay leaves (tajpat)
    • 1/4 teaspoon salt
    • 1/4 cup cilantro chopped (hara dhania)
    • 2 cups water
    • 2 tablespoons ghee clarified butter for garnishing

    Instructions
     

    • Wash the rice gently and soak it in lukewarm water for about 15 minutes. Drain the water and set aside.
    • Heat the oil in a saucepan moderately. Oil is the right temperature when one cumin seed drops into the oil cracks immediately.
    • Add the cumin seeds. When they crack, add all the spices red chili, cinnamon, bay leaves, and cardamom, and stir for a few seconds.
    • Add the rice. Stir-fry one minute.
    • Bring the water and salt to a boil, and turn the heat to low. Cover the pan.
    • Cook for 15 minutes, or until the rice is tender and the water has evaporated. Turn off the heat add cilantro and fluff the rice. Jeera rice is ready, serve hot.
    • Garnish the rice with ghee but this is optional. Jeera rice is very aromatic and delicious. This can enhance any meal.
    Tried this recipe?Let us know how it was!

    Master Art of Jeera Rice: A Guide to Indian Cumin Rice Recipe 

    Jeera rice is commonly served as a side dish in Indian cuisine and pairs well with a variety of main courses. It is often served alongside dishes such as Toor Dal, Kala Chana, Palak Kadhi, Urad Dal Tadka, Dal Tadka, Aam ki Dal  Vegetable curries, or paneer dishes. The mild and aromatic flavor of jeera rice complements the rich and spicy flavors of these dishes, making it a popular choice to balance out the meal. 

    Additionally, jeera rice can also be enjoyed on its own with a dollop of yogurt or raita for a simple and satisfying meal. Overall, jeera rice is a versatile and delicious dish that adds a fragrant and flavorful touch to any Indian meal.

    1. Preparing the Rice: Washing and Soaking 

    To start this flavorful jeera rice recipe, gently wash the rice and then soak it in lukewarm water for approximately 15 minutes. This step helps to ensure that the rice grains absorb enough water, resulting in a perfectly cooked and fluffy texture. After soaking, drain the water from the rice and set it aside, ready for the next stage of preparation.

    1. Heating the Oil: Ensuring the Right Temperature

    In a saucepan, heat the oil to the right temperature. You’ll know the oil is ready when a cumin seed dropped into it crackles immediately, indicating that it’s at the perfect temperature for cooking. This ensures that the jeera rice will be infused with the rich flavors of the spices and cumin seeds.

    1. Tempering the Spices: Infusing Flavor

    Once you’ve completed the crucial step of tempering the spices in your jeera rice preparation, it’s time to introduce the rice to the flavorful mixture. Adding the rice to the saucepan after the spices have been tempered ensures that it absorbs the rich aromas and flavors, resulting in a truly delicious jeera rice recipe.

    1. Adding the Rice: Stir-Frying for Flavor

    As you add the rice to the saucepan, begin stir-frying it for about a minute. This process allows the rice grains to come into contact with the aromatic spices and oil, enabling them to absorb the flavors deeply. Stir-frying the rice ensures that each grain is coated with a flavorful mixture, thereby enhancing its taste and aroma.

    1. Cooking the Rice: Simmering to Perfection

    Once the rice is stir-fried, bring the water and salt to a boil in the saucepan. Then, reduce the heat to low and cover the pan. Allow the rice to cook undisturbed for about 15 minutes, or until it is tender and the water has evaporated. This gentle simmering process ensures that the jeera rice cooks evenly and achieves the desired fluffy texture.

    1. Finishing Touches: Adding Freshness

    After the rice is cooked, turn off the heat and add freshly chopped cilantro. Gently fluff the rice with a fork to incorporate the cilantro and distribute the flavors evenly. This final step adds a burst of freshness to the jeera rice, enhancing its aroma and visual appeal. Your delicious Indian cumin rice is now ready to be served and enjoyed as a flavorful side dish or accompaniment to your favorite curry.

    If you loved our recipe of jeera rice then you must also check out other variants of Rice: Vegetable Biryani, Masala Khichdi, chole biryani, Quinoa Vegetable Pilaf, and Lemon Rice

  • Crispy Jalebi

    Crispy Jalebi

    Crispy Jalebi

    Crispy Jalebi

    Jalebi is a warm crispy, delicious treat. It can best be described as funnel cake. In my home town jalebi was a breakfast treat like pancakes, especially when they were served with kachori (puffed fried bread filled with spicy dal).  I know jalebi is mostly served as a dessert, but for me jalebi still makes the best breakfast treat.
    No ratings yet
    Course Dessert
    Cuisine Indian
    Servings 8 people

    Ingredients
      

    for Batter

    • 1 cup all-purpose flour, minus 2 Tablespoons
    • 2 tablespoons corn starch
    • Pinch of citric acid
    • 1 teaspoon oil
    • 1 teaspoon Yeast
    • 1-1/2 cup lukewarm water

    for Syrup

    • 1-1/2 cups sugar
    • 3/4 cup water
    • 4 cardamom crushed
    • A few strands of saffron
    • Few drops lemon juice
    • Oil to fry

    Instructions
     

    for Batter

    • Sift the all-purpose flour and corn starch together, add the citric acid, and yeast mix it well.
    • Add the water slowly to make a smooth batter, add oil and mix it well. Batter should be pourable consistency of dosa.
    • Set the batter aside in a warm place for about half an hour. Make sure the batter is not over-ferment. After fermenting the batter will be a little lacy.

    for Syrup

    • Boil the sugar and water together. Add the lemon juice, cardamom and saffron. (The lemon juice keeps the mixture from crystallizing). Boil for 2-3 minutes until syrup is about sticky to fingers but has not formed a thread. Turn off the heat.

    for Jalebi

    • Heat the oil in a flat frying pan about one inch deep. To test, put one drop of batter in the oil. The batter should sizzle and rise into a ball without changing color right away.
    • Fill the Jalebi batter into a piping bag with a #3 nozzle. You can also use an empty ketchup or mustard bottle. That’s what I am using.
    • Squeeze the Jalebi batter out into the hot oil in pretzel shapes about three inches in diameter.
    • Fry the jalebis until light golden brown on both sides. Take them out, wait for a minute then transfer them into the warm syrup. Let the jalebis soak in the syrup for about half a minute, take them out. Repeat the process.
    • Jalebies are ready to serve.

    Notes

    Variations
    1. Sprinkle sliced pistachios and almonds, cinnamon powder, coco powder, or sugar powder over the jalebis for a creative touch.
    2. Serve jalebis with malai (a milk reduced by boiling to about one-third of its original quantity.
    Keyword jalebi
    Tried this recipe?Let us know how it was!
  • Masala Vada (Vadai)

    Masala Vada (Vadai)

    Masala Vada

    (Vadai)

    Masala Vada is a South Indian favorite snack that is made with spiced chana dal. They are delicious crunchy on the outside and soft inside. Masala Vada is a popular street food in South India.  Try serving along with your afternoon tea.
    No ratings yet
    Course Appetizer
    Cuisine Indian
    Servings 6 people

    Ingredients
      

    • 1 cup chana dal or also known Bengal gram
    • 1 tablespoons rice flour
    • 1 cup potatoes boiled peeled and mashed
    • 1 teaspoon salt
    • 1-1/2 teaspoons fennel seeds crushed
    • 1 teaspoon mango powder
    • 1/2 teaspoon black pepper crushed
    • 1/8 teaspoon asafetida
    • 1 tablespoon ginger paste
    • 2 tablespoons finely chopped green chilies
    • 1/4 cup cilantro finely chopped
    • Also need oil to fry

    Instructions
     

    • Wash and Soak chana dal in three cups of water for about 4 hours after soaking this will become about twice in volume.
    • Drain the water, keep 2 tablespoons soaked dal aside. Grind dal coarsely without adding any water. I like to use food processor.
    • Take out the dal in a mixing bowl, add all the ingredients, potatoes, rice flour, salt , fennel seeds, mango powder, black pepper, asafetida, ginger, green chili, cilantro and soaked chana dal. Mix it well.
    • Lightly wet your palms, this will make easy to roll the vadas. Take a lemon size ball of the mix, flatten it with your hands, making them to about half inch thick patties. This should make about 16 patties. I like to make few of patties before I start frying.
    • Heat the oil in a frying pan, (frying pan should have about 1” of oil) over medium heat. Oil should be moderately hot when you drop the vada, oil should sizzle and come to surface slowly. Gently drop the vadas in oil making sure they don’t overlap.
    • Fry the vadas both sides till golden brown and crisp, turning over two to three times. This should take 6-7 minutes. Repeat the same procedure for the rest of the mix.
    • Take them out over paper towel, this absorb the access oil.
    • Serve vadas as they are or with chutneys, I like them with coconut chutney.
    Tried this recipe?Let us know how it was!

    Masala Vada Recipe: Delightful Snack


    Masala Vada is a delightful Indian appetizer and street food snack that fits perfectly into the categories of gluten-free, vegan, and snacks. Made primarily from chickpea flour and an assortment of spices, Masala Vada is a savory fritter popular in South Indian cuisine. It’s typically crafted by blending soaked and coarsely ground chana dal (split chickpeas) with green chilies, ginger, curry leaves, and coriander leaves. 

    Masala vada is a popular South Indian snack made from chana dal. It is crispy on the outside and soft on the inside, making it a delightful treat for snack lovers. This masala vada recipe is easy to follow and yields delicious vadas that are perfect for serving with tea or as an appetizer.

    Soaking the Chana Dal

    To begin making the recipe of masala vada, start by soaking the chana dal in water for at least 3-4 hours. This helps to soften the dal and make it easier to grind later on.

    Draining and Grinding

    Once the dal is soaked, drain the water completely and transfer the dal to a blender or food processor. Grind it coarsely without adding any water. The texture should be coarse, with small pieces of dal still visible.

    Mixing the Ingredients

    Transfer the ground dal to a mixing bowl and add chopped green chilies, grated ginger, chopped cilantro, cumin seeds, and salt to taste. Mix everything together until well combined. This mixture forms the base of your masala vada.

    Shaping the Vadas

    Heat oil in a deep frying pan or kadhai over medium heat. While the oil is heating, take small portions of the dal mixture and shape them into small patties or vadas. You can flatten them slightly with your palms to ensure even cooking.

    Frying the Vadas

    Carefully slide the shaped vadas into the hot oil, making sure not to overcrowd the pan. Fry them in batches until they turn golden brown and crispy on both sides. Use a slotted spoon to remove the fried vadas from the oil and drain them on paper towels to remove excess oil.

    Serving

    Serve the dal vada hot with your favorite chutney or sauce. They can also be enjoyed on their own as a crunchy and flavorful snack.

    Tips

    • To make the vadas even more flavorful, you can add curry leaves, or grated coconut to the dal mixture.
    • Make sure the oil is hot enough before frying the vadas to ensure they cook evenly and become crispy.
    • If you prefer a spicier version, you can increase the quantity of green chilies or add a pinch of red chili powder to the dal mixture.

    Variations

    • Instead of chana dal, you can use a combination of different dals like moong dal, urad dal, or toor dal to make variations of masala vada.
    • For a healthier alternative, you can air-fry the vadas instead of deep-frying them. Simply preheat the air fryer, brush the vadas with a little oil, and air-fry them until crispy.

    Benefits

    • Masala vada is a good source of protein and fiber due to the presence of chana dal, making it a nutritious snack option.
    • The spices used in the vadas like ginger and cumin seeds have digestive properties and aid in digestion.
    • As these vadas are fried, they should be consumed in moderation as part of a balanced diet.

    FAQs

    Can I make masala vada ahead of time?

    Yes, you can prepare the dal mixture in advance and store it in the refrigerator. When ready to serve, shape the vadas and fry them fresh for the best taste and texture.

    Can I freeze masala vada?

    While it’s best to consume masala vada fresh, you can freeze any leftover vadas for later consumption. Simply place them in an airtight container or ziplock bag and freeze for up to a month. Reheat them in an oven or air fryer before serving.

    Can I use pre-cooked dal to make masala vada?

    It’s recommended to use uncooked, soaked dal for this recipe as it gives the vadas the right texture and consistency. Using pre-cooked dal may result in vadas that are too soft and mushy.

    For more delicious recipes, explore more Indian recipes, appetizers, beverages, and desserts, be sure to check out the following links on Manjula’s Kitchen. Here are some links to recipes on Manjula’s Kitchen official website: Paneer Tikka Masala Recipe, Chana Chaat (Spicy Chickpea Salad) Recipe, Pav Bhaji (Spicy Vegetable Hash with Buns) Recipe, Raj Kachori (Crunchy Chaat) Recipe, Vegetable Biryani Recip. These recipes should offer you a flavorful experience straight from Manjula’s Kitchen.