Category: Traditional Indian Recipes

Traditional Indian Food: Authentic and Delicious Recipes

Indian cuisine is known for its rich flavors and diverse ingredients. Traditional Indian food offers a wide variety of dishes that are both delicious and culturally significant. Whether you’re looking for traditional Indian food, Indian traditional food, or specific traditional Indian food recipes, Manjula’s Kitchen provides an extensive collection of dishes to suit every palate. 

Classic Traditional Indian Food

Aloo Methi

Aloo Methi is a classic North Indian dish made with potatoes and fenugreek leaves. This dish is a staple in many Indian households and is a perfect example of traditional Indian food. The combination of earthy potatoes and the slightly bitter taste of fenugreek leaves, cooked with mild spices, makes this dish flavorful and nutritious.

Paneer Tikka

Paneer Tikka is a popular dish made with marinated paneer cubes grilled to perfection. This dish is a favorite among those who enjoy Indian traditional food. The marinated paneer is cooked with spices and herbs, making it a delicious and satisfying option for any meal. Serve it with a side of mint chutney for an added burst of flavor. Its a popular dish from paneer recipes. 

Traditional Indian Food Recipes for Main Course

Dal Tadka

Indian Dal Tadka is a simple yet flavorful lentil dish made with yellow lentils and tempered with cumin, mustard seeds, and red chilies. This dish is a staple in traditional Indian food recipes and is enjoyed with rice or roti. The rich and comforting flavor of the lentils makes it a beloved dish in many Indian households.

Baingan Bharta

Baingan Bharta is a smoky and flavorful eggplant dish that is perfect for any meal. The eggplants are roasted until soft, then mashed and cooked with tomatoes and mild spices. This dish is a delightful addition to your collection of Indian traditional food and pairs well with roti or rice. It a famous dish coming from north indian recipes 

Traditional Indian Food List: Snacks and Appetizers

Samosas

Samosas are crispy pastries filled with spiced potatoes and peas. This snack is a classic part of traditional Indian food recipes and is enjoyed by people of all ages. Samosas are perfect for any occasion and can be served with tamarind or mint chutney.

Pakoras

Pakoras are deep-fried fritters made with vegetables like spinach, potatoes, and cauliflower. This snack is a popular item on the traditional Indian food list and is perfect for tea-time or as an indian veg appetizers. Serve pakoras with a side of green chutney for a delicious treat.

Traditional Indian Food Recipes for Rice Dishes

Lemon Rice

Lemon Rice is a tangy and flavorful rice dish made with cooked rice, lemon juice, peanuts, and mild spices. This dish is a staple in South Indian cuisine and is a perfect example of traditional Indian food. It’s light, refreshing, and easy to prepare, making it a great choice for any meal.

Jeera Rice

Jeera Rice is a simple and aromatic rice dish made with cumin seeds and basmati rice. This dish is a versatile item on the traditional Indian food list and pairs well with various curries and dals. The subtle flavor of cumin enhances the taste of the rice, making it a favorite in many households.

Traditional Indian Desserts

Gulab Jamun

Gulab Jamun are soft, deep-fried balls made from khoya (dried milk) soaked in a sweet syrup flavored with cardamom and rose water. This dessert is a staple in traditional Indian food recipes and is often served during festivals and special occasions. The melt-in-your-mouth texture and sweet flavor make it a favorite among many.

Kheer

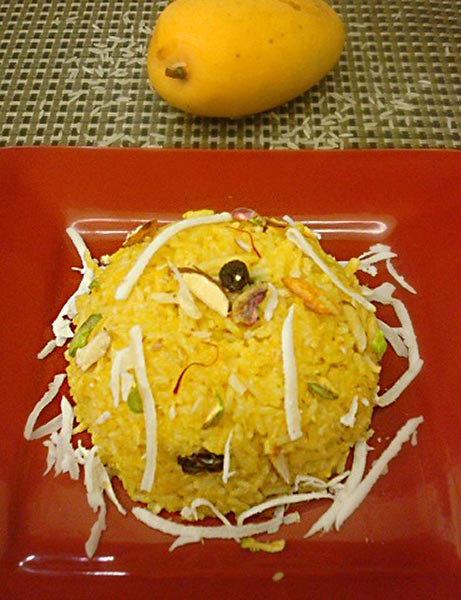
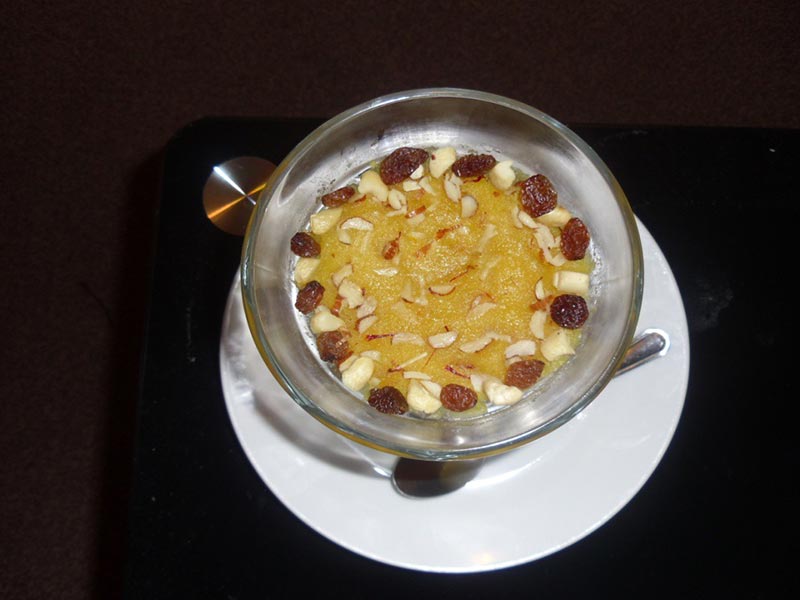
Kheer is a creamy rice pudding flavored with cardamom and garnished with nuts and raisins. This dessert is a classic in traditional Indian food and is easy to prepare. Kheer is a perfect ending to any meal and is often enjoyed during celebrations.

Elevating Your Traditional Indian Food Menu

To enhance your traditional Indian food menu, consider incorporating dishes from various categories that complement these classic recipes. Indian snacks like samosas and pakoras can introduce a delightful variety of flavors and textures.

For a sweet ending, explore Indian desserts such as gulab jamun and kheer. Offering healthy options like dal tadka and baingan bharta can provide lighter meal choices.

Planning a large gathering? The popular party food ideas are filled with dishes that are sure to impress your guests and make your celebration memorable. Including North Indian recipes like aloo methi or lemon rice can bring an authentic touch to your meal.

Frequently Asked Questions (FAQs)

Q: What are some popular traditional Indian food recipes?

A: Some popular traditional Indian food recipes include Aloo Methi, Paneer Tikka, Dal Tadka, Baingan Bharta, Samosas, Pakoras, Lemon Rice, Jeera Rice, Gulab Jamun, and Kheer. These dishes are flavorful, nutritious, and perfect for any occasion..

Q: What are some traditional Indian food recipes for a vegetarian diet? 

A: Some vegetarian traditional Indian food recipes include Paneer Tikka, Dal Tadka, Baingan Bharta, Samosas, Pakoras, Lemon Rice, and Jeera Rice. These dishes are nutritious, delicious, and perfect for a vegetarian diet.

Q: Can I prepare traditional Indian food recipes in advance? 

A: Yes, many traditional Indian food recipes can be prepared in advance and stored. Dishes like Dal Tadka and Baingan Bharta can be made ahead of time and refrigerated, while snacks like Samosas and Pakoras can be prepped and frozen.

Q: What are some traditional Indian desserts for special occasions? 

A: Some traditional Indian desserts for special occasions include Gulab Jamun and Kheer. These desserts are classic, easy to prepare, and perfect for celebrations.

Conclusion

Traditional Indian food is a celebration of diverse flavors and rich cultural heritage. Whether you’re looking for Indian traditional food, specific traditional Indian food recipes, or a comprehensive traditional Indian food list, these dishes will bring variety and flavor to your meals. So, gather your ingredients, try out these recipes, and enjoy the rich and diverse world of traditional Indian cuisine. Happy cooking and happy eating!

By incorporating these dishes into your menu, you’ll be able to enjoy a wide variety of delicious and nutritious foods. Whether you’re looking for snacks, main courses, or desserts, there’s a traditional Indian food recipe to suit every taste. Don’t forget to check out Manjula’s Kitchen for more inspiration and culinary delights. Happy cooking and happy eating!

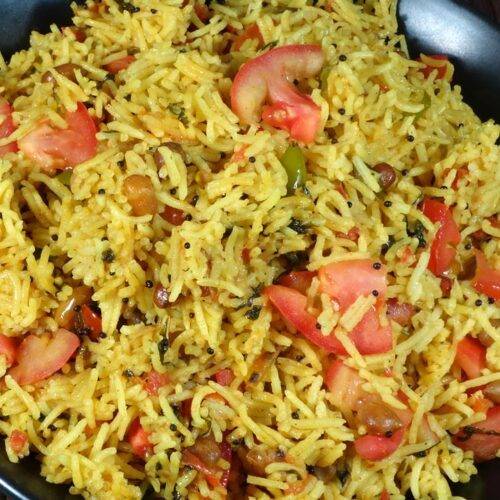
  • Tomato Rice (Pulao)

    Tomato Rice (Pulao)

    Tomato Rice (Pulao)

    Tomato Rice (Pulao)

    Tomato rice or pulao has a South Indian flair as I have used sambar powder in this recipe. Samber powder is a spice mix used in many South Indian dishes. It has a spicy and tangy flavor. This flavor combined with tomato and rice taste great! This dish will also make a nice lunch box meal.
    5 from 1 vote
    Course rice
    Cuisine Indian
    Servings 3 people

    Ingredients
      

    • 1 cup rice
    • 3 tomatoes chopped, will make 1-1/2 cup chopped tomatoes
    • 3 tablespoons oil
    • 1/4 cup raw shelled peanuts
    • 1 teaspoon mustard seeds
    • 1 green chili chopped
    • 1/4 teaspoon turmeric
    • 3 teaspoons samber powder, available in Indian grocery store
    • 1-1/2 teaspoo n salt 
    • 1/4 cup cilantro (hara dhania) chopped
    • 2 cups of water

    Instructions
     

    • Wash and soak the rice in about 3 cups of water for at least 15 minutes. Drain the water and set aside.
    • Heat the oil in a saucepan over medium heat. When moderately hot, add mustard seeds.
    • When the seeds cracks add peanuts and stir fry for one minute until peanuts are lightly golden brown.
    • Add about 1 cup chopped tomatoes, green chili, turmeric, sambar powder, salt and cilantro, cook until tomatoes are tender. This should take about 2 minutes.
    • Add rice and 2 cups of water mix and bring it to boil, lower the heat to low and cover the pen. Let it cook for about 18-20 minutes. Cook until rice is soft and water has evaporated.
    • Stir the rice gently and add the remaining tomatoes stir gently, cover the pan and let it cook for 2 more minutes.
    • Serve rice by it self or with yogurt.
    Tried this recipe?Let us know how it was!

    Delicious Tomato Pulao Recipe: How to Make Tomato Pulao 

    Tomato pulao is a gluten free, flavorful, kid friendly and aromatic rice dish originating from Indian cuisine. It is made by cooking rice with a mixture of tomatoes, spices, and other ingredients. Typically, the dish begins by tempering mustard seeds and peanuts in hot oil, followed by adding chopped tomatoes, green chilies, turmeric, sambar powder, salt, and cilantro.

    1. Soaking Rice for Flavorful Tomato Rice Dish 

    Embark on the journey of making tomato pulao by ensuring that the rice is clean and ready for cooking. Begin by thoroughly washing the rice to remove any impurities, ensuring a clean and pristine base for your dish. Once washed, soak the rice in about 3 cups of water for at least 15 minutes. This crucial step helps to soften the rice grains, allowing them to cook evenly and absorb the rich flavors of the tomato pulao recipe. After soaking, drain the water and set the rice aside, eagerly awaiting its transformation into a delicious and aromatic dish of tomato pulao rice.

    1. Tempering Oil and Stir-Frying: Enhancing Flavor in Tomato Pulao Rice

    In a saucepan heated over medium heat, initiate the flavor infusion process by adding oil and mustard seeds. Allow the oil to heat up to a moderate temperature, then add the mustard seeds and let them crackle, releasing their aromatic essence. Once the mustard seeds crackle, introduce peanuts to the pan and stir-fry for about a minute until they turn lightly golden brown. This step adds a delightful crunch and nutty flavor to the tomato pulao, elevating its overall taste and texture to new heights.

    1. Cooking Tomato Mixture: Infusing Flavors into Tomato Pulao Recipe 

    The heart of any tomato pulao recipe lies in its flavorful base. To create this base, add chopped tomatoes, green chili, turmeric, sambar powder, salt, and cilantro to the saucepan. Allow the mixture to cook until the tomatoes are tender, typically taking about 2 minutes. These flavorful ingredients work in harmony to infuse the rice with a burst of deliciousness, setting the stage for a mouthwatering tomato pulao experience that will tantalize your taste buds and leave you craving for more.

    1. Simmering Rice: Perfecting Tomato Rice Pulao 

    Once the tomato mixture has cooked to perfection, it’s time to introduce the star ingredient – the soaked and drained rice. Add the rice to the saucepan along with 2 cups of water, ensuring that everything is mixed well to distribute the flavors evenly. Bring the mixture to a gentle boil, then reduce the heat to low, cover the pan, and let the rice simmer for about 18-20 minutes, or until it becomes soft and the water has evaporated. After cooking, gently stir the rice and add the remaining tomatoes, incorporating them into the dish with care. Cover the pan once again and let it cook for an additional 2 minutes to ensure that all the flavors meld together perfectly, creating a harmonious symphony of taste and aroma.

    1. Serving Tomato Rice Pulao: Enjoying the Flavorful Rice Dish 

    With the tomato pulao cooked to perfection, it’s time to indulge in its flavorful goodness. Serve the dish by itself as a main course or pair it with yogurt for a satisfying and wholesome meal that will leave you feeling nourished and satisfied. Whether enjoyed as a standalone dish or as a side, tomato pulao is sure to impress with its vibrant flavors, aromatic spices, and irresistible appeal. So gather your loved ones, sit back, and savor every mouthful of this delightful and comforting tomato rice pulao.

    If you loved how to make tomato pulao recipe then you must also check out other variants of Rice: Vegetable Biryani, Masala Khichdi, Chhole Biryani, Quinoa Vegetable Pilaf and Lemon Rice.

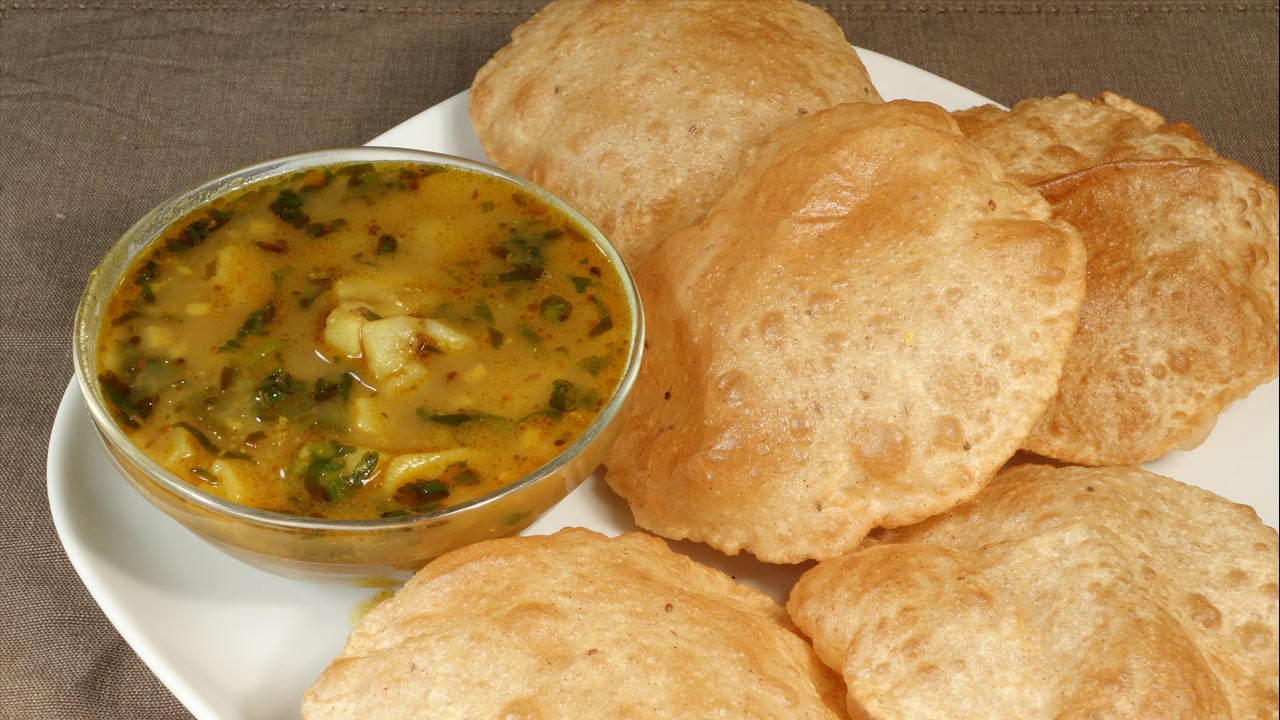
  • Aloo Puri (Potatoes with Fried Puffed Bread)

    Aloo Puri (Potatoes with Fried Puffed Bread)

    Aloo Puri

    Aloo Puri (Potatoes with Fried Puffed Bread)

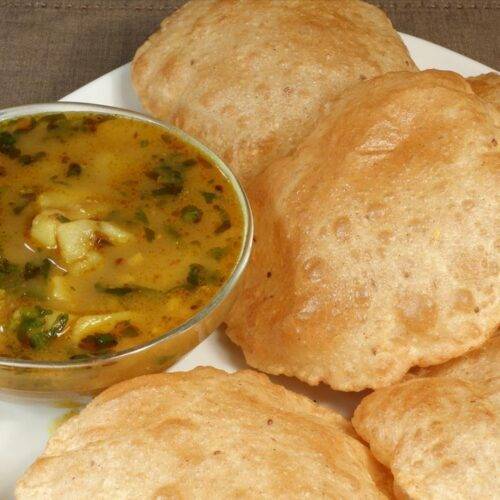
    Aloo Puri, spicy potatoes with gravy and puffed whole wheat bread (puri). It is simple and makes a complete meal. This is a popular combination in North India. This can be served for a casual breakfast, lunch, or dinner.
    5 from 1 vote
    Course Bread
    Cuisine Indian
    Servings 2 people

    Ingredients
      

    for Aloo (Potatoes with Gravy)

    • 3 medium-sized potatoes peeled and cubed in bite size, about 2 cups of cubed potato
    • 1-1/2 tablespoons oil
    • 1 teaspoon cumin seeds (jeera)
    • 1/8 teaspoon asafetida (hing)
    • 1/4 teaspoon turmeric (haldi)
    • 1 teaspoon ginger chopped
    • 1 green chili chopped
    • 2 teaspoon coriander powder (dhania)
    • 1 teaspoon of fennel seed crushed
    • 1/4 teaspoon red chili powder
    • 1 teaspoon salt
    • 1/2 teaspoon mango powder (amchur)
    • 1/4 teaspoon garam masala
    • About 2 tablespoons cilantro (hara dhania) finely chopped

    for Puri

    • 1 cup whole wheat flour
    • 1 tablespoon sooji/semolina
    • 1/8 teaspoon carom seeds (ajwain)
    • 1/2 teaspoon salt
    • Approx. ½ cup water

     Also need oil to fry

    Instructions
     

    For Aloo

    • In a small bowl, mix the coriander, fennel, turmeric, chili powder, salt, ginger, and green chili with about 2 tablespoons of water. Set it aside. 
    • Heat the oil in a saucepan over medium-high heat. Test the heat by adding one cumin seed to the oil. If the cumin seed cracks right away, the oil is ready. Add cumin seeds, and asafetida, as cumin seeds crack add spice mix and stir fry for about 15 seconds
    • Add potatoes mixed with spices, lower the heat to low medium, cover the pan, and let it cook for about three to four minutes stirring once in between.
    • Add about 1-1/2 cups of water and change the heat to medium-high heat. As potatoes come to a boil cover the pan lower the heat to medium and let it cook for about eight minutes.
    • Mix the potatoes and mash some potatoes as mixing the potatoes, this will thickness to the gravy. Adjust the water in the gravy to your liking; gravy will thicken as it cools.
    • Add mango powder, garam masala and cilantro. Mix it well, turn off the heat, and cover the pan.
    Tried this recipe?Let us know how it was!
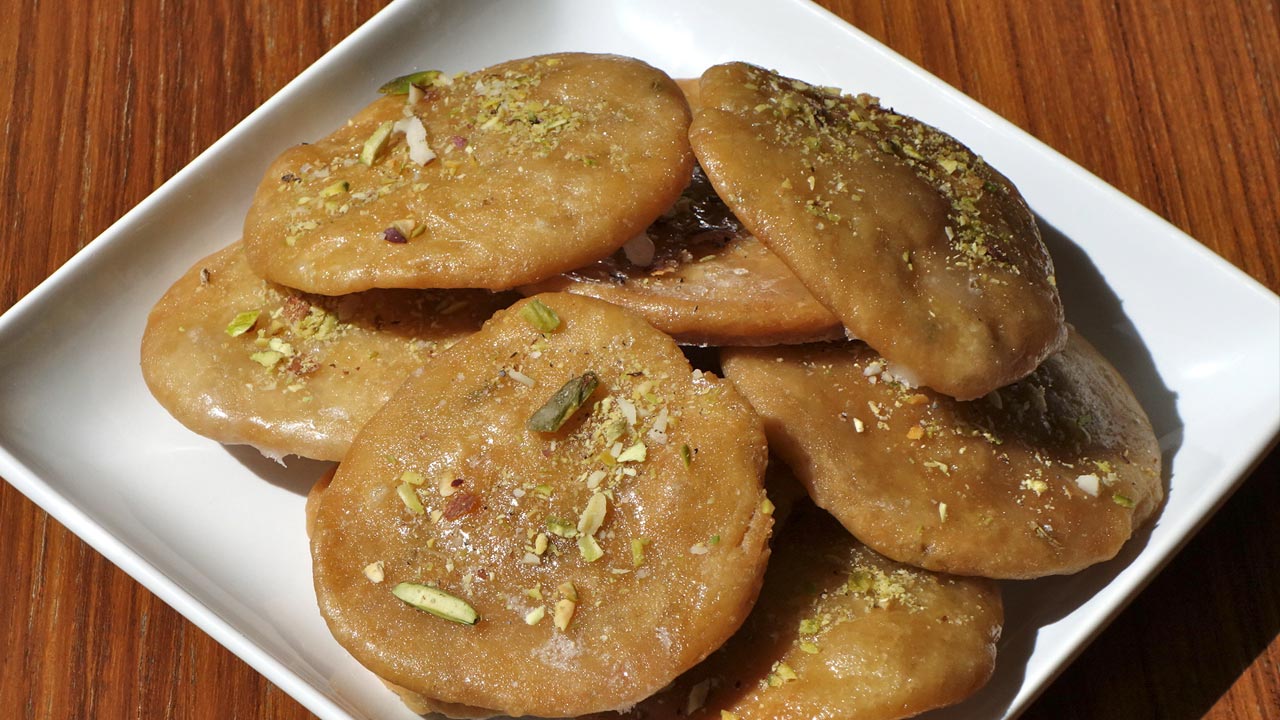
  • Meethi Matri (Indian Sweet Cracker)

    Meethi Matri (Indian Sweet Cracker)

    Meethi Matri

    Meethi Matri (Indian Sweet Cracker)

    Meethi matries are delightful crispy and sweet snack made during festivals like Holi and Diwali. You can also serve them as biscuit or cookie. Fennel and cardamom gives very nice and sweet flavor to them.
    No ratings yet
    Course Dessert
    Cuisine Indian
    Servings 14 Meethi Matri

    Ingredients
      

    • 1 cup all purpose flour (maida, plain flour)
    • 1 tablespoon sooji (rava, semolina)
    • 1/4 teaspoon salt
    • 1/2 teaspoon fennel seeds crushed
    • 2 tablespoon oil
    • Approx. 1/3 cup of lukewarm water
    • Oil to fry

    Syrup

    • 3/4 cup sugar
    • 1/4 cup water

    Garnish

    • 1/2 teaspoon crushed cardamom
    • 2 teaspoons pistachios crushed

    Instructions
     

    • Mix flour, sooji, salt, fennel seeds and oil in a bowl. Add water as needed to make soft dough. Don’t knead the dough. Cover the dough with a damp cloth. Let it rest at least 15 minutes.
    • Divide the dough into 14 equal parts. Rolling the dough between your palms form into balls.
    • Roll the dough balls into three inch circles. Prick each matri with a fork 8-10 places on both sides. This will prevent matri not to puff when frying.
    • Heat at least one inch of oil in a frying pan over medium heat. To check if oil is ready put a little piece of dough in the oil. It should make oil lightly sizzle, if dough float instantly oil is too hot.
    • Fry a few matri at a time. Fry the matries until both sides are a light golden-brown. It should take six to eight minutes. If the matries are fried on high heat, they will not be cooked inside.
    • Take them out over paper towel so it can absorb the extra oil.
    • For syrup, in a sauce pan add water, and sugar over medium heat, bring it to a boil. Let it boil for about 2 minutes until syrup is sticky, on candy thermometer it should be 230 degree.
    • Dip the matri one at a time into the syrup making sure it is coated with syrup all around.
    • Place the matries on a wire rack to allow the extra syrup drain or over greased plate.
    • Garnish the matries with cardamom and sliced pistachios while the matries are still moist with syrup.
    • Matries will be dry in an hour.
    • Matries can be stored in airtight container up to a month.
    Tried this recipe?Let us know how it was!
  • Til Ka Ladoo – Sesame Candy

    Til Ka Ladoo – Sesame Candy

    Til Ka Ladoo

    Til Ka Ladoo – Sesame Candy

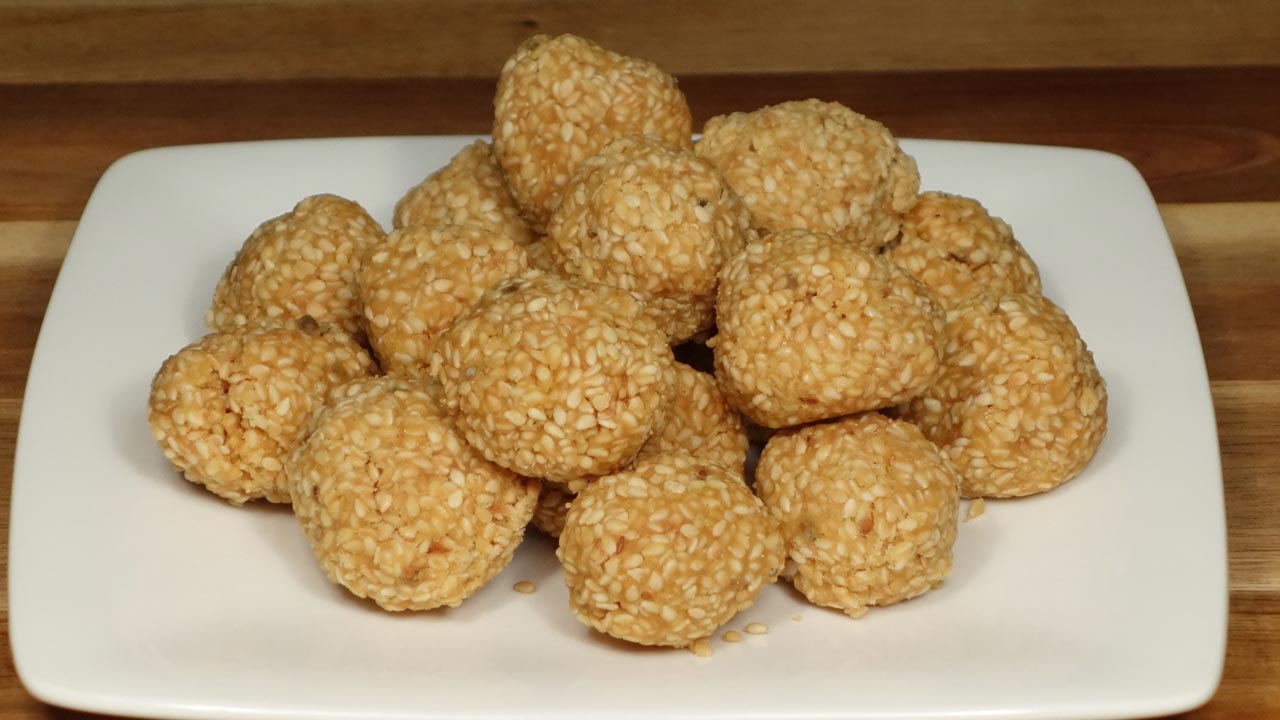
    Til ka ladoo is a traditional winter sweet. This is a simple recipe made with til and jaggery. Til is sesame seed and jaggery is unrefined cane sugar.
    You can also enjoy them as sesame candy. Til ka ladoos are also made on various festivals especially for Makar Sankranti and also like a regular sweet snack munchies.
    No ratings yet
    Course Dessert
    Cuisine Indian
    Servings 20 ladoos

    Ingredients
      

    • 1 cup sesame seeds, til
    • 1 cup jaggery or gur broken in small pieces, available at Indian grocery store
    • 3 tablespoons clarified butter, ghee
    • 1/2 teaspoon crushed cardamom
    • 1/2 cup water

    Instructions
     

    • Grease a plate and set aside.
    • In a frying pan roast the sesame seeds on medium heat stirring continuously. Sesame seeds will become light golden brown. This should take 4-5 minutes. Take the seeds out in a bowl. Set aside.
    • In the same frying pan heat the water and add the jaggery.
    • Simmer over medium heat till it starts caramelizing and forms a ball when you add a drop of syrup in cold water. This should take 4-5 minutes. Reduce the heat to low.
    • Add ghee, cardamom, and roasted sesame seeds mix it thoroughly with melted jaggery.
    • Transfer it in greased plate; take one tablespoon of mixture in your palm and make them into round ball, this should be half the size of golf balls.
    • Make all the ladoos while mix is still warm.
    • Sesame seed ladoo can be stored for months.

    Notes

    Variation:
    Til Ka Ladoo can be also made as burfi.
    Tried this recipe?Let us know how it was!
  • Chocolate Sandesh (Truffles)

    Chocolate Sandesh (Truffles)

    Chocolate Sandesh

    Chocolate Sandesh (Truffles)

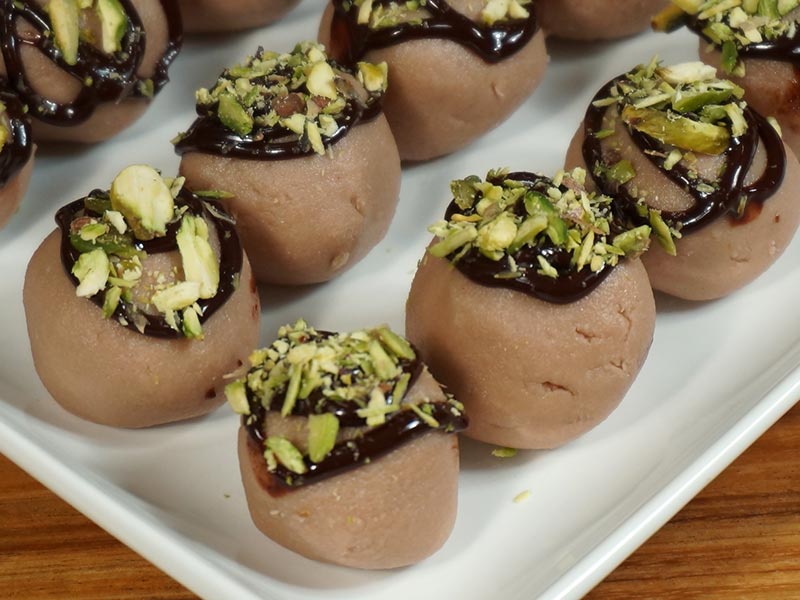
    Sandesh is a delicacy of Bengal. Chocolate flavored Sandesh is truly unique. This is very simple to make with few ingredients, milk, sugar and the flavor of your choice. Its is sugary snack or a milky dessert which soothes every sweet tooth and craving of every delight. Perfect for festive occasions such as diwali or holi.
    No ratings yet
    Course Dessert
    Cuisine Indian
    Servings 18 Sandesh

    Ingredients
      

    Ingredients:

    • 8 cups milk 1/2 gallon
    • 1/4 cup lemon juice
    • 1/2 cup sugar
    • 2 teaspoons coco powder

    For Garnishing

    • 3 tablespoon semisweet chocolate chips
    • 2 tablespoon heavy cream
    • 2 tablespoons sliced pistachios

    Instructions
     

    To make Paneer:

    • Mix lemon juice in half cup of hot water and keep aside.
    • Boil the milk in a heavy bottomed pan over medium high heat, stirring occasionally.
    • As the milk comes to a boil, add the lemon juice gradually and stir the milk gently. The curd will start separating from the whey, turn off the heat.
    • Once the milk fat has separated from the whey, drain the whey using a strainer line with cheesecloth, or muslin cloth.
    • Wrap the curds in a muslin cloth, rinse under cold water, and squeeze well.
    • To take excess water out, press the wrapped paneer under a heavy pan for about 1 hour.

    Making Sandesh:

    • Once the paneer is drained, place on a dry, clean surface and knead the paneer until the paneer is almost rolls into smooth soft dough.
    • Add the sugar and coco powder into the paneer and knead the paneer again until sugar and coco powder is mixed well.
    • Next on low heat cook the paneer mixture stirring continuously until paneer starts coming together as soft dough. This should take about 6 to 7 minutes. This is most important step to this dish; you are just cooking paneer enough to take out the rawness. If you over cook the paneer it will become grainy.
    • Turn off the heat and refrigerate the paneer for about an hour.
    • Divide the paneer into 18 equal parts and roll them making them in ball shape.
    • Refrigerate the Sandesh while preparing the chocolate Ganache for topping.

    Chocolate Ganache:

    • Heat the heavy cream, do hot boil, pour it over chocolate chips and mix it well for about a minute until it is smooth and shiny chocolate syrup consistency.
    • Pour the syrup in one corner of zip log bag and make a very small hole to drizzle the syrup on Sandesh, or use the icing bag.
    • Take out the Sandesh from refrigerator and drizzle the chocolate syrup over and garnish with few slices of pistachios.
    • Sandesh is ready
    • Refrigerate them for few hours before serving. Serve them chilled! And Enjoy delicious Sandesh

    Notes

    Note
    Sandesh can be refrigerated for about one week.
    Tried this recipe?Let us know how it was!
  • Kulfi (Indian Eggless Ice Cream)

    Kulfi (Indian Eggless Ice Cream)

    Kulfi Ice Cream

    Kulfi (Indian Eggless Ice Cream)

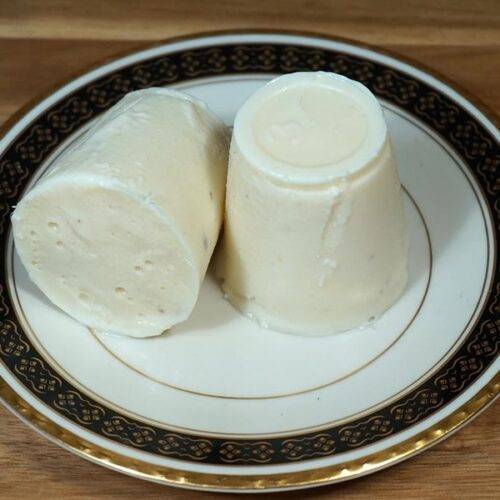
    Kulfi is an eggless Indian ice cream. This is a simple and delicious dessert made with milk and sugar. Kulfi is very popular with street vendors, especially in summer. This is an easy recipe to make and Kulfi is an absolute treat for both young and old.
    5 from 2 votes
    Course Dessert
    Cuisine Indian

    Ingredients
      

    • 4 cup milk
    • 3/4 cup heavy cream
    • 3/4 cup sugar
    • 2 teaspoons corn starch
    • 1/2 teaspoon agar-agar (sea weed works as a vegetarian gelatin)
    • 1/4  teaspoon cardamoms crushed

    Instructions
     

    • In a heavy bottom pan over medium high heat boil the milk, heavy cream, and sugar together.
    • After milk comes to boil lower the heat to medium and let it boil for about 35 minutes, stir the milk occasionally and clean the sides preventing milk not to make a ring on sides. Because of cream, milk does not burn in bottom of the pan.
    • In a small bowl mix corn starch, agar-agar, and cardamom with 2 spoons of water really well making sure there are no lumps,
    • Add to the boiling milk mix it well, boil for about 3 minutes. Turn off the heat and mix the milk for about a minute.
    • Let it cool and pour into the molds, use Kulfi molds, Popsicle molds or small cups. I am using 3 oz plastic cups.
    • Freeze for about 5 hours, before Kulfi is ready to serve.

    Notes

    Suggestions
    You can flavor Kulfi with saffron or vanilla and add the nuts of your choice.
    Tried this recipe?Let us know how it was!
  • Medu Vada

    Medu Vada

    Medu Vada

    Medu Vada

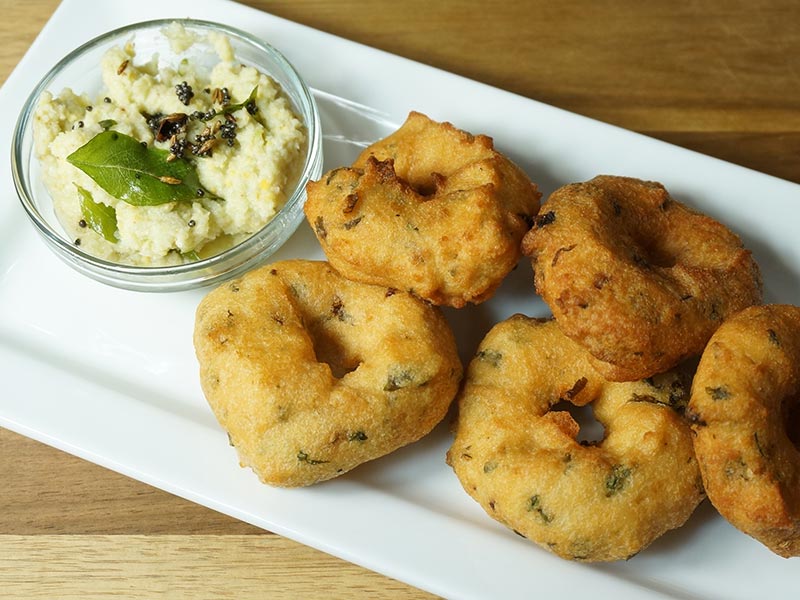
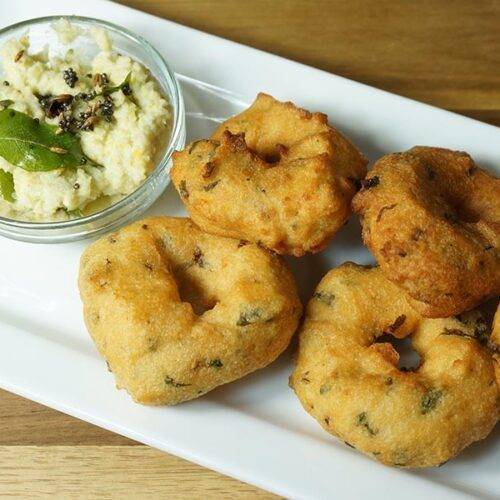
    Medu Vadas are a traditional South Indian dish which can be served as a main course, side dish, or snack. This crispy deliciousness is made with spiced urad dal batter and fried in donut shape dumplings. They are crispy on the outside and soft on the inside. They are served with Sambar and Coconut Chutney.
    No ratings yet
    Course Snack
    Cuisine Indian
    Servings 10 Vadas

    Ingredients
      

    • 1 cup split washed urad dal (available in Indian stores)
    • 1/8 teaspoon asafetida (hing)
    • 2 teaspoon whole coriander seeds (sabut dhania)
    • 1 tablespoon green chili chopped
    • 2 tablespoons cilantro chopped (hara dhania)
    • 1 teaspoon salt
    • Oil to fry

    Instructions
     

    • Wash and soak dal in about 3 cups of water for about 4-6 hours.
    • Drain the water and grind dal to smooth paste using very little water just enough to grind, food processor works good for this. Blend for another 2 minutes to whip dal to make fluffy. Take dal batter out in a wide bowl.
    • Add all the ingredients to the dal batter, cilantro, green chili, coriander, asafetida and salt, beat the batter for 2-3 minutes this will make the batter light and fluffy. To make sure batter is ready put one drop of batter in a bowl of water, batter should float.
    • Keeping the right consistency of batter is very important; add water as needed batter should not be soft but not runny. When you put the batter on your palm batter should hold its shape. Make the Vadas batter when you are ready to fry them, as the batter sit will get soft if you are not ready to fry keep batter refrigerated.
    • Heat the oil in a frying pan over medium high heat.
    • The frying pan should have about 1 inch of oil. To check if the oil is ready, put one drop of batter in oil. The batter should sizzle and come up but not change color right away. If oil is very hot Vadas will not cook through and will not be crispy.
    • Wet the palms and take golf size batter and place over your palm, flatten to round shape and make hole in the center looking like donut now with other hand wet fingers slowly slide Vada into the hot oil.
    • Fry the Vadas from both sides to golden brown. Take them out over a paper towel to drain access oil.
    • Traditionally Medu Vada is served with Coconut Chutney, and sambar (aromatic lentil soup with vegetables).

    Notes

    Notes
    1. If the Medu Vada Batter is too thick: The Vada will shape nicely but they will be hard inside after frying.
    2. If the batter is too soft: it will not be able to hold the shape and will absorb too much oil.
    3. It’s the consistency of the batter that determines how soft and shapely the Vadas turn out.
    Tried this recipe?Let us know how it was!

    Medu Vada: A South Indian Delicacy 

    Medu Vada is a South Indian delicacy often served as an appetizer or snack, especially during festive occasions like Yugadi. It is a gluten-free and vegan dish made primarily from urad dal (black gram lentils) batter, seasoned with spices like cumin seeds, black pepper, and curry leaves. The batter is shaped into round doughnuts and deep-fried until golden brown, resulting in a crispy exterior and a soft, fluffy interior. 

    Medu Vada is commonly enjoyed with coconut chutney or sambar, enhancing its flavor profile and making it a popular choice for those seeking gluten-free and vegan snack options. Medu Vada is a popular South Indian snack known for its crispy exterior and soft interior texture. Originating from the state of Tamil Nadu, it has gained widespread popularity across India and beyond. This medu vada recipe offers a step-by-step guide on how to make this delectable treat right in your kitchen.

    How to Make Medu Vada: Step-by-Step Recipe 

    Preparing the Batter 

    To start making medu vada, you’ll need to prepare the batter first. Begin by soaking urad dal in water for at least 4-5 hours or preferably overnight. The soaked dal should be soft enough to easily break when pressed between your fingers. Once soaked, drain the water and transfer the dal to a blender. Grind it to a smooth paste, adding minimal water as needed. The consistency should be thick, similar to that of a pancake batter. This step is crucial in achieving the perfect texture for your medu vada.

    Shaping the Vadas 

    Once the batter is ready, transfer it to a mixing bowl. Add finely chopped green chilies, ginger, curry leaves, cumin seeds, asafoetida, and salt to taste. Mix all the ingredients thoroughly to ensure an even distribution of flavors. Now, heat oil in a deep frying pan or kadhai on medium heat. To shape the vadas, wet your palms with water to prevent sticking. Take a small portion of the batter and flatten it slightly to form a disc shape with a hole in the center, resembling a donut. Carefully slide the shaped vada into the hot oil and fry until golden brown and crispy on both sides. Repeat the process with the remaining batter, frying a few vadas at a time to avoid overcrowding the pan.

    Frying to Perfection 

    Achieving the perfect medu vada requires frying them to crispy perfection. Make sure the oil is adequately heated before adding the vadas to ensure they cook evenly and develop a crunchy exterior. It’s essential to maintain the oil at a consistent temperature throughout the frying process. Avoid overcrowding the pan, as this can lower the oil temperature and result in soggy vadas. Fry the vadas in small batches, flipping them occasionally to ensure uniform browning on all sides. Once done, remove the vadas from the oil using a slotted spoon and drain the excess oil on paper towels.

    Serving Suggestions

    Medu vada is best enjoyed hot and crispy, served with coconut chutney and sambar. You can also pair it with a tangy tomato chutney or spicy mint chutney for added flavor. Some prefer to enjoy medu vada with a cup of hot filter coffee, making it a perfect breakfast or evening snack option. Experiment with different dipping sauces and accompaniments to find your favorite combination.

    Tips for Making Perfect Medu Vada 

    • Ensure the urad dal is soaked well to achieve a smooth batter texture.
    • Maintain the oil temperature while frying to achieve crispy vadas.
    • Wet your palms with water to prevent the batter from sticking while shaping the vadas.
    • Add chopped green chilies and ginger for an extra kick of flavor.
    • Serve medu vada hot for the best taste and texture.

    Variations of Medu Vada 

    While the traditional medu vada recipe calls for basic ingredients like urad dal, spices, and herbs, you can experiment with variations to suit your taste preferences. Some popular variations include:

    • Masala Medu Vada: Add coriander leaves and grated carrots to the batter for an extra burst of flavor.
    • Rava Medu Vada: Mix semolina (rava) with the urad dal batter to add a crunchy texture to the vadas.
    • Vegetable Medu Vada: Incorporate grated vegetables like carrots, cabbage, and spinach into the batter for a nutritious twist.
    • Cheese Medu Vada: Stuff the vadas with a cheesy filling or sprinkle grated cheese on top before frying for a gooey, indulgent treat.

    Benefits of Medu Vada 

    Medu vada is not only delicious but also offers several health benefits when consumed in moderation. Here are some of the benefits:

    • Rich in Protein: Urad dal, the main ingredient in medu vada, is a good source of protein, essential for muscle repair and growth.
    • Nutrient-Dense: It contains essential nutrients like iron, magnesium, and potassium, which are vital for overall health and well-being.
    • Gluten-Free: Since medu vada is made from urad dal, it is naturally gluten-free, making it suitable for individuals with gluten sensitivities or celiac disease.
    • Good Source of Fiber: Including medu vada in your diet can help improve digestion and promote gut health due to its fiber content.
    • Energizing Snack: It provides a quick energy boost, making it an ideal snack option for busy days or post-workout refueling.

    FAQs about Medu Vada 

    Q: Can I make the batter ahead of time?

    A: Yes, you can soak the urad dal and grind the batter ahead of time. Store it in the refrigerator for up to 1-2 days and fry the vadas when ready to serve.

    Q: Can I freeze the vadas?

    A: While it’s best to consume medu vada fresh for optimal taste and texture, you can freeze the shaped vadas and fry them directly from frozen when needed. However, freshly fried vadas are recommended for the best flavor.

    Q: Can I bake instead of frying?

    A: While traditional medu vada is deep-fried for that crispy texture, you can try baking them in a preheated oven at 375°F (190°C) for 20-25 minutes or until golden brown for a healthier alternative.

    Q: Can I use split urad dal instead of whole urad dal?

    A: Yes, you can use split urad dal (white or black) to make medu vada. However, the texture may vary slightly compared to using whole urad dal.

    Q: Can I make gluten-free medu vada?

    A: Yes, medu vada is naturally gluten-free since it’s made from urad dal. Just ensure that all ingredients used are gluten-free, especially if adding any additional flavorings or seasonings.

    Explore more Indian recipes on Manjula’s Kitchen:

    In conclusion, medu vada is a versatile and flavorful snack that can be enjoyed on its own or paired with a variety of chutneys and dips. With this detailed recipe and helpful tips, you can recreate this South Indian delicacy at home and impress your family and friends with your culinary skills. So, roll up your sleeves, gather your ingredients, and get ready to savor the crispy goodness of homemade medu vada!

  • Dal Pakwan (Sindhi Breakfast)

    Dal Pakwan (Sindhi Breakfast)

    Dal Pakwan

    Dal Pakwan (Sindhi Breakfast)

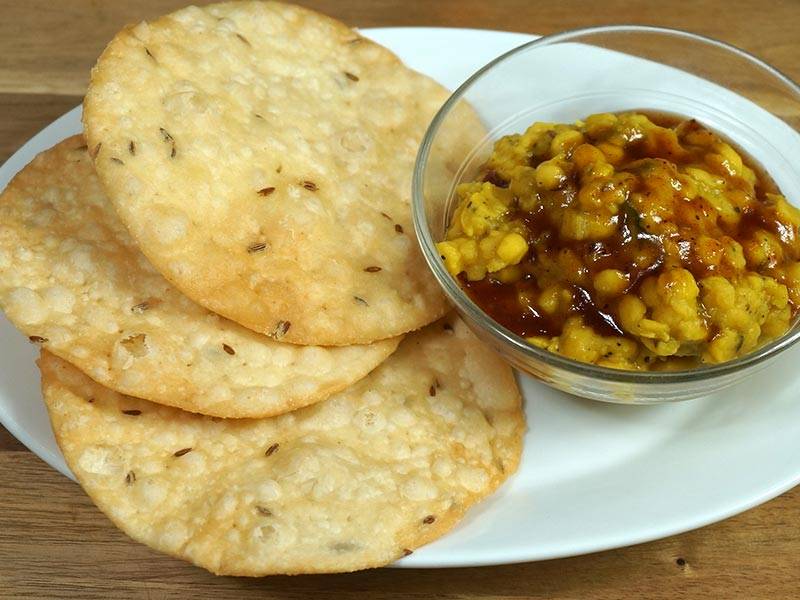
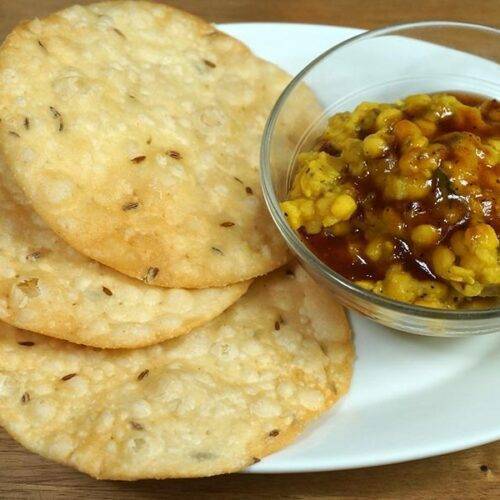
    Dal Pakwan is an authentic breakfast delicacy in Sindhi homes. Crisp flavored puries known as Pakwan served with spicy dal topped with chutney.
    5 from 1 vote
    Course snacks
    Cuisine Indian
    Servings 4 people

    Ingredients
      

    Ingredients

    • 1 cup chana dal (Bengal gram)
    • 1 teaspoon salt
    • 1/2  turmeric (haldi)
    • 1 tablespoon ginger finely chopped
    • 1 green chili chopped
    • 1/4 teaspoon black pepper
    • 1/4 teaspoon  garam masala
    • 1/2 teaspoon mango powder (amchoor)

    Seasoning

    • 2 tablespoons oil
    • 1 teaspoon cumin seeds (jeera)
    • 6-7 curry leaves

    Pakwan (Crisp Puries known as Pakwan):

    • 1 cup all purpose flour (maida/plain flour)
    • 1/4 cup semolina (sooji)
    • 1/4 teaspoon of salt
    • 1/2 teaspoon cumin seeds (jeera)
    • 2 tablespoon oil
    • Approx. 1/3 cup of water
    • Oil to fry

    Also need tamarind chutney for serving, check the recipe on my website

    Instructions
     

    Cooking Dal:

    • Wash and soak chana dal for at least 2 hours in 3 cups of water.
    • Drain the water and in pressure cooker add dal, 2-1/2 cups of water, salt, turmeric, green chili, and ginger, close the cooker and cook over medium high heat.
    • As the pressure cooker starts steaming turn the heat down to medium and cook for about 4 minutes.
    • Turn off the heat and wait until steam has stopped before opening the pressure cooker.
    • Dal should be soft well-cooked but not mushy. Add black pepper, mango powder and garam masala, mix it well. Dal should be thick in consistency.

    Seasoning

    • Heat the oil in a saucepan. Test the heat by adding one cumin seed to the oil; if seed cracks right away oil is ready.
    • Add cumin seeds, after seeds crack add curry leaves stir for few seconds and pour over dal mix it well and set aside. Curry leaves splatter be careful.

    Pakwan

    • Crisp Puries known as Pakwan: Mix flour, sooji, salt, cumin seeds, and oil. Add enough water to make firm dough. Knead the dough well.
    • Set the dough aside and let it sit for at least 15 minutes or longer.
    • Divide the dough in 10 equal parts, Roll the dough into about 5-inch diameter. If the dough is sticking to the rolling pin or rolling surface, put couple of drops of oil on the rolling pin and a couple of drops of oil on the surface.
    • Prick the rolled dough all over with a fork. This will limit puries from puffing and make them crisp.
    • Heat the oil in a frying pan over medium heat. The frying pan should have at about 1 inch of oil. To check if the oil is ready, put a small piece of dough in the oil. The dough should sizzle and come up slowly.
    • Fry 2-3 puries at time until both sides are a light golden-brown.
    • Transfer puries over paper towel, it will absorb the extra oil.
    • After the puries cool to room temperature they should be crisp. Puries can be stored in airtight container for 1 month.

    Notes

    Serve Pakwan with hot dal with drizzle of tamarind chutney.
    Tried this recipe?Let us know how it was!
  • Sindhi Kadhi (Vegetable in Gram Flour Gravy)

    Sindhi Kadhi (Vegetable in Gram Flour Gravy)

    Sindhi Kadhi (Vegetable in Gram Flour Gravy)

    Sindhi Kadhi (Vegetable in Gram Flour Gravy)

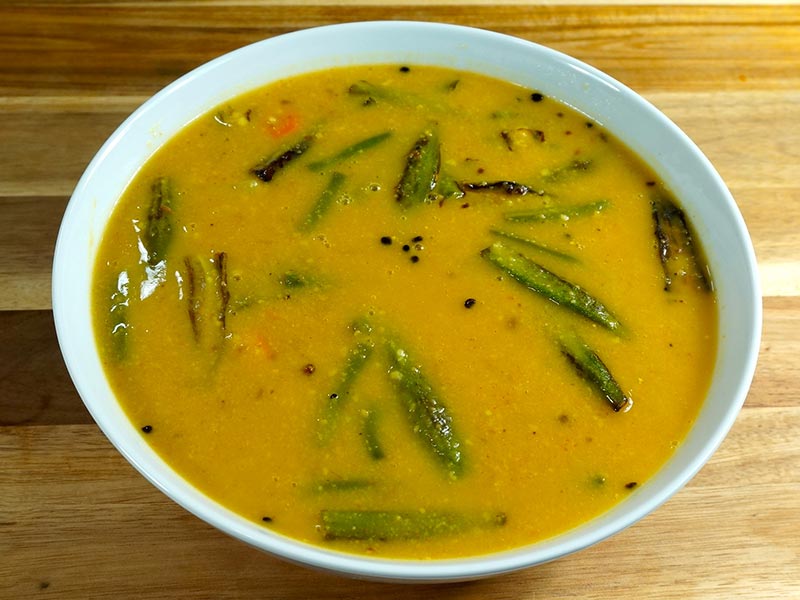
    Sindhi Kadhi is very delicious and nutritious gravy based main course dish. This tangy Kadhi is made with roasted besan, (gram flour) and mix of vegetables. Traditionally it is served with rice and also can be served as a soup.
    No ratings yet
    Course dal
    Cuisine Indian
    Servings 3 people

    Ingredients
      

    • 1/2 cup gram flour (besan)
    • 3 tablespoons oil
    • 1/2 teaspoon fenugreek seeds (mathi)
    • 1/2 teaspoon cumin seeds (jeera)
    • 3 whole red peppers
    • Approx. 10 curry leaves
    • 1/2 teaspoon turmeric (haldi)
    • 1/2 teaspoon red chili powder adjust to taste
    • 1 tablespoon grated ginger
    • Approx. 3 tablespoons tamarind pulp (imli)
    • 1-1/2 teaspoon salt
    • 2 cups of mixed vegetables (I am using 8 okras slit into 2 vertically, 1/4 cup carrots sliced in rounds, 1 small potato cubed, 1/4 cup cut green beans about 1 inch longs)
    • Also need 1 tablespoon oil for stir-fry okra
    • 5 cups of water

    Instructions
     

    • Wash and dry the okra. Remove the top of the okra and stir-fry in 1 tablespoon of oil over medium high heat until they are tender. Set aside.
    • Heat the oil in a sauce pan over medium high heat, add fenugreek seed, and cumin seeds, as seeds crack add asafetida, red pepper, ginger, and curry leaves stir for few seconds.
    • Reduce the heat to medium and add besan. Roast the besan stirring continually till the besan has become golden brown and aromatic (about 4-5 minutes).
    • Add about 4 cups of water slowly, stirring continuously to avoid forming lumps.
    • Add turmeric, salt, potatoes, green beans and carrots.
    • After Kadhi comes to boil, lower the heat to low medium and cover the pan and let it simmer for about 8-10 minutes, until vegetables are tender. If needed add more water, this should be running consistency but not watery.
    • Add okra and tamarind pulp to Kadhi, after kadhi comes to boil, let it simmer for another 6-7minutes over medium low heat.
    • Serve hot. Sindhi kadhi taste great with rice or serve as a soup.
    Tried this recipe?Let us know how it was!

    How To Make Sindhi Kadhi: Savor The Flavors Of Sindhi Kadhi

    Sindhi Kadhi is a flavorful and aromatic dish hailing from the Sindhi cuisine, known for its unique blend of spices and tangy flavors. This Sindhi Kadhi recipe features a medley of vegetables simmered in a creamy gram flour gravy, creating a dish that’s both comforting and nourishing. With its rich flavors and wholesome ingredients, Sindhi Kadhi is a beloved dish that’s perfect for any occasion. Sindhi Kadhi is a traditional dish originating from the Sindhi region of Pakistan and India. 

    It’s a flavorful and tangy soup made primarily with dal (lentils) and various vegetables. This dish is naturally gluten-free and low in fat, making it suitable for individuals with dietary restrictions. To prepare Sindhi Kadhi, lentils are cooked until they are soft and then combined with a variety of vegetables such as okra, potatoes, carrots, and tomatoes. The soup is seasoned with a blend of spices including turmeric, cumin, coriander, and mustard seeds, which give it its distinctive flavor profile. 

    To commence the preparation of Sindhi Kadhi, begin by thoroughly washing and drying the okra. Subsequently, delicately remove the tops of the okra and set them aside. Heat a tablespoon of oil in a skillet over medium-high heat. Once the oil reaches its optimal temperature, add the prepared okra and stir-fry until it reaches a tender consistency. This step enhances the flavor and texture of the okra, ensuring it is cooked to perfection. Once accomplished, set aside the cooked okra for future use.

    Next, in a saucepan, heat some oil over medium-high heat. Add fenugreek seeds and cumin seeds, allowing them to crackle. As they release their aroma, incorporate the asafetida, red pepper, ginger, and curry leaves, stirring for a few seconds. This process allows the spices to infuse into the oil, imparting their flavors to the dish.

    Lower the heat to medium and add besan (gram flour) to the spice-infused oil. Continuously stir the besan until it turns golden brown and emits a fragrant aroma, typically taking around 4 to 5 minutes. This roasting process is crucial as it enhances the nutty flavor of the besan, adding depth to the kadhi.

    Gradually pour in about 4 cups of water while stirring continuously to prevent the formation of lumps. This step ensures that the besan is evenly dispersed in the liquid, creating a smooth consistency for the kadhi base.

    Now, add turmeric, salt, potatoes, green beans, and carrots to the kadhi base. These vegetables not only contribute to the nutritional value of the dish but also add color and texture. Allow the kadhi to come to a gentle boil, then reduce the heat to low-medium, cover the pan, and let it simmer for 8 to 10 minutes until the vegetables are tender. If necessary, adjust the consistency by adding more water, ensuring that it retains a slightly thick, running consistency.

    Once the vegetables are cooked, add the previously prepared okra and tamarind pulp to the kadhi. Allow the kadhi to come to a boil again, then let it simmer for another 6 to 7 minutes over medium-low heat. This final step allows all the flavors to meld together, creating a harmonious balance in the dish.

    Tips for Perfect Sindhi Kadhi

    Variety of Vegetables: Experiment with different vegetables to add depth and flavor to the kadhi. Vegetables like bitter gourd (karela) and eggplant (brinjal) can also be used to enhance the taste of the dish.

    Consistency of Kadhi: Adjust the amount of water added to the kadhi to achieve the desired consistency. The kadhi should have a creamy texture that coats the back of a spoon.

    Balancing Flavors: Taste the kadhi and adjust the seasoning according to your preference. You can add more salt, sugar, or lemon juice to balance the flavors and enhance the taste.

    Variations of Sindhi Kadhi

    Paneer Kadhi: Add cubes of paneer (Indian cottage cheese) to the kadhi for a creamy and indulgent variation. Paneer adds richness and protein to the dish, making it more satisfying.

    Sprouted Lentils: Add sprouted lentils such as moong dal or matki to the kadhi for added nutrition and texture. Sprouted lentils are high in protein and fiber, making them a healthy addition to the dish.

    Benefits of Sindhi Kadhi

    Rich in Vitamins and Minerals: Sindhi Kadhi is loaded with a variety of vegetables, providing essential vitamins, minerals, and antioxidants that promote overall health and well-being.

    Digestive Aid: Gram flour (besan) is known for its digestive properties and helps aid in digestion, making Sindhi Kadhi a comforting and soothing dish for the stomach.

    Wholesome and Nourishing: With its blend of vegetables, spices, and gram flour gravy, Sindhi Kadhi is a wholesome and nourishing meal that’s perfect for the whole family.

    Frequently Asked Questions (FAQs)

    Can I make Sindhi Kadhi without vegetables?

    Yes, you can make a simple version of Sindhi Kadhi using only gram flour and spices for the gravy. However, adding vegetables enhances the taste and nutritional value of the dish.

    Can I make Sindhi Kadhi ahead of time?

    Yes, Sindhi Kadhi tastes even better when allowed to sit for a few hours or overnight, allowing the flavors to develop. Reheat it gently before serving.

    Is Sindhi Kadhi gluten-free?

    Yes, Sindhi Kadhi is naturally gluten-free as it contains no wheat or gluten-containing ingredients.

    Explore more delightful Sindhi recipes on Manjula’s Kitchen, such as Sindhi Koki for another culinary adventure.