Category: Party Recipes

Best Indian Dishes for a Party: Delicious and Easy Party Foods

Hosting a party is all about creating memorable experiences, and what better way to do that than with delicious food? Indian cuisine offers some of the best Indian dishes that are perfect for any celebration. Whether you’re looking for easy party foods, party food ideas, or the best Indian dishes for a party, Manjula’s Kitchen has a range of recipes to impress your guests. Let’s explore some fantastic dishes that will make your next gathering a hit.

Classic Indian Party Food Ideas

Samosas

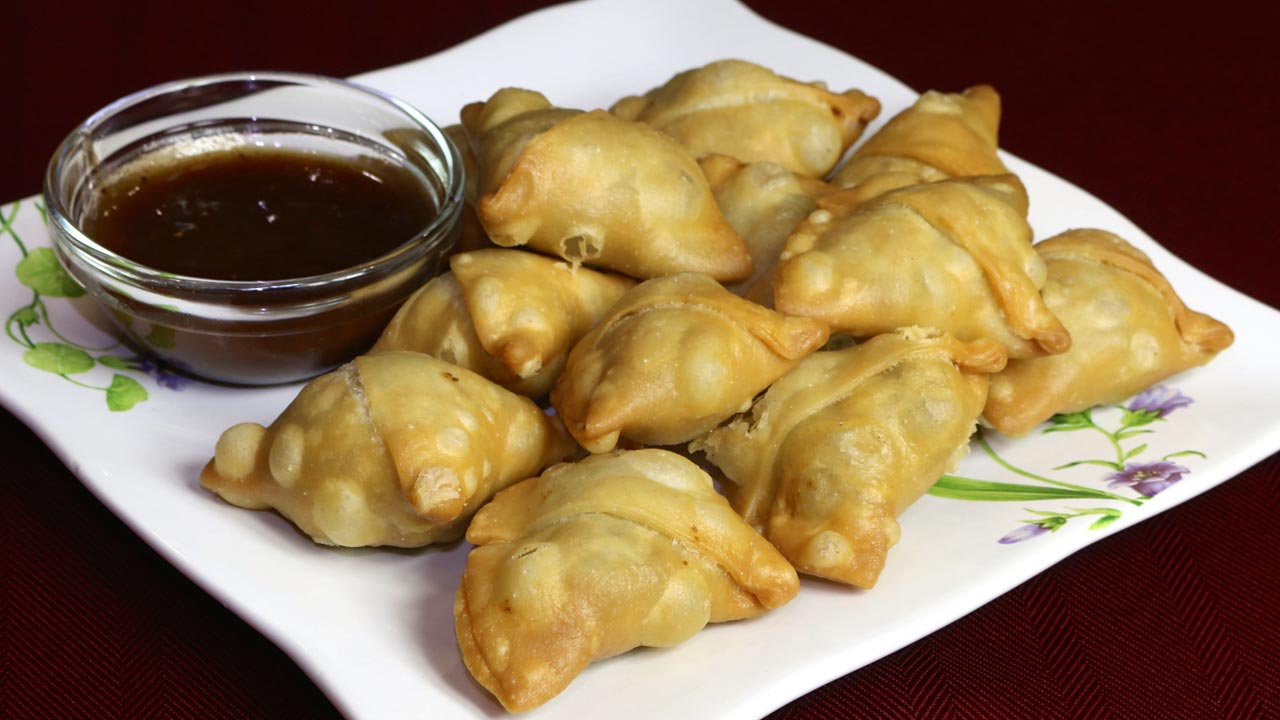
Samosas are one of the best Indian dishes that you can serve at a party. These crispy pastries filled with spiced potatoes and peas are a favorite among many. They are easy to make and can be prepared in advance, making them one of the best Indian dishes for a party. Serve them with indian chutney such as mint and tamarind sauce for an added burst of flavor.

Pakoras

Pakoras are another popular choice for easy party foods. These deep-fried fritters made with vegetables like spinach, and potatoes are perfect for any occasion. The crunchy exterior and flavorful interior make them a hit with guests. Pair them with a spicy chutney for the perfect party snack.

Easy Party Foods: Indian Style

Paneer Tikka

Paneer Tikka is a delicious and healthy Indian veg appetizer that fits well within easy party foods. Marinated paneer cubes are grilled to perfection, creating a smoky and flavorful dish. This dish is not only easy to prepare but also a crowd-pleaser, making it one of the best Indian dishes for a party.

Vegetable Biryani

Vegetable Biryani is a fragrant and flavorful rice dish cooked with a variety of vegetables and aromatic spices. This dish is perfect for large gatherings as it can be made in large quantities. Biryani is always a hit at parties, making it one of the top party food ideas.

Best Indian Dishes for a Party

Chole Bhature

Chole Bhature is a classic North Indian dish that is perfect for parties. Spicy chickpea curry served with fluffy deep-fried bread is a combination that is hard to resist. This dish is filling and delicious, making it one of the best Indian dishes for a party. Serve it with a side of pickles and yogurt for a complete meal.

Aloo Tikki

Aloo Tikki are spiced potato patties that are crispy on the outside and soft on the inside. These are perfect as appetizers or snacks at a party. They are easy to prepare and can be served with various chutneys, making them one of the top party food ideas.

Vegetarian Party Food Ideas

Hara Bhara Kabab

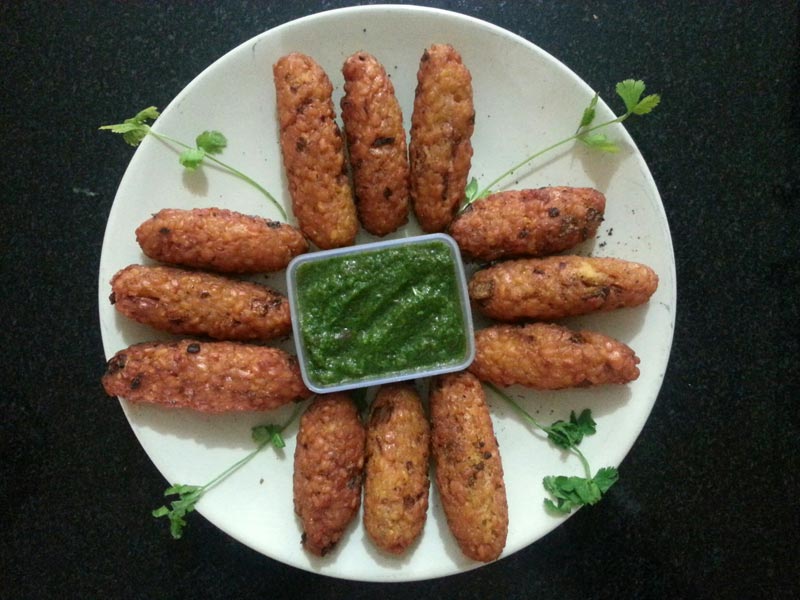
Hara Bhara Kabab is a nutritious and delicious vegetarian kabab made with spinach, peas, and potatoes. These kababs are a great addition to your list of best Indian dishes for a party. They are healthy, tasty, and easy to make, making them perfect for any gathering.

Dahi Puri

Dahi Puri is a popular Indian street food that is perfect for parties. Crisp puris are filled with spiced potatoes, chickpeas, yogurt, and chutneys, creating a burst of flavors in every bite. This dish is easy to assemble and always a hit with guests, making it one of the best Indian dishes for a party.

Indian Desserts for Parties

Gulab Jamun

Gulab Jamun are soft, deep-fried balls made from khoya (dried milk) soaked in a sweet syrup flavored with cardamom and rose water. This Indian dessert is a favorite among many and is perfect for any celebration. The melt-in-your-mouth texture and sweet flavor make it one of the best party food ideas for dessert.

Kheer

Kheer is a creamy rice pudding flavored with cardamom and garnished with nuts and raisins. This dessert is a classic in Indian cuisine and is easy to prepare in large quantities, making it one of the best Indian dishes for a party.

Elevating Your Party Menu

To enhance your party menu, consider incorporating dishes from related categories that complement these best Indian dishes. Adding Indian snacks like samosas and pakoras can offer a delightful variety of flavors and textures.

For a sweet ending, explore Indian desserts such as gulab jamun and kheer. Including healthy options like hara bhara kabab and paneer tikka can provide lighter choices for your meals.

Planning a large gathering? The popular party recipe category is filled with dishes that are sure to impress your guests and make your celebration memorable. Adding North Indian recipes like chole bhature or vegetable biryani can bring an authentic touch to your meal.

Frequently Asked Questions (FAQs)

Q: What are some popular easy party foods? 

A: Some popular easy party foods include Samosas, Pakoras, Paneer Tikka, Aloo Tikki, and Vegetable Biryani. These dishes are flavorful, easy to prepare, and perfect for any gathering.

Q: How can I make traditional Indian dishes suitable for a party? 

A: To make traditional Indian dishes suitable for a party, try recipes like Chole Bhature, Hara Bhara Kabab, and Dahi Puri. These recipes are modified to be easy to serve and can be made in large quantities.

Q: What are some vegetarian Indian dishes for a party? 

A: Some vegetarian Indian dishes for a party include Hara Bhara Kabab, Dahi Puri, Paneer Tikka, and Aloo Tikki. These dishes are healthy, delicious, and sure to impress your guests.

Q: Can I prepare Indian party recipes in advance? 

A: Yes, many Indian party recipes can be prepared in advance and stored. Dishes like Vegetable Biryani and Chole Bhature can be made ahead of time and refrigerated, while appetizers like Samosas and Pakoras can be prepped and frozen.

Q: What are some sweet Indian dishes for a party? 

A: Some sweet Indian dishes for a party include Gulab Jamun and Kheer. These desserts are classic, easy to prepare, and perfect for any celebration.

Conclusion

Best Indian dishes for a party are a celebration of diverse flavors and nutritious ingredients. Whether you’re looking for easy party foods, party food ideas, or the best Indian dishes for a party, these recipes will bring variety and flavor to your celebrations. So, gather your ingredients, try out these recipes, and enjoy the rich and diverse world of Indian party foods. Happy cooking and happy entertaining!

By incorporating these dishes into your party menu, you’ll be able to enjoy a wide variety of delicious and nutritious foods. Whether you’re hosting a small gathering or a large celebration, there’s an Indian party recipe to suit every taste. Don’t forget to check out Manjula’s Kitchen for more inspiration and culinary delights. Happy cooking and happy eating!

  • Cocktail Green Peas Samosa

    Cocktail Green Peas Samosa

    Cocktail Samosa

    Cocktail Green Peas Samosa

    Cocktail green peas samosas are tasty snack. These bite-sized crispy samosas are filled with spicy green peas. This was my mother's go-to appetizer for special occasions, and she received many compliments. My cooking style is greatly influenced by my mother, a true inspiration!  Of course they taste out of this world when served hot. Serve with tamarind chutney.
    5 from 1 vote
    Prep Time 15 minutes
    Cook Time 30 minutes
    Course snacks
    Cuisine Indian
    Servings 24 samosa

    Ingredients
      

    For crust

    • 1 cup All Purpose flour (plain flour or maida)
    • 1 tablespoon sooji fine (semolina)
    • 1/4 teaspoon salt
    • 2 tablespoons oil
    • Approximately 1/3 cup look warm water

    For filling

    • 2 cups boiled green peas I am using frozen green peas
    • 2 tablespoons oil
    • 3 teaspoons coriander powder (dhania)
    • 1 teaspoon red chili powder
    • 1 teaspoon mango powder (amchoor)
    • 1/4 teaspoon garam masala
    • 3/4 teaspoon salt (adjust to your taste)

    Instructions
     

    for Dough

    • Mix flour, sooji, salt, oil and water together to make soft dough (add water as needed).
    • Knead the dough to make it smooth and pliable.
    • Cover the dough and let it sit least ten minutes.

    To Make Filling

    • Boil the green peas over medium heat with 1 cup of water, until peas are tender. Drain the water, squeeze the excess water, and pat dry. Mix all the dry ingredients to the peas, coriander, chili powder, garam masala, mango powder and salt.
    • Heat the oil in a frying pan over medium heat, and put the green peas mix, stir fry and keep mashing, stir fry until no moisture left, but it should not be powdery.. This should take about 10-12 minutes.
    • Turn off the heat and let the let the filling cool to room temperature.

    Making samosas

    • Knead the dough for a minute.
    • Divide the dough into 12 equal parts and roll into balls.
    • Roll each ball about 4-1/2-inch diameter and cut each circle in half.
    • Take one semicircle and wet the sides lightly all around and fold it into a cone shape. Pinch the side of this cone so that it is completely sealed.
    • Fill the cone with about 1 teaspoon of filling. Press this filling down.
    • Close the top of the cone to form a triangular shape, pinching the top edge to seal it completely.
    • Continue filling the rest of the samosas.
    • Heat about 1 inches of oil in a frying pan on medium heat. To check if oil is hot enough place a small piece of dough in oil and dough should sizzle and come to the surface slowly.
    • Place the samosas in the frying pan a few at a time, they should not overlap.
    • After samosas are floating on top of the oil turn them slowly. Fry the samosas until the samosas are golden-brown color on all sides. This should take about 8 minutes. If you use a high heat, the samosa crust will be too soft and not cook properly.
    • Take the Samosas out over paper towel; it will absorb extra oil.
    • Cocktail Samosa goes well with tamarind chutney.
    Tried this recipe?Let us know how it was!

    Cocktail Samosa Recipe: A Delicious Twist on a Classic Snack 

    Introduction: 

    In this article, we’ll explore how to make cocktail samosa, specifically focusing on the delightful cocktail green peas samosa. This appetizing vegan snack is perfect for any occasion, whether you’re hosting a party or simply craving a savory treat. With its crispy exterior and flavorful filling, cocktail samosas are sure to be a hit with family and friends. Let’s dive into the recipe and discover the steps to create these irresistible snacks.

    Step 1: Preparing the Dough 

    To begin making cocktail samosas, start by preparing the dough. You’ll need all-purpose flour, salt, carom seeds, and oil. Combine the flour, salt, and carom seeds in a mixing bowl, then gradually add the oil while mixing the ingredients together. Knead the dough until it’s smooth and firm, then cover it and let it rest for about 30 minutes. This step ensures that the dough is pliable and easy to work with when shaping the samosas. For a detailed recipe on making the dough, you can refer to Manjula’s Kitchen’s samosa dough recipe.

    Step 2: Making the Green Peas Filling 

    Next, let’s prepare the flavorful green peas filling for our cocktail samosas. Heat oil in a pan over medium heat, then add cumin seeds and let them sizzle. Add finely chopped green chilies, ginger paste, and crushed coriander seeds, sautéing until fragrant. Stir in boiled and mashed green peas, along with salt, mango powder, and garam masala for seasoning. Cook the mixture for a few minutes until the flavors meld together, then let it cool. This delectable filling adds a burst of flavor to the cocktail samosas, making them truly irresistible.

    Step 3: Shaping and Filling the Samosas 

    Now comes the fun part – shaping and filling the samosas! Divide the rested dough into small balls and roll each one into a thin circle. Cut each circle in half to form semi-circles, then fold each semi-circle into a cone shape, sealing the edges with a water-flour paste. Fill each cone with a spoonful of the green peas filling, then seal the top to enclose the filling completely. Repeat this process until all the dough and filling are used up, creating a batch of perfectly shaped cocktail samosas ready for frying.

    Step 4: Frying to Golden Perfection 

    Once all the samosas are shaped and filled, it’s time to fry them to golden perfection. Heat oil in a deep frying pan or kadhai over medium-high heat until hot but not smoking. Carefully add the filled samosas to the hot oil, ensuring not to overcrowd the pan. Fry them in batches until they turn crispy and golden brown, flipping them occasionally for even cooking. Once fried, remove the samosas from the oil and drain them on paper towels to remove any excess oil. Serve the hot and crispy cocktail samosas with your favorite chutney or dipping sauce.

    Step 5: Serving and Enjoying 

    Now that your cocktail samosas are ready, it’s time to serve and enjoy this delicious snack with your loved ones. Arrange them on a platter alongside some mint chutney, tamarind chutney, or yogurt dip for dipping. These bite-sized treats are perfect for parties, gatherings, or even as a mid-day snack. Enjoy the crispy exterior and flavorful filling of these homemade cocktail samosas, and watch them disappear within minutes!

    Tips for Perfect Cocktail Samosas: 

    • Ensure the dough is rolled thinly for crispy samosas.
    • Seal the edges of the samosas tightly to prevent the filling from leaking out during frying.
    • Fry the samosas in hot oil for a crispy texture.
    • Serve the samosas hot for the best taste and texture.

    Variations to Try: 

    • Substitute the green peas filling with mashed potatoes or minced meat for different flavor options.
    • Add chopped vegetables like carrots, bell peppers, or beans to the filling for added texture and nutrition.
    • Experiment with different spices and seasonings to customize the flavor of the samosas according to your preference.

    Benefits of Cocktail Samosas: 

    • Cocktail samosas are a great appetizer or snack option for parties and gatherings.
    • They can be easily customized with different fillings to suit various tastes and dietary preferences.
    • Homemade cocktail samosas are healthier than store-bought ones, as you can control the quality and quantity of ingredients used.

    FAQs (Frequently Asked Questions): 

    • Can I make cocktail samosas ahead of time? 

    Yes, you can prepare the samosas ahead of time and store them in an airtight container in the refrigerator. When ready to serve, reheat them in the oven until crispy and hot.

    • Can I bake cocktail samosas instead of frying them? 

    While frying gives the samosas a crispy texture, you can bake them in the oven for a healthier alternative. Simply brush the samosas with oil and bake them at 375°F (190°C) until golden brown and crispy.

    • How long do cocktail samosas stay fresh? 

    Cocktail samosas are best enjoyed fresh on the day they are made. However, you can store any leftovers in the refrigerator for up to 2-3 days and reheat them before serving.

    Other Recipes on Manjula’s Kitchen 

    If you’re looking to explore more Indian recipes, appetizers, beverages, and desserts, be sure to check out the following links on Manjula’s Kitchen. Here are some links to recipes on Manjula’s Kitchen official website:

    Paneer Tikka Masala Recipe

    Chana Chaat (Spicy Chickpea Salad) Recipe

    Pav Bhaji (Spicy Vegetable Hash with Buns) Recipe

    Raj Kachori (Crunchy Chaat) Recipe

    Vegetable Biryani Recipe

    These recipes should offer you a flavorful experience straight from Manjula’s Kitchen.

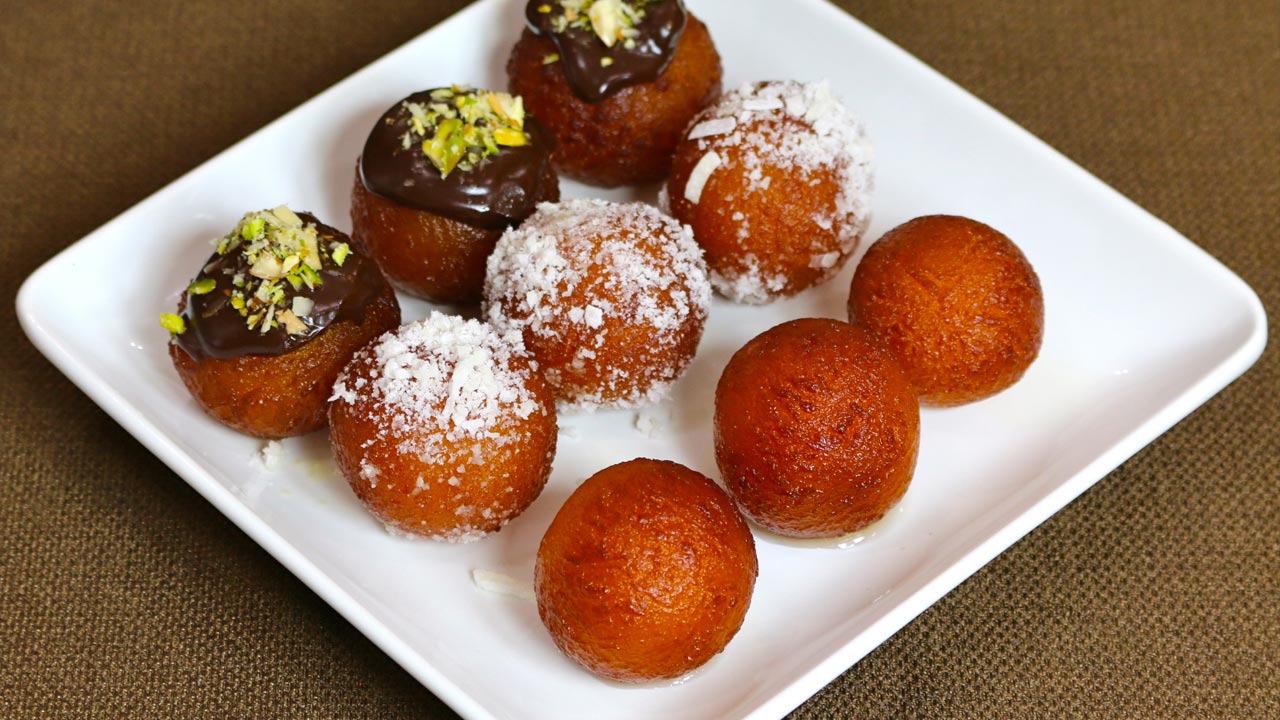
  • Gulab Jamun

    Gulab Jamun

    Gulab Jamun

    Gulab Jamun (2014)

    Gulab Jamun is easily the most popular and loved dessert in India.  Gulab jamun is best described as an Indian version of a donut immersed in a sweet syrup.  Gulab jamun recipe is especially dear to me as it was my very first video showcased on YouTube.  
    To be frank, I never dreamed that I would still be doing what I love seven years later.  Not everyone can say they are truly following their passion.  So in this spirit I decided I would present another version of Gulab Jamun a sweet snack savored by all.  This recipe is simpler than my original recipe, but still delicious.
    5 from 1 vote
    Prep Time 15 minutes
    Cook Time 19 minutes
    Course Dessert
    Cuisine Indian
    Servings 8 people

    Ingredients
      

    • 1 cup nonfat milk powder
    • 1/4 cup all purpose flour (plain flour, maida)
    • 1/8 teaspoon baking soda
    • 1/2 cup heavy cream, use as needed
    • 1/4 teaspoon cardamom coarsely ground

    For Syrup

    • 1-1/2 cup sugar
    • 1-1/2 cup water

    Other

    • Oil to fry

    Instructions
     

    For Syrup

    • In a pan add water, sugar bring it to boil, stir until the sugar has dissolved. Turn off the heat. Set aside.

    For Gulab Jamun

    • In a bowl, mix milk powder, all purpose flour, baking soda, and cardamom add cream and mix it well. This will be consistency of soft dough, if it is too dry add 1 to 2 spoons of milk as needed not the cream. Dough should be very soft and sticking to fingers, as dough sits milk powder will absorb the extra cream. Cover and set aside for about 10 minutes.
    • Knead the dough; grease your palm before working the dough.
    • Divide the dough into 18 equal parts and roll them into round balls.
    • Heat the oil in a frying pan on medium heat. The frying pan should have at least 1 inch of oil. Notes: To test if the oil is the right temperature, place a small piece of dough into the oil; oil should sizzle but it should take about 30 seconds to rise the dough. If dough rises faster, oil is too hot; if dough just sits without rising, oil is not hot enough.
    • Place the gulab Jamuns in the frying pan. Note: remember gulab jamuns will expand in about double the size, so give them enough space, and don’t over crowed them.
    • It should take about 7 minutes to fry the gulab jamuns. While frying keep rolling the gulab jamuns so they are evenly browned. You can make gulab jamuns in different size and shapeFry until the gulab jamuns become brown.
    • Let the gulab jamuns cool off for a few minutes before placing them in the hot syrup, not boiling.
    • The gulab jamuns should sit in the syrup for at least 20 minutes prior to serving.

    Notes

    Additional Tips
    1. If the gulab jamuns are fried on high heat, they will become hard inside and not fully cooked.
    2. Too much baking soda will cause the gulab jamuns to get too soft or they will break apart when frying.
    3. Don’t place the gulab jamuns in the syrup immediately after frying. This will cause the gulab jamuns to lose their shape and become chewy.
    Tried this recipe?Let us know how it was!
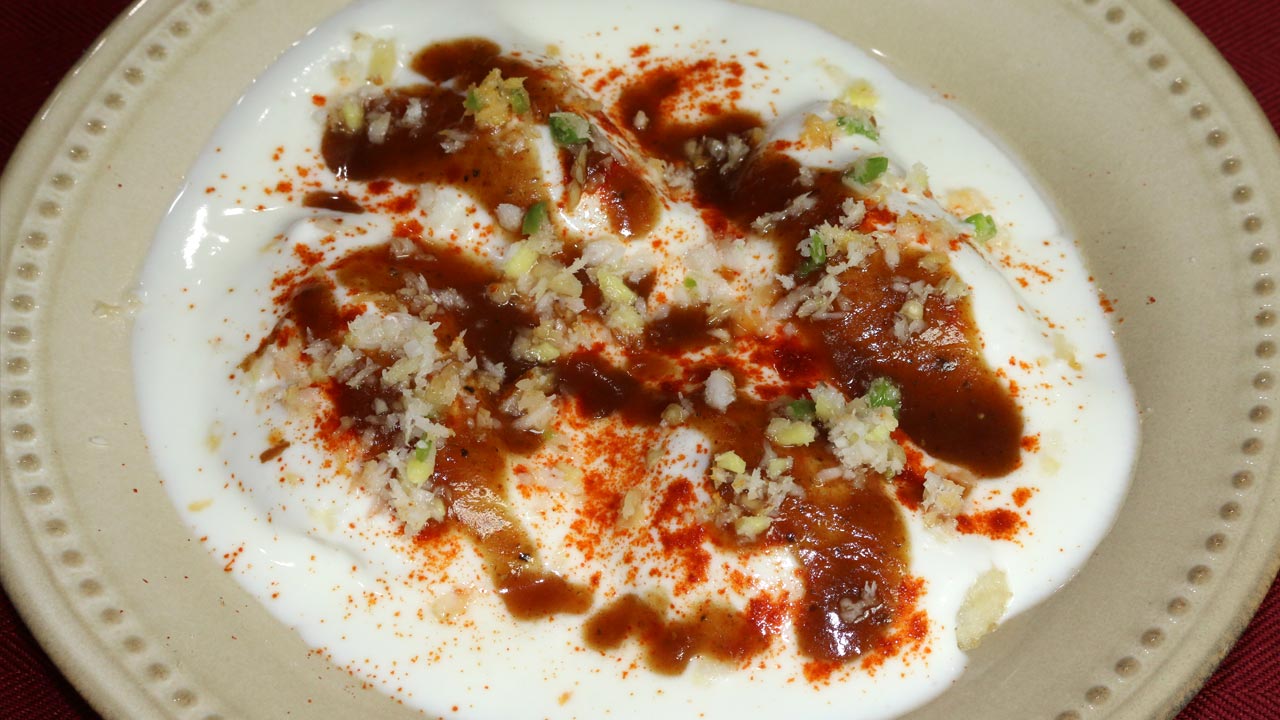
  • Bread Dahi Vada

    Bread Dahi Vada


    Bread Dahi Vada

    Bread Dahi Vada

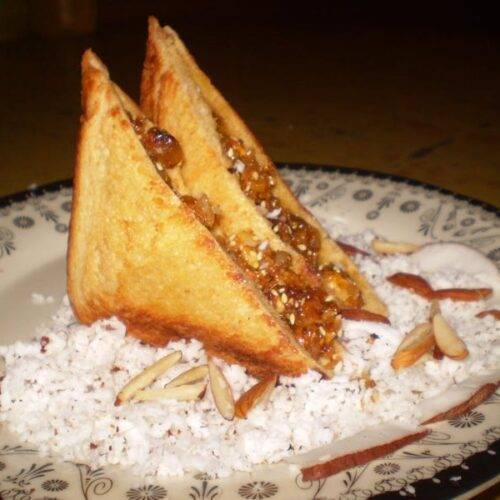
    Bread dahi vada is a quick and delicious version of the original dal lentil vadas.  There is no soaking of lentil required, no grinding and no frying required; this is an instant version of dahi vada. This can be served as a snack or appetizer.
    5 from 1 vote
    Prep Time 15 minutes
    Cook Time 20 minutes
    Course Appetizer
    Cuisine Indian
    Servings 4 people

    Ingredients
      

    • 8 slices of white bread
    • 2 tablespoon oil

    For Filling

    • 3 tablespoons shredded coconut; I am using frozen shredded coconut, available in Indian grocery stores
    • 1/4 teaspoon salt
    • 2 teaspoons ginger finely chopped
    • 2 teaspoons green chili finely chopped
    • 2 teaspoons sliced almonds

    For Serving

    • 1-1/2 cups yogurt (curd, Dahi)
    • 1/4 cup tamarind chutney check the recipe on my website
    • 1/2 teaspoon salt
    • 1/2 teaspoon red chili powder 

    Instructions
     

    • Mix all the ingredients for filling coconut, salt, ginger, green chili, and almonds, set aside.
    • Cut bread slices into rounds, I am using 3” cookie cutter.
    • Lightly wet one side of the bread and put 2 teaspoons of filling in center and fold the bread in half, forming semi-circle. Press the edges together with your fingers. Make sure the edges are sealed.
    • Continue filling rest of the vadas in the same manner.
    • Brush the vadas both side lightly with oil, and toast them in toaster oven just enough that bread has become light golden brown. You can also bake them in oven.
    • Serving the vadas
    • Whip the yogurt until smooth. Add a little milk as needed to make the consistency similar to pancake batter or lassi. Add the salt, adjust to your taste.
    • When ready to serve soak them in water for one minute and squeeze the vadas lightly between your both palms.
    • Dip them in yogurt one at a time and arrange them in serving plate, sprinkle the red chili powder to your taste, it is optional, drizzle the tamarind chutney and few pieces of cilantro, and gives a nice color.
    • Bread dahi vadas are ready to serve.
    Tried this recipe?Let us know how it was!

    Bread Dahi Vada Recipe

    Bread Dahi Vada is a delightful twist to the traditional dahi vada, offering a quicker and simpler way to enjoy this beloved Indian snack. Bread dahi vada is perfect for those who crave the flavors of dahi vada but prefer a hassle-free preparation method. This recipe is a fusion of textures and flavors, combining the softness of bread with the tanginess of yogurt and the spiciness of chutneys. Here’s how to make bread dahi vada at home.

    Step 1: Preparing the Bread

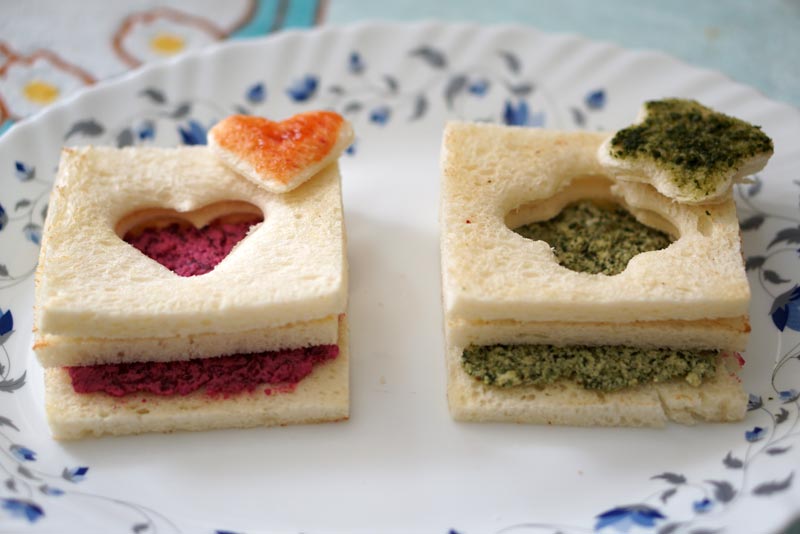
    To begin making bread dahi vada, start by preparing the bread slices. Trim the edges of the bread slices and then cut them into desired shapes. You can cut them into squares, rectangles, or use cookie cutters to create fun shapes like stars or hearts. This step ensures that the bread absorbs the yogurt mixture well, resulting in soft and flavorful vadas.

    Step 2: Soaking the Bread

    Once you’ve cut the bread into desired shapes, soak them in lukewarm water for a few seconds. Ensure that the bread slices are fully submerged in water to soften them. This step is crucial as it allows the bread to absorb moisture, making it easier to shape into vadas later. Squeeze out excess water from the soaked bread slices gently, being careful not to break them.

    Step 3: Preparing the Yogurt Mixture

    The next step in making bread dahi vada is to prepare the yogurt mixture. In a bowl, whisk fresh yogurt until smooth and creamy. Add a pinch of salt and sugar to the yogurt and mix well. The yogurt should have a balanced flavor, with a hint of sweetness to complement the savory elements of the dish. You can adjust the seasoning according to your taste preferences.

    Step 4: Assembling the Bread Dahi Vada

    Now it’s time to assemble the bread dahi vada. Take each soaked bread slice and gently squeeze out any remaining water. Place the squeezed bread slice on a serving plate or platter. Spoon a generous amount of the prepared yogurt mixture over the bread slice, covering it completely. Ensure that the yogurt coats the bread evenly, imparting its tangy flavor to every bite.

    Step 5: Garnishing the Bread Dahi Vada

    After assembling the bread dahi vada, it’s time to garnish it with various toppings and chutneys. Drizzle sweet tamarind chutney and spicy green chutney over the vadas, adding layers of flavor and heat. Sprinkle a pinch of chaat masala and roasted cumin powder on top for an extra burst of taste. Garnish with finely chopped cilantro leaves and pomegranate seeds for a vibrant and refreshing touch.

    Tips for Making Perfect Bread Dahi Vada:

    • Use Fresh Bread: Opt for fresh bread slices as they absorb moisture better, resulting in softer vadas.
    • Soak Bread Just Right: Ensure that you soak the bread slices for the right amount of time. Over-soaking can make them mushy, while under-soaking can make them dry.
    • Adjust Seasonings: Taste the yogurt mixture before assembling the vadas and adjust the seasonings according to your preference. You can add more salt or sugar as needed.

    Variations of Bread Dahi Vada:

    • Stuffed Bread Dahi Vada: For a flavorful twist, you can stuff the soaked bread slices with a mixture of chopped nuts, raisins, and spices before coating them with yogurt.
    • Bread Dahi Vada Chaat: Turn bread dahi vada into a delightful chaat by adding tomatoes, sev, and a drizzle of mint chutney on top.

    Benefits of Bread Dahi Vada:

    • Quick and Easy: Bread dahi vada is a quick and easy recipe that can be prepared in minutes, making it perfect for busy days or sudden cravings.
    • Lighter Option: Unlike traditional dahi vada made with lentils, bread dahi vada is lighter on the stomach, making it suitable for those looking for a lighter snack option.

    FAQs (Frequently Asked Questions) about Bread Dahi Vada:

    Can I use whole wheat bread for this recipe?

    • Yes, you can use whole wheat bread instead of white bread for a healthier twist. However, keep in mind that whole wheat bread may have a denser texture.


    Can I prepare bread dahi vada in advance? (H2) 

    • While it’s best to assemble bread dahi vada just before serving to maintain the texture of the bread, you can prepare the components in advance and assemble them when ready to serve.

    For more delightful Indian recipes, more Indian recipes, appetizers, beverages, and desserts, be sure to check out the following links on Manjula’s Kitchen. Here are some links to recipes on Manjula’s Kitchen official website:

    Paneer Tikka Masala Recipe

    Chana Chaat (Spicy Chickpea Salad) Recipe

    Pav Bhaji (Spicy Vegetable Hash with Buns) Recipe

    Raj Kachori (Crunchy Chaat) Recipe

    Vegetable Biryani Recipe

    These recipes should offer you a flavorful experience straight from Manjula’s Kitchen.

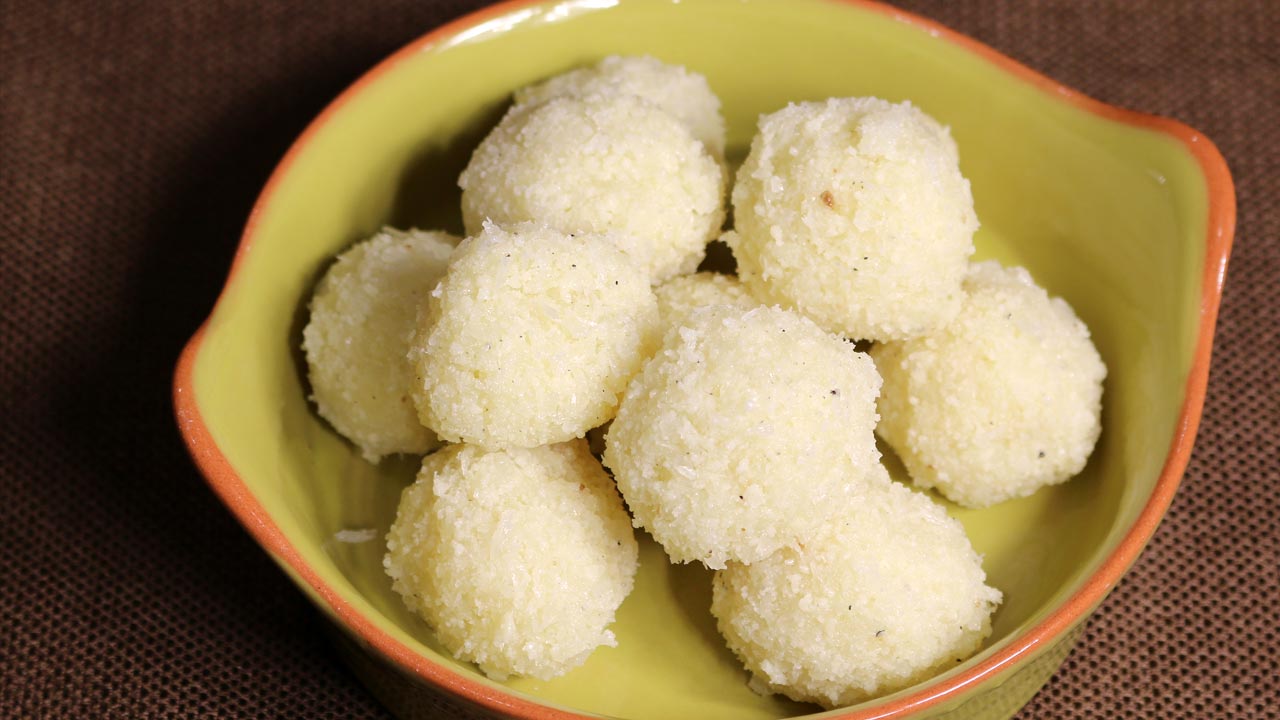
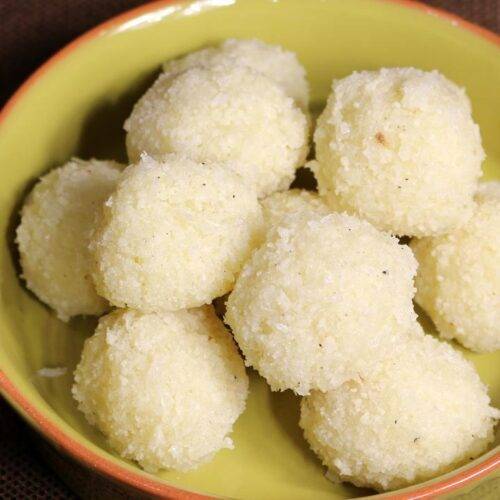
  • Coconut Ladoo

    Coconut Ladoo

    Coconut Ladoo

    Coconut ladoo

    Coconut ladoos are a rich, sweet dessertsnack. This is made for many festive occasions. Coconut laddoo is a very simple and easy recipe to make. These are made with few ingredients. Traditionally in Indian households ladoos are served as fudge candies.
    5 from 2 votes
    Prep Time 5 minutes
    Cook Time 40 minutes
    Total Time 45 minutes
    Course Dessert
    Cuisine Indian
    Servings 8 people

    Ingredients
      

    • 1-1/4 cup coconut freshly grated or frozen
    • 3 cups milk
    • 1/2 cup sugar
    • 1/4 tsp cardamom powder

    Instructions
     

    • Boil the milk and coconut in heavy bottom pan over medium high heat (I am using heavy non stick pan), do stir occasionally.
    • After milk comes to boil reduce the heat to medium and cook for 25-30 minutes, until all the moisture is absorbed and coconut is thick and creamy consistency.
    • Add sugar and cardamom to the coconut and cook for 7-8 minutes stir continuously, until all the moisture is absorbed. Coconut mix will be thick and crumbly in consistency. Turn off the heat.
    • Spread the coconut mix on the plate and let it cool of to the room temperature.
    • To make the ladoos, take about 2 tablespoons of coconut mixture into your palm. Gently press to form a smooth, round ball. Adjust the size of ladoo as you prefer

    Notes

     
    Ladoos are ready to be served; you can refrigerate them for about two weeks.
    Keyword Coconut Candy, Holiday Gift, Kid Friendly, Sweet Snack
    Tried this recipe?Let us know how it was!

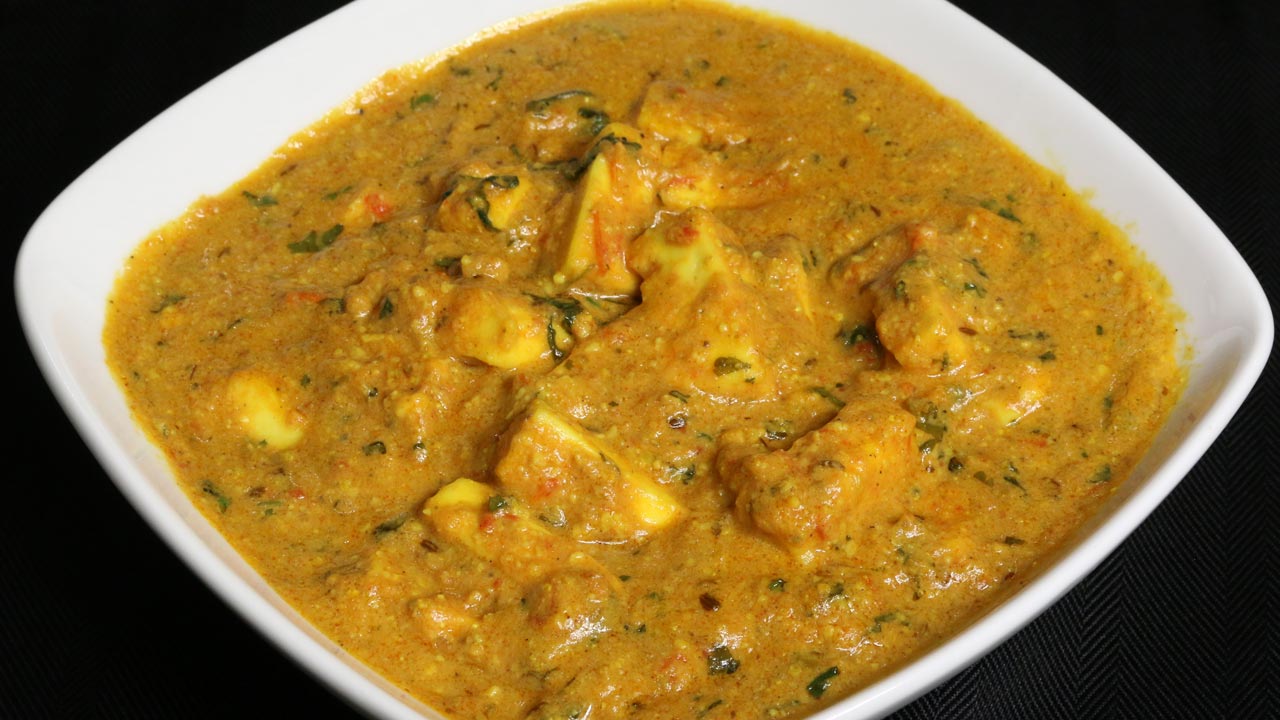
  • Paneer Makhani

    Paneer Makhani

    Paneer Makhani (Spicy Indian Cheese Curry)

    Paneer Makhani

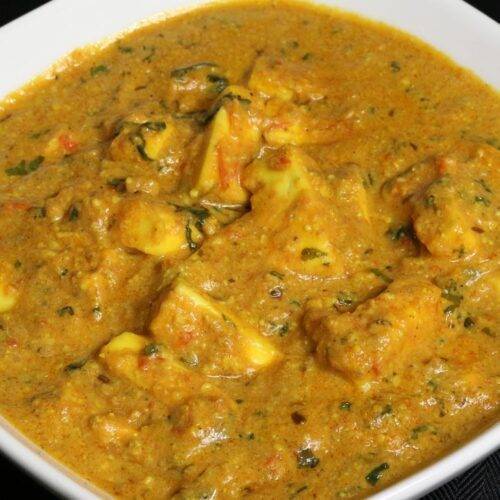
    Paneer Makhani is a popular Punjabi dish. Paneer (Indian cheese) simmered in rich creamy tomato gravy makes a very delicious dish. This is simple and easy recipe to make. Serve Paneer Makhani with any Indian flat bread or over rice. This will be enjoyed by everyone.
    5 from 1 vote
    Prep Time 10 minutes
    Cook Time 25 minutes
    Course paneer
    Cuisine Indian
    Servings 4 people

    Ingredients
      

    • 6oz paneer cubed (this will make 1-1/2 cup cubed paneer, available in Indian grocery stores)
    • 1/4 cup cashews
    • 2 tablespoon sesame seeds (til)
    • 4 tomatoes medium size cut into small pieces about 2 cup
    • 1 tablespoon chopped ginger
    • 1 green chili chopped
    • 2 tablespoons butter
    • 1 teaspoon cumin seeds (jeera)
    • 1/8 teaspoon asafetida (hing)
    • 2 teaspoon coriander powder (dhania)
    • 1/2 teaspoon turmeric (haldi)
    • 1 teaspoons salt
    • 1 teaspoon sugar
    • 2 tablespoons heavy cream
    • 1/2 teaspoon garam masala
    • 1/4 cup chopped cilantro 

    Instructions
     

    • Powdered the cashews and sesame seeds, (I like to use spice grinder). Set aside.
    • Pure the tomatoes, ginger and green chili. Set aside.
    • In about 2 cups of hot water soak the cubed paneeer for 5 minutes or more, this will make the paneer soft and give a nice texture. Set aside.
    • Heat the butter in sauce pan over medium heat; after butter is moderately hot add cumin seeds and asafetida. After the seeds crack add cashew nut powder and roast for about one minute. Add tomato puree and mix it well.
    • Add the remaining spices, coriander, turmeric, salt, sugar, mix it well and cover the pot. Tomatoes splatter while cooking. Cook for about four minutes stirring in between until tomatoes start leaving the oil and tomatoes will be half in quantity.
    • Add cream, cook for about two minutes stirring often. Add one cup of water, cover the pan and let it cook for about two to three minutes.
    • Take out the paneer from water and put into the gravy, stir and cover the pan and cook for about five minutes. Adjust the gravy to your liking if needed add little more water, and cook. Turn off the heat.
    • Add the cilantro and garam masala stir and cover for few minutes before serving.
    Tried this recipe?Let us know how it was!

    What Is Paneer Makhani – Manjula’s Kitchen 

    It’s a gluten-free, paneer-based party recipe featuring a rich gravy that defines its regal status. Uncover the delightful essence of this Indian culinary masterpiece.

    Introduction to Paneer Makhani Recipe: 

    In the journey of crafting an exquisite paneer makhani recipe, the first step involves an artful process of meticulously powdering cashews and sesame seeds using the precision of a spice grinder. This crucial procedure serves as the cornerstone, laying the groundwork for the creation of a rich and nutty flavor profile that distinctly defines the essence of the paneer makhani recipe. The amalgamation of these finely ground ingredients sets the stage for a culinary experience that promises to tantalize the taste buds with every indulgent bite.

    Creating the Tomato Puree for Paneer Makhani:

    Within the tapestry of the paneer makhani recipe, the spotlight shifts to the creation of a vibrant and tangy base by pureeing tomatoes, ginger, and green chili. This puree becomes an integral component, intricately woven into the overall composition, contributing to the unmistakable taste that characterizes paneer makhani. The harmonious blend of these ingredients not only imparts a delightful acidity but also adds a depth of flavor that elevates the entire culinary experience of this classic Indian dish.

    Softening Paneer for Paneer Makhani: 

    A distinctive element in the meticulous recipe of paneer makhani involves immersing cubed paneer in hot water for a minimum of five minutes. This step is crucial, ensuring that the paneer attains a desirable softness, transforming it into an integral component that gracefully melds into the luxurious texture of paneer makhani. The attention to softening the paneer reveals the commitment to achieving perfection in both taste and texture in this beloved Indian dish.

    Infusing Flavors in Butter for Paneer Makhani: 

    As the culinary odyssey unfolds in the preparation of paneer makhani, a saucepan takes center stage, filled with the sizzle of melting butter over medium heat. Into this decadent base, cumin seeds and asafetida make their entrance, infusing the recipe of paneer makhani with a tantalizing array of flavors. This infusion process not only sets the tone for the aromatic journey ahead but also showcases the meticulous layering of tastes that distinguishes paneer makhani.

    Crafting the Core of Paneer Makhani:

    The heart of the paneer makhani recipe unveils itself as the powdered cashew and sesame seed mixture gracefully blends into the pan. This step imparts a luxurious nuttiness to the curry, elevating the overall complexity of the paneer makhani recipe. The subsequent addition of tomato puree, alongside a carefully curated blend of spices—coriander, turmeric, salt, and sugar—forms the flavorful core of paneer makhani, embodying a symphony of tastes that dance on the palate.

    Simmering and Marrying Flavors in Paneer Makhani Gravy: 

    Advancing in the progression of paneer makhani, the curry undergoes a meticulous simmering process, allowing the tomatoes to release their juices and seamlessly meld with the spices. The introduction of cream into this aromatic medley creates a velvety texture that epitomizes the richness associated with paneer makhani. This harmonious infusion of flavors characterizes the unique appeal of the paneer makhani recipe, showcasing a culinary masterpiece that marries tradition with innovation.

    Incorporating Paneer into the Paneer Makhani Gravy: 

    As the culinary narrative unfolds, the softened paneer takes center stage, delicately incorporated into the simmering paneer makhani gravy. This meticulous step ensures that the paneer absorbs the aromatic essence of the curry, resulting in a harmonious fusion of flavors. The careful balance of ingredients and textures not only highlights the mastery behind the art of crafting paneer makhani but also promises a dining experience where each bite reveals the dedication invested in every element of this beloved Indian dish.

    Final Touches to Paneer Makhani: 

    As the crescendo of the paneer makhani recipe approaches, cilantro and garam masala make their grand entrance, imparting a burst of freshness and warmth to the dish. These final touches are not merely garnishes but integral components that elevate the overall appeal of paneer makhani. The amalgamation of flavors, textures, and aromatic nuances converges into a culinary masterpiece, presenting paneer makhani as a timeless and authentic representation of the rich tapestry of Indian cuisine.

    If you liked this recipe, then you must also try: Aloo Gobi, Potato Curry with Yogurt Gravy, Mattar Paneer & Vegetable RIce (Pulav)

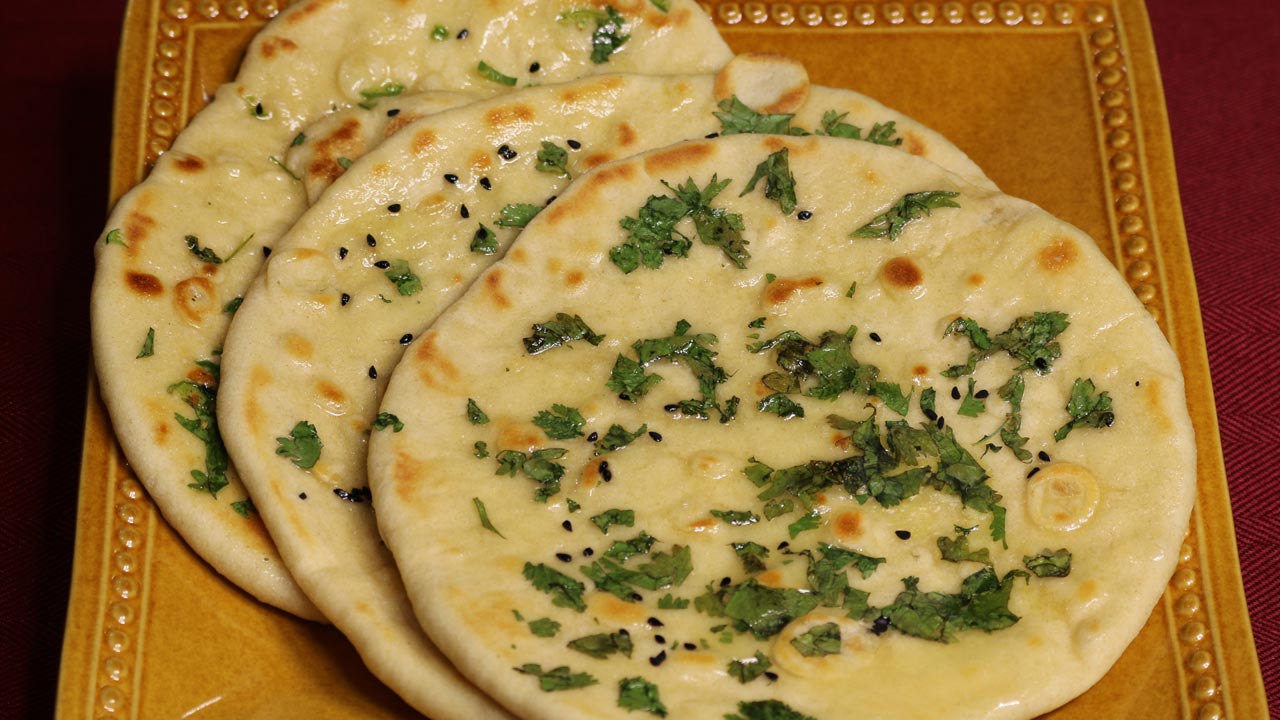
  • Kulcha (Punjabi Flatbread)

    Kulcha (Punjabi Flatbread)

    Kulcha - Punjabi Flatbread

    Kulcha (Punjabi Flatbread)

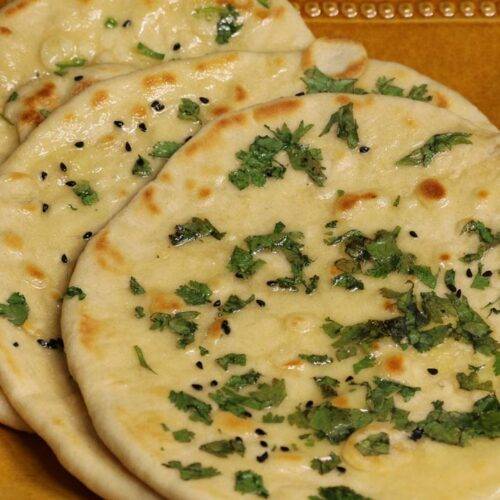
    Kulcha is a soft textured flatbread; this is very popular in North Indian recipe. They can be made in a tandoor (clay oven) or on a skillet. I am using a skillet. Traditionally kulchas are served with spicy chole (chick peas). This delicious combination is known as "Chole kulcha".  This is also another popular street food.
    5 from 1 vote
    Course Bread
    Cuisine Indian
    Servings 2 people

    Ingredients
      

    • 1 cup of all purpose flour (plain flour or maida)
    • 1/2 teaspoon baking powder
    • 1/4 teaspoon baking soda
    • 1/2 teaspoon salt
    • 1/2 teaspoon sugar
    • 1 tablespoon oil
    • 2 tablespoon yogurt (curd or dahi)
    • Approx. 1/4 cup milk use as needed

    Also need

    • 1/4 cup of all purpose flour for rolling
    • 1/2 teaspoon nigella seeds (kalaunji)
    • 1 tablespoon cilantro chopped (hara dhania)
    • 1 tablespoon clarified butter, ghee

    Instructions
     

    • In a bowl mix all the dry ingredients, flour, baking powder, baking soda, salt, and sugar, and sieve the flour to make sure even mixing.
    • Add oil and yogurt to the flour and mix it well, add milk as needed to make soft dough. Dough should be soft but not sticking to hand. Knead the dough to make smooth and pliable.
    • Cover the dough and let it sit for about 2 hours.
    • Knead the dough for few seconds and divide into four equal parts, roll them into patties. Take one patty press it in dry flour from both sides and roll in about 6” circle, if dough  start sticking to the rolling pin or rolling surface dust little more dry flour.
    • Heat the skillet (iron skillet works the best) on medium heat. Skillet should be moderately hot. Wipe the skillet with few drops of oil.
    • Place the kulcha over skillet. Sprinkle few drops of water. Sprinkle few nigella seeds and little cilantro over the kulcha while kulcha is still wet, and press it with the spatula.
    • When the kulcha start to change color and start bubbling flip it over. There will be some golden brown spots. Wait about a minute and flip it over again.
    • Kulcha should have golden brown spots from both sides. Kulcha should not be cooked on high heat otherwise it will not cook through.
    • Kulcha is ready, butter the kulcha before serving.

    Notes

    Serving Suggestions
    Traditionally kulchas are served with punjabi chole or serve with any rich gravy based side dish like palak paneer or dal makhani.
    Tried this recipe?Let us know how it was!

  • Hyderabadi Mirchi Ka Salan (Spicy Pepper Curry)

    Hyderabadi Mirchi Ka Salan (Spicy Pepper Curry)

    Hyderabadi Mirchi ka Salan

    Hyderabadi Mirchi Ka Salan (Spicy Pepper Curry)

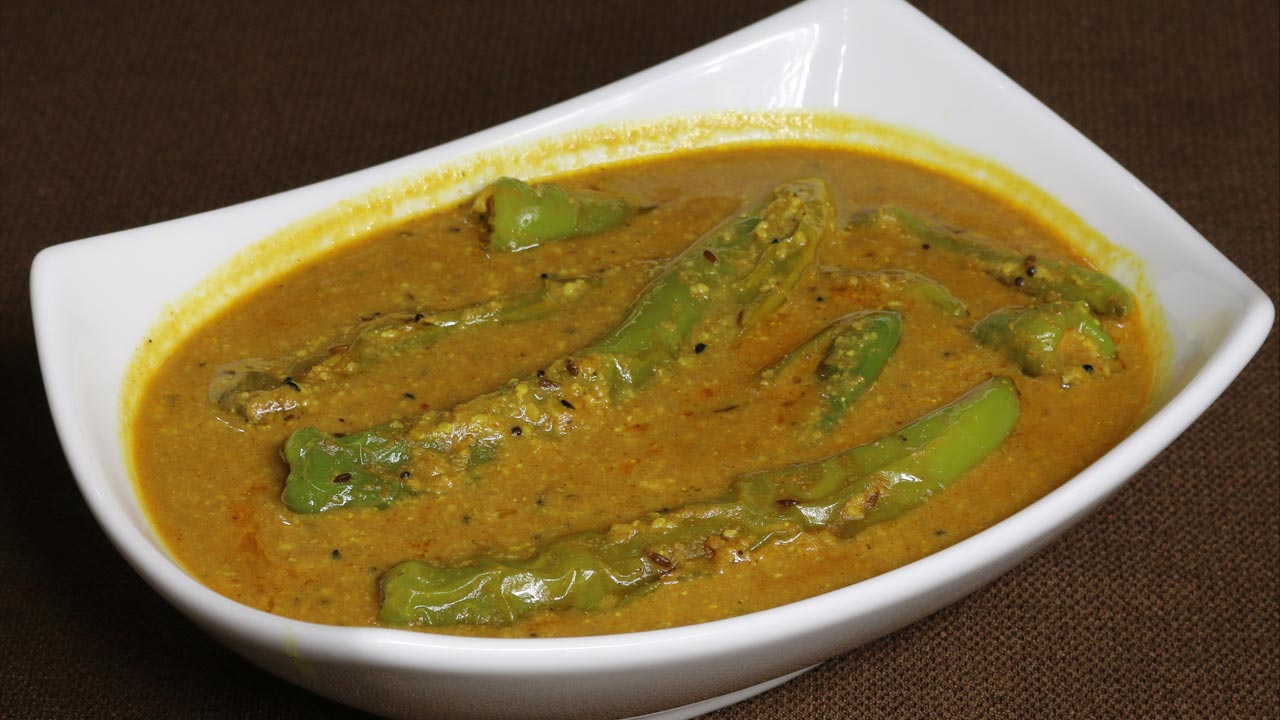
    Mirchi ka Salan” is a popular Hyderabadi dish. Generally speaking, Hyderabadi dishes are very spicy and aromatic, and this is one of them. Even the name of this dish “Mirchi ka salon" reflects that. Mirch is pepper and Salan means curry.  The chili pepper is cooked in a peanut and coconut spicy curry.
    This dish is a new one for me. Many of you had requested I make this, so I decided to try it out.  Of course I turned to Google to help me out and went through many recipes.  I tried many different variations until I was satisfied with the recipe.  
    I then invited a friend who is from Hyderabad to ask her for her honest opinion. She was surprised that I had never eaten “Mirch ka Salan” before.  She gave me some suggestions and pointers to perfect my recipe. I then incorporated her ideas and tweaked the recipe.  
    Now I loved it. I know this new dish will be on my list for “go-to” dishes when having get-togethers.  So if you enjoy hot and spicy food, indulge yourself with this dish! It pairs excellently with vegetable biryani or plain white rice. Its a vegan dish which is absolutely gluten free but spicy.
    5 from 1 vote
    Course curry
    Cuisine Indian
    Servings 4 people

    Ingredients
      

    • 8 Anaheim pepper or use the pepper which are mild
    • 1/4 cup coconut powder
    • 2 tablespoons sesame seeds
    • Approx. 3 tablespoon raw peanuts
    • 4 tablespoons oil
    • 1-1/2 tablespoon besan (Bengal gram flour)
    • 1 teaspoon cumin seeds (jeera)
    • 1/2 teaspoon mustard seeds (rai)
    • 1/2 teaspoon nigella seeds/kalanji
    • 1 tablespoon tamarind paste
    • 2 teaspoons ginger finely grated
    • 1/2 teaspoon turmeric (haldi)
    • 1 teaspoon red chili powder/adjust to taste
    • 2 teaspoons salt
    • 1 tablespoon sugar
    • 3/4 teaspoon garam masala
    • About 3 cups of water

    Instructions
     

    • Wash and wipe dry the peppers; slit the peppers vertically.
    • Grind the peanuts, sesame seeds, and coconut to make powder, set aside.
    • Mix tamarind paste, ginger, turmeric, and red chili powder with 1/4 cup of water. Set aside.
    • Use the flat frying pan, heat the oil on medium heat, and stir-fry the peppers till light brown all around. Take them out over paper towel.
    • Use the same pan as pan will have oil remaining, oil should be moderately hot. Add cumin seeds and mustard seeds as seeds crack add besan and nigella seeds stir fry for about one minute. Add the peanut powder and stir fry for about two minutes mix will be golden brown.
    • Add the spice paste and cook for 2-3 minutes stirring. Spice mix will start to leave the oil, add salt, sugar, 3 cups of water, and bring the gravy to boil.
    • Lower the heat to medium low and let it simmer for about 6-8 minutes.
    • Add the stir fried peppers and cover with gravy. Sprinkle the garam Masala, cover the pan and let it cook for another 3-4 minutes.
    • The gravy thickens as it cooks.
    • Mirchi ka Salam is ready. Serve hot over the plain rice or with briyani.
    Tried this recipe?Let us know how it was!

  • Aloo Tikki (Potato Patties)

    Aloo Tikki (Potato Patties)

    Aloo Tikki (Potato Patties)

    Aloo Tikki (Potato Patties)

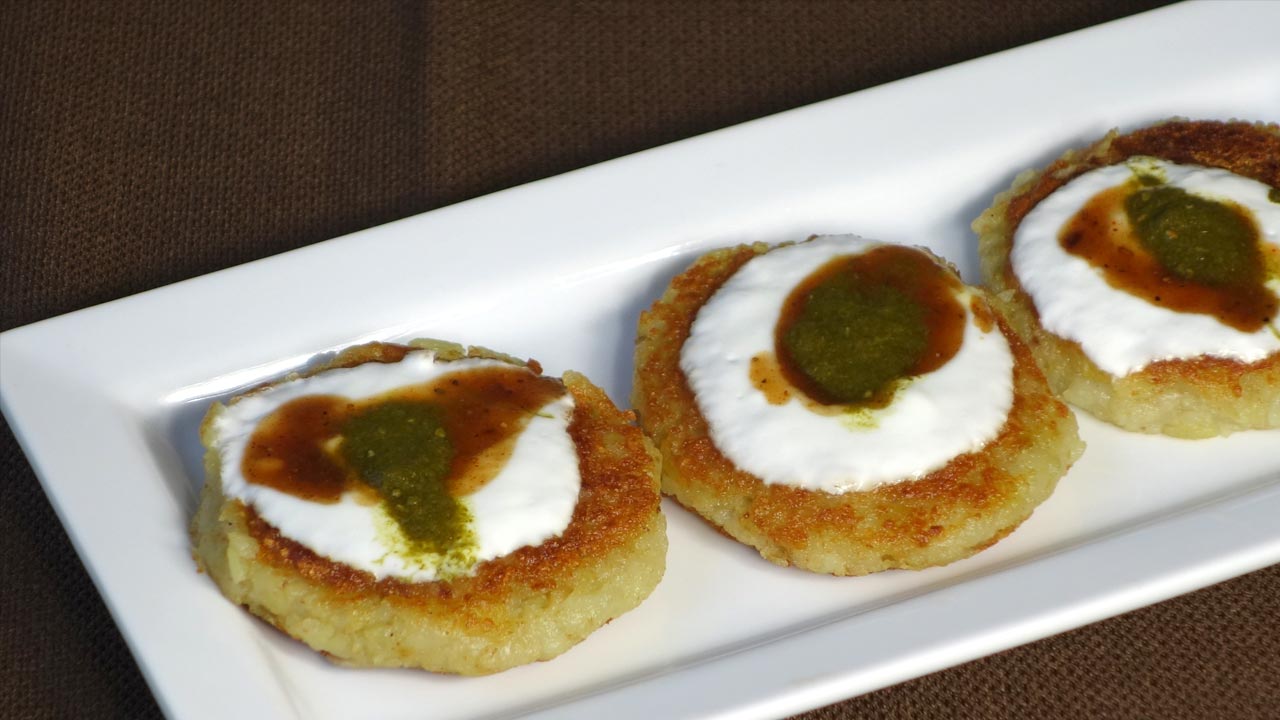
    Aloo tikki or potato patties are popular snack, traditionally when any snack is served with yogurt and chutney it is known as chaat. This is very popular with road side vendors, the aroma of the hot tikkis are enough to make you hungry.
    No ratings yet
    Course street food
    Cuisine Indian
    Servings 8 tikki

    Ingredients
      

    • 3 medium size potatoes boiled and shredded, this will make 2 cups of shredded potato
    • 2 tablespoon bread crumbs
    • 1 teaspoon salt
    • Oil for cooking

    for Filling

    • 1/3 cup green peas boiled and drained
    • 1 teaspoon chopped ginger
    • 1 tablespoon green chili minced
    • 1 tablespoon minced cilantro (hara dhania)
    • ¼ teaspoon salt
    • 1 teaspoon oil

    for Serving

    Instructions
     

    Making Filling

    • Boil and drain the water from the peas and lightly mash.
    • Heat the oil in a small pan over medium heat; add all the filling ingredients, stir fry for about two minutes. Keep the filling little moist. Set aside.

    Making tikkis

    • Add the salt and bread crumb into the potatoes and knead to make the dough.
    • Divide the potatoes into 8 equal parts.
    • Takes one part of the potato dough, make a ball and flatten over the oiled palm.  Put about 1 teaspoon of filling in the center and wrap around with potato. Lightly flatten the filled balls to patties. Make all the patties.
    • Heat non stick heavy skillet on medium high heat, generously greased the skillet.  Place the tikkies on the skillet, making sure they are not touching each other and has some space all around. Oil the tikkies from the top.
    • Cook them for about 1 minute and turn them over, tikkies should be light golden brown. Oil the tikkies from the top and lightly press with spatula.
    • Turn the tikkies 3-4 times as needed to make sure tikkies are nice and crispy. Brush the oil lightly every time when you turn the tikkies over and also press with spatula.
    • Aloo tikkies taste best when they are served right from over the skillet.
    • You can prepare them in advance, up to five steps and brown them just before serving.
    • Tikkies are served along with tamarind chutney, cilantro chutney and yogurt. You can also serve them with spicy chole.
    Tried this recipe?Let us know how it was!

    Aloo Tikki: A Delectable Indian Potato Patties Recipe 

    In this aloo tikki recipe, we delve into the art of creating these beloved potato patties, a staple in Indian cuisine. These aloo tikkis are not only flavorful but also versatile, making them perfect for various dishes like aloo tikki chaat. Aloo Tiki, a delightful vegan appetizer inspired by street food recipes. If you’re craving a delightful snack or appetizer, look no further than this tikki aloo recipe.

    Preparation: Crafting the Perfect Aloo Tikki 

    To start this aloo tikki recipe, begin by boiling potatoes until they are tender. Once cooled, peel and mash them thoroughly. Now, let’s infuse these mashed potatoes with flavor. Add green chili, ginger, salt, cumin seeds, mango powder, and garam masala to the mashed potatoes. Mix these ingredients well, ensuring they are evenly distributed, creating the base for our aloo tikkis.

    Cooking: Shaping and Pan-Frying the Aloo Tikki 

    Now comes the fun part – shaping the aloo tikkis! Take a portion of the potato mixture and roll it into a ball, then gently flatten it to form a patty. Repeat this process until all the mixture is used. Heat oil in a skillet over medium heat. Once hot, carefully place the aloo tikkis in the skillet, ensuring they don’t overlap. Cook each side until golden brown and crisp, creating a delightful texture that enhances the flavor of the tikki aloo.

    Serving: Enjoying Aloo Tikki in Various Forms 

    Now that your aloo tikkis are ready, it’s time to enjoy them in different ways. One popular option is aloo tikki chaat, where the tikki aloo is topped with a medley of chutneys, yogurt, and spices, creating a burst of flavors with every bite. You can also serve aloo tikkis with a side of mint chutney or tamarind chutney for a refreshing twist. Whether enjoyed as a snack, appetizer, or part of a meal, these aloo tikkis are sure to delight your taste buds.

    Tips for Perfect Aloo Tikki: 

    • Use starchy potatoes: Opt for potatoes like russets or Yukon Gold, as they have a higher starch content, resulting in fluffier aloo tikkis.
    • Keep the oil hot: Ensure the oil is sufficiently hot before frying the aloo tikkis to achieve a crispy exterior.
    • Don’t overcrowd the skillet: Cook the tikki aloo in batches, giving them enough space in the skillet to fry evenly.
    • Add breadcrumbs: If the potato mixture feels too wet, incorporate breadcrumbs to help bind it together.

    Variations of Aloo Tikki: 

    • Paneer-stuffed Aloo Tikki: Elevate your aloo tikki experience by adding a layer of paneer stuffing before shaping and frying them.
    • Vegetable-loaded Aloo Tikki: Mix finely chopped vegetables like carrots, peas, and bell peppers into the potato mixture for added texture and flavor.
    • Spicy Aloo Tikki: Increase the heat by adding extra green chilies or a dash of red chili powder to the potato mixture.

    Benefits of Aloo Tikki: 

    • Rich in carbohydrates: Potatoes are a great source of carbohydrates, providing energy to fuel your day.
    • Versatile: Aloo tikkis can be enjoyed on their own, as part of a meal, or as a base for various chaat dishes, offering endless culinary possibilities.
    • Comfort food: The warm and comforting flavors of aloo tikkis make them a favorite comfort food for many.

    FAQs about Aloo Tikki: 

    Q: Can I make aloo tikkis ahead of time? 

    A: Yes, you can prepare the potato mixture and shape the aloo tikkis in advance. Store them in the refrigerator until ready to fry.

    Q: Can I bake aloo tikkis instead of frying them? 

    A: While frying gives aloo tikkis their characteristic crispiness, you can bake them in the oven for a healthier alternative. Brush them with oil and bake at 400°F (200°C) until golden brown.

    Q: Are aloo tikkis gluten-free? 

    A: Yes, aloo tikkis are naturally gluten-free. However, if you’re adding breadcrumbs for binding, ensure they are gluten-free certified.

    Other Recipes on Manjula’s Kitchen 

    If you’re looking to explore more Indian recipes, appetizers, beverages, and desserts, be sure to check out the following links on Manjula’s Kitchen. Here are some links to recipes on Manjula’s Kitchen official website:

    Paneer Tikka Masala Recipe

    Chana Chaat (Spicy Chickpea Salad) Recipe

    Pav Bhaji (Spicy Vegetable Hash with Buns) Recipe

    Raj Kachori (Crunchy Chaat) Recipe

    Vegetable Biryani Recipe

    These recipes should offer you a flavorful experience straight from Manjula’s Kitchen.

  • Watermelon Cooler – Lemonade

    Watermelon Cooler – Lemonade

    Watermelon Cooler (Lemonade)

    Watermelon Cooler – Lemonade

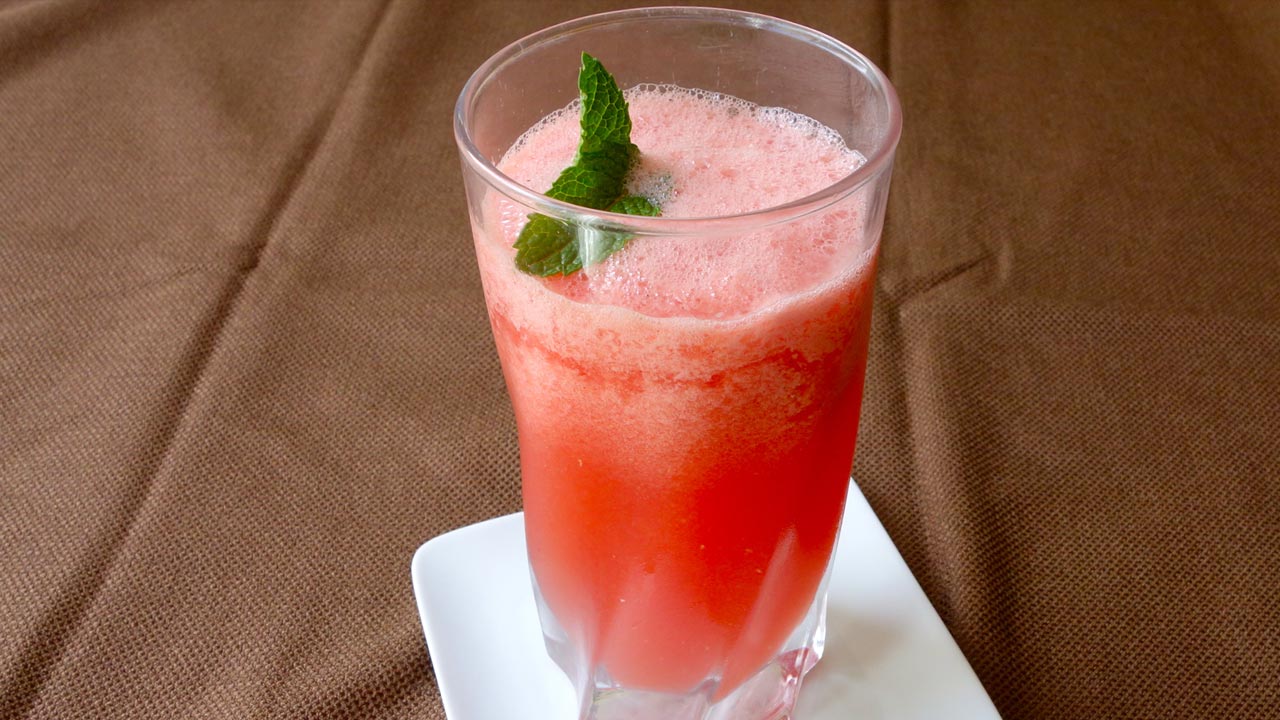
    Watermelon cooler is a refreshing summertime drink. Made with cubed watermelon, ginger ale, lemon juice and a few spices, it is sure to please. 
    No ratings yet
    Course Beverages
    Cuisine Indian
    Servings 2 people

    Ingredients
      

    • 2 cups watermelon cut in small pieces
    • 1-1/2 tablespoons lemon juice
    • 2 teaspoons ginger juice
    • 2 tablespoons sugar
    • 1/2 teaspoon black salt
    • Pinch of black pepper powder
    • Approx. 3/4 cup ginger ale
    • About 1 cup ice cubes

    Instructions
     

    • In a blender place watermelon, lemon juice, ginger juice, sugar, pepper and salt together and blend until it is smooth.  Add ice and blend it again until ice is crushed.
    • Pore the drink in a glass filling the glass up to 3/4 and add ginger ale, serve immediately.
    Tried this recipe?Let us know how it was!
  • Eggless Chocolate Cake

    Eggless Chocolate Cake

    Eggless Chocolate Cake

    Eggless Chocolate Cake

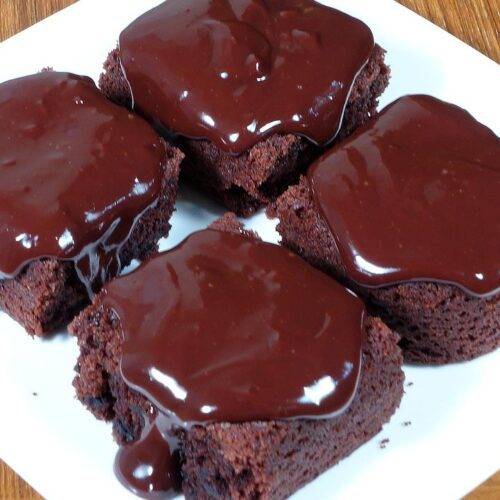
    This is a great recipe of delicious dessert, moist and eggless cake to satisfy your chocolate cravings and sweet tooth. Adults and kids alike will be delighted with this yummy cake. A cake that is like a sweet snack in every bite and is kids favorite for having chocolate in it.
    No ratings yet
    Course Dessert
    Cuisine Indian
    Servings 16 pieces

    Ingredients
      

    • 1-1/2 cup all purpose flour (plain flour, maida)
    • 2 tablespoons corn starch, or arrowroot
    • 1/4 cup coco powder
    • 1/2 teaspoon baking soda
    • 1/2 teaspoon baking powder
    • 1/4 teaspoon salt
    • 1 cup silky tofu ( soft tofu will also work)
    • 1/2 cup unsalted butter at room temperature
    • 1 cup sugar
    • 1 tablespoon vanilla essence
    • 1 tablespoon vinegar, I am using rice vinegar
    • Approx. 1/3 cup milk

    For Chocolate Ganache

    • 1/2 cup chocolate chips, semi-sweet
    • 1/3 cup heavy cream
    • 1 teaspoon vanilla essence

    Instructions
     

    For Ganache

    • Place chocolate in a bowl and add the vanilla essence. Bring the heavy cream to boil and turn off the heat. Pour the cream over chocolate and stir until chocolate completely dissolve and become glossy. As ganache cool it will become thick.

    For Cake

    • Preheat the oven at 350 degree F
    • Grease 8×8 inches cake pan. Set aside.
    • All the dry ingredients except sugar, sift together flour, corn starch, coco powder, baking soda, baking powder, and salt, three times to make sure all the ingredients are well mixed. Set aside.
    • With the electric mixer on low speed mix the butter, sugar, vinegar and vanilla until it is smooth this should take about two minutes. Add the tofu to butter mixture and mix on low speed for about two minutes. This will have a curdle kind of texture.
    • Slowly add the dry mix, mix with spatula all the ingredients should be mixed well. Add milk as needed, batter should be of thick consistency but pourable.
    • Pour the mixture into a greased baking pan evenly. Place the pan on middle oven rack and bake it for 35 minutes or until knife inserted in centre comes out clean.
    • Allow cake to cool for about 15 minutes in pan and then run a butter knife around the edges of cake. Place a wire cooling rack over top of pan. Use both hands to hold the rack in place while flipping the cake over onto the rack. Set the rack down and gently tap on the bottom of pan until the cake is released. Cool completely before slicing the cake.
    • Pour the ganache over the cake or individual cake pieces.
    Tried this recipe?Let us know how it was!