Category: Vegan Recipes

10 Easy Vegan Recipes | Vegan Indian Foods by Manjula’s Kitchen

Embracing a vegan lifestyle doesn’t mean you have to give up on the rich and flavorful experience of Indian cuisine. Here at Manjula’s Kitchen, we bring you a collection of vegan Indian food that is both delicious and easy to prepare. Let’s dive into 10 easy vegan recipes that will make your meals exciting and nutritious. These vegan Indian recipes are perfect for anyone looking to incorporate more plant-based meals into their diet.

1. Vegan Aloo Gobi

Aloo Gobi is a classic Indian dish made with potatoes and cauliflower. This flavorful and hearty dish is a staple in many Indian households and is a great example of vegan Indian food that is both satisfying and healthy. The combination of tender potatoes and cauliflower florets cooked with aromatic spices like cumin, turmeric, and garam masala makes this dish irresistible. Aloo Gobi is not only delicious but also easy indian recipes to prepare, making it a perfect choice for busy weeknights. Serve it with roti or rice for a complete meal.

2. Chana Masala

Chana Masala is a spicy and tangy chickpea curry that is a favorite among many. It’s one of the 10 easy vegan recipes that you can prepare quickly, and it’s packed with protein and flavor, making it a perfect vegan food recipe. Chickpeas are simmered in a rich tomato sauce flavored with an array of spices like coriander, cumin, and chili powder. This dish is hearty and comforting, ideal for lunch or dinner. Pair it with steamed basmati rice or warm naan for a satisfying meal.

3. Vegan Palak Tofu

Palak Tofu is a delicious twist on the traditional Palak Paneer. Instead of paneer, tofu is used to keep this dish vegan. The creamy spinach sauce pairs perfectly with the tofu, creating a nutritious and tasty vegan Indian recipe. Spinach is blended into a smooth puree and cooked with spices, then combined with tofu cubes to create a delightful dish. This vegan version retains all the flavors of the original and is a fantastic way to enjoy spinach and tofu in a new and exciting way. Serve it with jeera rice or chapati.

4. Baingan Bharta

Baingan Bharta is a smoky and flavorful eggplant dish that is popular in north indian recipes. This dish is made by roasting eggplants and cooking them with tomatoes, and spices, making it a delightful addition to your collection of vegan food recipes. The roasting process gives the eggplant a unique smoky flavor, which is then enhanced by the addition of spices like cumin, coriander, and garam masala. Baingan Bharta is perfect as a side dish or a main course when served with roti or rice.

5. Vegan Vegetable Biryani

Vegetable Biryani is a fragrant and flavorful rice dish cooked with a variety of vegetables and spices. This vegan version is just as delicious as the traditional one, making it a must-try among vegan Indian recipes. The rice is layered with a mixture of vegetables like carrots, peas, and bell peppers, along with aromatic spices such as cardamom, cinnamon, and cloves. Biryani is a complete meal in itself and can be enjoyed with a side of raita or salad.

6. Tofu Tikka Masala

Tofu Tikka Masala is a vegan take on the classic Chicken Tikka Masala. Tofu is marinated in spices and yogurt, then cooked in a rich and creamy tomato sauce. This dish is perfect for those looking for vegan food recipes that are both hearty and flavorful. The tofu absorbs the flavors of the marinade and the sauce, resulting in a dish that is rich and satisfying. Serve it with basmati rice or naan to soak up the delicious sauce.

7. Vegan Rajma

Rajma is a kidney bean curry that is a staple in North Indian cuisine. This vegan version is just as delicious and comforting, making it a great choice for anyone seeking vegan Indian food that is both nutritious and satisfying. Kidney beans are cooked in a spiced tomato gravy, flavored with a blend of spices like cumin, coriander, and garam masala. Rajma is traditionally served with rice, making it a wholesome and filling meal.

8. Masoor Dal

Masoor Dal is a simple yet flavorful red lentil curry. It’s one of the easiest vegan Indian recipes to prepare and is packed with protein and fiber, making it a healthy addition to your meal rotation. Red lentils are cooked with tomatoes, and spices, creating a comforting and nourishing dish. Masoor Dal is perfect for a quick lunch or indian dinner recipes and can be enjoyed with rice or chapati.

9. Vegan Korma

Vegan Korma is a creamy and mildly spiced curry made with a variety of vegetables and a rich coconut-based sauce. This dish is perfect for those looking for 10 easy vegan recipes that are both luxurious and easy to make. The vegetables are simmered in a sauce made from coconut milk, cashews, and spices, resulting in a dish that is rich and flavorful. Vegan Korma can be served with rice or naan for a complete meal.

10. Vegan Pulao

Vegan Pulao is a simple and flavorful rice dish cooked with vegetables and aromatic spices. It’s a versatile dish that can be enjoyed on its own or as a side, making it a great addition to your list of vegan Indian food recipes. The rice is cooked with vegetables like peas, carrots, and bell peppers, along with spices such as cumin, cinnamon, and bay leaves. Vegan Pulao is perfect for a quick and easy meal and can be paired with raita or a salad.

Conclusion

These 10 easy vegan recipes showcase the versatility and richness of vegan Indian food. From hearty curries to flavorful rice dishes, these recipes are sure to bring joy and nutrition to your table. Explore more vegan Indian recipes and discover the delicious possibilities of plant-based cooking with Manjula’s Kitchen. Happy cooking and enjoy your journey with vegan food recipes!

By incorporating these dishes into your diet, you’ll be able to enjoy a wide variety of delicious and nutritious foods. Whether you’re looking for breakfast, snacks, main courses, or desserts, there’s a vegan Indian recipe to suit every taste. Don’t forget to check out Manjula’s Kitchen for more inspiration and culinary delights. Happy cooking and happy eating!

  • Stuffed Bell Peppers (Stuffed Capsicum)

    Stuffed Bell Peppers (Stuffed Capsicum)

    Stuffed Bell Peppers

    Stuffed Bell Peppers

    For these mouthwatering Stuffed bell peppers, I decided to make them into rings, which makes it easier and quicker to make. Bell peppers provide a very nice vibrant color to any dish. Stuffed bell peppers are delicious and can be served as appetizers or as a side dish. I hope you enjoy this recipe as much as I enjoy!
    4.41 from 5 votes
    Course Appetizer, Side Dish
    Cuisine Indian, Italian
    Servings 4 people

    Ingredients
      

    • 2 bell peppers capsicum, pahadi mirch
    • 2 1/2 potatoes boiled, peeled and roughly mashed
    • 1 1/2 tsp salt
    • 1 tsp cumin seeds jeera
    • 3 tsp coriander powder dhania
    • 1/2 tsp red chili powder
    • 1/2 tsp mango powder amchoor
    • 1/2 tsp garam masala
    • 1 Tbsp green chili finely chopped
    • 1 Tbsp oil canola or vegetable

    Instructions
     

    • Add all the spices to mash potatoes to make filling, salt, cumin seeds, coriander powder, red chili powder, mango powder, garam masala, and green chilies.
    • Cut tops and bottoms of bell peppers; discard seeds and membranes.
    • Stuffed the bell peppers and slice them in half inch thick, use sharp knife. Depends the size of bell peppers how many slices you will make.
    • Press them gently to make sure potatoes stays inside the bell pepper rings.
    • Heat the heavy flat bottom sauce pan on medium heat and generously grease the pan.
    • Spread the bell pepper rings into skillet, do not overlap. Cover the pan and let it cook for about 1-2 minutes.
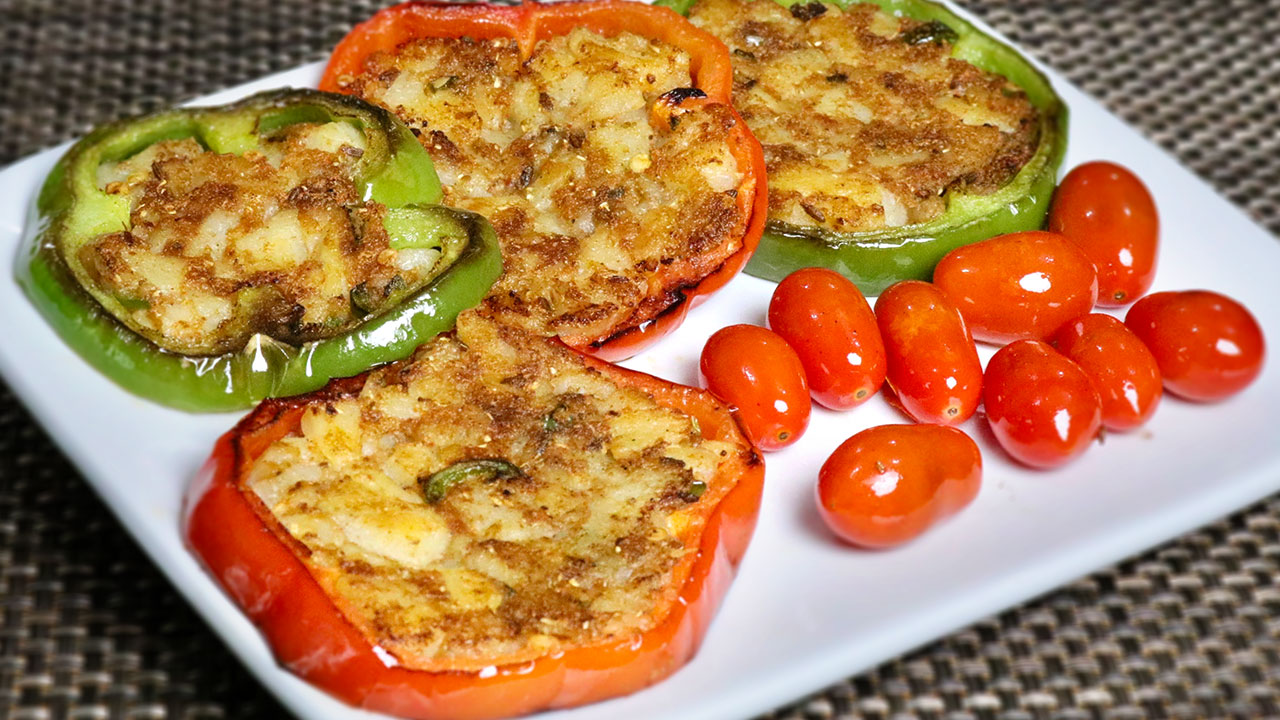
    • Remove the cover and turn the rings gently and press them lightly to ensure potatoes stays into the bell pepper rings. I cover the pan to make sure bell peppers are cooked, make sure they are not mushy. Cook the bell peppers from each side till they are golden brown. Stuffed bell peppers ready to serve.
    • Stuffed bell peppers are ready, this is a very enjoyable dish, serve them as an appetizers or side dish. I like to serve them with stir-fry cherry tomatoes.

    Notes

    Stuffed bell peppers are ready, this is a very enjoyable dish, serve them as an appetizers or side dish. I like to serve them with stir-fry cherry tomatoes.
    You can also use stuffed bell peppers to make sandwich, I like to use kaiser rolls with lettuce leaves, cheese, and slices of tomatoes.
    Tried this recipe?Let us know how it was!

    Stuffed Bell Peppers Recipe

    Stuffed bell peppers are a versatile option for appetizers or party recipes, suitable for a variety of dietary needs including gluten-free and vegan preferences, featuring a flavorful filling of sautéed vegetables. In this stuffed bell peppers recipe, we’ll infuse vibrant flavors into bell peppers, creating a delightful dish that’s both visually appealing and satisfying. Stuffed bell peppers offer a medley of textures and tastes, making them a versatile addition to any meal. Let’s delve into how to make stuffed bell peppers that will impress even the most discerning palates.

    Preparation and Assembly

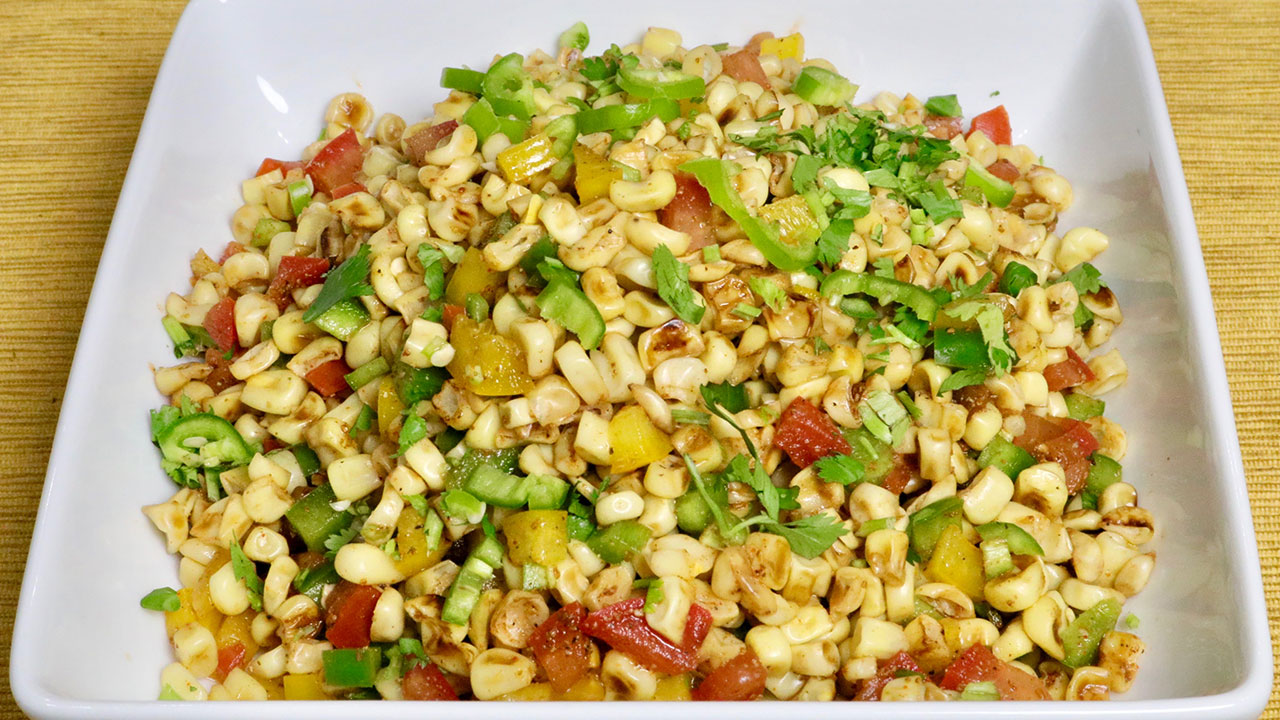
    To start, gather the necessary ingredients for the stuffing mixture. While the original recipe focuses on corn chaat, we’ll repurpose it to create a flavorful filling for our stuffed bell peppers. Begin by finely chopping tomatoes and green chilies. Sauté them in a pan until they turn golden brown, adding spices like cumin powder, coriander powder, and red chili powder for an extra kick of flavor. Then, mix in boiled corn kernels and season with salt to taste.

    Filling the Bell Peppers

    With the stuffing ready, it’s time to prepare the bell peppers for filling. Slice the tops off the bell peppers and remove the seeds and membranes from the insides, creating a hollow cavity perfect for holding the stuffing. Be sure to choose bell peppers that are firm and vibrant in color for the best results.

    Stuffing and Baking

    Carefully spoon the prepared stuffing mixture into each bell pepper, ensuring they are evenly filled. Place the stuffed bell peppers on a baking tray and bake them in a preheated oven until the peppers are tender and the filling is heated through. This process allows the flavors to meld together, resulting in a harmonious blend of tastes with every bite.

    Presentation and Serving

    Once baked to perfection, remove the stuffed bell peppers from the oven and let them cool slightly before serving. Garnish with fresh cilantro leaves for a pop of color and a burst of freshness. These stuffed bell peppers can be enjoyed as a standalone dish or paired with your favorite sides for a complete meal.

    Variations

    Experiment with different fillings to customize your stuffed bell peppers to suit your taste preferences. Try incorporating ingredients like cooked quinoa, black beans, or diced tofu for added protein and texture. You can also top the stuffed bell peppers with cheese before baking for a cheesy twist on this classic dish.

    Tips

    • When selecting bell peppers for stuffing, choose ones that are uniform in size and shape to ensure even cooking.
    • To save time, you can prepare the stuffing mixture in advance and store it in the refrigerator until ready to use.
    • For a spicy kick, add finely chopped jalapeños or serrano peppers to the stuffing mixture.
    • If you prefer a vegetarian option, omit the corn chaat and use a combination of vegetables like carrots, peas, and potatoes for the filling.

    Benefits

    Stuffed bell peppers are not only delicious but also packed with nutrients. Bell peppers are rich in vitamins A and C, as well as antioxidants that help boost immunity and promote overall health. By filling them with a variety of wholesome ingredients, you can create a nutritious meal that’s as satisfying as it is flavorful.

    FAQs

    Q: Can I use different colored bell peppers for this recipe?

    A: Yes, feel free to mix and match different colored bell peppers for a visually stunning presentation. Each color offers a slightly different flavor profile, adding depth to the dish.

    Q: How long will the stuffed bell peppers keep in the refrigerator?

    A: Stuffed bell peppers can be stored in an airtight container in the refrigerator for up to 3 days. Simply reheat them in the oven or microwave before serving.

    Q: Can I freeze stuffed bell peppers for later?

    A: Yes, stuffed bell peppers can be frozen for future meals. Wrap them individually in plastic wrap and aluminum foil before placing them in the freezer. To reheat, thaw them overnight in the refrigerator and bake them in the oven until heated through.

    Other Recipes on Manjula’s Kitchen

    If you’re looking to explore more Indian recipes, appetizers, beverages, and desserts, be sure to check out the following links on Manjula’s Kitchen. Here are some links to recipes on Manjula’s Kitchen’s official website:

    Paneer Tikka Masala Recipe

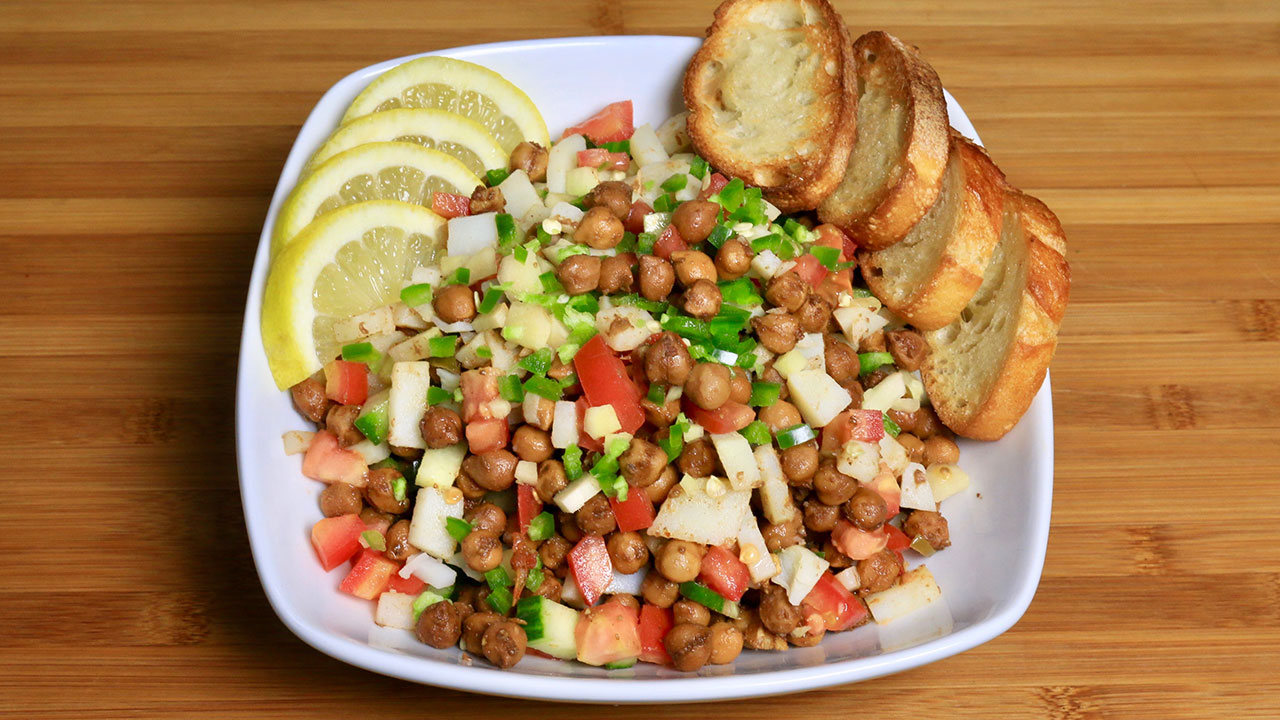
    Chana Chaat (Spicy Chickpea Salad) Recipe

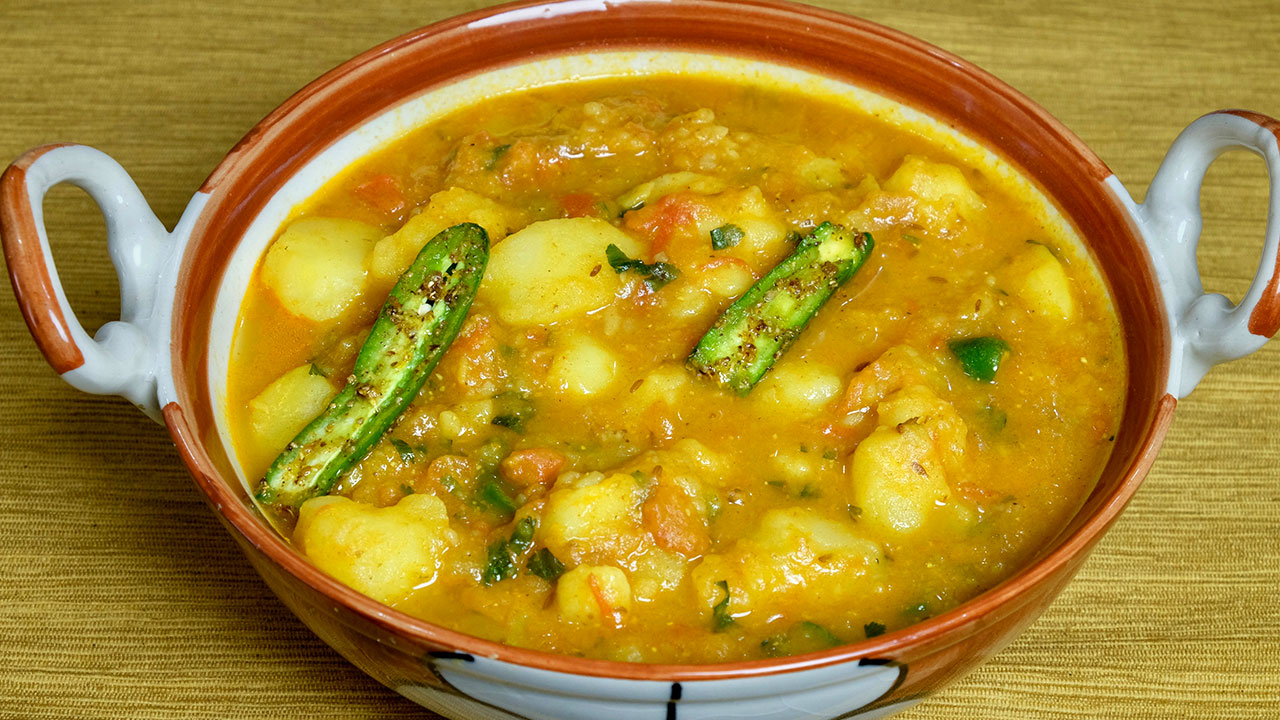
    Pav Bhaji (Spicy Vegetable Hash with Buns) Recipe

    Raj Kachori (Crunchy Chaat) Recipe

    Vegetable Biryani Recipe

    These recipes should offer you a flavorful experience straight from Manjula’s Kitchen.

  • Gatte Ki Sabji (Rajasthani Cuisine)

    Gatte Ki Sabji (Rajasthani Cuisine)

    Gatte Ki Sabji

    Gatte Ki Sabji

    Gatte Ki Sabji is a traditional dish from Rajasthan. These steamed gram-flour dumplings are cooked in a spicy gravy. This mouth-watering dish will complement any meal. Enjoy Gatte Ki sabji with roti or plain rice. The recipe is also vegan and gluten free.
    4.64 from 11 votes
    Prep Time 5 minutes
    Cook Time 40 minutes
    Total Time 45 minutes
    Course Main Course
    Cuisine Indian
    Servings 4 people

    Ingredients
      

    For Gatte

    • 2 cups besan gram flour
    • 4 Tbsp oil canola or vegetable oil
    • 1 tsp salt
    • 1 tsp red chili powder adjust to taste
    • 1/8 tsp asafetida hing, asafetida is gluten free spice, but asafetida powder contains some wheat flour, gluten free asafetida, is available on amazon.

    For Gravy

    • 3 Tbsp oil
    • 1/8 tsp asafetida hing
    • 1 tsp fennel seeds saunf
    • 2 bay leaves tejpat
    • 2 dry red chilies
    • ½ tsp red chili powder
    • 1/2 tsp turmeric haldi
    • 1 tablespoon coriander powder dhania
    • 1 tsp salt
    • 1 Tbsp Kasuri Methi
    • 1 tsp mango powder amchoor
    • 1/2 tsp garam masala

    Instructions
     

    • Mix all the ingredients for gatte together and make a stiff dough, using water as needed. You will need about 1/3 cup of water. Knead the dough well, let it rest for 10 minutes. Divide the dough into 8 parts and roll them in calendar about half inch thick.
    • Bring about 4 cups of water to boil in a pan on medium high heat. Gently drop the Gatte logs in boiling water. After it comes to boil, cover the pan and reduce the heat to medium low, and cook them cover for about 12-15 minutes’ gate should be floating on the top and will have bubbles all around.
    • Take them out from water and save the water, this will be used for making gravy. let them cool for few minutes and cut them in about half inch-thick slices.
    • Heat the oil in heavy bottom pan over medium heat, add fennel seeds, asafetida, red chilies stir and add Gattes, stir-fry for about 4-5 minutes until they are light golden brown.
    • Add bay leaves, chili powder, turmeric, coriander powder, and salt, stir-fry for about 2 minutes.
    • Add the water we saved, and Kasuri Methi boil for about 10 minutes over low medium heat, covered. This is the time add more water to adjust the thickness of the gravy. As Gatte Ki Sabji will cool off it gravy will become thick.
    • Turn off the heat and add mango powder, and garam masala, Gatte Ki Sabji is ready to serve.
    Tried this recipe?Let us know how it was!

    Authentic Rajasthani Gatte Ki Sabji: A Savory Besan Gatte ki Sabji

    Gatte ki sabji is a traditional Rajasthani dish popularly enjoyed during festivals like Karwa Chauth and Navaratri. It’s a gluten-free and vegan delicacy that features dumplings made from chickpea flour (besan) cooked in a flavorful vegetable curry or gravy. Along with the lentil-based dumplings, the curry typically includes a variety of vegetables, enhancing its nutritional value and taste. 

    Embark on a gastronomic odyssey through the vibrant flavors of Rajasthan as we delve into the intricate world of Besan Gatte Ki Sabji. This iconic dish, steeped in tradition and brimming with aromatic spices, offers a tantalizing glimpse into the culinary heritage of the region. Join us as we unravel the secrets behind crafting this delectable delicacy, offering tips, benefits, suggestions, and answers to frequently asked questions along the way.

    Crafting the Perfect Gatte:

    The journey begins with the meticulous preparation of the gatte, the cornerstone of this flavorful dish. Start by mixing besan (gram flour) with a carefully curated selection of spices, such as cumin, coriander, and ajwain, to infuse the dough with a burst of flavor. Gradually add water to form a stiff dough, ensuring it is kneaded well to achieve the desired consistency. Allow the dough to rest for at least 10 minutes to allow the flavors to meld before dividing it into equal portions and rolling them into cylindrical logs.

    Infusing Flavor into the Gravy:

    As the gatte take shape, it’s time to prepare the fragrant gravy that will elevate them to culinary perfection. Bring a pot of water to a gentle boil and gently drop the gatte logs into the simmering water. Allow them to cook until they float to the surface, indicating that they are ready to be incorporated into the savory gravy. Remember to reserve the cooking water, as it will serve as the base for the flavorful gravy, infused with the essence of besan.

    The Aromatic Symphony of Spices:

    In a heavy-bottomed pan, heat oil over medium heat and add a medley of aromatic spices, including fennel seeds, asafetida, and dried red chilies. Allow the spices to release their fragrant oils, infusing the kitchen with an irresistible aroma. Add the cooked gatte to the pan and stir-fry them until they acquire a golden-brown hue, enhancing their nutty flavor and crisp texture.

    Fine-Tuning the Consistency and Flavor Profile:

    To achieve the perfect balance of flavors, it’s essential to pay attention to the consistency of the gravy. Add bay leaves, chili powder, turmeric, and coriander powder to the pan, allowing them to bloom in the oil before incorporating the reserved cooking water. Adjust the thickness of the gravy by adding more water as needed, ensuring it coats the gatte evenly and imparts a luscious mouthfeel.

    Tips for Success:

    Use freshly ground spices for maximum flavor impact. 

    Don’t rush the cooking process; allow the gatte to cook until they float to the surface for optimal texture.

    Adjust the spice levels according to your preference, adding more or less chili powder as desired.

    For an extra layer of richness, substitute some of the water with milk or cream when making the gravy.

    Benefits of Besan Gatte Ki Sabji:

    Rich in protein: Gram flour is a good source of plant-based protein, making this dish a nutritious option for vegetarians and vegans.

    High in fiber: Besan gatte are packed with dietary fiber, which promotes digestive health and keeps you feeling full and satisfied.

    Versatile and customizable: This dish can be adapted to suit individual tastes and dietary preferences, allowing for endless variations and creative twists.

    Budget-friendly: Made with simple, pantry staples, Besan Gatte Ki Sabji is an affordable yet satisfying meal option for families on a budget.

    Suggestions for Serving:

    Garnish with freshly chopped cilantro and a squeeze of lemon juice for a burst of freshness.

    Serve hot with steamed rice or fluffy roti for a wholesome and satisfying meal.

    Pair with tangy pickle, creamy raita, or crunchy papad for a well-rounded dining experience.

    Frequently Asked Questions (FAQs):

    Q: Can I make Besan Gatte Ki Sabji in advance?

    A: Yes, you can prepare the gatte and gravy ahead of time and assemble them just before serving. Simply store the cooked gatte and gravy separately in airtight containers in the refrigerator for up to 2-3 days.

    Q: Can I freeze Besan Gatte Ki Sabji?

    A: While you can freeze the cooked gatte, the texture may change slightly upon reheating. It’s best to freeze the gatte and gravy separately and thaw them in the refrigerator overnight before reheating and assembling.

    Q: Can I substitute besan with any other flour?

    A: While besan lends a distinct flavor and texture to this dish, you can experiment with other flours such as chickpea flour or wheat flour for a different twist. Keep in mind that the flavor and consistency may vary.

    Conclusion:

    Besan Gatte Ki Sabji encapsulates the essence of Rajasthan’s rich culinary heritage, offering a tantalizing blend of flavors and aromas that delight the senses. With a bit of patience, creativity, and a dash of spice, you can recreate this iconic dish in your own kitchen, savoring the warmth and vibrancy of Rajasthani cuisine with every mouthful. So, gather your ingredients, unleash your inner chef, and embark on a culinary journey that celebrates the timeless allure of Besan Gatte Ki Sabji.

  • Spicy Corn Chaat

    Spicy Corn Chaat

    Spicy Corn Chaat

    Spicy Corn Chaat

    Craving something savory and delicious? This Spicy Corn Chaat is the perfect spicy snack that is sure to satisfy your cravings. It's also easy and quick to prepare!
    4.29 from 7 votes
    Prep Time 10 minutes
    Cook Time 10 minutes
    Total Time 20 minutes
    Course Snack
    Cuisine Indian
    Servings 6 people

    Ingredients
      

    • 16 oz frozen corn kernels about 3-1/2 cups
    • 1 cup green and yellow bell pepper finely chopped use any bell pepper you have, I decide to use them for color
    • 1/2 cup finely chopped tomato
    • 1 tsp ginger juice
    • 1 tsp salt
    • 1/2 tsp black salt optional
    • 1 tsp cumin seed powder roasted
    • 1/4 tsp black pepper
    • 1/4 tsp red chili powder
    • 1 tsp green chili finely chopped, adjust to taste
    • 1 Tbsp cilantro finely chopped
    • 1 Tbsp lemon juice

    Instructions
     

    • Mix all the dry ingredients together, salt, black salt, roasted cumin seed powder, black pepper, and chili powder, set aside.
    • Thaw the frozen corn kernels and lightly squeeze some water out.
    • Coat the nonstick frying pan with oil and heat over medium high heat, put the corn kernels and stir fry for 4-5 minutes stirring continuously. Some corn will start popping and they start getting some brown spots. Turn off the heat.
    • After corn comes to room temperature add all the ingredients, bell peppers, tomato, sprinkle the spice mix, ginger juice, cilantro and lemon juice and add the green chili to you taste. Mix them well.
    Tried this recipe?Let us know how it was!

    Spicy Corn Chaat Recipe: Step by Step Process 

    Spicy Corn Chaat is a flavorful appetizer or snack made from boiled corn kernels mixed with a blend of spices and tangy chutneys. It’s a gluten-free, low-cholesterol, and low-fat option, perfect for those looking for a healthy yet satisfying treat. This vegan dish makes for a great lunch box suggestion or a quick bite any time of the day.

    Introduction to Spicy Corn Chaat


    Indulge in the delightful flavors of spicy corn chaat with this easy-to-follow recipe. A popular street food in India, this spicy sweet corn chaat combines the sweetness of corn with tangy and spicy flavors, creating a tantalizing snack or appetizer. Learn how to make spicy corn chaat at home and treat yourself to a burst of deliciousness in every bite.

    Ingredients for Spicy Corn Chaat


    To prepare this lip-smacking spicy corn chaat recipe, you’ll need fresh or frozen corn kernels, finely chopped vegetables tomatoes, and bell peppers, green chilies for heat, chaat masala for that quintessential Indian flavor, and a squeeze of lemon juice to brighten up the dish.

    Step-by-Step Instructions for Making Spicy Corn Chaat


    1. Preparing the Corn

    Start by boiling the corn kernels until they are tender. Drain the water and set aside.

    1. Sautéing the Vegetables
      In a pan, heat some oil and add tomatoes, and bell peppers until they are soft and slightly caramelized. Add finely chopped green chilies for an extra kick of heat.
    2. Mixing the Corn and Vegetables
      Combine the boiled corn kernels with the sautéed vegetables in a mixing bowl. Toss them together gently to ensure even distribution of flavors.
    3. Seasoning with Chaat Masala
      Sprinkle generous amounts of chaat masala over the corn and vegetable mixture. This spice blend adds a burst of tanginess and complexity to the chaat.
    4. Adding Lemon Juice
      Squeeze fresh lemon juice over the chaat to enhance its flavors and add a refreshing citrusy note.
    5. Serving the Spicy Corn Chaat
      Transfer the prepared spicy corn chaat to serving bowls and garnish with fresh cilantro leaves for a pop of color and freshness. Serve immediately and enjoy the irresistible flavors of this delightful chaat.

    Tips for Making the Best Spicy Corn Chaat

    • Use fresh corn kernels for the best taste and texture, but frozen corn works well too.
    • Adjust the spiciness according to your preference by adding or reducing the amount of green chilies.
    • For added crunch, you can toss in some crushed papdi or sev just before serving.

    Variations of Spicy Corn Chaat

    • Cheesy Corn Chaat: Sprinkle grated cheese over the chaat for a creamy and indulgent twist.
    • Avocado Corn Chaat: Add diced avocado to the chaat for a buttery texture and extra creaminess.
    • Spicy Corn Salad: Skip the chaat masala and lemon juice, and toss the corn and vegetables with a zesty vinaigrette for a refreshing salad.

    Benefits of Spicy Corn Chaat


    Spicy corn chaat is not only delicious but also nutritious. Corn is a good source of fiber, vitamins, and minerals, while the vegetables add an array of nutrients. This chaat makes for a wholesome snack or appetizer that is both satisfying and nourishing.

    FAQs (Frequently Asked Questions)


    Q: Can I make spicy corn chaat ahead of time?

    A: While it’s best enjoyed fresh, you can prepare the components ahead of time and assemble the chaat just before serving to maintain its crunchiness and flavors.

    Q: Can I use canned corn for this recipe?

    A: While fresh or frozen corn is preferable, you can use canned corn if that’s what you have on hand. Just make sure to drain and rinse the corn before using it in the chaat.

    Q: Is spicy corn chaat suitable for vegetarians and vegans?

    A: Yes, this recipe is completely vegetarian and vegan-friendly, as it only contains plant-based ingredients.

    If you liked the recipe here are some other recipes that you may like too 

    Vegetable Cheela: A savory Indian pancake made with mixed vegetables and chickpea flour.

    Palak (Spinach) Paneer: A classic North Indian dish made with spinach and paneer cheese cooked in a creamy tomato-based sauce.

    Shahi Pulao (Vegetable Pulao): A flavorful rice dish made with spiced basmati rice and vegetables.

    Gobi (Cauliflower) Manchurian: Crispy cauliflower florets tossed in a tangy and spicy Indo-Chinese sauce.

    Aloo (Potato) Paratha: Whole wheat flatbread stuffed with spiced mashed potatoes and cooked on a griddle.

    Mango Lassi: A refreshing yogurt-based drink flavored with ripe mangoes and a hint of cardamom.

    Besan Ladoo: Traditional Indian sweet made with roasted chickpea flour, ghee, and sugar.

  • Chana Chaat (Spicy Snack)

    Chana Chaat (Spicy Snack)

    Chana Chaat

    Chana Chaat

    Chana Chaat is a healthy and delicious snack. I am using kala chana for this recipe. Kala chana looks like chickpeas, but brown in color. This is a delightfully sweet and tangy snack. Channa Chaat will also make a very enjoyable lunch box meal.
    3.75 from 4 votes
    Prep Time 10 minutes
    Cook Time 20 minutes
    Total Time 30 minutes
    Course Appetizer
    Cuisine Indian
    Servings 6 people

    Ingredients
      

    • 1 cup kala chana
    • 2 Tbsp oil Canola, or vegetable oil
    • 1 Tbsp ginger finely shredded
    • 1 Tbsp green chili finely chopped
    • 1 Tbsp coriander powder dhania
    • 1/4 cup tamarind pulp this is available in India grocery store or you can make it at home soaking the tamarind and squeeze the pulp. But not the concentrated tamarind
    • 1 tsp red chili powder
    • 1 tsp salt
    • 1 tsp black salt
    • 1 Tbsp sugar
    • 2 tsp roasted cumin seed powder bhuna jeera
    • 1 cup potato boiled peeled and cut in small pieces
    • 1/2 cup cucumber chopped in small pieces
    • 1/2 cup tomatoes chopped in small pieces

    For garnishing

    • 1 Tbsp ginger finely chopped
    • 1 Tbsp green chilies finely chopped
    • 5-6 wedges of lemon

    Instructions
     

    • Wash and soak kala chana in approx. 4 cups of water, for at least 4 hours. The kala chana will double in volume after soaking.
    • In pressure cooker cook kala chana with 2 cups of water over medium high heat. As pressure cooker starts steaming turn the heat down to low medium and cook for about 15 minutes. Close the heat and wait until steam has stopped before opening the pressure cooker. Chana should be soft and tender.
    • Drain the water and save it for later use, this water is high in protein and can be used for making the soup or dals.
    • Heat the oil in a sauce pan over medium high heat. Add the chana, stir for few seconds. Add ginger and green chili, coriander powder, sauté for about 1 minutes.
    • Add salt, black salt, red chili powder, and sugar, add tamarind pulp. Cook for 3-4 minutes over low heat. If needed use few spoons of water, Chana mix should be moist. Turn off the heat.
    • Assemble the Kala Chana Chaat, add chopped potatoes, tomatoes, and cucumber, drizzle the roasted cumin seeds powder and mix it well. If desired garnish with sliced ginger, green chilies and drizzle the lemon juice.

    Notes

    Prep Time of 10 minutes does not include soaking time.
    Suggestions
    You can serve chana chaat without adding the veggies, it tastes delicious. You can always adjust quantity of veggies to your choice. Also adjust the green chili and red pepper to your choice. After spicing the chana mix with cooked plain rice to make spicy delicious meal.
    Tried this recipe?Let us know how it was!

    Recipe for Chana Chaat: Elevate Your Snack Game with This Delicious Dish

    Chana chaat is a quintessential Indian street food known for its burst of flavors and satisfying crunch. This recipe for chana chaat brings together the wholesome goodness of kala chana (black chickpeas) with an array of spices and fresh vegetables, creating a dish that’s both nutritious and delicious. Whether enjoyed as a snack, appetizer, or light meal, chana chaat is sure to tantalize your taste buds and leave you craving for more.

    To begin your culinary journey with chana chaat, start by washing and soaking kala chana in water for at least 4 hours. This step is crucial as it helps the chana soften and swell, enhancing its texture and flavor. Once soaked, cook the kala chana in a pressure cooker until tender and soft. The aroma of freshly cooked chana will fill your kitchen, setting the stage for the flavorful dish that is to come.

    Now, it’s time to infuse the cooked chana with a medley of spices. Heat oil in a saucepan and sauté ginger, green chili, and coriander powder until fragrant. Then, add the cooked chana along with salt, black salt, red chili powder, sugar, and tangy tamarind pulp. Allow the spices to meld together, coating the chana in a burst of savory and tangy flavors. Adjust the seasoning according to your taste preferences, adding more spice for a fiery kick or dialing it down for a milder flavor profile.

    Once the chana is well-coated with the spice mixture, it’s time to assemble the chana chaat. Add chopped potatoes, tomatoes, and cucumber to the chana mixture, creating a colorful and vibrant medley of flavors and textures. For an extra burst of flavor, sprinkle roasted cumin seeds powder over the chaat, adding a depth of earthy aroma to the dish. Finally, garnish with sliced ginger, green chilies, and a squeeze of fresh lemon juice to brighten up the flavors.

    Variations:

    • Sprouted Chana Chaat: For a healthier twist, use sprouted chana instead of cooked chana. Sprouted chana is rich in nutrients and adds a delightful crunch to the chaat.
    • Fruit Chaat: Incorporate seasonal fruits like apples, grapes, and pomegranate seeds into the chaat for a refreshing and fruity twist.
    • Yogurt Chaat: Drizzle some creamy yogurt over the chana chaat for a creamy and tangy variation. Top it off with some mint chutney and tamarind chutney for an extra burst of flavor.

    Tips:

    • Save the Cooking Water: The water leftover from cooking the chana is rich in protein and can be used to make soups or dals, adding a nutritious boost to your meals.
    • Adjust Seasoning: Feel free to adjust the spices and seasoning according to your taste preferences. Experiment with different combinations to create your perfect flavor profile.
    • Serve with Rice: For a hearty meal, serve the spiced chana mixture with cooked plain rice, creating a satisfying and flavorful dish that’s perfect for lunch or dinner.

    Benefits:

    • High in Protein: Kala chana is rich in protein, making chana chaat a nutritious and filling snack option.
    • Rich in Fiber: The addition of fresh vegetables like tomatoes, cucumbers, and potatoes adds fiber to the dish, aiding in digestion and promoting overall gut health.
    • Packed with Flavor: The blend of spices and tangy tamarind pulp creates a flavor explosion in every bite, making chana chaat a truly irresistible snack option.

    FAQ:

    Can I Make Chana Chaat Ahead of Time? 

    Yes, you can prepare the chana mixture ahead of time and refrigerate it. Simply assemble the chaat with fresh vegetables and spices before serving.

    Can I Skip Adding Veggies to Chana Chaat? 

    While vegetables add freshness and texture to the chaat, you can certainly enjoy chana chaat without them. Adjust the recipe according to your taste preferences.

    How Long Does Chana Chaat Last in the Refrigerator? 

    Chana chaat can be stored in the refrigerator for 2-3 days. Make sure to store it in an airtight container to maintain its freshness.

    In conclusion, chana chaat is a delightful dish that combines the goodness of kala chana with a burst of spices and fresh vegetables. With this recipe of chana chaat mastered, you’ll have a versatile snack that’s perfect for any occasion. So, roll up your sleeves, gather your ingredients, and embark on a flavorful culinary adventure with chana chaat.

    Explore more recipes on Manjula’s Kitchen: Vegetable Samosas, Paneer Tikka, Crispy Spinach Pakoras, Mango Lassi, Masala Chai, Gulab Jamun, Kheer (Rice Pudding)

  • Aloo Tamatar Ki Sabji (Potato with Spicy Tomato Gravy)

    Aloo Tamatar Ki Sabji (Potato with Spicy Tomato Gravy)

    Aloo Tamatar ki Sabji

    Aloo Tamatar ki Sabji (Potatoes with Spicy Tomato Gravy)

    Aloo Tamatar ki Sabji or Potatoes with spicy tomato gravy is a classic combination and a popular North Indian dish. Aloo Tamatar, is flavorful and delicious and the best part is that it goes well with all different kinds of bread and rice.
    4.88 from 8 votes
    Course Main Course
    Cuisine Indian
    Servings 4 people

    Ingredients
      

    • 3 medium-sized potatoes boiled and peeled
    • 1 cup tomatoes finely chopped
    • 2 Tbsp oil (canola or vegetable)
    • 1 tsp cumin seeds jeera
    • 1/8 tsp asafetida hing
    • 3 tsp coriander powder dhania
    • 1/2 tsp red chili powder
    • 1/4 tsp turmeric haldi
    • 1 tsp finely grated ginger
    • 1 tsp salt
    • 2 cups water approx. 2 cups
    • 1/4 tsp garam masala
    • 2 Tbsp finely chopped cilantro dhania
    • 1 pieces green chili seeded and cut into small , optional

    Instructions
     

    • Break the potatoes by hand in bite size pieces and roughly mash them, this should make about 3 cups.
    • Heat the oil in a saucepan over medium high heat. Oil should be moderately hot, when you add the cumin seeds they should crack right of way. Add cumin seeds, and asafetida, as cumin seeds crack add the tomatoes.
    • Cook the tomatoes until they are soft and mushy. Add the other spices coriander powder, turmeric, chili powder and ginger, stir fry until tomato start separating from oil. This should take about 2 minutes.
    • Add potatoes and salt mix them well with spices, add water, as potatoes come to boil cover the pan and lower the heat to medium and let it cook for about ten minutes.
    • Mix the potatoes and mash some potatoes as mixing the potatoes, this will thickness to gravy. Adjust the water in gravy to your liking; gravy will thicken as it will cool.
    • Add garam masala and cilantro, and green chilies this is optional. Mix it well turn off the heat and cover the pan.

    Notes

    Aloo Tamatar Sabji is ready. Serve this with Paratha, Purie, Plain Rice, or you choice of bread.
    Tried this recipe?Let us know how it was!
  • Whole Wheat Dosa (Atta Ka Cheela)

    Whole Wheat Dosa (Atta Ka Cheela)

    Whole Wheat Dosa

    Whole Wheat Dosa (Atta Ka Cheela)

    Whole Wheat Dosa is a super quick and easy recipe. It is another version of the South Indian dosa. This recipe is a special one as it was my mother’s favorite, although this was known as Atta Ka Cheela in my home. Whole wheat dosa is tasty with the perfect amount of crispy deliciousness! You can serve this as my mother did, as Roti. She liked to pair it with her favorite side dishes of mint chutney, and Lauki Chana Dal
    This recipe will make 8 dosa and will serve 4.
    4.60 from 5 votes
    Prep Time 4 minutes
    Cook Time 15 minutes
    Total Time 19 minutes
    Course Breakfast
    Cuisine Indian
    Servings 4 people

    Ingredients
      

    • 1 cup whole wheat flour atta
    • 2 Tbsp sooji fine semolina
    • 1/2 tsp salt
    • 1 tsp sugar
    • 1 Tbsp oil canola or vegetable oil
    • 1/4 tsp black pepper
    • 1/2 tsp carom seeds ajwain
    • 1/2 tsp baking soda
    • 1-1/4 cups water
    • 4 Tbsp oil for cooking canola or vegetable oil

    Instructions
     

    • Mix all the dry ingredients together, whole wheat, sooji, salt, black pepper, carom seeds, and baking soda, mix it well. Add water slowly to make a smooth batter, add water as needed, batter should be pouring consistency.
    • Use a non-stick skillet and place on medium heat. Test by sprinkling a few drops of water on it. Water should sizzle right away. Wipe the skillet with moist towel.
    • Pour 1/4 cup of the batter mixture into the center of the skillet and spread evenly with the back of a spoon. Starting from the center, spiral outward until evenly spread, about 7” inches in diameter thin circle.
    • When the batter starts drying, smear about 2 teaspoons of oil over dosa, and cook till dosa turns golden brown in color. Flip dosa using a flat spatula, and cook for about 1 minute from other side until dosa is golden brown.
    • Crispy Whole Wheat Dosa is ready, repeat with remaining batter. Every time wipe the skillet. that helps spreading the dosa.

    Notes

    • Whole wheat dosa is looking nice and crisp.
    • You can use whole wheat dosa as eggless crepe.
    Tried this recipe?Let us know how it was!

    Elevate Your Culinary Experience with Our Whole Wheat Dosa Recipe 

    Dosa is a popular South Indian delicacy that looks like a crepe. It’s like a crisp and thin pancake made of rice and urad dal batter. Traditionally Dosa is served with sambar, aloo masala, and coconut chutney. It is an Indian crepe made usually through rice batter, but here we have experimented and made many alternative dosa such as Oat Dosa, Besan Dosa, Rava Dosa, Sorghand um Dosa. This preparation uses whole wheat dosa and is a bread-based breakfast recipe that is vegan. The preparation entails skillfully combining pan techniques and manual dexterity to achieve the perfect bread cooked on non-stick skillets.

    Creating the Whole Wheat Dosa Batter:

    In the first step of the whole wheat dosa recipe, begin by meticulously blending all the dry components – whole wheat, sooji, salt, black pepper, carom seeds, and baking soda. Achieve a seamless amalgamation to ensure a well-balanced flavor profile. Gradually incorporate water into the mixture, stirring continuously until a smooth batter with a pourable consistency is attained.

    Setting the Skillet for Whole Wheat Dosa:

    The second step of the recipe for wheat dosa for making optimum whole wheat dosa requires initiating the cooking process with a non-stick skillet placed over medium heat. To gauge its readiness, conduct a water test – if droplets sizzle upon contact, the skillet is primed. To prevent sticking during cooking, maintain a skillet surface free of residue by wiping it with a moist towel.

    Pouring and Spreading the Whole Wheat Dosa Batter:

    The next step in the recipe for wheat dosa is the artistic phase of crafting a perfect whole wheat dosa by taking 1/4 cup of the batter and pouring it gracefully into the skillet’s center. Utilize the back of a spoon to delicately spread the batter, commencing from the center and spiraling outward. Strive for a delicate, 7-inch diameter circle to ensure the desired thinness and crispiness in the final whole wheat dosa.

    Cooking and Flipping the Whole Wheat Dosa:

    As the whole wheat dosa batter begins to set, introduce about 2 teaspoons of oil, spreading it evenly over the surface. Allow the dosa to cook until it transforms into a luscious golden brown. Employ a flat spatula to skillfully flip the dosa, ensuring an additional minute of cooking on the other side until a uniform golden brown hue is achieved. Repeat this process with each dosa, while adhering to the essential skillet-wiping ritual for consistent dosa spreading.

    Finalizing the Whole Wheat Dosa Delight:

    Celebrate the fruition of your culinary endeavors with the satisfying crunch of a well-prepared whole wheat dosa. Replicate the cooking process with the remaining batter, guaranteeing each dosa mirrors the deliciousness of the initial ones. Keep in mind the importance of diligently wiping the skillet after each use to facilitate uniform spreading.

    Observations on Whole Wheat Dosa:

    Appreciate the aesthetic appeal and delectable crispiness that the whole wheat dosa brings to the table, making it an ideal choice for a wholesome and delightful meal. Explore the versatility of this whole wheat dosa by incorporating it seamlessly into your culinary repertoire as an eggless crepe alternative, enhancing your dining experiences with its wholesome goodness.

  • Apple Vegan Cake

    Apple Vegan Cake

    Apple Vegan Cake

    Apple vegan cake

    Apple vegan cake is a delicious, egg-less and dairy-free cake. Apple Vegan Cake is easy and basic. Cake has a soft and moist texture. It is hard to believe that this is vegan.
    4.32 from 16 votes
    Prep Time 10 minutes
    Cook Time 30 minutes
    Total Time 40 minutes
    Course Dessert
    Servings 8 people

    Ingredients
      

    • 1 cup all-purpose flour maida, plain flour
    • 1-1/2 Tbsp corn starch corn flour
    • 1 tsp baking soda
    • 1/8 tsp salt
    • 1/2 tsp cinnamon powder
    • 1/4 tsp nutmeg
    • 1/3 cup oil canola or any vegetable oil
    • 3/4 cup sugar
    • 1-1/2 cups apple sauce
    • 1 tsp vanilla extract
    • 1 Tbsp powdered sugar for garnishing

    Instructions
     

    • Pre heat the oven to 350°F
    • Square 8- inch cake pan, line with parchment paper and grease bottom and sides of the pan.
    • Mix the dry ingredients together except sugar, flour, corn starch, baking soda, nutmeg, cinnamon, and salt.
    • In a different bowl whisk oil and sugar together for about 2 minutes add apple sauce and vanilla extract mix it well.
    • Add the dry ingredients to apple mix and mix it together gently making sure all the ingredients mix together well.
    • Pour the mixture to cake pan and bake around 28 minutes, until cake begins to pull away from sides and/or toothpick inserted in the center pulls out clean.
    • Let it sit for about 20 minutes bring to room temperature and slice the cake into 16 square pieces.
    • Before serving lightly dust with powder sugar.
    Tried this recipe?Let us know how it was!
  • Masala Puri (Spicy Crackers)

    Masala Puri (Spicy Crackers)

    Masala Puri

    Masala Puri (Spicy Crackers)

    Masala puri is a delicious, crispy snack. You can also serve them as spicy crackers or chips. They can be quite addicting so be careful. Masala puri is one of my favorite snack with hot cup of chai. This simple and delicious recipe will make a great holiday gift!
    4.25 from 8 votes
    Prep Time 15 minutes
    Cook Time 20 minutes
    Total Time 35 minutes
    Course Appetizer, Snack
    Cuisine Indian
    Servings 40 masala puri

    Ingredients
      

    • 1 cup all-purpose flour maida, plain flour
    • 1/2 cup fine sooji semolina
    • 1 tsp salt
    • 1/2 tsp cumin seed jeera
    • 1/2 tsp carom seed ajwain
    • 1/8 tsp asafetida hing
    • 1 tsp red chili flakes
    • 2 Tbsp oil
    • 1/2 cup water
    • Also need oil to fry

    Instructions
     

    • In a bowl mix all the dry ingredients all-purpose flour, sooji, Salt, Cumin seeds, carom seeds, asafetida, and red chili flakes.
    • Add oil to the flour mix and rub with your fingers to mix it well. Add the water little at a time, making into a firm dough.
    • Cover the dough and set aside for about 10 minutes or more.
    • Divide the dough into about 40 equal parts, and roll them between your palms.
    • Roll the puries into 3 inch circles.
    • Prick each puri with a fork in 3 to 4 places, this will prevent the puries not to puff while frying.
    • Heat the oil in a frying pan on medium heat.
    • The frying pan should have about 1 inch of oil. To check if the oil is ready, put a small piece of dough in the oil. The dough should make the oil sizzle and come up slowly.
    • Fry few puries at a time, make sure to place just enough puries to cover the oil. Fry them until both sides are a light golden-brown. Take them out over paper towel and repeat the process.

    Tips

    • Masala Puries can be stored for a couple of months in airtight containers.
    • If the puries are cooked on high heat, they will be soft.

    Notes

    Here are some more gift ideas! Spicy Cashews, Almond Brittle, Flax Seed Burfi
    Tried this recipe?Let us know how it was!
  • Mexican Rice

    Mexican Rice

    Mexican Rice

    Mexican Rice

    When I first came to the United States, one of the first cuisines I was introduced to was Mexican. I really enjoyed it then just as much as I enjoy it now. My first experience with Mexican cuisine was a little mom and pop restaurant that really made an extra effort and catered to our vegetarian preference. I decided to try out a recipe for a Mexican rice which is typically served as a side dish with Mexican meals. I especially enjoy this rice with refried beans. Enjoy!
    5 from 3 votes
    Prep Time 5 minutes
    Cook Time 12 minutes
    Total Time 17 minutes
    Course Main Course
    Cuisine Mexican
    Servings 4 people

    Ingredients
      

    • 1 cup long grain rice you can use any long grain rice
    • 3 Tbsp oil
    • 1 14 oz can tomatoes chopped
    • 1 cup corn kernels I am using frozen corn
    • 1 cup green bell pepper cut in small pieces
    • 1 tsp cumin seeds ground, jeera
    • 1 tsp salt
    • 1 Tbsp jalapeno pepper finely chopped
    • 2 cups of water
    • 1/4 cup cilantro finely chopped hara dhania
    • 2 Tbsp lime juice I prefer lime juice but lemon juice will work

    Instructions
     

    • Wash the rice and drain the water and pat dry.
    • In a frying pan heat the oil over medium high heat, when oil is moderately hot add the rice and stir fry for about 4-5 minutes till rice is lightly toasted.
    • Add vegetables, corn bell pepper and jalapeno pepper sauté, stirring frequently for about 2 minutes.
    • Add cumin powder, salt and tomato sauté, stirring frequently for about 3-4 minutes. Until most of the moisture from tomatoes has evaporated.
    • Add water stir and bring it to boil, lower the heat to low. Cover the pan and let it cook for about 10 minutes, or until all the water has evaporated. Uncover the pan let it sit for about 2-3 minutes without stirring.
    • Add cilantro and lime juice and fluff the rice gently. Rice is ready to serve.
    Tried this recipe?Let us know how it was!

    Delicious Vegetarian Mexican Rice Recipe: A Flavorful Twist on a Classic Dish 

    Mexican rice is a delectable dish that combines the vibrant flavors of traditional Mexican cuisine with the aromatic spices of Indian cooking. This fusion is a gluten free, kid friendly, quick & easy, vegan choice of culinary influences resulting in a unique and savory recipe of veg Mexican rice that caters to vegetarian preferences. Commonly known as vegetarian Mexican rice recipe or Mexican rice vegetarian, this dish is a delightful medley of fluffy rice grains, assorted vegetables, and a tantalizing blend of Mexican spices. 

    When preparing this recipe for vegetarian Mexican rice, cooks infuse the dish with a harmonious combination of flavors, creating a truly satisfying and flavorful meal. Whether enjoyed as a standalone dish or as a flavorful accompaniment to other Mexican-inspired delicacies, this vegetable Mexican rice recipe is sure to tantalize taste buds and delight diners with its rich and aromatic profile.

    Preparing the Rice: Washing and Toasting 

    To initiate the process of crafting this recipe of veg Mexican rice, carefully wash the rice, ensuring thorough rinsing to remove any impurities. Drain the water completely and then gently pat the rice dry to eliminate excess moisture. Heat oil in a frying pan over medium-high heat until it reaches a moderate temperature. Once the oil is adequately heated, introduce the rice to the pan and stir-fry it for approximately 4-5 minutes until it achieves a light toasty texture.

    Adding Vegetables: Sautéing with Flavor

    For this enticing vegetarian Mexican rice recipe, introduce an array of vibrant vegetables into the pan. Incorporate sweet corn, crisp bell peppers, and spicy jalapeno peppers to infuse the dish with an explosion of flavors. Saute the medley of vegetables, ensuring frequent stirring, for about 2 minutes until they soften and release their aromatic essence.

    Seasoning and Cooking: Infusing Mexican Flavors 

    Elevate the essence of this Mexican rice vegetarian delight by introducing a blend of quintessential Mexican spices and ingredients. Sprinkle cumin powder, salt, and diced tomatoes into the pan, creating a harmonious symphony of flavors. Allow the ingredients to sauté together, ensuring regular stirring, for approximately 3-4 minutes until the tomatoes release their moisture, contributing to a rich and flavorful base.

    Simmering and Steaming: Cooking the Rice 

    Transition into the next phase of cooking by incorporating water into the pan, ensuring thorough mixing to integrate all the ingredients seamlessly. Bring the mixture to a gentle boil, then reduce the heat to low. Cover the pan, allowing the rice to simmer and absorb the flavorful essence of the ingredients for approximately 10 minutes or until all the water has evaporated. Once cooked, leave the pan uncovered for an additional 2-3 minutes, allowing the rice to rest and further develop its texture without disturbing its delicate balance.

    Final Touches: Adding Freshness

    Conclude the culinary journey by adding the finishing touches to this tantalizing recipe for vegetarian Mexican rice. Sprinkle freshly chopped cilantro over the rice, infusing it with a burst of refreshing aroma and vibrant color. Squeeze a hint of lime juice, enhancing the dish with a subtle tangy zest. Gently fluff the rice to distribute the flavors evenly, ensuring each bite is a delightful fusion of Mexican-inspired taste and wholesome goodness. Your masterpiece of vegetable Mexican rice is now prepared to be savored and enjoyed, brimming with vibrancy and culinary excellence. Bon appétit!

    If you loved our vegetarian mexican rice recipe then you must also check out other variants of Rice: Vegetable Biryani, Masala Khichdi, Chhole Biryani, Quinoa Vegetable Pilaf and Lemon Rice.

  • Aloo Bhujia – Potato Sev

    Aloo Bhujia – Potato Sev

    Aloo Bhujia

    Aloo Bhujia – Potato Sev

    Aloo bhujia is a vegan crispy savory snack. Bhujia looks like short thin noodles. Aloo bhujia is also a favorite snack with my grand kids. This is a perfect snack for a relaxed evening nibbling while watching TV.
    No ratings yet
    Prep Time 10 minutes
    Cook Time 15 minutes
    Course Snack
    Cuisine Indian
    Servings 4 people

    Ingredients
      

    • 2 cup boiled peeled and shredded potatoes
    • 1/2 cup besan, gram flour
    • 1 teaspoon salt
    • 1/2 teaspoon red chili powder
    • 1/8 teaspoon asafetida, hing
    • 1/8 teaspoon citric acid or you can use 2 teaspoon lemon juice
    • 1/4 teaspoon turmeric, haldi
    • Also need oil to fry

    Instructions
     

    • Take a bowl and combine potatoes, salt, chili powder, asafetida, citric acid, and turmeric, mix them well. Add besan and knead into a pliable dough. Do not use any water moisture from the potatoes will be enough to make the dough. If dough is too soft add little more besan. Lightly oil your palm and knead the dough again. Let it sit for ten minutes.
    • Grease sev maker with fine hole attachment. Place enough dough to fill the cylinder of sev maker and close. On other side, heat the oil in a frying pan on medium heat, frying pan should have about one inch of oil.
    • Oil should be moderately hot. Note: when you place little piece of dough oil should sizzle and dough should come up slowly without changing color.
    • Now hold the sev maker over frying pan, press the handle, bhujia will start coming out in to the oil. Slowly move the sev maker in circular motion. Don’t over lap.
    • Fry both sides till they become light golden brown, and oil will stop sizzling. Bhujia is ready. Remove it using slotted spoon.
    • Take them out over paper towel lined plate. And continue the same process for remaining dough.
    • Let the sev cool completely, as it cools they will become crispy.
    • Store them in air tight container, they should stay good for weeks.
    Tried this recipe?Let us know how it was!
  • Mango Rice

    Mango Rice

    Mango Rice

    Mango Rice

    Mango rice is just one style of South Indian rice dish among many different variations. Mango rice has a very unique flavor due to the tartness of the mangoes, the sweetness of the coconut, and the heat of the chilies all being mixed together. This is a simple but flavorful and satisfying light lunch!
    No ratings yet
    Course rice
    Cuisine Indian

    Ingredients
      

    For Rice

    • 1 cup long-grain rice, I am using basmati rice
    • 1 tablespoon oil
    • 1/2 teaspoon salt
    • 2 cups water

    For mango seasoning

    • 2 cups raw mango peeled and shredded
    • 3 tablespoons oil
    • 1/2 teaspoon mustard seeds, rai
    • About 10 curry leaves
    • 2 tablespoons peanuts
    • 2 tablespoons roasted chana, optional
    • 1 tablespoon ginger sliced, adrak
    • 2 green chili seeded and sliced lengthwise
    • 1/4 teaspoon turmeric, haldi
    • 1/4 teaspoon red chili powder
    • 1 teaspoon salt
    • 1/4 cup coconut freshly shredded, I am using frozen shredded coconut
    • 1 tablespoon sugar
    • 2 teaspoons lemon juice, use as needed

    Instructions
     

    • Wash and soak the rice in about 3 cups of water for at least 15 minutes.
    • Drain the rice. In the saucepan cook, the rice with 2 cups of water, salt, and oil over medium-high heat, bring rice to a boil then turn the heat to low, cover the pan, and cook the rice for about 15 minutes, or until the rice is tender and the water has evaporated. Turn off the heat and fluff the rice with a fork. Note: Cooked rice expands to about 4 times its original size, so be sure to use the proper size pan.
    • Heat the oil in a saucepan over medium heat, oil should be moderately hot, add mustard seeds.
    • When the seeds crack adds peanuts, and roasted chana, stir fry for one minute until peanuts are lightly brown.
    • Add green chili, curry leaves, and ginger, and stir for a few seconds.
    • Next add coconut, mango, sugar, salt, turmeric, and red chili mix it well and cook over low heat for 3-4 minutes until the mango is just tender, do not overcook the mango.
    • Gently fold the rice with mango and turn off the heat. Mango rice is ready to serve.
    • Turn off the heat and if needed drizzle some lemon juice.
    Tried this recipe?Let us know how it was!

    Indulge in taste of South Indian Mango Rice: mango rice Indian recipe 

    Mango rice is a vegan, gluten-freekid-friendly, quick & easy delectable South Indian dish that features the vibrant flavors of ripe mangoes combined with aromatic spices and cooked rice. Typically served as part of festive meals or enjoyed as a quick and flavorful lunch option, mango rice showcases the culinary diversity and richness of South Indian cuisine. Whether you’re looking to explore new flavors or simply craving a taste of home, this mango rice recipe is sure to delight your taste buds with its unique blend of sweet, tangy, and savory flavors.

    1. Preparing the Rice: Washing and Soaking 

    Start the process of making this flavorful South Indian mango rice by washing and soaking the rice in about 3 cups of water for at least 15 minutes. This step ensures that the rice grains absorb enough water to cook evenly and achieve the desired texture. Proper soaking also helps to reduce cooking time and enhances the overall taste and fluffiness of the dish.

    1. Cooking the Rice: Simmering to Perfection 

    After draining the soaked rice, cook it in a saucepan with 2 cups of water, salt, and oil over medium-high heat. Bring the rice to a boil, then reduce the heat to low, cover the pan, and let the rice cook for about 15 minutes until tender and the water has evaporated. It’s important to use the correct size pan as the cooked rice expands to about 4 times its original size. Once cooked, fluff the rice with a fork to ensure it is light and fluffy.

    1. Tempering the Spices: Enhancing Flavor 

    In another saucepan, begin the preparation for this delightful South Indian mango rice by heating oil over medium heat until it reaches a moderately hot temperature. Once the oil is hot, add mustard seeds to the pan, allowing them to crackle and pop in the sizzling oil. This process not only enhances the aroma of the dish but also imparts a nutty flavor to the oil, elevating the overall taste profile of the Indian mango rice. As the mustard seeds crackle and release their essence into the oil, they add depth and complexity to the dish, complementing the sweet and tangy flavors of the mango and the aromatic spices used in this mango rice recipe. The infusion of mustard seed flavor is a quintessential element of mango rice Indian recipe, contributing to its authentic taste and traditional appeal.

    1. Adding Crunchy Elements: Peanuts and Roasted Chana 

    Once the mustard seeds crackle, add peanuts and roasted chana to the saucepan. Stir-fry for about a minute until the peanuts are lightly browned, adding a delightful crunch to the dish. This combination of crunchy elements adds texture and flavor to the mango rice recipe.

    1. Infusing Aromatics: Green Chili, Curry Leaves, and Ginger 

    To enhance the aroma and flavor of the Indian mango rice, add green chili, curry leaves, and ginger to the saucepan. Stir-fry for a few seconds, allowing the spices to release their fragrant essence and infuse the oil.

    1. Incorporating Mango and Coconut: Adding Sweetness and Freshness 

    Next, add coconut, diced mango, sugar, salt, turmeric, and red chili to the saucepan. Mix well and cook over low heat for 3-4 minutes until the mango is just tender. It’s important not to overcook the mango to retain its freshness and natural sweetness, maintaining the integrity of the dish.

    1. Combining Rice and Mango Mixture: Creating Harmony 

    Gently fold the cooked rice with the mango mixture, ensuring that the flavors are evenly distributed throughout the dish. This step brings together the sweetness of the mango, the nuttiness of the rice, and the aromatic spices, creating a harmonious blend of flavors and textures.

    1. Finishing Touches: Drizzling Lemon Juice 

    If desired, turn off the heat and drizzle some lemon juice over the South Indian mango rice for an added burst of freshness and tanginess. This final touch elevates the flavors of the dish, balancing the sweetness of the mango with a hint of acidity. Your delicious mango rice Indian recipe is now ready to be served and enjoyed.

    If you loved our recipe of mango rice then you must also check out other variants of Rice: Vegetable Biryani, Masala Khichdi, Chhole Biryani, Quinoa Vegetable Pilaf, and Lemon Rice

  • Kache Kele Ki Sabji, Spicy Plantain, Raw Banana Sabji

    Kache Kele Ki Sabji, Spicy Plantain, Raw Banana Sabji

    Kele Ki Sabji (Banana Curry)

    Kache Kele Ki Sabji

    Spicy plantain, Kachhe Kele ki Sabzi , makes a delicious side dish. Plantain is green raw banana that is used for cooking. They do not have the sweetness or flavor as regular bananas, but taste amazing when cooked with  spices. I like to serve them with dal and rice.
    5 from 1 vote
    Course vegan
    Cuisine Indian
    Servings 4 people

    Ingredients
      

    • 2 cups plantain boiled peeled and sliced –green raw banana
    • 4 tablespoons oil
    • 1/8 teaspoon fenugreek seeds (mathi)
    • 1/2 teaspoon cumin seeds (jeera)
    • 2 tablespoons coriander powder (dhania)
    • 1/4 teaspoon turmeric (haldi)
    • 1/2 teaspoon red chili powder (lal mirch)
    • 1 teaspoon ginger shredded (adrak)
    • 1-1/4 teaspoon salt
    • 2 green chilies seeded and cut length wise in fours
    • 2 tablespoons cilantro finely chopped (hara dhania)
    • 1/2 teaspoon mango powder (amchoor)

    Instructions
     

    • Boil the plantain in pressure cooker with four cups of water over medium high heat. After pressure cooker start steaming lower the heat medium low and cook for 10 minutes. Turn off the heat and open the pressure cooker after all the steam has escaped. Plantain do not get very soft and mushy.
    • Peel the plantain and slice them about 1/8-inch-thick in half moon.
    • In a small bowl, mix the shredded ginger, coriander powder, chili powder, turmeric, and about 1/4 cup of water to make a paste.
    • Heat the oil in a frying pan over medium high heat. Test the heat by adding one cumin seed to the oil; if seed crack right away oil is ready.
    • Add cumin seeds, and fenugreek seeds to the oil after seeds crack add spice mix and green chilies and stir for a minute until spices start leaving the oil. Lower the heat to medium.
    • Add bananas, and salt, and mix well with Masala. Stir fry for 4-5 minutes. While stir frying keep mashing the bananas in small pieces. All the bananas should be coated with the spices.
    • Add about 1/4 cup of water and cook again for 2-3 minutes, bananas should be little moist. Turn off the heat’
    • Lastly, add the mango powder and fresh cilantro, mix it well. Adjust the salt to your taste.
    • Spicy plantain is ready to serve.
    Tried this recipe?Let us know how it was!
  • Crispy Aloo Tikki (Potato Patty)

    Crispy Aloo Tikki (Potato Patty)

    Crispy Aloo Tikki

    Crispy Aloo Tikki (Potato Patty)

    Crispy Aloo Tikki is a popular street food chaat that can be made in a variety of ways.  Any way you prepare these tikkis, they are sure to turn out great!  They taste especially delicious with cilantro chutney or tamarind chutney. One of my favorite toppings is spiced chola (this recipe for crispy aloo tikki is with spicy chola topping).
    5 from 2 votes
    Course Appetizer
    Cuisine Indian
    Servings 4 people

    Ingredients
      

    For aloo tikki

    • 4 cups potatoes boiled peeled and shredded
    • 2 tablespoons corn starch
    • 1 teaspoon salt
    • 2 tablespoons cilantro finely chopped (hara dhania)
    • Also need oil to shallow fry

    For Chola Topping

    • 1 15oz can of chick pea, garbanzo beans, kabuli chana,
    • 2 tablespoons oil
    • 2 tablespoons besan (gram flour)
    • 2 tablespoons green chili finely chopped, adjust to taste
    • 2 tablespoons ginger finely chopped, adjust to taste
    • 1 teaspoon salt
    • 1/2 teaspoon black salt
    • 1 teaspoon roasted cumin seeds powder
    • 1 teaspoon garam masala
    • 1/2 teaspoon mango powder (amchoor)

    Instructions
     

    Preparation for potatoes

    • Boil the potatoes you will need 3 to 4 potatoes, do not overcook the potatoes they should be still firm, otherwise potatoes will be mushy, and tikki will not be crispy as desired. Peel and shred the potatoes.
    • Add salt, corn starch, and cilantro to shredded potatoes and mix it well with light hand. Don’t knead the potatoes. Divide the potatoes in eight equal parts and roll them, into patties. Cover the patties and refrigerate for at least 4-5 hours. This is an important step to make crispy tikkies.

    Chola Topping

    • Wash the chick peas changing the water 2-3 times. In a blender mash the chick peas with one cup of water just churning few times. Chick peas should be mashed not pasty.
    • Heat the oil in a pan over medium heat add the besan and roast the besan stirring continuously until besan is golden brown this should take about a minute.
    • Add ginger and green chili stir for 30 seconds, add chick peas, salt, cumin seed powder, garam masala, and mango powder.
    • Cook over low heat for about 10 minutes if needed add water, chick peas should be consistency of dosa or pancake batter.
    • Turn off the heat, spiced chola topping should be served hot with crispy aloo tikki.

    Making the Crispy Aloo Tikki

    • Heat the flat frying pan with less than 1/8 inch of oil over medium high heat. When oil is moderately hot put the potatoes patties leaving some space in between. Let it brown for about 2 minutes then turn it over. Shallow fry the tikkies until they are light brown from both sides.

    Notes

    Tips
    1. Do not cook on low heat, tikkies will become greasy and will not be as crispy.
    2. Aloo tikkies are ready serve hot with spicy chola.
    3. You can also serve crispy tikkies with cilantro chutney or tamarind chutney.
    4. Chola topping also goes well with samosas and Samosa Pinwheels.
    Tried this recipe?Let us know how it was!
  • Thattai (Rice Crackers)

    Thattai (Rice Crackers)

    Thattai (Rice Crackers)

    Thattai (Rice Crackers)

    Thattai is a popular south Indian snack. You may call them crispy rice crackers. This is made with rice flour and a few spices. It is both vegan and gluten free. Thattai is a great snack to have on hand in your pantry.
    No ratings yet
    Course Snack
    Cuisine Indian
    Servings 30 thattai

    Ingredients
      

    • 1 cup rice flour
    • 1 tablespoons sesame seeds, til
    • 1 teaspoon chana dal
    • 3/4 teaspoon salt
    • 1/8 teaspoon asafetida, hing
    • 2 tablespoons oil
    • 1/2 teaspoon ginger paste
    • 1 green chili finely chopped
    • 1/3 cup of water
    • Also need oil to fry

    Instructions
     

    • Combine all the ingredients in a bowl, except water, rice flour, salt, asafetida, sesame seeds, chana dal, ginger, green chili, and oil mix it well. Add water as needed to make the firm dough.
    • Divide the dough in about 30 equal parts.
    • Take 2 plastic sheet, I am using zip lock bags this makes it easy to roll. Place one part of the dough between two bags and flatten it thin. Heat oil in a heavy frying pan on medium heat. Check the oil temperature by dropping a small piece of dough into the oil, if it sizzle and rises to the surface slowly, without changing the color, oil is ready for frying.
    • Gently transfer the flattened dough into the oil. Do not over crowed the frying pan. Fry them until they are light golden brown both sides. This should take about four minutes.
    • Take them out over paper towed to drain the excess oil.
    • Repeat the same process for the rest of the dough.
    • Thattai should be crisp. After it cools, store it in an air tight container.
    Tried this recipe?Let us know how it was!
  • Dosa (Rice and Urad Dal Crepe)

    Dosa (Rice and Urad Dal Crepe)

    Dosa (Rice and Urad Dal Crepe)

    Dosa (Rice and Urad Dal Crepe)

    Dosa is a popular South Indian delicacy which looks like a crepe. Dosa is a crisp and thin pancakes made of a rice and urad dal batter. Traditionally Dosa is served with samber, aloo masala and coconut chutney.
    5 from 1 vote
    Course Bread
    Cuisine Indian
    Servings 3 people

    Ingredients
      

    • 1-1/2 cups rice
    • 1/2 cup urad dal washed
    • 1/2 teaspoon fenugreek seeds
    • 1 teaspoon salt
    • tablespoons oil or clarified butter, ghee

    Instructions
     

    • Wash rice and dal changing water three to four times. Soak rice mix and fenugreek seeds in about 4 cups of water for at least six hours.
    • In a blender, blend the rice and dal mix to very creamy texture. Use only as little water as needed to blend. Using too much water for blending will not give the desired creamy texture. Use the same water dal was soaked to grind the batter as that helps in fermentation.
    • Add the salt to batter, cover and ferment the batter in a warm place for about a day. Batter will be about one and half time in volume.
    • When ready to make dosa whip the batter for few seconds. Add water as needed, batter should be pourable, or like pancake consistency.
    • Place a non-stick- heavy skillet over medium heat. Test by sprinkling a few drops of water on it. The water should sizzle right away.
    • Pour 1/2 cup of the batter mixture into the skillet and spread evenly with the back of a spoon. Starting from the center, spiral outward until evenly spread, about eight inches in diameter thin circle.
    • Smear about 2 teaspoons oil over it and along the edges and cook till the dosa turns brown in color and crisp. This point flip the dosa using a flat spatula, for about 15 seconds.
    • Dosa is ready, repeat with remaining batter. Every time wipe the skillet with wet towel that helps spreading the dosa.
    • Serve with coconut chutney, aloo masala and sambhar.
    Tried this recipe?Let us know how it was!