10 Easy Vegan Recipes | Vegan Indian Foods by Manjula’s Kitchen
Embracing a vegan lifestyle doesn’t mean you have to give up on the rich and flavorful experience of Indian cuisine. Here at Manjula’s Kitchen, we bring you a collection of vegan Indian food that is both delicious and easy to prepare. Let’s dive into 10 easy vegan recipes that will make your meals exciting and nutritious. These vegan Indian recipes are perfect for anyone looking to incorporate more plant-based meals into their diet.
1. Vegan Aloo Gobi
Aloo Gobi is a classic Indian dish made with potatoes and cauliflower. This flavorful and hearty dish is a staple in many Indian households and is a great example of vegan Indian food that is both satisfying and healthy. The combination of tender potatoes and cauliflower florets cooked with aromatic spices like cumin, turmeric, and garam masala makes this dish irresistible. Aloo Gobi is not only delicious but also easy indian recipesto prepare, making it a perfect choice for busy weeknights. Serve it with roti or rice for a complete meal.
2. Chana Masala
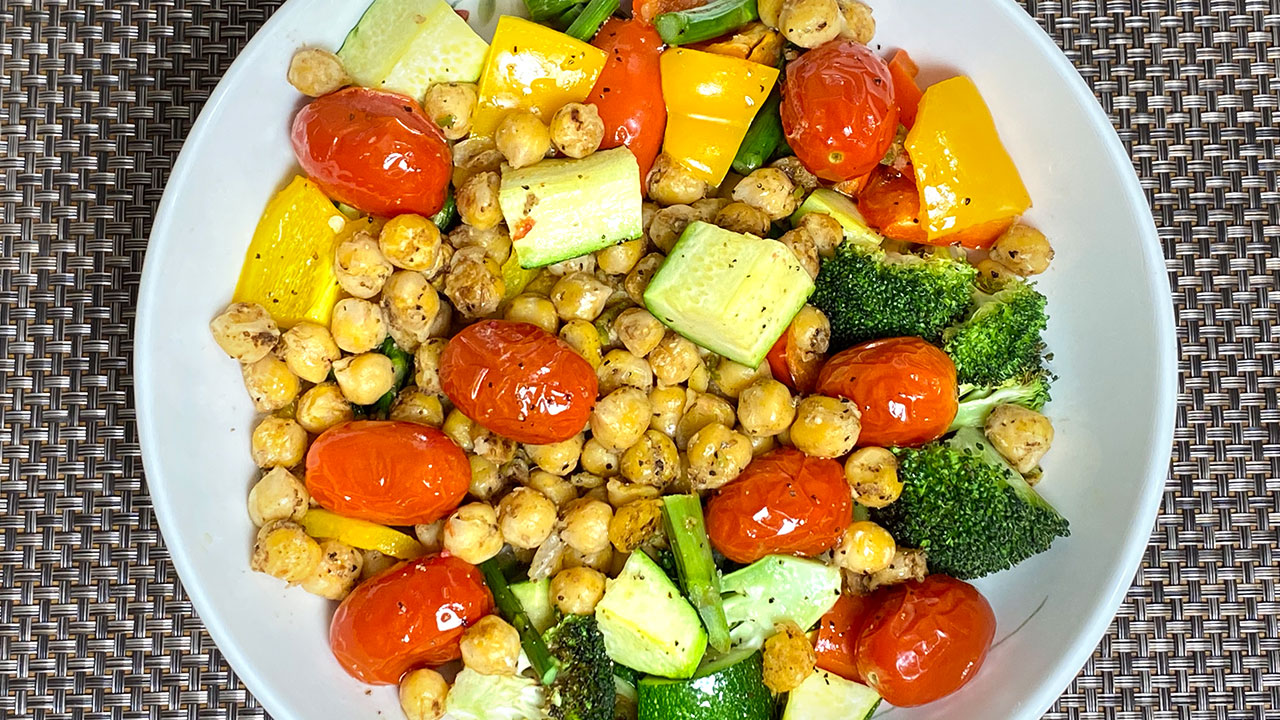
Chana Masala is a spicy and tangy chickpea curry that is a favorite among many. It’s one of the 10 easy vegan recipes that you can prepare quickly, and it’s packed with protein and flavor, making it a perfect vegan food recipe. Chickpeas are simmered in a rich tomato sauce flavored with an array of spices like coriander, cumin, and chili powder. This dish is hearty and comforting, ideal for lunch or dinner. Pair it with steamed basmati rice or warm naan for a satisfying meal.
3. Vegan Palak Tofu
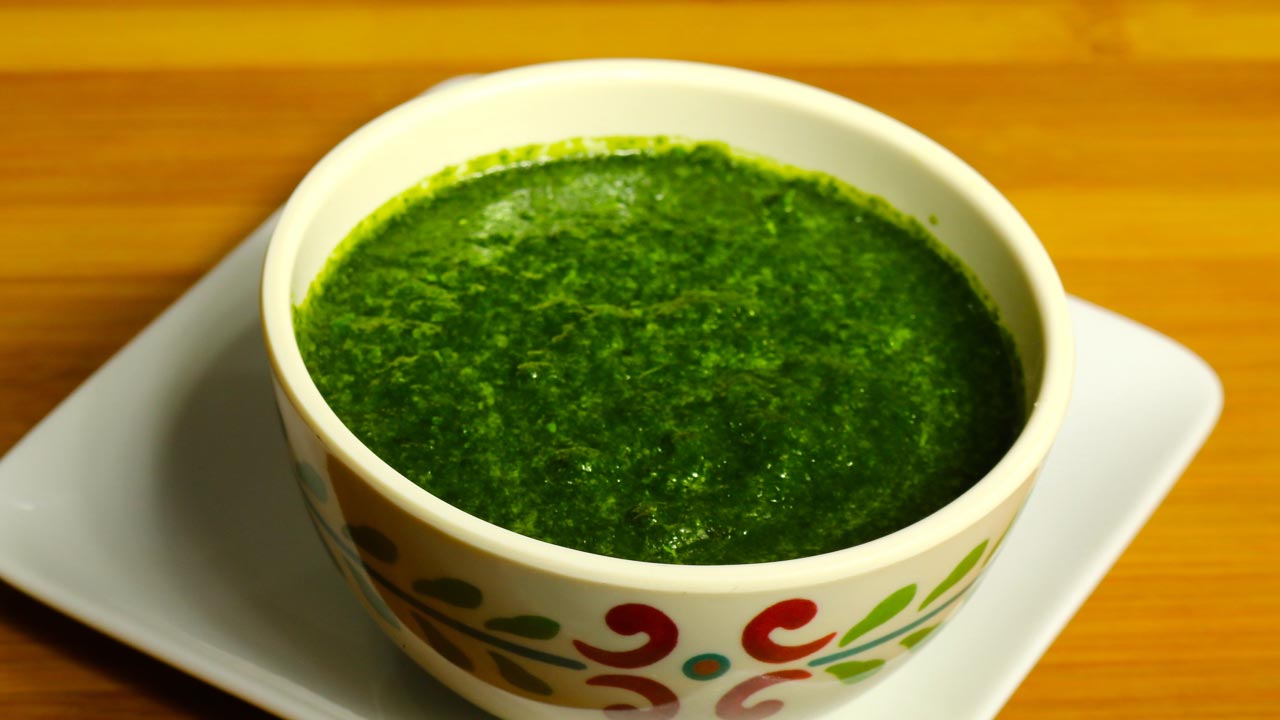
Palak Tofu is a delicious twist on the traditional Palak Paneer. Instead of paneer, tofu is used to keep this dish vegan. The creamy spinach sauce pairs perfectly with the tofu, creating a nutritious and tasty vegan Indian recipe. Spinach is blended into a smooth puree and cooked with spices, then combined with tofu cubes to create a delightful dish. This vegan version retains all the flavors of the original and is a fantastic way to enjoy spinach and tofu in a new and exciting way. Serve it with jeera rice or chapati.
4. Baingan Bharta
Baingan Bharta is a smoky and flavorful eggplant dish that is popular in north indian recipes. This dish is made by roasting eggplants and cooking them with tomatoes, and spices, making it a delightful addition to your collection of vegan food recipes. The roasting process gives the eggplant a unique smoky flavor, which is then enhanced by the addition of spices like cumin, coriander, and garam masala. Baingan Bharta is perfect as a side dish or a main course when served with roti or rice.
5. Vegan Vegetable Biryani
Vegetable Biryani is a fragrant and flavorful rice dish cooked with a variety of vegetables and spices. This vegan version is just as delicious as the traditional one, making it a must-try among vegan Indian recipes. The rice is layered with a mixture of vegetables like carrots, peas, and bell peppers, along with aromatic spices such as cardamom, cinnamon, and cloves. Biryani is a complete meal in itself and can be enjoyed with a side of raita or salad.
6. Tofu Tikka Masala
Tofu Tikka Masala is a vegan take on the classic Chicken Tikka Masala. Tofu is marinated in spices and yogurt, then cooked in a rich and creamy tomato sauce. This dish is perfect for those looking for vegan food recipes that are both hearty and flavorful. The tofu absorbs the flavors of the marinade and the sauce, resulting in a dish that is rich and satisfying. Serve it with basmati rice or naan to soak up the delicious sauce.
7. Vegan Rajma
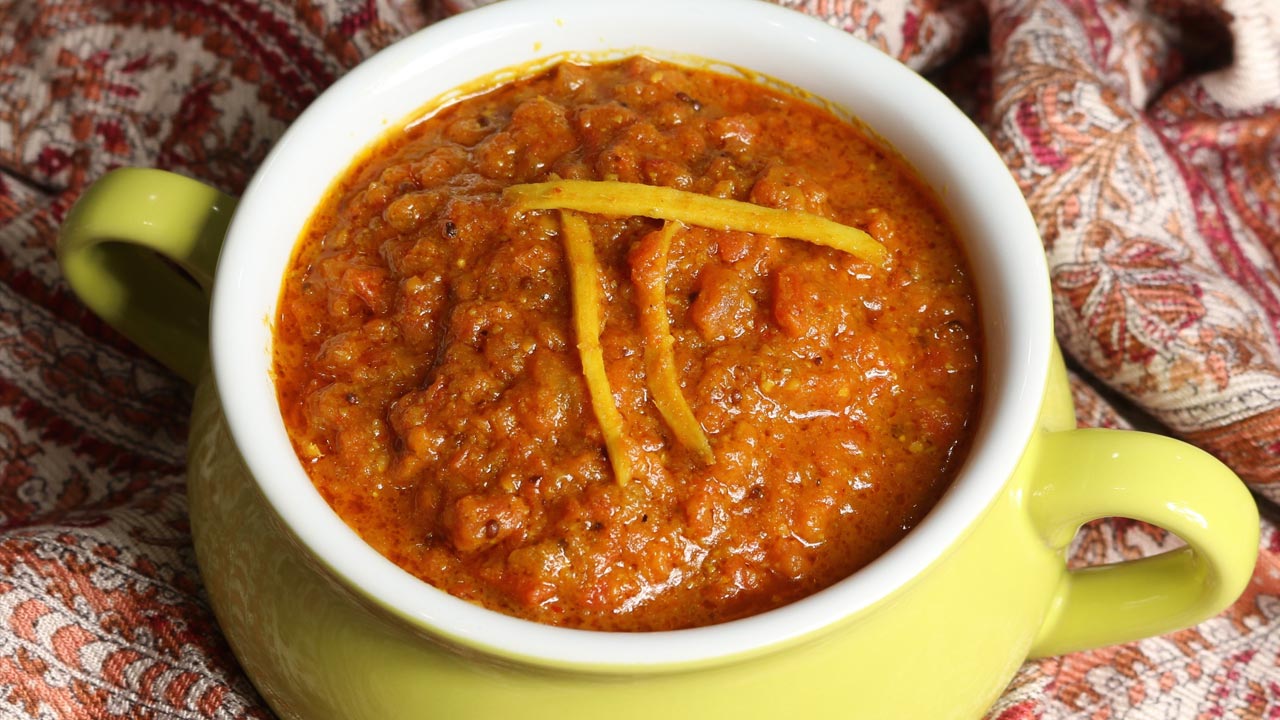
Rajma is a kidney bean curry that is a staple in North Indian cuisine. This vegan version is just as delicious and comforting, making it a great choice for anyone seeking vegan Indian food that is both nutritious and satisfying. Kidney beans are cooked in a spiced tomato gravy, flavored with a blend of spices like cumin, coriander, and garam masala. Rajma is traditionally served with rice, making it a wholesome and filling meal.
8. Masoor Dal
Masoor Dal is a simple yet flavorful red lentil curry. It’s one of the easiest vegan Indian recipes to prepare and is packed with protein and fiber, making it a healthy addition to your meal rotation. Red lentils are cooked with tomatoes, and spices, creating a comforting and nourishing dish. Masoor Dal is perfect for a quick lunch or indian dinner recipes and can be enjoyed with rice or chapati.
9. Vegan Korma
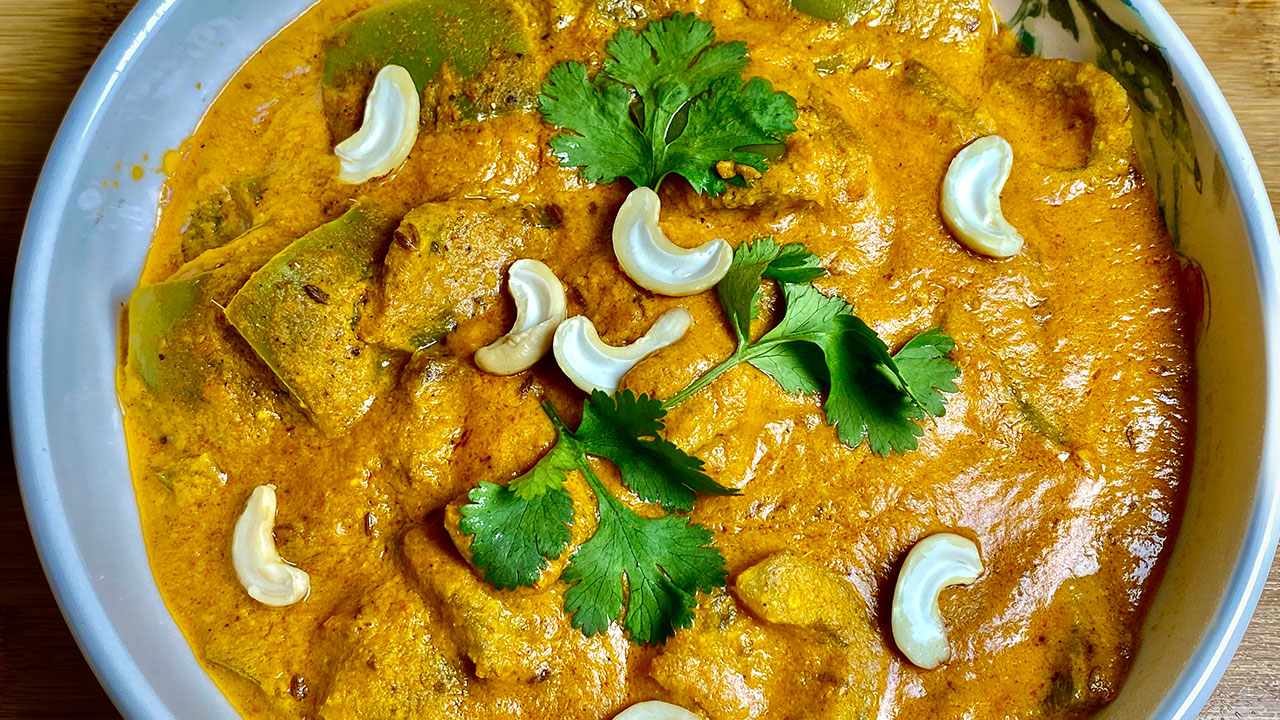
Vegan Korma is a creamy and mildly spiced curry made with a variety of vegetables and a rich coconut-based sauce. This dish is perfect for those looking for 10 easy vegan recipes that are both luxurious and easy to make. The vegetables are simmered in a sauce made from coconut milk, cashews, and spices, resulting in a dish that is rich and flavorful. Vegan Korma can be served with rice or naan for a complete meal.
10. Vegan Pulao
Vegan Pulao is a simple and flavorful rice dish cooked with vegetables and aromatic spices. It’s a versatile dish that can be enjoyed on its own or as a side, making it a great addition to your list of vegan Indian food recipes. The rice is cooked with vegetables like peas, carrots, and bell peppers, along with spices such as cumin, cinnamon, and bay leaves. Vegan Pulao is perfect for a quick and easy meal and can be paired with raita or a salad.
Conclusion
These 10 easy vegan recipes showcase the versatility and richness of vegan Indian food. From hearty curries to flavorful rice dishes, these recipes are sure to bring joy and nutrition to your table. Explore more vegan Indian recipes and discover the delicious possibilities of plant-based cooking with Manjula’s Kitchen. Happy cooking and enjoy your journey with vegan food recipes!
By incorporating these dishes into your diet, you’ll be able to enjoy a wide variety of delicious and nutritious foods. Whether you’re looking for breakfast, snacks, main courses, or desserts, there’s a vegan Indian recipe to suit every taste. Don’t forget to check out Manjula’s Kitchen for more inspiration and culinary delights. Happy cooking and happy eating!
Mix all the ingredients together except water, besan, all-purpose flour, salt, turmeric, asafetida, and oil, add the water as needed to make firm dough. Lightly oil the dough, cover the dough and set aside for at least 15 minutes.
Spice Filling
Mix all the ingredients for spice mix except sugar and lemon juice, coconut powder, sesame seeds, fennel seeds, coriander, cumin seeds, chili powder, garam masala, asafetida, and salt.
Grind the spices to a coarse powder, coffee grinder or spice grinder works the best.
Take the spice mix in a bowl and add the sugar and lemon juice, mix it well set aside.
Making Bhakarwadi
Mix besan with about 3 tablespoons of water to make a thin batter. Set aside.
Knead the dough for a minute before rolling, make it into ball. Lightly floured the rolling surface and flatten the dough ball. Roll into about 12-13-inch diameter.
Spread the filling evenly over leaving about ¼” border all around, and press the filling lightly slightly pressing.
Roll the sheet gently, but firmly until you have a nice firm log. Roll the log gently 6-7 times this helps keeping together, and press lightly.
With a sharp knife slice the both ends about 1 inch long then slice the log into 3/4 inch thick, this should make about 14 -16 Bhakarwadi.
Heat at least one inch of oil in a frying pan over medium high heat. To test, put a small piece of dough into the oil; dough should sizzle and come up slowly, but not change color.
Dip them in the batter from both sides one at a time and drop them slowly into the hot oil. Fry the Bhakarwadi until both sides are golden-brown, turning occasionally. Each batch will take 7-8 minutes to cook.
Arbi is also known as Taro root. Masala Arbi with a great blend of spices makes a very enjoyable side dish. This can complement any meal. Masala Arbi can be served with paratha or roti.
Wash arbi before boiling and do not over boil the arbi as they become very slimy. I prefer to boil arbi in a pot so that it is easy to check if they are cooked. Arbi should be firm, and knife should go through effortless.
Peel the skin and slice them into about 1/8” thick rounds. Set aside.
In a small bowl mix turmeric, coriander powder, and red chili powder with 1/4 cup of water to make a paste. Set aside.
Heat the oil in wide pan over medium heat, oil should be moderately hot, (when you add the cumin seed to oil it should crack right away).
Add carom seeds, and cumin seeds as cumin seeds crack add asafetida,
Stir and add spice paste stir for about 30 seconds till oil start separating from oil.
Add green chili stir for few seconds.
Add arbi spreading over the pan, sprinkle the salt, and mango powder gently fold the arbi with spice mix, all the arbies should be coated well with spices. Making sure arbies are not sticking to each other.
Sautée them over medium heat till they are lightly brown both sides. Turning them occasionally gently. This should take about 8-10 minutes.
Dal Dhokli is a traditional Gujarati dish. This recipe consists of spicy whole wheat uncooked roti pieces simmered into dal and cooked to perfection. Dal dhokli has a mild sweet and spicy flavor. Dal dhokli also makes a delightful one pot one dish meal.
Combine all the ingredients in a bowl, whole wheat flour, besan, turmeric, green chili, asafetida, carom seeds, salt, and oil and mix it well. Add the water as needed to make firm dough, this should take about ¼ cup of water.
Divide the dough into 2 equal parts and roll out each portion into about 7 inch in diameter. If needed use little whole wheat flour for dusting the rolling surface that will help in rolling.
Cut each roti into about 1-1/2 inch squares and set aside.
For the dal
Clean, wash and drain the dal. In pressure cooker add dal, salt, turmeric, and 3 cups of water. Cook over medium high heat.
When the pressure cooker starts to steam, lower the heat to medium and cook seven minutes.
Turn off the heat and allow the steam to escape before opening the lid.
Combine the cooked dal and 1 cup of hot water, whip the dal so it becomes creamy texture, you can use the hand blender to mix dal. Dal will be consistency of thick batter. Add about 3-4 cups of boiling water. Dal should be very liquidey, consistency of runny batter.
Add peanuts, chili powder, tomatoes, ginger, and jiggery to dal, mix well and cook on a medium flame for 2-3 minutes, stirring occasionally.
Prepare the seasoning, heat the oil in a small pan, when oil is moderately hot add the cumin seeds and mustard seeds, asafetida, and red chilies and allow them to crack.
Add this tempering to the dal, mix well, add dhokli and cook on a low medium heat for about 15 minutes, stirring occasionally.
Add cilantro and cook for another 2 minutes on low medium heat.
Notes
Serving suggestionsServe with plain rice, drizzle some ghee and lemon juice on top right before serving dal dhokli. Dal dhokli should be served hot.You will also enjoy other one dish meal like, masala khichdi, Vegetable rice, and Quinoa vegetable pilaf
How To Make Traditional Gujarati Dal Dhokli Recipe: A Comforting Gujarati Delicacy
Dal Dokli is a traditional Gujarati vegan gluten free dish that combines the richness of dal (lentils) with the heartiness of dhokli (wheat flour dumplings). This Dal Dhokli recipe is a beloved comfort vegan food in Gujarati households, cherished for its wholesome flavors and nourishing qualities. With its perfect blend of spices and textures, Dal Dhokli offers a delightful culinary experience that’s both satisfying and comforting.
Step 1: Preparing traditional Gujarati dal dhokli recipe
To start, prepare the dough for the dhokli by combining wheat flour, besan (gram flour), turmeric powder, red chili powder, ajwain (carom seeds), salt, and oil in a mixing bowl. Gradually add water and knead the ingredients into a smooth and pliable dough. Allow the dough to rest for a few minutes to ensure it’s well-hydrated and easy to work with.
Step 2: Rolling and Cutting Dhokli
Divide the rested dough into small portions and roll them out into thin, flat discs resembling chapatis. Use a knife or a pizza cutter to cut the rolled-out dough into small diamond or square-shaped pieces, known as dhokli. Ensure that the dhokli are uniform in size to ensure even cooking and a consistent texture.
Step 3: Cooking Dhokli in Dal
In a large pot or pressure cooker, prepare the dal base by cooking soaked tur dal (pigeon peas) with water, turmeric powder, salt, and a pinch of asafoetida until soft and mushy. Once the dal is cooked, add the prepared dhokli to the pot, gently stirring to ensure they’re submerged in the dal. Allow the dhokli to cook in the dal until they’re tender and cooked through.
Step 4: Tempering and Flavoring the Dal Dokli
In a separate pan, heat ghee or oil and add mustard seeds, cumin seeds, cloves, cinnamon, dried red chilies, and curry leaves. Allow the spices to sizzle and release their aromas. Sauté the aromatics until they’re golden brown and fragrant, enhancing the flavor of the tempering.
Step 5: Incorporating the Tempering into the Dal
Once the tempering is ready, pour it over the cooked dal dokli, stirring gently to combine. The tempering adds layers of flavor and aroma to the dal, elevating its taste profile and making it even more delicious. Allow the dal dhokli to simmer for a few more minutes, allowing the flavors to meld together.
Step 6: Garnishing and Serving
Before serving, garnish the dal dokli with freshly chopped cilantro leaves and a sprinkle of garam masala for added flavor and aroma. Serve the piping hot dal dhokli with a dollop of ghee on top, alongside steamed rice or roti for a wholesome and satisfying meal that’s sure to delight your taste buds.
Tips for Perfect Dal Dhokli
Consistency of Dhokli Dough: Ensure that the dough for the dhokli is neither too soft nor too firm. It should be smooth, pliable, and easy to roll out into thin discs.
Even Cooking of Dhokli: Cut the dhokli into uniform-sized pieces to ensure they cook evenly and have a consistent texture throughout.
Balancing Flavors: Adjust the amount of spices and seasoning in the dal according to your taste preferences. You can increase or decrease the spice level to suit your palate.
Tempering Technique: Take care not to burn the spices while tempering. The tempering should be aromatic and flavorful without any burnt taste.
Variations of Dal Dhokli
Mixed Dal Dhokli: Use a combination of different lentils such as moong dal, masoor dal, and chana dal to add variety and depth of flavor to the dish.
Vegetable Dal Dokli: Enhance the nutritional value of the dish by adding diced vegetables such as carrots, potatoes, and peas along with the dal dhokli.
Spicy Dal Dhokli: Increase the heat level of the dish by adding green chilies or red chili powder to the tempering for an extra kick of spice.
Benefits of Dal Dokli
Rich in Protein: The combination of lentils and wheat flour in dal dhokli provides a good amount of protein, essential for muscle repair and growth.
High in Fiber: The presence of lentils and whole wheat flour in dal dhokli makes it rich in dietary fiber, promoting digestive health and aiding in weight management.
Balanced Meal: Dal dhokli is a complete meal in itself, providing a balanced combination of carbohydrates, protein, and fats along with essential vitamins and minerals.
Frequently Asked Questions (FAQs)
Can I use store-bought dhokli instead of making it from scratch?
Yes, you can use store-bought dhokli as a time-saving alternative. However, homemade dhokli has a fresher flavor and texture.
Can I make dal dhokli ahead of time?
Yes, dal dhokli tastes even better when allowed to sit for a few hours or overnight, allowing the flavors to meld together. Reheat it gently before serving.
Is dal dhokli gluten-free?
No, dal dhokli contains wheat flour, so it’s not suitable for those following a gluten-free diet.
Aloo bread pakora, bread stuffed with spicy potatoes, coated with gram flour and deep fry. Spicy hot aloo bread pakora is a tasty compliment for afternoon tea or served as an appetizer. Aloo bread pakora is crunchy outside, spicy and soft inside.
8 bread slices, I have already trim the edges of the bread slices
3 medium potatoes boiled peeled and finely chopped (this will make 2 cups of chopped potatoes)
1tbspoil
1/2tbspcumin seeds (jeera)
1/8tbspturmeric (haldi)
1/4tbspmango powder (amchoor)
1tbspfinely chopped ginger
1 green chili finely chopped adjust to taste
2tbspchopped cilantro (hara dhania)
1/2 tbspsalt adjust to taste
For Batter
3/4cup besan, gram flour
1/8tbspasafetida (hing)
1/4tbspbaking soda
1/4tbspred pepper
1/2tbspsalt adjust to taste
1tbspoil
About 3/4cup of water
Instructions
Batter
In a bowl mix besan, salt, asafetida, pepper, baking powder and oil. Add water slowly to make a thick and smooth batter. Set aside.
Filling
Heat oil in a frying pan on medium heat moderately.
Add cumin seeds as the seeds crack add potatoes, ginger, green chili, turmeric, mango powder, and salt.
Stir fry for about 3 minutes over medium heat. Add cilantro mix it well. Turn of the heat.
Making the Pakoras
Trim the edges of the bread slices.
Wet your palms with water, place the slice between your palms and press lightly making sure bread is moist, not wet.
Roll 1½ tablespoons of the mixture at a time into round balls. (The size of the potato balls will depend on the size of the bread.)
Place the filling in the center of the bread and mold the bread to completely cover the potatoes all around, giving a round shape. Repeat to make all the rolls. Before frying.
Heat about 1 inch of oil in a frying pan on medium high heat moderately. To check if the oil is ready, put one drop of batter in oil. The batter should come up but not change color right away.
Dip the potato balls into the batter one at a time, making sure the potato balls are completely covered with batter. Then, slowly drop them into the frying pan.
Turn them occasionally. Fry the pakoras until all sides are golden-brown.
Aloo bread pakoras will take about four minutes to cook.
Cut them in half before serving. Serve them with mint chutney.
Bread Potato Pakora: A Delicious Snack for Any Occasion
Bread potato pakora is a popular vegan Indian snack made by coating bread slices with a spiced potato mixture and then deep-frying them until crispy and golden brown. It’s a versatile dish that can be enjoyed as a tea-time snack or as an appetizer for parties and gatherings. In this recipe, we’ll explore how to make delicious bread potato pakoras at home.
How to Make Potato Bread Pakora
To make potato bread pakora, start by preparing the potato stuffing. Boil potatoes until they are soft, then mash them and mix them with spices such as turmeric, cumin, coriander, and salt. Next, take slices of bread and spread a layer of the potato mixture between two slices to form sandwiches. Cut the sandwiches into triangles or rectangles. Prepare a batter using gram flour (besan), water, salt, and spices such as chili powder and ajwain. Dip the potato-stuffed bread sandwiches into the batter, ensuring they are fully coated. Deep fry the pakoras until they are golden brown and crispy. Serve hot with chutney or ketchup.
Potato Stuffed Bread Pakora Recipe: Tips for Success
Use fresh bread: Fresh bread works best for making bread potato pakoras as it holds its shape better during frying.
Adjust the spices: Feel free to adjust the spices in the potato mixture and batter according to your taste preferences. You can make it spicier by adding more chili powder or milder by reducing the amount of spices.
Ensure even frying: Make sure the oil is hot enough before frying the pakoras to ensure they cook evenly and become crispy.
Serve immediately: Bread potato pakoras are best enjoyed hot and crispy, so serve them immediately after frying for the best taste and texture.
Variations of Bread Potato Pakora
Cheese-filled: For an indulgent twist, you can add a slice of cheese along with the potato mixture between the bread slices before frying.
Vegetable-packed: Add finely chopped vegetables such as bell peppers, or spinach to the potato mixture for added flavor and nutrition.
Sauce-dipped: Serve the pakoras with a tangy tamarind chutney or mint yogurt sauce for a burst of flavor.
How to Make Potato Bread Pakora: Serving Suggestions
Bread potato pakoras can be served as a standalone snack with green chutney, tamarind chutney, or ketchup. They also pair well with a hot cup of tea or coffee, making them perfect for afternoon gatherings or rainy-day munching. Additionally, you can serve them alongside other Indian snacks such as samosas, pakoras, or chaat for a complete spread.
Benefits of Bread Potato Pakora
Quick and easy: Bread potato pakoras can be made in a relatively short amount of time, making them perfect for when you need a quick snack or appetizer.
Kid-friendly: Children tend to love the crispy texture and flavorful filling of bread potato pakoras, making them a great way to sneak in some veggies.
Customizable: You can customize the spices and fillings in bread potato pakoras to suit your taste preferences or dietary restrictions.
FAQs about Bread Potato Pakora
Q: Can I make bread potato pakoras ahead of time?
A: While bread potato pakoras are best enjoyed fresh, you can prepare the potato stuffing and batter ahead of time and assemble and fry the pakoras just before serving.
Q: Can I bake bread potato pakoras instead of frying them?
A: While traditionally bread potato pakoras are deep-fried for a crispy texture, you can try baking them in the oven for a healthier alternative. Simply brush them with oil and bake at a high temperature until they are golden brown and crispy.
Q: Can I freeze bread potato pakoras?
A: While bread potato pakoras are best enjoyed fresh, you can freeze them after frying. Allow them to cool completely, then place them in an airtight container or freezer bag and freeze for up to one month. To reheat, simply bake them in a preheated oven until heated through.
If you’re interested in exploring more recipes similar to aloo bread pakora, be sure to check out Manjula’s Kitchen for a wide range of Indian snacks, appetizers, and main courses. From samosas to chaat to curries, you’ll find delicious and authentic Indian recipes to try at home.
Bell pepper is also known as capsicum or shimla mirch. Masala bell pepper with great blend of spices, makes a very enjoyable side dish. This can complement any meal. Masala bell pepper can be served with roti, paratha or puries. I enjoy this with side of dal fry and plain rice.
3 medium Green bell pepper seeded and cubed in 1/2” pieces this will make about 3 cup cubed bell pepper (capsicum, shimla mirch)
2tbspoil
1/2tbspcumin seeds (jeera)
1/8tbspasafetida (hing)
1-1/2 tbspcoconut powder (gola)
1-1/2tbspsesame Seed powder (til)
2 tbspteaspoons coriander powder (dhania)
2 tbspfennel seeds powder (saunf)
1/2tbspRed Chili Powder (lal mirch)
1/4 tbspTurmeric Powder (haldi)
3/4 tbspsalt
1tbspsugar
1/2tbspmango powder (amchoor)
1tbspLemon Juice
Instructions
In a small bowl mix most of the spices, coconut powder, sesame powder, coriander powder, fennel seeds powder, red chili, turmeric, salt, and sugar. Set aside.
In a wide frying pan heat the oil moderately over medium high heat, add cumin seeds as seeds crack add asafetida. Add bell pepper mix well lower the heat to low medium. Cover the pan and let it cook for about 3 minutes.
Sprinkle the spice mix. Mix it well coating all the bell pepper. Let it cook about 3-4 minutes covered, do stir in between. Cook the bell peppers until they are tender but still little crisp.
Turn off the heat, add the mango powder and lemon juice mix well.
This Fruit smoothie is a delicious and healthy drink, and also quick and easy to make. Fruit smoothie is one of my favorite summer drinks. This great smoothie consists of cantaloupes, strawberries, and yogurt with a touch of ginger giving a nice and tangy taste. Try this recipe for the perfect almost-summer drink.
Put the cantaloupes and strawberries in a blender and process on high speed until smooth, add yogurt, orange juice, ginger juice and sugar blend until everything mixed well. Add ice blend on high speed until there is no ice and smoothie is little frothy. Pour into glasses and serve.
Notes
NotesFruits should be ripe but do not use overripe fruits. Sugar needs to be adjusted depending on the fruits.You will also like to try Arugula and Melon Salad and Chilled Melon Soup
Tomato Chutney is tangy and spicy. I was inspired to make this particular tomato chutney from the south Indian cuisine. Chutneys and pickles are a common component of Indian meals. This unique blend of spices gives an amazing unforgettable flavor to chutney. It goes well with breads and rice or can be used as a spread for sandwiches. Tomato chutney is very easy to make and can be refrigerated for up to a month.
In a small frying pan dry roast red chilies, over low medium heat, stirring continuously to cook evenly till they are darker in color, this should take about 2 minutes. Remove from the frying pan.
In the same pan, dry roast sesame seeds, coriander seeds, and fenugreek seeds over low medium heat individually stirring continuously to cook evenly for about less than a minutes. Don’t over roast.
In a same pan add 2 teaspoons of oil when oil is moderately hot add ginger and stir-fry on low medium heat for about 3 minutes until ginger start catching the light brown color from the sides. Set aside.
After spices cool of grind them into the powder. Set aside.
In a blender crush the tomatoes do not make a paste. Set aside.
In a pan heat remaining oil over medium high heat, oil should be moderately hot add mustard seeds, after they crack add asafetida. Now add tomatoes, and tamarind paste. Stir and cook for about 10 minutes semi covered (after tomato comes to boil start splattering) or until oil start separating.
Add the roasted spice powder, ginger, turmeric, salt and sugar, reduce the heat to low medium and cook for about another 8 minutes or until chutney is thick and oil is separated.
Notes
I like to serve tomato chutney with rava dosa, vada or spread on sandwich.
Mint chutney is a delicious condiment, blend of mint and cilantro combined with spices. Most Indian snacks are incomplete without chutney. Chutney also tastes great with a main meal. Try using mint chutney as a spread for your sandwiches – it tastes great!
1 cup packed mint (podina) leaves all the stems removed
1 cup packed Cilantro (hara dhania)roughly chopped
2tbspgreen chilies chopped (adjust to taste)
2 tbsplemon juice (adjust to taste)
1/2 inch ginger chopped
1tbspsalt (adjust to taste)
2 tbspsugar
Pinch of asafetida (hing)
Approx. 3tbspwater use as needed
Instructions
Blend all ingredients, except the mint and cilantro, into a paste. Add mint and cilantro, a little at a time, and blend until smooth. Add water as needed.
Taste and adjust salt, green chilies, or lemon juice as desire.
Taste great with samosa, vegetable pakoras….
Notes
SuggestionsYou can make mint chutney in large quantity in advance and freeze it in ice cube trays. Store the frozen cubes in a zip-lock plastic bag. When ready to serve, defrost as many cubes of mint chutney as needed.
Kurkuri Bhindi is a delicious twist to Masala Bhindi. Kurkuri means crispy and Bhindi means okra. This spicy, crispy okra is simply delicious. The okra is marinated in spices, coated with flour, and then deep fried for a satisfying crunch. Kurkuri bhindi especially goes well with Moong Dal Soup and Rice. Kurkuri bhindi can also be served as a snack, or appetizer.
2 tbspbesan (gram flour) available in Indian grocery stores
1 tbsprice flour
Oil to fry
Instructions
Wash and pat dry the okra, cut off the tops and bottom of the okra. Cut the okras vertically into thin slices.
Lightly massage the okra with fingers, doing this some of the seeds will come out of the okras remove the seeds; it is not necessary to remove all the seeds.
Sprinkle all the spice salt, cumin seeds, coriander powder, chili flakes, mango powder, and turmeric over okra and mix it well. Okras should be well coated with spices. Let it sit for about 10 minutes. Okras will become moist because of the salt.
Sprinkle besan, and rice flour over bhinidies, mix slowly and keep mixing by lightly rubbing them until okras are coated well.
Heat the oil in frying pan moderately over medium high heat. Fry the okras in batches without over crowding. Fry them till they are golden brown this should take about seven minutes. Take the okra out and place them on paper towels to absorb the excess oil.
Kurkuri bhindi, crispy okra is ready to be served.
Mango panna cotta is a delicious, easy, light and refreshing dessert. Mango and coconut milk together makes it a layered, tempting vegan delight that is hard to resist.
1-1/2 cup mango puree, (I used 1-1/2 mango, mango should not be over ripe)
2tbsplemon juice
1/4 cup sugar use as needed depend on sweetness of mango
1-1/2tbsp agar-agar
Also need a setting/serving dish
I am using 5-1/2” x 7-1/2” pyrex/glass rectangle dish. You can also make them in individual serving bowls or glasses.
Instructions
For Cream Layer
In a sauce pan add the coconut milk and sugar, bring it to boil over medium heat. Boil for 3-4 minutes.
Dissolve agar-agar in two tablespoons of luke warm water, add agar-agar and vanilla to coconut milk, boil for about 2 minutes, mixing continuously making sure there are no lumps. Turn off the heat.
Whisk the milk for a few minutes and pour into the dish. Let this sit for about 25 minutes before adding the mango layer. Note: as coconut will cool it will be getting firm like jello, before adding the mango layer coconut layer should be firm but not settled all the way completely.
For Mango Layer
In a sauce pan add the mango puree, sugar and lemon juice and bring it to boil over medium heat. Boil for 2-3 minutes.
Dissolve agar-agar in two tablespoons of luke warm water, add agar-agar to the mango pulp, boil for about 2 minutes mixing continuously, making sure there are no lumps.
Turn off the heat, whisk for few minutes.
Pour the mango puree over coconut, coconut milk should be little firm.
Refrigerate for about three hours before serving. Slice the panna cotta in individual serving pieces. White and yellow makes this look beautiful.
Mango panna cotta can be refrigerated for 5-6 days. Enjoy!
Cabbage pickle is a spicy condiment with any meal. This is quick and easy to prepare. Traditionally Indian meals are not complete without pickles / relish.
Spinach Potato Pakoras are great as an appetizer, a tasty compliment for your afternoon tea and a spicy delicious snack anytime. They are made with spinach, potatoes, besan and spices and then fried till crispy golden.
2 large potatoes peeled and cubed in small pieces, (will make 2 cups of cubed potatoes)
2 cuppacked spinach roughly chopped
2 green chilies finely chopped, adjust to taste
1cup besan (gram flour, available in Indian grocery stores)
2tbsprice flour
1/2tbspred pepper, adjust to taste
2tbspcoriander crushed (dhania)
1 tbspmango powder (amchoor, available in Indian grocery stores)
1tbsp cumin seeds (jeera)
2tbspsalt
¼tbspasafetida (hing)
Approx. 2tbspof water adjust as needed
Also need oil to fry
Instructions
Combine all the dry ingredients, besan, rice flour, coriander, cumin seeds, red pepper, salt, mango powder, and asafetida in a bowl. Mix it well.
Add potatoes, spinach, and green chilies into dry mix, mix it well and add water as needed to make soft and sticky dough. When you are ready to fry pakoras mix the veggies with dry ingredients, otherwise spinach and potatoes will leave the water because of salt.
Heat at least one inch of oil in a frying pan over medium high heat. To test, put one drop of batter in the oil. The batter should come up and not change color instantly.
Place about one tablespoon of mix holding with your fingers into the oil. Do not over lap the pakoras.
Fry the pakoras in small batches; this will take three to four minutes per batch. Fry the pakoras, turning occasionally, until both sides are golden brown.
Repeat this process for the remaining batches.
The crispy, delicious pakoras are now ready to serve.
Notes
TipsIf the oil is too hot the pakoras will not be crisp; if the oil is not hot enough, the pakoras will be greasy.
How to Make Aloo Palak Pakora: A Step-by-Step Guide
Aloo Palak Pakora is a delightful gluten freevegansnack that combines the goodness of spinach (palak) with the earthy flavor of potatoes (aloo), all encased in a crispy, golden-brown batter. This popular appetizer is perfect for rainy days or as a tea-time snack. In this comprehensive guide, we will walk you through the process of making delicious Aloo Palak Pakoras step-by-step.
Preparation and Ingredients for Aloo Palak Pakora
Before diving into the cooking process, it’s essential to gather all the necessary ingredients. For this recipe, you will need fresh spinach leaves, potatoes, chickpea flour (besan), rice flour, cornstarch, green chilies, ginger, cumin seeds, carom seeds (ajwain), salt, and oil for frying. Ensure that the spinach leaves and potatoes are thoroughly washed and dried before use.
Tips for Perfect Aloo Palak Pakoras
To achieve the ideal texture and flavor for your Aloo Palak Pakoras, here are some useful tips:
Use Fresh Ingredients: Fresh spinach and potatoes are key to a vibrant and flavorful dish.
Maintain the Oil Temperature: Keep the oil at a consistent temperature while frying to ensure even cooking and crispy pakoras.
Adjust Spice Levels: Customize the spiciness of the pakoras according to your preference by adding or reducing the amount of green chilies.
Experiment with Seasonings: Feel free to add your favorite spices or herbs to the batter for extra flavor.
Serve Immediately: Aloo Palak Pakoras are best enjoyed hot and crispy, so serve them immediately after frying for the ultimate taste experience.
Variations of Aloo Palak Pakoras
While the classic Aloo Palak Pakora recipe is delicious on its own, you can also experiment with various ingredients and flavors to create unique variations:
Cheese-Stuffed Pakoras: Add a savory twist to your pakoras by stuffing them with cheese before frying.
Paneer Palak Pakoras: Replace potatoes with paneer (Indian cottage cheese) for a rich and creamy texture.
Spicy Mint Chutney: Serve your Aloo Palak Pakoras with a zesty mint chutney for an extra kick of flavor.
Mixed Vegetable Pakoras: Incorporate a variety of vegetables like cauliflower, and bell peppers for a colorful assortment of pakoras.
Gluten-Free Option: Substitute chickpea flour with gluten-free flour for a gluten-free version of this recipe.
Benefits of Aloo Palak Pakoras
Aloo Palak Pakoras not only satisfy your taste buds but also offer several health benefits: (H2)
Rich in Nutrients: Spinach is packed with vitamins, minerals, and antioxidants, while potatoes provide a good source of carbohydrates and potassium.
Boosts Immunity: The combination of spinach and potatoes helps strengthen the immune system and protect against infections.
Digestive Aid: The spices used in the pakora batter, such as cumin and ginger, aid digestion and promote gut health.
Energy Boost: Aloo Palak Pakoras are a satisfying and energizing snack, making them perfect for a quick bite or appetizer.
Easy to Make: With simple ingredients and easy preparation steps, Aloo Palak Pakoras are a convenient snack option for any occasion.
FAQs about Aloo Palak Pakoras
Q: Can I make Aloo Palak Pakoras ahead of time?
A: While Aloo Palak Pakoras are best enjoyed fresh, you can prepare the batter in advance and fry them just before serving to maintain their crispiness.
Q: Can I bake Aloo Palak Pakoras instead of frying them?
A: While frying yields the crispiest results, you can try baking the pakoras in a preheated oven at 400°F (200°C) for approximately 20-25 minutes or until golden brown.
Q: Can I freeze leftover Aloo Palak Pakoras?
A: Yes, you can freeze the leftover pakoras in an airtight container for up to one month. Reheat them in the oven or air fryer until heated through before serving.
Q: Can I use frozen spinach for this recipe?
A: While fresh spinach is preferred for its vibrant flavor and texture, you can use thawed frozen spinach as a substitute if fresh spinach is not available.
Q: What can I serve with Aloo Palak Pakoras?
A: Aloo Palak Pakoras pair well with mint chutney, tamarind chutney, or ketchup. They also make a delicious accompaniment to hot chai or masala tea.
Aloo Palak Pakoras are a delightful and versatile snack that can be enjoyed on any occasion. Whether you’re hosting a party or simply craving a savory treat, these crispy pakoras are sure to impress. With the guidance provided in this step-by-step recipe, you can easily recreate the authentic flavors of Aloo Palak Pakoras in your own kitchen. So gather your ingredients, heat up the oil, and get ready to indulge in the irresistible crunchiness of these delectable snacks. Explore more recipes on Manjula’s Kitchen: Vegetable Samosas, Paneer Tikka, Crispy Spinach Pakoras, Mango Lassi, Masala Chai, Gulab Jamun, Kheer (Rice Pudding)
Gobi or cauliflower Manchurian is a popular Indo Chinese dish. This is a super delicious appetizer or main dish. Gobi manchurian satisfies both your savory and spicy cravings! It consists of fried gobi (cauliflower) simmered in a flavorful gravy made with soy sauce and red chili sauce.
20 cauliflower pieces cut into medium size florets
For Sauce
2 tbspoil
1tbspginger paste or finely shredded ginger (adrak)
1 green chili chopped
1/4cup celery finely chopped
2 tbspred chili sauce
2tbspsoy sauce
1tbspvinegar
2tbsptomato paste
1/2tbspsugar
2 tbspcorn starch or arrow root powder
Approx. ½ cup water
For Batter
1/3cup all purpose flour (plain flour, maida)
3tbspcorn starch or arrow root powder
1/2tbspsalt
1/8tbspblack pepper
Approx. ½ cup water
Instructions
Mix the corn starch with water and set aside.
Heat the oil in sauce pan over medium high heat; add ginger, celery and green chili stir for about two minute. Add all the ingredients for sauce except corn starch, (chili sauce, soy sauce, vinegar, tomato paste, and sugar).
Stir for 2 minutes add corn starch and cook for another two minutes, sauce should be thick, consistency of a dosa or pancake batter. If needed add more water, sauce gets thicker as it sits.
Sauce is ready, set aside.
To make batter mix flour, corn starch, salt and pepper in a bowl. Add the water slowly to make a smooth batter (batter should be consistency of pancake batter or dosa batter).
Heat at least one inch of oil in a frying pan over medium high heat. Oil should be moderately hot. (If oil is not hot cauliflower will be greasy).
Dip the cauliflower into the batter one at a time, making sure it is completely covered by the batter. Then drop the cauliflowers slowly into oil in the frying pan. (do not overlap them)
Fry the cauliflowers in small batches, four to five minutes per batch. Fry them turning occasionally, until they are all sides golden brown. Take them out over paper towel.
Repeat this process for the remaining cauliflowers.
Fold fried cauliflower/ gobies into gravy and serve hot.
Notes
NotesManchurian tastes best when cauliflower has some crunch. If you have fried them earlier, refry them before dipping in the sauce as fried cauliflower becomes soft as they cool off.
Gobi Manchurian Recipe: A Delicious Indo-Chinese Delight
Gobi Manchurian is a beloved Indo-Chinese dish that combines the crispiness of cauliflower with a tangy, spicy sauce. It is a delectable fusionappetizer featuring crispy cauliflower florets coated in a savory vegancurry/gravy infused with aromatic vegetables.If you’re craving this flavorful dish and want to recreate it at home, look no further than this gobi manchurian recipe. With simple ingredients and easy-to-follow steps, you’ll be able to whip up a batch of delicious cauliflower manchurian in no time.
Preparation:
Begin by preparing the cauliflower florets. Make sure they are clean and dry before proceeding with the recipe. You can blanch the florets in hot water for a few minutes to soften them slightly, or you can proceed with frying them directly for a crispier texture.
Frying the Cauliflower (cauliflower manchurian recipe):
In a bowl, prepare a batter using all-purpose flour, cornflour, salt, pepper, ginger, and water. Coat each cauliflower floret in the batter, ensuring they are evenly coated.
Heat oil in a deep pan or wok over medium heat. Once the oil is hot, carefully add the battered cauliflower florets in batches. Fry them until they turn golden brown and crispy. Remove them from the oil and place them on a paper towel-lined plate to drain excess oil.
Making the Manchurian Sauce (recipe for manchurian cauliflower):
In another pan, heat oil over medium heat. Add finely chopped ginger, and green chilies. Sauté them until fragrant.
Next, add bell peppers. Cook until they turn soft and translucent.
Now, it’s time to add the sauces. Pour in soy sauce, chili sauce, ketchup, vinegar, and a pinch of sugar. Stir well to combine all the ingredients.
In a small bowl, prepare a slurry using cornflour and water. Add this slurry to the pan to thicken the sauce. Stir continuously to avoid lumps.
Once the sauce reaches your desired consistency, add the fried cauliflower florets to the pan. Toss them gently in the sauce until they are well coated.
Tips for Perfect Gobi Manchurian:
Make sure the cauliflower florets are dry before coating them in the batter to prevent the batter from becoming soggy.
Adjust the amount of chili sauce and green chilies according to your spice preference.
For a healthier version, you can bake the cauliflower florets instead of frying them. Simply coat them in the batter and place them on a baking sheet lined with parchment paper. Bake in a preheated oven at 400°F (200°C) for 20-25 minutes or until crispy.
Variations to Try:
Add diced carrots, cabbage, or other vegetables of your choice to make the dish more colorful and nutritious.
For a vegan version, use tamari instead of soy sauce and skip the vinegar or use apple cider vinegar.
Garnish the gobi manchurian or cilantro for an extra burst of flavor and freshness.
Benefits of Gobi Manchurian
Gobi Manchurian is not only delicious but also packed with nutrients. Cauliflower is a rich source of vitamins, minerals, and antioxidants, making it beneficial for overall health. Additionally, by controlling the ingredients used in the recipe, you can make it healthier compared to the restaurant version.
FAQs (cauliflower manchurian):
Q: Can I use frozen cauliflower for this recipe?
A: While fresh cauliflower is preferred for its crisp texture, you can use frozen cauliflower if that’s what you have on hand. Make sure to thaw and pat dry the cauliflower before using it in the recipe.
Q: How can I make the sauce less spicy?
A: To reduce the spice level of the sauce, you can decrease the amount of chili sauce and green chilies used in the recipe. You can also omit the green chilies altogether for a milder flavor.
With this comprehensive gobi manchurian recipe, you’ll be able to recreate the flavors of your favorite Indo-Chinese dish right in your own kitchen. Whether you’re cooking for a special occasion or simply craving a tasty snack, this dish is sure to satisfy your cravings. Enjoy the crispy texture of the cauliflower combined with the savory and tangy flavors of the Manchurian sauce—it’s a winning combination that’s sure to become a favorite in your household.
Other Recipes If you enjoyed this banana rice recipe, you might also like to try these other recipes from Manjula’s Kitchen:
Corn and mushroom in tomato and spicy cashew gravy makes a delicious main dish. Cashews add a creamy and rich texture to the dish. This is a quick and easy recipe. This goes well with any Indian flat bread or plain rice.
1cup corn kernel/ bhuta ka dana (I am using frozen corn kernels)
1/4 cup cashews (kaju)
2 cup tomato chopped
1tbsp ginger chopped
1tbsp green chili chopped
2 tbspoil
1/2tbsp cumin seed (jeera)
1/8tbsp asafetida (hing)
1/4tbspturmeric (haldi)
1/4 tbspred chili powder (lal mirch)
2 tbspcoriander powder (dhania)
1 tbspsalt
2tbspcilantro chopped (hara dhania)
Approx. 1-1/2cup water
Instructions
Blend the tomatoes, cashews, ginger and green chili to make creamy paste. Set aside.
Heat the oil in a saucepan over medium high heat. Test the heat by adding one cumin seed to the oil. If the cumin seed cracks right away, the oil is ready.
Next add coriander; red chili powder, turmeric and salt. Lower the heat to medium and cook the spice mix for about 4-5 minutes until mix start leaving the side of the pan.
Add corn and mushrooms, mix it well and add about 1-1/2 cups of water. Cook for about 10-12 minutes, stirring occasionally. Corn and mushrooms should be tender and gravy should be thick in consistency.
Mushroom Corn Curry is ready serve hot with Roti or plain rice.
If you like chips, and you like spicy food, these chips are for you. This is a quick and easysnack recipe. I have used flour tortillas and flavored them with Indian spice mix. They are hard to resist you will say just one more.
4 flour tortillas uncooked I am using 8” diameter tortillas
Oil to fry
Spice Mix
1tbspdry mint leaves available at Indian grocery store
1tbsproasted cumin seed powder
1/4 tbspgaram masala available Indian grocery store
1/2tbspblack salt available in Indian grocery store
1/2tbspsalt
1/2tbspred chili powder
1/2tbspmango powder (amchoor) available Indian grocery store
Generous pinch of citric acid (nimbu ka sat)
Instructions
Spice mix, in a bowl mix all the spices really well. Set aside.
Prick the tortillas from both sides, this will limit chips from puffing and make them crisp.
Cut each tortilla in 8 triangles, like slicing pizza.
Heat the oil in a frying pan over medium heat. The frying pan should have about 1 inch of oil. To check if the oil is ready, put a small piece of tortilla in the oil. The tortilla should sizzle and come up slowly.
Take them out in a plate and sprinkle the spice mix on both sides right away, before they are dry. This will keep the spices on the chips. Repeat the process until all the chips are done.
After the chips cool to room temperature they can be stored in airtight container for 1 month.
Notes
Suggestions
For Fried Tortillas If you don’t find uncooked tortillas use thin tortillas.
Fried tortillas store well in air tight container for a month.
Fried tortillas can be served in many different ways; a quick and easy way is to make Papdi Chaat. Serve them with Chole Chaat or Matra Chaat and I am sure you can find many other ways to serve them.
For Spice mix Make spice mix in a big batch and use it like Chaat Masala over the sliced fruits, salad, with yogurt. I am sure you can find many other ways to use this spice mix.
When it comes to irresistible snacks, spicy Indian flour chips top the list. These crunchy delights, known for their bold flavors and satisfying texture, are perfect for any occasion. Whether you’re hosting a party, looking for a quick bite, or craving a spicy snack, these chips are sure to please. In this article, we’ll explore the origins, variations, and tips for making the perfect Indian flour chips at home, along with maximizing the use of internal links to other delicious recipes.
The Essence of Spicy Indian Flour Chips
Spicy Indian flour chips are made from a simple dough of flour, spices, and herbs, rolled out thin and fried to crispy perfection. The combination of spices used in the dough gives these chips their distinctive flavor, making them a favorite snack among spice lovers. These chips are often enjoyed with a cup of tea or as an accompaniment to meals, adding a delightful crunch to every bite.
Origins and Cultural Significance
These chips have their roots in Indian street food culture, where they are commonly known as “namak pare” or “mathri.” They are especially popular during festivals and celebrations, symbolizing the joy and togetherness of these occasions. The simplicity of the ingredients and the ease of preparation have made spicy Indian flour chips a staple snack in many Indian households.
Tips for Perfect Spicy Indian Flour Chips
Choosing the Right Flour: The base of these chips is typically made from wheat flour, but you can experiment with other flours like chickpea or rice flour for different textures and flavors.
Spice Blend: A perfect blend of spices is key. Common spices include cumin, ajwain (carom seeds), chili powder, and turmeric. Adjust the spice levels according to your preference.
Rolling the Dough: Roll the dough as thin as possible for the crispiest chips. Thicker chips will be harder and less crispy.
Frying: Fry the chips in hot oil until golden brown. Ensure the oil is at the right temperature to prevent the chips from absorbing too much oil and becoming greasy.
Variations to Try
While the classic spicy Indian flour chips are delicious on their own, you can try different variations to keep things interesting. For instance, you can add finely chopped spinach or fenugreek leaves to the dough for a nutritious twist. Adding sesame seeds or crushed peanuts can also enhance the flavor and texture. For more creative ideas, check out Sweet and Sour Guava Curry and Dodha Burfi (Punjabi Milk Fudge).
Pairing and Serving Suggestions
Spicy Indian flour chips can be enjoyed in various ways. Serve them with a side of tangy tamarind chutney or refreshing yogurt chutney for a flavor contrast. They also make a great addition to a snack platter alongside Sweet Potato Chaat or Moong Dal Halwa (Vegan). These chips are perfect for munching on their own or as a crunchy side to a meal.
Making Indian flour chips at home allows you to control the ingredients and ensure a healthier snack option. By using whole grain flours and minimal oil, you can enjoy these tasty chips without the guilt. For more healthy homemade snack ideas, explore Millet Soup (Bajra Raab) and Vegetable Biryani (Instant Pot).
Frequently Asked Questions
Q: Can I bake these chips instead of frying?
A: Yes, you can bake the chips for a healthier option. Preheat your oven to 375°F (190°C) and bake the rolled-out dough until crispy and golden brown, about 15-20 minutes.
Q: How long can these chips be stored?
A: Store the chips in an airtight container to keep them crispy. They can last for up to two weeks when stored properly.
Q: Can I make these chips gluten-free?
A: Absolutely. Substitute the wheat flour with gluten-free flour blends or chickpea flour to make gluten-free spicy Indian flour chips.
Conclusion
The spicy Indian flour chips recipe is a fantastic way to enjoy a crunchy and flavorful snack that is easy to make at home. Whether you’re a seasoned cook or a beginner, these chips are sure to become a favorite in your snack repertoire. For more exciting recipes and variations, explore other delightful dishes like [Sweet and Sour Guava Curry, [Dodha Burfi (Punjabi Milk Fudge), and Masala Bell Pepper Curry. Enjoy the journey of flavors and happy cooking!