Category: North Indian Recipes

North Indian Recipes: A Journey Through Flavors

There’s something irresistibly comforting about North Indian cuisine. It’s not just the rich, aromatic spices that tantalize your senses, but the sheer warmth and heartiness of the dishes that make you feel at home, no matter where you are. Today, let’s explore some North Indian recipes, perfect for any occasion, and delightfully vegetarian to boot.

Rajma Galouti Kebabs

Imagine biting into Rajma Galouti Kebabs, where the robust flavor of kidney beans meets a medley of aromatic spices. These kebabs, a wonderful example of North Indian vegetarian recipes, are perfect for starting your meal. They pair beautifully with a refreshing sip from one of the many delightful Indian beverages, perhaps a tangy aam panna or a cooling lassi.

Methi Malai Matar

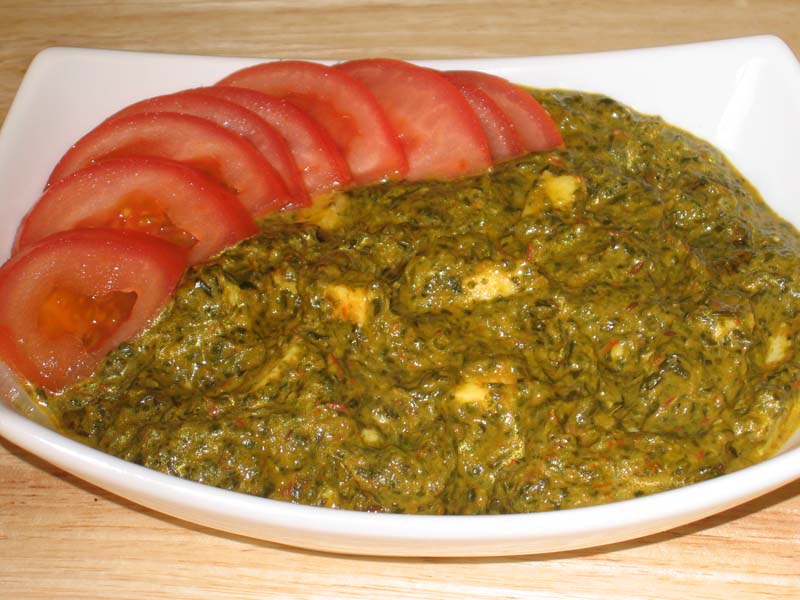
The gentle bitterness of fresh fenugreek leaves mingles with the sweet pop of peas in Methi Malai Matar. This dish, creamy and subtly spiced, epitomizes the charm of North Indian food recipes. It sits wonderfully alongside a bowl of fragrant rice or warm naan, complemented by a light, crisp salad from the array of soups and salads recipes available.

Pindi Chana

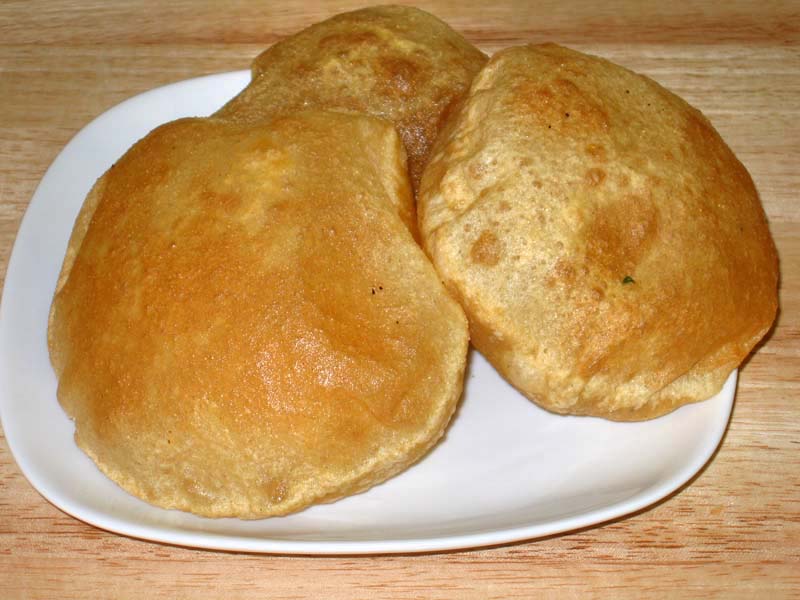
For those who crave a hearty, robust dish, Pindi Chana offers chickpeas enveloped in a symphony of spices, each bite bursting with flavor. This traditional gem from North Indian recipes is best enjoyed with fluffy bhature or poori. Add a tangy, spicy pickle from the pickle chutney selection to elevate the experience.

Enhancing Your North Indian Menu

To elevate your North Indian feast, consider adding delightful Indian snacks like dhokla or kachori. These snacks bring a playful variety of textures and flavors that dance on your palate.

To end on a sweet note, indulge in Indian desserts recipes such as the delicate, syrup-soaked rasmalai or the creamy, comforting shrikhand.

For healthier options, dishes like dal makhani and bhindi masala offer deliciously light choices, perfect for those mindful of their diet.

For your next gathering, explore the wealth of recipes in the popular party recipe collection to ensure your menu impresses every guest.

More North Indian Vegetarian Recipes

Dum Aloo

Imagine baby potatoes, cooked gently until tender, then enveloped in a rich, spiced gravy that epitomizes comfort food. This is Dum Aloo, a beloved staple in North Indian vegetarian recipes. It’s a dish that not only satisfies but also invites you to savor each mouthful. Pair it with a vibrant side from the vegetables sautéed / dry recipes, like a simple yet flavorful stir-fry.

Sweet Endings: Gulab Jamun and Kheer

No meal is complete without a sweet indulgence. Gulab Jamun, those soft, syrup-drenched delights, and Kheer, a creamy rice pudding adorned with cardamom and nuts, are perfect for rounding off your feast. These desserts, highlighted in the Indian desserts recipe category, add a touch of sweetness to your culinary journey.

Frequently Asked Questions (FAQs)

Q: What are some popular North Indian recipes? 

A: Some popular North Indian recipes include Rajma Galouti Kebabs, Methi Malai Matar, Pindi Chana, Dum Aloo, Gulab Jamun, and Kheer. These dishes are flavorful, nutritious, and perfect for any occasion.

Q: How can I make traditional North Indian food suitable for a vegetarian diet? 

A: To make traditional North Indian food suitable for a vegetarian diet, try recipes like Rajma Galouti Kebabs, Methi Malai Matar, and Dum Aloo. These recipes are hearty, flavorful, and perfect for vegetarians.

Q: What are some easy North Indian vegetarian recipes? 

A: Some easy healthy vegetarian recipes include Rajma Galouti Kebabs, Methi Malai Matar, and Pindi Chana. These dishes are quick to prepare and provide the necessary nutrients for a healthy diet.

Q: Can I prepare North Indian food recipes in advance? 

A: Yes, many North Indian food recipes can be prepared in advance and stored. Dishes like Rajma Galouti Kebabs and Pindi Chana can be made ahead of time and refrigerated, while snacks like dhokla and kachori can be prepped and frozen.

Q: What are some sweet North Indian food recipes for special occasions? 

A: Some sweet North Indian food recipes for special occasions include Gulab Jamun and Kheer. These desserts are classic, easy to prepare, and perfect for celebrations.

Conclusion

North Indian recipes are a celebration of diverse flavors and rich cultural heritage. Whether you’re looking for North Indian vegetarian recipes, specific North Indian food recipes, or comprehensive vegetarian Indian recipes, these dishes will bring variety and flavor to your meals. So, gather your ingredients, try out these recipes, and enjoy the rich and diverse world of North Indian cuisine. Happy cooking and happy eating!

By incorporating these dishes into your menu, you’ll be able to enjoy a wide variety of delicious and nutritious foods. Whether you’re looking for snacks, main courses, or desserts, there’s a North Indian recipe to suit every taste. Don’t forget to check out Manjula’s Kitchen for more inspiration and culinary delights. Happy cooking and happy eating!

  • Spinach Raita

    Spinach Raita

    Spinach Raita

    Spinach Raita

    Spinach raita is a refreshing yogurt-based dish made with spiced spinach and yogurt. By adjusting its thickness, you can also serve spinach raita as a sandwich spread or as a dip for fresh veggies. Spinach raita tastes delicious any way you serve it.
    No ratings yet
    Course Raita
    Cuisine Indian
    Servings 4 people

    Ingredients
      

    Ingredients:

    • 2 cups chopped spinach, stems removed
    • 1 teaspoon oil
    • 1/2  teaspoon cumin seeds (jeera)
    • Pinch of asafetida (hing)
    • 2 whole red chili
    • 1/2  teaspoon black pepper
    • 1/2 teaspoon salt (adjust to taste)
    • 1 1/2  cup yogurt

    Instructions
     

    Method:

    • Heat the oil in a saucepan on medium high heat. Test the heat by adding one cumin seed to the oil; if seed cracks right away, oil is ready.
    • Add the asafetida and cumin seeds. After the cumin seeds crack, add red chilies stir-fry for few seconds.
    • Add spinach, salt, and black pepper and stir-fry, pressing the spinach down to allow most of the water to evaporate but still leaving the spinach moist.
    • After the spinach cools off, mix it well into the yogurt.
    • Add milk to the raita about half a cup adjust to the desire consistency.
    • For best result serve chill.

    Notes

    Tips:
    Frozen chopped spinach can be used instead of fresh spinach.
    Variations:
    1. Spinach raita also can be served as a spread with bread or crackers keep the consistency thick do not need to add any milk.
    2. To serve as a dip add about ¼ cup of milk but keep thicker then raita.
    Serving suggestion:
    Serve over plain rice or as a side dish with any meal.
    Tried this recipe?Let us know how it was!

    How to Make Palak Raita – Manjula’s Kitchen 

    What is Raita: Raita is an accompaniment for any Indian meal and can be created in the form of Vegetable Raita, Spinach Raita, Boondi ka Raita, Cucumber Raita & Lauki ka Raita. Here we are focussing on making palak ka raita or spinach raita, it’s a simple quick & easy, gluten free, kid friendly and nutritious yogurt-based recipe featuring palak or spinach and a selection of Indian spice powders. 

    1. Heating Oil and Infusing Flavours: Initiating Palak Raita Preparation 

    Begin the palatable journey of creating Palak Raita by heating oil in a saucepan over medium-high heat. A simple test, featuring the crackling of a cumin seed, confirms the readiness of the oil for the culinary symphony about to unfold. With the aromatic base established, infuse the oil with the distinctive essence of asafetida and cumin seeds. As the cumin seeds crackle, introduce red chilies, stirring the mix for a tantalizing burst of flavour that sets the stage for the vibrant palak raita.

    1. Sautéing Spinach with Seasonings: Crafting the Palak Raita Base

    Add the star ingredient, spinach, to the fragrant mix, along with a dash of salt and black pepper. Engage in a thorough stir-fry, applying gentle pressure to the spinach, coaxing it to release its moisture. The objective is to strike a balance, allowing most of the water to evaporate while retaining the spinach’s inherent moisture. This meticulous step forms the foundation of the palak raita, infusing it with the earthy essence of spinach.

    1. Blending Spinach with Yogurt and Milk: Achieving Palak Raita Consistency 

    Once the sautéed spinach cools off, seamlessly integrate it into the waiting yogurt. This integration creates a symphony of textures and flavours, transforming the yogurt into the creamy canvas for the palak raita. To achieve the desired consistency, introduce milk gradually, adjusting until reaching the perfect balance. This harmonious blend of yogurt and milk ensures a palak raita that is not only flavorful but also luxuriously creamy.

    1. Chilling for Optimal Enjoyment: Perfecting the Palak Raita Experience 

    For optimal results, serve the palak raita chilled. This step enhances the overall sensory experience, allowing the flavours to meld and intensify. The coolness complements the earthy spinach and the tanginess of the yogurt, resulting in a refreshing and delightful palak raita that is sure to tantalize the taste buds.

    1. Tips and Variations: Enhancing the Palak Raita Recipe 

    Consider using frozen chopped spinach as a convenient alternative to fresh spinach. Additionally, palak raita transforms into a versatile spread when served with bread or crackers, maintaining a thick consistency without the need for additional milk. For a dip, add approximately ¼ cup of milk, ensuring a thicker texture than traditional raita. These variations allow palak raita to shine in diverse culinary roles, catering to a spectrum of taste preferences.

    1. Serving Suggestions: Palak Raita as a Versatile Accompaniment 

    Experience the versatility of Palak Raita by serving it over plain rice or as a side dish accompanying any meal. Its dynamic flavours and creamy texture make it a perfect accompaniment to a variety of dishes, contributing a touch of freshness and vibrancy to the overall dining experience.

  • Sandesh

    Sandesh


    Sandesh

    Sandesh (Bangali Sweet)

    Sandesh is a specialty from the state of Bengal. Sandesh is a delicacy, served as a dessert. Made several different ways using freshly made paneer.
    4 from 2 votes
    Prep Time 10 minutes
    Cook Time 25 minutes
    Total Time 35 minutes
    Course Dessert
    Cuisine Indian
    Servings 10 people

    Ingredients
      

    • 1/2 gallon equal to 8 cups milk
    • 1/4 cup lemon juice
    • 1/2 cup sugar
    • 1/4 tsp cardamom ground

    Garnishing

    • 2 tbsp sliced pistachios
    • 8 strands of saffron
    • 2 tbsp crushed pineapple

    Instructions
     

    • Make the paneer (check the recipe for paneer).
    • Drain the whey using a strainer line with cheesecloth, or muslin cloth. Wrap the curds in a muslin cloth, rinse under cold water, and squeeze well.
    • Once the paneer is drained, place on a dry, clean surface and knead the paneer until the paneer is almost rolls into smooth soft dough.
    • Add the sugar and cardamom into the paneer and knead the paneer again until sugar is mixed well.
    • Next on low heat cook the paneer mixture stirring continuously until paneer starts coming together as soft dough. This should take about 6 to 7 minutes.
    • Turn off the heat and keep mixing the paneer like you are making dough. This is most important step to this dish; you are just cooking paneer enough to take out the rawness. If you over cook the paneer it will become crumbly.
    • Mix the saffron thread in 1 teaspoon of warm milk and mix it well. Keep aside.
    • Divide the paneer in 24 equal parts and roll them giving a ball shape.
    • Garnish with crushed pineapple, or garnish them with a drop of saffron paste putting sliced pistachio over.
    • Refrigerate them for few hours before serving. Serve them chilled!

    Notes

    Notes
    Important step to this dish; you are just cooking paneer enough to take out the rawness. If you over cook the paneer it will become crumbly.
    Sandesh can be refrigerated for a week.
    You will also enjoy to Rasgulla and Chumchum
    Tried this recipe?Let us know how it was!
  • Almond Cashew Burfi

    Almond Cashew Burfi

    Almond Cashew Burfi

    Almond Cashew Burfi

    Almond Walnut Cashew Burfi is a healthy, quality substitute for candy that your entire family will enjoy. Its a nice sweet snack that is popular in north India. Recipe will make 24 pieces.
    5 from 1 vote
    Course Dessert
    Cuisine Indian
    Servings 24 peices

    Ingredients
      

    • ½ cup almonds
    • ½ cup walnuts
    • ½ cup cashew nuts
    • 1 ¼ cup sugar
    • ½ cup water
    • ½ tsp cardamom powder
    • 1 Tbsp sliced almonds to garnish

    Instructions
     

    • Dry grind the walnuts, cashews and almonds in a food processor.
    • Dry roast the groundnuts in a frying pan on low medium heat.
    • Roast them just enough so that the nuts start to give off an aroma. It will take about 4 to 5 minutes. Remove from heat and set aside.
    • Put the sugar and water together in a saucepan on medium heat. Bring to a boil to make the 1 thread syrup or on the candy thermometer it should reach 230 degrees F.
    • Turn off the heat and stir in the cardamom powder.
    • Add the nuts to the syrup and mix, and then spread over a greased 8-inch plate. Note: don’t let the syrup cool off. It must be spread while still hot.
    • Wait a few minutes until burfi is set but still soft.
    • Then cut the burfi into any shape you like (such as square, diamond, triangle).
    • Garnish each piece of burfi with sliced almonds while the burfi is still soft.
    • Allow the burfi to cool for about an hour to dry and hold its shape. Now you can remove the burfi from the plate.
    • Burfi can be stored for a month.

    Notes

    Variations
    • Proportion of nuts can be changed to your choice.
    • You may also add pistachios and coconut powder.
    Keyword Almonds, barfi, Burfi, Candy, Cashew, Dessert, Gluten Free, Sweet, Vegan, walnut
    Tried this recipe?Let us know how it was!
  • Masala Peanuts

    Masala Peanuts

    Masala Peanuts

    Masala Peanuts

    Hot and spicy peanuts fried with delicious mix of spices. This makes a great snacks for sitting around watching TV or playing games with family and friends. Recipe serves 6.
    No ratings yet
    Course Snack
    Cuisine Indian
    Servings 6 people

    Ingredients
      

    • 1 ½ cup Peanuts or 1/2 pound shelled peanuts
    • ½ cup gram flour basen
    • ¼ cup rice flour
    • 1 Tbsp coriander powder dhania
    • ½ tsp turmeric haldi
    • 1 tsp red pepper
    • ½ tsp black pepper
    • 1 Tbsp green chili finely chopped
    • ¼ tsp ginger powder soth
    • 1 tsp salt adjust to taste
    • ½ tsp mango powder amchoor
    • tsp citric acid

    Also needed:

    • 1 cup Water as needed
    • Oil to fry

    Instructions
     

    • In a frying pan roast the dry peanuts on medium heat for 3-4 minutes and let it cool for few minutes.
    • Mix all the ingredients together in a large bowl.
    • Add water as needed making sure the spices and flour stick to the peanuts uniformly.
    • Heat the oil in a frying pan on medium heat.
    • The frying pan should have at least 1 inch of oil. To check if the oil is ready, put one drop of batter in the oil. The batter should raise to the top but not change color right away.
    • put few drops of oil in your hand it helps droping the penuts before putting peanuts on the oil.
    • While putting the peanuts into oil, loosen them with your fingers to make sure the peanuts are separated and do not form lumps. Peanuts should be separated while frying.
    • Fry the peanuts until they turn light brown, turning them occasionally.
    • When they are done cooking, take them out of the oil with a slotted spoon. Place them on a paper towel to absorb the extra oil.
    • After cooling to room temperature, the peanuts should be crispy.

    Notes

    • Masala Peanuts can be stored for a month in an airtight container.
    • Also see my recipe for Spicy Cashew, Almond brittle.
    • These make a delicious homemade gift – pack it in a jar or candy bag.
    Keyword basen, chilli, Gluten Free, masala, peanuts, Spicy
    Tried this recipe?Let us know how it was!

    Peanut Masala Recipe: A Spicy Delight

    Masala Peanuts are delightful appetizers perfect for holidays and festivals, offering a crunchy, gluten-free snack option that satisfies both vegan and non-vegan palates alike. Peanut masala recipe is a beloved snack across India, offering a delightful combination of crunchy peanuts and aromatic spices. This masala peanuts recipe is a favorite among snack enthusiasts for its bold flavors and addictive crunch. Whether you’re hosting a gathering or simply craving a savory treat, learning how to make masala peanuts recipe at home is both rewarding and satisfying.

    How to Make Masala Peanuts Recipe: Step-by-Step Guide

    Step 1: Prepare the Peanuts

    Start by selecting fresh, raw peanuts for the best results. Rinse them thoroughly under cold water to remove any dirt or debris. Then, pat them dry using a clean kitchen towel or paper towels.

    Step 2: Dry Roast the Peanuts

    Heat a non-stick pan over medium heat. Once the pan is hot, add the peanuts in a single layer. Dry roast them, stirring occasionally, until they turn golden brown and emit a nutty aroma. This process typically takes about 8 to 10 minutes. Keep a close eye on them to prevent burning.

    Step 3: Prepare the Spice Mixture

    While the peanuts are roasting, prepare the spice mixture. In a small bowl, combine masala peanuts recipe spices such as red chili powder, turmeric powder, cumin powder, chaat masala, and salt according to your taste preferences. Adjust the spice levels to suit your palate.

    Step 4: Coat the Peanuts with Spices

    Once the peanuts are roasted to perfection, transfer them to a large mixing bowl. While they are still warm, sprinkle the prepared spice mixture over the peanuts. Toss them gently to ensure that each peanut is evenly coated with the spices. Allow the peanuts to cool completely before serving.

    Step 5: Serve and Enjoy

    Your homemade masala peanuts are now ready to be enjoyed! Serve them as a standalone snack or pair them with your favorite beverages. Store any leftovers in an airtight container to maintain their freshness and crunchiness.

    Tips for Making Perfect Masala Peanuts

    • Experiment with different spice blends to customize the flavor according to your preferences. 
    • You can add ingredients like amchur powder for tanginess or garam masala for extra warmth.
    • For an extra layer of flavor, consider adding roasted garlic or curry leaves to the spice mixture.
    • Make sure to roast the peanuts evenly to achieve a uniform golden brown color and prevent any burnt spots.
    • Allow the peanuts to cool completely before storing them to maintain their crispiness.

    Variations of Masala Peanuts

    Sweet and Spicy: Add a touch of sweetness to your masala peanuts by incorporating a bit of powdered sugar or jaggery along with the spices.

    Herb Infused: Experiment with fresh herbs like cilantro, mint, or curry leaves to add a refreshing twist to your masala peanuts.

    Nutty Crunch: Enhance the texture of your masala peanuts by tossing them with a handful of toasted cashews, almonds, or pistachios.

    Benefits of Masala Peanuts

    Rich in Protein: Peanuts are an excellent source of plant-based protein, making masala peanuts a nutritious snack option.

    Good Source of Healthy Fats: Peanuts are high in monounsaturated fats, which are beneficial for heart health when consumed in moderation.

    Packed with Essential Nutrients: Peanuts are rich in essential nutrients like vitamins, minerals, and antioxidants, contributing to overall well-being.

    FAQs about Masala Peanuts

    Can I use pre-roasted peanuts for this recipe?

    While you can use pre-roasted peanuts, roasting them yourself allows you to control the level of crunchiness and ensures that they are freshly toasted.

    How long do homemade masala peanuts stay fresh?

    When stored in an airtight container at room temperature, homemade masala peanuts can stay fresh for up to two weeks. However, they are best enjoyed within the first few days to maintain their crispiness.

    Can I make masala peanuts without oil?

    Yes, you can skip the oil and dry roast the peanuts directly in a pan for a healthier alternative. However, using a small amount of oil helps the spices adhere to the peanuts more effectively.

    For more delightful Indian recipes, explore Manjula’s Kitchen, where you’ll find a treasure trove of culinary inspiration ranging from traditional dishes to modern twists on classic favorites. Be sure to check out recipes like Aloo Gobi, Palak Paneer, and Chana Masala for a taste of authentic Indian cuisine.

    If you enjoyed making these masala peanuts, why not try your hand at some other mouthwatering recipes from Manjula’s Kitchen? Vegetable Pakoras, Paneer Tikka, Aloo Gobi (Potato Cauliflower), Samosa, Mango Lassi

    Explore these recipes and more for a culinary journey through the vibrant and diverse flavors of Indian cuisine.

  • Boondi (bundi) Ladoo

    Boondi (bundi) Ladoo


    Boondi Ladoo

    Boondi Ladoo

    Boondi Ladoo is a popular mouthwatering dessert and must to have at all special occasions all over India. Boondis are very small, round deep-fried balls that have been soaked in fragrant sugar syrup. After soaking, the syrup is drained, and the syrup infused boondi are formed into balls (ladoos). It is a popular sweet delicacy made during festivals like Diwali or Holi.
    5 from 2 votes
    Prep Time 5 minutes
    Cook Time 25 minutes
    Total Time 30 minutes
    Course Dessert
    Cuisine Indian
    Servings 4 people

    Ingredients
      

    • 1 cup besan gram flour
    • 1/2 cup water use as needed, to make batter
    • 1-1/2 cup sugar
    • 1 cup water for syrup
    • 6 green cardamom pods ilachai
    • 1 tbsp sliced almonds

    Oil to fry

    Perforated Spoon, Skimmer, or Ladle: to make Boondi

    The critical part of boondi making is to use the right kind of utensil for the batter to drop through the holes into the hot oil to form the little pearl shaped fried balls. To accomplish this you need to use a flat skimmer, strainer or perforated ladle that has several round holes on the surface, each about the size of a whole black peppercorn.

    Instructions
     

    • Crack open the cardamom pods and remove the seeds. Crush the seeds and keep aside.
    • Put the water and sugar in a saucepan and bring to a boil on medium-high heat. When the syrup comes to a boil, turn the heat down to medium and stir to dissolve the sugar. Let it simmer until the syrup is about half thread consistency or 220 degrees on the candy thermometer.
    • Mix the gram flour with water to make a smooth pancake-like batter or slightly thicker than dosa batter.
    • Heat the oil in a frying pan on medium high heat. The frying pan should have at least 1 1/2 inches of oil. Tip: To test if the oil is the right temperature, drop a pinch of batter into the oil; if it rises immediately without changing color then the oil is ready to start frying the
    • Hold the skimmer about 1 to 1 1/2 inches above the oil over the center of the frying pan with one hand. With your other hand pour some of the batter onto the skimmer to cover all of the holes without spilling over the edge of the skimmer. Tip: if you hold the skimmer higher than 11/2 inches above the oil boondi will not be round.
    • The batter will start dropping through the holes into the oil. If the batter doesn’t drop right away through the holes, pour the batter on the skimmer back into the batter bowl, mix a little more water to the batter and start again. Drop enough boondi into the oil so they just cover the surface of the oil in frying pan in a single layer
    • Fry them until the sound of sizzling stops and boondis are light gold in color but not crispy! Lift the boondi out of the oil with a slotted spoon (this allows excess oil to drip back into the frying pan) and put them directly into the warm syrup and mix.*
    • Before making the next batch of boondi, wipe clean the skimmer. This helps to keep the boondi round.
    • Repeat the process of making boondi and adding to the syrup with rest of the batter. You may have to adjust the heat in between making boondis.
    • When finished frying the boondi, let them soak in the syrup for few minutes. Add the crushed cardamom seeds and sliced almonds to the syrup. Now drain off the excess syrup.
    • If the boondis are still hot, let them sit only until they are warm enough to handle – don’t let them to cool off. If the boondis become cold you will not be able to form them into ladoos.
    • To make the ladoos, scoop up some of the boondi mixture into your palm with a spoon. Gently squeeze the mixture between both palms to shape into a round ball about the size of a golf ball. As you are squeezing some of the syrup will come out. You can make the ladoo larger or smaller if you have a preference.
    • As you finish making each ladoo, put it on a plate and continue on to make the next ladoo.
    • As the Ladoos cool to room temperature they will become firm but they should still be moist.

    Notes

    Shelf Life
    Ladoos will keep at room temperature in a covered container for up to 10 days and for one month in the refrigerator.
    Tips
    If the syrup is not of the right temperature, you will not be able to form the ladoos.
    If the boondis cool down to room temperature before being shaped into balls, the sugar will crystallize.
    If you are not able to make ladoos, don’t worry. You can still enjoy them as “meethi boondi” or sweet boondi.
    *If you like the boondi for raita or making some other salty snack don’t add to the syrup.
    Keyword Festival Special, Kid Friendly, Popular Dessert
    Tried this recipe?Let us know how it was!

  • Rajma Chawal (Kidney Bean Curry)

    Rajma Chawal (Kidney Bean Curry)

    Rajma Chawal

    Rajma Chawal (Kidney Bean Curry)

    Rajma chawal (kidney beans with rice) is a great combination. This is a complete vegan, gluten free main course meal in itself. Serves 4.
    5 from 3 votes
    Course Main Course
    Cuisine Indian
    Servings 4 people

    Ingredients
      

    • 1 ½ cup kidney beans rajma
    • 1 tsp salt adjust to taste
    • 2 large tomatoes
    • 1 Tbsp ginger
    • 1 green chili
    • 3 Tbsp oil
    • Generous pinch of asafetida hing
    • 1 tsp cumin seeds jeera
    • 2 Tbsp coriander powder dhania
    • ½ tsp turmeric haldi
    • ½ tsp red chili powder adjust to taste
    • ½ tsp black pepper
    • 1 tsp paprika
    • 1 medium chopped tomato for garnishing

    Instructions
     

    • Wash and soak the kidney beans in about six cups of water for at least 6 hours (the beans will double in volume ).
    • Cut the tomatoes in small pieces, green chili slice lengthwise and take out the seeds (if you prefer mild). Blend tomatoes, green chili, and ginger and make a paste.
    • Heat the oil in pressure cooker. Test the heat by adding one cumin seed. If the seed cracks right away, the oil is ready. Add asafetida and cumin seeds, as the cumin seeds crack add tomato paste, coriander, turmeric, chili powder, black pepper, and paprika.
    • Stir-fry for two to three minutes, until the oil begins to separate from the mixture. Add kidney beans, salt, and three cups of water. Close the cooker. Cook over medium high heat.
    • When pressure cooker starts to steam, turn the heat down to medium and cook twelve minutes.
    • Turn off the heat. Wait until the steam has stopped before opening the pressure cooker.
    • Kidney beans should be soft and tender. Stir and mash them gently. Adjust salt and pepper to taste.
    • Garnish with chopped tomatoes.
    Keyword beans, chawal, curry, Dal, Gluten Free, kidney, kuri, lentils, rajma, rajmah, Rice, Vegan
    Tried this recipe?Let us know how it was!

    How To Make Rajma Chawal Recipe: A Jain Rajma Recipe with Tips and FAQs

    Rajma Chawal, a quintessential North Indian dish, is beloved for its rich flavors and comforting texture. While traditionally made with kidney beans simmered in a tomato-based gravy, there are various regional and dietary variations to this dish. In this rendition, we present a Jain version of Rajma Chawal, devoid of onion and garlic, yet bursting with aromatic spices and wholesome goodness.

    Preparation:

    Wash the kidney beans thoroughly under running water to remove any dirt or impurities.

    Soak the kidney beans in about six cups of water for at least 6 hours or overnight. This helps in softening the beans and reducing cooking time.

    Making the Paste:

    Cut the tomatoes into small pieces and slice the green chilies lengthwise, removing the seeds if you prefer a milder taste.

    Peel and chop the ginger.

    In a blender, combine the tomatoes, green chilies, and ginger to make a smooth paste. Set aside.

    Cooking:

    Heat the cooking oil in a pressure cooker over medium heat.

    To test the oil temperature, add one cumin seed. If it crackles right away, the oil is ready.

    Add a pinch of asafetida followed by the cumin seeds. Allow the cumin seeds to crackle.

    Once the cumin seeds start crackling, add the prepared tomato paste to the cooker.

    Stir in the coriander powder, turmeric powder, red chili powder, black pepper powder, and paprika. Mix well.

    Stir-frying:

    Stir-fry the mixture for two to three minutes or until the oil begins to separate from the sides. This step enhances the flavor of the spices and ensures a rich gravy.

    Adding Kidney Beans:

    Drain the soaked kidney beans and add them to the pressure cooker.

    Season with salt according to taste.

    Pour in three cups of water and mix well to combine all the ingredients.

    Pressure Cooking:

    Close the pressure cooker with its lid securely.

    Cook over medium-high heat until the pressure cooker starts steaming.

    Reduce the heat to medium and continue cooking for twelve minutes.

    Finishing Touches:

    Once the cooking time is complete, turn off the heat and allow the pressure to release naturally.

    Once the steam has stopped, carefully open the pressure cooker lid.

    Mashing and Adjusting Seasoning:

    The kidney beans should be soft and tender. Gently stir and mash them to thicken the gravy.

    Taste the Rajma and adjust the salt and pepper as per your preference.

    Garnishing:

    Serve the Jain Rajma hot, garnished with chopped tomatoes for a refreshing burst of flavor.

    Tips and Suggestions:

    Soaking the kidney beans overnight or for at least 6 hours is crucial as it helps in reducing the cooking time and ensures even cooking.

    Use mustard oil for an authentic flavor, but if unavailable, any cooking oil can be substituted.

    Adjust the quantity of green chilies and red chili powder according to your spice preference.

    For a creamier texture, you can mash some of the kidney beans before serving.

    Garnish the Rajma with freshly chopped cilantro for added freshness and aroma.

    Serve Rajma Chawal with steamed rice or Indian bread like roti or naan for a wholesome meal.

    Benefits of Rajma Chawal:

    High in Protein: Kidney beans are an excellent source of plant-based protein, making Rajma Chawal a nutritious meal choice, especially for vegetarians and vegans.

    Rich in Fiber: Rajma is loaded with dietary fiber, which aids digestion, promotes satiety, and helps maintain a healthy weight.

    Essential Nutrients: This dish provides essential nutrients such as iron, potassium, and folate, which are vital for overall health and well-being.

    Heart-Healthy: Consuming kidney beans regularly may help lower cholesterol levels and reduce the risk of heart disease.

    Satisfying and Comforting: Rajma Chawal is not only nutritious but also deeply comforting, making it a favorite comfort food for many.

    FAQs (Frequently Asked Questions):

    Q: Can I use canned kidney beans instead of dried ones?

    A: Yes, you can use canned kidney beans for convenience. However, dried beans are preferred for their texture and flavor.

    Q: Can I skip soaking the kidney beans?

    A: Soaking the kidney beans is essential as it helps in reducing cooking time and aids in digestion. Skipping this step may result in unevenly cooked beans.

    Q: How do I make Jain Rajma without onion and garlic?

    A: In this Rajma recipe, we have omitted onion and garlic to make it suitable for a Jain diet. The rich flavor comes from a blend of aromatic spices and tomatoes.

    Q: Can I make this Rajma recipe without a pressure cooker?

    A: While a pressure cooker significantly reduces the cooking time, you can cook Rajma on a stovetop in a heavy-bottomed pot. It will require longer cooking time and frequent stirring to prevent sticking.

    Q: How long can I store leftover Rajma?

    A: Leftover Rajma can be stored in an airtight container in the refrigerator for up to 3-4 days. Reheat thoroughly before serving.

    Jain Rajma Chawal is a delicious and wholesome dish that can be enjoyed by everyone, regardless of dietary preferences. With aromatic spices, creamy kidney beans, and a rich tomato gravy, it’s a comforting meal that’s perfect for any occasion. Follow this simple rajma chawal recipe and savor the authentic flavors of North Indian cuisine right in your own kitchen.
    Explore more delightful Rajasthani recipes on Manjula’s Kitchen, Explore more appetiser recipes on Manjula’s Kitchen: Vegetable Samosas, Paneer Tikka, Crispy Spinach Pakoras, Mango Lassi, Masala Chai, Gulab Jamun, Kheer (Rice Pudding)

  • Corn Vegetable Soup

    Corn Vegetable Soup

    Corn Vegetable Soup

    Corn Vegetable Soup

    Corn Vegetable Soup is a creamy corn soup with vegetables is a great starter for a summer lunch. This delicious soup can be served hot or cold. Serves 4.
    4 from 1 vote
    Course Soup
    Cuisine Indian
    Servings 4 people

    Ingredients
      

    • 2 ¼ cup corn
    • 1 medium tomato
    • 1 cup cabbage finely chopped
    • 8 to 10 string beans
    • 1 small carrot
    • 1 Tbsp cornstarch
    • 1 tsp oil
    • ½ tsp cumin seeds jeera
    • ½ tsp black pepper
    • 1 tsp salt adjust to taste
    • 1 tsp lemon juice adjust to taste

    Instructions
     

    • Chop cabbage, carrot, and string beans into very small pieces.
    • Chop tomato in small pieces and remove the seeds. Set aside.
    • Boil the corn in about 1 ½ cups of water until the corn is soft. Remove ¼ cup of corn and set aside.
    • Blend the rest of the corn into a paste and strain.
    • Mix the cornstarch with ¼ cup of water and set aside.
    • Heat the oil in a saucepan. Test the heat by adding one cumin seed to the oil; if seed cracks right away oil is ready.
    • Now add the cumin seeds. After the cumin seeds crack, add the carrot, cabbage, beans and ¼ cup of water. Cook the vegetables on medium heat until they are tender.
    • Next, add the corn paste, corn, cornstarch mixture, and two cups of water to the vegetables. Bring the soup to a boil add tomatoes and lower the heat to medium low. Let the soup cook for another five minutes. Add the lemon juice and serve.

    Notes

    Suggestions
    • Corn soup can be refrigerated for about a week and can be frozen for months.
    • If you have decided to freeze or refrigerate the soup hold the water you were adding.
    • Add the water at the time ready to use the soup.
    Keyword corn, Creamy, Gluten Free, hot, Soup, summer, Vegetable
    Tried this recipe?Let us know how it was!
  • Pani Puri

    Pani Puri

    Pani Puri

    Pani Puri

    Pani puris are a great snack, served as chaat and a popular street food all over India. They are served filled with spicy water, chickpeas and potatoes. Makes about 60 puris.
    5 from 1 vote
    Course Appetizer, Snack
    Cuisine Indian
    Servings 60 puris

    Ingredients
      

    Pani (Spicy Water):

    • 1 cup mint leaves Pudina
    • 2 to 4 green chilies adjust to taste
    • 3 Tbsp tamarind paste Imli
    • 3 Tbsp lemon juice
    • 1 tsp black salt
    • 1 tsp salt adjust to taste
    • ¼ tsp ginger powder
    • tsp asafetida Hing
    • 1 Tbsp roasted cumin seed powder
    • 1 Tbsp sugar adjust to taste
    • ½ tsp black pepper
    • 4 cup water adjust to taste

    Puris:

    • ¼ cup All Purpose flour Maida or Plain Flour
    • ¾ cup fine Sooji Semolina Flour
    • ½ cup water as needed

    Instructions
     

    Pani (Spicy Water):

    • Blend everything except the water together to make a fine paste. While blending, add water as needed to blend.
    • Taste to adjust the green chilies as they can be mild or hot. Add more lemon juice, sugar, and salt as needed to your desired taste. Remember you will be adding more water to dilute so paste should be spicier. Strain the paste using water as needed.
    • After straining mix the paste with remaining water or adjusting to the taste.
    • The pani (water) will taste best if refrigerated for a day.

    To make Puris:

    • Mix the flour and sooji. Add water as needed to make firm dough. Knead the dough until it is pliable. Cover the dough with a damp cloth for about ten minutes.
    • Damp two kitchen towels, spread one damp towel over a cookie sheet or plain surface, close to where you are going to fry the puris.
    • Divide the dough into about 60 small balls. Keep them under a damp cloth.
    • Start rolling each ball to about a 2-inch diameter circle. Place over a damp towel and cover with another damp towel. Do this for all 60 puris. TIP: Placing the puris between damp cloths helps the puris to puff evenly on all sides.
    • Heat the oil on medium high heat. Oil should be about 1 1/2 inch high in frying pan. To test the oil, put a little piece of dough in the oil. The oil is ready if the dough comes up right away and does not change color.
    • Start frying the puris, starting first with the puri you first rolled.
    • Put one puri in the oil and press lightly. When it puffs turn over and put another puri in the oil. Keep adding six to eight puris at a time. Fry the puris until they are golden-brown all around by turning a few times. You may adjust the heat as needed while frying.
    • Take the puris out and place over paper towel, so the excess oil is absorbed. TIP: When taking the puris out of the frying pan, make sure to tilt the skimmer so that the excess oil is drained before placing on the paper towel.
    • Fry all the puris. They should be crisp and puff like a ball.

    Notes

    Serving Suggestions
    • Pani puris are served by making a small hole in each puri. Fill the puris with boiled and chopped potatoes, or boiled chickpeas.
    • Finish by filling each puri with the spicy pani (water). Enjoy!
    Keyword Chaat, chat, futchka, golgappa, pani puri, panipuri, poori, snacks, Vegan
    Tried this recipe?Let us know how it was!

    Pani Puri Recipe: The Ultimate Guide to Making Delicious Pani Puris

    Introduction to Pani Puri


    Pani Puri, also known as golgappa or phuchka, is a beloved Indian street food famous for its burst of flavors and crunchy texture. This pani puri recipe encapsulates the essence of Indian culinary tradition, offering a delightful mix of tangy, spicy, and sweet flavors. Perfect for gatherings, parties, or simply as a snack, making pani puri at home is a rewarding experience that brings friends and family together.

    How to Make Pani Puri: Step-by-Step Guide


    Preparing the Puris


    To start this recipe for pani puri, you’ll need puris, which are hollow, crispy semolina or wheat spheres. You can either make them at home or purchase them from a store. If making at home, mix semolina or wheat flour with water and knead into a firm dough. Roll out small circles and deep fry until golden brown. Set aside to cool.

    Preparing the Pani


    The pani puri is incomplete without its signature spicy and tangy water. In a blender, combine mint leaves, coriander leaves, green chilies, ginger, tamarind pulp, black salt, roasted cumin powder, chaat masala, and salt. Blend until smooth. Strain the mixture and dilute it with water according to taste. Chill the pani in the refrigerator for at least an hour before serving.

    Preparing the Filling


    For the filling, boil potatoes until tender, then peel and mash them. Add boiled chickpeas, and a dash of chaat masala for extra flavor. Mix well and set aside.

    Assembling the Pani Puris


    Now comes the fun part! Take each puri and gently make a hole in the center, creating a cavity for the filling. Stuff the puris with the potato mixture and arrange them on a serving plate. Pour the chilled pani into each puri using a small spoon or a pani puri maker, ensuring they’re filled to the brim.

    Garnishing and Serving


    Garnish the pani puris with a drizzle of sweet tamarind chutney and a sprinkle of sev (crunchy chickpea flour noodles) for added texture. Serve immediately to enjoy the burst of flavors and textures in every bite.

    Tips for Perfect Pani Puris

    Fresh Ingredients: Use fresh mint, coriander, and tamarind for the pani to enhance the flavor.

    Chilling Time: Allow the pani to chill for at least an hour to let the flavors meld together.

    Crunchy Puris: Ensure the puris are crispy and hollow to hold the filling and pani without getting soggy.

    Variations of Pani Puri 

    Ragda Pani Puri: Replace the potato filling with ragda (spicy chickpea curry) for a heartier version.

    Fruit Pani Puri: Experiment with filling options like diced mango, pomegranate seeds, or grated pineapple for a fruity twist.

    Sukha Puri: Skip the pani and serve the stuffed puris with sweet tamarind chutney and spicy mint chutney for a dry version.

    Benefits of Pani Puri

    Rich in Flavor: Pani puri offers a medley of flavors, from spicy and tangy to sweet and savory.

    Customizable: You can adjust the spice level and filling according to your preference, making it suitable for all taste buds.

    Social Experience: Making and enjoying pani puri with friends and family fosters bonding and creates lasting memories.

    FAQs (Frequently Asked Questions)


    Q: Can I make the puris ahead of time?


    A: Yes, you can prepare the puris in advance and store them in an airtight container for up to a week.

    Q: How spicy should the pani be?


    A: The spice level of the pani can be adjusted according to your preference. Start with fewer green chilies and add more if desired.

    Q: Can I make a healthier version of pani puri?


    A: Yes, you can opt for baked puris and use less oil in the filling to make a healthier version of pani puri.

    For more delightful Indian recipes, visit Manjula’s Kitchen and explore a world of culinary delights!

    By following this comprehensive pani puri recipe, you’ll be able to recreate the magic of this iconic Indian street food in the comfort of your own kitchen. Whether it’s a special occasion or just a craving for something delicious, pani puri never fails to satisfy. So gather your ingredients, invite your loved ones, and embark on a flavorful journey with homemade pani puris!

    Other Recipes on Manjula’s Kitchen

    If you’re looking to explore more Indian recipes, appetizers, beverages, and desserts, be sure to check out the following links on Manjula’s Kitchen. Here are some links to recipes on Manjula’s Kitchen official website: Vegetable Pakoras Recipe

    Kaju Katli (Cashew Burfi) Recipe, Baingan Bharta (Roasted Eggplant) Recipe, Matar (Green Peas) Paneer Recipe, Besan Ladoo Recipe

  • Kadhi Pakoras

    Kadhi Pakoras

    Kadhi Pakoras

    Kadhi Pakoras

    Kadhi, a blend of yogurt and besan (gram flour) with besan pakoras, this is served with rice. This dish is popular throughout India specially in North India.
    5 from 1 vote
    Prep Time 5 minutes
    Cook Time 1 hour 20 minutes
    Total Time 1 hour 25 minutes
    Course Main Course
    Cuisine Indian
    Servings 2 people

    Ingredients
      

    For Kadhi

    • 1 cup yogurt dahi, curd
    • 2/3 cup besan gram flour
    • 6 cup water
    • 2 tbsp ghee clarified butter
    • 1/8 tsp asafetida hing
    • 1/2 tsp fenugreek seeds methi dana
    • 1/2 tsp cumin seeds jeera
    • 1 tsp turmeric haldi
    • 4 whole red chilies
    • 2 bay leaves
    • 1/2 tsp red chili powder
    • 1 tsp salt
    • pinch citric acid if needed to give more sourness to kadhi

    For Pakoras

    • 3/4 cup besan, gram flour
    • 2/3 cup water use as needed

    For Garnish

    • 1 tsp ghe clarified butter
    • 1 tsp red chili powder

    Instructions
     

    Making Kadhi

    • Mix gram flour and turmeric with yogurt until smooth. Add three cups of water slowly and mix well.
    • Heat the oil in a saucepan. Test the heat by adding one cumin seed to the oil. If the cumin seeds crack right away, the oil is ready. Add the asafetida, fenugreek seeds, cumin seeds, stir and add bay leaves, whole red chilies, and red chili powder. Stir for a few seconds. Add the yogurt mixture and keep stirring until the kadhi comes to a boil.
    • Add three cups of water and let it come to boil. Add salt. Turn the heat to medium low. Let the kadhi cook an hour and a half, stir occasionally. To adjust thickness, add boiled water.

    Making Pakoras

    • Add water slowly to the besan to make a smooth and thick batter. Whip the besan batter two to three minutes in a circular motion using a spoon, until light and fluffy.
    • Fry the pakoras in ½ inch of oil in a flat frying pan over medium heat. (Don’t use enough oil to cover the pakoras; they will be softer and fluffier if fried in shallow oil.
    • To test, drop one drop of batter into the oil. The batter should form a ball on the surface of the pan, but not change color right away.
    • Place about one tablespoon of batter into the oil. Fry the pakoras in small batches until golden-brown.
    • After frying, soak the pakoras in room-temperature water for ten minutes. Squeeze the pakoras gently to remove the water, taking care not to break them.
    • Add the pakoras to the kadhi and boil on low to medium heat for ten minutes.

    Making the Seasoning

    • Heat the ghee (clarified butter) lightly in a small saucepan. Add chili powder and/or paprika (adjust to taste). Pour over the kadhi when ready to serve.

    Notes

    Variations 
    Add one cup chopped spinach to the kadhi just before adding the pakoras for extra flavor and color. 
    Add one tablespoon dry fenugreek leaves (dry mathi leaves) to the pakora batter.
    My favrait way to Serve Kadhi Pakoras is with Rice, Roti, Jeera Aloo, Spicy Green Peas
    Tried this recipe?Let us know how it was!

    Punjabi Kadhi Pakora Recipe

    Kadhi Pakora is a gluten-free summer recipe featuring a savory vegetable curry with dal (lentils) and crispy fried pakoras, creating a delightful and flavorful dish. Kadhi Pakora, a popular North Indian dish, is a comforting and flavorful yogurt-based curry with gram flour dumplings. This traditional dish is known for its tangy and savory taste, making it a favorite among many households. In this kadhi recipe, we’ll show you how to make authentic Punjabi Kadhi Pakora step by step, so you can enjoy its deliciousness at home. Whether you’re craving a comforting meal or planning a special dinner, Kadhi Pakora is sure to satisfy your taste buds.

    Step 1: Preparation of Ingredients for kadhi pakora punjabi style

    Start by gathering all the necessary ingredients for making Kadhi Pakora. For the pakoras, prepare a batter using gram flour, spices, and water. Slice and chop green chilies, cilantro, and ginger for the pakora batter. For the kadhi, whisk yogurt and gram flour together until smooth, and set aside. Finely tomatoes and ginger for the kadhi gravy. Having all the ingredients ready will streamline the cooking process.

    Step 2: Making Pakoras:

    To make the pakoras, heat oil in a deep-frying pan. Drop Spoonfuls of the pakora batter into the hot oil and fry until golden brown and crispy. Remove the pakoras from the oil and place them on a paper towel to drain excess oil. Repeat the process until all the batter is used. The crispy pakoras will add texture and flavor to the kadhi.

    Step 3: Preparing the Kadhi Base:

    In a large pot or saucepan, heat oil or ghee over medium heat. Add cumin seeds, mustard seeds, and fenugreek seeds, and let them splutter. Next, add ginger, and cook until fragrant. The aromatic base will form the foundation of the kadhi gravy, imparting depth of flavor to the dish.

    Step 4: Cooking the Kadhi:

    Once the aromatics are sautéed, it’s time to add the chopped tomatoes to the pot. Cook the tomatoes until they soften and break down, forming a thick gravy. Then, add the whisked yogurt and gram flour mixture to the pot, stirring continuously to prevent lumps from forming. Bring the mixture to a gentle boil, then reduce the heat and let it simmer.

    Step 5: Adding Pakoras:

    Once the kadhi base is cooked and thickened, add the fried pakoras to the pot. Gently stir to coat the pakoras with the flavorful kadhi gravy. Allow the pakoras to simmer in the kadhi for a few minutes to absorb the flavors. The combination of soft pakoras and tangy kadhi creates a harmonious and satisfying dish.

    Step 6: Finishing Touches:

    Before serving, garnish the Kadhi Pakora with freshly chopped cilantro leaves for a burst of freshness and color. You can also sprinkle some roasted cumin powder on top for extra flavor. Serve the Kadhi Pakora hot with steamed rice or roti for a comforting and wholesome meal.

    Tips for Making Perfect Kadhi Pakora:

    • Consistency: Adjust the consistency of the kadhi by adding more water if it’s too thick or simmering longer if it’s too thin.
    • Fresh Ingredients: Use fresh yogurt and spices for the best flavor in the kadhi gravy.
    • Frying Pakoras: Fry the pakoras in batches to ensure even cooking and crispiness.

    Variations of Kadhi Pakora:

    • Vegetarian Variation: Skip the addition of pakoras and add vegetables like potatoes, carrots, or bell peppers to the kadhi for a vegetarian version.
    • Gluten-Free Option: Use chickpea flour (besan) instead of wheat flour for the pakora batter to make it gluten-free.
    • Spicy Version: Add extra green chilies or red chili powder for a spicier kadhi.

    Benefits of Including Kadhi Pakora in Your Diet:

    • Probiotic-rich: Yogurt used in kadhi is rich in probiotics, which promote gut health and digestion.
    • Good Source of Protein: Gram flour used in pakoras adds protein to the dish, making it a satisfying meal option.
    • Balanced Meal: Kadhi Pakora is a balanced meal that provides carbohydrates, protein, and fats, along with essential vitamins and minerals.

    Frequently Asked Questions (FAQs) about Kadhi Pakora:

    Q: Can I make kadhi without pakoras?

    A: Yes, you can skip adding pakoras and enjoy the kadhi as a creamy yogurt-based curry with a tempering of spices.

    Q: How long does kadhi pakora last in the refrigerator?

    A: Kadhi Pakora can be stored in the refrigerator for up to 3-4 days. Reheat gently on the stovetop before serving.

    Q: Can I freeze kadhi pakora?

    A: While you can freeze kadhi pakora, the texture of the pakoras may change slightly upon thawing. It’s best enjoyed fresh or stored in the refrigerator for a few days.

    For more delicious Indian curry recipes, visit Manjula’s Kitchen. Explore a variety of vegetarian curry dishes featuring a range of spices, vegetables, and legumes to add flavor and variety to your meals.

    For more delicious Indian recipes, check out Manjula’s Kitchen: Chole Bhature, Naan, Paneer Tikka Masala, Aloo Paratha, Vegetable Biryani.

  • Mango Lassi

    Mango Lassi

    Mango Lassi

    Mango Lassi

    Mango Lassi is a soothing cold drink for hot summer days or to brighten up any meal. This pale drink is a blend of mango and yogurt. A popular beverage in Indian restaurants.
    3.67 from 6 votes
    Prep Time 5 minutes
    Cook Time 5 minutes
    Total Time 10 minutes
    Course Drinks
    Cuisine Indian
    Servings 3 people

    Ingredients
      

    • 2 cups ripe mangoes peeled and chopped
    • 1 cup yogurt curd, dahi
    • 1/2 cup milk
    • 3 tbsp sugar adjust to taste
    • 1/8 tsp cardamom ilachi
    • 1 tbsp mint chopped optional
    • 3 cup crushed ice or ice cubes,(use as needed)

    Instructions
     

    • Blend yogurt, mango, and 2 tablespoons sugar and taste before adding more sugar. How much sugar is used depends on the sweetness of the mango and the yogurt.
    • Add and cardamom powder and blend. If it is too thick, add some water to desired consistency. Pour into a tall glass and garnish with mint leaves. ice and cardamom powder and blend again.

    Notes

    Tips
    Adjust ingredient quantities depending on the sweetness of the mango and the thickness of the yogurt. Mango Lassi it is better if the mangoes are not fibrous.
    You may also enjoy Falooda, Lemonade  
    Keyword Kid Friendly, Mango Drink, Picnic Drink
    Tried this recipe?Let us know how it was!

  • Dal Makhani

    Dal Makhani

    Dal Makhani

    Dal Makhani, Punjabi Style

    Dal Makhani is a popular dish from state of Punjab and across North India. Rich and hearty, dal makhani is a combination of whole urad (an Indian lentil)and red kidney beans. It goes well with Naan, and Tandoori Roti (oven-baked flat bread).
    5 from 1 vote
    Prep Time 20 minutes
    Cook Time 40 minutes
    Total Time 1 hour
    Course Main Course
    Cuisine Indian
    Servings 2 people

    Ingredients
      

    • 1/2 cup whole urad dal
    • 1/8 cup red kidney beans rajma
    • 1 tsp ginger grated
    • 1 green chili, finely chopped
    • 1/2 tsp turmeric haldi
    • 3/4 tsp salt
    • 1/2 tsp mango powder amchoor
    • 1/4 tsp garam masala
    • 1/4 cup cream

    For Seasoning

    • 2 tbsp ghee, clarified ghee
    • 1/2 tsp cumin seeds jeera
    • 1/8 tsp asafetida hing
    • 3 whole dried red chilies
    • 1/4 tsp red chili powder
    • 1/2 tbsp ginger thinly sliced

    Instructions
     

    • Wash urad dal and kidney beans well. Soak the dal in six cups of water at least for eight hours. After soaking, dal will be about two and a half times the volume of the original.
    • Place the dal in a pressure cooker with four cups of water. Add the salt, turmeric, ginger, and green chili, and cook over medium high heat. When it begins to steam, turn the heat down to medium. Cook 25 minutes.
    • Turn off the heat. Wait until steam has stopped before opening the pressure cooker. The dal and kidney beans should be soft and tender.
    • Lightly mash the kidney beans and dal. Cook for another five minutes on low-to-medium heat.
    • Add cream, garam masala, and amchoor powder. Cook for ten minutes on low heat.

    For Seasoning

    • Heat the ghee in a small saucepan. Test the heat by adding one cumin seed to the oil; if it cracks right away, the oil is ready. Add cumin seeds. When they crack, add the asafetida, red chilies, and red chili powder. Stir for a few seconds.
    • Add one teaspoon of water to keep the spices from burning. Pour the spiced ghee over the dal.
    • Garnish with shredded ginger.

    Notes

    Serving suggestion, taste best with Naan, or Tandoori Roti
    Tried this recipe?Let us know how it was!

    Punjabi Dal Makhani: A Step by Step Urad Dal Makhani Recipe

    Dal Makhani is a rich and creamy lentil dish that originates from the Punjab region of India. Made with black lentils (urad dal), kidney beans, and a blend of aromatic spices, this dal makhani recipe is a staple in Punjabi cuisine. Known for its luscious texture and indulgent flavors, Dal Makhani is a popular Indian dish made primarily from lentils (dal) and typically enjoyed during the winter months. 

    It is a rich and creamy dish that is usually gluten-free, as lentils themselves are naturally gluten-free. The main ingredients for making Dal Makhani include black lentils (urad dal), red kidney beans (rajma), butter, cream, and various spices such as cumin, coriander, turmeric, and garam masala. It is traditionally cooked slowly over a low flame, allowing the flavors to meld together and the lentils to become tender. Dal Makhani is often served with rice or Indian bread like naan or roti.

    Step 1: Preparation of Ingredients:

    Begin by gathering all the necessary ingredients for making Dal Makhani. Rinse the black lentils and kidney beans under cold water and soak them for at least 8 hours or overnight to soften. Finely chop tomatoes, ginger, and green chilies to prepare the base for the dal. Having all the ingredients prepped and ready will make the cooking process smoother.

    Step 2: Cooking the Lentils:

    In a pressure cooker or a pot, add the soaked black lentils and kidney beans along with fresh water, salt, and a pinch of turmeric powder. Pressure cook or simmer until the lentils and beans are soft and fully cooked. Cooking them until tender is essential for achieving the creamy texture of Dal Makhani. Once cooked, set them aside while we prepare the gravy.

    Step 3: Preparing the Gravy:

    In a large pot or saucepan, heat oil or ghee over medium heat. Add whole spices such as cinnamon, cloves, and cardamom pods, and let them sizzle. Then, add finely chopped ginger and green chilies, and sauté until fragrant. The aromatic base will infuse the gravy with depth of flavor.

    Step 4: Adding Tomatoes: 

    Once the aromatics are sautéed, it’s time to add the chopped tomatoes to the pot. Cook the tomatoes until they soften and break down, forming a thick gravy. You can also add tomato puree for a smoother texture. Stir in spices such as coriander powder, cumin powder, red chili powder, and garam masala, and cook until the oil separates from the mixture.

    Step 5: Cooking the Lentils with Gravy:

    Now, add the cooked black lentils and kidney beans to the pot with the tomato gravy. Stir well to combine all the ingredients. Allow the mixture to simmer for a while, allowing the flavors to meld together. This slow cooking process helps develop the rich and indulgent flavors of Dal Makhani.

    Step 6: Adding Cream and Butter:

    To finish off the dish, add a generous amount of cream and butter to the pot. Stir well to incorporate the cream and butter into the dal, creating a velvety and luxurious texture. Adjust the seasoning with salt and add a pinch of sugar to balance the acidity of the tomatoes if needed.

    Step 7: Garnishing and Serving:

    Before serving, garnish the Dal Makhani with freshly chopped cilantro leaves for a burst of freshness and color. You can also drizzle a little more cream on top for added richness. Serve the Dal Makhani hot with steamed rice, naan, or roti for a comforting and satisfying meal.

    Tips for Making Perfect Dal Makhani:

    • Soak Lentils and Beans: Soaking the black lentils and kidney beans overnight helps reduce cooking time and ensures they cook evenly.
    • Slow Cooking: Allow the dal to simmer on low heat for a longer time to develop the flavors and achieve the desired creamy consistency.
    • Use Fresh Cream and Butter: Using fresh cream and butter adds richness and depth of flavor to the dish.

    Variations of Dal Makhani:

    • Spicy Dal Makhani: Add extra green chilies or red chili powder for a spicier version of the dish.
    • Restaurant-style Dal Makhani: For a restaurant-style flavor, add a tadka (tempering) of cumin seeds and dried red chilies in ghee and pour it over the prepared dal before serving.

    Benefits of Including Dal Makhani in Your Diet:

    • High in Protein: Dal Makhani is rich in protein from black lentils and kidney beans, making it a nutritious option for vegetarians and vegans.
    • Rich in Iron: Black lentils are a good source of iron, which is essential for maintaining healthy blood cells and preventing anemia.
    • Source of Healthy Fats: The addition of cream and butter provides healthy fats, which are important for overall health and satiety.

    Frequently Asked Questions (FAQs) about Dal Makhani:

    Q: Can I make Dal Makhani in advance?

    A: Yes, Dal Makhani tastes even better when made in advance as it allows the flavors to develop. It can be stored in the refrigerator for up to 3-4 days and reheated before serving.

    Q: Can I freeze Dal Makhani?

    A: Yes, Dal Makhani freezes well. Allow it to cool completely, then transfer it to airtight containers or freezer bags and freeze for up to 3 months. Thaw overnight in the refrigerator before reheating.

    Q: Is Dal Makhani gluten-free?

    A: Yes, Dal Makhani is naturally gluten-free, making it suitable for those with gluten intolerance or celiac disease.

    For more delicious Indian dal recipes, visit Manjula’s Kitchen. Explore a variety of vegetarian dal dishes featuring a range of lentils, spices, and vegetables to add flavor and variety to your meals.

    For more delicious Indian recipes, check out Manjula’s Kitchen: Chole Bhature, Naan, Paneer Tikka Masala, Aloo Paratha, Vegetable Biryani.

  • Spinach Paratha

    Spinach Paratha

    Spinach Paratha

    Spinach Paratha

    This is a great “anytime” meal. Spinach Parathas are whole-wheat Indian flat bread stuffed with a spicy spinach filling. Makes 6 Parathas.
    5 from 1 vote
    Course Bread, Breakfast
    Cuisine Indian
    Servings 6 Parathas

    Ingredients
      

    Dough

    • 1 cup whole-wheat flour
    • 1/2 cup water Add more water as needed
    • Pinch of salt

    Spinach Filling

    • 2 cups chopped spinach
    • Pinch of asafetida
    • 1/4 teaspoon salt
    • 1/2 teaspoon cumin seeds
    • 1/4 teaspoon red chilly flakes
    • 1/4 cup whole-wheat flour for rolling
    • Oil to cook

    Instructions
     

    Dough

    • Mix flour, salt and water togather to make soft dough (if needed add more water).
    • Knead the dough for a few minutes on a lightly greased surface to make soft, smooth and pliable dough.
    • Set the dough aside and cover it with a damp cloth. Let the dough rest for at least ten minutes.

    Filling

    • Heat the oil in a saucepan on medium-high heat. Oil is the right temperature when cumin cracks immedialety after being put the oil.
    • Add the asafetida and cumin seeds. After the cumin seeds crack, add the spinach.
    • Stir-fry, making sure to press the spinach down so the water can evaporate.
    • Cook the spinach until most of the water has evaporated. Spinach still should be moist and should be able to form a ball. Add the salt and pepper and mix well. Set aside until the spinach cools off.

    Making of Paratha

    • Divide the dough and spinach filling into 6 equal parts.
    • Roll the dough into 3 inch circles. Put the filling in the center. Seal by pulling the edges together and make into a ball. Procced to make all six balls.
    • Each ball needs to settle for two minutes before you start rolling. Note: If you don’t wait long enough spinach mixture will seep through the edges when rolling the paratha.
    • Heat the skillet on medium high. Note: An iron skillet works best. To see if the skillet is ready, put a couple of drops of water on it. If the water sizzles right away, the skillet is ready.
    • Press th filled ball lightly on dry whole-wheat flour from both sides.
    • Roll the ball light handed to make 6-inch circle. Note: Keep the sealed side of the ball on the top.
    • If the paratha sticks to the rolling pin or rolling surface, lightly dust the paratha with dry flour.
    • Place the paratha over the skillet.
    • After paratha start changing color and start puffing in different places flip the paratha over. You will notice some golden-brown spots.
    • After few seconds, spread 1 teaspoon of oil on the paratha. Flip the paratha and lightly press the puffed areas of the paratha with a spatula.
    • Flip again and press with the spatula making sure the paratha is golden-brown on both sides.
    • Cool the parathas on a wire rack so they don’t get soggy.
    • Parathas can be kept outside for up to 2 days wrapped in aluminum foil or in a closed container. For later use paratha can be refrigerated for 3-4 days.

    Notes

    Serving suggestions
    • Parathas can be served with plain yogurt, potatoes with gravy, and with any Indian pickle.
    • Put cheese in the middle, fold over, heat, and eat like a quesadilla.
    Keyword Bread, Cheese, Palak, Paratha, Spinach, stuffed, Vegan, Wheat
    Tried this recipe?Let us know how it was!
  • Bhindi Masala – Spicy Okra

    Bhindi Masala – Spicy Okra

    Bhindi Masala

    Bhindi Masala – Spicy Okra

    Bhindi Masala is a delicious, quick & easy to make vegetable dish. This is a North Indian style recipe with just perfect blend of spices.  
    5 from 3 votes
    Prep Time 10 minutes
    Cook Time 10 minutes
    Total Time 20 minutes
    Course Main Course
    Cuisine Indian
    Servings 2 people

    Ingredients
      

    • 1/2 pound okra bhindi, lady finger
    • 1-1/2 tbsp oil canola, vegetable
    • 1/2 tsp cumin seeds jeera
    • 1/8 tsp asafetida hing
    • 1 tbsp coriander powder dhania
    • 1/2 tsp red chili powder
    • 1/2 tsp turmeric haldi
    • 1/2 tsp salt
    • 1/2 tsp mango powder amchoor
    • 1 tbsp besan gram flour
    • 2 tbsp finely chopped yellow bell pepper
    • 2 tbsp finely chopped red bell pepper

    Instructions
     

    • Wash the okra and pat dry. Make sure to completely dry the okra as wet okra will be sticky when cutting.
    • Cut off the both ends of the okra, and slice lengthwise in halves. Set aside.
    • Heat the oil in a frying pan on medium-high heat. Test the heat by adding one cumin seed to the oil; if seed crack right away oil is ready. Add the cumin seeds and asafetida (hing). When the cumin seeds crack, add the okra.
    • Stir for a minute and reduce the heat to medium. Cover the okra for two to three minutes.
    • Remove the cover and add the coriander powder, red cayenne pepper and turmeric, stir.
    • Next add gram flour (besan) and continue to stir-fry until the okra is tender. Add the salt, mango powder and bell peppers, cook for another minute. Salt is added last to avoid the okra becoming lacy.  Masala Bhindi is ready. Enjoy!

    Notes

    Variations
    Adding colorful bell pepper is a great garnish for the okra and adds flavor to the dish.
    You can substitute the bell pepper with sliced tomatoes as a garnish.
    You can also slice the okra in 1/4 inch pieces and follow the same method above.
    Keyword Spicy Okra, Lady Finger,
    Tried this recipe?Let us know how it was!

  • Bread Pakoras

    Bread Pakoras

    Bread Pakoras

    Bread Pakoras

    Spicy Bread Pakoras are great as an appetizer, finger food for any gathering, and a tasty compliment to your afternoon tea.
    5 from 1 vote
    Prep Time 5 minutes
    Cook Time 15 minutes
    Total Time 20 minutes
    Course Appetizer
    Cuisine Indian
    Servings 4 people

    Ingredients
      

    • 4 slices white firm bread
    • 1 cup besan gram flour
    • 1 tbsp rice flour
    • 1 tsp salt
    • 1/8 tsp asafetida hing
    • 1 tsp cumin seeds jeera
    • 2 tbsp green finely chopped
    • 1/4 cup cilantro finely chopped hara dhania
    • 1/2 cup water little more or less use as needed

    Instructions
     

    • Remove the crust from all sides of the bread. Slice the bread lengthwise into 3 equal parts.
    • Mix all the dry ingredients together: Gram flour (besan), rice flour, asafetida, cumin seeds, and salt. Rice flour adds to the crispness. Add the water slowly to make a smooth batter. (Batter should be the consistency of pancake batter or dosa batter)
    • Next, add the green chilies and cilantro. Mix well.
    • Heat the oil in a frying pan on medium high heat. Frying pan should have at least 1 inch of oil. To check if the oil is ready, put one drop of batter in the oil. The batter should come up but not change color right away.
    • Dip the bread slices in the batter one at a time and slowly drop into the frying pan. Fry the Pakoras in small batches. The pakoras will take about 4 to 5 minutes to cook.
    • Turn them occasionally. Fry the Pakoras until both sides are golden-brown. Repeat this process. The crispy, delicious Bread Pakoras are ready to serve.

    Notes

    Tips:
    If oil is too hot Pakoras will cook too fast and will not be crispy; if oil is not hot enough Pakoras will be greasy. You may have to adjust the heat as needed while cooking.
    Variations:
    Use 1/4 cup of chopped spinach or 2 tablespoons of chopped fenugreek leaves as a substitute for the chopped cilantro.
    Serving suggestions:
    The bread pakoras are best when dipped with a fresh cilantro chutney or 
    Pakoras taste best when they are served hot.
    Pakoras can be made one day in advance do not refrigerate. When ready to eat, place on a cookie sheet and heat in the preheated oven on 300 degrees.
    Keyword Crispy Pakora, Kid Friendly, Spicy Fritters, Tea Time Snack, Vegan
    Tried this recipe?Let us know how it was!

  • Badam Burfi (Almond Candy)

    Badam Burfi (Almond Candy)

    Badam Burfi

    Badam Burfi (Almond Candy)

    Badam (almond) Burfi is a healthy substitute for candy but is rich in flavor. Almond burfi can be served as dessert or snack.
    5 from 1 vote
    Prep Time 10 minutes
    Cook Time 20 minutes
    soaking time 30 minutes
    Total Time 30 minutes
    Course Dessert
    Cuisine Indian
    Servings 10 people

    Ingredients
      

    • 1 cup whole almonds
    • 1 cup sugar
    • 1/8 tsp cardamom powder
    • 2 tbsp ghe clarified butter
    • 1/3 cup milk

    Instructions
     

    • Soak the almonds in hot water for 30 minutes. Peel the skin off the almonds. 
    • Blend the almonds into a fine paste using just enough milk as needed to blend. Add the sugar and whip it for a couple of minutes.
    • Heat the ghee in the frying pan on low-medium heat. As the ghee melts, add the almond paste and cook on medium heat, stirring continuously.
    • Continue stirring until the mixture thickens to the consistency of bread batter and starts leaving the sides of the pan.
    • Add the cardamom powder. Remove the frying pan from the heat.
    • Whip the batter using a spoon in a circular motion for about two to three minutes.
    • Pour it into the prepared greased pan. Smooth en the surface of the mixture to about a quarter inch thick.
    • Let cool for about 20 minutes until burfi is just look warm.
    • Cut into 1-inch squares or any shape you like.

    Notes

    Cool to the room temperature and store burfi in an airtight container. Almond burfi has a long shelf life and can be kept outside for up to one week. When refrigerated, almond burfi will last a couple of months.
    Suggestions: 
    You can make burfi using almond meal or almond flour. If you are using almond meal, mix one cup almond meal with the sugar and milk and knead the mixture for two minutes. Let the mixture sit for 10 to 15 minutes. Then follow the directions above. The almond flour burfi will be a little chewy.
    Tried this recipe?Let us know how it was!