Category: North Indian Recipes

North Indian Recipes: A Journey Through Flavors

There’s something irresistibly comforting about North Indian cuisine. It’s not just the rich, aromatic spices that tantalize your senses, but the sheer warmth and heartiness of the dishes that make you feel at home, no matter where you are. Today, let’s explore some North Indian recipes, perfect for any occasion, and delightfully vegetarian to boot.

Rajma Galouti Kebabs

Imagine biting into Rajma Galouti Kebabs, where the robust flavor of kidney beans meets a medley of aromatic spices. These kebabs, a wonderful example of North Indian vegetarian recipes, are perfect for starting your meal. They pair beautifully with a refreshing sip from one of the many delightful Indian beverages, perhaps a tangy aam panna or a cooling lassi.

Methi Malai Matar

The gentle bitterness of fresh fenugreek leaves mingles with the sweet pop of peas in Methi Malai Matar. This dish, creamy and subtly spiced, epitomizes the charm of North Indian food recipes. It sits wonderfully alongside a bowl of fragrant rice or warm naan, complemented by a light, crisp salad from the array of soups and salads recipes available.

Pindi Chana

For those who crave a hearty, robust dish, Pindi Chana offers chickpeas enveloped in a symphony of spices, each bite bursting with flavor. This traditional gem from North Indian recipes is best enjoyed with fluffy bhature or poori. Add a tangy, spicy pickle from the pickle chutney selection to elevate the experience.

Enhancing Your North Indian Menu

To elevate your North Indian feast, consider adding delightful Indian snacks like dhokla or kachori. These snacks bring a playful variety of textures and flavors that dance on your palate.

To end on a sweet note, indulge in Indian desserts recipes such as the delicate, syrup-soaked rasmalai or the creamy, comforting shrikhand.

For healthier options, dishes like dal makhani and bhindi masala offer deliciously light choices, perfect for those mindful of their diet.

For your next gathering, explore the wealth of recipes in the popular party recipe collection to ensure your menu impresses every guest.

More North Indian Vegetarian Recipes

Dum Aloo

Imagine baby potatoes, cooked gently until tender, then enveloped in a rich, spiced gravy that epitomizes comfort food. This is Dum Aloo, a beloved staple in North Indian vegetarian recipes. It’s a dish that not only satisfies but also invites you to savor each mouthful. Pair it with a vibrant side from the vegetables sautéed / dry recipes, like a simple yet flavorful stir-fry.

Sweet Endings: Gulab Jamun and Kheer

No meal is complete without a sweet indulgence. Gulab Jamun, those soft, syrup-drenched delights, and Kheer, a creamy rice pudding adorned with cardamom and nuts, are perfect for rounding off your feast. These desserts, highlighted in the Indian desserts recipe category, add a touch of sweetness to your culinary journey.

Frequently Asked Questions (FAQs)

Q: What are some popular North Indian recipes? 

A: Some popular North Indian recipes include Rajma Galouti Kebabs, Methi Malai Matar, Pindi Chana, Dum Aloo, Gulab Jamun, and Kheer. These dishes are flavorful, nutritious, and perfect for any occasion.

Q: How can I make traditional North Indian food suitable for a vegetarian diet? 

A: To make traditional North Indian food suitable for a vegetarian diet, try recipes like Rajma Galouti Kebabs, Methi Malai Matar, and Dum Aloo. These recipes are hearty, flavorful, and perfect for vegetarians.

Q: What are some easy North Indian vegetarian recipes? 

A: Some easy healthy vegetarian recipes include Rajma Galouti Kebabs, Methi Malai Matar, and Pindi Chana. These dishes are quick to prepare and provide the necessary nutrients for a healthy diet.

Q: Can I prepare North Indian food recipes in advance? 

A: Yes, many North Indian food recipes can be prepared in advance and stored. Dishes like Rajma Galouti Kebabs and Pindi Chana can be made ahead of time and refrigerated, while snacks like dhokla and kachori can be prepped and frozen.

Q: What are some sweet North Indian food recipes for special occasions? 

A: Some sweet North Indian food recipes for special occasions include Gulab Jamun and Kheer. These desserts are classic, easy to prepare, and perfect for celebrations.

Conclusion

North Indian recipes are a celebration of diverse flavors and rich cultural heritage. Whether you’re looking for North Indian vegetarian recipes, specific North Indian food recipes, or comprehensive vegetarian Indian recipes, these dishes will bring variety and flavor to your meals. So, gather your ingredients, try out these recipes, and enjoy the rich and diverse world of North Indian cuisine. Happy cooking and happy eating!

By incorporating these dishes into your menu, you’ll be able to enjoy a wide variety of delicious and nutritious foods. Whether you’re looking for snacks, main courses, or desserts, there’s a North Indian recipe to suit every taste. Don’t forget to check out Manjula’s Kitchen for more inspiration and culinary delights. Happy cooking and happy eating!

  • Masala Peanuts

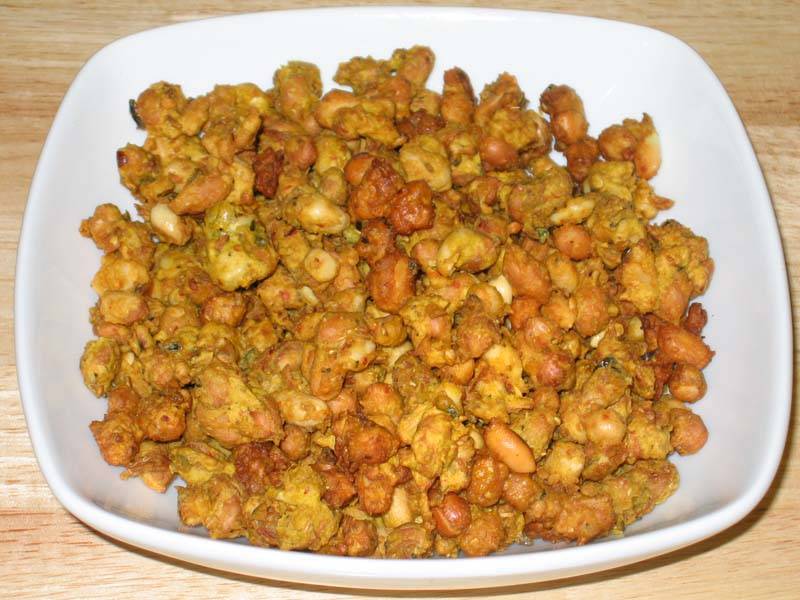
    Peanut Masala Recipe: A Spicy Delight

    Masala Peanuts are delightful appetizers perfect for holidays and festivals, offering a crunchy, gluten-free snack option that satisfies both vegan and non-vegan palates alike. Peanut masala recipe is a beloved snack across India, offering a delightful combination of crunchy peanuts and aromatic spices. This masala peanuts recipe is a favorite among snack enthusiasts for its bold flavors and addictive crunch. Whether you’re hosting a gathering or simply craving a savory treat, learning how to make masala peanuts recipe at home is both rewarding and satisfying.

    How to Make Masala Peanuts Recipe: Step-by-Step Guide

    Step 1: Prepare the Peanuts

    Start by selecting fresh, raw peanuts for the best results. Rinse them thoroughly under cold water to remove any dirt or debris. Then, pat them dry using a clean kitchen towel or paper towels.

    Step 2: Dry Roast the Peanuts

    Heat a non-stick pan over medium heat. Once the pan is hot, add the peanuts in a single layer. Dry roast them, stirring occasionally, until they turn golden brown and emit a nutty aroma. This process typically takes about 8 to 10 minutes. Keep a close eye on them to prevent burning.

    Step 3: Prepare the Spice Mixture

    While the peanuts are roasting, prepare the spice mixture. In a small bowl, combine masala peanuts recipe spices such as red chili powder, turmeric powder, cumin powder, chaat masala, and salt according to your taste preferences. Adjust the spice levels to suit your palate.

    Step 4: Coat the Peanuts with Spices

    Once the peanuts are roasted to perfection, transfer them to a large mixing bowl. While they are still warm, sprinkle the prepared spice mixture over the peanuts. Toss them gently to ensure that each peanut is evenly coated with the spices. Allow the peanuts to cool completely before serving.

    Step 5: Serve and Enjoy

    Your homemade masala peanuts are now ready to be enjoyed! Serve them as a standalone snack or pair them with your favorite beverages. Store any leftovers in an airtight container to maintain their freshness and crunchiness.

    Tips for Making Perfect Masala Peanuts

    • Experiment with different spice blends to customize the flavor according to your preferences. 
    • You can add ingredients like amchur powder for tanginess or garam masala for extra warmth.
    • For an extra layer of flavor, consider adding roasted garlic or curry leaves to the spice mixture.
    • Make sure to roast the peanuts evenly to achieve a uniform golden brown color and prevent any burnt spots.
    • Allow the peanuts to cool completely before storing them to maintain their crispiness.

    Variations of Masala Peanuts

    Sweet and Spicy: Add a touch of sweetness to your masala peanuts by incorporating a bit of powdered sugar or jaggery along with the spices.

    Herb Infused: Experiment with fresh herbs like cilantro, mint, or curry leaves to add a refreshing twist to your masala peanuts.

    Nutty Crunch: Enhance the texture of your masala peanuts by tossing them with a handful of toasted cashews, almonds, or pistachios.

    Benefits of Masala Peanuts

    Rich in Protein: Peanuts are an excellent source of plant-based protein, making masala peanuts a nutritious snack option.

    Good Source of Healthy Fats: Peanuts are high in monounsaturated fats, which are beneficial for heart health when consumed in moderation.

    Packed with Essential Nutrients: Peanuts are rich in essential nutrients like vitamins, minerals, and antioxidants, contributing to overall well-being.

    FAQs about Masala Peanuts

    Can I use pre-roasted peanuts for this recipe?

    While you can use pre-roasted peanuts, roasting them yourself allows you to control the level of crunchiness and ensures that they are freshly toasted.

    How long do homemade masala peanuts stay fresh?

    When stored in an airtight container at room temperature, homemade masala peanuts can stay fresh for up to two weeks. However, they are best enjoyed within the first few days to maintain their crispiness.

    Can I make masala peanuts without oil?

    Yes, you can skip the oil and dry roast the peanuts directly in a pan for a healthier alternative. However, using a small amount of oil helps the spices adhere to the peanuts more effectively.

    For more delightful Indian recipes, explore Manjula’s Kitchen, where you’ll find a treasure trove of culinary inspiration ranging from traditional dishes to modern twists on classic favorites. Be sure to check out recipes like Aloo Gobi, Palak Paneer, and Chana Masala for a taste of authentic Indian cuisine.

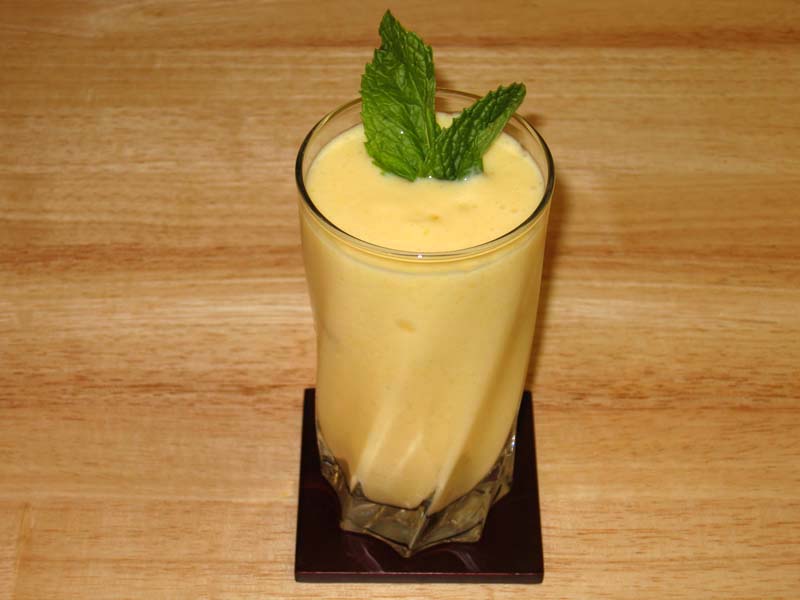
    If you enjoyed making these masala peanuts, why not try your hand at some other mouthwatering recipes from Manjula’s Kitchen? Vegetable Pakoras, Paneer Tikka, Aloo Gobi (Potato Cauliflower), Samosa, Mango Lassi

    Explore these recipes and more for a culinary journey through the vibrant and diverse flavors of Indian cuisine.

  • Boondi (bundi) Ladoo


    Boondi Ladoo

    Boondi Ladoo is a popular mouthwatering dessert and must to have at all special occasions all over India. Boondis are very small, round deep-fried balls that have been soaked in fragrant sugar syrup. After soaking, the syrup is drained, and the syrup infused boondi are formed into balls (ladoos).

    • 1 cup besan (gram flour)
    • 1/2 cup water use as needed, to make batter
    • 1-1/2 cup sugar
    • 1 cup water for syrup
    • 6 green cardamom pods (ilachai)
    • 1 tbsp sliced almonds

    Oil to fry

    Perforated Spoon, Skimmer, or Ladle: to make Boondi

    The critical part of boondi making is to use the right kind of utensil for the batter to drop through the holes into the hot oil to form the little pearl shaped fried balls. To accomplish this you need to use a flat skimmer, strainer or perforated ladle that has several round holes on the surface, each about the size of a whole black peppercorn.

    1. Crack open the cardamom pods and remove the seeds. Crush the seeds and keep aside.

    2. Put the water and sugar in a saucepan and bring to a boil on medium-high heat. When the syrup comes to a boil, turn the heat down to medium and stir to dissolve the sugar. Let it simmer until the syrup is about half thread consistency or 220 degrees on the candy thermometer.
    3. Mix the gram flour with water to make a smooth pancake-like batter or slightly thicker than dosa batter.
    4. Heat the oil in a frying pan on medium high heat. The frying pan should have at least 1 1/2 inches of oil. Tip: To test if the oil is the right temperature, drop a pinch of batter into the oil; if it rises immediately without changing color then the oil is ready to start frying the
    5. Hold the skimmer about 1 to 1 1/2 inches above the oil over the center of the frying pan with one hand. With your other hand pour some of the batter onto the skimmer to cover all of the holes without spilling over the edge of the skimmer. Tip: if you hold the skimmer higher than 11/2 inches above the oil boondi will not be round.
    6. The batter will start dropping through the holes into the oil. If the batter doesn’t drop right away through the holes, pour the batter on the skimmer back into the batter bowl, mix a little more water to the batter and start again. Drop enough boondi into the oil so they just cover the surface of the oil in frying pan in a single layer
    7. Fry them until the sound of sizzling stops and boondis are light gold in color but not crispy! Lift the boondi out of the oil with a slotted spoon (this allows excess oil to drip back into the frying pan) and put them directly into the warm syrup and mix.*
    8. Before making the next batch of boondi, wipe clean the skimmer. This helps to keep the boondi round.
    9. Repeat the process of making boondi and adding to the syrup with rest of the batter. You may have to adjust the heat in between making boondis.
    10. When finished frying the boondi, let them soak in the syrup for few minutes. Add the crushed cardamom seeds and sliced almonds to the syrup. Now drain off the excess syrup.
    11. If the boondis are still hot, let them sit only until they are warm enough to handle – don’t let them to cool off. If the boondis become cold you will not be able to form them into ladoos.
    12. To make the ladoos, scoop up some of the boondi mixture into your palm with a spoon. Gently squeeze the mixture between both palms to shape into a round ball about the size of a golf ball. As you are squeezing some of the syrup will come out. You can make the ladoo larger or smaller if you have a preference.
    13. As you finish making each ladoo, put it on a plate and continue on to make the next ladoo.
    14. As the Ladoos cool to room temperature they will become firm but they should still be moist.

    Shelf Life

    Ladoos will keep at room temperature in a covered container for up to 10 days and for one month in the refrigerator.

    Tips

    If the syrup is not of the right temperature, you will not be able to form the ladoos.

    If the boondis cool down to room temperature before being shaped into balls, the sugar will crystallize.

    If you are not able to make ladoos, don’t worry. You can still enjoy them as “meethi boondi” or sweet boondi.

    *If you like the boondi for raita or making some other salty snack don’t add to the syrup.

    Dessert
    Indian
    Festival Special, Kid Friendly, Popular Dessert

  • Rajma Chawal (Kidney Bean Curry)

    How To Make Rajma Chawal Recipe: A Jain Rajma Recipe with Tips and FAQs

    Rajma Chawal, a quintessential North Indian dish, is beloved for its rich flavors and comforting texture. While traditionally made with kidney beans simmered in a tomato-based gravy, there are various regional and dietary variations to this dish. In this rendition, we present a Jain version of Rajma Chawal, devoid of onion and garlic, yet bursting with aromatic spices and wholesome goodness.

    Preparation:

    Wash the kidney beans thoroughly under running water to remove any dirt or impurities.

    Soak the kidney beans in about six cups of water for at least 6 hours or overnight. This helps in softening the beans and reducing cooking time.

    Making the Paste:

    Cut the tomatoes into small pieces and slice the green chilies lengthwise, removing the seeds if you prefer a milder taste.

    Peel and chop the ginger.

    In a blender, combine the tomatoes, green chilies, and ginger to make a smooth paste. Set aside.

    Cooking:

    Heat the cooking oil in a pressure cooker over medium heat.

    To test the oil temperature, add one cumin seed. If it crackles right away, the oil is ready.

    Add a pinch of asafetida followed by the cumin seeds. Allow the cumin seeds to crackle.

    Once the cumin seeds start crackling, add the prepared tomato paste to the cooker.

    Stir in the coriander powder, turmeric powder, red chili powder, black pepper powder, and paprika. Mix well.

    Stir-frying:

    Stir-fry the mixture for two to three minutes or until the oil begins to separate from the sides. This step enhances the flavor of the spices and ensures a rich gravy.

    Adding Kidney Beans:

    Drain the soaked kidney beans and add them to the pressure cooker.

    Season with salt according to taste.

    Pour in three cups of water and mix well to combine all the ingredients.

    Pressure Cooking:

    Close the pressure cooker with its lid securely.

    Cook over medium-high heat until the pressure cooker starts steaming.

    Reduce the heat to medium and continue cooking for twelve minutes.

    Finishing Touches:

    Once the cooking time is complete, turn off the heat and allow the pressure to release naturally.

    Once the steam has stopped, carefully open the pressure cooker lid.

    Mashing and Adjusting Seasoning:

    The kidney beans should be soft and tender. Gently stir and mash them to thicken the gravy.

    Taste the Rajma and adjust the salt and pepper as per your preference.

    Garnishing:

    Serve the Jain Rajma hot, garnished with chopped tomatoes for a refreshing burst of flavor.

    Tips and Suggestions:

    Soaking the kidney beans overnight or for at least 6 hours is crucial as it helps in reducing the cooking time and ensures even cooking.

    Use mustard oil for an authentic flavor, but if unavailable, any cooking oil can be substituted.

    Adjust the quantity of green chilies and red chili powder according to your spice preference.

    For a creamier texture, you can mash some of the kidney beans before serving.

    Garnish the Rajma with freshly chopped cilantro for added freshness and aroma.

    Serve Rajma Chawal with steamed rice or Indian bread like roti or naan for a wholesome meal.

    Benefits of Rajma Chawal:

    High in Protein: Kidney beans are an excellent source of plant-based protein, making Rajma Chawal a nutritious meal choice, especially for vegetarians and vegans.

    Rich in Fiber: Rajma is loaded with dietary fiber, which aids digestion, promotes satiety, and helps maintain a healthy weight.

    Essential Nutrients: This dish provides essential nutrients such as iron, potassium, and folate, which are vital for overall health and well-being.

    Heart-Healthy: Consuming kidney beans regularly may help lower cholesterol levels and reduce the risk of heart disease.

    Satisfying and Comforting: Rajma Chawal is not only nutritious but also deeply comforting, making it a favorite comfort food for many.

    FAQs (Frequently Asked Questions):

    Q: Can I use canned kidney beans instead of dried ones?

    A: Yes, you can use canned kidney beans for convenience. However, dried beans are preferred for their texture and flavor.

    Q: Can I skip soaking the kidney beans?

    A: Soaking the kidney beans is essential as it helps in reducing cooking time and aids in digestion. Skipping this step may result in unevenly cooked beans.

    Q: How do I make Jain Rajma without onion and garlic?

    A: In this Rajma recipe, we have omitted onion and garlic to make it suitable for a Jain diet. The rich flavor comes from a blend of aromatic spices and tomatoes.

    Q: Can I make this Rajma recipe without a pressure cooker?

    A: While a pressure cooker significantly reduces the cooking time, you can cook Rajma on a stovetop in a heavy-bottomed pot. It will require longer cooking time and frequent stirring to prevent sticking.

    Q: How long can I store leftover Rajma?

    A: Leftover Rajma can be stored in an airtight container in the refrigerator for up to 3-4 days. Reheat thoroughly before serving.

    Jain Rajma Chawal is a delicious and wholesome dish that can be enjoyed by everyone, regardless of dietary preferences. With aromatic spices, creamy kidney beans, and a rich tomato gravy, it’s a comforting meal that’s perfect for any occasion. Follow this simple rajma chawal recipe and savor the authentic flavors of North Indian cuisine right in your own kitchen.
    Explore more delightful Rajasthani recipes on Manjula’s Kitchen, Explore more appetiser recipes on Manjula’s Kitchen: Vegetable Samosas, Paneer Tikka, Crispy Spinach Pakoras, Mango Lassi, Masala Chai, Gulab Jamun, Kheer (Rice Pudding)

  • Pani Puri

    Pani Puri Recipe: The Ultimate Guide to Making Delicious Pani Puris

    Introduction to Pani Puri


    Pani Puri, also known as golgappa or phuchka, is a beloved Indian street food famous for its burst of flavors and crunchy texture. This pani puri recipe encapsulates the essence of Indian culinary tradition, offering a delightful mix of tangy, spicy, and sweet flavors. Perfect for gatherings, parties, or simply as a snack, making pani puri at home is a rewarding experience that brings friends and family together.

    How to Make Pani Puri: Step-by-Step Guide


    Preparing the Puris


    To start this recipe for pani puri, you’ll need puris, which are hollow, crispy semolina or wheat spheres. You can either make them at home or purchase them from a store. If making at home, mix semolina or wheat flour with water and knead into a firm dough. Roll out small circles and deep fry until golden brown. Set aside to cool.

    Preparing the Pani


    The pani puri is incomplete without its signature spicy and tangy water. In a blender, combine mint leaves, coriander leaves, green chilies, ginger, tamarind pulp, black salt, roasted cumin powder, chaat masala, and salt. Blend until smooth. Strain the mixture and dilute it with water according to taste. Chill the pani in the refrigerator for at least an hour before serving.

    Preparing the Filling


    For the filling, boil potatoes until tender, then peel and mash them. Add boiled chickpeas, and a dash of chaat masala for extra flavor. Mix well and set aside.

    Assembling the Pani Puris


    Now comes the fun part! Take each puri and gently make a hole in the center, creating a cavity for the filling. Stuff the puris with the potato mixture and arrange them on a serving plate. Pour the chilled pani into each puri using a small spoon or a pani puri maker, ensuring they’re filled to the brim.

    Garnishing and Serving


    Garnish the pani puris with a drizzle of sweet tamarind chutney and a sprinkle of sev (crunchy chickpea flour noodles) for added texture. Serve immediately to enjoy the burst of flavors and textures in every bite.

    Tips for Perfect Pani Puris

    Fresh Ingredients: Use fresh mint, coriander, and tamarind for the pani to enhance the flavor.

    Chilling Time: Allow the pani to chill for at least an hour to let the flavors meld together.

    Crunchy Puris: Ensure the puris are crispy and hollow to hold the filling and pani without getting soggy.

    Variations of Pani Puri 

    Ragda Pani Puri: Replace the potato filling with ragda (spicy chickpea curry) for a heartier version.

    Fruit Pani Puri: Experiment with filling options like diced mango, pomegranate seeds, or grated pineapple for a fruity twist.

    Sukha Puri: Skip the pani and serve the stuffed puris with sweet tamarind chutney and spicy mint chutney for a dry version.

    Benefits of Pani Puri

    Rich in Flavor: Pani puri offers a medley of flavors, from spicy and tangy to sweet and savory.

    Customizable: You can adjust the spice level and filling according to your preference, making it suitable for all taste buds.

    Social Experience: Making and enjoying pani puri with friends and family fosters bonding and creates lasting memories.

    FAQs (Frequently Asked Questions)


    Q: Can I make the puris ahead of time?


    A: Yes, you can prepare the puris in advance and store them in an airtight container for up to a week.

    Q: How spicy should the pani be?


    A: The spice level of the pani can be adjusted according to your preference. Start with fewer green chilies and add more if desired.

    Q: Can I make a healthier version of pani puri?


    A: Yes, you can opt for baked puris and use less oil in the filling to make a healthier version of pani puri.

    For more delightful Indian recipes, visit Manjula’s Kitchen and explore a world of culinary delights!

    By following this comprehensive pani puri recipe, you’ll be able to recreate the magic of this iconic Indian street food in the comfort of your own kitchen. Whether it’s a special occasion or just a craving for something delicious, pani puri never fails to satisfy. So gather your ingredients, invite your loved ones, and embark on a flavorful journey with homemade pani puris!

    Other Recipes on Manjula’s Kitchen

    If you’re looking to explore more Indian recipes, appetizers, beverages, and desserts, be sure to check out the following links on Manjula’s Kitchen. Here are some links to recipes on Manjula’s Kitchen official website: Vegetable Pakoras Recipe

    Kaju Katli (Cashew Burfi) Recipe, Baingan Bharta (Roasted Eggplant) Recipe, Matar (Green Peas) Paneer Recipe, Besan Ladoo Recipe

  • Kadhi Pakoras

    Kadhi Pakoras

    Kadhi, a blend of yogurt and besan (gram flour) with besan pakoras, this is served with rice. This dish is popular throughout India specially in North India.

    For Kadhi

    • 1 cup yogurt (dahi, curd)
    • 2/3 cup besan (gram flour)
    • 6 cup water
    • 2 tbsp ghee (clarified butter)
    • 1/8 tsp asafetida (hing)
    • 1/2 tsp fenugreek seeds (methi dana)
    • 1/2 tsp cumin seeds (jeera)
    • 1 tsp turmeric (haldi)
    • 4 whole red chilies
    • 2 bay leaves
    • 1/2 tsp red chili powder
    • 1 tsp salt
    • pinch citric acid if needed to give more sourness to kadhi

    For Pakoras

    • 3/4 cup besan, (gram flour)
    • 2/3 cup water use as needed

    For Garnish

    • 1 tsp ghe (clarified butter)
    • 1 tsp red chili powder

    Making Kadhi

    1. Mix gram flour and turmeric with yogurt until smooth. Add three cups of water slowly and mix well.

    2. Heat the oil in a saucepan. Test the heat by adding one cumin seed to the oil. If the cumin seeds crack right away, the oil is ready. Add the asafetida, fenugreek seeds, cumin seeds, stir and add bay leaves, whole red chilies, and red chili powder. Stir for a few seconds. Add the yogurt mixture and keep stirring until the kadhi comes to a boil.

    3. Add three cups of water and let it come to boil. Add salt. Turn the heat to medium low. Let the kadhi cook an hour and a half, stir occasionally. To adjust thickness, add boiled water.

    Making Pakoras

    1. Add water slowly to the besan to make a smooth and thick batter. Whip the besan batter two to three minutes in a circular motion using a spoon, until light and fluffy.

    2. Fry the pakoras in ½ inch of oil in a flat frying pan over medium heat. (Don’t use enough oil to cover the pakoras; they will be softer and fluffier if fried in shallow oil.
    3. To test, drop one drop of batter into the oil. The batter should form a ball on the surface of the pan, but not change color right away.
    4. Place about one tablespoon of batter into the oil. Fry the pakoras in small batches until golden-brown.
    5. After frying, soak the pakoras in room-temperature water for ten minutes. Squeeze the pakoras gently to remove the water, taking care not to break them.

    6. Add the pakoras to the kadhi and boil on low to medium heat for ten minutes.

    Making the Seasoning

    1. Heat the ghee (clarified butter) lightly in a small saucepan. Add chili powder and/or paprika (adjust to taste). Pour over the kadhi when ready to serve.

    Variations 

    Add one cup chopped spinach to the kadhi just before adding the pakoras for extra flavor and color. 

    Add one tablespoon dry fenugreek leaves (dry mathi leaves) to the pakora batter.

    My favrait way to Serve Kadhi Pakoras is with Rice, Roti, Jeera Aloo, Spicy Green Peas

    Main Course
    Indian

    Punjabi Kadhi Pakora Recipe

    Kadhi Pakora is a gluten-free summer recipe featuring a savory vegetable curry with dal (lentils) and crispy fried pakoras, creating a delightful and flavorful dish. Kadhi Pakora, a popular North Indian dish, is a comforting and flavorful yogurt-based curry with gram flour dumplings. This traditional dish is known for its tangy and savory taste, making it a favorite among many households. In this kadhi recipe, we’ll show you how to make authentic Punjabi Kadhi Pakora step by step, so you can enjoy its deliciousness at home. Whether you’re craving a comforting meal or planning a special dinner, Kadhi Pakora is sure to satisfy your taste buds.

    Step 1: Preparation of Ingredients for kadhi pakora punjabi style

    Start by gathering all the necessary ingredients for making Kadhi Pakora. For the pakoras, prepare a batter using gram flour, spices, and water. Slice and chop green chilies, cilantro, and ginger for the pakora batter. For the kadhi, whisk yogurt and gram flour together until smooth, and set aside. Finely tomatoes and ginger for the kadhi gravy. Having all the ingredients ready will streamline the cooking process.

    Step 2: Making Pakoras:

    To make the pakoras, heat oil in a deep-frying pan. Drop Spoonfuls of the pakora batter into the hot oil and fry until golden brown and crispy. Remove the pakoras from the oil and place them on a paper towel to drain excess oil. Repeat the process until all the batter is used. The crispy pakoras will add texture and flavor to the kadhi.

    Step 3: Preparing the Kadhi Base:

    In a large pot or saucepan, heat oil or ghee over medium heat. Add cumin seeds, mustard seeds, and fenugreek seeds, and let them splutter. Next, add ginger, and cook until fragrant. The aromatic base will form the foundation of the kadhi gravy, imparting depth of flavor to the dish.

    Step 4: Cooking the Kadhi:

    Once the aromatics are sautéed, it’s time to add the chopped tomatoes to the pot. Cook the tomatoes until they soften and break down, forming a thick gravy. Then, add the whisked yogurt and gram flour mixture to the pot, stirring continuously to prevent lumps from forming. Bring the mixture to a gentle boil, then reduce the heat and let it simmer.

    Step 5: Adding Pakoras:

    Once the kadhi base is cooked and thickened, add the fried pakoras to the pot. Gently stir to coat the pakoras with the flavorful kadhi gravy. Allow the pakoras to simmer in the kadhi for a few minutes to absorb the flavors. The combination of soft pakoras and tangy kadhi creates a harmonious and satisfying dish.

    Step 6: Finishing Touches:

    Before serving, garnish the Kadhi Pakora with freshly chopped cilantro leaves for a burst of freshness and color. You can also sprinkle some roasted cumin powder on top for extra flavor. Serve the Kadhi Pakora hot with steamed rice or roti for a comforting and wholesome meal.

    Tips for Making Perfect Kadhi Pakora:

    • Consistency: Adjust the consistency of the kadhi by adding more water if it’s too thick or simmering longer if it’s too thin.
    • Fresh Ingredients: Use fresh yogurt and spices for the best flavor in the kadhi gravy.
    • Frying Pakoras: Fry the pakoras in batches to ensure even cooking and crispiness.

    Variations of Kadhi Pakora:

    • Vegetarian Variation: Skip the addition of pakoras and add vegetables like potatoes, carrots, or bell peppers to the kadhi for a vegetarian version.
    • Gluten-Free Option: Use chickpea flour (besan) instead of wheat flour for the pakora batter to make it gluten-free.
    • Spicy Version: Add extra green chilies or red chili powder for a spicier kadhi.

    Benefits of Including Kadhi Pakora in Your Diet:

    • Probiotic-rich: Yogurt used in kadhi is rich in probiotics, which promote gut health and digestion.
    • Good Source of Protein: Gram flour used in pakoras adds protein to the dish, making it a satisfying meal option.
    • Balanced Meal: Kadhi Pakora is a balanced meal that provides carbohydrates, protein, and fats, along with essential vitamins and minerals.

    Frequently Asked Questions (FAQs) about Kadhi Pakora:

    Q: Can I make kadhi without pakoras?

    A: Yes, you can skip adding pakoras and enjoy the kadhi as a creamy yogurt-based curry with a tempering of spices.

    Q: How long does kadhi pakora last in the refrigerator?

    A: Kadhi Pakora can be stored in the refrigerator for up to 3-4 days. Reheat gently on the stovetop before serving.

    Q: Can I freeze kadhi pakora?

    A: While you can freeze kadhi pakora, the texture of the pakoras may change slightly upon thawing. It’s best enjoyed fresh or stored in the refrigerator for a few days.

    For more delicious Indian curry recipes, visit Manjula’s Kitchen. Explore a variety of vegetarian curry dishes featuring a range of spices, vegetables, and legumes to add flavor and variety to your meals.

    For more delicious Indian recipes, check out Manjula’s Kitchen: Chole Bhature, Naan, Paneer Tikka Masala, Aloo Paratha, Vegetable Biryani.

  • Mango Lassi

    Mango Lassi

    Mango Lassi is a soothing cold drink for hot summer days or to brighten up any meal. This pale drink is a blend of mango and yogurt. A popular beverage in Indian restaurants.

    • 2 cups ripe mangoes peeled and chopped
    • 1 cup yogurt (curd, dahi)
    • 1/2 cup milk
    • 3 tbsp sugar adjust to taste
    • 1/8 tsp cardamom (ilachi)
    • 1 tbsp mint chopped (optional)
    • 3 cup crushed ice or ice cubes,(use as needed)
    1. Blend yogurt, mango, and 2 tablespoons sugar and taste before adding more sugar. How much sugar is used depends on the sweetness of the mango and the yogurt.

    2. Add and cardamom powder and blend. If it is too thick, add some water to desired consistency. Pour into a tall glass and garnish with mint leaves. ice and cardamom powder and blend again.

    Tips

    Adjust ingredient quantities depending on the sweetness of the mango and the thickness of the yogurt. Mango Lassi it is better if the mangoes are not fibrous.

    You may also enjoy Falooda, Lemonade  

    Drinks
    Indian
    Kid Friendly, Mango Drink, Picnic Drink

  • Dal Makhani

    Dal Makhani, Punjabi Style

    Dal Makhani is a popular dish from state of Punjab and across North India. Rich and hearty, dal makhani is a combination of whole urad (an Indian lentil)and red kidney beans. It goes well with Naan, and Tandoori Roti (oven-baked flat bread).

    • 1/2 cup whole urad dal
    • 1/8 cup red kidney beans (rajma)
    • 1 tsp ginger grated
    • 1 green chili, finely chopped
    • 1/2 tsp turmeric (haldi)
    • 3/4 tsp salt
    • 1/2 tsp mango powder (amchoor)
    • 1/4 tsp garam masala
    • 1/4 cup cream

    For Seasoning

    • 2 tbsp ghee, clarified ghee
    • 1/2 tsp cumin seeds (jeera)
    • 1/8 tsp asafetida (hing)
    • 3 whole dried red chilies
    • 1/4 tsp red chili powder
    • 1/2 tbsp ginger thinly sliced
    1. Wash urad dal and kidney beans well. Soak the dal in six cups of water at least for eight hours. After soaking, dal will be about two and a half times the volume of the original.

    2. Place the dal in a pressure cooker with four cups of water. Add the salt, turmeric, ginger, and green chili, and cook over medium high heat. When it begins to steam, turn the heat down to medium. Cook 25 minutes.
    3. Turn off the heat. Wait until steam has stopped before opening the pressure cooker. The dal and kidney beans should be soft and tender.

    4. Lightly mash the kidney beans and dal. Cook for another five minutes on low-to-medium heat.
    5. Add cream, garam masala, and amchoor powder. Cook for ten minutes on low heat.

    For Seasoning

    1. Heat the ghee in a small saucepan. Test the heat by adding one cumin seed to the oil; if it cracks right away, the oil is ready. Add cumin seeds. When they crack, add the asafetida, red chilies, and red chili powder. Stir for a few seconds.

    2. Add one teaspoon of water to keep the spices from burning. Pour the spiced ghee over the dal.
    3. Garnish with shredded ginger.

    Serving suggestion, taste best with Naan, or Tandoori Roti

    Main Course
    Indian

    Punjabi Dal Makhani: A Step by Step Urad Dal Makhani Recipe

    Dal Makhani is a rich and creamy lentil dish that originates from the Punjab region of India. Made with black lentils (urad dal), kidney beans, and a blend of aromatic spices, this dal makhani recipe is a staple in Punjabi cuisine. Known for its luscious texture and indulgent flavors, Dal Makhani is a popular Indian dish made primarily from lentils (dal) and typically enjoyed during the winter months. 

    It is a rich and creamy dish that is usually gluten-free, as lentils themselves are naturally gluten-free. The main ingredients for making Dal Makhani include black lentils (urad dal), red kidney beans (rajma), butter, cream, and various spices such as cumin, coriander, turmeric, and garam masala. It is traditionally cooked slowly over a low flame, allowing the flavors to meld together and the lentils to become tender. Dal Makhani is often served with rice or Indian bread like naan or roti.

    Step 1: Preparation of Ingredients:

    Begin by gathering all the necessary ingredients for making Dal Makhani. Rinse the black lentils and kidney beans under cold water and soak them for at least 8 hours or overnight to soften. Finely chop tomatoes, ginger, and green chilies to prepare the base for the dal. Having all the ingredients prepped and ready will make the cooking process smoother.

    Step 2: Cooking the Lentils:

    In a pressure cooker or a pot, add the soaked black lentils and kidney beans along with fresh water, salt, and a pinch of turmeric powder. Pressure cook or simmer until the lentils and beans are soft and fully cooked. Cooking them until tender is essential for achieving the creamy texture of Dal Makhani. Once cooked, set them aside while we prepare the gravy.

    Step 3: Preparing the Gravy:

    In a large pot or saucepan, heat oil or ghee over medium heat. Add whole spices such as cinnamon, cloves, and cardamom pods, and let them sizzle. Then, add finely chopped ginger and green chilies, and sauté until fragrant. The aromatic base will infuse the gravy with depth of flavor.

    Step 4: Adding Tomatoes: 

    Once the aromatics are sautéed, it’s time to add the chopped tomatoes to the pot. Cook the tomatoes until they soften and break down, forming a thick gravy. You can also add tomato puree for a smoother texture. Stir in spices such as coriander powder, cumin powder, red chili powder, and garam masala, and cook until the oil separates from the mixture.

    Step 5: Cooking the Lentils with Gravy:

    Now, add the cooked black lentils and kidney beans to the pot with the tomato gravy. Stir well to combine all the ingredients. Allow the mixture to simmer for a while, allowing the flavors to meld together. This slow cooking process helps develop the rich and indulgent flavors of Dal Makhani.

    Step 6: Adding Cream and Butter:

    To finish off the dish, add a generous amount of cream and butter to the pot. Stir well to incorporate the cream and butter into the dal, creating a velvety and luxurious texture. Adjust the seasoning with salt and add a pinch of sugar to balance the acidity of the tomatoes if needed.

    Step 7: Garnishing and Serving:

    Before serving, garnish the Dal Makhani with freshly chopped cilantro leaves for a burst of freshness and color. You can also drizzle a little more cream on top for added richness. Serve the Dal Makhani hot with steamed rice, naan, or roti for a comforting and satisfying meal.

    Tips for Making Perfect Dal Makhani:

    • Soak Lentils and Beans: Soaking the black lentils and kidney beans overnight helps reduce cooking time and ensures they cook evenly.
    • Slow Cooking: Allow the dal to simmer on low heat for a longer time to develop the flavors and achieve the desired creamy consistency.
    • Use Fresh Cream and Butter: Using fresh cream and butter adds richness and depth of flavor to the dish.

    Variations of Dal Makhani:

    • Spicy Dal Makhani: Add extra green chilies or red chili powder for a spicier version of the dish.
    • Restaurant-style Dal Makhani: For a restaurant-style flavor, add a tadka (tempering) of cumin seeds and dried red chilies in ghee and pour it over the prepared dal before serving.

    Benefits of Including Dal Makhani in Your Diet:

    • High in Protein: Dal Makhani is rich in protein from black lentils and kidney beans, making it a nutritious option for vegetarians and vegans.
    • Rich in Iron: Black lentils are a good source of iron, which is essential for maintaining healthy blood cells and preventing anemia.
    • Source of Healthy Fats: The addition of cream and butter provides healthy fats, which are important for overall health and satiety.

    Frequently Asked Questions (FAQs) about Dal Makhani:

    Q: Can I make Dal Makhani in advance?

    A: Yes, Dal Makhani tastes even better when made in advance as it allows the flavors to develop. It can be stored in the refrigerator for up to 3-4 days and reheated before serving.

    Q: Can I freeze Dal Makhani?

    A: Yes, Dal Makhani freezes well. Allow it to cool completely, then transfer it to airtight containers or freezer bags and freeze for up to 3 months. Thaw overnight in the refrigerator before reheating.

    Q: Is Dal Makhani gluten-free?

    A: Yes, Dal Makhani is naturally gluten-free, making it suitable for those with gluten intolerance or celiac disease.

    For more delicious Indian dal recipes, visit Manjula’s Kitchen. Explore a variety of vegetarian dal dishes featuring a range of lentils, spices, and vegetables to add flavor and variety to your meals.

    For more delicious Indian recipes, check out Manjula’s Kitchen: Chole Bhature, Naan, Paneer Tikka Masala, Aloo Paratha, Vegetable Biryani.

  • Bhindi Masala – Spicy Okra

    Bhindi Masala – Spicy Okra

    Bhindi Masala is a delicious, quick & easy to make vegetable dish. This is a North Indian style recipe with just perfect blend of spices.  

    • 1/2 pound okra (bhindi, lady finger)
    • 1-1/2 tbsp oil (canola, vegetable)
    • 1/2 tsp cumin seeds (jeera)
    • 1/8 tsp asafetida (hing)
    • 1 tbsp coriander powder (dhania)
    • 1/2 tsp red chili powder
    • 1/2 tsp turmeric (haldi)
    • 1/2 tsp salt
    • 1/2 tsp mango powder (amchoor)
    • 1 tbsp besan (gram flour)
    • 2 tbsp finely chopped yellow bell pepper
    • 2 tbsp finely chopped red bell pepper
    1. Wash the okra and pat dry. Make sure to completely dry the okra as wet okra will be sticky when cutting.

    2. Cut off the both ends of the okra, and slice lengthwise in halves. Set aside.
    3. Heat the oil in a frying pan on medium-high heat. Test the heat by adding one cumin seed to the oil; if seed crack right away oil is ready. Add the cumin seeds and asafetida (hing). When the cumin seeds crack, add the okra.

    4. Stir for a minute and reduce the heat to medium. Cover the okra for two to three minutes.

    5. Remove the cover and add the coriander powder, red cayenne pepper and turmeric, stir.

    6. Next add gram flour (besan) and continue to stir-fry until the okra is tender. Add the salt, mango powder and bell peppers, cook for another minute. Salt is added last to avoid the okra becoming lacy.  Masala Bhindi is ready. Enjoy!

    Variations

    Adding colorful bell pepper is a great garnish for the okra and adds flavor to the dish.

    You can substitute the bell pepper with sliced tomatoes as a garnish.

    You can also slice the okra in 1/4 inch pieces and follow the same method above.

    Main Course
    Indian
    Spicy Okra, Lady Finger,

  • Bread Pakoras

    Bread Pakoras

    Spicy Bread Pakoras are great as an appetizer, finger food for any gathering, and a tasty compliment to your afternoon tea.

    • 4 slices white firm bread
    • 1 cup besan (gram flour)
    • 1 tbsp rice flour
    • 1 tsp salt
    • 1/8 tsp asafetida (hing)
    • 1 tsp cumin seeds (jeera)
    • 2 tbsp green finely chopped
    • 1/4 cup cilantro finely chopped (hara dhania)
    • 1/2 cup water little more or less use as needed
    1. Remove the crust from all sides of the bread. Slice the bread lengthwise into 3 equal parts.

    2. Mix all the dry ingredients together: Gram flour (besan), rice flour, asafetida, cumin seeds, and salt. Rice flour adds to the crispness. Add the water slowly to make a smooth batter. (Batter should be the consistency of pancake batter or dosa batter)

    3. Next, add the green chilies and cilantro. Mix well.
    4. Heat the oil in a frying pan on medium high heat. Frying pan should have at least 1 inch of oil. To check if the oil is ready, put one drop of batter in the oil. The batter should come up but not change color right away.

    5. Dip the bread slices in the batter one at a time and slowly drop into the frying pan. Fry the Pakoras in small batches. The pakoras will take about 4 to 5 minutes to cook.

    6. Turn them occasionally. Fry the Pakoras until both sides are golden-brown. Repeat this process. The crispy, delicious Bread Pakoras are ready to serve.

    Tips:

    If oil is too hot Pakoras will cook too fast and will not be crispy; if oil is not hot enough Pakoras will be greasy. You may have to adjust the heat as needed while cooking.

    Variations:

    Use 1/4 cup of chopped spinach or 2 tablespoons of chopped fenugreek leaves as a substitute for the chopped cilantro.

    Serving suggestions:

    The bread pakoras are best when dipped with a fresh cilantro chutney or 

    Pakoras taste best when they are served hot.

    Pakoras can be made one day in advance do not refrigerate. When ready to eat, place on a cookie sheet and heat in the preheated oven on 300 degrees.

    Appetizer
    Indian
    Crispy Pakora, Kid Friendly, Spicy Fritters, Tea Time Snack, Vegan

  • Badam Burfi (Almond Candy)

    Badam Burfi (Almond Candy)

    Badam (almond) Burfi is a healthy substitute for candy but is rich in flavor. Almond burfi can be served as dessert or snack.

    • 1 cup whole almonds
    • 1 cup sugar
    • 1/8 tsp cardamom powder
    • 2 tbsp ghe (clarified butter)
    • 1/3 cup milk
    1. Soak the almonds in hot water for 30 minutes. Peel the skin off the almonds. 

    2. Blend the almonds into a fine paste using just enough milk as needed to blend. Add the sugar and whip it for a couple of minutes.

    3. Heat the ghee in the frying pan on low-medium heat. As the ghee melts, add the almond paste and cook on medium heat, stirring continuously.

    4. Continue stirring until the mixture thickens to the consistency of bread batter and starts leaving the sides of the pan.
    5. Add the cardamom powder. Remove the frying pan from the heat.
    6. Whip the batter using a spoon in a circular motion for about two to three minutes.
    7. Pour it into the prepared greased pan. Smooth en the surface of the mixture to about a quarter inch thick.

    8. Let cool for about 20 minutes until burfi is just look warm.
    9. Cut into 1-inch squares or any shape you like.

    Cool to the room temperature and store burfi in an airtight container. Almond burfi has a long shelf life and can be kept outside for up to one week. When refrigerated, almond burfi will last a couple of months.

    Suggestions: 

    You can make burfi using almond meal or almond flour. If you are using almond meal, mix one cup almond meal with the sugar and milk and knead the mixture for two minutes. Let the mixture sit for 10 to 15 minutes. Then follow the directions above. The almond flour burfi will be a little chewy.

    Dessert
    Indian

  • Vegetable Raita (Yogurt)

    Learn How to make Vegetable Raita by Manjula’s Kitchen

    What is Vegetable Raita: Raita is an accompaniment for any Indian meal and can be created in the form of Vegetable Raita, Spinach Raita, Boondi ka Raita, Cucumber Raita & Lauki ka Raita. Here we are focussing on making vegetable raita, it is a simple quick & easy, gluten free, kid friendly and nutritious yogurt-based recipe featuring vegetables and a selection of Indian spice powders. In the realm of culinary exploration, the creation of a delectable mix vegetable raita stands as a testament to the artistry that can be achieved with a few simple ingredients. This versatile dish, known for its refreshing taste and vibrant medley of flavours, offers a delightful twist to traditional raita recipes. Let’s embark on a culinary journey, unravelling the intricacies of crafting a mix vegetable raita that captivates the palate.

    Mixing the Yogurt Base:

    The journey begins with the heart of the mix vegetable raita—yogurt. A foundational step involves thoroughly mixing the yogurt to create a smooth and creamy base. If the yogurt happens to be thick, akin to pudding, a strategic addition of milk is introduced to attain the desired consistency reminiscent of a yogurt drink. This meticulous process sets the stage for the infusion of various flavours that will transform the humble yogurt into a culinary delight.

    Seasoning the Base:

    To elevate the taste profile, a symphony of seasonings is introduced. Salt, chopped dill, black pepper, roasted cumin seeds, and paprika come together in perfect harmony, each contributing its distinct note to the mix vegetable raita. This amalgamation not only imparts a depth of flavour but also showcases the versatility of the dish, making it a fitting accompaniment to various culinary creations.

    Balancing Flavours:

    A key consideration in perfecting the mix vegetable raita is achieving a harmonious balance of flavours. If the yogurt tends towards sourness, a touch of sugar is introduced, striking the perfect equilibrium between sweetness and tanginess. This thoughtful addition ensures that every spoonful of the raita delivers a well-rounded and satisfying taste experience.

    Infusing Freshness with Vegetables:

    The introduction of chopped cucumber, tomatoes, and yellow bell pepper adds a burst of freshness and colour to the mix vegetable raita. These crisp and vibrant vegetables not only enhance the visual appeal but also contribute a delightful crunch, transforming the raita into a sensory delight. The careful selection and preparation of vegetables elevate the dish from a simple condiment to a standalone culinary creation.

    Variations and Personalization:

    The beauty of mix vegetable raita lies in its adaptability. Variations abound, allowing for creative culinary expressions. Dill, a traditional choice, can be replaced with chopped mint or cilantro, offering a different herbal note to the ensemble. The vegetable composition can also be tailored to individual taste preferences, making the mix vegetable raita a versatile canvas for culinary innovation.

    Expert Tips for Culinary Success:

    No culinary journey is complete without a few expert tips. To enhance the flavour profile, dry roasting cumin seeds is recommended. This process is performed on medium heat until the seeds turn brown, releasing the distinctive aroma of cumin. Post-roasting, grinding the cumin seeds, once cooled to room temperature, ensures that the spice is evenly distributed throughout the mix vegetable raita, intensifying the overall taste experience.

    Conclusion: A Culinary Symphony Unveiled

    In conclusion, the process of creating a mix vegetable raita is not just a culinary endeavour; it’s a symphony of flavours, textures, and creativity. From the careful mixing of the yogurt base to the strategic addition of seasonings and the infusion of fresh vegetables, each step contributes to the creation of a culinary masterpiece. The variations and personalised touches open the door to endless possibilities, allowing individuals to tailor the mix vegetable raita to their unique taste preferences.

    As we navigate the intricacies of the mix vegetable raita recipe, it becomes apparent that this dish is not merely a side accompaniment but a culinary journey that showcases the art of harmonising diverse elements. It is an invitation to explore, experiment, and savour the richness of flavours that unfold with every bite. The mix vegetable raita, with its vibrant medley and thoughtful nuances, stands as a testament to the creative potential within the realm of culinary arts.

  • Gajar ka Halwa (Carrot Halwa)

    Gajar Ka Halwa, Carrot Pudding

    Gajar Ka Halwa is a classical Indian dessert, this is also known as gajrala. Gajar ka Halwa is a delicious and popular north indian sweet dish made with few ingredients, carrots, milk, sugar and flavored with cardamom. Gajar ka Halwa is a perfect dessert for any celebration. 

    • 2 cups shredded carrots
    • 2 cups milk
    • 3 tbsp unsalted butter (or ghee)
    • 1/4 cup sugar
    • 1/2 tsp cardamom powder
    • 6 cashew roasted and broken (for garnishing)
    1. Roast the cashew nuts and set aside for the garnish.

    2. Boil the milk on medium-high heat in a non-stick pan until it is reduced to about to 1 cup. Stir often to ensure the milk does not burn in the bottom of the pan. Set aside.
    3. Melt the butter in a frying pan on medium heat. Add the shredded carrots and stir-fry for about seven to eight minutes. Carrots should be tender and slightly changed in color.

    4. Add the milk and cook until the milk dries. This will take about eight to ten minutes.
    5. Next add the sugar, and cardamom powder and stir-fry for another three to four minutes until the halwa starts to leave the side of frying pan.
    6. Garnish with cashew nuts.

    Tips:

    Gajar Halwa can be refrigerated for up to one week and kept in the freezer for up to two months.

    When ready to serve just warm.

    Suggestion:

    Cook the halwa a little more and pour on a greased plate.

    Spread the halwa until it is flat and 3/4 inch thick.

    After the halwa cools, cut in squares.

    Garnish with cashew nuts or sliced almonds.


    Dessert
    Indian
    Carrot Halwa, Delicacy, Dessert, Gajrela, Gluten Free

Exit mobile version