Tag: Vegan Snacks

Delicious and Easy Vegan Snacks
Introduction
Finding delightful and nutritious vegan snacks can be both easy and rewarding. These indian snacks are free from animal products, making them perfect for those who follow a vegan diet or simply want to incorporate more plant-based foods into their lifestyle. 

Whether you need a quick bite on the go, something to satisfy your afternoon cravings, or snacks for a party, there’s a wide variety of healthy vegan snacks available. 
Benefits of Vegan Snacks
Nutrient-Rich: Vegan snacks often include whole foods such as fruits, vegetables, nuts, and seeds, which are packed with vitamins, minerals, and antioxidants.

Ethical and Eco-Friendly: Choosing vegan snacks supports animal welfare and reduces environmental impact.

Dietary Inclusion: Vegan snacks are suitable for those with dairy or egg allergies and can be gluten-free or low in sugar.
Popular Vegan Snacks
1. Hummus and Veggie Sticks
One of the best vegan snacks is hummus paired with a variety of fresh vegetable sticks. This snack is not only delicious but also rich in fiber, protein, and healthy fats.
2. Trail Mix
A homemade trail mix made with nuts, seeds, dried fruit, and a sprinkle of dark chocolate chips is a perfect healthy vegan snack. It provides a quick energy boost and satisfies sweet cravings.
3. Roasted Chickpeas
Roasted chickpeas are a crunchy and savory vegan snack that can be seasoned with various spices like paprika, cumin. They are high in protein and fiber it’s an easy Indian recipes
Easy Vegan Snacks
4. Avocado Toast
Avocado toast is an easy vegan snack that can be customized with different toppings such as tomatoes, radishes, or nutritional yeast. It’s a great source of healthy fats and vitamins.
5. Fruit Salad
A simple fruit salad made with seasonal fruits is refreshing and hydrating. Add a squeeze of lemon juice and a sprinkle of mint for extra flavor.
6. Smoothie
A fruit and vegetable smoothie is a quick indian beverage along with being a nutritious snack. Blend your favorite fruits with spinach, almond milk, and a spoonful of chia seeds for a nutrient-packed drink.
Best Vegan Snacks
7. Vegan Energy Bars
Homemade or store-bought vegan energy bars made with oats, nuts, seeds, and dried fruit are convenient and packed with nutrients.
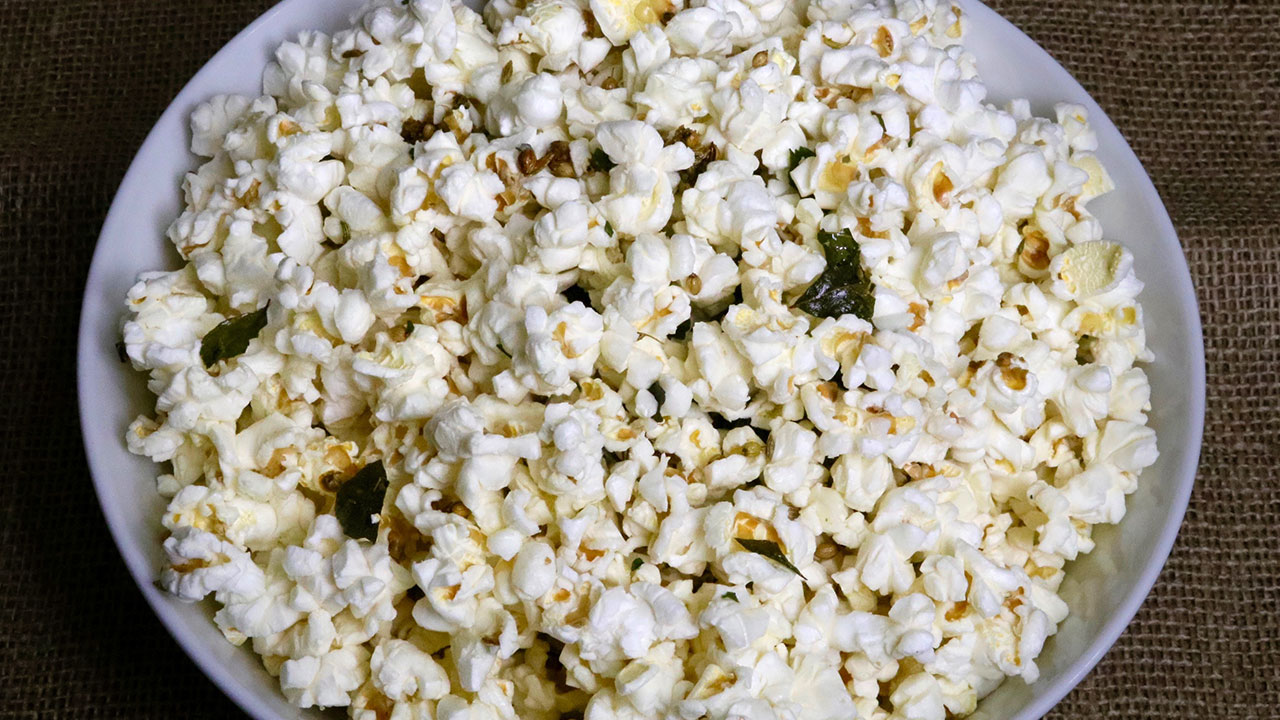
8. Vegan Popcorn
Popcorn seasoned with nutritional yeast, which gives it a cheesy flavor, is a satisfying and low-calorie vegan snack. It’s a nice Indian vegetarian appetizer that can also be tasty and available for all seasons and at any time. 
9. Stuffed Dates
Dates stuffed with almond butter and sprinkled with coconut flakes are a sweet and indulgent vegan snack. They are rich in natural sugars and fiber.
Quick Vegan Snacks
10. Nut Butter and Apple Slices
Sliced apples with a dollop of almond or peanut butter make a quick vegan snack that’s both sweet and savory.
11. Rice Cakes with Toppings
Rice cakes topped with avocado, hummus, or nut butter are easy to prepare and can be customized to your taste.
12. Vegan Yogurt with Granola
A bowl of vegan yogurt topped with granola and fresh berries is a delicious and satisfying snack that can be prepared in minutes.
Vegan Snacks Recipes
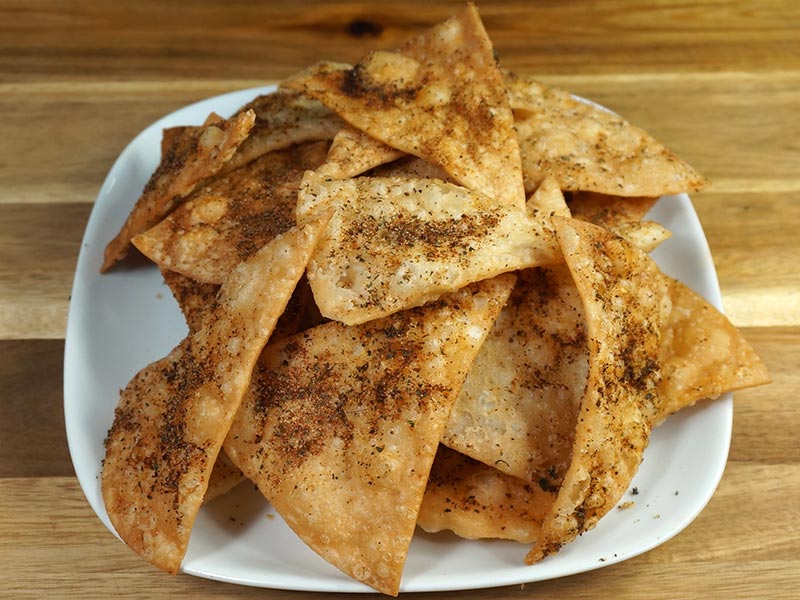
13. Vegan Nachos
Vegan nachos made with tortilla chips, black beans, guacamole, salsa, and a vegan cheese sauce are perfect for sharing and enjoying as a snack or appetizer.
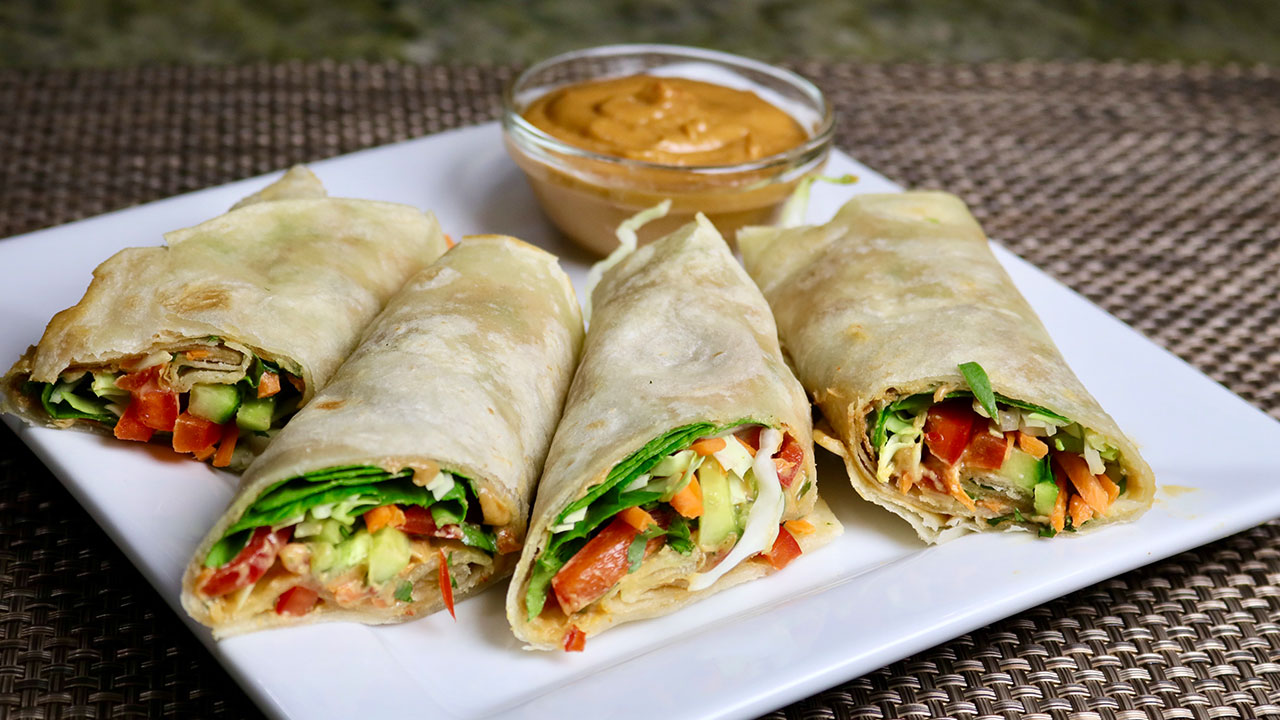
14. Vegan Spring Rolls
Vegan spring rolls filled with fresh vegetables, tofu, and rice noodles, served with a peanut dipping sauce, are light and refreshing.
15. Vegan Chocolate Bark
Vegan chocolate bark made with dark chocolate, nuts, seeds, and dried fruit is a delightful snack that’s easy to make and perfect for satisfying sweet cravings.
FAQs about Vegan Snacks
What snacks are vegan? 
Vegan snacks are those that do not contain any animal products, including dairy, eggs, and honey. Examples include hummus and veggie sticks, trail mix, and roasted chickpeas.
What are some healthy vegan snacks? 
Healthy vegan snacks include options like avocado toast, fruit salad, and smoothies. These snacks are made with whole, nutrient-dense ingredients.
What are the best vegan snacks?
The best vegan snacks are often those that are both delicious and nutritious, such as vegan energy bars, vegan popcorn, and stuffed dates.
What is a quick vegan snack? 
A quick vegan snack is one that can be prepared in a short amount of time, like nut butter and apple slices or rice cakes with toppings.
How do you make vegan snacks? 
Vegan snacks recipes typically involve using plant-based ingredients like fruits, vegetables, nuts, seeds, and whole grains. These ingredients can be combined in various ways to create tasty and satisfying snacks.
Conclusion
Incorporating vegan snacks into your diet can be both enjoyable and beneficial. From nutrient-rich options to quick and easy preparations, there’s a vast array of healthy vegan snacks to explore. 

Whether you’re looking for easy vegan snacks for a busy day or aiming to find the best vegan snacks for a special occasion, these recipes provide a delightful way to enjoy plant-based eating. 

For more exciting vegan snack ideas and recipes, visit Manjula’s Kitchen and discover the joy of Indian vegetarian and vegan cooking.

This article provides a comprehensive guide to vegan snacks, highlighting various vegan snacks recipes and discussing the benefits and ease of preparation. 

By exploring these snacks, you can find the best vegan snacks that suit your tastes and dietary preferences. Enjoy the process of making and savoring these delightful vegan snacks!

  • Zucchini Lentil Pakoras

    Zucchini Lentil Pakoras

    A plate of crispy Zucchini Lentil Pakoras served with chutney

    Zucchini Lentil Pakoras

    As pakoras are one of the most welcoming snacks all over India. It is a popular street food. Everyone has their own favorites and there are countless recipes. Pakoras are a very comforting snack especially when it is cold, and it is raining. Here, we are experiencing both and I am wishing for pakoras with a hot cup of chai, blanket and a good TV show or movie. In a particular magazine, I saw a fusion pakora recipe. Instead of using traditional beasn batter, the chef had used red lentil batter. Several times, I have used moong dal batter, but I never even thought about using red lentil. I was ready to give it a try with another pakora recipe using lentil batter. I made some changes and added chopped ginger that added a nice kick to the pakoras. They turned out to be mouthwatering appetizers: crispy on the outside and soft on the inside. These pakoras are addicting! These work as a tasty pairing with your afternoon tea or a spicy delicious snack before any meal. These pakoras have a different crispness but are very delightful. Give these pakoras a try and enjoy! These Pakoras are also vegan and gluten-free.
    This recipe will serve 4.
    5 from 1 vote
    Prep Time 10 minutes
    Cook Time 15 minutes
    Total Time 25 minutes
    Course Appetizer
    Cuisine Indian
    Servings 4 people

    Ingredients
      

    • 1 cup red lentils washed masoor dal
    • 1 zucchini medium sized, cut into thick rounds
    • 2 Tbsp green chili chopped
    • 2 Tbsp ginger finely chopped
    • 2 Tbsp cilantro chopped
    • 1 ½ tsp salt adjust to taste
    • ½ tsp red chili powder
    • Pinch of baking soda
    • 2 Tbsp corn starch

    Instructions
     

    • Soak red lentil at least for 1hours or more.
    • Pet dry zucchini slices and keep aside.
    • Blend dal to smooth batter, using just enough water needed to blend.
    • To make Pakora batter add corn starch, salt, chili powder and salt together, mix it well, whipping for few seconds. Add all the other ingredients to the batter, ginger, green chili, cilantro and mix all the ingredient well. Batter should be consistency of pancake mix, if needed add little water.
    • Heat the oil in a frying pan on medium-high heat. The frying pan should have about 1 inch of oil. To check if the oil is ready, put one drop of batter in the oil. The batter should come up but not change color right away.
    • Dip the zucchini slices into the batter one at a time, making sure it is covered by the batter completely. Then, slowly drop into the frying pan.
    • Fry the pakoras in small batches, not overlapping. The pakoras will take about 4-5 minutes to cook.
    • Turn them occasionally. Fry the pakoras until both sides are golden brown. If the oil is too hot, the pakoras will brown too fast and not get crispy.
    • Left over batter, place about one tablespoon of batter into the oil. Fry the pakoras in small batches until golden-brown.
    • The crispy, delicious pakoras are now ready to serve. I like to serve these both pakoras side by side.

    Notes

    Serving Suggestions
    Tried this recipe?Let us know how it was!
  • Apple Banana Pakora

    Apple Banana Pakora

    A plate of crispy Apple Banana Pakoras

    Apple Banana Pakora

    Apple and Banana Pakoras! Pakoras are an all-time favorite snack amongst everyone. Pakoras are made in so many ways using a variety of vegetables and lentils. Apple and Banana Pakoras were suggested by my friend Rajni from India. It sounds different because I never tried these pakoras. I decided to give it a try. I know she enjoys sweet and spicy combinations of flavors. These pakoras are crispy from the outside and soft from the inside. These Pakoras are also vegan and gluten-free. Give it a try and share your experience. Hope you will enjoy it. This recipe will serve 4.
    5 from 2 votes
    Prep Time 5 minutes
    Cook Time 15 minutes
    Total Time 20 minutes
    Course Appetizer
    Cuisine Indian
    Servings 4 people

    Ingredients
      

    • 6 Apple slices cut into rounds ¼ inch thick
    • 6 banana slices, cut into the long way banana should not be very ripe
    • ½ cup gram flour besan
    • 2 Tbsp rice flour
    • 1 Tbsp corn starch also can use arrow root powder
    • ½ tsp salt adjust to taste
    • ½ tsp cumin seeds jeera
    • ¼ tsp black pepper
    • ½ tsp mango powder amchoor
    • 1 Tbsp sugar
    • 2 Tbsp cilantro finely chopped, hara dhania
    • 1 Tbsp green chili finely chopped

    Instructions
     

    • I am using firm apples. I have sliced the apples in rounds about 1/4 inch thick. Use firm bananas that are slightly less ripe. Do not use fully ripe bananas. I am using 1banana. I sliced the banana in 6 pieces the long way
    • To make the batter, add all the dry ingredients together besan, rice flour, cornstarch, salt, cumin seeds, black pepper, mango powder, and sugar. Mix all the ingredients well.
    • Add the water slowly to make a smooth batter. Consistency of pancake mix. I used about 1/2 cup of water. Now add the green chilies and cilantro, mix it well.
    • Heat the oil in a frying pan on medium-high heat. The frying pan should have about 1 inch of oil. To check if the oil is ready, put one drop of batter in the oil. The batter should come up but not change color right away.
    • Dip the apples and bananas slices into the batter one at a time, making sure it is covered by the batter completely. Then, slowly drop in the slices into the frying pan.
    • Fry the pakoras in small batches, not overlapping. The pakoras will take about 3-4 minutes to cook.
    • Turn them occasionally. Fry the pakoras until both sides are golden brown. If the oil is too hot, the pakoras will brown too fast and not get crispy.
    • The crispy, delicious pakoras are now ready to serve.

    Notes

    They taste delicious with tamarind sweet and sour chutney. I already have this chutney recipe on my blog.
    You would also like to see the recipes for Apple Jalebi, Apple Bread Rolls, Aloo Puri, Tomato soup.
    Tried this recipe?Let us know how it was!
  • Kamal Kakdi Ki Chaat

    Kamal Kakdi Ki Chaat

    A plate of Kamal Kakdi Ki Chaat

    Kamal Kakdi Ki Chaat

    Kamal Kakdi Chaat is a truly unique and tasty dish. I wanted to make something new and delicious but also healthy and easy to make. kamal kakdi, is an edible lotus root that has a crunchy texture and slightly sweet taste. After doing some research, I was surprised at how much nutrients kamal kakdi has. I was excited to try out a spicy chat recipe using it. An added plus is that this recipe requires no frying and is a nice healthy savory snack. My family really enjoyed this new dish! Hope you give this recipe a try and enjoy!
    This recipe will serve 6.
    5 from 1 vote
    Prep Time 5 minutes
    Cook Time 5 minutes
    Total Time 10 minutes
    Course Chaat
    Cuisine Indian
    Servings 6 people

    Ingredients
      

    • 2 cup sliced lotus stem I am using frozen, Kamal Kakdi
    • 1 Tbsp oil
    • 1 Tbsp ginger thinly sliced, adrak
    • ½ tsp cumin seeds jeera
    • ½ tsp salt
    • ¼ tsp black pepper kali mirch
    • 1 tsp green chili finely chopped, Hari mirch
    • ½ tsp lemon juice

    Also Need for Serving

    • ½ cup whipped yogurt for serving
    • 2 Tbsp tamarind chutney please add the link check the recipe

    Instructions
     

    • pressure cook the Kamal Kakdi in an instant pot for five minutes in two cups of water. I also drained the water. Kamal Kakdi should be tender. Notes: you can also, use the pressure cooker and cook at the same time, or you can also cook in a pot for 20 minutes.
    • Drain the water and pat dry.
    • In a frying pan heat the oil over low medium heat. Add the oil, oil should be just warm add sliced ginger. Stir fry for about 2 minutes and take it out in a bowl. I will use this ginger later for garnishing. Note: I feel adding ginger later it gives a nice kick to chaat.
    • Use the same pan and it already has some left-over oil. Oil should be moderately hot, add cumin seeds. As cumin seeds crack add kamal kakdi, stir and sprinkle salt and black pepper.
    • Stir fry for one minute add about 1 teaspoon of chopped green chiles and lemon juice stir fry for about 2 minutes, turn off the heat. Kamal Kakdi is ready to be served.
    • Plating the chaat, drizzle yogurt over kamal kakdi also drizzle tamarind chutney. And finish it off with some green chilies and roasted ginger.

    Notes

    Serving suggestions: You can also serve this kamal kakdi as is as a masla kamal kakdi, sprinkle little chaat masala.
    You will also enjoy the recipes for, Bread Pudding With Chocolate Sauce, Sabudana (Tapioca) Bhel, Dahi Puri Chaat
    Tried this recipe?Let us know how it was!
  • Spicy Namak Para

    Spicy Namak Para

    A plate of crispy Namak Para (savory fried snacks)

    Spicy Namak Para (Masala Paras)

    Spicy Namak Para is a crispy and savory snack that's perfect for the holiday season. Not only is this a popular snack, but it is also easy to make. This particular recipe is a twist on traditional Namak Paras with added spices to make it even more flavorful. You can always experiment with different variations by adding your choice of flavors! Spicy Namak Para taste especially delicious with a hot cup of chai. They also make for a simple but special homemade gift. It's also an easy road trip snack when traveling with your family! Hope you enjoy this recipe! This recipe is good for 10 people.
    3.50 from 4 votes
    Course Appetizer
    Cuisine Indian
    Servings 10 people

    Ingredients
      

    • 2 cup All Purpose Flour Maida
    • ¼ cup fine semolina sooji
    • 1 tsp salt
    • 1 tsp black pepper crushed, kali mirch
    • 1 tsp chili flakes lal mirch
    • 1 tsp cumin seeds jeera
    • 1 Tbsp dried fenugreek leaves Kasuri Methi
    • 4 Tbsp oil
    • ¾ cup chilled water approx

    Instructions
     

    • In a bowl mix all the dry ingredients well, all-purpose flour, sooji, salt, black pepper, red pepper, cumin seeds, and methi. Next add the oil mix it well.
    • Add the chilled water slowly, mixing with your fingers as you pour. Do not knead the dough. The dough should be soft. Cover the dough and let it sit for at least fifteen minutes.
    • Knead the dough and divide into two equal parts. Take each part of the dough and make a flat ball shape. Roll them into about 10-inch circles, it should not be very thin.
    • Prick them with a fork all over the rolled dough, on both sides. This helps paras not to puff while frying.
    • Cut each of the rolled dough into about 1/2-inch-wide and 3-inch-long pieces. Note: you can cut them in your desire shape.
    • Heat the oil in a frying pan on medium heat.
    • The frying pan should have at least 1-1/2 inch of oil. To check if the oil is ready, put a small piece of dough in the oil. The dough should make the oil sizzle and come up slowly.
    • Make sure to place just enough paras so you can turn them over easily when frying. Fry the paras until both sides are light golden brown. This should take about 8 minutes.
    • After Spicy Namak Paras come to room temperature they should become crisp.

    Notes

    Experimenting and making the recipes to your taste is the best part of cooking.
    Try different variations by adding your choice of flavors.
    Tried this recipe?Let us know how it was!
  • Scalloped Potatoes

    Scalloped Potatoes

    A glass baking dish filled with golden brown scalloped potatoes topped with a creamy, bubbly cheese sauce.

    Scalloped Potatoes (Spicy Baked Potatoes) in Creamy Sauce

    Scalloped Potatoes are a classic dish with layers of potatoes topped with a delicious creamy sauce! It is the perfect comfort food and side dish to any meal.
    A little background to the origin to this dish: When I first came to the United State, I was fortunate enough to meet a very kind elderly woman named Helen. She was so kind and helped me a lot when I first came to this country. She was the same age as my grandmother, but she wanted me to simply refer to her as Helen. We became so close that she eventually became another grandmother for my kids when I was away from my family and country. She truly was a blessing to our family. Scalloped potatoes was one of her favorite vegetarian favorite dishes to make for us. She would make this as a side dish for Easter and Thanksgiving. The ingredients are simple, and the dish is easy to make. I got inspired to make this dish while going through old photos. It has been 30 years since Helen passed away, but she will never be forgotten. I decided to add a variation to this recipe by adding some veggies and making it little spicy.
    This recipe will serve 4.
    4.50 from 2 votes
    Course Side Dish
    Cuisine American
    Servings 4 people

    Ingredients
      

    • 3 medium sized potatoes peeled and sliced about 1/8 inch thick
    • ¼ cup green peas
    • ¼ cup corn kernels
    • ¼ cup bell pepper chopped
    • ¼ cup carrots shredded
    • 1 Tbsp green chilies finely chopped (this is optional)
    • 2 Tbsp cilantro chopped

    For white sauce

    • 2 Tbsp olive oil
    • 2 Tbsp all-purpose flour plain flour, maida
    • tsp black pepper
    • ½ tsp red chili flakes adjust to taste
    • ½ cup heavy cream
    • 1 ½ cup milk
    • ½ tsp salt

    Instructions
     

    Sauce

    • In a small frying pan, heat the oil over low medium heat and add all-purpose flour, stir for a minute. Add black pepper, chili flakes, and salt, stir for another minute.
    • Reduce heat to low. While stirring slowly add cream making sure there are no lumps. Add a small amount of milk at a time. The mixture will start becoming thick, continue adding a little milk at a time whisking until smooth.

    Assembly

    • Preheat oven to 350 degrees F (190 degrees C). I am using 5” x 7” Pyrex pan to make the Scalloped Potatoes. Grease the pan.
    • layer the potatoes evenly in the pan.
    • Pour cream sauce just covering the potatoes. Now spread the vegetables, bell pepper, carrots, green peas, corn, green chilies and cilantro. Layer the potato again over the vegetables. Pour the sauce making sure covering the potatoes evenly.
    • Bake it for about 40-45 minutes, potatoes should be tender and should be brown from the top.
    • Scalloped Potatoes are ready, nice color. Enjoy.

    Notes

    I prefer Yukon gold or Russet potatoes for this dish. You can use different vegetables of your choice, like broccoli, cauliflower, green beans, spinach.
    You might also like Vegetable Kathi Rolls, Mexican Bhel, Vegan Macaroni and Cheese
    Keyword Baked Potatoes, Baked Vegetable, Cream Sauce, Creamy Butternut squash, Homemade, Main Dish, Quick And Easy, Side Dish, Spicy Baked Potatoes, Spinach Pasta, Vegetable Pasta, Vegetarian, Video Recipe, Zucchini pasta
    Tried this recipe?Let us know how it was!
  • Spicy Indian Chips Recipe

    Spicy Indian Chips Recipe

    Spicy Indian Chips

    Spicy Indian (Flour) Chips

    If you like chips, and you like spicy food, these chips are for you. This is a quick and easy snack recipe. I have used flour tortillas and flavored them with Indian spice mix. They are hard to resist you will say just one more.
    No ratings yet
    Course Appetizer
    Cuisine Indian
    Servings 6 people

    Ingredients
      

    • 4 flour tortillas uncooked I am using 8” diameter tortillas
    • Oil to fry

    Spice Mix

    • 1 tbsp dry mint leaves available at Indian grocery store
    • 1 tbsp roasted cumin seed powder
    • 1/4 tbsp garam masala available Indian grocery store
    • 1/2 tbsp black salt available in Indian grocery store
    • 1/2 tbsp salt
    • 1/2 tbsp red chili powder
    • 1/2 tbsp mango powder (amchoor) available Indian grocery store
    • Generous pinch of citric acid (nimbu ka sat)

    Instructions
     

    • Spice mix, in a bowl mix all the spices really well. Set aside.
    • Prick the tortillas from both sides, this will limit chips from puffing and make them crisp.
    • Cut each tortilla in 8 triangles, like slicing pizza.
    • Heat the oil in a frying pan over medium heat. The frying pan should have about 1 inch of oil. To check if the oil is ready, put a small piece of tortilla in the oil. The tortilla should sizzle and come up slowly.
    • Heat the oil in a frying pan over medium heat. The frying pan should have about 1 inch of oil. To check if the oil is ready, put a small piece of tortilla in the oil. The tortilla should sizzle and come up slowly.
    • Take them out in a plate and sprinkle the spice mix on both sides right away, before they are dry. This will keep the spices on the chips. Repeat the process until all the chips are done.
    • After the chips cool to room temperature they can be stored in airtight container for 1 month.

    Notes

    Suggestions
    1. For Fried Tortillas If you don’t find uncooked tortillas use thin tortillas.
    2. Fried tortillas store well in air tight container for a month.
    3. Fried tortillas can be served in many different ways; a quick and easy way is to make Papdi Chaat. Serve them with Chole Chaat or Matra Chaat and I am sure you can find many other ways to serve them.
    4. For Spice mix Make spice mix in a big batch and use it like Chaat Masala over the sliced fruits, salad, with yogurt. I am sure you can find many other ways to use this spice mix.
    Tried this recipe?Let us know how it was!

    Savor the Crunch: Spicy Indian Flour Chips

    When it comes to irresistible snacks, spicy Indian flour chips top the list. These crunchy delights, known for their bold flavors and satisfying texture, are perfect for any occasion. Whether you’re hosting a party, looking for a quick bite, or craving a spicy snack, these chips are sure to please. In this article, we’ll explore the origins, variations, and tips for making the perfect Indian flour chips at home, along with maximizing the use of internal links to other delicious recipes.

    The Essence of Spicy Indian Flour Chips

    Spicy Indian flour chips are made from a simple dough of flour, spices, and herbs, rolled out thin and fried to crispy perfection. The combination of spices used in the dough gives these chips their distinctive flavor, making them a favorite snack among spice lovers. These chips are often enjoyed with a cup of tea or as an accompaniment to meals, adding a delightful crunch to every bite.

    Origins and Cultural Significance

    These chips have their roots in Indian street food culture, where they are commonly known as “namak pare” or “mathri.” They are especially popular during festivals and celebrations, symbolizing the joy and togetherness of these occasions. The simplicity of the ingredients and the ease of preparation have made spicy Indian flour chips a staple snack in many Indian households.

    Tips for Perfect Spicy Indian Flour Chips

    • Choosing the Right Flour: The base of these chips is typically made from wheat flour, but you can experiment with other flours like chickpea or rice flour for different textures and flavors.
    • Spice Blend: A perfect blend of spices is key. Common spices include cumin, ajwain (carom seeds), chili powder, and turmeric. Adjust the spice levels according to your preference.
    • Rolling the Dough: Roll the dough as thin as possible for the crispiest chips. Thicker chips will be harder and less crispy.
    • Frying: Fry the chips in hot oil until golden brown. Ensure the oil is at the right temperature to prevent the chips from absorbing too much oil and becoming greasy.

    Variations to Try

    While the classic spicy Indian flour chips are delicious on their own, you can try different variations to keep things interesting. For instance, you can add finely chopped spinach or fenugreek leaves to the dough for a nutritious twist. Adding sesame seeds or crushed peanuts can also enhance the flavor and texture. For more creative ideas, check out Sweet and Sour Guava Curry and Dodha Burfi (Punjabi Milk Fudge).

    Pairing and Serving Suggestions

    Spicy Indian flour chips can be enjoyed in various ways. Serve them with a side of tangy tamarind chutney or refreshing yogurt chutney for a flavor contrast. They also make a great addition to a snack platter alongside Sweet Potato Chaat or Moong Dal Halwa (Vegan). These chips are perfect for munching on their own or as a crunchy side to a meal.

    Making Indian flour chips at home allows you to control the ingredients and ensure a healthier snack option. By using whole grain flours and minimal oil, you can enjoy these tasty chips without the guilt. For more healthy homemade snack ideas, explore Millet Soup (Bajra Raab) and Vegetable Biryani (Instant Pot).

    Frequently Asked Questions

    Q: Can I bake these chips instead of frying?

    A: Yes, you can bake the chips for a healthier option. Preheat your oven to 375°F (190°C) and bake the rolled-out dough until crispy and golden brown, about 15-20 minutes.

    Q: How long can these chips be stored?

    A: Store the chips in an airtight container to keep them crispy. They can last for up to two weeks when stored properly.

    Q: Can I make these chips gluten-free?

    A: Absolutely. Substitute the wheat flour with gluten-free flour blends or chickpea flour to make gluten-free spicy Indian flour chips.

    Conclusion

    The spicy Indian flour chips recipe is a fantastic way to enjoy a crunchy and flavorful snack that is easy to make at home. Whether you’re a seasoned cook or a beginner, these chips are sure to become a favorite in your snack repertoire. For more exciting recipes and variations, explore other delightful dishes like [Sweet and Sour Guava Curry, [Dodha Burfi (Punjabi Milk Fudge), and Masala Bell Pepper Curry. Enjoy the journey of flavors and happy cooking!

  • Spicy Bread Pakora

    Spicy Bread Pakora

    A plate of Spicy Bread Pakora

    Spicy Bread Pakora

    Spicy Bread Pakoras, Pakoras are all time favorite snack, at least for me. Bread Pakoras are made so many different ways, but this time I have layered the bread with spicy sweet and sour potatoes like chutney. Before I decided to do this recipe, I have served these pakoras to many friends, the only thig they could say wow. They could not figure out what I have used for filling. Bread Pakora is all time favorite snack; at least for me. I have made these bread pakoras so many ways, but this recipe is different, and taste great. I have layered these pakoras with spicy sweet and sour potato like chutney. Before I decided to do this recipe, I have served these pakoras to many friends, the only thig they could say wow. They could not figure out what I have used for filling. You don’t need any chutney or dipping sauce, but green cilantro or mint chutney enhance the flavor.Recipe will serve 4.
    5 from 1 vote
    Prep Time 10 minutes
    Cook Time 20 minutes
    Total Time 30 minutes
    Course Appetizer
    Cuisine Indian
    Servings 4 people

    Ingredients
      

    • 4 slices of while bread

    For Batter

    • 1 ½ cup besan gram flour
    • 2 Tbsp corn starch
    • ¼ tsp baking soda
    • tsp asafetida hing
    • ½ tsp salt
    • 1 tsp oil
    • About ¾ cup of water

    For Filling

    • 1 cup potato boiled and mashed
    • 1 ½ Tbsp oil
    • 1 tsp cumin seeds jeera
    • tsp asafetida hing
    • 2 tsp coriander powder dhania
    • 1 Tbsp ginger finely chopped
    • 1 Tbsp green chili chopped
    • ½ tsp red chili powder
    • ½ tsp salt
    • ½ tsp black salt
    • 2 Tbsp mango powder amchoor
    • 1 ½ Tbsp sugar
    • ¼ tsp garam masala
    • ¼ cup cilantro chopped

    Instructions
     

    Batter

    • In a bowl mix all the dry ingredients together, besan, corn starch, salt, asafetida and baking soda, mix it well. Add oil and add water slowly to make a thick and smooth batter. Set aside.

    Filling

    • In a frying pan heat the oil over medium heat. When oil is moderately hot add cumin seeds, asafetida, coriander powder, ginger, green chili, and red chili powder stir fry for few seconds.
    • Next add potatoes, salt, black salt, mango powder, garam masala and sugar stir for about 2 minutes, add ½ cup of water keep stirring and keep mashing the mix if needed add little more water. Mix should be very mushy and soft like a spread. Add cilantro and mix it well.
    • Taste the potato mix it should be spicy after you spread the mix to bread and fry with batter spice level will go down. I always keep the mix extra spicy. Mix is ready keep aside.

    Making Pakoras

    • Spread the mix generously on two slices of bread, then close sandwiches with other slices of bread.
    • Remove the crest from the bread all sides and slice them in the shape you like. I am slicing them in 6 pieces because the bread I am using have big slices.
    • Heat about 1 inch of oil in a frying pan on medium high heat moderately. To check if the oil is ready, put one drop of batter in oil. The batter should come up but not change color right away.
    • Dip the bread into the batter one at a time, making sure bread are completely covered with batter. Then, slowly drop them into the frying pan.
    • Turn them quick and take them out quick. We are going to double fry these pakoras. Fry them all then put them back in frying pan and fry the pakoras until they are golden-brown both sides.

    Notes

    Pakoras can be serve with your choice of chutney:
    Off course hot cup of Chai Masala Tea.
    Tried this recipe?Let us know how it was!

    Introduction to Spicy Bread Pakora

    Spicy Bread Pakora is a popular vegan Indian street food snack loved for its crispy exterior and flavorful filling. This spicy bread pakora recipe offers a tantalizing twist to the traditional version, making it a perfect choice for those who enjoy a bit of heat in their appetizers. If you’re wondering how to make spicy bread pakora, look no further! Follow along for a step-by-step guide to creating this delicious treat.

    Step 1: Prepare the Filling

    To start making spicy bread pakora, prepare the filling mixture. Combine mashed potatoes, finely chopped green chilies, chopped cilantro, grated ginger, garam masala, amchur (dry mango) powder, and salt in a bowl. Mix well to ensure all the ingredients are evenly incorporated. This flavorful filling adds a delightful kick to the bread pakora. If you prefer a milder version, you can adjust the amount of green chilies according to your taste preferences.

    Tip: For a variation in filling, you can add crumbled paneer or shredded cheese to the potato mixture for added richness and texture. Check out Manjula’s recipe for Paneer Pakora for inspiration.

    Step 2: Prepare the Batter

    Next, it’s time to prepare the batter for coating the bread slices. In a separate bowl, combine chickpea flour (besan), rice flour, salt, ajwain (carom seeds), turmeric powder, cumin seeds, and red chili powder. Gradually add water to the dry ingredients while whisking to form a smooth, lump-free batter. The consistency should be thick enough to coat the bread slices evenly. This flavorful batter is what gives spicy bread pakora its signature crunchy coating.

    Variation: For a gluten-free option, you can substitute rice flour with cornflour or a gluten-free flour blend. Manjula offers a recipe for Gluten-Free Rice Flour Pakoras that you might find useful.

    Step 3: Assemble the Bread Pakoras

    Now, it’s time to assemble the spicy bread pakoras. Take a slice of bread and spread a generous amount of the prepared potato filling mixture on one side. Place another slice of bread on top to form a sandwich. Carefully cut the sandwich into desired shapes, such as triangles or rectangles. Dip each sandwich piece into the prepared batter, ensuring it is coated evenly on all sides.

    Tip: To enhance the flavor and aroma, you can add a pinch of chaat masala to the batter before dipping the bread slices. Manjula shares her recipe for Chaat Masala, which you can make at home with a blend of aromatic spices.

    Step 4: Fry the Pakoras

    Heat oil in a deep frying pan over medium heat. Once the oil is hot, carefully place the coated bread pakoras into the oil, making sure not to overcrowd the pan. Fry the pakoras until they turn golden brown and crispy on all sides, flipping them occasionally for even cooking. Once done, remove the pakoras from the oil and drain excess oil on paper towels.

    Benefit: While spicy bread pakoras are undoubtedly indulgent and delicious, they are best enjoyed in moderation as a treat due to their deep-fried nature. Pair them with a fresh salad or chutney for a balanced snack.

    Step 5: Serve and Enjoy!

    Once fried to perfection, serve the spicy bread pakoras hot and crispy alongside your favorite chutney or dipping sauce. They make for a delightful appetizer or tea-time snack, perfect for sharing with friends and family. The combination of crunchy exterior and flavorful filling is sure to tantalize your taste buds and leave you craving for more.

    By incorporating these tips and variations, you can elevate the classic bread pakora into a spicy and irresistible snack that’s bound to impress your guests. Check out more appetizer recipes on Manjula’s Kitchen for further culinary inspiration, such as her Vegetable Pakoras or Samosas. Cheers to delicious snacking!

    Explore more appetizer recipes on Manjula’s Kitchen: Vegetable Samosas, Paneer Tikka, Crispy Spinach PakorasMango Lassi, Masala Chai, Gulab Jamun, Kheer (Rice Pudding)

  • Vegetable Kathi Roll

    Vegetable Kathi Roll

    Four vegetable kathi rolls filled with fresh veggies, served with a side of dipping sauce.

    Vegetable Kathi roll

    Vegetable Kathi Rolls are a popular Mumbai street food. Vegetable Kathi rolls are the perfect meal for any time. These are also a great vegan treat. This recipe is super easy to put together and it makes for the perfect lunchbox or tiffin meal. Also, this is my version of Spring Roll.
    4.25 from 4 votes
    Prep Time 15 minutes
    Cook Time 15 minutes
    Course Appetizer
    Cuisine Indian
    Servings 2 people

    Ingredients
      

    For Kathi roll

    • 2 uncooked tortilla
    • 2 tsp oil to cook the tortillas
    • About 20 spinach leaves cut into 2-3 pieces
    • ½ cup red bell pepper thinly sliced and remove the seeds
    • 1 cup cabbage thinly sliced
    • ¼ cup carrots shredded
    • ½ cup cucumber thinly sliced
    • 2 Tbsp cilantro leaves finely chopped

    Peanut Sauce

    • ¼ cup peanut butter
    • 2 Tbsp soy sauce
    • 1 Tbsp ginger juice
    • 1 Tbsp sugar
    • 2 Tbsp lime juice
    • 1 Tbsp sesame oil optional
    • 3 whole red chilies

    Instructions
     

    Sauce

    • Remove the seeds from red chili and soak in 2 tablespoons of hot water for few minutes. Blend all the ingredients together except peanut butter, soy sauce, ginger juice, sugar, lime juice, and sesame oil. After spices are blended to paste add peanut butter and blend enough to mix t well. Note: don’t over blend peanut butter will leave the oil.
    • Check if the salt is needed, soy sauce is quite salty.

    Kathi Roll

    • Heat the skillet over medium high, lightly oil the skillet, place the tortilla over skillet for about half a minute, it will change in the color lightly and puff different places. Flip the tortilla over, and lightly brush the oil, flip it again and lightly brush the tortilla. tortilla should have light golden color on both sides.
    • Remove the tortilla from the skillet, make both tortilla same way. And set it aside. You can cook the tortillas in advance.

    Assembling the Frankie

    • Take one tortilla and put it over a flat surface. Spread about 2 tablespoons of peanut sauce over tortilla, leaving 1/2 inch around. Center of the tortilla spread the vegetables moderately, spinach, carrot, bell pepper, cucumber, cabbage, and cilantro. Roll them tightly like burrito.
    • Use extra peanut sauce as a dip.

    Notes

    Suggestions
    Instead of tortilla you may use left over Roti, Paratha. Serve Peanut Sauce as a dipping sauce with vegetable salad, French fries or with variety of bread.
    You may also enjoy Idli Manchurian, Veggie Hash Browns
    Keyword Appetizer, Healthy, Homemade, Jain Food, Lunch Box, No Garlic, No Onion, Picnic Food, Sattvik Food, Snack, Spring Roll, Street Food, Vegan, Vegetable Roll, Vegetarian
    Tried this recipe?Let us know how it was!

    Guide to How to make Vegetable Kathi Rolls

    Welcome to our comprehensive recipe for vegetable kathi roll. Whether you’re a seasoned cook or a beginner in the kitchen, this recipe promises to deliver a delicious and satisfying appetizer. Kathi Rolls, a popular street food in India, are versatile and customizable, making them perfect for any occasion. 

    Paired with our homemade peanut sauce, they are sure to impress your family and friends. In this guide, we’ll walk you through each step of the process, providing clear instructions, helpful tips, and suggestions for variations. Let’s get started!

    Step-by-Step Instructions: Preparing the Sauce

    To start, let’s prepare the flavorful peanut sauce that will elevate your Kathi Rolls to the next level.

    • Begin by removing the seeds from the red chili and soaking them in two tablespoons of hot water for a few minutes. This step helps to soften the chili and enhance its flavor.
    • Once the chili is soaked, blend all the ingredients together in a blender, excluding the peanut butter, soy sauce, ginger juice, sugar, lime juice, and sesame oil. This will create a fragrant and spicy paste.
    • After blending the spices into a paste, add the peanut butter to the mixture. Be careful not to overblend, as this can cause the peanut butter to release its oil.
    • Taste the sauce and adjust the salt if necessary. Remember that soy sauce is quite salty, so proceed with caution.

    Cooking the Kathi Rolls

    Now that the sauce is ready, let’s move on to assembling the Kathi Rolls.

    • Heat a skillet over medium-high heat and lightly oil the surface. This will prevent the tortillas from sticking.
    • Once the skillet is hot, place a tortilla on it for about half a minute. You’ll notice the tortilla changing color slightly and puffing up in different places.
    • Flip the tortilla over and lightly brush it with oil. Repeat this process, flipping the tortilla again and brushing it with oil until it achieves a light golden color on both sides.
    • Remove the tortilla from the skillet and repeat the process with the remaining tortillas. You can cook the tortillas in advance and set them aside for later use.

    Assembling the Kathi Rolls

    Now it’s time to assemble the Kathi Rolls with our delicious peanut sauce.

    • Take one tortilla and lay it flat on a clean surface. Spread approximately two tablespoons of peanut sauce evenly over the tortilla, leaving about half an inch of space around the edges.
    • In the center of the tortilla, layer the vegetables generously. You can use a combination of spinach, carrots, bell peppers, cucumbers, cabbage, and cilantro for a colorful and nutritious filling.
    • Once the vegetables are in place, carefully roll the tortilla tightly like a burrito, ensuring that the filling is secure inside.
    • Repeat this process with the remaining tortillas until all the Kathi Rolls are assembled and ready to serve.

    Serving Suggestions

    Here are some suggestions for serving your Kathi Rolls with Peanut Sauce:

    • Serve the rolls with extra peanut sauce on the side for dipping.
    • Instead of tortillas, you can use leftover Roti or Paratha for a more traditional twist.
    • Pair the rolls with a side of vegetable salad, French fries, or a variety of bread for a complete meal.

    Notes and Tips

    • Be mindful not to overblend the peanut butter when preparing the sauce, as it can release its oil and affect the texture.
    • Adjust the salt level in the sauce according to your preference, keeping in mind the saltiness of the soy sauce.
    • You can customize the filling of the Kathi Rolls according to your taste preferences. Try addingpaneer, or tofu for added protein.
    • If you’re preparing the rolls in advance, store them in an airtight container in the refrigerator and reheat them in the oven or microwave before serving for best results.

    Frequently Asked Questions (FAQ)

    Q: Can I make the peanut sauce ahead of time?

    A: Yes, you can prepare the peanut sauce in advance and store it in the refrigerator for up to a week. Just make sure to stir it well before using.

    Q: Can I make the Kathi Rolls with gluten-free tortillas?

    A: Absolutely! You can use gluten-free tortillas or even lettuce wraps as a substitute for traditional tortillas.

    Q: Can I freeze the assembled Kathi Rolls?

    A: While it’s possible to freeze the assembled rolls, the texture of the vegetables may change upon thawing. It’s best to assemble the rolls just before serving for the freshest taste.

    Benefits of Kathi Rolls with Peanut Sauce

    • Kathi Rolls are a convenient and portable meal option, perfect for on-the-go lunches or picnics.
    • The peanut sauce adds a rich and creamy texture to the rolls while providing a good source of protein and healthy fats.
    • With a variety of vegetables in the filling, Kathi Rolls are a nutritious option that can help you meet your daily intake of vitamins and minerals.
    • By making your own Kathi Rolls at home, you can control the ingredients and customize them to suit your dietary preferences and restrictions.

    We hope this guide has inspired you to try making Kathi Rolls with Peanut Sauce at home. Enjoy experimenting with different fillings and variations to create your own delicious twist on this classic street food!
    Explore more appetizer recipes on Manjula’s Kitchen: Vegetable Samosas, Paneer Tikka, Crispy Spinach Pakoras, Mango Lassi, Masala Chai, Gulab Jamun, Kheer (Rice Pudding)

  • Vegan Mac and Cheese, Quick and Easy

    Vegan Mac and Cheese, Quick and Easy

    Vegan Mac and Cheese

    Vegan Mac and Cheese, Quick and Easy

    Vegan Macaroni and Cheese is made with dairy free cheese. This quick, easy recipe is creamy and delicious. Mac and cheese has always been a comfort food in my family. My son is on a dairy free diet and one day while craving for Mac and Cheese, asked about making vegan cheese. I experimented with many recipes and finally my son was happy with the result. To my surprise my grand-kids also enjoyed this vegan mac and cheese. This was a surprise success at my house.
    No ratings yet
    Prep Time 10 minutes
    Cook Time 15 minutes
    Total Time 25 minutes
    Course Main Course
    Cuisine Italian
    Servings 2 people

    Ingredients


    • 1 cup elbow macaroni
    • 1 cup small florets of broccoli optional

    For Vegan Cheese

    • 1/2 cup raw cashews
    • 1 cup Yukon gold potatoes (cubed) they have thin and smooth skin, I have already peeled and cubed
    • 1/2 cup carrots sliced
    • 3 Tbsp fresh lemon juice.
    • 1 tsp salt
    • 1/4 cup nutritional yeast
    • 1/4 tsp chili powder

    Instructions
     

    • Boil the macaroni according to the instruction over the box. Set aside.
    • In boiling water soak the broccoli for few minutes and drain the water, set aside.
    • Soak the cashews for about half hour and set aside.
    • Wash and peel both potatoes and carrots, and chop into uniform pieces and boil with 2 cups of water for about 8 minutes, till they are soft. Take them out from water.
    • Add all the ingredients for cheese into a blender with one cup of water and blend until smooth, use more water as needed. I used about 2 cups of water.
    • Pour into a pot on the stove and heat to medium-low heat, stirring occasionally. Once it starts to thicken, remove from the heat and stir again and it should thicken up a bit more. If it’s too thick, add more water. Cheese should be pourable consistency. It should only take a couple of minutes to thicken up on the stove. 
    • For serving toss the broccoli and pasta together, pour the cheese over, serve hot.
    Tried this recipe?Let us know how it was!

  • Masala Popcorn, Spicy Popcorn, Indian Style

    Masala Popcorn, Spicy Popcorn, Indian Style

    Masala Popcorn

    Masala Popcorn, Spicy Popcorn, Indian Style

    Masala Popcorn is a spicy and flavorful snack. Enjoy low calorie snack masala popcorn while watching a movie or your favorite TV show.
    4.50 from 10 votes
    Prep Time 5 minutes
    Cook Time 5 minutes
    Total Time 10 minutes
    Course Snack
    Cuisine Indian
    Servings 4 People

    Ingredients


    • 1 pack microwave popcorn about 3 ounce pack plain
    • 3 Tbsp oil canola, or vegetable
    • 1 tsp fennel seeds saunf
    • 1 tsp coriander seeds dhania
    • 1/4 tsp asafetida hing
    • 2 Tbsp green chili finely chopped
    • 12 curry leaves
    • 1/2 tsp salt
    • 1/3 tsp sugar

    Instructions
     

    • Make the popcorn using the instruction over popcorn bag. Keep aside.
    • Heat a large frying pan over low heat, put all the ingredients except popcorn, oil, fennel seeds, coriander seeds, asafetida, green chili, curry leaves, salt, and sugar. 
    • Keep stirring till green chili and curry leaves are dry this should take about 2 minutes. Add the popcorn stir till popcorns are coated with spices. Turn off the heat.
    • Enjoy!
    Tried this recipe?Let us know how it was!

  • Besan Sev (Crispy Indian Snack)

    Besan Sev (Crispy Indian Snack)

    Besan Sev

    Besan Sev (Crispy Indian Snack)

    Besan sev is a popular savory crispy snack, which is made in almost every household in India. These noodle-like Sev are so tasty that when you start munching, it's often difficult to stop.  This is a quick and easy recipe. Besan Sev is a great snack to make in bulk as it stays fresh for months.  They are made on all festive occasions. How you serve these sev often depends on how thick sev are. Fine sev are used for garnishing chaat. Thicker sev are served alone as a snack.   My favorite way to serve sev drizzeled with cilantro chutney. To make sev you do need to use sev maker, which is a small gadget like for making noodles.
    No ratings yet
    Prep Time 10 minutes
    Cook Time 14 minutes
    Course snacks
    Cuisine Indian
    Servings 4 people

    Ingredients
      

    • 2 cups besan (gram flour)
    • 1 teaspoon carom seeds crushed (ajwain)
    • 1-1/2 salt
    • 1/2 teaspoon red chili powder, adjust to taste
    • 1/4 teaspoon black pepper
    • 1/4 teaspoon asafetida (hing)
    • 3 tablespoons oil
    • 1/2 cup lukewarm water
    • Oil to fry

    Also need sev maker

    Instructions
     

    • Mix all the dry ingredients together, besan carom seeds, red chili, black pepper, and asafetida. Add the oil and mix it well.
    • Add the water slowly to make soft and smooth dough. Dough is very sticky, I used a spoon to mix the dough in the beginning. Then oil the palm and knead the dough. Cover the dough and allow to rest for about 15 minutes.
    • Greased sev maker with attachment. Place enough dough to fill the cylinder of sev maker and close. On other side, heat the oil in a frying pan on medium heat, frying pan should have about one inch of oil.
    • Oil should be moderately hot, Note: when you place little piece of dough oil should sizzle and dough should come up slowly without changing color.
    • Now hold the sev maker over frying pan, press the handle, sev will start coming out in to the oil. As sev is coming, slowly move the sev maker in circular motion.
    • As you complete one circle stop. Fry both sides till they become light golden brown, and oil will stop sizzling. Sev is ready. Remove it using slotted spoon.
    • Take them out over paper towel lined plate. And continue the same process for remaining dough.
    • Let the sev cool completely, as it cools they will become crispy. Break sev lightly with your hand and sev is ready to serve.
    Tried this recipe?Let us know how it was!

  • Hara Bhara Kabab – Vegetable Cutlet

    Hara Bhara Kabab – Vegetable Cutlet

    Hara Bhara Kabab (Vegetable Cutlet)

    Hara Bhara Kabab – Vegetable Cutlet

    Hara bhara kabab is a popular tasty snacks in Indian restaurants. This spicy delicious snack is deep fried made with spinach and potatoes flavored with spice mix. Hara bhara kabab is crispy outside and soft inside. Hara Bhara Kebabs are absolutely delicious appetizer and looks like cutlets.
    No ratings yet
    Prep Time 20 minutes
    Cook Time 30 minutes
    Course Appetizer
    Cuisine Indian
    Servings 20 kababs

    Ingredients
      

    • 6 cup spinach finely chopped, (do remove all the stems)
    • 1-1/2 cup potatoes boiled, peeled and shredded
    • 2 teaspoons oil
    • ½ teaspoon cumin seeds (jeera)
    • 1 teaspoon ginger finely chopped
    • 3/4 teaspoon salt
    • 3 tablespoons corn starch
    • ¼ cup finely chopped cilantro (hara dhania)
    • 2 tablespoons green chili finely chopped
    • Also need oil to fry

    Instructions
     

    • Heat the oil in a saucepan on medium-high heat. Oil should be moderately hot add cumin seeds. After the cumin seeds crack, add the spinach.
    • Stir-fry, making sure to press the spinach down so the water can evaporate. Cook the spinach until most of the water has evaporated. Spinach still should be moist not dry.
    • After spinach is at room temperature, add to the potatoes with all other ingredients, ginger, cilantro, green chilies, salt, and corn starch. Mix will be the consistency of soft dough.
    • Divided the mix to 20 equal parts and roll them into oval shapes.
    • Heat the oil in a frying pan on medium heat. The frying pan should have about 1 inch of oil. To check if the oil is ready, put small piece of the mix in oil. It should sizzle and come up slowly. If oil is very hot kababs will not cook through and will not be crispy.
    • Fry the kababs in small batches. Fry kababs until golden-brown all around, this should take about 6-7 minutes.
    • Serve them hot with sweet and sour tamarind chutney.
    Tried this recipe?Let us know how it was!

    Hara Bhara Kabab Recipe – A Delicious Veggie Treat 

    Hara Bhara Kabab is a delightful appetizer commonly enjoyed during Diwali celebrations. These gluten-free and vegan kababs are perfect for parties and gatherings, offering a flavorful snack option. Made with a mix of spinach, potatoes, peas, and spices, Hara Bhara Kabab is not only delicious but also caters to dietary preferences, making it an inclusive choice for various guests.

    Are you craving a delightful snack that’s not only tasty but also healthy? Look no further than hara bhara kabab! These delightful vegetable cutlets are packed with the goodness of spinach, peas, and potatoes, making them a wholesome treat for any occasion. In this hara bhara kabab recipe, I’ll walk you through the steps to create these crispy delights at home, ensuring you achieve the perfect texture and flavor every time.

    How to Make Hara Bhara Kabab – Step by Step Guide 

    • Preparing the Vegetables: Begin by blanching spinach leaves and peas until they are tender. Drain them well and set aside. Boil and mash the potatoes until they are smooth and lump-free.
    • Making the Kabab Mixture: In a mixing bowl, combine the blanched spinach, peas, and mashed potatoes. Add finely chopped green chilies, ginger, and coriander leaves for a burst of flavor. Season the mixture with salt, garam masala, and chaat masala to enhance the taste.
    • Binding the Ingredients: To bind the mixture together, add breadcrumbs or roasted chickpea flour (besan). This will help absorb excess moisture and give the kababs a nice texture. Mix everything thoroughly until well combined.
    • Shaping the Kababs: Take small portions of the mixture and shape them into round or oval patties. Press them gently between your palms to ensure they hold their shape. You can also coat the kababs with additional breadcrumbs for extra crispiness.
    • Frying the Kababs: Heat oil in a pan for shallow frying or deep frying, depending on your preference. Once the oil is hot, carefully place the kababs in the pan and fry them until they turn golden brown and crispy on both sides.

    Tips for Perfect Hara Bhara Kababs 

    • Use Fresh Ingredients: For the best flavor and texture, use fresh spinach, peas, and potatoes. Avoid using frozen vegetables as they may contain excess moisture, affecting the consistency of the kababs.
    • Adjust Spices to Taste: Feel free to adjust the amount of green chilies, ginger, and spices according to your taste preferences. You can make the kababs milder or spicier to suit your palate.
    • Add Nutritional Boost: Sneak in additional veggies like grated carrots or finely chopped bell peppers for added nutrition and flavor. These kababs are a great way to get picky eaters to consume their vegetables.
    • Make Ahead and Freeze: You can prepare the kabab mixture in advance and freeze it for later use. Simply shape the mixture into patties, arrange them on a baking sheet, and freeze until firm. Once frozen, transfer the patties to a freezer bag or container and store them for up to a month. When ready to enjoy, thaw the kababs in the refrigerator and fry as directed.

    Variations of Hara Bhara Kabab 

    • Paneer Hara Bhara Kabab: Add crumbled paneer (Indian cottage cheese) to the kabab mixture for a creamy and rich texture. Paneer adds protein and enhances the taste of the kababs.
    • Corn and Spinach Kabab: Replace peas with sweet corn kernels for a slightly sweet flavor and crunchy texture. Corn and spinach complement each other beautifully, making these kababs a crowd-pleaser.
    • Quinoa and Vegetable Kabab: For a healthier twist, substitute a portion of the potatoes with cooked quinoa. Quinoa adds protein, fiber, and a nutty flavor to the kababs, making them a nutritious snack option.

    Benefits of Hara Bhara Kabab 

    • Rich in Nutrients: Hara bhara kababs are loaded with vitamins, minerals, and antioxidants from the spinach, peas, and other vegetables. They make for a nutritious snack or appetizer option.
    • Vegetarian Protein Source: These kababs are an excellent source of plant-based protein, especially when made with ingredients like peas, chickpea flour, and paneer. They are perfect for vegetarians and vegans looking to increase their protein intake.
    • Low in Calories: When shallow fried or baked, hara bhara kababs are relatively low in calories compared to traditional fried snacks. They offer a guilt-free indulgence without compromising on taste.

    FAQs About Hara Bhara Kabab 

    Can I Bake Hara Bhara Kababs Instead of Frying Them?

    • Yes, you can bake hara bhara kababs in a preheated oven at 375°F (190°C) for 20-25 minutes or until they are golden brown and crispy. Remember to brush or spray the kababs with oil before baking to help them brown evenly.

    Can I Make Hara Bhara Kababs Gluten-Free?

    • Absolutely! Simply replace breadcrumbs with crushed cornflakes or gluten-free oats to make the kababs gluten-free. You can also use chickpea flour (besan) instead of breadcrumbs for binding.

    Are Hara Bhara Kababs Suitable for Kids?

    • Yes, hara bhara kababs are kid-friendly and a great way to sneak in some vegetables into their diet. You can adjust the spiciness level to suit their taste preferences and serve them with their favorite dipping sauce or chutney.

    Can I Freeze Hara Bhara Kabab Mixture?

    • Yes, you can prepare the kabab mixture in advance and freeze it for later use. Simply shape the mixture into patties, arrange them on a baking sheet, and freeze until firm. Once frozen, transfer the patties to a freezer bag or container and store them for up to a month. Thaw them in the refrigerator before frying.
    • Other Recipes on Manjula’s Kitchen

    If you’re looking to explore more Indian recipes, appetizers, beverages, and desserts, be sure to check out the following links on Manjula’s Kitchen. Here are some links to recipes on Manjula’s Kitchen official website: Paneer Tikka Masala Recipe, Chana Chaat (Spicy Chickpea Salad) Recipe, Pav Bhaji (Spicy Vegetable Hash with Buns) Recipe, Raj Kachori (Crunchy Chaat) Recipe, Vegetable Biryani Recipe. These recipes should offer you a flavorful experience straight from Manjula’s Kitchen.

  • Chakli (Crispy Rice Snack)

    Chakli (Crispy Rice Snack)

    Crispy Chakli

    Chakli (Crispy Rice Snack)

    Chakli a popular snack all throughout India. Chakli is a crispy and delicious snack that is prepared for holidays. It is perfect with a hot cup of Chai. In my opinion, chakli is a must-have munchie! Chakli is prepared many different ways using different pulses with rice.  I plan on making Chakli with rice flour and moong dal.
    No ratings yet
    Prep Time 20 minutes
    Cook Time 24 minutes
    Course snacks
    Cuisine Indian
    Servings 6 people

    Ingredients
      

    • 1 cup rice flour
    • 1/4 cup washed yellow moong dal
    • 1/4 cup all-purpose flour (maida, plain flour)
    • 2 tablespoons sesame seeds (til)
    • 1/2 teaspoon red chili powder
    • 1/4 teaspoon black papper
    • 1/2 teaspoon cumin seeds (jeere)
    • 1/8 teaspoon asafetida (hing)
    • 1/4 teaspoon turmeric (haldi)
    • 1 teaspoon salt
    • 1 teaspoon lemon juice
    • 2 tablespoons hot oil
    • Approx., 1/4 cup hot water use as needed
    • Oil to fry

    Also need chakli maker, available in Indian grocery stores

    Instructions
     

    • Mix all the dry ingredients in a bowl rice flour, all-purpose, sesame seeds, chili powder, black pepper, cumin seeds, asafetida, turmeric, and salt. Set aside.
    • Cook the moong dal with 2 cups of water over medium high heat till it is very soft, and mushy, if needed add more water.
    • Add hot dal to rice flour mix and mix with spoon, add lemon juice, and hot oil, and mix it well. First use the spoon to mix because mix will be quite hot.
    • Add hot water as needed to make soft and firm dough. Cover the dough and set aside for five minutes.
    • Knead the dough well. Divide the dough into 3 parts and roll them into long rolls. Put one of the roll into chakli maker, and close.  Press the chakli maker, making the chackli into spiral’s (roll them 3 to 4 times) over flat plate.
    • Heat the oil in a frying pan over medium heat, frying pan should have about one inch of oil. Oil should be moderately hot. Put few chaklies at a time just enough to cover the surface of the oil.
    • Fry them both sides until they are light brown, this should take 4 to 5 minutes.
    • Serve them after they cool off so chaklies are nice and crispy. Or store them in air tight container for later use.

    Notes

    Notes
    1. If dough is too soft add little more rice flour.
    2. If they are braking it is ok don’t worry still it will taste great, need some practice.
    Tried this recipe?Let us know how it was!

  • Nimki (Salted Fried Crackers)

    Nimki (Salted Fried Crackers)

    Nimki - Salted Fried Crackers

    Nimki (Salted Fried Crackers)

    Nimki (Namak Para) is a popular classic savory snack. You can serve nimkies with pickle at tea time, or enjoy as is! For all those upcoming holidays nimkies make a good snack to have around. They also make good homemade holiday gift.
    5 from 1 vote
    Prep Time 15 minutes
    Cook Time 20 minutes
    Course snacks
    Cuisine Indian
    Servings 6 people

    Ingredients
      

    • 1 cup all-purpose flour, (maida, plain flour)
    • 2 tablespoons sooji fine, samolina
    • 2 tablespoons oil
    • 3/4 teaspoon salt
    • 1/4 teaspoon cumin seeds
    • Approx. ¼ cup warm water
    • 18 whole black pepper for garnishing
    • Also need oil to fry

    Instructions
     

    • Mix the dry ingredients all purpose flour, sooji, salt, and cumin seeds, add the oil and mix it well.
    • Add water slowly to make firm dough. Cover the dough and set aside for at least ten minutes.
    • Divide the dough into 18 equal parts.
    • Take each part of the dough and make them in smooth round shape. Roll them into thin circles should be about four inch diameter.
    • Prick each nimki with a fork in 10 to 12 places, (to prevent puffing the nimkies when frying. Fold the rolled nimki into triangle don’t press it, prick them lightly from both sides 2 to 3 times. Take one whole black pepper and press it in the center. Repeat the processes roll all the nimkies before frying.
    • Heat the oil in a frying pan on medium heat. Frying pan should have at least 1 inch of oil. To check if the oil is ready, put a small piece of dough in the oil. The dough should make the oil sizzle and come up very slowly.
    • Fry nimkies in batches, making sure to place just enough nimkies to cover the frying oil. Fry them until both sides are a light golden-brown. This should take about 7 to 8 minutes.
    • Take them out over paper towel, which will absorb the extra oil.

    Notes

    Notes
    1. If the nimkies are cooked on high heat, they will not be crisp.
    2. Nimkies can be stored for a month in airtight containers.
    Tried this recipe?Let us know how it was!

  • Aloo Tikki (Potato Patties)

    Aloo Tikki (Potato Patties)

    Aloo Tikki (Potato Patties)

    Aloo Tikki (Potato Patties)

    Aloo tikki or potato patties are popular snack, traditionally when any snack is served with yogurt and chutney it is known as chaat. This is very popular with road side vendors, the aroma of the hot tikkis are enough to make you hungry.
    No ratings yet
    Course street food
    Cuisine Indian
    Servings 8 tikki

    Ingredients
      

    • 3 medium size potatoes boiled and shredded, this will make 2 cups of shredded potato
    • 2 tablespoon bread crumbs
    • 1 teaspoon salt
    • Oil for cooking

    for Filling

    • 1/3 cup green peas boiled and drained
    • 1 teaspoon chopped ginger
    • 1 tablespoon green chili minced
    • 1 tablespoon minced cilantro (hara dhania)
    • ¼ teaspoon salt
    • 1 teaspoon oil

    for Serving

    Instructions
     

    Making Filling

    • Boil and drain the water from the peas and lightly mash.
    • Heat the oil in a small pan over medium heat; add all the filling ingredients, stir fry for about two minutes. Keep the filling little moist. Set aside.

    Making tikkis

    • Add the salt and bread crumb into the potatoes and knead to make the dough.
    • Divide the potatoes into 8 equal parts.
    • Takes one part of the potato dough, make a ball and flatten over the oiled palm.  Put about 1 teaspoon of filling in the center and wrap around with potato. Lightly flatten the filled balls to patties. Make all the patties.
    • Heat non stick heavy skillet on medium high heat, generously greased the skillet.  Place the tikkies on the skillet, making sure they are not touching each other and has some space all around. Oil the tikkies from the top.
    • Cook them for about 1 minute and turn them over, tikkies should be light golden brown. Oil the tikkies from the top and lightly press with spatula.
    • Turn the tikkies 3-4 times as needed to make sure tikkies are nice and crispy. Brush the oil lightly every time when you turn the tikkies over and also press with spatula.
    • Aloo tikkies taste best when they are served right from over the skillet.
    • You can prepare them in advance, up to five steps and brown them just before serving.
    • Tikkies are served along with tamarind chutney, cilantro chutney and yogurt. You can also serve them with spicy chole.
    Tried this recipe?Let us know how it was!

    Aloo Tikki: A Delectable Indian Potato Patties Recipe 

    In this aloo tikki recipe, we delve into the art of creating these beloved potato patties, a staple in Indian cuisine. These aloo tikkis are not only flavorful but also versatile, making them perfect for various dishes like aloo tikki chaat. Aloo Tiki, a delightful vegan appetizer inspired by street food recipes. If you’re craving a delightful snack or appetizer, look no further than this tikki aloo recipe.

    Preparation: Crafting the Perfect Aloo Tikki 

    To start this aloo tikki recipe, begin by boiling potatoes until they are tender. Once cooled, peel and mash them thoroughly. Now, let’s infuse these mashed potatoes with flavor. Add green chili, ginger, salt, cumin seeds, mango powder, and garam masala to the mashed potatoes. Mix these ingredients well, ensuring they are evenly distributed, creating the base for our aloo tikkis.

    Cooking: Shaping and Pan-Frying the Aloo Tikki 

    Now comes the fun part – shaping the aloo tikkis! Take a portion of the potato mixture and roll it into a ball, then gently flatten it to form a patty. Repeat this process until all the mixture is used. Heat oil in a skillet over medium heat. Once hot, carefully place the aloo tikkis in the skillet, ensuring they don’t overlap. Cook each side until golden brown and crisp, creating a delightful texture that enhances the flavor of the tikki aloo.

    Serving: Enjoying Aloo Tikki in Various Forms 

    Now that your aloo tikkis are ready, it’s time to enjoy them in different ways. One popular option is aloo tikki chaat, where the tikki aloo is topped with a medley of chutneys, yogurt, and spices, creating a burst of flavors with every bite. You can also serve aloo tikkis with a side of mint chutney or tamarind chutney for a refreshing twist. Whether enjoyed as a snack, appetizer, or part of a meal, these aloo tikkis are sure to delight your taste buds.

    Tips for Perfect Aloo Tikki: 

    • Use starchy potatoes: Opt for potatoes like russets or Yukon Gold, as they have a higher starch content, resulting in fluffier aloo tikkis.
    • Keep the oil hot: Ensure the oil is sufficiently hot before frying the aloo tikkis to achieve a crispy exterior.
    • Don’t overcrowd the skillet: Cook the tikki aloo in batches, giving them enough space in the skillet to fry evenly.
    • Add breadcrumbs: If the potato mixture feels too wet, incorporate breadcrumbs to help bind it together.

    Variations of Aloo Tikki: 

    • Paneer-stuffed Aloo Tikki: Elevate your aloo tikki experience by adding a layer of paneer stuffing before shaping and frying them.
    • Vegetable-loaded Aloo Tikki: Mix finely chopped vegetables like carrots, peas, and bell peppers into the potato mixture for added texture and flavor.
    • Spicy Aloo Tikki: Increase the heat by adding extra green chilies or a dash of red chili powder to the potato mixture.

    Benefits of Aloo Tikki: 

    • Rich in carbohydrates: Potatoes are a great source of carbohydrates, providing energy to fuel your day.
    • Versatile: Aloo tikkis can be enjoyed on their own, as part of a meal, or as a base for various chaat dishes, offering endless culinary possibilities.
    • Comfort food: The warm and comforting flavors of aloo tikkis make them a favorite comfort food for many.

    FAQs about Aloo Tikki: 

    Q: Can I make aloo tikkis ahead of time? 

    A: Yes, you can prepare the potato mixture and shape the aloo tikkis in advance. Store them in the refrigerator until ready to fry.

    Q: Can I bake aloo tikkis instead of frying them? 

    A: While frying gives aloo tikkis their characteristic crispiness, you can bake them in the oven for a healthier alternative. Brush them with oil and bake at 400°F (200°C) until golden brown.

    Q: Are aloo tikkis gluten-free? 

    A: Yes, aloo tikkis are naturally gluten-free. However, if you’re adding breadcrumbs for binding, ensure they are gluten-free certified.

    Other Recipes on Manjula’s Kitchen 

    If you’re looking to explore more Indian recipes, appetizers, beverages, and desserts, be sure to check out the following links on Manjula’s Kitchen. Here are some links to recipes on Manjula’s Kitchen official website:

    Paneer Tikka Masala Recipe

    Chana Chaat (Spicy Chickpea Salad) Recipe

    Pav Bhaji (Spicy Vegetable Hash with Buns) Recipe

    Raj Kachori (Crunchy Chaat) Recipe

    Vegetable Biryani Recipe

    These recipes should offer you a flavorful experience straight from Manjula’s Kitchen.