Find Vegetarian Recipes: Exploring Indian Vegetarian Cuisine
Indian cuisine is a treasure trove of delicious and nutritious vegetarian recipes. Whether you’re looking for vegetarian recipes or explore a variety of Indian vegetarian recipes, Manjula’s Kitchen offers an extensive collection of dishes that cater to every taste. Let’s delve into some mouth-watering vegetarian Indian recipes that are both easy to prepare and packed with flavor.
Why Find Vegetarian Recipes?
Health Benefits: Vegetarian recipes are often lower in saturated fats and cholesterol while being high in vitamins, minerals, and fiber.
Environmental Impact: Choosing vegetarian meals can reduce your carbon footprint, as plant-based foods typically require fewer resources than meat-based foods.
Ethical Reasons: Many people choose vegetarianism for ethical reasons, preferring not to consume animal products.
Breakfast Recipes
Aloo Paratha
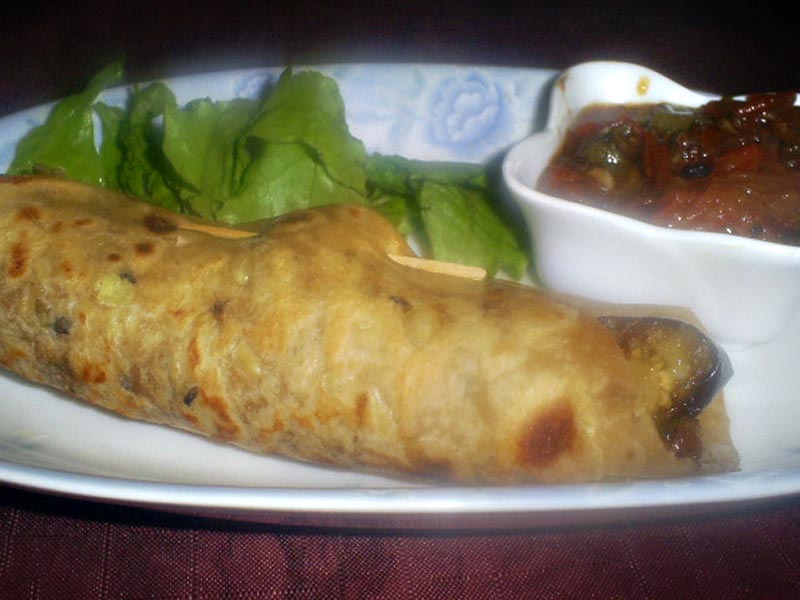
Aloo Paratha is a popular Indian breakfast made with whole wheat flatbread stuffed with spiced mashed potatoes. This dish is a classic example of Indian recipes vegetarian style. It’s hearty, flavorful, and perfect for satisfyingIndian breakfast ideas. Serve it with yogurt and pickle for a complete meal.
Upma
Upma is a savory semolina porridge cooked with vegetables and tempered with mustard seeds, curry leaves, and green chilies. This dish is a staple inSouth Indian recipes and a fantastic option when you wants vegetarian recipes that are quick and nutritious. Upma is often enjoyed with a side of coconut chutney.
Lunch Recipes
Chole (Chickpea Curry)
Chole is a robust chickpea curry cooked in a rich tomato-based gravy with aromatic spices. This dish is a beloved part of Indian vegetarian recipes and is usually served with rice or bhature (deep-fried bread). It’s a hearty and comforting meal that is both satisfying and nutritious.
Paneer Butter Masala
Paneer Butter Masala is a rich and creamy curry made with paneer (Indian cottage cheese) cooked in a spiced tomato and cashew gravy. This dish is a favorite amongvegetarian Indian recipes and pairs well with naan or jeera rice. The creamy texture and flavorful sauce make it a hit at any meal.
Dinner Recipes
Baingan Bharta
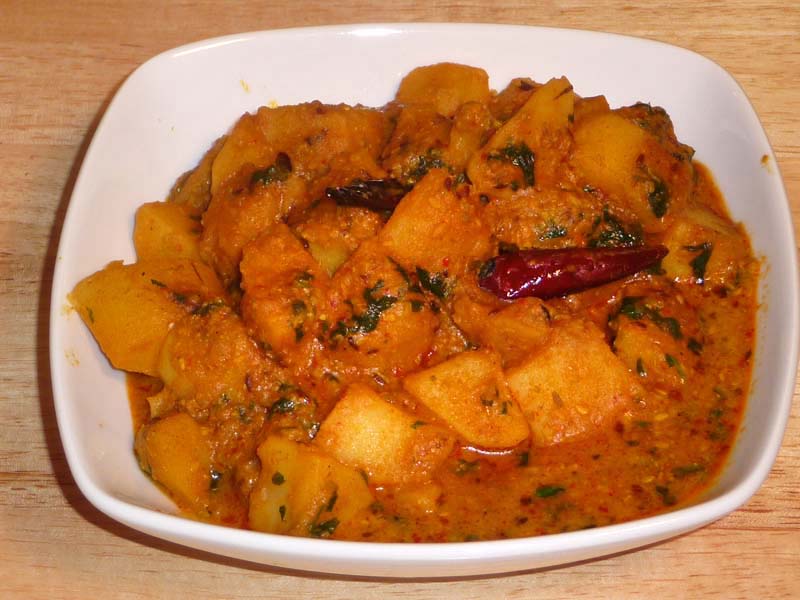
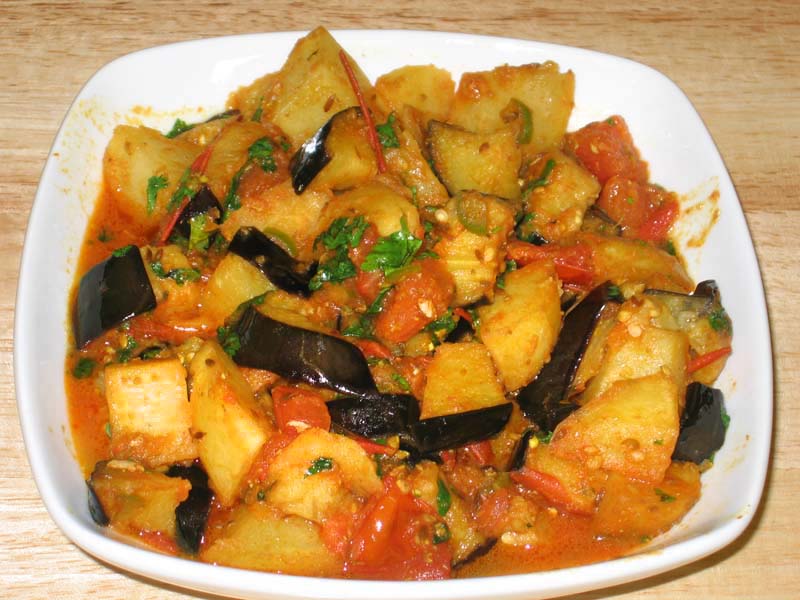
Baingan Bharta is a smoky and flavorful eggplant dish that is a must-try in vegetarian recipes in Indian cuisine. The eggplants are roasted until soft, then mashed and cooked with tomatoes, and spices. It’s a delicious and nutritious dish that pairs well with roti or rice.
Dal Makhani
Dal Makhani is a rich and creamy lentil dish made with black lentils and kidney beans simmered in a buttery tomato sauce. This dish is a staple in North Indian cuisine and a perfect example of Indian vegetarian recipes. It’s best enjoyed with naan or basmati rice for a complete meal.
Snack Recipes
Samosa
Samosa is a popular Indian snack consisting of a crispy pastry filled with spiced potatoes and peas. This snack is a favorite among those who want vegetarian recipes that are both delicious and easy to make. Samosas are typically served with tamarind or mint chutney.
Bhel Puri
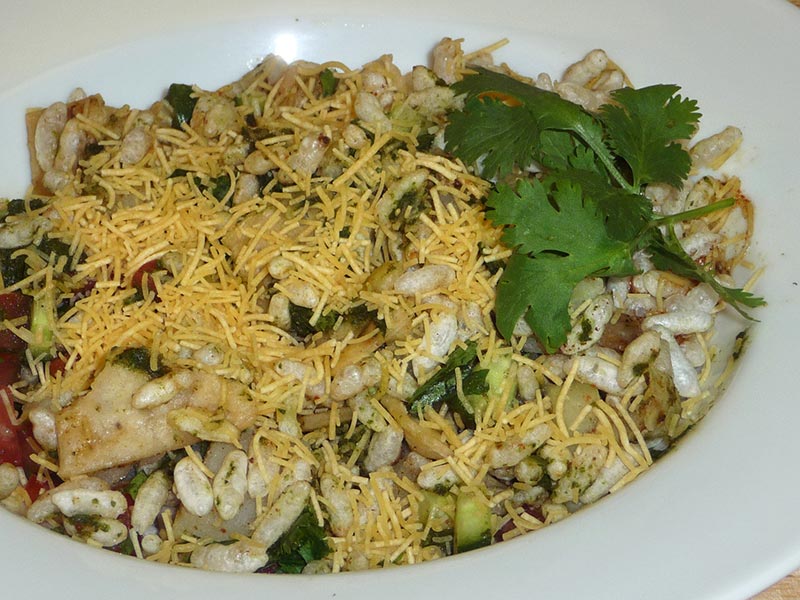
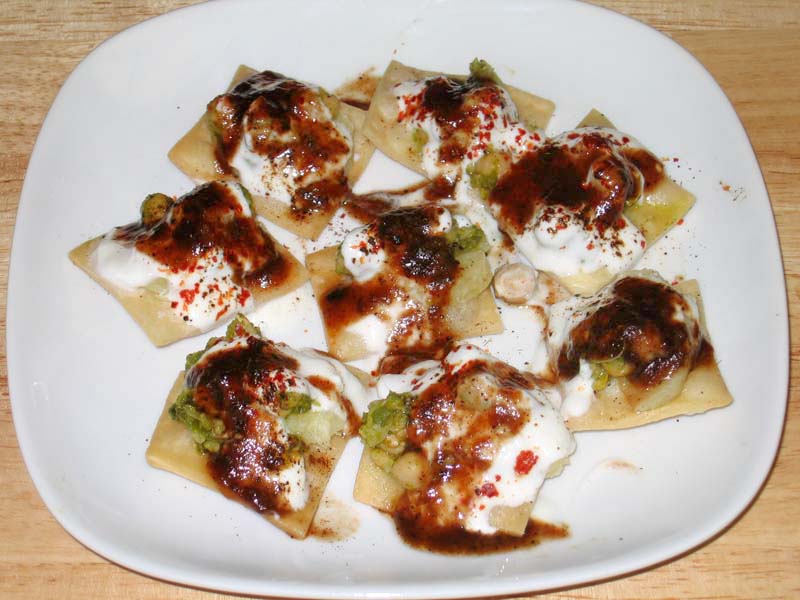
Bhel Puri is a tangy and spicy snack made with puffed rice, vegetables, and tamarind sauce. This dish is a quintessential part of street food in India and a great addition to your collection of vegetarian Indian recipes. It’s light, flavorful, and perfect for an evening snack.
Dessert Recipes
Gulab Jamun
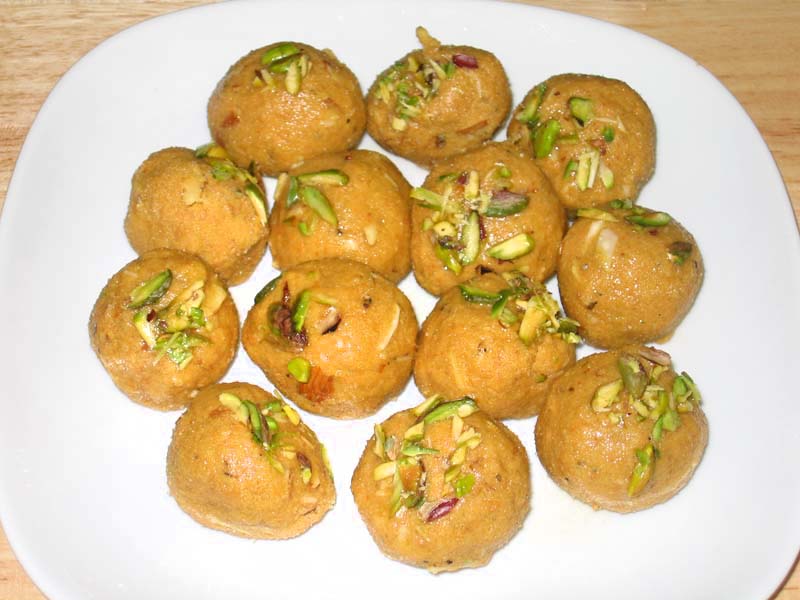
Gulab Jamun are soft, deep-fried balls made from khoya (dried milk) soaked in a sweet syrup flavored with cardamom and rose water. This dessert is a beloved part ofIndian recipes vegetarian and is often served during festivals and special occasions. The melt-in-your-mouth texture and sweet flavor make it a favorite.
Kheer
Kheer is a creamy rice pudding flavored with cardamom and garnished with nuts and raisins. This dessert is a classic in vegetarian recipes in Indian cuisine and is easy to prepare. Kheer is a perfect ending to any meal and is often enjoyed during celebrations.
Enhancing Your Vegetarian Menu
To enhance your vegetarian menu, consider exploring related categories that complement these vegetarian Indian recipes. Adding Indian snacks like samosas and bhel puri can provide a variety of flavors and textures. For a sweet ending, explore Indian desserts such as gulab jamun and kheer. Incorporating healthy recipes like upma and baingan bharta can offer lighter options for your meals. Hosting a large gathering? The popular party recipe category is filled with dishes that are sure to impress your guests and make your celebration memorable. Including North Indian recipes like chole or dal makhani can add a touch of authenticity to your meal.
Tips to Find Easy Vegetarian Recipes
Online Recipe Sites: Websites like AllRecipes, Epicurious, and BBC Good Food offer a vast collection of vegetarian recipes. Use search filters to find easy vegetarian recipes that fit your time constraints and skill level.
Cooking Apps: Apps like Tasty, Yummly, and Mealime can help you find the vegetarian recipes you need. These apps often provide step-by-step instructions and video tutorials.
Social Media: Platforms like Instagram, Pinterest, and YouTube are excellent resources to find vegetarian recipes in India. Follow vegetarian chefs and influencers for inspiration and new ideas.
Cookbooks: Invest in a few good vegetarian cookbooks. Authors like Madhur Jaffrey and Meera Sodha offer fantastic collections of vegetarian recipes.
Cooking Classes: Consider taking a vegetarian cooking class to learn new techniques and find easy vegetarian recipes that you can incorporate into your routine.
FAQs About Finding Vegetarian Recipes
Q: How can I find vegetarian recipes that my whole family will enjoy?
A: Look for versatile and customizable recipes like build-your-own taco bowls, pasta dishes, and stir-fries. These can easily be adapted to suit different tastes.
Q: Are there any quick ways to find easy vegetarian recipes?
A: Yes, use cooking apps, social media platforms, and online recipe databases. These resources often have filters for easy and quick recipes.
Q: Where can I find vegetarian recipes in India?
A: To find vegetarian recipes in India, explore Indian cooking blogs, YouTube channels by Indian chefs, and cookbooks dedicated to Indian cuisine.
Q: Can I find vegetarian recipes that are also gluten-free?
A: Absolutely. Many vegetarian recipes are naturally gluten-free. You can also look for specific gluten-free vegetarian recipes online or in specialized cookbooks.
Q: What are some good sources to find easy vegetarian recipes?
A: Good sources include online recipe websites, vegetarian cookbooks, cooking apps, and social media platforms where chefs and home cooks share their recipes.
Conclusion
Embarking on a journey to find vegetarian recipes can be both exciting and rewarding. Whether you’re looking to find easy vegetarian recipes for a quick meal or seeking to vegetarian recipes India for an authentic culinary experience, there are endless possibilities to explore.
Manjula’s Kitchen is one such brand which provides authentic reference point to all kinds of vegetarian recipes and providing alternatives to even dietary plans be it vegan, high protein, low carb or low calorie. We got all the healthy recipes across various platforms from Pinterest to YouTube to Instagram to Facebook. Manjula’s kitchen recipes are available in video and blogging format allowing every one enjoy its flavorful recipes.
Til ki Burfi is a healthy, quick & easy way to make home-made sweet snack which can also be offered as a dessert post meal. Its a must try recipe during winters.
Roast sesame seeds over medium heat till they are golden in color. This should take about 3-4 minutes. Keep aside.
In a non-stick frying pan add heavy cream and milk powder mix it well. Cook over medium-high heat, stir continuously till the mixture starts to bubble.
Lower the heat to medium and keep stirring and scraping the sides and bottom of the pan, until mixture is reduced to thick paste and starts coming together. This should take 8-10 minutes.
Add roasted sesame seeds and mix well. Stir for another 2-3 minutes until mix start looking soft dough.
Lower the heat to low and add sugar and cardamom powder and mix it well. This will become soft in texture after adding sugar.
Keep stirring for 1-2 minutes and bring the burfi back to dough texture.
Spread burfi mixture onto the greased plate, approximately ½ inch thick. Let it sit for at leadt two hours at room temperature. Cut burfis to desired shape; square or diamond shape works well.
The burfis will store well in an airtight container, at room temperature for up to 2 weeks.
Rava Idli is a popular South Indian dish. The traditional way of making idlis would take two days. This recipe is much quicker and easier, and tastes just as delicious! Rava Idlis can be enjoyed as a snack or as a light meal.
22 green chilies sliced lengthwise and cut in half.
Utensils for Steaming Idlis
Idli stand – this has three to four plates stacked over each other.
Covered pot, large enough to hold the idli stand.
Alternatively, an egg poacher can work just as well,
Instructions
Mix sooji, salt, green chili, ginger, cilantro, cabbage, yogurt, and water (as needed) to make a pancake-like batter. Set aside for at least 30 minutes.
The batter thickens as the semolina absorbs the water. At this point, add a little more water if it is too thick.
Add approximately ¾ cup of water to the pot. Check to make sure that the water does not touch the bottom plate of the idli stand. Bring to boil
Lightly grease Idli plates with oil.
Add Eno Fruit Salt to the batter and mix well. The mixture will begin foaming. Immediately begin pouring into the Idli trays. Place the stand into the steaming pot.
Cover the pot and steam the idlis ten to twelve minutes on medium heat. Insert a toothpick in the center of one idli. If the toothpick comes out clean, remove the stand from the pot. Do not overcook the idlis, as they will lose their softness and dry out as they cool.
Cool for just a few minutes before removing each individual idli. They should come out easily and not stick to the mould. The idlis should be spongy and soft.
For The Seasoning
Heat oil in a saucepan. Add mustard and cumin seeds. When the seeds begin to crack, add the chilies. Stir for a few seconds and remove from the heat.Pour the seasoning over the Idlis on the serving plate.
Notes
TipsYou can replace the cabbage with shredded carrots.This recipe will make slightly more than 16 idlis. If you choose, you can make it in two batches. The batter can be prepared all at once; however, you must add the Eno just prior to pouring into the idli stand.Serving SuggestionsServe seasoned Idlis with coconut or cilantro chutney.Serve Idlis with samber (south Indian vegetable soup). Idlis do not have to be seasoned for that.Stir-fry Idlis in the seasoning oil mixture over medium heat for a few minutes. They will turn slightly brown.
Rava Idli is a popular South Indian dish known for its simplicity and delicious taste. Rava Idli is a fantastic option for a quick & easyappetizer or snack, and it also makes for a convenient lunch box suggestion. Rava idli recipe is a versatile dish that can be enjoyed for breakfast, lunch, or dinner. Made from idli rava, a type of semolina, this dish is easy to prepare and requires minimal ingredients.
Idli rava is coarser in texture compared to regular semolina, giving the idlis a unique taste and texture. In this rava idli recipe, we will explore the process of making rava idli and various tips, variations, and benefits associated with it.
Making Rava Idli: Step-by-Step Guide
Preparation of Batter
To begin rava idli preparation, start by heating a tablespoon of oil in a pan. Add mustard seeds and allow them to splutter. Then, add finely chopped green chilies, grated ginger, and curry leaves for added flavor. Sauté for a few minutes until the raw aroma disappears. Incorporating these spices enhances the taste of rava idli.
Roasting Idli Rava
Next, add idli rava to the pan and roast it for a few minutes until it turns aromatic and light golden brown. Roasting the idli rava adds a nutty flavor to the dish and ensures that the idlis are soft and fluffy.
Preparing the Batter
Transfer the roasted idli rava to a mixing bowl and let it cool slightly. Then, add yogurt and water to the roasted rava and mix well to form a thick batter. Allow the batter to rest for 10-15 minutes to allow the idli rava to absorb the moisture. This step is crucial for achieving the perfect texture in rava idli.
Seasoning the Batter
Meanwhile, prepare the seasoning by heating oil in a small pan. Add mustard seeds, urad dal, and cashew nuts, and fry until the dal turns golden brown and the nuts are lightly roasted. Pour this seasoning over the rava idli batter and mix well. Seasoning adds a depth of flavor to the rava idli and makes it more aromatic.
Adding Baking Soda
Just before steaming the idlis, add baking soda to the batter and mix gently. Baking soda acts as a leavening agent and helps in making the idlis soft and fluffy. However, it’s important not to overmix the batter at this stage to ensure that the idlis remain airy and light.
Steaming the Idlis
Grease the idli molds with oil and pour the batter into each mold. Place the molds in a steamer and steam the idlis for 10-12 minutes or until they are cooked through. Insert a toothpick into the center of an idli to check for doneness. If it comes out clean, the idlis are ready to be served.
Tips for Perfect Rava Idlis
Use fresh idli rava for the best results. Stale or old rava may result in dense and hard idlis.
Adjust the consistency of the batter by adding more water if it’s too thick or yogurt if it’s too thin.
For enhanced flavor, you can add grated vegetables like carrots, peas, or capsicum to the batter.
Serve rava idli hot with coconut chutney or sambar for a wholesome and satisfying meal.
Variations of Rava Idli
Vegetable Rava Idli: Add finely chopped vegetables like carrots, peas, and bell peppers to the batter for a nutritious twist.
Spicy Rava Idli: Increase the quantity of green chilies and add finely chopped coriander leaves for a spicier version of rava idli.
Paneer Rava Idli: Grate paneer and mix it into the batter along with some chopped mint leaves for a rich and flavorful variation.
Masala Rava Idli: Add a teaspoon of garam masala powder to the batter along with some tomatoes for a masaledar twist.
Benefits of Rava Idli
Nutritious: Rava idli is a good source of carbohydrates, proteins, and essential nutrients, making it a wholesome meal option.
Easy to Digest: Since idli rava is made from semolina, it’s easy to digest and is suitable for people of all ages.
Quick and Easy: Unlike traditional idlis, which require fermentation, rava idli can be prepared instantly, making it a convenient option for busy days.
Versatile: You can customize rava idli with different toppings and seasonings to suit your taste preferences.
FAQs about Rava Idli
Can I use regular semolina instead of idli rava?
While you can use regular semolina to make idlis, the texture and taste may vary slightly from traditional rava idli. Idli rava is coarser and gives a unique texture to the idlis.
How long should I steam the idlis?
Steam the idlis for 10-12 minutes or until a toothpick inserted into the center comes out clean. Over-steaming may result in dry and rubbery idlis.
Can I make rava idli without baking soda?
Baking soda helps in making the idlis soft and fluffy. However, if you prefer not to use it, you can substitute it with a pinch of fruit salt or eno.
For more delicious recipes, you can explore other recipes on Manjula’s Kitchen.
Ground Almonds( without skin)- 40 g/ just less than 2 oz
1 tspGrated zest of orange
2Eggs
3 tbspFreshly squeezed orange juice-
Butterscotch sauce:
1/2 tbspButter
2 tbspBrown sugar
75 mlCream
1 tbspHoney
1/2 tspVanilla extract
Pistachio Praline:
1 tbspPistachio without shell
2 tbspBrown sugar
1 tspLemon juice
Instructions
For the Sponge:
Melt the butter and keep it separately.
Beat the eggs and sugar in a large bowl until it looks fluffy.
Add the orange juice and zest, mix well.
Sift the flour, baking powder, bicarbonate of soda and almonds into the egg mixture.
Fold gently without any lumps.
Finally fold the butter into the mixture.
Grease 4 ramekins with butter and dust it with flour. Pour the mixture equally into the ramekins.
Preheat the oven to 180 degree Celsius.
Take a large tray, fill with boiling water and then place the ramekins inside that.
Bake it in the preheated oven for 25 minutes or until a skewer inserted comes out clean.
Note: The cooking time might vary according to the size of the dish you are using.
For Butterscotch sauce:
Heat together butter, sugar and honey in a heavy based pan in medium to low heat.
Once everything is melted completely, heat it for 2 to 3 minutes stirring continuously.
Take it off from heat, add the extract and cream little by little, stirring continuously.
For Pistachio Praline:
Heat the pistachio, sugar and lemon juice in a pan, stirring continuously.
When it reaches a consistency of 1 string consistency, take it off from heat and pour it in a baking parchment paper.
After it hardens, bash it with a rolling pin to crumble into pieces.
Note: To check the one string consistency, wet your hands with cold water. Take a small amount of syrup between your two fingers, when you press and release, you should see a small thread between your two fingers.
Notes
To Serve:Place the sponge in individual serving plates, pour the warm sauce on top. Finally top it up with pistachio praline.To enjoy the real taste of this dessert, serve while they are still warmAdditional Notes:
You can replace brown sugar with caster sugar for sponge.
For the butterscotch sauce, you can use caster sugar and brown sugar mixed.
For the praline also you can replace with caster sugar.
Indulge in the perfect blend of almonds and cashews with this delectable dessert. This recipe features roasted and ground almonds combined with creamy butter and a touch of cinnamon, forming the base of delightful almond bakes. Dipped in a rich, cardamom-flavored cashew paste, this sweet snack is not only gluten-free but also incredibly healthy. Ideal for those seeking a nutritious yet indulgent treat, this dessert is a wonderful addition to any gluten-free diet and perfect for satisfying sweet cravings.
The Almond Poli with Walnut Khoya Filling is a delightful fusion of traditional Indian flavors and healthy ingredients. This unique recipe features a rich and creamy khoya filling, enhanced with the nutty goodness of walnuts, all encased in a soft, almond-based outer layer. The combination of these elements creates a dessert that is not only delicious but also packed with nutritional benefits.
Mix in all the ingredients listed under "for outer covering" to form a soft, non-sticky dough. Knead this dough for at least 10 minutes and let it sit for 30 minutes to 1 hour before making the poli. Meanwhile lets make the filling.
Heat milk in a wide pan and bring it to boil. Now add sugar, cardamom, walnut powder and let the mixture cook on a medium flame.
Cook the mixture until it reduces to khoya consistency or when the mixture solidifies and starts leaving the pan. It can also be referred to as halwa consistency.
Turn off the heat and walnut khoya filling is ready. This filling by itself is a great dessert. I could not stop munching on this filling while making my polis..
Now divide the dough into 5-6 medium sized balls. Pat the ball with your fingers into a small circle and place 2 tablespoons of walnut filling into it. Now seal the filling with the dough and roll into a chapati. We can make thinner or thicker polis as we wish, but take care not to tear the outer covering. No flour is required for rolling the dough, because its so elastic and non sticky.
Repeat the same with rest of the dough and filling. Now cook the poli on a hot non-stick pan with few drops of ghee if desired on a low flame. Cook on each side for 2-3minutes until golden brown spots appear on each side.
Warm polis are ready to be enjoyed with a splash of ghee on it.
Shahi Paneer is a very festive main dish that is creamy and rich in flavor. It is usually a special occasion dish. Shahi paneer can be served with any Indian bread, such as naan or with rice.
Grind cashews into powder-like consistency. Keep aside.
Puree tomatoes, green chili and ginger. Keep aside.
Add oil in a pan, over medium heat. Shallow fry paneer cubes till they turn slightly brown. Remove from pan and place over paper towels to absorb excess oil.
Increase heat to medium-high and test the oil by adding one cumin seed. If it cracks immediately, the oil is ready. Add cumin seeds to the oil and as they crack, add asafetida and bay leaves. Stir for a few seconds.
Add tomato puree, coriander powder, turmeric, red chili powder, and paprika. Cook the mixture, stirring occasionally for 2-3 minutes. It will reduce to half its volume and start separating from the oil.
Add sugar, cashew powder and yogurt. Cook for another minute then add 1 cup of water and salt and bring to boil.
Add paneer and cover the pan. Simmer for a few minutes over medium-low heat, till gravy is slightly thick in consistency.
Remove from heat, add garam masala and chopped cilantro. Mix gently, cover the pan and let it sit for a couple of minutes. Shahi paneer tastes best if it is served hot.
Notes
Serve Shahi Paneer with Naan, or over the Jeera Rice
Keyword Creamy Cashew Gravy, Kid Friendly, Party Dish
Shahi Paneer is a delightful and gluten-free culinary creation, offering a rich and creamy gravy that is not only a treat for the taste buds but also is kids friendly as its a hit among kids too. This regal dish is characterized by its luxurious texture and flavorful combination of paneer, creating a harmonious blend that appeals to both young and adult palates. Its festive dish made on special occasions and would be a great addition to parties and gatherers as a party recipe.
Dicing the Paneer:
Grab your paneer and a sharp knife. Cut the paneer into cubes that are about the size of a large grape or ¾ of an inch each. It’s okay if they’re not perfectly uniform, but similar-sized pieces will cook more evenly. Set the cut paneer aside in a bowl for now.
Grinding the Cashews:
Take your cashews and grind them up into a fine powder using a mortar and pestle, a spice grinder, or even a food processor if you have one. You want them to be like a smooth, nutty dust. Once they’re ground, store them in a separate bowl for later.
Making the Tomato-Ginger-Chili Paste:
Grab your tomatoes, green chili, and ginger. If you prefer a milder dish, you can remove the seeds from the chili before chopping. Finely chop all three ingredients. You can use a blender or food processor to make things easier. Blend them together until you have a smooth, thick paste. Set this paste aside in a bowl with the other ingredients.
Pan-Frying the Paneer:
Pour some oil into a pan and heat it up over medium heat. You want the oil to be hot but not so hot that it starts to smoke. When the oil is ready, gently add the paneer cubes to the pan. Carefully fry the paneer cubes, turning them occasionally, until they turn a light golden brown on all sides. This will take a few minutes. Once they’re browned, take the paneer out of the pan with a spoon and place them on a paper towel-lined plate. The paper towels will soak up any excess oil.
Tempering the Oil and Adding Spices:
Now, increase the heat to medium-high. To test if the oil is hot enough, take a single cumin seed and toss it in the oil. If it sizzles right away, the oil is ready. If it doesn’t sizzle, wait a little longer before testing again. Once the oil is hot, add the cumin seeds. As the cumin seeds crackle, add a pinch of asafetida (if using) and a few bay leaves. Sauté these spices for a few seconds, stirring them constantly, until they release their aroma.
Cooking the Tomato Masala:
Add the tomato-ginger-chili paste you made earlier to the pan with the spices. Next, sprinkle in the coriander powder, turmeric, red chili powder, and paprika. Stir everything together and cook the mixture over medium heat for 2-3 minutes, stirring occasionally. You’ll notice the mixture will start to reduce in volume and thicken up as it cooks. It may even separate a little from the oil around the edges of the pan. That’s okay!
Adding Sweetness and Creaminess:
Now, it’s time to add a touch of sweetness and creaminess to the sauce. Sprinkle in some sugar and add the ground cashew powder you made earlier. Stir this in and cook for another minute. Then, pour in one cup of water and add salt to taste. Bring the mixture to a boil.
Simmering the Paneer in the Masala:
Carefully add the pan-fried paneer cubes back into the pan with the simmering tomato masala. Gently stir everything together to coat the paneer in the sauce. Cover the pan with a lid and reduce the heat to medium-low. Let the paneer simmer for a few minutes, until the gravy thickens slightly and becomes a nice consistency.
Finishing Touches:
Once the paneer is cooked through and the gravy has reached your desired consistency, turn off the heat. Now, sprinkle in some garam masala and chopped fresh cilantro. Gently fold these ingredients into the dish without over stirring. Cover the pan again and let it sit for a couple of minutes. This allows the flavors to meld together.
Serving Up the Shahi Paneer:
Your Shahi Paneer is now ready to be enjoyed! For the best flavor, serve it hot with rice, naan, or your favorite flatbread.
Shahi Paneer FAQs:
Is Shahi Paneer vegetarian?
Yes, Shahi Paneer is a vegetarian dish made with paneer, vegetables, and spices.
Is Shahi Paneer healthy?
While delicious, Shahi Paneer is on the richer side due to the use of cashews and cream. Moderation is key. It offers some protein from paneer and healthy fats from cashews, but may be higher in calories.
Can I substitute paneer in Shahi Paneer?
Tofu can be used as a substitute, although the texture will be slightly different.
What does Shahi Paneer taste like?
Shahi Paneer offers a burst of flavors: creamy, slightly sweet from tomatoes, savory from cashews and yogurt, with a hint of spice.
How to store leftover Shahi Paneer?
Store leftover Shahi Paneer in an airtight container in the refrigerator for up to 2-3 days. Reheat gently on the stovetop over low heat.
Wash karelas thoroughly and using a knife, scrape the skin. Set the scrapes aside.
Make a slit in the karelas length wise and remove the seeds. Add karelas and the skin scrapings to a bowl. Mix and sprinkle with salt and lemon juice. Let it marinate for at least an hour.
Squeeze the karelas to remove all the marinade. Wash karelas twice with hot water and then squeeze out all the water. Separate the scrapings from the whole karelas.
Preparing the Filling:
Heat the oil in a saucepan. Test the heat by adding one cumin seed to the oil; if the seed cracks right away, the oil is ready. Add the cumin seeds and asafetida to the oil. After the cumin seeds crack, add the karela scrapings and stir fry for about 2 minutes.
Add gram flour (besan) and stir-fry for another minute.
Add all the remaining dry spices: coriander powder, fennel powder, turmeric, chili powder, and mango powder. Sauté for a minute and then turn off the heat.
Stuff the split karelas with this spice mixture (there should be some spice mix remaining, which will be used later). Tie the karelas with a thread so that the stuffing does not come out while cooking.
Cooking the Stuffed karelas:
Add 2 tablespoons of oil in a sauce pan over medium heat. Spread the stuffed karelas in the pan and sprinkle with salt. Cover the pan and let it cook for about 2 minutes.
Turn the karelas over to the uncooked side and cook for about 1 minute. Repeat until all four sides of the karelas are cooked.
Sprinkle 2 tablespoons of water and the remaining spice mixture over the karelas. Cover the pan and let it cook for 2 more minutes.
Remove the lid to see if the karelas are tender. Gently turn them over a few more times, making sure they are covered with the spice mixture.
Notes
NotesStuffed karela can be served hot or cold and can be refrigerated up to a week.VariationsFor a slightly sweeter taste add 2 tablespoons of sugar to the cooked spice filling, prior to stuffing the karela.I like to Serve Karela with Urad Dal Tadka, Mixed Dal, Dal Makhini and Rice
Keyword Bitter Melon, Diabetic Friendly, Healthy Side Dish
This healthful vegan soup is high in protein. Made with split Moong dal and flavored with hari cilantro chutney, moong dal soup is flavorful yet simple and easy to make.
1 cup split yellow Moong dal, washed (available in Indian grocery stores)
1 teaspoon salt
1/4 teaspoon turmeric (haldi)
3 cups water
Approximately 1/4 cup of Hari Cilantro Chutney
For the Seasoning
1 tablespoon oil
1/2teaspoon cumin seeds (jeera)
Pinch of asafetida (hing)
For the Garnish (optional)
1 tablespoon ginger, finely sliced
1/8 teaspoonsalt, adjust to taste
1 teaspoon lemon juice
Instructions
Method
Wash the dal several times, until the water becomes almost clear.
In a medium pot combine the moong dal, turmeric, salt, and water. Cook over medium-high heat until it starts to boil. Remove the frothy foam that accumulates on the surface as the dal cooks.
Lower the heat to medium and cook for 15 to 20 minutes, until completely cooked and a little mushy. Stir occasionally and add more water if needed. Turn off the heat.
Puree the dal using a hand blender or regular blender. If needed, adjust the thickness of the dal by adding more boiled water. Mix well. The dal will thicken as it cools.
Add hari cilantro chutney to suit your taste. The chutney gives the soup a fresh green appearance and a tangy flavor.
Seasoning
Heat the oil in a small saucepan. Add cumin seeds and wait until the seeds crack. Add asafetida and turn off the heat.
Pour the mixture over the cooked soup.
Garnish (optional)
Combine the ginger, salt and lemon juice. Marinate for at least a half hour.
Garnish with a few slices of marinated ginger.
Marinated ginger can be refrigerated for up to a week.
Notes
Time-saving Tip:To save time you may use a pressure cooker, as follows.
In a pressure cooker add Moong dal, turmeric, salt, and water. Close the cooker.
Cook over medium-high heat until it starts to steam. Lower the heat to medium and cook for 5 more minutes.
Turn off the heat and let the steam escape before you open the pressure cooker.
Puree the dal using a hand blender or regular blender. If needed, adjust the dal to your desired consistency by adding more boiled water. Mix well.
Add “Hari Cilantro Chutney” according to your taste. The chutney will give a fresh green look to the soup and have a tangy flavor.
Moong dal soup is a nutritious dish made from split mung beans, also known as moong dal. It is suitable for individuals with diabetes as it has a low glycemic index, meaning it doesn’t cause a rapid spike in blood sugar levels. Additionally, it is gluten-free, making it safe for those with gluten sensitivities or celiac disease.
The soup is high in protein due to the lentils, making it a filling and satisfying meal option. It is also low in fat, which can be beneficial for those looking to manage their weight or reduce their fat intake.
Moong dal soup is often prepared as a vegan dish, as it typically does not contain any animal products. It can be served as a standalone soup or paired with salads for a wholesome and nutritious meal. Overall, it’s a healthy option that aligns with various dietary preferences and requirements.
Moong dal soup is a comforting and nutritious dish that is popular in Indian cuisine. Made from split mung beans, this soup is not only delicious but also packed with protein, fibre, and essential nutrients. In this easy moong dal soup recipe, we’ll guide you through the process of making a flavorful and hearty soup that is perfect for any occasion.
Easy Moong Dal Soup: A Cozy and Flavorful Treat
This recipe guides you through making a delicious and comforting moong dal soup, perfect for a quick and nourishing meal. Moong dal, also known as split mung beans, cooks quickly and offers a satisfying protein punch. Let’s get started!
Prep Work (15 minutes): Clean the Dal: Rinse the moong dal thoroughly under cold running water to remove any dust or debris. Soaking the dal for 30 minutes to 1 hour is optional, but it helps them cook faster and become more tender.
Flavor Builders: While the dal soaks (or if you choose to skip soaking), chop up some fresh ginger for that warming aroma. You can also add diced tomatoes and green chilies for a touch of sweetness and heat, depending on your preference.
Cooking the Soup (30-40 minutes): Sautéing the Aromatics: Heat oil or ghee in a pot over medium heat. Once hot, add the chopped ginger and cook for a few minutes until fragrant. This fragrant base will form the foundation of your soup’s flavor.
Spice Up Your Life: Now comes the magic! Add ground cumin, coriander, turmeric, and a pinch of asafoetida (if using) to the pot with the ginger. Stir everything well to coat the aromatics in the spices. Let them sizzle for a bit, releasing their wonderful aromas. Feel free to adjust the spice quantities based on your taste preference.
Simmering the Dal: Add the soaked (or unsoaked) moong dal to the pot and stir to combine it with the flavorful spice mixture. Next, pour in enough water or vegetable broth to cover the dal completely. Bring the mixture to a boil, then reduce heat and simmer gently. Let it simmer until the dal is tender and cooked through.
Creamy Option (optional, 5-10 minutes): Smooth Operator (Optional): If you prefer a creamy soup, let it cool slightly. Then, use an immersion blender or a regular blender (in batches) to achieve a smooth and velvety texture. Blend until you reach your desired consistency.
Final Touches (5 minutes): Season to Perfection: Now’s the time to adjust the taste! Add salt and a squeeze of lemon juice (optional) to balance the flavors. You can also add more spices if needed.
Fresh Finish: Garnish your soup with freshly chopped cilantro leaves for a pop of color and a refreshing touch.
Serving Up Warmth (enjoy!):
Ladle and Enjoy: Ladle the hot soup into serving bowls and garnish with additional cilantro, if desired. Pair your comforting bowl of moong dal soup with crusty bread, naan, or rice for a complete and satisfying meal. Enjoy this nourishing and delicious soup anytime you need a warm hug in a bowl!
Tips for Making the Perfect Moong Dal Soup:
Soaking the moong dal helps reduce cooking time and improves texture.
Experiment with different spices and seasonings to customize the flavor of the soup to your liking.
For added richness, you can stir in a spoonful of coconut milk or cream towards the end of cooking.
If you prefer a chunkier soup, you can skip blending and leave some of the dal intact.
Variations of Moong Dal Soup:
Vegetable Moong Dal Soup: Add diced carrots, peas, and spinach for a hearty and nutritious twist.
Spicy Moong Dal Soup: Increase the amount of green chilies or add red chili powder for extra heat.
Coconut Moong Dal Soup: Stir in coconut milk for a creamy and indulgent flavor.
Benefits of Including Moong Dal Soup in Your Diet:
High in Protein: Moong dal is an excellent source of plant-based protein, making it ideal for vegetarians and vegans.
Rich in Fiber: The fiber content in moong dal aids digestion and helps maintain a healthy gut.
Low in Fat: Moong dal soup is low in fat and cholesterol, making it a heart-healthy option for all.
Frequently Asked Questions (FAQs) about Moong Dal Soup:
Q: Can I use other lentils instead of moong dal?
A: Yes, you can substitute other lentils such as masoor dal or red lentils for moong dal in this recipe.
Q: Can I make moong dal soup in advance?
A: Yes, you can make the soup ahead of time and store it in the refrigerator for up to 3 days. Reheat gently on the stovetop or in the microwave before serving.
Q: Is moong dal soup gluten-free?
A: Yes, moong dal soup is naturally gluten-free, making it suitable for those with gluten intolerance or celiac disease.
For more delicious Indian soup recipes, visit Manjula’s Kitchen. Explore a variety of vegetarian soups, appetizers, main courses, and desserts to delight your taste buds and impress your family and friends.
Mix all dry ingredients together in a bowl: flour, gram flour, asafetida, cumin seeds, turmeric, chili flakes, salt, and fenugreek leaves.
Add oil and yogurt to the flour mix and mix well. Add water as needed to make firm dough. Knead the dough for a minute on a lightly greased surface to make it smooth and pliable. Set the dough aside and cover it with a damp cloth. Let the dough rest at least ten minutes.
Divide the dough into six to eight equal parts. Using your oiled palm, roll each one into a smooth ball and press flat.
Take one dough ball and press it lightly on both sides on a surface covered with dry flour. Using a rolling pin, roll the dough into a circle of five to six inches. If dough starts sticking, dust it with more flour. However, do not use any dry flour toward the end of the rolling, as it will make the thepla dry.
Heat a skillet over medium high heat. To test, sprinkle a couple of drops of water on the skillet. It should sizzle immediately.
Place the thepla in the skillet. As it cooks, the dough will change color and have a dryer look. Turn the thepla over using a spatula. You should see golden-brown spots on the semi-cooked side.
After few seconds, spread ½ teaspoon oil onto the thepla using a spatula. Turn the thepla over. Using your spatula, lightly press the entire surface of the thepla to help it cook all the way through. It may puff up in some areas.
Turn over the Thepla over again and press with the spatula, making sure it is golden-brown on both sides. Remove from heat.
Repeat with the remaining dough, untill they are all done.
Notes
Serving SuggestionsMethi Thapla can be served plain or serve with Plain Yogurt or try with Date and Raisin Chutney, this sweet and chutney can really enhance the flavor.VariationThis recipe uses dry fenugreek leaves, as they are available year-round. But fresh fenugreek leaves are ideal if you can find them. Substitute ½ cup fresh chopped fenugreek leaves for the dry leaves.
Macaroons are special soft cookies usually made with egg whites, sugar and coconut. Here is an eggless version, made with few ingredients and very easy to put together. Perfect for the holidays as a sweet tasty snack and can be even savored as a dessert post any kind of meal.
Line a cookie sheet with parchment and grease with cooking spray. This step is very important as it prevents the cookies from sticking to the sheet.
In a bowl, mix the coconut all purpose flour, cardamom powder, and salt.
Add the condensed milk and vanilla to the coconut mixture and mix well till everything is well blended.
Cover the mixture and refrigerate for 20 mins.
After 20 mins., with a teaspoon or using your hands make small balls and spread the cookies on the cookie sheet. These cookies won’t spread and you can arrange them closely.
Press a mini milk chocolate morsel in the middle of the macaroon and bake for 15 20 mins. or till golden.
Take the cookie sheet out of the oven and let the macaroons cool for a few minutes on the parchment paper.
Remove the macaroons and let them cool on a wire rack.
The Bourbon Biscuits recipe is a delightful treat made with simple ingredients like flour, butter, sugar, cocoa, and vanilla essence. While this specific recipe is not vegan or gluten-free, it is a versatile snack that can inspire creative variations for those with dietary preferences. Enjoy these homemade biscuits as a delicious dessert or snack option.
The Vanilla Chocolate Triangles recipe on Manjula's Kitchen is a delightful treat that perfectly combines the rich flavors of vanilla and chocolate. These triangles are ideal for serving as desserts or enjoying as snacks. The recipe involves creating distinct vanilla and chocolate layers, making it both visually appealing and delicious. While it is not inherently vegan or gluten-free, it offers a versatile base for customization to suit various dietary needs.
In a bowl, mix the flour, sugar,salt and Add soft butter to make soft dough
Divide the dough into two equal parts.Take one part of dough and add vanilla extract.Mix well.
Now take second part of dough and add cocoa powder.Mix well again.
Keep both dough in refrigerator for half an hour.
After half an hour,Take the both dough and roll out into flat rectangles of 1/4" thickness on a plastic sheet( trim the edges to make them into equal sized rectangles).
Now place the chocolate layer on top of the vanilla layer showing just 1/4" of the vanilla layer on top(This will help you get a clean swirl when you roll it)
After placing it, gently start rolling the layers until you form a log and press the dough on three sides to get triangle shape. Now cover it again with plastic sheet and refrigerate for half an hour. This will make the dough firm and will be easy to cut.
After half an hour remove it from the fridge and cut them into slices of 1/4" thickness.
Place the sliced cookies on a baking tray and bake for 10 – 12 mins. Check after ten mins to note if the vanilla part has turned into light golden color.
If done, remove the cookie sheet from the oven. Let the cookies cool down for two to three minutes before taking them off the cookie sheet.
Notes
Note:
Try to make different shapes like squares, spiral, semi circle, heart shapes.
To make heart shapes,roll the dough from both sides in direction of center(after step 5) and keep in refrigerator.
I like chocolate cookies so i use cocoa powder but you can also try different Jam(like strawberry, raspberry), dates and figs (finallychopped) instead of using chocolate dough.
My recipe is Chocolate Squares which is inspired by a recipe from the book Baker's Fiesta by Sangeeta Khanna. I saw this recipe a long time ago and decided it would be perfect for this month's contest. I hope you will like it too. Its a nice dessert that also goes along well as a nice sweet snack.
This is one of my mom's cherished recipes, known for being quick and easy to make. My brothers and I used to whip these up when we were in elementary school. If I had to rename them, I'd call them "Quick Cookies" because they truly live up to the name. They take about 3 minutes to prepare and 15 minutes to bake. Another great aspect of this recipe is that it's vegan-friendly, as it's entirely egg-less. These cookies are perfect for anyone looking for a speedy, egg-less treat.