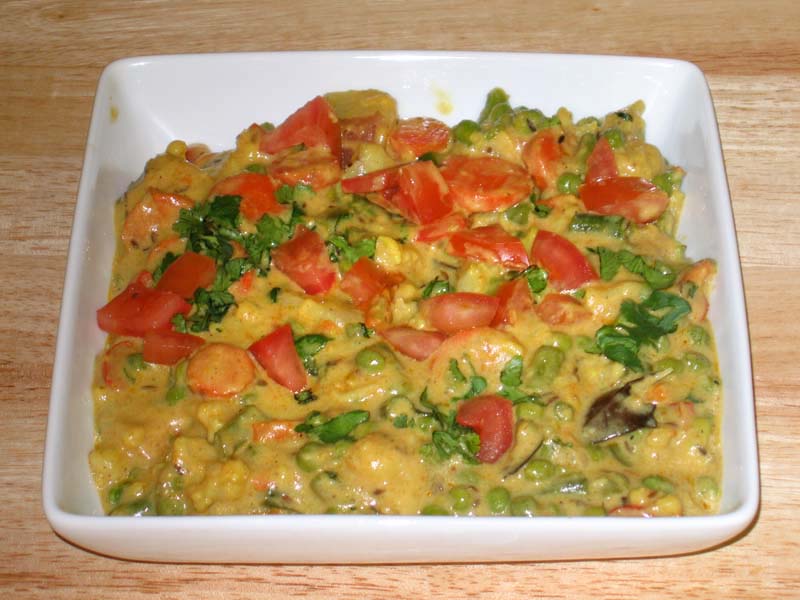
Vegetable Navratan Korma
Ingredients
- 2-1/2 cups chopped vegetables (cauliflower, green peas, carrot, green beans, red bell pepper)
- 1/2 cup chopped fried paneer
- 3 tbsp oil
- 1/8 tsp asafetida hing
- 1/2 tsp cumin seeds jeera
- 1 green chili seeded finely chopped
- 1 tbsp shredded ginger
- 1 tbsp coriander powder dhania
- 1/4 tsp turmeric haldi
- 1/2 tsp cayenne pepper
- 1 bay leaves
- 1/2 tsp garam masala
- 1/2 tsp mango powder amchoor
- 1 cup milk
- 1/2 tbsp corn starch
Garnish
- 1/2 cup seeded and chopped tomatoes
- 2 tbsp finely chopped cilantro
Instructions
- Mix the shredded ginger, green chili, coriander powder, turmeric, and cayenne pepper with 2 tablespoons of water and set aside.
- Mix cornstarch with milk and set aside.
- Heat the oil in a saucepan. Test the heat by adding one cumin seed to the oil; if it cracks right away oil is ready. Add the asafetida and cumin seeds. After cumin seeds crack, add the bay leaves and the spice mixture. Fry for a few seconds until the spices start separating from the oil.
- Add the cauliflower, green peas, carrot and green beans. Mix well and cover the pan. Let the vegetables cook on medium heat for about 7 to 8 minutes. The vegetables should be cooked just about half way.
- Add the bell pepper and paneer. Mix well. Add the milk/cornstarch mixture and cook until the vegetables are tender. Add more milk if needed for more gravy.
- Turn off the heat. Mix in the garam masala, amchoor powder and cilantro.
- Place the vegetable korma in a serving dish and garnish with chopped tomatoes. Enjoy!
Notes
How to make Veg Navratan Korma Recipe
Let’s dive into the preparation of this delectable Gluten free, paneer based vegetable curry dish known as Vegetable Navratan Korma. This recipe is a flavorful blend of various vegetables and aromatic spices, making it a delightful and satisfying dish. Here’s a detailed explanation of each step:
Preparing the Spice Mixture:
Gather and mix all the ingredients that is shredded ginger, green chili, coriander powder, turmeric, and cayenne pepper to make a vibrant and aromatic spice blend. The shredded ginger contributes a zesty warmth, while the green chili brings a hint of spiciness. The addition of 2 tablespoons of water acts as a binder, forming a cohesive paste that serves as the heart and soul of the flavor profile for our Vegetable Navratan Korma. This meticulously crafted spice blend promises to infuse each bite with a symphony of tastes, making the dish a delightful and harmonious culinary experience.
Creating the Cornstarch and Milk Blend:
To enhance the sumptuousness of our Navratan Korma, an essential step involves preparing a velvety cornstarch and milk blend. In a dedicated bowl, combine the smooth consistency of cornstarch with the lusciousness of milk, ensuring a thorough mix that eliminates any lumps. As the cornstarch dissolves in the milk, it creates a luxuriously thick and rich base that coats the vegetables and absorbs the myriad of spices, elevating the overall indulgence of the Navratan Korma.
Heating the Oil:
Initiate the cooking process by heating a sufficient amount of oil in a sturdy saucepan over medium heat. The key to achieving the perfect foundation for our Navratan Korma lies in ensuring the oil reaches the ideal temperature. To determine this, employ a simple yet effective technique: introduce a single cumin seed into the heated oil. If the cumin seed crackles and sizzles immediately upon contact, it’s a clear indicator that the oil has attained the optimum temperature for our best Navratan Korma recipe.
Infusing Aromatics:
Introduce asafetida and cumin seeds into the heated oil. Once the cumin seeds crack, add bay leaves and the earlier-prepared spice mixture. Allow the spices to infuse the oil, creating a fragrant base for our veg Navratan Korma.
Vegetable Medley:
Add cauliflower, green peas, carrot, and green beans to the spice-infused oil. Ensure a thorough mix and cover the pan. Let the vegetables cook on medium heat for 7 to 8 minutes, achieving that perfect balance where they are halfway cooked.
Incorporating More Vegetables:
Introduce bell pepper and paneer into the vegetable mix. Achieve a harmonious blend of flavors by stirring in the milk/cornstarch mixture. This step is crucial for achieving the desired tenderness of the vegetables in our Navratan Korma.
Adjusting Consistency and Flavor:
If necessary, add more milk to achieve the desired level of gravy. Ensure that the vegetables are tender, providing a satisfying texture. This step is vital for the success of our vegetable Navratan Korma.
Final Seasoning and Garnish:
Turn off the heat and gently mix in garam masala, amchoor powder, and cilantro. This final touch enhances the overall flavor profile of our Veg Navratan Korma, providing a burst of aromatic goodness.
Presentation and Enjoyment:
Transfer the prepared Vegetable Navratan Korma into a serving dish and garnish it with chopped tomatoes. This not only adds a visual appeal but also complements the dish’s taste. Serve the Navratan Korma with Roti, your choice of bread, or over rice for a truly satisfying culinary experience.
This detailed walkthrough ensures that you can effortlessly recreate the best Navratan Korma recipe with an array of vegetables and aromatic spices, resulting in a delightful and flavorsome dish. Enjoy the rich and creamy goodness of this classic Indian cuisine!