Category: Janamastmi Recipes

Krishna Janmashtami Recipes: Celebrating the Birth of Lord Krishna

Krishna Janmashtami, the joyous festival celebrating the birth of Lord Krishna, is marked by fasting, prayers, and a variety of delectable Janmashtami recipes. This celebration is incomplete without preparing and offering traditional Janmashtami bhog recipes to the deity. Let’s explore some popular Janmashtami food recipes that can make your celebration special.

Festive Sweets for Janmashtami
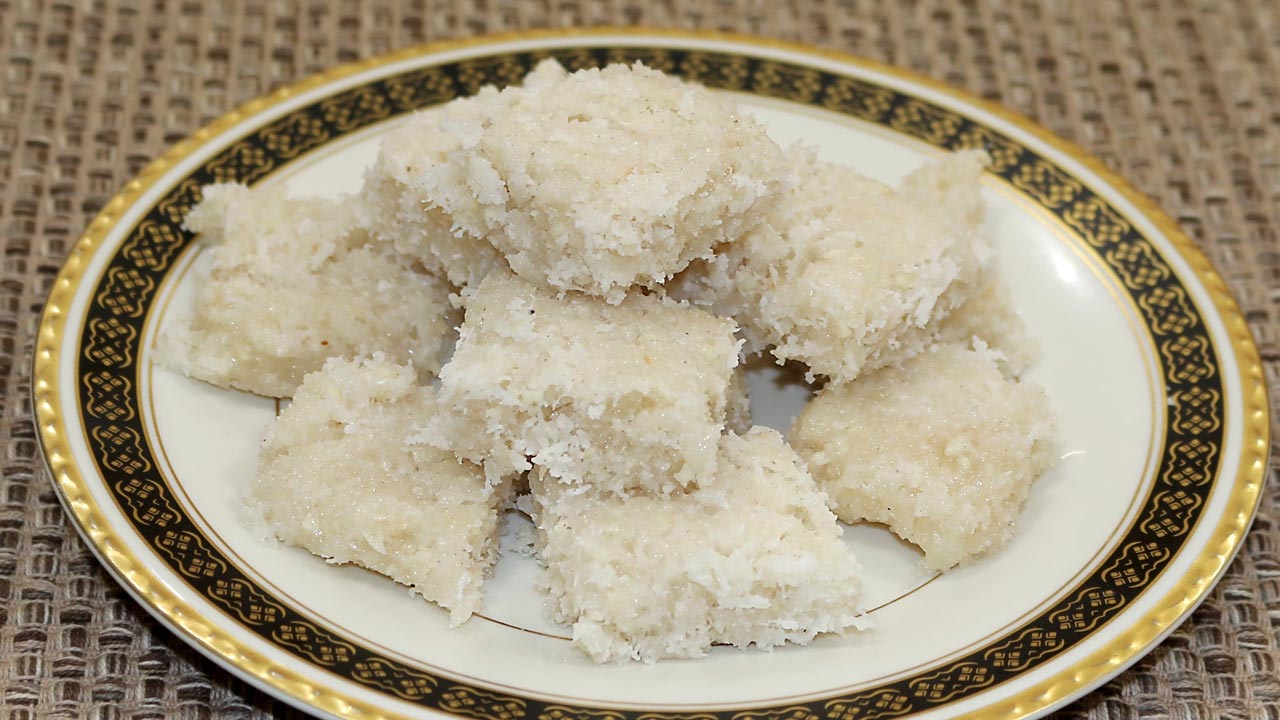
Makhan Mishri

Makhan Mishri is one of the simplest yet most cherished Janmashtami bhog recipes. Made with fresh white butter and sugar crystals, this dish is believed to be Lord Krishna’s favourite. Including Makhan Mishri in your recipes is a must.

Peda

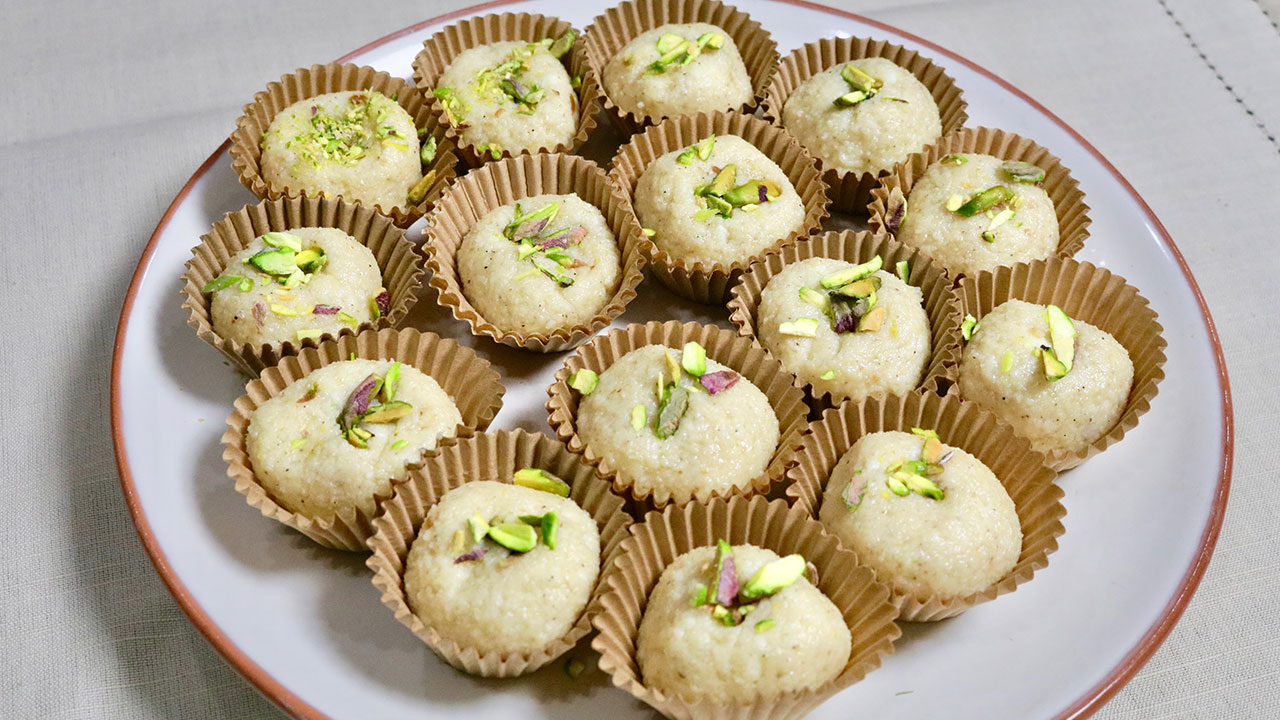
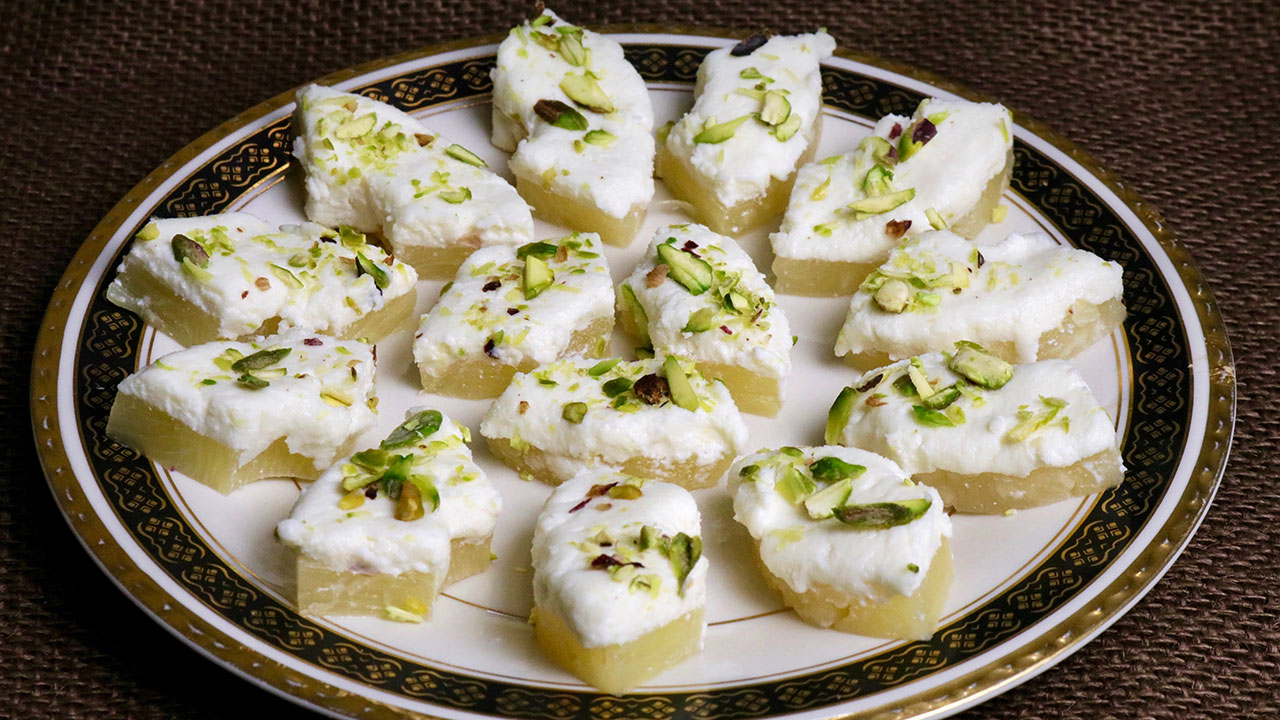
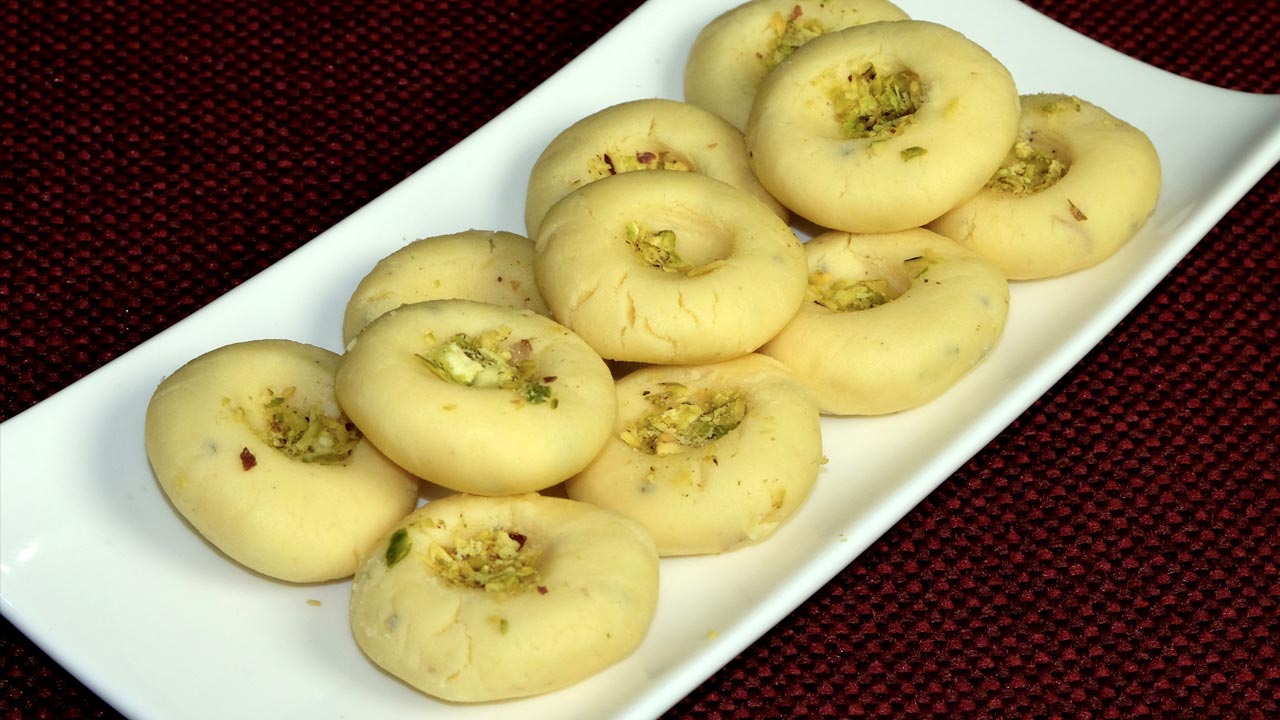
Peda is a delightful sweet made from khoya (dried milk) and flavoured with cardamom. This sweet treat is often prepared as part of a recipe. Pedas are part of easy indian recipes to make and can be offered as Janmashtami bhog recipes.

Kheer

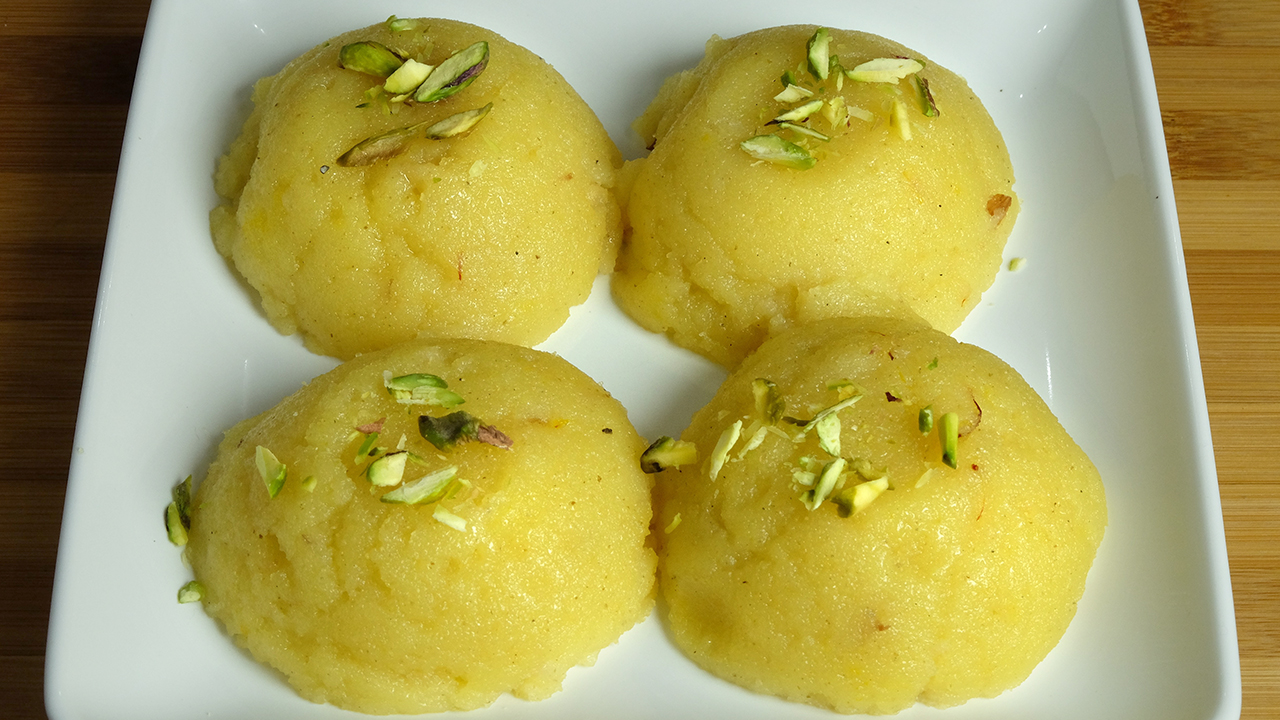
Kheer, a creamy rice pudding made with milk, sugar, and rice, is a staple in many Indian festivals, and kheer is a popular Indian dessert recipes. As one of the traditional Janmashtami recipes, Kheer is often flavoured with cardamom and garnished with nuts, making it a perfect offering.

Savory Delights for Janmashtami

Sabudana Khichdi

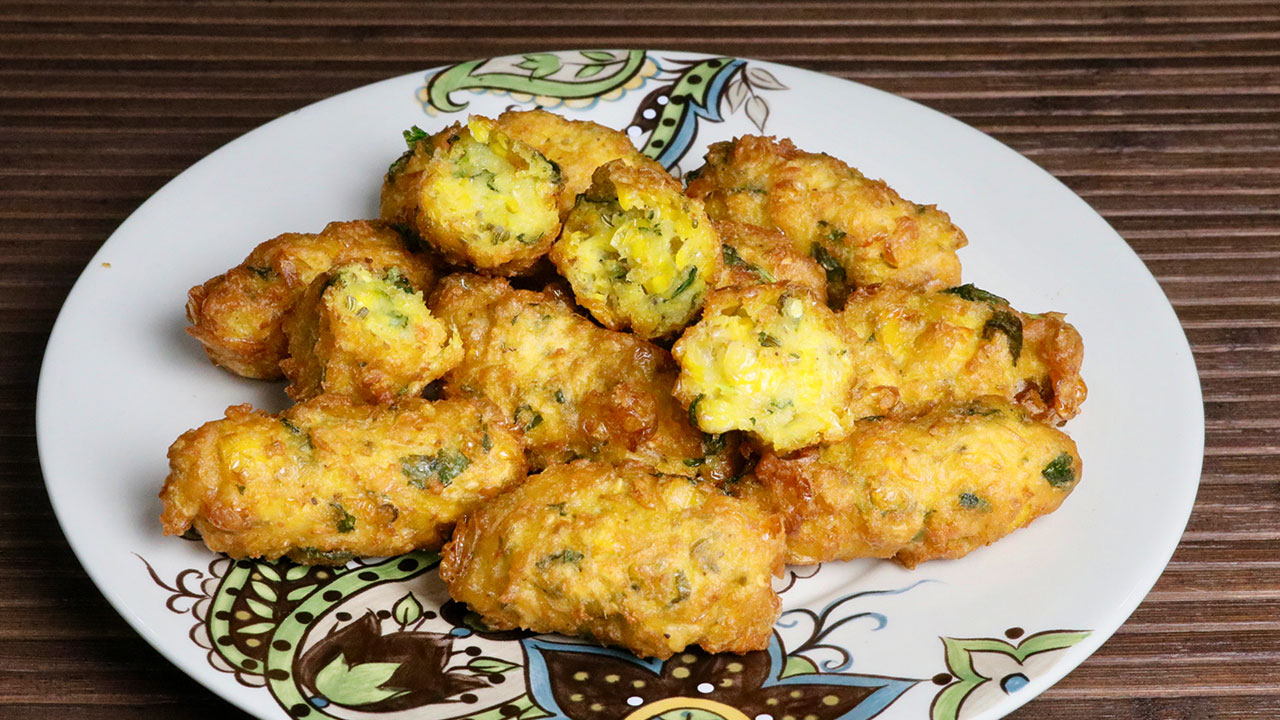
Sabudana Khichdi is a popular fasting dish made with tapioca pearls, peanuts, and potatoes. This dish is light yet nutritious and fits well within Krishna Janmashtami recipes. It’s an excellent choice for Janmashtami food recipes and comes under one of the healthy indian recipes

Aloo Puri

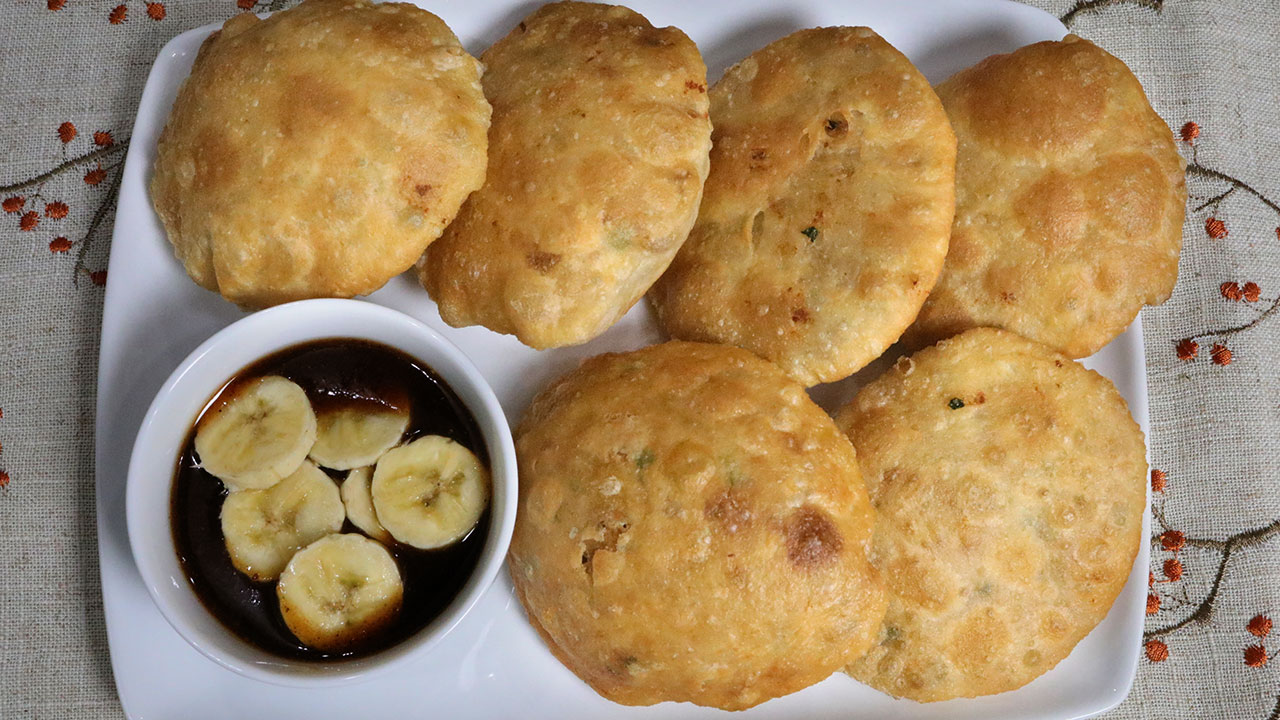
Aloo Puri consists of spiced potato curry served with deep-fried bread (puri). This dish is a festive favourite and is often included in Janmashtami bhog recipes. The combination of spicy aloo and crispy puris makes it a beloved part of the recipe. It’s a popular dish up in north indian recipes

Special Janmashtami Bhog

Panjiri

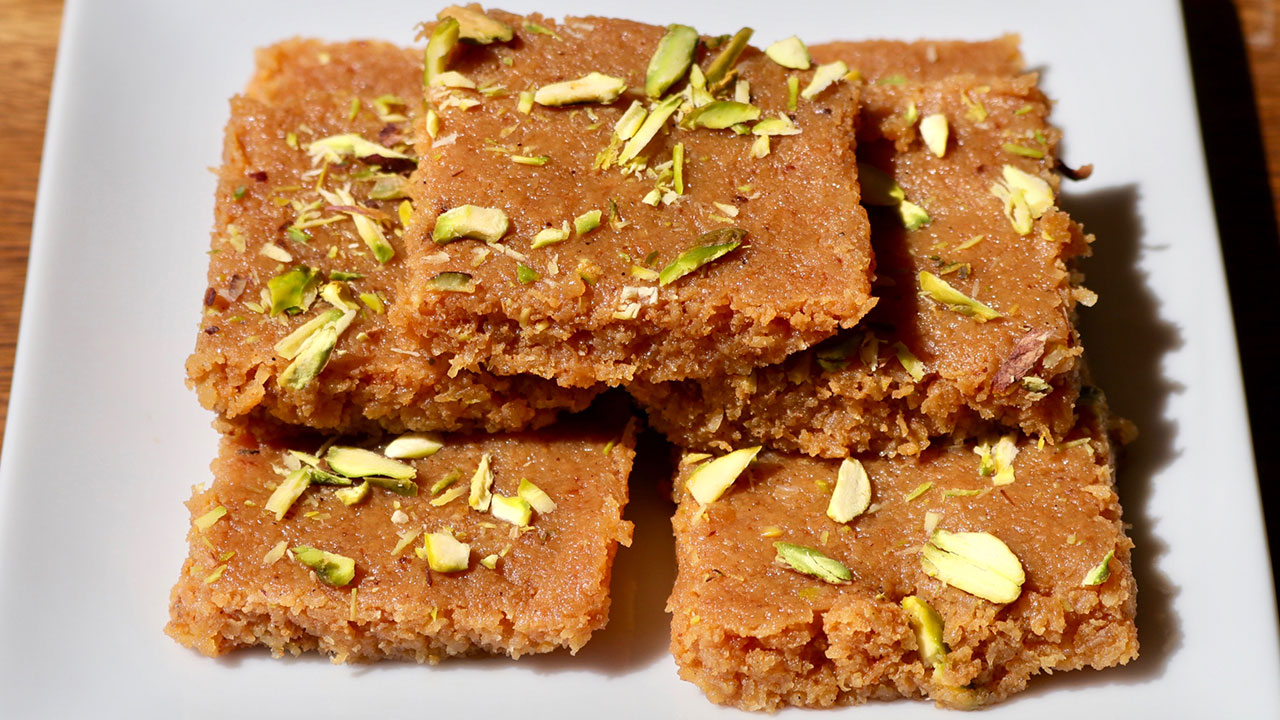
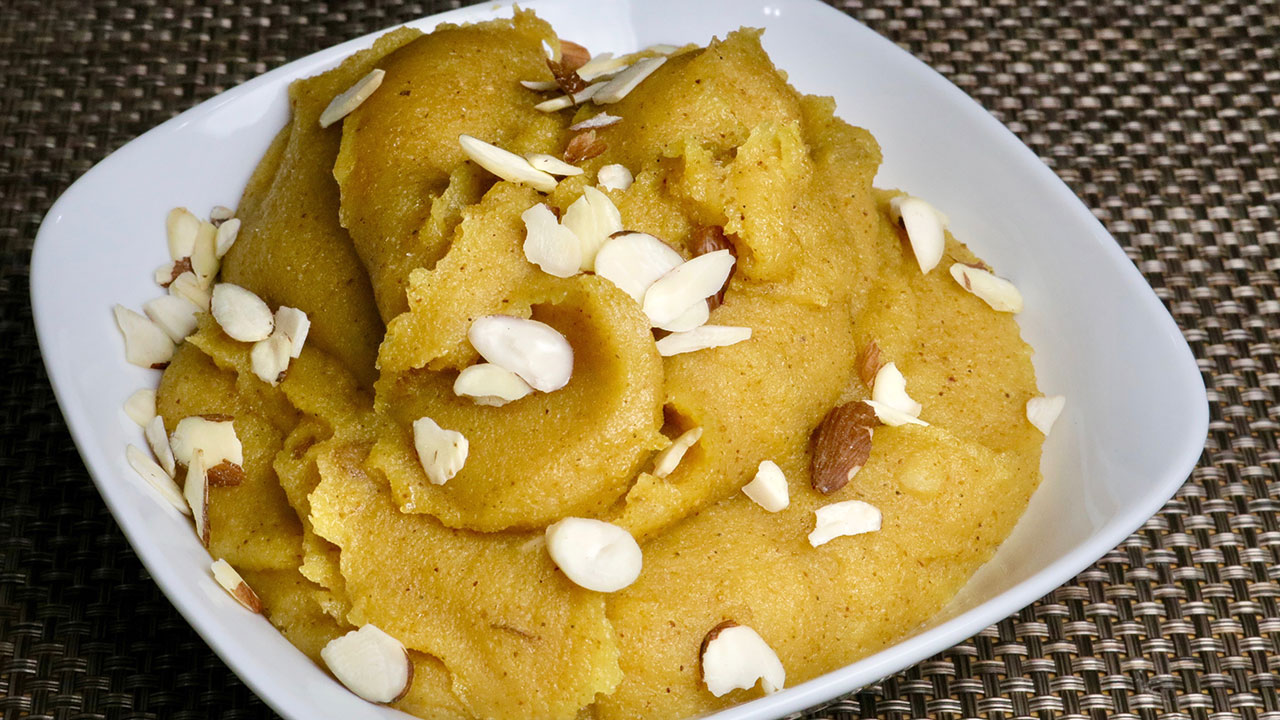
Panjiri is a traditional Janmashtami bhog recipe made with whole wheat flour, ghee, sugar, and nuts. This nutritious and delicious dish is often prepared during Krishna Janmashtami. It is believed to have been a favourite of Lord Krishna and is a vital part of Krishna Janmashtami recipes.

Malpua

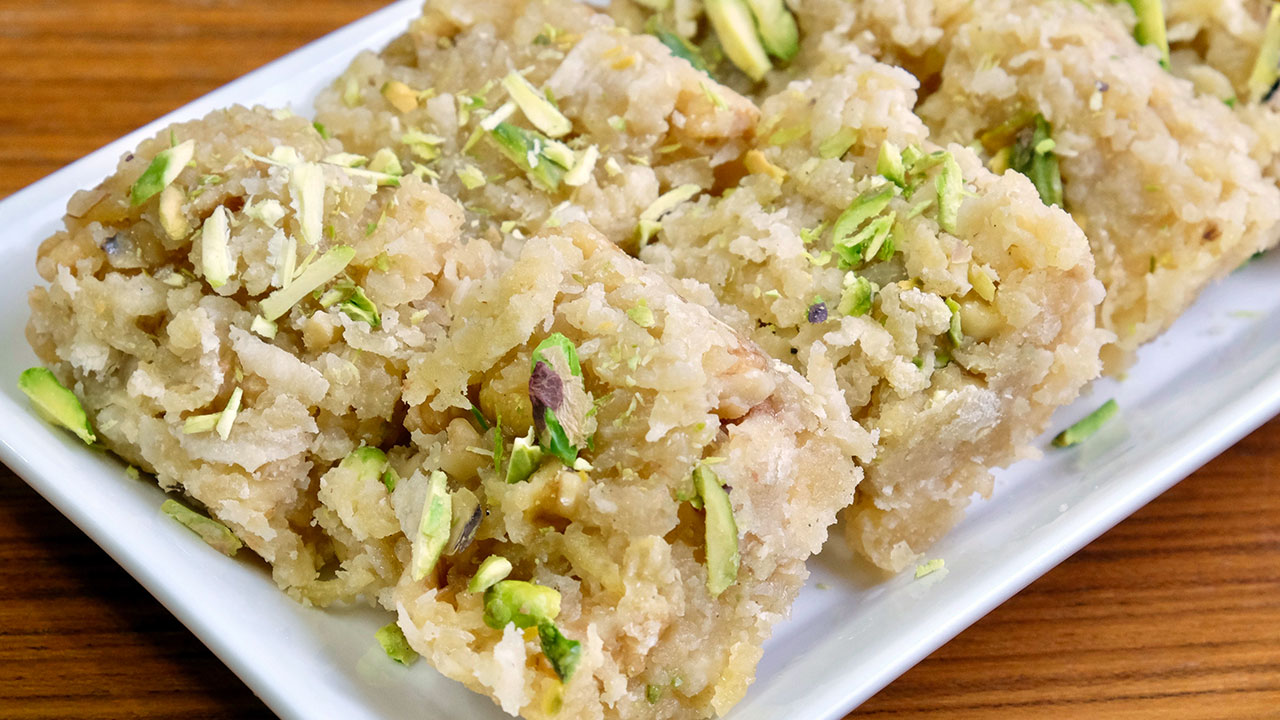
Malpua is a sweet pancake soaked in sugar syrup, often served with rabdi (sweetened condensed milk). This dessert is a classic Janmashtami food recipe.

Enhancing Your Janmashtami Feast

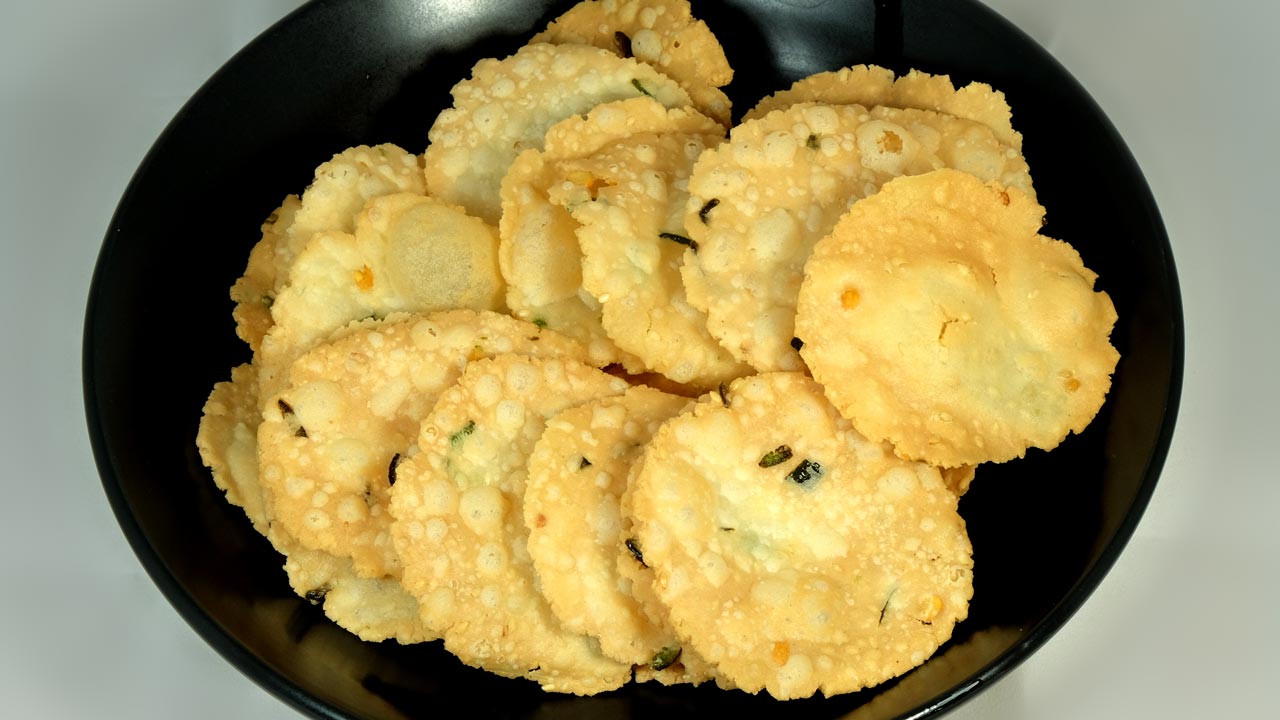
To enhance your Janmashtami feast, consider exploring related categories that complement these Janmashtami recipes. Adding popular Indian snacks recipes like samosas and pakoras can provide a variety of flavours and textures. 

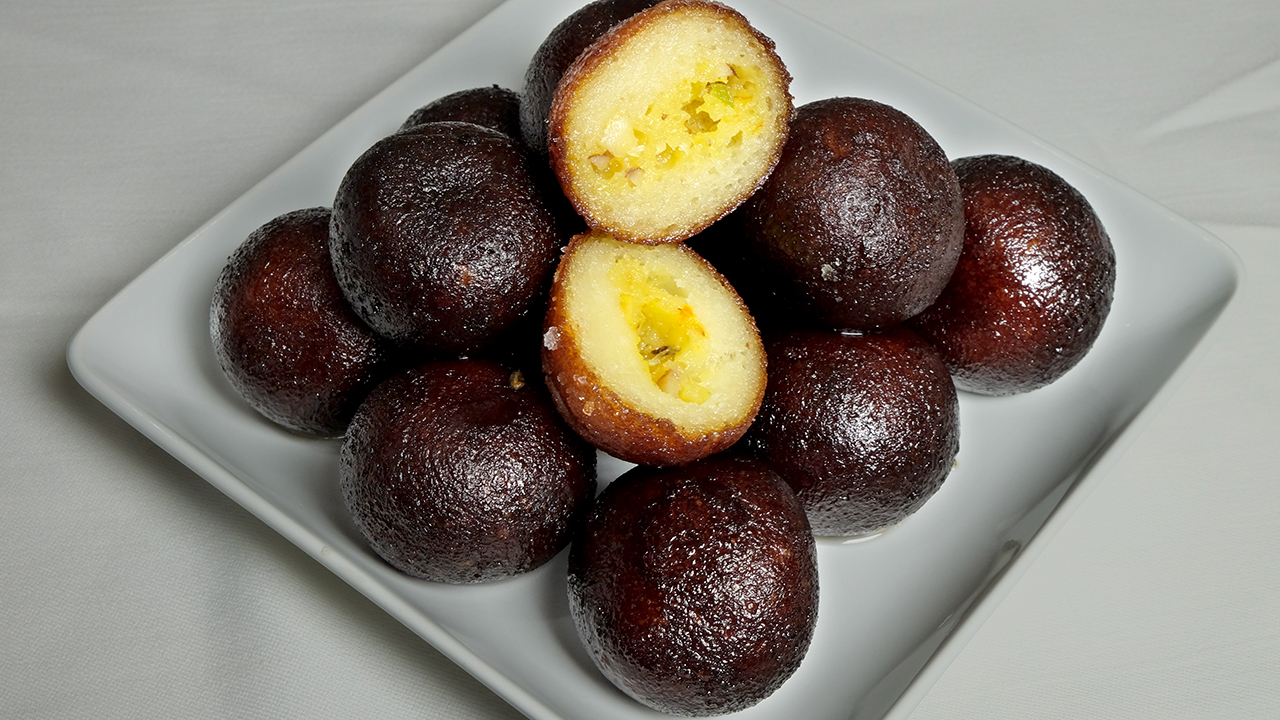
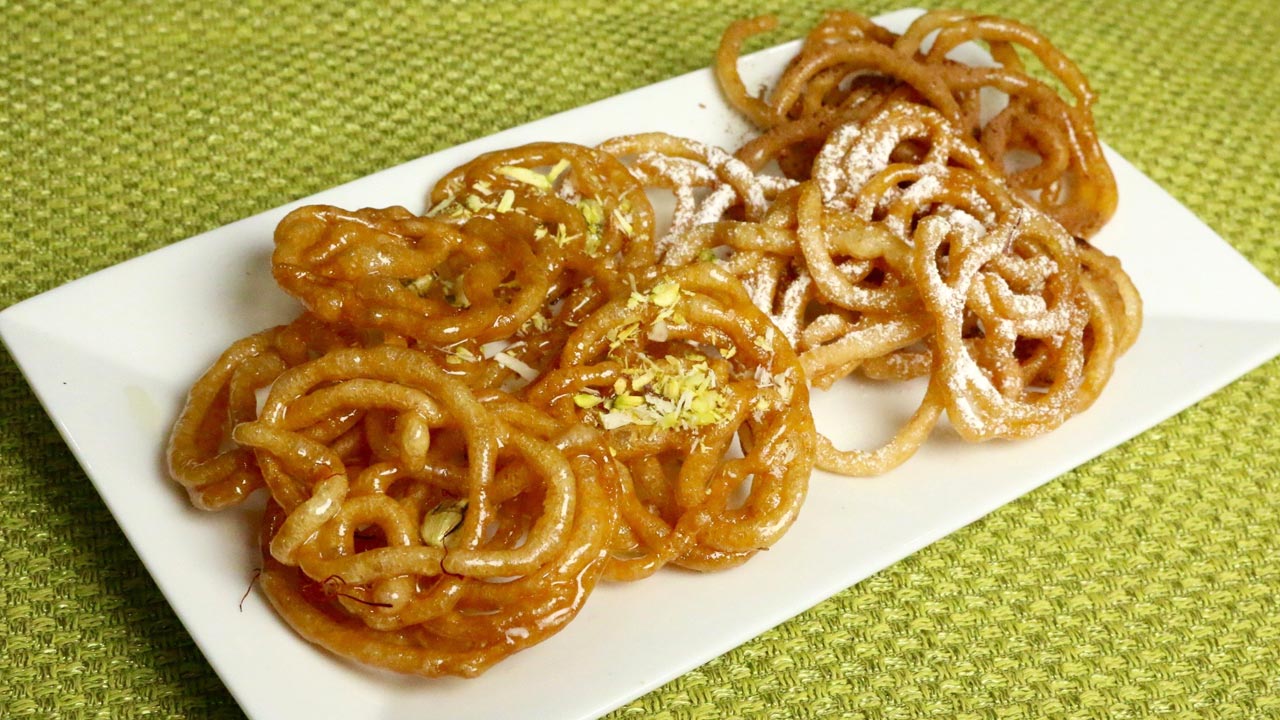
For a sweet ending, explore Indian desserts such as gulab jamun and jalebi. Incorporating healthy recipes like roasted nuts and fruit chaat can offer lighter options for your guests. 

Hosting a large gathering? The popular party recipe category is filled with dishes that are sure to impress your guests and make your celebration memorable. Including North Indian recipes like dal makhani or biryani can add a touch of authenticity to your meal.

Frequently Asked Questions (FAQs)

Q: What are some popular Janmashtami recipes? 

A: Some popular Janmashtami recipes include Makhan Mishri, Peda, Kheer, Sabudana Khichdi, Aloo Puri, Panjiri, and Malpua.

Q: How can I make traditional Krishna Janmashtami food at home? 

A: To make traditional Krishna Janmashtami recipes at home, try recipes like Makhan Mishri, Peda, and Kheer. These recipes are simple to prepare and capture the essence of the festival.

Q: What are some Janmashtami special food ideas for a party? 

A: Some Janmashtami party food ideas include Makhan Mishri, Peda, Sabudana Khichdi, and Aloo Puri. These dishes are flavorful and perfect for celebrations and gatherings.

Q: Can I prepare Janmashtami food in advance? 

A: Yes, many Janmashtami food recipes can be prepared in advance and stored. Sweets like Peda and Kheer can be made ahead of time, while dishes like Sabudana Khichdi and Aloo Puri can be prepared and refrigerated.

Q: What are some healthy options for Janmashtami food? 

A: Some healthy recipes options for Janmashtami food recipes include roasted nuts, fruit chaat, and steamed dishes like Sabudana Khichdi.

Conclusion

Janmashtami is a celebration of rich flavours and traditional preparations. Whether you’re looking for Janmashtami dinner recipes, these dishes will bring joy and satisfaction to your table. So, gather your ingredients, try out these recipes, and create unforgettable meals with your loved ones. Don’t forget to explore related categories for more delightful recipes from Manjula’s Kitchen!

By incorporating these dishes into your Janmashtami celebrations, you’ll be able to enjoy a wide variety of delicious and traditional foods. Whether you’re looking for sweets, snacks, or main courses, there’s a Janmashtami food recipe to suit every taste. Happy cooking and happy Krishna Janmashtami!

  • Paneer Malai Ladoo

    Paneer Malai Ladoo

    Paneer Malai Ladoo

    Paneer Malai Ladoo

    Paneer Malai Ladoo is a rich and delicious homemade sweet dessert. Paneer Ladoos have a creamy texture and they taste amazing! This dessert is perfect for people with a sophisticated palette and is super easy to prepare. 
    5 from 1 vote
    Prep Time 5 minutes
    Cook Time 20 minutes
    Making Paneer 15 minutes
    Total Time 25 minutes
    Course Dessert
    Cuisine Indian
    Servings 10 people

    Ingredients


    • 1 cup home made paneer
    • 1 cup whole milk
    • 1 cup milk powder
    • 1 Tbsp clarified butter ghee
    • 1/2 cup sugar
    • 1/4 tsp cardamom powder
    • 2 Tbsp sliced pistachios for garnishing

    Instructions
     

    • I used 4 cups of whole milk to make 1 cup of paneer. I have done the recipe earlier how to make Paneer.
    • Use heavy bottom flat frying pan, add paneer, milk and milk powder, mix it well.
    • Cook the paneer mixture over low heat stirring continually, because of the milk powder mix can burn easily. Also keep scrapping the sides. Mix will come together and will be the texture of soft dough, this should take about 10-12 minutes.
    • Add clarified butter mix it well and cook for one minute. Turn off the heat. Transfer the paneer mix on a plate, and let it come to room temperature.
    • Add sugar and cardamom powder, mix it well and knead, for a minute. this should be like a soft dough. Make them in about one-inch balls. Paneer Ladoos should be soft in texture. Garnish with pistachios.

    Notes

    Paneer Ladoos taste best when they are served chilled.
    Notes: if ladoo mix is dry add warm milk before adding the sugar.
    Tried this recipe?Let us know how it was!
  • Nariyal Burfi (Coconut Fudge)

    Nariyal Burfi (Coconut Fudge)

    Nariyal Burfi

    Nariyal Burfi (Coconut Fudge)

    Nariyal Burfi is simple and delicious dessert that only requires a few ingredients! It is super easy to make, and you can serve this as sweet snack in the form of candy. I make this burfi with caramelized sugar which gives a nice twist to the burfi itself. 
    No ratings yet
    Prep Time 5 minutes
    Cook Time 20 minutes
    Total Time 25 minutes
    Course Dessert
    Cuisine Indian
    Servings 6 people

    Ingredients


    • 1-3/4 cup milk
    • 3/4 cup coconut powder
    • 1/2 cup sugar
    • 1/8 tsp cardamom powder
    • 4 tsp butter
    • 1 Tbsp pistachios sliced

    Instructions
     

    • Soak the coconut in boiling milk for about 30 minutes.
    • In a flat heavy bottom pan, over medium high heat melt one teaspoon of butter, add sugar, spread evenly in pan.
    • After sugar start melting, keep stirring the sugar continuously till sugar start melting and changing the color to light brown. Turn off the heat as soon it comes to golden brown in color. This should take 4 minutes. Note: when sugar starts melting it changes the color very quickly and it can easily burn.
    • Slowly add milk mixture sugar will become lumpy open the heat to medium and keep stirring sugar will dissolve and will give nice light brown color.
    • Keep stirring and scraping the sides about 15 minutes mixture will become lumpy add the remaining butter and keep stirring until mixture become soft dough consistency.
    • Pour it over greased plate and flatten with the greased back side of the spoon. Garnish with sliced pistachios.
    • Leave for 3-4 hours before cutting them into pieces. Cut them into your desired shape. I like to cut them in 1’ squares.

    Notes

    Notes
    Caramelizing the sugar adds a very unique taste to Burfi, something every one talk about.
    Leave for 3-4 hours before cutting them into pieces. Cut them into your desired shape. I like to cut them in 1 inch squares.
    You will also enjoy few of these recipes, they are easy, has a long shelf life and also great gift ideas, Moong Dal Ladoo, Almond Brittle, Spicy Cashews, 
    Keyword Coconut Candy, Gola Ki Burfi, Kid Friendly
    Tried this recipe?Let us know how it was!
  • Paneer Methi (Methi Malai Paneer) Recipe by Manjula

    Paneer Methi (Methi Malai Paneer) Recipe by Manjula

    Paneer Methi

    Paneer Methi (Methi Malai Paneer)

    Paneer Methi is a delicacy of Northern India. This recipe is paneer with creamy gravy flavored with dry fenugreek leaves known as Fasoori Methi. Paneer Methi is a perfect side dish for formal dinner or even a quiet dinner where you want to impress someone. Any way or time you serve this, it is delicious.
    4.60 from 20 votes
    Prep Time 10 minutes
    Cook Time 20 minutes
    Total Time 30 minutes
    Course Main Course
    Cuisine Indian
    Servings 3 people

    Ingredients
      

    • 1-1/2 cups paneer cubed in about 1/2 inch pieces used 8oz paneer
    • 1-1/2 cups tomatoes chopped
    • 1 Tbsp ginger chopped
    • 1 green chili chopped
    • 2 Tbsp oil
    • 1/2 tsp cumin seeds jeera
    • 1/8 tsp asafetida hing
    • 1/4 tsp turmeric haldi
    • 1/4 tsp red chili powder lal mirch
    • 2 Tbsp cashew powder kaju
    • 2 tsp coriander powder dhania
    • 1 tsp fennel seed powder saunf
    • 1 Tbsp dry fenugreek leaves kasoori methi
    • 1 tsp salt
    • 1-1/2 cup milk
    • 1/4 tsp garam masala

    Instructions
     

    • Rub the kasoori methi between your palms and remove the stems if there is any, set aside.
    • Blend tomatoes, ginger, green chili to fine paste. Set aside.
    • Heat one teaspoon of oil in a pan on low heat stir fry the paneer until they are light gold in color, take them out.
    • Heat the remaining oil in a sauce pan on medium heat. When the oil is moderately hot add cumin seeds. (Cumin seeds should crack right of way). Lower the heat too low, add asafetida, turmeric, chili powder, and cashew powder stir for a minute.
    • Add tomato paste, coriander, fennel seed powder, salt and kasoori methi, keep stirring till tomato start leaving the side of the pan, this should take 3-4 minutes. Add milk, and cook for 2-3 minutes. Add paneer and let it cook over low heat for 2-3 minutes. This is the time you can add water as needed if gravy is too thick. Add garam masala stir and turn off the heat.
    • Paneer Methi is ready. 

    Notes

    To make vegan, Substitute paneer with tofu and milk with coconut milk
    Serve Paneer Methi with Naan, or Lacha Paratha.
    Keyword Gluten Free, No Garlic, No Onion, Paneer In Creamy Gravy, Paneer With Fenugreek, Party Food
    Tried this recipe?Let us know how it was!

    Methi Paneer Recipe: A Palate-Pleasing Dish 

    Methi Malai Paneer Recipe is a popular party recipe in Indian cuisine. This flavorful veg gravy dish is rich in high protein and gluten-free combining the richness of paneer (Indian cottage cheese) with the distinct taste of kasuri methi (fenugreek leaves), creating a harmonious blend of textures and aromas.

    Kasuri Methi Preparation: Unlocking Aromatic Richness 

    To commence the Methi Malai Paneer recipe start with the preparation of kasuri methi. This involves a tactile step of rubbing fenugreek leaves between the palms to unlock their aromatic flavors, carefully removing any stems present. Once this initial step is completed, the kasuri methi takes center stage, ready to infuse its unique essence into the dish.

    Tomato-Based Foundation: Crafting Depth and Color 

    The methi malai paneer recipe continues by creating a robust base for the dish. Tomatoes, ginger, and green chili unite in a harmonious blend, resulting in a fine paste that serves as a fundamental component. This tomato-based paste contributes not only vibrant color but also imparts a deep, layered flavor profile to the Methi Paneer. After blending, the mixture patiently awaits its turn to seamlessly integrate into the unfolding cooking process.

    Paneer’s Golden Prelude: A Textural Symphony Begins 

    Transitioning to the cooking phase as we go further in the methi malai paneer recipe add a teaspoon of oil is heat in a pan over low flame. Paneer cubes take center stage as we gently stir-fry until achieving a light golden hue. This initial culinary dance ensures that the paneer attains a delightful texture, priming it to absorb the forthcoming flavors with grace and precision.

    Spiced Elevation: Building a Fragrant Foundation 

    Post-paneer preparation, add the remaining oil in a saucepan over medium heat. Include Cumin seeds as they start to crackle and release their earthy aroma. Lower the heat, while a symphony of asafetida, turmeric, chili powder, and cashew powder join the stage, creating a fragrant and flavorful foundation for the paneer methi.

    Tomato Tapestry: Melding Flavors with Precision 

    The tomato paste, a star player prepared earlier, enters the culinary arena as part of the methi paneer recipe. Coriander, fennel seed powder, salt, and the patiently waiting kasuri methi are added. The ensemble is stirred diligently until tomatoes gracefully release from the pan’s sides, a visual and flavorful indication of the meticulous incorporation of diverse elements. This nuanced cooking process takes approximately 3-4 minutes, allowing flavors to intertwine and harmonize.

    Creamy Symphony: Milk’s Contribution to Indulgence

    To further elevate the dish, milk makes its entrance, contributing a creamy texture that enhances the overall indulgence of paneer methi. The mixture is allowed to simmer, a gentle dance of flavors taking place over 2-3 minutes. The paneer absorbs the creamy richness of the sauce, with the flexibility to adjust the consistency by adding water if the gravy proves too thick.

    Paneer’s Reunion: Absorbing Creamy Richness 

    The previously stir-fried paneer cubes re-enter the pan, allowing them to luxuriate in the creamy tomato and spice-infused gravy. Over low heat, this reunion lasts for an additional 2-3 minutes, ensuring the paneer absorbs the full spectrum of flavors, resulting in a well-balanced and delectable paneer methi.

    Garam Masala Finale: Aromatic Culmination 

    As a grand finale, garam masala is introduced to the dish, enhancing the overall aromatic profile and weaving together the diverse flavors into a harmonious conclusion. A final stir marks the end of the culinary symphony, and the heat is turned off, signaling the completion of the Methi Paneer recipe. The result is a tantalizing masterpiece that marries the succulence of paneer with the unique bitterness of fenugreek leaves, promising to delight the fortunate taste buds that savor this culinary creation of paneer methi.

    If you liked this recipe, try our other recipes such as Shahi Paneer, Paneer Sandwich, Masala Bell Pepper, Masala Paneer & Mattar Paneer


  • Aloo ki Kachori

    Aloo ki Kachori

    Aloo ki Kachori

    Aloo Ki Kachori (Kachori With Potato Stuffing)

    Aloo Ki kachori is a delicious, spicy, fried puff bread. Aloo Ki kachori can be part of the main meal or it can even be served for breakfast with a hot cup of chai. This kachori also makes a mouthwatering appetizer that can be served with Green Chutney as chaat.
    5 from 7 votes
    Prep Time 15 minutes
    Cook Time 30 minutes
    boiling potatoes 15 minutes
    Total Time 45 minutes
    Course Main Course
    Cuisine Indian
    Servings 4 people

    Ingredients


    For Dough

    • 1 cup all-purpose flour maida, plain flour
    • 2 Tbsp sooji samolina
    • 1/4 tsp salt
    • 2 Tbsp oil canola, vegetable
    • 3 drops lemon juice
    • 1/3 cup chilled water approximately

    For Filling

    • 1 cup boiled peeled potatoes roughly mashed
    • 1 Tbsp oil canola, vegetable
    • 1/2 tsp cumin seeds jeera
    • 1/2 tsp red chili powder
    • 1 tsp coriander powder dhania
    • 1/2 tsp mango powder amchoor
    • 1/2 tsp salt
    • 1 Tbsp green chili finely chopped
    • 2 Tbsp chopped cilantro hara dhania

    Instructions
     

    To Make Dough

    • Mix the flour, sooji, salt, lemon drops and oil. note lemon should be just 3-4 drops, we are not adding to flavor, lemon is added to give the crispness.
    • Add the chilled water slowly, mixing with your fingers as you pour.
    • Do not knead the dough. The dough should be soft.
    • Cover the dough and let it sit for at least fifteen minutes.

    Make Filling

    • Heat the oil in a frying pan on medium high heat. Test the heat by adding one cumin seed to the oil; if it cracks right away oil is ready.
    • Add cumin seeds as cumin seeds crack, add all the ingredients, potatoes, red pepper, green chilies, cilantro, and coriander powder, mix it well while stirring the mix keep pressing.
    • Filling should be not very dry, this should take about 5 minutes.
    • Stir in garam masala and amchur. Add more salt or amchur according to taste.
    • Let the filling cool to room temperature, mix it well this should have texture of firm dough.

    To make Kachoris

    • Take the dough and knead it for a minute. Divide the dough in twelve equal parts.
    • Mash the dough lightly and divide in 12 parts filling should be about same size as dough.
    • Take one part of the dough and with your fingers flatten the edges and make into 3-inch circle. Leaving center little thicker then edges.
    • Mold the dough into a cup and place filling in the center. Pull the edges of the dough to wrap the dal filling. Proceed to make all 12 balls.
    • Let the filled ball sit for three to four minutes before rolling. It helps spreading the filling evenly.
    • Set the kachoris on a surface with the seams facing up. Using the base of your palm, slowly flatten them into about three inches in diameter, or use the rolling pin roll the kachori with light hand.
    • Heat the oil in frying pan over medium heat frying pan should have about one inch of oil. To check if oil is ready put a little piece of dough in the oil. Dough should sizzle and come up very slow without changing the color.
    • Fry them on medium-low heat. After they start to puff, slowly turn them over. Fry until golden-brown on both sides. If the kachoris are fried on high heat, they will get soft and will not be crispy.

    Notes

    Serve the kachories with cilantro chutney or tamarind chutney.
    Tried this recipe?Let us know how it was!

    Introduction to Aloo Kachori

    Aloo kachori is a popular Indian snack that perfectly fits into various occasions and dietary preferences. It serves as a delightful addition to appetizers, party recipes, and festive menus like Diwali, Ganesh Chaturthi, Holi, Karwa Chauth, and Krishna Janmashtami. It’s also a great option for breakfast and lunch box suggestions. This delectable dish consists of deep-fried bread stuffed with a savory mixture of spiced mashed potatoes, making it a satisfying choice for vegans and anyone craving a flavorful treat.

    Preparing the Dough for Aloo Kachori

    To begin making aloo kachori, we first prepare the dough. In a mixing bowl, combine all-purpose flour, salt, and a splash of oil. Gradually add water and knead the mixture until you achieve a smooth, pliable dough. Cover the dough and let it rest for about 15-20 minutes. This resting period allows the gluten to relax, making the dough easier to work with and resulting in softer kachoris.

    Making the Aloo Kachori Filling

    While the dough rests, let’s prepare the flavorful filling for our aloo kachori. Start by boiling potatoes until they are tender. Once cooled, peel and mash them coarsely. In a pan, heat oil and add mustard seeds, cumin seeds, and hing (asafoetida) for added flavor. Add ginger, green chilies, and spices like turmeric, red chili powder, coriander powder, and garam masala to the pan. Mix well and cook for a minute before adding the mashed potatoes. Stir the mixture until the spices are well incorporated and cook for a few minutes. Finally, add chopped cilantro for a fresh burst of flavor. Allow the filling to cool completely before proceeding.

    Assembling and Frying Aloo Kachori

    Now, let’s assemble our aloo kachori. Divide the rested dough into small portions and roll them out into small circles. Place a spoonful of the prepared potato filling in the center of each circle. Gently gather the edges of the dough to enclose the filling and pinch them together to seal. Flatten the filled dough balls slightly.

    Next, heat oil in a deep pan for frying. Once the oil is hot, carefully slide the prepared aloo kachoris into the oil. Fry them in batches until they turn golden brown and crisp on all sides. Remove them from the oil using a slotted spoon and place them on paper towels to drain excess oil.

    Serving Aloo Kachori

    Once fried to perfection, aloo kachoris are ready to be served. They can be enjoyed on their own as a snack or paired with a variety of chutneys and dips. For an extra indulgence, you can also turn them into a delicious aloo kachori chaat by topping them with yogurt, tamarind chutney, green chutney, sev. The combination of crispy kachori and flavorful toppings creates a tantalizing blend of textures and flavors that will surely satisfy your taste buds.

    Tips for Making Perfect Aloo Kachori

    • Ensure the dough is well rested to achieve a soft and pliable texture.
    • Keep the filling mixture relatively dry to prevent the kachoris from becoming soggy.
    • Seal the edges of the filled dough balls properly to prevent the filling from leaking out during frying.
    • Fry the kachoris in hot oil to ensure they cook evenly and become crispy.
    • Serve the kachoris hot for the best taste and texture.

    Variations of Aloo Kachori

    While the classic aloo kachori is a favorite, there are endless variations you can try to add your own twist to this beloved snack. You can experiment with different fillings such as paneer, peas, or lentils to create unique flavors. Additionally, you can adjust the spice level according to your preference by adding more or less chili powder or green chilies. Get creative and tailor the recipe to suit your taste buds.

    Benefits of Aloo Kachori

    Aloo kachori is not only delicious but also offers some nutritional benefits. Potatoes, the main ingredient in the filling, are a good source of vitamins and minerals, including vitamin C, potassium, and B vitamins. When enjoyed in moderation as part of a balanced diet, aloo kachori can be a satisfying and wholesome snack option.

    FAQs about Aloo Kachori

    Can I make aloo kachori ahead of time?
    • Yes, you can prepare the dough and filling ahead of time and assemble the kachoris just before frying. This can save you time, especially when serving them for parties or gatherings.
    Can I bake aloo kachori instead of frying?
    • While traditionally fried, you can certainly try baking the kachoris for a healthier alternative. Brush them with oil and bake in a preheated oven until golden brown and crisp.
    How do I store leftover aloo kachori?
    • Allow any leftover kachoris to cool completely before storing them in an airtight container. They can be refrigerated for a couple of days and reheated in a toaster oven or microwave before servin

    If you’re looking to explore more Indian recipes, appetizers, beverages, and desserts, be sure to check out the following links on Manjula’s Kitchen. Here are some links to recipes on Manjula’s Kitchen official website: Vegetable Pakoras Recipe

    Kaju Katli (Cashew Burfi) Recipe, Baingan Bharta (Roasted Eggplant) Recipe, Matar (Green Peas) Paneer Recipe, Besan Ladoo Recipe

  • Pineapple Sandesh (Bengali Sweet)

    Pineapple Sandesh (Bengali Sweet)

    Pineapple Sandesh

    Pineapple Sandesh (Bengali Sweet)

    Pineapple Sandesh is a popular Bengali sweet. This is healthy and delicious dessert and a great dessert for sophisticated people and so easy to make. 
    5 from 3 votes
    Prep Time 5 minutes
    Cook Time 24 minutes
    Total Time 29 minutes
    Course Dessert
    Cuisine Indian
    Servings 8 people

    Ingredients


    • 4 cup whole milk
    • 3 Tbsp lemon juice
    • 3 Tbsp fine sugar
    • 1/4 tsp cardamom
    • 6 slice pineapple canned
    • 2 Tbsp sliced pistachios for garnishing

    Instructions
     

    • Making paneer: Boil the milk in a heavy bottomed pan over medium high heat, stirring occasionally.
    • As the milk comes to a boil, add the lemon juice gradually and stir the milk gently. The curd will start separating from the whey, turn off the heat.
    • Once the milk fat has separated from the whey, drain the whey using a strainer line with cheesecloth, or muslin cloth.
    • Wrap the curds in a muslin cloth, rinse under cold water, and squeeze well. 
    • Making Sandesh: Once the paneer is drained, place on a dry, clean surface and knead the paneer until the paneer is almost rolls into smooth soft dough.
    • Add the sugar and cardamom powder into the paneer and knead the paneer again until sugar is mixed well. Now this paneer known Sandesh.
    • Spread the pineapple slices on a dry surface and pat dry using the muslin cloth or paper towel.
    • Spread the Sandesh covering the pineapple slices evenly and garnish with slice pistachios. I prefer cutting them in four.
    • Refrigerate the Sandesh for about 1 hours before serving. Pineapple Sandesh taste best when it is served chilled and refrigerating the Sandesh also helps to set over pineapple.

    Notes

    After kneading the sugar with paneer it is known as Sandesh. This is a basic Sandesh you can use this for making many variation of Sandesh. I also I have 2 more recipe of Sandesh, you will be interested Sandesh, and Chocolate Sandesh
    Tried this recipe?Let us know how it was!

  • Corn Cutlets (Corn Fritters)

    Corn Cutlets (Corn Fritters)

    Corn Cutlets

    Corn Cutlets (Corn Fritters)

    Corn Cutlets are a mouthwatering appetizer which can be served as starters for a party or even as an evening snack. Corn Cutlets are crispy outside and soft inside. This is one of those snacks you can serve without any sauce and they taste delicious. They are also gluten free, and vegan.
    This recipe will make 12 cutlets.
    4.63 from 8 votes
    Prep Time 10 minutes
    Cook Time 15 minutes
    Total Time 25 minutes
    Course Appetizer, Snack
    Cuisine Indian
    Servings 4 People

    Ingredients


    • 2 cup yellow corn I am using frozen corn
    • 1 tsp fennel seeds coarsely ground, saunf
    • 1/2 tsp salt
    • 1 tsp ginger grated, adrak
    • 1 Tbsp green chili finely chopped, hari mirch
    • 1 Tbsp cilantro finely chopped, hara dhania
    • 1 tsp mango powder amchoor
    • 1/4 cup rice flour chawal ka atta

    Also Need

    • oil to fry

    Instructions
     

    • Defrost the corn, and pat dry. Then blend the corn to coarse paste without adding any water. 
    • Transfer the paste to a large mixing bowl. Add all the spices, ginger, fennel, coriander, green chili, mango powder and salt, mix it well. 
    • Add rice flour to the corn mixture, mix it well. Mixture should hold together, and consistency should be like a soft dough. If needed add little more rice flour.
    • Wash and grease your palm lightly, divide the dough into 12 equal parts and shape the into bullets.
    • Heat the oil in a frying pan on medium heat. Oil should be moderately hot. To check the oil, drop a little piece of mixture, mixture should sizzle and come up. Drop the rolls slowly into it, taking care not to overlap them. 
    • Fry the cutlets until they are golden brown, turning occasionally. This should take about 6-7 minutes. Take them out over a paper towel.

    Notes

    Suggestions
    Serve them hot! If you have prepared them beforehand, heat them in a toaster oven or in oven to bring the crispness back. But they taste good even at room temperature.
    Tried this recipe?Let us know how it was!

    How to Make Corn Cutlet: A Delicious Recipe

    Corn Cutlet is a versatile appetizer perfect for Holi, Krishna Janmashtami, or any party occasion, offering a quick and easy gluten-free snack option that’s also suitable for vegans, showcasing the delightful flavors of corn in every bite. These crispy treats are perfect for any occasion, whether it’s a party, a family gathering, or simply a cozy evening at home. In this recipe, we’ll explore how to make corn cutlet step by step, ensuring a perfect result every time.

    Step 1: Preparing the Ingredients

    To start making corn cutlet, gather the following ingredients: canned corn kernels, boiled potatoes, bread crumbs, chopped cilantro, minced green chilies, ginger paste, garam masala, amchur (dry mango) powder, salt, and oil for frying. These simple ingredients come together to create a delicious blend of flavors and textures in every bite.

    Step 2: Mashing the Potatoes and Corn

    Begin by draining the canned corn kernels and boiling the potatoes until they are soft. Once they’re cooked, mash them together in a large bowl until you have a smooth mixture. This forms the base of your corn cutlet, providing both substance and binding for the other ingredients.

    Step 3: Adding Flavorful Ingredients

    Now it’s time to add the flavorings to your corn and potato mixture. Mix in chopped cilantro, minced green chilies, ginger paste, garam masala, amchur powder, and salt according to your taste preferences. These spices add depth and complexity to the corn cutlet, elevating it from simple to sensational.

    Step 4: Forming the Cutlets

    Once all the ingredients are well combined, shape the mixture into small patties or cutlets. You can make them any size you like, but smaller cutlets are easier to handle and cook more evenly. Coat each cutlet in bread crumbs, ensuring that they’re thoroughly coated on all sides for maximum crispiness.

    Step 5: Frying to Perfection

    Heat oil in a deep frying pan or skillet over medium heat. Carefully place the breaded cutlets into the hot oil, making sure not to overcrowd the pan. Fry them until they’re golden brown and crispy on the outside, flipping them occasionally to ensure even cooking. Once they’re done, remove the corn cutlets from the oil and place them on a paper towel-lined plate to drain off any excess oil.

    Step 6: Serving and Enjoying

    Your corn cutlets are now ready to be served! Arrange them on a platter with your favorite dipping sauces or chutneys for added flavor. These cutlets are best enjoyed hot and crispy, straight from the frying pan. Serve them as an appetizer, snack, or even as a side dish alongside your favorite main course. However you choose to enjoy them, these corn cutlets are sure to be a hit with family and friends alike.

    Tips for Making Perfect Corn Cutlets

    • Ensure that the mashed potato and corn mixture is well combined to create a uniform texture.
    • Adjust the amount of green chilies and spices according to your preference for heat and flavor.
    • For extra crunch, you can add finely chopped bell peppers to the mixture.
    • If you’re short on time, you can use frozen corn kernels instead of canned ones, just make sure to thaw them before using.
    • To make these cutlets healthier, you can bake them in the oven instead of frying them. Simply place them on a baking sheet lined with parchment paper and bake at 375°F (190°C) for 20-25 minutes, or until golden brown and crispy.

    Variations on Corn Cutlets

    • Cheese Corn Cutlets: Add grated cheese to the corn and potato mixture for a gooey, cheesy twist.
    • Spicy Corn Cutlets: Increase the amount of green chilies or add red chili powder for an extra kick of heat.
    • Corn and Paneer Cutlets: Mix crumbled paneer (Indian cottage cheese) with the corn and potato mixture for added richness and protein.
    • Corn Tikki Chaat: Serve the cutlets topped with yogurt, tamarind chutney, and chaat masala for a delicious Indian street food-inspired treat.

    Benefits of Corn Cutlets

    • Rich in fiber: Corn is a good source of dietary fiber, which aids in digestion and helps keep you feeling full for longer.
    • Nutrient-dense: Corn is packed with essential vitamins and minerals, including vitamin C, vitamin B6, and potassium.
    • Versatile: Corn cutlets can be customized with a variety of spices and ingredients to suit your taste preferences.
    • Crowd-pleaser: Whether you’re serving them at a party or a family dinner, corn cutlets are sure to be a hit with guests of all ages.

    FAQs about Corn Cutlets

    Can I make corn cutlets ahead of time and reheat them later?

    • Yes, you can prepare the cutlets in advance and store them in the refrigerator for up to 2-3 days. When ready to serve, simply reheat them in a preheated oven at 350°F (175°C) for 10-15 minutes, or until heated through.


    Can I freeze corn cutlets?

    • Yes, you can freeze uncooked corn cutlets for up to 1 month. Place them on a baking sheet lined with parchment paper and freeze until firm, then transfer them to a freezer-safe bag or container. When ready to cook, fry them directly from frozen, adding a few extra minutes to the cooking time.


    Can I make corn cutlets without bread crumbs?

    • While bread crumbs help to bind the cutlets and create a crispy exterior, you can substitute crushed cornflakes or panko breadcrumbs for a similar effect.


    Are corn cutlets gluten-free?

    • If you use gluten-free breadcrumbs or omit them altogether, corn cutlets can be made gluten-free. Just be sure to check the labels of all ingredients to ensure they are gluten-free.


    Other Recipes on Manjula’s Kitchen

    If you’re looking to explore more Indian recipes, appetizers, beverages, and desserts, be sure to check out the following links on Manjula’s Kitchen. Here are some links to recipes on Manjula’s Kitchen official website:

    Paneer Tikka Masala Recipe

    Chana Chaat (Spicy Chickpea Salad) Recipe

    Pav Bhaji (Spicy Vegetable Hash with Buns) Recipe

    Raj Kachori (Crunchy Chaat) Recipe

    Vegetable Biryani Recipe

    These recipes should offer you a flavorful experience straight from Manjula’s Kitchen.

  • Besan Ka Halwa

    Besan Ka Halwa

    Besan Ka Halwa

    Besan Ka Halwa

    Besan Ka Halwa is a traditional Indian dessert and made using different flour, lentils, nuts and vegetables. Besan Ka Halwa is one of my favorite Halwas. This is delicious and also quick and easy to make. When you roast the besan, the house is full of sweet aroma. Besan Ka Halwa is also gluten free.
    3.89 from 9 votes
    Prep Time 5 minutes
    Cook Time 12 minutes
    Total Time 17 minutes
    Course Dessert
    Cuisine Indian
    Servings 4 people

    Ingredients
      

    • 1 cup coarse besan ladoo ka besan, gram flour
    • 1/2 cup clarified butter ghee
    • 1 cup sugar
    • 1/4 tsp cardamom powder ilachi
    • 2-1/2 cup water
    • 2 Tbsp almonds sliced

    Instructions
     

    • Boil the water with sugar, and cardamom powder in a sauce pan over low medium heat. Bring to a boil and Set aside.
    • Melt the clarified butter in a frying pan on low medium heat. Add besan and roast to golden brown color; stirring constantly this will take about 5 to 8 minutes. Besan will be golden brown in color and will have a light sweet aroma.
    • Add the syrup slowly, as you add the syrup to besan water will splatter.
    • Turn down the heat to low and let it cook for about 2-3 minutes.
    • Besan will absorb the water, as the Halwa cools so keep Halwa a little softer then you like.
    • Garnish with cashews.

    Notes

    Serving suggestion
    Serve hot for best taste. If you like, garnish with shaved pistachio, almonds or shredded coconut.
    Variations
    Instead of water add 1 cup of milk and 1/2 cup of water and keep Halwa a little thicker. Pour the Halwa on a greased plate, keep it about 1/2 inch thick. Garnish with shaved almonds or pistachio or shredded coconut, and let it cool for about a half an hour. Cut the Halwa in square or diamond shapes like burfi.
    Tried this recipe?Let us know how it was!

    Besan ka Halwa is a classic Indian dessert made from besan (gram flour), ghee (clarified butter), sugar, and aromatic spices. This sweet treat is loved for its rich flavor, creamy texture, and irresistible aroma. 

    Whether served warm or at room temperature, Besan ka Halwa is a delightful dessert that’s perfect for celebrating special occasions such as a party recipe or even festive occasions such as diwali, holi, ganesh chaturthi or janmashtami or simply made to satisfy one’s sweet tooth. 

    Variations of Halwa:

    Although Besan ka Halwa can be considered to be one of the most savoury and fulfilling desserts amongst all halwas, here we have a list of some halwas that can be savoured and enjoyed all along with friends and family. 

    1. Gajar ka Halwa: Gajar Ka Halwa is a classical Indian dessert, this is also known as gajraula. Gajar ka Halwa is a delicious and popular sweet made with few ingredients, carrots, milk, sugar and flavoured with cardamom.
    2. Atta Ka Halwa: Atta ka Halwa, is a delicious sweet dessert. This is easy to make and with few ingredients. Atta ka halwa is made with whole wheat flour, sugar, and clarified butter, flavoured with cardamom.
    3. Sooji ka Halwa: Sooji Halwa is a very popular sweet dish all over India and is made on religious occasions, as prasad.
    4. Sweet Potato Halwa: Sweet Potato Halwa, an eggless pudding, stands out as one of the simplest Halwa recipes to prepare. Infused with the delicate and distinctive flavors of cardamom and cinnamon, it serves as a deliciously warm dessert ideal for chilly winter evenings.

    Tips for Making Perfect Besan ka Halwa:

    Use Good Quality Gram Flour: Use fresh and high-quality gram flour (besan) to make Besan ka Halwa for the best flavor and texture. Fresh besan has a nutty aroma and a smooth texture, which enhances the taste of the halwa.

    Roast the Gram Flour Well: Roast the gram flour in ghee until it turns golden brown and fragrant. Properly roasting the gram flour is crucial for developing the rich and nutty flavor of the halwa.

    Control the Sweetness: Adjust the amount of sugar according to your taste preferences. Some people prefer Besan ka Halwa to be sweeter, while others prefer it less sweet. Start with a smaller amount of sugar and add more if needed.

    Garnish with Nuts and Saffron: Garnish Besan ka Halwa with chopped nuts such as almonds, pistachios, and cashews, as well as a few strands of saffron for a luxurious touch. The nuts add crunch and texture, while saffron adds color and aroma to the halwa.

    FAQs about Besan ka Halwa:

    Can I make Besan ka Halwa ahead of time? 

    Yes, Besan ka Halwa can be made ahead of time and stored in an airtight container in the refrigerator for up to 3-4 days. Reheat the halwa gently on the stovetop or in the microwave before serving.

    Can I freeze Besan ka Halwa? 

    While Besan ka Halwa can be frozen, its texture may change slightly upon thawing. If freezing, allow the halwa to cool completely before transferring it to a freezer-safe container. Thaw the halwa in the refrigerator overnight before reheating.

    Is Besan ka Halwa vegan-friendly? 

    Traditional Besan ka Halwa is made with ghee (clarified butter), which is not vegan. However, you can make a vegan version of Besan ka Halwa by using plant-based ghee or oil instead of dairy ghee.

    Is Besan ka Halwa gluten-free? 

    Yes, Besan ka Halwa is gluten-free as it is made from gram flour, which is naturally gluten-free. However, be cautious of cross-contamination if you have a severe gluten allergy or celiac disease.

    Besan ka Halwa is a luxurious and aromatic dessert that’s perfect for indulging in on special occasions or as a sweet treat for your loved ones. 

    With its rich flavor, creamy texture, and endless variations, Besan ka Halwa is sure to become a favorite in your dessert repertoire. Whether enjoyed warm or at room temperature, this halwa is guaranteed to satisfy your sweet cravings and leave you feeling content and happy.

    Besan ka Halwa goes best even at marriage and big events hence its often served as people’s favorite choice of sweet dessert after every celebration and is a great hit among family gatherings and unions.

  • Mango Shrikhand | Amrakhand

    Mango Shrikhand | Amrakhand

    Mango Shrikhand

    Mango Shrikhand

    Mango Shrikhand is a refreshing yogurt based sweet dish. Shrikand with mango makes it a very delicious dessert. This exotic dessert is easy to prepare and Shrikhand is often served with poori.
    5 from 2 votes
    Prep Time 10 minutes
    Course Dessert
    Cuisine Indian
    Servings 6 people

    Ingredients
      

    • 3 cup yogurt (curd or dahi)
    • 1 cup mango puree
    • 1/3 cup fine sugar approx, use as needed
    • 1/4 tsp crushed cardamom

    For Garnishing

    • 1/4 cup mango cut into small pieces
    • 1 Tbsp sliced pistachios pista

    Instructions
     

    • Preparing yogurt – Put a muslin or cheese cloth over a strainer. Pour the yogurt over muslin cloth. Place a bowl underneath the strainer to collect the excess water.
    • Next gently squeeze the excess water from yogurt. Make sure not to squeeze out the yogurt.
    • Move the yogurt with strainer and bowl into the refrigerator for at about four hours to drain excess water. Occasionally squeeze the excess water.
    • Yogurt will become thick in consistency, like a cheese ball.
    • Add mango pulp, sugar, and cardamom powder to yogurt and mix well till sugar dissolves.
    • Chill the shrikhand before serving.
    • Garnish with mango pieces, and pistachios.
    Tried this recipe?Let us know how it was!

  • Apple Coconut Barfi

    Apple Coconut Barfi

    Apple Coconut Barfi

    Apple Coconut Barfi

    Apple Coconut Barfi is a delicious treat. This fudge-like barfi super easy to make. It's also vegan and gluten-free. The fruity taste makes for a great sweet snack without the guilt!
    4.63 from 8 votes
    Prep Time 10 minutes
    Cook Time 30 minutes
    Total Time 30 minutes
    Course Dessert
    Cuisine Indian
    Servings 6 people

    Ingredients
      

    • 3 cup apple peeled and shredded
    • 1 cup freshly grated coconut I am using frozen coconut
    • 1 1/2 cup sugar
    • 1/2 cup chopped walnuts
    • 1/4 tsp crushed cardamom
    • 1 Tbsp sliced pistachios for garnishing

    Instructions
     

    • In a non-stick frying pan add coconut, apple, and sugar, cook over medium heat, until mixture start coming together and apples should be very tender. This should take about 7-10 minutes.
    • Add cardamom powder and walnut, mix it well cook stirring continually until mix should becomes consistency of soft dough, this should take about 2-3 minutes, turn of the heat.
    • Pour the mixture into greased plate while Burfi mixture is still hot spread it evenly about 3/4-inch-thick in a square shape. Press the mixture with spatula to make it firm. Sprinkle the pistachios and lightly press.
    • While Burfi is still warm cut them in about one inch square.
    • Allow the Burfi to cool for about two hours to dry and hold its shape. Now you can remove the burfi from the plate.

    Notes

    Burfi can be stored for 2 weeks in air tight container.
    Tried this recipe?Let us know how it was!

  • Rava Kesari (Kesari Halwa)

    Rava Kesari (Kesari Halwa)

    Rava Kesari

    Rava Kesari (Kesari Halwa)

    Rava Kesari (Kesari Halwa) is a popular South Indian sweet dish which is a different version of Sooji ka Halwa. Rava Kesari is delicious and easy to make, usually made on festive occasions. This is a quick fix sweet for parties as it is quick & easy to make especially if you have unexpected guests.
    5 from 1 vote
    Prep Time 5 minutes
    Cook Time 15 minutes
    Total Time 20 minutes
    Course Dessert, Snack
    Cuisine Indian
    Servings 8 people

    Ingredients
      

    • 1 cup fine sooji semolina
    • 3/4 cup sugar
    • 4 Tbsp ghee clarified butter
    • 2 Tbsp sliced almonds
    • 8 drops yellow food color
    • Pinch of saffron kesar
    • 1/8 tsp cardamom crushed, ilachi
    • 3-1/3 cups water
    • 1 Tbsp sliced pistachios pista for garnishing

    Instructions
     

    • Boil the water with sugar, and cardamom powder in a pot over medium heat. Bring the syrup to boil, mix it making sure sugar is dissolve add the food color and mix. Set aside
    • Melt 1 tablespoon of ghee in a frying pan on low medium heat. Add the sooji, and almonds and roast stirring continuously, sooji should be light golden brown in color and will have a light sweet aroma. This should take about 7-8 minutes.
    • Add the syrup slowly, as you add the syrup to sooji water will splatter. Make sure there are no lumps. Cook for 2-3 minutes, stirring continuously. Add more water if halwa becomes very thick.
    • Add the remaining ghee 1 tablespoon at a time and cook for 3-4 minutes stirring continuously. Rava Kesari will start leaving the sides of frying pan. Rava Kesari will have a texture of thick batter.
    • Garnish the Rava Kesari with sliced pistachios, serve warm or at room temperature.

    Notes

    Treat yourself, serve Rava Kesari for breakfast with Aloo Puri , Dal Puri
    Tried this recipe?Let us know how it was!

  • Kala Jamun

    Kala Jamun

    Kala Jamun

    Kala Jamun

    Kala Jamun is a delicious vegan dessert very similar to Gulab Jamun. Kala jamun is an exotic sweet dish served on special occasions. Kala Jamuns have a very unique texture as they are chewy outside and grainy inside.
    No ratings yet
    Prep Time 30 minutes
    Cook Time 19 minutes
    Course Dessert
    Cuisine Indian
    Servings 6 people

    Ingredients
      

    • 1 cup nonfat milk powder
    • 1/4 cup all-purpose flour (plain flour, maida)
    • 1/4 cup paneer (see the video how to make the paneer) I used 1-1/2 cup of milk for paneer
    • 1/8 teaspoon baking soda
    • 1/2 cup heavy cream

    For Filling

    • Pinch of saffron
    • 1 tablespoon crushed almond
    • 1 tablespoon crushed pistachios
    • 1 tablespoon warm milk

    For Syrup

    • 1-1/2 cups sugar
    • 1 cup water
    • 4 crushed green cardamom
    • Oil to fry

    Instructions
     

    Syrup

    • In a saucepan, combine the water, sugar, and cardamom over medium heat and bring it to a boil. Simmer until the syrup is sticky but not making the thread. If using a candy thermometer, it should reach 200°F. Set aside.

    Kala Jamun

    • Soak the saffron in warm cream. And set aside.
    • Knead the paneer enough to make it smooth, do not over knead the paneer.
    • In a bowl mix the dry ingredients together, all-purpose flour, milk powder, and baking soda. Add the paneer and mix well add cream to make soft dough. Dough should be soft and sticking to fingers, as dough sits milk powder will absorb the extra cream. Let it sit for about 5 minutes.
    • Knead the dough if it is dry add 1 to 2 tablespoons of milk as needed not the cream. Divide the dough into 14 equal parts.
    • Take two pieces of dough and add the filling ingredients saffron, almonds and pistachios, mix well. Divide the filling into 12 equal parts.
    • Take one part of the dough roll it between your both palms to make a smooth ball and mold it into cup, place one filling in the center, cover from all around, and roll it into smooth ball. Make all 12 the same way.
    • Heat the oil in a frying pan on low medium heat. The frying pan should have at least 1-1/2 inch of oil. Notes: To test if the oil is the right temperature, place a small piece of dough into the oil; oil should sizzle but it should take about 30 seconds to rise the dough. If dough rises faster, oil is too hot; if dough just sits without rising, oil is not hot enough.
    • Place the Kala Jamuns in the frying pan. Note: remember Kala jamuns will expand in about one and half the size, so give them enough space to expend, and don’t over crowed them.
    • It should take about 7 minutes to fry the kala jamuns. While frying keep rolling the kala jamuns so they are evenly browned. Kala Jamun should be near to black color.
    • Put the kala jamuns in the hot syrup, not boiling.
    • The kala jamuns should sit in the syrup for at least 30 minutes prior to serving.
    • Kala jamuns are ready. Serve them for your next get together.
    Keyword Kala Jamun
    Tried this recipe?Let us know how it was!

  • Thattai (Rice Crackers)

    Thattai (Rice Crackers)

    Thattai (Rice Crackers)

    Thattai (Rice Crackers)

    Thattai is a popular south Indian snack. You may call them crispy rice crackers. This is made with rice flour and a few spices. It is both vegan and gluten free. Thattai is a great snack to have on hand in your pantry.
    No ratings yet
    Course Snack
    Cuisine Indian
    Servings 30 thattai

    Ingredients
      

    • 1 cup rice flour
    • 1 tablespoons sesame seeds, til
    • 1 teaspoon chana dal
    • 3/4 teaspoon salt
    • 1/8 teaspoon asafetida, hing
    • 2 tablespoons oil
    • 1/2 teaspoon ginger paste
    • 1 green chili finely chopped
    • 1/3 cup of water
    • Also need oil to fry

    Instructions
     

    • Combine all the ingredients in a bowl, except water, rice flour, salt, asafetida, sesame seeds, chana dal, ginger, green chili, and oil mix it well. Add water as needed to make the firm dough.
    • Divide the dough in about 30 equal parts.
    • Take 2 plastic sheet, I am using zip lock bags this makes it easy to roll. Place one part of the dough between two bags and flatten it thin. Heat oil in a heavy frying pan on medium heat. Check the oil temperature by dropping a small piece of dough into the oil, if it sizzle and rises to the surface slowly, without changing the color, oil is ready for frying.
    • Gently transfer the flattened dough into the oil. Do not over crowed the frying pan. Fry them until they are light golden brown both sides. This should take about four minutes.
    • Take them out over paper towed to drain the excess oil.
    • Repeat the same process for the rest of the dough.
    • Thattai should be crisp. After it cools, store it in an air tight container.
    Tried this recipe?Let us know how it was!

  • Kesar Peda (Indian Milk Dessert)

    Kesar Peda (Indian Milk Dessert)

    Kesar Peda

    Kesar Peda (Indian Milk Dessert)

    kesar peda is a classic dessert made for festive occasions. They are delicious sweet snack and made with very few ingredients, milk and sugar, flavored with cardamom and saffron. This is a easy recipe to make.
    No ratings yet
    Course Dessert
    Cuisine Indian
    Servings 10 people

    Ingredients
      

    • 2 cups dry milk powder
    • 1 cup heavy cream
    • 1/2 cup sugar
    • 1/4 teaspoon crushed cardamom
    • Few strands of saffron
    • 1 tablespoon milk to soak the saffron
    • 1 tablespoon sliced pistachios for garnishing

    Instructions
     

    • Soak the saffron strand in warm milk. Set aside.
    • Heat the frying pan on low heat, I like to use heavy bottom nonstick pan. Add cream and milk powder. Mix it well. Mix will start getting soft consistency of thick batter as it gets warm.
    • Cook mixture on low medium heat stirring continuously until mixture becomes lumpy like soft dough. This should take about 12-15 minutes. Add saffron and cardamom mix it well and cook for 2-3 more minutes until it is consistency of soft dough. Turn off the heat. Now this is known as khoya.
    • Transfer the khoya into a bowl and let it cool off until khoya becomes lukewarm.
    • Add the sugar into the khoya and knead it for about a minute until everything blends together and become soft dough. Note: if you mix the sugar while khoya is hot that will make khoya soft and will not able to make peda.
    • Divide the mix into 20 equal parts or more, less depends the size you prefer. Make them into ball rolling between your palms. Make a dent into the peda.
    • Garnish them with pistachios.
    • Finish peda consistency should be little grainy.

    Notes

    Notes
    1. If peda mix is too dry add lukewarm cream as needed.
    2. If peda mix is too soft add little almond powder, now you can call this peda kesar almond peda. Do not try to cook again thinking it will become thick, peda will become chewy.
    Tried this recipe?Let us know how it was!

  • Crispy Jalebi

    Crispy Jalebi

    Crispy Jalebi

    Crispy Jalebi

    Jalebi is a warm crispy, delicious treat. It can best be described as funnel cake. In my home town jalebi was a breakfast treat like pancakes, especially when they were served with kachori (puffed fried bread filled with spicy dal).  I know jalebi is mostly served as a dessert, but for me jalebi still makes the best breakfast treat.
    No ratings yet
    Course Dessert
    Cuisine Indian
    Servings 8 people

    Ingredients
      

    for Batter

    • 1 cup all-purpose flour, minus 2 Tablespoons
    • 2 tablespoons corn starch
    • Pinch of citric acid
    • 1 teaspoon oil
    • 1 teaspoon Yeast
    • 1-1/2 cup lukewarm water

    for Syrup

    • 1-1/2 cups sugar
    • 3/4 cup water
    • 4 cardamom crushed
    • A few strands of saffron
    • Few drops lemon juice
    • Oil to fry

    Instructions
     

    for Batter

    • Sift the all-purpose flour and corn starch together, add the citric acid, and yeast mix it well.
    • Add the water slowly to make a smooth batter, add oil and mix it well. Batter should be pourable consistency of dosa.
    • Set the batter aside in a warm place for about half an hour. Make sure the batter is not over-ferment. After fermenting the batter will be a little lacy.

    for Syrup

    • Boil the sugar and water together. Add the lemon juice, cardamom and saffron. (The lemon juice keeps the mixture from crystallizing). Boil for 2-3 minutes until syrup is about sticky to fingers but has not formed a thread. Turn off the heat.

    for Jalebi

    • Heat the oil in a flat frying pan about one inch deep. To test, put one drop of batter in the oil. The batter should sizzle and rise into a ball without changing color right away.
    • Fill the Jalebi batter into a piping bag with a #3 nozzle. You can also use an empty ketchup or mustard bottle. That’s what I am using.
    • Squeeze the Jalebi batter out into the hot oil in pretzel shapes about three inches in diameter.
    • Fry the jalebis until light golden brown on both sides. Take them out, wait for a minute then transfer them into the warm syrup. Let the jalebis soak in the syrup for about half a minute, take them out. Repeat the process.
    • Jalebies are ready to serve.

    Notes

    Variations
    1. Sprinkle sliced pistachios and almonds, cinnamon powder, coco powder, or sugar powder over the jalebis for a creative touch.
    2. Serve jalebis with malai (a milk reduced by boiling to about one-third of its original quantity.
    Keyword jalebi
    Tried this recipe?Let us know how it was!
  • Coconut Almond Burfi

    Coconut Almond Burfi

    Coconut Almond Burfi

    Coconut Almond Burfi

    Coconut almond burfi is a classic dessert and simply delicious. Coconut almond burfi is super easy to make with few ingredients.  This is also vegan and gluten-free.
    No ratings yet
    Course Dessert
    Cuisine Indian
    Servings 6 people

    Ingredients
      

    • 2 cups coconut freshly grated, I am using frozen shredded coconut
    • 1-3/4 cups sugar
    • 1/2 cup blanched almond powder
    • 1/4 teaspoon cardamom powder

    Instructions
     

    • In a non-stick frying pan add coconut and sugar, cook over low medium heat, stir continuously till sugar is melted and mixture starts to bubble.
    • Add the almond powder and cardamom, keep stirring continuously, scraping the sides and bottom of the pan, until mixture start coming together and becomes consistency of soft dough. This should take about 6-7 minutes. Turn of the heat.
    • Pour the mixture into greased plate while burfi mixture is still hot spread it evenly about 3/4 inch thick in a square shape. Press the mixture with spatula to make it firm.
    • While burfi is still warm cut them in about one inch square.
    • Allow the burfi to cool for about an hour to dry and hold its shape. Now you can remove the burfi from the plate.
    • Burfi can be stored for 2 weeks in air tight container.

    Notes

    Notes: To blanch almonds, drop almonds in boiling water and keep aside. Drain and rinse under cold water after 5 minutes. Press the almonds one by one and squeeze the skin lightly to pop
    Tried this recipe?Let us know how it was!