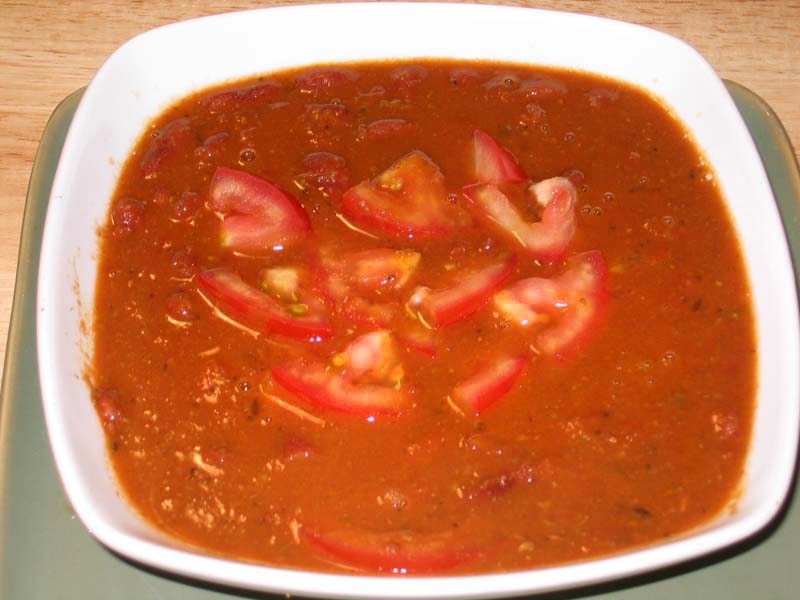
Lentil Vegetable Soup
Ingredients
Ingredients:
- 1/2 cup lentils (masoor dal)
- 1 cup of carrots, sliced in 1/2-inch pieces
- 1/2 cup of green string beans, sliced ½ inch pieces
- 1 cup of celery, sliced in ½ inch pieces
- 3 medium size tomatoes cut into 8 pieces
- About ½ inch ginger thin sliced
- 1½ teaspoon salt
- 1/2 teaspoon turmeric (haldi)
- 1/2 teaspoon black pepper
Chaunk (seasoning):
- 2 tablespoon clarified butter (ghee) or 2 tablespoons oil
- 1/2 teaspoon cumin seed (jeera)
- 1/2 teaspoon garam masala
- Half a lemon
Instructions
Method:
- Wash lentils and soak in 2 cups of water for 1 hour or longer. Once soaked, the lentils should be about double in volume.
- Heat 4 cups of water in a pressure cooker on medium high heat. Next add soaked lentils, salt, turmeric, black pepper, ginger, carrots, green beans, celery, and tomatoes.
- Close the pressure cooker and put the weight on (or seal the exhaust).
- As the pressure cooker starts steaming turn the heat down to medium and cook for about 6 minutes.
- Turn off the heat and wait until the steam has stopped before opening the pressure cooker.
- Mix dal well, if dal is thick add more boiling water and make the consistency as you desire. Soup should be chunky.
Chaunk (seasoning):
- For seasoning (chaunk) heat the butter in a small saucepan, add cumin seeds and wait until cumin seed crack. Then pour it over the soup.
- Add garam masala to the soup and mix it well.
- Before serving squeeze, a few drops of lemon juice.
Introduction to Lentil Vegetable Soup:
Lentil Vegetable Soup is a nutritious and hearty dish that combines lentils with various vegetables to create a flavorful and satisfying meal. It is suitable for individuals with diabetes, as it is low in cholesterol, low in fat, and gluten-free. Additionally, it is high in protein, making it a great option for those looking to increase their protein intake. This soup is perfect for winter months and can be easily packed into lunch boxes for a nutritious meal on the go. It is a wholesome option for anyone looking for a healthy and filling soup or salad option.
Lentil Vegetable Soup is a comforting and nutritious dish that is perfect for chilly days or whenever you’re craving a hearty meal. Packed with protein-rich lentils and a variety of colorful vegetables, this soup is not only delicious but also easy to make. In this recipe, we’ll show you how to make red lentil vegetable soup step by step, so you can enjoy its warmth and goodness at home.
Step 1: Gathering Ingredients:
To begin making Lentil Vegetable Soup, gather all the necessary ingredients. You’ll need red lentils, mixed vegetables such as carrots, celery, and bell peppers, along with tomatoes. Having all the ingredients prepared and ready will make the cooking process smoother and more efficient.
Step 2: Preparation of Vegetables:
Start by washing and chopping the vegetables for the soup. Dice the carrots, celery, and bell peppers into small, bite-sized pieces. Finely chop tomatoes, mince and dice the tomatoes. Preparing the vegetables in advance ensures that they cook evenly and helps to build layers of flavor in the soup.
Step 3: Sauteing Aromatics:
In a large pot or Dutch oven, heat olive oil over medium heat. Then, add the minced and cook for another minute until aromatic. The combination forms the base of the soup and adds depth of flavor.
Step 4: Adding Vegetables and Lentils:
Once the aromatics are sautéed, add the chopped vegetables to the pot. Stir well to coat the vegetables with mixture. Then, add the rinsed red lentils to the pot along with vegetable broth or water. Stir everything together and bring the soup to a gentle simmer.
Step 5: Simmering the Soup:
Let the Lentil Vegetable Soup simmer over medium-low heat for about 20-25 minutes, or until the lentils and vegetables are tender. Stir occasionally to prevent the lentils from sticking to the bottom of the pot. The soup will thicken as it cooks, creating a hearty and satisfying texture.
Step 6: Seasoning and Adjustments:
Once the soup is cooked through, season it with salt, pepper, and any other desired herbs or spices such as thyme, oregano, or bay leaves. Taste and adjust the seasoning according to your preference. You can also add a splash of lemon juice for a hint of acidity and brightness.
Step 7: Finishing Touches:
Before serving, garnish the Lentil Vegetable Soup with freshly chopped parsley or cilantro for a pop of color and freshness. Ladle the hot soup into bowls and serve with crusty bread or crackers for a complete meal. This hearty and nutritious soup is sure to warm you up from the inside out.
Tips for Making the Best Lentil Vegetable Soup:
Use Fresh Ingredients: Fresh vegetables and herbs will give the soup the best flavor and texture.
Don’t Overcook Lentils: Be careful not to overcook the lentils, as they can become mushy. Cook until they are tender but still hold their shape.
Adjust Consistency: If the soup is too thick, you can thin it out with more vegetable broth or water. If it’s too thin, let it simmer for longer to reduce and thicken.
Variations of Lentil Vegetable Soup:
Curried Lentil Vegetable Soup: Add curry powder or paste to the soup for a spicy and aromatic twist.
Coconut Lentil Vegetable Soup: Stir in coconut milk for a creamy and indulgent flavor.
Italian Lentil Vegetable Soup: Add diced tomatoes, cannellini beans, and Italian herbs such as basil and rosemary for an Italian-inspired version of the soup.
Benefits of Including Lentil Vegetable Soup in Your Diet:
Rich in Protein: Lentils are a great source of plant-based protein, making this soup a filling and satisfying meal.
Loaded with Fiber: Both lentils and vegetables are high in fiber, which promotes digestive health and helps keep you feeling full and satisfied.
Packed with Vitamins and Minerals: Lentil Vegetable Soup is packed with essential nutrients such as vitamin C, vitamin A, iron, and potassium, contributing to overall health and well-being.
Frequently Asked Questions (FAQs) about Lentil Vegetable Soup:
Q: Can I freeze Lentil Vegetable Soup?
A: Yes, Lentil Vegetable Soup freezes well. Let it cool completely before transferring to freezer-safe containers. Thaw in the refrigerator overnight before reheating.
Q: Can I use other types of lentils in this soup?
A: Yes, you can use other varieties of lentils such as green lentils or brown lentils if you prefer. Keep in mind that cooking times may vary.
Q: Is Lentil Vegetable Soup gluten-free?
A: Yes, Lentil Vegetable Soup is naturally gluten-free, making it suitable for those with gluten intolerance or celiac disease.
For more delicious soup recipes, visit Manjula’s Kitchen. Explore a variety of vegetarian soups, including lentil soups, vegetable soups, and more, to warm up your soul and tantalize your taste buds.