Tag: High Protein Vegetarian Meals

High Protein Vegetarian Meals: Nutritious and Delicious Options
Finding high protein vegetarian meals that are both delicious and nutritious can be a game-changer for your diet. Whether you’re looking for high protein vegetarian meals, low calorie high protein vegetarian meals, or high protein vegetarian meals for weight loss, this guide has got you covered.
Why Choose High Protein Vegetarian Meals?
High protein vegetarian meals are an excellent way to keep your energy levels stable throughout the day. They help in muscle repair, provide satiety, and can aid in weight management. Let’s explore some high protein meals that you can easily incorporate into your diet. Some of these are Indian vegetarian recipes
1. Quinoa Salad with Chickpeas
Quinoa is a fantastic source of protein. Pair it with chickpeas and fresh vegetables for a salad that is both tasty and nutritious. This combination is a perfect example of high protein vegetarian meals. The nutty flavor of quinoa mixed with the earthiness of chickpeas creates a harmonious and satisfying meal that is also rich in fiber and essential nutrients.
2. Tofu Stir-Fry
Tofu is a versatile ingredient that is rich in protein. Stir-fry it with a mix of your favorite vegetables for a quick and delicious high protein meal vegetarian. Tofu absorbs flavors well, making it perfect for a stir-fry with soy sauce, ginger,and a splash of sesame oil. This dish is easy to prepare and makes for a nutritious and satisfying dinner.
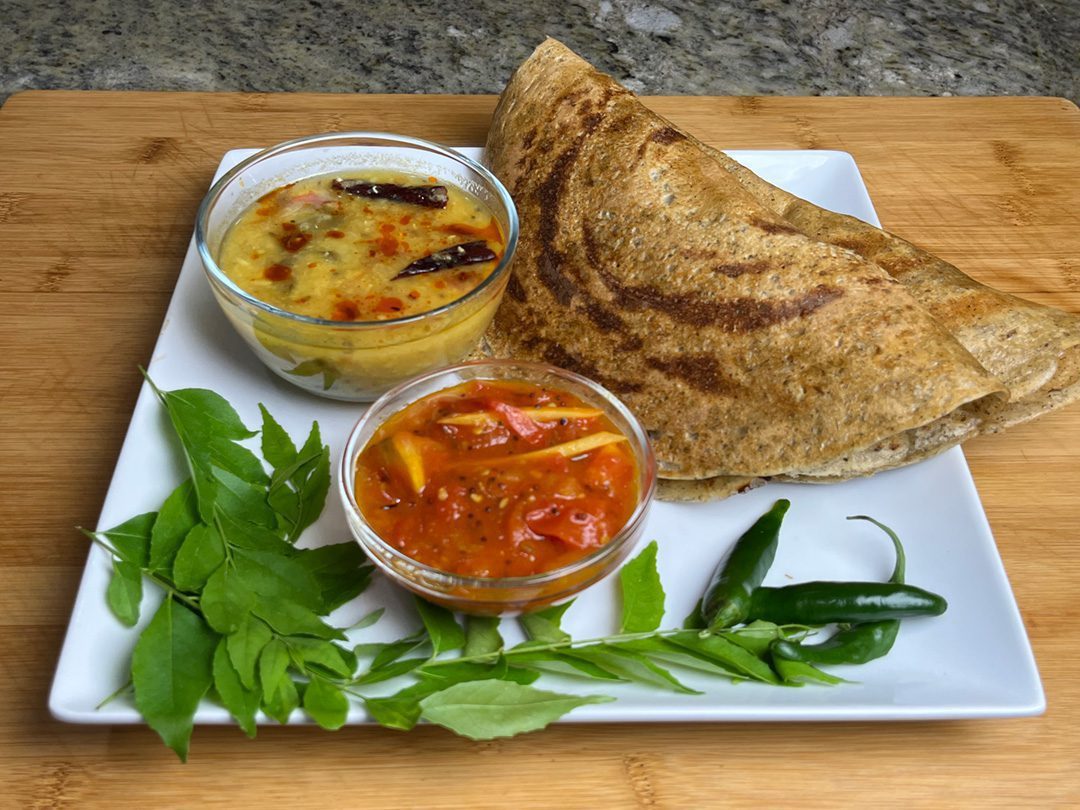
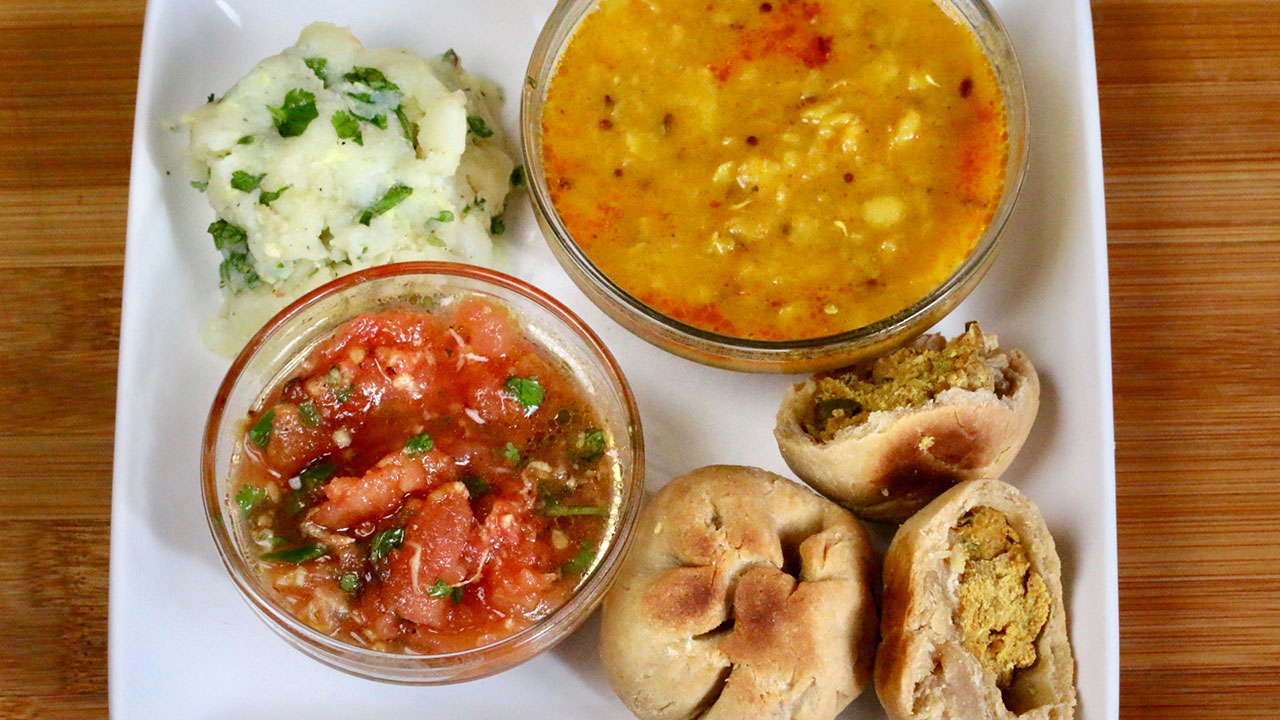
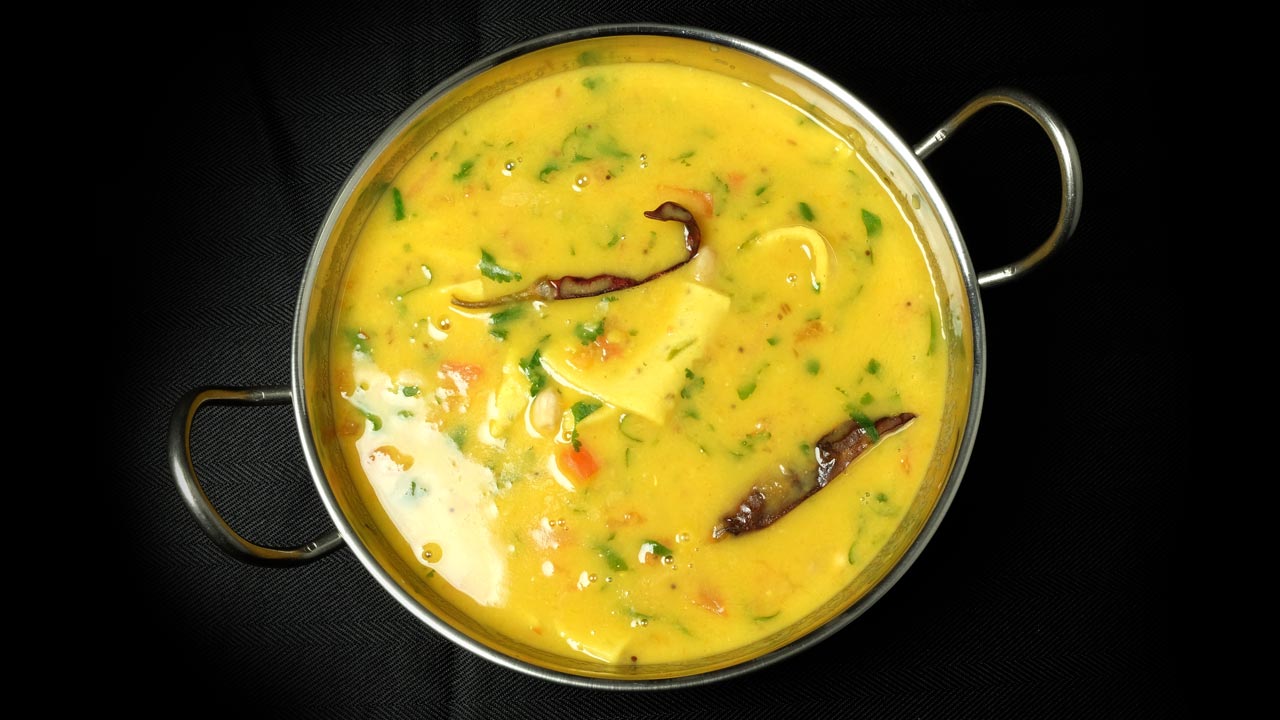
3. Lentil Soup
Lentils are packed with protein and make for a hearty soup. This dish is not only delicious but also provides a good dose of protein, making it one of the best high protein vegetarian meals. Add some carrots, celery, tomatoes, and spinach to your lentil soup for extra nutrients and flavor. Serve it with a slice of whole-grain bread for a complete meal. A delightful dish coming from a daal recipe.
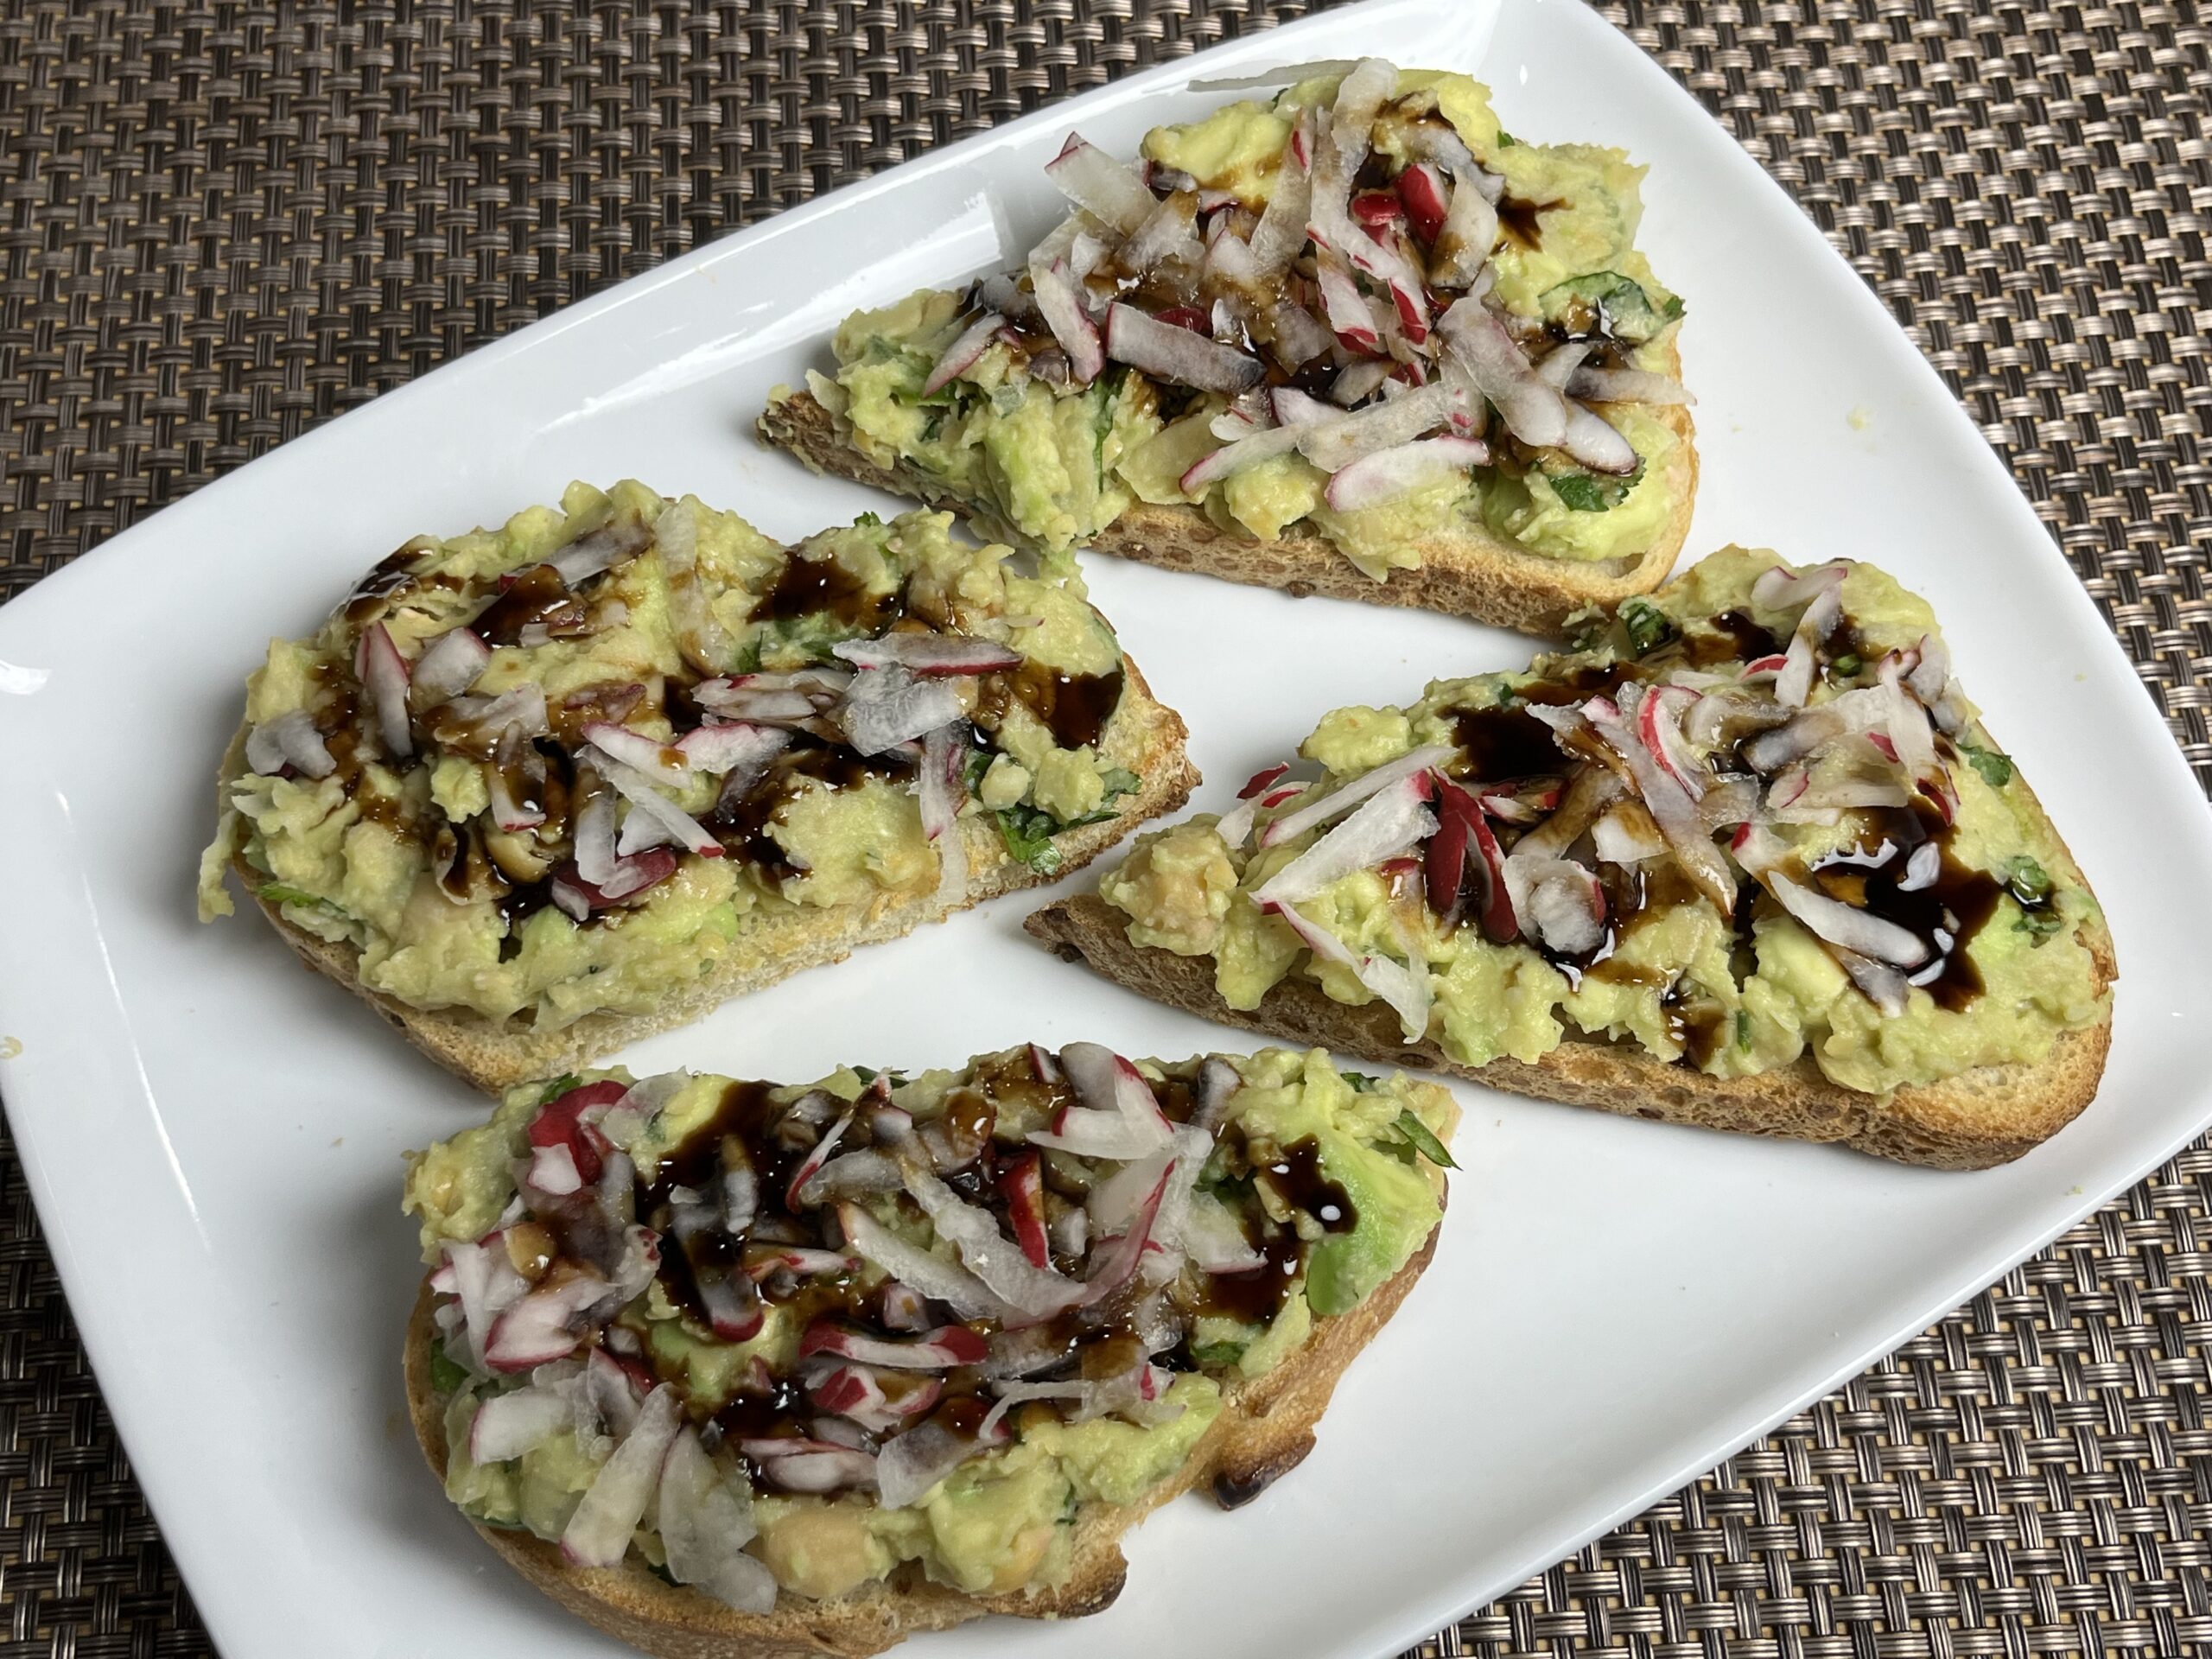
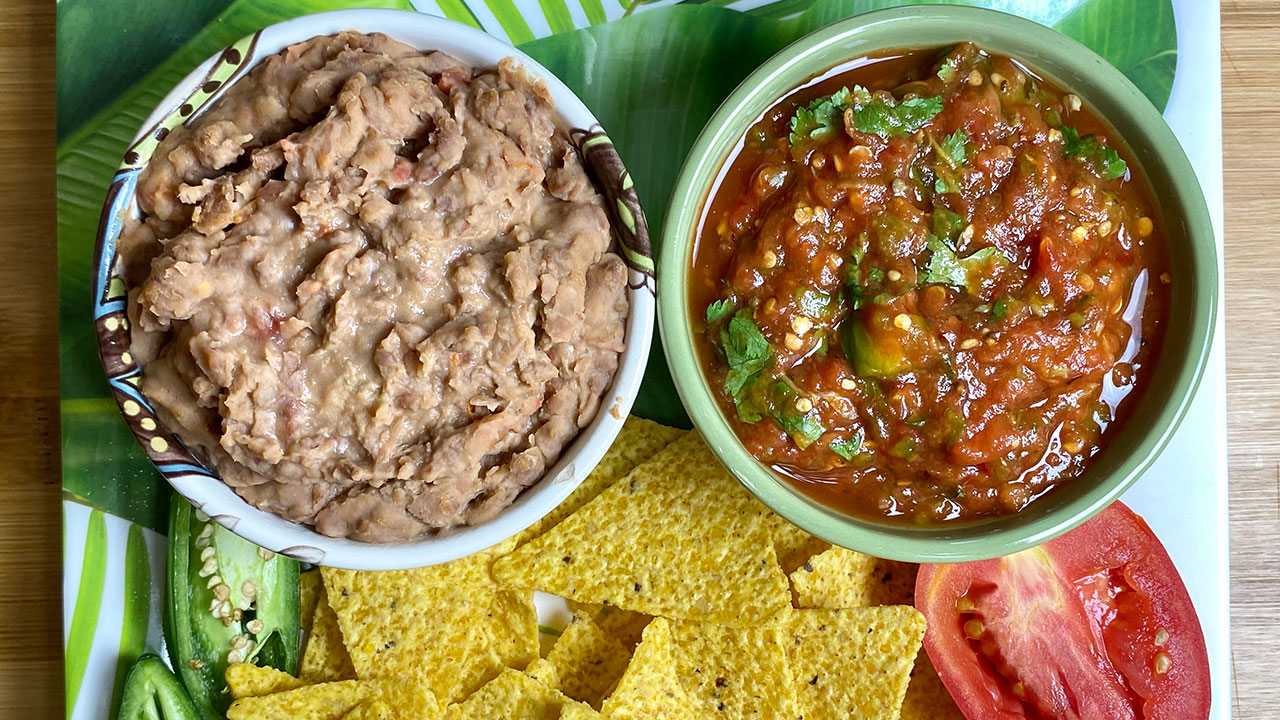
4. Black Bean Tacos
Black beans are an excellent source of protein. Make tacos with black beans, avocado, and fresh salsa for a satisfying and protein-rich meal. These tacos are great as easy high protein vegetarian meals. The creamy avocado complements the spicy black beans, and the fresh salsa adds a burst of freshness and acidity.
5. Chia Seed Pudding
Chia seeds are not only high in protein but also in fiber. Make a chia seed pudding with almond milk and a touch of honey for a sweet yet healthy snack that fits perfectly into the category of high protein vegetarian meals. Top it with fresh berries and nuts for added texture and flavor.
6. Veggie Burger
A homemade veggie burger made with black beans, quinoa, and spices is a delicious and protein-packed meal. It’s an ideal choice for those looking for low calorie high protein vegetarian meals. Serve it on a whole-grain bun with lettuce, tomato, and a dollop of Greek yogurt for a healthy twist on a classic burger.
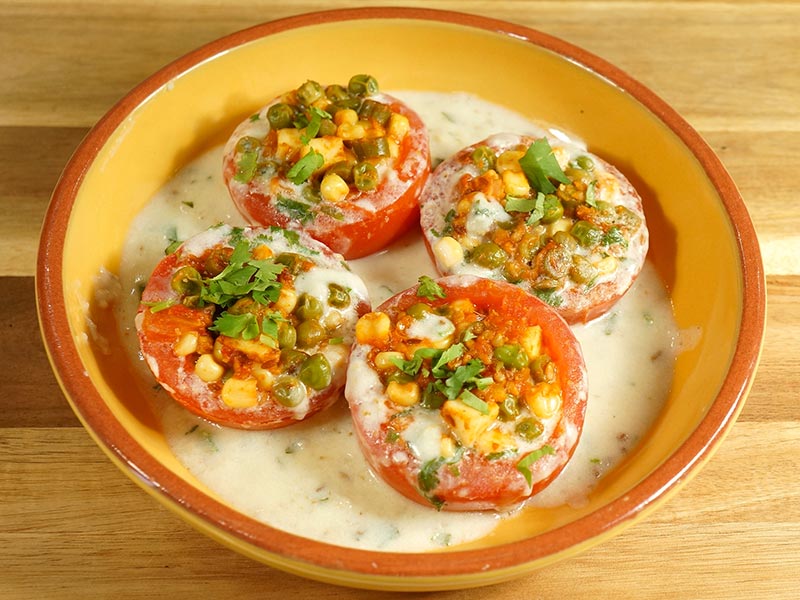
7. Spinach and Feta Stuffed Peppers
Stuffed peppers with spinach, feta cheese, and quinoa are not only high in protein but also full of flavor. This dish is perfect for a wholesome dinner and fits well into the category of high protein vegetarian meals for weight loss. The sweetness of the peppers pairs beautifully with the savory filling, creating a balanced and satisfying meal.
8. Greek Yogurt with Nuts
Greek yogurt is a great source of protein. Add a handful of nuts for an extra protein boost and a satisfying snack. This combination is an excellent example of quick high protein vegetarian meals. The creaminess of the yogurt and the crunchiness of the nuts make for a delightful contrast in textures.
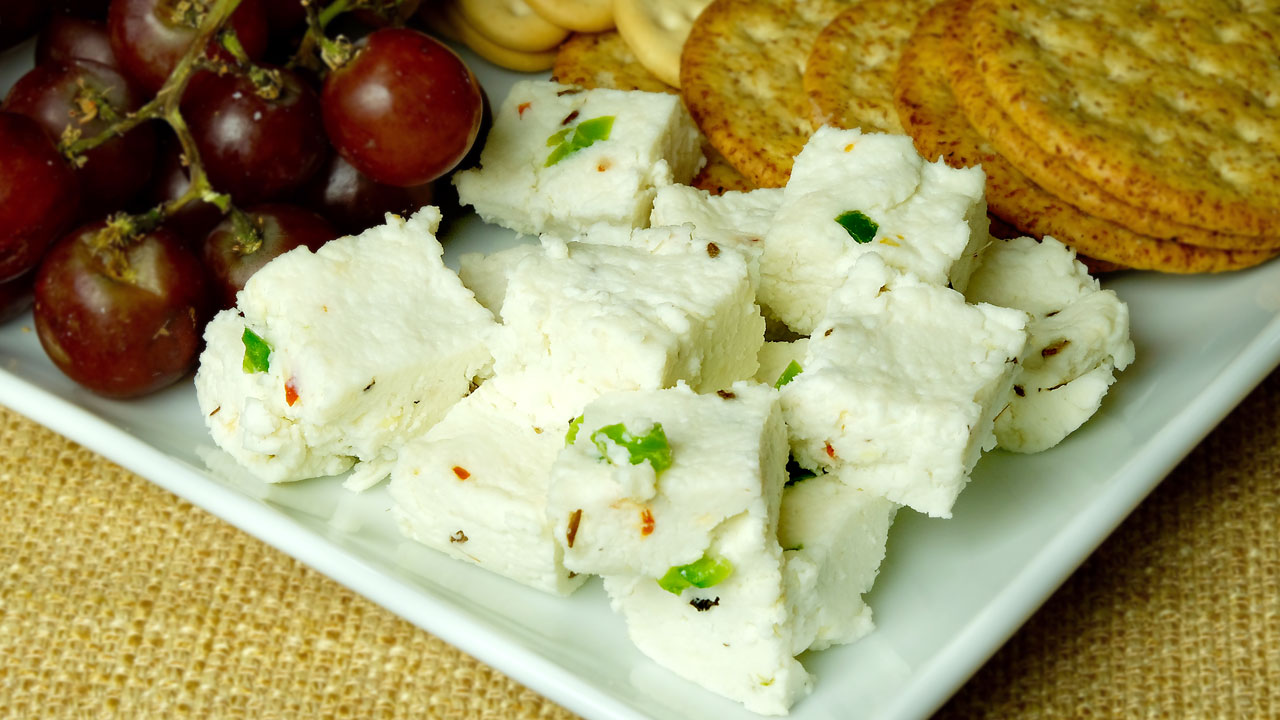
9. Paneer Tikka
Paneer, or Indian cottage cheese, is rich in protein. Marinate it with spices and grill it for a tasty and protein-rich dish that is perfect for lunch or dinner. Serve it with a side of mint chutney and a fresh salad for a complete meal. This dish is a staple in Indian cuisine and is a favorite among vegetarians looking for a high protein option. Its a a delightful dish coming from paneer recipes.
10. Edamame and Brown Rice Bowl
Edamame beans are high in protein and pair well with brown rice for a nutritious meal. Add some veggies and a light dressing for a delicious and healthy bowl. This dish is easy to prepare and makes for a great lunch or dinner option. The combination of edamame and brown rice provides a complete protein, making it a perfect example of high protein vegetarian meals. It is a nice addition to Indian rice recipes.
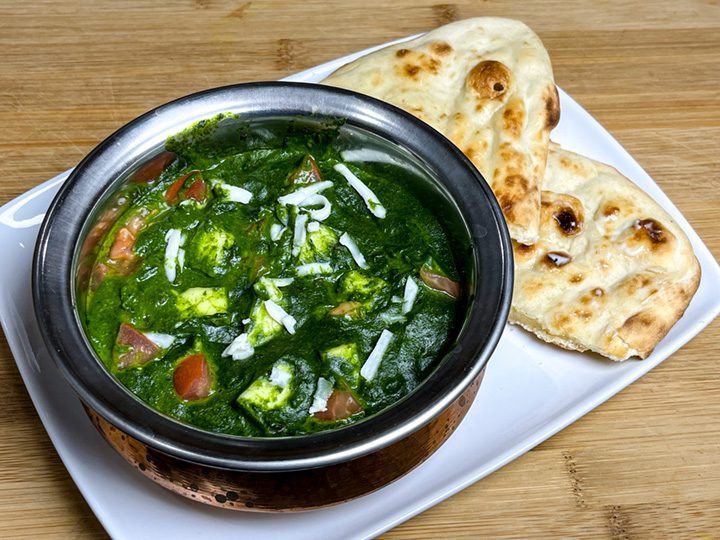
11. Chickpea and Spinach Curry
Chickpeas are a fantastic source of protein. Cook them with spinach and spices for a hearty and flavorful curry. Serve it with brown rice or whole-grain naan for a satisfying meal that fits well into the category of high protein low calorie vegetarian meals.
12. Tempeh Stir-Fry
Tempeh is a fermented soybean product that is high in protein. Stir-fry it with vegetables and your favorite sauce for a quick and nutritious meal. This dish is a great example of quick high protein vegetarian meals and can be customized with your choice of vegetables and seasonings.
13. Almond Butter Smoothie
Blend almond butter with banana, spinach, and almond milk for a protein-packed smoothie. This smoothie is perfect for a quick breakfast or post-workout snack and is an excellent example of high protein vegetarian meals.
14. Mushroom and Lentil Shepherd’s Pie
Make a vegetarian shepherd’s pie with mushrooms and lentils for a hearty and protein-rich meal. Top it with mashed sweet potatoes for a twist on the traditional recipe. This dish is perfect for a comforting dinner and fits well into the category of healthy high protein vegetarian meals.
15. Buckwheat Porridge
Buckwheat is a gluten-free grain that is high in protein. Cook it with almond milk and top it with fresh fruit and nuts for a nutritious breakfast. This porridge is a great way to start your day with a high protein meal.
16. Spicy Peanut Noodles
Make a quick and easy dish with whole-grain noodles, a spicy peanut sauce, and plenty of vegetables. This dish is not only delicious but also provides a good amount of protein, making it one of the best high protein vegetarian meals.
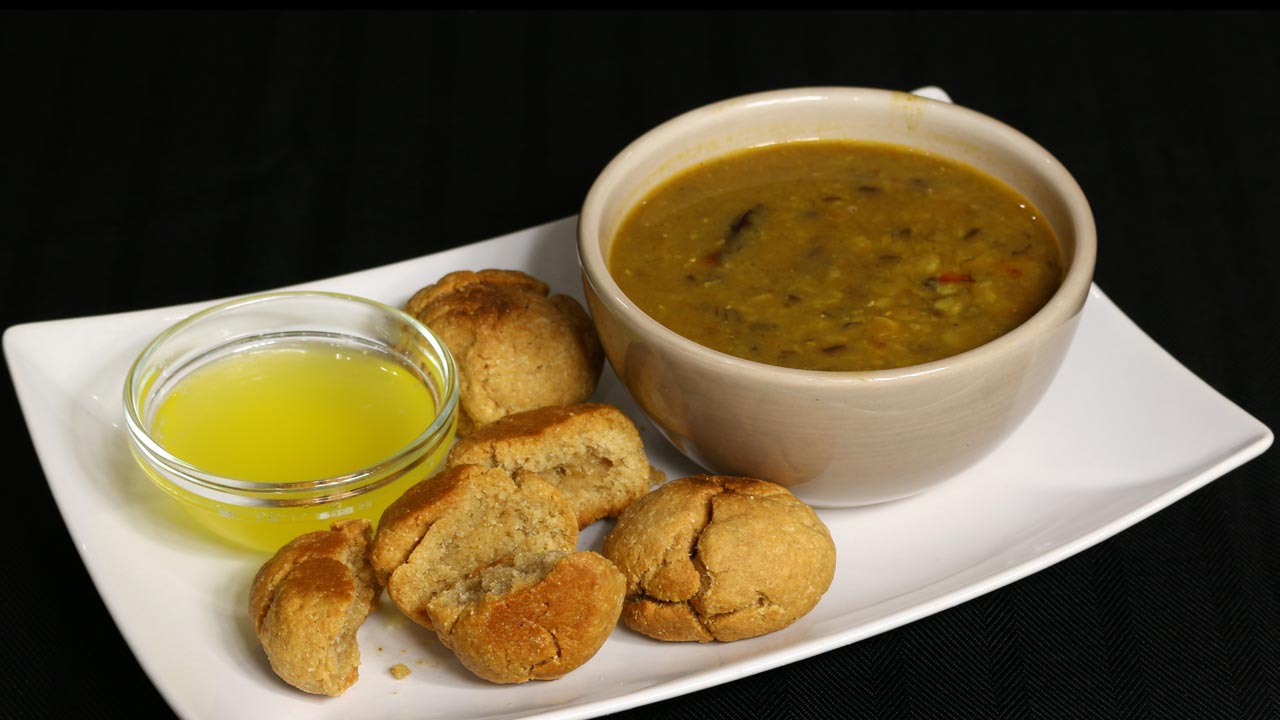
17. Red Kidney Bean Curry
Kidney beans are high in protein and make for a delicious curry. Cook them with tomatoes, and spices for a hearty and satisfying meal. Serve it with brown rice or whole-grain bread for a complete meal.
18. Mixed Bean Salad
Combine a variety of beans with fresh vegetables and a light vinaigrette for a refreshing and protein-rich salad. This dish is easy to prepare and makes for a great lunch or side dish.
19. Cauliflower Rice Stir-Fry
Use cauliflower rice as a low-carb alternative to regular rice. Stir-fry it with tofu and vegetables for a nutritious and protein-packed meal. This dish is perfect for those looking for high protein vegetarian meals that are also low in calories.
20. Roasted Chickpeas
Roast chickpeas with spices for a crunchy and protein-rich snack. This snack is perfect for on-the-go and fits well into the category of easy high protein vegetarian meals.
FAQs
What are high protein vegetarian meals? High protein vegetarian meals include quinoa salad with chickpeas, tofu stir-fry, lentil soup, and black bean tacos.

What are some easy high protein vegetarian meals? 

Some easy high protein vegetarian meals are veggie burgers, Greek yogurt with nuts, and chia seed pudding.

What are low calorie high protein vegetarian meals? 

Low calorie high protein vegetarian meals include spinach and feta stuffed peppers, edamame and brown rice bowl, and quinoa salad.

What are high protein vegetarian meals for weight loss? 

High protein vegetarian meals for weight loss are lentil soup, black bean tacos, and tofu stir-fry.

For more delicious and nutritious high protein vegetarian meals, visit Manjula’s Kitchen and explore a wide range of recipes that fit your dietary needs.

  • Palak Paneer

    Palak Paneer

    Palak Paneer

    Palak Paneer

    Palak Paneer is perhaps the most popular paneer dish in North India and is a favorite in Indian restaurants. Creamy spinach paired with paneer makes for a delicious main course. This recipe has always been one of my favorites, and I can prepare it quickly.
    Although I’ve made this recipe before, I now want to simplify it by using just a few ingredients. Even after so many years of cooking, I’m still learning and striving to keep things simple, healthy, nutritious, and flavorful.
    This dish is made with blanched spinach, which helps retain its vibrant green color. I didn’t know why blanching was used in cooking, but this is all part of the learning process. Palak Paneer pairs perfectly with roti, naan, or paratha.
    4 from 5 votes
    Course Main Course
    Cuisine Indian
    Servings 2 people

    Ingredients
      

    • 5 oz spinach washed and clean, about 6 cups packed spinach
    • 1 cup paneer cubed into bite size, about 4oz of paneer
    • 1 green chili chopped
    • 1 tbsp oil
    • 1/2 tsp cumin seeds – jeera
    • 1/8 tsp asafetida – hing
    • 1 tsp coriander powder – dhania
    • 1/4 tsp turmeric – haldi
    • 1/2 tsp salt adjust to taste
    • 1/2 tsp sugar
    • 1 tbsp whole wheat flour
    • 1/4 cup heavy cream
    • 1/4 cup finely chopped tomato
    • 2 tbsp paneer shredded for garnishing

    Instructions
     

    • First blanch the spinach, this helps to keep the spinach color bright. To blanch the spinach, boil about 6 cups of water in a saucepan, and let the spinach boil for one minute. Drain the water and put the spinach in ice cold water for about two minutes. Drain the water.
    • Blend the spinach, ginger and green chili. Spinach should be creamy.
    • Soak the cubed paneer in about three cups of hot water, for about 5 minutes. This helps to give the paneer a soft texture. Set it aside.
    • While cooking, spinach can splatter, use larger saucepan. Heat the oil in a saucepan, over medium high heat. Test the heat by adding one cumin seed to the oil; if it cracks right away it is ready.
    • Add cumin seed, and asafetida. After cumin seeds crack, add blended spinach and stir. Add coriander, salt, and sugar, stir.
    • After spinach comes to boil lower the heat to low, and let the spinach cook for about 5-6 minutes partially cover the pot, because spinach will splatter. I don’t cover the pan fully because this helps keep the green color of spinach.
    • Mix the flour to 1/2 cup of water and add to the spinach, also add the cream. Mix it well and let it cook for five minutes. If needed add a little more water.
    • Drain the paneer and fold it gently with spinach and let it simmer for about five minutes.
    • Palak paneer is ready, add the tomatoes and turn off the heat. Garnish it with shredded or crumbled paneer.
    Keyword palak paneer
    Tried this recipe?Let us know how it was!

    Palak Paneer is one of the most popular paneer dishes from North India and a favorite at Indian restaurants around the world. This creamy, flavorful dish features tender paneer cubes nestled in a rich spinach sauce, making it a perfect main course for any meal. 

    With its vibrant green color and delicious combination of spinach and paneer, Palak Paneer pairs wonderfully with roti, naan, or paratha. This simplified version of the recipe uses just a few ingredients, allowing the natural flavors of the spinach and paneer to shine while remaining healthy and nutritious.

    Cultural and Traditional Importance 

    Paneer dishes are a staple in North Indian cuisine, and Palak Paneer is undoubtedly one of the most beloved. Traditionally prepared in Indian households and served during special occasions or family gatherings, this dish showcases the versatility of paneer and the use of leafy greens in Indian cooking. 

    Palak Paneer is often served with flatbreads like naan or paratha, and its creamy texture and mildly spiced flavor make it a crowd-pleaser.

    This simplified recipe doesn’t compromise on taste, while offering a more convenient way to prepare Palak Paneer at home. Blanching the spinach helps retain its bright green color, making the dish visually appealing as well as delicious.

    Recipe Variations from Manjula’s Kitchen While Palak Paneer is a classic dish on its own, you can explore other paneer-based recipes and spinach variations from Manjula’s Kitchen:

    Paneer Butter Masala: A rich and creamy tomato-based dish, perfect for those who enjoy a sweeter, milder flavor.

    Aloo Palak (Potato Spinach): A delicious vegetarian dish combining spinach with tender potatoes, offering another way to enjoy spinach in your meals.

    Paneer Saag: A similar dish that incorporates other leafy greens, like mustard greens, along with spinach for a different flavor profile.

    Matar Paneer: A flavorful combination of paneer and green peas cooked in a spiced tomato sauce, offering a wonderful variation for paneer lovers.

    Health Benefits and Dietary Considerations Palak Paneer is not only delicious but also packed with nutrients. Spinach is rich in iron, vitamins A, C, and K, as well as antioxidants that promote overall health. 

    The use of paneer adds a good amount of protein and calcium, making this dish a balanced meal that supports both muscle and bone health. 

    For those looking to make a lighter version of Palak Paneer, you can substitute the heavy cream with a lighter cream or yogurt. The dish is also naturally gluten-free (ensure the flour you use is gluten-free or omit it), making it suitable for those with gluten sensitivities. If you’re vegan, tofu can be used in place of paneer to create a delicious Palak Tofu.

    Serving Suggestions Palak Paneer can be served with a variety of Indian breads, such as roti, naan, or paratha. It also pairs well with rice dishes like Jeera Rice or Plain Basmati Rice for a more complete meal. For added texture and flavor, you can garnish the dish with freshly grated paneer or a drizzle of cream.

    For a more elaborate meal, serve Palak Paneer alongside other classic Indian dishes such as Dal Tadka or Aloo Gobi to create a balanced vegetarian spread.

    Conclusion Palak Paneer is a quintessential North Indian dish that brings together the creamy richness of paneer and the nutritious goodness of spinach. This simplified recipe ensures that you can prepare this dish quickly, without sacrificing flavor or texture. Whether you’re cooking for a family dinner or hosting a special meal, Palak Paneer is sure to be a hit. Try this recipe today and enjoy one of India’s most loved dishes in the comfort of your home.

    Frequently Asked Questions (FAQs)

    How do I keep the spinach color bright in Palak Paneer?

    Blanching the spinach is the key to retaining its vibrant green color. Boil the spinach for about a minute, then immediately transfer it to ice-cold water to stop the cooking process.

    Can I make Palak Paneer vegan?

    Yes, you can substitute the paneer with tofu and use coconut cream or cashew cream in place of dairy cream to make a vegan version of this dish.

    What are some variations of Palak Paneer I can try?

    You can try dishes like Saag Paneer, which uses a combination of leafy greens, or Aloo Palak, which pairs spinach with potatoes for a different take on the classic.

    How do I serve Palak Paneer?

    Palak Paneer pairs wonderfully with Indian breads like naan, roti, or paratha. It can also be served with Jeera Rice or Plain Basmati Rice.

    Can I prepare Palak Paneer in advance?

    Yes, you can prepare the spinach puree and paneer in advance. Store them separately in the refrigerator, and when ready to serve, gently reheat and combine the two for a fresh and delicious meal.

  • Mixed Dal Dosa

    Mixed Dal Dosa

    Mixed Dal Dosa

    Mixed Dal Dosa is a simple and nutritious flatbread that doesn’t require fermentation. This high-protein dosa is made from a blend of various lentils (dal), which are soaked and ground into a smooth paste. A few spices enhance the flavors, and the dosa is cooked on a hot skillet until it’s crispy and golden. These dosas are not only high in protein but also vegan and gluten-free, making them a healthy choice for everyone.
    These protein-rich mixed dal dosas are incredibly versatile. They’re perfect for a healthy breakfast, but they can also be enjoyed at any meal—lunch, dinner, or even as a snack. Serve them with your favorite chutney, a comforting soup, or your choice of vegetable dish to complete the meal.
    4 from 5 votes
    Prep Time 15 minutes
    Cook Time 20 minutes
    Servings 6 Dosa

    Ingredients
      

    • ¼ cup moong dal
    • ¼ cup washed moong dal
    • ¼ cup washed urad dal
    • ¼ cup red lentil
    • 1 green chili chopped optional
    • ¼ piece ginger chopped
    • ½ tsp cumin seeds (jeera)
    • ¼ tsp black pepper 
    • tsp asafetida (hing)
    • ½ tsp salt (adjust to taste)
    • 4 tbsp oil

    Instructions
     

    • In a bowl mix all the dal, wash them changing water 2-3 times. Soak dal in four cups of water for 6-8 hours.
    • Drain the water. Blend the lentils (dal) with green chili and ginger, adding water slowly as needed to make a smooth batter. Note: The less water, the smoother the batter.
    • Mix the salt and cumin seeds into the batter. Add water as needed. The total water added will be about ½ cup, just enough to achieve the consistency of pancake batter.
    • Place a non-stick skillet over medium-high heat. Test by sprinkling a few drops of water on it. The water should sizzle right away.
    • Pour about ½ cup of the batter mixture into the skillet and spread evenly with the back of a spoon. Starting from the center, spiral outward until evenly spread, about seven inches in diameter.
    • When the batter begins to dry, gently spread one teaspoon of oil over it. Wait about 30 seconds, then flip the dosa using a flat spatula.
    • Press the dosa lightly with the spatula all around to ensure even cooking, turning them two to three times. Dosa should be crisp and golden brown on both sides.
    • Repeat for the remaining dosas.

    Notes

    Notes: If you are on a gluten-free diet, be aware that asafetida (hing) in powder form is often not gluten-free. In that case, you may want to avoid using asafetida.
    Serving suggestion
    Serve dosas with any chutney, such as tomato chutney, peanut chutney or cilantro chutney, or chutney of your choice.
    You can also serve them with samber (a south Indian style dal) or your choice of soup.
    For a creative twist, you can use these dosas to make delicious wraps, commonly known as frankies or kathi rolls. Simply wrap some vegetables or salad inside the dosa for a wholesome and satisfying meal on the go. 
    You can even make these dosas in advance, then reheat them over a skillet to restore their crispness.
    For a creative twist, you can use these dosas to make delicious wraps. Make the dosas slightly thicker so they stay soft; these wraps are commonly known as frankies or kathi rolls. Simply wrap some vegetables or salad inside the dosa for a wholesome and satisfying meal on the go.
    Tried this recipe?Let us know how it was!

    Introduction to Mixed Dal Dosa

    Mixed Dal Dosa is a wholesome, protein-rich flatbread that’s not only easy to make but also doesn’t require the traditional fermentation process. Made from a blend of various lentils, this dosa is packed with plant-based protein, making it a great meal option for anyone looking to boost their protein intake. Lentils like moong dal, urad dal, and red lentils are soaked, ground into a smooth batter, and spiced to create a savory and crispy dosa. The best part? This dosa is both vegan and gluten-free, catering to various dietary preferences while still delivering great taste and texture.

    Cultural and Traditional Importance

    Dosas are a staple in South Indian cuisine, traditionally made from fermented rice and lentil batter. However, the Mixed Dal Dosa offers a quicker alternative without the need for fermentation, making it an ideal choice for those who are short on time. Lentils are a common ingredient in Indian cooking, celebrated for their versatility and nutritional value. By using a variety of dals, this dosa provides a range of nutrients, especially plant-based proteins, making it a go-to dish for breakfast, lunch, dinner, or even as a snack.

    The beauty of Mixed Dal Dosa lies in its simplicity and adaptability. It’s a great way to incorporate different types of lentils into your diet, each contributing its unique flavor and health benefits. Traditionally served with chutneys and sambar, this dosa has found a place in modern kitchens due to its quick preparation and nutritious profile.

    Recipe Variations from Manjula’s Kitchen

    While Mixed Dal Dosa is delicious and nutritious on its own, there are several other similar dosa and pancake recipes available on Manjula’s Kitchen that you can explore for variety:

    • Moong Dal Dosa: Another high-protein dosa made primarily from moong dal, offering a lighter alternative.
    • Besan Chilla: A savory pancake made with gram flour (besan), perfect for a quick, protein-packed breakfast.
    • Rava Dosa: A crisp and delicate dosa made with semolina, for those who prefer a thin and crunchy dosa.
    • Oat Dosa: Similar to Mixed Dal Dosa, Instant Oat dosa is an easy recipe that is perfect for busy families.

    Health Benefits and Dietary Considerations

    The Mixed Dal Dosa is packed with nutrients, especially protein, making it a great option for those following a vegetarian or vegan diet. Lentils are an excellent source of protein, fiber, vitamins, and minerals, contributing to overall digestive health and maintaining energy levels throughout the day. By using a variety of dals, you’re also ensuring that you get a broader range of nutrients in every dosa.

    Additionally, this recipe is gluten-free, making it suitable for those with gluten sensitivities or anyone on a gluten-free diet. If you’re strictly gluten-free, it’s important to note that asafetida (hing) often contains gluten, so be sure to use a gluten-free version or skip it altogether.

    Serving Suggestions

    Mixed Dal Dosa can be served with a variety of chutneys to complement its savory flavors. Here are a few chutney options from Manjula’s Kitchen that pair well with the dosa:

    • Tomato Chutney: A tangy and slightly sweet chutney that adds a fresh burst of flavor.
    • Cilantro Chutney: A classic chutney with refreshing cilantro and a hint of spice.
    • Peanut Chutney: A creamy and nutty chutney that pairs wonderfully with the crispy dosa.

    For a complete meal, serve Mixed Dal Dosa with Sambar or a comforting soup. Another creative twist is to use the dosa as a wrap, filling it with vegetables, paneer, or salad to create a delicious and nutritious frankie or kathi roll. The dosas can also be prepared in advance and reheated on a skillet, making them an excellent option for meal prep.

    Conclusion

    Mixed Dal Dosa is a simple yet highly nutritious meal that can be enjoyed at any time of the day. Its high protein content, along with being vegan and gluten-free, makes it a versatile option for a variety of dietary needs. Whether you’re serving it with chutney for breakfast or transforming it into a wrap for lunch, this high protein dosa will quickly become a favorite in your household. Explore the other dosa recipes on Manjula’s Kitchen to discover even more delicious ways to enjoy Indian flatbreads.

    Frequently Asked Questions (FAQs)

    What makes Mixed Dal Dosa high in protein?

    The use of multiple lentils like moong dal, urad dal, and red lentils makes Mixed Dal Dosa rich in plant-based protein, making it an excellent option for those seeking a high-protein meal.

    Can I make the dosa ahead of time?

    Yes, you can make the dosas in advance and reheat them on a skillet to restore their crispness. They also work well as wraps for on-the-go meals.

    What are some serving options for Mixed Dal Dosa?

    Serve Mixed Dal Dosa with chutneys like tomato chutney, cilantro chutney, or peanut chutney. You can also pair it with sambar or use it as a wrap filled with vegetables or paneer.

    Is Mixed Dal Dosa gluten-free?

    Yes, this dosa is naturally gluten-free. However, be cautious with asafetida (hing) as it may contain gluten unless specifically labeled gluten-free.

    Can I adjust the spiciness of the dosa?

    Absolutely! You can adjust the spice level by adding or omitting green chili and black pepper based on your preference.

  • Amritsari Aloo Wadiyan

    Amritsari Aloo Wadiyan

    aloo wadi recipe

    Aloo Wadi Ki Sabji, Amritsari Punjabi Aloo Vadiyan, Vegan Gluten Free

    Amritsari Style Aloo Wadi Ki Sabji has a unique flavor. This is a delightful Punjabi dish using sun-dried lentil dumplings, potatoes and green peas. Aloo Wadi is a spicy, gravy-based dish, perfect for those who enjoy spicy food. Explore this tasty recipe exclusively at Manjula's Kitchen official website.
    This was one of my favorite dishes growing up. Amritsari Wadi wasn't available at the Indian grocery store where I shop, but they had plain Urad Dal Wadi. I like to use ingredients that are easily available. As usual, I searched on Google for the spices used in Amritsari Wadis, and there were so many different versions that none matched what I remembered. I wanted to make a recipe very close to what I remember.
    After trying a few times, I finally called my sister to find out the ingredients used in Amritsari Wadi. She knows some good Indian vegetarian recipes that are very traditional and excellent, and of course, she helped me out. After a few tries, I was happy with the balance of spices in the Aloo Wadi.
    5 from 3 votes
    Course Main Course
    Cuisine Indian
    Servings 4 people

    Ingredients
      

    • 2 cups boiled potatoes peeled and cut into byte size cubes
    • 1 cup green peas frozen green peas
    • 3/4 cup urad dal wadi broken into small pieces
    • 3/4 cup tomato puree
    • 3 tbsp oil
    • 1 tsp cumin seeds (jeera)
    • 1/8 tsp asafetida (hing)
    • 1-1/2 tbsp coriander crushed (dhania)
    • 2 tsp black pepper crushed (kali mirch)
    • 2 dry red chilies (sabut lal mirch) broken in small pieces
    • 1/4 tsp Kashmiri red chili powder, optional
    • 1/4 tsp turmeric (haldi)
    • 1-1/2 tsp salt
    • 1-1/2 cup water

    Instructions
     

    • Heat the pan on medium-low and add 2 tablespoons of oil. Add the urad dal vadi and stir-fry until they are light golden brown, about 2 minute. Remove them and set aside in a bowl.
    • In the same saucepan, add the remaining tablespoon of oil over medium heat. When the oil is moderately hot, add the cumin seeds. When the seeds start to crackle, add the asafetida, stir, and then add the tomato puree, coriander, black pepper, red chili, Kashmiri chili powder, turmeric, and salt. Cook, stirring occasionally, until the spice mix starts releasing oil, about 2 minutes.
    • Add the potatoes, green peas, vadis, and 1 1/2 cups of water. Cover the pan and let it cook for about 10 minutes over medium-low heat. Adjust the water if needed.
    • Vadis are ready, I will serve them with rice.

    Notes

    About Aloo Wadiyan
    Punjabi Aloo Wadiyan is a traditional North Indian dish that features potatoes (aloo) and sun-dried Urad Dal dumplings (wadiyan). It’s a flavorful and hearty vegetarian dish that is popular in Punjabi cuisine. The sun-dried lentil dumplings add a unique texture and taste to the dish.
    If you don’t have urad dal vadiyan, you can use moong dal vadayan.
    Keyword Punjabi Cuisine
    Tried this recipe?Let us know how it was!

    The Unique Flavor of Amritsari Punjabi Aloo Wadiyan

    Amritsari Punjabi Aloo Wadiyan is a delightful and spicy dish from Punjab, known for its unique flavor and the use of sun-dried lentil dumplings (wadiyan). This Aloo Wadi Ki Sabji combines potatoes and green peas with flavorful spices, making it a hearty and satisfying meal. This dish is perfect for those who enjoy a spicy, gravy-based curry, explore more Indian gravy recipes.

    The Essence of Aloo Wadi Ki Sabji

    The essence of Aloo Wadi Ki Sabji lies in its combination of textures and flavors. The sun-dried urad dal dumplings (wadiyan) add a chewy texture and rich taste, while the potatoes and green peas provide a comforting base. The blend of spices creates a flavorful gravy that ties everything together. This dish is one of the finest Indian vegan recipes that is also gluten-free, making it suitable for various dietary preferences.

    Origin and Popularity

    Aloo Wadiyan is a traditional dish in Punjabi cuisine, this special occasions recipe often enjoyed during family gatherings. The use of Amritsari wadiyan adds a unique twist to this dish, with the wadiyan being a specialty of the Amritsar region. The combination of potatoes and lentil dumplings in a spicy gravy makes this dish a favorite among those who appreciate hearty and flavorful vegetarian meals.

    Why You’ll Love This Recipe

    • Unique Flavor: The sun-dried lentil dumplings provide a distinctive taste and texture.
    • Spicy and Flavorful: The blend of spices creates a rich and spicy gravy.
    • Vegan and Gluten-Free: Suitable for various dietary preferences.
    • Comforting and Hearty: Perfect for a satisfying meal, especially when served with rice.

    Variations of Vegetable Dry Recipes

    Exploring Manjula’s Kitchen reveals a treasure trove of other delicious vegetable dry recipes that you might enjoy. Here are some related dishes that you might find interesting:

    1. Aloo Gobi: A classic Indian dish made with potatoes and cauliflower cooked with spices.
    2. Bhindi Masala: A flavorful dish made with okra and a blend of spices.
    3. Baingan Bharta: A smoky and flavorful dish made with roasted eggplant and spices.
    4. Gajar Matar: A simple and healthy dish made with carrots and green peas.
    5. Palak Paneer: A popular dish made with spinach and paneer in a creamy sauce.

    Serving Suggestions

    Aloo wadi ki sabji can be enjoyed in various ways:

    • With Rice: Serve with steamed plain basmati rice or jeera rice for a complete meal.
    • With Indian Breads: Pair with roti, naan, or paratha for a satisfying meal.
    • As a Side Dish: Enjoy as a side with other Indian curries and dishes.
    • For Special Occasions: Perfect for festive meals and family gatherings.

    Tips and Tricks

    To perfect your aloo wadi ki sabji recipe, consider these helpful tips:

    • Use Fresh Wadiyan: Fresh sun-dried lentil dumplings provide the best flavor and texture.
    • Balance the Spices: Adjust the spice levels to suit your taste preferences.
    • Cook Gently: Simmer the dish on low heat to allow the flavors to meld together.
    • Customize: Feel free to add other vegetables like carrots or bell peppers for added nutrition and flavor.

    FAQs Frequently Asked Questions

    Can I Use Moong Dal Wadiyan Instead of Urad Dal Wadiyan?

    Yes, you can use moong dal wadiyan as a substitute if urad dal wadiyan are not available.

    How Long Does Aloo Wadi Ki Sabji Last?

    Store any leftovers in an airtight container in the refrigerator for up to 2 days. Reheat gently before serving.

    Is Aloo Wadi Ki Sabji Vegan?

    Yes, this recipe is naturally vegan and gluten-free.

    What Can I Serve With Aloo Wadi Ki Sabji?

    This dish pairs well with steamed basmati rice, jeera rice, roti, naan, or paratha.

    Can I Make This Dish Less Spicy?

    Yes, adjust the amount of green chilies and red chili powder to make the dish milder.

  • Avocado Chickpea Toast

    Avocado Chickpea Toast

    A slice of toast topped with mashed avocado and chickpeas, garnished with herbs

    Avocado Chickpea Toast

    Avocado chickpea toast, a flavorful and healthy option for toast. Easy to make for a perfect lunch, it's packed with healthy fats from avocado and protein from chickpeas. Simple and quick recipes to follow.
    I was inspired by this toast the other day when I had avocado and corn dip with tortilla chips with a friend.
    Avocado won't retain its green color for more than an hour, but it will still taste good for a day. To prevent losing its green color, I'll prepare everything in advance, mixing mashed chickpeas with other ingredients and mashing the avocado with the chickpea mix when ready to serve.
    This easy avocado and chickpea spread can be enjoyed also as a sandwich or served as a dip with corn tortilla crackers or veggies!
    The avocado and chickpea toast are my all-time favorites. Chickpeas and avocado together create the most amazing toast. It's easy, healthy, fresh, and delicious! Even my grandkids like it, and they're ready to help me make it.
    5 from 1 vote
    Course snacks
    Cuisine Indian
    Servings 4 people

    Ingredients
      

    Ingredients:

    • 4 slices of bread to your choice (French bread preferred)
    • 1 1/2 cups boiled chickpeas
    • 1 large or 2 small avocados
    • 1 tbsp finely sliced green chilies
    • 1 1/2 tsp salt
    • 2 tbsp lime juice
    • 2 tbsp finely chopped cilantro
    • 2 tbsp balsamic glaze or balsamic vinegar
    • 1/4 cup shredded radish

    Instructions
     

    Instructions:

    • In a bowl mash the chickpeas with fork or potato masher, until all the chickpeas are broken. Add the lemon juice, salt, green chilies, and cilantro. Mash the avocado, mix it well, add more salt, lemon juice and cilantro to adjust your taste.
    • Toast the bread, spread the chickpea avocado spread over bread garnish with drizzling balsamic glaze and radish. Serve, and enjoy!

    Notes

    Serving Suggestions:
    • I love this avocado, and chickpea spread because you can serve it in many ways. I like to add shredded radish on top for a nice color and crunch.
    • You can also serve this avocado and chickpea sandwich. Making a sandwich, you may add spinach leaves and thinly sliced tomatoes.
    • You can also use it as a dip; that’s how I first tasted it. Instead of chickpeas, you can add white corn.
    • If you like the recipe, share the video with your friends. If you haven’t subscribed to my YouTube channel, please do so. Also, click the bell icon, and very importantly, leave a comment and suggestions.
    Thank you!
    Tried this recipe?Let us know how it was!

    Explore  Delectable Avocado Chickpea Toast

    Savor the delightful fusion of flavors and nutrition with avocado chickpea toast—a culinary masterpiece that tantalizes the taste buds and nourishes the body. This nutritious option is a versatile treat suitable for any meal occasion, be it a quick lunch, a hearty breakfast, or a satisfying snack. By combining the creamy richness of avocado with the protein-packed goodness of chickpeas, this toast emerges as a nutrient powerhouse that fuels you with energy throughout the day.

    Unveiling the Health Benefits

    Heart-Healthy Monounsaturated Fats

    By incorporating avocado into your diet, you not only indulge in its sumptuous flavor but also prioritize your cardiovascular health. Unlike other toasts such as Veggie Cheese Toast or if you are going for sweeter variants of toasts like Shahi Toast (Eggless Bread Pudding), Avocado chickpea toast is a rich source of mono unsaturated fats.

    Plant-Based Protein from Chickpeas

    Meanwhile, chickpeas offer a robust source of plant-based protein, essential for muscle growth and repair. This protein punch not only satisfies hunger but also supports overall health and vitality. By harnessing the power of chickpeas, avocado chickpea toast emerges as a satiating and nourishing meal option.

    Fiber-Rich Goodness

    Both avocado and chickpeas are rich in dietary fiber, promoting better digestion, regulating blood sugar levels, and supporting gut health. The fiber content of this toast contributes to a feeling of fullness and aids in maintaining a healthy weight. By incorporating fiber-rich ingredients into your diet, you foster optimal digestive function and overall well-being.

    Essential Vitamins, Minerals, and Antioxidants

    Moreover, avocados and chickpeas boast an array of essential vitamins, minerals, and antioxidants, offering protection against cell damage and chronic diseases. These nutrient powerhouses contribute to overall health and vitality, ensuring that every bite of avocado chickpea toast nourishes your body from within.

    Variations to Avocado Chickpea Toast

    Avocado Chickpea Sandwich

    Transform the avocado chickpea spread into a delectable sandwich filling by layering it between slices of bread. Enhance the flavor profile by adding spinach leaves, tomatoes, or your preferred sandwich toppings. This variation offers a convenient and satisfying meal option for on-the-go enjoyment. 

    Avocado Chickpea Dip

    Blend the avocado chickpea spread until smooth to create a creamy dip, perfect for pairing with vegetable sticks, pita chips, or crackers. This versatile dip option adds a burst of flavor and nutrition to your snacking experience, making it a crowd-pleasing appetizer for any occasion.

    Customize with Different Toppings

    Experiment with a variety of toppings to create your unique avocado chickpea toast masterpiece. From roasted vegetables and olives to feta cheese and chili flakes, the possibilities are endless. Customize your toast according to your taste preferences and culinary creativity, elevating your dining experience with every bite. You can also incorporate avocado in form of paratha like Avocado Paratha

    Frequently Asked Questions:

    What is Avocado Chickpea Toast?

    Avocado Chickpea Toast is a delicious and nutritious dish consisting of mashed avocado and seasoned chickpeas spread on top of toasted bread.  

    What type of bread works best for Avocado Chickpea Toast?

    You can use any type of bread for Avocado Chickpea Toast depending on your preference. Popular choices include whole wheat bread, sourdough, multigrain, or gluten-free bread for those with dietary restrictions.

    Can I customize the toppings for Avocado Chickpea Toast?

    Absolutely! Avocado Chickpea Toast is highly customizable. You can add toppings like sliced tomatoes, red pepper flakes, crumbled feta cheese, sliced radishes, or a drizzle of hot sauce to suit your taste preferences.

    Is Avocado Chickpea Toast a healthy option?

    Yes, Avocado Chickpea Toast is a nutritious choice. Avocado provides healthy fats, while chickpeas offer plant-based protein and fiber. Additionally, whole grain bread adds complex carbohydrates and additional fiber to the dish.

    Is Avocado Chickpea Toast suitable for vegans?

    Yes, Avocado Chickpea Toast can easily be made vegan-friendly by choosing a vegan bread option and ensuring any additional toppings are also vegan.

    Can I make Avocado Chickpea Toast ahead of time?

    While it’s best to assemble Avocado Chickpea Toast just before serving to prevent the bread from becoming soggy, you can prepare the avocado mash and seasoned chickpeas in advance and store them separately in airtight containers in the refrigerator. Then, simply toast the bread and assemble when ready to eat. Its a great alternative to Veggie Cheese Toast

    How can I add more flavor to Avocado Chickpea Toast?

    Experiment with different seasonings and toppings to enhance the flavor of Avocado Chickpea Toast. Consider adding ingredients like lemon juice, fresh herbs, or a sprinkle of nutritional yeast for extra taste.

    Is Avocado Chickpea Toast suitable for people with gluten intolerance?

    Avocado Chickpea Toast can be made gluten-free by using gluten-free bread. Ensure all other ingredients and toppings are also gluten-free to accommodate individuals with gluten intolerance or celiac disease.

    Can I serve Avocado Chickpea Toast as a meal or a snack?

    Avocado Chickpea Toast can be enjoyed as a nutritious breakfast, a satisfying lunch, or a light dinner. It also makes a delicious and filling snack any time of day. You can serve it as a meal before Chocolate Ganache Toast

  • Mushroom with peas

    Mushroom with peas


    Mushroom with peas

    Mushroom with peas is a great side dish consisting of mushrooms and peas in a spiced tomato curry with a touch of fenugreek leaves. It is a nice appetizer dish to start with for any occasion.
    4.50 from 2 votes
    Prep Time 10 minutes
    Cook Time 20 minutes
    Total Time 30 minutes
    Course Main Course
    Cuisine Indian
    Servings 2 people

    Ingredients
      

    • 2 cups mushrooms sliced
    • 1 cup green peas, I am using frozen green peas
    • 1 cup diced tomatoes
    • 1 tsp shredded ginger
    • 2 tbsp fenugreek chooped leaves
    • 2 tbsp oil
    • 1 tsp cuminseeds jeera
    • 1/2 tsp turmeric haldi
    • 2 tsp coriander powder dhania
    • 1 tsp red pepper
    • 3/4 tsp salt
    • 1/2 tsp lemon juice
    • 1 green chili finely chopped

    Instructions
     

    • Heat the oil in a saucepan on medium high heat. Test the heat by adding one cumin seed to the oil. If the cumin seed cracks right away, the oil is ready. Add the cumin seeds. As cumin seeds crack add turmeric. Stir-fry for a few seconds.
    • Add tomatoes, ginger, salt, coriander, and chili powder. Cook until the tomatoes are soft and reduce to half.
    • Add mushrooms, and peas. After coming to a boil reduce the heat to medium.
    • Add fenugreek leaves after mushrooms have cooked half the way about 4 minutes. Cook until mushrooms and peas are tender. Close the heat.
    • Add lemon juice and green chili if you like. Serve hot.

    Notes

    Notes:
    Dicing the tomatoes will give a different texture to the curry then tomato puree.
    Fenugreek leaves can be replaced with chopped cilantro (hara dhaniya).
    To add heat to this dish, garnish with finely chopped green chilies.
    Tried this recipe?Let us know how it was!

  • Vegetable Cutlets

    Vegetable Cutlets

    Vegetable Cutlets

    Vegetable Cutlets- Mixed Vegetable Cutlets

    Vegetable cutlets are great blend of vegetables and spices. These are great as an appetizer, afternoon snack with tea, or as a side dish with dinner.
    4.50 from 2 votes
    Prep Time 20 minutes
    Cook Time 20 minutes
    Total Time 40 minutes
    Course Appetizer
    Cuisine Indian
    Servings 4 people

    Ingredients
      

    • 2 medium potatoes boiled peeled and mashed
    • 1 cup chopped mixed vegetables green peas, carrots, green beans, corn
    • 2 tbsp chopped cilantro hara dhania
    • 2 finely chopped green chilies
    • 1 tsp chopped ginger
    • 1 tsp salt
    • 1 tsp mango powder amchoor
    • 3 tbsp all-purpose flour plain flour. maida
    • 1 cup bread crumbs

    oil to fry

    Instructions
     

    • Steam the chopped mixed vegetables. Squeeze the vegetables to take the excess water out and Pat dry.
    • Mix all the ingredients to mashed potatoes, mixed vegetables, cilantro, green chilies, ginger, salt, and mango powder.
    • Add 4 tablespoons of water to the All Purpose flour to make a batter and keep aside.
    • With oiled hands, divide the mixture into 10 equal parts. Shape into flat round patties about 1/2 inch thick.
    • Dip each patty in the flour batter and roll the patty in breadcrumbs and set aside.
    • Heat the oil on medium high heat in a frying pan. Frying pan should have at least 1 inch of oil. To check if the oil is ready, put one drop of batter in the oil, the batter should come up right away.
    • Fry a few cutlets at a time until they are golden-brown on both sides. Repeat this until all the cutlets are done. Serve hot.

    Notes

    Tips:
    If the oil is not hot enough, the patties will break.
    If the vegetable/potato mixture looks wet, you can add some breadcrumbs.
    You can always change the shape of the cutlets to your desired shape.
    Make them day before and heat them in oven at 350 degree F before serving, or heat them over skillet.
    Serving suggestions:
    Vegetable cutlets are best when dipped with Cilantro chutney, or tamarind chutney.
    Vegetable cutlets also make great veggie burgers, adding cheese lettuce, tomatoes, and chutney.
    Tried this recipe?Let us know how it was!

    Recipe for Vegetable Cutlets – Manjula’s Kitchen

    Experience the culinary journey of crafting these delectable vegetable cutlets with our comprehensive recipe. This versatile recipe allows you to showcase a fusion of flavors and textures, making it an excellent choice for anyone seeking a delightful snack or appetizer.

    Start by carefully selecting a combination of vibrant vegetables like green peas, carrots, green beans, and corn. Steam these vegetables to perfection, and then take a moment to remove any excess water, ensuring your cutlets have the perfect consistency. The meticulous process of patting the vegetables dry sets the stage for a flawless mixture that seamlessly blends with the other ingredients.

    The vegetarian cutlet recipe’s essence lies in the harmonious combination of steamed vegetables, mashed potatoes, cilantro, green chilies, ginger, salt, and a touch of mango powder. This blend of flavors creates a filling that will delight your taste buds with each bite of the cutlet.

    To bind the ingredients, make a simple batter using All-Purpose flour and water. This addition not only acts as a cohesive element but also adds a pleasant crispiness to the cutlets when fried in hot oil.

    Divide the mixture into 10 equal portions, then shape them into flat, round patties about 1/2 inch thick using oiled hands. Increase the crispiness by dipping each vegetable cutlet into the flour batter before generously coating them with breadcrumbs, resulting in a crunchy exterior that complements the tender, flavorful interior.

    Heat oil in a frying pan over medium-high heat to a depth of at least 1 inch. Test the oil’s readiness by dropping a bit of batter – it should sizzle and rise immediately. Fry the cutlets in batches until they achieve a beautiful golden-brown color on both sides. This frying technique seals in the flavors, producing vegetarian cutlets that are not only visually appealing but also incredibly delicious.

    Whether served as an appetizer at gatherings or as a quick snack, these vegetable cutlets from our recipe are sure to please a crowd. Their harmonious blend of vegetables, spices, and textures showcases the versatility of vegetarian cuisine, making them a delightful addition to your culinary repertoire.

    Notes: 

    In crafting the perfect veg cutlet with this veg cutlet recipe, attention to detail is crucial. Ensure that the oil is adequately heated, as insufficient heat may cause the patties to break during frying. To counter any excess moisture in the vegetable/potato mixture, consider incorporating additional breadcrumbs, enhancing both texture and absorbency.

    Flexibility is a key feature of this vegetable cutlet recipe. You have the freedom to mold the cutlets into your preferred shape, allowing for a personalized touch to these vegetarian cutlets.

    For added convenience, these veg cutlets can be prepared a day in advance. Simply heat them in the oven at 350 degrees Fahrenheit before serving, or warm them on a skillet for a quick and satisfying meal.

    When it comes to serving, elevate the experience by pairing these vegetable cutlets with delightful chutneys. Cilantro chutney or tamarind chutney are excellent choices, enhancing the flavors of the veg cutlets. For a heartier option, transform them into veggie burgers by adding cheese, lettuce, tomatoes, and a dollop of chutney. This versatile veg cutlet recipe provides endless possibilities, making it an ideal choice for those seeking a flavorful and customizable vegetarian treat.

    You might also like: Chakli, Rava Uttapam, Matar Chaat, Masala Mathri

  • Mexican Refried Beans and Salsa

    Mexican Refried Beans and Salsa

    A plate of Mexican Refried Beans and Salsa served with tortilla chips and fresh vegetables

    Mexican Refried Beans and Salsa

    My ultimate favorite cuisine is of course Indian. But I must say that Mexican and Italian cuisines are close seconds! Overall, I enjoy trying new cuisines with a variety of flavors. After coming to the United States, Mexican cuisine was the first new cuisine I tried. As you already know, I have a story behind every dish.
    It was many years ago and we had just come to the United States. Some good friends of ours decided to take us to a small mom and pop Mexican restaurant. They were sure we would enjoy the food. I was a little hesitant and when the server came to take our order, I immediately began to tell her all of my limitations for food, such as no onions, garlic, and of course vegetarian. She smiled at me and proudly let me know she was the owner of the restaurant. She reassured me that I had come to the right restaurant and advised that all the food at her restaurant was made fresh that very day. She personally brought out our food which included refried beans, soft tortillas, salsa, enchiladas, and salad. I tried the food and immediately fell in love. Mexican cuisine had become another favorite cuisine, and this restaurant became our go-to place for dinner. Both dishes are also vegan and gluten free.
    I typically keep beans and salsa in my refrigerator or freezer. Both items freeze well. Also, you can come up with so many dishes using them. These are some of my favorite dishes to serve using refried beans and salsa: beans and corn chips, tostadas, burritos, and enchiladas. I hope you will enjoy these dishes!
    This recipe will serve 4.
    No ratings yet

    Ingredients
      

    Refried Beans

    • 1 cup pinto beans
    • 3 Tbsp oil
    • ½ cup tomatoes finely chopped
    • 1 tsp ginger shredded
    • 1 tsp salt
    • 2 cup of water

    Salsa

    • 5 Roma tomatoes
    • 3 Jalapeno pepper
    • 6 red whole red chili
    • 1 tsp salt
    • ¼ cup cilantro finely chopped

    Instructions
     

    How to prepare Beans

    • soak the beans for at least 6 hours in six cups of water. Drain the water boiled the beans in 3 cups of water instant pot or pressure cooker for 40 minutes. Drain most of the water and save, this will be used slowly as needed.
    • In a saucepan moderately heat the oil over medium-high heat. Add beans keep steering and keep mashing the beans. Cook for about 5 minutes. Add tomatoes, ginger and salt keep mashing, and cook for another five minutes. Add water we have saved from beans slowly as needed. As beans cool off will become thick. I used most of the water, we saved from beans. Beans should be the inconsistency of thick batter.

    How to prepare Salsa

    • dry roast the red chilies over medium heat, till they are darker in color. Remove from the pan and set aside.
    • Preheat the oven at 350-degree F. Half the tomatoes and jalapeno peppers long way. Spread them over the baking sheet, Put the tomatoes and jalapeno face down, and bake for 10 minutes.
    • Take out from the oven and remove the skin from tomatoes and jalapenos.
    • First in a food processor crush red chilies, then add tomatoes, jalapeno, and salt roughly blend them together, take it out in a bowl and add cilantro. Salsa is ready and keeps aside.
    • Beans and salsa make a good side dish for any Mexican cuisine.
    • Enjoy!
    Tried this recipe?Let us know how it was!
  • Vegetable Cheela Rolls

    Vegetable Cheela Rolls

    Vegetable Cheela Rolls recipe by Manjula

    Vegetable Cheela Rolls

    Vegetable Cheela Rolls is a healthy and delicious any-time meal. Cheela Rolls is a treat for people who are vegan and gluten free. Cheela is like a besan dosa, and can be used as a wrap and this cheela wrap with vegetables makes a wholesome meal. Cheela Rolls can be used as a snack and also for good a lunch box meal.
    4.41 from 5 votes
    Prep Time 10 minutes
    Cook Time 20 minutes
    Total Time 30 minutes
    Course Appetizer, Snack
    Cuisine Indian
    Servings 2 people

    Ingredients
      

    For Cheela

    • 1 cup besan Gram flour
    • 2 Tbsp rice flour
    • 1 tsp salt
    • 1/2 tsp cumin seeds jeera
    • 3/4 cup water to make batter
    • 4 tsp oil

    For Filling

    • 3 cup cabbage thinly sliced
    • 1/2 cup carrots shredded
    • 1/2 cup bell pepper thinly sliced
    • 2 tsp oil Canola or vegetable oil
    • 1/2 tsp cumin seeds jeera
    • 1/2 tsp mustard seeds rai
    • 2 tsp coriander powder dhania
    • 1/4 tsp chili powder
    • 1/2 tsp salt
    • 1/2 tsp sugar
    • 1 tsp lemon juice

    Instructions
     

    • Mix all the dry ingredients together, besan, rice flour, cumin seeds, and salt. Add the water slowly to make a smooth batter, consistency of Dosa batter. Set aside.
    • To make the filling: Heat the oil in frying pan over medium high heat. Oil should be moderately hot, add cumin seeds and mustard seeds, as the seeds crack. Add cabbage, carrots, and bell pepper. Stir-fry for about one minutes add all the other ingredients, coriander powder, chili powder, salt, sugar and lemon juice. Stir- fry for about three to four minutes, vegetables should be still crisp. Turn off the heat.
    • To make the Cheele: Use a heavy skillet and place on medium-high heat. Test by sprinkling a few drops of water on it. Water should sizzle right away.
    • Pour about 1/4 cup of the batter into the skillet and spread evenly with a back of spoon. Starting from the center, spiral the batter outward evenly to form a circle.
    • When batter starts to dry, gently spread one teaspoon of oil over it. Wait about 30 seconds; flip the cheela using a flat spatula.
    • Press the cheela lightly all around with the spatula to make cheela cook evenly. Turn the cheela and in the center of the cheele put about ½ cup of stir-fry diagonally and roll it.
    • Vegetable Cheela Roll is ready to serve. I like to serve this with Mango Pickle or Cilantro Chutney.
    • Enjoy!

    Notes

    In the ingredients, we need about 4 cups total of sliced vegetable (this includes the cabbage, bell pepper, and carrots)
    Suggestions
    Use or preferred vegetables and also works good with any leftover vegetables.
    Tried this recipe?Let us know how it was!

    A Comprehensive Guide to Besan Cheela Recipe with Vegetables

    Welcome to Manjula’s Kitchen, your ultimate destination for authentic Indian recipes and culinary inspiration. Today, we embark on a flavorful journey to explore the delightful world of Vegetable Cheela Rolls, a versatile and nutritious dish that is perfect for any meal of the day. Made with besan (gram flour) and a colorful assortment of vegetables, these cheelas are not only delicious but also packed with vitamins, minerals, and fibre. 

    Join us as we unravel the secrets to creating the perfect Besan Cheela Recipe with Vegetables, along with tips, variations, benefits, and answers to frequently asked questions. Vegetable cheela is a delectable gluten-free and vegan snack, perfect for appetizers or as a bread alternative, offering a flavorful option for those seeking tasty and wholesome options.

    Preparing the Batter for Vegetable Cheela 

    • Begin by preparing the batter for the besan Vegetable Cheela, the foundation of this delectable dish. In a mixing bowl, combine besan (gram flour) with water to create a smooth and lump-free batter. Add finely chopped vegetables such as carrots, bell peppers, spinach, and green chilies to the batter, along with spices like turmeric powder, cumin powder, and salt. Mix well to ensure that the vegetables are evenly distributed throughout the batter, imparting their vibrant colors and flavors.

    Cooking the Vegetable Cheela 

    • Once the batter is ready, it’s time to cook the Vegetable Cheela to perfection. Heat a non-stick skillet or tawa over medium heat and lightly grease it with oil or ghee. Pour a ladleful of the batter onto the skillet and spread it evenly in a circular motion to form a thin layer. Cook the cheela for a few minutes until the edges start to crisp up and bubbles appear on the surface. Flip the cheela using a spatula and cook the other side until golden brown and crisp. Repeat the process with the remaining batter, adjusting the heat as needed to ensure even cooking.

    Assembling the Vegetable Cheela Rolls 

    • Once all the cheelas are cooked, it’s time to assemble the besan Vegetable Cheela Rolls, adding an extra layer of flavor and texture. Place a cooked cheela on a clean surface and spread a generous layer of mint chutney or yogurt sauce over it. Add a filling of thinly sliced cucumber, tomatoes and fresh coriander leaves on one side of the cheela. Roll the cheela tightly into a cylindrical shape, securing the filling inside. Repeat the process with the remaining cheelas to create a batch of delicious besan Vegetable Cheela Rolls.
    • Tips for Perfect Vegetable Cheela Rolls Every Time 

    • Use a non-stick skillet or tawa to cook the cheelas to prevent sticking and ensure easy flipping.
    • Add a pinch of baking soda to the batter to make the cheelas light and fluffy.
    • Experiment with different vegetables and spices to customize the flavor of your cheelas according to your taste preferences.
    • Serve the besan Vegetable Cheela Rolls hot with a side of green chutney or ketchup for dipping.

    Variations of Besan Cheela Recipe with Vegetables 

    • Paneer Cheela: Add crumbled paneer (Indian cottage cheese) to the vegetable filling for added protein and richness.
    • Masala Cheela: Sprinkle chaat masala or garam masala over the cooked cheelas for an extra burst of flavor.
    • Cheese Cheela: Grate some cheese over the filling before rolling the cheelas for a gooey and indulgent twist.

    Health Benefits of Vegetable Cheela Rolls: 

    Vegetable Cheela Rolls are not only delicious but also nutritious, offering a range of health benefits:

    • Besan (gram flour) is rich in protein, fiber, and essential nutrients, making it a healthy alternative to refined flour.
    • Vegetables add vitamins, minerals, and antioxidants to the dish, promoting overall health and well-being.
    • Cheelas are low in calories and high in satiety, making them a filling and satisfying option for weight management.

    Frequently Asked Questions (FAQs) About Vegetable Cheela Rolls 

    Q: Can I make the batter for Vegetable Cheela in advance?

    A: Yes, you can prepare the batter in advance and store it in the refrigerator for up to 24 hours. Just give it a quick stir before cooking the cheelas.

    Q: Can I freeze Vegetable Cheela Rolls for later use?

    A: While it’s best to enjoy besan Vegetable Cheela Rolls fresh, you can freeze them for up to 1 month. Wrap them individually in plastic wrap or foil and store them in an airtight container. Thaw and reheat in a skillet or microwave before serving.

    Q: What other fillings can I use for Vegetable Cheela Rolls?

    A: You can get creative with the fillings for Vegetable Cheela Rolls. Try adding cooked beans, grated cheese, or leftover cooked vegetables for added flavor and variety.

    Congratulations! You have now mastered the art of making besan Vegetable Cheela Rolls, a wholesome and delicious dish that is sure to impress your family and friends. Whether enjoyed as a snack, appetizer, or light meal, these flavorful rolls are a testament to the rich culinary heritage of India. Explore more recipes and culinary inspirations on Manjula’s Kitchen and continue your culinary adventures with confidence and creativity.

    If you liked the recipe here are some other recipes that you may like too 

    Vegetable Cheela: A savory Indian pancake made with mixed vegetables and chickpea flour.

    Palak (Spinach) Paneer: A classic North Indian dish made with spinach and paneer cheese cooked in a creamy tomato-based sauce.

    Shahi Pulao (Vegetable Pulao): A flavorful rice dish made with spiced basmati rice and vegetables.

    Gobi (Cauliflower) Manchurian: Crispy cauliflower florets tossed in a tangy and spicy Indo-Chinese sauce.

    Aloo (Potato) Paratha: Whole wheat flatbread stuffed with spiced mashed potatoes and cooked on a griddle.

    Mango Lassi: A refreshing yogurt-based drink flavored with ripe mangoes and a hint of cardamom.

    Besan Ladoo: Traditional Indian sweet made with roasted chickpea flour, ghee, and sugar.

  • Litti Chokha

    Litti Chokha

    Litti Chokha

    Litti Chokha (Bihari Sattu Litti)

    Litti Chokha is an appetizer from the state of Bihar made with stuffed whole wheat dough balls with roasted chana dal and spices inside. These stuffed balls are known as Litties are usually roasted over charcoal but can also be baked. Litties are served with Chokha. Chokha is a dip prepared with mashing potato, tomato or eggplant with spices, but at my home it was always served with Dal Tadka.
    This recipe will make 8 litties.
    5 from 2 votes
    Prep Time 10 minutes
    Cook Time 30 minutes
    Total Time 40 minutes
    Course Main Course
    Cuisine Indian
    Servings 4 people

    Ingredients
      

    Dough

    • 1 cup whole wheat flour chapatti atta
    • 2 Tbsp ghee clarified butter
    • 1/2 tsp salt
    • cup About 1/3 lukewarm water

    Filling

    • 3/4 cup sattu flour of roasted chana dal, available in Indian grocery stores
    • 1/2 tsp salt adjust to taste
    • 1/8 tsp asafetida hing
    • 1/8 tsp turmeric haldi
    • 1/2 tsp red chili powder
    • 1 tsp mango powder amchoor
    • 1 tsp grated ginger
    • 1 Tbsp green chili finely chopped, adjust to taste
    • 1 tsp ghee clarified butter
    • 1/4 cup water approximately

    Potato, and Tomato Chokha

    • 1 cup medium size potato boiled peeled and roughly mashed
    • 2 medium size tomato roasted peeled and mashed, I have roasted them over the skillet
    • 1 tsp salt
    • Spices we will use half and half to make both Potato and Tomato Chokha
    • 1/4 tsp black pepper
    • 1 tsp lemon juice just for Potato Chokha
    • 2 tsp grated ginger
    • 2 Tbsp finely chopped green chilies
    • 2 Tbsp finely chopped cilantro
    • 2 Tbsp olive oil or mustard oil I prefer olive oil
    • 2 Tbsp ghee or clarified butter for serving the Litties.

    Instructions
     

    For Tomato Chokha

    • To prepare the Tomato Chokha add the spices to mashed tomatoes about 1/2 tsp salt, pinch of black pepper, 1/2 tsp ginger, 1 Tbsp green chili. 1 Tbsp cilantro and 1 Tbsp of oil mix it together. Tomato Chokha is ready set aside.

    For Potato Chokha

    • Add all the remaining spices with mashed potatoes, salt, pinch of black pepper, lemon juice, ginger, cilantro and oil, mix it well. Potato Chokha is ready, set aside.

    To Make Dough

    • Mix the flour, salt and ghee. Add water slowly to make dough. Dough should be firm but do not knead the dough. Cover the dough and let it sit for at least fifteen minutes.

    Filling

    • Mix all the ingredients together except water, sattu, salt, asafetida, turmeric, red chili powder, mango powder, ginger, green chili, and ghee, now add little water to make firm dough, dough will be little crumbly.

    Making Litti

    • Pre-heat the oven at 400 degree Fahrenheit. I am using a toaster oven or you can also use oven.
    • Divide the dough into 8 equal parts and roll them into balls. They will not be very smooth dough ball. Also, divide the filling in 8 parts filling should be little smaller then dough balls.
    • Roll the dough balls into 3-inch circle. Place one part of the filling in the center of each rolled dough, and pull the edges of the dough to wrap the filling. Proceed to make all 8 balls. Grease your palms and roll the filled balls gently between your palms.
    • Arrange the litties over greased baking sheet about one inch apart and place in toaster oven, for 10-12 minutes, turn them over and bake again for 10-12 minutes. Litties should be golden brown all around.

    Serving

    • need about 2 Tbsp ghee or clarified butter for serving the Litties.

    Notes

    I like to eat these Litties with Dal Tadka and Potato or Tomato Chokha.
    Tried this recipe?Let us know how it was!

    Litti Chokha Recipe: How to make Litti Chokha

    Litti Chokha is a traditional and an iconic appetiser and a bread format of dish from the state of Bihar in India. It consists of stuffed whole wheat dough balls (litti) served with spicy mashed vegetable mixture or chokha. This rustic and flavorful dish is a staple in Bihari cuisine and is enjoyed as a hearty meal or snack

    Litti Chokha: A traditional Bihari food

    High in Fiber: Litti Chokha is made primarily from whole wheat flour, which is rich in dietary fiber. Fiber aids in digestion, promotes gut health, and helps regulate blood sugar levels. Consuming fiber-rich foods like Litti Chokha can contribute to overall health and well-being.

    Vitamins and Minerals: Litti Chokha is often served with chokha, a spicy mashed vegetable mixture made from ingredients such as roasted eggplant, tomatoes, and potatoes. These vegetables are rich in vitamins, minerals, and antioxidants, which support immune function and promote overall health.

    Satiating and Flavorful: Litti Chokha is a satisfying and flavorful dish that combines the earthy taste of roasted wheat dough with the spicy and tangy flavors of chokha. The contrast in textures and flavors creates a delightful eating experience that is both comforting and nourishing.

    Variations of Litti Chokha:

    • Mattar Ke Kachori: Mattar Kachori is a delicious, fried puff pastry filled with spicy green peas. This mouthwatering snack also can be served as part of any main meal.
    • Pizza Paratha: Pizza has become a universal food enjoyed by all. Pizza paratha is perfect for the times when you want to enjoy homemade pizza. This is also a quick and easy recipe.
    • Dal Bati: Dal bati is a popular Rajasthani delicacy. Dal is simply soup of mixed lentils, cooked with spices. Bati is a baked, whole wheat bread roll and the combination is known as dal bati.
    • Khasta Kachori: Khasta kachori is a delicious, spicy, fried puffed pastry. Khasta Kachori is filled with spicy moong dal mixture and then deep fried. Kachori is flakey from outside and hollow inside. Kachori should be fried on low heat so it can cook through to have a nice crunch.

    Tips for Making Perfect Litti Chokha:

    Knead the Dough Well: For soft and fluffy litti, knead the dough thoroughly until it becomes smooth and elastic. Properly kneaded dough ensures that the litti hold their shape and cook evenly without becoming too dense or chewy.

    Roast Litti Over Charcoal: Traditional litti are cooked over a charcoal or wood fire, which imparts a smoky flavor and crispy texture to the outer crust. If using an oven, you can achieve a similar effect by placing the litti directly on a grill rack or using a barbecue grill.

    Use Fresh Ingredients: Use fresh and high-quality ingredients, especially for the chokha, to enhance the flavor and nutritional value of the dish. Choose ripe, firm vegetables and aromatic spices for the best results.

    Serve with Ghee: Litti Chokha is traditionally served with a generous drizzle of melted ghee (clarified butter) on top. The rich and buttery flavor of ghee complements the earthy taste of litti and adds a touch of indulgence to the dish.

    FAQs about Litti Chokha:

    Can I make Litti Chokha without sattu? 

    While sattu is the traditional filling for litti, you can substitute it with other ingredients such as besan (gram flour), crushed roasted peanuts, or mashed lentils. Experiment with different fillings to create unique variations of Litti Chokha.

    Is Litti Chokha gluten-free? 

    Litti Chokha is not gluten-free as it is made from whole wheat flour, which contains gluten. However, you can explore gluten-free alternatives for the dough, such as using a combination of gluten-free flours like rice flour, chickpea flour, and tapioca flour.

    Can I make Litti Chokha spicy? 

    Yes, you can adjust the level of spiciness in Litti Chokha according to your taste preferences by adding more or fewer green chilies or red chili powder to the chokha mixture. You can also serve Litti Chokha with a side of spicy pickle or chutney for extra heat.

    Can I make Litti Chokha ahead of time? 

    Yes, you can prepare the dough and filling for litti in advance and assemble them just before cooking. Store the prepared dough and filling separately in the refrigerator until ready to use. Leftover chokha can be stored in an airtight container in the refrigerator for up to 2-3 days.

    Litti Chokha is a delicious and wholesome dish that captures the essence of traditional Bihari cuisine. With its rich flavors, nourishing ingredients, and endless variations, Litti Chokha is sure to become a favorite among food enthusiasts. 

  • Urad Dal Tadka

    Urad Dal Tadka

    Urad Dal Tadka

    Tadka Urad Dal

    Tadka Urad Dal was a favored lentil dish in my family while I was growing up. Dal is a staple dish in Indian meals and, for most Indian vegetarians, a frequent source of protein. This delicious, nourishing dish can accompany any number of different meals be it lunch or dinner.
    4.37 from 19 votes
    Prep Time 10 minutes
    Cook Time 15 minutes
    Total Time 45 minutes
    Course Main Course
    Cuisine Indian
    Servings 4 people

    Ingredients
      

    • 1 cup urad dal washed
    • 1 tsp salt
    • 1/4 tsp turmeric
    • 1 Tbsp ginger finely chopped
    • 2 cups water
    • 1/4 tsp garam masala
    • 1/2 tsp mango powder amchoor

    Seasoning

    • 3 Tbsp ghee clarified butter
    • 1/2 tsp cumin seeds jeera
    • 1/8 tsp asafetida hing
    • 1 green chili sliced
    • 1 Tbsp ginger thinly sliced
    • 1/2 tsp red pepper adjust to taste
    • 4 pieces lemon for garnishing

    Instructions
     

    • Wash and soak urad dal for at least 20 minutes. Dal will be double in volume after soaking. Drain the water.
    • Put dal with 2 cups water into a pressure cooker and add salt, turmeric, and ginger. Close the cover and cook on medium high heat.
    • When the pressure cooker starts to steam, turn the heat down to low and cook for five minutes.
    • Turn off the heat and wait until all the steam has escaped before opening the pressure cooker. Dal should be soft. If needed add more water, dal should be not very mushy you should be able to see the grains. You should be able to scoop the dal with roti. Dal will thicken as it sits after cooking. So leave it more liquid than you want it to be.
    • Add garam masala, and mango powder mix it well.

    Seasoning

    • Heat ghee in a small saucepan. Test the heat by adding one cumin seed to the ghee; if it cracks immediately, the oil is ready. Add the cumin seeds. When they begin to crack, add the asafetida, ginger, and green chilies. Stir for a few seconds. Add red chili powder and 1 tablespoon of water to prevent the spices from burning. Pour spiced chaunk over hot dal, before serving.

    Notes

    Tadka urad dal is ready serve with roti or paratha, or with plain rice.
    Tried this recipe?Let us know how it was!

    Urad Dal Tadka: A Tempting Tempered Lentil Dish

    Urad Dal Tadka, also known as Urad Dal Ka Tadka or Black Urad Dal Tadka, is a flavorful and comforting lentil dish that hails from North India. This urad dal tadka recipe features split black gram lentils cooked to perfection and tempered with aromatic spices, creating a dish that’s gluten free, healthy, hearty and satisfying. Whether served with steamed rice, roti, or naan bread, urad dal tadka is sure to delight your taste buds and leave you craving more of its irresistible flavors.

    To commence the preparation, it is imperative to first ensure that all the vegetables are meticulously dried, a step crucial in achieving the desired texture and consistency in the final dish. This entails patting dry each vegetable, thereby mitigating excess moisture which could potentially alter the outcome of the recipe.

    Once the vegetables are suitably dried, the next step entails assembling all the ingredients within a food processor. This multifunctional kitchen appliance serves as the cornerstone in amalgamating the disparate elements into a cohesive mixture. However, it is imperative to exercise caution during this stage, as over-processing the ingredients can lead to an undesired homogeneity akin to a paste. The objective here is to achieve a harmonious blend wherein the individual components remain discernible, imparting both visual appeal and varied texture to the final product.

    Upon achieving the desired consistency, the mixture is then transferred from the confines of the food processor. At this juncture, it should embody the texture of a chunky yet pliable dough, indicative of a successful amalgamation of ingredients. This textured amalgam serves as the canvas upon which the ensuing steps of the recipe unfold.

    With the mixture at hand, the next course of action involves portioning it into individual servings. This is accomplished by dividing the mixture into 16 equal portions, each to be fashioned into flat patties approximately half an inch in thickness. This meticulous shaping process not only ensures uniformity in size but also facilitates even cooking, thereby contributing to the overall gustatory experience.

    As the patties take shape, attention shifts towards the culinary medium responsible for their transformation—hot oil. In a frying pan preheated to medium-high heat, a liberal amount of oil is introduced, its shimmering surface a harbinger of the culinary alchemy about to unfold. With utmost care, the patties are then gently lowered into the oil, ensuring that they are evenly spaced and devoid of any overlap. This deliberate approach not only prevents overcrowding but also promotes uniformity in cooking, allowing each cutlet to attain a golden brown hue, indicative of its culinary readiness.

    Throughout the frying process, periodic rotation of the cutlets ensures uniformity in color and texture, with a total cooking time averaging between 5 to 6 minutes. Once the desired golden hue is achieved, the cutlets are carefully removed from the frying pan, their journey culminating on a bed of absorbent paper towels. This final step serves the dual purpose of draining any residual oil while preserving the inherent crispiness of the cutlets.

    In culmination, the fruition of this culinary endeavor is best savored when the cutlets are served piping hot, their delectable aroma tantalizing the senses. Paired with the refreshing zest of cilantro chutney, each bite is a symphony of flavors and textures—a testament to the meticulous preparation and artistry inherent in this timeless recipe.

    Tips for Perfect Urad Dal Tadka

    • Soak Urad Dal: Soaking the urad dal before cooking helps reduce the cooking time and ensures that the lentils cook evenly and become tender.
    • Control Spice Level: Adjust the amount of dried red chilies and red chili powder according to your spice tolerance. For a milder dal, reduce the amount of spice used or remove the seeds from the dried red chilies.
    • Enhance Flavor with Ghee: For an extra layer of richness and flavor, consider using ghee (clarified butter) instead of oil for tempering the spices. Ghee adds a distinctive nutty flavor and aroma to the dish.

    Variations of Urad Dal Tadka

    • Urad Chana Dal Tadka: Combine black urad dal with chana dal (split chickpeas) for a nutritious and flavorful variation of the dish. The combination of lentils adds texture and depth to the dal tadka.
    • Creamy Urad Dal Tadka: For a creamy texture, blend a portion of the cooked urad dal before adding it back to the tempering mixture. This creates a velvety sauce that coats the lentils, resulting in a luxurious and indulgent dal tadka.

    Benefits of Urad Dal Tadka

    • Rich in Protein: Urad dal is a excellent source of plant-based protein, essential for muscle repair and growth.
    • High in Fiber: Urad dal is also high in dietary fiber, promoting digestive health and keeping you feeling full and satisfied.
    • Packed with Nutrients: Urad dal is rich in essential nutrients such as iron, magnesium, and potassium, supporting overall health and well-being.

    Frequently Asked Questions (FAQs)

    Can I make urad dal tadka without soaking the lentils?

    • While soaking the lentils helps reduce the cooking time, you can still cook urad dal tadka without soaking, although it may take longer for the lentils to become tender.

    Can I make urad dal tadka ahead of time?

    • Yes, urad dal tadka tastes even better when allowed to sit for a few hours or overnight, allowing the flavors to meld together. Reheat it gently before serving.

    Is urad dal tadka vegan-friendly?

    • Yes, urad dal tadka is inherently vegan as it contains no animal products. It’s a perfect option for those following a vegan or plant-based diet.

    Explore more delicious Indian recipes on Manjula’s Kitchen 

    If you’re looking to explore more Indian recipes, appetizers, beverages, and desserts, be sure to check out the following links on Manjula’s Kitchen. Here are some links to recipes on Manjula’s Kitchen official website: Vegetable Pakoras, Kaju Katli (Cashew Burfi), Baingan Bharta (Roasted Eggplant), Matar (Green Peas) Paneer, Besan Ladoo.


  • Masala Paneer

    Masala Paneer

    Masala Paneer

    Masala Paneer

    Need a simple healthy appetizer that is sure to be enjoyed by all? Try serving my "Masala Paneer Cubes" at your next get together! It is homemade paneer mixed with a variety of spices. Serve with crackers, or fruit plate. Masala paneer can be used for many different ways, like paneer pakoras, paneer paratha.
    No ratings yet
    Course Appetizer
    Cuisine Indian
    Servings 8 people

    Ingredients
      

    • 8 cup milk whole milk
    • 5 tbsp lemon juice
    • 1 tbsp salt
    • 10 black pepper crushed
    • 1/4 tbsp red chili flakes
    • 1 tbsp clarified butter, ghee
    • 1/2 tbsp cumin seeds, jeera
    • 1 tbsp ginger finely shredded, or paste
    • 1 tbsp green chili seeded and finely chopped
    • 1 tbsp lemon juice

    Instructions
     

    • Boil the milk in a heavy-bottomed pan over medium heat, first wet the pan to ensure the milk will not burn. Stir occasionally.
    • When the milk comes to a boil, add the lemon juice gradually and stir gently. The curd will start separating from the whey. Turn off the heat.
    • Once the milk fat has separated from the whey, drain the whey using a strainer lined with muslin cloth.
    • Wrap the curds in a muslin cloth, rinse under cold water, and squeeze well.
    • To test whether enough water has been removed from the paneer, rub a little piece of paneer on your palm with your fingers. After rubbing the paneer 15-20 seconds, you should be able to make a firm, smooth ball.
    • In a small frying pan heat the clarified butter (ghee) over medium heat. When ghee is moderately hot add cumin seeds as seeds crack add green chili and ginger, turn off the heat. Stir fry for few seconds and set aside.
    • In a mixing bowl mix the paneer with all the ingredients fried cumin mix, salt, black pepper, chili flakes, black pepper and lemon juice.
    • Mix it well, do not knead the paneer. Put the paneer in a flat bowl and press it to spread evenly. Cover it and refrigerate for at least two hours.

    Notes

    Notes
    For this recipe full fat milk works better otherwise paneer will be too dry.
    Do not knead the paneer that will make paneer little chew.
    Keyword Masala Paneer
    Tried this recipe?Let us know how it was!

    How To Make Paneer Masala At Home Recipe 

    Explore the perfect fusion of flavors with our delectable masala paneer appetizers and snacks. Satisfy your cravings for gluten-free delights featuring the rich essence of paneer. Indulge in these flavorful snacks that redefine the joy of snacking.

    Preparing Masala Paneer at Home: 

    Indulge in the culinary art of crafting masala paneer by following this easy step-by-step guide on how to make paneer masala at home. Begin the process by boiling milk in a heavy-bottomed pan over medium heat, ensuring the pan is wet to prevent burning. Stir occasionally as the milk comes to a boil. Gradually introduce lemon juice to curdle the milk, separating the curd from the whey. This initial step sets the foundation for a delightful paneer butter masala.

    Draining and Squeezing the Curds for Paneer Butter Masala:

    After successfully curdling the milk, the next crucial step in the paneer butter masala recipe involves draining the whey. Employ a strainer lined with muslin cloth to filter out excess liquid. Wrap the curds in the cloth, rinse under cold water, and squeeze thoroughly. Testing the paneer’s water content is key; a firm, smooth ball should form after rubbing it on your palm for 15-20 seconds. This meticulous process ensures the perfect texture for your homemade paneer butter masala.

    Flavor Infusion with Cumin Mix for Masala Paneer:

    Enhance the taste of your paneer butter masala by preparing a flavorful cumin mix. Heat clarified butter (ghee) in a small pan, adding cumin seeds until they crack. Introduce green chili and ginger, stir-frying for a few seconds. This aromatic blend serves as a crucial ingredient in the masala, imparting a distinct and savory touch to your how to make paneer butter masala adventure.

    Mixing and Chilling for the Best Paneer Butter Masala: 

    In a mixing bowl, combine the prepared paneer with the cumin mix, salt, black pepper, chili flakes, and lemon juice. It’s essential to achieve a thorough mix without kneading the paneer. Place the paneer in a flat bowl, press it evenly, and cover it. Allow it to refrigerate for a minimum of two hours. This cooling period not only solidifies the paneer but also intensifies the flavors for an extraordinary paneer butter masala recipe.

    Savoring the Delight of Homemade Paneer Butter Masala: 

    Once refrigerated, your homemade masala paneer is ready to elevate your culinary experience, especially when preparing the tantalizing paneer butter masala. Explore the rich flavors and follow a simple how to make paneer butter masala recipe to create a dish that delights your taste buds and showcases your culinary prowess. Relish the satisfaction of crafting a delectable paneer butter masala from scratch, bringing the authentic taste of Indian cuisine to your dining table.

    If you liked this recipe you should also try our: Corn Bruschetta, Baklava Rolls, Spicy Cashews, Bread Potato Rolls and Kalmi Vada

  • Dal Dhokli (Gujarati One Dish Meal)

    Dal Dhokli (Gujarati One Dish Meal)

    Dal Dhokli

    Dal Dhokli (Gujarati One Dish Meal)

    Dal Dhokli is a traditional Gujarati dish. This recipe consists of spicy whole wheat uncooked roti pieces simmered into dal and cooked to perfection. Dal dhokli has a mild sweet and spicy flavor.  Dal dhokli also makes a delightful one pot one dish meal.
    5 from 2 votes
    Prep Time 15 minutes
    Cook Time 25 minutes
    Course dal
    Cuisine Indian
    Servings 2 people

    Ingredients
      

    For dal

    • 1/2 cup Toor dal (Pigeon peas)
    • 1 tbsp salt
    • 1/4 tbsp turmeric (haldi)
    • 2 tbsp peanuts
    • 1/2 tbsp Red chili powder
    • 1/2 cup tomato chopped
    • 1 tbsp ginger paste
    • 1 tbsp Jaggery, gur
    • 3 cup of water

    For Seasoning (Tadka)

    • 2 tbsp oil
    • 1/4 tbsp mustard seeds (rai)
    • 1/4 tbsp cumin seeds (jeera)
    • 1/8 tbsp asafetida (hing)
    • 2 whole red chilies

    For garnishing

    • 2 tbsp cilantro finely chopped

    For Dhokli 

    • 1/2 cup whole wheat flour (Chapati atta)
    • 1 tbsp besan (gram flour)
    • 1/4 tbsp Turmeric (haldi)
    • 1 tbsp finely chopped green chili
    • 1/8 tbsp asafetida (hing)
    • 1/8 tbsp Carom seed (Ajwain)
    • 1/2 tbsp Salt
    • 1 tbsp Oil
    • 1/4 cup water

    Instructions
     

    For the dhoklis

    • Combine all the ingredients in a bowl, whole wheat flour, besan, turmeric, green chili, asafetida, carom seeds, salt, and oil and mix it well. Add the water as needed to make firm dough, this should take about ¼ cup of water.
    • Divide the dough into 2 equal parts and roll out each portion into about 7 inch in diameter. If needed use little whole wheat flour for dusting the rolling surface that will help in rolling.
    • Cut each roti into about 1-1/2 inch squares and set aside.

    For the dal

    • Clean, wash and drain the dal. In pressure cooker add dal, salt, turmeric, and 3 cups of water. Cook over medium high heat.
    • When the pressure cooker starts to steam, lower the heat to medium and cook seven minutes.
    • Turn off the heat and allow the steam to escape before opening the lid.
    • Combine the cooked dal and 1 cup of hot water, whip the dal so it becomes creamy texture, you can use the hand blender to mix dal. Dal will be consistency of thick batter. Add about 3-4 cups of boiling water. Dal should be very liquidey, consistency of runny batter.
    • Add peanuts, chili powder, tomatoes, ginger, and jiggery to dal, mix well and cook on a medium flame for 2-3 minutes, stirring occasionally.
    • Prepare the seasoning, heat the oil in a small pan, when oil is moderately hot add the cumin seeds and mustard seeds, asafetida, and red chilies and allow them to crack.
    • Add this tempering to the dal, mix well, add dhokli and cook on a low medium heat for about 15 minutes, stirring occasionally.
    • Add cilantro and cook for another 2 minutes on low medium heat.

    Notes

    Serving suggestions
    Serve with plain rice, drizzle some ghee and lemon juice on top right before serving dal dhokli.  Dal dhokli should be served hot.
    You will also enjoy other one dish meal like, masala khichdi, Vegetable rice, and Quinoa vegetable pilaf
    Keyword Dal, Dal Dhokli
    Tried this recipe?Let us know how it was!

    How To Make Traditional Gujarati Dal Dhokli Recipe: A Comforting Gujarati Delicacy

    Dal Dokli is a traditional Gujarati vegan gluten free dish that combines the richness of dal (lentils) with the heartiness of dhokli (wheat flour dumplings). This Dal Dhokli recipe is a beloved comfort vegan food in Gujarati households, cherished for its wholesome flavors and nourishing qualities. With its perfect blend of spices and textures, Dal Dhokli offers a delightful culinary experience that’s both satisfying and comforting.

    Step 1: Preparing traditional Gujarati dal dhokli recipe

    To start, prepare the dough for the dhokli by combining wheat flour, besan (gram flour), turmeric powder, red chili powder, ajwain (carom seeds), salt, and oil in a mixing bowl. Gradually add water and knead the ingredients into a smooth and pliable dough. Allow the dough to rest for a few minutes to ensure it’s well-hydrated and easy to work with.

    Step 2: Rolling and Cutting Dhokli

    Divide the rested dough into small portions and roll them out into thin, flat discs resembling chapatis. Use a knife or a pizza cutter to cut the rolled-out dough into small diamond or square-shaped pieces, known as dhokli. Ensure that the dhokli are uniform in size to ensure even cooking and a consistent texture.

    Step 3: Cooking Dhokli in Dal

    In a large pot or pressure cooker, prepare the dal base by cooking soaked tur dal (pigeon peas) with water, turmeric powder, salt, and a pinch of asafoetida until soft and mushy. Once the dal is cooked, add the prepared dhokli to the pot, gently stirring to ensure they’re submerged in the dal. Allow the dhokli to cook in the dal until they’re tender and cooked through.

    Step 4: Tempering and Flavoring the Dal Dokli

    In a separate pan, heat ghee or oil and add mustard seeds, cumin seeds, cloves, cinnamon, dried red chilies, and curry leaves. Allow the spices to sizzle and release their aromas. Sauté the aromatics until they’re golden brown and fragrant, enhancing the flavor of the tempering.

    Step 5: Incorporating the Tempering into the Dal

    Once the tempering is ready, pour it over the cooked dal dokli, stirring gently to combine. The tempering adds layers of flavor and aroma to the dal, elevating its taste profile and making it even more delicious. Allow the dal dhokli to simmer for a few more minutes, allowing the flavors to meld together.

    Step 6: Garnishing and Serving

    Before serving, garnish the dal dokli with freshly chopped cilantro leaves and a sprinkle of garam masala for added flavor and aroma. Serve the piping hot dal dhokli with a dollop of ghee on top, alongside steamed rice or roti for a wholesome and satisfying meal that’s sure to delight your taste buds.

    Tips for Perfect Dal Dhokli

    Consistency of Dhokli Dough: Ensure that the dough for the dhokli is neither too soft nor too firm. It should be smooth, pliable, and easy to roll out into thin discs.

    Even Cooking of Dhokli: Cut the dhokli into uniform-sized pieces to ensure they cook evenly and have a consistent texture throughout.

    Balancing Flavors: Adjust the amount of spices and seasoning in the dal according to your taste preferences. You can increase or decrease the spice level to suit your palate.

    Tempering Technique: Take care not to burn the spices while tempering. The tempering should be aromatic and flavorful without any burnt taste.

    Variations of Dal Dhokli

    Mixed Dal Dhokli: Use a combination of different lentils such as moong dal, masoor dal, and chana dal to add variety and depth of flavor to the dish.

    Vegetable Dal Dokli: Enhance the nutritional value of the dish by adding diced vegetables such as carrots, potatoes, and peas along with the dal dhokli.

    Spicy Dal Dhokli: Increase the heat level of the dish by adding green chilies or red chili powder to the tempering for an extra kick of spice.

    Benefits of Dal Dokli

    Rich in Protein: The combination of lentils and wheat flour in dal dhokli provides a good amount of protein, essential for muscle repair and growth.

    High in Fiber: The presence of lentils and whole wheat flour in dal dhokli makes it rich in dietary fiber, promoting digestive health and aiding in weight management.

    Balanced Meal: Dal dhokli is a complete meal in itself, providing a balanced combination of carbohydrates, protein, and fats along with essential vitamins and minerals.

    Frequently Asked Questions (FAQs)

    Can I use store-bought dhokli instead of making it from scratch?

    Yes, you can use store-bought dhokli as a time-saving alternative. However, homemade dhokli has a fresher flavor and texture.

    Can I make dal dhokli ahead of time?

    Yes, dal dhokli tastes even better when allowed to sit for a few hours or overnight, allowing the flavors to meld together. Reheat it gently before serving.

    Is dal dhokli gluten-free?

    No, dal dhokli contains wheat flour, so it’s not suitable for those following a gluten-free diet.

    Explore more delightful Gujarati recipes on Manjula’s Kitchen, such as Gujarati Kadhi for another culinary adventure.
    If you’re looking to explore more Indian recipes, appetizers, beverages, and desserts, be sure to check out the following links on Manjula’s Kitchen. Here are some links to recipes on Manjula’s Kitchen official website: Vegetable Pakoras, Kaju Katli (Cashew Burfi), Baingan Bharta (Roasted Eggplant), Matar (Green Peas) Paneer, Besan Ladoo.

  • Dal Bati Recipe

    Dal Bati Recipe

    Dal Bati

    Dal Bati (Rajasthani cuisine)

    When you mention about Rajasthani food dal bati has to be on the top of the list, otherwise it is incomplete. Dal bati is a popular Rajasthani delicacy. Dal is simply soup of mixed lentils, cooked with spices. Bati is a baked, whole wheat bread rolls and the combination is known as dal bati. Traditionally bati is cooked over charcoal, but oven also works great.
    My daughter in law is from Jaipur, Rajasthan; I can entice her any time just mentioning dal bati and gatte ki kadhi.  First time I had dal bati in Jaipur, Apno Gaon a restaurant with village setting that was a memorable experience. They served dal bati with buttermilk known as chaach. I suggest having this for leisurely lunch/dinner.
    3.20 from 10 votes
    Course dal
    Cuisine Indian
    Servings 2 people

    Ingredients
      

    • 1/4 cup chana dal (split gram)
    • 1/4 cup toor dal
    • 1/4 cup moong dal (split with skin)
    • 1/4 cup urad dal (split black lentil with skin)
    • 1/4 tbsp turmeric (haldi)
    • 2 tbsp ginger grated
    • 1-1/2 tbsp salt
    • 1 tbsp coriander powder (dhania)
    • 2 tbsp mango powder (amchoor)
    • 1/2 tbsp garam masala

    For seasoning

    • 3 tbsp clarified butter (ghee)
    • 1 tbsp cumin seeds
    • 1/8 tbsp asafetida (hing)
    • 1/2 tbsp chili powder
    • 2 dried red chili broken in pieces

    For Bati

    • 1 cup whole wheat flour (roti ka atta)
    • 1/4 cup fine sooji (semolina)
    • 1/8 tbsp baking powder
    • 1/2 tbsp salt
    • 1/4 cup clarified butter (ghee)
    • 1/2 cup milk use as needed

    For serving

    • About 1/4 cup hot clarify butter (ghee)

    Instructions
     

    • Combine all dals, wash changing water few times. In a pressure cooker add dal with 4 cups of water, salt, turmeric, coriander powder, and ginger, cook on medium high.
    • After pressure cooker start steaming lower the heat to medium and cook for about eight minutes. Turn off the heat; wait until all the steam has escaped before opening the cooker.
    • Dal should be soft and mushy, consistency of the pourable batter, if needed add hot water. The consistency of the dal will thicken over time.
    • Add garam masala and amchoor, mix it well.
    • Heat ghee in a small saucepan for seasoning; after ghee is moderately hot add cumin seeds as they crack add asafetida, red chilies and red chili powder.  Stir for a few seconds. To prevent the spices from burning, you may add 1 teaspoon of water.  Pour spiced Chaunk over dhal. Mix it well and let it simmer for two to three minutes.
    • Dal is ready.

    For the Bati

    • Preheat the oven to 350 degree F.
    • In a mixing bowl mix all the dry ingredients together, flour, sooji, salt and baking soda. Add the ghee and mix with fingers, add the milk as need to make firm dough, knead the dough well. Set aside for about 10 minutes.
    • Divide the dough into 8 equal parts and roll them into balls. They will not be very smooth dough ball and will have cracks all over; this will help them to cook all the way through. Arrange the batis over cookie sheet about one inch apart and place the pan on middle oven rack and bake at 350 degree F in a preheated oven for 25 minutes. Turn them over and bake for another 30 minutes until batis are golden brown all around.
    • Break one bati from one side to make sure they have cooked through.

    Notes

    How to Serve
    1. Break the bati into two pieces and pour about one teaspoon of hot melted ghee over and serve with bowl of hot dal.
    2. If you have baked the batties earlier heat the batties in oven for about 10 minutes.
    Tried this recipe?Let us know how it was!

    How to make Dal Bati: A Flavorful Rajasthani Specialty

    Dal Bati is a quintessential Rajasthani dish that consists of two main components: dal (lentils) and bati (baked wheat flour balls). This dal bati recipe is a beloved vegan culinary delight in Rajasthan, known for its hearty flavors and wholesome ingredients. Served with a side of churma (sweetened crushed wheat) or form of bread, dal bati is a complete meal that offers a perfect balance of savory and sweet flavors, making it a favorite among food enthusiasts.

    To prepare the dal, begin by combining all the lentils and thoroughly washing them, changing the water a few times to remove any impurities. Once cleaned, transfer the lentils to a pressure cooker and add four cups of water along with salt, turmeric, coriander powder, and ginger. Place the pressure cooker on medium-high heat and allow it to come to pressure. Once pressurized, reduce the heat to medium and let the dal cook for approximately eight minutes.

    After cooking, turn off the heat and allow the pressure to release naturally before opening the cooker. The dal should have a soft and mushy consistency, resembling pourable batter. If needed, adjust the consistency by adding hot water, keeping in mind that the dal will thicken over time. Once cooked, stir in the garam masala and amchoor to enhance the flavors.

    For the seasoning, heat ghee in a small saucepan until moderately hot. Add cumin seeds and let them crackle, then add asafetida, red chilies, and red chili powder. Stir the spices for a few seconds, being careful not to burn them. If necessary, add a teaspoon of water to prevent burning. Once the spices are fragrant and well combined, pour the seasoned ghee over the dal mixture.

    Stir well to incorporate the flavors and allow the dal to simmer for two to three minutes, allowing the spices to infuse into the dish. Moving on to the preparation of the bati, preheat the oven to 350 degrees Fahrenheit. In a mixing bowl, combine all the dry ingredients including flour, sooji (semolina), salt, and baking soda. Add ghee to the dry ingredients and mix thoroughly with fingers until the mixture resembles coarse crumbs. Gradually add milk as needed to form a firm dough, and knead the dough well to ensure even distribution of ingredients. Let the dough rest for about 10 minutes to allow the gluten to relax.

    Divide the dough into eight equal portions and shape each portion into rough balls. The dough balls may have cracks, which is normal and aids in even cooking. Arrange the batis on a cookie sheet, leaving about an inch of space between each one, and place the sheet on the middle rack of the preheated oven. Bake the batis for 25 minutes, then turn them over and bake for an additional 30 minutes or until they are golden brown all around. To ensure they are cooked through, break one bati open from the side.

    To serve, break the bati into two pieces and drizzle about a teaspoon of hot melted ghee over each piece. Serve the batis alongside a bowl of hot dal for a comforting and flavorful meal. If the batis were baked earlier and have cooled, reheat them in the oven for about 10 minutes before serving to ensure they are warm and crisp.

    Tips for Perfect Dal Bati

    • Consistency of Bati Dough: Ensure that the bati dough is firm and smooth, as it will help in shaping the batis and prevent them from crumbling during baking.
    • Baking Temperature and Time: Bake the batis at a moderate temperature until they are golden brown and crispy on the outside, ensuring they are evenly cooked throughout.
    • Tempering Technique for Dal: Take care while tempering the dal to ensure the spices are well-infused and aromatic, enhancing the flavor of the dish.

    Variations of Dal Bati

    • Stuffed Batis: Add a flavorful stuffing of spiced mashed potatoes or paneer (Indian cottage cheese) inside the batis for an extra burst of flavor and texture.
    • Sweet Churma: Customize the churma by adding jaggery or gur instead of powdered sugar for a richer and more traditional sweetness.

    Benefits of Dal Bati

    • High in Protein and Fiber: Dal bati is a nutritious meal that provides a good amount of protein and fiber from the lentils and whole wheat flour, promoting satiety and aiding in digestion.
    • Rich in Essential Nutrients: Packed with essential vitamins, minerals, and antioxidants, dal bati offers a nourishing and wholesome meal option for individuals of all ages.

    Frequently Asked Questions (FAQs)

    Can I make dal bati without an oven?

    • Yes, you can cook the batis on a stovetop over an open flame or in a traditional tandoor for authentic flavor and texture.

    Can I use different types of lentils for the dal?

    • Yes, you can use a variety of lentils such as masoor dal, moong dal, or chana dal to prepare the dal according to your preference.

    Is Dal Baati a vegetarian dish?

    • Yes, Dal Baati is a vegetarian dish that’s popular among vegetarians and non-vegetarians alike for its rich flavors and wholesome ingredients.

    Explore more delightful Rajasthani recipes on Manjula’s Kitchen, such as Gatte Ki Sabji for another culinary adventure.

    Explore more appetizer recipes on Manjula’s Kitchen: Vegetable Samosas, Paneer Tikka, Crispy Spinach Pakoras, Mango Lassi, Masala Chai, Gulab Jamun, Kheer (Rice Pudding)

  • Stuffed Tomatoes with Gravy

    Stuffed Tomatoes with Gravy

    Stuffed Tomatoes with Gravy

    Stuffed Tomatoes with Gravy

    Tomatoes filled with flavorful mixed vegetables simmered with spicy sauce makes a gourmet, delectable and mouthwatering dish. Serve this with roti, paratha or any flat bread. This flavorful dish is sure to be a crowd pleaser!
    5 from 1 vote
    Course Chaat
    Cuisine Indian
    Servings 4 people

    Ingredients
      

    • 4 tomatoes round medium size

    For filling

    • 1/2 cup green peas, I am using frozen peas
    • 1/4 cup green beans finely chopped
    • 1/4 cup corn kernels, I am using frozen corn
    • 1/4 cup paneer cut into very small cubes (available in Indian grocery store)
    • 1 tbsp ginger finely chopped
    • 2 tbsp oil
    • 1/2 tbsp cumin seed (jeera)
    • 1/8 tbsp asafetida (hing)
    • 1 tbsp coriander powder (dhania)
    • 1/4 tbsp red chili powder
    • 1/2 tbsp salt

    Gravy

    • 1 tbsp oil
    • 1/4 tbsp cumin seeds (jeera)
    • 1-1/2 tablespoon all purpose flour (plain flour, maida)
    • 1 teaspoon coriander powder (dhania)
    • 1 teaspoon ginger finely chopped
    • 1 teaspoon green chili finely chopped
    • 1/4 teaspoon salt
    • 1-1/4 cup milk
    • 2 tablespoon chopped cilantro

    Instructions
     

    • Slice tomatoes in half and scoop out pulp, pulp will be used for filling. Set aside.
    • For Filling: heat the oil in a saucepan over medium high, Test the heat by adding one cumin seed to the oil. If the cumin seed cracks right away, the oil is ready.
    • Add cumin seeds, asafetida as cumin seeds crack, add, ginger, coriander; turmeric, red chili, and salt stir for few seconds and add tomatoes.
    • Cook the tomatoes for about 2-3 minutes; add corn, green beans, green peas and paneer. Cook till vegetables are tender and the liquid from gravy has evaporated, this should take about 4-5 minutes. Vegetables should be very moist.
    • Stuff the tomatoes with filling, don’t over fill them. Set aside.
    • For Gravy: heat the oil in flat saucepan over medium heat, pan should be large enough to hold all the tomatoes in single layer, can not overlap the tomatoes.
    • Add cumin seeds as seeds crack add all purpose flour and stir fry for about one minute.
    • Add the milk slowly and keep stirring making sure there are no lumps. Add coriander, green chili, ginger, half the cilantro and salt, stir for few seconds.
    • After gravy comes to boil stir and put the filled tomatoes slowly in single layer. Cover the pan and lower the heat low medium. Let it cook for about 4 minutes, check the tomatoes, gently stirring gravy. If needed let it cook as needed, tomatoes should not be very soft as they will loose the shape.
    • Garnish with remaining cilantro. Serve hot.
    Tried this recipe?Let us know how it was!

  • Methi Bajra Paratha (Millet Gluten Free and Vegan Bread)

    Methi Bajra Paratha (Millet Gluten Free and Vegan Bread)

    A plate of Methi Bajra Paratha, golden and crispy, garnished with fresh fenugreek leaves

    Methi Bajra Paratha

    Parathas always have been a family-favorite treat. Lately I have been trying to make gluten-free breads. A combination of bajra and besan with methi parathas taste delicious. These spicy Methi Bajra Parathas have a biscuit texture, which makes it very enjoyable. They also pair well with gravy-based dishes like Mixed Dal, Aloo Tamatar or you can serve with plain yogurt. You can enjoy these as a proper meal, or even as a great on-the-go lunch! I also enjoy these parathas with just hot cup of chai.
    This recipe will serve 2, and make 4 Parathas.
    5 from 1 vote
    Prep Time 10 minutes
    Cook Time 10 minutes
    Total Time 20 minutes
    Course Breakfast
    Cuisine Indian
    Servings 2 people

    Ingredients
      

    • ½ cup millet flour bajra atta
    • ½ cup besan
    • ½ tsp cumin seeds jeera
    • ½ tsp salt
    • 1 tsp chili flakes
    • ¼ tsp turmeric haldi
    • tsp asafetida hing
    • 1 Tbsp sesame seeds til
    • 1 Tbsp oil
    • ¼ cup fenugreek leaves option is using dry leaves
    • ½ cup hot water use as needed

    Also Need

    • 4 tsp oil to cook the parathas

    Instructions
     

    • Mix all the ingredients for paratha together, millet flour, besan. Cumin, salt, chili flakes, turmeric, asafetida, sesame seeds, oil, and fenugreek leaves. Notes: if you don’t have fresh fenugreek leaves use dry methi known as Kasuri Methi.
    • Make the dough using hot water, you will need about 1/2 cup of water. Dough should be firm and pliable. Notes: dough should be prepare just before making paratha.
    • Dived the dough into 4 equal parts, oil your palm and roll them between your palms, to make them round petites.
    • Heat the skillet on medium high heat. To test, sprinkle a couple of drops of water on the skillet. The water should sizzle right away.
    • Roll the paratha in about 6” circle, roll them between two pieces of plastic that makes the rolling easy, I am using zip log bag.
    • Place the methi bajra paratha over the skillet. When start to change color, flip it over. You will notice some golden-brown spots.
    • After a few seconds, spread one teaspoon of oil on the aratha. Flip it again and lightly press the with a spatula. Flip again and press with the spatula making sure the paratha is golden-brown on both sides.
    • Repeat same process for the remaining.
    Tried this recipe?Let us know how it was!