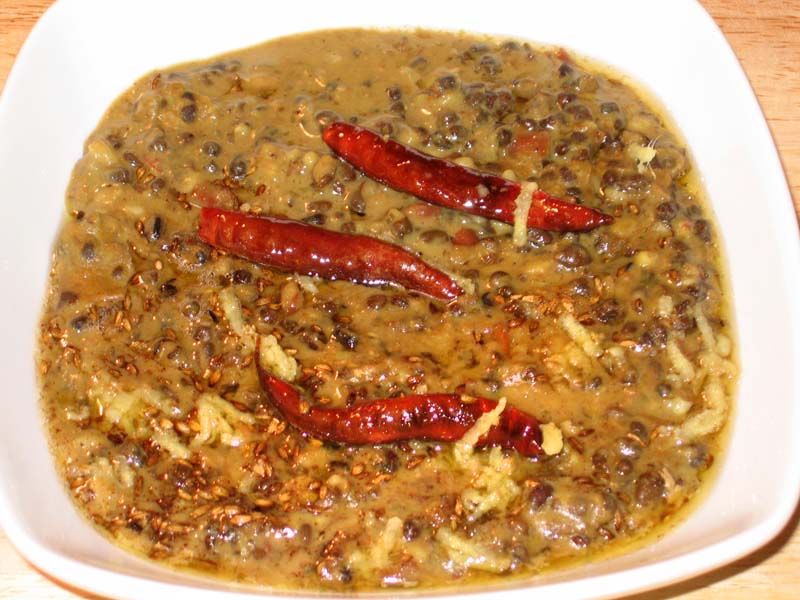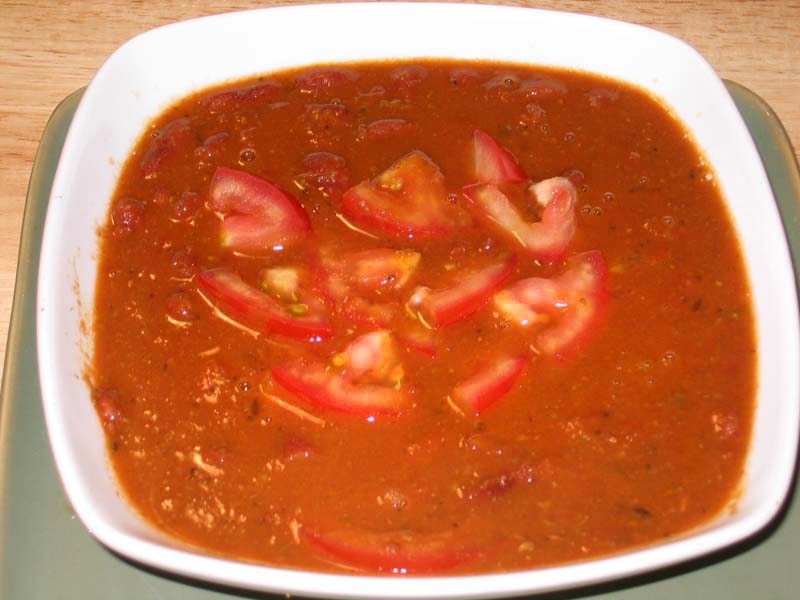
Rajma Chawal (Kidney Bean Curry)
Ingredients
- 1 ½ cup kidney beans rajma
- 1 tsp salt adjust to taste
- 2 large tomatoes
- 1 Tbsp ginger
- 1 green chili
- 3 Tbsp oil
- Generous pinch of asafetida hing
- 1 tsp cumin seeds jeera
- 2 Tbsp coriander powder dhania
- ½ tsp turmeric haldi
- ½ tsp red chili powder adjust to taste
- ½ tsp black pepper
- 1 tsp paprika
- 1 medium chopped tomato for garnishing
Instructions
- Wash and soak the kidney beans in about six cups of water for at least 6 hours (the beans will double in volume ).
- Cut the tomatoes in small pieces, green chili slice lengthwise and take out the seeds (if you prefer mild). Blend tomatoes, green chili, and ginger and make a paste.
- Heat the oil in pressure cooker. Test the heat by adding one cumin seed. If the seed cracks right away, the oil is ready. Add asafetida and cumin seeds, as the cumin seeds crack add tomato paste, coriander, turmeric, chili powder, black pepper, and paprika.
- Stir-fry for two to three minutes, until the oil begins to separate from the mixture. Add kidney beans, salt, and three cups of water. Close the cooker. Cook over medium high heat.
- When pressure cooker starts to steam, turn the heat down to medium and cook twelve minutes.
- Turn off the heat. Wait until the steam has stopped before opening the pressure cooker.
- Kidney beans should be soft and tender. Stir and mash them gently. Adjust salt and pepper to taste.
- Garnish with chopped tomatoes.
How To Make Rajma Chawal Recipe: A Jain Rajma Recipe with Tips and FAQs
Rajma Chawal, a quintessential North Indian dish, is beloved for its rich flavors and comforting texture. While traditionally made with kidney beans simmered in a tomato-based gravy, there are various regional and dietary variations to this dish. In this rendition, we present a Jain version of Rajma Chawal, devoid of onion and garlic, yet bursting with aromatic spices and wholesome goodness.
Preparation:
Wash the kidney beans thoroughly under running water to remove any dirt or impurities.
Soak the kidney beans in about six cups of water for at least 6 hours or overnight. This helps in softening the beans and reducing cooking time.
Making the Paste:
Cut the tomatoes into small pieces and slice the green chilies lengthwise, removing the seeds if you prefer a milder taste.
Peel and chop the ginger.
In a blender, combine the tomatoes, green chilies, and ginger to make a smooth paste. Set aside.
Cooking:
Heat the cooking oil in a pressure cooker over medium heat.
To test the oil temperature, add one cumin seed. If it crackles right away, the oil is ready.
Add a pinch of asafetida followed by the cumin seeds. Allow the cumin seeds to crackle.
Once the cumin seeds start crackling, add the prepared tomato paste to the cooker.
Stir in the coriander powder, turmeric powder, red chili powder, black pepper powder, and paprika. Mix well.
Stir-frying:
Stir-fry the mixture for two to three minutes or until the oil begins to separate from the sides. This step enhances the flavor of the spices and ensures a rich gravy.
Adding Kidney Beans:
Drain the soaked kidney beans and add them to the pressure cooker.
Season with salt according to taste.
Pour in three cups of water and mix well to combine all the ingredients.
Pressure Cooking:
Close the pressure cooker with its lid securely.
Cook over medium-high heat until the pressure cooker starts steaming.
Reduce the heat to medium and continue cooking for twelve minutes.
Finishing Touches:
Once the cooking time is complete, turn off the heat and allow the pressure to release naturally.
Once the steam has stopped, carefully open the pressure cooker lid.
Mashing and Adjusting Seasoning:
The kidney beans should be soft and tender. Gently stir and mash them to thicken the gravy.
Taste the Rajma and adjust the salt and pepper as per your preference.
Garnishing:
Serve the Jain Rajma hot, garnished with chopped tomatoes for a refreshing burst of flavor.
Tips and Suggestions:
Soaking the kidney beans overnight or for at least 6 hours is crucial as it helps in reducing the cooking time and ensures even cooking.
Use mustard oil for an authentic flavor, but if unavailable, any cooking oil can be substituted.
Adjust the quantity of green chilies and red chili powder according to your spice preference.
For a creamier texture, you can mash some of the kidney beans before serving.
Garnish the Rajma with freshly chopped cilantro for added freshness and aroma.
Serve Rajma Chawal with steamed rice or Indian bread like roti or naan for a wholesome meal.
Benefits of Rajma Chawal:
High in Protein: Kidney beans are an excellent source of plant-based protein, making Rajma Chawal a nutritious meal choice, especially for vegetarians and vegans.
Rich in Fiber: Rajma is loaded with dietary fiber, which aids digestion, promotes satiety, and helps maintain a healthy weight.
Essential Nutrients: This dish provides essential nutrients such as iron, potassium, and folate, which are vital for overall health and well-being.
Heart-Healthy: Consuming kidney beans regularly may help lower cholesterol levels and reduce the risk of heart disease.
Satisfying and Comforting: Rajma Chawal is not only nutritious but also deeply comforting, making it a favorite comfort food for many.
FAQs (Frequently Asked Questions):
Q: Can I use canned kidney beans instead of dried ones?
A: Yes, you can use canned kidney beans for convenience. However, dried beans are preferred for their texture and flavor.
Q: Can I skip soaking the kidney beans?
A: Soaking the kidney beans is essential as it helps in reducing cooking time and aids in digestion. Skipping this step may result in unevenly cooked beans.
Q: How do I make Jain Rajma without onion and garlic?
A: In this Rajma recipe, we have omitted onion and garlic to make it suitable for a Jain diet. The rich flavor comes from a blend of aromatic spices and tomatoes.
Q: Can I make this Rajma recipe without a pressure cooker?
A: While a pressure cooker significantly reduces the cooking time, you can cook Rajma on a stovetop in a heavy-bottomed pot. It will require longer cooking time and frequent stirring to prevent sticking.
Q: How long can I store leftover Rajma?
A: Leftover Rajma can be stored in an airtight container in the refrigerator for up to 3-4 days. Reheat thoroughly before serving.
Jain Rajma Chawal is a delicious and wholesome dish that can be enjoyed by everyone, regardless of dietary preferences. With aromatic spices, creamy kidney beans, and a rich tomato gravy, it’s a comforting meal that’s perfect for any occasion. Follow this simple rajma chawal recipe and savor the authentic flavors of North Indian cuisine right in your own kitchen.
Explore more delightful Rajasthani recipes on Manjula’s Kitchen, Explore more appetiser recipes on Manjula’s Kitchen: Vegetable Samosas, Paneer Tikka, Crispy Spinach Pakoras, Mango Lassi, Masala Chai, Gulab Jamun, Kheer (Rice Pudding)