Category: Special Occasion Recipes

Special Occasion Recipes: Celebrate with Delicious Indian Vegetarian Dishes

In Indian culture, food is an integral part of every celebration, festival, and special occasion. Whether it’s a grand wedding, a religious festival, or a simple family get-together, the menu is always elaborate, reflecting the richness of the Indian culinary heritage. Special occasions call for special dishes, and when it comes to Indian cuisine, the options are endless. From mouth-watering appetizers to sumptuous main courses and decadent desserts, Indian vegetarian recipes can make any celebration truly unforgettable.

The Importance of Food in Indian Celebrations

Food plays a central role in Indian celebrations, symbolizing prosperity, happiness, and togetherness. Each dish is thoughtfully prepared, using ingredients that are in harmony with the occasion’s significance. Traditional recipes passed down through generations often take center stage, with a focus on flavors, textures, and presentation.

Indian vegetarian cuisine, in particular, offers a wide range of options that cater to various dietary preferences and religious practices. These recipes are not only delicious but are also steeped in cultural and regional significance, making them ideal for special occasions.

Must-Try Indian Vegetarian Recipes for Special Occasions

Paneer Lababdar

Paneer Lababdar is a rich and creamy dish made with paneer (Indian cottage cheese) cooked in a tomato-based gravy. The addition of cream and butter gives it a luxurious texture, making it perfect for a festive meal. Serve it with naan or pulao for a complete experience.

Dum Aloo

Dum Aloo is a popular dish from North India, where baby potatoes are cooked slowly in a spicy yogurt-based gravy. The slow cooking process, known as “dum,” ensures that the flavors are deeply infused into the potatoes, making it a favorite for special occasions.

Malai Kofta

Malai Kofta is a classic dish that features soft, melt-in-the-mouth koftas (dumplings) made from paneer, potatoes, and nuts, simmered in a creamy tomato gravy. It’s a dish that’s sure to impress your guests and is often served at weddings and celebrations.

Pulao with Nuts and Raisins

A fragrant and flavorful rice dish, pulao is often prepared with a variety of spices, nuts, and raisins. This dish is a staple at Indian weddings and festivals, offering a delightful combination of sweet and savory flavors.

Gajar Ka Halwa

No Indian celebration is complete without dessert, and Gajar Ka Halwa (carrot pudding) is a must-have. Made with grated carrots, milk, sugar, and ghee, this dessert is garnished with nuts and is often served during Diwali and other festive occasions.

Puran Poli

Puran Poli is a traditional Maharashtrian sweet flatbread stuffed with a filling made from chana dal (split chickpeas) and jaggery. This delicacy is commonly prepared during festivals like Holi and Ganesh Chaturthi and is enjoyed by people of all ages.

Kofta Biryani

Biryani is synonymous with celebration, and Kofta Biryani adds a vegetarian twist to this classic dish. Made with spiced koftas, basmati rice, and aromatic spices, this dish is layered and slow-cooked to perfection, making it ideal for festive gatherings.

Dahi Bhalla

Dahi Bhalla is a popular North Indian snack made from deep-fried lentil balls soaked in yogurt and topped with chutneys and spices. This dish is a favorite during festivals like Holi and Diwali and is loved for its tangy and sweet flavors.

Shahi Paneer

Shahi Paneer is a royal dish that lives up to its name. “Shahi” means royal, and this dish is made with paneer cooked in a rich and creamy gravy of cashews, almonds, and cream. It’s a dish that is often reserved for the most special occasions.

Kheer

Kheer, a rice pudding, is one of the most beloved Indian desserts, often prepared for festivals and celebrations. Made with rice, milk, sugar, and flavored with cardamom and saffron, kheer is garnished with nuts and dried fruits, making it a fitting end to a celebratory meal.

Tips for Planning a Special Occasion Menu

Balance the Menu: Ensure that your menu has a good mix of appetizers, main courses, and desserts. Include a variety of flavors and textures to keep your guests engaged.

Consider Dietary Preferences: Indian cuisine offers a range of vegetarian options, but it’s also important to consider other dietary needs, such as vegan or gluten-free preferences.

Plan Ahead: Special occasion meals often require elaborate preparation. Plan your menu in advance and do as much prep work as possible the day before the event.

Presentation Matters: The way you present your food can enhance the dining experience. Use garnishes, elegant serving dishes, and thoughtful plating to make your dishes visually appealing.

Conclusion

Indian vegetarian cuisine offers a rich tapestry of flavors and dishes that are perfect for any special occasion. Whether you’re celebrating a wedding, a festival, or just gathering with loved ones, these recipes will add a touch of festivity and joy to your table. From creamy paneer dishes to decadent desserts, each dish is crafted to make your celebration memorable.

For more special occasion recipes, visit Manjula’s Kitchen – Special Occasion Recipes. Explore a world of flavors and find the perfect dishes to make your celebration truly special.

  • Tawa Naan Recipe

    Tawa Naan Recipe

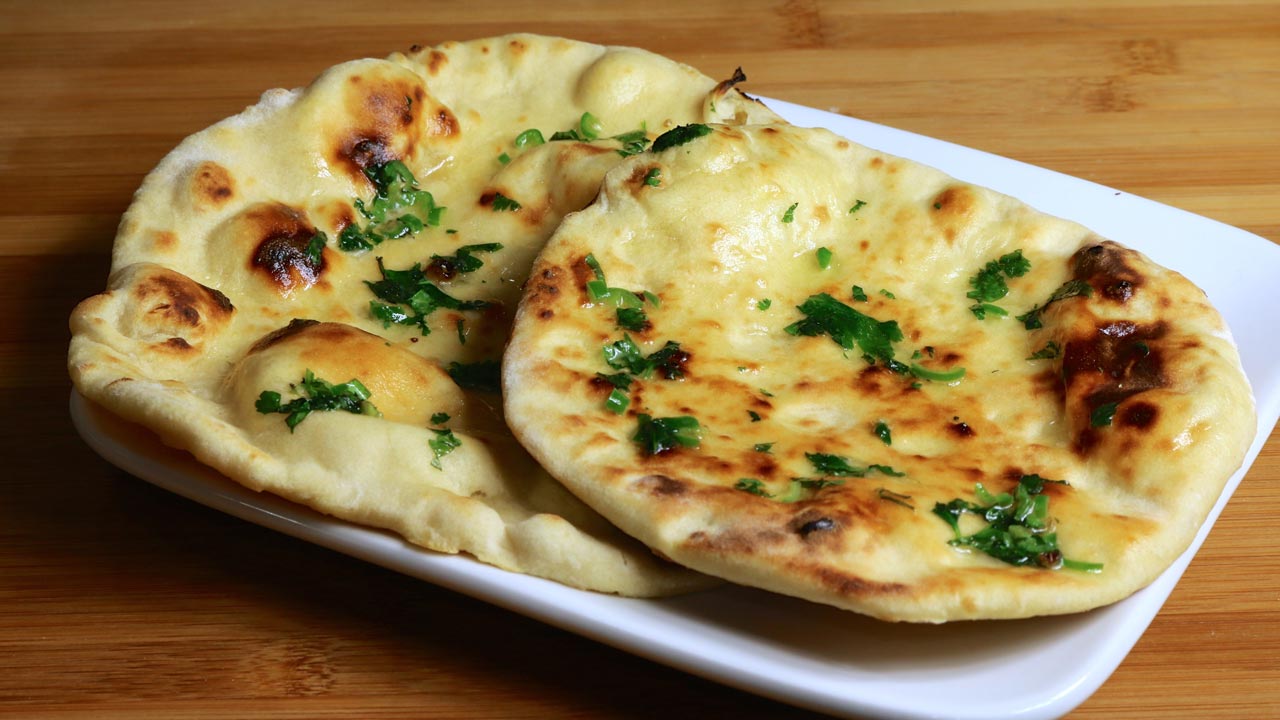
    Tawa Naan (Naan without Tandoor)

    Tawa Naan, Naan Without Tandoor

    Naan is definitely the most popular bread in Indian restaurants. Traditionally, naan is cooked in a tandoor (hot clay oven). I have already done a naan recipe using the oven and I used pizza stone to give a tandoor texture. But I find at home "tawa naan" is much easier to make. Tawa Naan turns out really soft and it tastes great. It's hassle free because you don't need a tandoor or oven. Naan Goes well with chole, palak paneer or any gravy based dish.
    4.08 from 13 votes
    Prep Time 10 minutes
    Cook Time 10 minutes
    Total Time 20 minutes
    Course Main Course
    Cuisine Indian
    Servings 2 people

    Ingredients
      

    • 1 cup all-purpose flour plain flour, Maida
    • 1/4 tsp baking soda
    • 1/4 tsp salt
    • 1/4 tsp sugar
    • 1/4 cup yogurt room temperature
    • 1-1/2 tsp oil canola, vegetable
    • 1/4 cup look warm water use as needed

    Garnishing

    • 1 tbsp clear butter or ghee
    • 1 tbsp chopped cilantro
    • 1 tbsp green chili finely chopped
    • 1/4 tsp sea salt

    Instructions
     

    • We also need tawa or skillet to make naan, nonstick skillet will not work for this recipe. Iron tawa or skiller works the best for making Tawa Naan.

    Making Naan

    • For garnishing mix all the ingredients, butter, salt, cilantro, and green chili Set aside.
    • Mix the dry ingredients together, add 1 tablespoon of oil and yogurt mix it well. Then add the water gradually to make very soft dough but not sticky. Knead the dough on a lightly floured surface, knead the dough well. Apply light oil to the dough and cover. Let the dough sit for about 3 hours in warm place.
    • Dough should be about 1-1/2 time, knead the dough again on floured surface. Divide the dough in four parts, lightly roll into the flour, cover the balls and let it sit for about five minutes before rolling.
    • Roll the naan one at a time on a lightly floured surface little less than 1/4 inch thick. Sprinkle the water lightly on one side of the naan.
    • Heat the tawa on medium heat, to check if tawa is ready sprinkle the few drops of water on tawa, water should sizzle.
    • Put water side naan over tawa, once the naan start bubbling and dough start drying, turn the tawa over flames keeping about 2 inch away from the flames to cook the naan from top. Note: yes naan will stick to tawa and will not fall of, this the reason you cannot use the nonstick skillet.
    • Once naan browned to your satisfaction, remove, and spread the butter mix over. Place in a on a plate and cover with a cloth to keep warm until serving. Naan is ready!

    Notes

    Serving Suggestion
    Taste best with Punjabi Chole or Palak Paneer
     
    Tried this recipe?Let us know how it was!

    How to make Naan at Home on Tawa Recipe – Manjula’s Kitchen 

    Tawa or Skillet: 

    Let’s dive into crafting the perfect Tawa Naan (Indian bread) at home with this easy Tawa Naan recipe. Begin by selecting the right equipment – an essential iron tawa or skillet. Forgo the nonstick skillet; the traditional iron one is crucial for achieving that perfect stickiness in your Tawa Naan.

    Garnishing: 

    Elevate your Tawa Naan with a delightful mix of clear butter, sea salt, chopped cilantro, and finely chopped green chili. This straightforward concoction adds richness, freshness, and a hint of heat, transforming your naan into a culinary masterpiece with our special naan on the tawa recipe.

    Mixing the Dry Ingredients: 

    At the heart of our Tawa Naan recipe lies the meticulous combination of dry ingredients. In a mixing bowl, blend Maida, baking soda, salt, and sugar. Add oil and yogurt – the oil ensures a smooth integration of flavors, and the yogurt contributes a creamy richness and subtle tanginess to the dough in this How to make naan at Home on Tawa guide.

    Gradual Addition of Water: 

    As you gradually add water to the dry mixture, witness the alchemy of dough creation. Water acts as the binding agent, transforming the dry ingredients into a soft, pliable dough. Aim for a texture that is soft yet not sticky, setting the stage for a naan that strikes the perfect balance between chewiness and tenderness in our naan on tawa recipe.

    Kneading and Resting the Dough: 

    The art of kneading takes center stage. On a lightly floured surface, the dough transforms. Well-kneaded and coated with a touch of oil, it is covered and left to rest for a patient for three hours. This period of repose allows the dough to rise, making it 1-1/2 times its original size, imparting a lightness that will be evident in the final Tawa Naan.

    Division and Resting: 

    Post-resting, knead again and divide the dough into four equal parts. Lightly roll the dough balls in flour, cover them, and grant them a five-minute interlude before the next act in our naan on the tawa recipe. This resting period allows the dough to gather its composure, ensuring a smooth rolling process.

    Rolling and Sprinkling: 

    Each naan takes shape individually, rolled on a lightly floured surface to a thickness slightly less than 1/4 inch. A sprinkle of water on one side adds subtle moisture, a touch that will contribute to the naan’s characteristic texture as per our how to make naan at home on Tawa guide.

    Cooking on the Tawa: 

    The Tawa, heated to a medium temperature with a few drops of water sprinkled on the surface sizzling, signals the readiness of the Tawa. The naan, waterside down, meets the hot surface. As it begins to bubble and the dough dries, a flip of the tawa over flames cooks the naan from the top. A crucial note underscores the unique nature of this process: the naan sticks to the Tawa, a characteristic that needs the use of a traditional iron surface rather than a nonstick skillet.

    Final Touch: 

    As the naan achieves the desired golden-brown hue, it exits the stage. A generous spread of the previously prepared butter mix crowns the naan with a final change of richness and flavor. Placed on a plate and covered with a cloth, the naan awaits its moment of glory, ready to be served warm and relished in our naan on tawa recipe.

    Serving Suggestion: 

    Completing our culinary symphony, the serving suggestion recommends pairing the Tawa Naan with Dal Makhani, Punjabi Chole, Palak Paneer, Butter Paneer Masala & Malai Kofta. This is not merely a suggestion but a curated experience, inviting us to savor the naan’s texture and flavor alongside these iconic accompaniments, creating a culinary ensemble that transcends the ordinary according to our how-to-make naan at home on tawa guide. 

  • Mysore Bonda

    Mysore Bonda

    Mysore Bonda

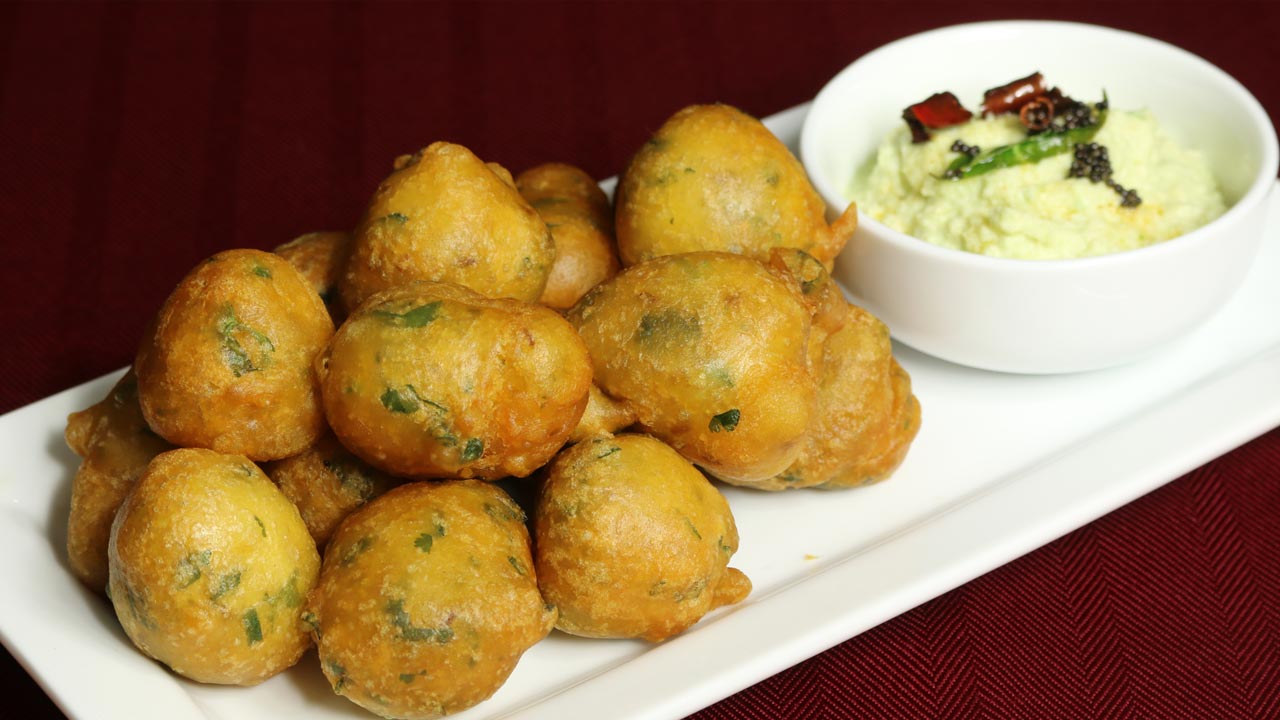
    Mysore bondas

    Mysore bondas are south indian fried dumplings dish made with flour, yogurt and spices. They are crispy outside and fluffy inside. They make a delightful treat for any party or snack for tea time. Serve them with coconut chutney.
    No ratings yet
    Prep Time 10 minutes
    Cook Time 10 minutes
    Total Time 20 minutes
    Course Appetizer
    Cuisine Indian
    Servings 4 people

    Ingredients
      

    • 1 cup all purpose flour maida, plain flour
    • 1/4 cup rice flour
    • 1 tsp salt 1
    • 1/2 tsp baking soda
    • 1/2 tsp cumin seeds jeera
    • 1/2 cup yogurt, dahai sour curd works best
    • 3/3 cup water
    • 1 tsp finely chopped ginger
    • 1 tbsp finely chopped green chilies
    • 2 tbsp finely chopped cilantro hara dhania

    Oil to fry

    Instructions
     

    • To make batter, mix all the dry ingredients together, all-purpose flour, rice flour, salt, baking soda, and cumin seeds. Add yogurt mix it well add the water to make thick batter. Add remaining ingredients ginger, green chili, and cilantro. Set aside for about 15-20 minutes. Batter will be light and fluffy.
    • Heat the oil on medium heat. The frying pan should have about 1 inch of oil. To check if the oil is ready, put little batter in oil. The batter should sizzle and come up but not change color right away. If oil is very hot bondas will not cook through and will not be crispy.
    • Place about 2 tablespoon of batter into the oil with your fingers. Fry bondas in small batches. Fry them until golden-brown all around. This should take about 3-4 minutes.
    • Mysore bond a should be crispy from outside and should be soft inside.

    Notes

    Serve them with coconut Chutney.
    You will also enjoy Rava Idli another quick South Indian dish.
    Tried this recipe?Let us know how it was!

    Exploring the Delights of Mysore Bonda: A Flavorful South Indian Treat 

    Originating from the vibrant culinary landscape of South India, Mysore bonda is a delectable snack cherished for its crispy exterior and soft, fluffy interior. This beloved dish is a favorite among locals and has gained popularity worldwide for its irresistible taste and unique texture. Traditionally served as a tea-time snack or as part of a festive spread, Mysore bonda captivates food enthusiasts with its distinct flavors and comforting appeal.

    Directions: 

    To embark on the delightful journey of preparing Mysore bonda, follow these simple steps:

    • Gathering Ingredients: Start by assembling the necessary ingredients. You’ll need urad dal (black gram lentils), rice flour, finely chopped green chilies, chopped cilantro (coriander leaves), ginger paste, salt, and asafoetida (hing).
    • Preparing Batter: Begin by soaking urad dal in water for a few hours. Once soaked, drain the water and grind the urad dal into a smooth paste using minimal water. Transfer the paste into a mixing bowl and add rice flour, chopped green chilies, cilantro, ginger paste, salt, and a pinch of asafoetida. Mix the ingredients thoroughly to form a thick batter.
    • Frying Bonda: Heat oil in a deep frying pan or kadhai over medium heat. Once the oil is hot, take small portions of the batter and gently drop them into the oil using your fingers or a spoon. Fry the bondas until they turn golden brown and crispy on the outside, ensuring they are evenly cooked.
    • Draining Excess Oil: Once fried to perfection, remove the bondas from the oil using a slotted spoon and place them on a paper towel-lined plate to drain excess oil.
    • Serve Hot: Your crispy and fluffy Mysore bondas are now ready to be served. Enjoy them hot with coconut chutney or a tangy tomato sauce for a delightful culinary experience.

    Tips: 

    • For best results, ensure the consistency of the batter is thick enough to hold its shape when dropped into the hot oil.
    • Adding a pinch of baking soda to the batter can enhance the fluffiness of the bondas.
    • Use freshly ground urad dal for optimal taste and texture.

    Variations: 

    • Spice it up by adding grated carrots to the batter for extra flavor and crunch.
    • Experiment with different spices such as cumin seeds or curry leaves to customize the taste according to your preference.
    • For a healthier twist, try air-frying the bondas instead of deep-frying them.

    Suggestions: 

    • Serve Mysore bonda as a delightful appetizer or snack during gatherings or festive occasions.
    • Pair it with a piping hot cup of masala chai or filter coffee for an authentic South Indian culinary experience.
    • Garnish with freshly grated coconut or chopped cilantro for added visual appeal.

    FAQs: 

    Q: Can I use store-bought rice flour instead of grinding rice at home?

    A: Yes, you can use store-bought rice flour as a convenient alternative to grinding rice at home. However, freshly ground rice flour may yield better results in terms of texture and flavor.

    Q: Can I make the batter in advance and fry the bondas later?

    A: While it’s best to fry the bondas immediately after preparing the batter to retain their crispiness, you can refrigerate the batter for a few hours before frying. Just ensure to bring the batter to room temperature before frying.

    Q: Can I freeze leftover bondas for later consumption?

    A: Yes, you can freeze leftover bondas in an airtight container for up to a month. When ready to enjoy, simply reheat them in a preheated oven until heated through.

    Explore more appetizer recipes on Manjula’s Kitchen: Vegetable Samosas, Paneer Tikka, Crispy Spinach Pakoras, Mango Lassi, Masala Chai, Gulab Jamun, Kheer (Rice Pudding)

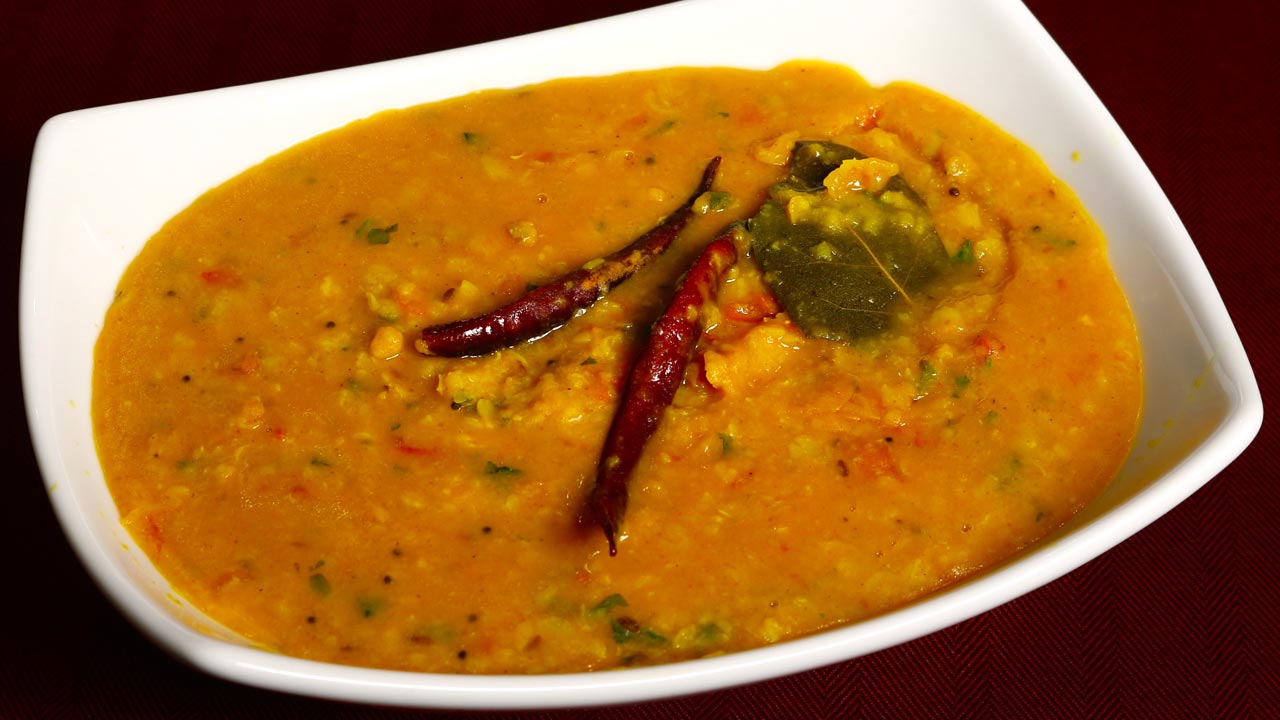
  • Dal Fry (Dal Tadka) Recipe

    Dal Fry (Dal Tadka) Recipe

    Dal Fry (Dal Tadka)

    Dal Fry (Dal Tadka)

    Dal Fry is a popular Indian lentil recipe. This recipe uses Toor dal, which is also known as Arhar or Toovar dal. The dal is seasoned with variety of spices and it tastes delicious. This is something you often find served at Indian restaurants and is a part of the main course as part of the servings.
    5 from 2 votes
    Prep Time 10 minutes
    Cook Time 15 minutes
    Course dal
    Cuisine Indian

    Ingredients
      

    • 1 cup toor dal, arahar dal
    • 2-1/2 cup water
    • 1 tbsp salt
    • 1/4 tbsp turmeric

    Seasoning  

    • 3 tbsp clarified butter or ghee
    • 1 cup tomatoes chopped I used 3 medium size tomatoes
    • 1/2 tbsp cumin seeds (jeera)
    • 1/2 tbsp mustard seeds (rai)
    • 1/8 tbsp asafetida (hing)
    • 2 whole dry red chili
    • 2 bay leaf
    • 1 tbsp green chili finely chopped adjust to taste
    • 2 tbsp ginger finely shredded
    • 2 tbsp cilantro finely chopped (hara dhania)
    • 1/2 tbsp red pepper adjust to taste
    • 1/2 tbsp salt
    • 1 tbsp sugar
    • 1/2 tbsp mango powder (amchoor)
    • 1/4 tbsp garam masala

    Instructions
     

    • Wash and soak toor dal in approx. 3 cups of water, for at least one hours. Dal will be double in volume after soaking. Drain the water.
    • Put dal with 2-1/2 cups water into a pressure cooker and add salt, turmeric, Cook on medium high heat.
    • When the pressure cooker starts to steam, turn the heat down to medium and cook for five minutes.
    • Turn off the heat and wait until all the steam has escaped before opening the pressure cooker. Dal should be soft. If needed add more water, dal should be consistency of thick soup.

    Seasoning

    • Heat the ghee in a saucepan. Test the heat by adding one cumin seed to the oil; if it cracks right away, ghee is ready. Add cumin seeds, and mustard seeds, asafetida, whole red chili. After the seeds crack, add bay leaves, green chili, ginger and chili powder. Stir for a few seconds.
    • Add tomatoes, salt and sugar stir and cook until tomatoes are tender and mushy.
    • Add cilantro, mango powder, and garam masala cook for about one minute.
    • Pour the seasoning over  dal mix it well and cook for another minute.
    • Dal fry is ready, serve this as a main dish with Indian flat bread or I prefer with plain rice.
    Tried this recipe?Let us know how it was!

    How to make Dal Tadka Punjabi Style: A Flavorful Punjabi Delight

    Dal Tadka, also known as Dal Fry or Tadka Dal, is a gluten free north indian dish known for its rich flavors and aromatic tempering. This dal tadka recipe offers a tantalizing blend of lentils cooked to perfection and tempered with aromatic spices, making it a favorite comfort food across the country. Whether served with rice or roti, dal tadka never fails to satisfy the taste buds with its hearty and wholesome goodness.

    Step 1: Cooking the Lentils

    To begin, thoroughly wash and rinse the lentils of your choice, such as toor dal (split pigeon peas) or masoor dal (red lentils). In a pressure cooker or large pot, add the washed lentils along with water, turmeric powder, and salt. Cook the lentils until they are soft and mushy, ensuring they are well-cooked to achieve the desired creamy consistency for the dal.

    Step 2: Preparing the Tadka

    While the lentils are cooking, prepare the tadka (tempering) for the dal. In a separate pan, heat ghee or oil over medium heat. Add mustard seeds, cumin seeds, and dried red chilies to the hot ghee, allowing them to sizzle and release their aromatic flavors.

    Step 3: Adding Aromatics and Spices

    Add minced ginger and green chilies to the pan, stirring to combine with the tadka. Next, add ground spices such as cumin powder, coriander powder, and red chili powder, stirring well to toast the spices and enhance their flavors. Adjust the amount of spices according to your taste preferences, keeping in mind the desired level of heat and spice.

    Step 4: Combining Lentils and Tadka

    Once the lentils are cooked and the tadka is prepared, carefully pour the tadka over the cooked lentils, ensuring it covers the surface evenly. Stir the dal tadka gently to combine the lentils with the aromatic tadka, allowing the flavors to meld together. Let the dal tadka simmer for a few minutes to allow the flavors to infuse, adjusting the consistency with additional water if needed.

    Step 5: Garnishing and Serving

    Before serving, garnish the dal tadka with freshly chopped cilantro leaves for a burst of freshness and color. You can also drizzle a spoonful of lemon juice over the dal tadka to add a tangy kick to the dish. Serve the dal tadka hot with steamed rice, roti, or naan bread for a satisfying and wholesome meal.

    Tips for Perfect Dal Tadka

    Lentil Consistency: Ensure that the lentils are cooked until soft and mushy for the perfect creamy texture of the dal tadka.

    Tempering Technique: Take care not to burn the spices while tempering. The tadka should be aromatic and flavorful without any burnt taste.

    Adjusting Spice Level: Customize the spice level of the dal tadka according to your taste preferences by adjusting the amount of green chilies and red chili powder used in the tadka.

    Variations of Dal Tadka

    Restaurant-Style Dal Tadka: Recreate the flavors of your favorite restaurant-style dal tadka by adding a touch of cream or butter to the dish for extra richness.

    Healthy Dal Tadka: For a healthier version of dal tadka, use minimal oil or ghee for tempering and add a variety of vegetables such as spinach, tomatoes, or carrots to the lentils for added nutrition.

    Protein-Packed Dal Tadka: Boost the protein content of the dal tadka by adding cooked chickpeas or kidney beans along with the lentils for an extra protein boost.

    Benefits of Dal Tadka

    Rich in Protein: Lentils are a excellent source of plant-based protein, essential for muscle repair and growth.

    High in Fiber: Dal tadka is rich in dietary fiber, promoting digestive health and keeping you feeling full and satisfied.

    Nutrient-Dense: Packed with essential vitamins and minerals, dal tadka provides a nourishing and balanced meal option for vegetarians and non-vegetarians alike.

    Frequently Asked Questions (FAQs)

    Can I use different types of lentils for dal tadka?

    Yes, you can use a variety of lentils such as moong dal, masoor dal, or chana dal to make dal tadka according to your preference.

    Can I make dal tadka ahead of time?

    Yes, dal tadka tastes even better when allowed to sit for a few hours or overnight, allowing the flavors to meld together. Reheat it gently before serving.

    Is dal tadka gluten-free?

    Yes, dal tadka is inherently gluten-free as it contains no wheat or gluten-containing ingredients.

    Explore more delightful Rajasthani recipes on Manjula’s Kitchen, such as Gatte Ki Sabji for another culinary adventure.Explore more appetiser recipes on Manjula’s Kitchen: Vegetable Samosas, Paneer Tikka, Crispy Spinach Pakoras, Mango Lassi, Masala Chai, Gulab Jamun, Kheer (Rice Pudding)

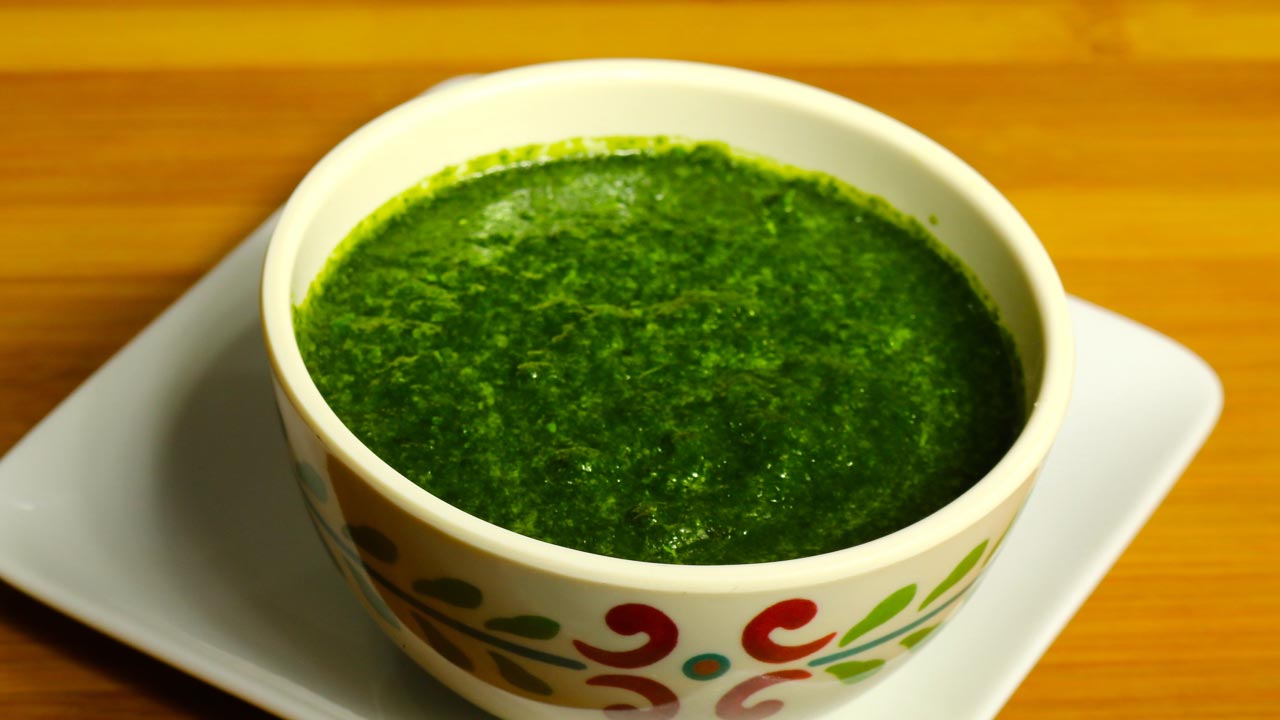
  • Mint Chutney Recipe

    Mint Chutney Recipe

    Mint Chutney

    Mint Chutney – Indian Condiment

    Mint chutney is a delicious condiment, blend of mint and cilantro combined with spices. Most Indian snacks are incomplete without chutney. Chutney also tastes great with a main meal. Try using mint chutney as a spread for your sandwiches – it tastes great!
    5 from 1 vote
    Prep Time 15 minutes
    Cook Time 10 minutes
    Course Chutney
    Cuisine Indian
    Servings 6 people

    Ingredients
      

    • 1 cup packed mint (podina) leaves all the stems removed
    • 1 cup packed Cilantro (hara dhania)roughly chopped
    • 2 tbsp green chilies chopped (adjust to taste)
    • 2 tbsp lemon juice (adjust to taste)
    • 1/2  inch ginger chopped
    • 1 tbsp salt (adjust to taste)
    • 2 tbsp sugar
    • Pinch of asafetida (hing)
    • Approx. 3 tbsp water use as needed

    Instructions
     

    • Blend all ingredients, except the mint and cilantro, into a paste. Add mint and cilantro, a little at a time, and blend until smooth. Add water as needed.
    • Taste and adjust salt, green chilies, or lemon juice as desire.
    • Taste great with samosa, vegetable pakoras….

    Notes

    Suggestions
    You can make mint chutney in large quantity in advance and freeze it in ice cube trays. Store the frozen cubes in a zip-lock plastic bag. When ready to serve, defrost as many cubes of mint chutney as needed 
    Tried this recipe?Let us know how it was!

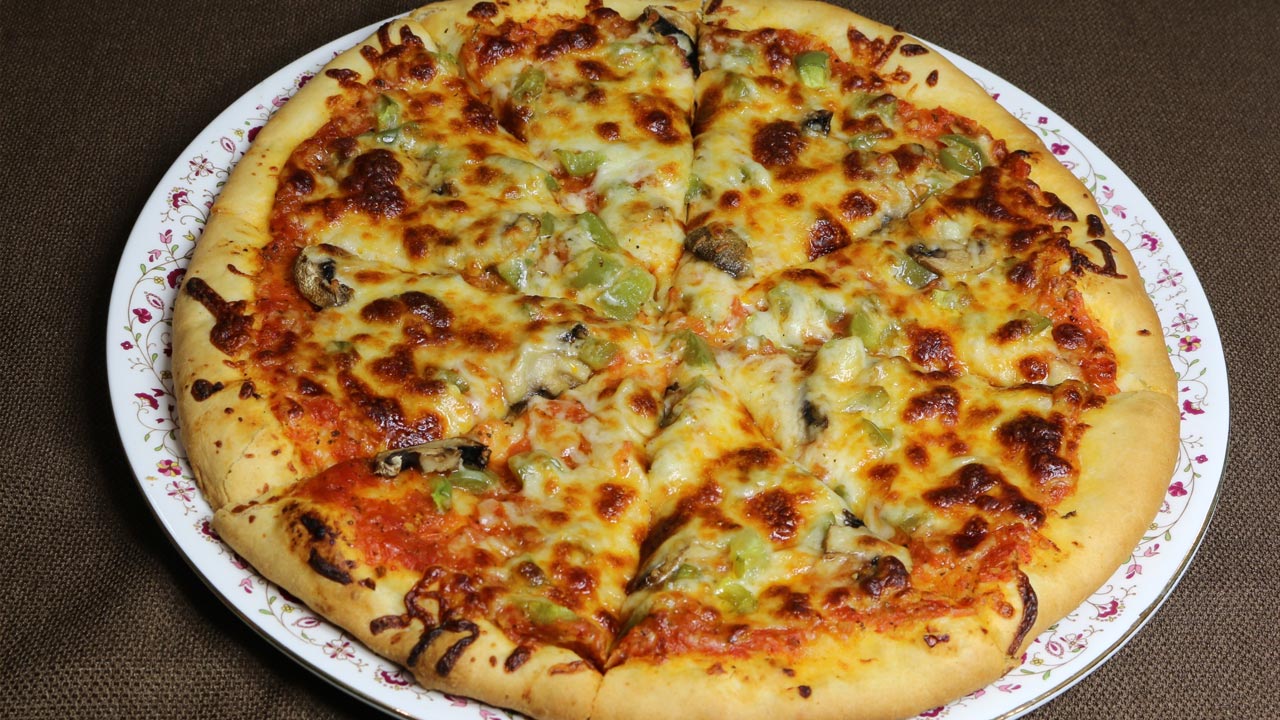
  • Homemade Pizza

    Homemade Pizza

    Homemade Pizza

    Home Made Pizza

    Pizza – who can name someone that does not enjoy pizza? Now has become a universal snack loved by all! There are so many variations of pizza. There are a number of recipes for pizza dough, sauce, and toppings. I like to make all my pizzas from scratch. There's nothing better than biting into that first slice of fresh, hot, homemade pizza. Its a great appetizer to be tried by all.
    5 from 1 vote
    Prep Time 30 minutes
    Cook Time 40 minutes
    Total Time 1 hour 10 minutes
    Course Main Course
    Cuisine Italian
    Servings 4 people

    Ingredients
      

    Dough

    • 2-1/2 cups all-purpose flour plain flour, maida
    • 1/2 tsp sugar
    • 1/2 tsp salt
    • 1-1/2 tbsp dry yeast
    • 3 tbsp olive oil preferred
    • 1 cup lukewarm water, use as needed
    • 2 tbsp all-purpose flour for rolling

    Sauce

    • 3 cups crushed tomatoes
    • 1 tsp Italian herbs
    • 1 tsp salt
    • 2 tsp sugar
    • 1/8 tsp black pepper
    • 1/4 tsp chili flake
    • 2 tsp corn starch

    For Topping

    • 2 cups shredded mozzarella cheese
    • 1 cup sliced bell pepper in small pieces capsicum, Shimla mirch
    • 1 cup sliced mushrooms

    Instructions
     

    Dough

    • Add the yeast to lukewarm water and set it aside for about 5 minutes, mix it well making sure yeast has dissolved.
    • Combine flour, sugar, salt and oil and mix. I am using food processor with dough blade to make dough. Note: for pizza dough should be knead well, you can use standing mixer with a dough attachment, or make the dough by hand.
    • Add yeast water run the food processor for 4-5 minutes, stopping every minute for few seconds. Make sure dough is very soft but not sticky if needed add more water or if it is too sticky add little more flour. When dough is ready add 1 tablespoon of oil and run the food processor for about half a minute more.
    • Take out the dough over floured surface and knead the dough until smooth and elastic will take about 3-4 minutes.
    • Grease large bowl with oil, and oil the dough all around lightly, cover the bowl. Set aside the dough in a warm area, for about two hours, dough should be double in size.
    • Knead the dough again over lightly floured surface and divide the dough into 2 equal parts. And let them rest for 3-4 minutes, before rolling. 

    Making Sauce

    • Add oil into a pan over medium high heat. Add Italian herbs, black pepper, and chili flakes stir for few seconds add tomatoes, salt and sugar. Cook until tomatoes have become mushy and most of the water from tomatoes has evaporated. Mix the corn starch with 2 tablespoons of water and add to the tomatoes. Reduce the heat to low stir the sauce for few minutes until sauce becomes the consistency of soft batter. If tomatoes are too sour use little more sugar. Set aside.

    Preparing the Pizza

    • Preheat the oven at 425 degree F (225 Celsius). Grease the pizza pan, I am using 14 inch pan. 
    • Lightly flour roll into a 13 inch circle. Transferred to greased 12-in. pizza pan; build up edges slightly. Lightly greased the rolled dough, this helps making the pizza crisp.
    • Spoon a few tablespoons of sauce into the center of the pizza and use the back of a spoon to spread it out to within one inch of edges. Spread your toppings bell pepper, mushrooms, sprinkle the cheese.
    • Bake for 15 to 18 minutes depend on the oven, until the golden brown. Slice and serve.

    Notes

    Notes
    When you make pizza and crust comes out soggy every time, did not cook well and you don’t know what you are doing wrong!  For that bake the pizza before adding any topping or sauce at 375° for about 10 minutes or until lightly browned. Spread sauce and topping bake again for about 10 minutes or until pizza is done.
    Also check the recipe for pasta  Butternut squash Pasta, Creamy Spinach Pasta, stove top pizza  
    Keyword Home Made Sauce, Kid Friendly, Vegetable Pizza
    Tried this recipe?Let us know how it was!

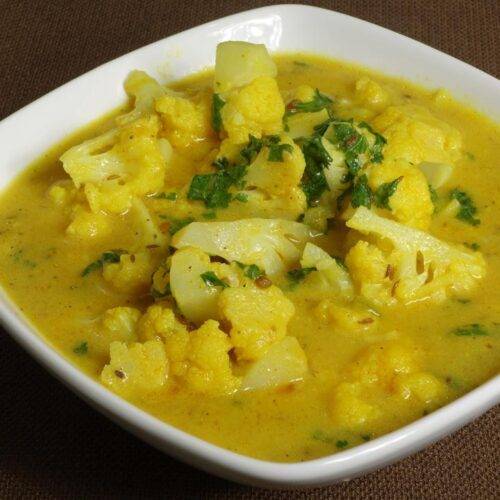
  • Cauliflower with Yogurt Gravy

    Cauliflower with Yogurt Gravy

    Cauliflower with Yogurt Gravy

    Cauliflower with Yogurt Gravy

    Cauliflower in spiced yogurt gravy makes a very flavorful side dish. This dish is simply delicious and worth trying. You can serve this with any bread or rice.
    5 from 1 vote
    Course curry
    Cuisine Indian
    Servings 4 people

    Ingredients
      

    • 3 cup cauliflower cut into small florets (phool gobi)
    • 3 tbsp oil
    • 1/2 tbsp cumin seeds (jeera)
    • 1/4 tbsp fenugreek seeds (methi dana)
    • 1/4 tbsp mustard seeds (rai)
    • 1/8 tbsp asafetida (hing)
    • 2 tbsp besan, available in Indian grocery stores
    • 1/4 tbsp turmeric (haldi)
    • 1/4 tbsp red chili powder
    • 1 tbsp ginger thinly sliced (adrak)
    • 1 green chili finely chopped
    • 1/2 cup yogurt (curd, dahi)
    • 1 tbsp salt
    • 1/2 tbsp sugar
    • Approx. 1 cup water
    • 2 tbsp cilantro chopped (hara dhania)
    • 1/4 tbsp garam masala, available in Indian grocery stores

    Instructions
     

    • Heat the oil in a saucepan over medium high heat. Test the heat by adding one cumin seed to the oil. If the cumin seed cracks right away, the oil is ready.
    • Add cumin, fenugreek, mustard seeds, and asafetida. When the seeds crack, lower the heat to low.
    • Add the besan, stir fry for about one minute until besan becomes light golden brown and becomes lightly aromatic.
    • Add ginger, green chili, turmeric, red chili powder, stir fry for about one minute and add yogurt mix it well and cook for two minutes stirring continuously.
    • Add water and salt bring it to boil, add cauliflower cook 15-18 minutes, stirring occasionally. Cauliflower should be tender and the gravy should be thick. Adjust the thickness of the gravy to taste.
    • Turn off the heat, add cilantro and garam masala and cover the pan for a minute.
    • Cauliflower with yogurt gravy is ready. Serve with any bread or plain rice.
    Tried this recipe?Let us know how it was!

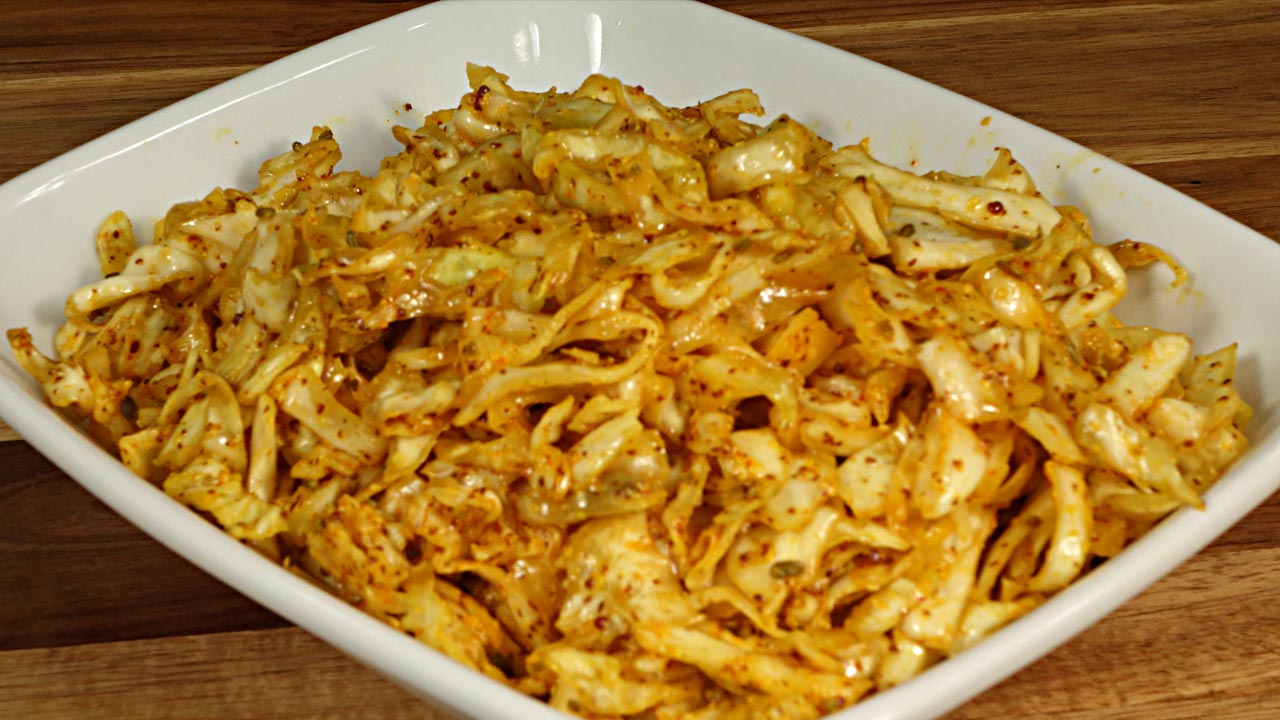
  • Cabbage Pickle Recipe

    Cabbage Pickle Recipe

    Cabbage Pickle

    Cabbage Pickle (Bandh Gobhi Achar)

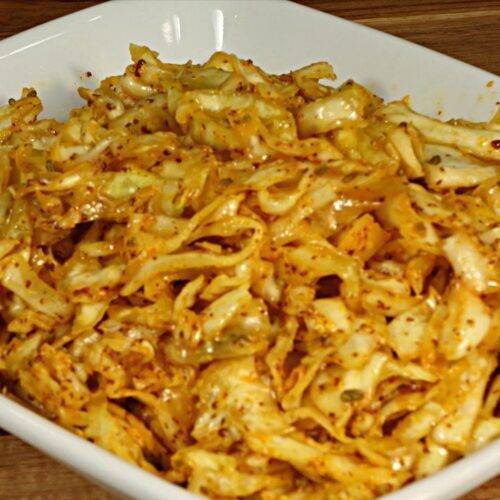
    Cabbage pickle is a spicy condiment with any meal. This is quick and easy to prepare. Traditionally Indian meals are not complete without pickles / relish.
    5 from 1 vote
    Course Pickle
    Cuisine Indian

    Ingredients
      

    • 4 cup cabbage sliced, (patta gobhi, bandh gobhi)
    • 3 tbsp mustard seeds coarsely ground, (rai)
    • 1 tbsp fennel seeds coarsely ground (saunf)
    • 1/4 tbsp turmeric (haldi)
    • 1/2 tbsp chili powder adjust to taste
    • 1-1/2 tbsp salt
    • 1/8 tbsp asafetida (hing)
    • 1 tbsp mustard oil (sarso ka tale) this is my preference but you may use olive oil

    Instructions
     

    • Mix all the ingredients together with the cabbage and put in a glass jar. Set the jar in the sun for three to four hours.
    • Pickle can be refrigerated for about two weeks.

    Notes

    Serving Suggestions
    1. Cabbage pickle can also be used as a side dish.
    2. Use the pickle for sandwiches.
    Tried this recipe?Let us know how it was!

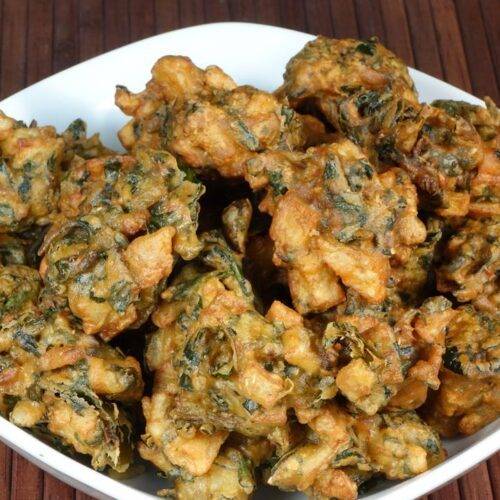
  • Spinach Potato Pakora Recipe

    Spinach Potato Pakora Recipe

    Spinach Potato

    Spinach Potato (Aloo Palak) Pakora

    Spinach Potato Pakoras are great as an appetizer, a tasty compliment for your afternoon tea and a spicy delicious snack anytime. They are made with spinach, potatoes, besan and spices and then fried till crispy golden.
    5 from 1 vote
    Course Appetizer
    Cuisine Indian
    Servings 4 people

    Ingredients
      

    • 2 large potatoes peeled and cubed in small pieces, (will make 2 cups of cubed potatoes)
    • 2 cup packed spinach roughly chopped
    • 2 green chilies finely chopped, adjust to taste
    • 1 cup besan (gram flour, available in Indian grocery stores)
    • 2 tbsp rice flour
    • 1/2 tbsp red pepper, adjust to taste
    • 2 tbsp coriander crushed (dhania)
    • 1 tbsp mango powder (amchoor, available in Indian grocery stores)
    • 1 tbsp cumin seeds (jeera)
    • 2 tbsp salt
    • ¼ tbsp asafetida (hing)
    • Approx. 2 tbsp of water adjust as needed
    • Also need oil to fry

    Instructions
     

    • Combine all the dry ingredients, besan, rice flour, coriander, cumin seeds, red pepper, salt, mango powder, and asafetida in a bowl. Mix it well.
    • Add potatoes, spinach, and green chilies into dry mix, mix it well and add water as needed to make soft and sticky dough. When you are ready to fry pakoras mix the veggies with dry ingredients, otherwise spinach and potatoes will leave the water because of salt.
    • Heat at least one inch of oil in a frying pan over medium high heat. To test, put one drop of batter in the oil. The batter should come up and not change color instantly.
    • Place about one tablespoon of mix holding with your fingers into the oil. Do not over lap the pakoras.
    • Fry the pakoras in small batches; this will take three to four minutes per batch. Fry the pakoras, turning occasionally, until both sides are golden brown.
    • Repeat this process for the remaining batches.
    • The crispy, delicious pakoras are now ready to serve.

    Notes

    Tips
    If the oil is too hot the pakoras will not be crisp; if the oil is not hot enough, the pakoras will be greasy.
    Keyword pakora, palak pakora
    Tried this recipe?Let us know how it was!

    How to Make Aloo Palak Pakora: A Step-by-Step Guide

    Aloo Palak Pakora is a delightful gluten free vegan snack that combines the goodness of spinach (palak) with the earthy flavor of potatoes (aloo), all encased in a crispy, golden-brown batter. This popular appetizer is perfect for rainy days or as a tea-time snack. In this comprehensive guide, we will walk you through the process of making delicious Aloo Palak Pakoras step-by-step.

    Preparation and Ingredients for Aloo Palak Pakora

    Before diving into the cooking process, it’s essential to gather all the necessary ingredients. For this recipe, you will need fresh spinach leaves, potatoes, chickpea flour (besan), rice flour, cornstarch, green chilies, ginger, cumin seeds, carom seeds (ajwain), salt, and oil for frying. Ensure that the spinach leaves and potatoes are thoroughly washed and dried before use.

    Tips for Perfect Aloo Palak Pakoras

    To achieve the ideal texture and flavor for your Aloo Palak Pakoras, here are some useful tips:

    Use Fresh Ingredients: Fresh spinach and potatoes are key to a vibrant and flavorful dish.

    Maintain the Oil Temperature: Keep the oil at a consistent temperature while frying to ensure even cooking and crispy pakoras.

    Adjust Spice Levels: Customize the spiciness of the pakoras according to your preference by adding or reducing the amount of green chilies.

    Experiment with Seasonings: Feel free to add your favorite spices or herbs to the batter for extra flavor.

    Serve Immediately: Aloo Palak Pakoras are best enjoyed hot and crispy, so serve them immediately after frying for the ultimate taste experience.

    Variations of Aloo Palak Pakoras

    While the classic Aloo Palak Pakora recipe is delicious on its own, you can also experiment with various ingredients and flavors to create unique variations:

    Cheese-Stuffed Pakoras: Add a savory twist to your pakoras by stuffing them with cheese before frying.

    Paneer Palak Pakoras: Replace potatoes with paneer (Indian cottage cheese) for a rich and creamy texture.

    Spicy Mint Chutney: Serve your Aloo Palak Pakoras with a zesty mint chutney for an extra kick of flavor.

    Mixed Vegetable Pakoras: Incorporate a variety of vegetables like cauliflower, and bell peppers for a colorful assortment of pakoras.

    Gluten-Free Option: Substitute chickpea flour with gluten-free flour for a gluten-free version of this recipe.

    Benefits of Aloo Palak Pakoras

    Aloo Palak Pakoras not only satisfy your taste buds but also offer several health benefits: (H2)

    Rich in Nutrients: Spinach is packed with vitamins, minerals, and antioxidants, while potatoes provide a good source of carbohydrates and potassium.

    Boosts Immunity: The combination of spinach and potatoes helps strengthen the immune system and protect against infections.

    Digestive Aid: The spices used in the pakora batter, such as cumin and ginger, aid digestion and promote gut health.

    Energy Boost: Aloo Palak Pakoras are a satisfying and energizing snack, making them perfect for a quick bite or appetizer.

    Easy to Make: With simple ingredients and easy preparation steps, Aloo Palak Pakoras are a convenient snack option for any occasion.

    FAQs about Aloo Palak Pakoras

    Q: Can I make Aloo Palak Pakoras ahead of time?

    A: While Aloo Palak Pakoras are best enjoyed fresh, you can prepare the batter in advance and fry them just before serving to maintain their crispiness.

    Q: Can I bake Aloo Palak Pakoras instead of frying them?

    A: While frying yields the crispiest results, you can try baking the pakoras in a preheated oven at 400°F (200°C) for approximately 20-25 minutes or until golden brown.

    Q: Can I freeze leftover Aloo Palak Pakoras?

    A: Yes, you can freeze the leftover pakoras in an airtight container for up to one month. Reheat them in the oven or air fryer until heated through before serving.

    Q: Can I use frozen spinach for this recipe?

    A: While fresh spinach is preferred for its vibrant flavor and texture, you can use thawed frozen spinach as a substitute if fresh spinach is not available.

    Q: What can I serve with Aloo Palak Pakoras?

    A: Aloo Palak Pakoras pair well with mint chutney, tamarind chutney, or ketchup. They also make a delicious accompaniment to hot chai or masala tea.

    Aloo Palak Pakoras are a delightful and versatile snack that can be enjoyed on any occasion. Whether you’re hosting a party or simply craving a savory treat, these crispy pakoras are sure to impress. With the guidance provided in this step-by-step recipe, you can easily recreate the authentic flavors of Aloo Palak Pakoras in your own kitchen. So gather your ingredients, heat up the oil, and get ready to indulge in the irresistible crunchiness of these delectable snacks.
    Explore more recipes on Manjula’s Kitchen: Vegetable Samosas, Paneer Tikka, Crispy Spinach Pakoras, Mango Lassi, Masala Chai, Gulab Jamun, Kheer (Rice Pudding)

  • Chocolate Almond Candy

    Chocolate Almond Candy

    Chocolate Almond Candy

    Chocolate Almond Candy

    This is a quick, yummy homemade candy dessert. This is a very simple quick and easy recipe with few ingredients. These candies will be loved by kids and adults alike.
    No ratings yet
    Course Dessert
    Cuisine Indian

    Ingredients
      

    • 1 cup almonds coarsely ground
    • 1-1/4 cup baking chocolate semi-sweet, chopped in small pieces
    • 3 tbsp condense milk sweetened

    Instructions
     

    • Grease a 12 inch flat plate or wax paper and set aside.
    • I am using microwave to melt the chocolate this is easy and quick way to melt, but be careful and, don’t over cook the chocolate. Make sure every utensil you are using to melt the chocolate is dry. If any water comes in contact with the chocolate, it will become grainy and unusable
    • Use microwaveable bowl that doesn't retain too much heat.
    • Microwave chocolate at 30 seconds interval, three times and mix it every time with spoon. If you are able to mix most of the chocolate smoothly, don’t heat any more, keep mixing till all the chocolate melts.
    • In a bowl add almonds, condense milk and 1 tablespoons of melted chocolate.
    • Grease your palms and make the mix into dough. Divide it into 16 equal parts or your preferred size. Roll them into balls.
    • Dip one almond ball into the chocolate, pick using a fork making sure it is coated all around, tip it lightly to drip the extra chocolate and put it over a greased plate. Repeat the same process with remaining balls.
    • Set aside it takes 7-8 hours before chocolate is completely dry.
    Tried this recipe?Let us know how it was!

  • Gobi (Cauliflower) Manchurian

    Gobi (Cauliflower) Manchurian

    Gobi (Cauliflower) Manchurian

    Gobi (Cauliflower) Manchurian

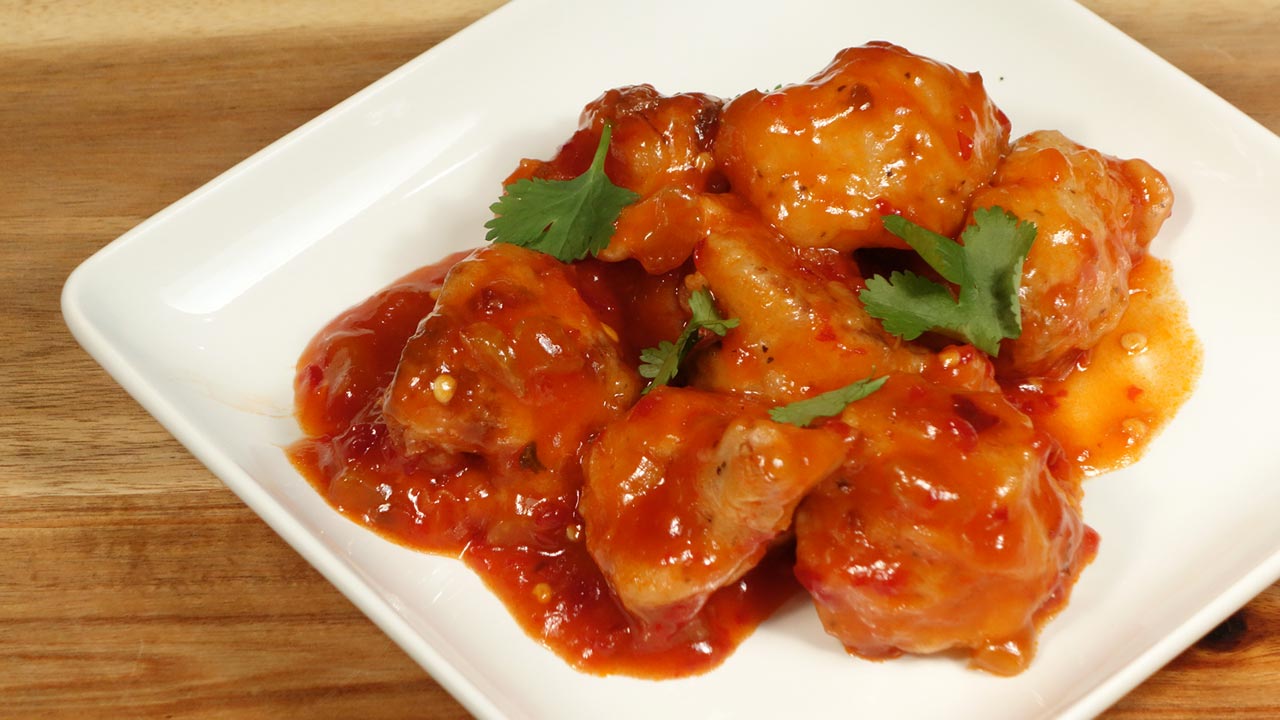
    Gobi or cauliflower Manchurian is a popular Indo Chinese dish. This is a super delicious appetizer or main dish. Gobi manchurian satisfies both your savory and spicy cravings! It consists of fried gobi (cauliflower) simmered in a flavorful gravy made with soy sauce and red chili sauce.
    3.50 from 6 votes
    Course Appetizer
    Cuisine Indian
    Servings 4 people

    Ingredients
      

    • 20 cauliflower pieces cut into medium size florets

    For Sauce

    • 2 tbsp oil
    • 1 tbsp ginger paste or finely shredded ginger (adrak)
    • 1 green chili chopped
    • 1/4 cup celery finely chopped
    • 2 tbsp red chili sauce
    • 2 tbsp soy sauce
    • 1 tbsp vinegar
    • 2 tbsp tomato paste
    • 1/2 tbsp sugar
    • 2 tbsp corn starch or arrow root powder
    • Approx. ½ cup water

    For Batter

    • 1/3 cup all purpose flour (plain flour, maida)
    • 3 tbsp corn starch or arrow root powder
    • 1/2 tbsp salt
    • 1/8 tbsp black pepper
    • Approx. ½ cup water

    Instructions
     

    • Mix the corn starch with water and set aside.
    • Heat the oil in sauce pan over medium high heat; add ginger, celery and green chili stir for about two minute. Add all the ingredients for sauce except corn starch, (chili sauce, soy sauce, vinegar, tomato paste, and sugar).
    • Stir for 2 minutes add corn starch and cook for another two minutes, sauce should be thick, consistency of a dosa or pancake batter. If needed add more water, sauce gets thicker as it sits.
    • Sauce is ready, set aside.
    • To make batter mix flour, corn starch, salt and pepper in a bowl. Add the water slowly to make a smooth batter (batter should be consistency of pancake batter or dosa batter).
    • Heat at least one inch of oil in a frying pan over medium high heat. Oil should be moderately hot. (If oil is not hot cauliflower will be greasy).
    • Dip the cauliflower into the batter one at a time, making sure it is completely covered by the batter. Then drop the cauliflowers slowly into oil in the frying pan. (do not overlap them)
    • Fry the cauliflowers in small batches, four to five minutes per batch. Fry them turning occasionally, until they are all sides golden brown. Take them out over paper towel.
    • Repeat this process for the remaining cauliflowers.
    • Fold fried cauliflower/ gobies into gravy and serve hot.

    Notes

    Notes
    Manchurian tastes best when cauliflower has some crunch. If you have fried them earlier, refry them before dipping in the sauce as fried cauliflower becomes soft as they cool off.
    Tried this recipe?Let us know how it was!

    Gobi Manchurian Recipe: A Delicious Indo-Chinese Delight 

    Gobi Manchurian is a beloved Indo-Chinese dish that combines the crispiness of cauliflower with a tangy, spicy sauce. It is a delectable fusion appetizer featuring crispy cauliflower florets coated in a savory vegan curry/gravy infused with aromatic vegetables.If you’re craving this flavorful dish and want to recreate it at home, look no further than this gobi manchurian recipe. With simple ingredients and easy-to-follow steps, you’ll be able to whip up a batch of delicious cauliflower manchurian in no time.

    Preparation: 

    Begin by preparing the cauliflower florets. Make sure they are clean and dry before proceeding with the recipe. You can blanch the florets in hot water for a few minutes to soften them slightly, or you can proceed with frying them directly for a crispier texture.

    Frying the Cauliflower (cauliflower manchurian recipe):  

    In a bowl, prepare a batter using all-purpose flour, cornflour, salt, pepper, ginger, and water. Coat each cauliflower floret in the batter, ensuring they are evenly coated.

    Heat oil in a deep pan or wok over medium heat. Once the oil is hot, carefully add the battered cauliflower florets in batches. Fry them until they turn golden brown and crispy. Remove them from the oil and place them on a paper towel-lined plate to drain excess oil.

    Making the Manchurian Sauce (recipe for manchurian cauliflower): 

    In another pan, heat oil over medium heat. Add finely chopped ginger, and green chilies. Sauté them until fragrant.

    Next, add bell peppers. Cook until they turn soft and translucent.

    Now, it’s time to add the sauces. Pour in soy sauce, chili sauce, ketchup, vinegar, and a pinch of sugar. Stir well to combine all the ingredients.

    In a small bowl, prepare a slurry using cornflour and water. Add this slurry to the pan to thicken the sauce. Stir continuously to avoid lumps.

    Once the sauce reaches your desired consistency, add the fried cauliflower florets to the pan. Toss them gently in the sauce until they are well coated.

    Tips for Perfect Gobi Manchurian: 

    • Make sure the cauliflower florets are dry before coating them in the batter to prevent the batter from becoming soggy.
    • Adjust the amount of chili sauce and green chilies according to your spice preference.
    • For a healthier version, you can bake the cauliflower florets instead of frying them. Simply coat them in the batter and place them on a baking sheet lined with parchment paper. Bake in a preheated oven at 400°F (200°C) for 20-25 minutes or until crispy.

    Variations to Try: 

    • Add diced carrots, cabbage, or other vegetables of your choice to make the dish more colorful and nutritious.
    • For a vegan version, use tamari instead of soy sauce and skip the vinegar or use apple cider vinegar.
    • Garnish the gobi manchurian or cilantro for an extra burst of flavor and freshness.

    Benefits of Gobi Manchurian 

    Gobi Manchurian is not only delicious but also packed with nutrients. Cauliflower is a rich source of vitamins, minerals, and antioxidants, making it beneficial for overall health. Additionally, by controlling the ingredients used in the recipe, you can make it healthier compared to the restaurant version.

    FAQs (cauliflower manchurian): 

    Q: Can I use frozen cauliflower for this recipe?

    A: While fresh cauliflower is preferred for its crisp texture, you can use frozen cauliflower if that’s what you have on hand. Make sure to thaw and pat dry the cauliflower before using it in the recipe.

    Q: How can I make the sauce less spicy?

    A: To reduce the spice level of the sauce, you can decrease the amount of chili sauce and green chilies used in the recipe. You can also omit the green chilies altogether for a milder flavor.

    With this comprehensive gobi manchurian recipe, you’ll be able to recreate the flavors of your favorite Indo-Chinese dish right in your own kitchen. Whether you’re cooking for a special occasion or simply craving a tasty snack, this dish is sure to satisfy your cravings. Enjoy the crispy texture of the cauliflower combined with the savory and tangy flavors of the Manchurian sauce—it’s a winning combination that’s sure to become a favorite in your household.

    Other Recipes If you enjoyed this banana rice recipe, you might also like to try these other recipes from Manjula’s Kitchen:

    1.   Vegetable Pulao
    2.   Mango Lassi
    3.   Chickpea Salad
    4.   Coconut Chutney
    5.   Vegetable Pakoras
    6.   Paneer Tikka Masala
    7.   Fruit Chaat

    These recipes are perfect and are sure to satisfy your cravings. Happy cooking!

  • Dodha Burfi Recipe

    Dodha Burfi Recipe

    Dodha Burfi (Punjabi Milk Fudge)

    Dodha Burfi – Punjabi Milk Fudge

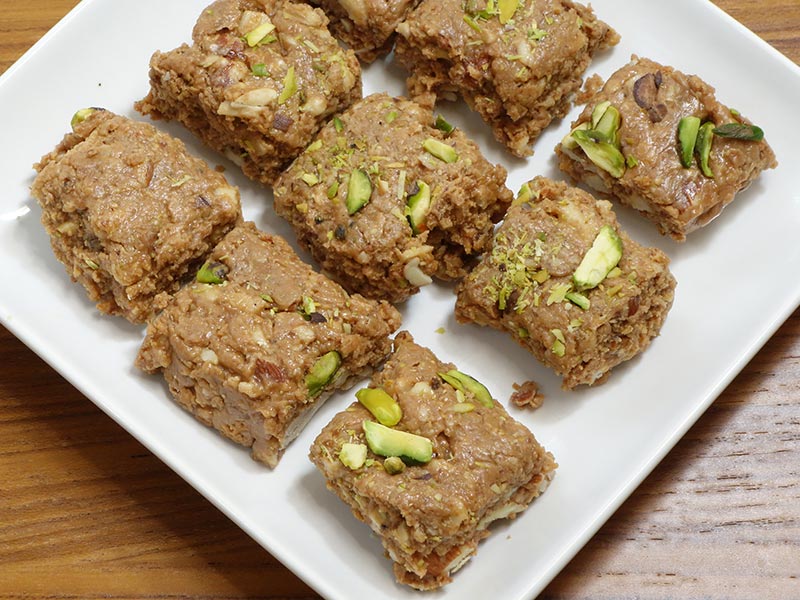
    Dodha is a very traditional and festive dessert from state of Punjab. It is best described as an Indian version of fudge. It is made with milk, sugar, and nuts. With this delicious combination of ingredients how can one resist this scrumptious quick and easy dessert?
    No ratings yet
    Course Dessert
    Cuisine Indian
    Servings 20 pieces

    Ingredients
      

    • 4 cup milk
    • 1-1/2 cup heavy cream
    • 2 cup sugar
    • 3 tbsp fine crack wheat (dahlia)
    • 1 tbsp clarified butter (ghee)
    • 1 cup crushed cashews (kaju)
    • 1 cup crushed almonds (badam)
    • 2 tbsp coco powder
    • 2 tbsp sliced pistachios for garnishing

    Instructions
     

    • In a small pan stir fry crack wheat with butter over medium heat, till it turns brown in color. Set aside.
    • In a heavy bottom pan over medium high heat boil the milk, and heavy cream, together.
    • Let it boil till milk begins to thicken for about 40 minutes, stir occasionally and clean the sides to avoid the milk build up.
    • Add crack wheat and sugar mix well and keep cooking for about 20 more minutes and stirring occasionally and clean the sides to avoid the milk build up.
    • Add coco powder mix well, add cashews and almonds stir continuously till milk has become like soft dough and Burfi start leaving the sides of the pan and also Burfi has start leaving the butter. This should take about 15 minutes.
    • Transfer the Dodha to 12 inch plate shaping it into square or rectangle in about ½ inch thick.
    • While Dodha is still warm cut them in about one inch square. Sprinkle the pistachios over Dodha and lightly press them in.
    • Dodha is ready to serve when it is at room temperature. Dhoda will stay good for about 2 weeks at room temperature or refrigerate for 2-3 months.

    Notes

    Notes
    I am using coco powder for not giving the flavor of chocolate but to give the dark brown color traditional Dodha Burfi has.
    Tried this recipe?Let us know how it was!
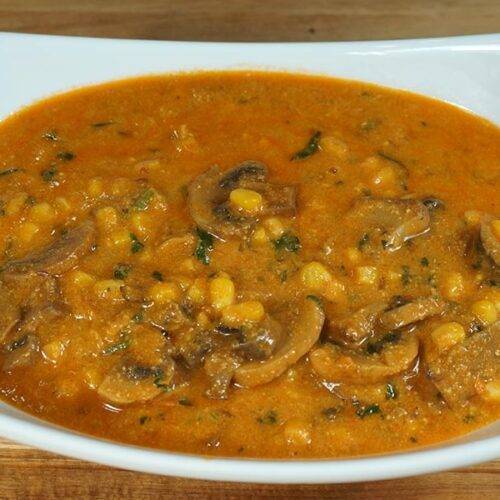
  • Mushroom Corn Cashew Curry

    Mushroom Corn Cashew Curry

    Mushroom Corn Cashew Curry

    Mushroom Corn Cashew Curry

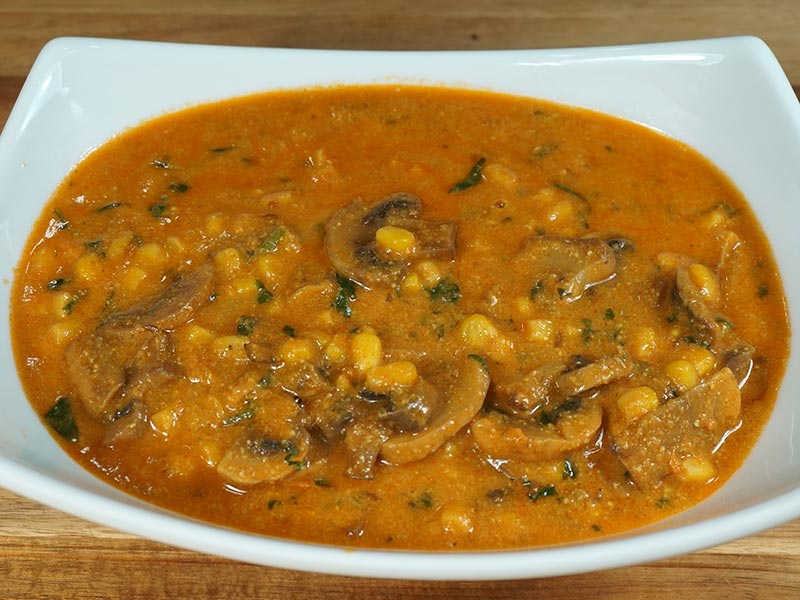
    Corn and mushroom in tomato and spicy cashew gravy makes a delicious main dish. Cashews add a creamy and rich texture to the dish. This is a quick and easy recipe. This goes well with any Indian flat bread or plain rice.
    3 from 3 votes
    Course curry
    Cuisine Indian
    Servings 2 people

    Ingredients
      

    • 3 cup sliced mushrooms
    • 1 cup corn kernel/ bhuta ka dana (I am using frozen corn kernels)
    • 1/4 cup cashews (kaju)
    • 2 cup tomato chopped
    • 1 tbsp ginger chopped
    • 1 tbsp green chili chopped
    • 2 tbsp oil
    • 1/2 tbsp cumin seed (jeera)
    • 1/8 tbsp asafetida (hing)
    • 1/4 tbsp turmeric (haldi)
    • 1/4 tbsp red chili powder (lal mirch)
    • 2 tbsp coriander powder (dhania)
    • 1 tbsp salt
    • 2 tbsp cilantro chopped (hara dhania)
    • Approx. 1-1/2 cup water

    Instructions
     

    • Blend the tomatoes, cashews, ginger and green chili to make creamy paste. Set aside.
    • Heat the oil in a saucepan over medium high heat. Test the heat by adding one cumin seed to the oil. If the cumin seed cracks right away, the oil is ready.
    • Add cumin seeds, asafetida as cumin seeds crack add tomato paste.
    • Next add coriander; red chili powder, turmeric and salt. Lower the heat to medium and cook the spice mix for about 4-5 minutes until mix start leaving the side of the pan.
    • Add corn and mushrooms, mix it well and add about 1-1/2 cups of water. Cook for about 10-12 minutes, stirring occasionally. Corn and mushrooms should be tender and gravy should be thick in consistency.
    • Mushroom Corn Curry is ready serve hot with Roti or plain rice.
    Tried this recipe?Let us know how it was!
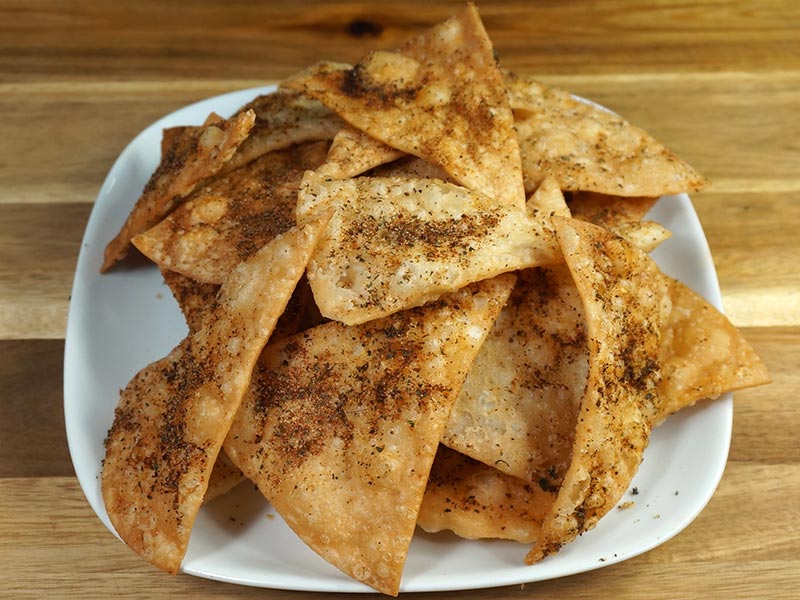
  • Spicy Indian Chips Recipe

    Spicy Indian Chips Recipe

    Spicy Indian Chips

    Spicy Indian (Flour) Chips

    If you like chips, and you like spicy food, these chips are for you. This is a quick and easy snack recipe. I have used flour tortillas and flavored them with Indian spice mix. They are hard to resist you will say just one more.
    No ratings yet
    Course Appetizer
    Cuisine Indian
    Servings 6 people

    Ingredients
      

    • 4 flour tortillas uncooked I am using 8” diameter tortillas
    • Oil to fry

    Spice Mix

    • 1 tbsp dry mint leaves available at Indian grocery store
    • 1 tbsp roasted cumin seed powder
    • 1/4 tbsp garam masala available Indian grocery store
    • 1/2 tbsp black salt available in Indian grocery store
    • 1/2 tbsp salt
    • 1/2 tbsp red chili powder
    • 1/2 tbsp mango powder (amchoor) available Indian grocery store
    • Generous pinch of citric acid (nimbu ka sat)

    Instructions
     

    • Spice mix, in a bowl mix all the spices really well. Set aside.
    • Prick the tortillas from both sides, this will limit chips from puffing and make them crisp.
    • Cut each tortilla in 8 triangles, like slicing pizza.
    • Heat the oil in a frying pan over medium heat. The frying pan should have about 1 inch of oil. To check if the oil is ready, put a small piece of tortilla in the oil. The tortilla should sizzle and come up slowly.
    • Heat the oil in a frying pan over medium heat. The frying pan should have about 1 inch of oil. To check if the oil is ready, put a small piece of tortilla in the oil. The tortilla should sizzle and come up slowly.
    • Take them out in a plate and sprinkle the spice mix on both sides right away, before they are dry. This will keep the spices on the chips. Repeat the process until all the chips are done.
    • After the chips cool to room temperature they can be stored in airtight container for 1 month.

    Notes

    Suggestions
    1. For Fried Tortillas If you don’t find uncooked tortillas use thin tortillas.
    2. Fried tortillas store well in air tight container for a month.
    3. Fried tortillas can be served in many different ways; a quick and easy way is to make Papdi Chaat. Serve them with Chole Chaat or Matra Chaat and I am sure you can find many other ways to serve them.
    4. For Spice mix Make spice mix in a big batch and use it like Chaat Masala over the sliced fruits, salad, with yogurt. I am sure you can find many other ways to use this spice mix.
    Tried this recipe?Let us know how it was!

    Savor the Crunch: Spicy Indian Flour Chips

    When it comes to irresistible snacks, spicy Indian flour chips top the list. These crunchy delights, known for their bold flavors and satisfying texture, are perfect for any occasion. Whether you’re hosting a party, looking for a quick bite, or craving a spicy snack, these chips are sure to please. In this article, we’ll explore the origins, variations, and tips for making the perfect Indian flour chips at home, along with maximizing the use of internal links to other delicious recipes.

    The Essence of Spicy Indian Flour Chips

    Spicy Indian flour chips are made from a simple dough of flour, spices, and herbs, rolled out thin and fried to crispy perfection. The combination of spices used in the dough gives these chips their distinctive flavor, making them a favorite snack among spice lovers. These chips are often enjoyed with a cup of tea or as an accompaniment to meals, adding a delightful crunch to every bite.

    Origins and Cultural Significance

    These chips have their roots in Indian street food culture, where they are commonly known as “namak pare” or “mathri.” They are especially popular during festivals and celebrations, symbolizing the joy and togetherness of these occasions. The simplicity of the ingredients and the ease of preparation have made spicy Indian flour chips a staple snack in many Indian households.

    Tips for Perfect Spicy Indian Flour Chips

    • Choosing the Right Flour: The base of these chips is typically made from wheat flour, but you can experiment with other flours like chickpea or rice flour for different textures and flavors.
    • Spice Blend: A perfect blend of spices is key. Common spices include cumin, ajwain (carom seeds), chili powder, and turmeric. Adjust the spice levels according to your preference.
    • Rolling the Dough: Roll the dough as thin as possible for the crispiest chips. Thicker chips will be harder and less crispy.
    • Frying: Fry the chips in hot oil until golden brown. Ensure the oil is at the right temperature to prevent the chips from absorbing too much oil and becoming greasy.

    Variations to Try

    While the classic spicy Indian flour chips are delicious on their own, you can try different variations to keep things interesting. For instance, you can add finely chopped spinach or fenugreek leaves to the dough for a nutritious twist. Adding sesame seeds or crushed peanuts can also enhance the flavor and texture. For more creative ideas, check out Sweet and Sour Guava Curry and Dodha Burfi (Punjabi Milk Fudge).

    Pairing and Serving Suggestions

    Spicy Indian flour chips can be enjoyed in various ways. Serve them with a side of tangy tamarind chutney or refreshing yogurt chutney for a flavor contrast. They also make a great addition to a snack platter alongside Sweet Potato Chaat or Moong Dal Halwa (Vegan). These chips are perfect for munching on their own or as a crunchy side to a meal.

    Making Indian flour chips at home allows you to control the ingredients and ensure a healthier snack option. By using whole grain flours and minimal oil, you can enjoy these tasty chips without the guilt. For more healthy homemade snack ideas, explore Millet Soup (Bajra Raab) and Vegetable Biryani (Instant Pot).

    Frequently Asked Questions

    Q: Can I bake these chips instead of frying?

    A: Yes, you can bake the chips for a healthier option. Preheat your oven to 375°F (190°C) and bake the rolled-out dough until crispy and golden brown, about 15-20 minutes.

    Q: How long can these chips be stored?

    A: Store the chips in an airtight container to keep them crispy. They can last for up to two weeks when stored properly.

    Q: Can I make these chips gluten-free?

    A: Absolutely. Substitute the wheat flour with gluten-free flour blends or chickpea flour to make gluten-free spicy Indian flour chips.

    Conclusion

    The spicy Indian flour chips recipe is a fantastic way to enjoy a crunchy and flavorful snack that is easy to make at home. Whether you’re a seasoned cook or a beginner, these chips are sure to become a favorite in your snack repertoire. For more exciting recipes and variations, explore other delightful dishes like [Sweet and Sour Guava Curry, [Dodha Burfi (Punjabi Milk Fudge), and Masala Bell Pepper Curry. Enjoy the journey of flavors and happy cooking!

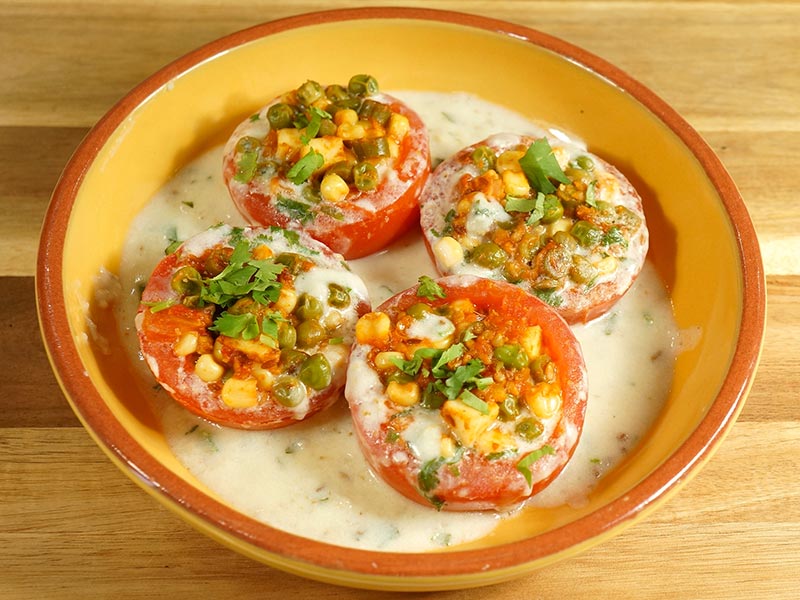
  • Stuffed Tomatoes with Gravy

    Stuffed Tomatoes with Gravy

    Stuffed Tomatoes with Gravy

    Stuffed Tomatoes with Gravy

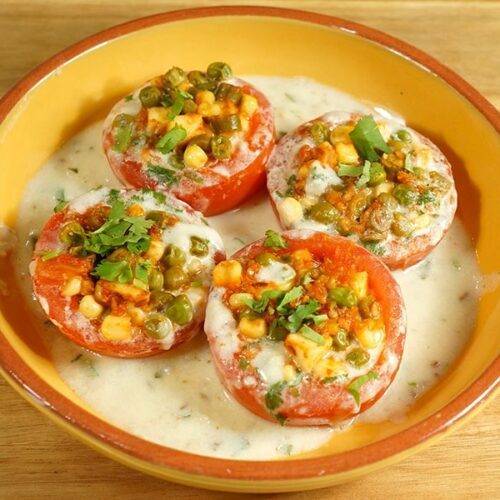
    Tomatoes filled with flavorful mixed vegetables simmered with spicy sauce makes a gourmet, delectable and mouthwatering dish. Serve this with roti, paratha or any flat bread. This flavorful dish is sure to be a crowd pleaser!
    5 from 1 vote
    Course Chaat
    Cuisine Indian
    Servings 4 people

    Ingredients
      

    • 4 tomatoes round medium size

    For filling

    • 1/2 cup green peas, I am using frozen peas
    • 1/4 cup green beans finely chopped
    • 1/4 cup corn kernels, I am using frozen corn
    • 1/4 cup paneer cut into very small cubes (available in Indian grocery store)
    • 1 tbsp ginger finely chopped
    • 2 tbsp oil
    • 1/2 tbsp cumin seed (jeera)
    • 1/8 tbsp asafetida (hing)
    • 1 tbsp coriander powder (dhania)
    • 1/4 tbsp red chili powder
    • 1/2 tbsp salt

    Gravy

    • 1 tbsp oil
    • 1/4 tbsp cumin seeds (jeera)
    • 1-1/2 tablespoon all purpose flour (plain flour, maida)
    • 1 teaspoon coriander powder (dhania)
    • 1 teaspoon ginger finely chopped
    • 1 teaspoon green chili finely chopped
    • 1/4 teaspoon salt
    • 1-1/4 cup milk
    • 2 tablespoon chopped cilantro

    Instructions
     

    • Slice tomatoes in half and scoop out pulp, pulp will be used for filling. Set aside.
    • For Filling: heat the oil in a saucepan over medium high, Test the heat by adding one cumin seed to the oil. If the cumin seed cracks right away, the oil is ready.
    • Add cumin seeds, asafetida as cumin seeds crack, add, ginger, coriander; turmeric, red chili, and salt stir for few seconds and add tomatoes.
    • Cook the tomatoes for about 2-3 minutes; add corn, green beans, green peas and paneer. Cook till vegetables are tender and the liquid from gravy has evaporated, this should take about 4-5 minutes. Vegetables should be very moist.
    • Stuff the tomatoes with filling, don’t over fill them. Set aside.
    • For Gravy: heat the oil in flat saucepan over medium heat, pan should be large enough to hold all the tomatoes in single layer, can not overlap the tomatoes.
    • Add cumin seeds as seeds crack add all purpose flour and stir fry for about one minute.
    • Add the milk slowly and keep stirring making sure there are no lumps. Add coriander, green chili, ginger, half the cilantro and salt, stir for few seconds.
    • After gravy comes to boil stir and put the filled tomatoes slowly in single layer. Cover the pan and lower the heat low medium. Let it cook for about 4 minutes, check the tomatoes, gently stirring gravy. If needed let it cook as needed, tomatoes should not be very soft as they will loose the shape.
    • Garnish with remaining cilantro. Serve hot.
    Tried this recipe?Let us know how it was!

  • Okra Tomato Curry ( Bhindi )

    Okra Tomato Curry ( Bhindi )

    Okra (Bhindi) Tomato Curry

    Okra Tomato Curry

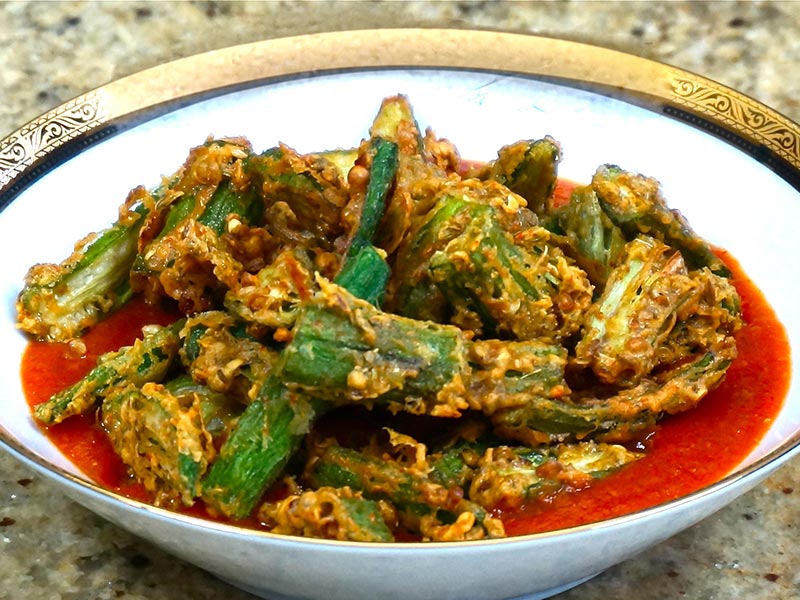
    Crispy okra (bhindi) served with a flavorful tomato curry is a mouthwatering side dish. You will be sure to impress your guests with this unique vegetable dish!
    5 from 1 vote
    Course curry
    Cuisine Indian

    Ingredients
      

    For Gravy

    • 4 medium tomato puree will make approx. 1-1/2 cup
    • 1/4 -inch piece of ginger
    • 1 tablespoon oil
    • 1/2 teaspoon cumin seeds (Jeera)
    • Pinch of asafetida (Hing)
    • 1 teaspoon coriander powder (dhania)
    • 1/4 teaspoon turmeric (Haldi)
    • 1/2 teaspoon  red chili powder
    • 1/2 teaspoon  salt
    • 1 teaspoon sugar
    • 1 teaspoon corn starch/arrowroot powder

    Fried Okra

    • Approx. ½ pond okra sliced from the center and cut in half to make about 1-3/4 cup cut okra (bhindi)
    • 1/4 cup  besan gram flour
    • 1/2  teaspoon salt
    • 1/2  teaspoon cumin seeds (jeera)
    • 1/2 teaspoon mango powder (amchur)
    • 1 teaspoon fennel seeds coarsely ground (sonff)
    • 1-1/2 teaspoons coriander seeds coarsely ground (dhania)
    • 1/2  teaspoon red chili powder
    • Approx. 3 tablespoons water
    • Oil to fry

    Instructions
     

    Gravy

    • Mix cornstarch with three tablespoons of water and keep aside.
    • Blend the tomatoes and ginger to make tomato puree.
    • Heat the oil in a saucepan over medium high. Test the heat by adding one cumin seed to the oil. If the cumin seed cracks right away, the oil is ready.
    • Add cumin seeds, and asafetida and stir for a few seconds now add coriander; turmeric, red chili, salt, and sugar stir fry for a few seconds and add tomato puree.
    • Cook the tomatoes for about 4-5 minutes, add cornstarch, and cook for about 3 minutes. Gravy should be pourable consistency. Gravy is ready to keep aside.

    Fried Okra

    • In a bowl put the okra and add all the dry ingredients, salt, cumin, mango powder, fennel, coriander, red chili powder and besan (gram flour) mix it well. Add the water slowly okra should be nicely coated with spices but the mix should not be runny.
    • Heat the oil in a frying pan over medium-high heat, the frying pan should have about 1 inch of oil. Oil should be moderately hot when you put okra in oil it should float right away but not change color.
    • Put one okra at a time into the oil and fry till they are golden brown on both sides this should take about four minutes.
    • Take them out over a paper towel.
    • Serve the Okra over gravy; don’t mix it as you should pick up the okra with gravy.

    Notes

    Suggestions
    1. You can prepare the gravy and okra in advance; gravy can be refrigerated for 4-5 days. Fried okra should be stored at room temperature for 3-4 days. Before serving heat, the gravy and heat the gravy in a frying pan like stir fry so they become crunchy and serve over the gravy.
    2. You can serve the fried okra without gravy as a side dish they taste great
    Tried this recipe?Let us know how it was!