Find Vegetarian Recipes: Exploring Indian Vegetarian Cuisine
Indian cuisine is a treasure trove of delicious and nutritious vegetarian recipes. Whether you’re looking for vegetarian recipes or explore a variety of Indian vegetarian recipes, Manjula’s Kitchen offers an extensive collection of dishes that cater to every taste. Let’s delve into some mouth-watering vegetarian Indian recipes that are both easy to prepare and packed with flavor.
Why Find Vegetarian Recipes?
Health Benefits: Vegetarian recipes are often lower in saturated fats and cholesterol while being high in vitamins, minerals, and fiber.
Environmental Impact: Choosing vegetarian meals can reduce your carbon footprint, as plant-based foods typically require fewer resources than meat-based foods.
Ethical Reasons: Many people choose vegetarianism for ethical reasons, preferring not to consume animal products.
Breakfast Recipes
Aloo Paratha
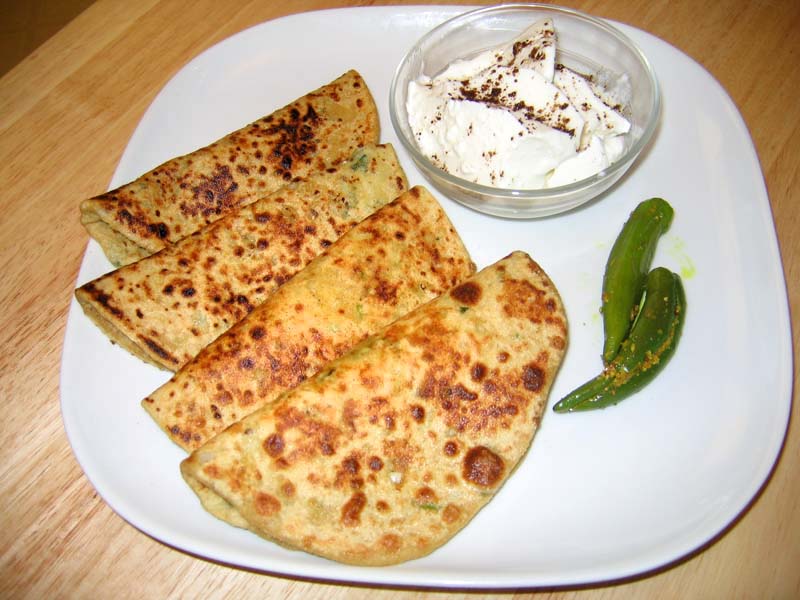
Aloo Paratha is a popular Indian breakfast made with whole wheat flatbread stuffed with spiced mashed potatoes. This dish is a classic example of Indian recipes vegetarian style. It’s hearty, flavorful, and perfect for satisfyingIndian breakfast ideas. Serve it with yogurt and pickle for a complete meal.
Upma
Upma is a savory semolina porridge cooked with vegetables and tempered with mustard seeds, curry leaves, and green chilies. This dish is a staple inSouth Indian recipes and a fantastic option when you wants vegetarian recipes that are quick and nutritious. Upma is often enjoyed with a side of coconut chutney.
Lunch Recipes
Chole (Chickpea Curry)
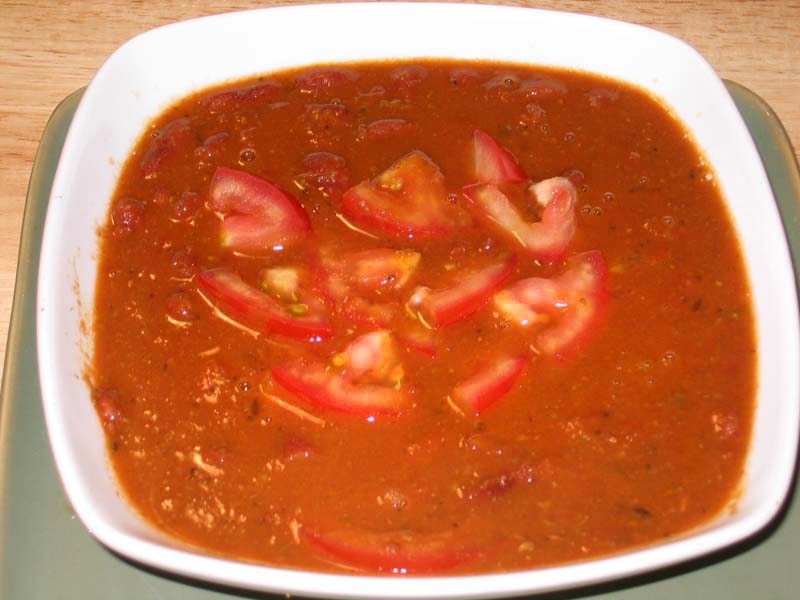
Chole is a robust chickpea curry cooked in a rich tomato-based gravy with aromatic spices. This dish is a beloved part of Indian vegetarian recipes and is usually served with rice or bhature (deep-fried bread). It’s a hearty and comforting meal that is both satisfying and nutritious.
Paneer Butter Masala
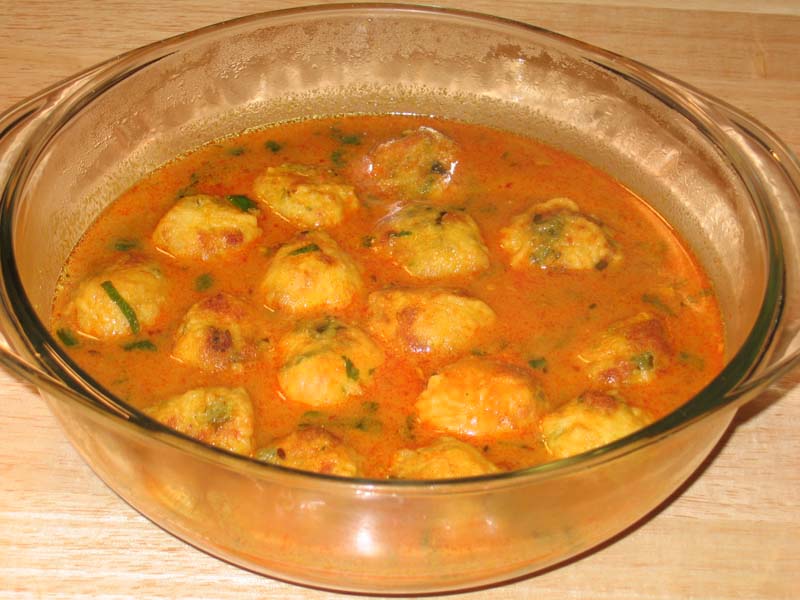
Paneer Butter Masala is a rich and creamy curry made with paneer (Indian cottage cheese) cooked in a spiced tomato and cashew gravy. This dish is a favorite amongvegetarian Indian recipes and pairs well with naan or jeera rice. The creamy texture and flavorful sauce make it a hit at any meal.
Dinner Recipes
Baingan Bharta
Baingan Bharta is a smoky and flavorful eggplant dish that is a must-try in vegetarian recipes in Indian cuisine. The eggplants are roasted until soft, then mashed and cooked with tomatoes, and spices. It’s a delicious and nutritious dish that pairs well with roti or rice.
Dal Makhani
Dal Makhani is a rich and creamy lentil dish made with black lentils and kidney beans simmered in a buttery tomato sauce. This dish is a staple in North Indian cuisine and a perfect example of Indian vegetarian recipes. It’s best enjoyed with naan or basmati rice for a complete meal.
Snack Recipes
Samosa
Samosa is a popular Indian snack consisting of a crispy pastry filled with spiced potatoes and peas. This snack is a favorite among those who want vegetarian recipes that are both delicious and easy to make. Samosas are typically served with tamarind or mint chutney.
Bhel Puri
Bhel Puri is a tangy and spicy snack made with puffed rice, vegetables, and tamarind sauce. This dish is a quintessential part of street food in India and a great addition to your collection of vegetarian Indian recipes. It’s light, flavorful, and perfect for an evening snack.
Dessert Recipes
Gulab Jamun
Gulab Jamun are soft, deep-fried balls made from khoya (dried milk) soaked in a sweet syrup flavored with cardamom and rose water. This dessert is a beloved part ofIndian recipes vegetarian and is often served during festivals and special occasions. The melt-in-your-mouth texture and sweet flavor make it a favorite.
Kheer
Kheer is a creamy rice pudding flavored with cardamom and garnished with nuts and raisins. This dessert is a classic in vegetarian recipes in Indian cuisine and is easy to prepare. Kheer is a perfect ending to any meal and is often enjoyed during celebrations.
Enhancing Your Vegetarian Menu
To enhance your vegetarian menu, consider exploring related categories that complement these vegetarian Indian recipes. Adding Indian snacks like samosas and bhel puri can provide a variety of flavors and textures. For a sweet ending, explore Indian desserts such as gulab jamun and kheer. Incorporating healthy recipes like upma and baingan bharta can offer lighter options for your meals. Hosting a large gathering? The popular party recipe category is filled with dishes that are sure to impress your guests and make your celebration memorable. Including North Indian recipes like chole or dal makhani can add a touch of authenticity to your meal.
Tips to Find Easy Vegetarian Recipes
Online Recipe Sites: Websites like AllRecipes, Epicurious, and BBC Good Food offer a vast collection of vegetarian recipes. Use search filters to find easy vegetarian recipes that fit your time constraints and skill level.
Cooking Apps: Apps like Tasty, Yummly, and Mealime can help you find the vegetarian recipes you need. These apps often provide step-by-step instructions and video tutorials.
Social Media: Platforms like Instagram, Pinterest, and YouTube are excellent resources to find vegetarian recipes in India. Follow vegetarian chefs and influencers for inspiration and new ideas.
Cookbooks: Invest in a few good vegetarian cookbooks. Authors like Madhur Jaffrey and Meera Sodha offer fantastic collections of vegetarian recipes.
Cooking Classes: Consider taking a vegetarian cooking class to learn new techniques and find easy vegetarian recipes that you can incorporate into your routine.
FAQs About Finding Vegetarian Recipes
Q: How can I find vegetarian recipes that my whole family will enjoy?
A: Look for versatile and customizable recipes like build-your-own taco bowls, pasta dishes, and stir-fries. These can easily be adapted to suit different tastes.
Q: Are there any quick ways to find easy vegetarian recipes?
A: Yes, use cooking apps, social media platforms, and online recipe databases. These resources often have filters for easy and quick recipes.
Q: Where can I find vegetarian recipes in India?
A: To find vegetarian recipes in India, explore Indian cooking blogs, YouTube channels by Indian chefs, and cookbooks dedicated to Indian cuisine.
Q: Can I find vegetarian recipes that are also gluten-free?
A: Absolutely. Many vegetarian recipes are naturally gluten-free. You can also look for specific gluten-free vegetarian recipes online or in specialized cookbooks.
Q: What are some good sources to find easy vegetarian recipes?
A: Good sources include online recipe websites, vegetarian cookbooks, cooking apps, and social media platforms where chefs and home cooks share their recipes.
Conclusion
Embarking on a journey to find vegetarian recipes can be both exciting and rewarding. Whether you’re looking to find easy vegetarian recipes for a quick meal or seeking to vegetarian recipes India for an authentic culinary experience, there are endless possibilities to explore.
Manjula’s Kitchen is one such brand which provides authentic reference point to all kinds of vegetarian recipes and providing alternatives to even dietary plans be it vegan, high protein, low carb or low calorie. We got all the healthy recipes across various platforms from Pinterest to YouTube to Instagram to Facebook. Manjula’s kitchen recipes are available in video and blogging format allowing every one enjoy its flavorful recipes.
This is one simple and yummy halwa that is quick & easy to make and tastes great. The richness of the halwa comes from the almonds added to it. Also this halwa is almost healthy as it includes a large amount of veggie in it. It has less fat than the traditional badam halwa but tastes almost similar to it.
Mushroom Sesame Fingers are a great choice for a light, crispy and low-fatappetizer. Prepare it in advance whenever there’s a party, and store it in the oven. Reheat for 10 minutes before serving.
Crispy Veggie Balls with Cilantro Dipping Sauce is a delicious appetizer to entertain guests throughout the years. It has been highly appreciated by all my guests who have tried it. Whenever I invite people for dinner, they ask if I will be serving crispy veggie balls! Hope this recipe pleases your crowd as well!
1 cup French green beans, cut into 1/4 inch long sections 1 large potato, cooked in microwave (approx 6 or 7 minutes), peeled, and mashed
1/2 of a large onion, finely chopped
1/2 cup roasted cashew nuts, chopped
1/2 cup golden raisins
1/3 cup water
3 cloves garlic, peeled and finely chopped
1 large jalapeno pepper, finely chopped (substitute: 1 tsp red chili pepper – can adjust to taste)
2 tbsp powdered corn starch
1 tsp curry powder
1/2 tsp salt
1/4 tsp garam masala
4 cups canola oil (or oil of your choice, for frying)
Dipping Sauce (optional):
1/3 cup tomato ketchup
1/4 cup honey mustard
1/4 cup cilantro, un-stemmed and finely chopped
1/2 tsp red chili flakes (or more, according to taste)
Instructions
Method
In a 10” stir fry pan, heat 2 tbs cooking oil over medium high heat. Add coconut and cook until slightly brown. Next add garlic, onion, jalapeno (or chili pepper), curry powder. Cook for 2 minutes and then reduce to medium heat.
Add Nutrela (which you prepared as above), carrots, beans, and salt. Combine thoroughly and let cook with lid on top. Let cook for approx 3 minutes or until vegetables are cooked through.
Uncover the pan and increase the heat a bit. Cook until the water that was released by vegetables dries out. Then turn off heat.
Add garam masala, cashews, raisins, and cilantro. Combine thoroughly for approx 2 minutes. Then set aside for a few minutes to allow mixture to cool down.
Add mashed potato (as prepared above) to cooked vegetables and combine thoroughly. Potato will serve as a binder. Use a candy or melon scooper to make approx 30 (1” diameter) balls. Set these aside on a large dinner platter.
In a 1 or 2 qt sauce pan, bring 1/3 cup of water to boil over high heat. Add corn starch and boil over medium heat for 4-5 minutes (stirring frequently) to make liquid starch. Set aside for a few minutes to allow it to cool before working with it.
Place 2 cups of Panko on a medium platter. Place liquid starch in a bowl. Dip one ball at a time in the starch and roll over the Panko. Place on a clean dinner platter. (Starch will act like glue to help Panko stick to balls). After you have breaded all the balls, repeat the process by re-dipping balls in starch and rolling in Panko again. Let the balls rest for approx 5 minutes at room temperature – this will allow Panko to settle on the veggie balls.
Over medium high heat in 10” stir fry pan, place rest of cooking oil and wait until it has heated up. Fry 4-5 balls at a time until golden brown all over. Adjust the heat as necessary during frying.
Serve immediately with cilantro dipping sauce (you can substitute with any store-bought cilantro chutney or tomato ketchup)
Cheese is produced and consumed throughout the world in various forms. Shakkar para or Namak para are very popular snacks served in India during Diwali season. Combing cheese with Namak Para has resulted into what I call "Cheese Para". The cheese adds a little zing to the Namak Para taking it to a whole new level.
50 grams (1 3/4 ounces) cheese (Cheddar or Colby Jack cheese)
1 tbsp butter
1 tsp red chili powder
Salt to taste
1/2 cup water to knead the dough
Oil for frying
Instructions
Method
Grate the cheese finely. (Use the smallest size possible)
Take cold butter and chop them into small pieces using a knife. Make sure the butter is straight out of the fridge and is not at room temperature. Using cold butter will make the cheeslings crisp and flaky.
Mix salt, red chili powder, grated cheese and butter in the flour.
Add water little at a time and knead the mixture into a firm but smooth dough. Cover the mixture with a damp cloth/ kitchen towel and let it rest for 15 minutes.
Knead the dough and divide this into 4 equal parts.
Roll out each part into a circle of approximately 8-inch diameter.
Cut into rectangular pieces such that each cheeseling is about l 1/2 inches long and 1/2 inch wide.
Heat oil on medium heat.
Once the oil is hot, drop the pieces and fry till they are golden brown. Do not fry them until brown else the cheese will taste bitter.
Notes
Tips
Since the cheese is added directly to the flour while kneading the dough, make sure that it is finely grated else the cheese will separate while frying and will burn.
For 1 1/2 cups of all-purpose flour, 50 grams of cheese is sufficient for a subtle cheese taste. However you can increase the amount of cheese in case you want the cheese to dominate the taste. Be careful while adding more cheese as it can separate while frying.
You can substitute the red chilli powder with ground pepper as well.
Who doesn't like chaat? I think the Indian chaat is loved universally these days. It's a great appetizer and one that's bound to get those taste buds jumpin' for more. Chaat is a great all-weather appetizer too. The spices make it perfect for that rainy/cold day and the freshness makes it perfect for a hot summer's day as well. However, chaat – be it bhel puri, aloo chaat, dahi batata puri etc., served up in the traditional way can get messy and it's not easy to serve as an appetizer, especially to large party crowds. When made ahead of time, it can get soggy too.Appetizers are typically finger foods that are easy to pick up and eat while waiting for the main course. So I decided to come up with an appetizer that has all the flavors of a traditional chaat and at the same time has the convenience of being able to be made ahead of time and is also a finger food. After some thinking, I came up with these yummy Chaat Bites – a crowd pleaser for sure!
1/2 Chickpeas – can drained or 1/2 cup after soaking overnight
1 small Tomato (chopped)
3 tsp Chaat masala
1-2 tsp Red chili powder
2 tsp Chole masala
1 tbsp Greek yogurt (if you don't have greek yogurt, take regular plain yogurt in a thin muslin cloth, tie the ends and hang it overnight in the refrigerator to drain out the liquid)
Salt to taste
1 Cup Fine Sev
For Date/Tamarind (Red) chutney:
5 dates
1 tbsp tamarind paste
1 tbsp of jaggery
1 tsp black salt
1 tsp red chili powder
2 tsp cumin powder
1 1/4 cup of water
For Mint/Cilantro (Green) chutney:
2 cups Mint leaves (washed)
1 cup Cilantro leaves (washed)
2-3 green chilies
salt to taste
pinch of jaggery
2-3 tbsp of water
Instructions
Method
Take the chickpeas in a microwave safe bowl. Add 2 tsp chaat masala, chopped tomato, chole masala, salt to taste (chaat masala already has salt), 2tbsp water. Microwave covered on high for 5 minutes. Remove and mash with fork or pulse couple times in the blender to get a course and chunky paste.
Take the above paste in a big bowl. Add all the remaining ingredients except the chutneys and the sev.
Now add about 2 tsp of red chutney and 2tsp of green chutney.
Mix all ingredients well using a spatula or clean hands to form a big ball like dough. Should be able to make small balls.
Now take about lemon sized chunks of the mixture and shape into balls.
Place the balls on a cookie sheet and bake at 350F for about 7-8mins. This step is entirely optional. The baking only adds some crispiness to the texture and enhances some flavors but the since all ingredients are already cooked, this step can be skipped.
Now in another deep bowl combine 1/2 cup of red chutney and 1/2 cup of green chutney and mix well.
Take the 1cup of fine sev in a shallow dish.
Now take one ball and dip it in the chutney mixture to coat it evenly and then roll it in the sev until the sev sticks to it all around. You just made your first chaat bite!
Carefully place it on the serving dish. Repeat with all other balls and serve the chaat bites along with the remaining chutney.
For Date/Tamarind (Red) chutney:
Combines all ingredients into a pan.
Heat on medium until water starts to boil and the dates soften.
Then put it in a blender and blend to smooth chutney.
Back home in India, we used to relish the pickled chilies or mirchi ka achar, where good quality of mirchi or chilies are chosen with great care, and then stuffed with pickle spices , drenched in hot mustard oil and infused with the flavor of fennel, cumin, mustard etc. The other way to enjoy it as an appetizer, where the jalapeno or korean chilies are coated with seasoned chickpeas flour and then deep-fried in hot oil, and on an overcast monsoon day you can relish these hot mirchi bhajjis with a cup of coffee…some of the simple pleasures in life. No discussion of chilies can be ever completed without mentioning the celebrated mirchi ka salan from the cuisines of Hyderabad. The lip smacking dish successfully wins every heart whether you love or hate the chilies.
leave the stalk intact and cut (lengthwise) the chili in half with a knife, take extra care while handling the chilies. Discard the seed and membrane with the help of a knife or spoon. Do not touch the seeds and membrane with your hand.
Drop the chilies in boiling water for couple of minutes, drain and let it dry. Blanching the chilies, this way will reduce the heat or spiciness of chilies.
Preparing the filling : Heat a tablespoon of olive oil in a pan, and then brown the sliced onion for few moments.
Once the onions are browned evenly, add the grated coconut, candied ginger, raisins, seasoned it well with salt and pepper. If you wish, you can add little cumin powder also.
Stir for few moments on low heat. Take off the heat and add bread crumbs in it. Mix them well.
Let the filling cool slightly before stuffing the chili peppers.
With the help of a tea-spoon, fill the halved chili peppers with coconut mixture and topped each of them with cheese.
Bake in a preheated oven at 350 F for 15-20 minute or until the cheese melts.
Mawa Kachori is an exotic dessert. This is a delicacy from the state of Rajasthan. Rajasthan is known for its rich food and culture its a sweet savory snack. Pastry filled with an aromatic mixture of Mawa and nuts makes a very festive dessert.
1/4 cup mixed nuts (almonds, pistachios coarsely ground)
1/4 teaspoon crushed cardamom
3 tablespoons sugar
Note: If you are using Mawa use ¾ cup of Mawa instead cream and powder
Oil to fry
Syrup
1cup sugar
1/2 cup water
1/8 teaspoon crushed cardamom
Few strands of saffron
Instructions
Crust
Mix flour, and clarified butter in a bowl, making it firm and soft adding water slowly as needed. Knead the dough until the dough becomes soft and pliable.
Set the dough aside and cover it with a damp cloth. Let the dough sit for at least ten minutes.
Syrup
Boil the sugar and water on medium heat, as sugar comes to a boil add saffron, and cardamom on medium heat until syrup is about one thread or 220 degrees (Fahrenheit) on a candy thermometer. Set it aside.
Filling
Mix the cream and milk powder in a frying pan. Cook on medium heat until it becomes the consistency of soft dough, this should take about 3-4 minutes. Stir continuously so the mixture does not burn on the bottom of the pan. This mixture is known as Mava.
Next add nuts mixture, sugar, and cardamom powder to Mawa. Mix well and cook for about 2 more minutes until the mixture is consistent with soft dough. Keep it aside.
After cooling, the mixture will become drier but still should be lightly moist.
Making Kachoris
Knead the dough for a minute.
Divide the dough into about 18 equal parts.
Roll each ball into about 2-inch diameters.
Take one of the rolled doughs in your palm and place about 1 tablespoon of filling in the center. Pull the edges of the dough to wrap the filling. Proceed to make all 30 balls.
Let the filled balls sit for 3 to 4 minutes before pressing.
In the frying pan heat the oil on medium-high, the frying pan should have about 1-1/2 inches of oil.
Set the filled balls on a clean and dry surface with the seam facing up. Using the base of your palm, slowly flatten them into a circle of about 3 inches.
To check if the oil is ready put a little piece of dough in the oil. It should sizzle, and come up slowly.
Slowly drop the Kachoris in the oil, do not overcrowd the kachoris in a frying pan, fry them on medium heat.
After they are puffed, slowly turn them over.
It will take about 5-6 minutes to fry. Fry until golden brown on all sides.
If the kachoris are fried on high heat, they will get soft and will not be crispy.
Notes
Serving
Just before serving drizzle the kachori with about 2 tablespoons of hot syrup. Garnish them with leftover filling or sliced pistachios.
These are absolutely delicious and flavorful sandwiches that are quick and easy to make. Tofu sandwiches are healthy and appropriate for Vegans, too. The Tofu provides a great source of protein, while the Hari Cilantro chutney brings in a unique ethnic flavor to the sandwich. These sandwiches make a great “to-go” lunch.
Prepare sandwich ingredients: Slice tofu into ¼” thickness and pat dry. Wash and remove ends of zucchini, then cut lengthwise into approx. ⅛” thick slices. Wash and slice tomatoes. Set aside.
Mix Hari Cilantro Chutney and sugar, set aside.
Generously grease a flat skillet and bring to medium heat. Add tofu and zucchini slices and lightly sprinkle with salt. Grill on both sides until they are light-brown in color. Remove from skillet and wipe skillet clean.
Slice rolls lengthwise through the center and lightly spread with olive oil on the inside portion. Place on medium-heat skillet to toast. Turn off the heat.
Assemble the sandwich over the skillet: Turn over the roll and lightly spread Hari Cilantro Chutney on the bottom half of the roll. Layer with lettuce followed by tofu slices. Spread tofu with more chutney. Layer with zucchini followed by tomatoes. Cover with the top half of the roll.
Notes
VariationYellow Squash, eggplant, or mushrooms also taste great in this sandwich.
Potato skins are boiled potatoes filled with spicy chickpeas. This is a mouthwatering snack, that looks great and tastes yummy. It is a delicious and healthyappetizer for the people who don’t like to have oily food.
Boil approximately 3 cups of water in a pan over medium high heat; add salt, oil and potatoes.
Cover and cook potatoes till they are tender, which will take approximately 20 minutes. Remove them from the water.
Once the potatoes are cool to touch, scoop out the insides from the center leaving ¼ inch thickness to outside of the potato. Red potato works best for this recipe because they hold their shape nicely.
Set potatoes aside.
Filling
Soak chickpeas for at least 8 hours in 3 cups of water or more.
Boil the chickpeas in 1 ½ cup of water in a pressure cooker over medium high heat. As the pressure cooker begins to steam, lower the heat to medium and cook for 6 minutes.
Add all the spices, mix well and cook for 3-4 minutes over low heat.
Spicy chickpeas should be a thick gravy-like consistency, not dry. As chickpeas cool they will absorb the water. Set aside.
Assembling Potato Skin
Take each potato bowl and coat the inside with one teaspoon of Hari Cilantro Chutney.
Place 2 tablespoons of spiced chickpeas into the chutney coated bowl. Drizzle the top with tamarind chutney.
Potato Skins Recipe: A Delicious Appetizer for Any Occasion
Potato skins, a beloved appetizer, can be transformed into a delectable snack that satisfies both vegan and gluten-free diets, offering a low-fat option perfect for those seeking a healthier indulgence, while still enjoying the savory crunch of chaat-inspired flavors. Potato skins are a classic appetizer loved by many for their crispy texture and delicious toppings. This potato skins recipe offers a simple yet flavorful way to enjoy this dish at home. Whether you’re hosting a party or simply craving a savory snack, learning how to make potato skins will surely impress your guests and satisfy your taste buds.
Step 1: Preparing the Potatoes
Start by scrubbing the potatoes thoroughly under running water to remove any dirt or debris. Since the skin plays a crucial role in this dish, ensure you choose potatoes that are uniform in size and free from blemishes. The ideal potatoes for potato skins are russets or Idaho potatoes, known for their starchy texture, which crisps up beautifully when baked.
Step 2: Baking the Potatoes
Once cleaned, prick the potatoes all over with a fork to allow steam to escape during baking. This prevents them from bursting open in the oven. Place the potatoes directly on the middle rack of a preheated oven and bake at 400°F for about 45-60 minutes or until tender when pierced with a fork. Baking the potatoes ensures they are cooked through while developing that desirable crispy texture in the potato skin.
Step 3: Cooling and Halving the Potatoes
After baking, allow the potatoes to cool for a few minutes until they are safe to handle. Then, carefully cut each potato in half lengthwise using a sharp knife. Use a spoon to scoop out the flesh, leaving about a quarter-inch layer attached to the potato skin. Reserve the scooped-out potato flesh for another use, such as mashed potatoes or potato soup, minimizing food waste.
Step 4: Crisping the Potato Skins
Return the hollowed-out potato skins to the oven, placing them cut side up on a baking sheet. Increase the oven temperature to 450°F and bake the potato skins for an additional 10-15 minutes or until they are golden and crispy. This step ensures that the potato skins develop a satisfying crunch, providing the perfect base for your toppings.
Step 5: Adding Toppings
Once the potato skins are crispy and golden brown, it’s time to add your favorite toppings. Popular options include shredded cheese and dollops of sour cream. Feel free to get creative with your toppings, experimenting with different combinations to suit your taste preferences. Return the topped potato skins to the oven for a few minutes to melt the cheese and heat up the toppings.
Step 6: Serving and Enjoying
Once the toppings are heated through and the cheese is melted and bubbly, remove the potato skins from the oven and transfer them to a serving platter. Garnish with additional chopped herbs, such as parsley or chives, for a pop of color and freshness. Serve the potato skins hot, alongside your favorite dipping sauces, and watch them disappear within minutes!
Tips for Perfect Potato Skins
For extra crispy potato skins, brush the hollowed-out shells with melted butter or olive oil before baking.
To save time, you can prepare the potato skins in advance up to the point of baking them with the toppings. Simply cover and refrigerate the assembled potato skins until you’re ready to bake and serve.
Get creative with your toppings! Try adding cooked ground beef or turkey, diced bell peppers, or jalapeños for a spicy kick.
Variations of Potato Skins
Vegetarian Option: Opt for vegetarian toppings such as sautéed mushrooms, diced tomatoes, and black olives.
Loaded Potato Skins: Go all out with your toppings by adding a variety of ingredients such as chili con carne, guacamole, and salsa for a hearty and flavorful twist.
Tex-Mex Potato Skins: Use Mexican-inspired toppings like shredded Mexican cheese blend, diced avocado, and a drizzle of chipotle mayo for a south-of-the-border flair.
Benefits of Potato Skins
Nutrient-Rich: Potato skins are a good source of fiber, vitamins, and minerals, including potassium and vitamin C. Leaving the skin on maximizes the nutritional benefits of this appetizer.
Versatile: You can customize potato skins with your favorite toppings, making them suitable for various dietary preferences and occasions.
Crowd-Pleaser: Whether served as an appetizer at a party or enjoyed as a snack while watching the game, potato skins are sure to be a hit with guests of all ages.
Frequently Asked Questions (FAQs)
Q: Can I make potato skins ahead of time?
A: Yes, you can prepare the potato skins up to the point of adding the toppings, then cover and refrigerate them until you’re ready to bake and serve.
Q: Can I freeze leftover potato skins?
A: While it’s best to enjoy potato skins fresh, you can freeze any leftovers in an airtight container for up to 1-2 months. Reheat them in the oven until heated through before serving.
Q: Can I use different types of potatoes for this recipe?
A: While russet or Idaho potatoes are traditionally used for potato skins, you can experiment with other varieties such as Yukon Gold or sweet potatoes for a unique twist.
Other Recipes on Manjula’s Kitchen
If you’re looking to explore more Indian recipes, appetizers, beverages, and desserts, be sure to check out the following links on Manjula’s Kitchen. Here are some links to recipes on Manjula’s Kitchen official website:
Veggie Pops in Cucumber vase with Green Apple chutney
These appetizers are served in a cucumber vase to make it healthy along with Green Apple chutney. I have used an assortment of veggies (carrot, celery included) to make the veggie bites. Served at the tip of a carrot stick they make great veggie pops that go perfectly with the green apple chutney as accompaniment. Set in a cucumber vase, it has a fresh spring look just right to wet your appetite.
Microwave the potato after piercing it a couple times. Use the potato setting on the microwave or microwave on high until soft about 5mins. Roughly chop the carrot, celery and broccoli. Take in a microwave safe bowl along with about 3 tbsp of water and microwave on High for 4 minutes.
Mash up the potato after removing its skin and keep aside. Drain the other veggies and grate them up. Combine with the potatos. Add the remaining ingredients except bread crumbs and knead.
Make bite size balls of the mixture and flatten on palm to about 1cm thickness. Roll in bread crumbs.
Heat a skillet on medium and coat with oil or oil-spray. Place the flattened balls on the skillet and cook until golden brown. Flip over and cook until the other side is golden brown too. Drizzle oil as needed. Remove on a paper towel. Veggie bites are ready.
Green apple chutney
Combine jaggery and water and heat on med-hi until the jaggery dissolves.
Add tamarind paste and shredded green apple and cook for 1 minuite.
Reduce heat to medium and add the red chili powder, cumin powder and salt.
Let it simmer for about 5 mins and until it thickens to sauce like consistency then turn off the heat.
Putting it all together
Cut about 3 inch piece of cucumber from one end to make the cucumber vase.
Flatten out the narrow end so that the cucumber can rest on the narrow end.
Scoop out the interior fully.
Make V-shaped incisions on the wider end as pictured.
Now cut out about 3 inch long firm sticks out of a carrot. It should be thick enough to hold the veggie bites.
Gently pierce the carrot sticks into the veggie bites and place in the cucumber vase. Decorate with mint leaves.
To serve the chutney, cut about 2 inch piece of cucmber. Slice vertically in half and scoop out the interior. Pat dry and spoon the green apple chutney on it.
Veggie pops in cucumber vase with green apple chutney is now ready to be served!
Notes
Additional NotesNot only do the veggie pops taste great with the chutney, the carrot sticks and cucumber taste great with the chutney as a dip too so the appetizer can be consumed in its entirety. The soft and mildy spiced veggie bites along with the fresh ‘n’ crunchy vegetables complemented by the green apple chutney are sure to set your taste buds rolling.
Wonton Cups with Spicy Carrot and Cheesy Apple Filling
These pretty little wonton cups are perfect for a delicious springtime appetizer. A spicy carrot and potato filling is delicately balanced with the taste of cheesy and crunchy apples. The wonton cup adds just the right amount of crunchiness to this zestful mix of flavors. Serve these for your next party and watch the plate getting emptied out as quick as a wink!
Preheat oven to 350 degrees. Brush oil on both sides of each wonton wrapper. Gently press one wrapper into each cup of a 12-muffin pan. Bake for 7 minutes. Remove from oven and allow it to cool.
To make the filling
Boil potatoes until they are tender
After the potatoes are cool, peel the skin off and mash the potatoes.
Heat the remaining ¼ cup oil in a frying pan. Test the temperature of the oil by adding a fennel seed to the oil; if it cracks right away the oil is ready.
Add fennel seeds and stir fry for half a minute.
Add the onions and carrots in the oil. Stir fry in medium high heat till the onions turn golden brown.
Add the potatoes to the mixture and stir fry on medium high heat till they are light golden brown.
Add salt, cumin powder, ground red pepper and cook for another 4-5 minutes. Adjust salt and red pepper to your taste.
Replace 12 of the baked cups in the muffin pan.
Fill with 2 tablespoons of filling mixture.
Sprinkle with grated parmesan cheese.
Return to the oven and bake at 350 degrees for 17-20 minutes. The wonton wrap will become crisp. (Sometimes oven timings vary; so if the wonton cup doesn’t become crisp in the given time, return to oven for 2-3 minutes. Make sure to wear oven gloves)
Remove from muffin-pan to cool.
Garnish with crunchy sweet apples.
Notes
Notes
Wonton wraps are available in Chinese grocery stores or in Asian vegetables section in regular grocery stores.
You will also need a muffin pan for this recipe. Available in the Baking Section in grocery stores.
Tips
This appetizer is a perfect solution to busy schedules.
Pre-bake the wrappers and store in airtight containers once cool.
Make the filling and store it in the fridge. It is very convenient and quick to bake when guests drop by unexpectedly.
Suggestions
Try adding soybean nuggets to the filling. Boil 10-15 soybean nuggets in water with a little salt. When the soybean nuggets are softened, shred them into little pieces. Heat oil in a frying pan with medium to high heat. Fry the shredded nuggets. Add while potatoes are being fried.
This Bean Sprouts Salad Spring Roll recipe is Vietnamese cuisine inspired salad. I give credit to my very dear friend Anaya for this recipe and she in turn gives credit to her friend and food network. No matter what changes we make, this spring roll is tasty, healthy, very filling, very colorful, and quick & easy to make. It has always been a very big hit whenever I have taken to potluck. Hope you all enjoy it. This versatile spring roll can be eaten with mint sauce or cilantro. I have used mint dressing in this recipe. I especially like this since it is not fried, tasty and a healthy salad which I like to skip a meal and eat this instead.
In a mixing bowl take 3 cups of bean sprouts and set aside.
Cut carrots and beets into thin strips and add to bean sprouts. Chop cilantro and green chilies finely and add to the bowl.
Dry roast 1/3 cup of peanuts without oil and mix it in.
Add I tsp of black sesame oil, salt, pepper powder, lime juice and set aside for 15 minutes.
Now take the rice paper wrapper (Available in all Chinese/Vietnamese grocery store) and follow the instructions on the wrapper to fold it.
Divide the salad into 10 equal parts or stuff in a handful at a time.
Most of the rice paper needs to be soaked in water for 2-3 minutes and put the stuffing in and roll it. Once put in water it becomes very soft and pliable.
Notes
Tips
Tastes best when served immediately after the salad is wrapped.
If planning to make for a party, make the stuffing ready and wrap it 30 minutes before or if wrapped at an earlier time, roll each wrap in saran wrap so that it does not stick to each other.
Be innovative and add vegetables and nuts as per your taste.
Mixed Sprouts and Arugula Green Salad with White Bean Dressing
My recipe for this month's contest is Mixed Sprouts and Arugula Green Salad with White Bean Dressing. I have been following your website for some time and I learned many recipes from you (as well as recipes from every month contest winners). This time I got chance to participate in the contest and I am very excited. This is a healthyvegansalad with all the right nutrients to give a boost to ones health.
4-5 tablespoonQuarter cup sprouted Kala channa (Bengal gram)
Quarter cup sprouted Red Kidney beans
Quarter cup sprouted Black beans
Quarter cup sprouted Moong beans
10 cherry tomatoes cut into two pieces
1/2 cup Red Cabbage chopped
1/4 cup of Poblano Pepper chopped bite size
1 carrot cut into bite size
2 Sweet Red Mini peppers chopped into bite size
2 Sweet Yellow Mini peppers chopped into bite size
2 Sweet Orange Mini peppers chopped into bite size
1 seeded and chopped green chili
1 stick of celery chopped
1 small Mexican mango cut into bite size
2 cup of arugula green (I also mixed a small amount of watercress green)
1 teaspoon of olive oil
1 teaspoon of cumin seed
For Salad Dressing:
4-5 tablespoonQuarter cup white beans washed and soaked in about 1 cups of water overnight.
1/2 tablespoon black pepper
1 and 1/2 teaspoon Salt, adjust to taste
1 teaspoon Red chilly powder
1/2 tablespoon vinegar
10 dashes of Balsamic vinegar
1 tablespoon lemon juice, adjust to taste
1 tablespoon ginger juice or adjust to taste
2 tablespoon olive oil
1 Orange
1 Zest of orange
1/2Zest of Lemon
Sweet Mini peppers – 1/2 of Red, 1/2 of Yellow and 1/2 of Orange, chopped very finely.
1 and 1/2 tablespoon fresh Dill
1/2 cup of water
For Garnish
Slices Cucumbers, Radish, and Carrot
Instructions
For Dressing
Drain the white bean and wash it.
In a pressure cooker add white beans with 1 and 1/2 cup of water.
As pressure cooker starts steaming turn the heat down to medium low, cook for about 10- 12 minutes.
Turn off the heat and wait for 10 min. Now open cooker and check white bean, they should be soft. Drain the white beans and allow it to cool for 10 -15 min.
Next, in a food processor add white bean, 2 tablespoon of olive oil and 3 tablespoons of water. Make a paste.
In bowl add white bean paste and add rest of water to make it dressing like consistency (this depends upon one's own choice).
Next add orange zest and the juice of a orange. Stir.
Hot and Cold Bean Salad in Lettuce Cups with Tomato Lime Dressing
This Hot and Cold Bean Salad in Lettuce Cups with Tomato Lime Dressing recipe is full of color and bursting with flavors and textures. The best way to serve this salad is both hot and cold at the same time. Confused!? Well, don't be.One ingredient is warm and the rest of them are cold. The best thing is that the cup in which it is served can also be eaten (so minimal washing after). That is a well deserved bonus for all the busy bees out there along with the recipe being a healthyvegan and a great meal for those who are diet conscious.
3-4Whole iceberg lettuce leaves or gem lettuce leaves :
Wash and trim the edges of the leaves.
1/2 hour before serving time, take a large bowl of cold water and add ice cubes.
Plunge the lettuce leaves in this ice cold water.
Instructions
Method
Wash and chop the veggies. Keep the chopped avacado in a seperate bowl. Refrigerate rest of the veggies.
Wash the mint and coriander leaves and chop coarsely
Grate the garlic finely.
De-seed and chop the red chili.
Finely chop the lemon thyme sprigs.
Mix all the ingredients given for the salad dressing and refrigerate.
Assemble and serve:
In a large bowl add the chopped veggies except avocado, mint and coriander leaves.
Add half the dressing and mix two to three times.
Drain and rinse the beans to get rid of the excessive salt. Add fresh water (just enough to barely cover the beans).
Cook in microwave high for 4-5 mins until pipping hot.
Add this to the veggie mix along with the avacado and toss once.
Serve immediately in the chilled lettuce cups along with the reserved salad dressing.
Notes
Notes:
Avocado can turn mushy if mixed at the beginning and will not look and taste nice.
It is important to serve the dressing chilled even if the salad is at room temperature. The reason being, flax seed oil contains more than 50% of good fats (omega 3 and omega 6) which gets destroyed when heated. Even though this is a healthy oil,1-2 tbsp is enough as it does comes with more or less the same amount of calories as the others. If this oil is unavailable, please kindly use olive oil or peanut oil for a smoky tasty.
Points to remember:
Buy fresh vegetables and cut them before 20 minutes or so before serving time.
Refrigerate all the vegetables added in this salad before and after cutting them until serving time.
This dish is a favorite for breakfast or as a light snack in different parts of India. Being raised in Bihar, my mother was very fond of Chudwey. She would often prepare this dish as a special snack for guests to be served with tea. I have grown up loving this recipe and thought I would share it with all of you. This is a quick and easy recipe to make and very delicious.
2cupsthick poha, poha is available in different thickness
1cupgreen peas, I am using frozen
2tbspoil
1tspmustard seedsrai
3cardamomsilachai
1/2tspturmerichaldi
1/4tspred chili powder
1green Chile finely chopped
1tspginger finely chopped
1tspsalt
1tspsugar
1tsplemon juice
2tbspcilantro finely choppedhara dhania1
2lemon slice for garnishing
1/4cupchopped tomatoes for garnishing
Instructions
Gently wash poha in a colander and let it sit/drain for approx. 10 minutes.
Sprinkle turmeric, chili powder and salt and toss with a fork.
Wash and drain green peas and set aside.
Heat oil in a frying pan over medium high heat. When oil is moderately hot add mustard seeds and wait till seeds crack. Add cardamom, ginger and green chili and stir for a few seconds. Then add green peas and cook until they are tender.
Add poha and stir-fry for 3 to 4 minutes, mixing gently. (If the poha looks too dry, add a few tablespoons of water and continue cooking).
Remove from heat and add lemon juice, sugar and cilantro. Mix and cover for few minutes.
Notes
Serve hot with a side of Hari Cilantro Chutney.Tips: Poha comes in different thickness sizes, but you must use the “thick” poha for this recipe, or else it will become too mushy.Varying brands of Poha may absorb water differently. Therefore use your judgment while cooking, to add a few tablespoons of water, if it feels too dry.I am using frozen baby green peas, but you can use fresh or frozen of any style green peas. Just make sure that they are fully cooked before you add the poha.