Category: Easy Indian Recipes

Easy Indian Recipes for Every Occasion

Indian cuisine is renowned for its rich flavors, aromatic spices, and diverse dishes. While some may think that Indian cooking is complicated, there are numerous easy Indian recipes that you can prepare without spending hours in the kitchen. 

This guide will introduce you to a variety of easy Indian recipes that are both delicious and straightforward to make. From appetizers to main courses and desserts, these Indian food recipes will become staples in your culinary repertoire.

Easy Indian Appetizers

  1. Vegetable Samosas: These crispy and savory pastries are filled with a spiced mixture of potatoes and peas. They make for a great starter and are relatively simple to prepare with store-bought pastry sheets. Indian snacks that are sure to make every taste bud excited for more. 
  2. Chana Chaat: A tangy and spicy chickpea salad, Chana Chaat is an excellent appetizer that can be prepared in minutes. It’s made with boiled chickpeas, tomatoes, green chilies, and a variety of spices.
  3. Paneer Tikka: Marinated in yogurt and spices, paneer cubes are grilled to perfection. This is one of the easy Indian recipes that you can quickly prepare for a party or a family dinner.
  4. Aloo Tikki: These potato patties are flavored with spices and herbs, then shallow-fried until golden brown. Serve them with mint chutney for a delightful appetizer. One of the easy Indian street food recipes that is most tried in northern parts of India. 

Simple Indian Main Courses

  1. Palak Paneer: This spinach and cottage cheese curry is not only healthy but also easy to prepare. The creamy spinach sauce pairs perfectly with the soft paneer, making it a favorite among vegetarians.
  2. Chole Bhature: Chole (spiced chickpea curry) and Bhature (fluffy deep-fried bread) are a classic combination. Despite its restaurant-style taste, it is one of the Indian food recipes easy to recreate at home.
  3. Vegetable Biryani: A fragrant and flavorful rice dish, Vegetable Biryani can be made quickly using a pressure cooker or an Instant Pot. It’s a one-pot meal that’s perfect for a busy weeknight.
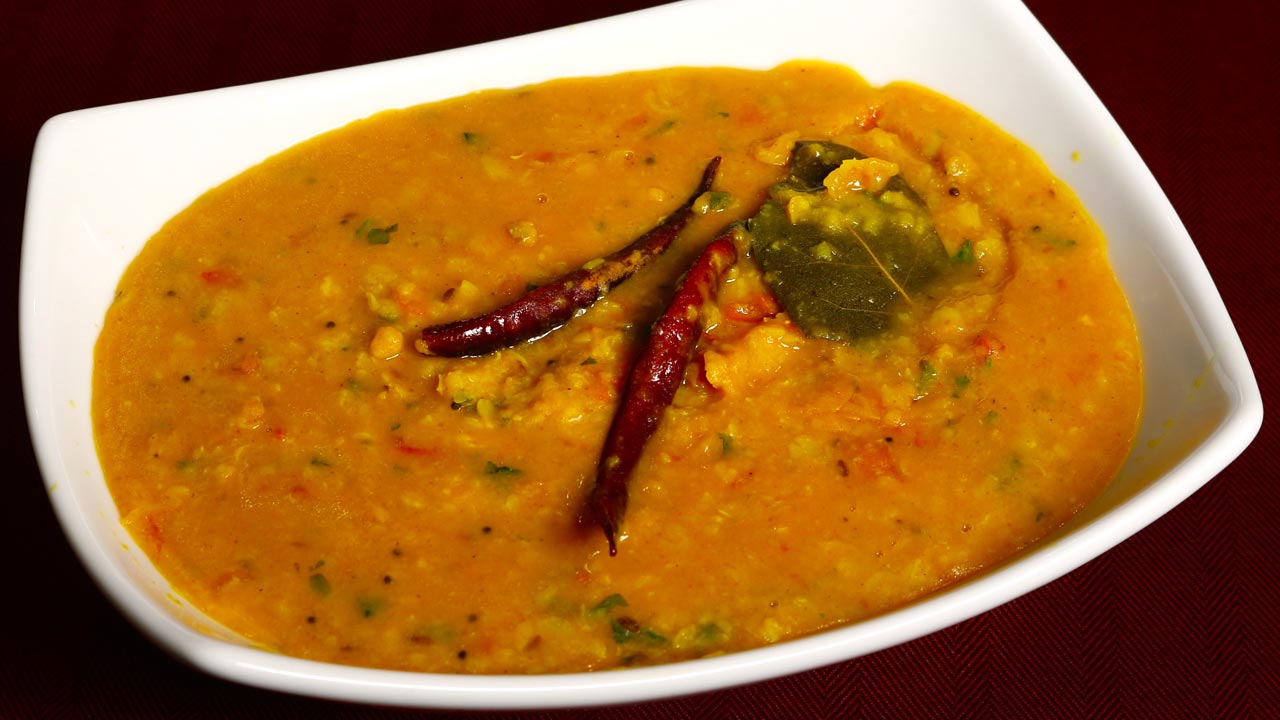
  4. Dal Tadka: This daal recipe is a staple in Indian households. It involves cooking lentils with spices and then tempering them with ghee, garlic, and cumin seeds. It’s simple, nutritious, and pairs well with rice or roti.
  5. Aloo Gobi: This dry curry made with potatoes and cauliflower is spiced with turmeric, cumin, and coriander. It’s a quick and easy Indian recipe that’s perfect for a weekday meal.

Quick Indian Side Dishes

  1. Raita: A cooling yogurt-based side dish, Raita is made with yogurt, cucumber, mint, and spices. It’s perfect for balancing out spicy dishes.
  2. Jeera Rice: Flavored with cumin seeds, this simple rice dish is a perfect accompaniment to curries. It’s one of the Indian recipes easy to make and adds a fragrant touch to your meal.
  3. Baingan Bharta: Roasted and mashed eggplant cooked with tomatoes, and spices. This smoky-flavored dish is both easy and delicious.
  4. Kachumber Salad: A refreshing salad made with chopped cucumbers, tomatoes, and a sprinkle of lemon juice and chaat masala. It’s a great side dish for any Indian meal.

Easy Indian Desserts

  1. Gajar Halwa: This carrot-based dessert is made by simmering grated carrots with milk, sugar, and ghee. It’s garnished with nuts and cardamom, making it a comforting sweet treat.
  2. Kheer: A rice pudding made with milk, rice, and sugar, flavored with cardamom and garnished with nuts. It’s one of the easy Indian food recipes that’s perfect for any festive occasion.
  3. Rasgulla: Soft and spongy cheese balls soaked in sugar syrup. This dessert can be made quickly with store-bought paneer.
  4. Mango Lassi: A refreshing drink made with yogurt, mango pulp, and a touch of cardamom. It’s perfect for cooling down on a hot day.

FAQs

Q: What are some easy Indian recipes for beginners? 

A: Some easy Indian recipes for beginners include Chana Chaat, Aloo Tikki, Dal Tadka, and Jeera Rice. These recipes are simple to follow and don’t require advanced cooking skills.

Q: Can I make Indian food without a lot of spices? 

A: Yes, many Indian food recipes can easily be made with a minimal number of spices. For example, Jeera Rice and Raita require only a few common spices like cumin and coriander.

Q: Are there quick Indian recipes for weeknight dinners? 

A: Absolutely! Easy Indian recipes like Vegetable Biryani, Palak Paneer, and Aloo Gobi are perfect for weeknight dinners as they can be prepared quickly and offer a balanced meal.

Q: What are some easy Indian desserts I can try? 

A: Easy Indian food recipes for desserts include Kheer, Gajar Halwa, and Mango Lassi. These desserts are straightforward to make and are sure to satisfy your sweet tooth.

Q: How can I make Indian food healthier? 

A: To make Indian food healthier, use less oil, incorporate more vegetables, and opt for whole grains like brown rice or whole wheat roti. You can also use low-fat dairy products and lean proteins.

Conclusion

Exploring easy Indian recipes doesn’t have to be daunting. With these easy Indian food recipes, you can enjoy the rich and diverse flavors of Indian cuisine without spending too much time in the kitchen. 

From appetizers and main courses to desserts, these Indian food recipes easy are perfect for any occasion. So, gather your ingredients and get ready to embark on a culinary journey that celebrates the best of Indian cooking. 

Enjoy creating these dishes and sharing them with your loved ones! Explore more recipes on Manjula’s Kitchen and discover the joy of cooking nutritious and delicious food.

  • Tawa Naan Recipe

    Tawa Naan Recipe

    Tawa Naan (Naan without Tandoor)

    Tawa Naan, Naan Without Tandoor

    Naan is definitely the most popular bread in Indian restaurants. Traditionally, naan is cooked in a tandoor (hot clay oven). I have already done a naan recipe using the oven and I used pizza stone to give a tandoor texture. But I find at home "tawa naan" is much easier to make. Tawa Naan turns out really soft and it tastes great. It's hassle free because you don't need a tandoor or oven. Naan Goes well with chole, palak paneer or any gravy based dish.
    4.17 from 12 votes
    Prep Time 10 minutes
    Cook Time 10 minutes
    Total Time 20 minutes
    Course Main Course
    Cuisine Indian
    Servings 2 people

    Ingredients
      

    • 1 cup all-purpose flour plain flour, Maida
    • 1/4 tsp baking soda
    • 1/4 tsp salt
    • 1/4 tsp sugar
    • 1/4 cup yogurt room temperature
    • 1-1/2 tsp oil canola, vegetable
    • 1/4 cup look warm water use as needed

    Garnishing

    • 1 tbsp clear butter or ghee
    • 1 tbsp chopped cilantro
    • 1 tbsp green chili finely chopped
    • 1/4 tsp sea salt

    Instructions
     

    • We also need tawa or skillet to make naan, nonstick skillet will not work for this recipe. Iron tawa or skiller works the best for making Tawa Naan.

    Making Naan

    • For garnishing mix all the ingredients, butter, salt, cilantro, and green chili Set aside.
    • Mix the dry ingredients together, add 1 tablespoon of oil and yogurt mix it well. Then add the water gradually to make very soft dough but not sticky. Knead the dough on a lightly floured surface, knead the dough well. Apply light oil to the dough and cover. Let the dough sit for about 3 hours in warm place.
    • Dough should be about 1-1/2 time, knead the dough again on floured surface. Divide the dough in four parts, lightly roll into the flour, cover the balls and let it sit for about five minutes before rolling.
    • Roll the naan one at a time on a lightly floured surface little less than 1/4 inch thick. Sprinkle the water lightly on one side of the naan.
    • Heat the tawa on medium heat, to check if tawa is ready sprinkle the few drops of water on tawa, water should sizzle.
    • Put water side naan over tawa, once the naan start bubbling and dough start drying, turn the tawa over flames keeping about 2 inch away from the flames to cook the naan from top. Note: yes naan will stick to tawa and will not fall of, this the reason you cannot use the nonstick skillet.
    • Once naan browned to your satisfaction, remove, and spread the butter mix over. Place in a on a plate and cover with a cloth to keep warm until serving. Naan is ready!

    Notes

    Serving Suggestion
    Taste best with Punjabi Chole or Palak Paneer
     
    Tried this recipe?Let us know how it was!

    How to make Naan at Home on Tawa Recipe – Manjula’s Kitchen 

    Tawa or Skillet: 

    Let’s dive into crafting the perfect Tawa Naan (Indian bread) at home with this easy Tawa Naan recipe. Begin by selecting the right equipment – an essential iron tawa or skillet. Forgo the nonstick skillet; the traditional iron one is crucial for achieving that perfect stickiness in your Tawa Naan.

    Garnishing: 

    Elevate your Tawa Naan with a delightful mix of clear butter, sea salt, chopped cilantro, and finely chopped green chili. This straightforward concoction adds richness, freshness, and a hint of heat, transforming your naan into a culinary masterpiece with our special naan on the tawa recipe.

    Mixing the Dry Ingredients: 

    At the heart of our Tawa Naan recipe lies the meticulous combination of dry ingredients. In a mixing bowl, blend Maida, baking soda, salt, and sugar. Add oil and yogurt – the oil ensures a smooth integration of flavors, and the yogurt contributes a creamy richness and subtle tanginess to the dough in this How to make naan at Home on Tawa guide.

    Gradual Addition of Water: 

    As you gradually add water to the dry mixture, witness the alchemy of dough creation. Water acts as the binding agent, transforming the dry ingredients into a soft, pliable dough. Aim for a texture that is soft yet not sticky, setting the stage for a naan that strikes the perfect balance between chewiness and tenderness in our naan on tawa recipe.

    Kneading and Resting the Dough: 

    The art of kneading takes center stage. On a lightly floured surface, the dough transforms. Well-kneaded and coated with a touch of oil, it is covered and left to rest for a patient for three hours. This period of repose allows the dough to rise, making it 1-1/2 times its original size, imparting a lightness that will be evident in the final Tawa Naan.

    Division and Resting: 

    Post-resting, knead again and divide the dough into four equal parts. Lightly roll the dough balls in flour, cover them, and grant them a five-minute interlude before the next act in our naan on the tawa recipe. This resting period allows the dough to gather its composure, ensuring a smooth rolling process.

    Rolling and Sprinkling: 

    Each naan takes shape individually, rolled on a lightly floured surface to a thickness slightly less than 1/4 inch. A sprinkle of water on one side adds subtle moisture, a touch that will contribute to the naan’s characteristic texture as per our how to make naan at home on Tawa guide.

    Cooking on the Tawa: 

    The Tawa, heated to a medium temperature with a few drops of water sprinkled on the surface sizzling, signals the readiness of the Tawa. The naan, waterside down, meets the hot surface. As it begins to bubble and the dough dries, a flip of the tawa over flames cooks the naan from the top. A crucial note underscores the unique nature of this process: the naan sticks to the Tawa, a characteristic that needs the use of a traditional iron surface rather than a nonstick skillet.

    Final Touch: 

    As the naan achieves the desired golden-brown hue, it exits the stage. A generous spread of the previously prepared butter mix crowns the naan with a final change of richness and flavor. Placed on a plate and covered with a cloth, the naan awaits its moment of glory, ready to be served warm and relished in our naan on tawa recipe.

    Serving Suggestion: 

    Completing our culinary symphony, the serving suggestion recommends pairing the Tawa Naan with Dal Makhani, Punjabi Chole, Palak Paneer, Butter Paneer Masala & Malai Kofta. This is not merely a suggestion but a curated experience, inviting us to savor the naan’s texture and flavor alongside these iconic accompaniments, creating a culinary ensemble that transcends the ordinary according to our how-to-make naan at home on tawa guide. 

  • Dal Fry (Dal Tadka) Recipe

    Dal Fry (Dal Tadka) Recipe

    Dal Fry (Dal Tadka)

    Dal Fry (Dal Tadka)

    Dal Fry is a popular Indian lentil recipe. This recipe uses Toor dal, which is also known as Arhar or Toovar dal. The dal is seasoned with variety of spices and it tastes delicious. This is something you often find served at Indian restaurants and is a part of the main course as part of the servings.
    5 from 1 vote
    Prep Time 10 minutes
    Cook Time 15 minutes
    Course dal
    Cuisine Indian
    Servings 0

    Ingredients
      

    • 1 cup toor dal, arahar dal
    • 2-1/2 cup water
    • 1 tbsp salt
    • 1/4 tbsp turmeric

    Seasoning  

    • 3 tbsp clarified butter or ghee
    • 1 cup tomatoes chopped I used 3 medium size tomatoes
    • 1/2 tbsp cumin seeds (jeera)
    • 1/2 tbsp mustard seeds (rai)
    • 1/8 tbsp asafetida (hing)
    • 2 whole dry red chili
    • 2 bay leaf
    • 1 tbsp green chili finely chopped adjust to taste
    • 2 tbsp ginger finely shredded
    • 2 tbsp cilantro finely chopped (hara dhania)
    • 1/2 tbsp red pepper adjust to taste
    • 1/2 tbsp salt
    • 1 tbsp sugar
    • 1/2 tbsp mango powder (amchoor)
    • 1/4 tbsp garam masala

    Instructions
     

    • Wash and soak toor dal in approx. 3 cups of water, for at least one hours. Dal will be double in volume after soaking. Drain the water.
    • Put dal with 2-1/2 cups water into a pressure cooker and add salt, turmeric, Cook on medium high heat.
    • When the pressure cooker starts to steam, turn the heat down to medium and cook for five minutes.
    • Turn off the heat and wait until all the steam has escaped before opening the pressure cooker. Dal should be soft. If needed add more water, dal should be consistency of thick soup.

    Seasoning

    • Heat the ghee in a saucepan. Test the heat by adding one cumin seed to the oil; if it cracks right away, ghee is ready. Add cumin seeds, and mustard seeds, asafetida, whole red chili. After the seeds crack, add bay leaves, green chili, ginger and chili powder. Stir for a few seconds.
    • Add tomatoes, salt and sugar stir and cook until tomatoes are tender and mushy.
    • Add cilantro, mango powder, and garam masala cook for about one minute.
    • Pour the seasoning over  dal mix it well and cook for another minute.
    • Dal fry is ready, serve this as a main dish with Indian flat bread or I prefer with plain rice.
    Tried this recipe?Let us know how it was!

    How to make Dal Tadka Punjabi Style: A Flavorful Punjabi Delight

    Dal Tadka, also known as Dal Fry or Tadka Dal, is a gluten free north indian dish known for its rich flavors and aromatic tempering. This dal tadka recipe offers a tantalizing blend of lentils cooked to perfection and tempered with aromatic spices, making it a favorite comfort food across the country. Whether served with rice or roti, dal tadka never fails to satisfy the taste buds with its hearty and wholesome goodness.

    Step 1: Cooking the Lentils

    To begin, thoroughly wash and rinse the lentils of your choice, such as toor dal (split pigeon peas) or masoor dal (red lentils). In a pressure cooker or large pot, add the washed lentils along with water, turmeric powder, and salt. Cook the lentils until they are soft and mushy, ensuring they are well-cooked to achieve the desired creamy consistency for the dal.

    Step 2: Preparing the Tadka

    While the lentils are cooking, prepare the tadka (tempering) for the dal. In a separate pan, heat ghee or oil over medium heat. Add mustard seeds, cumin seeds, and dried red chilies to the hot ghee, allowing them to sizzle and release their aromatic flavors.

    Step 3: Adding Aromatics and Spices

    Add minced ginger and green chilies to the pan, stirring to combine with the tadka. Next, add ground spices such as cumin powder, coriander powder, and red chili powder, stirring well to toast the spices and enhance their flavors. Adjust the amount of spices according to your taste preferences, keeping in mind the desired level of heat and spice.

    Step 4: Combining Lentils and Tadka

    Once the lentils are cooked and the tadka is prepared, carefully pour the tadka over the cooked lentils, ensuring it covers the surface evenly. Stir the dal tadka gently to combine the lentils with the aromatic tadka, allowing the flavors to meld together. Let the dal tadka simmer for a few minutes to allow the flavors to infuse, adjusting the consistency with additional water if needed.

    Step 5: Garnishing and Serving

    Before serving, garnish the dal tadka with freshly chopped cilantro leaves for a burst of freshness and color. You can also drizzle a spoonful of lemon juice over the dal tadka to add a tangy kick to the dish. Serve the dal tadka hot with steamed rice, roti, or naan bread for a satisfying and wholesome meal.

    Tips for Perfect Dal Tadka

    Lentil Consistency: Ensure that the lentils are cooked until soft and mushy for the perfect creamy texture of the dal tadka.

    Tempering Technique: Take care not to burn the spices while tempering. The tadka should be aromatic and flavorful without any burnt taste.

    Adjusting Spice Level: Customize the spice level of the dal tadka according to your taste preferences by adjusting the amount of green chilies and red chili powder used in the tadka.

    Variations of Dal Tadka

    Restaurant-Style Dal Tadka: Recreate the flavors of your favorite restaurant-style dal tadka by adding a touch of cream or butter to the dish for extra richness.

    Healthy Dal Tadka: For a healthier version of dal tadka, use minimal oil or ghee for tempering and add a variety of vegetables such as spinach, tomatoes, or carrots to the lentils for added nutrition.

    Protein-Packed Dal Tadka: Boost the protein content of the dal tadka by adding cooked chickpeas or kidney beans along with the lentils for an extra protein boost.

    Benefits of Dal Tadka

    Rich in Protein: Lentils are a excellent source of plant-based protein, essential for muscle repair and growth.

    High in Fiber: Dal tadka is rich in dietary fiber, promoting digestive health and keeping you feeling full and satisfied.

    Nutrient-Dense: Packed with essential vitamins and minerals, dal tadka provides a nourishing and balanced meal option for vegetarians and non-vegetarians alike.

    Frequently Asked Questions (FAQs)

    Can I use different types of lentils for dal tadka?

    Yes, you can use a variety of lentils such as moong dal, masoor dal, or chana dal to make dal tadka according to your preference.

    Can I make dal tadka ahead of time?

    Yes, dal tadka tastes even better when allowed to sit for a few hours or overnight, allowing the flavors to meld together. Reheat it gently before serving.

    Is dal tadka gluten-free?

    Yes, dal tadka is inherently gluten-free as it contains no wheat or gluten-containing ingredients.

    Explore more delightful Rajasthani recipes on Manjula’s Kitchen, such as Gatte Ki Sabji for another culinary adventure.Explore more appetiser recipes on Manjula’s Kitchen: Vegetable Samosas, Paneer Tikka, Crispy Spinach Pakoras, Mango Lassi, Masala Chai, Gulab Jamun, Kheer (Rice Pudding)

  • Homemade Pizza

    Homemade Pizza

    Homemade Pizza

    Home Made Pizza

    Pizza – who can name someone that does not enjoy pizza? Now has become a universal snack loved by all! There are so many variations of pizza. There are a number of recipes for pizza dough, sauce, and toppings. I like to make all my pizzas from scratch. There's nothing better than biting into that first slice of fresh, hot, homemade pizza. Its a great appetizer to be tried by all.
    5 from 1 vote
    Prep Time 30 minutes
    Cook Time 40 minutes
    Total Time 1 hour 10 minutes
    Course Main Course
    Cuisine Italian
    Servings 4 people

    Ingredients
      

    Dough

    • 2-1/2 cups all-purpose flour plain flour, maida
    • 1/2 tsp sugar
    • 1/2 tsp salt
    • 1-1/2 tbsp dry yeast
    • 3 tbsp olive oil preferred
    • 1 cup lukewarm water, use as needed
    • 2 tbsp all-purpose flour for rolling

    Sauce

    • 3 cups crushed tomatoes
    • 1 tsp Italian herbs
    • 1 tsp salt
    • 2 tsp sugar
    • 1/8 tsp black pepper
    • 1/4 tsp chili flake
    • 2 tsp corn starch

    For Topping

    • 2 cups shredded mozzarella cheese
    • 1 cup sliced bell pepper in small pieces capsicum, Shimla mirch
    • 1 cup sliced mushrooms

    Instructions
     

    Dough

    • Add the yeast to lukewarm water and set it aside for about 5 minutes, mix it well making sure yeast has dissolved.
    • Combine flour, sugar, salt and oil and mix. I am using food processor with dough blade to make dough. Note: for pizza dough should be knead well, you can use standing mixer with a dough attachment, or make the dough by hand.
    • Add yeast water run the food processor for 4-5 minutes, stopping every minute for few seconds. Make sure dough is very soft but not sticky if needed add more water or if it is too sticky add little more flour. When dough is ready add 1 tablespoon of oil and run the food processor for about half a minute more.
    • Take out the dough over floured surface and knead the dough until smooth and elastic will take about 3-4 minutes.
    • Grease large bowl with oil, and oil the dough all around lightly, cover the bowl. Set aside the dough in a warm area, for about two hours, dough should be double in size.
    • Knead the dough again over lightly floured surface and divide the dough into 2 equal parts. And let them rest for 3-4 minutes, before rolling. 

    Making Sauce

    • Add oil into a pan over medium high heat. Add Italian herbs, black pepper, and chili flakes stir for few seconds add tomatoes, salt and sugar. Cook until tomatoes have become mushy and most of the water from tomatoes has evaporated. Mix the corn starch with 2 tablespoons of water and add to the tomatoes. Reduce the heat to low stir the sauce for few minutes until sauce becomes the consistency of soft batter. If tomatoes are too sour use little more sugar. Set aside.

    Preparing the Pizza

    • Preheat the oven at 425 degree F (225 Celsius). Grease the pizza pan, I am using 14 inch pan. 
    • Lightly flour roll into a 13 inch circle. Transferred to greased 12-in. pizza pan; build up edges slightly. Lightly greased the rolled dough, this helps making the pizza crisp.
    • Spoon a few tablespoons of sauce into the center of the pizza and use the back of a spoon to spread it out to within one inch of edges. Spread your toppings bell pepper, mushrooms, sprinkle the cheese.
    • Bake for 15 to 18 minutes depend on the oven, until the golden brown. Slice and serve.

    Notes

    Notes
    When you make pizza and crust comes out soggy every time, did not cook well and you don’t know what you are doing wrong!  For that bake the pizza before adding any topping or sauce at 375° for about 10 minutes or until lightly browned. Spread sauce and topping bake again for about 10 minutes or until pizza is done.
    Also check the recipe for pasta  Butternut squash Pasta, Creamy Spinach Pasta, stove top pizza  
    Keyword Home Made Sauce, Kid Friendly, Vegetable Pizza
    Tried this recipe?Let us know how it was!

  • Dal Bati Recipe

    Dal Bati Recipe

    Dal Bati

    Dal Bati (Rajasthani cuisine)

    When you mention about Rajasthani food dal bati has to be on the top of the list, otherwise it is incomplete. Dal bati is a popular Rajasthani delicacy. Dal is simply soup of mixed lentils, cooked with spices. Bati is a baked, whole wheat bread rolls and the combination is known as dal bati. Traditionally bati is cooked over charcoal, but oven also works great.
    My daughter in law is from Jaipur, Rajasthan; I can entice her any time just mentioning dal bati and gatte ki kadhi.  First time I had dal bati in Jaipur, Apno Gaon a restaurant with village setting that was a memorable experience. They served dal bati with buttermilk known as chaach. I suggest having this for leisurely lunch/dinner.
    3.20 from 10 votes
    Course dal
    Cuisine Indian
    Servings 2 people

    Ingredients
      

    • 1/4 cup chana dal (split gram)
    • 1/4 cup toor dal
    • 1/4 cup moong dal (split with skin)
    • 1/4 cup urad dal (split black lentil with skin)
    • 1/4 tbsp turmeric (haldi)
    • 2 tbsp ginger grated
    • 1-1/2 tbsp salt
    • 1 tbsp coriander powder (dhania)
    • 2 tbsp mango powder (amchoor)
    • 1/2 tbsp garam masala

    For seasoning

    • 3 tbsp clarified butter (ghee)
    • 1 tbsp cumin seeds
    • 1/8 tbsp asafetida (hing)
    • 1/2 tbsp chili powder
    • 2 dried red chili broken in pieces

    For Bati

    • 1 cup whole wheat flour (roti ka atta)
    • 1/4 cup fine sooji (semolina)
    • 1/8 tbsp baking powder
    • 1/2 tbsp salt
    • 1/4 cup clarified butter (ghee)
    • 1/2 cup milk use as needed

    For serving

    • About 1/4 cup hot clarify butter (ghee)

    Instructions
     

    • Combine all dals, wash changing water few times. In a pressure cooker add dal with 4 cups of water, salt, turmeric, coriander powder, and ginger, cook on medium high.
    • After pressure cooker start steaming lower the heat to medium and cook for about eight minutes. Turn off the heat; wait until all the steam has escaped before opening the cooker.
    • Dal should be soft and mushy, consistency of the pourable batter, if needed add hot water. The consistency of the dal will thicken over time.
    • Add garam masala and amchoor, mix it well.
    • Heat ghee in a small saucepan for seasoning; after ghee is moderately hot add cumin seeds as they crack add asafetida, red chilies and red chili powder.  Stir for a few seconds. To prevent the spices from burning, you may add 1 teaspoon of water.  Pour spiced Chaunk over dhal. Mix it well and let it simmer for two to three minutes.
    • Dal is ready.

    For the Bati

    • Preheat the oven to 350 degree F.
    • In a mixing bowl mix all the dry ingredients together, flour, sooji, salt and baking soda. Add the ghee and mix with fingers, add the milk as need to make firm dough, knead the dough well. Set aside for about 10 minutes.
    • Divide the dough into 8 equal parts and roll them into balls. They will not be very smooth dough ball and will have cracks all over; this will help them to cook all the way through. Arrange the batis over cookie sheet about one inch apart and place the pan on middle oven rack and bake at 350 degree F in a preheated oven for 25 minutes. Turn them over and bake for another 30 minutes until batis are golden brown all around.
    • Break one bati from one side to make sure they have cooked through.

    Notes

    How to Serve
    1. Break the bati into two pieces and pour about one teaspoon of hot melted ghee over and serve with bowl of hot dal.
    2. If you have baked the batties earlier heat the batties in oven for about 10 minutes.
    Tried this recipe?Let us know how it was!

    How to make Dal Bati: A Flavorful Rajasthani Specialty

    Dal Bati is a quintessential Rajasthani dish that consists of two main components: dal (lentils) and bati (baked wheat flour balls). This dal bati recipe is a beloved vegan culinary delight in Rajasthan, known for its hearty flavors and wholesome ingredients. Served with a side of churma (sweetened crushed wheat) or form of bread, dal bati is a complete meal that offers a perfect balance of savory and sweet flavors, making it a favorite among food enthusiasts.

    To prepare the dal, begin by combining all the lentils and thoroughly washing them, changing the water a few times to remove any impurities. Once cleaned, transfer the lentils to a pressure cooker and add four cups of water along with salt, turmeric, coriander powder, and ginger. Place the pressure cooker on medium-high heat and allow it to come to pressure. Once pressurized, reduce the heat to medium and let the dal cook for approximately eight minutes.

    After cooking, turn off the heat and allow the pressure to release naturally before opening the cooker. The dal should have a soft and mushy consistency, resembling pourable batter. If needed, adjust the consistency by adding hot water, keeping in mind that the dal will thicken over time. Once cooked, stir in the garam masala and amchoor to enhance the flavors.

    For the seasoning, heat ghee in a small saucepan until moderately hot. Add cumin seeds and let them crackle, then add asafetida, red chilies, and red chili powder. Stir the spices for a few seconds, being careful not to burn them. If necessary, add a teaspoon of water to prevent burning. Once the spices are fragrant and well combined, pour the seasoned ghee over the dal mixture.

    Stir well to incorporate the flavors and allow the dal to simmer for two to three minutes, allowing the spices to infuse into the dish. Moving on to the preparation of the bati, preheat the oven to 350 degrees Fahrenheit. In a mixing bowl, combine all the dry ingredients including flour, sooji (semolina), salt, and baking soda. Add ghee to the dry ingredients and mix thoroughly with fingers until the mixture resembles coarse crumbs. Gradually add milk as needed to form a firm dough, and knead the dough well to ensure even distribution of ingredients. Let the dough rest for about 10 minutes to allow the gluten to relax.

    Divide the dough into eight equal portions and shape each portion into rough balls. The dough balls may have cracks, which is normal and aids in even cooking. Arrange the batis on a cookie sheet, leaving about an inch of space between each one, and place the sheet on the middle rack of the preheated oven. Bake the batis for 25 minutes, then turn them over and bake for an additional 30 minutes or until they are golden brown all around. To ensure they are cooked through, break one bati open from the side.

    To serve, break the bati into two pieces and drizzle about a teaspoon of hot melted ghee over each piece. Serve the batis alongside a bowl of hot dal for a comforting and flavorful meal. If the batis were baked earlier and have cooled, reheat them in the oven for about 10 minutes before serving to ensure they are warm and crisp.

    Tips for Perfect Dal Bati

    • Consistency of Bati Dough: Ensure that the bati dough is firm and smooth, as it will help in shaping the batis and prevent them from crumbling during baking.
    • Baking Temperature and Time: Bake the batis at a moderate temperature until they are golden brown and crispy on the outside, ensuring they are evenly cooked throughout.
    • Tempering Technique for Dal: Take care while tempering the dal to ensure the spices are well-infused and aromatic, enhancing the flavor of the dish.

    Variations of Dal Bati

    • Stuffed Batis: Add a flavorful stuffing of spiced mashed potatoes or paneer (Indian cottage cheese) inside the batis for an extra burst of flavor and texture.
    • Sweet Churma: Customize the churma by adding jaggery or gur instead of powdered sugar for a richer and more traditional sweetness.

    Benefits of Dal Bati

    • High in Protein and Fiber: Dal bati is a nutritious meal that provides a good amount of protein and fiber from the lentils and whole wheat flour, promoting satiety and aiding in digestion.
    • Rich in Essential Nutrients: Packed with essential vitamins, minerals, and antioxidants, dal bati offers a nourishing and wholesome meal option for individuals of all ages.

    Frequently Asked Questions (FAQs)

    Can I make dal bati without an oven?

    • Yes, you can cook the batis on a stovetop over an open flame or in a traditional tandoor for authentic flavor and texture.

    Can I use different types of lentils for the dal?

    • Yes, you can use a variety of lentils such as masoor dal, moong dal, or chana dal to prepare the dal according to your preference.

    Is Dal Baati a vegetarian dish?

    • Yes, Dal Baati is a vegetarian dish that’s popular among vegetarians and non-vegetarians alike for its rich flavors and wholesome ingredients.

    Explore more delightful Rajasthani recipes on Manjula’s Kitchen, such as Gatte Ki Sabji for another culinary adventure.

    Explore more appetizer recipes on Manjula’s Kitchen: Vegetable Samosas, Paneer Tikka, Crispy Spinach Pakoras, Mango Lassi, Masala Chai, Gulab Jamun, Kheer (Rice Pudding)

  • Cauliflower with Yogurt Gravy

    Cauliflower with Yogurt Gravy

    Cauliflower with Yogurt Gravy

    Cauliflower with Yogurt Gravy

    Cauliflower in spiced yogurt gravy makes a very flavorful side dish. This dish is simply delicious and worth trying. You can serve this with any bread or rice.
    5 from 1 vote
    Course curry
    Cuisine Indian
    Servings 4 people

    Ingredients
      

    • 3 cup cauliflower cut into small florets (phool gobi)
    • 3 tbsp oil
    • 1/2 tbsp cumin seeds (jeera)
    • 1/4 tbsp fenugreek seeds (methi dana)
    • 1/4 tbsp mustard seeds (rai)
    • 1/8 tbsp asafetida (hing)
    • 2 tbsp besan, available in Indian grocery stores
    • 1/4 tbsp turmeric (haldi)
    • 1/4 tbsp red chili powder
    • 1 tbsp ginger thinly sliced (adrak)
    • 1 green chili finely chopped
    • 1/2 cup yogurt (curd, dahi)
    • 1 tbsp salt
    • 1/2 tbsp sugar
    • Approx. 1 cup water
    • 2 tbsp cilantro chopped (hara dhania)
    • 1/4 tbsp garam masala, available in Indian grocery stores

    Instructions
     

    • Heat the oil in a saucepan over medium high heat. Test the heat by adding one cumin seed to the oil. If the cumin seed cracks right away, the oil is ready.
    • Add cumin, fenugreek, mustard seeds, and asafetida. When the seeds crack, lower the heat to low.
    • Add the besan, stir fry for about one minute until besan becomes light golden brown and becomes lightly aromatic.
    • Add ginger, green chili, turmeric, red chili powder, stir fry for about one minute and add yogurt mix it well and cook for two minutes stirring continuously.
    • Add water and salt bring it to boil, add cauliflower cook 15-18 minutes, stirring occasionally. Cauliflower should be tender and the gravy should be thick. Adjust the thickness of the gravy to taste.
    • Turn off the heat, add cilantro and garam masala and cover the pan for a minute.
    • Cauliflower with yogurt gravy is ready. Serve with any bread or plain rice.
    Tried this recipe?Let us know how it was!

  • Mushroom Corn Cashew Curry

    Mushroom Corn Cashew Curry

    Mushroom Corn Cashew Curry

    Mushroom Corn Cashew Curry

    Corn and mushroom in tomato and spicy cashew gravy makes a delicious main dish. Cashews add a creamy and rich texture to the dish. This is a quick and easy recipe. This goes well with any Indian flat bread or plain rice.
    3 from 3 votes
    Course curry
    Cuisine Indian
    Servings 2 people

    Ingredients
      

    • 3 cup sliced mushrooms
    • 1 cup corn kernel/ bhuta ka dana (I am using frozen corn kernels)
    • 1/4 cup cashews (kaju)
    • 2 cup tomato chopped
    • 1 tbsp ginger chopped
    • 1 tbsp green chili chopped
    • 2 tbsp oil
    • 1/2 tbsp cumin seed (jeera)
    • 1/8 tbsp asafetida (hing)
    • 1/4 tbsp turmeric (haldi)
    • 1/4 tbsp red chili powder (lal mirch)
    • 2 tbsp coriander powder (dhania)
    • 1 tbsp salt
    • 2 tbsp cilantro chopped (hara dhania)
    • Approx. 1-1/2 cup water

    Instructions
     

    • Blend the tomatoes, cashews, ginger and green chili to make creamy paste. Set aside.
    • Heat the oil in a saucepan over medium high heat. Test the heat by adding one cumin seed to the oil. If the cumin seed cracks right away, the oil is ready.
    • Add cumin seeds, asafetida as cumin seeds crack add tomato paste.
    • Next add coriander; red chili powder, turmeric and salt. Lower the heat to medium and cook the spice mix for about 4-5 minutes until mix start leaving the side of the pan.
    • Add corn and mushrooms, mix it well and add about 1-1/2 cups of water. Cook for about 10-12 minutes, stirring occasionally. Corn and mushrooms should be tender and gravy should be thick in consistency.
    • Mushroom Corn Curry is ready serve hot with Roti or plain rice.
    Tried this recipe?Let us know how it was!
  • Stuffed Tomatoes with Gravy

    Stuffed Tomatoes with Gravy

    Stuffed Tomatoes with Gravy

    Stuffed Tomatoes with Gravy

    Tomatoes filled with flavorful mixed vegetables simmered with spicy sauce makes a gourmet, delectable and mouthwatering dish. Serve this with roti, paratha or any flat bread. This flavorful dish is sure to be a crowd pleaser!
    5 from 1 vote
    Course Chaat
    Cuisine Indian
    Servings 4 people

    Ingredients
      

    • 4 tomatoes round medium size

    For filling

    • 1/2 cup green peas, I am using frozen peas
    • 1/4 cup green beans finely chopped
    • 1/4 cup corn kernels, I am using frozen corn
    • 1/4 cup paneer cut into very small cubes (available in Indian grocery store)
    • 1 tbsp ginger finely chopped
    • 2 tbsp oil
    • 1/2 tbsp cumin seed (jeera)
    • 1/8 tbsp asafetida (hing)
    • 1 tbsp coriander powder (dhania)
    • 1/4 tbsp red chili powder
    • 1/2 tbsp salt

    Gravy

    • 1 tbsp oil
    • 1/4 tbsp cumin seeds (jeera)
    • 1-1/2 tablespoon all purpose flour (plain flour, maida)
    • 1 teaspoon coriander powder (dhania)
    • 1 teaspoon ginger finely chopped
    • 1 teaspoon green chili finely chopped
    • 1/4 teaspoon salt
    • 1-1/4 cup milk
    • 2 tablespoon chopped cilantro

    Instructions
     

    • Slice tomatoes in half and scoop out pulp, pulp will be used for filling. Set aside.
    • For Filling: heat the oil in a saucepan over medium high, Test the heat by adding one cumin seed to the oil. If the cumin seed cracks right away, the oil is ready.
    • Add cumin seeds, asafetida as cumin seeds crack, add, ginger, coriander; turmeric, red chili, and salt stir for few seconds and add tomatoes.
    • Cook the tomatoes for about 2-3 minutes; add corn, green beans, green peas and paneer. Cook till vegetables are tender and the liquid from gravy has evaporated, this should take about 4-5 minutes. Vegetables should be very moist.
    • Stuff the tomatoes with filling, don’t over fill them. Set aside.
    • For Gravy: heat the oil in flat saucepan over medium heat, pan should be large enough to hold all the tomatoes in single layer, can not overlap the tomatoes.
    • Add cumin seeds as seeds crack add all purpose flour and stir fry for about one minute.
    • Add the milk slowly and keep stirring making sure there are no lumps. Add coriander, green chili, ginger, half the cilantro and salt, stir for few seconds.
    • After gravy comes to boil stir and put the filled tomatoes slowly in single layer. Cover the pan and lower the heat low medium. Let it cook for about 4 minutes, check the tomatoes, gently stirring gravy. If needed let it cook as needed, tomatoes should not be very soft as they will loose the shape.
    • Garnish with remaining cilantro. Serve hot.
    Tried this recipe?Let us know how it was!

  • Okra Tomato Curry ( Bhindi )

    Okra Tomato Curry ( Bhindi )

    Okra (Bhindi) Tomato Curry

    Okra Tomato Curry

    Crispy okra (bhindi) served with a flavorful tomato curry is a mouthwatering side dish. You will be sure to impress your guests with this unique vegetable dish!
    5 from 1 vote
    Course curry
    Cuisine Indian
    Servings 0

    Ingredients
      

    For Gravy

    • 4 medium tomato puree will make approx. 1-1/2 cup
    • 1/4 -inch piece of ginger
    • 1 tablespoon oil
    • 1/2 teaspoon cumin seeds (Jeera)
    • Pinch of asafetida (Hing)
    • 1 teaspoon coriander powder (dhania)
    • 1/4 teaspoon turmeric (Haldi)
    • 1/2 teaspoon  red chili powder
    • 1/2 teaspoon  salt
    • 1 teaspoon sugar
    • 1 teaspoon corn starch/arrowroot powder

    Fried Okra

    • Approx. ½ pond okra sliced from the center and cut in half to make about 1-3/4 cup cut okra (bhindi)
    • 1/4 cup  besan gram flour
    • 1/2  teaspoon salt
    • 1/2  teaspoon cumin seeds (jeera)
    • 1/2 teaspoon mango powder (amchur)
    • 1 teaspoon fennel seeds coarsely ground (sonff)
    • 1-1/2 teaspoons coriander seeds coarsely ground (dhania)
    • 1/2  teaspoon red chili powder
    • Approx. 3 tablespoons water
    • Oil to fry

    Instructions
     

    Gravy

    • Mix cornstarch with three tablespoons of water and keep aside.
    • Blend the tomatoes and ginger to make tomato puree.
    • Heat the oil in a saucepan over medium high. Test the heat by adding one cumin seed to the oil. If the cumin seed cracks right away, the oil is ready.
    • Add cumin seeds, and asafetida and stir for a few seconds now add coriander; turmeric, red chili, salt, and sugar stir fry for a few seconds and add tomato puree.
    • Cook the tomatoes for about 4-5 minutes, add cornstarch, and cook for about 3 minutes. Gravy should be pourable consistency. Gravy is ready to keep aside.

    Fried Okra

    • In a bowl put the okra and add all the dry ingredients, salt, cumin, mango powder, fennel, coriander, red chili powder and besan (gram flour) mix it well. Add the water slowly okra should be nicely coated with spices but the mix should not be runny.
    • Heat the oil in a frying pan over medium-high heat, the frying pan should have about 1 inch of oil. Oil should be moderately hot when you put okra in oil it should float right away but not change color.
    • Put one okra at a time into the oil and fry till they are golden brown on both sides this should take about four minutes.
    • Take them out over a paper towel.
    • Serve the Okra over gravy; don’t mix it as you should pick up the okra with gravy.

    Notes

    Suggestions
    1. You can prepare the gravy and okra in advance; gravy can be refrigerated for 4-5 days. Fried okra should be stored at room temperature for 3-4 days. Before serving heat, the gravy and heat the gravy in a frying pan like stir fry so they become crunchy and serve over the gravy.
    2. You can serve the fried okra without gravy as a side dish they taste great
    Tried this recipe?Let us know how it was!

  • Mango Pickle (Aam ka Achar)

    Mango Pickle (Aam ka Achar)

    Mango Pickle

    Mango Pickle (Aam ka Achar)

    Mango pickle is a spicy and tangy gluten free condiment. Almost every Indian household has their own favorite recipes for Mango Pickle. It is a popular condiment adds the extra "oomph" to every meal.
    5 from 1 vote
    Course Pickle
    Cuisine Indian
    Servings 12 oz pickle

    Ingredients
      

    • 1 large green mango raw pickling mango/about 2-1/2 cup cubed mango (they are available at Indian and Asian grocery store)
    • 1 tablespoons salt
    • 1 teaspoon red chili powder, adjust to taste (lal mirch)
    • 1/4 teaspoons turmeric (haldi)
    • 1 tablespoons coriander seeds crushed(dhania)
    • 1 tablespoon fennel seeds crushed(Saunf)
    • 1 teaspoon fenugreek seeds (sabut mathi)
    • 1 teaspoon nigella seeds/kalonji
    • 2 tablespoons mustard oil or olive oil

    Instructions
     

    • Wash and dry the mango, cut in small cubes with skin.
    • In a glass bowl put the mango with salt and mix it well.
    • Set aside for about 3-4 hour. Mix and by this time there will be some salt water. Squeeze the mango, and save the water, as we will use later.
    • Spread the mango slices over dry surface and let it dry out preferably in sun light for 4-5 hours. Mango slices should be little dry but still moist. Note: Mangoes will reduce in volume.
    • Add all the spices to salt water and keep it aside.
    • Mix spices, water and oil to mango slices.
    • Keep the Mango pickle in glass jar with lid on. Pickle should be ready in 4-7 days. Mango slices are nicely marinated with spices.
    Keyword Pickle
    Tried this recipe?Let us know how it was!

  • Methi Bajra Paratha (Millet Gluten Free and Vegan Bread)

    Methi Bajra Paratha (Millet Gluten Free and Vegan Bread)

    A plate of Methi Bajra Paratha, golden and crispy, garnished with fresh fenugreek leaves

    Methi Bajra Paratha

    Parathas always have been a family-favorite treat. Lately I have been trying to make gluten-free breads. A combination of bajra and besan with methi parathas taste delicious. These spicy Methi Bajra Parathas have a biscuit texture, which makes it very enjoyable. They also pair well with gravy-based dishes like Mixed Dal, Aloo Tamatar or you can serve with plain yogurt. You can enjoy these as a proper meal, or even as a great on-the-go lunch! I also enjoy these parathas with just hot cup of chai.
    This recipe will serve 2, and make 4 Parathas.
    5 from 1 vote
    Prep Time 10 minutes
    Cook Time 10 minutes
    Total Time 20 minutes
    Course Breakfast
    Cuisine Indian
    Servings 2 people

    Ingredients
      

    • ½ cup millet flour bajra atta
    • ½ cup besan
    • ½ tsp cumin seeds jeera
    • ½ tsp salt
    • 1 tsp chili flakes
    • ¼ tsp turmeric haldi
    • tsp asafetida hing
    • 1 Tbsp sesame seeds til
    • 1 Tbsp oil
    • ¼ cup fenugreek leaves option is using dry leaves
    • ½ cup hot water use as needed

    Also Need

    • 4 tsp oil to cook the parathas

    Instructions
     

    • Mix all the ingredients for paratha together, millet flour, besan. Cumin, salt, chili flakes, turmeric, asafetida, sesame seeds, oil, and fenugreek leaves. Notes: if you don’t have fresh fenugreek leaves use dry methi known as Kasuri Methi.
    • Make the dough using hot water, you will need about 1/2 cup of water. Dough should be firm and pliable. Notes: dough should be prepare just before making paratha.
    • Dived the dough into 4 equal parts, oil your palm and roll them between your palms, to make them round petites.
    • Heat the skillet on medium high heat. To test, sprinkle a couple of drops of water on the skillet. The water should sizzle right away.
    • Roll the paratha in about 6” circle, roll them between two pieces of plastic that makes the rolling easy, I am using zip log bag.
    • Place the methi bajra paratha over the skillet. When start to change color, flip it over. You will notice some golden-brown spots.
    • After a few seconds, spread one teaspoon of oil on the aratha. Flip it again and lightly press the with a spatula. Flip again and press with the spatula making sure the paratha is golden-brown on both sides.
    • Repeat same process for the remaining.
    Tried this recipe?Let us know how it was!
  • Masala Bell Pepper Curry

    Masala Bell Pepper Curry

    A bowl of Masala Bell Pepper Curry garnished with cashews and fresh cilantro

    Masala Bell Pepper Curry

    Masala Bell Pepper Curry, which is a Hyderabadi-style dish. Hyderabad dishes are very spicy and aromatic. For me, bell pepper curry represents these dishes well. I wanted to do a recipe for a side dish for a more formal get together. I happened to have some extra bell peppers in my fridge, so I decided to experiment with those.
    Since this is a dish for a party, I wanted the gravy to be spicy and rich. Of course, I had to try out variations of this recipe a few times to balance the flavor. This dish has a complex flavor. The nuttiness of the cashews, sesame seeds, and coconut blends perfectly together. The gravy for this dish is also very versatile. You can also make a variety of dishes with this gravy. You can try adding potatoes or paneer with this gravy base, comes out delicious.
    Bell Pepper Masala Curry is very aromatic and delicious, in addition to being vegan and gluten-free. If you enjoy hot and spicy food, indulge yourself with this dish! It pairs excellently with naan, puri, or plain white rice. Enjoy!
    Recipe will serve 4.
    4.46 from 11 votes
    Prep Time 10 minutes
    Cook Time 30 minutes
    Course Main Course
    Cuisine Indian
    Servings 4 people

    Ingredients
      

    • 2 medium size green bell pepper cut into bite size pieces

    Spice Mix

    • 1 tsp oil
    • ¼ cup broken cashews
    • 1 Tbsp sesame seeds
    • 1 Tbsp coriander
    • 1 Tbsp coconut powder

    Gravy

    • 1 ½ cup chopped tomato I used 3 medium size tomatoes
    • 1 Tbsp ginger cut into small pieces
    • 1 Tbsp chopped green chili
    • 2 Tbsp oil
    • 8 fenugreek seeds methi dana
    • 1 tsp cumin seeds jeera
    • ¼ tsp turmeric haldi
    • tsp asafetida hing
    • 1 tsp red chili powder lal mirch
    • ½ tsp sugar
    • 1 tsp salt
    • ½ tsp garam masala

    Instructions
     

    • Cut the bell peppers in half and remove the core and discard and cut them in bite size pieces.
    • In a pan, heat 1 teaspoon oil. Add cashews, sesame seeds, coriander seeds, and on a low flame, stir fry them for about 2 minutes. Turn off the heat and add coconut stir together. After the mix comes to room temperature blend the mix using about 1/4 cup of water and make it into a paste and set aside.
    • Blend tomatoes, ginger, and green chili into a paste. Set aside.
    • Use the same frying pan, heat the oil on medium heat, oil should be moderately hot. Add cumin seeds, fenugreek seeds and asafetida stir for a minute add tomato paste. Add turmeric, salt, sugar, and red chili powder. Stir fry for about 2 minutes, oil will start separating.
    • Add the spice paste and cook for 2-3 minutes stirring. The spice mix will start to leave the oil. Add bell pepper stir and 1-1/2 cups of water and bring the gravy to boil.
    • Lower the heat to medium low and let it simmer for about 6-8 minutes. Until bell pepper is tender.
    • Gravy will thicken as it sits, if needed add more water.
    • Sprinkle the garam Masala and cover the pan.
    • Bell pepper curry is ready to serve. I like to serve this with Naan, or over plain rice.
    Tried this recipe?Let us know how it was!
  • Palak Paneer

    Palak Paneer

    Palak Paneer

    Palak Paneer (2016)

    Palak Paneer is likely the most popular paneer dish from North India. Creamy spinach with tasty paneer makes a delicious main dish. This recipe was one of my favorite. After so many years of cooking, my family has decided my cooking skills have improved! I wanted to do this recipe again as with modified cooking method. Also I will like to thank you to all of my viewers who have encouraged me over the years. You guys truly inspire me!
    4.66 from 23 votes
    Prep Time 10 minutes
    Cook Time 25 minutes
    Total Time 35 minutes
    Course Main Course
    Cuisine Indian
    Servings 3 people

    Ingredients
      

    • 10 oz spinach washed and clean, about 6 cups packed spinach
    • 1-1/2 cups paneer cubed into bite size, about 1/3 pound of paneer
    • 1 tomato finely chopped, this will make 3/4 of chopped tomato
    • 1 green chili chopped
    • 1 Tbsp ginger chopped
    • 1 Tbsp oil
    • 1/2 tsp cumin seeds jeera
    • 1/8 tsp asafetida hing
    • 1 tsp coriander powder dhania
    • 1/4 tsp turmeric haldi
    • 1/2 tsp red chili powder
    • 1/2 tsp salt adjust to taste
    • 1/2 tsp sugar
    • 1 Tbsp whole wheat flour
    • 1/3 cup heavy cream

    Instructions
     

    • First blanch the spinach, this helps to keep the spinach color bright. To blanch the spinach, boil about 6 cups of water in a saucepan, and let the spinach boil for one minutes. Drain the water and put the spinach in ice cold water for about two minutes. Drain the water.
    • Blend the spinach, ginger and green chili. Spinach should be creamy but not pasty.
    • Soak the cubed paneer in about three cups of hot water, for about 5 minutes or more. This helps to give the paneer soft texture. Set aside.
    • While cooking, spinach can splatter, use larger sauce pan. Heat the oil in a sauce pan, over medium high heat. Test the heat by adding one cumin seed to the oil; if it cracks right away it is ready.
    • Add cumin seed, and asafetida. After cumin seeds crack, add the tomatoes and stir fry for 1-2 minutes. Tomatoes should be tender not mushy. Add coriander, turmeric, red chili powder, salt, and sugar, stir and add the spinach.
    • After spinach comes to boil lower the heat to low, and let the spinach cook for about 5-6 minutes do not cover the pot. This helps keeping the green color of spinach.
    • Mix the flour to 1/2 cup of water and add to the spinach, also add the cream. Mix it well and let it cook for five minutes. If needed add little more water.
    • Drain the paneer and fold it gently with spinach and let it simmer for about five minutes.

    Notes

    Palak paneer is ready, serve with naan, tandoori roti, Paratha.
    Tried this recipe?Let us know how it was!

  • Sattu Paratha, Bihari Recipe, Spicy Paratha

    Sattu Paratha, Bihari Recipe, Spicy Paratha

    Close-up view of Sattu Paratha served with a bowl of yogurt garnished with green chilies.

    Sattu Paratha

    Sattu Paratha, Sattu Ka Paratha is made with spicy sattu filling, sattu is roasted chana flour. This is a popular paratha in state of Bihar. Sattu Paratha is a great breakfast treat and a good lunch box option.
    5 from 1 vote
    Prep Time 15 minutes
    Cook Time 15 minutes
    Course Breakfast, Main Course
    Cuisine Indian
    Servings 3 people

    Ingredients
      

    For Dough

    • 1 cup whole wheat flour roti ka atta
    • 1 tbsp oil
    • ½ tsp salt
    • cup water to make dough use as needed

    Filling

    • 1 ½ cup sattu, dailya, roasted chana flour
    • 2 tbsp oil
    • 1 ¼ tsp salt
    • ½ tsp cumin seeds jeera
    • 1/8 tsp asafetida hing
    • 1/8 tsp nigella seeds kalonji
    • ½ tsp mango powder amchoor
    • ¼ tsp red chili powder
    • 1 tbsp green chili finely chopped
    • cup water to make crumbly dough use as needed

    Also Need

    • 2 tbsp whole wheat flour to roll the paratha
    • 2 tbsp oil to cook the paratha

    Instructions
     

    Making Dough

    • Mix flour, salt, and oil add water as needed to make a soft dough. Knead dough for about two minutes on a lightly greased surface to make the dough soft, smooth and pliable. Cover the dough and let the dough rest for at least ten minutes.

    Filling

    • Mix all the filling ingredients together, sattu, salt, asafetida, cumin seeds, kalonji, mango powder and green chili, well. Add water as needed to bind all the ingredients together. Use just enough water, it should hold everything together.

    Making Paratha

    • Divide the dough and filling into six equal parts and form into balls. Filling balls will be little bigger than dough.
    • Roll dough into a 3” circle. Place a filling in the center. Pull the edges of the dough to wrap it around the sattu filling. Repeat to make all six balls. Let the filled balls settle three to four minutes.
    • Meanwhile heat a heavy skillet on medium high heat until moderately hot. To test, sprinkle water on the skillet. If the water sizzles right away, the skillet is ready.
    • Press the filled ball lightly on dry whole wheat flour from both sides. Using a rolling pin, roll the balls lightly to make six-inch circles, keeping the sealed side up. If the dough sticks to the rolling pin or rolling surface, lightly dust the parathas with dry flour.
    • Place the paratha on the skillet. When the paratha starts to change color and begins to puff up, flip it over. You will notice some golden-brown spots.
    • After a few seconds, drizzle one teaspoon of oil over the paratha. Flip the paratha again and lightly press the puffed areas with a spatula.
    • Flip again and press with a spatula making sure the paratha is golden-brown from both sides. Repeat for the remaining parathas. Paratha are best served hot and crispy.

    Notes

    Parathas can be kept at room temperature for up to two days wrapped in aluminum foil or in a covered container.  For later use, parathas can be refrigerated three to four days or frozen for up to a month. Re-heat using a skillet or oven.
    Serving Suggestions Parathas can be served with Plain Yogurt, Mango pickle, or with Aloo Tamatar ki Sabji , (Potatoes with spicy tomato gravy) a classic combination.
    What is Sattu
    The difference between  besan and sattu because they both look about the same. The difference being that whereas besan is the flour of raw gram, and sattu is the flour of the roasted gram. Roasting the besan it is not same as the flour of roasted chana. Sattu is also high in protein.
    Tried this recipe?Let us know how it was!

    Sattu Paratha: A Nutritious and Flavorful Stuffed Flatbread

    Sattu Paratha is a traditional Indian flatbread stuffed with a filling made from sattu, which is roasted gram flour. This nutritious and flavorful dish is popular in the states of Bihar, Jharkhand, and Uttar Pradesh, where it is enjoyed as a wholesome breakfast, lunch, or dinner option. 

    Sattu, the main ingredient in Sattu Paratha, is known for its high protein and fiber content, making it a healthy and satisfying choice.

    Benefits of Sattu Paratha:

    • High in Protein: Sattu, the roasted gram flour filling used in Sattu Paratha, is rich in protein, making it an excellent source of plant-based protein for vegetarians and vegans. Protein is essential for muscle repair and growth, as well as for supporting overall bodily functions.
    • Rich in Fibre: Sattu is also high in dietary fiber, which aids in digestion, promotes satiety, and helps regulate blood sugar levels. Fiber-rich foods like Sattu Paratha can help prevent constipation, reduce the risk of chronic diseases, and support weight management.
    • Vitamins and Minerals: Sattu contains essential vitamins and minerals such as iron, calcium, magnesium, and B vitamins, which are important for maintaining overall health and well-being. 

    Variations of Sattu Paratha:

    • Spicy Sattu Paratha: Add chopped green chilies, ginger, and spices such as cumin powder, coriander powder, and garam masala to the Sattu filling to create a spicy version of Sattu Paratha. Spicy Sattu Paratha is flavorful and aromatic, with a kick of heat that’s perfect for spice lovers.
    • Vegetable Sattu Paratha: Mix grated vegetables such as tomatoes, carrots, and spinach into the Sattu filling to create a nutritious and colorful Vegetable Sattu Paratha. The addition of vegetables adds texture, flavor, and extra nutrients to the paratha, making it a wholesome meal option.
    • Paneer Sattu Paratha: Combine crumbled paneer (Indian cottage cheese) with Sattu to create a rich and creamy Paneer Sattu Paratha. Paneer adds a soft and creamy texture to the filling, while Sattu provides protein and fiber, making it a filling and satisfying option for vegetarians.
    • Sweet Sattu Paratha: For a sweet twist on Sattu Paratha, mix Sattu with jaggery (unrefined cane sugar), chopped nuts, and spices such as cardamom and nutmeg to create a sweet filling. Sweet Sattu Paratha is a delicious dessert or snack option that’s sure to satisfy your sweet tooth.

    Tips for Making Perfect Sattu Paratha:

    • Use Fresh Sattu: Use freshly roasted and ground Sattu for the best flavor and texture in Sattu Paratha. You can either roast the gram flour at home or purchase ready-made Sattu from the store. Fresh Sattu has a nutty aroma and a rich flavor that enhances the taste of the paratha.
    • Roll the Parathas Thin: Roll out the dough for Sattu Paratha into thin discs to ensure even cooking and a flaky texture. Use a rolling pin and a dusting of flour to roll the dough evenly without sticking. Aim for a thickness similar to that of a tortilla or chapati.
    • Cook on Medium Heat: Cook the Sattu Parathas on a hot griddle or tawa over medium heat to ensure they cook through evenly without burning. Brush the parathas with ghee or oil on both sides while cooking to enhance the flavor and achieve a golden-brown color.

    FAQs about Sattu Paratha:

    • Can I make Sattu Paratha gluten-free?

    • Yes, you can make gluten-free Sattu Paratha by using gluten-free flours such as chickpea flour (besan) or sorghum flour (jowar) for the dough. Ensure that the Sattu filling and any additional ingredients are also gluten-free.
    • Is Sattu Paratha suitable for weight loss?

    • Yes, Sattu Paratha can be a suitable option for weight loss when included as part of a balanced diet. Sattu is low in calories and high in protein and fiber, which can help keep you feeling full and satisfied for longer, reducing the likelihood of overeating.
    • Can I freeze Sattu Paratha dough?

    • Yes, you can freeze Sattu Paratha dough for future use. Divide the dough into portions, wrap them tightly in plastic wrap or aluminum foil, and store them in an airtight container or freezer bag. Thaw the dough in the refrigerator overnight before rolling and cooking.
    • What can I serve with Sattu Paratha?

    • Sattu Paratha pairs well with a variety of accompaniments such as yogurt, pickle, chutney, or raita (yogurt dip). You can also serve Sattu Paratha with dal (lentil curry), vegetable curry, or salad for a complete and satisfying meal.

    In conclusion, Sattu Paratha is a nutritious and flavorful Indian flatbread that’s perfect for any meal of the day. Whether enjoyed for breakfast, lunch, or dinner, Sattu Paratha offers a delicious combination of protein, fibre, and essential nutrients that’s sure to keep you feeling satisfied and energized. With its versatile filling options, simple preparation, and wholesome ingredients, Sattu Paratha is a must-try dish for anyone looking to explore the diverse flavors of Indian cuisine.

  • Idli Chaat (South Indian Appetizer)

    Idli Chaat (South Indian Appetizer)

    A plate of Idli Chaat garnished with sev, diced potatoes, chutneys, and yogurt, creating a colorful and appetizing Indian street food dish.

    Idli Chaat, South Indian Appetizer

    Idli Chaat is a tasty twist to traditional South Indian Idli. This can be served as an appetizer or an afternoon snack. It's quick and easy to make, with the perfect savory flavors! Try this recipe today and you will be satisfied with a great dish! 
    4 from 4 votes
    Prep Time 10 minutes
    Cook Time 15 minutes
    Total Time 25 minutes
    Course Snack
    Cuisine Indian
    Servings 3 people

    Ingredients


    • 6 Idlies
    • 1/2 cup potatoes boiled peeled and cut into small pieces
    • 2 Tbsp oil
    • 1/2 tsp salt
    • 1 Tbsp green chili finely chopped
    • 2/3 cup yogurt whipped dahi,curd
    • 3 Tbsp hari cilantro chutney
    • 3 Tbsp tamarind chutney
    • 1/4 cup fine sev

    Instructions
     

    • I am using store bought frozen idlies or you can also use left over idlies. Make sure though frozen idlies to bring to room temperature.
    • Whip the yogurt until smooth. Add a little milk as needed to make the pourable consistency. 
    • Heat 2 tablespoons of oil in a pan and arrange the idle do not overlap them. Cooked the idlis over medium heat, turn them about 3-4 time, till they are light golden brown both sides. This should take about 4 minutes.
    • Transfer them on a plate and stir-fry the potatoes in the same pan sprinkling the 1/4 teaspoon of salt. Stir-fry the potatoes till they start getting light golden color this should take about 2 minutes.  

    Serving the Idli Chaat

    • Arrange the idlies in a serving plate, sprinkle remaining salt ¼ teaspoon. Put ½ the potatoes drizzle the yogurt, cilantro chutney and tamarind chutney. Garnish with green chilies and fine sev.

    Notes

    Notes
    You can slice the idli in about 6 pieces and stir fry. This is another delicious way to serve to serve left over idlies.
    You will also enjoy Dahi Vada, and Bhel Puri. Links for Cilantro Chutney and tamarind Chutney
    Tried this recipe?Let us know how it was!

    Idli Chaat Recipe: A Delicious Twist to a Classic Dish

    Idli Chaat is a delightful fusion of traditional South Indian idlis with a twist of chaat-inspired flavors, creating a quick and easy snack that tantalizes the taste buds with its irresistible appetizers. Idli chaat is a delightful fusion dish that combines the traditional South Indian snack of idli with the flavors of chaat, a popular street food in India. This unique blend of textures and flavors creates a mouthwatering experience that is sure to please your taste buds. In this article, we’ll explore how to make idli chaat at home, step by step.

    Step 1: Preparing the Idlis

    To begin making idli chaat, you’ll need freshly steamed idlis. If you don’t have idlis ready, you can prepare them using your favorite idli batter recipe. Once the idlis are steamed to perfection, allow them to cool slightly before proceeding to the next step.

    Step 2: Cutting the Idlis

    Once the idlis have cooled down, cut them into bite-sized pieces. This step helps to create a perfect base for the chaat toppings and ensures that each bite is filled with flavor.

    Step 3: Assembling the Dahi Idli Chaat

    Now comes the fun part – assembling the dahi idli chaat! Take the cut idli pieces and arrange them on a serving plate. Next, generously drizzle them with creamy yogurt, ensuring that each piece is well-coated. This adds a refreshing tanginess to the dish.

    Step 4: Adding Toppings

    Now, it’s time to add the toppings that will take your idli chaat to the next level. You can get creative with your toppings, but some classic choices include tomatoes, and cilantro. For an extra kick of flavor, sprinkle some chaat masala and roasted cumin powder on top.

    Step 5: Garnishing

    To finish off your dahi idli chaat, garnish it with a handful of nylon sev and a drizzle of tangy tamarind chutney. These final touches not only add visual appeal but also enhance the overall taste of the dish.

    Tips for Making the Perfect Idli Chaat

    • Use freshly steamed idlis for the best texture and flavor.
    • Be generous with the yogurt and toppings to ensure every bite is bursting with taste.
    • Experiment with different toppings and garnishes to customize the chaat according to your references.

    Variations of Idli Chaat

    • For a spicy twist, add some finely chopped green chilies or a dash of red chili powder.
    • Instead of yogurt, you can use whipped cream or sour cream for a different flavor profile.
    • Try adding some boiled chickpeas or sprouts for added protein and texture.

    Benefits of Idli Chaat

    • Idli chaat is a nutritious dish that provides a good balance of carbohydrates, protein, and vitamins.
    • It’s a great way to use leftover idlis and turn them into a delicious snack or appetizer.
    • The probiotics in yogurt make this dish beneficial for gut health.

    FAQs (Frequently Asked Questions)

    Q: Can I use store-bought idlis for this recipe?

    A: Yes, you can certainly use store-bought idlis if you’re short on time. However, freshly steamed idlis will yield the best results in terms of flavor and texture.

    Q: Can I make idli chaat in advance?

    A: While it’s best enjoyed fresh, you can prepare the components of idli chaat in advance and assemble them just before serving to prevent the idlis from becoming soggy.

    Q: Is idli chaat spicy?

    A: The level of spiciness can be adjusted according to your preference. You can make it as spicy or as mild as you like by controlling the amount of green chilies or chili powder you use.

    Exploring Other Recipes on Manjula’s Kitchen

    If you’re looking to explore more Indian recipes, appetizers, beverages, and desserts, be sure to check out the following links on Manjula’s Kitchen. Here are some links to recipes on Manjula’s Kitchen official website: Paneer Tikka Masala, Chana Chaat (Spicy Chickpea Salad), Pav Bhaji (Spicy Vegetable Hash with Buns), Raj Kachori (Crunchy Chaat), Vegetable Biryani

    Idli Chaat is a delightful dish that brings together the best of both worlds – the comforting flavors of idli and the exciting taste of chaat. With just a few simple ingredients, you can create a dish that is sure to impress your family and friends. So why not give this recipe a try and experience the deliciousness of idli chaat for yourself?

  • Sabudana (Tapicoa) Bhel, Chaat

    Sabudana (Tapicoa) Bhel, Chaat

    A vibrant plate of Sabudana (Tapioca) Bhel Chaat, garnished with crispy toppings and drizzled with tamarind chutney.

    Sabudana (Tapicoa) Bhel, Chaat

    Sabudana Bhel this is a delicious appetizer or also can be served with afternoon tea. Sabudana Bhel or I like to call this chaat is an elegant looking dish, that will sure to impress all your family and friends.
    4 from 1 vote
    Prep Time 10 minutes
    Cook Time 10 minutes
    Total Time 20 minutes
    Course Appetizer
    Cuisine Indian
    Servings 4 people

    Ingredients


    For Sabudana – Tapioca

    • 1/2 cup sabudana tapioca, use the larger pearls
    • 2 tsp oil
    • 1/4 tsp cumin seeds jeera
    • 1/4 tsp mustard seeds rai
    • pinch turmeric haldi
    • 1/2 tsp salt
    • few drops lemon juice

    For Serving

    • 1 cup potato boiled peeled and cut into small cubes
    • 1 Tbsp green chili finely chopped
    • 1/2 tsp salt
    • 1/2 cup peanuts roasted and crushed
    • 2 tsp chaat masala
    • 1/2 cup aloo lacha check existing recipe
    • 1/4 cup tamarind chutney check existing recipe

    Instructions
     

    • Wash sabudana (tapioca) changing the water 2-3 time and soak with one cup of water, soak 8 hours or more. Sabudana will become all most four time in volume and will be soft.
    • Heat the oil in a frying pan on medium heat. Test the heat by adding one cumin seed to the oil; if seed cracks right away oil is ready. Add cumin seeds and mustard seeds after seeds crack add turmeric, lower the heat to low. Add sabudana, and salt. Keep stir frying until sabudana becomes translucence, looks like pearls. This should take about another 4-5 minutes. Stir gently and making sure tapioca doesn’t get sticky and stuck to each other. Turn off the heat, and drizzle 3-4 drops of lemon juice and stir.
    • Transfer sabudana to a wide bowl stir for few minutes with fork making sure sabudana pearls are separated and not sticky. Serve the sabudana at room temperature.
    • Add 1/2 teaspoon of salt and green chilies to cubed potatoes, mix it well and set aside.
    • Assembling the Sabudana Bhel, in a serving platter spread the cooked sabudana, sprinkle the roasted peanuts, over peanuts sprinkle the potatoes, then aloo lacha, some more peanuts and drizzle the chutney.

    Notes

    Suggestion, this is a easy recipe, you can prepare every thing in advance, cooked sabudana can be refrigerator for up to a week. Aloo Lacha and tamarind chutney can be stored for months.  
    Tried this recipe?Let us know how it was!

    Introduction to Sabudana Bhel Chaat

    Sabudana Bhel is a quick & easy, gluten-free, and vegan snack with flavors reminiscent of chaat, perfect for Krishna Janmashtami and Navaratri celebrations, offering a delightful appetizer option. In this recipe, we’ll learn how to make sabudana bhel chaat, a delightful and crunchy snack that’s perfect for any occasion. Sabudana, also known as tapioca pearls, is the star ingredient here, lending its unique texture and taste to create a mouthwatering dish. This sabudana bhel recipe combines the traditional flavors of bhel with the subtle nuttiness of sabudana, resulting in a tantalizing treat that’s sure to please your taste buds. Whether you’re looking for a tasty snack to enjoy with your evening tea or planning a party menu, this crispy sabudana bhel is sure to be a hit.

    Preparing the Sabudana Mixture

    To begin making the sabudana bhel, start by soaking the sabudana pearls in water for a few hours until they turn soft and plump. Once the sabudana pearls have soaked well, drain any excess water and spread them out on a clean kitchen towel to remove any excess moisture. Now, heat oil in a pan and fry the sabudana pearls until they turn crispy and golden brown. This step is crucial for achieving that perfect crunch in your sabudana bhel chaat.

    Adding Crunchy Elements

    Next, it’s time to add some crunchy elements to our sabudana bhel mixture. You can use a variety of ingredients such as roasted peanuts, tomatoes, and crunchy sev. These ingredients not only add texture to the dish but also enhance its flavor profile. Feel free to adjust the quantities according to your preference, but make sure to include a good mix of flavors and textures for the best results.

    Seasoning the Bhel

    Once you’ve assembled all the crunchy elements, it’s time to season your sabudana bhel mixture. You can use a combination of spices such as chaat masala, red chili powder, roasted cumin powder, and black salt to add a burst of flavor to the dish. Additionally, you can squeeze some fresh lemon juice over the mixture to give it a tangy twist. Mix everything together until well combined, ensuring that the sabudana pearls are evenly coated with the seasoning.

    Garnishing and Serving

    Finally, garnish your sabudana bhel chaat with some fresh coriander leaves and a sprinkle of nylon sev for an extra crunch. You can also add some pomegranate arils or grated coconut for a pop of color and flavor. Serve the crispy sabudana bhel immediately in individual serving bowls or plates, garnished with some more sev on top for added crunchiness. Pair it with a cup of hot tea or your favorite chutney for a truly satisfying snacking experience.

    Tips for Perfect Sabudana Bhel

    • Soak the sabudana pearls in water for at least 4-5 hours or overnight to ensure they become soft and plump.
    • Drain the soaked sabudana pearls well and spread them out on a kitchen towel to remove excess moisture before frying.
    • Fry the sabudana pearls in batches to ensure they cook evenly and become crispy.
    • Adjust the seasoning according to your taste preferences. You can make the sabudana bhel spicier by adding more red chili powder or tangier by squeezing extra lemon juice.
    • Garnish the sabudana bhel chaat with fresh ingredients like coriander leaves, pomegranate arils, or grated coconut to enhance its visual appeal and flavor.

    Variations of Sabudana Bhel

    • Fruit Bhel: Add diced fruits such as apples, bananas, and grapes to the sabudana bhel mixture for a refreshing twist.
    • Sprouts Bhel: Incorporate sprouted moong beans or chickpeas into the sabudana bhel for added protein and crunch.
    • Vegetable Bhel: Include finely chopped vegetables like cucumber, carrots, and bell peppers to make the sabudana bhel more nutritious and colorful.
    • Sweet Bhel: For a sweet variation, skip the savory seasonings and instead toss the sabudana pearls with honey, yogurt, and chopped fruits for a delicious dessert option.

    Benefits of Sabudana Bhel

    • Gluten-Free: Sabudana is naturally gluten-free, making this sabudana bhel recipe suitable for individuals with gluten intolerance or celiac disease.
    • Rich in Carbohydrates: Sabudana is a rich source of carbohydrates, providing a quick and sustainable source of energy.
    • Easy to Digest: Sabudana is light on the stomach and easy to digest, making it an ideal ingredient for people with digestive issues or those following a bland diet.
    • Versatile: You can customize the sabudana bhel recipe with your favorite ingredients to suit your taste preferences and dietary requirements.
    • Satisfying Snack: This crispy sabudana bhel is not only delicious but also quite filling, making it a satisfying snack option for any time of the day.

    FAQs about Sabudana Bhel

    Q: Can I make sabudana bhel ahead of time?

    A: While it’s best to serve sabudana bhel chaat immediately after preparing it to enjoy its crispiness, you can prepare the sabudana mixture in advance and assemble the bhel just before serving to prevent it from becoming soggy.

    Q: Can I store leftover sabudana bhel?

    A: It’s not recommended to store leftover sabudana bhel as it tends to lose its crispiness over time. However, if you have any leftover mixture, you can refrigerate it in an airtight container for up to a day and reheat it in the oven before serving.

    Q: Is sabudana bhel suitable for fasting days?

    A: Yes, sabudana bhel is a popular dish consumed during fasting days, especially during festivals like Navratri. Just ensure that you use sendha namak (rock salt) instead of regular salt if you’re making it for fasting purposes.

    Q: Can I make sabudana bhel without frying the sabudana pearls?

    A: While frying the sabudana pearls adds a crispy texture to the sabudana bhel, you can try alternative cooking methods such as roasting or air-frying for a healthier version of the dish.

    Q: Can I serve sabudana bhel as a main dish?

    A: While sabudana bhel chaat is typically served as a snack or appetizer, you can definitely enjoy it as a light meal, especially when paired with some yogurt or a side salad for added nutrition.

    Other Recipes on Manjula’s Kitchen

    If you’re looking to explore more Indian recipes, appetizers, beverages, and desserts, be sure to check out the following links on Manjula’s Kitchen. Here are some links to recipes on Manjula’s Kitchen official website:

    Paneer Tikka Masala Recipe

    Chana Chaat (Spicy Chickpea Salad) Recipe

    Pav Bhaji (Spicy Vegetable Hash with Buns) Recipe

    Raj Kachori (Crunchy Chaat) Recipe

    Vegetable Biryani Recipe

    These recipes should offer you a flavorful experience straight from Manjula’s Kitchen.