Category: Quick & Easy

Easy Indian Recipes: Quick and Delicious Vegetarian Dishes

In today’s fast-paced world, we often find ourselves seeking meals that are quick to prepare but still bursting with flavor. Indian cuisine, known for its rich and aromatic spices, offers a plethora of options that are both easy to make and incredibly satisfying. Let’s explore some easy Indian recipes vegetarian, perfect for any occasion, ensuring that you can enjoy delicious easy Indian recipes without spending hours in the kitchen.

Paneer Bhurji

Paneer Bhurji is a delightful scramble made with crumbled paneer (Indian cottage cheese) and a mix of vegetables and spices. This dish is a staple in many Indian households and is a fantastic example of easy Indian recipes. It comes together quickly, making it ideal for a weeknight dinner or a hearty breakfast. Serve it with a side of warm roti or toast for a complete meal.

Vegetable Pulao

For a one-pot wonder, Vegetable Pulao is a go-to choice. This dish features rice cooked with a medley of vegetables and fragrant spices. It’s a shining star among easy Indian food recipes due to its simplicity and the minimal effort required. Pair it with a cooling cucumber raita from the Raita Recipes category for a refreshing touch.

Aloo Jeera

Aloo Jeera, or cumin-spiced potatoes, is a quick and flavorful dish that exemplifies Indian food recipes easy. The potatoes are sautéed with cumin seeds and a handful of spices, resulting in a dish that’s both comforting and satisfying. This recipe is perfect for those times when you need something delicious without a lot of fuss.

Enhancing Your Quick and Easy Menu

To elevate your menu, why not include some delectable options from other categories? Indian Breads like chapati or naan can be quickly prepared and make a perfect accompaniment to any meal. For those with a sweet tooth, Indian Desserts Recipes such as a speedy coconut burfi or a delightful mango lassi can provide a sweet finish to your meal. Incorporating dishes from the Healthy Recipes section, such as a simple and nutritious palak dal or a crisp salad from the Soups and Salads Recipe category, can add a healthy balance to your table.

More Easy Indian Recipes

Chana Masala

Chana Masala is a popular dish featuring chickpeas cooked in a spiced tomato gravy. This dish is not only delicious but also quick to prepare, making it a favorite in the realm of easy Indian recipes vegetarian. Serve it with basmati rice or naan for a complete meal.

Moong Dal Khichdi

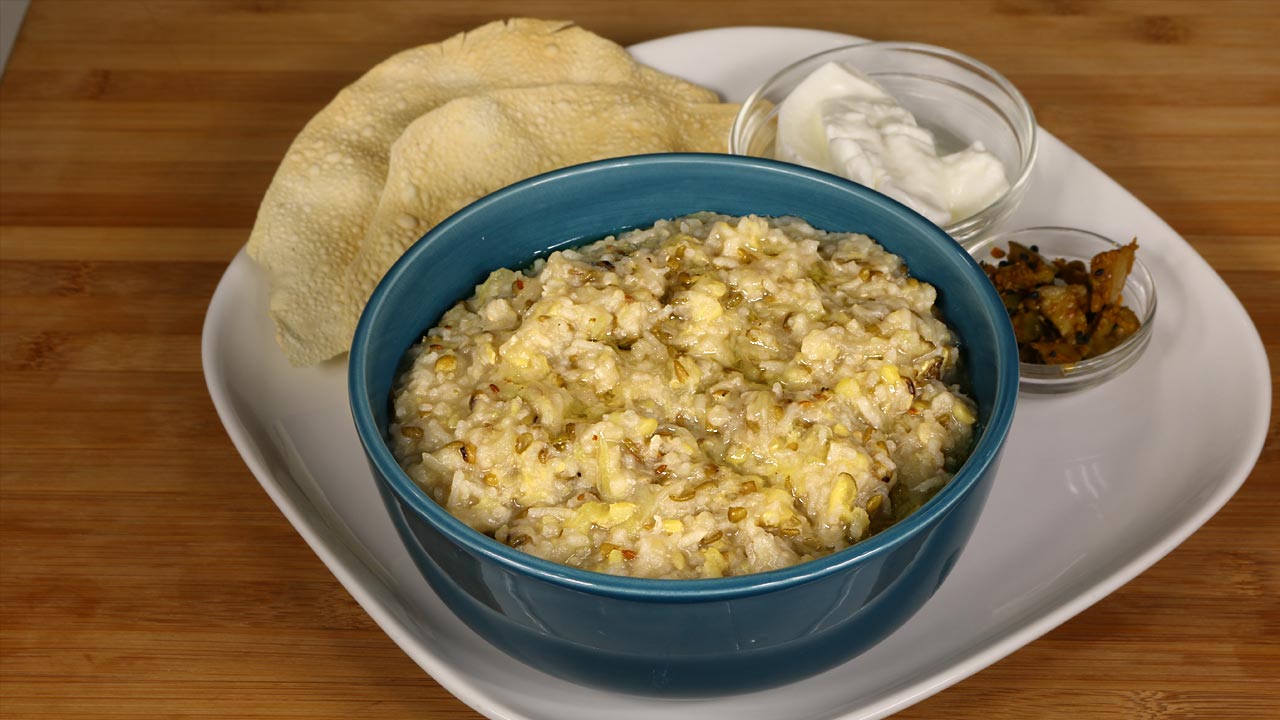
For a comforting and nourishing option, Moong Dal Khichdi is a must-try. This simple dish made from rice and yellow moong dal (split yellow lentils) is seasoned with basic spices and is incredibly easy to make. It’s perfect for those days when you want something light yet satisfying.

Sweet and Simple Endings

Sheera

Sheera is a traditional Indian dessert made with semolina, ghee, and sugar. It’s a quick and easy dessert that fits perfectly into the category of easy Indian food recipes. The best part? It takes just a few minutes to prepare, making it a great option for last-minute sweet cravings.

Coconut Ladoo

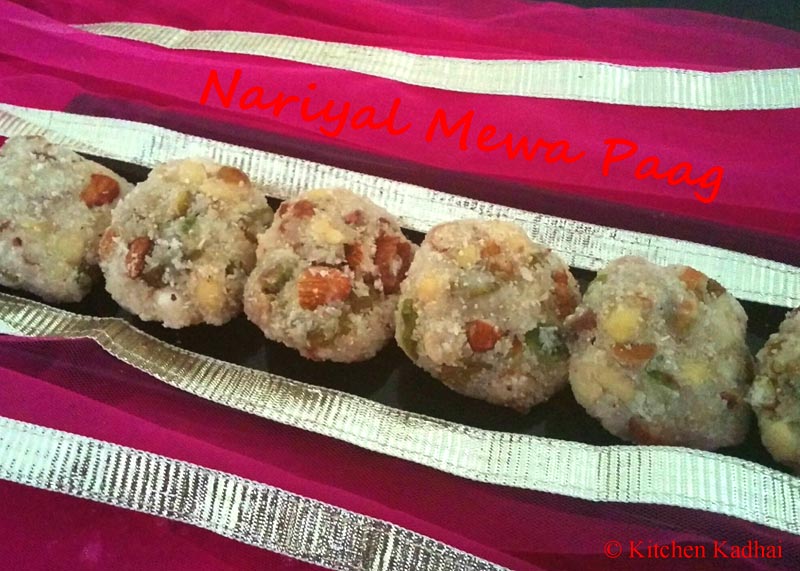
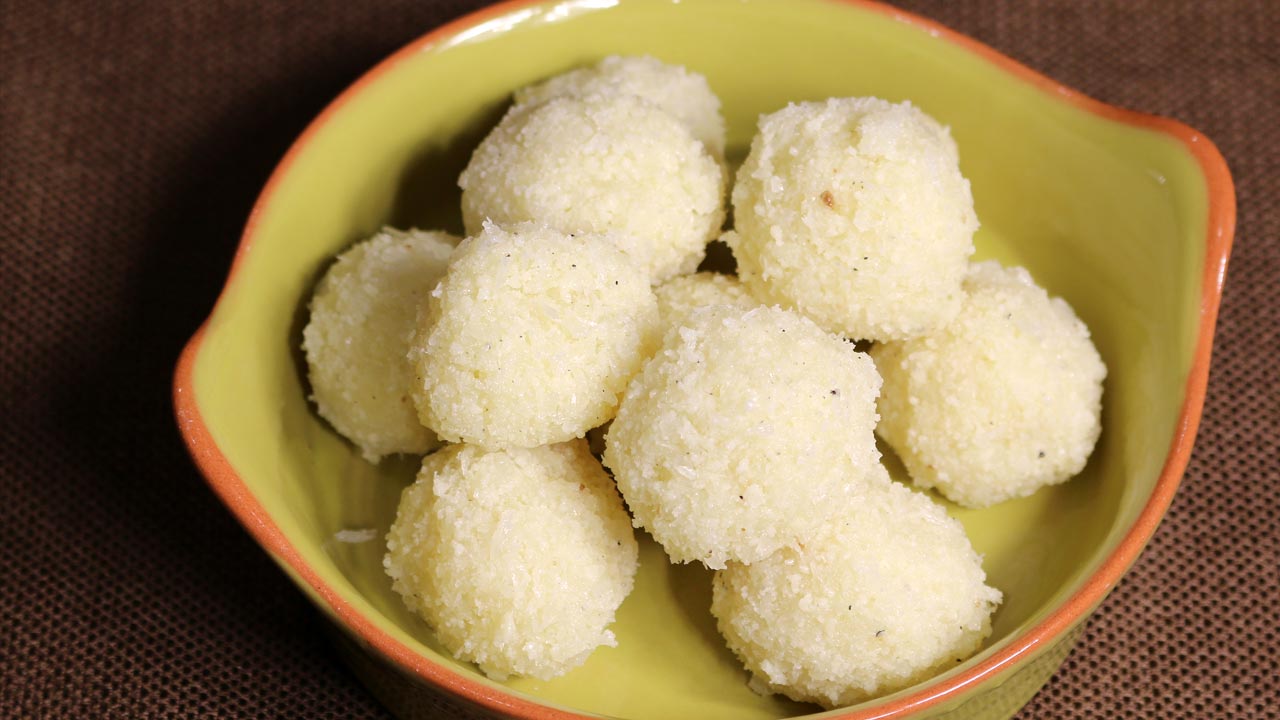
Another sweet treat that’s both simple and delightful is Coconut Ladoo. Made with grated coconut and condensed milk, these sweet balls are a favorite among easy Indian recipes vegetarian. They’re perfect for festivals or just as a quick dessert to satisfy your sweet tooth.

Frequently Asked Questions (FAQs)

Q: What are some popular easy Indian recipes vegetarian? 

A: Some popular easy Indian recipes vegetarian include Paneer Bhurji, Vegetable Pulao, Aloo Jeera, Chana Masala, Moong Dal Khichdi, Sheera, and Coconut Ladoo. These dishes are quick to prepare and full of flavor.

Q: How can I make traditional Indian food recipes easy? 

A: To make traditional Indian food recipes easy, look for recipes that require minimal ingredients and cooking time. Dishes like Paneer Bhurji, Aloo Jeera, and Moong Dal Khichdi are great examples of easy and quick Indian recipes.

Q: What are some easy Indian food recipes for beginners? 

A: Some easy Indian food recipes for beginners include Vegetable Pulao, Chana Masala, and Coconut Ladoo. These recipes are straightforward and don’t require advanced cooking skills, making them perfect for those new to Indian cooking.

Q: Can I prepare easy Indian recipes in advance? 

A: Yes, many easy Indian recipes can be prepared in advance. Dishes like Vegetable Pulao and Chana Masala can be made ahead of time and stored in the refrigerator. Simply reheat before serving.

Q: What are some quick Indian desserts? 

A: Some quick Indian desserts recipes include Sheera and Coconut Ladoo. These desserts are easy to make and require minimal preparation time, making them perfect for when you need a sweet treat in a hurry.

Conclusion

Easy Indian recipes vegetarian offer a world of flavors and aromas without the lengthy preparation time. 

Whether you’re looking for easy Indian recipes, easy Indian food recipes, or specific Indian food recipes easy, these dishes bring convenience and deliciousness to your table. 

So, gather your ingredients, try out these recipes, and enjoy the rich and diverse world of Indian cuisine. Happy cooking and happy eating!

By incorporating these dishes into your menu, you’ll be able to enjoy a wide variety of delicious and nutritious foods. Whether you’re looking for quick snacks, main courses, or desserts, there’s an easy Indian recipe to suit every taste. 

Don’t forget to check out Manjula’s Kitchen for more inspiration and culinary delights. Happy cooking and happy eating!

  • Rava Laddu (Sooji Ladoo)

    Rava Laddu (Sooji Ladoo)

    Rava Ladoo

    Rava Ladoo

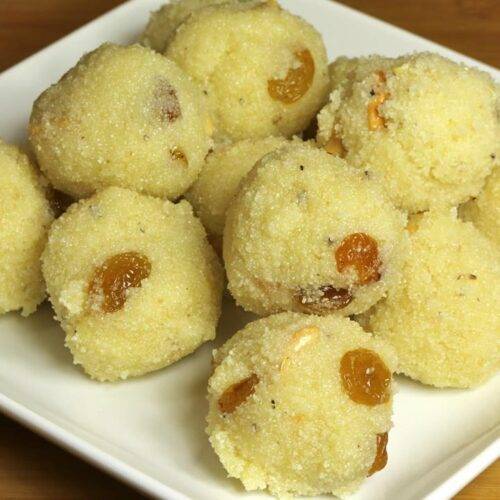
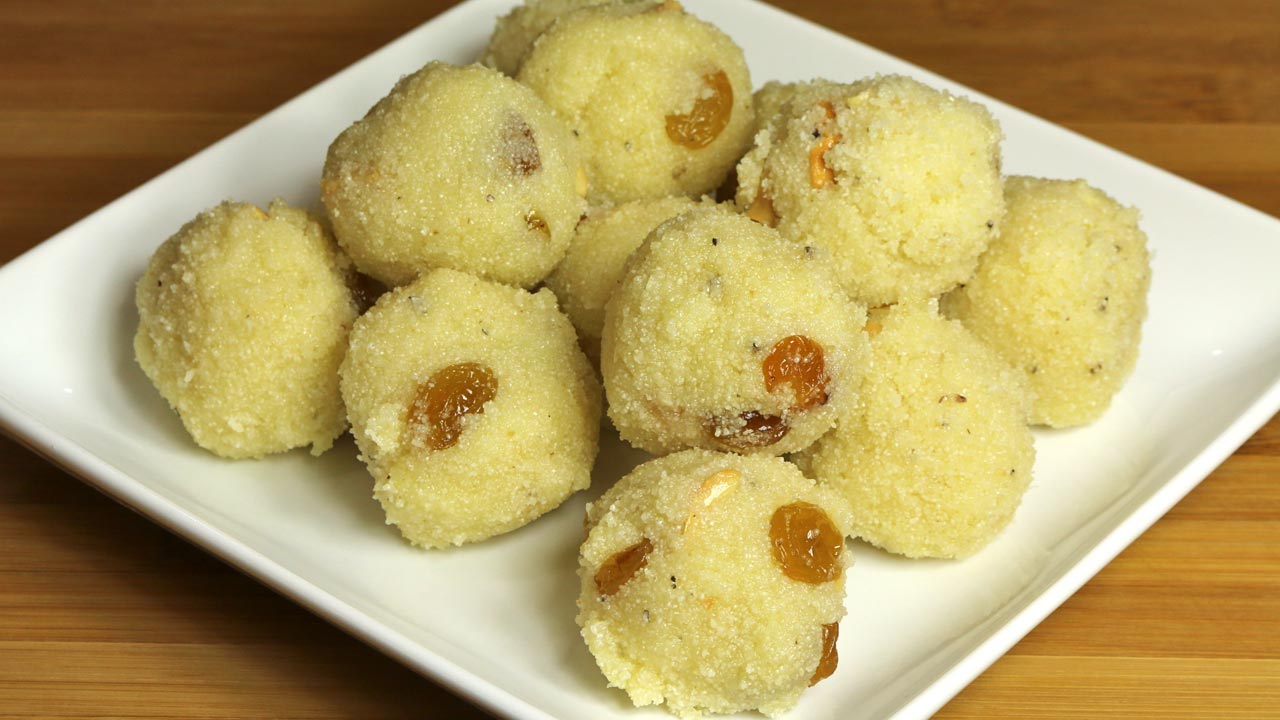
    Rava ladoo is a traditional Maharashtrian sweet snack. This is a popular ladoo prepared almost in every household for all the festivals. Rava ladoo is a simple and easy recipe but still exotic. Rava ladoo is made with roasted rava (sooji), coconut, ghee, sugar and nuts.
    4 from 3 votes
    Prep Time 10 minutes
    Cook Time 20 minutes
    Total Time 30 minutes
    Course Dessert
    Cuisine Indian
    Servings 6 people

    Ingredients
      

    • 1 cup sooji coarse rava, samolina
    • 1/3 cup coconut powder
    • 1/4 cup clarified butter ghee
    • 3/4 cup fine sugar
    • 2 tbsp cashew crushed
    • 1 tbsp raisins
    • 1/4 tsp cardamom
    • 1/4 cup milk boiling hot

    Instructions
     

    • Heat one tablespoon of clarified butter in a small pan over medium low heat; roast the cashews for about 2 minutes until light golden brown. Add raisins and roast for another minute, raisins will be puffed. Turn off the heat and transfer them in a bowl. Set aside.
    • Heat the remaining clarified butter in a frying pan over low medium heat; add rava and roast until it changes the color lightly this should take 6-7 minutes. It is important to stir continuously making sure rava roast evenly.
    • Add coconut and roast stirring continually for about 2 more minutes. Add nuts, cardamom, and sugar stir until everything mix well. Turn off the heat.
    • Add about 2 tablespoons of hot milk, mix it well mix should be moist add more milk as needed.
    • Allow the mixture to cool slightly. Make about 14 ladoos little smaller then golf ball, pressing about 1-1/2 tablespoon mixture between your palms. Add little more milk if you are enable to hold the mixture.

    Notes

    Serve them after at least one hour. Ladoos can be stored in air tight container for about 10 days.
    You will also enjoy! Puran Poli Maharashtrian specialty, Cereal Chivda a quick snack.
    Tried this recipe?Let us know how it was!
  • Carrot Burfi (Gajar Ki Burfi)

    Carrot Burfi (Gajar Ki Burfi)

    Carrot Burfi (Gajar Ki Burfi)

    Carrot Burfi (Gajar Ki Burfi)

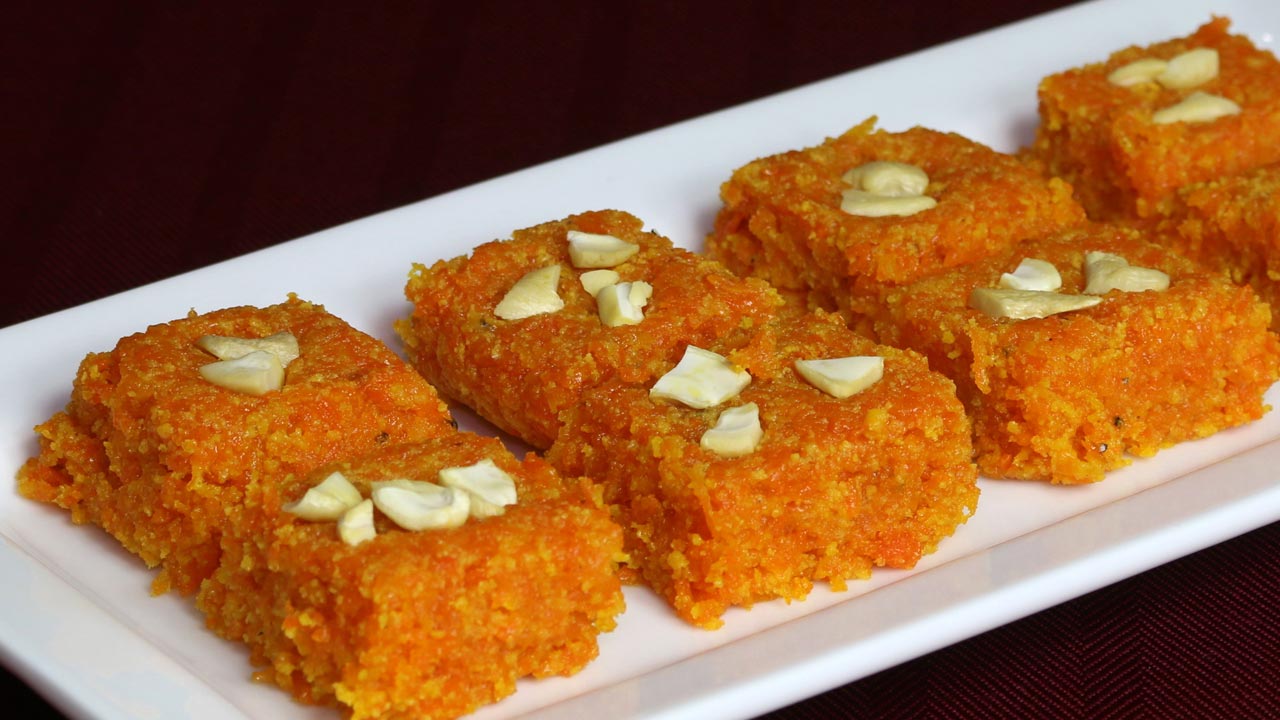
    Carrot Burfi or carrot fudge is a classic Indian dessert made with carrot and milk. This burfi is packed with all the goodness of carrots. Carrot burfi tastes absolutely divine. Everyone, young and old enjoys traditional homemade methai (sweet snack). Carrot burfi is perfect for all occasions. Gajar Burfi-Delicious fudge made from carrots and milk.
    4 from 1 vote
    Course Dessert
    Cuisine Indian

    Ingredients
      

    • 2 cups carrot shredded
    • 2 cups milk
    • 1/3 cup heavy cream
    • 1/2 cup sugar
    • 2 tablespoons clarified butter or ghee
    • 1/4 teaspoon cardamom powder
    • 2 tablespoons chopped cashews to garnish

    Instructions
     

    • In a large heavy frying pan bring the milk, cream and carrots to boil over medium high heat.  Do stir occasionally, making sure milk does not burn in bottom of the pan. After milk comes to boil reduce the heat to medium.
    • Let carrot cook for about 25 minutes, until carrot mix become like a lumpy dough. Keep stirring occasionally at the same time keep scraping the sides. Last ten minutes stir continuously otherwise mix will burn from the bottom.
    • Add sugar, after adding sugar mix will become very soft. Cook for about 10 minutes stirring continuously. Mix should be consistency of soft dough, add butter, cardamom and keep stirring for about another 4 minutes. Mix will be very lumpy.
    • Transfer mixture to the greased plate and press firmly into a square shape, approximately 1/2 inch high.
    • Let the burfi sit for at least two hour before slicing I prefer cutting in about 1-1/2 inch squares.
    • For garnishing put one cashew in center of every piece.
    Tried this recipe?Let us know how it was!
  • Cocktail Green Peas Samosa

    Cocktail Green Peas Samosa

    Cocktail Samosa

    Cocktail Green Peas Samosa

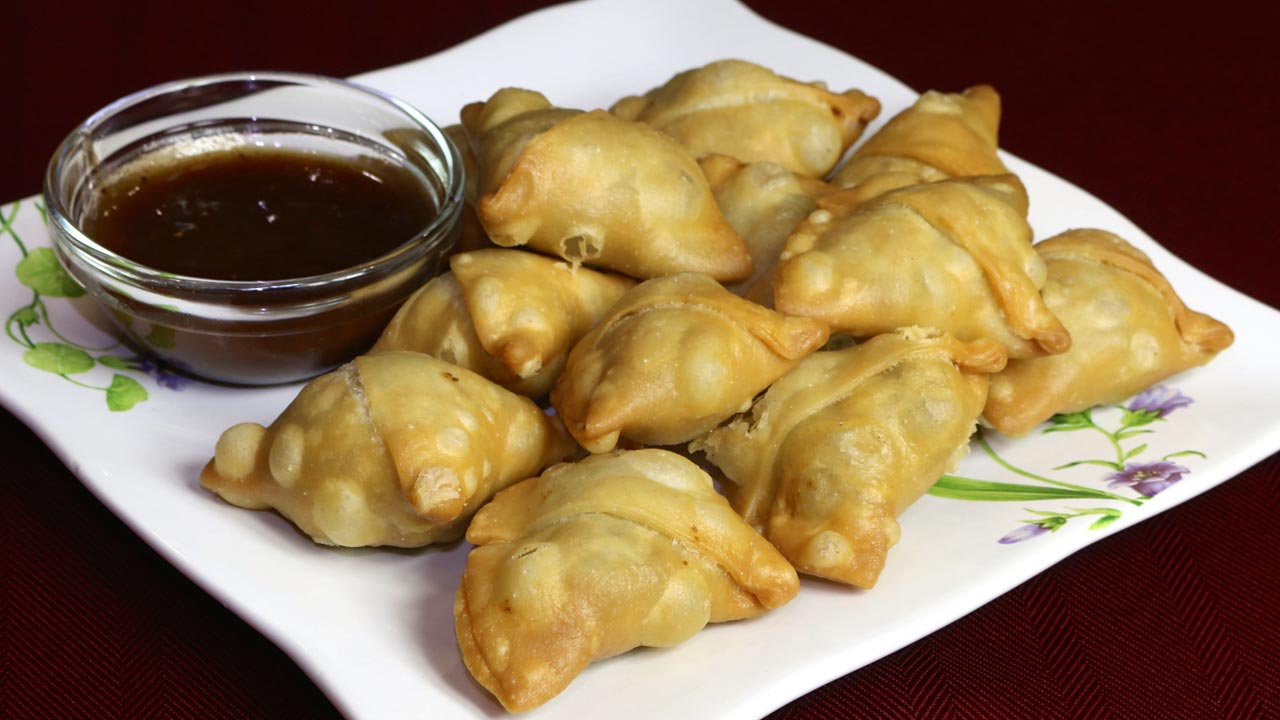
    Cocktail green peas samosas are tasty snack. These bite-sized crispy samosas are filled with spicy green peas. This was my mother's go-to appetizer for special occasions, and she received many compliments. My cooking style is greatly influenced by my mother, a true inspiration!  Of course they taste out of this world when served hot. Serve with tamarind chutney.
    5 from 1 vote
    Prep Time 15 minutes
    Cook Time 30 minutes
    Course snacks
    Cuisine Indian
    Servings 24 samosa

    Ingredients
      

    For crust

    • 1 cup All Purpose flour (plain flour or maida)
    • 1 tablespoon sooji fine (semolina)
    • 1/4 teaspoon salt
    • 2 tablespoons oil
    • Approximately 1/3 cup look warm water

    For filling

    • 2 cups boiled green peas I am using frozen green peas
    • 2 tablespoons oil
    • 3 teaspoons coriander powder (dhania)
    • 1 teaspoon red chili powder
    • 1 teaspoon mango powder (amchoor)
    • 1/4 teaspoon garam masala
    • 3/4 teaspoon salt (adjust to your taste)

    Instructions
     

    for Dough

    • Mix flour, sooji, salt, oil and water together to make soft dough (add water as needed).
    • Knead the dough to make it smooth and pliable.
    • Cover the dough and let it sit least ten minutes.

    To Make Filling

    • Boil the green peas over medium heat with 1 cup of water, until peas are tender. Drain the water, squeeze the excess water, and pat dry. Mix all the dry ingredients to the peas, coriander, chili powder, garam masala, mango powder and salt.
    • Heat the oil in a frying pan over medium heat, and put the green peas mix, stir fry and keep mashing, stir fry until no moisture left, but it should not be powdery.. This should take about 10-12 minutes.
    • Turn off the heat and let the let the filling cool to room temperature.

    Making samosas

    • Knead the dough for a minute.
    • Divide the dough into 12 equal parts and roll into balls.
    • Roll each ball about 4-1/2-inch diameter and cut each circle in half.
    • Take one semicircle and wet the sides lightly all around and fold it into a cone shape. Pinch the side of this cone so that it is completely sealed.
    • Fill the cone with about 1 teaspoon of filling. Press this filling down.
    • Close the top of the cone to form a triangular shape, pinching the top edge to seal it completely.
    • Continue filling the rest of the samosas.
    • Heat about 1 inches of oil in a frying pan on medium heat. To check if oil is hot enough place a small piece of dough in oil and dough should sizzle and come to the surface slowly.
    • Place the samosas in the frying pan a few at a time, they should not overlap.
    • After samosas are floating on top of the oil turn them slowly. Fry the samosas until the samosas are golden-brown color on all sides. This should take about 8 minutes. If you use a high heat, the samosa crust will be too soft and not cook properly.
    • Take the Samosas out over paper towel; it will absorb extra oil.
    • Cocktail Samosa goes well with tamarind chutney.
    Tried this recipe?Let us know how it was!

    Cocktail Samosa Recipe: A Delicious Twist on a Classic Snack 

    Introduction: 

    In this article, we’ll explore how to make cocktail samosa, specifically focusing on the delightful cocktail green peas samosa. This appetizing vegan snack is perfect for any occasion, whether you’re hosting a party or simply craving a savory treat. With its crispy exterior and flavorful filling, cocktail samosas are sure to be a hit with family and friends. Let’s dive into the recipe and discover the steps to create these irresistible snacks.

    Step 1: Preparing the Dough 

    To begin making cocktail samosas, start by preparing the dough. You’ll need all-purpose flour, salt, carom seeds, and oil. Combine the flour, salt, and carom seeds in a mixing bowl, then gradually add the oil while mixing the ingredients together. Knead the dough until it’s smooth and firm, then cover it and let it rest for about 30 minutes. This step ensures that the dough is pliable and easy to work with when shaping the samosas. For a detailed recipe on making the dough, you can refer to Manjula’s Kitchen’s samosa dough recipe.

    Step 2: Making the Green Peas Filling 

    Next, let’s prepare the flavorful green peas filling for our cocktail samosas. Heat oil in a pan over medium heat, then add cumin seeds and let them sizzle. Add finely chopped green chilies, ginger paste, and crushed coriander seeds, sautéing until fragrant. Stir in boiled and mashed green peas, along with salt, mango powder, and garam masala for seasoning. Cook the mixture for a few minutes until the flavors meld together, then let it cool. This delectable filling adds a burst of flavor to the cocktail samosas, making them truly irresistible.

    Step 3: Shaping and Filling the Samosas 

    Now comes the fun part – shaping and filling the samosas! Divide the rested dough into small balls and roll each one into a thin circle. Cut each circle in half to form semi-circles, then fold each semi-circle into a cone shape, sealing the edges with a water-flour paste. Fill each cone with a spoonful of the green peas filling, then seal the top to enclose the filling completely. Repeat this process until all the dough and filling are used up, creating a batch of perfectly shaped cocktail samosas ready for frying.

    Step 4: Frying to Golden Perfection 

    Once all the samosas are shaped and filled, it’s time to fry them to golden perfection. Heat oil in a deep frying pan or kadhai over medium-high heat until hot but not smoking. Carefully add the filled samosas to the hot oil, ensuring not to overcrowd the pan. Fry them in batches until they turn crispy and golden brown, flipping them occasionally for even cooking. Once fried, remove the samosas from the oil and drain them on paper towels to remove any excess oil. Serve the hot and crispy cocktail samosas with your favorite chutney or dipping sauce.

    Step 5: Serving and Enjoying 

    Now that your cocktail samosas are ready, it’s time to serve and enjoy this delicious snack with your loved ones. Arrange them on a platter alongside some mint chutney, tamarind chutney, or yogurt dip for dipping. These bite-sized treats are perfect for parties, gatherings, or even as a mid-day snack. Enjoy the crispy exterior and flavorful filling of these homemade cocktail samosas, and watch them disappear within minutes!

    Tips for Perfect Cocktail Samosas: 

    • Ensure the dough is rolled thinly for crispy samosas.
    • Seal the edges of the samosas tightly to prevent the filling from leaking out during frying.
    • Fry the samosas in hot oil for a crispy texture.
    • Serve the samosas hot for the best taste and texture.

    Variations to Try: 

    • Substitute the green peas filling with mashed potatoes or minced meat for different flavor options.
    • Add chopped vegetables like carrots, bell peppers, or beans to the filling for added texture and nutrition.
    • Experiment with different spices and seasonings to customize the flavor of the samosas according to your preference.

    Benefits of Cocktail Samosas: 

    • Cocktail samosas are a great appetizer or snack option for parties and gatherings.
    • They can be easily customized with different fillings to suit various tastes and dietary preferences.
    • Homemade cocktail samosas are healthier than store-bought ones, as you can control the quality and quantity of ingredients used.

    FAQs (Frequently Asked Questions): 

    • Can I make cocktail samosas ahead of time? 

    Yes, you can prepare the samosas ahead of time and store them in an airtight container in the refrigerator. When ready to serve, reheat them in the oven until crispy and hot.

    • Can I bake cocktail samosas instead of frying them? 

    While frying gives the samosas a crispy texture, you can bake them in the oven for a healthier alternative. Simply brush the samosas with oil and bake them at 375°F (190°C) until golden brown and crispy.

    • How long do cocktail samosas stay fresh? 

    Cocktail samosas are best enjoyed fresh on the day they are made. However, you can store any leftovers in the refrigerator for up to 2-3 days and reheat them before serving.

    Other Recipes on Manjula’s Kitchen 

    If you’re looking to explore more Indian recipes, appetizers, beverages, and desserts, be sure to check out the following links on Manjula’s Kitchen. Here are some links to recipes on Manjula’s Kitchen official website:

    Paneer Tikka Masala Recipe

    Chana Chaat (Spicy Chickpea Salad) Recipe

    Pav Bhaji (Spicy Vegetable Hash with Buns) Recipe

    Raj Kachori (Crunchy Chaat) Recipe

    Vegetable Biryani Recipe

    These recipes should offer you a flavorful experience straight from Manjula’s Kitchen.

  • Bread Dahi Vada

    Bread Dahi Vada


    Bread Dahi Vada

    Bread Dahi Vada

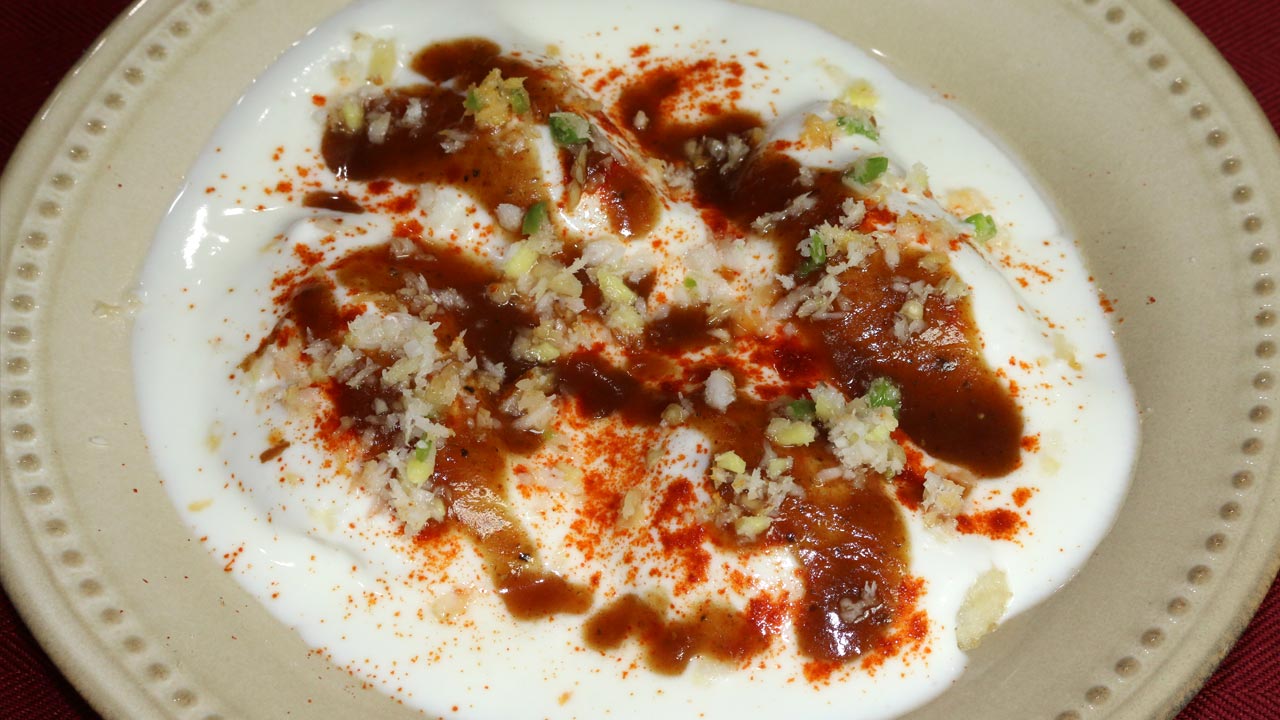
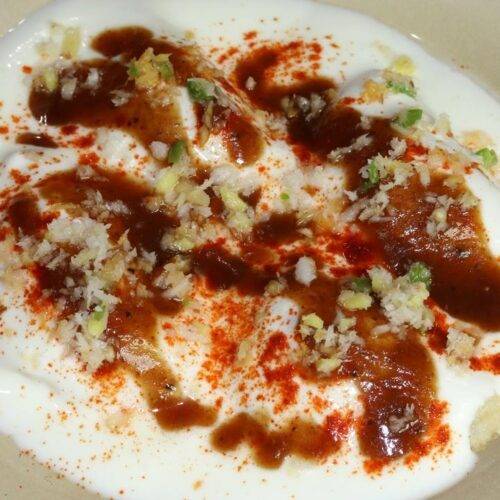
    Bread dahi vada is a quick and delicious version of the original dal lentil vadas.  There is no soaking of lentil required, no grinding and no frying required; this is an instant version of dahi vada. This can be served as a snack or appetizer.
    5 from 1 vote
    Prep Time 15 minutes
    Cook Time 20 minutes
    Course Appetizer
    Cuisine Indian
    Servings 4 people

    Ingredients
      

    • 8 slices of white bread
    • 2 tablespoon oil

    For Filling

    • 3 tablespoons shredded coconut; I am using frozen shredded coconut, available in Indian grocery stores
    • 1/4 teaspoon salt
    • 2 teaspoons ginger finely chopped
    • 2 teaspoons green chili finely chopped
    • 2 teaspoons sliced almonds

    For Serving

    • 1-1/2 cups yogurt (curd, Dahi)
    • 1/4 cup tamarind chutney check the recipe on my website
    • 1/2 teaspoon salt
    • 1/2 teaspoon red chili powder 

    Instructions
     

    • Mix all the ingredients for filling coconut, salt, ginger, green chili, and almonds, set aside.
    • Cut bread slices into rounds, I am using 3” cookie cutter.
    • Lightly wet one side of the bread and put 2 teaspoons of filling in center and fold the bread in half, forming semi-circle. Press the edges together with your fingers. Make sure the edges are sealed.
    • Continue filling rest of the vadas in the same manner.
    • Brush the vadas both side lightly with oil, and toast them in toaster oven just enough that bread has become light golden brown. You can also bake them in oven.
    • Serving the vadas
    • Whip the yogurt until smooth. Add a little milk as needed to make the consistency similar to pancake batter or lassi. Add the salt, adjust to your taste.
    • When ready to serve soak them in water for one minute and squeeze the vadas lightly between your both palms.
    • Dip them in yogurt one at a time and arrange them in serving plate, sprinkle the red chili powder to your taste, it is optional, drizzle the tamarind chutney and few pieces of cilantro, and gives a nice color.
    • Bread dahi vadas are ready to serve.
    Tried this recipe?Let us know how it was!

    Bread Dahi Vada Recipe

    Bread Dahi Vada is a delightful twist to the traditional dahi vada, offering a quicker and simpler way to enjoy this beloved Indian snack. Bread dahi vada is perfect for those who crave the flavors of dahi vada but prefer a hassle-free preparation method. This recipe is a fusion of textures and flavors, combining the softness of bread with the tanginess of yogurt and the spiciness of chutneys. Here’s how to make bread dahi vada at home.

    Step 1: Preparing the Bread

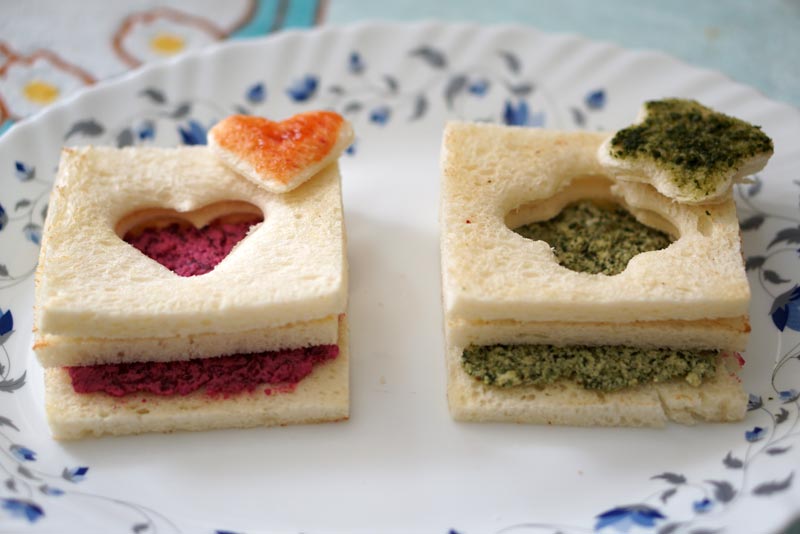
    To begin making bread dahi vada, start by preparing the bread slices. Trim the edges of the bread slices and then cut them into desired shapes. You can cut them into squares, rectangles, or use cookie cutters to create fun shapes like stars or hearts. This step ensures that the bread absorbs the yogurt mixture well, resulting in soft and flavorful vadas.

    Step 2: Soaking the Bread

    Once you’ve cut the bread into desired shapes, soak them in lukewarm water for a few seconds. Ensure that the bread slices are fully submerged in water to soften them. This step is crucial as it allows the bread to absorb moisture, making it easier to shape into vadas later. Squeeze out excess water from the soaked bread slices gently, being careful not to break them.

    Step 3: Preparing the Yogurt Mixture

    The next step in making bread dahi vada is to prepare the yogurt mixture. In a bowl, whisk fresh yogurt until smooth and creamy. Add a pinch of salt and sugar to the yogurt and mix well. The yogurt should have a balanced flavor, with a hint of sweetness to complement the savory elements of the dish. You can adjust the seasoning according to your taste preferences.

    Step 4: Assembling the Bread Dahi Vada

    Now it’s time to assemble the bread dahi vada. Take each soaked bread slice and gently squeeze out any remaining water. Place the squeezed bread slice on a serving plate or platter. Spoon a generous amount of the prepared yogurt mixture over the bread slice, covering it completely. Ensure that the yogurt coats the bread evenly, imparting its tangy flavor to every bite.

    Step 5: Garnishing the Bread Dahi Vada

    After assembling the bread dahi vada, it’s time to garnish it with various toppings and chutneys. Drizzle sweet tamarind chutney and spicy green chutney over the vadas, adding layers of flavor and heat. Sprinkle a pinch of chaat masala and roasted cumin powder on top for an extra burst of taste. Garnish with finely chopped cilantro leaves and pomegranate seeds for a vibrant and refreshing touch.

    Tips for Making Perfect Bread Dahi Vada:

    • Use Fresh Bread: Opt for fresh bread slices as they absorb moisture better, resulting in softer vadas.
    • Soak Bread Just Right: Ensure that you soak the bread slices for the right amount of time. Over-soaking can make them mushy, while under-soaking can make them dry.
    • Adjust Seasonings: Taste the yogurt mixture before assembling the vadas and adjust the seasonings according to your preference. You can add more salt or sugar as needed.

    Variations of Bread Dahi Vada:

    • Stuffed Bread Dahi Vada: For a flavorful twist, you can stuff the soaked bread slices with a mixture of chopped nuts, raisins, and spices before coating them with yogurt.
    • Bread Dahi Vada Chaat: Turn bread dahi vada into a delightful chaat by adding tomatoes, sev, and a drizzle of mint chutney on top.

    Benefits of Bread Dahi Vada:

    • Quick and Easy: Bread dahi vada is a quick and easy recipe that can be prepared in minutes, making it perfect for busy days or sudden cravings.
    • Lighter Option: Unlike traditional dahi vada made with lentils, bread dahi vada is lighter on the stomach, making it suitable for those looking for a lighter snack option.

    FAQs (Frequently Asked Questions) about Bread Dahi Vada:

    Can I use whole wheat bread for this recipe?

    • Yes, you can use whole wheat bread instead of white bread for a healthier twist. However, keep in mind that whole wheat bread may have a denser texture.


    Can I prepare bread dahi vada in advance? (H2) 

    • While it’s best to assemble bread dahi vada just before serving to maintain the texture of the bread, you can prepare the components in advance and assemble them when ready to serve.

    For more delightful Indian recipes, more Indian recipes, appetizers, beverages, and desserts, be sure to check out the following links on Manjula’s Kitchen. Here are some links to recipes on Manjula’s Kitchen official website:

    Paneer Tikka Masala Recipe

    Chana Chaat (Spicy Chickpea Salad) Recipe

    Pav Bhaji (Spicy Vegetable Hash with Buns) Recipe

    Raj Kachori (Crunchy Chaat) Recipe

    Vegetable Biryani Recipe

    These recipes should offer you a flavorful experience straight from Manjula’s Kitchen.

  • Coconut Ladoo

    Coconut Ladoo

    Coconut Ladoo

    Coconut ladoo

    Coconut ladoos are a rich, sweet dessertsnack. This is made for many festive occasions. Coconut laddoo is a very simple and easy recipe to make. These are made with few ingredients. Traditionally in Indian households ladoos are served as fudge candies.
    5 from 2 votes
    Prep Time 5 minutes
    Cook Time 40 minutes
    Total Time 45 minutes
    Course Dessert
    Cuisine Indian
    Servings 8 people

    Ingredients
      

    • 1-1/4 cup coconut freshly grated or frozen
    • 3 cups milk
    • 1/2 cup sugar
    • 1/4 tsp cardamom powder

    Instructions
     

    • Boil the milk and coconut in heavy bottom pan over medium high heat (I am using heavy non stick pan), do stir occasionally.
    • After milk comes to boil reduce the heat to medium and cook for 25-30 minutes, until all the moisture is absorbed and coconut is thick and creamy consistency.
    • Add sugar and cardamom to the coconut and cook for 7-8 minutes stir continuously, until all the moisture is absorbed. Coconut mix will be thick and crumbly in consistency. Turn off the heat.
    • Spread the coconut mix on the plate and let it cool of to the room temperature.
    • To make the ladoos, take about 2 tablespoons of coconut mixture into your palm. Gently press to form a smooth, round ball. Adjust the size of ladoo as you prefer

    Notes

     
    Ladoos are ready to be served; you can refrigerate them for about two weeks.
    Keyword Coconut Candy, Holiday Gift, Kid Friendly, Sweet Snack
    Tried this recipe?Let us know how it was!

  • Bread Paneer Rolls

    Bread Paneer Rolls

    Bread Paneer Rolls

    Bread Paneer Rolls

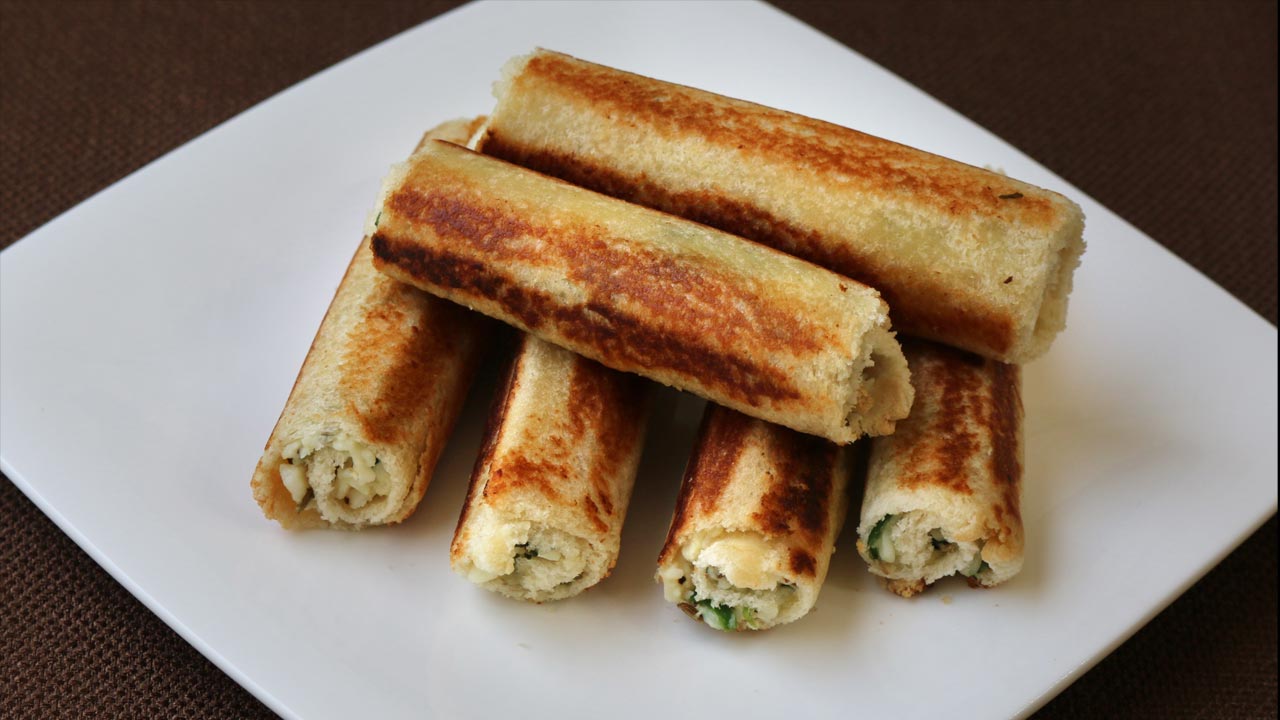
    Spicy bread Paneer rolls are great as an appetizer and a tasty compliment for afternoon tea. This is very easy and quick recipe to make. Paneer, is an Indian cheese also known as chena that is liked by all and used in many dishes. Bread paneer rolls are made with spiced paneer rolled in bread.
    No ratings yet
    Prep Time 10 minutes
    Cook Time 10 minutes
    Total Time 20 minutes
    Course Appetizer
    Cuisine Indian
    Servings 3 people

    Ingredients
      

    • 6 slice soft white bread
    • 1 cup shredded paneer available in Indian grocery stores
    • 1/2 tsp salt
    • 1/2 tsp cumin seeds jeera
    • 1/8 tsp black pepper
    • 1 tsp ginger finely shredded adrak
    • 2 tbsp cilantro finely chopped hara dhania
    • 1 tsp green chili finely chopped
    • 2 tbsp hot milk, use as needed
    • 2 tbsp melted butter

    Instructions
     

    • Mix well all the filling ingredients, except milk. The texture of the mix should be soft enough to spread on bread. If needed add milk as needed. Set aside.
    • Trim the edges of the bread slices. Roll the bread very thin using rolling pin. Spread a thin layer of the mix over ¾ of the bread slice, and roll it into a cylinder, making sure ends are sealed, if needed brush the edges with water.
    • Lightly butter all around and grill on skillet over medium heat. Keep turning them, making sure rolls are evenly browned all around.
    • Serve them hot or at room temperature they taste great. You can also slice them in two to three pieces.

    Notes

    Variations
    Instead of paneer you can also use the boiled mashed potato with same spices.
    Keyword Healthy Snack, Kid Friendly, Lunch Box, Snack
    Tried this recipe?Let us know how it was!

  • Moong Dal Khichdi

    Moong Dal Khichdi

    Moong Dal Khichdi

    Moong Dal Khichdi

    Moong dal khichdi is a very basic and healthy food. Every house hold has their own recipe for khichdi. At my home khichdi was made with split moong dal and rice. I have added the laucki (ghia, opo squash, bottle gourd), to make this a more complete one dish and one pot meal.
    5 from 1 vote
    Course rice
    Cuisine Indian
    Servings 3 people

    Ingredients
      

    • ½ cup rice
    • ½ cup moong dal
    • 2 cup shredded opus also known as bottle guard, laucki or ghia, you can also use zucchini shredded with skin on
    • 1 tablespoon clarified butter (ghee) if you are vegan replace the ghee with oil
    • 1 teaspoon cumin seeds (jeera)
    • 1/8 teaspoon asafetida (hing)
    • 1-1/4 teaspoon salt
    • 2 teaspoon ginger finely grated (adrak)
    • 3-1/2 cups water

    For serving

    • 2 tablespoons hot clarified butter (ghee) optional

    Instructions
     

    • Wash and soak the rice and moong dal in about 3 cups of water for at least 15 minutes. Drain the water and set aside.
    • Heat the clarified butter in a pressure cooker over medium high heat. When butter is moderately hot, add cumin seeds and asafetida. After the seeds crack add all the other ingredients for khichdi and stir.
    • Close the pressure cooker and seal the exhaust, or put the weight.
    • After the pressure cooker start steaming lower the heat to medium and cook for about 7 minutes.
    • Turn off the heat and wait until steam has stopped before opening the cooker.
    • Mix the khichdi well, dal and rice should be very soft, little mushy. Consistency of the khichdi should be like runny dough. Note: as khichdi cools will become little thick. If needed add boiling water too adjust the consistency of your liking.
    • Traditionally hot butter is poured over khichdi before serving, serve hot.
    • Serve the khichdi with pickle, yogurt and papdam.
    Tried this recipe?Let us know how it was!

    Delicious Moong Dal ki Khichdi Recipe: An easy step by step preparation 

    Moong dal ki khichadi is a traditional gluten free, low fat, quick & easy Indian dish renowned for its simplicity, versatility, and nutritious profile. At its core, it comprises moong dal (split mung beans) and rice, which are cooked together to create a wholesome and satisfying meal.

    1. Thoroughly Washing and Soaking for Flavorful Moong Dal Ki Khichdi 

    Commence the culinary journey of crafting the perfect moong dal ki khichdi by meticulously washing and soaking the rice and moong dal in approximately 3 cups of water for a minimum duration of 15 minutes. This essential step ensures that the grains imbibe adequate moisture, crucial for achieving the desired texture and taste in the moong dal khichdi. Post-soaking, meticulously drain the water and set the rice and dal aside, ready to absorb the aromatic flavors awaiting them.

    1. Tempering the Spices: Elevating Flavor Profiles in Split Moong Dal Khichdi 

    In a heavy-bottomed pressure cooker, elevate the culinary experience by heating clarified butter over medium-high heat until it reaches an optimal temperature. Once sufficiently heated, introduce the fragrant duo of cumin seeds and asafetida into the glistening butter, allowing them to sizzle and release their captivating aromas. As the seeds crackle, gracefully incorporate all the other ingredients essential for crafting the quintessential moong dal khichadi, ensuring each component contributes to the symphony of flavors that define this revered dish.

    1. Pressure Cooking: Sealing and Culinary Alchemy in split Moong Dal Khichdi 

    Embrace the essence of culinary alchemy as you tightly seal the pressure cooker and ignite the flames of anticipation by activating the exhaust or positioning the weight atop. As the pressure cooker builds momentum and begins to emit a gentle stream of steam, revel in the anticipation of the transformative process unfolding within, signifying the metamorphosis of simple ingredients into a tantalizing ensemble known as dal khichadi.

    1. Cooking Under Pressure: Nurturing Texture and Flavor in split Moong Dal Khichdi

    With the pressure cooker exuding a gentle hiss of anticipation, regulate the heat to a medium setting and allow the dal khichadi to undergo its metamorphosis for an approximate duration of 7 minutes. This judicious cooking period fosters the delicate interplay of flavors and textures, ensuring that the rice and dal emerge soft and supple, a testament to the culinary prowess employed in crafting this illustrious dish.

    1. Releasing Pressure: Embracing Tradition and Consistency in Dal Khichadi 

    Upon completion of the cooking process, gracefully relinquish the pressure cooker from its duties and patiently await the cessation of steam before venturing to unveil the treasure concealed within. As the lid is lifted, marvel at the amalgamation of flavors and textures that greet your senses, each spoonful promising a symphony of sensations that define the essence of moong dal khichadi. With gentle, yet deliberate strokes, ensure the khichdi is thoroughly mixed, allowing the rice and dal to meld seamlessly and attain a consistency akin to that of runny dough, a hallmark of culinary perfection.

    1. Adjusting Consistency: Fine-tuning Your Moong Dal Khichadi Masterpiece

    Should the need arise, exercise culinary finesse by judiciously adjusting the consistency of the khichdi to suit your preferences. Introduce boiling water in measured increments to achieve the desired thickness, bearing in mind that as the dal khichadi cools, it may undergo a slight thickening process, necessitating preemptive measures to maintain its impeccable texture throughout.

    1. Serving Tradition: Enhancing Flavor and Tradition with Hot Butter 

    Stay true to tradition and honor the heritage of moong dal ki khichdi by drizzling a generous portion of piping hot butter over the sumptuous ensemble before serving. This timeless practice not only imbues the dish with an additional layer of richness and flavor but also pays homage to the culinary customs and traditions that have stood the test of time, enriching the dining experience and elevating it to an unparalleled level of indulgence.

    1. Serving Suggestions: Completing the Culinary Odyssey of Moong Dal Khichdi 

    Embark on a culinary odyssey of unparalleled flavor and indulgence as you savor each spoonful of the meticulously crafted moong dal khichdi. Accompany this gastronomic delight with an assortment of tangy pickle, creamy yogurt, and crispy papadum, each element serving to enhance and complement the nuanced flavors and textures of the dish. Let every bite be a testament to the culinary ingenuity and mastery that have culminated in the creation of this timeless masterpiece, a feast for both the senses and the soul.

    If you loved our moong dal ki khichdi then you must also check out our other variants of Rice: Vegetable Biryani, Masala Khichdi, Chhole Biryani, Quinoa Vegetable Pilaf and Lemon Rice