Tag: Low Calorie Snacks

Low Calorie Snacks for a Healthy Lifestyle
Incorporating low calorie snacks into your daily diet is a great way to maintain energy levels, satisfy hunger, and stay on track with your health goals. 

These snacks are not only nutritious but also delicious, making them a perfect choice for anyone looking to enjoy tasty treats without compromising on their dietary needs. 

Below, we explore various healthy low calorie snacks that are ideal for different occasions. So let’s check out these snacks which are beyond indian snacks
Popular Low Calorie Snacks
1. Vegetable Sticks with Hummus
Vegetable sticks such as carrots, cucumbers, and bell peppers paired with hummus make for a crunchy and satisfying snack. This combination is rich in vitamins and low in calories, making it one of the best low calorie snacks.
2. Air-Popped Popcorn
Popcorn is a whole grain and can be a very filling snack when air-popped without butter. Season it with a bit of salt or nutritional yeast for added flavor. This is a favorite among those seeking very low calorie snacks.
3. Greek Yogurt with Berries
Greek yogurt is high in protein and, when paired with fresh berries, offers a sweet and tangy snack that is both filling and low in calories. This is one of the healthy low calorie snacks that can be enjoyed any time of the day.
4. Apple Slices with Peanut Butter
Apple slices with a thin spread of peanut butter make for a delicious and nutritious snack. The natural sweetness of the apple complements the creamy texture of the peanut butter, making it an easy low calorie snack.
5. Rice Cakes with Avocado
Rice cakes are a low-calorie base that can be topped with mashed avocado for a healthy and satisfying snack. Add a sprinkle of salt and pepper to enhance the flavor. This is a popular choice in low calorie snacks recipes.

6.Roasted Makhana

Roasted makhana is a delicious and healthy low-calorie snack. Packed with nutrients and offering a satisfying crunch, it’s perfect for guilt-free munching. Ideal for weight management, this snack is also rich in protein and fiber, making it a great choice for a quick and nutritious bite. It is also one of those easy Indian vegetarian recipes which is quick to make and very popular.

7. Roasted chana

Roasted chana is a nutritious, low-calorie snack. High in protein and fiber, it helps keep you full longer, making it ideal for weight management. This crunchy delight is also rich in essential vitamins and minerals, providing a healthy and satisfying option for on-the-go munching. A delightful dish coming from vegan food recipes.
8. Baked Samosas
Baked samosas are a healthier twist on the traditional fried version, offering a low-calorie yet equally delicious option. Filled with a savory mixture of spiced potatoes and peas, these samosas are baked to perfection, providing a crispy exterior without the extra oil. Perfect as a guilt-free snack or indian veg appetizers.
Benefits of Low Calorie Snacks
Including low calorie snacks in your diet offers numerous benefits:

Weight Management: Low calorie snacks help control calorie intake while keeping hunger at bay.
Energy Boost: These snacks provide a quick energy boost without adding unnecessary calories.
Nutrient Intake: Many low calorie snacks are rich in essential nutrients, contributing to overall health.
Satiety: High-fiber and protein-rich snacks can help you feel fuller for longer.

More Low Calorie Snack Ideas
Here are some more low calorie snacks that you can easily prepare at home:
Cottage Cheese with Pineapple
Cottage cheese is low in calories and high in protein. Pair it with pineapple chunks for a refreshing and filling snack.
Celery Sticks with Almond Butter
Celery sticks with almond butter are a crunchy and satisfying snack that is both low in calories and high in healthy fats.
Cherry Tomatoes with Mozzarella Balls
Cherry tomatoes paired with small mozzarella balls (bocconcini) make for a delicious and low-calorie snack. Add a drizzle of balsamic vinegar for extra flavor.
Mixed Berries
A bowl of mixed berries such as strawberries, blueberries, and raspberries is a sweet and low-calorie treat that is packed with antioxidants.
Edamame
Edamame, or steamed soybeans, are high in protein and low in calories. Sprinkle it with a bit of sea salt for a tasty snack.
FAQs
What are low calorie snacks? 
Low calorie snacks are foods that provide minimal calories while offering nutritional benefits. They help control calorie intake and can be part of a balanced diet.
What are some healthy low calorie snacks? 
Some healthy low calorie snacks include vegetable sticks with hummus, air-popped popcorn, Greek yogurt with berries, apple slices with peanut butter, and rice cakes with avocado.
What are the best low calorie snacks? 
The best low calorie snacks are those that are both nutritious and satisfying. Examples include cottage cheese with pineapple, celery sticks with almond butter, and mixed berries.
Are there any very low calorie snacks? 
Yes, very low calorie snacks include options like air-popped popcorn, celery sticks, cherry tomatoes, and edamame.
What are some easy low calorie snacks to make?
Some easy low calorie snacks to make are rice cakes with avocado, apple slices with peanut butter, and Greek yogurt with berries.
Conclusion
Incorporating low calorie snacks into your diet is an excellent way to enjoy tasty treats without compromising on your health goals. From vegetable sticks with hummus to rice cakes with avocado, these snacks provide the perfect balance of taste and nutrition. Enjoy these healthy low calorie snacks to support a healthy and balanced lifestyle. Explore more recipes on Manjula’s Kitchen and discover the joy of cooking nutritious and delicious food.

  • Raj Kachori

    Raj Kachori

    Raj Kachori Chat

    Raj Kachori

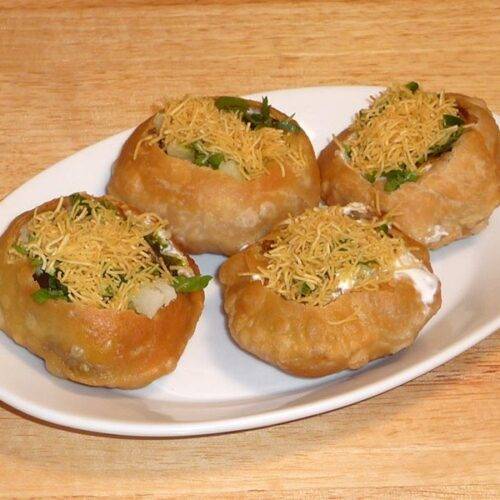
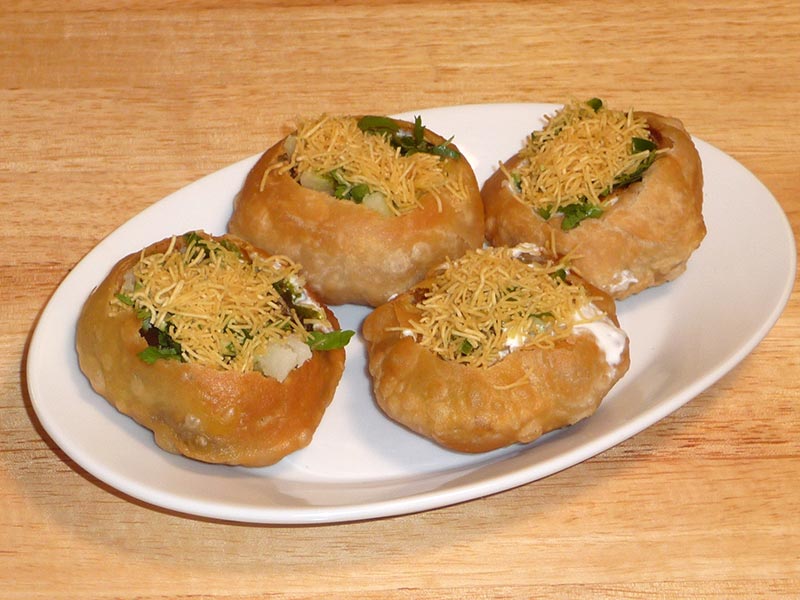
    Raj Kachori is a spicy chaat bowl filled with delicious condiments. It has refreshing flavors and makes for a unique food experience. Guests will have fun filling their own Kachories according to their taste palette. Served as a snack or appetizer, Raj Kachories make a beautiful presentation and are thoroughly enjoyed by just about everyone.
    5 from 1 vote
    Prep Time 15 minutes
    Cook Time 30 minutes
    Total Time 45 minutes
    Course Appetizer
    Cuisine Indian
    Servings 6 people

    Ingredients
      

    Kachori Dough

    • 1 cup all-purpose flour plain flour, maida
    • 1 tbsp oil
    • 1/2 tsp salt
    • 1/2 cup approx. lukewarm water

    Kachori Filling

    • 1/3 cup besan gram flour
    • 1/8 tsp asafetide hing
    • 1/2 tsp salt
    • 1/2 tsp chili flakes
    • 1/2 tsp mango powder amchoor
    • 1 tbsp oil

    Condiments to be served With Kachories

    • 1 cup moong sprouts
    • 1 cup boiled and peeled potato cut into small pieces
    • 1 cup whipped yogurt dahi, curd
    • 1/4 cup hari cilantro chutney
    • 1/4 cup tamarind chutney
    • 2 tbsp cilantri finely chopped hara dhania
    • 2 green chilies finely chopped
    • 1/4 cup fine save available in Indian grocery store optional

    Instructions
     

    Making Dough

    • In a mixing bowl add all-purpose flour, salt, and oil; add water slowly while mixing and kneading to make firm, yet pliable dough. Cover and set the dough aside for at least 10 minutes.

    Filling

    • Mix Kachori filling ingredients together, i.e. gram flour, asafetida, salt, chili flakes, mango powder and oil. Set it aside.

    Making Kachori

    • Knead dough for a minute and divide into 12 equal parts.
    • Roll dough ball into a 2-inch diameter circle and place 1 teaspoon of filling in the center. Seal by pulling the edges together to make a ball. Prepare all 12 kachoris and let sit for 3 to 4 minutes.
    • Place a filled kachori with the seam side up, onto a clean surface. Using a rolling pin roll into a circle, approximately 3 inches in diameter.
    • Heat approx. 1 ½ inches of oil in a frying pan over medium heat. To check if the oil is ready, put a little piece of dough into the oil and it should immediately rise to the surface without having changed its color.
    • Slowly drop kachoris into the frying pan making sure they don’t overlap with one another. As kachoris puff up, slowly turn them over and fry them on all sides. Turn kachoris 3-4 times until they are golden brown in color, which will take about 7KacKachorishories should be crisp. If the kachoris are fried over high heat they will be too soft.

    Notes

    Prepare Moong Sprouts
    Add ¼ teaspoon of salt and 2-3 tablespoons of water to the moong sprouts. Cover and cook over medium heat for 3-4 minutes till sprouts are tender. Set aside.
    Serving Kachories
    Gently make an inch sized hole in the center of the kachori.
    Fill with 1 tablespoon of sprouts, 1 tablespoon of potatoes, 2 tablespoons of yogurt and a drizzle with both of the 2 chutneys.
    As an option, add a little cilantro, green chili and 1 tablespoon of fine Sev. These add a little more texture and flavor to the Kachori.
    Tip:
    These Raj Kachories can be prepared in advance and stored up to 2 weeks in an air tight container, making it more convenient to serve. It is even easier if you have the Hari Cilantro and Tamarind chutneys previously stored.
    Keyword Appetizer, Party Food, Street Food, Tea Time Snack
    Tried this recipe?Let us know how it was!

    How To Make Raj Kachori Recipe – Manjula’s Kitchen 

    Raj Kachori Indian appetizer, a popular Indian snack, is a delightful combination of crispy shells filled with flavorful ingredients. Follow this step-by-step guide to create your own Raj Kachori at home, offering a burst of textures and tastes in every bite.

    Making the Dough: 

    Begin by preparing the dough for the kachori. In a mixing bowl, combine all-purpose flour (maida), salt, and oil. Gradually add water while kneading to achieve a firm and pliable consistency. Cover the dough and set it aside for at least 10 minutes to allow it to rest and develop the right texture.

    Preparing the Filling: 

    The filling is a crucial component that adds a distinct taste to Raj Kachori. Mix gram flour, asafetida, salt, chili flakes, mango powder, and oil in a bowl. This flavorful mixture will be the heart of your kachori, providing a savory and aromatic essence.

    Shaping and Filling the Kachori: 

    After the dough has rested, knead it briefly and divide it into 12 equal parts. Roll each portion into a 2-inch diameter circle. Spoon 1 teaspoon of the prepared filling into the center of each circle and seal the edges to form a ball. Let these filled kachories sit for a few minutes. Roll each ball into a 3-inch diameter circle, ensuring an even distribution of the filling.

    Frying the Kachoris: 

    Heat about 1 ½ inches of oil in a frying pan over medium heat. To check if the oil is ready, drop a small piece of dough into it; it should rise immediately without changing its color. Carefully place the filled kachoris in the pan, ensuring they do not overlap. As the kachoris puff up, turn them over slowly, frying on all sides until they achieve a golden-brown color. This process should take approximately 7 minutes, and it’s crucial to maintain medium heat to ensure the kachoris turn out crispy rather than overly soft.

    Preparing Moong Sprouts: 

    For an additional layer of flavor and nutrition, cook moong sprouts with a pinch of salt and a few tablespoons of water over medium heat for 3-4 minutes until they become tender. Set aside these sprouts as they will be used as a topping for your kachori.

    Serving the Kachoris: 

    Once the kachoris are cooked to perfection, it’s time to assemble and serve them. Gently create a small hole in the center of each kachori. Fill the hole with a tablespoon of each of the moong sprouts, mashed potatoes, and yogurt. Drizzle the kachoris with both hari cilantro and tamarind chutneys for a burst of tangy and spicy flavors. For those seeking an extra layer of texture and flavor, consider adding fresh cilantro, green chilies, and a tablespoon of fine Sev as optional toppings.

    Tips for Storage: 

    For convenience, Raj Kachoris can be prepared in advance and stored in an airtight container for up to two weeks. This makes it easy to serve these delightful treats whenever the craving strikes. With this simple yet comprehensive recipe on how to make raj Kachori, create authentic Raj Kachori in your kitchen. Enjoy the delectable experience of this iconic Indian street food without the need to visit a chaat vendor.

  • Spinach Triangles Cheese Crackers

    Spinach Triangles Cheese Crackers

    Spinach Triangles Cheese Crackers

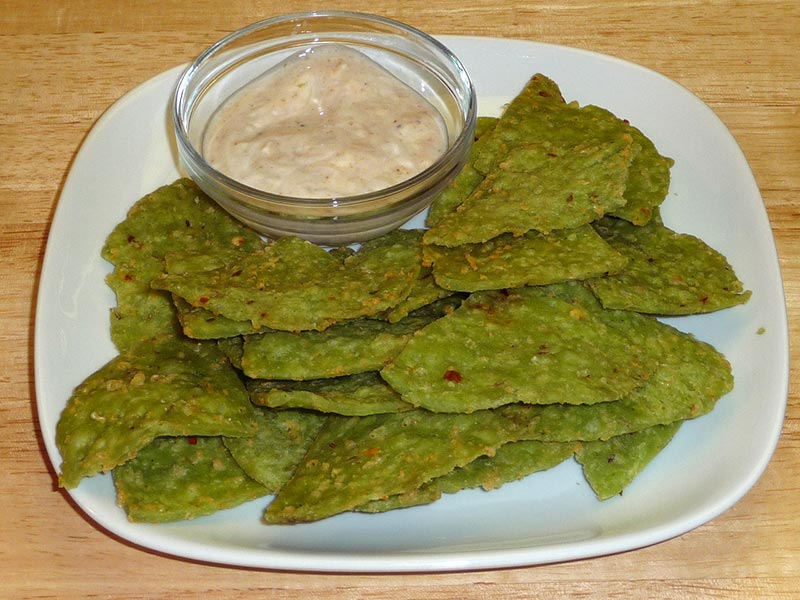
    Spinach crackers are crisp appetizer flavored with cheese and mildly spiced makes tasty snack.
    No ratings yet
    Course Appetizer
    Cuisine Indian
    Servings 0

    Ingredients
      

    • 1 cup all purpose flour (maida, plain flour)
    • ½ cup semolina (fine sooji)
    • ½ tbsp salt
    • ¼ tbsp baking soda
    • 3 tbsp butter
    • ½ tbsp cumin seeds
    • ½ tbsp chili flakes
    • ½ cup grated parmesan cheese
    • ¾ cup spinach puree
    • Oil to fry

    Instructions
     

    • Mix all purpose flour, semolina, salt, chili flakes, cumin seeds, and baking soda in a bowl together.
    • Add the butter and parmesan cheese, mix well it will be consistency of bread crumb.
    • Add the spinach puree and make firm dough.
    • Set the dough aside and cover it with a damp cloth. Let the dough rest for at least ten minutes.
    • Divide the dough in 16 equal parts and make them into balls.
    • Roll the dough about into a 5-inch circle.
    • Slice the each roll dough in 4 pieces in triangle shape.
    • Heat the oil in a frying pan on medium heat.
    • The frying pan should have at least 1 ½ inch of oil. To check if the oil is ready, put a small piece of dough in the oil. The dough should make the oil sizzle and come up slowly.
    • Make sure to place just enough chips so you can turn them over easily when frying. Fry the chips until both sides are light golden in color.
    • After chips come to room temperature they should become crisp.

    Notes

    Tips
    1. Spinach chips can be stored for weeks in airtight containers.
    2. If the chips are cooked on high heat, they will be soft.
    Keyword Spinach Triangles Cheese Crackers
    Tried this recipe?Let us know how it was!
  • Muthia

    Muthia

    Muthia (Steamed Dumpling)

    Muthia (Steamed Dumpling)

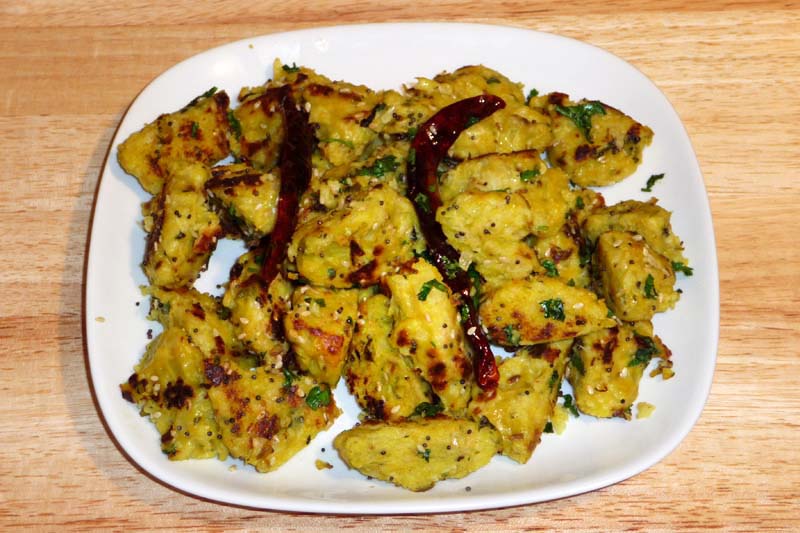
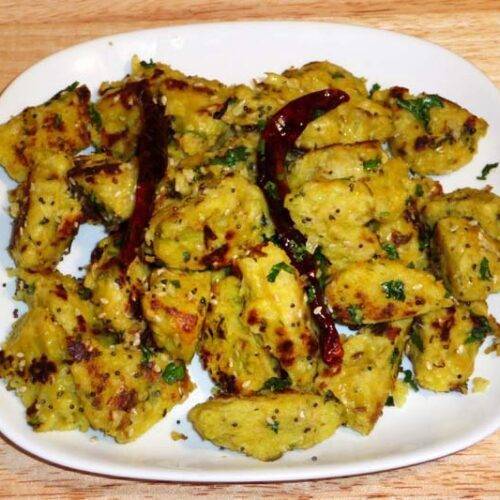
    Muthias are steamed spiced dumplings, made with gram flour (besan), cabbage, and spices. They make a tasty appetizer or snack.
    Serves 4.
    3.67 from 3 votes
    Course Appetizer
    Cuisine Indian
    Servings 4 people

    Ingredients
      

    For Muthia

    • ½ tsp sugar
    • tsp citric acid
    • 4 cup cabbage very fine shredded
    • 1 cup gram flour basen (available in Indian grocery stores)
    • 2 Tbsp whole wheat flour
    • 2 Tbsp chopped fenugreek leaves can be substitute with 2 tablespoons of dry fenugreek leaves or kastoori mathi fenugreek can also be replaced with chopped cilantro (hara dhania)
    • 2 chopped green chili adjust to taste
    • 1 tsp cumin seed jeera
    • ½ tsp turmeric haldi
    • 1 tsp salt adjust to taste
    • 2 Tbsp oil

    For Seasoning and Garnish

    • 2 Tbsp oil
    • ½ tsp mustard seeds
    • 1 Tbsp sesame seeds til
    • 4 whole red chili
    • 2 Tbsp chopped cilantro hara dhania

    Instructions
     

    • Combine gram flour, whole wheat flour, fenugreek, cumin seed, turmeric, green chili, sugar, citric acid, oil, and salt in a bowl.
    • Add the cabbage to the flour mixture and mix well to make soft dough. Add water if needed .
    • Grease your fingers and divide the mixture into 14 pieces. Drop slowly onto the steamer and steam, covered, 18 to 20 minutes. Test by inserting a knife; blade should come out clean.
    • Let the muthias cool. Cut each one into two pieces off and then slice them in two pieces.

    Making Seasoning

    • Heat the oil in the frying pan over medium high heat. Add the mustard seeds. Once they crack, add the sesame seeds and red chili and stir-fry the mixture a few seconds.
    • Add muthias and stir-fry them for three to four minutes until they are light brown.Garnish them with chopped cilantro.
    • Serve them hot or at room temperature.

    Notes

    Additional Notes
    • Steam immediately after preparing the mixture. If you allow it to sit, it will be too soft. If you have more than one batch, hold the salt and add it one batch at a time or it will be too soft.
    • Muthias can be refrigerated for 3 to 4 days.
    • Muthias can be frozen before seasoning. When ready to serve, thaw the frozen muthias and season them.
    Variation
    You can substitute zucchini or bottled gourd (also known as doodhi, loki or ghia) for the cabbage. Because theses vegetables have more water content, after shredding lightly squeeze them between your palms to remove the excess water before making the mixture.
    Serving suggestions
    • Muthias are great with cilantro chutney.
    • Muthias can be served just after steaming, but before seasoning, with cilantro chutney.
    Keyword Cabbage, Cabbage Dumpling, Healthy, Muthia, Muthiya, Steamed, Vegan
    Tried this recipe?Let us know how it was!
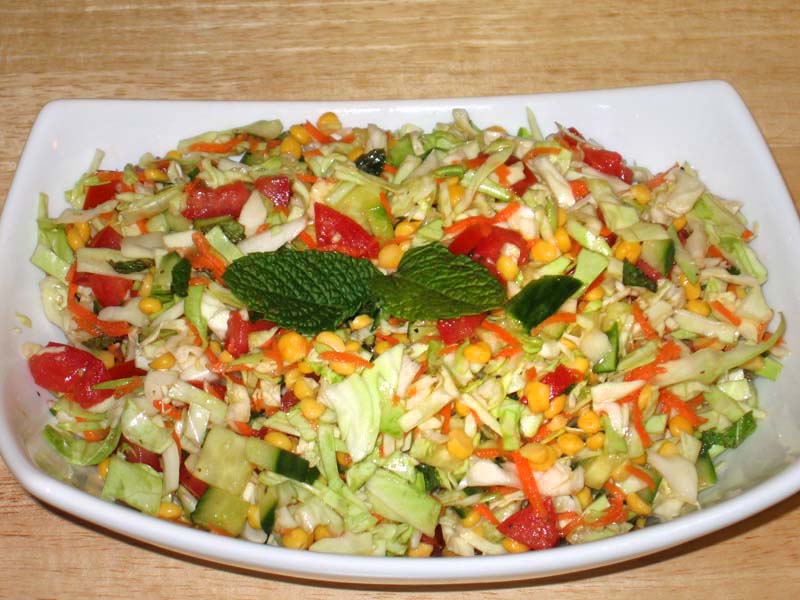
  • Cabbage Chana Dal Salad

    Cabbage Chana Dal Salad

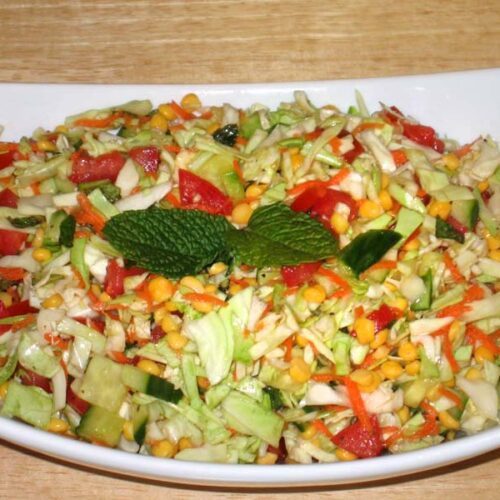
    A bowl of Cabbage Chana Dal Salad garnished with fresh coriander

    Cabbage Chana Dal Salad

    Cabbage Chana Dal Salad is a healthy and refreshing colorful salad can brighten up any meal. Perfect for summer brunch or served with any meal.
    Serves 4.
    5 from 1 vote
    Course Salad
    Cuisine Indian
    Servings 4 people

    Ingredients
      

    • 2 cup cabbage very finely chopped
    • 2 medium tomatoes seeded and finely chopped
    • 1 cup cucumber chopped
    • 1 carrot shredded
    • 10 mint leaves minced
    • ¼ cup yellow chana dal

    Salad Dressing:

    • 1 Tbsp olive oil
    • 1 Tbsp vinegar
    • 1 Tbsp lemon juice
    • 1 Tbsp ginger juice
    • 1 tsp salt
    • 1 tsp sugar
    • ½ tsp ground black pepper

    Instructions
     

    • Soak the chana dal for at least 2 hours in lukewarm water.
    • When ready, the dal should be soft all around.
    • Drain the water from chana dal.
    • Mix the chana dal with the chopped vegetables.
    • Mix the ingredients above together to make the salad dressing.
    • Mix the salad and dressing together and let sit for about a half hour so the salad is nicely marinated.

    Notes

    Variations
    • Substitute chana dal with split yellow moong dal or moong dal sprouts.
    • You can substitute the dal with boiled corn and finely chopped bell pepper.
    Suggestions
    • This salad dressing can be used with any salad.
    • Take out the vinegar and use this dressing with fresh fruit, adding chopped mint leaves.
    Keyword brunch, Cabbage, chana, Dal, Gluten Free, Moong, Refreshing, Salad, Spices, summer, Vegan
    Tried this recipe?Let us know how it was!
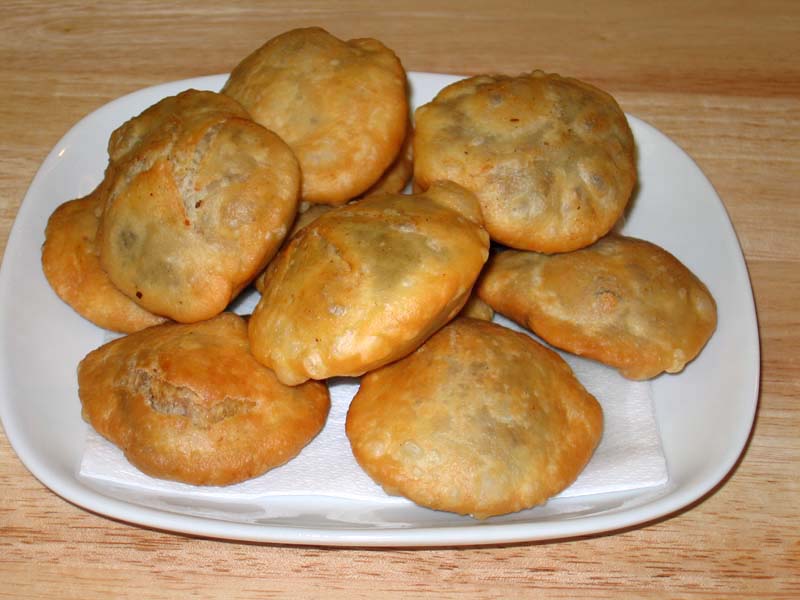
  • Khasta Kachori

    Khasta Kachori

    Khasta Kachori

    Khasta Kachori

    Khasta kachori is a delicious, spicy, fried puffed pastry. Khasta Kachori is filled with spicy moong dal mixture and then deep fried. Kachori is flakey from outside and hollow inside. Kachori should be fried on low heat so it can cook through to have a nice crunch. Khasta kachori is one of the dish you can eat for any meal! Serve them for breakfast with potato curry with yogurt. kachori makes a mouthwatering appetizer and can be served with, Green Chutney, and tamarind chutney. How about serving for dinner with Aloo Dum. This is one of those recipe you make when you want to impress someone. Kachories can also be stored in air tight container for a week.
    4.16 from 13 votes
    Prep Time 15 minutes
    Cook Time 40 minutes
    Total Time 55 minutes
    Course Appetizer
    Servings 4 people

    Ingredients
      

    Dough

    • 1 cup all purpose flour maida, plain flour
    • ¼ tsp salt
    • 2 Tbsp oil canola, or vegetable
    • ¼ cup cold water more or less as needed

    Filling

    • ¼ cup washed moong dal, yellow
    • 1 tsp fennel seeds coarsely ground saunf
    • 1 tsp red chilly flakes
    • ¼ tsp ginger powder saunth
    • ½ tsp mango powder amchoor
    • tsp asafetida hing
    • ½ tsp salt
    • 2 Tbsp water

    Instructions
     

    Making Dough

    • Mix the flour, salt and oil. Add the chilled water slowly, mixing with your fingers as you pour. Do not knead the dough. The dough should be soft. Cover the dough and let it sit for at least fifteen minutes.

    Filling

    • Grind the moong dal dry, almost to a powder.
    • Mix one tablespoon of oil to the ground dal in a frying pan and roast over medium heat for about two to three minutes or until dal changes color slightly. Stir continuously. Turn off the heat. Add all the spices mix well. Let the mixture cool off. Add two tablespoons of warm water and mix it well. Let it sit for ten minutes and cover with demp cloth.

    Making Kachories

    • Take the dough and knead it for a minutes. Divide the dough in twelve equal parts.
    • Take one part of the dough and with your fingers flatten the edges and make into 3-inch circle. Leaving center little thicker then edges. Mold the dough into a cup and place 1 teaspoon of filling in the center. Pull the edges of the dough to wrap the dal filling. Proceed to make all 12 balls.
    • Let the filled ball sit for three to four minutes before rolling.
    • Set the kachoris on a surface with the seams facing up. Using the base of your palm, slowly flatten them into about three inches in diameter.
    • Heat the oil in frying pan over medium heat frying pan should have about one inch of oil. To check if oil is ready put a little piece of dough in the oil. Dough should sizzle, and come up very slow.
    • Fry them on medium-low heat. After they start to puff, slowly turn them over. Fry until golden-brown on both sides. If the kachoris are fried on high heat, they will get soft and will not be crispy.
    • Kachories can be stored for at least a week in an airtight container

    Notes

    Additional Tips
    Don’t roll the kachoris with a rolling pin. Rolling pins can create small holes in the dough that let the oil seep into the kachoris, and they can also cause the kachoris to come out with one side thicker than the other.
    Variation
    Instead of using moong dal, you can use washed urad dal or chana dal. The rest of the recipe stays the same.
    Serving suggestions:
    Kachoris can be served plain, with Tamarind Chutneys, chola, or with Aloo Dum.  Serve them as a chat, pouring plain yogurt and chutney on top.
    Tried this recipe?Let us know how it was!

    Khasta Kachori Recipe: How to make Khasta Kachori

    Khasta Kachori, a popular Indian street food delicacy, is a deep-fried pastry filled with a spicy and flavorful stuffing. This crispy and indulgent snack is loved for its rich taste and satisfying crunch, making it a favorite among food enthusiasts.

    Khasta Kachori Recipe: 

    Rich Flavor Profile: Khasta Kachori is bursting with a medley of spices and aromatics, creating a symphony of flavors with every bite. The combination of ingredients like lentils, spices, and herbs provides a unique and indulgent taste experience.

    Satiating Snack: Despite its small size, Khasta Kachori is incredibly filling and satiating, making it an ideal snack option to curb hunger pangs between meals or as a satisfying accompaniment to tea or coffee.

    Versatile: While traditionally served as a snack, Khasta Kachori can also be enjoyed as a part of a larger meal. It pairs well with various chutneys, sauces, and accompaniments, allowing for endless culinary creativity.

    Convenience: Khasta Kachori can be prepared in advance and stored for later consumption, making it a convenient snack option for busy days or entertaining guests.

    Variations of Kachori:

    1. Mattar Ke Kachori: Mattar Kachori is a delicious, fried puff pastry filled with spicy green peas. This mouthwatering snack also can be served as part of any main meal.
    2. Raj Kachori: Raj Kachori is a spicy chaat bowl filled with delicious condiments. It has refreshing flavors and makes for a unique food experience. Guests will have fun filling their own Kachoris according to their taste palette. Served as a snack or appetizer, Raj Kachories make a beautiful presentation and are thoroughly enjoyed by just about everyone.
    3. Mawa Kachori: Mawa Kachori is an exotic dessert. This is a delicacy from the state of Rajasthan. Rajasthan is known for its rich food and culture. Pastry filled with an aromatic mixture of Mawa and nuts makes a very festive dessert.
    4. Urad Dal Kachori: Dal kachori is a delicacy from north India. Dal kachori is a spicy puffed pastry. Traditionally kachoris are sold at a sweet and snack shop. These mouthwatering Dal kachoris can be served as a snack, chaat or part of main meal, making the meal exotic.

    Tips for Making Perfect Khasta Kachori

    Prepare the Dough with Care: The key to crispy and flaky Khasta Kachori lies in the dough preparation. Use a combination of all-purpose flour (maida) and semolina (sooji) to achieve the desired texture. Ensure that the dough is firm yet pliable to prevent it from becoming too soft during frying.

    Fry at the Right Temperature: Fry the kachoris in hot oil over medium-high heat to ensure that they cook evenly and develop a golden-brown crust. Avoid overcrowding the frying pan to maintain the oil temperature and prevent the kachoris from absorbing too much oil.

    Seal the Edges Properly: To prevent the filling from leaking out during frying, seal the edges of the kachoris tightly before frying. Press the edges together firmly and ensure that there are no gaps or openings.

    Serve Fresh and Hot: Khasta Kachori is best enjoyed fresh and hot, straight out of the frying pan. Serve it with your favorite chutneys, sauces, or accompaniments for a delightful snacking experience.

    FAQs about Khasta Kachori:

    Can I make Khasta Kachori ahead of time? 

    While Khasta Kachori is best enjoyed fresh, you can prepare the dough and filling in advance and assemble the kachoris just before frying to save time.

    Can I bake Khasta Kachori instead of frying? 

    While traditional Khasta Kachori is deep-fried for that signature crispy texture, you can try baking them for a healthier alternative. However, the texture and taste may differ slightly.

    What are the best accompaniments for Khasta Kachori? 

    Khasta Kachori pairs well with a variety of chutneys such as tamarind chutney, mint chutney, or coriander chutney. It also tastes delicious with a dollop of yogurt and a sprinkle of chaat masala.

    Is Khasta Kachori suitable for vegetarians? 

    Yes, Khasta Kachori is a vegetarian dish as it contains no meat or animal products. It’s a popular choice among vegetarians and vegans alike.

    Khasta Kachori is not just a snack; it’s a culinary delight that excites your taste buds with its crispy exterior and flavorful filling. Whether enjoyed as a street food treat or homemade snack, its rich taste and versatility make it a beloved favorite in Indian cuisine. 

  • Tamarind Chutney

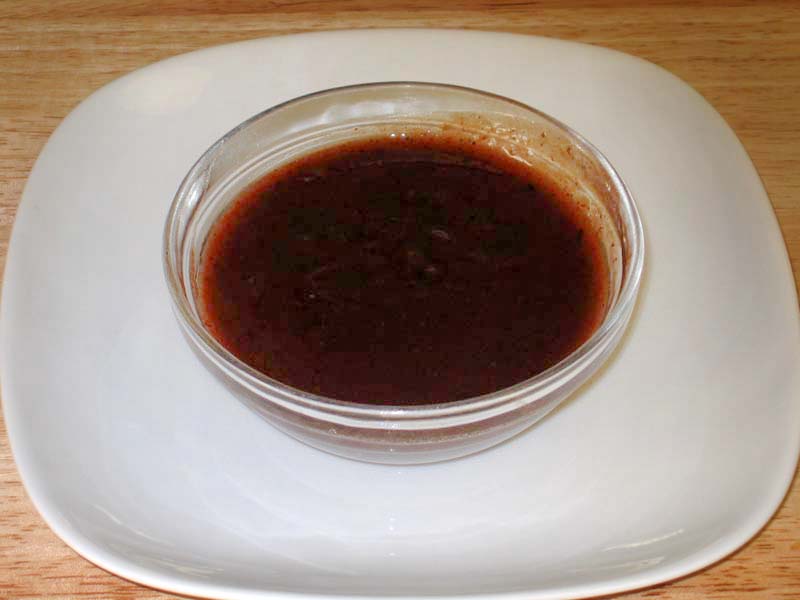
    Tamarind Chutney

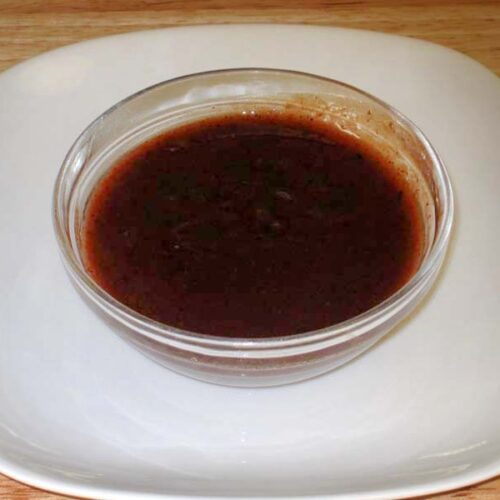
    Homemade Tamarind Chutney served in a bowl

    Tamarind Chutney, Tamarind Sauce

    This exotic sweet and sour chutney is a zesty condiment. This chutney can be called the ketchup of the east and goes best with all kinds of indian snacks, be it pakoras to other snack munchies.
    5 from 3 votes
    Prep Time 5 minutes
    Cook Time 20 minutes
    Total Time 25 minutes
    Course Side Dish
    Cuisine Indian
    Servings 20 people

    Ingredients
      

    • 1/2 lm tamarind seeded imle
    • 2-1/2 cup sugar
    • 2 cups boiling water
    • 1-1/2 tbsp roasted ground cumin seeds
    • 1 tbsp salt
    • 1 tsp black salt
    • 1 tsp red chili powder
    • 1 tsp ground black pepper
    • 1/2 tsp ginger powder

    Instructions
     

    • Break the tamarind into small pieces and soak in boiling water for one hour.
    • Mash it into a pulp and strain, pressing the tamarind into the strainer to remove all the pulp. Add sugar to the pulp. Mix well. Add the remaining ingredients. Mix and taste. Add more sugar, salt or pepper as needed.

    Notes

    Notes
    Chutney can be refrigerated for two to three months.
    Serving Suggestions
    Tamarind chutney is delicious with samosas, pakoras, drizzled over dahi vadas,  or any kind of chat.
    It is also delicious as a dipping sauce for French fries and as a spread over crackers.
    Try drizzling over rice to add a unique flavor to plain rice.
    Variations
    To use as a dip, thicker chutney is ideal. To use as a topping, add water to make the chutney thinner.
    Add water and ice cubes to serve as a cool spicy drink.
    Add equal parts yogurt and chutney to make a dipping sauce.
    Keyword Hot And Spicy, Popular Condiment, Sweet And Sour Sauce
    Tried this recipe?Let us know how it was!

    Tamarind Chutney Recipe: 

    Tamarind Chutney, also known as Imli Chutney, is a sweet and tangy condiment widely used in Indian cuisine. This versatile chutney adds a burst of flavor to a variety of dishes, from savory snacks to appetizers to main courses. 

    Why Tamarind Chutney is so popular:

    • Rich Flavor Profile: Tamarind Chutney is prized for its unique combination of sweet, tangy, and slightly sour flavors. The tartness of tamarind is balanced with sweetness from jaggery or sugar, creating a harmonious blend of tastes that enhances the overall flavor of any dish.
    • Versatile Usage: Tamarind Chutney is incredibly versatile and can be used in various ways. It’s commonly served as a dipping sauce for snacks like samosas be it or pakoras like Spinach Potato Pakora, Cabbage Pakora or Palak Pakora, and Chaat. Its tangy-sweet flavor adds depth and complexity to both savory and sweet dishes.
    • Digestive Properties: Tamarind is known for its digestive properties and is often used in traditional medicine to aid digestion and relieve gastrointestinal issues. Tamarind Chutney, with its natural acidity, can help stimulate digestion and alleviate discomfort after a heavy meal.
    • Easy to Prepare: Making Tamarind Chutney at home is simple and requires only a few basic ingredients. With minimal effort, you can whip up a batch of this flavorful condiment to elevate your favorite dishes and impress your guests.

    Variations of Chutney:

    • Hari Cilantro Chutney: Hari chutney is a blend of fresh cilantro (green coriander) and variety of spices. Hari chutney is a “must” with pakoras, samosas, chaats, and many popular Indian snacks.
    • Date And Raisin Chutney: Date and Raisin chutney! This exotic sweet and sour chutney is mildly spiced, this will complement any meal. This recipe is quick and easy to make.
    • Methi Chutney: Methi Chutney is a popular North Indian condiment. Methi Chutney is packed with flavors, sourness from mango, sweetness from raisins; some bitterness from fenugreek, mixed with spices it has a very unique taste. 
    • Tomato Chutney: Tomato Chutney with freshly grated ginger for a warming and aromatic flavor. It adds a spicy and pungent kick to the chutney, making it ideal for pairing with rich and hearty dishes like kebabs and curries.

    Tips for Making Perfect Tamarind Chutney:

    • Soak Tamarind Properly: Start by soaking tamarind pulp in warm water to soften it before extracting the pulp. This helps to release the natural flavors and acids from the tamarind, resulting in a more flavorful chutney.
    • Adjust Sweetness and Tanginess: Taste the Tamarind Chutney as you go and adjust the sweetness and tanginess according to your preference. Add more jaggery or sugar for a sweeter chutney, or increase the amount of tamarind pulp for a tangier flavor.
    • Strain for Smooth Texture: For a smooth and silky texture, strain the Tamarind Chutney after cooking to remove any fibrous or gritty particles. This ensures a velvety consistency and enhances the overall eating experience.
    • Store Properly: Store Tamarind Chutney in an airtight container in the refrigerator for up to a month. It can also be frozen for longer storage. Allow it to thaw before using and adjust the consistency with a little water if needed.

    FAQs about Tamarind Chutney:

    Is Tamarind Chutney gluten-free? 

    Yes, Tamarind Chutney is naturally gluten-free as it’s made with tamarind pulp, sugar or jaggery, and spices, which are all gluten-free ingredients. It’s safe for individuals with gluten intolerance or celiac disease to consume.

    Can I make Tamarind Chutney without sugar?

    Yes, you can make Tamarind Chutney without sugar by using alternatives like jaggery, honey, or maple syrup. Adjust the amount of sweetener according to your taste preferences and dietary restrictions.

    How long does Tamarind Chutney last? 

    Tamarind Chutney can be stored in the refrigerator for up to a month in an airtight container. If properly stored, it can last even longer. However, always check for signs of spoilage before consuming.

    What can I serve with Tamarind Chutney? 

    Tamarind Chutney pairs well with a variety of dishes, including samosas, pakoras, chaat, grilled meats, and rice dishes. It adds a tangy-sweet flavor and enhances the overall taste of the dish.

    In conclusion, Tamarind Chutney is a delightful and versatile condiment that adds a burst of flavor to a wide range of dishes. Whether enjoyed as a dipping sauce for snacks or as a condiment for main courses, its tangy-sweet taste and aromatic spices are sure to tantalize your taste buds and elevate your dining experience. So why not try making a batch of homemade Tamarind Chutney and discover the joy of this beloved Indian condiment?

    Stay tuned for our next exploration into the world of culinary delights!

  • Kamal Kakdi Ki Chaat

    Kamal Kakdi Ki Chaat

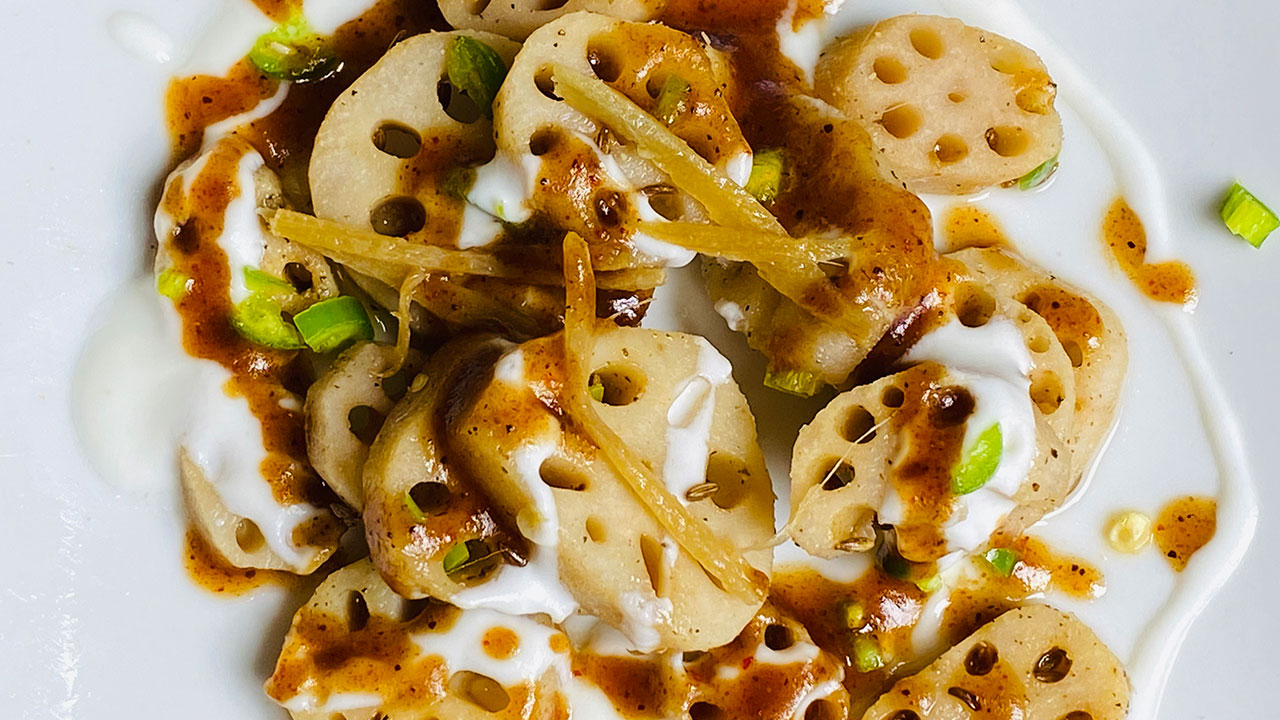
    A plate of Kamal Kakdi Ki Chaat

    Kamal Kakdi Ki Chaat

    Kamal Kakdi Chaat is a truly unique and tasty dish. I wanted to make something new and delicious but also healthy and easy to make. kamal kakdi, is an edible lotus root that has a crunchy texture and slightly sweet taste. After doing some research, I was surprised at how much nutrients kamal kakdi has. I was excited to try out a spicy chat recipe using it. An added plus is that this recipe requires no frying and is a nice healthy savory snack. My family really enjoyed this new dish! Hope you give this recipe a try and enjoy!
    This recipe will serve 6.
    5 from 1 vote
    Prep Time 5 minutes
    Cook Time 5 minutes
    Total Time 10 minutes
    Course Chaat
    Cuisine Indian
    Servings 6 people

    Ingredients
      

    • 2 cup sliced lotus stem I am using frozen, Kamal Kakdi
    • 1 Tbsp oil
    • 1 Tbsp ginger thinly sliced, adrak
    • ½ tsp cumin seeds jeera
    • ½ tsp salt
    • ¼ tsp black pepper kali mirch
    • 1 tsp green chili finely chopped, Hari mirch
    • ½ tsp lemon juice

    Also Need for Serving

    • ½ cup whipped yogurt for serving
    • 2 Tbsp tamarind chutney please add the link check the recipe

    Instructions
     

    • pressure cook the Kamal Kakdi in an instant pot for five minutes in two cups of water. I also drained the water. Kamal Kakdi should be tender. Notes: you can also, use the pressure cooker and cook at the same time, or you can also cook in a pot for 20 minutes.
    • Drain the water and pat dry.
    • In a frying pan heat the oil over low medium heat. Add the oil, oil should be just warm add sliced ginger. Stir fry for about 2 minutes and take it out in a bowl. I will use this ginger later for garnishing. Note: I feel adding ginger later it gives a nice kick to chaat.
    • Use the same pan and it already has some left-over oil. Oil should be moderately hot, add cumin seeds. As cumin seeds crack add kamal kakdi, stir and sprinkle salt and black pepper.
    • Stir fry for one minute add about 1 teaspoon of chopped green chiles and lemon juice stir fry for about 2 minutes, turn off the heat. Kamal Kakdi is ready to be served.
    • Plating the chaat, drizzle yogurt over kamal kakdi also drizzle tamarind chutney. And finish it off with some green chilies and roasted ginger.

    Notes

    Serving suggestions: You can also serve this kamal kakdi as is as a masla kamal kakdi, sprinkle little chaat masala.
    You will also enjoy the recipes for, Bread Pudding With Chocolate Sauce, Sabudana (Tapioca) Bhel, Dahi Puri Chaat
    Tried this recipe?Let us know how it was!
  • Dates and Nuts Bar

    Dates and Nuts Bar

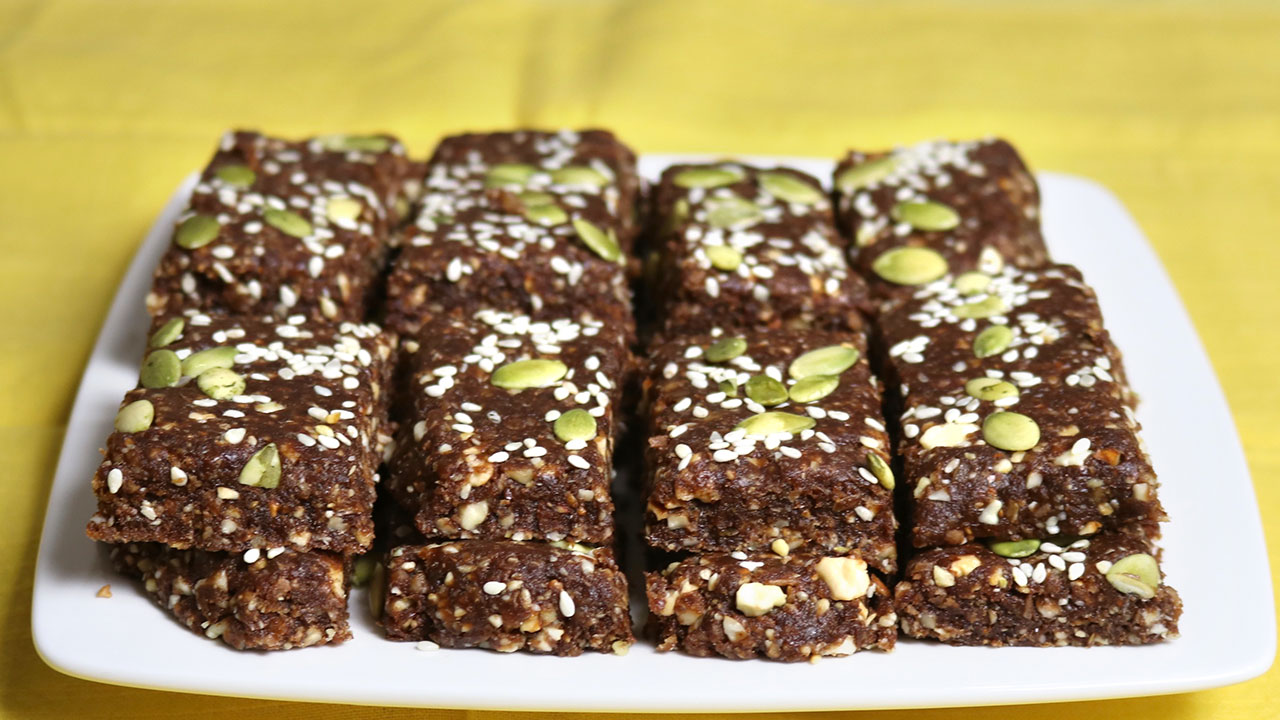
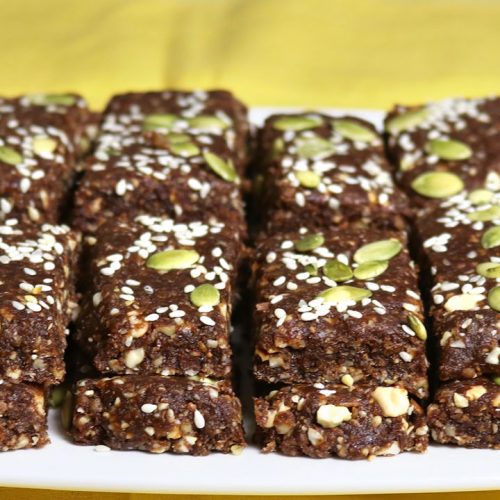
    A platter of homemade Dates and Nuts Energy Bars, topped with sesame seeds and pumpkin seeds, arranged neatly on a white plate with a yellow background.

    Dates and Nuts Energy Bar, Healthy Bar, All-Natural Nutritional Bar

    2020 is the start of a new decade and like most people I’m sure you have thought about eating clean and healthy. My next recipe is for any new year resolutions and is called “Dates and Nuts Bar”. This healthy gluten-free energy bar is also vegan and sugar-free. The bars have a great nutty texture that tastes so delicious. This yummy treat is so satisfying for any sweet cravings!
    Because we all live busy lives, these bars make great snacks because they are so easy to take on the go. You can even give them to your kids as an after -school snack.
    Because dates are so sweet, they provide the perfect natural alternative to added sugars. They are sure to be a hit with friends who are avoiding sugar but still crave something sweet.
    Try these bars as a healthy alternative to cookies and other sweet treats. You will feel amazing.
    3.34 from 6 votes
    Prep Time 10 minutes
    Cook Time 10 minutes
    Total Time 20 minutes
    Course Snack
    Servings 16 pieces

    Ingredients
      

    • 1 ½ cup pitted dates cut into small pieces
    • 2 Tbsp cocoa powder
    • cup coconut powder
    • cup flax seed meal
    • tsp sea salt
    • ½ cup roasted Walnuts roughly chopped
    • ½ cup roasted Almond roughly chopped
    • ½ cup roasted Cashews roughly chopped
    • 2 tsp sesame seeds
    • 2 tsp pumpkin seeds

    Instructions
     

    • Soften the chopped dates in microwave for 30 seconds, doing this makes dates soft and easy to work.
    • Blend the dates in the food processor until they become to the paste, this should take about 15 seconds. Add flex seed meal, and cocoa powder and salt to the food processor and blend it until all the ingredients incorporated. This should take about 15 second.
    • Add the roasted and chopped nuts walnuts, almonds, and cashew nuts. Blended it until all the ingredients incorporated, but nuts should be still chunky this should take about 20 seconds of blending.
    • Remove the mix from food processor, and make it into 2 balls, roll it into about 1/4-inch-thick, sprinkle the sesame seeds and pumpkin seeds to the rolled bar and lightly press the seeds, so they stay into the bars. Cut them into your desire shape. I decided to cut them in bars.

    Notes

    These are some more healthy choice you would like to know Quinoa salad, Stuffed karela, Lentil Vegetable soup, Mango panna cotta
    Keyword All Natural, Almonds, Badam Burfi, Besan ki barfi, Candy, Cocoa Powder, Coconut, coconut Ladoo, Cooking Video, Dates Bar, Delightful, Diabetic, Flax Seed Burfi, Flax Seeds, Gluten Free, Gourmet food, Homemade, Jain Food, Kid Friendly, Lunch Box, Natural Alternative, Nutritional Bar, Nutty, Quick And Easy, Sattvik Food, Snack, Sugar Free, Swaminarayan, Sweet, Vegan, Walnuts
    Tried this recipe?Let us know how it was!
  • Tomato Chutney Recipe

    Tomato Chutney Recipe

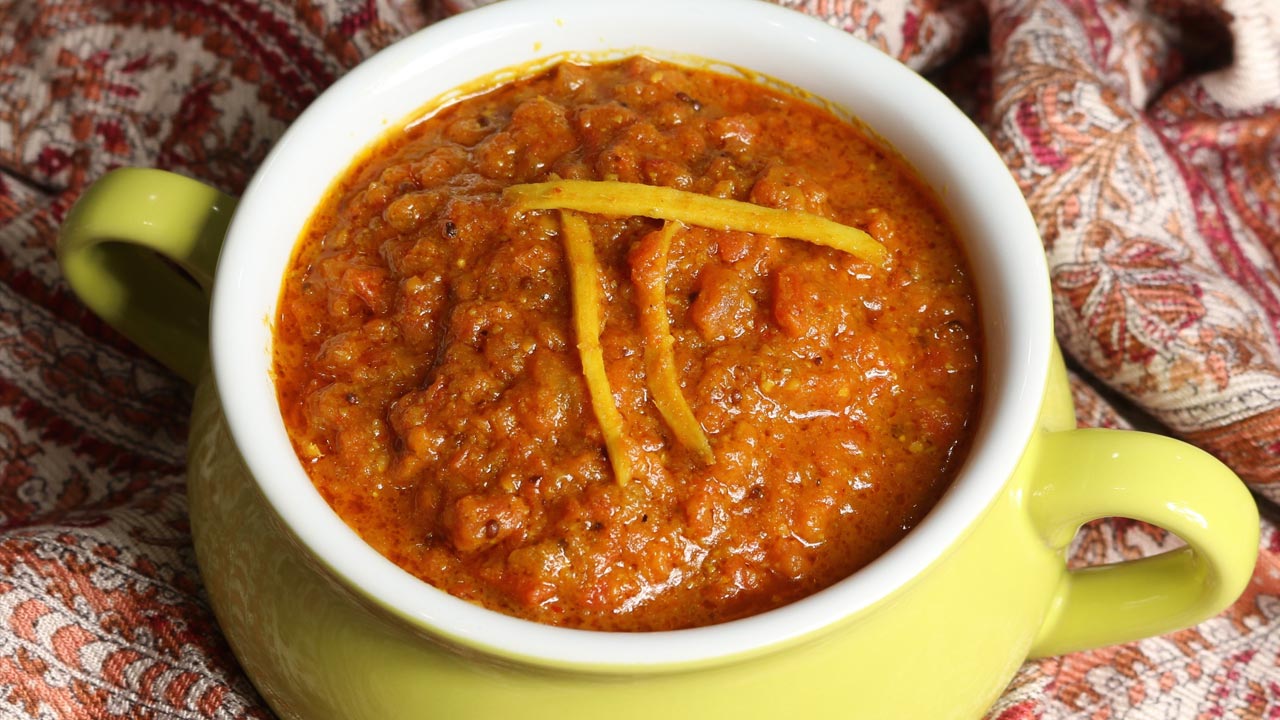
    Tomato Chutney

    Tomato Chutney (Pickle)

    Tomato Chutney is tangy and spicy. I was inspired to make this particular tomato chutney from the south Indian cuisine. Chutneys and pickles are a common component of Indian meals. This unique blend of spices gives an amazing unforgettable flavor to chutney. It goes well with breads and rice or can be used as a spread for sandwiches. Tomato chutney is very easy to make and can be refrigerated for up to a month.
    5 from 1 vote
    Prep Time 10 minutes
    Cook Time 30 minutes
    Total Time 40 minutes
    Course Side Dish
    Cuisine Indian
    Servings 10 people

    Ingredients
      

    • 4 cups tomatoes cubed in small pieces
    • 3 tbsp tamarind paste
    • 1/4 cup oil
    • 1 tsp mustard seeds rai
    • 1 tsp asafetide hing
    • 1/4 tsp turmeric haldi
    • 2 tbsp sesame seeds til
    • 2 tbsp coriander seed
    • 1 tsp fenugreek seeds
    • 10 whole dry red chilies
    • 1/4 cup sliced ginger optional
    • 1 tsp salt
    • 2 tsp sugar

    Instructions
     

    • In a small frying pan dry roast red chilies, over low medium heat, stirring continuously to cook evenly till they are darker in color, this should take about 2 minutes. Remove from the frying pan.
    • In the same pan, dry roast sesame seeds, coriander seeds, and fenugreek seeds over low medium heat individually stirring continuously to cook evenly for about less than a minutes. Don’t over roast.
    • In a same pan add 2 teaspoons of oil when oil is moderately hot add ginger and stir-fry on low medium heat for about 3 minutes until ginger start catching the light brown color from the sides. Set aside.
    • After spices cool of grind them into the powder. Set aside.
    • In a blender crush the tomatoes do not make a paste. Set aside.
    • In a pan heat remaining oil over medium high heat, oil should be moderately hot add mustard seeds, after they crack add asafetida. Now add tomatoes, and tamarind paste. Stir and cook for about 10 minutes semi covered (after tomato comes to boil start splattering) or until oil start separating.
    • Add the roasted spice powder, ginger, turmeric, salt and sugar, reduce the heat to low medium and cook for about another 8 minutes or until chutney is thick and oil is separated.

    Notes

    I like to serve tomato chutney with rava dosa, vada or spread on sandwich.
    Tried this recipe?Let us know how it was!

  • Spicy Indian Chips Recipe

    Spicy Indian Chips Recipe

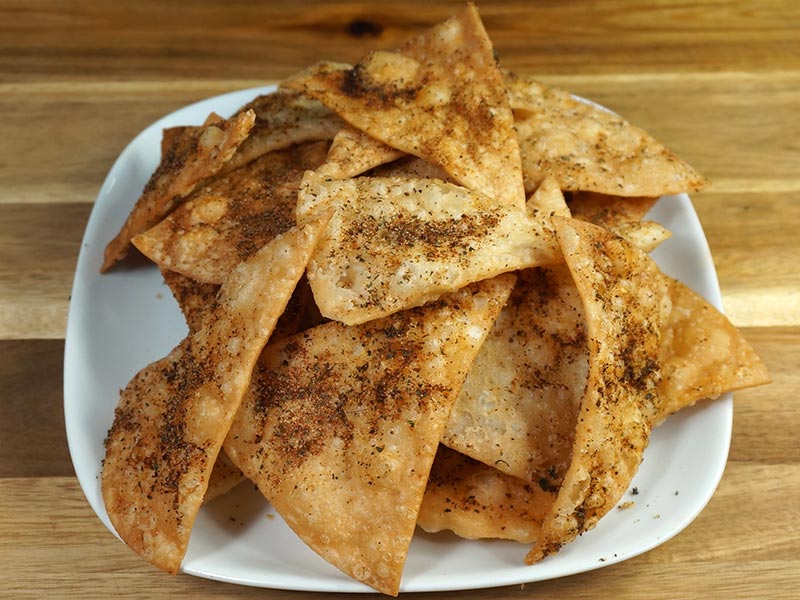
    Spicy Indian Chips

    Spicy Indian (Flour) Chips

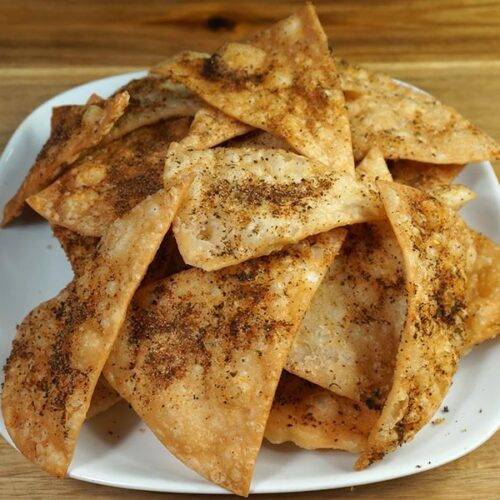
    If you like chips, and you like spicy food, these chips are for you. This is a quick and easy snack recipe. I have used flour tortillas and flavored them with Indian spice mix. They are hard to resist you will say just one more.
    No ratings yet
    Course Appetizer
    Cuisine Indian
    Servings 6 people

    Ingredients
      

    • 4 flour tortillas uncooked I am using 8” diameter tortillas
    • Oil to fry

    Spice Mix

    • 1 tbsp dry mint leaves available at Indian grocery store
    • 1 tbsp roasted cumin seed powder
    • 1/4 tbsp garam masala available Indian grocery store
    • 1/2 tbsp black salt available in Indian grocery store
    • 1/2 tbsp salt
    • 1/2 tbsp red chili powder
    • 1/2 tbsp mango powder (amchoor) available Indian grocery store
    • Generous pinch of citric acid (nimbu ka sat)

    Instructions
     

    • Spice mix, in a bowl mix all the spices really well. Set aside.
    • Prick the tortillas from both sides, this will limit chips from puffing and make them crisp.
    • Cut each tortilla in 8 triangles, like slicing pizza.
    • Heat the oil in a frying pan over medium heat. The frying pan should have about 1 inch of oil. To check if the oil is ready, put a small piece of tortilla in the oil. The tortilla should sizzle and come up slowly.
    • Heat the oil in a frying pan over medium heat. The frying pan should have about 1 inch of oil. To check if the oil is ready, put a small piece of tortilla in the oil. The tortilla should sizzle and come up slowly.
    • Take them out in a plate and sprinkle the spice mix on both sides right away, before they are dry. This will keep the spices on the chips. Repeat the process until all the chips are done.
    • After the chips cool to room temperature they can be stored in airtight container for 1 month.

    Notes

    Suggestions
    1. For Fried Tortillas If you don’t find uncooked tortillas use thin tortillas.
    2. Fried tortillas store well in air tight container for a month.
    3. Fried tortillas can be served in many different ways; a quick and easy way is to make Papdi Chaat. Serve them with Chole Chaat or Matra Chaat and I am sure you can find many other ways to serve them.
    4. For Spice mix Make spice mix in a big batch and use it like Chaat Masala over the sliced fruits, salad, with yogurt. I am sure you can find many other ways to use this spice mix.
    Tried this recipe?Let us know how it was!

    Savor the Crunch: Spicy Indian Flour Chips

    When it comes to irresistible snacks, spicy Indian flour chips top the list. These crunchy delights, known for their bold flavors and satisfying texture, are perfect for any occasion. Whether you’re hosting a party, looking for a quick bite, or craving a spicy snack, these chips are sure to please. In this article, we’ll explore the origins, variations, and tips for making the perfect Indian flour chips at home, along with maximizing the use of internal links to other delicious recipes.

    The Essence of Spicy Indian Flour Chips

    Spicy Indian flour chips are made from a simple dough of flour, spices, and herbs, rolled out thin and fried to crispy perfection. The combination of spices used in the dough gives these chips their distinctive flavor, making them a favorite snack among spice lovers. These chips are often enjoyed with a cup of tea or as an accompaniment to meals, adding a delightful crunch to every bite.

    Origins and Cultural Significance

    These chips have their roots in Indian street food culture, where they are commonly known as “namak pare” or “mathri.” They are especially popular during festivals and celebrations, symbolizing the joy and togetherness of these occasions. The simplicity of the ingredients and the ease of preparation have made spicy Indian flour chips a staple snack in many Indian households.

    Tips for Perfect Spicy Indian Flour Chips

    • Choosing the Right Flour: The base of these chips is typically made from wheat flour, but you can experiment with other flours like chickpea or rice flour for different textures and flavors.
    • Spice Blend: A perfect blend of spices is key. Common spices include cumin, ajwain (carom seeds), chili powder, and turmeric. Adjust the spice levels according to your preference.
    • Rolling the Dough: Roll the dough as thin as possible for the crispiest chips. Thicker chips will be harder and less crispy.
    • Frying: Fry the chips in hot oil until golden brown. Ensure the oil is at the right temperature to prevent the chips from absorbing too much oil and becoming greasy.

    Variations to Try

    While the classic spicy Indian flour chips are delicious on their own, you can try different variations to keep things interesting. For instance, you can add finely chopped spinach or fenugreek leaves to the dough for a nutritious twist. Adding sesame seeds or crushed peanuts can also enhance the flavor and texture. For more creative ideas, check out Sweet and Sour Guava Curry and Dodha Burfi (Punjabi Milk Fudge).

    Pairing and Serving Suggestions

    Spicy Indian flour chips can be enjoyed in various ways. Serve them with a side of tangy tamarind chutney or refreshing yogurt chutney for a flavor contrast. They also make a great addition to a snack platter alongside Sweet Potato Chaat or Moong Dal Halwa (Vegan). These chips are perfect for munching on their own or as a crunchy side to a meal.

    Making Indian flour chips at home allows you to control the ingredients and ensure a healthier snack option. By using whole grain flours and minimal oil, you can enjoy these tasty chips without the guilt. For more healthy homemade snack ideas, explore Millet Soup (Bajra Raab) and Vegetable Biryani (Instant Pot).

    Frequently Asked Questions

    Q: Can I bake these chips instead of frying?

    A: Yes, you can bake the chips for a healthier option. Preheat your oven to 375°F (190°C) and bake the rolled-out dough until crispy and golden brown, about 15-20 minutes.

    Q: How long can these chips be stored?

    A: Store the chips in an airtight container to keep them crispy. They can last for up to two weeks when stored properly.

    Q: Can I make these chips gluten-free?

    A: Absolutely. Substitute the wheat flour with gluten-free flour blends or chickpea flour to make gluten-free spicy Indian flour chips.

    Conclusion

    The spicy Indian flour chips recipe is a fantastic way to enjoy a crunchy and flavorful snack that is easy to make at home. Whether you’re a seasoned cook or a beginner, these chips are sure to become a favorite in your snack repertoire. For more exciting recipes and variations, explore other delightful dishes like [Sweet and Sour Guava Curry, [Dodha Burfi (Punjabi Milk Fudge), and Masala Bell Pepper Curry. Enjoy the journey of flavors and happy cooking!

  • Roasted Caramelized Makhana

    Roasted Caramelized Makhana

    Roasted Caramelized Makhana

    Roasted Caramelize Makhana Snack

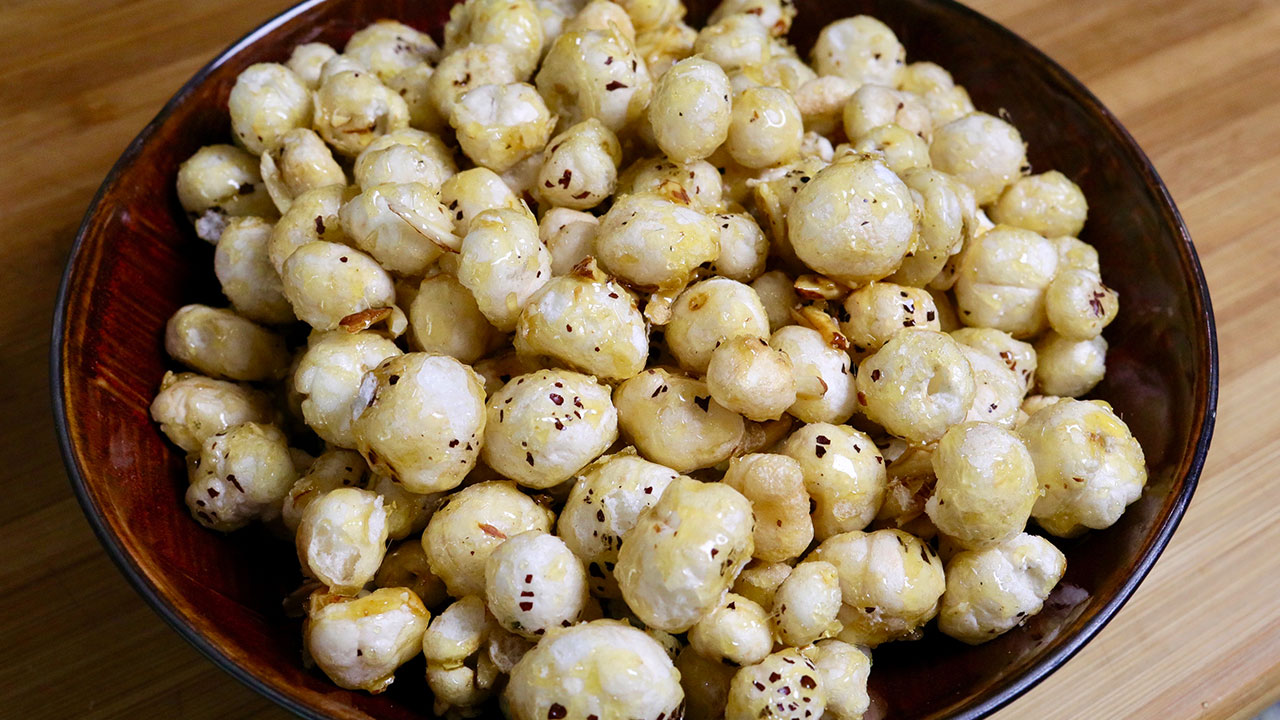
    Caramelized Makhana is the perfect snack for all ages, especially kids. My grandchildren absolutely love this recipe and my youngest even calls it kettle corn. This is not just quick and easy to make, but it is a healthy snack because it is high in protein and has many nutritional values. This recipe is the perfect tea time munchie and will be a hit with everyone who enjoys a sweet and crunchy snack.
    No ratings yet
    Prep Time 5 minutes
    Cook Time 15 minutes
    Total Time 20 minutes
    Course Appetizer
    Cuisine Indian
    Servings 4 people

    Ingredients


    • 4 cup makhana fox nuts, lotus seeds
    • 3 Tbsp oil
    • 1 tsp salt
    • 6 Tbsp sugar
    • 2 Tbsp almonds sliced

    Instructions
     

    • Use a larger frying pan then you think you need, because it makes it easy to roast otherwise when you are roasting makhana will be dropping all over. Use heavy frying pan.
    • In a frying pan take the makhana and drizzle with the oil, (save 2 teaspoons of oil and set this oil aside we will use later) and sprinkle the salt. Using your fingers mix it well until makhanas are coated well with oil and salt.
    • Open the heat to medium low keep stirring till they are very light gold this should take about 6-8 minutes, try one makhana to make sure they are crispy. As they cool of, they will become crunchier.
    • Remove them from frying pan, you will notice most of the salt will remain in the frying pan, wipe the frying pan, we will use it again.
    • Use the same pan, heat over low medium heat. Put the oil we have saved in the frying pan, and sprinkle all the sugar, wait till you see sugar has start melting, now stir the sugar and keep stirring till the sugar has melted turn off the heat quick otherwise sugar will burn.
    • Add almonds and roasted makhana, keep stirring till all the makhanas are coated with caramelize sugar and almonds. Spread it over non-stick surface and with spatula keep separating or separate with your fingers. Carnalized Makhanas are ready.

    Notes

    Notes: keep them air tight container they will stay good for month or more.
    I make them for holiday season, because they also make good homemade gift.
    Keyword High In Protien, Kid Friendly, Kurmura Makhana
    Tried this recipe?Let us know how it was!

    Roasted Caramelized Makhana Recipe

    Roasted Caramelized Makhana is a delectable snack perfect for winter recipes and festive occasions like Krishna Janmashtami and Navaratri, offering a gluten-free, high-protein option that satisfies both vegan and non-vegan appetizers cravings. Roasted Caramelized Makhana is a delightful treat that combines the earthy crunch of makhana (fox nuts) with the sweet allure of caramel. This Caramel Makhana Recipe transforms simple ingredients into a gourmet snack that’s perfect for any occasion.

    Step 1: Preparing the Makhana

    To begin this Caramel Roasted Makhana Recipe, start by heating a pan over medium heat. Add a tablespoon of ghee, allowing it to melt and warm up. Then, add the makhana to the pan, ensuring they are in a single layer. Roast them gently, stirring occasionally to ensure even cooking. This step helps to enhance the nutty flavor of the makhana and prepare them for the caramel coating.

    Step 2: Making the Caramel

    Now, let’s move on to the star of this Caramel Roasted Makhana Recipe: the caramel. In a separate pan, melt butter over low heat. Once the butter has melted, add in sugar and stir continuously until the sugar dissolves completely. Keep a close eye on the mixture to prevent it from burning. As the sugar melts, it will gradually turn into a golden brown caramel, infusing the butter with its rich flavor.

    Step 3: Coating the Makhana

    Once the caramel reaches a beautiful golden hue, carefully pour it over the roasted makhana. Use a spatula to gently toss the makhana, ensuring that each piece is coated evenly with the caramel. Work quickly but cautiously, as the caramel will begin to harden upon contact with the makhana.

    Step 4: Allowing to Cool

    After coating the makhana with caramel, spread them out on a parchment-lined baking sheet to cool. Allow them to sit undisturbed for at least 10-15 minutes, giving the caramel ample time to set. Once cooled, the makhana will form a delectable caramelized crust, adding an irresistible sweetness to every bite.

    Step 5: Serving and Enjoying 

    Your Caramel Roasted Makhana is now ready to be enjoyed! Serve them as a standalone snack or incorporate them into your favorite dishes for a touch of sweetness and crunch. These caramelized makhana make for a perfect accompaniment to tea or coffee, or simply enjoy them as a guilt-free indulgence anytime you crave a delicious treat.

    Tips for Perfect Caramelized Makhana:

    • Ensure that the makhana are roasted until they are crisp but not browned before adding the caramel. This helps to prevent them from becoming too crunchy or overcooked.
    • Work quickly when coating the makhana with caramel, as it can harden rapidly upon contact with the cooler makhana. Use a spatula to toss them gently and evenly coat each piece.
    • Allow the caramelized makhana to cool completely before serving to ensure that the caramel has fully set and formed a crunchy crust.

    Variations of Caramel Makhana:

    • For a savory twist, you can add a pinch of salt or your favorite spices to the caramel mixture before coating the makhana. This adds depth of flavor and balances out the sweetness of the caramel.
    • Experiment with different coatings such as melted chocolate or flavored syrups for a unique twist on this classic recipe. Drizzle the melted chocolate over the cooled makhana and allow it to set before serving.

    Benefits of Caramel Makhana:

    Makhana, or fox nuts, are not only delicious but also offer a range of health benefits. They are low in calories and fat, making them an ideal snack for those looking to maintain a healthy diet. Makhana are also rich in protein, fiber, and antioxidants, which can help support overall health and well-being. Additionally, they are gluten-free and hypoallergenic, making them suitable for individuals with dietary restrictions or food sensitivities.

    FAQs:

    Q: Can I store caramelized makhana for later use?

    A: Yes, you can store caramelized makhana in an airtight container at room temperature for up to a week. Just make sure they are completely cooled and the caramel has set before storing them.

    Q: Can I use other nuts instead of makhana for this recipe?

    A: Absolutely! While this recipe specifically calls for makhana, you can easily substitute other nuts such as almonds, cashews, or peanuts for a different flavor and texture.

    Q: Can I reheat caramelized makhana if they become soft?

    A: Yes, if the caramelized makhana become soft or lose their crunchiness, you can reheat them in a low oven (around 250°F) for a few minutes until they become crisp again. Be sure to keep an eye on them to prevent burning.

    Other Recipes on Manjula’s Kitchen

    If you’re looking to explore more Indian recipes, appetizers, beverages, and desserts, be sure to check out the following links on Manjula’s Kitchen. Here are some links to recipes on Manjula’s Kitchen official website:

    Paneer Tikka Masala Recipe

    Chana Chaat (Spicy Chickpea Salad) Recipe

    Pav Bhaji (Spicy Vegetable Hash with Buns) Recipe

    Raj Kachori (Crunchy Chaat) Recipe

    Vegetable Biryani Recipe

    These recipes should offer you a flavorful experience straight from Manjula’s Kitchen.

  • Jhaal Muri – Kolkata Puffed Rice Snack

    Jhaal Muri – Kolkata Puffed Rice Snack

    Jhaal Muri (Kolkata Puffed Rice Snack)

    Jhaal Muri – Kolkata Puffed Rice Snack

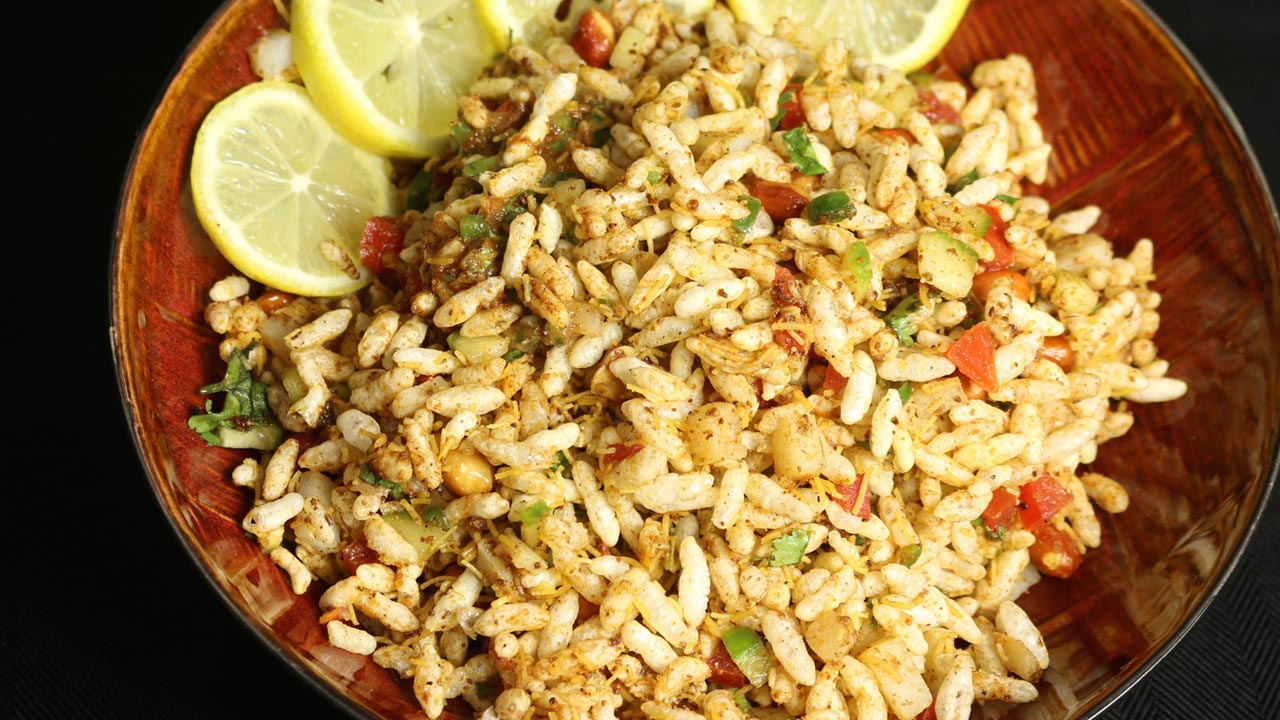
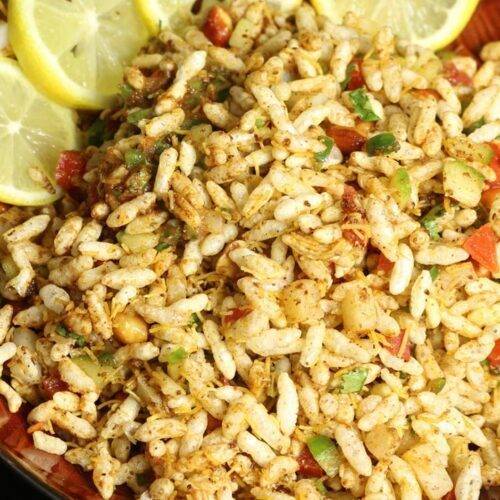
    Jhaal muri is a popular street food snack of Kolkata. Jhaal means spices and muri is puffed rice. A long time ago, I visited my uncle in Kolkata and I still remember this mouthwatering snack. This puffed rice is tossed with potato, cucumber, tomatoes.  A special blend of spices including tamarind pulp, and mustard oil are also added to jhaal muri. This is a simple yet delicious snack.
    5 from 1 vote
    Course Chaat
    Cuisine Indian
    Servings 4 people

    Ingredients
      

    • 4 cups murmura/ muri (puffed rice)
    • 1/4 cup fine sev (bengal gram vermicelli)
    • 1/4 cup peanuts
    • 1 teaspoon oil
    • 1/2 cup potato boiled, peeled and cut into small pieces
    • 1/2 cup tomato finely chopped, seeded
    • 1/2 cup cucumber finely chopped
    • 2 tablespoons green chili, finely chopped, adjust to taste
    • 2 tablespoons cilantro finely chopped (hara dhania)
    • 1/4 cup tamarind paste
    • 4 teaspoons mustard oil

    Spice Mix

    • 4 teaspoons roasted cumin seeds powder
    • 1 teaspoon salt
    • 1 teaspoon black salt
    • 1 teaspoon mango powder (amchoor)
    • 1 teaspoon red chili powder
    • 1/2 teaspoon garam masala

    4 slices of lemon for garnishing

    Instructions
     

    How to make Bengali Jhaal Muri

    • Combine all the dry spices together. Set aside.
    • Heat a 1 teaspoon of oil in a small pan on medium heat, add peanuts and roast stirring continuously till lightly brown. This should take about 2 minutes. Set aside.
    • Dry roast the muri/puffed rice on medium heat for about 3 minutes. Notes: muri should not change color, they should be white but roasting gives freshness and make them crispy. Set aside.
    • Just before ready to serve jhaal muri add the peanuts, sev, tomato, potato, cucumber, green chili, cilantro, tamarind paste, mustard oil and spices. Toss them and serve.
    • You may adjust all the ingredients to your taste. Enjoy!
    Tried this recipe?Let us know how it was!