Tag: Low Calorie Meals

10+ Healthy Low-Calorie Meals: Easy and Filling Recipes
For health-conscious individuals looking to reduce carbohydrate intake at dinnertime, these low calorie meals offer a variety of satisfying and nutritious options. Whether you’re meal prepping for the week or need a quick recipe for tonight, these easy low calorie meals will keep you on track with your dietary goals.
Moong Dal Chilla
Moong Dal Chilla is a healthy and delicious Indian pancake made with split yellow moong dal. This low calorie meal is high in protein and fiber, making it a perfect option for breakfast, lunch, or dinner.
Vegetable Soup
Vegetable soup is a simple and nutritious low calorie meal, vegetable soup is packed with a variety of vegetables and spices. It’s a great way to enjoy a light yet filling meal that is both satisfying and nutritious.
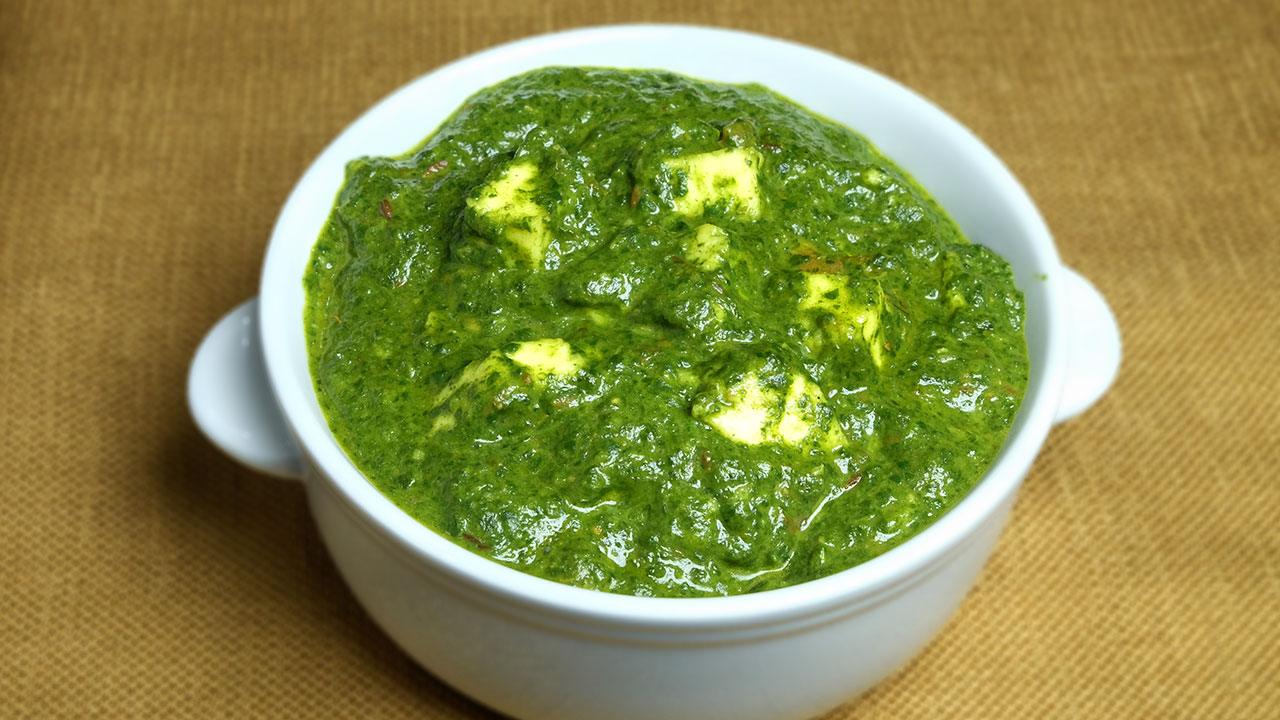
Palak Paneer
Palak Paneer is a classic North Indian dish that combines spinach and paneer in a creamy, spiced gravy. This healthy low calorie meal is not only delicious but also packed with vitamins and minerals. Serve it with a side of roti or rice for a complete meal. It’s a nice addition from paneer recipes
Cucumber Raita
Cucumber Raita is a refreshing and low-calorie side dish made with yogurt and cucumber. This low calorie meal recipe is perfect for cooling down on a hot day and complements spicy dishes beautifully.
Masoor Dal
Masoor Dal, or red lentil curry, is a light and nutritious dish that is perfect for a low-calorie meal. This low calorie filling meal is rich in protein and fiber, making it both satisfying and healthy.
Cauliflower Rice
Cauliflower Rice is a great low-calorie alternative to traditional easy indian rice recipes. This simple low calorie meal can be paired with a variety of curries and stir-fries, making it a versatile and healthy option.
Tofu Stir-Fry
A quick and easy low calorie meal, this tofu stir-fry is packed with nutrients and flavor. Use a mix of your favorite vegetables and toss them with tofu cubes for a satisfying meal.
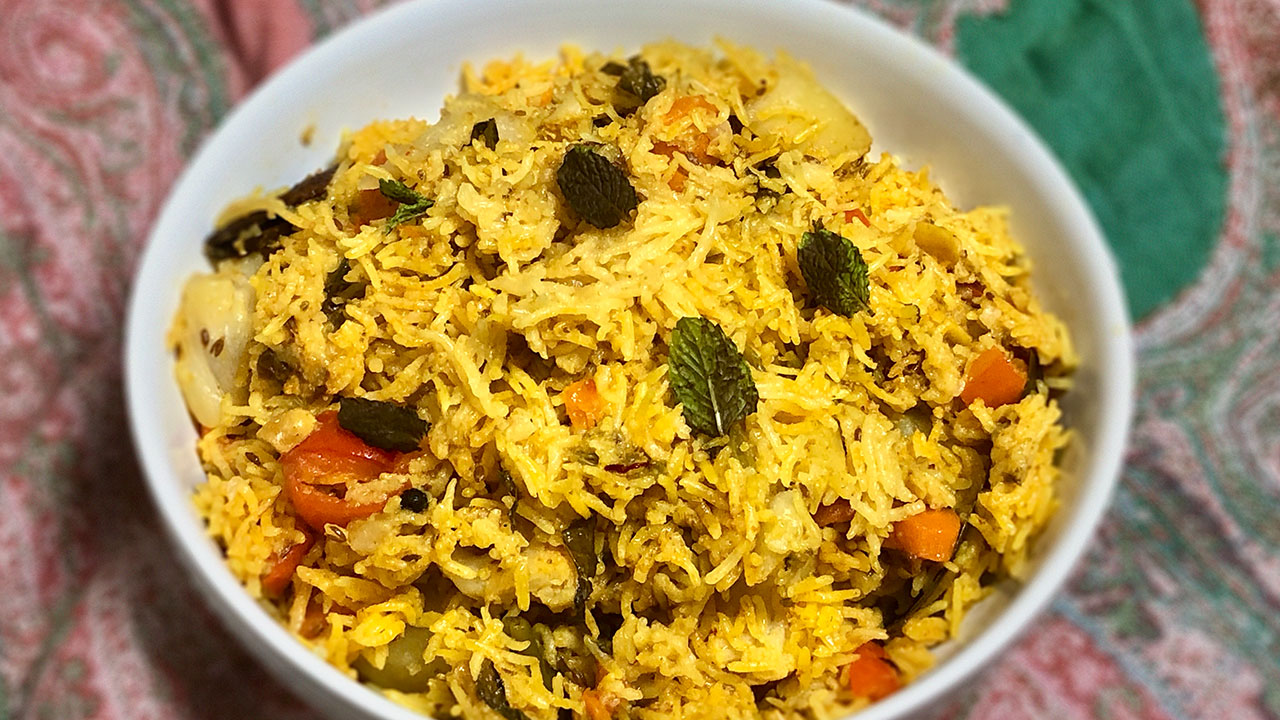
Vegetable Biryani
Vegetable Biryani is a flavorful rice dish made with a variety of vegetables, spices, and herbs. This low calorie meal is perfect for special occasions or when you want to enjoy a delicious and aromatic meal.
Bhindi Masala
Bhindi Masala, or spiced okra, is a delicious low calorie meal that is easy to prepare and full of flavor. Cooked with tomatoes, and spices, this dish is a great addition to any meal.
Aloo Palak
Aloo Palak is a simple yet flavorful dish made with potatoes, spinach, and spices. This low calorie meal is a great way to incorporate more vegetables into your diet.
Rajma
Rajma, or red kidney bean curry, is a hearty and nutritious dish that is a perfect Indian recipes for dinner. This low calorie meal is rich in protein and fiber, making it a satisfying and healthy option.
Cabbage Sabzi
Cabbage Sabzi is a simple and healthy stir-fry made with cabbage and spices. This low calorie meal recipe is perfect for a quick and nutritious meal.
Lemon Quinoa Salad
Lemon Quinoa Salad is a light and refreshing dish made with quinoa, vegetables, and a tangy lemon dressing. This low calorie meal is perfect for lunch or dinner and is packed with protein and fiber.
Methi Thepla
Methi Thepla is a healthy and flavorful Indian flatbread recipe made with fenugreek leaves and whole wheat flour. This low calorie meal is perfect for breakfast or lunch and can be enjoyed with yogurt or pickles.
Zucchini Noodles
Zucchini Noodles are a great low-calorie alternative to traditional pasta. This healthy low calorie meal can be paired with a variety of sauces and toppings for a delicious and nutritious meal.
Dal Tadka
Dal Tadka is a comforting and nutritious lentil dish that is perfect for dinner. This low calorie meal is rich in protein and fiber, making it a healthy and satisfying option. Dal tadka is a nice dish coming from indian dal.
FAQs
What is a good low-calorie meal?
A good low calorie meal includes options like Moong Dal Chilla, Vegetable Soup, and Palak Paneer. These meals are rich in flavor and nutrients, making them perfect for maintaining a healthy diet.
What are some easy low-calorie meals?
Some easy low calorie meals include Tofu Stir-Fry, Bhindi Masala, and Cabbage Sabzi. These dishes are quick to prepare and perfect for busy weeknights.
What are some healthy low-calorie meals?
Some healthy low calorie meals include Masoor Dal, Cauliflower Rice, and Lemon Quinoa Salad. These dishes are packed with vitamins and minerals, making them great options for a nutritious meal.
What are some low-calorie meal recipes?
Low calorie meal recipes like Vegetable Biryani, Rajma, and Methi Thepla are delicious and satisfying options. These meals are rich in flavor and perfect for a wholesome dinner.

For more delicious low calorie meals, visit Manjula’s Kitchen, where you’ll find an extensive collection of healthy and nutritious recipes to suit your dietary needs.

  • Mixed Dal Dosa

    Mixed Dal Dosa

    Mixed Dal Dosa

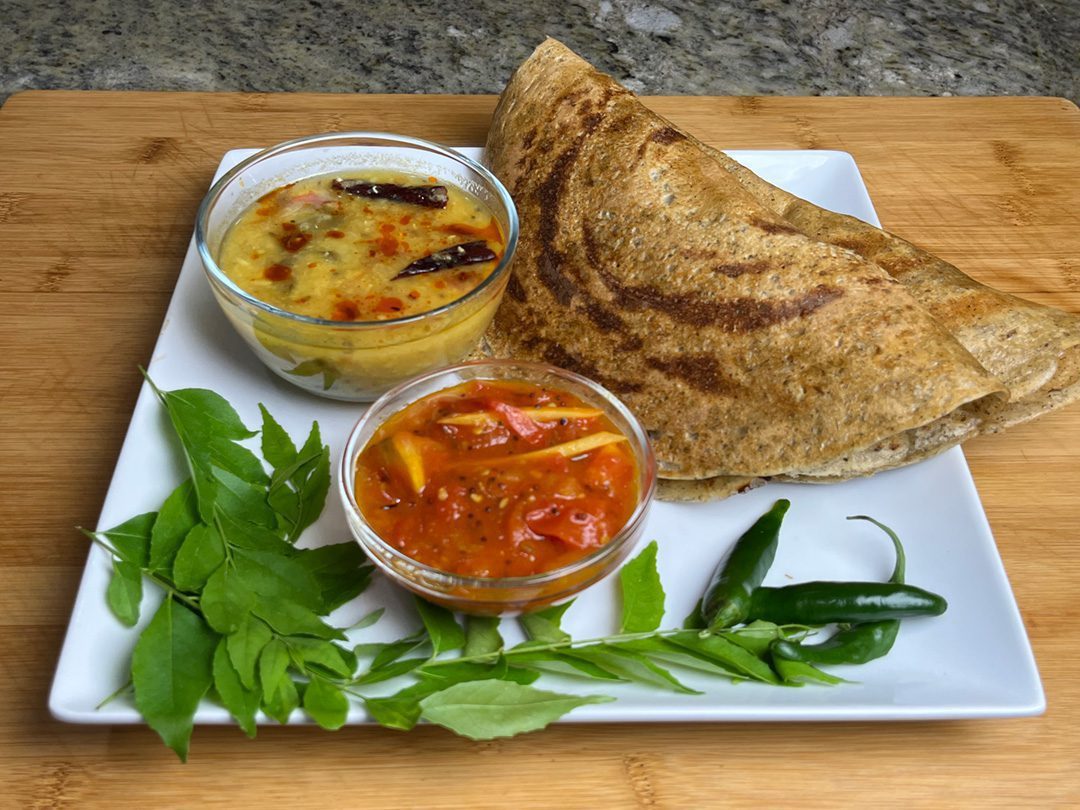
    Mixed Dal Dosa is a simple and nutritious flatbread that doesn’t require fermentation. This high-protein dosa is made from a blend of various lentils (dal), which are soaked and ground into a smooth paste. A few spices enhance the flavors, and the dosa is cooked on a hot skillet until it’s crispy and golden. These dosas are not only high in protein but also vegan and gluten-free, making them a healthy choice for everyone.
    These protein-rich mixed dal dosas are incredibly versatile. They’re perfect for a healthy breakfast, but they can also be enjoyed at any meal—lunch, dinner, or even as a snack. Serve them with your favorite chutney, a comforting soup, or your choice of vegetable dish to complete the meal.
    5 from 1 vote
    Prep Time 15 minutes
    Cook Time 20 minutes
    Servings 6 Dosa

    Ingredients
      

    • ¼ cup moong dal
    • ¼ cup washed moong dal
    • ¼ cup washed urad dal
    • ¼ cup red lentil
    • 1 green chili chopped optional
    • ¼ piece ginger chopped
    • ½ tsp cumin seeds (jeera)
    • ¼ tsp black pepper 
    • tsp asafetida (hing)
    • ½ tsp salt (adjust to taste)
    • 4 tbsp oil

    Instructions
     

    • In a bowl mix all the dal, wash them changing water 2-3 times. Soak dal in four cups of water for 6-8 hours.
    • Drain the water. Blend the lentils (dal) with green chili and ginger, adding water slowly as needed to make a smooth batter. Note: The less water, the smoother the batter.
    • Mix the salt and cumin seeds into the batter. Add water as needed. The total water added will be about ½ cup, just enough to achieve the consistency of pancake batter.
    • Place a non-stick skillet over medium-high heat. Test by sprinkling a few drops of water on it. The water should sizzle right away.
    • Pour about ½ cup of the batter mixture into the skillet and spread evenly with the back of a spoon. Starting from the center, spiral outward until evenly spread, about seven inches in diameter.
    • When the batter begins to dry, gently spread one teaspoon of oil over it. Wait about 30 seconds, then flip the dosa using a flat spatula.
    • Press the dosa lightly with the spatula all around to ensure even cooking, turning them two to three times. Dosa should be crisp and golden brown on both sides.
    • Repeat for the remaining dosas.

    Notes

    Notes: If you are on a gluten-free diet, be aware that asafetida (hing) in powder form is often not gluten-free. In that case, you may want to avoid using asafetida.
    Serving suggestion
    Serve dosas with any chutney, such as tomato chutney, peanut chutney or cilantro chutney, or chutney of your choice.
    You can also serve them with samber (a south Indian style dal) or your choice of soup.
    For a creative twist, you can use these dosas to make delicious wraps, commonly known as frankies or kathi rolls. Simply wrap some vegetables or salad inside the dosa for a wholesome and satisfying meal on the go. 
    You can even make these dosas in advance, then reheat them over a skillet to restore their crispness.
    For a creative twist, you can use these dosas to make delicious wraps. Make the dosas slightly thicker so they stay soft; these wraps are commonly known as frankies or kathi rolls. Simply wrap some vegetables or salad inside the dosa for a wholesome and satisfying meal on the go.
    Tried this recipe?Let us know how it was!

    Introduction to Mixed Dal Dosa

    Mixed Dal Dosa is a wholesome, protein-rich flatbread that’s not only easy to make but also doesn’t require the traditional fermentation process. Made from a blend of various lentils, this dosa is packed with plant-based protein, making it a great meal option for anyone looking to boost their protein intake. Lentils like moong dal, urad dal, and red lentils are soaked, ground into a smooth batter, and spiced to create a savory and crispy dosa. The best part? This dosa is both vegan and gluten-free, catering to various dietary preferences while still delivering great taste and texture.

    Cultural and Traditional Importance

    Dosas are a staple in South Indian cuisine, traditionally made from fermented rice and lentil batter. However, the Mixed Dal Dosa offers a quicker alternative without the need for fermentation, making it an ideal choice for those who are short on time. Lentils are a common ingredient in Indian cooking, celebrated for their versatility and nutritional value. By using a variety of dals, this dosa provides a range of nutrients, especially plant-based proteins, making it a go-to dish for breakfast, lunch, dinner, or even as a snack.

    The beauty of Mixed Dal Dosa lies in its simplicity and adaptability. It’s a great way to incorporate different types of lentils into your diet, each contributing its unique flavor and health benefits. Traditionally served with chutneys and sambar, this dosa has found a place in modern kitchens due to its quick preparation and nutritious profile.

    Recipe Variations from Manjula’s Kitchen

    While Mixed Dal Dosa is delicious and nutritious on its own, there are several other similar dosa and pancake recipes available on Manjula’s Kitchen that you can explore for variety:

    • Moong Dal Dosa: Another high-protein dosa made primarily from moong dal, offering a lighter alternative.
    • Besan Chilla: A savory pancake made with gram flour (besan), perfect for a quick, protein-packed breakfast.
    • Rava Dosa: A crisp and delicate dosa made with semolina, for those who prefer a thin and crunchy dosa.
    • Oat Dosa: Similar to Mixed Dal Dosa, Instant Oat dosa is an easy recipe that is perfect for busy families.

    Health Benefits and Dietary Considerations

    The Mixed Dal Dosa is packed with nutrients, especially protein, making it a great option for those following a vegetarian or vegan diet. Lentils are an excellent source of protein, fiber, vitamins, and minerals, contributing to overall digestive health and maintaining energy levels throughout the day. By using a variety of dals, you’re also ensuring that you get a broader range of nutrients in every dosa.

    Additionally, this recipe is gluten-free, making it suitable for those with gluten sensitivities or anyone on a gluten-free diet. If you’re strictly gluten-free, it’s important to note that asafetida (hing) often contains gluten, so be sure to use a gluten-free version or skip it altogether.

    Serving Suggestions

    Mixed Dal Dosa can be served with a variety of chutneys to complement its savory flavors. Here are a few chutney options from Manjula’s Kitchen that pair well with the dosa:

    • Tomato Chutney: A tangy and slightly sweet chutney that adds a fresh burst of flavor.
    • Cilantro Chutney: A classic chutney with refreshing cilantro and a hint of spice.
    • Peanut Chutney: A creamy and nutty chutney that pairs wonderfully with the crispy dosa.

    For a complete meal, serve Mixed Dal Dosa with Sambar or a comforting soup. Another creative twist is to use the dosa as a wrap, filling it with vegetables, paneer, or salad to create a delicious and nutritious frankie or kathi roll. The dosas can also be prepared in advance and reheated on a skillet, making them an excellent option for meal prep.

    Conclusion

    Mixed Dal Dosa is a simple yet highly nutritious meal that can be enjoyed at any time of the day. Its high protein content, along with being vegan and gluten-free, makes it a versatile option for a variety of dietary needs. Whether you’re serving it with chutney for breakfast or transforming it into a wrap for lunch, this high protein dosa will quickly become a favorite in your household. Explore the other dosa recipes on Manjula’s Kitchen to discover even more delicious ways to enjoy Indian flatbreads.

    Frequently Asked Questions (FAQs)

    What makes Mixed Dal Dosa high in protein?

    The use of multiple lentils like moong dal, urad dal, and red lentils makes Mixed Dal Dosa rich in plant-based protein, making it an excellent option for those seeking a high-protein meal.

    Can I make the dosa ahead of time?

    Yes, you can make the dosas in advance and reheat them on a skillet to restore their crispness. They also work well as wraps for on-the-go meals.

    What are some serving options for Mixed Dal Dosa?

    Serve Mixed Dal Dosa with chutneys like tomato chutney, cilantro chutney, or peanut chutney. You can also pair it with sambar or use it as a wrap filled with vegetables or paneer.

    Is Mixed Dal Dosa gluten-free?

    Yes, this dosa is naturally gluten-free. However, be cautious with asafetida (hing) as it may contain gluten unless specifically labeled gluten-free.

    Can I adjust the spiciness of the dosa?

    Absolutely! You can adjust the spice level by adding or omitting green chili and black pepper based on your preference.

  • Spinach Salad

    Spinach Salad

    Spinach Salad

    Spinach Salad

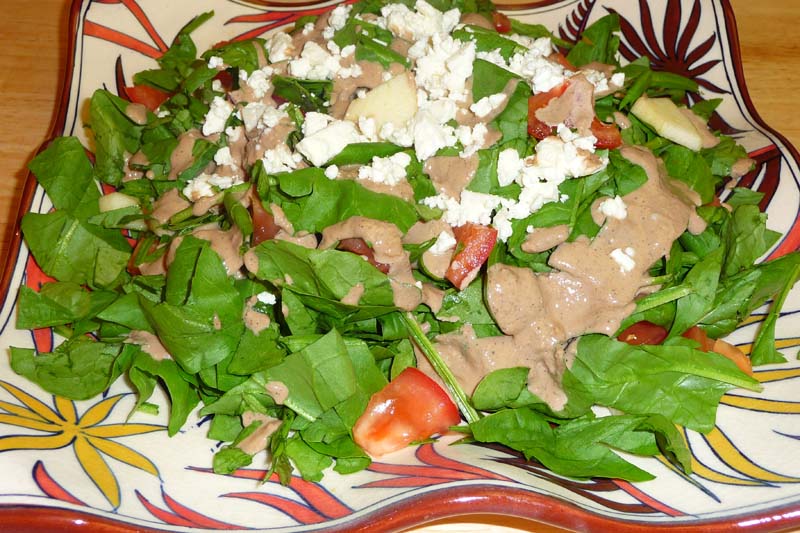
    This is a delicious quick & easy and refreshing spinach and tomato salad. Adding walnuts and ginger dressing provides a creamy and tangy flavor.
    5 from 1 vote
    Course Salad
    Cuisine Indian
    Servings 4 people

    Ingredients
      

    • About 4 cup chopped spinach
    • 2 tomatoes
    • 1 apple
    • 1/4 cup  feta cheese (optional)
    • 1/4 cup  walnuts
    • 2 tbsp olive oil
    • 2 tbsp balsamic vinegar
    • 1 tbsp lemon juice
    • 1 tbsp ginger juice
    • 1 tbsp salt
    • 1 tbsp sugar
    • 1/2 tbsp black pepper
    • About 2 tbsp water adjust as needed

    Instructions
     

    • Wash the spinach and pat dry and chop them coarsely. Keep aside.
    • Cut the tomatoes in halves and remove the seeds, cut them in about half inch pieces.
    • Next peel and cut the apples in small pieces.
    • In a salad bowl toss the spinach, tomatoes and apples together. Keep aside.

    Notes

    Dressing:
    1. Shred about 1 inch piece of ginger on fine side of shredder. Squeeze the shredded ginger between your fingers to make ginger juice.
    2. Next blend all the dressing ingredients together. Add the water as needed otherwise dressing will be too thick.
    3. Pour the dressing over salad, and sprinkle with feta cheese. Enjoy!
     
    Suggested Variations:
    1. Tomatoes can be replaced with strawberries.
    2. Walnuts can be replaced with roasted peanuts
    Keyword Healthy Salad
    Tried this recipe?Let us know how it was!
  • How to make Paneer

    How to make Paneer

    Paneer

    How To Make Paneer

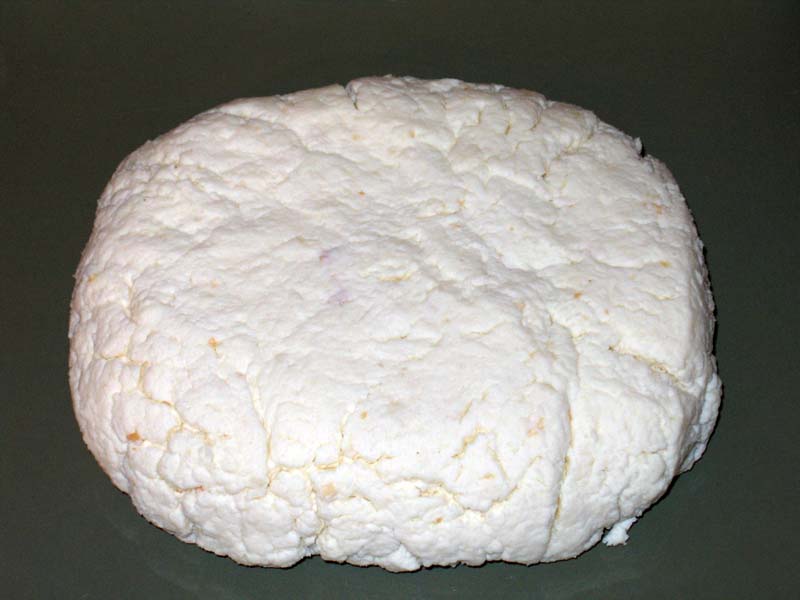
    Paneer is a homemade Indian cheese. Paneer is used many different ways making desserts, appetizers and main course dishes.
    5 from 1 vote
    Prep Time 20 minutes
    Cook Time 1 hour
    Total Time 1 hour 20 minutes
    Course Main Course
    Cuisine Indian
    Servings 0

    Ingredients
      

    • 8 cupa milk, half gallon
    • 1/4 cup lemon juice

    Instructions
     

    • Mix lemon juice in half cup of hot water and put aside.
    • Boil the milk in a heavy bottomed pan over medium heat, stirring occasionally, making sure not to burn milk.
    • As the milk comes to a boil, add the lemon juice gradually and stir the milk gently. The curd will start separating from the whey, turn off the heat.
    • Once the milk fat has separated from the whey, drain the whey using a strainer line with cheesecloth, or muslin cloth. Wrap the curds in a muslin cloth, rinse under cold water, and squeeze well. This process takes out the sourness from the lemon.
    • To take out the excess water, press the wrapped paneer under a heavy pan for about 1 hour.

    Notes

    Tips:
    If paneer will be used to make any dessert dish:
    The most important part of making paneer for dessert is how much water to take out from the paneer.
    To check if right amount of  water is out of the paneer, take a little piece of paneer on your palm and rub with your fingers. After rubbing the paneer for about 15-20 seconds, you should be able to make a firm but smooth ball.
    For making sweets, paneer can be refrigerated for 1 to 2 days.
    Paneer from half-gallon milk will make about 15 to 20 rasgullas.
    I suggest 2% milk for rasgullas, ras malai, chamcham or any other dish in that category.
    For sandaish, burfee or any other such dish use regular milk.
    If paneer will be used for making main dishes:
    Before Pressing the paneer knead it enough so paneer is not crumbly.
    Press the paneer instead one hour, two hours making firmer.
    Cut the paneer to desired shape. Paneer can be refrigerated for a few days or kept frozen for months.
    Variations:
    Add salt to the paneer, if you like with your choice of spices one or more, including black pepper, roasted cumin seed, chopped green chilies, chopped cilantro (Hara Dhania) or to your taste.
    Keyword Indian Cheese, Paneer
    Tried this recipe?Let us know how it was!

    Homemade Paneer Recipe By Manjula’s Kitchen 

    Here is a detailed Guide on How to Make Homemade Paneer at Home from Milk. Learning the art of paneer-making at home allows you to enjoy fresh and homemade cheese in your favorite recipes. Learn the art of crafting delightful homemade paneer with this step-by-step guide on how to make paneer at home from milk. Whether you’re a novice or an experienced cook, discover the joy of creating your paneer with this comprehensive walkthrough.

    Section 1: Gathering Ingredients and Tools 

    To embark on your homemade paneer journey, it’s crucial to gather the essential ingredients and tools. Begin with selecting quality milk, a heavy-bottomed pan, fresh lemon juice, and a strainer lined with cheesecloth or muslin cloth. Choosing the right milk is key; opt for 2% milk for desserts like rasgullas and ras malai, and regular milk for savory dishes such as sandaish or peda.

    2.1 Boiling the Milk 

    The first step to creating a homemade paneer is to start by pouring the milk into a heavy-bottomed pan and placing it over medium heat. Stir occasionally to prevent the milk from burning. Maintain a watchful eye until the milk reaches a gentle boil, signaling the beginning of the paneer-making process.

    2.2 Adding Lemon Juice 

    While the milk is heating, mix fresh lemon juice with hot water and set it aside. Once the milk starts boiling, gradually introduce the lemon juice into the mix, all while stirring gently. Witness the magic unfold as the curds separate from the whey, signifying a crucial phase in how to make paneer from milk.

    2.3 Draining and Wrapping 

    Upon achieving the desired separation of curds and whey, turn off the heat. Utilize a strainer lined with cheesecloth or muslin cloth to drain the whey, leaving you with the precious curds. Next, wrap the curds in muslin cloth, rinse under cold water, and give it a good squeeze to remove any excess liquid.

    2.4 Removing Sourness 

    To eliminate the lemony tang, rinse the wrapped paneer under cold water. This step ensures that the paneer remains neutral in flavor, ready to adapt to both sweet and savory culinary creations.

    2.5 Pressing and Shaping 

    The pressing stage is crucial in how to make paneer from the milk recipe to determine the texture of your homemade paneer. Lay the wrapped paneer under a heavy pan, pressing it for about an hour. Before pressing, knead the paneer sufficiently to prevent it from becoming crumbly. Adjust the pressing duration based on your preference for a softer or firmer texture. Once pressed, cut the paneer into the desired shapes, ready to be incorporated into various dishes.

    Section 3: Testing Paneer Consistency 

    A pivotal test to ensure the right water content in your paneer involves rubbing a small piece on your palm. After 15-20 seconds of rubbing, the paneer should form a firm yet smooth ball, indicating the optimal consistency for culinary use.

    Section 4: Tips and Variations  

    4.1 Tips for Dessert Dishes 

    For a truly authentic taste of desserts, many Indian chefs prefer to do paneer make at home, allowing them to control the quality and freshness of the cheese. For those planning to use paneer in desserts, refrigerate it for 1 to 2 days. The choice of 2% milk is recommended for sweets like rasgullas, ras malai, and chamcham, imparting a rich and creamy texture to these delicacies.

    4.2 Tips for Main Dishes 

    When preparing paneer for main dishes, knead it thoroughly before pressing to prevent crumbliness. Vary the pressing time to achieve the desired level of firmness. Paneer for main dishes can be refrigerated for a few days or frozen for long-term storage.

    4.3 Variations in Flavor 

    Elevate the flavor profile of your homemade paneer by experimenting with variations. Add salt to the paneer for a savory twist and incorporate spices such as black pepper, roasted cumin seeds, chopped green chilies, or cilantro to suit your taste preferences.

    Mastering the art of making paneer at home from milk is a rewarding culinary skill that allows you to customize this versatile ingredient for a myriad of dishes. This detailed guide ensures you understand each step involved, from selecting the right ingredients to testing the consistency and exploring variations. Embrace the satisfaction of creating fresh and flavorful homemade paneer, ready to elevate your culinary creations.

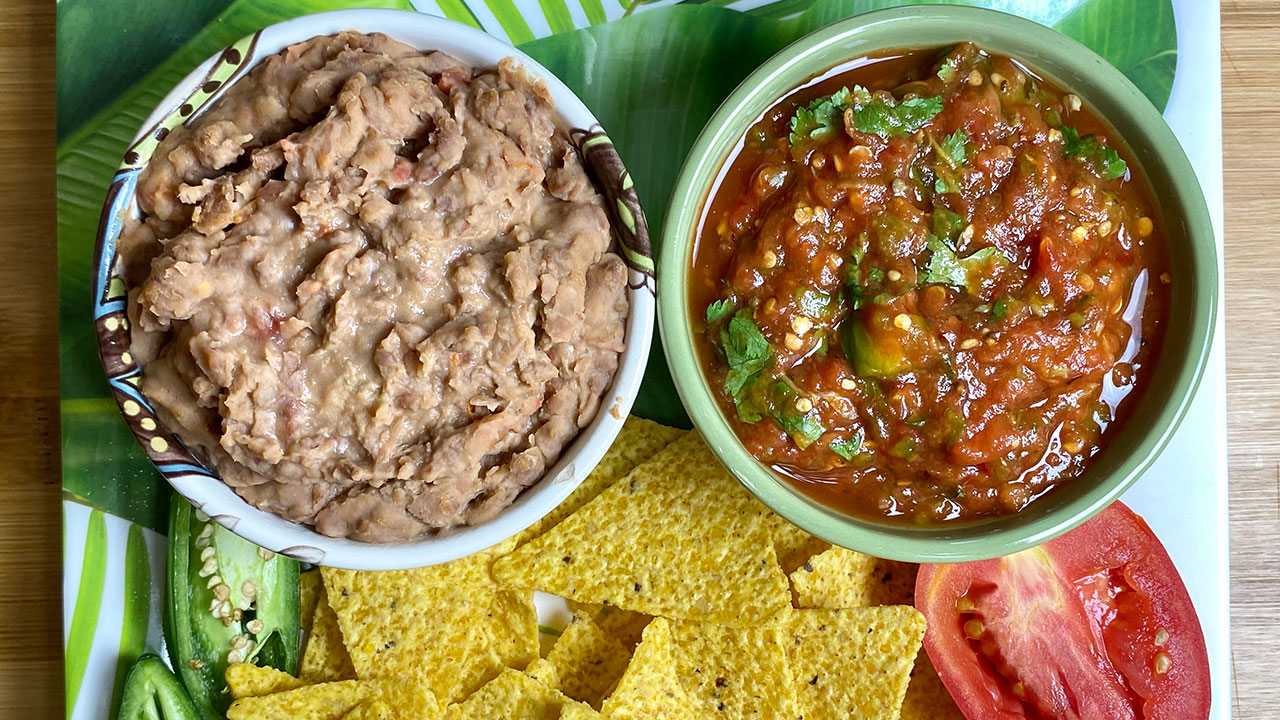
  • Mexican Refried Beans and Salsa

    Mexican Refried Beans and Salsa

    A plate of Mexican Refried Beans and Salsa served with tortilla chips and fresh vegetables

    Mexican Refried Beans and Salsa

    My ultimate favorite cuisine is of course Indian. But I must say that Mexican and Italian cuisines are close seconds! Overall, I enjoy trying new cuisines with a variety of flavors. After coming to the United States, Mexican cuisine was the first new cuisine I tried. As you already know, I have a story behind every dish.
    It was many years ago and we had just come to the United States. Some good friends of ours decided to take us to a small mom and pop Mexican restaurant. They were sure we would enjoy the food. I was a little hesitant and when the server came to take our order, I immediately began to tell her all of my limitations for food, such as no onions, garlic, and of course vegetarian. She smiled at me and proudly let me know she was the owner of the restaurant. She reassured me that I had come to the right restaurant and advised that all the food at her restaurant was made fresh that very day. She personally brought out our food which included refried beans, soft tortillas, salsa, enchiladas, and salad. I tried the food and immediately fell in love. Mexican cuisine had become another favorite cuisine, and this restaurant became our go-to place for dinner. Both dishes are also vegan and gluten free.
    I typically keep beans and salsa in my refrigerator or freezer. Both items freeze well. Also, you can come up with so many dishes using them. These are some of my favorite dishes to serve using refried beans and salsa: beans and corn chips, tostadas, burritos, and enchiladas. I hope you will enjoy these dishes!
    This recipe will serve 4.
    No ratings yet
    Servings 0

    Ingredients
      

    Refried Beans

    • 1 cup pinto beans
    • 3 Tbsp oil
    • ½ cup tomatoes finely chopped
    • 1 tsp ginger shredded
    • 1 tsp salt
    • 2 cup of water

    Salsa

    • 5 Roma tomatoes
    • 3 Jalapeno pepper
    • 6 red whole red chili
    • 1 tsp salt
    • ¼ cup cilantro finely chopped

    Instructions
     

    How to prepare Beans

    • soak the beans for at least 6 hours in six cups of water. Drain the water boiled the beans in 3 cups of water instant pot or pressure cooker for 40 minutes. Drain most of the water and save, this will be used slowly as needed.
    • In a saucepan moderately heat the oil over medium-high heat. Add beans keep steering and keep mashing the beans. Cook for about 5 minutes. Add tomatoes, ginger and salt keep mashing, and cook for another five minutes. Add water we have saved from beans slowly as needed. As beans cool off will become thick. I used most of the water, we saved from beans. Beans should be the inconsistency of thick batter.

    How to prepare Salsa

    • dry roast the red chilies over medium heat, till they are darker in color. Remove from the pan and set aside.
    • Preheat the oven at 350-degree F. Half the tomatoes and jalapeno peppers long way. Spread them over the baking sheet, Put the tomatoes and jalapeno face down, and bake for 10 minutes.
    • Take out from the oven and remove the skin from tomatoes and jalapenos.
    • First in a food processor crush red chilies, then add tomatoes, jalapeno, and salt roughly blend them together, take it out in a bowl and add cilantro. Salsa is ready and keeps aside.
    • Beans and salsa make a good side dish for any Mexican cuisine.
    • Enjoy!
    Tried this recipe?Let us know how it was!
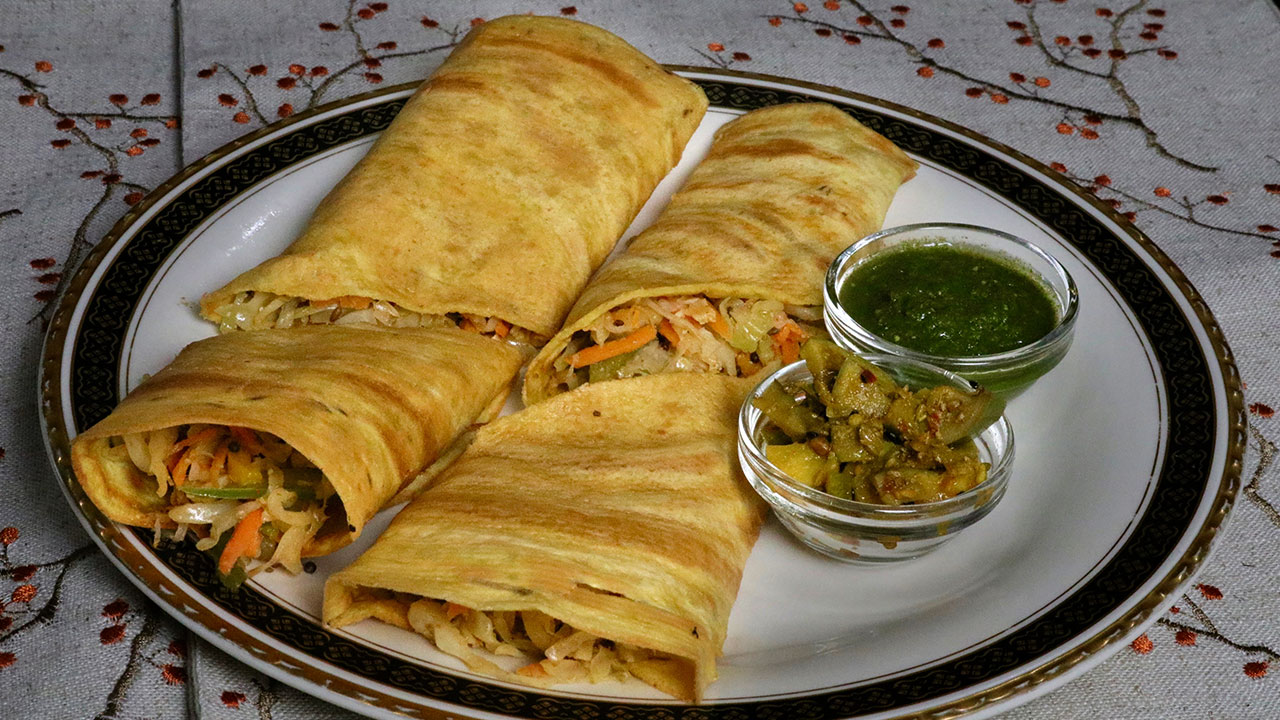
  • Vegetable Cheela Rolls

    Vegetable Cheela Rolls

    Vegetable Cheela Rolls recipe by Manjula

    Vegetable Cheela Rolls

    Vegetable Cheela Rolls is a healthy and delicious any-time meal. Cheela Rolls is a treat for people who are vegan and gluten free. Cheela is like a besan dosa, and can be used as a wrap and this cheela wrap with vegetables makes a wholesome meal. Cheela Rolls can be used as a snack and also for good a lunch box meal.
    4.41 from 5 votes
    Prep Time 10 minutes
    Cook Time 20 minutes
    Total Time 30 minutes
    Course Appetizer, Snack
    Cuisine Indian
    Servings 2 people

    Ingredients
      

    For Cheela

    • 1 cup besan Gram flour
    • 2 Tbsp rice flour
    • 1 tsp salt
    • 1/2 tsp cumin seeds jeera
    • 3/4 cup water to make batter
    • 4 tsp oil

    For Filling

    • 3 cup cabbage thinly sliced
    • 1/2 cup carrots shredded
    • 1/2 cup bell pepper thinly sliced
    • 2 tsp oil Canola or vegetable oil
    • 1/2 tsp cumin seeds jeera
    • 1/2 tsp mustard seeds rai
    • 2 tsp coriander powder dhania
    • 1/4 tsp chili powder
    • 1/2 tsp salt
    • 1/2 tsp sugar
    • 1 tsp lemon juice

    Instructions
     

    • Mix all the dry ingredients together, besan, rice flour, cumin seeds, and salt. Add the water slowly to make a smooth batter, consistency of Dosa batter. Set aside.
    • To make the filling: Heat the oil in frying pan over medium high heat. Oil should be moderately hot, add cumin seeds and mustard seeds, as the seeds crack. Add cabbage, carrots, and bell pepper. Stir-fry for about one minutes add all the other ingredients, coriander powder, chili powder, salt, sugar and lemon juice. Stir- fry for about three to four minutes, vegetables should be still crisp. Turn off the heat.
    • To make the Cheele: Use a heavy skillet and place on medium-high heat. Test by sprinkling a few drops of water on it. Water should sizzle right away.
    • Pour about 1/4 cup of the batter into the skillet and spread evenly with a back of spoon. Starting from the center, spiral the batter outward evenly to form a circle.
    • When batter starts to dry, gently spread one teaspoon of oil over it. Wait about 30 seconds; flip the cheela using a flat spatula.
    • Press the cheela lightly all around with the spatula to make cheela cook evenly. Turn the cheela and in the center of the cheele put about ½ cup of stir-fry diagonally and roll it.
    • Vegetable Cheela Roll is ready to serve. I like to serve this with Mango Pickle or Cilantro Chutney.
    • Enjoy!

    Notes

    In the ingredients, we need about 4 cups total of sliced vegetable (this includes the cabbage, bell pepper, and carrots)
    Suggestions
    Use or preferred vegetables and also works good with any leftover vegetables.
    Tried this recipe?Let us know how it was!

    A Comprehensive Guide to Besan Cheela Recipe with Vegetables

    Welcome to Manjula’s Kitchen, your ultimate destination for authentic Indian recipes and culinary inspiration. Today, we embark on a flavorful journey to explore the delightful world of Vegetable Cheela Rolls, a versatile and nutritious dish that is perfect for any meal of the day. Made with besan (gram flour) and a colorful assortment of vegetables, these cheelas are not only delicious but also packed with vitamins, minerals, and fibre. 

    Join us as we unravel the secrets to creating the perfect Besan Cheela Recipe with Vegetables, along with tips, variations, benefits, and answers to frequently asked questions. Vegetable cheela is a delectable gluten-free and vegan snack, perfect for appetizers or as a bread alternative, offering a flavorful option for those seeking tasty and wholesome options.

    Preparing the Batter for Vegetable Cheela 

    • Begin by preparing the batter for the besan Vegetable Cheela, the foundation of this delectable dish. In a mixing bowl, combine besan (gram flour) with water to create a smooth and lump-free batter. Add finely chopped vegetables such as carrots, bell peppers, spinach, and green chilies to the batter, along with spices like turmeric powder, cumin powder, and salt. Mix well to ensure that the vegetables are evenly distributed throughout the batter, imparting their vibrant colors and flavors.

    Cooking the Vegetable Cheela 

    • Once the batter is ready, it’s time to cook the Vegetable Cheela to perfection. Heat a non-stick skillet or tawa over medium heat and lightly grease it with oil or ghee. Pour a ladleful of the batter onto the skillet and spread it evenly in a circular motion to form a thin layer. Cook the cheela for a few minutes until the edges start to crisp up and bubbles appear on the surface. Flip the cheela using a spatula and cook the other side until golden brown and crisp. Repeat the process with the remaining batter, adjusting the heat as needed to ensure even cooking.

    Assembling the Vegetable Cheela Rolls 

    • Once all the cheelas are cooked, it’s time to assemble the besan Vegetable Cheela Rolls, adding an extra layer of flavor and texture. Place a cooked cheela on a clean surface and spread a generous layer of mint chutney or yogurt sauce over it. Add a filling of thinly sliced cucumber, tomatoes and fresh coriander leaves on one side of the cheela. Roll the cheela tightly into a cylindrical shape, securing the filling inside. Repeat the process with the remaining cheelas to create a batch of delicious besan Vegetable Cheela Rolls.
    • Tips for Perfect Vegetable Cheela Rolls Every Time 

    • Use a non-stick skillet or tawa to cook the cheelas to prevent sticking and ensure easy flipping.
    • Add a pinch of baking soda to the batter to make the cheelas light and fluffy.
    • Experiment with different vegetables and spices to customize the flavor of your cheelas according to your taste preferences.
    • Serve the besan Vegetable Cheela Rolls hot with a side of green chutney or ketchup for dipping.

    Variations of Besan Cheela Recipe with Vegetables 

    • Paneer Cheela: Add crumbled paneer (Indian cottage cheese) to the vegetable filling for added protein and richness.
    • Masala Cheela: Sprinkle chaat masala or garam masala over the cooked cheelas for an extra burst of flavor.
    • Cheese Cheela: Grate some cheese over the filling before rolling the cheelas for a gooey and indulgent twist.

    Health Benefits of Vegetable Cheela Rolls: 

    Vegetable Cheela Rolls are not only delicious but also nutritious, offering a range of health benefits:

    • Besan (gram flour) is rich in protein, fiber, and essential nutrients, making it a healthy alternative to refined flour.
    • Vegetables add vitamins, minerals, and antioxidants to the dish, promoting overall health and well-being.
    • Cheelas are low in calories and high in satiety, making them a filling and satisfying option for weight management.

    Frequently Asked Questions (FAQs) About Vegetable Cheela Rolls 

    Q: Can I make the batter for Vegetable Cheela in advance?

    A: Yes, you can prepare the batter in advance and store it in the refrigerator for up to 24 hours. Just give it a quick stir before cooking the cheelas.

    Q: Can I freeze Vegetable Cheela Rolls for later use?

    A: While it’s best to enjoy besan Vegetable Cheela Rolls fresh, you can freeze them for up to 1 month. Wrap them individually in plastic wrap or foil and store them in an airtight container. Thaw and reheat in a skillet or microwave before serving.

    Q: What other fillings can I use for Vegetable Cheela Rolls?

    A: You can get creative with the fillings for Vegetable Cheela Rolls. Try adding cooked beans, grated cheese, or leftover cooked vegetables for added flavor and variety.

    Congratulations! You have now mastered the art of making besan Vegetable Cheela Rolls, a wholesome and delicious dish that is sure to impress your family and friends. Whether enjoyed as a snack, appetizer, or light meal, these flavorful rolls are a testament to the rich culinary heritage of India. Explore more recipes and culinary inspirations on Manjula’s Kitchen and continue your culinary adventures with confidence and creativity.

    If you liked the recipe here are some other recipes that you may like too 

    Vegetable Cheela: A savory Indian pancake made with mixed vegetables and chickpea flour.

    Palak (Spinach) Paneer: A classic North Indian dish made with spinach and paneer cheese cooked in a creamy tomato-based sauce.

    Shahi Pulao (Vegetable Pulao): A flavorful rice dish made with spiced basmati rice and vegetables.

    Gobi (Cauliflower) Manchurian: Crispy cauliflower florets tossed in a tangy and spicy Indo-Chinese sauce.

    Aloo (Potato) Paratha: Whole wheat flatbread stuffed with spiced mashed potatoes and cooked on a griddle.

    Mango Lassi: A refreshing yogurt-based drink flavored with ripe mangoes and a hint of cardamom.

    Besan Ladoo: Traditional Indian sweet made with roasted chickpea flour, ghee, and sugar.

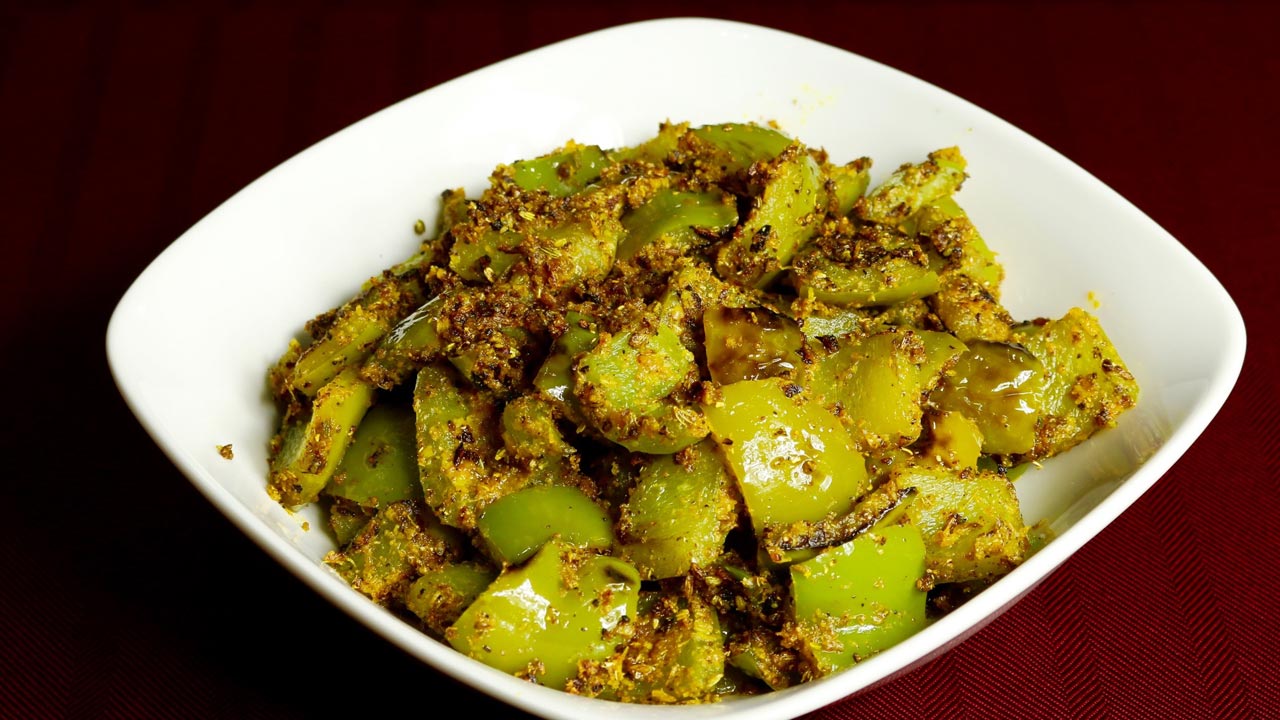
  • Masala Bell Pepper Recipe

    Masala Bell Pepper Recipe

    Masala Bell Pepper

    Masala Bell Pepper (Capsicum)

    Bell pepper is also known as capsicum or shimla mirch. Masala bell pepper with great blend of spices, makes a very enjoyable side dish. This can complement any meal. Masala bell pepper can be served with roti, paratha or puries. I enjoy this with side of dal fry and plain rice.
    5 from 1 vote
    Course vegan
    Cuisine Indian
    Servings 4 people

    Ingredients
      

    • 3 medium Green bell pepper seeded and cubed in 1/2” pieces this will make about 3 cup cubed bell pepper (capsicum, shimla mirch)
    • 2 tbsp oil
    • 1/2 tbsp cumin seeds (jeera)
    • 1/8 tbsp asafetida (hing)
    • 1-1/2 tbsp coconut powder (gola)
    • 1-1/2 tbsp sesame Seed powder (til)
    • 2 tbsp teaspoons coriander powder (dhania)
    • 2 tbsp fennel seeds powder (saunf)
    • 1/2 tbsp Red Chili Powder (lal mirch)
    • 1/4 tbsp Turmeric Powder (haldi)
    • 3/4 tbsp salt
    • 1 tbsp sugar
    • 1/2 tbsp mango powder (amchoor)
    • 1 tbsp Lemon Juice

    Instructions
     

    • In a small bowl mix most of the spices, coconut powder, sesame powder, coriander powder, fennel seeds powder, red chili, turmeric, salt, and sugar. Set aside.
    • In a wide frying pan heat the oil moderately over medium high heat, add cumin seeds as seeds crack add asafetida. Add bell pepper mix well lower the heat to low medium. Cover the pan and let it cook for about 3 minutes.
    • Sprinkle the spice mix. Mix it well coating all the bell pepper. Let it cook about 3-4 minutes covered, do stir in between. Cook the bell peppers until they are tender but still little crisp.
    • Turn off the heat, add the mango powder and lemon juice mix well.
    • Masala bell pepper is ready.
    Tried this recipe?Let us know how it was!


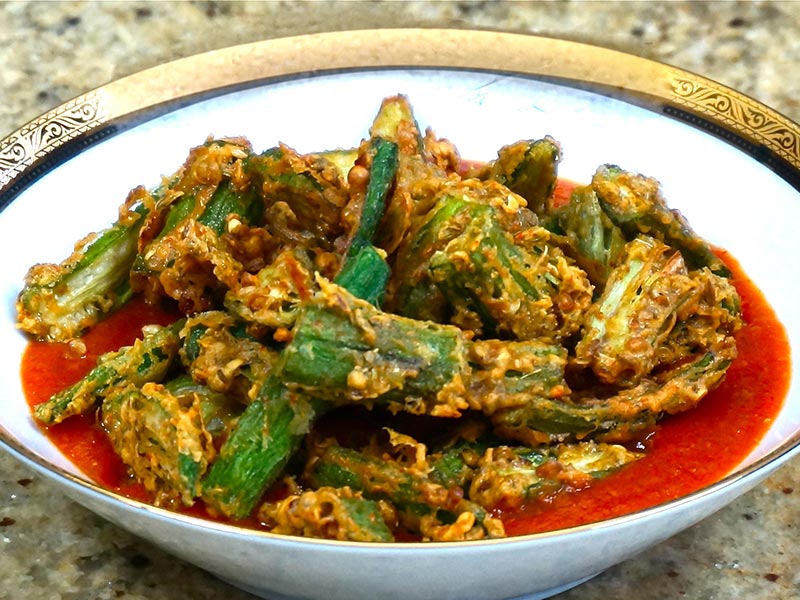
  • Okra Tomato Curry ( Bhindi )

    Okra Tomato Curry ( Bhindi )

    Okra (Bhindi) Tomato Curry

    Okra Tomato Curry

    Crispy okra (bhindi) served with a flavorful tomato curry is a mouthwatering side dish. You will be sure to impress your guests with this unique vegetable dish!
    5 from 1 vote
    Course curry
    Cuisine Indian
    Servings 0

    Ingredients
      

    For Gravy

    • 4 medium tomato puree will make approx. 1-1/2 cup
    • 1/4 -inch piece of ginger
    • 1 tablespoon oil
    • 1/2 teaspoon cumin seeds (Jeera)
    • Pinch of asafetida (Hing)
    • 1 teaspoon coriander powder (dhania)
    • 1/4 teaspoon turmeric (Haldi)
    • 1/2 teaspoon  red chili powder
    • 1/2 teaspoon  salt
    • 1 teaspoon sugar
    • 1 teaspoon corn starch/arrowroot powder

    Fried Okra

    • Approx. ½ pond okra sliced from the center and cut in half to make about 1-3/4 cup cut okra (bhindi)
    • 1/4 cup  besan gram flour
    • 1/2  teaspoon salt
    • 1/2  teaspoon cumin seeds (jeera)
    • 1/2 teaspoon mango powder (amchur)
    • 1 teaspoon fennel seeds coarsely ground (sonff)
    • 1-1/2 teaspoons coriander seeds coarsely ground (dhania)
    • 1/2  teaspoon red chili powder
    • Approx. 3 tablespoons water
    • Oil to fry

    Instructions
     

    Gravy

    • Mix cornstarch with three tablespoons of water and keep aside.
    • Blend the tomatoes and ginger to make tomato puree.
    • Heat the oil in a saucepan over medium high. Test the heat by adding one cumin seed to the oil. If the cumin seed cracks right away, the oil is ready.
    • Add cumin seeds, and asafetida and stir for a few seconds now add coriander; turmeric, red chili, salt, and sugar stir fry for a few seconds and add tomato puree.
    • Cook the tomatoes for about 4-5 minutes, add cornstarch, and cook for about 3 minutes. Gravy should be pourable consistency. Gravy is ready to keep aside.

    Fried Okra

    • In a bowl put the okra and add all the dry ingredients, salt, cumin, mango powder, fennel, coriander, red chili powder and besan (gram flour) mix it well. Add the water slowly okra should be nicely coated with spices but the mix should not be runny.
    • Heat the oil in a frying pan over medium-high heat, the frying pan should have about 1 inch of oil. Oil should be moderately hot when you put okra in oil it should float right away but not change color.
    • Put one okra at a time into the oil and fry till they are golden brown on both sides this should take about four minutes.
    • Take them out over a paper towel.
    • Serve the Okra over gravy; don’t mix it as you should pick up the okra with gravy.

    Notes

    Suggestions
    1. You can prepare the gravy and okra in advance; gravy can be refrigerated for 4-5 days. Fried okra should be stored at room temperature for 3-4 days. Before serving heat, the gravy and heat the gravy in a frying pan like stir fry so they become crunchy and serve over the gravy.
    2. You can serve the fried okra without gravy as a side dish they taste great
    Tried this recipe?Let us know how it was!

  • Palak Paneer

    Palak Paneer

    Palak Paneer

    Palak Paneer (2016)

    Palak Paneer is likely the most popular paneer dish from North India. Creamy spinach with tasty paneer makes a delicious main dish. This recipe was one of my favorite. After so many years of cooking, my family has decided my cooking skills have improved! I wanted to do this recipe again as with modified cooking method. Also I will like to thank you to all of my viewers who have encouraged me over the years. You guys truly inspire me!
    4.66 from 23 votes
    Prep Time 10 minutes
    Cook Time 25 minutes
    Total Time 35 minutes
    Course Main Course
    Cuisine Indian
    Servings 3 people

    Ingredients
      

    • 10 oz spinach washed and clean, about 6 cups packed spinach
    • 1-1/2 cups paneer cubed into bite size, about 1/3 pound of paneer
    • 1 tomato finely chopped, this will make 3/4 of chopped tomato
    • 1 green chili chopped
    • 1 Tbsp ginger chopped
    • 1 Tbsp oil
    • 1/2 tsp cumin seeds jeera
    • 1/8 tsp asafetida hing
    • 1 tsp coriander powder dhania
    • 1/4 tsp turmeric haldi
    • 1/2 tsp red chili powder
    • 1/2 tsp salt adjust to taste
    • 1/2 tsp sugar
    • 1 Tbsp whole wheat flour
    • 1/3 cup heavy cream

    Instructions
     

    • First blanch the spinach, this helps to keep the spinach color bright. To blanch the spinach, boil about 6 cups of water in a saucepan, and let the spinach boil for one minutes. Drain the water and put the spinach in ice cold water for about two minutes. Drain the water.
    • Blend the spinach, ginger and green chili. Spinach should be creamy but not pasty.
    • Soak the cubed paneer in about three cups of hot water, for about 5 minutes or more. This helps to give the paneer soft texture. Set aside.
    • While cooking, spinach can splatter, use larger sauce pan. Heat the oil in a sauce pan, over medium high heat. Test the heat by adding one cumin seed to the oil; if it cracks right away it is ready.
    • Add cumin seed, and asafetida. After cumin seeds crack, add the tomatoes and stir fry for 1-2 minutes. Tomatoes should be tender not mushy. Add coriander, turmeric, red chili powder, salt, and sugar, stir and add the spinach.
    • After spinach comes to boil lower the heat to low, and let the spinach cook for about 5-6 minutes do not cover the pot. This helps keeping the green color of spinach.
    • Mix the flour to 1/2 cup of water and add to the spinach, also add the cream. Mix it well and let it cook for five minutes. If needed add little more water.
    • Drain the paneer and fold it gently with spinach and let it simmer for about five minutes.

    Notes

    Palak paneer is ready, serve with naan, tandoori roti, Paratha.
    Tried this recipe?Let us know how it was!

  • Vegetable Biryani (Instant Pot)

    Vegetable Biryani (Instant Pot)

    A bowl of Vegetable Biryani garnished with fresh mint leaves

    Vegetable Biryani (Instant Pot)

    This next recipe is due to many of you requesting I do a tasty and delicious recipe using the Instant Pot. I decided to try a recipe for "Vegetable Biryani". I have been a little hesitant to do recipes using the Instant Pot. Maybe it's because I have been cooking for so long and I'm set in my habits, or maybe it's my age! I will say I have loved using my Instant Pot more as a pressure cooker and love using it for that purpose! I make lentils and legumes using the Instant Pot and think it's great. Once I use the Instant Pot more and get used to the timings, I think it will allow me to give more precise times for my recipes.
    Vegetable Biryani is a complete, satisfying, one-dish meal. My mother would often say this dish is a fancy name for vegetable pulao. However, I think it is more than that. The secret behind this flavorful Vegetable Biryani is a spice mixture that creates the perfect balance of flavors. Basmati rice with a mix of fresh vegetables combined with this spice mixture turns into a dish of perfection! If you follow my steps, you'll see I try to make this recipe as simple as possible. Vegetable Biryani also makes a great lunch box meal. Make sure to check out the footnotes to see how you can make this dish vegan.
    Hope you enjoy!
    This recipe will serve 3
    5 from 3 votes
    Prep Time 10 minutes
    Cook Time 30 minutes
    Total Time 40 minutes
    Course Main Course
    Cuisine Indian
    Servings 3 people

    Ingredients
      

    • 1 cup long grain rice I preferred Basmati Rice
    • 3 Tbsp Milk
    • 1 pinch Saffron Kesar few strands
    • 2 Tbsp oil or ghee
    • ¼ cup cashews
    • 15 Raisins
    • 1 Tbsp ginger thinly sliced
    • 2 cup mixed vegetables cubed potatoes, carrots, bell pepper, green beans cut into 1-inch pieces, cauliflower florets
    • ¼ cup Plain Yogurt whisked
    • ¼ cup Mint leaves Pudhina finely chopped
    • 1 ¼ cup Water

    Spices

    • 3 whole Green Cardamom Elaichi
    • 6 Cloves Laung
    • 8 Black Peppercorns
    • 1 inch long cinnamon stick Dalchini
    • 2 Bay leaf Tej Patta
    • 1 tsp Cumin seeds Jeera
    • 1 tsp coriander powder
    • 1 tsp fennel seed powder
    • 1 tsp red chili powder adjust to taste
    • ¼ tsp Turmeric Haldi
    • 1 tsp Salt adjust to taste

    Instructions
     

    • In warm milk soak the saffron and keep aside.
    • Soak the rice for about 10 minutes, then drain the water and keep aside.
    • Use the instant pot on sauté mode add ghee after half a minute add cashews and raisins and sauté lightly roast them for about 1 minutes.
    • Add all the whole spices and sauté for 30 seconds, they will become aromatic.
    • Add all the dry spices, coriander powder, fennel seed powder, turmeric, red chili powder and salt stir for few seconds, add vegetables and yogurt mix it well, cleaning sides and making sure vegetable mix spread evenly in the pot.
    • Next spread the rice evenly over the veggies. Spread the mint leaves evenly over rice. Sprinkle saffron milk on top of the rice.
    • Add the water for cooking on top of the rice. Rice should be just immersed under water.
    • You are layering the ingredients do not stir in between the steps. Close the lid with vent in sealing position.
    • Change the instant pot setting to pressure cook mode. Secure the lid, close the pressure valve and cook for 9 minutes at high pressure.
    • After the instant pot beeps, on the instant pot panel you will notice keep warm mode. Cancel the keep warm mode and wait until it releases the pressure and open the pot, that will take about 12 minutes.
    • Open the pot and fluff the rice gently with a fork.

    Notes

    Serve hot with Plain yogurt, Spinach Raita, and my favorite is Salted Mint Lassi
    Making Vegan:
    This is a easy recipe to make vegan, soak saffron in water instead of milk and yogurt you can replace with vegan yogurt or tomato puree.
    Keyword Bhojan, Bondi Raita, cooking shows, Cooking Video, Delicacy, delicious, Desi Khana, Gluten Free, Gourmet food, Homemade, Instant Pot, Jain Cooking, Khana, Lunch Box, Mint Lassi, One Pot Meal, Onion Garlic Free Cooking, Recipe videos, Rice Dish, Sattvic Food, Swaminarayan
    Tried this recipe?Let us know how it was!
  • Spring Quinoa Fruit Salad

    Spring Quinoa Fruit Salad

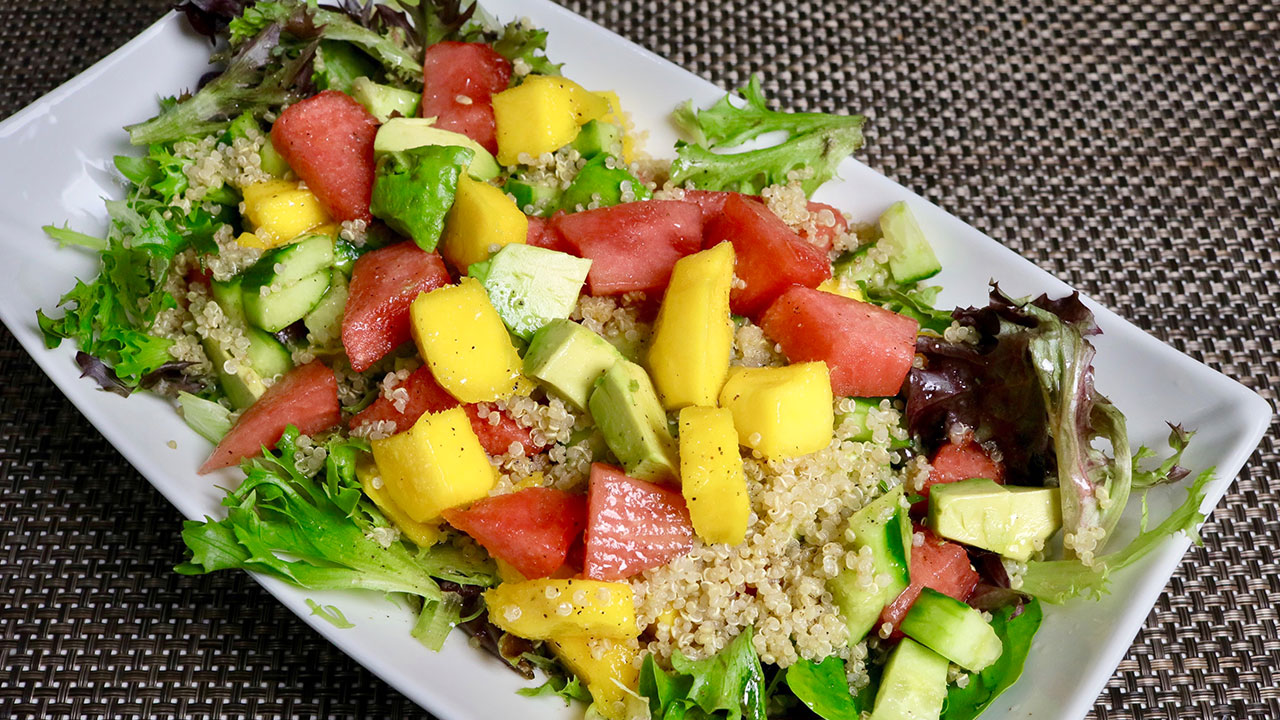
    A vibrant and colorful Spring Quinoa Fruit Salad featuring mixed greens, quinoa, watermelon, mango, cucumber, and avocado.

    Spring Quinoa Fruit Salad

    Spring Quinoa Fruit Salad just perfect for the start of Spring! This is a vibrant, fresh fruit salad with quinoa and homemade ginger and lemon dressing. It is the perfect go-to recipe if you are looking for something simple, light and refreshing in this warmer weather. The quinoa and fruit make it a healthy choice for those who want to eat clean. It also makes for a beautiful presentation, with the watermelon, mangoes, and avocado!
    5 from 1 vote
    Prep Time 10 minutes
    Cook Time 15 minutes
    Total Time 25 minutes
    Course Salad
    Cuisine Indian
    Servings 2 people

    Ingredients


    • 2 cup spring salad this is mix of several greens
    • 1/3 cup quinoa cooked quinoa is cooked just like rice
    • 1 cup watermelon cut into byte size cubes
    • 1 cup mango cut into byte size cubes
    • 1/2 cup cucumber cut into byte size cubes
    • 1/2 avocado cut in small pieces

    For Dressing

    • 1 Tbsp vinegar I am using rice vinegar
    • 1 Tbsp lemon juice
    • 1 Tbsp olive oil
    • 1 tsp sugar
    • 1/2 tsp salt
    • 1/4 tsp black pepper
    • 1 tsp ginger juice*

    Instructions
     

    • For dressing: add all the dressing ingredients together mix it well making sure sugar is dissolved. Set aside. * To make ginger juice shred the ginger using fine shredder or zester and squeeze the juice with fingers.
    • Cook the quinoa like rice 1-part quinoa to 2 parts of water. After quinoa and water comes to boil reduce heat to medium-low, cover, and simmer until all the water has been absorbed, this will take about 12 minutes. Set aside to cool.
    • In a salad bowl layered all the ingredients, spread the greens, watermelon, mango n cucumber, avocado sprinkle the quinoa and drizzle the salad dressing. 

    Notes

    Suggestions:  use your choice of fruits, salad measurements are just for suggestion,
    Quinoa, can be prepared in advance, I make quinoa always extra and I use the quinoa with almost every salad I make.
    Salad dressing also can be prepare in advance, this is very light dressing. I make this dressing in large quantity, I always have ready to use.
    Tried this recipe?Let us know how it was!

  • Grilled Paneer

    Grilled Paneer

    Grilled Paneer

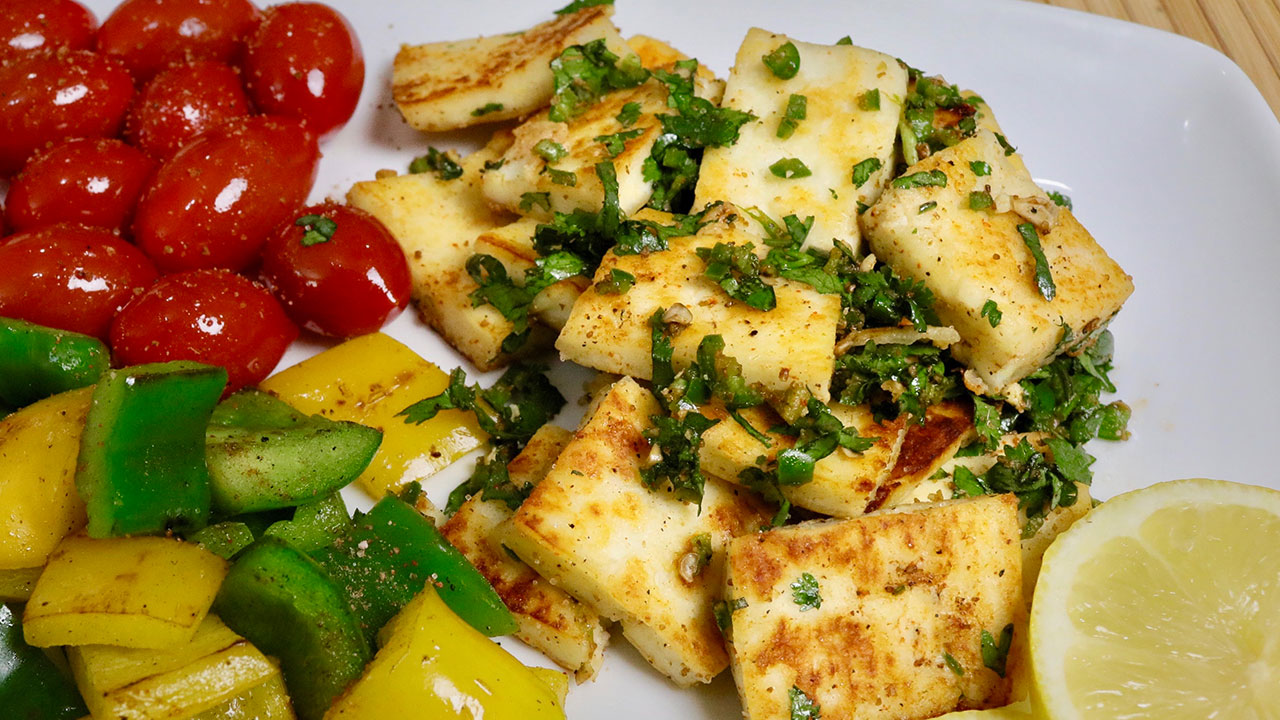
    Grilled Paneer (Indian Cottage Cheese Appetizer)

    Grilled Paneer makes for a great appetizer that compliments any main course dish. Grilled paneer is quick and easy to put together, making it the perfect party appetizer. I will be preparing this appetizer a lot this holiday season because it is perfect to serve at get together and bring to potlucks.
    5 from 1 vote
    Prep Time 5 minutes
    Cook Time 15 minutes
    Total Time 20 minutes
    Course Appetizer
    Cuisine Indian
    Servings 4 people

    Ingredients


    • 1 1/2 cup paneer cubed in 1” square and 1/2” thick
    • 1/2 cup bell pepper cubed, yellow and green to give the color
    • 1/2 cup cherry tomatoes
    • 2 tsp oil
    • 1 Tbsp green chili finely chopped, optional
    • 2 Tbsp cilantro finely chopped, hara dhania
    • 1 tsp fresh lemon juice

    Spice Mix

    • 1/2 tsp salt
    • 1/2 tsp black salt
    • 1/2 tsp roasted cumin seed powder
    • 1/8 tsp black pepper
    • 1/8 tsp red chili powder

    Instructions
     

    • Mix the spice mix and keep aside. you can make this spice mix in a large quantity and keep it ready to go whenever you need it.
    • Heat heavy flat frying pan on low medium heat, add the oil in to warm frying pan. Spread the paneer cubes don’t over lap them. Grill the paneer from both sides, this should take about 2 minutes. Take them out from frying pan.
    • Use the same pan and grill the bell pepper, for about 2 minutes stirring occasionally, bell pepper will have some brown spots. Take them out from frying pan.
    • Use the same pan and grill the tomatoes for about 1-2 minutes, tomatoes will have some blisters. Take them out from frying pan.
    • In a bowl toss the paneer with spice mix, use the spice mix about in half the quantity, adjust for you taste, cilantro, green chili and lemon juice.
    • Serve the grilled paneer with side of bell pepper and tomatoes and sprinkle little spice mix over bell pepper and tomatoes.
    • A healthy and delicious appetizer is ready to serve.

    Notes

    Note: This spice mix known as chaat masala can also be used to spice up any food. It especially tastes good when it is sprinkled over sliced cucumber and tomato or over pakoras. You can make the chaat masala in a larger quantity and keep it ready to go whenever you need it.
    Keyword Appetizer, Grilled Paneer and Veggies, Masala Paneer, Party Food
    Tried this recipe?Let us know how it was!

    Grilled Paneer Recipe 

    Grilled paneer recipe is a delightful way to enjoy the rich flavors of Indian cuisine. Grilled paneer is a versatile dish that is kid friendly, quick & easy, party recipe that can be served as an appetizer, side dish, or even a main course. This recipe combines the creaminess of paneer with the smoky char of the grill, resulting in a dish that is both flavorful and satisfying. Whether you’re hosting a backyard barbecue or simply craving a taste of India, this Indian grilled paneer recipe is sure to please your palate.

    Indian Grilled Paneer: A Flavorful Delight 

    When it comes to Indian cuisine, grilled paneer holds a special place in the hearts of many food enthusiasts. The process of grilling adds a depth of flavor to the paneer, while still allowing its creamy texture to shine through. This paneer grilled recipe is perfect for those looking to add a touch of Indian flair to their meals. By marinating the paneer in a blend of spices and yogurt, you’ll create a dish that is bursting with flavor from the very first bite.

    Preparation 

    To begin, place the cubed paneer in a large bowl and set aside. In a separate bowl, whisk together the yogurt, olive oil, lemon juice,  ground cumin, ground coriander, turmeric, salt, and pepper. Pour the marinade over the paneer, making sure to coat each piece evenly. Cover the bowl and let the paneer marinate in the refrigerator for at least 30 minutes, allowing the flavors to meld together.

    Grilling the Paneer 

    Once the paneer has finished marinating, preheat your grill to medium-high heat. Thread the paneer cubes onto skewers, leaving a small amount of space between each piece. This will allow the heat to circulate evenly around the paneer, ensuring that it cooks evenly on all sides. Place the skewers on the grill and cook for 2-3 minutes per side, or until the paneer is lightly charred and heated through.

    Tips for Perfect Grilled Paneer 

    Use firm or extra-firm paneer for grilling, as softer varieties may crumble on the grill.

    Soak wooden skewers in water for at least 30 minutes before threading the paneer to prevent them from burning.

    Experiment with different marinade ingredients, such as ginger, chili powder, or garam masala, to customize the flavor of your grilled paneer.

    Variations on Grilled Paneer

    While this Indian grilled paneer recipe is delicious as is, feel free to get creative with your marinade and seasoning choices. For a spicy kick, add chopped green chilies or a dash of cayenne pepper to the marinade. You can also incorporate fresh herbs like cilantro or mint for a burst of freshness. Serve the grilled paneer with a side of mint chutney or tamarind sauce for an extra layer of flavor.

    Benefits of Grilled Paneer

    Grilled paneer is not only delicious, but it also offers several health benefits. Paneer is a good source of protein, calcium, and phosphorus, making it an excellent addition to a balanced diet. Grilling the paneer helps to retain its nutrients while adding a smoky flavor that enhances its overall taste. Additionally, paneer is low in carbohydrates, making it a suitable option for those following a low-carb or keto diet.

    Frequently Asked Questions (FAQs)

    Can I grill paneer without skewers?

    Yes, you can grill paneer directly on the grill grates or use a grill basket to prevent it from falling through.

    How long does grilled paneer last?

    Grilled paneer can be stored in the refrigerator for up to 3-4 days. Simply reheat it in the microwave or on the grill before serving.

    Can I freeze grilled paneer?

    While you can freeze grilled paneer, its texture may change slightly upon thawing. It’s best to freeze the paneer before grilling and marinating it.

    Can I make grilled paneer in the oven?

    Yes, you can bake paneer in the oven at 400°F for 15-20 minutes, or until it is lightly browned and heated through.

    Other Recipes on Manjula’s Kitchen

    If you’re looking to explore more Indian recipes, appetizers, beverages, and desserts, be sure to check out the following links on Manjula’s Kitchen. Here are some links to recipes on Manjula’s Kitchen official website: Paneer Tikka Masala, Chana Chaat (Spicy Chickpea Salad), Pav Bhaji (Spicy Vegetable Hash with Buns), Raj Kachori (Crunchy Chaat), Vegetable Biryani. These recipes should offer you a flavorful experience straight from Manjula’s Kitchen.

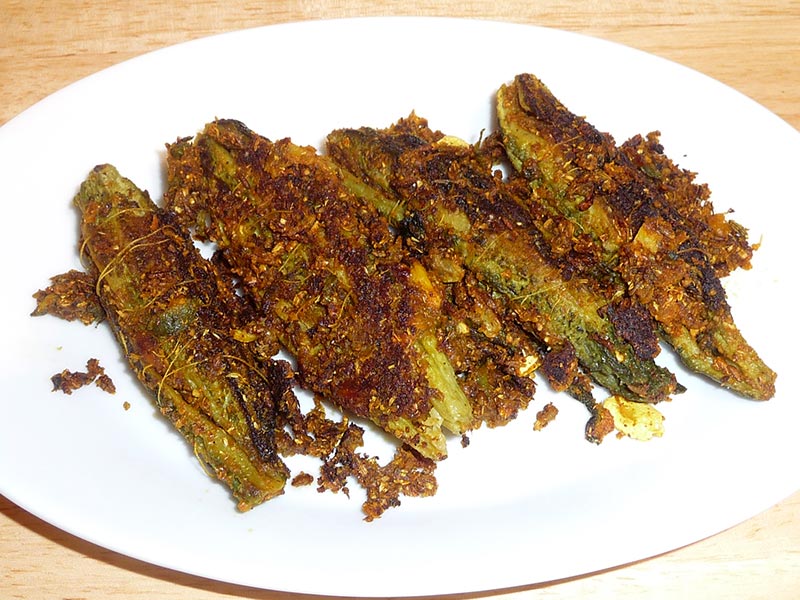
  • Stuffed Karela (Bitter Melon)

    Stuffed Karela (Bitter Melon)

    Stuffed Karela (Bitter Melon)

    Stuffed Karela (Bitter Melon)

    Stuffed karela makes a great side dish to any meal. Karelas have many health benefits including a home remedy for diabetes.
    5 from 3 votes
    Prep Time 10 minutes
    Cook Time 20 minutes
    Marinating Time 1 hour
    Total Time 30 minutes
    Course Side Dish
    Cuisine Indian
    Servings 4 people

    Ingredients
      

    For the Marinate:

    • 4 karela bitter melon
    • 1 tbsp salt
    • 1 tbsp lemon juice

    For the Filling

    • 2 tbsp oil
    • 1 tsp cumin seeds jeera
    • 1/8 tsp asafetida hing
    • 2 tbsp besan gram flour
    • 1 tbsp coriander powder dhania
    • 1 tbso fennel seed powder saunf
    • 1-1/2 tsp salt
    • 1/2 tsp turmeric haldi
    • 1/2 tsp red chili powder
    • 1-1/2 tbsp mango powder amchoor

    For Cooking

    • 2 tbsp oil
    • 1/2 tsp salt
    • also need thread to wrap

    Instructions
     

    Preparing the Kerala

    • Wash karelas thoroughly and using a knife, scrape the skin. Set the scrapes aside.
    • Make a slit in the karelas length wise and remove the seeds. Add karelas and the skin scrapings to a bowl. Mix and sprinkle with salt and lemon juice. Let it marinate for at least an hour.
    • Squeeze the karelas to remove all the marinade. Wash karelas twice with hot water and then squeeze out all the water. Separate the scrapings from the whole karelas.

    Preparing the Filling:

    • Heat the oil in a saucepan. Test the heat by adding one cumin seed to the oil; if the seed cracks right away, the oil is ready. Add the cumin seeds and asafetida to the oil. After the cumin seeds crack, add the karela scrapings and stir fry for about 2 minutes.
    • Add gram flour (besan) and stir-fry for another minute.
    • Add all the remaining dry spices: coriander powder, fennel powder, turmeric, chili powder, and mango powder. Sauté for a minute and then turn off the heat.
    • Stuff the split karelas with this spice mixture (there should be some spice mix remaining, which will be used later). Tie the karelas with a thread so that the stuffing does not come out while cooking.

    Cooking the Stuffed karelas:

    • Add 2 tablespoons of oil in a sauce pan over medium heat. Spread the stuffed karelas in the pan and sprinkle with salt. Cover the pan and let it cook for about 2 minutes.
    • Turn the karelas over to the uncooked side and cook for about 1 minute. Repeat until all four sides of the karelas are cooked.
    • Sprinkle 2 tablespoons of water and the remaining spice mixture over the karelas. Cover the pan and let it cook for 2 more minutes.
    • Remove the lid to see if the karelas are tender. Gently turn them over a few more times, making sure they are covered with the spice mixture.

    Notes

    Notes
    Stuffed karela can be served hot or cold and can be refrigerated up to a week.
    Variations
    For a slightly sweeter taste add 2 tablespoons of sugar to the cooked spice filling, prior to stuffing the karela.
    I like to Serve Karela with Urad Dal Tadka, Mixed Dal, Dal Makhini and Rice
    Keyword Bitter Melon, Diabetic Friendly, Healthy Side Dish
    Tried this recipe?Let us know how it was!