Category: Special Occasion Recipes

Special Occasion Recipes: Celebrate with Delicious Indian Vegetarian Dishes

In Indian culture, food is an integral part of every celebration, festival, and special occasion. Whether it’s a grand wedding, a religious festival, or a simple family get-together, the menu is always elaborate, reflecting the richness of the Indian culinary heritage. Special occasions call for special dishes, and when it comes to Indian cuisine, the options are endless. From mouth-watering appetizers to sumptuous main courses and decadent desserts, Indian vegetarian recipes can make any celebration truly unforgettable.

The Importance of Food in Indian Celebrations

Food plays a central role in Indian celebrations, symbolizing prosperity, happiness, and togetherness. Each dish is thoughtfully prepared, using ingredients that are in harmony with the occasion’s significance. Traditional recipes passed down through generations often take center stage, with a focus on flavors, textures, and presentation.

Indian vegetarian cuisine, in particular, offers a wide range of options that cater to various dietary preferences and religious practices. These recipes are not only delicious but are also steeped in cultural and regional significance, making them ideal for special occasions.

Must-Try Indian Vegetarian Recipes for Special Occasions

Paneer Lababdar

Paneer Lababdar is a rich and creamy dish made with paneer (Indian cottage cheese) cooked in a tomato-based gravy. The addition of cream and butter gives it a luxurious texture, making it perfect for a festive meal. Serve it with naan or pulao for a complete experience.

Dum Aloo

Dum Aloo is a popular dish from North India, where baby potatoes are cooked slowly in a spicy yogurt-based gravy. The slow cooking process, known as “dum,” ensures that the flavors are deeply infused into the potatoes, making it a favorite for special occasions.

Malai Kofta

Malai Kofta is a classic dish that features soft, melt-in-the-mouth koftas (dumplings) made from paneer, potatoes, and nuts, simmered in a creamy tomato gravy. It’s a dish that’s sure to impress your guests and is often served at weddings and celebrations.

Pulao with Nuts and Raisins

A fragrant and flavorful rice dish, pulao is often prepared with a variety of spices, nuts, and raisins. This dish is a staple at Indian weddings and festivals, offering a delightful combination of sweet and savory flavors.

Gajar Ka Halwa

No Indian celebration is complete without dessert, and Gajar Ka Halwa (carrot pudding) is a must-have. Made with grated carrots, milk, sugar, and ghee, this dessert is garnished with nuts and is often served during Diwali and other festive occasions.

Puran Poli

Puran Poli is a traditional Maharashtrian sweet flatbread stuffed with a filling made from chana dal (split chickpeas) and jaggery. This delicacy is commonly prepared during festivals like Holi and Ganesh Chaturthi and is enjoyed by people of all ages.

Kofta Biryani

Biryani is synonymous with celebration, and Kofta Biryani adds a vegetarian twist to this classic dish. Made with spiced koftas, basmati rice, and aromatic spices, this dish is layered and slow-cooked to perfection, making it ideal for festive gatherings.

Dahi Bhalla

Dahi Bhalla is a popular North Indian snack made from deep-fried lentil balls soaked in yogurt and topped with chutneys and spices. This dish is a favorite during festivals like Holi and Diwali and is loved for its tangy and sweet flavors.

Shahi Paneer

Shahi Paneer is a royal dish that lives up to its name. “Shahi” means royal, and this dish is made with paneer cooked in a rich and creamy gravy of cashews, almonds, and cream. It’s a dish that is often reserved for the most special occasions.

Kheer

Kheer, a rice pudding, is one of the most beloved Indian desserts, often prepared for festivals and celebrations. Made with rice, milk, sugar, and flavored with cardamom and saffron, kheer is garnished with nuts and dried fruits, making it a fitting end to a celebratory meal.

Tips for Planning a Special Occasion Menu

Balance the Menu: Ensure that your menu has a good mix of appetizers, main courses, and desserts. Include a variety of flavors and textures to keep your guests engaged.

Consider Dietary Preferences: Indian cuisine offers a range of vegetarian options, but it’s also important to consider other dietary needs, such as vegan or gluten-free preferences.

Plan Ahead: Special occasion meals often require elaborate preparation. Plan your menu in advance and do as much prep work as possible the day before the event.

Presentation Matters: The way you present your food can enhance the dining experience. Use garnishes, elegant serving dishes, and thoughtful plating to make your dishes visually appealing.

Conclusion

Indian vegetarian cuisine offers a rich tapestry of flavors and dishes that are perfect for any special occasion. Whether you’re celebrating a wedding, a festival, or just gathering with loved ones, these recipes will add a touch of festivity and joy to your table. From creamy paneer dishes to decadent desserts, each dish is crafted to make your celebration memorable.

For more special occasion recipes, visit Manjula’s Kitchen – Special Occasion Recipes. Explore a world of flavors and find the perfect dishes to make your celebration truly special.

  • Rice and Potato Cutlets

    Rice and Potato Cutlets

    Rice and Potato Cutlets

    Rice and Potato Cutlets

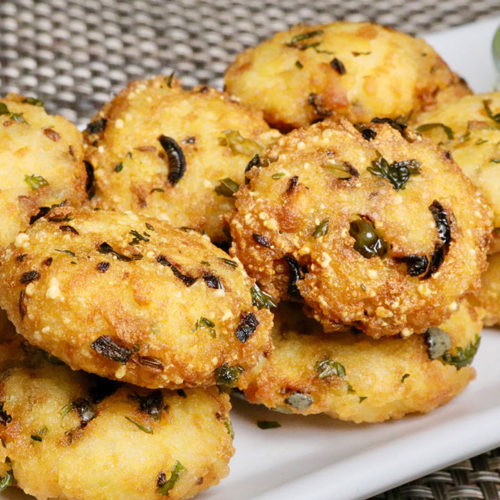
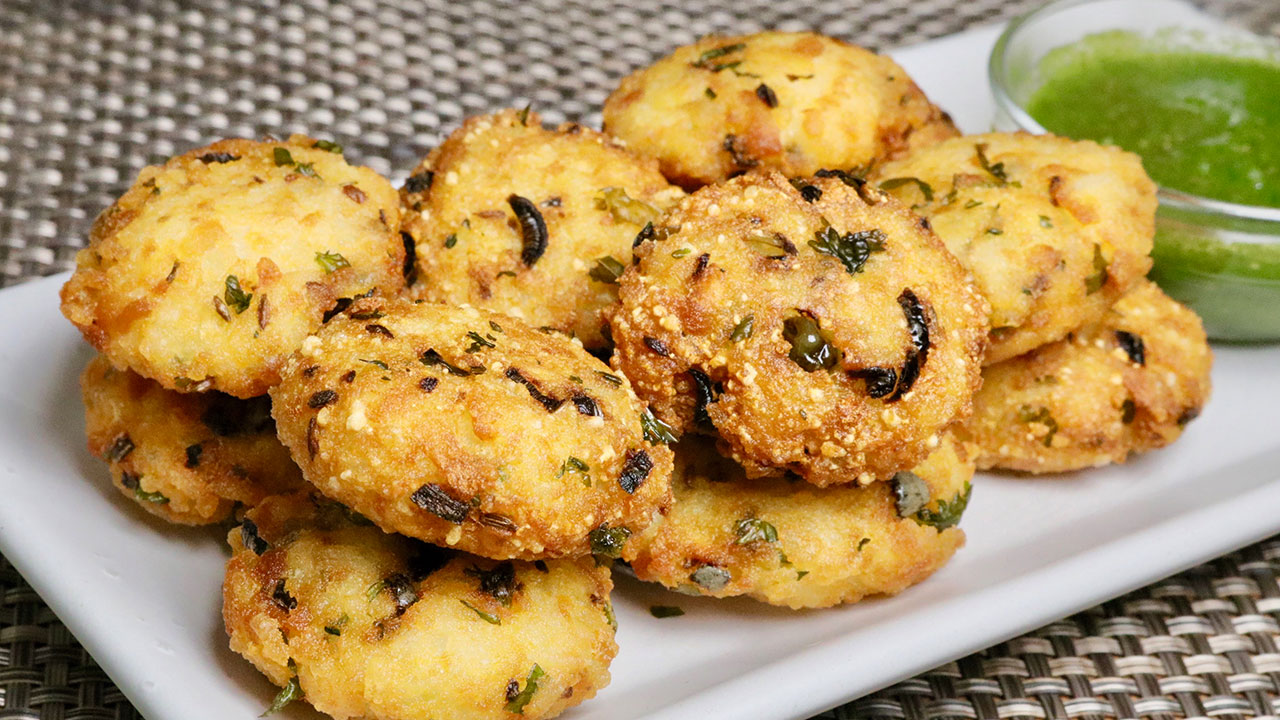
    These Rice and Potato Cutlets are a tasty treat as a tea time snack or you can also serve them as an appetizer. They are crispy outside and soft inside. This is a quick and easy recipe and a good way to use left over rice.
    4.80 from 5 votes
    Prep Time 5 minutes
    Cook Time 10 minutes
    Total Time 15 minutes
    Course Appetizer
    Cuisine Indian
    Servings 3 people

    Ingredients


    • 1 cup rice cooked
    • 1 cup potatoes boiled, peeled, and shredded
    • 1/2 tsp salt
    • 1/2 tsp cumin seeds jeera
    • 1 Tbsp green chili chopped
    • 1 tsp ginger finely chopped
    • 2 Tbsp cilantro finely chopped, hara dhania
    • 1/4 tsp fresh lemon juice

    Instructions
     

    • In a bowl mash the rice, rice should be semi mashed add potatoes mix it well now add all the other ingredients, salt, cumin seeds, green chilies, ginger, cilantro and lemon juice. Mix should be firm and will be consistency of a sticky dough.
    • Grease your palm and divide them into 12 pieces I wanted to make them in small size. Roll them in patties.
    • Heat the oil in a frying pan on medium high heat. Frying pan should have about 1” of oil. Oil should be moderately hot. Test the oil putting a small piece of mix, this should up right of way. Drop the cutlets slowly into it, taking care not to overlap them.
    • Fry the cutlets until they are golden brown, turning occasionally. This should take about 5 minutes. Take them out over a paper towel.
    • For best taste serve them hot. Cutlets taste great with cilantro chutney.

    Notes

    1. Potatoes should be not over cooked, that will make mix soft and cutlets can break in the oil while frying.
    2. If oil is not hot enough cutlets will be greasy. Rice and potato min should not be very soft otherwise cutlets will break in oil.
    Tried this recipe?Let us know how it was!

    Rice and Potato Cutlets Recipe Expansion

    Introduction to Rice Potato Cutlet Recipe

    Welcome to an expanded version of the Rice Potato Cutlets recipe from Manjula’s Kitchen! These delightful cutlets are a perfect way to make the most of your leftover rice while indulging in a crispy, flavorful snack. If you’ve been wondering how to transform your surplus rice into something delicious, look no further. Let’s dive into the expanded recipe, exploring tips, variations, benefits, and frequently asked questions along the way.

    Tips for Perfect Rice Cutlets

    • Choosing the Right Rice: For the best results, opt for cooked leftover rice that is slightly dry. This texture helps in binding the ingredients together, resulting in firmer cutlets.
    • Flavor Enhancement: Enhance the flavor of your cutlets by adding various spices like cumin powder, garam masala, or chaat masala to the mixture. You can also incorporate finely chopped herbs like cilantro or mint for a refreshing twist.
    • Crispy Coating: Achieve a crispy exterior by coating the cutlets in breadcrumbs or semolina before frying. This not only adds texture but also prevents them from becoming soggy.
    • Oil Temperature: Maintain the oil at a moderate temperature while frying to ensure even cooking and a golden-brown crust. Avoid overcrowding the pan, which can lower the oil temperature and lead to greasy cutlets.
    • Make-Ahead Option: Prepare the cutlets ahead of time and refrigerate them for up to a day. This makes them perfect for parties or quick snacks whenever cravings strike.


    Variations of Rice Potato Cutlet

    • Vegetable Medley: Incorporate finely diced vegetables like carrots, peas, or bell peppers into the mixture for added color and nutrition. Sauté them briefly before mixing with the rice and potatoes.
    • Cheesy Delight: Add grated cheese to the mixture for a gooey, indulgent filling. Cheddar, mozzarella, or paneer are excellent choices that melt beautifully when fried.
    • Spicy Kick: Boost the heat by including chopped green chilies or a dash of chili powder in the mixture. Adjust the spiciness according to your preference for a flavorful kick.
    • Protein Power: Amp up the protein content by adding cooked lentils, chickpeas, or tofu to the mixture. This not only enhances the nutritional value but also adds a satisfying texture.
    •  

    Benefits of Rice Cutlets

    • Utilizes Leftovers: This recipe provides a creative solution for using up leftover rice, minimizing food waste while creating a delicious snack or appetizer.
    • Budget-Friendly: With simple ingredients that are often already available in the kitchen, rice cutlets offer an economical way to enjoy a satisfying dish without breaking the bank.
    • Customizable: The versatility of this recipe allows for endless variations to suit individual tastes and dietary preferences. Whether you prefer a mild flavor or crave something spicy, you can customize the cutlets to your liking.
    • Kid-Friendly: Children tend to love the crispy texture and mild flavors of rice cutlets, making them a convenient option for family meals or lunchboxes.


    FAQs about Leftover Rice Cutlet Recipe

    • Can I freeze the uncooked cutlets? 

    • Yes, you can freeze the uncooked cutlets for later use. Place them in a single layer on a baking sheet and freeze until solid, then transfer to a freezer-safe container. When ready to cook, thaw them in the refrigerator overnight before frying.


    • Can I bake the cutlets instead of frying them? 

    • While frying yields the crispiest results, you can bake the cutlets for a healthier alternative. Arrange them on a baking sheet lined with parchment paper and bake in a preheated oven at 375°F (190°C) for 25-30 minutes, flipping halfway through, until golden brown.


    • Can I use brown rice instead of white rice? 

    • Yes, you can substitute brown rice for white rice in this recipe. Keep in mind that brown rice has a firmer texture, so you may need to adjust the amount of potato or binding agent accordingly.


    • What dipping sauces pair well with rice cutlets? 

    • Rice cutlets pair well with a variety of dipping sauces, such as mint chutney, tamarind chutney, or ketchup. Get creative and experiment with different flavors to find your favorite combination.


    Exploring Other Recipes on Manjula’s Kitchen

    If you’re looking to explore more Indian recipes, appetizers, beverages, and desserts, be sure to check out the following links on Manjula’s Kitchen. Here are some links to recipes on Manjula’s Kitchen official website: Paneer Tikka Masala, Chana Chaat (Spicy Chickpea Salad), Pav Bhaji (Spicy Vegetable Hash with Buns), Raj Kachori (Crunchy Chaat), Vegetable Biryani

  • Chilli Paneer (Indo-Chinese Dish)

    Chilli Paneer (Indo-Chinese Dish)

    Chilli Paneer

    Chilli Paneer

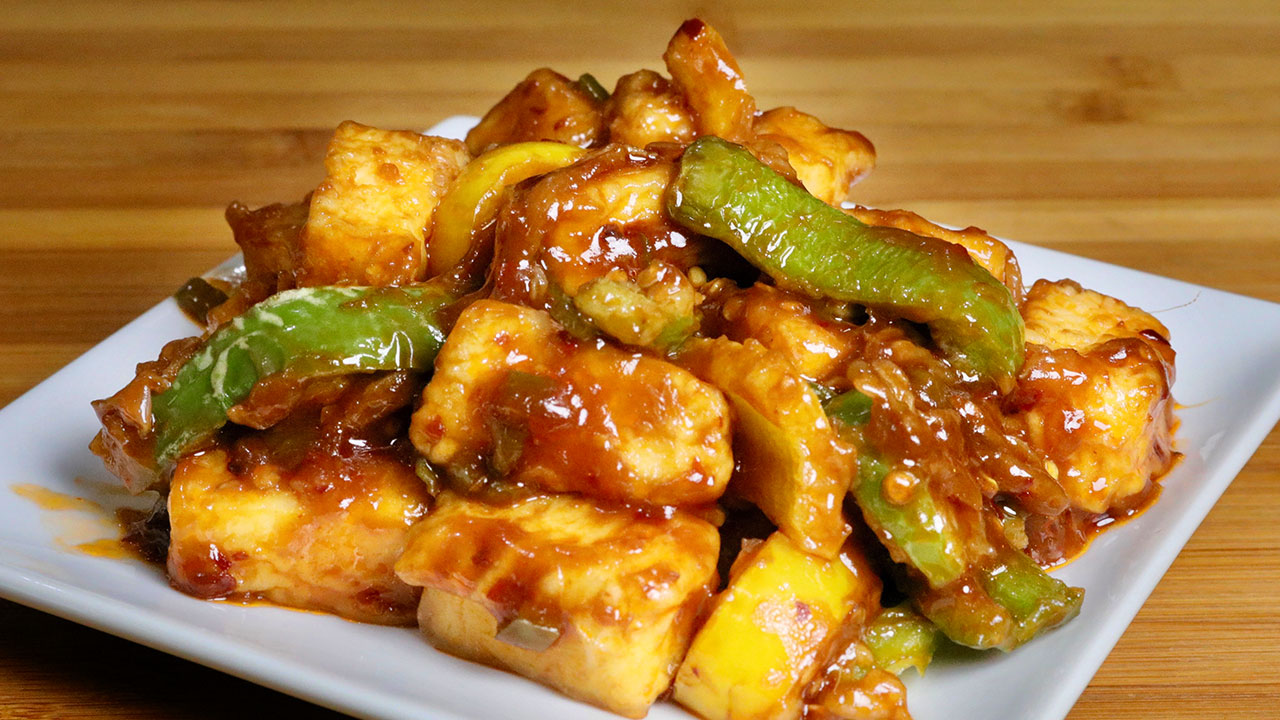
    Chilli Paneer is a popular Indo-Chinese dish. Chilli Paneer makes a spicy flavorful starter at parties especially for many of my friends who enjoy the spicy food. Chilli Paneer can also be served as a side dish. This is absolutely delicious and easy to make spicy snack savored by all.
    5 from 4 votes
    Prep Time 5 minutes
    Cook Time 10 minutes
    Total Time 15 minutes
    Course Appetizer
    Cuisine Indian, Indochinese
    Servings 6 people

    Ingredients
      

    • 6 oz paneer cut into bite sized pieces
    • 1 cup bell pepper sliced, capsicum, Shimla mirch, I am using yellow and green bell pepper for color

    For Batter

    • 2 Tbsp all-purpose flour plain flour, maida
    • 2 Tbsp corn starch or arrow root powder
    • 1/2 tsp salt

    For Sauce

    • 2 Tbsp oil canola or vegetable oil
    • 1 Tbsp ginger shredded, adrak
    • 1 Tbsp green chili chopped
    • 1 tsp chili flakes
    • 2 Tbsp soy sauce
    • 1 Tbsp vinegar
    • 1 Tbsp tomato paste
    • 1-1/2 tsp corn starch or arrow root powder
    • 1/2 cup water

    Instructions
     

    • I am using store bought paneer, texture is not very soft to give the paneer softer texture soak the paneer for at least 10 minutes in hot water with few drops of lemon juice.
    • To make batter mix flour, corn starch, and salt in a bowl. Add the water slowly to make a smooth batter (batter should be consistency of pancake batter or dosa batter).
    • Heat at least 1/2 inch of oil in a frying pan over medium high heat. Oil should be moderately hot.
    • Dip the paneer into the batter, making sure it is completely covered by the batter. Then drop the paneer pieces slowly into oil in the frying pan. (do not overlap them)
    • Fry the paneer in small batches. Fry them turning occasionally, until they are very light golden brown. Take them out over paper towel.
    • Do same with bell pepper.
    • For sauce heat the oil in sauce pan over medium heat; add ginger, and green chili stir for about one minutes. Add all the ingredients for sauce except corn starch, (soy sauce, vinegar, chili flakes, and tomato paste), Stir for 1 minutes. mix water and corn starch and add to the sauce. Cook for another two minutes, sauce should be thick consistency. Sauce gets thicker as it sits.
    • Add paneer, and bell pepper into sauce and serve hot.
    Tried this recipe?Let us know how it was!

    Chilli Paneer Recipe: Irresistible Appetizer Chilli Paneer:

    Chilli Paneer is a delectable appetizer commonly found in party recipes and snack menus. It’s a savory Indo-Chinese dish that combines the succulence of paneer (Indian cottage cheese) with a flavorful chili-infused sauce. The dish typically involves frying paneer cubes until they’re golden brown and then tossing them in a tantalizing sauce made from chili peppers, ginger, soy sauce, and other spices

    The result is a mouthwatering fusion of textures and flavors, with the paneer offering a creamy contrast to the spicy kick of the sauce. Chilli Paneer is a perfect addition to any gathering, offering a delightful combination of heat, sweetness, and tanginess that’s sure to please any palate.

    Indulge in the delectable flavors of chilli paneer with this easy-to-follow recipe paneer chilli. Whether you’re a fan of Indo-Chinese cuisine or simply looking to add a spicy twist to your meal, this dish is sure to satisfy your taste buds. Made with succulent cubes of paneer (Indian cottage cheese) and a flavorful blend of spices, this chilli paneer recipe is a crowd-pleaser.

    Step 1: Preparing the Ingredients

    Before diving into the cooking process, gather all the necessary ingredients for making chilli paneer. You’ll need fresh paneer, vibrant bell peppers, ginger, green chilies, soy sauce, chili sauce, ketchup, cornstarch, and a few pantry staples like salt and oil. Ensure that your ingredients are prepped and ready to go before you start cooking.

    Step 2: Marinating the Paneer

    Begin by marinating the paneer cubes in a tantalizing mixture of soy sauce, chili sauce, and cornstarch. This step allows the paneer to absorb the flavors, resulting in a more vibrant and flavorful dish. Let the paneer marinate for at least 15-20 minutes to ensure maximum flavor infusion.

    Step 3: Stir-frying the Ingredients

    Heat oil in a pan or wok over medium-high heat. Add finely chopped garlic, ginger, and green chilies to the hot oil, and sauté until fragrant. Then, toss in the diced bell peppers, stirring constantly until they’re slightly softened yet still retain their crunch. This colorful medley of vegetables adds both flavor and texture to the paneer chilli.

    Step 4: Adding the Marinated Paneer

    Once the vegetables are cooked to perfection, gently add the marinated paneer cubes to the pan. Be careful not to overcrowd the pan, as you want the paneer to brown evenly. Allow the paneer to cook undisturbed for a few minutes, allowing it to develop a golden crust before flipping each piece to ensure even cooking.

    Step 5: Sauce Preparation

    In a separate bowl, mix together soy sauce, chili sauce, and ketchup to create a savory and tangy sauce for the chilli paneer. Adjust the quantities according to your preference for spiciness and sweetness. Once combined, pour the sauce over the cooked paneer and vegetables, tossing everything together until evenly coated.

    Step 6: Garnishing and Serving

    To finish off this mouthwatering dish, garnish the chilli paneer and fresh coriander leaves. These vibrant greens not only add a pop of color but also enhance the overall flavor profile of the dish. Serve the cheese chilli paneer hot with steamed rice or crispy noodles for a complete and satisfying meal experience.

    Tips for Perfect Chilli Paneer:

    • For extra heat, add more green chilies or a dash of hot sauce to the dish.
    • To make the chilli paneer more indulgent, sprinkle some grated cheese on top just before serving for a cheesy twist.
    • Experiment with different vegetables like mushrooms, broccoli, or baby corn to customize the dish to your liking.

    Variations of Chilli Paneer:

    • Dry Chilli Paneer: If you prefer a drier version of chilli paneer, simply reduce the amount of sauce added to the dish. This results in a more intense flavor and a slightly crispy texture.
    • Gravy Chilli Paneer: To create a saucier version of chilli paneer, add more water or vegetable broth to the sauce mixture and simmer until it reaches your desired consistency. This is perfect for drizzling over steamed rice or noodles.

    Benefits of Chilli Paneer:

    • High Protein: Paneer is a rich source of protein, making it an excellent choice for vegetarians and vegans looking to increase their protein intake.
    • Rich in Calcium: Paneer is also loaded with calcium, which is essential for maintaining strong and healthy bones.
    • Versatile: Chilli paneer can be enjoyed as a standalone dish or paired with other Indian or Chinese favorites like fried rice or noodles.

    FAQs about Chilli Paneer:

    Q: Can I use tofu instead of paneer in this recipe?

    A: Yes, you can easily substitute tofu for paneer if you’re looking for a vegan alternative. Just make sure to press the tofu to remove excess moisture before marinating and cooking.

    Q: How spicy is this dish?

    A: The spiciness of chilli paneer can be adjusted according to your preference. Feel free to increase or decrease the amount of green chilies or chili sauce to suit your taste buds.

    Q: Can I make this dish ahead of time?

    A: While chilli paneer is best enjoyed fresh, you can prepare the ingredients ahead of time and store them separately in the refrigerator. Simply stir-fry everything together just before serving for optimal flavor and texture.

    Other Recipes on Manjula’s Kitchen

    If you’re looking to explore more Indian recipes, appetizers, beverages, and desserts, be sure to check out the following links on Manjula’s Kitchen. Here are some links to recipes on Manjula’s Kitchen official website:

    Paneer Tikka Masala Recipe

    Chana Chaat (Spicy Chickpea Salad) Recipe

    Pav Bhaji (Spicy Vegetable Hash with Buns) Recipe

    Raj Kachori (Crunchy Chaat) Recipe

    Vegetable Biryani Recipe
    These recipes should offer you a flavorful experience straight from Manjula’s Kitchen.

  • Masala Paratha (Besan Ka Masala Paratha)

    Masala Paratha (Besan Ka Masala Paratha)

    Masala Paratha

    Besan Ka Masala Paratha

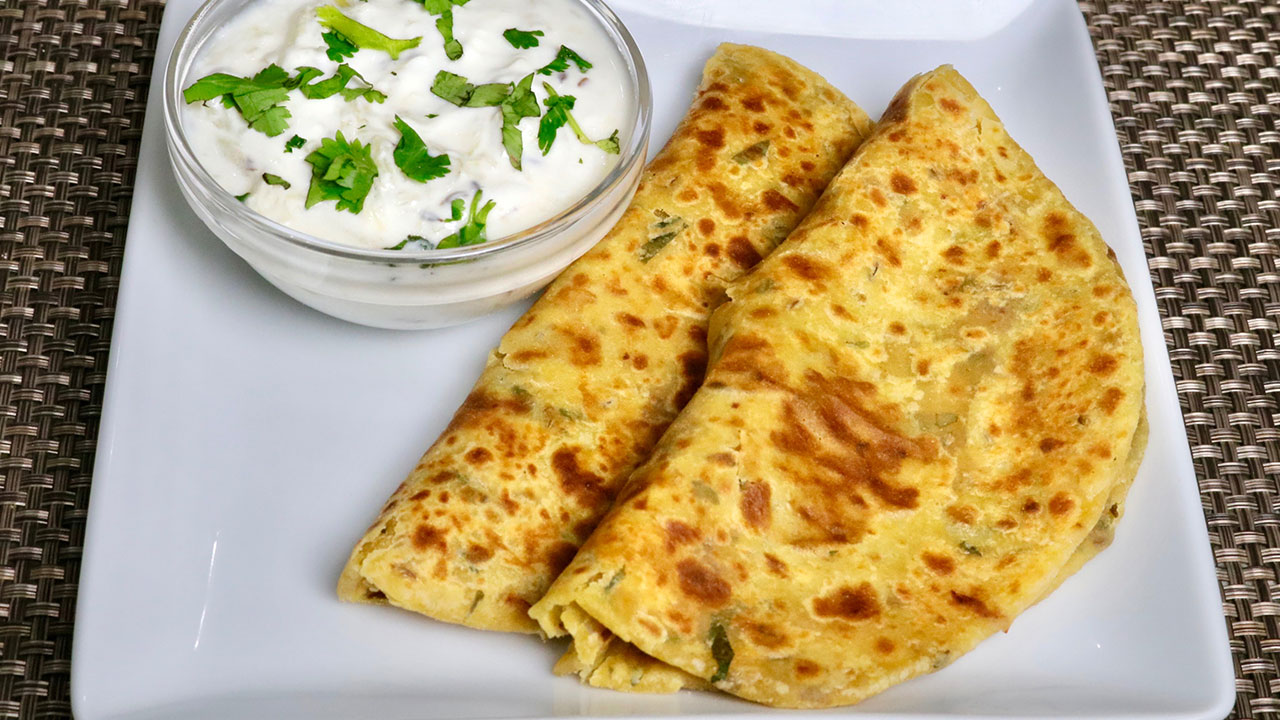
    Masala Paratha is a flavorful flat bread. This paratha is a combination of whole wheat flour and besan with a mix of delicious spices. Masala Paratha is a great breakfast treat and also a great lunch box option.
    4.72 from 7 votes
    Prep Time 10 minutes
    Cook Time 15 minutes
    Total Time 25 minutes
    Course Breakfast
    Cuisine Indian
    Servings 3 people

    Ingredients
      

    • 1 cup whole wheat flour atta
    • 1 cup besan gram flour
    • 1 tsp salt
    • 1 tsp cumin seeds jeera
    • 1 tsp red chili flake
    • 1/8 tsp asafetida hing
    • 2 tsp ginger finely grated
    • 1/4 cup mint finely chopped
    • 3 Tbsp oil canola oil or vegetable oil
    • 1/2 cup lukewarm water

    We also need

    • 1/4 cup whole wheat flour for rolling the paratha
    • 3 Tbsp oil for cooking

    Instructions
     

    • Mix all the ingredients together in a bowl, except water: flour, gram flour, salt, cumin seeds, chili flakes, asafetida, ginger, mint, and oil.
    • Add water as needed to make firm dough. Grease your palm and knead the dough for a minute on a lightly greased surface to make it smooth and pliable. Let the dough sit aside for about 15 minutes.
    • Knead the dough on a lightly greased surface. The dough should be very smooth and soft. Kneading the dough is important to make good parathas.
    • Divide the dough into six equal parts and form into balls. Roll dough ball into a 3” circle. Spread about 2 drops of oil and pull the edges of the dough to wrap. Repeat to make all six balls.
    • Meanwhile heat the heavy skillet on medium heat until moderately hot. To test, sprinkle water on the skillet. If the water sizzles right away, the skillet is ready.
    • Take one dough ball and press it lightly on both sides on a surface covered with dry flour. Using a rolling pin, roll the dough into about 7-8 inches in circle. If dough starts sticking, dust it with more flour.
    • Place the Paratha over the skillet. When you see the color change and the paratha will puff in different places. Turn the paratha over.
    • After few seconds, spread 1/2 teaspoon oil onto the paratha. Turn the paratha over, and spread again 1/2 teaspoon of oil.  Using your spatula, lightly press the entire surface of the paratha to help it cook all the way through. It will puff up.
    • After a few seconds, flip the paratha and press with a spatula making sure the paratha is golden-brown on both sides. Repeat for the remaining parathas.

    Notes

    Serve the Masala Paratha any gravy based dish like Lauki Raita, Aloo Dum.
    Tried this recipe?Let us know how it was!

  • Mango Shrikhand | Amrakhand

    Mango Shrikhand | Amrakhand

    Mango Shrikhand

    Mango Shrikhand

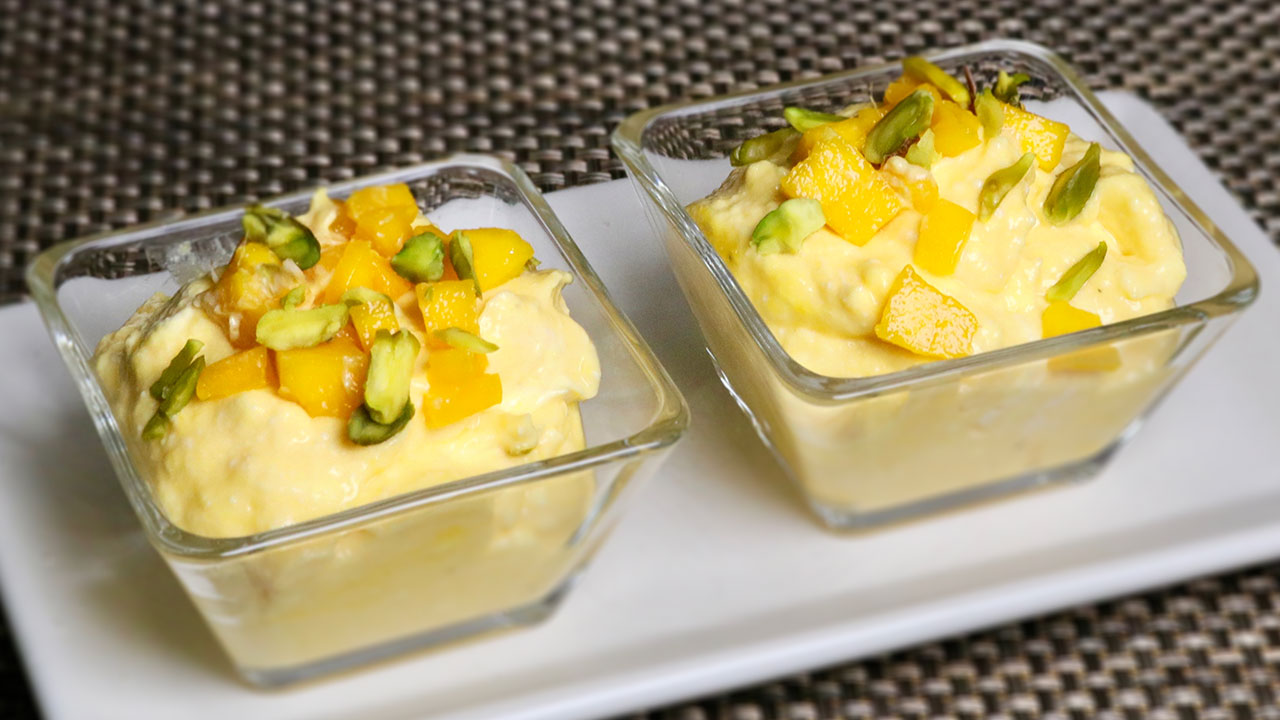
    Mango Shrikhand is a refreshing yogurt based sweet dish. Shrikand with mango makes it a very delicious dessert. This exotic dessert is easy to prepare and Shrikhand is often served with poori.
    5 from 2 votes
    Prep Time 10 minutes
    Course Dessert
    Cuisine Indian
    Servings 6 people

    Ingredients
      

    • 3 cup yogurt (curd or dahi)
    • 1 cup mango puree
    • 1/3 cup fine sugar approx, use as needed
    • 1/4 tsp crushed cardamom

    For Garnishing

    • 1/4 cup mango cut into small pieces
    • 1 Tbsp sliced pistachios pista

    Instructions
     

    • Preparing yogurt – Put a muslin or cheese cloth over a strainer. Pour the yogurt over muslin cloth. Place a bowl underneath the strainer to collect the excess water.
    • Next gently squeeze the excess water from yogurt. Make sure not to squeeze out the yogurt.
    • Move the yogurt with strainer and bowl into the refrigerator for at about four hours to drain excess water. Occasionally squeeze the excess water.
    • Yogurt will become thick in consistency, like a cheese ball.
    • Add mango pulp, sugar, and cardamom powder to yogurt and mix well till sugar dissolves.
    • Chill the shrikhand before serving.
    • Garnish with mango pieces, and pistachios.
    Tried this recipe?Let us know how it was!

  • Stuffed Bell Peppers (Stuffed Capsicum)

    Stuffed Bell Peppers (Stuffed Capsicum)

    Stuffed Bell Peppers

    Stuffed Bell Peppers

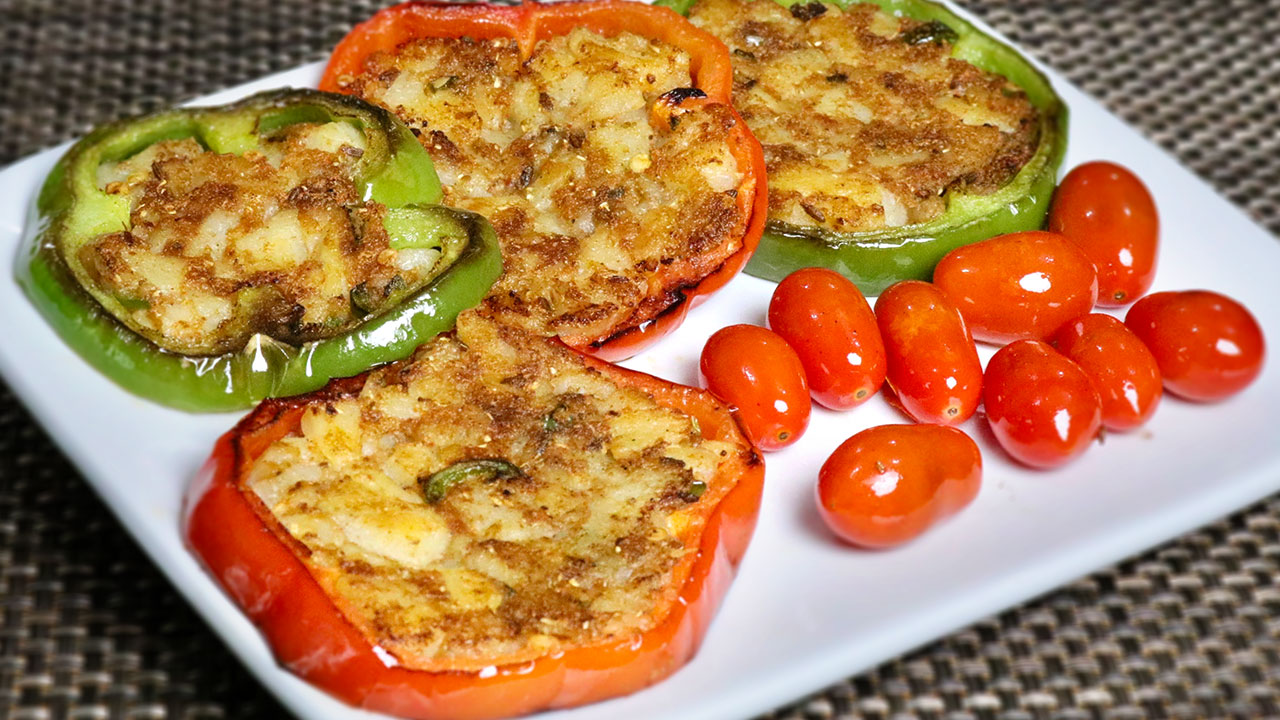
    For these mouthwatering Stuffed bell peppers, I decided to make them into rings, which makes it easier and quicker to make. Bell peppers provide a very nice vibrant color to any dish. Stuffed bell peppers are delicious and can be served as appetizers or as a side dish. I hope you enjoy this recipe as much as I enjoy!
    4.41 from 5 votes
    Course Appetizer, Side Dish
    Cuisine Indian, Italian
    Servings 4 people

    Ingredients
      

    • 2 bell peppers capsicum, pahadi mirch
    • 2 1/2 potatoes boiled, peeled and roughly mashed
    • 1 1/2 tsp salt
    • 1 tsp cumin seeds jeera
    • 3 tsp coriander powder dhania
    • 1/2 tsp red chili powder
    • 1/2 tsp mango powder amchoor
    • 1/2 tsp garam masala
    • 1 Tbsp green chili finely chopped
    • 1 Tbsp oil canola or vegetable

    Instructions
     

    • Add all the spices to mash potatoes to make filling, salt, cumin seeds, coriander powder, red chili powder, mango powder, garam masala, and green chilies.
    • Cut tops and bottoms of bell peppers; discard seeds and membranes.
    • Stuffed the bell peppers and slice them in half inch thick, use sharp knife. Depends the size of bell peppers how many slices you will make.
    • Press them gently to make sure potatoes stays inside the bell pepper rings.
    • Heat the heavy flat bottom sauce pan on medium heat and generously grease the pan.
    • Spread the bell pepper rings into skillet, do not overlap. Cover the pan and let it cook for about 1-2 minutes.
    • Remove the cover and turn the rings gently and press them lightly to ensure potatoes stays into the bell pepper rings. I cover the pan to make sure bell peppers are cooked, make sure they are not mushy. Cook the bell peppers from each side till they are golden brown. Stuffed bell peppers ready to serve.
    • Stuffed bell peppers are ready, this is a very enjoyable dish, serve them as an appetizers or side dish. I like to serve them with stir-fry cherry tomatoes.

    Notes

    Stuffed bell peppers are ready, this is a very enjoyable dish, serve them as an appetizers or side dish. I like to serve them with stir-fry cherry tomatoes.
    You can also use stuffed bell peppers to make sandwich, I like to use kaiser rolls with lettuce leaves, cheese, and slices of tomatoes.
    Tried this recipe?Let us know how it was!

    Stuffed Bell Peppers Recipe

    Stuffed bell peppers are a versatile option for appetizers or party recipes, suitable for a variety of dietary needs including gluten-free and vegan preferences, featuring a flavorful filling of sautéed vegetables. In this stuffed bell peppers recipe, we’ll infuse vibrant flavors into bell peppers, creating a delightful dish that’s both visually appealing and satisfying. Stuffed bell peppers offer a medley of textures and tastes, making them a versatile addition to any meal. Let’s delve into how to make stuffed bell peppers that will impress even the most discerning palates.

    Preparation and Assembly

    To start, gather the necessary ingredients for the stuffing mixture. While the original recipe focuses on corn chaat, we’ll repurpose it to create a flavorful filling for our stuffed bell peppers. Begin by finely chopping tomatoes and green chilies. Sauté them in a pan until they turn golden brown, adding spices like cumin powder, coriander powder, and red chili powder for an extra kick of flavor. Then, mix in boiled corn kernels and season with salt to taste.

    Filling the Bell Peppers

    With the stuffing ready, it’s time to prepare the bell peppers for filling. Slice the tops off the bell peppers and remove the seeds and membranes from the insides, creating a hollow cavity perfect for holding the stuffing. Be sure to choose bell peppers that are firm and vibrant in color for the best results.

    Stuffing and Baking

    Carefully spoon the prepared stuffing mixture into each bell pepper, ensuring they are evenly filled. Place the stuffed bell peppers on a baking tray and bake them in a preheated oven until the peppers are tender and the filling is heated through. This process allows the flavors to meld together, resulting in a harmonious blend of tastes with every bite.

    Presentation and Serving

    Once baked to perfection, remove the stuffed bell peppers from the oven and let them cool slightly before serving. Garnish with fresh cilantro leaves for a pop of color and a burst of freshness. These stuffed bell peppers can be enjoyed as a standalone dish or paired with your favorite sides for a complete meal.

    Variations

    Experiment with different fillings to customize your stuffed bell peppers to suit your taste preferences. Try incorporating ingredients like cooked quinoa, black beans, or diced tofu for added protein and texture. You can also top the stuffed bell peppers with cheese before baking for a cheesy twist on this classic dish.

    Tips

    • When selecting bell peppers for stuffing, choose ones that are uniform in size and shape to ensure even cooking.
    • To save time, you can prepare the stuffing mixture in advance and store it in the refrigerator until ready to use.
    • For a spicy kick, add finely chopped jalapeños or serrano peppers to the stuffing mixture.
    • If you prefer a vegetarian option, omit the corn chaat and use a combination of vegetables like carrots, peas, and potatoes for the filling.

    Benefits

    Stuffed bell peppers are not only delicious but also packed with nutrients. Bell peppers are rich in vitamins A and C, as well as antioxidants that help boost immunity and promote overall health. By filling them with a variety of wholesome ingredients, you can create a nutritious meal that’s as satisfying as it is flavorful.

    FAQs

    Q: Can I use different colored bell peppers for this recipe?

    A: Yes, feel free to mix and match different colored bell peppers for a visually stunning presentation. Each color offers a slightly different flavor profile, adding depth to the dish.

    Q: How long will the stuffed bell peppers keep in the refrigerator?

    A: Stuffed bell peppers can be stored in an airtight container in the refrigerator for up to 3 days. Simply reheat them in the oven or microwave before serving.

    Q: Can I freeze stuffed bell peppers for later?

    A: Yes, stuffed bell peppers can be frozen for future meals. Wrap them individually in plastic wrap and aluminum foil before placing them in the freezer. To reheat, thaw them overnight in the refrigerator and bake them in the oven until heated through.

    Other Recipes on Manjula’s Kitchen

    If you’re looking to explore more Indian recipes, appetizers, beverages, and desserts, be sure to check out the following links on Manjula’s Kitchen. Here are some links to recipes on Manjula’s Kitchen’s official website:

    Paneer Tikka Masala Recipe

    Chana Chaat (Spicy Chickpea Salad) Recipe

    Pav Bhaji (Spicy Vegetable Hash with Buns) Recipe

    Raj Kachori (Crunchy Chaat) Recipe

    Vegetable Biryani Recipe
    These recipes should offer you a flavorful experience straight from Manjula’s Kitchen.

  • Falooda, Delicious Dessert Beverage

    Falooda, Delicious Dessert Beverage

    Falooda Recipe

    Falooda

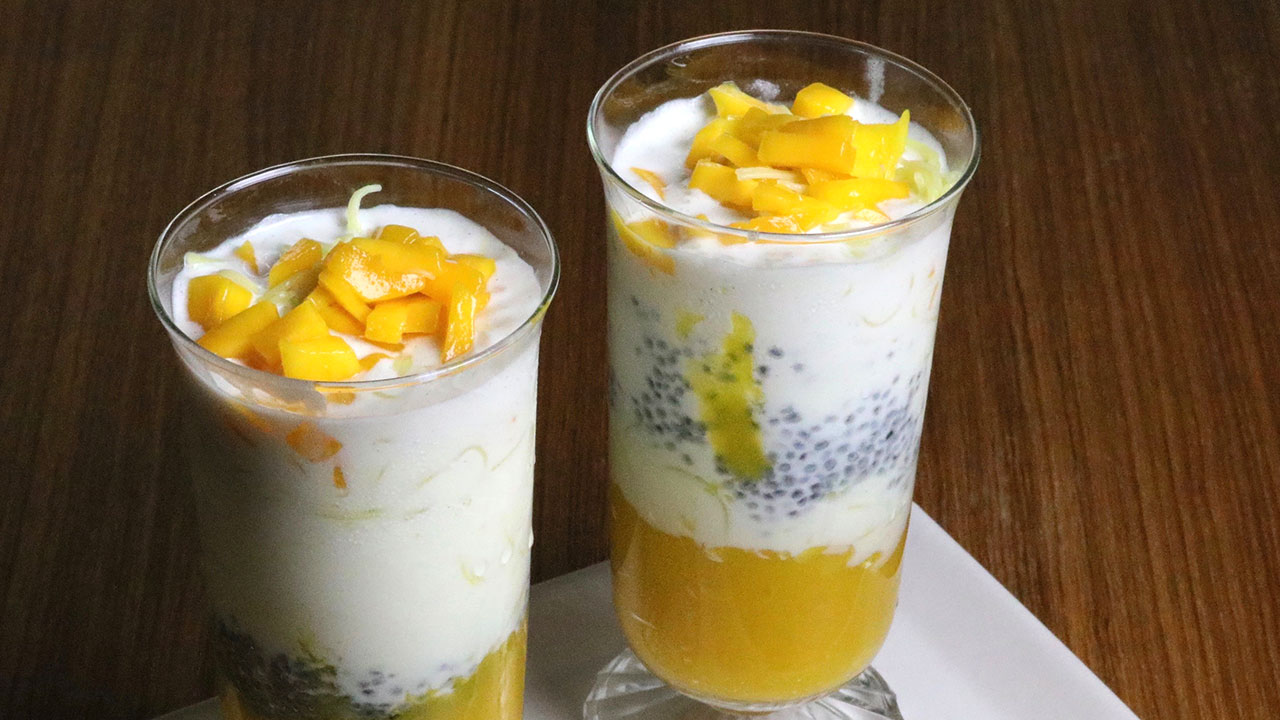
    Falooda is best described as a dessert beverage which is really corn vermicelli. This is a delicious combination of layered Falooda with milk, sweet basil and vanilla ice-cream. I like to serve this with mango. This can be an any-time snack! Falooda is popular with Mumbai road side street food. This chilled beverage-dessert is the perfect way to cool off in the summer heat.
    5 from 1 vote
    Prep Time 5 minutes
    Cook Time 20 minutes
    Total Time 25 minutes
    Course Dessert
    Cuisine Indian
    Servings 4 people

    Ingredients
      

    • 2-1/2 Cup milk
    • 3 Tbsp sugar divided
    • 1 Cup fresh mango pulp
    • 2 Tbsp sweet basil seed tukmaria, sabza
    • 1 oz packet of falooda falooda ia a corn vermicelli
    • 6 scoops vanilla ice-cream
    • 1/2 cup finely chopped mangos for garnishing

    Instructions
     

    • Boil the milk with 2 tablespoons of sugar for about 15 minutes after milk comes to boil or until till it reduces to about 1-1/2 cup. After milk cool off refrigerate, milk should be chill.
    • Cook the falooda in boiling water, till they are soft! Strain, and chopped them in few pieces and keep aside to cool. Then refrigerator till needed, and it is chilled.
    • Add about 2 table spoons of sugar to mango pulp or as needed depends on sweetness of mango. Refrigerate the mango pulp and chopped mango, till you are ready to use.
    • soak the basil seeds/ tukmaria in a bowl in about ¼ cup of water making sure seeds are completely submerge. They will soon start to swell and look transparent. Strain and keep aside in a small bowl.
    • Milk and falooda should be refrigerated till you are ready to use, you can prepare them in advance as they can be refrigerated for 3-4 days.
    • Time to assemble the falooda, it is layered beverage-desert, take a tall glass first put 2-3 tablespoons of mango pulp, few spoons of falooda, about 2 spoons of baisel seeds, pour about ¼ cup of milk, about 1or 2 scoops of ice-cream, again some falooda and garnish with chopped mango.

    Notes

    Enjoy!
    Tried this recipe?Let us know how it was!

  • Gatte Ki Sabji (Rajasthani Cuisine)

    Gatte Ki Sabji (Rajasthani Cuisine)

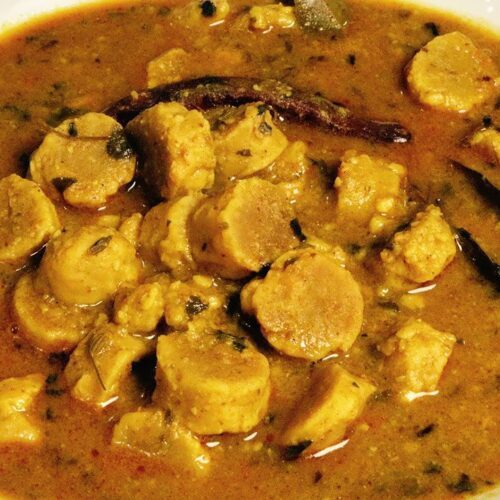
    Gatte Ki Sabji

    Gatte Ki Sabji

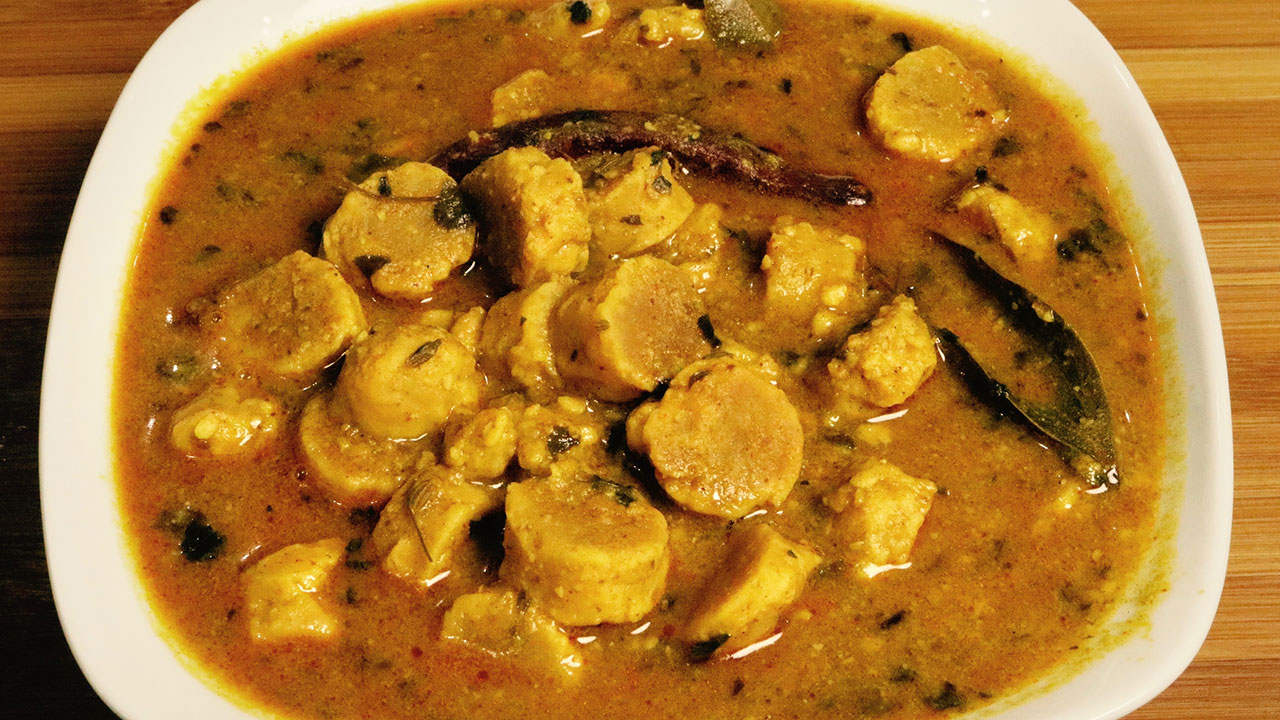
    Gatte Ki Sabji is a traditional dish from Rajasthan. These steamed gram-flour dumplings are cooked in a spicy gravy. This mouth-watering dish will complement any meal. Enjoy Gatte Ki sabji with roti or plain rice. The recipe is also vegan and gluten free.
    4.64 from 11 votes
    Prep Time 5 minutes
    Cook Time 40 minutes
    Total Time 45 minutes
    Course Main Course
    Cuisine Indian
    Servings 4 people

    Ingredients
      

    For Gatte

    • 2 cups besan gram flour
    • 4 Tbsp oil canola or vegetable oil
    • 1 tsp salt
    • 1 tsp red chili powder adjust to taste
    • 1/8 tsp asafetida hing, asafetida is gluten free spice, but asafetida powder contains some wheat flour, gluten free asafetida, is available on amazon.

    For Gravy

    • 3 Tbsp oil
    • 1/8 tsp asafetida hing
    • 1 tsp fennel seeds saunf
    • 2 bay leaves tejpat
    • 2 dry red chilies
    • ½ tsp red chili powder
    • 1/2 tsp turmeric haldi
    • 1 tablespoon coriander powder dhania
    • 1 tsp salt
    • 1 Tbsp Kasuri Methi
    • 1 tsp mango powder amchoor
    • 1/2 tsp garam masala

    Instructions
     

    • Mix all the ingredients for gatte together and make a stiff dough, using water as needed. You will need about 1/3 cup of water. Knead the dough well, let it rest for 10 minutes. Divide the dough into 8 parts and roll them in calendar about half inch thick.
    • Bring about 4 cups of water to boil in a pan on medium high heat. Gently drop the Gatte logs in boiling water. After it comes to boil, cover the pan and reduce the heat to medium low, and cook them cover for about 12-15 minutes’ gate should be floating on the top and will have bubbles all around.
    • Take them out from water and save the water, this will be used for making gravy. let them cool for few minutes and cut them in about half inch-thick slices.
    • Heat the oil in heavy bottom pan over medium heat, add fennel seeds, asafetida, red chilies stir and add Gattes, stir-fry for about 4-5 minutes until they are light golden brown.
    • Add bay leaves, chili powder, turmeric, coriander powder, and salt, stir-fry for about 2 minutes.
    • Add the water we saved, and Kasuri Methi boil for about 10 minutes over low medium heat, covered. This is the time add more water to adjust the thickness of the gravy. As Gatte Ki Sabji will cool off it gravy will become thick.
    • Turn off the heat and add mango powder, and garam masala, Gatte Ki Sabji is ready to serve.
    Tried this recipe?Let us know how it was!

    Authentic Rajasthani Gatte Ki Sabji: A Savory Besan Gatte ki Sabji

    Gatte ki sabji is a traditional Rajasthani dish popularly enjoyed during festivals like Karwa Chauth and Navaratri. It’s a gluten-free and vegan delicacy that features dumplings made from chickpea flour (besan) cooked in a flavorful vegetable curry or gravy. Along with the lentil-based dumplings, the curry typically includes a variety of vegetables, enhancing its nutritional value and taste. 

    Embark on a gastronomic odyssey through the vibrant flavors of Rajasthan as we delve into the intricate world of Besan Gatte Ki Sabji. This iconic dish, steeped in tradition and brimming with aromatic spices, offers a tantalizing glimpse into the culinary heritage of the region. Join us as we unravel the secrets behind crafting this delectable delicacy, offering tips, benefits, suggestions, and answers to frequently asked questions along the way.

    Crafting the Perfect Gatte:

    The journey begins with the meticulous preparation of the gatte, the cornerstone of this flavorful dish. Start by mixing besan (gram flour) with a carefully curated selection of spices, such as cumin, coriander, and ajwain, to infuse the dough with a burst of flavor. Gradually add water to form a stiff dough, ensuring it is kneaded well to achieve the desired consistency. Allow the dough to rest for at least 10 minutes to allow the flavors to meld before dividing it into equal portions and rolling them into cylindrical logs.

    Infusing Flavor into the Gravy:

    As the gatte take shape, it’s time to prepare the fragrant gravy that will elevate them to culinary perfection. Bring a pot of water to a gentle boil and gently drop the gatte logs into the simmering water. Allow them to cook until they float to the surface, indicating that they are ready to be incorporated into the savory gravy. Remember to reserve the cooking water, as it will serve as the base for the flavorful gravy, infused with the essence of besan.

    The Aromatic Symphony of Spices:

    In a heavy-bottomed pan, heat oil over medium heat and add a medley of aromatic spices, including fennel seeds, asafetida, and dried red chilies. Allow the spices to release their fragrant oils, infusing the kitchen with an irresistible aroma. Add the cooked gatte to the pan and stir-fry them until they acquire a golden-brown hue, enhancing their nutty flavor and crisp texture.

    Fine-Tuning the Consistency and Flavor Profile:

    To achieve the perfect balance of flavors, it’s essential to pay attention to the consistency of the gravy. Add bay leaves, chili powder, turmeric, and coriander powder to the pan, allowing them to bloom in the oil before incorporating the reserved cooking water. Adjust the thickness of the gravy by adding more water as needed, ensuring it coats the gatte evenly and imparts a luscious mouthfeel.

    Tips for Success:

    Use freshly ground spices for maximum flavor impact. 

    Don’t rush the cooking process; allow the gatte to cook until they float to the surface for optimal texture.

    Adjust the spice levels according to your preference, adding more or less chili powder as desired.

    For an extra layer of richness, substitute some of the water with milk or cream when making the gravy.

    Benefits of Besan Gatte Ki Sabji:

    Rich in protein: Gram flour is a good source of plant-based protein, making this dish a nutritious option for vegetarians and vegans.

    High in fiber: Besan gatte are packed with dietary fiber, which promotes digestive health and keeps you feeling full and satisfied.

    Versatile and customizable: This dish can be adapted to suit individual tastes and dietary preferences, allowing for endless variations and creative twists.

    Budget-friendly: Made with simple, pantry staples, Besan Gatte Ki Sabji is an affordable yet satisfying meal option for families on a budget.

    Suggestions for Serving:

    Garnish with freshly chopped cilantro and a squeeze of lemon juice for a burst of freshness.

    Serve hot with steamed rice or fluffy roti for a wholesome and satisfying meal.

    Pair with tangy pickle, creamy raita, or crunchy papad for a well-rounded dining experience.

    Frequently Asked Questions (FAQs):

    Q: Can I make Besan Gatte Ki Sabji in advance?

    A: Yes, you can prepare the gatte and gravy ahead of time and assemble them just before serving. Simply store the cooked gatte and gravy separately in airtight containers in the refrigerator for up to 2-3 days.

    Q: Can I freeze Besan Gatte Ki Sabji?

    A: While you can freeze the cooked gatte, the texture may change slightly upon reheating. It’s best to freeze the gatte and gravy separately and thaw them in the refrigerator overnight before reheating and assembling.

    Q: Can I substitute besan with any other flour?

    A: While besan lends a distinct flavor and texture to this dish, you can experiment with other flours such as chickpea flour or wheat flour for a different twist. Keep in mind that the flavor and consistency may vary.

    Conclusion:

    Besan Gatte Ki Sabji encapsulates the essence of Rajasthan’s rich culinary heritage, offering a tantalizing blend of flavors and aromas that delight the senses. With a bit of patience, creativity, and a dash of spice, you can recreate this iconic dish in your own kitchen, savoring the warmth and vibrancy of Rajasthani cuisine with every mouthful. So, gather your ingredients, unleash your inner chef, and embark on a culinary journey that celebrates the timeless allure of Besan Gatte Ki Sabji.

  • No Bake Cheesecake

    No Bake Cheesecake

    No Bake Cheesecake

    No Bake Cheesecake

    This  Cheese cake recipe requires absolutely no cooking or baking. This is a delicious and perfect, quick and easy dessert for hot summer days. I like to use the fresh seasonal fruits over cheese cake. This is an amazing recipe and everyone will enjoy.
    4.67 from 3 votes
    Prep Time 10 minutes
    Cook Time 15 minutes
    Total Time 25 minutes
    Course Dessert
    Servings 4

    Ingredients
      

    • 1 cup graham crackers fine crumbs, I used 12 gram crackers
    • 4 Tbsp unsalted butter at room temperature
    • 8 oz cream cheese at room temperature
    • 1/3 cup sugar
    • 1/2 cup heavy cream chilled
    • 1 tsp lemon juice
    • Few slices of fresh fruit of your choice I am using, mango, kiwi, strawberry, and few black berry

    Instructions
     

    • First line 4×7 inch pan with wax paper or parchment paper.
    • Mix cookie crumbs and butter well to combine.
    • Transfer the mix to prepared pan and press evenly to make it very firm. Refrigerate for at least 30 minutes.
    • Using the electric mixer beat the cream cheese and sugar in a large bowl on medium high speed until smooth. Reduce the mixer speed and gradually add the cream, and lemon juice increase the speed to medium high until stiff peak forms.
    • Spread the cream cheese evenly over crust, refrigerate for at least 4 hours or up to 3 days.
    • Just before serving top with fruits.

    Notes

    Finishing time 15 minutes not including refrigeration time.
    Tried this recipe?Let us know how it was!

  • Spicy Corn Chaat

    Spicy Corn Chaat

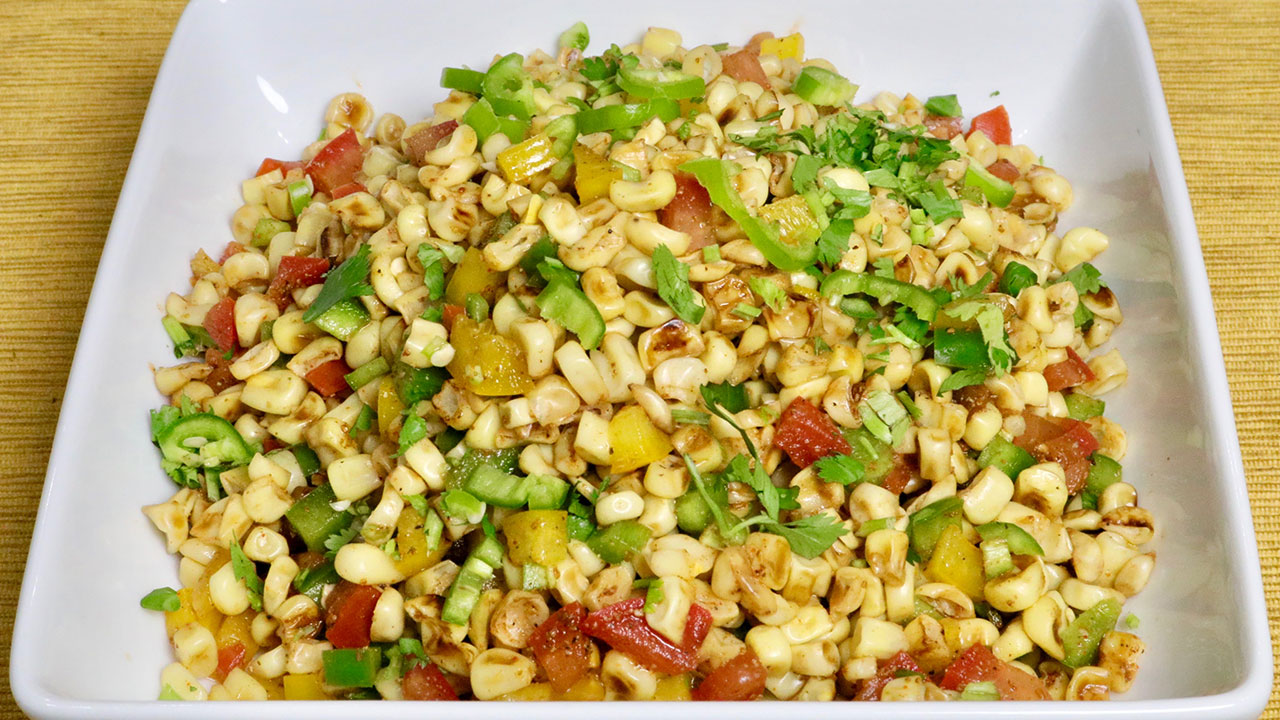
    Spicy Corn Chaat

    Spicy Corn Chaat

    Craving something savory and delicious? This Spicy Corn Chaat is the perfect spicy snack that is sure to satisfy your cravings. It's also easy and quick to prepare!
    4.29 from 7 votes
    Prep Time 10 minutes
    Cook Time 10 minutes
    Total Time 20 minutes
    Course Snack
    Cuisine Indian
    Servings 6 people

    Ingredients
      

    • 16 oz frozen corn kernels about 3-1/2 cups
    • 1 cup green and yellow bell pepper finely chopped use any bell pepper you have, I decide to use them for color
    • 1/2 cup finely chopped tomato
    • 1 tsp ginger juice
    • 1 tsp salt
    • 1/2 tsp black salt optional
    • 1 tsp cumin seed powder roasted
    • 1/4 tsp black pepper
    • 1/4 tsp red chili powder
    • 1 tsp green chili finely chopped, adjust to taste
    • 1 Tbsp cilantro finely chopped
    • 1 Tbsp lemon juice

    Instructions
     

    • Mix all the dry ingredients together, salt, black salt, roasted cumin seed powder, black pepper, and chili powder, set aside.
    • Thaw the frozen corn kernels and lightly squeeze some water out.
    • Coat the nonstick frying pan with oil and heat over medium high heat, put the corn kernels and stir fry for 4-5 minutes stirring continuously. Some corn will start popping and they start getting some brown spots. Turn off the heat.
    • After corn comes to room temperature add all the ingredients, bell peppers, tomato, sprinkle the spice mix, ginger juice, cilantro and lemon juice and add the green chili to you taste. Mix them well.
    Tried this recipe?Let us know how it was!

    Spicy Corn Chaat Recipe: Step by Step Process 

    Spicy Corn Chaat is a flavorful appetizer or snack made from boiled corn kernels mixed with a blend of spices and tangy chutneys. It’s a gluten-free, low-cholesterol, and low-fat option, perfect for those looking for a healthy yet satisfying treat. This vegan dish makes for a great lunch box suggestion or a quick bite any time of the day.

    Introduction to Spicy Corn Chaat


    Indulge in the delightful flavors of spicy corn chaat with this easy-to-follow recipe. A popular street food in India, this spicy sweet corn chaat combines the sweetness of corn with tangy and spicy flavors, creating a tantalizing snack or appetizer. Learn how to make spicy corn chaat at home and treat yourself to a burst of deliciousness in every bite.

    Ingredients for Spicy Corn Chaat


    To prepare this lip-smacking spicy corn chaat recipe, you’ll need fresh or frozen corn kernels, finely chopped vegetables tomatoes, and bell peppers, green chilies for heat, chaat masala for that quintessential Indian flavor, and a squeeze of lemon juice to brighten up the dish.

    Step-by-Step Instructions for Making Spicy Corn Chaat


    1. Preparing the Corn

    Start by boiling the corn kernels until they are tender. Drain the water and set aside.

    1. Sautéing the Vegetables
      In a pan, heat some oil and add tomatoes, and bell peppers until they are soft and slightly caramelized. Add finely chopped green chilies for an extra kick of heat.
    2. Mixing the Corn and Vegetables
      Combine the boiled corn kernels with the sautéed vegetables in a mixing bowl. Toss them together gently to ensure even distribution of flavors.
    3. Seasoning with Chaat Masala
      Sprinkle generous amounts of chaat masala over the corn and vegetable mixture. This spice blend adds a burst of tanginess and complexity to the chaat.
    4. Adding Lemon Juice
      Squeeze fresh lemon juice over the chaat to enhance its flavors and add a refreshing citrusy note.
    5. Serving the Spicy Corn Chaat
      Transfer the prepared spicy corn chaat to serving bowls and garnish with fresh cilantro leaves for a pop of color and freshness. Serve immediately and enjoy the irresistible flavors of this delightful chaat.

    Tips for Making the Best Spicy Corn Chaat

    • Use fresh corn kernels for the best taste and texture, but frozen corn works well too.
    • Adjust the spiciness according to your preference by adding or reducing the amount of green chilies.
    • For added crunch, you can toss in some crushed papdi or sev just before serving.

    Variations of Spicy Corn Chaat

    • Cheesy Corn Chaat: Sprinkle grated cheese over the chaat for a creamy and indulgent twist.
    • Avocado Corn Chaat: Add diced avocado to the chaat for a buttery texture and extra creaminess.
    • Spicy Corn Salad: Skip the chaat masala and lemon juice, and toss the corn and vegetables with a zesty vinaigrette for a refreshing salad.

    Benefits of Spicy Corn Chaat


    Spicy corn chaat is not only delicious but also nutritious. Corn is a good source of fiber, vitamins, and minerals, while the vegetables add an array of nutrients. This chaat makes for a wholesome snack or appetizer that is both satisfying and nourishing.

    FAQs (Frequently Asked Questions)


    Q: Can I make spicy corn chaat ahead of time?

    A: While it’s best enjoyed fresh, you can prepare the components ahead of time and assemble the chaat just before serving to maintain its crunchiness and flavors.

    Q: Can I use canned corn for this recipe?

    A: While fresh or frozen corn is preferable, you can use canned corn if that’s what you have on hand. Just make sure to drain and rinse the corn before using it in the chaat.

    Q: Is spicy corn chaat suitable for vegetarians and vegans?

    A: Yes, this recipe is completely vegetarian and vegan-friendly, as it only contains plant-based ingredients.

    If you liked the recipe here are some other recipes that you may like too 

    Vegetable Cheela: A savory Indian pancake made with mixed vegetables and chickpea flour.

    Palak (Spinach) Paneer: A classic North Indian dish made with spinach and paneer cheese cooked in a creamy tomato-based sauce.

    Shahi Pulao (Vegetable Pulao): A flavorful rice dish made with spiced basmati rice and vegetables.

    Gobi (Cauliflower) Manchurian: Crispy cauliflower florets tossed in a tangy and spicy Indo-Chinese sauce.

    Aloo (Potato) Paratha: Whole wheat flatbread stuffed with spiced mashed potatoes and cooked on a griddle.

    Mango Lassi: A refreshing yogurt-based drink flavored with ripe mangoes and a hint of cardamom.

    Besan Ladoo: Traditional Indian sweet made with roasted chickpea flour, ghee, and sugar.

  • Lemonade (Classic / Strawberry)

    Lemonade (Classic / Strawberry)

    Lemonade recipe

    Lemonade (Classic and Strawberry)

    Summer is around the corner and I love this time of year! It means more time with my grandkids, a relaxed schedule and of course endless days of sun, pool and pure bliss! I like to serve refreshing Lemonade on these hot summer days. It's definitely a must-have for fun summer outings like picnics or casual lunches if you are entertaining. Today I am making two different lemonades – traditional classic Lemonade and Strawberry Lemonade. It's the perfect pick-me-up drink!
    5 from 4 votes
    Prep Time 10 minutes
    Cook Time 10 minutes
    Total Time 20 minutes
    Course Drinks
    Servings 6 people

    Ingredients
      

    For simple syrup

    • 1 cup sugar
    • 1 cup water this is to make simple syrup
    • 1/4 cup fresh mint leaves

    lemonade

    • 3 Tbsp freshly squeezed lemon juice
    • 1/2 cup simple syrup adjust to taste
    • 1/4 tsp salt
    • 1/8 tsp black pepper grounded
    • 2 cup cold water approximately
    • Mint leaves and lemon slices to garnish
    • Ice

    Strawberry lemonade

    • 1 cup strawberries trimmed and sliced
    • 3 Tbsp fresh lemon juice
    • ½ cup simple syrup adjust as needed
    • 2 cup cold water approximately
    • Ice

    Instructions
     

    • First make a “simple syrup”. Place the sugar, water and mint leaves in a small saucepan and bring to a simmer. Stir so that the sugar dissolves completely and turn off the heat.
    • After syrup cools off, strain the syrup to remove the mint leaves.
    • This syrup can be made in advance and can be refrigerated.

    Classic Lemon lemonade

    • Mix simple syrup, lemon juice, salt and black pepper to the water and pour over ice. Garnish with mint leaves and lemon slice.

    Strawberry lemonade

    • Save few slices of strawberry for garnishing and purée rest of the strawberries with ¼ cup of water in a blender until smooth
    • Then strain the puree into a bowl to remove seeds.
    • Stir together strawberry purée, with lemon juice, simple syrup, and water in a pitcher mix it well.
    • Taste, then add more sugar if desired. Serve over ice. Add few pieces of strawberry to the glass.

    Notes

    Tip: Every ingredient in this recipe can be adjusted to your taste. 
    Variations
    Replace water with soda water. Add one tablespoon fresh ginger juice.
    Tried this recipe?Let us know how it was!

  • Jalapeno Cheese Paratha

    Jalapeno Cheese Paratha

    Jalapeno Cheese Paratha

    Jalapeno Cheese Paratha

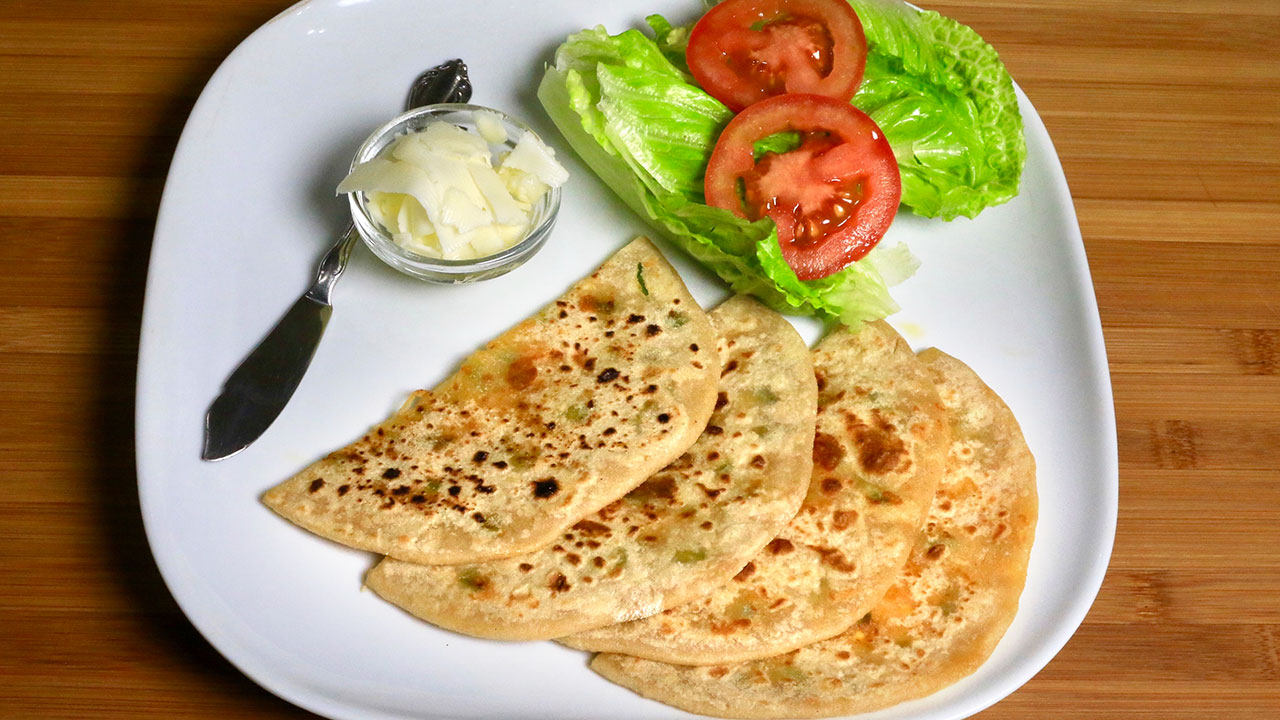
    Jalapeno Cheese Paratha is a whole wheat flat bread filled with a combination of grated cheese. This is not only delicious, but also a great breakfast option. Jalapeno Cheese Paratha can be served like cheese bagels or bread.
    This recipe will make 6 parathas and will serve 3.
    5 from 3 votes
    Prep Time 10 minutes
    Cook Time 20 minutes
    Total Time 30 minutes
    Course Appetizer, Breakfast, Snack
    Cuisine Indian
    Servings 3 people

    Ingredients
      

    For Dough

    • 1 cup whole wheat flour chapatti atta
    • 1/2 teaspoon salt
    • 1/2 cup water

    For Filling

    • 2 cup grated mix cheese I am using mix cheese, Cheddar, Colby and Monterey Jack
    • 1/4 cup jalapeno finely chopped, adjust to your taste

    Instructions
     

    Making the Dough

    • Mix flour, and salt, in a bowl add the water as needed to make soft dough. Knead the dough for about one minutes on a lightly greased surface to make soft, and pliable dough. Set aside for at least ten minutes.

    Making the Filling

    • Cheese and Jalapeno pepper mix it well and divide in 6 equal parts and roll them. Set aside.

    Making the Parathas

    • Divide the dough into six equal parts and form into balls.
    • Roll dough ball into a 3” circle. Place a cheese ball in the center. Pull the edges of the dough to wrap it around the cheese filling. Repeat to make all six balls. Let the filled balls settle three to four minutes. Note, this help rolling the paratha.
    • Meanwhile heat the heavy skillet on medium heat until moderately hot. To test, sprinkle water on the skillet. If the water sizzles right away, the skillet is ready.
    • Press the filled ball lightly on dry whole wheat flour from both sides.
    • Using a rolling pin, roll the balls lightly to make six-inch circles, keeping the sealed side of the balls on top. If the dough sticks to the rolling pin or rolling surface, lightly dust the parathas with dry flour.
    • Place the paratha on the skillet. When the paratha start to change color, and begins to puff up, flip it over. You will notice some golden-brown spots.
    • After a few seconds, flip the paratha and press with a spatula making sure the paratha is golden-brown on both sides. Repeat for the remaining parathas.
    • Parathas can be kept unrefrigerated for up to two days wrapped in aluminum foil or in a covered container. For later use, parathas can be refrigerated for about a week. Re-heat using a skillet or oven.

    Notes

    Adjust the pepper to your taste, you can use any hot chilies I also like to use Serrano chili. For my grand kids, I make them with cheese only.
    Serving Suggestion
    • Jalapeno Cheese Paratha, is best for the breakfast and serve it with butter or cream cheese.
    • Cheese parathas are also good for sandwiches with lettuce and slice of tomatoes.
    Tried this recipe?Let us know how it was!

  • Chana Chaat (Spicy Snack)

    Chana Chaat (Spicy Snack)

    Chana Chaat

    Chana Chaat

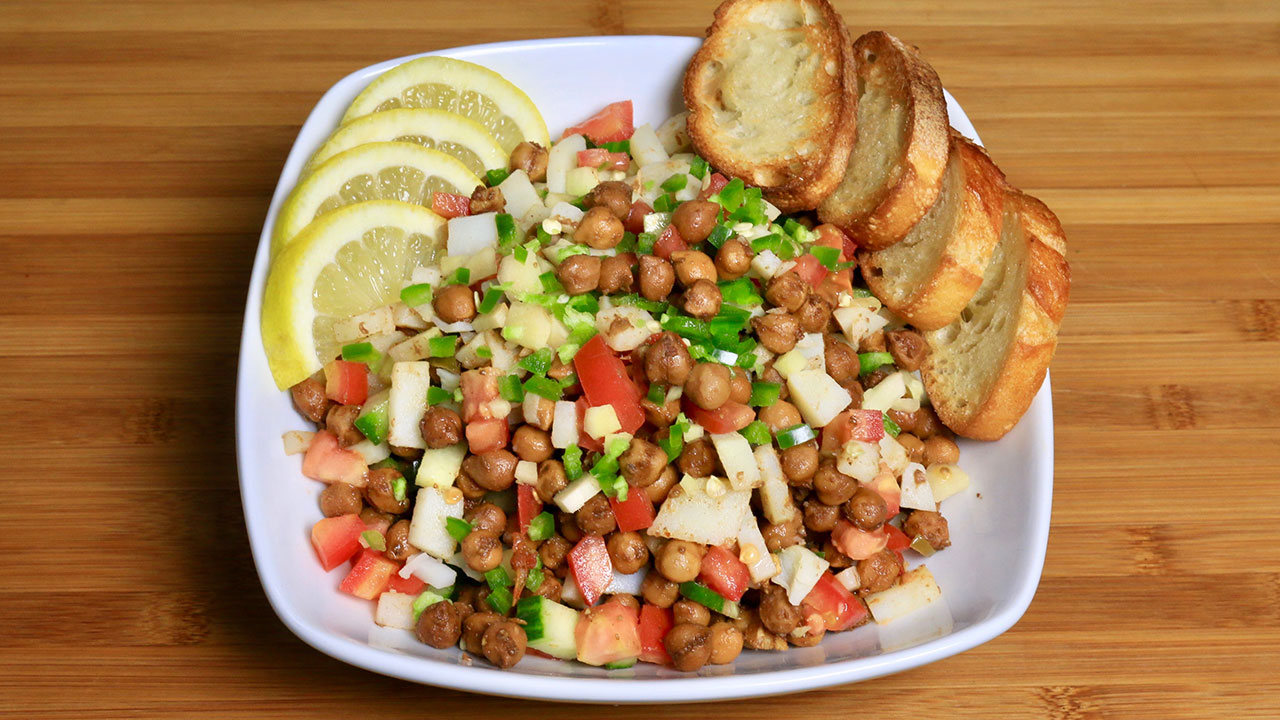
    Chana Chaat is a healthy and delicious snack. I am using kala chana for this recipe. Kala chana looks like chickpeas, but brown in color. This is a delightfully sweet and tangy snack. Channa Chaat will also make a very enjoyable lunch box meal.
    3.75 from 4 votes
    Prep Time 10 minutes
    Cook Time 20 minutes
    Total Time 30 minutes
    Course Appetizer
    Cuisine Indian
    Servings 6 people

    Ingredients
      

    • 1 cup kala chana
    • 2 Tbsp oil Canola, or vegetable oil
    • 1 Tbsp ginger finely shredded
    • 1 Tbsp green chili finely chopped
    • 1 Tbsp coriander powder dhania
    • 1/4 cup tamarind pulp this is available in India grocery store or you can make it at home soaking the tamarind and squeeze the pulp. But not the concentrated tamarind
    • 1 tsp red chili powder
    • 1 tsp salt
    • 1 tsp black salt
    • 1 Tbsp sugar
    • 2 tsp roasted cumin seed powder bhuna jeera
    • 1 cup potato boiled peeled and cut in small pieces
    • 1/2 cup cucumber chopped in small pieces
    • 1/2 cup tomatoes chopped in small pieces

    For garnishing

    • 1 Tbsp ginger finely chopped
    • 1 Tbsp green chilies finely chopped
    • 5-6 wedges of lemon

    Instructions
     

    • Wash and soak kala chana in approx. 4 cups of water, for at least 4 hours. The kala chana will double in volume after soaking.
    • In pressure cooker cook kala chana with 2 cups of water over medium high heat. As pressure cooker starts steaming turn the heat down to low medium and cook for about 15 minutes. Close the heat and wait until steam has stopped before opening the pressure cooker. Chana should be soft and tender.
    • Drain the water and save it for later use, this water is high in protein and can be used for making the soup or dals.
    • Heat the oil in a sauce pan over medium high heat. Add the chana, stir for few seconds. Add ginger and green chili, coriander powder, sauté for about 1 minutes.
    • Add salt, black salt, red chili powder, and sugar, add tamarind pulp. Cook for 3-4 minutes over low heat. If needed use few spoons of water, Chana mix should be moist. Turn off the heat.
    • Assemble the Kala Chana Chaat, add chopped potatoes, tomatoes, and cucumber, drizzle the roasted cumin seeds powder and mix it well. If desired garnish with sliced ginger, green chilies and drizzle the lemon juice.

    Notes

    Prep Time of 10 minutes does not include soaking time.
    Suggestions
    You can serve chana chaat without adding the veggies, it tastes delicious. You can always adjust quantity of veggies to your choice. Also adjust the green chili and red pepper to your choice. After spicing the chana mix with cooked plain rice to make spicy delicious meal.
    Tried this recipe?Let us know how it was!

    Recipe for Chana Chaat: Elevate Your Snack Game with This Delicious Dish

    Chana chaat is a quintessential Indian street food known for its burst of flavors and satisfying crunch. This recipe for chana chaat brings together the wholesome goodness of kala chana (black chickpeas) with an array of spices and fresh vegetables, creating a dish that’s both nutritious and delicious. Whether enjoyed as a snack, appetizer, or light meal, chana chaat is sure to tantalize your taste buds and leave you craving for more.

    To begin your culinary journey with chana chaat, start by washing and soaking kala chana in water for at least 4 hours. This step is crucial as it helps the chana soften and swell, enhancing its texture and flavor. Once soaked, cook the kala chana in a pressure cooker until tender and soft. The aroma of freshly cooked chana will fill your kitchen, setting the stage for the flavorful dish that is to come.

    Now, it’s time to infuse the cooked chana with a medley of spices. Heat oil in a saucepan and sauté ginger, green chili, and coriander powder until fragrant. Then, add the cooked chana along with salt, black salt, red chili powder, sugar, and tangy tamarind pulp. Allow the spices to meld together, coating the chana in a burst of savory and tangy flavors. Adjust the seasoning according to your taste preferences, adding more spice for a fiery kick or dialing it down for a milder flavor profile.

    Once the chana is well-coated with the spice mixture, it’s time to assemble the chana chaat. Add chopped potatoes, tomatoes, and cucumber to the chana mixture, creating a colorful and vibrant medley of flavors and textures. For an extra burst of flavor, sprinkle roasted cumin seeds powder over the chaat, adding a depth of earthy aroma to the dish. Finally, garnish with sliced ginger, green chilies, and a squeeze of fresh lemon juice to brighten up the flavors.

    Variations:

    • Sprouted Chana Chaat: For a healthier twist, use sprouted chana instead of cooked chana. Sprouted chana is rich in nutrients and adds a delightful crunch to the chaat.
    • Fruit Chaat: Incorporate seasonal fruits like apples, grapes, and pomegranate seeds into the chaat for a refreshing and fruity twist.
    • Yogurt Chaat: Drizzle some creamy yogurt over the chana chaat for a creamy and tangy variation. Top it off with some mint chutney and tamarind chutney for an extra burst of flavor.

    Tips:

    • Save the Cooking Water: The water leftover from cooking the chana is rich in protein and can be used to make soups or dals, adding a nutritious boost to your meals.
    • Adjust Seasoning: Feel free to adjust the spices and seasoning according to your taste preferences. Experiment with different combinations to create your perfect flavor profile.
    • Serve with Rice: For a hearty meal, serve the spiced chana mixture with cooked plain rice, creating a satisfying and flavorful dish that’s perfect for lunch or dinner.

    Benefits:

    • High in Protein: Kala chana is rich in protein, making chana chaat a nutritious and filling snack option.
    • Rich in Fiber: The addition of fresh vegetables like tomatoes, cucumbers, and potatoes adds fiber to the dish, aiding in digestion and promoting overall gut health.
    • Packed with Flavor: The blend of spices and tangy tamarind pulp creates a flavor explosion in every bite, making chana chaat a truly irresistible snack option.

    FAQ:

    Can I Make Chana Chaat Ahead of Time? 

    Yes, you can prepare the chana mixture ahead of time and refrigerate it. Simply assemble the chaat with fresh vegetables and spices before serving.

    Can I Skip Adding Veggies to Chana Chaat? 

    While vegetables add freshness and texture to the chaat, you can certainly enjoy chana chaat without them. Adjust the recipe according to your taste preferences.

    How Long Does Chana Chaat Last in the Refrigerator? 

    Chana chaat can be stored in the refrigerator for 2-3 days. Make sure to store it in an airtight container to maintain its freshness.

    In conclusion, chana chaat is a delightful dish that combines the goodness of kala chana with a burst of spices and fresh vegetables. With this recipe of chana chaat mastered, you’ll have a versatile snack that’s perfect for any occasion. So, roll up your sleeves, gather your ingredients, and embark on a flavorful culinary adventure with chana chaat.

    Explore more recipes on Manjula’s Kitchen: Vegetable Samosas, Paneer Tikka, Crispy Spinach Pakoras, Mango Lassi, Masala Chai, Gulab Jamun, Kheer (Rice Pudding)

  • Dahi Bhindi (Okra with Yogurt Gravy)

    Dahi Bhindi (Okra with Yogurt Gravy)

    Dahi Bhindi

    Dahi Bhindi

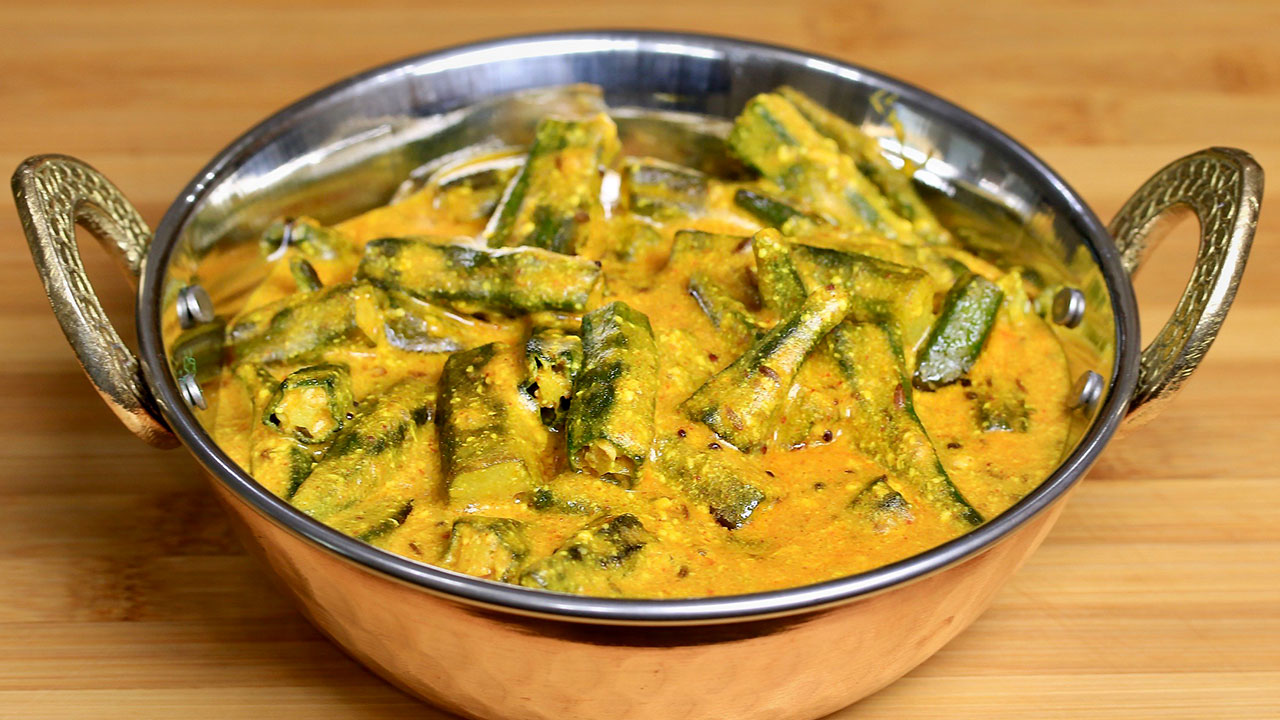
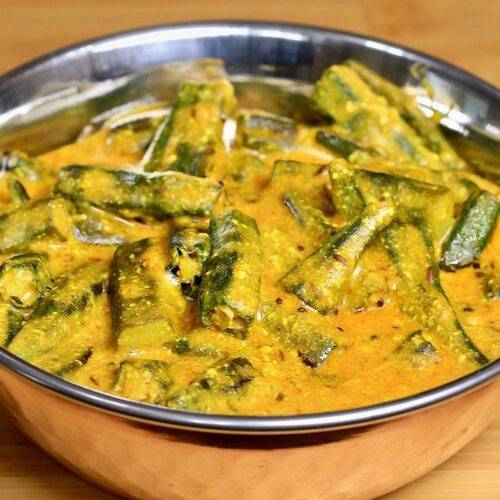
    Dahi Bhindi is a great way to enjoy okra in tangy creamy sauce. Dahi Bhindi is simply delicious, and easy to make. This goes well with Jeera (Cumin) Rice, or roti-paratha.
    4.43 from 7 votes
    Prep Time 10 minutes
    Cook Time 20 minutes
    Total Time 30 minutes
    Course Main Course
    Cuisine Indian
    Servings 4 people

    Ingredients
      

    • 40 medium size okra (bhindi) after cutting them in half it should be about 2 cups.
    • 3 Tbsp oil canola or vegetable oil
    • 1/2 tsp cumin seeds jeera
    • 1/4 tsp mustard seeds rai
    • 1/8 tsp asafetida hing
    • 1 Tbsp besan gram flour
    • 2 tsp coriander powder dhania
    • 1 tsp Red Chili Powder
    • 1/4 tsp Turmeric Powder
    • 1 cup yogurt dahi, curd
    • 1 cup water approximately
    • 1/2 tsp salt

    Instructions
     

    • Wash and pat dry the okra cut both ends, and cut them into about 1-inch pieces. I have used about 35 medium size okra after cutting, they are about 2 cups.
    • Heat 2 tablespoons of oil in a frying pan over medium heat and stir fry the okra till they are tender. This should take about 7-8 minutes.
    • Take them out in a bowl and use the same pan for making gravy.
    • Heat 1 tablespoon of oil, over medium heat. After the oil is moderately hot add the cumin seeds, mustard seeds and asafetida as the seeds crack, turn down the heat to low.
    • Add the besan and stir fry for about 1 minute until it has a light aroma, and is golden brown in color. Besan gives the thickness to gravy.
    • Add yogurt, turmeric, chili powder and coriander powder. Mix it well. And cook until the spice mix comes together, and you should be able to see the oil leaving the sides of spice mix. This should take about 2-3 minutes.
    • Spice mix is ready add about 1/2 cup of water and salt, bring it to boil. Add okra and let it cook for 3-4 minutes, on low heat.
    • Suggestions: You can make so many different dishes using this gravy. Instead of okra use potatoes, paneer, green peas, mixed vegetables, or any vegetable you have. 

    Notes

    Enjoy with plain white rice or any Indian flat bread, like Roti, Paratha, Puri
    Tried this recipe?Let us know how it was!