Delicious and Easy Indian Vegetarian Recipes for Every Occasion
Indian cuisine is known for its rich variety of spices, flavors, and vibrant vegetarian dishes that suit every occasion. Whether you’re planning a family dinner, hosting a potluck, or looking for a quick snack, Manjula’s Kitchen offers a wide array of Indian vegetarian recipes that are both healthy and delicious.
Here’s a selection of recipes from Manjula’s Kitchen to try out at home:
1. Vegetable Biryani
Vegetable Biryani is a fragrant rice dish cooked with vegetables, aromatic spices, and herbs. This one-pot meal is perfect for family dinners or gatherings and pairs well with yogurt or raita for a complete meal.
2. Paneer Tikka
Paneer Tikka is a popular grilled dish made with marinated paneer cubes cooked to perfection. The smoky flavor of this appetizer makes it a hit at parties and potlucks. Serve it with mint chutney for a burst of flavor.
3. Aloo Gobi
Aloo Gobi is a simple yet delicious combination of potatoes and cauliflower, cooked with cumin, turmeric, and coriander. It’s a quick and easy dish that pairs well with chapati or paratha.
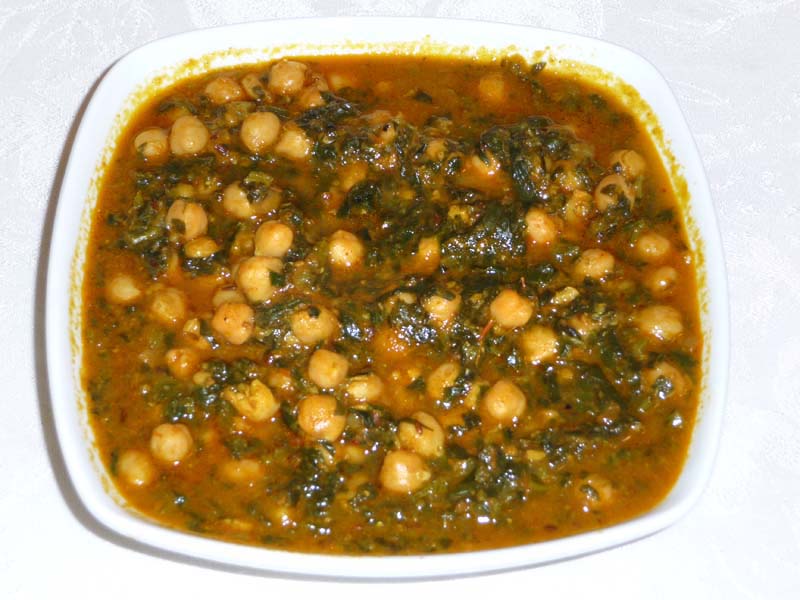
4. Chana Masala
Chana Masala is a flavorful chickpea curry made with tomatoes, and a blend of spices. This protein-packed dish is perfect for serving with basmati rice or puris, making it a wholesome meal for any time of the day.
5. Dal Tadka
Dal Tadka is a staple in Indian households, made with yellow lentils and flavored with a tempering of cumin, garlic, and red chili. It’s a comforting and protein-rich dish served with rice or chapati.
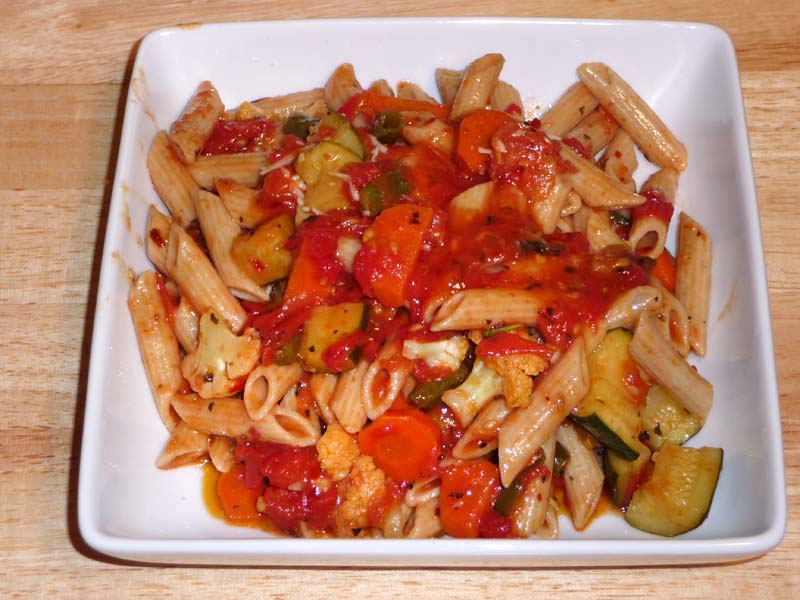
6. Vegetable Pulao
Vegetable Pulao is a quick and easy rice dish made with mixed vegetables and fragrant spices. It’s a versatile meal that can be served on its own or alongside curries, making it perfect for busy weeknights.
7. Samosa
Samosas are crispy pastry pockets filled with a spicy potato mixture. These popular Indian snacks are perfect for potlucks, parties, or family gatherings. Serve with tamarind or mint chutney for a complete snack experience.
8. Palak Paneer
Palak Paneer is a creamy spinach-based dish with cubes of paneer (Indian cottage cheese). This healthy and flavorful recipe is rich in iron and perfect for pairing with naan or chapati.
9. Baingan Bharta
Baingan Bharta is a smoky, mashed eggplant dish cooked with tomatoes and spices. It’s a flavorful and healthy dish that goes well with Indian flatbreads like roti or paratha.
10. Kheer (Rice Pudding)
Kheer is a traditional Indian dessert made from rice, milk, and sugar, flavored with cardamom and saffron. This sweet treat is perfect for festivals or as a delightful end to any meal.
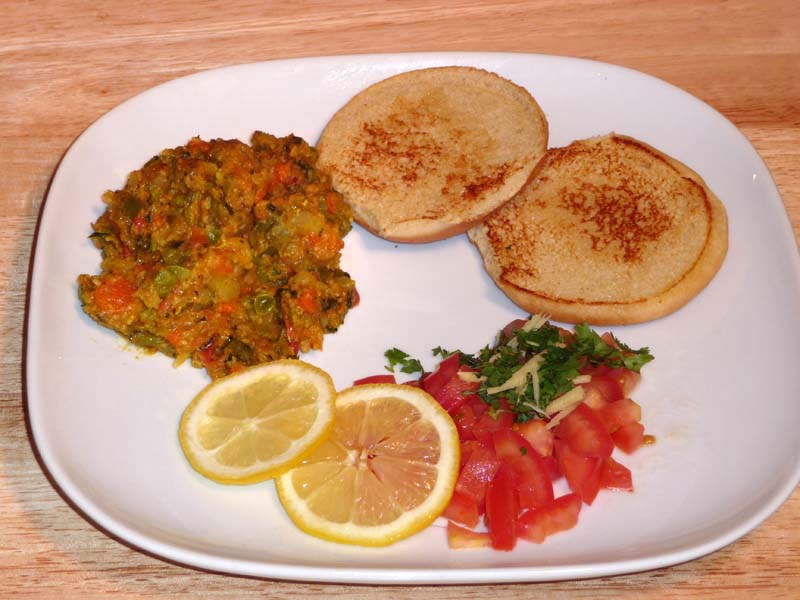
11. Pav Bhaji
Pav Bhaji is a popular street food dish made with mashed vegetables cooked in spices and served with buttered buns (pav). It’s a flavorful and hearty meal that’s perfect for potlucks or family dinners.
12. Dhokla
Dhokla is a steamed savory cake made from fermented chickpea batter. It’s light, fluffy, and tangy, making it an excellent appetizer or snack. Serve with green chutney for a refreshing side.
13. Rajma (Kidney Beans Curry)
Rajma is a hearty kidney bean curry simmered in a flavorful tomato gravy. This protein-packed dish is perfect for family meals and pairs beautifully with rice or naan.
14. Masoor Dal
Masoor Dal is a simple and nutritious red lentil curry that’s easy to make and packed with flavor. It’s a great source of protein and goes well with both rice and roti.
15. Rava Idli
Rava Idli is a steamed semolina cake, perfect for breakfast or a light dinner. It’s quick to prepare and can be served with coconut chutney and sambar for an authentic South Indian meal.
Conclusion
Whether you’re planning a special dinner, preparing for a potluck, or simply looking for a quick and healthy meal, these Indian vegetarian recipes from Manjula’s Kitchen will add flavor and variety to your meals. Each recipe is easy to follow, packed with rich Indian flavors, and perfect for vegetarians and vegans alike.
For more recipes and inspiration, visit Manjula’s Kitchen and explore the delicious world of Indian vegetarian cooking!
Paneer Paratha is whole-wheat flat bread filled with mildly spiced paneer Indian Cheese). This is a good breakfast option. Paneer paratha can be served by itself or enjoyed with any gravy-based dish.
In a bowl, mix whole-wheat, all-purpose flour, salt and oil. Add water to make soft dough (adjust the water as needed).
Knead the dough on a lightly greased surface. The dough should be very smooth and soft.
Set the dough aside and cover. Let the dough rest for at least ten minutes.
Filling
Mix all the ingredients for filling together, mix it well (don’t knead the filling).
Making Paratha
Divide the dough and the paneer mix into 6 equal parts.
Roll the dough into 3-inch diameter circles. Place the paneer balls in the center. Seal by pulling the edges of the rolled dough together to make a ball. Proceed to make all six balls.
Let them settle for 3 to 4 minutes before rolling them.
Heat the skillet on medium high. An iron skillet works best. To check if the skillet is hot enough. Sprinkle a few drops of water on the skillet, water should sizzle. Skillets should not be smoking.
Before rolling the paratha roll the filled ball in dry whole-wheat flour.
Lightly press the ball and keep it sealed side up. Roll the ball lightly handed in to 6–7-inch circle. Whenever the dough sticks to the rolling pin or rolling surface, lightly sprinkle dry whole-wheat flour on both sides of the semi-rolled paratha.
Place the paratha over the skillet. About half a minute you will see the paratha changing in color lightly and puff different places.
Then flip the paratha over. You should see some light golden-brown spots on the topside. After a few seconds, spread 1 teaspoon of oil on the paratha. Again, flip the paratha and lightly press the puffed areas with a spatula that will help the paratha too puff from other sides.
Flip again and press with the spatula making sure the paratha is golden-brown on both sides.
For best taste serve parathas hot as they get soft as they cool.
Parathas can be kept outside for a day. For later use, parathas can be refrigerated for 5-6 days or freezed (wrapped in aluminum foil) for a month. Reheat a skillet or toaster oven.
Sugar free Vegan Vanilla Ice Cream using Coconut Milk
In my every day cooking I use a lot of coconut and coconut oil. But haven't really tried them in making ice creams, until I saw a Coconut Milk Ice cream in one of the health food stores and also came across lot of recipes when I searched in internet on Coconut Milk ice cream. Most of the recipes either used sugar, agave, honey or maple. Even though the latter sweeteners are much better alternate than sugar in terms of dental health, they are high in fructose. So if you are watching your carb and sugars these are not for you. I finally nailed down a recipe using Xylitol and this was absolutely delicious. So try it out and let me know what you think. This recipe is so simple and you don't need an Ice Cream maker for this. Its a healthy, vegandessert recipe that is great for summers.
1/2 Cup Xylitol (You can substitute sugar for xylitol if you want to)
1 Cup Cashews
2 Tbsp Agar Agar Flakes
1/2 Tsp Vanilla extract
2 Tbsp Coconut Oil
Instructions
Method
Take the agar agar flakes and add it to the coconut milk and let this sit for 10-15 minutes till the flakes soften.
Simmer on low to medium heat and add the xylitol and retain it till the agar agar flakes and xylitol both dissolve.
Let this cool down for 10-15 minutes, now pour the coconut milk mixture in a blender ( I used Vitamix) add the cashews, coconut oil, vanilla extract and blend till smooth.
Pour in a container and keep it aside for 10-15 minutes till the mixture is lukewarm, cover and refrigerate overnight.
Scoop out using an ice cream scoop dipped in hot water and enjoy.
The coconut is such a versatile fruit and can be incorporated in a myriad of recipes. Instead of using coconut for its meat i decided to use coconut flour and create some wonderfully delicious pancakes. Coconut flour is fast gaining popularity as a great health food. It is low in carbohydrate content and high in fiber and it helps with weight loss.I've also made coconut syrup to go with this vegan coconut pancakes. Followed by a glass of tender coconut water, it makes a very healthy and tasty breakfast which at the same time is packed with protein and fiber and a great deal of nutrients and antioxidant from coconut water.
Add the coconut milk and combine. Keep stirring as you add the milk and whisk to form smooth batter.
Heat a griddle on medium heat.
Pour 1/3 cup batter in the center of the heated griddle and gently spread to about 5 inches diameter.
Drizzle with about 1 tsp of coconut oil.
Flip the pancake over after about a minute. It should be golden brown in color. Let the other side cook for about half a minute and then remove it from the griddle.
Make the other pancakes in this manner
for Cocunut Syrup
Take water in a vessel and let it come to a boil.
Add jaggery and turn heat to medium. Heat until the jaggery dissolves fully and starts forming a syrupy texture.
Add the coconut and let it cook for about 3 minutes.
Add the cardmom powder and remove from heat.
Putting it all together
We will form a stack of four pancakes. So take one pancake. Drizzle some syrup on it making sure u get enough coconut on the pancake. Continue stacking 4 pancakes in this manner. Drizzle the rest of the syrup on the topmost pancake and top with some freeze dried or fresh fruits of your choice. Enjoy!. The pancakes are tasty enough without the syrup too so the health conscious can enjoy the low-carb high fiber pancakes without the extra carbs from the syrup. What a guilt free and sumptuous breakfast!
Black Eyed Bean is also known as Lobia or Chawli This is a basic recipe, quick & easy, healthy and nutritious recipe to make, very delicious and protein-rich.
In a small bowl, mix the ginger, green chili, coriander powder, turmeric, and 3 tablespoons of water to make a paste.
Heat the oil in pressure cooker on medium heat. Test the heat by adding one cumin seed to the oil; if seed cracks right away oil is ready. Add the cumin seeds as they crack add asafetida, add the spice paste and stir for a minute until spices start leaving the oil.
Add Black Eyed Beans, salt and water close the pressure cooker as pressure cooker starts steaming turn the heat down to medium and cook for 6-7 minutes.
Turn off the heat and wait until the steam has stopped before opening the pressure cooker. Black-eyed beans should be soft and tender.
Add mango powder, garam masala, and tomatoes, and cover the cooker for a few minutes. That will give tomatoes a chance to get semi-cooked with steam.
Garnish this with lemon wedge.
Notes
TipsMaking a paste with the spices will prevent the spices from burning.
Mastering the Art of Black-eyed beans are a type of legume that are also known as black-eyed peas. They are a variety of cowpea and are commonly used in cooking around the world. Black-eyed beans are a popular ingredient in many cuisines due to their versatility and nutritional value. They are a good source of plant-based protein, making them a great option for vegan and vegetarian diets.
Additionally, they are naturally gluten-free, making them suitable for those with gluten sensitivities or celiac disease. Black-eyed beans can be used to make a variety of dishes, including salads, soups, stews, and curries. They are often used in combination with other ingredients such as vegetables, spices, and grains to create flavorful and nutritious meals.
How To Make The Best Black Eyed Beans Recipe
Rinse the beans: Give your black-eyed beans a good wash under running water.
Soak the beans (optional): Soaking the beans for at least 1 hour (or even overnight) will make them softer and easier to digest. You can skip this step if you’re short on time, but the beans may take longer to cook.
Make a spice mix: Combine ginger, green chili, coriander powder, turmeric, and a little water to create a flavorful paste.
Heat oil and spices: Add oil to your pressure cooker and heat it up. Then, add cumin seeds and wait for them to sizzle. This tells you the oil is hot enough. Once hot, toss in a pinch of asafetida (optional) followed by the spice paste. Let the spices cook for a minute or so until they smell fragrant.
Cook the beans: Add the rinsed (and possibly soaked) beans along with water and salt to the pressure cooker. Close the lid and let it come up to pressure. Once it starts steaming, reduce heat and cook for 6-7 minutes.
Release pressure and add flavor: Once done cooking, turn off the heat and let the pressure release naturally for a while. Then, carefully open the cooker. Now, add some mango powder, garam masala, and chopped tomatoes. Close the lid again for a few minutes to let the tomatoes soften with the steam.
Serve and enjoy! Finish the dish with a squeeze of lemon juice for a fresh touch. Your delicious black-eyed beans are ready to be devoured!
Tips for Cooking the Best Black-Eyed Beans
Use Fresh Beans: Whenever possible, use fresh, high-quality black-eyed beans for the best results. Fresh beans will cook more evenly and have better texture compared to older beans.
Don’t Salt Too Early: Avoid adding salt to the cooking water until the beans are almost fully cooked. Adding salt too early can toughen the beans and prolong the cooking time.
Customize the Flavor: Experiment with different seasonings and aromatics to customize the flavor of the beans to your taste preferences. Don’t be afraid to get creative and try new combinations of herbs and spices.
Frequently Asked Questions (FAQs)
What are the health benefits of black eyed beans?
Black eyed beans are a nutritional powerhouse! They are a good source of protein, fiber, folate, iron, and magnesium. These contribute to a healthy heart, blood sugar control, and overall well-being.
Do I need to soak black eyed beans before cooking?
Soaking is not strictly necessary, but it helps reduce cooking time and can make the beans easier to digest. Soaking for at least 6 hours is recommended, or you can use a quick soak method.
How long does it take to cook black eyed beans?
Cooking time depends on whether you soaked them beforehand. Soaked beans will take about an hour to cook on the stovetop, while unsoaked beans can take up to two hours.
How can I use black eyed beans in recipes?
Black eyed beans are incredibly versatile! They are a delicious addition to soups, stews, salads, dips, and even burgers. You can find them used in cuisines worldwide, from Southern Hoppin’ John to Brazilian Feijoada.
Are black eyed peas the same as black eyed beans?
Yes, black eyed beans and black eyed peas are the same thing!
Where can I buy black eyed beans?
Black eyed beans are widely available in most grocery stores. You can find them dried in bulk bins or bags, or canned and pre-cooked for convenience.
How should I store black eyed beans?
Dried black eyed beans can be stored in an airtight container in a cool, dry place for up to a year. Cooked black eyed beans should be stored in an airtight container in the refrigerator for up to 5 days, or frozen for longer storage.
Summer is the best time for frozen treats and there is nothing better than ice cold Popsicle. These Popsicles are made with fresh fruits. This is a kid’s friendly recipe. This recipe is for two different fruit flavored Popsicles, orange and strawberry.
This drink is inspired by my absolute favorite drink at KAFE, a hip and healthy restaurant in the beautiful Ubud, Bali. A refreshing combination of mangoes, raspberries, and coconut, this drink rejuvenates and re-hydrates from the inside.I have chosen coconut milk for 2 reasons: 1) it is cooling and calming (and hence decreases Pitta!), and 2) it doesn't violate any of the Ayurvedic food combination rules. If you prefer less viscous smoothies, simply substitute the coconut milk for coconut water.Enjoy this drink on an empty stomach and at least a half hour before a snack or meal.
Combine cucumber, honeydew and lime juice and salt.
Blend most of the blueberries (reserve a handful) with ½ cup of water.
Strain the blueberry purée into an ice cube tray, filling up half of the molds. In each of the other molds, place 3-5 whole blueberries (from the reserved handful) and fill with water. Put in freezer to set for about two hours.
To serve, arrange the blueberry ices in a glass alternately and top with juice. Garnish with sprig of mint. If desired, sugar or other sweetener can be added. Enjoy!
1 Melon (Gala for light sweet/Honey Dew for more sweet)
4 teaspoon lemon juice
1/2 teaspoon chilli flakes
2 teaspoon ginger juice
Salt and Pepper to Taste
2 teaspoon sugar (Optional, depending on taste)
1/2 Cup water
For Cheese Crackers:
3-4 Savory Crackers of your choice
3-4 thick cut feta cheese cubes
2 tablespoons of Green, Red and Yellow Bell Peppers
few Coriander leaves
4-6 Black Olives
Salt and Pepper for Seasoning
For garnish:
1 Tablespoon feta cheese to sprinkle
2-4 Olives
1 inch cube of melon cut into 4 small parts
Coriander leaves to decorate
1 Tablespoon of mixed bell Peppers cubes
4 Toothpicks
Instructions
Method
Cut the Melon (leave a 1 inch cube aside for decoration later) into medium pieces and marinate with the lemon juice, ginger juice, chilli flakes, salt and pepper in the refrigerator for half an hour. It is good to marinate the melon slices in the spices to assimilate all the flavors well, but if you don't have time to marinade you can make the soup instantly as well.
Blend the marinated melon in a mixer with about half cup water.
Pour the Soup into Serving Cups and Garnish with crumbled cheese, coriander and olives.
In a small bowl make a mixture of small cubes of bell peppers, olives and melon and season with salt and pepper. Take a toothpick, skew the small pieces onto it. Decorate on the glass.
Take 3-4 savory crackers, Gently keep the cube of feta cheese on top and garnish with olives, peppers and season. Serve beside the soup as a teaser.
Relish as a snack drink or a refreshing starter.
Notes
Variations:
This soup can be made with any melon variety of your liking. You may also add mint for freshness.
As a serving suggestion, this soup can also be served in half cut scooped out shells of the melon.
soak almonds and cashew nuts both in a small cup of water for 20 minutes and then remove the skin of almonds and keep aside
remove seeds in dates and soak them in water for 20 minutes and keep aside
now blend soy milk, watermelon pieces, strawberries, banana, apple, vanilla essence, soaked almonds, cashew nuts and dates. (number of dates can be adjusted according to taste)
add crushed ice and blend again and pour in tall glass.
now add watermelon cubes into glass and stir it with spoon once.
This is a great recipe to satisfy your and your kid’s sweet tooth. Your family and guests will appreciate a dessert tray filled with chocolate brownies. These brownies are very moist and have a deep chocolate flavor its a sweet snack loved by all.
Preheat the oven to 350 degree F/180c. Grease the 8×8-baking pan.
Mix the tofu until it is smooth.
Mix flour, salt and baking soda, set aside.
In a mixing bowl stir together the oil, cocoa powder and sugar until its well blended. Then stir in the mixed tofu and vanilla.
Add the flour mix and once its well-mixed, then fold-in walnuts.
Pour the mixture into a greased baking pan evenly and bake it for 25 to 30 minutes. Place the pan on the middle oven tray.
Once the brownies are baked, let them cool to room temperature before cutting the brownies into squares. Cutting too early will make the brownies to crumble.
This is a delicious pasta dish with fresh spinach and rich white sauce. It is my version of fettuccini alfredo. Creamy spinach pasta looks and tastes great. Its a nice vegetarianappetizer.
6 ozchopped spinach, just the leaves, about 2 cups
Instructions
Bring a large pot of water to boil, add salt and oil. After water boils add the pasta.Cook the pasta until it is tender this will take about 10 minutes. Drain the water and set pasta aside.
Heat the oil over medium heat and add all-purpose flour, then stir for a minute. Add basil, Italian herb mix, black pepper, and chili flakes, and stir for another minute.
While stirring slowly add cream making sure there are no lumps. After it comes to a boil, add milk then bring it to a boil again.
Add spinach, mix it well and let it cook for 2-3 minutes stirring continuously, then turn off the heat. Add Mozzarella cheese and stir.
Dal is a staple dish in Indian meals and, for most Indian vegetarians, a frequent source of protein. This delicious, nourishing dish can accompany any number of different meals be it dinner or lunch as a simple main course the dish fills all appetite. Mixing a variety of lentils gives a more interesting flavor.
1/4 cup split urad dal (with skin) (available in Indian grocery stores)
1/4 cup split-wash moong dal (without skin) (available in Indian grocery stores)
1/4 cup lentil (masoor)
1/4 cup toor dal/arhar (available in Indian grocery stores)
1/2 teaspoon turmeric (haldi)
1 tablespoon minced ginger
1-1/2 teaspoon salt
3 cups water
1/2 teaspoon garam masala, optional (available in Indian grocery stores)
1/2 teaspoon mango powder (amchoor)
Chaunk (Seasoned oil)
4 tablespoons clarified butter (ghee); or oil
1 teaspoon cumin seeds (jeera)
1/8 teaspoon asafetida (hing)
4 whole red chilies
1/2 teaspoon red chili powder
Instructions
Method
Combine all dals. Wash and soak in approx. four cups of water for at least 30 minutes. Drain the water.
Put three cups water into a pressure cooker and add salt, turmeric, and ginger. Cook on medium high heat.
When the pressure cooker starts to steam, turn the heat down to medium and cook seven minutes.
Turn off the heat and wait until all the steam has escaped before opening the pressure cooker. Dal should be soft and mushy.
Mix dal, if needed, and add more water to adjust thickness to your liking. Cook another three to four minutes on low heat. Dal will thicken as it sits after cooking. So leave it more liquid than you want it to be.
Add garam masala and amchoor powder.
Prepare Chaunk
Heat ghee in a small saucepan. Test the heat by adding one cumin seed to the ghee; if it cracks immediately, the oil is ready. Add the cumin seeds. When they begin to crack, add the asafetida, red chilies and red chili powder. Stir for a few seconds. To prevent the spices from burning, you may add one teaspoon of water. Pour spiced chaunk over dal.
Mixed dal, also known as mixed lentils, is a wholesome and nutritious gluten freehigh protein dish that combines a variety of lentils to create a flavorful medley. This mixed dal recipe is a popular choice in Indian cuisine, loved for its rich taste and comforting texture.
With a harmonious blend of different lentils, mixed dal offers a balanced combination of protein, fibre, and essential nutrients. Let’s dive into the art of making delicious mixed dal that will tantalize your taste buds and nourish your body.
Step 1: Selecting Lentils
Begin by selecting a variety of lentils for your mix dal. Common choices include split green gram (moong dal), split pigeon peas (toor dal), split chickpeas (chana dal), and red lentils (masoor dal). Each lentil brings its unique flavor and texture to the dish, creating a well-rounded flavor profile. Rinse the lentils thoroughly under cold water to remove any dirt or debris before cooking.
Step 2: Preparing the Lentils
In a large bowl, combine the rinsed lentils and soak them in water for at least 30 minutes to soften them and reduce cooking time. Alternatively, you can skip the soaking step and cook the lentils directly, but soaking helps in faster and more even cooking. Once soaked, drain the lentils and rinse them again before cooking.
Step 3: Cooking the Lentils
Transfer the soaked lentils to a pressure cooker or large pot and cover them with water. For every cup of lentils, add approximately three cups of water. Cook the lentils until they are soft and tender, but not mushy. In a pressure cooker, cook the lentils for about 3-4 whistles, while in a pot, simmer them over medium heat for 20-25 minutes, stirring occasionally.
Step 4: Tempering the Dal
In a separate pan, heat ghee or oil over medium heat. Add cumin seeds, mustard seeds, and dry red chilies to the hot oil and let them sizzle and crackle. Then, add ginger, sautéing until they turn golden brown and aromatic. Next, add diced tomatoes and cook until they soften and release their juices, adding a tangy sweetness to the tempering.
Step 5: Flavoring the Dal
Once the tempering is ready, add ground spices such as turmeric powder, coriander powder, cumin powder, and red chili powder to the pan, stirring well to combine. The spices infuse the tempering with their rich flavors and aromatic fragrance, enhancing the taste of the dal. You can adjust the amount of spices according to your preference for heat and flavor intensity.
Step 6: Combining Lentils and Tempering
Once the lentils are cooked and the tempering is flavored, add the tempering to the cooked lentils, stirring gently to combine. Let the dal simmer for a few minutes to allow the flavors to meld together and the consistency to thicken slightly. If the dal is too thick, you can add more water to achieve the desired consistency.
Step 7: Garnishing and Serving
Before serving, garnish the mixed dal with freshly chopped cilantro leaves for a burst of freshness and color. You can also squeeze a dash of lemon juice over the dal for an extra tangy kick. Serve the mixed dal hot with steamed rice or roti for a comforting and satisfying meal.
Tips for Perfect Mixed Dal
Balance of Lentils: Experiment with different ratios of lentils to find the perfect balance of flavors and textures. You can adjust the proportion of each lentil according to your preference.
Tempering Variation: Get creative with the tempering by adding ingredients like curry leaves, green chilies, and grated coconut for added flavor and complexity.
Consistency Control: Pay attention to the consistency of the dal and adjust it by adding more water if it’s too thick or simmering it longer if it’s too thin.
Variations of Mixed Dal
Creamy Coconut Dal: Add coconut milk or grated coconut to the dal for a creamy and indulgent variation. Coconut adds richness and sweetness to the dish, balancing the spices.
Vegetable Medley Dal: Enhance the nutritional value of the dal by adding a variety of vegetables such as carrots, potatoes, and spinach. Vegetables add color, texture, and flavor to the dish, making it more wholesome and satisfying.
Benefits of Mixed Dal
Protein-Packed: Mixed dal is a rich source of plant-based protein, essential for muscle growth and repair.
Fiber-Rich: With a high fiber content, mixed dal promotes digestive health and helps regulate blood sugar levels.
Nutrient-Dense: Mixed dal is packed with essential vitamins, minerals, and antioxidants, making it a nourishing and balanced meal option.
Frequently Asked Questions (FAQs)
Can I use canned lentils for mixed dal?
Yes, you can use canned lentils for convenience, but keep in mind that they may have a softer texture compared to dried lentils.
Can I freeze mixed dal for later use?
Yes, you can freeze mixed dal in an airtight container for up to 3 months. Thaw it overnight in the refrigerator before reheating.
Is mixed dal gluten-free?
Yes, mixed dal is naturally gluten-free as it contains no wheat or gluten-containing ingredients.
This is a mildly spiced, refreshing and healthyappetizer. Tomatoes and cucumbers are filled with sprouted moong or flavored cream cheese. It makes an amazingly colorful finger food that is quick & easy to prepare and tastes incredible.
Prepare Sprouts: In a small frying pan, heat the oil on medium heat. Add cumin seeds and as they crack add sprouts, ginger, black pepper and water. Cook for 2-3 minutes until sprouts are tender. Remove pan from heat. Add lemon juice, stir and set aside.
Prepare cream cheese topping by mixing all the ingredients. Set aside.
Cut tomatoes in half and scoop out the seeds creating hollow bowls.
Take cucumber slices and scoop out the seeds, creating small bowls.
Fill all tomatoes and 4 cucumber slices with moong sprouts.
Fill the remaining 4 cucumber slices with cream cheese filling.
Serve and enjoy!
Notes
How to make sprouts
Soak the whole moong for 10 to 12 hours. Water should be about four times more than the Moong.
After soaking moong, it will double in volume.
Drain the water and loosely wrap the beans with the muslin or cheesecloth. Store the soaked beans in a warm dark place
These are absolutely delicious and flavorful sandwiches that are quick and easy to make. Tofu sandwiches are healthy and appropriate for Vegans, too. The Tofu provides a great source of protein, while the Hari Cilantro chutney brings in a unique ethnic flavor to the sandwich. These sandwiches make a great “to-go” lunch.
Prepare sandwich ingredients: Slice tofu into ¼” thickness and pat dry. Wash and remove ends of zucchini, then cut lengthwise into approx. ⅛” thick slices. Wash and slice tomatoes. Set aside.
Mix Hari Cilantro Chutney and sugar, set aside.
Generously grease a flat skillet and bring to medium heat. Add tofu and zucchini slices and lightly sprinkle with salt. Grill on both sides until they are light-brown in color. Remove from skillet and wipe skillet clean.
Slice rolls lengthwise through the center and lightly spread with olive oil on the inside portion. Place on medium-heat skillet to toast. Turn off the heat.
Assemble the sandwich over the skillet: Turn over the roll and lightly spread Hari Cilantro Chutney on the bottom half of the roll. Layer with lettuce followed by tofu slices. Spread tofu with more chutney. Layer with zucchini followed by tomatoes. Cover with the top half of the roll.
Notes
VariationYellow Squash, eggplant, or mushrooms also taste great in this sandwich.