Search results for: “hari cilantro chutney”

  • Tamarind Chutney

    Tamarind Chutney

    Homemade Tamarind Chutney served in a bowl

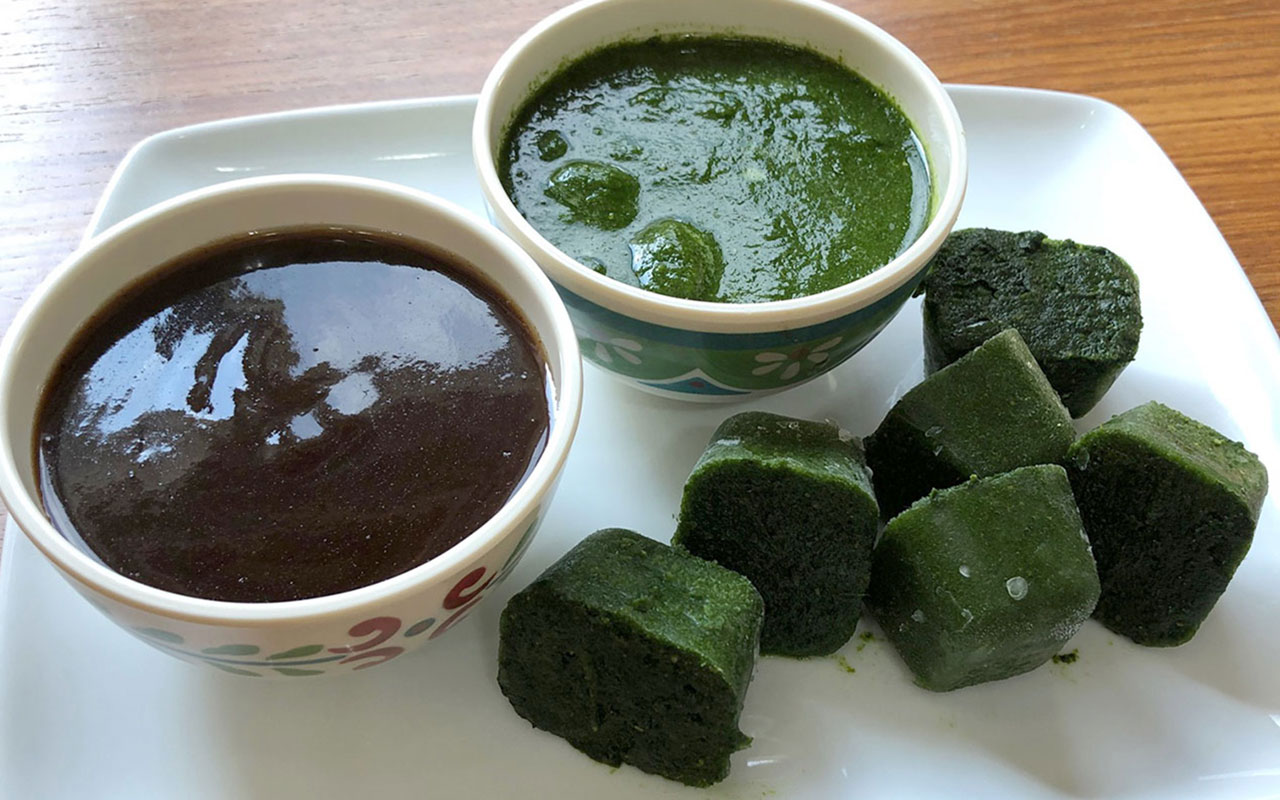
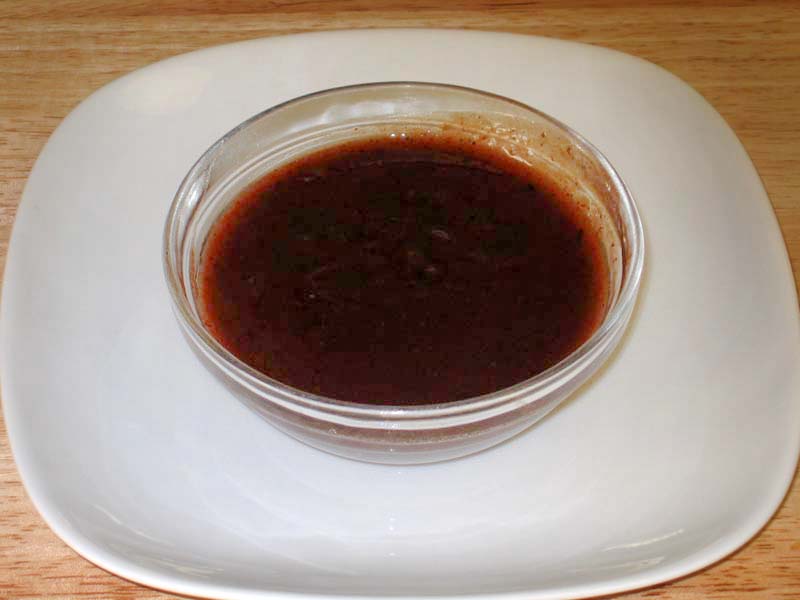
    Tamarind Chutney, Tamarind Sauce

    This exotic sweet and sour chutney is a zesty condiment. This chutney can be called the ketchup of the east and goes best with all kinds of indian snacks, be it pakoras to other snack munchies.
    5 from 3 votes
    Prep Time 5 minutes
    Cook Time 20 minutes
    Total Time 25 minutes
    Course Side Dish
    Cuisine Indian
    Servings 20 people

    Ingredients
      

    • 1/2 lm tamarind seeded imle
    • 2-1/2 cup sugar
    • 2 cups boiling water
    • 1-1/2 tbsp roasted ground cumin seeds
    • 1 tbsp salt
    • 1 tsp black salt
    • 1 tsp red chili powder
    • 1 tsp ground black pepper
    • 1/2 tsp ginger powder

    Instructions
     

    • Break the tamarind into small pieces and soak in boiling water for one hour.
    • Mash it into a pulp and strain, pressing the tamarind into the strainer to remove all the pulp. Add sugar to the pulp. Mix well. Add the remaining ingredients. Mix and taste. Add more sugar, salt or pepper as needed.

    Notes

    Notes
    Chutney can be refrigerated for two to three months.
    Serving Suggestions
    Tamarind chutney is delicious with samosas, pakoras, drizzled over dahi vadas,  or any kind of chat.
    It is also delicious as a dipping sauce for French fries and as a spread over crackers.
    Try drizzling over rice to add a unique flavor to plain rice.
    Variations
    To use as a dip, thicker chutney is ideal. To use as a topping, add water to make the chutney thinner.
    Add water and ice cubes to serve as a cool spicy drink.
    Add equal parts yogurt and chutney to make a dipping sauce.
    Keyword Hot And Spicy, Popular Condiment, Sweet And Sour Sauce
    Tried this recipe?Let us know how it was!

    Tamarind Chutney Recipe: 

    Tamarind Chutney, also known as Imli Chutney, is a sweet and tangy condiment widely used in Indian cuisine. This versatile chutney adds a burst of flavor to a variety of dishes, from savory snacks to appetizers to main courses. 

    Why Tamarind Chutney is so popular:

    • Rich Flavor Profile: Tamarind Chutney is prized for its unique combination of sweet, tangy, and slightly sour flavors. The tartness of tamarind is balanced with sweetness from jaggery or sugar, creating a harmonious blend of tastes that enhances the overall flavor of any dish.
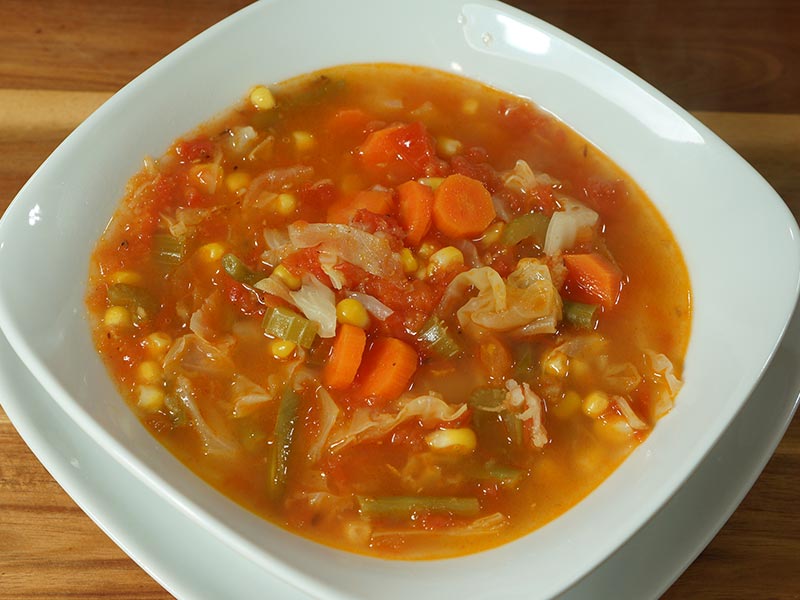
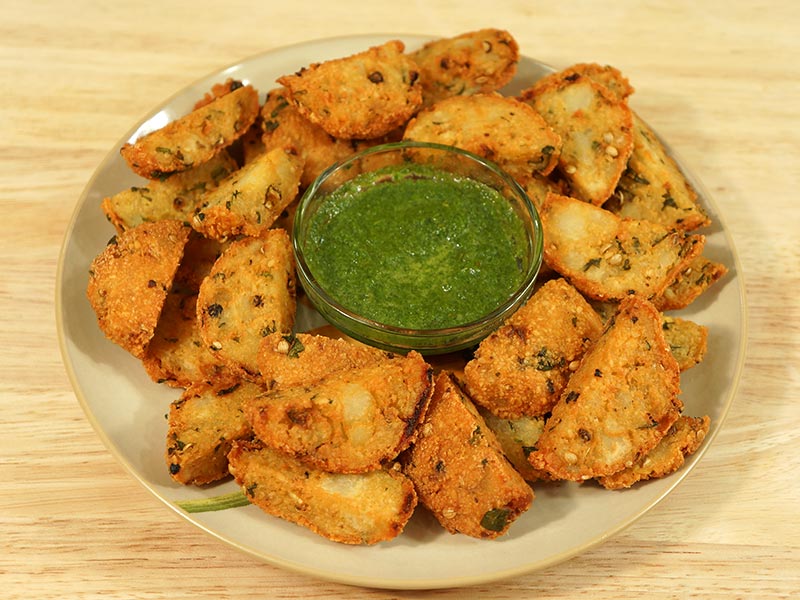
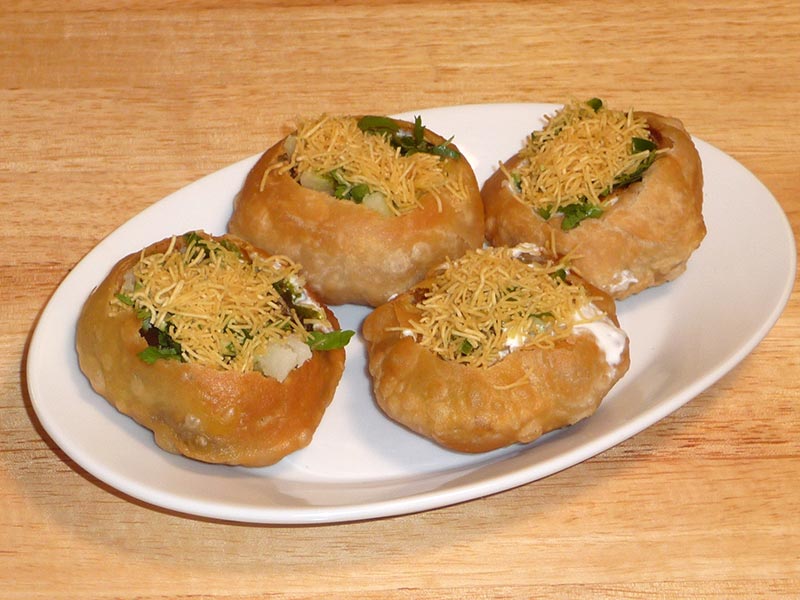
    • Versatile Usage: Tamarind Chutney is incredibly versatile and can be used in various ways. It’s commonly served as a dipping sauce for snacks like samosas be it or pakoras like Spinach Potato Pakora, Cabbage Pakora or Palak Pakora, and Chaat. Its tangy-sweet flavor adds depth and complexity to both savory and sweet dishes.
    • Digestive Properties: Tamarind is known for its digestive properties and is often used in traditional medicine to aid digestion and relieve gastrointestinal issues. Tamarind Chutney, with its natural acidity, can help stimulate digestion and alleviate discomfort after a heavy meal.
    • Easy to Prepare: Making Tamarind Chutney at home is simple and requires only a few basic ingredients. With minimal effort, you can whip up a batch of this flavorful condiment to elevate your favorite dishes and impress your guests.

    Variations of Chutney:

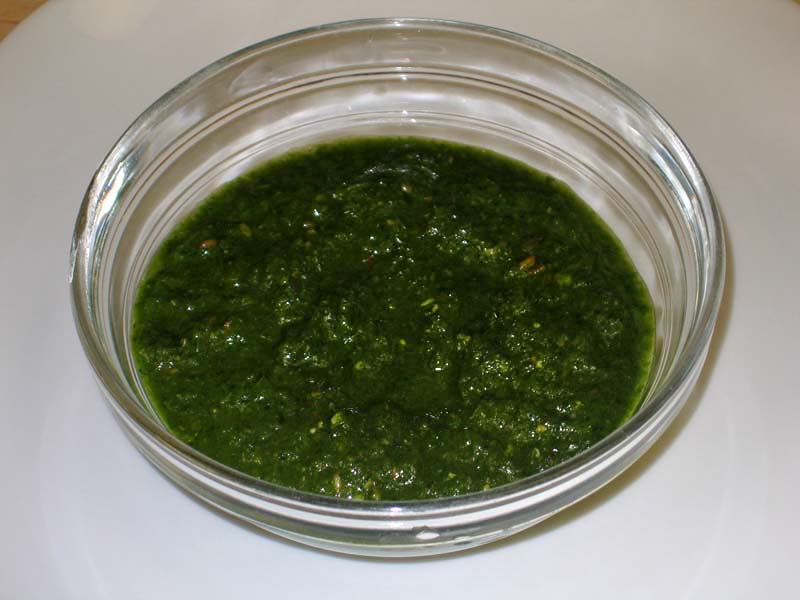
    • Hari Cilantro Chutney: Hari chutney is a blend of fresh cilantro (green coriander) and variety of spices. Hari chutney is a “must” with pakoras, samosas, chaats, and many popular Indian snacks.
    • Date And Raisin Chutney: Date and Raisin chutney! This exotic sweet and sour chutney is mildly spiced, this will complement any meal. This recipe is quick and easy to make.
    • Methi Chutney: Methi Chutney is a popular North Indian condiment. Methi Chutney is packed with flavors, sourness from mango, sweetness from raisins; some bitterness from fenugreek, mixed with spices it has a very unique taste. 
    • Tomato Chutney: Tomato Chutney with freshly grated ginger for a warming and aromatic flavor. It adds a spicy and pungent kick to the chutney, making it ideal for pairing with rich and hearty dishes like kebabs and curries.

    Tips for Making Perfect Tamarind Chutney:

    • Soak Tamarind Properly: Start by soaking tamarind pulp in warm water to soften it before extracting the pulp. This helps to release the natural flavors and acids from the tamarind, resulting in a more flavorful chutney.
    • Adjust Sweetness and Tanginess: Taste the Tamarind Chutney as you go and adjust the sweetness and tanginess according to your preference. Add more jaggery or sugar for a sweeter chutney, or increase the amount of tamarind pulp for a tangier flavor.
    • Strain for Smooth Texture: For a smooth and silky texture, strain the Tamarind Chutney after cooking to remove any fibrous or gritty particles. This ensures a velvety consistency and enhances the overall eating experience.
    • Store Properly: Store Tamarind Chutney in an airtight container in the refrigerator for up to a month. It can also be frozen for longer storage. Allow it to thaw before using and adjust the consistency with a little water if needed.

    FAQs about Tamarind Chutney:

    Is Tamarind Chutney gluten-free? 

    Yes, Tamarind Chutney is naturally gluten-free as it’s made with tamarind pulp, sugar or jaggery, and spices, which are all gluten-free ingredients. It’s safe for individuals with gluten intolerance or celiac disease to consume.

    Can I make Tamarind Chutney without sugar?

    Yes, you can make Tamarind Chutney without sugar by using alternatives like jaggery, honey, or maple syrup. Adjust the amount of sweetener according to your taste preferences and dietary restrictions.

    How long does Tamarind Chutney last? 

    Tamarind Chutney can be stored in the refrigerator for up to a month in an airtight container. If properly stored, it can last even longer. However, always check for signs of spoilage before consuming.

    What can I serve with Tamarind Chutney? 

    Tamarind Chutney pairs well with a variety of dishes, including samosas, pakoras, chaat, grilled meats, and rice dishes. It adds a tangy-sweet flavor and enhances the overall taste of the dish.

    In conclusion, Tamarind Chutney is a delightful and versatile condiment that adds a burst of flavor to a wide range of dishes. Whether enjoyed as a dipping sauce for snacks or as a condiment for main courses, its tangy-sweet taste and aromatic spices are sure to tantalize your taste buds and elevate your dining experience. So why not try making a batch of homemade Tamarind Chutney and discover the joy of this beloved Indian condiment?

    Stay tuned for our next exploration into the world of culinary delights!

  • Hari Chutney

    Hari Chutney


    Hari Cilantro Chutney

    Hari Cilantro Chutney

    Hari chutney is a blend of fresh cilantro (green coriander) and variety of spices. Hari chutney is a “must” with pakoras, samosas, chaats, and many popular Indian snacks. Like ketchup and other popular condiments, hari chutney can be used in a variety of different ways!
    5 from 1 vote
    5 10 minutes
    Course Side Dish
    Cuisine Indian
    Servings 6 people

    Ingredients
      

    • 1 large bunch of cilantro. will be about cups
    • 3 green chilies chopped about 2 tbsp
    • 3 tbsp lemon juice
    • 1/2 inch ginger
    • 1-1/2 tsp salt
    • 1 tsp cumin seeds jeera
    • 1 tsp oil
    • 1 tsp sugar
    • 1/8 tsp asafetida hing

    Instructions
     

    • Blend all ingredients, except the cilantro, into a paste. Add cilantro, a little at a time, and blend until smooth. Add water as needed.
    • Taste and adjust salt, green chilies, or lemon juice as desired.

    Notes

    Tips:
    Using a little oil and sugar keeps the color fresh.
    While cleaning cilantro (hara dhania) chop off just the thick stems.
    You can make hari chutney in large quantity in advance and freeze it in ice cube trays. Store the frozen cubes in a zip-lock plastic bag. When ready to serve, defrost as many cubes of hari chutney as needed.  If you freeze the hari chutney soon after preparing, the chutney will not lose its bright green color and freshness.
    Variations:
    Mix mint leaves (without stems) with cilantro half and half.
    Serving Suggestions:
    To make a delicious dip for vegetables, chips, or crackers, mix one part chutney and three parts yogurt.  
    To make a sandwich spread, mix 1 part chutney and 2 parts cream cheese.
    Tried this recipe?Let us know how it was!
  • How to Save The Chutney

    How to Save The Chutney

    Chutney are a big part of the condiments that I serve and I always like to keep them handy since they have long shelf life. These chutneys are used as an extra source of flavor with many appetizers, snacks, and chaat (whether it be sweet, sour,spicy, etc.). They are great to have readily available, because it makes life so easy when preparing a large menu, especially when you are in mood to have something spicy or when you make a sudden plan to entertain family or friend for afternoon tea. You can easily take any kind of dry snacks that you have on hand, even boiled potatoes, chickpeas, or crackers and turn them into a mouth-watering treat.
    These two chutneys, in my opinion, are a staple to every household preparing Indian food. I have their recipes on my website.

    Tamarind Chutney

    This chutney can be refrigerated for months. I like to make it thick in texture so that I can adjust the thickness of the chutney depending on what I am using it for. This exotic, sweet and sour chutney and can be called the ketchup of the east! This is delicious as a dipping sauce for French fries, as a spread over crackers, or even as a zesty addition to a rice dish. You really can never go wrong with it.

    Cilantro Chutney

    I prefer to prepare this in a large quantity in advance and freeze it in ice cube trays. You can store the frozen cubes in a zip-lock plastic bag. When you ready to serve, defrost as many cubes of chutney as needed. And after so many years, I have finally learned how to keep the vibrant green color of chutney. When blending the chutney, use crushed ice to blend instead of room temperature water; I was amazed by the difference it makes.

    Keep looking out for my blogs because I will continue sharing the tips I have learned over the years. It might just solve the one problem you could not figure out.

  • Grilled Tofu Sandwich

    Grilled Tofu Sandwich

    Grilled Tofu Sandwich

    Grilled Tofu Sandwich

    These are absolutely delicious and flavorful sandwiches that are quick and easy to make. Tofu sandwiches are healthy and appropriate for Vegans, too. The Tofu provides a great source of protein, while the Hari Cilantro chutney brings in a unique ethnic flavor to the sandwich. These sandwiches make a great “to-go” lunch.
    No ratings yet
    Course sandwich
    Cuisine Indian
    Servings 2 sandwiches

    Ingredients
      

    Ingredients:

    • French rolls or sandwich rolls
    • 4-¼ inch thick firm tofu slices (tofu usually comes in 16oz blocks soaked in water and each of these will make approx. 12 slices)
    • 1 zucchini
    • slices of tomatoes
    • Few pieces of romaine lettuce
    • 2 tablespoons olive oil
    • ¼ cup Hari Cilantro Chutney
    • 2 teaspoons  sugar
    • About 1/8 teaspoon salt

    Instructions
     

    Method

    • Prepare sandwich ingredients: Slice tofu into ¼” thickness and pat dry. Wash and remove ends of zucchini, then cut lengthwise into approx. ⅛” thick slices. Wash and slice tomatoes. Set aside.
    • Mix Hari Cilantro Chutney and sugar, set aside.
    • Generously grease a flat skillet and bring to medium heat. Add tofu and zucchini slices and lightly sprinkle with salt. Grill on both sides until they are light-brown in color. Remove from skillet and wipe skillet clean.
    • Slice rolls lengthwise through the center and lightly spread with olive oil on the inside portion. Place on medium-heat skillet to toast. Turn off the heat.
    • Assemble the sandwich over the skillet: Turn over the roll and lightly spread Hari Cilantro Chutney on the bottom half of the roll. Layer with lettuce followed by tofu slices. Spread tofu with more chutney. Layer with zucchini followed by tomatoes. Cover with the top half of the roll.

    Notes

    Variation
    Yellow Squash, eggplant, or mushrooms also taste great in this sandwich.
    Tried this recipe?Let us know how it was!
  • Moong Dal Soup

    Moong Dal Soup

    Moong Dal Soup

    Moong Dal Soup

    This healthful vegan soup is high in protein. Made with split Moong dal and flavored with hari cilantro chutney, moong dal soup is flavorful yet simple and easy to make.
    No ratings yet
    Course dal, Soup
    Cuisine Indian
    Servings 4 people

    Ingredients
      

    For the Soup

    • 1 cup split yellow Moong dal, washed (available in Indian grocery stores)
    • 1 teaspoon salt
    • 1/4  teaspoon turmeric (haldi)
    • 3 cups water
    • Approximately 1/4 cup of Hari Cilantro Chutney

    For the Seasoning

    • 1 tablespoon oil
    • 1/2 teaspoon cumin seeds (jeera)
    • Pinch of asafetida (hing)

    For the Garnish (optional)

    • 1 tablespoon ginger, finely sliced
    • 1/8 teaspoon salt, adjust to taste
    • 1 teaspoon lemon juice

    Instructions
     

    Method

    • Wash the dal several times, until the water becomes almost clear.
    • In a medium pot combine the moong dal, turmeric, salt, and water. Cook over medium-high heat until it starts to boil. Remove the frothy foam that accumulates on the surface as the dal cooks.
    • Lower the heat to medium and cook for 15 to 20 minutes, until completely cooked and a little mushy. Stir occasionally and add more water if needed. Turn off the heat.
    • Puree the dal using a hand blender or regular blender. If needed, adjust the thickness of the dal by adding more boiled water. Mix well. The dal will thicken as it cools.
    • Add hari cilantro chutney to suit your taste.  The chutney gives the soup a fresh green appearance and a tangy flavor.

    Seasoning

    • Heat the oil in a small saucepan. Add cumin seeds and wait until the seeds crack. Add asafetida and turn off the heat.
    • Pour the mixture over the cooked soup.

    Garnish (optional)

    • Combine the ginger, salt and lemon juice. Marinate for at least a half hour.
    • Garnish with a few slices of marinated ginger.
    • Marinated ginger can be refrigerated for up to a week.

    Notes

    Time-saving Tip:
    To save time you may use a pressure cooker, as follows.
    1. In a pressure cooker add Moong dal, turmeric, salt, and water.  Close the cooker.
    2. Cook over medium-high heat until it starts to steam.  Lower the heat to medium and cook for 5 more minutes.
    3. Turn off the heat and let the steam escape before you open the pressure cooker.
    4. Puree the dal using a hand blender or regular blender. If needed, adjust the dal to your desired consistency by adding more boiled water.  Mix well.
    5. Add “Hari Cilantro Chutney” according to your taste.  The chutney will give a fresh green look to the soup and have a tangy flavor.
    Tried this recipe?Let us know how it was!

    How to make Yellow Moong al Soup with Vegetables

    Moong dal soup is a nutritious dish made from split mung beans, also known as moong dal. It is suitable for individuals with diabetes as it has a low glycemic index, meaning it doesn’t cause a rapid spike in blood sugar levels. Additionally, it is gluten-free, making it safe for those with gluten sensitivities or celiac disease.

    The soup is high in protein due to the lentils, making it a filling and satisfying meal option. It is also low in fat, which can be beneficial for those looking to manage their weight or reduce their fat intake.

    Moong dal soup is often prepared as a vegan dish, as it typically does not contain any animal products. It can be served as a standalone soup or paired with salads for a wholesome and nutritious meal. Overall, it’s a healthy option that aligns with various dietary preferences and requirements.

    Moong dal soup is a comforting and nutritious dish that is popular in Indian cuisine. Made from split mung beans, this soup is not only delicious but also packed with protein, fibre, and essential nutrients. In this easy moong dal soup recipe, we’ll guide you through the process of making a flavorful and hearty soup that is perfect for any occasion.

    Easy Moong Dal Soup: A Cozy and Flavorful Treat
    This recipe guides you through making a delicious and comforting moong dal soup, perfect for a quick and nourishing meal. Moong dal, also known as split mung beans, cooks quickly and offers a satisfying protein punch. Let’s get started!

    Prep Work (15 minutes): Clean the Dal: Rinse the moong dal thoroughly under cold running water to remove any dust or debris. Soaking the dal for 30 minutes to 1 hour is optional, but it helps them cook faster and become more tender.

    Flavor Builders: While the dal soaks (or if you choose to skip soaking), chop up some fresh ginger for that warming aroma. You can also add diced tomatoes and green chilies for a touch of sweetness and heat, depending on your preference.

    Cooking the Soup (30-40 minutes): Sautéing the Aromatics: Heat oil or ghee in a pot over medium heat. Once hot, add the chopped ginger and cook for a few minutes until fragrant. This fragrant base will form the foundation of your soup’s flavor.

    Spice Up Your Life: Now comes the magic! Add ground cumin, coriander, turmeric, and a pinch of asafoetida (if using) to the pot with the ginger. Stir everything well to coat the aromatics in the spices. Let them sizzle for a bit, releasing their wonderful aromas. Feel free to adjust the spice quantities based on your taste preference.

    Simmering the Dal: Add the soaked (or unsoaked) moong dal to the pot and stir to combine it with the flavorful spice mixture. Next, pour in enough water or vegetable broth to cover the dal completely. Bring the mixture to a boil, then reduce heat and simmer gently. Let it simmer until the dal is tender and cooked through.

    Creamy Option (optional, 5-10 minutes): Smooth Operator (Optional): If you prefer a creamy soup, let it cool slightly. Then, use an immersion blender or a regular blender (in batches) to achieve a smooth and velvety texture. Blend until you reach your desired consistency.

    Final Touches (5 minutes): Season to Perfection: Now’s the time to adjust the taste! Add salt and a squeeze of lemon juice (optional) to balance the flavors. You can also add more spices if needed.

    Fresh Finish: Garnish your soup with freshly chopped cilantro leaves for a pop of color and a refreshing touch.

    Serving Up Warmth (enjoy!):

    Ladle and Enjoy: Ladle the hot soup into serving bowls and garnish with additional cilantro, if desired. Pair your comforting bowl of moong dal soup with crusty bread, naan, or rice for a complete and satisfying meal. Enjoy this nourishing and delicious soup anytime you need a warm hug in a bowl!

    Tips for Making the Perfect Moong Dal Soup:

    • Soaking the moong dal helps reduce cooking time and improves texture.
    • Experiment with different spices and seasonings to customize the flavor of the soup to your liking.
    • For added richness, you can stir in a spoonful of coconut milk or cream towards the end of cooking.
    • If you prefer a chunkier soup, you can skip blending and leave some of the dal intact.

    Variations of Moong Dal Soup:

    • Vegetable Moong Dal Soup: Add diced carrots, peas, and spinach for a hearty and nutritious twist.
    • Spicy Moong Dal Soup: Increase the amount of green chilies or add red chili powder for extra heat.
    • Coconut Moong Dal Soup: Stir in coconut milk for a creamy and indulgent flavor.

    Benefits of Including Moong Dal Soup in Your Diet:

    • High in Protein: Moong dal is an excellent source of plant-based protein, making it ideal for vegetarians and vegans.
    • Rich in Fiber: The fiber content in moong dal aids digestion and helps maintain a healthy gut.
    • Low in Fat: Moong dal soup is low in fat and cholesterol, making it a heart-healthy option for all.

    Frequently Asked Questions (FAQs) about Moong Dal Soup:

    Q: Can I use other lentils instead of moong dal?

    A: Yes, you can substitute other lentils such as masoor dal or red lentils for moong dal in this recipe.

    Q: Can I make moong dal soup in advance?

    A: Yes, you can make the soup ahead of time and store it in the refrigerator for up to 3 days. Reheat gently on the stovetop or in the microwave before serving.

    Q: Is moong dal soup gluten-free?

    A: Yes, moong dal soup is naturally gluten-free, making it suitable for those with gluten intolerance or celiac disease.

    For more delicious Indian soup recipes, visit Manjula’s Kitchen. Explore a variety of vegetarian soups, appetizers, main courses, and desserts to delight your taste buds and impress your family and friends.

  • Green Pea Soup

    Green Pea Soup

    Green Pea Soup

    Green Pea Soup

    Manjula Jain
    This is a healthy and delicious vibrant green color soup. Green pea soup can be served with slice of bread or with rice.
    5 from 1 vote
    Course Soup
    Cuisine Indian
    Servings 4 people

    Ingredients
      

    • 2 Cup frozen thawed green peas
    • 1 tbsp ginger paste easy to make shred ginger using zester or fine shredder
    • 1-1/2 tbsp oil
    • 1 tbsp salt
    • 3 tbsp heavy cream
    • 2 Cup water

    Instructions
     

    • Blend the green peas into coarse paste using little water or no water.
    • Heat 1 tablespoon of oil in a frying pan and add the peas, salt and ginger paste stir fry the peas over medium heat by pressing and scrapping from the sides for about 5 minutes. Set aside.
    • Heat 1 tablespoon of oil in a saucepan over medium high heat, Test the heat by adding one cumin seed to the oil; if seed cracks right away oil is ready.
    • Add the cumin seeds as they crack add fenugreek seeds and turmeric stir for a second and add water let it come to boil.
    • Add cooked green peas, and cream, mix it well. As it comes to boil lower the heat to low medium, cover the sauce pan and let it cook for about 20 minutes. Turn off the heat.
    • Add lemon juice, black pepper, garam masala mix and cover for few minutes.
    • Garnish with cream. Serve warm or at room temperature.

    Notes

    For seasoning:
    • 1/2 tablespoon oil
    • 1 teaspoon cumin seeds (jeera)
    • 1/4 teaspoon fenugreek seeds (methi dana)
    • 1/4 teaspoon turmeric (haldi)
    • 1 teaspoon lemon juice
    • 1/4 teaspoon garam masala, available in Indian grocery stores
    • 1/8 teaspoon black pepper
     For garnishing 2 tablespoons of heavy cream is optional
     
    Enjoy this tasty Pea Soup!
    Keyword Green Pea Soup
    Tried this recipe?Let us know how it was!

    Introduction to Green Pea Soup

    Green pea soup is a delightful and nutritious dish, perfect for both vegans and vegetarians. This easy-to-make soup is a staple in many households and offers a range of health benefits. In this guide, we’ll delve into the different types of green pea soup, its health benefits, and why it should be a part of your regular diet. 

    What is Green Pea Soup?

    Green pea soup is a versatile and healthy dish made primarily from green peas. It can be served hot or cold, making it suitable for any season. This soup can be made creamy or chunky, depending on your preference.

    Health Benefits of Green Pea Soup

    Green peas are packed with nutrients like vitamins A, C, K, and several B vitamins. They are also rich in fiber and protein, making green pea soup a great option for those looking to maintain a healthy diet.

    Vegan Green Pea Soup: A Plant-Based Delight

    Vegan green pea soup is made without any animal products, making it an excellent choice for those following a plant-based diet. This version of the soup is not only delicious but also easy to prepare.

    Vegetarian Green Pea Soup: A Nutritious Choice

    Vegetarian green pea soup includes dairy products like milk or cream but excludes any form of meat or meat-based broths. It offers a rich, creamy texture that is both satisfying and nutritious.

    Easy Green Pea Soup: Quick and Simple Recipes

    For those short on time, easy green pea soup recipes are the perfect solution. These recipes require minimal ingredients and effort, allowing you to enjoy a nutritious meal without spending hours in the kitchen.

    Split Pea Soup: A Variation Worth Trying

    Split pea soup is another variation of green pea soup, made using dried split peas. This version is heartier and often thicker, providing a more filling meal.

    Why Choose Green Pea Soup?

    Green pea soup is not only delicious but also highly nutritious. It’s an excellent source of protein for vegetarians and vegans and is packed with essential vitamins and minerals.

    How to Enjoy Green Pea Soup

    Green pea soup can be enjoyed in various ways. Serve it as a starter, a side dish, or a main course. Pair it with crusty bread or a fresh salad for a complete meal.

    Other Soup Recipe available on Manjula’s Kitchen

    Tomato Soup: Nothing compares to the satisfaction and comfort of a hot bowl of soup. This quick and easy Tomato Soup recipe is not only simply delicious but also versatile, perfect as a starter or a light meal when paired with a salad and crusty bread.

    Millet Soup: Millet Soup, also known as Bajra Raab, is a traditional warm soup from Rajasthan and Gujarat. This healthy and delicious recipe highlights the nutritional benefits of millet, which is gluten-free and packed with essential nutrients.

    Corn Vegetable Soup: Corn Vegetable Soup is a creamy corn soup with vegetables that is a great starter for a summer lunch. This delicious soup can be served hot or cold.

    Moong Dal Soup: This healthful vegan soup is high in protein. Made with split Moong dal and flavoured with hari cilantro chutney, moong dal soup is flavorful yet simple and easy to make.

    Green Pea Soup in Different Cuisines

    Green pea soup is enjoyed in various cuisines around the world. From the French potage Saint-Germain to Indian matar ka shorba, the possibilities are endless.

    FAQs

    What is the best way to store green pea soup?

    Store green pea soup in an airtight container in the refrigerator for up to five days. It can also be frozen for up to three months.

    Can green pea soup be made ahead of time?

    Yes, green pea soup can be made ahead of time and reheated before serving. This makes it a convenient option for meal prep.

    Is green pea soup good for weight loss?

    Yes, green pea soup is low in calories and high in fiber, making it a great option for those looking to lose weight.

    What can I serve with green pea soup?

    Green pea soup pairs well with crusty bread, a fresh salad, or a sandwich.

    Can I use frozen peas for green pea soup?

    Yes, frozen peas can be used to make green pea soup. They are convenient and retain most of their nutrients.

    Is green pea soup gluten-free?

    Yes, green pea soup can be made gluten-free by ensuring all ingredients used are gluten-free.

    Green pea soup is a versatile, nutritious, and delicious dish that is perfect for any diet. Whether you prefer a vegan, vegetarian, or easy-to-make version, there is a green pea soup recipe for everyone. Make sure to explore different recipes on Manjula’s Kitchen.

  • Vegetable Soup

    Vegetable Soup


    Vegetable Soup

    Vegetable Soup

    A hearty Vegetable Soup is so tempting in winter. A cup of soup is a great meal starter before main course or a tasty, nutritious and satisfying lunch. Vegetable Soup is very comforting.
    5 from 2 votes
    Prep Time 10 minutes
    Cook Time 50 minutes
    Total Time 1 hour
    Course Soup
    Cuisine Indian
    Servings 4 people

    Ingredients
      

    • 2 tbsp oil
    • 1/2 tsp cumin seeds jeera
    • 1 bay leaf tajpat
    • 6 cloves long
    • 1 tsp salt
    • 1/2 cup carrots, peeled and chopped into rounds
    • 1 small potato peeled and cubed in small pieces
    • 1 cup fresh green beans cut into 3/4 inch pieces
    • 1/4 cup celery chopped
    • 1 cup cabbage chopped
    • 1-1/2 cups tomato chopped
    • 1/4 cup corn kernels
    • 3 cups water
    • 1/4 tsp ground black pepper
    • 1-2 tsp freshly squeezed lemon juice

    Instructions
     

    • Heat the oil in a saucepan over medium high heat, Test the heat by adding one cumin seed to the oil; if the seed cracks right away, the oil is ready.
    • Add the cumin seeds. As they crack, add carrots, potatoes, green beans, bay leaf, cloves, and salt. Cook two to three minutes, stirring occasionally.
    • Add corn, cabbage, celery, tomato, and three cups of water. When it boils, turn the heat down to low medium.
    • Cover and cook 25 to 30 minutes, until the vegetables are tender.
    • Add the black pepper and lemon juice. Taste and season with additional salt and pepper as needed.
    Tried this recipe?Let us know how it was!

    Vegetarian Vegetable Soup Recipe: A Bowl of Goodness

    Vegetarian Vegetable Soup is a comforting nourishing vegan dish that celebrates the vibrant flavors and colours of fresh vegetables. Packed with nutrients, vitamins, and minerals, this soup is not only delicious but also incredibly wholesome.

    Tips for How to make Vegetable Soup:

    1. Start with Aromatics: Begin by sautéing aromatics such as cumin seeds in oil until softened and fragrant. This creates a flavorful base for the soup and enhances the overall taste.
    2. Layer Flavors: Layer flavors by adding corn, cabbage, celery, tomato, and three cups of water cooking for a burst of freshness.
    3. Don’t Overcook the Vegetables: Be mindful not to overcook the vegetables, as they can become mushy and lose their texture. Cook the vegetables until 25-30 min they are tender but still slightly crisp for the best results.
    4. Adjust Seasonings: Taste the soup as it cooks and adjust the seasonings as needed. Add more salt, pepper, or spices to enhance the flavor and balance the taste. A squeeze of lemon juice to brighten the flavors of the soup.

    Benefits of Homemade Vegetable Soup:

    1. Nutrient-Rich Ingredients: Vegetarian Vegetable Soup is made with a variety of vegetables such as corn, cabbage, celery, tomato, providing a wide range of nutrients and antioxidants. These vegetables are low in calories but high in fibre, vitamins, and minerals, making the soup a nutritious addition to any diet.
    2. Low in Calories: Best vegetable soup recipe is focussed on vegetables and broth which is naturally low in fat and calories, making it an excellent option for those looking to maintain a healthy weight or incorporate more plant-based foods into their diet. It’s a satisfying and filling meal without the added calories from cream or other milk products.
    3. Easy to Digest: The simple ingredients and light broth of Vegetarian Vegetable Soup make it easy to digest, making it a soothing option for those with digestive issues or anyone feeling under the weather. It’s gentle on the stomach being gluten free while still providing essential nutrients and hydration.
    4. Versatile and Customizable: Vegetarian Vegetable Soup is incredibly versatile and can be customised according to personal taste preferences and seasonal availability. You can add any combination of vegetables, herbs, and spices to create a unique flavor profile that suits your palate.

    Variations of Vegetarian Vegetable Soup:

    1. Corn Vegetable Soup: Corn Vegetable Soup is a creamy corn soup with vegetables that is a great starter for a summer lunch. This delicious shoup can be served hot or cold.
    2. Lentil Vegetable Soup: Lentil soup is a healthy and very satisfying dish. It’s a great soup for lunch served with bread.
    3. Moong Dal Soup: This healthful vegan soup is high in protein. Made with split Moong dal and flavored with hari cilantro chutney, moong dal soup is flavorful yet simple and easy to make.
    4. Sambar: Sambar is a flavorful spicy South Indian lentil soup made with a variety of vegetables. It fits nicely with many South Indian meals, including dosas (pancakes), idlis (savory cakes), and rice. It could be said that a South Indian meal is incomplete without sambar.

    FAQs about Vegetarian Vegetable Soup:

    Can I freeze Vegetarian Vegetable Soup? 

    Yes, Vegetarian Vegetable Soup freezes well and can be stored in an airtight container in the freezer for up to 3 months. Thaw the soup overnight in the refrigerator before reheating on the stovetop or in the microwave.

    What can I serve with Vegetarian Vegetable Soup? 

    Vegetarian Vegetable Soup can be served as a standalone meal or as a starter alongside crusty bread, crackers, or a fresh salad. It pairs well with grilled cheese sandwiches, or a simple side of rice or quinoa.

    Can I make Vegetarian Vegetable Soup in advance? 

    Yes, you can prepare Vegetarian Vegetable Soup in advance and store it in the refrigerator for up to 3-4 days. Reheat the soup gently on the stovetop or in the microwave before serving.

    Can I add pasta or grains to Vegetarian Vegetable Soup? 

    Yes, you can add pasta, rice, quinoa, or other grains to Vegetarian Vegetable Soup for added texture and heartiness. Cook the pasta or grains separately according to package instructions, then add them to the soup during the last few minutes of cooking.

    Whether enjoyed as a light meal, a comforting snack, or a soothing remedy, its versatility and nutritional benefits make it a favorite among food enthusiasts. 

    With a few simple ingredients and some creative flair, you can easily whip up a delicious batch of Vegetarian Vegetable Soup to warm your body and soul.

    Stay tuned for our next exploration into the world of culinary delights!

  • Grilled Potato Sandwich

    Grilled Potato Sandwich

    Grilled Potato Sandwich

    Grilled Potato Sandwich

    Potato Sandwiches give a different dimension to grilled cheese sandwich. They are delicious and add an Indian taste to standard grilled cheese. Potato& cheese sandwiches are excellent choice for a hearty and satisfying lunch.
    No ratings yet
    Course Breakfast
    Cuisine Indian
    Servings 2 people

    Ingredients
      

    • 4 slices white firm bread I am using buttermilk bread
    • 3 medium size potatoes boiled peeled and mashed, about 1-1/2 cups of mashed potatoes
    • 2 tbsp chopped cilantro (hara dhania)
    • 1 tbsp chopped ginger (adrak)
    • 1 tbsp chopped green chili (hari mirch)
    • ½ tbsp cumin seeds (jeera)
    • ½ tbsp salt
    • ½ tbsp mango power (amchoor)
    • 2 tbsp melted butter
    • 2 slices cheddar cheese
    • 8 sliced tomato thinly

    Instructions
     

    • In a bowl mix potatoes, cilantro, ginger, green chili, salt, cumin seeds, and mango powder well.
    •  Lightly butter the bread slices from one side and other side spread layer of thin potato mixture evenly, and brush the butter over the mixture.
    • Heat the skillet over medium heat and put the bread slices over the skillet putting the potato mixture side down.
    • Let it cook for about 2-3 minutes or till it is golden brown from bottom. Note: if you turn too quickly the spread will start coming out. Turn it over; put one slice of cheese and tomato slices covering the bread slice.
    • Now put the other slice of bread potato side down over tomatoes and grilled both sides until sandwich is golden brown and cheese has melted.
    • Potato Sandwich is ready, slice them diagonally. Serve the sandwich with Hari Cilantro Chutney and side of Carrot Pickle.

    Notes

    Suggestions
    1. Slice them in small squares and serve them as snack.
    2. You may use leftover dry vegetables like Aloo Gobi (potatoes with cauliflower) or Aloo jeera, mash the left over vegetables and follow the same steps.
    3. You can also use a multigrain or whole wheat bread of your choice.
    Tried this recipe?Let us know how it was!

    Introduction

    A grilled potato sandwich is a delightful and versatile dish, perfect for any meal. Combining the comforting taste of potatoes with the crispiness of grilled bread, this sandwich is both satisfying and easy to make. In this guide, we will explore various aspects of the grilled potato sandwich, including its variations like the potato grilled cheese sandwich and potato cheese grilled sandwich.

    What is a Grilled Potato Sandwich?

    A grilled potato sandwich features seasoned mashed or sliced potatoes layered between slices of bread, then grilled to perfection. This sandwich can be enhanced with various ingredients to create delicious variations.

    Variations of Grilled Potato Sandwich

    Potato Grilled Cheese Sandwich: This version adds melted cheese to the mix, creating a gooey, satisfying bite. It’s perfect for those who love the combination of potatoes and cheese.

    Potato Cheese Grilled Sandwich: Similar to the grilled cheese variant, this sandwich includes additional cheese varieties and perhaps even some extra vegetables or spices for a richer flavor profile.

    Potato Grilled Sandwich: This simple version focuses on the basic elements of potatoes and grilled bread, allowing the flavors of the seasoned potatoes to shine.

    Health Benefits of Grilled Potato Sandwich

    While the grilled potato sandwich is indulgent, it can also be nutritious when made with whole grain bread and fresh ingredients. Potatoes are a good source of vitamins and minerals, including vitamin C, potassium, and fiber.

    Making the Perfect Grilled Potato Sandwich

    Ingredients:

    • Bread (whole grain or your choice)
    • Potatoes (boiled and mashed or thinly sliced)
    • Cheese (optional, for cheese variants)
    • Butter or oil (for grilling)
    • Spices (salt, pepper, and optional herbs like cilantro or parsley)

    Method:

    1. Prepare the Potatoes: Boil and mash the potatoes, seasoning them with salt, pepper, and any additional spices or herbs.
    2. Assemble the Sandwich: Spread the potato mixture onto a slice of bread, add cheese if using, and top with another slice of bread.
    3. Grill the Sandwich: Heat a pan or griddle with butter or oil, then grill the sandwich until golden brown and crispy on both sides.

    Serving Suggestions

    Grilled potato sandwiches can be served with a variety of sides, such as:

    Tips for Making the Best Grilled Potato Sandwich

    • Use fresh, high-quality ingredients for the best flavor.
    • Ensure the potatoes are well-seasoned to enhance the taste.
    • Experiment with different types of bread and cheese to find your favorite combination.

    Incorporating Grilled Potato Sandwich into Your Diet

    A grilled potato sandwich can be enjoyed as a meal or snack. It’s versatile enough to be part of breakfast, lunch, or dinner. Pair it with nutrient-dense sides for a balanced diet.

    FAQs

    Can I make a grilled potato sandwich vegan? Yes, use plant-based butter and vegan cheese to make a vegan grilled potato sandwich.

    What type of cheese is best for a potato grilled cheese sandwich? Cheddar, mozzarella, and gouda are excellent choices for a potato grilled cheese sandwich.

    How can I add more flavor to my grilled potato sandwich? Add herbs like rosemary or thyme, or spices like paprika and cumin to the potato mixture.

    Can I use leftover mashed potatoes for a grilled potato sandwich? Yes, leftover mashed potatoes work well and can save time.

    What is the best type of bread for a grilled potato sandwich? Whole grain, sourdough, and ciabatta are all great choices for a grilled potato sandwich.

    How can I make a gluten-free grilled potato sandwich? Use gluten-free bread and ensure all other ingredients are gluten-free.

    Conclusion

    The grilled potato sandwich is a delicious and versatile dish that can be enjoyed in many variations. Whether you prefer the classic version or the cheesy delights of a potato grilled cheese sandwich, there’s something for everyone. Follow our guide to create the perfect grilled potato sandwich and enjoy its rich, comforting flavors.

    Similar Recipes from Manjula’s Kitchen

    • Aloo Paratha
    • Paneer Paratha
    • Masala Toast
    • Spinach and Tofu Paratha
    • Vegetable Sandwich
    • Cucumber Sandwich
    • Tomato Basil Cheese Sandwich
  • Kalmi Vada

    Kalmi Vada

    Kalmi Vada

    Kalmi Vada

    Kalmai Vadas are crispy and delicious appetizer. Fried patties made with lentil and potatoes, can be a delightful treat for any party or a tea time snack.
    5 from 1 vote
    Course Appetizer
    Cuisine Indian
    Servings 6 people

    Ingredients
      

    • 1/2 cup chana dal
    • 1/4 cup split moong Dal
    • 1-1/2 medium size boiled and mash potatoes this should be about 3/4 cup of mashed potatoes
    • 2 chopped green chili adjust to taste (hari mirch)
    • 1 tbsp chopped ginger (adrak)
    • 3/4 tbsp salt adjust to taste
    • 1/2 tbsp crushed black pepper
    • 2 tbsp crushed coriander (dhania)
    • 1/8 tbsp asafetida (hing)
    • 2 tbsp chopped cilantro (hara dhania)
    • Oil to fry

    Instructions
     

    • Wash and soak chana and moong dal in four cups of water at least for four hours or more, after soaking dal will be about two times in the volume.
    • Blend dal coarsely, add water if needed to blend but not more than 2-3 tablespoons. I use Food processor; it does a good job for blending dal coarsely without much water.
    • Next mix all the ingredients together; this will make soft and crumbly dough.
    • Divide the dough into 7-8 equal parts and make them into patties.
    • Heat the oil in frying pan over medium high heat; frying pan should have about 1” of oil.
    • Note: Kalmi Vadas are double fried.
    • Fry the patties until they are golden brown it should take about 5-6 minutes.
    • Take them out over paper towel and let them cool of to the room temperature, now cut patties into four pieces.
    • Fry them again over medium high heat till they are golden brown. Take them out over paper towel.
    • Kalmi vadas are ready.
    • To enhance the taste serve vadas with hari cilantro chutney.

    Notes

    Note
    Kalmi Vadas can be prepared ahead of time. Double fry Vadas just before serving, sliced Vadas (before double frying) can be refrigerated for 2-3 days or freezzed for about one month.
    Tried this recipe?Let us know how it was!
  • Rava Dosa

    Rava Dosa

    Rava Dosa

    Rava Dosa (South Indian Delicacy)

    Rava Dosa is a popular South Indian thin and crispy flat bread. It looks like thin crepes. This is a mouthwatering culinary delight. Rava Dosas are quick to make. They can be served as a snack or part of a main meal.
    4.67 from 3 votes
    Prep Time 10 minutes
    Cook Time 15 minutes
    Batter fermenting 30 minutes
    Total Time 25 minutes
    Course Main Course
    Cuisine Indian
    Servings 3 people

    Ingredients
      

    • 1/2 cup fine sooji samolina
    • 1/4 cup rice flour
    • 1/4 cup all-purpose-flour plain flour, maida
    • 1/2 tsp cumin seeds jeera
    • 1/2 tsp salt
    • 1/8 tsp asafetida hing
    • 1 tbsp cilantro chopped hara dhania
    • 1 green finely chopped
    • 2 cupa watwer approximately

    Instructions
     

    • Mix all three flours including semolina, rice flour and all-purpose flour. Make a thin batter using little water at a time and avoiding any lumps. Batter should have pouring consistency like buttermilk.
    • Add all other ingredients to the batter including cumin seeds, salt, asafetida, cilantro and green chili. Mix it well. Let the batter stand for about 30 minutes.
    • Heat the skillet on medium high. To check if skillet is ready sprinkle few drops of water over skillet water should sizzle. Wipe the skillet with few drops of oil.
    • Pour the batter with ladle on the skillet in a circular motion starting from the periphery to the center. Keep pouring the batter till it covers the whole skillet.
    • Note: pour the batter on the skillet from about 3 to 4 inches height. Don’t try to spread the batter otherwise the characteristic and appearance of Rava Dosa will not come. Rava Dosa should have holes like swiss cheese or have lacy look.
    • Sprinkle 1 teaspoon of oil around dosa.
    • Cook Dosa over medium heat for about 2 minutes or until Dosa becomes golden brown. Then turn the Dosa using spatula.
    • Let Dosa cook for about 1 minute from other side. Dosa will be golden brown on one side and light color on other side. Thin and crispy Rava Dosa is ready to serve.

    Notes

    Serving Suggestions
    Rava dosa is very flavorful. You may eat this snack with Hari Cilantro Chutney.
    Traditionally Rava Dosa is served with Sambar (lentil soup cooked with vegetables), and coconut chutney.
    I have the recipes for Sambar, Coconut Chutney, and Hari Cilantro Chutney on my web site.
    Tried this recipe?Let us know how it was!

    How to make Rava Dosa: Your Guide to the Perfect Crispy Delight 

    Dosa is a popular south indian delicacy which looks like a crepe. It’s like a crisp and thin pancake made of rice and urad dal batter. Traditionally Dosa is served with sambar, aloo masala and coconut chutney. It is an Indian crepe made usually through rice batter, but here we have experimented and made many alternative dosa such as Oat Dosa, Besan Dosa, Rava Dosa, Sorghum Dosa. What is Rava Dosa: This preparation is using rava and is a bread based breakfast recipe that is vegan. The preparation entails skillfully combining pan techniques and manual dexterity to achieve the perfect bread cooked on non-stick skillets.

    Mixing the Flours: Crafting the Perfect Rava Dosa Batter 

    Embark on your culinary journey to master the art of rava dosa by starting with the essential step of mixing the flours. In your quest to perfect the rava dosa recipe, combine three key flours – semolina, rice flour, and all-purpose flour. This trio forms the foundation of the batter, each contributing its unique texture and flavor.

    As you blend the flours, ensure a smooth consistency by gradually adding water to the mix, meticulously stirring to prevent the formation of lumps. Aim for a batter resembling buttermilk, with a fluidity that promises to spread effortlessly on the skillet. This foundational step lays the groundwork for the success of your dosa rava recipe, setting the stage for a culinary masterpiece.

    Flavorful Fusion: Adding the Finishing Touches to Your Dosa Rava Recipe 

    Elevate the rava dosa batter to new heights by infusing it with a harmonious medley of essential ingredients. Cumin seeds, salt, asafetida, cilantro, and green chilli converge to create a symphony of flavors that dance on the palate.

    With a thorough mix, allow the batter to rest for approximately 30 minutes—a crucial period that allows the ingredients to meld and intermingle, enhancing the overall taste and texture of your rava dosa.

    This resting period is a vital secret in the art of how to make rava dosa, imparting depth and complexity to the final dish. Embrace this moment of anticipation as the flavors marry and evolve, preparing to embark on a culinary adventure like no other.

    Sizzling Skillet: Setting the Stage for Rava Dosa Magic 

    Prepare your skillet on medium-high heat, the stage upon which the magic of rava dosa unfolds. A simple water test unveils the skillet’s readiness – when sprinkled on the surface, the water should sizzle and evaporate in an instant, signalling the perfect temperature for dosa-making.

    A touch of oil ensures a non-stick surface, laying the groundwork for the mesmerising dance of the rava dosa batter. With the skillet prepped and primed, you are poised to embark on a culinary journey filled with tantalizing aromas and mouthwatering flavors.

    Artful Pouring: Creating the Signature Look of Rava Dosa 

    With finesse and precision, pour the rava dosa batter onto the heated skillet, employing a circular motion from the edges towards the centre. The key lies in maintaining a height of 3 to 4 inches while pouring, resisting the urge to spread the batter thinly.

    This technique ensures the characteristic appearance of rava dosa – a delicate, lacy texture with enticing holes reminiscent of Swiss cheese. As the batter spreads and sizzles on the skillet, marvel at the artistry unfolding before your eyes, a testament to the skill and craftsmanship inherent in the rava dosa tradition.

    Crispy Transformation: Cooking Your Rava Dosa to Perfection 

    As the rava dosa graces the heated skillet, sprinkle a teaspoon of oil around its edges, allowing it to cook over medium heat for approximately 2 minutes until it achieves a golden brown hue. With practised precision, skillfully flip the dosa using a spatula, revealing its crispy underside to the world.

    Let it cook for an additional minute, ensuring that both sides are cooked to perfection. The end result is a thin and crispy rava dosa, a culinary masterpiece ready to tantalize your taste buds and transport you to culinary nirvana. With each bite, savor the symphony of flavors and textures that define the essence of this beloved Indian delicacy.

    In conclusion, the journey of crafting the perfect rava dosa is a culinary adventure filled with precision, skill, and a touch of artistry. From mixing the flours to savoring the crispy transformation on the skillet, each step in the process is imbued with tradition and flavor, culminating in a dish that delights the senses and nourishes the soul.

    So, gather your ingredients, fire up your skillet, and embark on a journey to discover the magic of rava dosa – a timeless classic that never fails to captivate and delight.

    Serving Suggestions: Enhancing the Rava Dosa Experience 

    Rava dosa’s aromatic profile pairs exceptionally well with Hari Cilantro Chutney. For a traditional touch, serve it alongside Sambar, a lentil soup enriched with vegetables, and coconut chutney. Explore these culinary companions to elevate your Rava Dosa feast to new heights.

  • Bread Potato Rolls

    Bread Potato Rolls

    Bread Potato Rolls

    Bread Potato Rolls

    Bread with potato filling makes a mouthwatering snack. This is a perfect snack with afternoon tea or served as an appetizer. Bread Potato Rolls are crunchy outside, spicy and soft inside. Easy to prepare
    4.50 from 2 votes
    Prep Time 10 minutes
    Cook Time 15 minutes
    boiling potatoes 20 minutes
    Total Time 25 minutes
    Course Appetizer
    Cuisine Indian
    Servings 4 people

    Ingredients
      

    • 4 slices bread slices, bread should be firm
    • 2 medium potatoes boiled peeled and mashed will make about 1-1/4 cup mashed potatoes
    • 1/4 cup green peas, boiled using frozen peas
    • 1 tsp oil canola, vegetable
    • 1/4 tsp cumin seeds jeera
    • 1/2 tsp salt
    • 1/8 tsp red chili powder lal mirch
    • 1/2 tsp mango powder amchoor
    • 1 tbsp cilantro finely chopped hara dhania
    • 1 tbsp green chili finely chopped
    • 1 tsp ginger finely chopped
    • oil to fry

    Instructions
     

    • Heat the oil in a frying pan and add the cumin seed. When the cumin seed starts to crack, add green peas, green chili, and ginger, and stir for a few seconds.
      Add the potatoes and all the spices (chili powder, mango powder, salt, cilantro) and stir-fry for a minute. Turn off the heat.
      Taste the mixture; it should be a little spicier than you like, as it will taste milder inside the bread. Set aside.
    • Trim the edges of the bread slices and cut them into two pieces. Set aside. Roll 1½ tablespoons of the mixture at a time into an oval shape. Make twelve rolls. (The size of the potato rolls will depend on the size of the bread).
    • Fill a small bowl with water to wet the bread. Dip one side of a slice of the bread lightly in the water. Place the slice between your palms and press, squeezing out the excess water. This makes the bread moist.
    • Place the filling in the center of this bread and mold the bread to completely cover it all around, giving an oval shape. Repeat to make all the rolls. Before frying, let them sit for about five minutes. (This will evaporate some of the water from the bread so that it absorbs less oil while frying; also making the bread rolls crisper).
    • Heat the oil in a frying pan on medium high heat. Drop the rolls slowly into it, taking care not to overlap them.
    • Fry the bread rolls until they are golden brown, turning occasionally. This should take about two to three minutes. Take them out over a paper towel.

    Notes

    Serve them hot with hari cilantro chutney and tamarind sweet and sour chutney.
    Keyword Appetizer, Party Food, Tea Time Snack
    Tried this recipe?Let us know how it was!

    The Ultimate Guide to Bread Potato Rolls

    Bread potato rolls are a popular snack that combines the comforting flavors of potatoes with the crispy texture of bread. These rolls are perfect for parties, gatherings, or just as a tasty treat. In this article, we will explore the various aspects of bread potato rolls, including a detailed recipe, variations, and serving suggestions.

    What are Bread Potato Rolls?

    Bread potato rolls are made by stuffing a spiced potato mixture into slices of bread, rolling them up, and frying or baking until golden and crispy. This snack is versatile, quick & easy to prepare, and loved by all age groups.

    Health Benefits of Bread Potato Rolls

    While bread potato rolls are often considered an indulgent treat, they can also be nutritious when made with whole grain bread and a balanced filling. Potatoes provide essential vitamins and minerals, and whole grain bread adds fibre.

    Simple Bread Potato Rolls Recipe

    Ingredients:

    • Bread slices
    • Potatoes (boiled and mashed)
    • Spices (cumin, coriander, turmeric, chili powder)
    • Fresh herbs (coriander leaves, green chilies)
    • Oil for frying or baking

    Method:

    1. Prepare the Filling: Mix mashed potatoes with spices and herbs.
    2. Assemble the Rolls: Flatten the bread slices, add the potato mixture, and roll them up.
    3. Cook the Rolls: Fry the rolls until golden brown or bake them for a healthier option.

    Variations of Bread Potato Rolls

    • Cheese Bread Potato Rolls: Add grated cheese to the potato mixture for a gooey, cheesy filling.
    • Vegetable Bread Potato Rolls: Incorporate other vegetables like peas, carrots, or corn for added nutrition and flavor.

    Serving Suggestions

    Bread potato rolls can be served with a variety of dips and sauces, such as mint chutney, tamarind chutney, or ketchup. They are perfect as appetizers, snacks, or even as a light meal.

    Tips for Making the Best Bread Potato Rolls

    • Use fresh, high-quality bread for the best texture.
    • Ensure the potato filling is well-seasoned to enhance the flavor.
    • Fry on medium heat to ensure even cooking and prevent burning.

    Incorporating Bread Potato Rolls into Your Diet

    Enjoy bread potato rolls as an occasional treat. Pair them with a fresh salad or a bowl of soup for a balanced meal.

    FAQs Frequently Asked Queries

    What type of bread is best for potato rolls? 

    Whole grain or white bread works well, but ensure it’s fresh and soft for easy rolling.

    Can I make bread potato rolls vegan? 

    Yes, use vegan bread and skip any dairy-based ingredients in the filling.

    How can I store leftover bread potato rolls? 

    Store in an airtight container in the refrigerator for up to two days. Reheat in an oven or on a pan before serving.

    Can I bake bread potato rolls instead of frying? 

    Yes, baking is a healthier alternative. Brush the rolls with a little oil and bake until golden and crispy.

    What is the best dipping sauce for bread potato rolls? 

    Mint chutney, tamarind chutney, and ketchup are popular choices.

    Can I make bread potato rolls in advance? 

    Yes, prepare the rolls and store them in the refrigerator. Fry or bake them just before serving.

    Bread potato rolls are a delicious and versatile snack that can be enjoyed in many variations. By following our detailed recipe and tips, you can create the perfect rolls at home. Whether served as an appetizer or a snack, these rolls are sure to be a hit with family and friends.

    Similar Recipes from Manjula’s Kitchen: Aloo Tikki, Paneer Pakora, Vegetable Cutlets, Samosa, Spinach Pakoras

  • Finger Sandwiches

    Finger Sandwiches


    Finger Sandwiches

    Finger Sandwiches

    These mouthwatering finger sandwiches are great for any picnic or party. The flavored cream cheese spread with different herbs give a unique taste, and has a nice crunch with every bite. The recipes are for four different sandwiches: Tomato, Cabbage, Cucumber and Pineapple. You can prepare one or all four of these varieties, as they are quite easy to make.
    5 from 1 vote
    10 20 minutes
    Course Appetizer
    Cuisine Indian
    Servings 4 people

    Ingredients
      

    • 8 slice white bread firm
    • 5 oz cream cheese at room temperature
    • 3 tsp ginger paste
    • 1/2 tsp salt
    • 1 green chili, minced
    • 1/2 tsp hari cilantro chutney
    • 2 tbsp cilantro finely chopped hara dhania
    • 1 tbsp mint finely chopped podhina
    • 1/8 tsp black pepper
    • 1/3 cup cabbage finely chopped band gobhi
    • 8 slices cucumber, thinly sliced
    • 8 slices tomato, thinly sliced
    • 1/4 cup crushed pineapple
    • 2 pickled peperoncini, finely diced

    Instructions
     

    • Trim sides of each slice of bread. Set aside.
    • Divide the cream cheese into four equal parts.

    Tomato Sandwich

    • To one part of the cream cheese add black pepper, 1 teaspoon ginger, mint leaves and a pinch of salt. Mix well.
    • Spread cream cheese mixture onto 2 slices of bread. Place tomato slices and top with the other slice of bread to make the sandwich. Cut into 4 pieces, garnish with a dab of spread and put small piece of tomato.

    Cabbage Sandwich

    • To one part of the cream cheese add cabbage, 1 tablespoon of cilantro, 1 teaspoon ginger, half of the green chili (adjust to taste) and a pinch of salt. Mix well.
    • Spread mixture onto one slice of bread and top with another slice to make sandwich. Cut into 4 pieces and garnish with a dab of the spread.

    Cucumber Sandwich

    • To one part of the cream cheese add Hari Cilantro Chutney. Mix well.
    • Spread cream cheese mixture onto 2 slices of bread. Place cucumber slices and top with the other slice of bread to make the sandwich. Cut into 4 pieces, garnish with a dab of spread and a sliver of cucumber.

    Pineapple Sandwich

    • To one part of the cream cheese add pineapple, black pepper, 1 teaspoon ginger, pepperchini (adjust to taste), and a pinch of salt. Mix well.
    • Spread mixture onto one slice of bread and top with another slice to make the sandwich. Cut into 4 pieces and garnish with a dab of the spread.

    Notes

    Tips: 
    You can easily prepare these finger sandwiches with yogurt if you prefer.
    How to remove the water from yogurt, also known hung yogurt:
    Place a muslin or cheesecloth over a strainer and pour yogurt to drain the water.Gently squeeze the yogurt to remove excess water, making sure not to let the yogurt drain through. Place a bowl underneath the strainer and place in a refrigerator for at least 6 hours to drain more water. Yogurt will become thick in consistency, just like cream cheese.
    Tried this recipe?Let us know how it was!

  • Raj Kachori

    Raj Kachori

    Raj Kachori Chat

    Raj Kachori

    Raj Kachori is a spicy chaat bowl filled with delicious condiments. It has refreshing flavors and makes for a unique food experience. Guests will have fun filling their own Kachories according to their taste palette. Served as a snack or appetizer, Raj Kachories make a beautiful presentation and are thoroughly enjoyed by just about everyone.
    5 from 1 vote
    Prep Time 15 minutes
    Cook Time 30 minutes
    Total Time 45 minutes
    Course Appetizer
    Cuisine Indian
    Servings 6 people

    Ingredients
      

    Kachori Dough

    • 1 cup all-purpose flour plain flour, maida
    • 1 tbsp oil
    • 1/2 tsp salt
    • 1/2 cup approx. lukewarm water

    Kachori Filling

    • 1/3 cup besan gram flour
    • 1/8 tsp asafetide hing
    • 1/2 tsp salt
    • 1/2 tsp chili flakes
    • 1/2 tsp mango powder amchoor
    • 1 tbsp oil

    Condiments to be served With Kachories

    • 1 cup moong sprouts
    • 1 cup boiled and peeled potato cut into small pieces
    • 1 cup whipped yogurt dahi, curd
    • 1/4 cup hari cilantro chutney
    • 1/4 cup tamarind chutney
    • 2 tbsp cilantri finely chopped hara dhania
    • 2 green chilies finely chopped
    • 1/4 cup fine save available in Indian grocery store optional

    Instructions
     

    Making Dough

    • In a mixing bowl add all-purpose flour, salt, and oil; add water slowly while mixing and kneading to make firm, yet pliable dough. Cover and set the dough aside for at least 10 minutes.

    Filling

    • Mix Kachori filling ingredients together, i.e. gram flour, asafetida, salt, chili flakes, mango powder and oil. Set it aside.

    Making Kachori

    • Knead dough for a minute and divide into 12 equal parts.
    • Roll dough ball into a 2-inch diameter circle and place 1 teaspoon of filling in the center. Seal by pulling the edges together to make a ball. Prepare all 12 kachoris and let sit for 3 to 4 minutes.
    • Place a filled kachori with the seam side up, onto a clean surface. Using a rolling pin roll into a circle, approximately 3 inches in diameter.
    • Heat approx. 1 ½ inches of oil in a frying pan over medium heat. To check if the oil is ready, put a little piece of dough into the oil and it should immediately rise to the surface without having changed its color.
    • Slowly drop kachoris into the frying pan making sure they don’t overlap with one another. As kachoris puff up, slowly turn them over and fry them on all sides. Turn kachoris 3-4 times until they are golden brown in color, which will take about 7KacKachorishories should be crisp. If the kachoris are fried over high heat they will be too soft.

    Notes

    Prepare Moong Sprouts
    Add ¼ teaspoon of salt and 2-3 tablespoons of water to the moong sprouts. Cover and cook over medium heat for 3-4 minutes till sprouts are tender. Set aside.
    Serving Kachories
    Gently make an inch sized hole in the center of the kachori.
    Fill with 1 tablespoon of sprouts, 1 tablespoon of potatoes, 2 tablespoons of yogurt and a drizzle with both of the 2 chutneys.
    As an option, add a little cilantro, green chili and 1 tablespoon of fine Sev. These add a little more texture and flavor to the Kachori.
    Tip:
    These Raj Kachories can be prepared in advance and stored up to 2 weeks in an air tight container, making it more convenient to serve. It is even easier if you have the Hari Cilantro and Tamarind chutneys previously stored.
    Keyword Appetizer, Party Food, Street Food, Tea Time Snack
    Tried this recipe?Let us know how it was!

    How To Make Raj Kachori Recipe – Manjula’s Kitchen 

    Raj Kachori Indian appetizer, a popular Indian snack, is a delightful combination of crispy shells filled with flavorful ingredients. Follow this step-by-step guide to create your own Raj Kachori at home, offering a burst of textures and tastes in every bite.

    Making the Dough: 

    Begin by preparing the dough for the kachori. In a mixing bowl, combine all-purpose flour (maida), salt, and oil. Gradually add water while kneading to achieve a firm and pliable consistency. Cover the dough and set it aside for at least 10 minutes to allow it to rest and develop the right texture.

    Preparing the Filling: 

    The filling is a crucial component that adds a distinct taste to Raj Kachori. Mix gram flour, asafetida, salt, chili flakes, mango powder, and oil in a bowl. This flavorful mixture will be the heart of your kachori, providing a savory and aromatic essence.

    Shaping and Filling the Kachori: 

    After the dough has rested, knead it briefly and divide it into 12 equal parts. Roll each portion into a 2-inch diameter circle. Spoon 1 teaspoon of the prepared filling into the center of each circle and seal the edges to form a ball. Let these filled kachories sit for a few minutes. Roll each ball into a 3-inch diameter circle, ensuring an even distribution of the filling.

    Frying the Kachoris: 

    Heat about 1 ½ inches of oil in a frying pan over medium heat. To check if the oil is ready, drop a small piece of dough into it; it should rise immediately without changing its color. Carefully place the filled kachoris in the pan, ensuring they do not overlap. As the kachoris puff up, turn them over slowly, frying on all sides until they achieve a golden-brown color. This process should take approximately 7 minutes, and it’s crucial to maintain medium heat to ensure the kachoris turn out crispy rather than overly soft.

    Preparing Moong Sprouts: 

    For an additional layer of flavor and nutrition, cook moong sprouts with a pinch of salt and a few tablespoons of water over medium heat for 3-4 minutes until they become tender. Set aside these sprouts as they will be used as a topping for your kachori.

    Serving the Kachoris: 

    Once the kachoris are cooked to perfection, it’s time to assemble and serve them. Gently create a small hole in the center of each kachori. Fill the hole with a tablespoon of each of the moong sprouts, mashed potatoes, and yogurt. Drizzle the kachoris with both hari cilantro and tamarind chutneys for a burst of tangy and spicy flavors. For those seeking an extra layer of texture and flavor, consider adding fresh cilantro, green chilies, and a tablespoon of fine Sev as optional toppings.

    Tips for Storage: 

    For convenience, Raj Kachoris can be prepared in advance and stored in an airtight container for up to two weeks. This makes it easy to serve these delightful treats whenever the craving strikes. With this simple yet comprehensive recipe on how to make raj Kachori, create authentic Raj Kachori in your kitchen. Enjoy the delectable experience of this iconic Indian street food without the need to visit a chaat vendor.

  • Chole Tikki

    Chole Tikki

    Chola Tikki

    Chola Tikki, Chickpeas Crispy Patties

    Chola Tikki (chickpeas patties) is a spicy and yummy indian snack. Tikki is a nice chat recipes. Just the smell of Tikki can make you hungry.
    3.67 from 3 votes
    Prep Time 15 minutes
    Cook Time 20 minutes
    Total Time 35 minutes
    Course Appetizer
    Cuisine Indian
    Servings 4 people

    Ingredients
      

    • 1 cup chickpeas boiled garbanzo kable chana
    • 3 medium potatoes
    • 1 tbsp ginger shredded
    • 1 tbsp cilantro chopped
    • 2 green chilies chopped, adjust to taste
    • 1/2 tsp black pepper
    • 1 tsp salt
    • 1 tsp lemon juice
    • oil to shallow fry

    For Serving

    Instructions
     

    • Boil potatoes until they are tender. Once cooked, drain the water and let the potatoes cool down. Note: Do not cool the potatoes under running water because the potatoes will absorb the extra water, making potatoes mushy. After potatoes are cool, peel the skin off and mash the potatoes.
    • Drain the water out of the chickpeas and dry the chickpeas using paper towel making sure there is no access water in chickpeas. Mash the chickpeas coarsely.
    • Mix all the ingredients together; adjust salt and pepper to your taste. With oiled hands, divide the mixture into 8 to 10 equal portions. Make them into the shape of patties keeping them about a half inch thick.
    • Heat the oil in a flat bottom saucepan on medium high heat (oil should cover the surface of the pan generously). To check the oil, place a little piece of tikki in the oil, this should make the oil sizzle.
    • Place the Tikkis in the pan and shallow fry the Tikkis on both sides until both sides are golden brown. If the Tikki is very dry use more oil as needed without making them too greasy.
    • You may have to adjust the heat while cooking as needed.

    Notes

    Serving suggestions:
    Serve Tikki hot. Drizzle some
    , tamarind chutney and hari chutney over the Tikki, or use any combination you prefer. See the recipes for chutney on this site.
    Tips
    Substitute the boiled chickpeas with can chickpeas.
    Also if mixture is too moist Tikki will break.
    Tikki can be made before and refrigerated for two to three days. Before serving, heat the Tikki over the skiltet .
    Tried this recipe?Let us know how it was!

    Savor the Flavor of Chola Tikki

    Chola Tikki are crispy and flavorful patties made from mashed chickpeas (chola) and spices. This chola tikki recipe is perfect snacks or indian appetizers, offering a delightful blend of textures and flavors. Whether served alone or with chutneys, these patties are sure to be a hit with your family and friends.

    The Essence of Chola Tikki

    The essence of chola tikki lies in its crispy exterior and soft, flavorful interior. Chickpeas are mashed and mixed with spices, herbs, and binding agents to form patties, which are then shallow-fried to golden perfection. These Indian chickpea patties are not only delicious but also nutritious, making them a great addition to your indian snack repertoire.

    Origin and Popularity

    Chola tikki, also known as chole tikki, is a popular Indian street food, especially in North India. These chickpea patties are enjoyed for their savory taste and satisfying crunch. They are often served with chutneys and yogurt, making them a flavorful and refreshing snack. This chickpea tikki is a versatile dish that can be enjoyed in various ways, from a standalone snack to a component of chaat (Indian street food).

    Why You’ll Love This Recipe

    • Crispy and Flavorful: The perfect combination of a crispy exterior and a soft, flavorful interior.
    • Nutritious: Packed with protein and fiber from chickpeas.
    • Easy to Make: Simple ingredients and easy preparation.
    • Versatile: Can be served as a snack, appetizer, or part of a larger meal.

    Other Variations of Recipes

    Exploring Manjula’s Kitchen reveals a treasure trove of other delicious vegetable dry recipes that you might enjoy. Here are some related dishes that you might find interesting:

    1. Kadhi Pakora: A tangy yogurt-based curry with gram flour dumplings, seasoned with spices. Recipe: 
    2. Methi Thepla: Spiced flatbreads made with fenugreek leaves, perfect for breakfast or as a snack. Recipe: 
    3. Stuffed Bell Peppers: Bell peppers stuffed with a spiced potato filling and baked to perfection. Recipe: 
    4. Moong Dal Khichdi: A comforting and nutritious one-pot dish made with rice and yellow lentils. Recipe: 
    5. Lobia Curry: Black-eyed peas cooked with tomatoes and spices, offering a hearty and delicious curry.

    Serving Suggestions

    Chola tikki can be enjoyed in various ways:

    • With Chutneys: Serve with mint chutney, tamarind chutney, or yogurt for a burst of flavor.
    • As a Snack: Perfect for tea-time or as an evening snack.
    • In Chaat: Use as a base for chaat with toppings like yogurt, chutneys, and sev.
    • With Salad: Pair with a fresh salad for a healthy meal.

    Tips and Tricks

    To perfect your chola tikki recipe, consider these helpful tips:

    • Use Cooked Chickpeas: Ensure the chickpeas are well-cooked and mashed for a smooth texture.
    • Bind Well: Use enough binding agents like bread crumbs or gram flour to help the patties hold together.
    • Fry Evenly: Fry the patties on medium heat to ensure they are cooked through and golden brown.
    • Season Well: Adjust the spices to your taste preference for the best flavor.

    FAQs

    Can I Bake the Tikkis Instead of Frying? 

    Yes, you can bake the tikkis in a preheated oven at 375°F (190°C) for about 20-25 minutes, flipping halfway through.

    How Long Does Chola Tikki Last? 

    Store leftover tikkis in an airtight container in the refrigerator for up to 2 days. Reheat before serving.

    Is Chola Tikki Gluten-Free? 

    To make it gluten-free, use gluten-free bread crumbs or omit them and use gram flour as a binder.

    Can I Add Vegetables to the Mixture? 

    Yes, you can add finely chopped vegetables like bell peppers, or spinach to the mixture for added nutrition and flavor.

    What Can I Serve with Chola Tikki? 

    Chola tikki pairs well with chutneys, yogurt, salads, and can also be used as a patty in a sandwich or burger.

  • Sweet Potato Chaat

    Sweet Potato Chaat

    A plate of Sweet Potato Chaat garnished with pomegranate seeds and fresh coriander

    Sweet Potato Chaat, Shakarkandi

    I have been wanting to make a sweet potato chaat (Shakarkandi Chaat) for some time now. It's a savory and flavorful chaat, which also happens to be a very popular Delhi street food. I have tried to make this recipe many times but never quite perfected it! Last weekend I had the honor of being a guest judge for a cooking contest which was conducted virtually over Zoom! The contest was for the best air fryer recipe. The winner of this contest, Rashmi Sabjur, happened to make an eggplant chaat. While she was discussing her creative recipe, I got the idea of making a sweet potato chaat in the air fryer. Many people ask me how I am inspired to come up with new recipes…well the answer is people like Rashmi, and of course you all, my viewers! Traditionally, sweet potatoes are cooked over coal, cut into small pieces, and drizzled with lemon juice and spices to make it delicious and flavorful. This spicy chaat is also had a nice crunch. Try this recipe out soon! A special thank you to Rashmi for inspiring me to perfect sweet potato chaat!
    This recipe is also vegan.
    This recipe will serve 6.
    5 from 1 vote
    Prep Time 10 minutes
    Cook Time 25 minutes
    Total Time 35 minutes
    Course Appetizer
    Cuisine Indian
    Servings 6 people

    Ingredients
      

    • 1 large sweet potato sliced in thick rounds

    For Batter

    • 1 ½ Tbsp all purpose flour plain flour, maida
    • 1 ½ Tbsp corn starch corn flour or arrowroot powder
    • ½ tsp salt
    • ¼ tsp black pepper
    • cup water approx
    • Oil spray

    For Breadcrumbs

    • ½ cup bread crumb plain unflavored
    • ½ salt
    • ¼ black pepper

    For Garnishing

    For Garnishing (optional)

    • lemon juice sprinkle over chaat
    • chaat masala powder
    • green chili finely chopped
    • ginger finely chopped

    Instructions
     

    • Use a large, sweet potato. Wash and peel and slice them in rounds of about ¼ inch thick. Keep aside.
    • In a bowl take breadcrumbs, add ½ tsp salt and ¼ tsp black pepper, and mix it all well.
    • In another bowl mix all-purpose flour, corn starch, ½ tsp salt, and ¼ tsp black pepper. Add the water slowly and make it into a thick batter. I used about 1/3 cup of water.
    • I am using parchment paper over air fryer baking tray oil the parchment paper.
    • Coat both sides of a sweet potato slice in the flour batter and then in the breadcrumb mixture. Shake off any excess breading and transfer the sweet potato slices to an airfryer baking sheet. Repeat with the remaining sweet potato slices.
    • Spray the slices with oil.
    • Bake in air fryer for 10 minutes (on 325-degree Fahrenheit). Then turn the sweet potato slices and bake it again for 10 minutes. Maybe you will have to adjust the time and temperature according to your air fryer.
    • The sweet potatoes will have a nice crunch. You may serve them hot or at room temperature with your favorite garnishing. I prefer with yogurt and chutney.

    Notes

    Serving Suggestions
    Sweet potatoes have nice crunch, my favorite way to serve this chaat, is to drizzle with yogurt, little cilantro chutney and top it with tamarind chutney if you like hot and spicy sprinkle with finely chopped green chilies and ginger. I have done cilantro chutney and tamarind chutney recipes earlier; you can find these recipes on my website.
    Tried this recipe?Let us know how it was!