Tag: Vegan Breakfast

Vegan Breakfast Recipe Options
Introduction
Starting your day with Indian breakfast ideas, a vegan breakfast can be both energizing and satisfying. A well-balanced vegan breakfast is rich in nutrients, vitamins, and minerals that support overall health. 

Whether you’re looking for vegan breakfast ideas to try something new or searching for the best vegan breakfast options, this guide provides a variety of recipes and concepts to inspire your morning meals.
Benefits of a Vegan Breakfast

Health: Healthy vegan breakfast options are typically lower in saturated fats and cholesterol, promoting heart health.
Energy: A nutritious vegan breakfast can provide sustained energy throughout the day.
Sustainability: Choosing plant-based meals helps reduce your environmental footprint.

Popular Vegan Breakfast Ideas
Here we will explore a list of popular easy Indian recipes for breakfast. 
1. Smoothie Bowls
Smoothie bowls are a popular vegan breakfast choice. Blend your favorite fruits with plant-based milk and top with granola, seeds, and nuts for added texture and nutrition.
2. Overnight Oats
Overnight oats are convenient and versatile. Combine oats with almond milk, chia seeds, and a sweetener of your choice. Refrigerate overnight and enjoy a quick, easy vegan breakfast in the morning.
3. Avocado Toast
Avocado toast is a classic vegan breakfast option. Mash ripe avocados and spread them on whole-grain toast. Add toppings like cherry tomatoes, radishes, or nutritional yeast for a flavor boost.
Vegan Breakfast Recipes
4. Vegan Pancakes
Fluffy vegan pancakes made with plant-based milk and flour are a delicious way to start your day. Top with fresh fruit, maple syrup, or nut butter.
5. Tofu Scramble
Tofu scramble is a protein-packed alternative to scrambled eggs. Sauté crumbled tofu with veggies and spices for a savory vegan breakfast recipe.
6. Chia Pudding
Chia pudding is a nutritious and healthy vegan breakfast option. Mix chia seeds with coconut milk and a natural sweetener, then let it sit overnight. Top with fruit and nuts before serving.
Best Vegan Breakfast Options
7. Vegan Burritos
Vegan burritos are a hearty breakfast choice. Fill a tortilla with black beans, avocado, salsa, and veggies for a satisfying meal.
8. Banana Bread
Banana bread made with whole wheat flour and ripe bananas is a wholesome vegan breakfast option. Enjoy a slice with your morning coffee or tea.
9. Vegan Yogurt Parfait
Layer vegan yogurt with granola and fresh berries for a quick and nutritious breakfast parfait.
Healthy Vegan Breakfast Ideas
10. Green Smoothies
Green smoothies are packed with vitamins and minerals. Blend spinach, kale, banana, and almond milk for a refreshing and healthy vegan breakfast.
11. Quinoa Breakfast Bowl
Quinoa breakfast bowls are a protein-rich way to start your day. Cook quinoa with almond milk and top with nuts, seeds, and berries.
12. Vegan Muffins
Vegan muffins made with whole grains and natural sweeteners are a great easy vegan breakfast option. Enjoy them plain or with a dollop of almond butter.
Easy Vegan Breakfast Ideas
For those busy mornings, here are some easy vegan breakfast ideas that require minimal preparation:
13. Peanut Butter Banana Toast
Spread peanut butter on whole-grain toast and top with banana slices. Sprinkle with chia seeds or cinnamon for added flavor.
14. Fruit Salad
A simple fruit salad with seasonal fruits is a refreshing and quick breakfast option.
15. Vegan Protein Bars
Homemade vegan protein bars made with oats, nuts, and dried fruit are perfect for a grab-and-go breakfast.
10 Easy Vegan Breakfast Recipes
While we explored a huge plethora of vegan breakfast lets see some easy Indian recipes:

Vegan Upma: Made with semolina, mixed vegetables, and seasoned with mustard seeds, curry leaves,and green chilies.

Vegan Poha: Flattened rice cooked with turmeric, mustard seeds, curry leaves, and a mix of peas, and peanuts.

Vegan Masala Dosa: Fermented rice and lentil crepe filled with a spiced potato filling, served with coconut chutney and sambar.

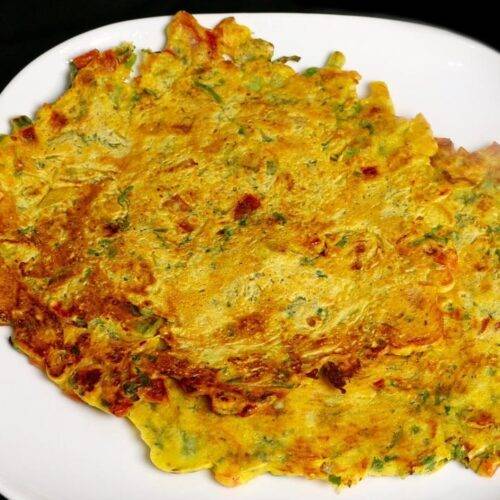
Vegan Besan Chilla: Savory pancakes made from chickpea flour mixed with vegetables and spices.

Vegan Idli: Steamed rice cakes made from fermented rice and urad dal batter, served with coconut chutney and sambar is a popular dish in south indian recipes

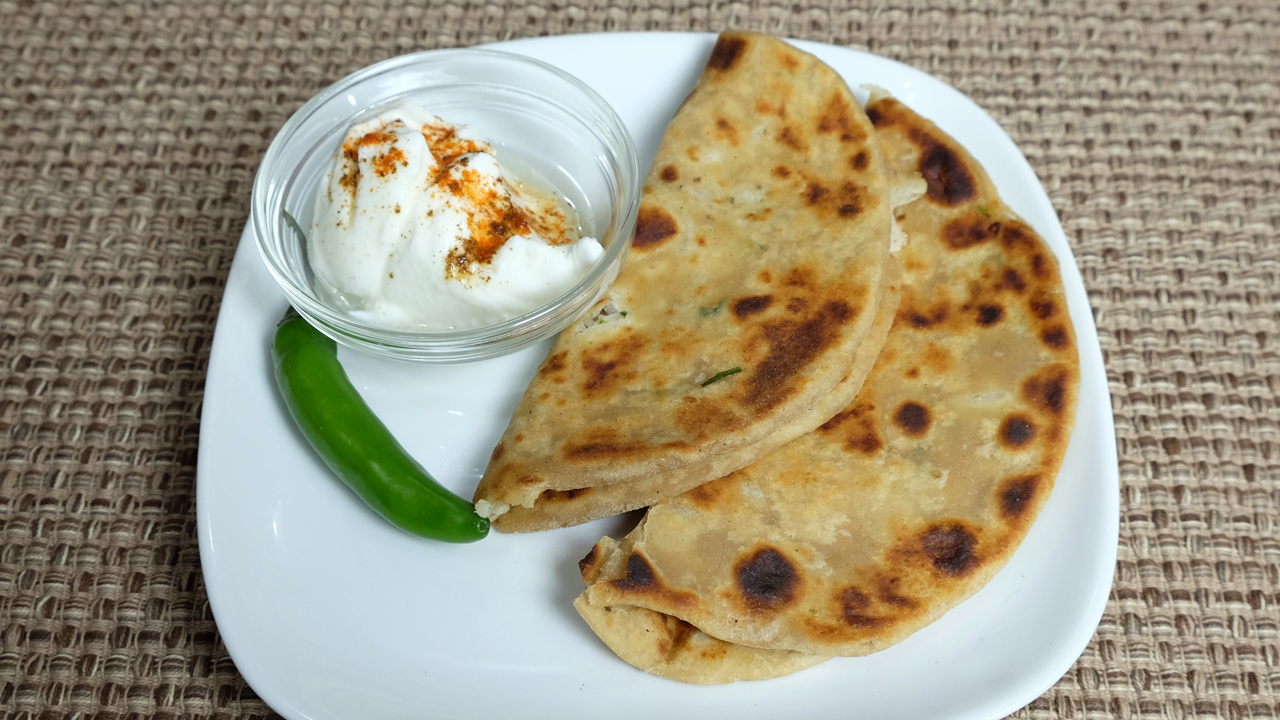
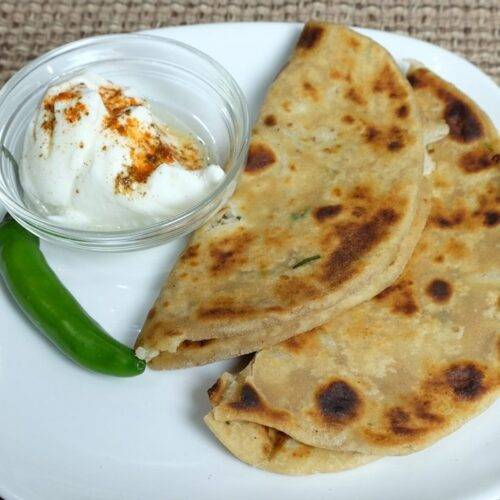
Vegan Aloo Paratha: Whole wheat flatbread stuffed with a spiced mashed potato filling, served with vegan yogurt or chutney.

Vegan Rava Dhokla: Steamed savory cake made from semolina, flavored with ginger, green chili, and tempered with mustard seeds and curry leaves.

Vegan Pesarattu: Green gram (moong dal) crepes served with ginger chutney.

Vegan Thepla: A popular Indian street food recipe Vegan Thepla is a Gujarati flatbread made from whole wheat flour, fenugreek leaves, and spices, often served with pickles. Its a popular 

Vegan Sabudana Khichdi: Tapioca pearls cooked with peanuts, potatoes, and seasoned with cumin seeds and green chilies.
FAQs about Vegan Breakfast
What is a vegan breakfast? 
A vegan breakfast is a morning meal made without any animal products, focusing on plant-based ingredients.
What are some easy vegan breakfast ideas? 
Easy vegan breakfast ideas include Avocado Toast, Smoothie Bowls, and Overnight Oats.
What are the best vegan breakfast recipes? 
The best vegan breakfast recipes often include hearty and flavorful options like Vegan Pancakes, Tofu Scramble, and Vegan Burritos.
What is a healthy vegan breakfast? 
A healthy vegan breakfast is one that is rich in nutrients, vitamins, and minerals, such as Green Smoothies, Chia Pudding, and Quinoa Breakfast Bowls.
Conclusion
Incorporating a vegan breakfast into your daily routine can be both delicious and beneficial. From Smoothie Bowls and Overnight Oats to Vegan Pancakes and Tofu Scramble, there are endless possibilities to explore. Whether you are looking for easy vegan breakfast ideas or the best vegan breakfast options, you can enjoy a variety of flavors and textures while staying healthy. For more exciting recipes and ideas, visit Manjula’s Kitchen and discover the joy of Indian vegetarian and vegan cooking.

This article provides a comprehensive overview of vegan breakfast options, highlighting various vegan breakfast recipes and discussing the benefits and ease of preparation. By exploring these recipes, you can find the best vegan breakfast that suits your tastes and dietary preferences. Enjoy the process of making and savoring these delightful vegan breakfast options!

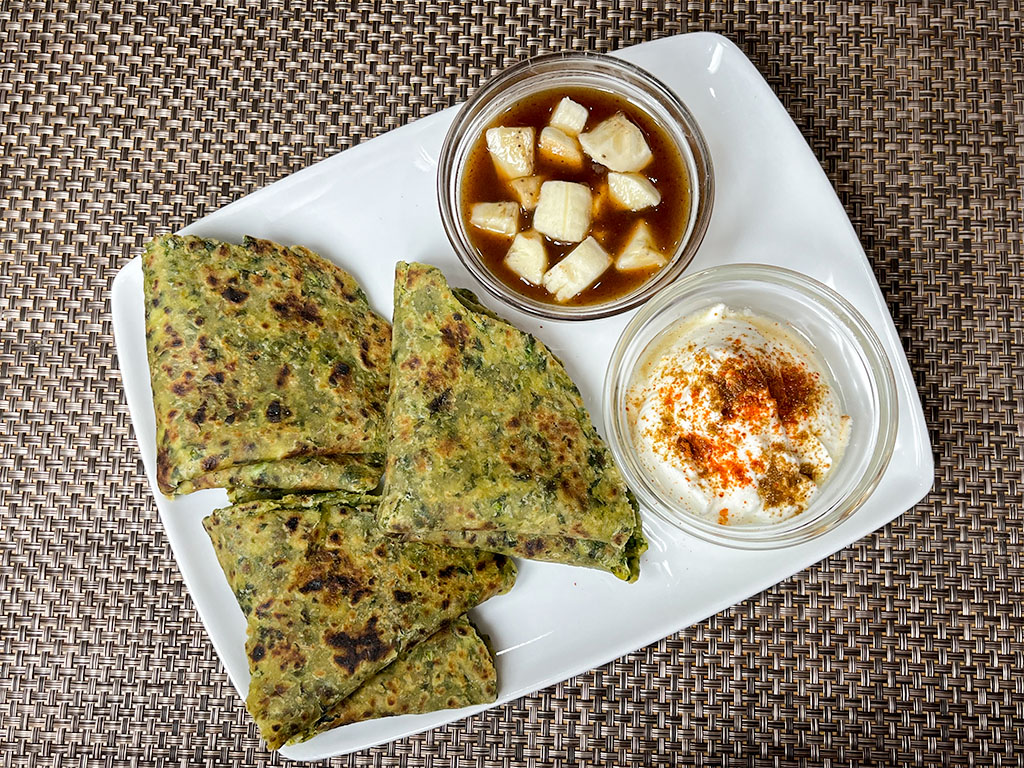
  • Spinach Almond Paratha

    Spinach Almond Paratha

    palak paratha

    Spinach Almond Paratha

    Spinach Almond Paratha is a delicious unleavened Indian flatbread made on a skillet. There are many variations of parathas, most of which are made with whole wheat flour. Parathas can be plain or stuffed with various fillings.
    Spinach Almond Paratha is a healthy indian recipe and tasty option. It is crispy on the outside and soft on the inside. This paratha is made with spinach, almond flour, whole wheat flour, and some spices. It can be served for indian breakfast recipe with butter, yogurt, or pickle, or as part of a meal alongside toor dal or a gravy-based dish.
    Almond Spinach Paratha has a beautiful green color and is a nutritious alternative, especially great for incorporating spinach into your diet.
    When making indian parathas, it's important to know how to roll and fold them. While rolling the dough, apply oil or ghee and fold it to create layers. This technique results in parathas that are crisp on the outside and have a soft texture inside.
    Another advantage of parathas is that they keep well, making them perfect for lunch boxes or for picnics.
    4.50 from 4 votes
    Prep Time 15 minutes
    Cook Time 15 minutes
    Course Breakfast, lunch
    Cuisine Indian
    Servings 4 people

    Ingredients
      

    • 1 cup whole wheat flour, atta
    • ½ cup almond flour – badam ka powder
    • cup chopped spinach, Palak
    • 1 tbspn oil
    • 1 tsp cumin seeds, jeera
    • ½ tsp salt
    • ¼ tsp black pepper, kali mirch
    • tsp asafetida, hing
    • ½ cup chilled water
    • ½ tsp red chili flake if you like hot and spicy
    • ¼ cup whole wheat flour for rolling paratha
    • 2 tbsp oil for cooking parathas

    Instructions
     

    • Mix all the ingredients together in a bowl, except water: flour, almond flour, chopped spinach, salt, black pepper, cumin seeds, asafetida, and oil. Add water as needed to make a firm dough (as it sits dough will get soft). Grease your palm and knead the dough until all the ingredients are combined. Let the dough sit aside for about 15 minutes.
    • Knead the dough on a lightly greased surface until it becomes soft. Divide the dough into four equal parts and form them into balls. Roll each dough ball into a 3-inch circle. Spread about 2 drops of oil on each circle and fold them into triangles. Repeat this process for all four triangles.
    • Meanwhile, heat a heavy skillet on medium heat until moderately hot. To test if the skillet is ready, sprinkle a few drops of water on it. When the water sizzles right away, the skillet is ready.
    • Take one dough ball and lightly press it on both sides on a surface dusted with dry flour. Using a rolling pin, roll the dough into a 7–8-inch circle. If the dough starts sticking, dust it with more flour.
    • Place the paratha on the skillet. When you see the color change and the paratha puffs up in different places, turn the paratha over. After a few seconds, spread 1/2 teaspoon of oil onto the paratha. Turn the paratha over again and spread another 1/2 teaspoon of oil. Using your spatula, lightly press the entire surface of the paratha to help it cook all the way through.
    • After a few seconds, flip the paratha and press with the spatula, ensuring it is golden-brown on both sides. Repeat this process for the remaining parathas.
    • For the best taste serve paratha hot, taste great with hot cup of Chai. Enjoy!

    Notes

    When making parathas, it’s important to know how to roll and fold them. While rolling the dough, apply oil or ghee and fold it to create layers. This technique results in parathas that are crisp on the outside and have a soft texture inside.
    Spinach Almond paratha taste great when cooked with ghee, (clarified butter).
    Serving suggestions:
    For breakfast serve the Spinach Almond Paratha with yogurt and pickle, or as part of a meal alongside dal or a gravy-based dish.
    Keyword Paratha, Stuffed Paratha
    Tried this recipe?Let us know how it was!

    Introduction

    Spinach Almond Paratha is a nutritious and flavorful Indian flatbread that combines the goodness of spinach and the crunch of almonds. This spinach almond paratha recipe is perfect for a healthy indian recipes breakfast, lunch, or indian dinner recipes. The addition of spinach not only enhances the nutritional value but also adds a vibrant green color, while the almonds provide a delightful crunch and a boost of healthy fats and proteins.

    The Essence of Spinach Almond Paratha

    The essence of spinach almond paratha lies in its blend of fresh spinach and finely chopped almonds. The spinach is mixed into the dough, making each bite packed with nutrients and flavor. The almonds add a unique texture and richness, making this paratha a wholesome and satisfying meal.

    Origin and Popularity

    Parathas are a staple in Indian cuisine, particularly in North India. They are enjoyed in various forms, stuffed with different fillings or mixed with ingredients like spinach and almonds. This healthy paratha recipe is a modern twist on the traditional paratha, incorporating superfoods to make it even more nutritious and delicious.

    Why You’ll Love This Recipe

    • Nutritious and Delicious: Packed with vitamins, minerals, and healthy fats from spinach and almonds.
    • Easy to Make: Simple ingredients and straightforward steps make this recipe accessible to everyone.
    • Versatile: Can be enjoyed as a main dish, side dish, or even as a snack.
    • Perfect for Any Meal: Ideal for breakfast, lunch, or dinner.

    How to Make Spinach Almond Paratha: Here’s a step-by-step guide on how to make spinach almond paratha:

    1. Prepare the Ingredients:
      • Fresh spinach, washed and finely chopped.
      • Almonds, finely chopped or ground.
      • Whole wheat flour, water, and salt for the dough.
      • Optional spices: cumin powder, garam masala, and green chilies for extra flavor.
    2. Make the Dough:
      • In a large mixing bowl, combine whole wheat flour, chopped spinach, and almonds.
      • Add salt and any optional spices.
      • Gradually add water and knead the mixture into a soft dough.
      • Cover the dough and let it rest for 15-20 minutes.
    3. Roll Out the Parathas:
      • Divide the dough into equal-sized balls.
      • Roll each ball into a flat circle using a rolling pin, dusting with flour as needed to prevent sticking.
    4. Cook the Parathas:
      • Heat a tawa or skillet over medium heat.
      • Place a rolled-out paratha on the hot tawa and cook until bubbles start to form.
      • Flip the paratha and cook the other side until golden brown spots appear.
      • Apply a small amount of oil or ghee on both sides and cook until crispy and fully cooked.
    5. Serve Hot:
      • Serve the spinach almond parathas hot with yogurt, pickles, or your favorite curry.

    Variations of Parathas

    Exploring Manjula’s Kitchen reveals a treasure trove of other delicious paratha recipes that you might enjoy. Here are some related parathas that you might find interesting:

    1. Aloo Paratha: A classic stuffed paratha with a spiced potato filling.
    2. Paneer Paratha: Paratha stuffed with a flavorful paneer (Indian cottage cheese) filling.
    3. Methi Paratha: A healthy paratha made with fresh fenugreek leaves.
    4. Gobhi Paratha: Paratha stuffed with a spiced cauliflower filling.
    5. Palak Paratha: Another spinach-based paratha, perfect for a nutritious meal.

    Serving Suggestions

    Spinach almond paratha can be enjoyed in various ways:

    • With Yogurt: Serve with plain or flavored yogurt for a cooling side.
    • With Pickles: Pair with Indian pickles for a tangy contrast.
    • With Raita: Serve with a refreshing cucumber or mint raita.
    • As a Wrap: Use the paratha as a base for wraps, adding vegetables or paneer.
    • With Curries: Enjoy with your favorite vegetarian curry.

    Tips and Tricks

    To perfect your spinach almond paratha recipe, consider these helpful tips:

    Use Fresh Ingredients: Fresh spinach and high-quality almonds enhance the flavor.

    Knead Well: Ensure the dough is well-kneaded for a soft and pliable texture.

    Rest the Dough: Letting the dough rest helps it become more elastic and easier to roll out.

    Cook on Medium Heat: Cooking on medium heat ensures the paratha is cooked through without burning.

    Customize Spices: Adjust the spices to suit your taste preferences.

    FAQs

    Can I Use Frozen Spinach?

    Yes, you can use frozen spinach. Thaw and drain it well before adding to the dough.

    How Long Does Spinach Almond Paratha Last?

    Parathas are best enjoyed fresh but can be stored in the refrigerator for up to 2 days. Reheat on a tawa before serving.

    Can I Freeze the Dough?

    Yes, you can freeze the dough for up to a month. Thaw it in the refrigerator before using.

    Is This Recipe Vegan?

    To make this recipe vegan, use oil instead of ghee for cooking the parathas.

    Can I Add Other Ingredients?

    Feel free to add other ingredients like grated carrots, beetroot, or different nuts for variety.

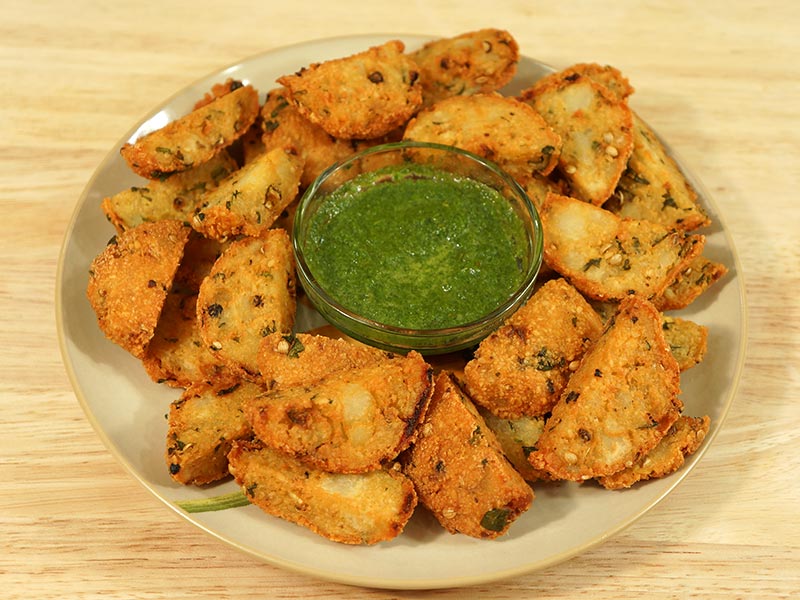
  • Kalmi Vada

    Kalmi Vada

    Kalmi Vada

    Kalmi Vada

    Kalmai Vadas are crispy and delicious appetizer. Fried patties made with lentil and potatoes, can be a delightful treat for any party or a tea time snack.
    5 from 1 vote
    Course Appetizer
    Cuisine Indian
    Servings 6 people

    Ingredients
      

    • 1/2 cup chana dal
    • 1/4 cup split moong Dal
    • 1-1/2 medium size boiled and mash potatoes this should be about 3/4 cup of mashed potatoes
    • 2 chopped green chili adjust to taste (hari mirch)
    • 1 tbsp chopped ginger (adrak)
    • 3/4 tbsp salt adjust to taste
    • 1/2 tbsp crushed black pepper
    • 2 tbsp crushed coriander (dhania)
    • 1/8 tbsp asafetida (hing)
    • 2 tbsp chopped cilantro (hara dhania)
    • Oil to fry

    Instructions
     

    • Wash and soak chana and moong dal in four cups of water at least for four hours or more, after soaking dal will be about two times in the volume.
    • Blend dal coarsely, add water if needed to blend but not more than 2-3 tablespoons. I use Food processor; it does a good job for blending dal coarsely without much water.
    • Next mix all the ingredients together; this will make soft and crumbly dough.
    • Divide the dough into 7-8 equal parts and make them into patties.
    • Heat the oil in frying pan over medium high heat; frying pan should have about 1” of oil.
    • Note: Kalmi Vadas are double fried.
    • Fry the patties until they are golden brown it should take about 5-6 minutes.
    • Take them out over paper towel and let them cool of to the room temperature, now cut patties into four pieces.
    • Fry them again over medium high heat till they are golden brown. Take them out over paper towel.
    • Kalmi vadas are ready.
    • To enhance the taste serve vadas with hari cilantro chutney.

    Notes

    Note
    Kalmi Vadas can be prepared ahead of time. Double fry Vadas just before serving, sliced Vadas (before double frying) can be refrigerated for 2-3 days or freezzed for about one month.
    Tried this recipe?Let us know how it was!
  • Sambar Recipe

    Sambar Recipe

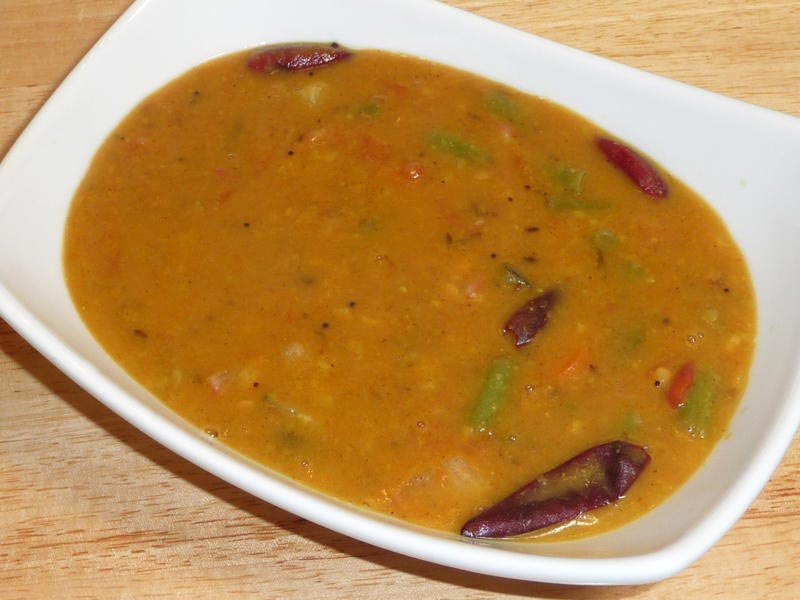
    Sambar (Spicy Lentil Soup)

    Sambar is a flavorful spicy South Indian lentil soup made with a variety of vegetables. It fits nicely with many South Indian meals, including dosas (pancakes), idlis (savory cakes), and rice. It could be said that a South Indian meal is incomplete without sambar.
    5 from 2 votes
    Course dal
    Cuisine Indian
    Servings 4 people

    Ingredients
      

    • 1/2 cup toor dal/arhar dal available in any Indian grocery store
    • 1/2 tbsp salt
    • 1/4 tbsp turmeric (haldi)
    • 2 tbsp oil
    • 1/2 tbsp cumin seeds (jeera)
    • 1/8 tbsp fenugreek seed (methi)
    • 1/4 tbsp mustard seeds (rai)
    • Pinch of asafetida (hing)
    • 10-12 curry leaves
    • 4 dry whole red chilies
    • 1 large tomato cubed in small pieces
    • 1-½ cups mixed vegetables, cute into bite-size cubes (green beans, carrots, zucchini, radishes)
    • 2 tbsp tamarind pulp
    • 1/2 tbsp salt
    • 1 tbsp sambar powder, available in any Indian grocery store

    Instructions
     

    • Wash and soak the dal in two cups of water for ten minutes or longer.
    • In a pressure cooker combine soaked dal with 2½ cups of water, salt, and turmeric. Cook over medium high heat.
    • When the pressure cooker starts to steam, reduce the heat to medium and cook for another six minutes.
    • Turn off the heat and wait until steam has escaped before opening the pressure cooker. Dal should be soft and mushy.
    • Mix the dal well enough to remove lumps. If the dal is thick, add up to one cup of water.

    Notes

    Prepare Seasoning
    1. Heat the oil in a saucepan. Test the heat by adding one cumin seed to the oil; if it cracks immediately, the oil is ready.
    2. Add cumin seeds, mustard seeds, fenugreek seeds, asafetida, red chilies, and curry leaves. Stir for a few seconds.
    3. Add tomatoes, vegetables, sambar powder, tamarind pulp and ½ cup water.
    4. Cover the pan and let the vegetables cook until they are tender over medium heat.
    5. Combine the vegetables and the dal to make the Sambar.  Sambar should be thin, like soup. If the sambar is thick, add water as needed.
    6. Cook sambar on low heat for 10-15 minutes.
    Serve Sambar with dosa, idli, rice or with any meal as a side.
    Keyword Dal
    Tried this recipe?Let us know how it was!

    How to make Sambar Masala: Sambar Recipe

    Sambar is a quintessential South Indian dish that holds a cherished place in Indian cuisine. This sambar recipe is a delightful combination of sambar dal, vegetables, and aromatic spices, creating a flavorful and nutritious sambar masala. In this comprehensive guide, we’ll explore how to make sambar step by step, incorporating tips, variations, and benefits to elevate your culinary experience.

    Tips for Perfecting Your Sambar Recipe

    • Use Fresh Ingredients: Opt for fresh spices, vegetables, and lentils to ensure the best flavor and texture in your sambar.
    • Balance the Flavors: Adjust the proportions of tamarind paste, jaggery, and salt to achieve the perfect balance of sour, sweet, and savoury notes in your sambar.
    • Experiment with Vegetables: Don’t hesitate to experiment with different combinations of vegetables to create unique variations of sambar tailored to your liking.
    • Temper with Care: Take care not to burn the spices while tempering, as it can impart a bitter taste to the sambar. Maintain medium heat and keep a close eye on the tempering process.
    • Allow for Resting Time: Let the sambar rest for a few minutes after cooking to allow the flavors to develop fully before serving.

    Variations of Sambar

    • Mixed Vegetable Sambar: Incorporate a medley of seasonal vegetables such as pumpkin, beans, and bell peppers for a colorful and nutritious twist on the classic sambar.
    • Tiffin Sambar: Prepare a thinner version of sambar specifically paired with idli, dosa, or vada, featuring a lighter consistency and a higher proportion of tamarind for tanginess.
    • Kadamba Sambar: This variation of sambar includes a diverse range of vegetables along with freshly ground spices, lending it a robust and hearty character ideal for special occasions.

    Benefits of Including Sambar in Your Diet

    • Rich in Protein: Sambar is a rich source of protein due to the inclusion of lentils, making it a nourishing option for vegetarians and vegans.
    • Loaded with Vitamins and Minerals: The array of vegetables in sambar provides essential vitamins, minerals, and dietary fibre, promoting overall health and well-being.
    • Digestive Aid: The spices and herbs in sambar, such as cumin, fenugreek, and curry leaves, possess digestive properties that aid in digestion and alleviate digestive discomfort.
    • Low in Calories: Despite its hearty and satisfying nature, sambar is relatively low in calories, making it a guilt-free indulgence for those watching their calorie intake.
    • Boosts Immunity: The antioxidants present in the spices and vegetables in sambar help strengthen the immune system and protect the body against various infections and diseases.

    FAQs (Frequently Asked Questions) About Sambar

    • Can I make sambar without tamarind paste? 

    • Yes, you can substitute tamarind paste with lemon juice or dried mango powder (amchur) for a tangy flavor in your sambar.
    • Is sambar gluten-free? 

    • Yes, sambar is naturally gluten-free as long as no wheat-based ingredients such as asafoetida powder (hing) are used in the recipe. You can use gluten-free asafoetida or omit it altogether to ensure the dish is gluten-free.
    • Can I make sambar ahead of time? 

    • Yes, you can prepare sambar in advance and store it in an airtight container in the refrigerator for up to 2-3 days. Reheat gently on the stovetop or microwave before serving.
    • Can I freeze leftover sambar? 

    • While it’s technically possible to freeze leftover sambar, the texture of the vegetables and lentils may change upon thawing, resulting in a slightly altered consistency. It’s best to consume fresh sambar for optimal taste and texture.

    If you’re looking to explore more Indian recipes, appetizers, beverages, and desserts, be sure to check out the following links on Manjula’s Kitchen. Here are some links to recipes on Manjula’s Kitchen official website: Vegetable Pakoras, Kaju Katli (Cashew Burfi), Baingan Bharta (Roasted Eggplant), Matar (Green Peas) Paneer, Besan Ladoo.

  • Coconut Chutney

    Coconut Chutney

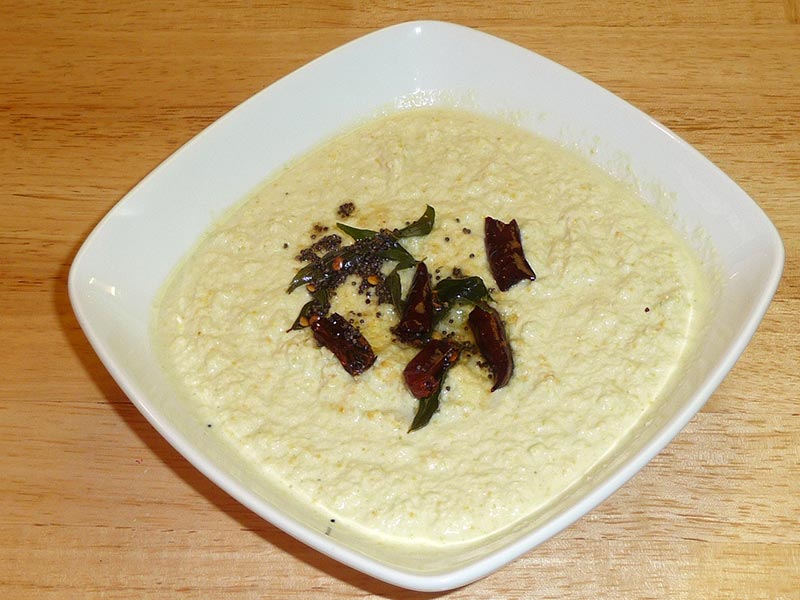
    A bowl of creamy Coconut Chutney with fresh coconut and spices

    Coconut Chutney

    Coconut chutney is a typical condiment that is served with South Indian dishes, especially Idlis and Dosas. It has great texture and a unique taste that compliments many dishes.
    5 from 1 vote
    Prep Time 10 minutes
    Cook Time 10 minutes
    Total Time 20 minutes
    Course Side Dish
    Cuisine Indian
    Servings 8 people

    Ingredients
      

    • 1 cup coconut peeled and cut in small pieces
    • 2 tbsp chana dal bengal gram
    • 1 cup yogurt curd, dahi
    • 1-1/2 tsp salt
    • 2 green chilies,
    • 1/2 inch ginger
    • 1 tsp lemon juice as required

    For seasoning

    • 1 tsp oil
    • 1/8 tsp asafetida hing
    • 1/4 tsp black mustard seeds rai
    • 2 red chilies broken pieces
    • 8 curry leaves

    Instructions
     

    • Peel coconut and cut into small pieces for easy blending.
    • Roast chana dal on medium heat until it is light brown in color and has a roasted aroma.
    • Coarsely grind chana dal in a blender. Add yogurt, green chilies, and salt and continue blending into the paste.
    • Add coconut to the paste, a few pieces at a time and keep blending. Add water, as needed, to help with the grinding. (Adding the coconut in small amounts also helps this process).
    • Before removing from blender, taste chutney to adjust the salt and pepper. Use lemon juice to adjust the tang to suit your taste. Blend well.

    Seasoning

    • Heat oil in small pan. When hot, add black mustard seeds. When the seeds crack, add asafetida, red chilies and curry leaves.
    • Pour the seasoning mixture over the chutney.

    Notes

    Coconut chutney can be refrigerated up to a week.
    Serving suggestion: serve Coconut Chutney with Idli, Rava Dosa, Dosa 
    Tried this recipe?Let us know how it was!

    Coconut Chutney: A Refreshing and Versatile South Indian Condiment

    Coconut chutney is a quintessential South Indian condiment known for its refreshing flavor, creamy texture, and versatility. Made from fresh coconut, green chilies, roasted chana dal (split chickpeas), and a blend of spices, coconut chutney is a delicious accompaniment to various South Indian dishes such as dosa, idli, vada, and uttapam

    This versatile condiment can also be enjoyed with snacks like pakoras, samosas, or even spread on sandwiches for an extra kick of flavor. 

    Benefits of Coconut Chutney:

    • Good Source of Fibre: Coconut chutney contains dietary fibre from coconut and roasted chana dal, which helps support digestive health, regulate blood sugar levels, and promote feelings of fullness. A diet high in fibre is associated with a reduced risk of heart disease, diabetes, and certain cancers.
    • Packed with Flavorful Ingredients: Coconut chutney gets its delicious flavor from a combination of fresh coconut, green chilies, roasted chana dal, ginger, and spices such as cumin seeds, mustard seeds, and curry leaves. These aromatic ingredients come together to create a tantalizing blend of flavours that enhance the taste of various dishes.
    • Vegan and Gluten-Free: Coconut chutney is naturally vegan and gluten-free, making it suitable for individuals following plant-based diets or those with gluten sensitivities or celiac disease. It’s a versatile condiment that can be enjoyed by people with diverse dietary preferences and restrictions.

    Variations of Chutney:

    • Rhubarb Chutney: This Sweet and Sour chutney with a blend of spices tastes great and is very addictive. This is a great complement to any meal
    • Date And Raisin Chutney: Using two major ingredients date and raisin this chutney is sweet and sour and is a great complement to most snacks, pakoras and appetizers
    • Mango Chutney: Mango fruit is a tricky recipe but it’s a chutney that acts as a great side order which can go along with pakoras, snacks, fries and other appetisers.
    • Yogurt Chutney: A quick and easy chutney which can be prepared in no time and is made using yogurt and formed to excite the taste buds of all munchies like appetizers, snacks or pakoras. 

    Tips on How to make Coconut Chutney:

    • Use Fresh Coconut: For the best flavor and texture, use fresh coconut instead of desiccated coconut or coconut powder. Break open a mature coconut, remove the flesh, and chop it into smaller pieces before blending with other ingredients to make the chutney.
    • Adjust Spice Levels: Adjust the quantity of green chilies according to your preference for spice. If you prefer a milder chutney, use fewer green chilies or remove the seeds and membranes before blending. For a spicier chutney, add extra green chilies or include a few dried red chilies.
    • Consistency Matters: Achieve the desired consistency of coconut chutney by controlling the amount of water added during blending. Start with a small quantity of water and gradually add more as needed to reach the desired thickness. The chutney should have a smooth and creamy texture, similar to a thick sauce.
    • Tempering Technique: Master the art of tempering (tadka) to enhance the flavor of coconut chutney. Heat oil in a small pan, add mustard seeds, urad dal, dried red chilies, and curry leaves, and fry until the mustard seeds splutter and the dal turns golden brown. Pour the tempering over the blended chutney and mix well before serving.

    FAQs about Coconut Chutney:

    How long does coconut chutney last? 

    Coconut chutney can be stored in the refrigerator for 3-4 days in an airtight container. However, it’s best enjoyed fresh for optimal flavor and texture.

    Can I freeze coconut chutney? 

    While coconut chutney can be frozen for longer storage, the texture may change slightly upon thawing. It’s best to consume fresh coconut chutney whenever possible for the best taste and texture.

    Is coconut chutney spicy ?

    The spiciness of coconut chutney can be adjusted according to personal preference by varying the quantity of green chilies used. It can range from mild to moderately spicy depending on the amount of chilies added.

    Can I use desiccated coconut instead of fresh coconut? 

    While fresh coconut is preferred for its flavor and texture, desiccated coconut can be used as a substitute by soaking it in warm water for 15-20 minutes before blending.

    With its simple ingredients, customizable variations, and easy preparation, coconut chutney is a must-have in any South Indian kitchen.

  • Spinach Salad

    Spinach Salad

    Spinach Salad

    Spinach Salad

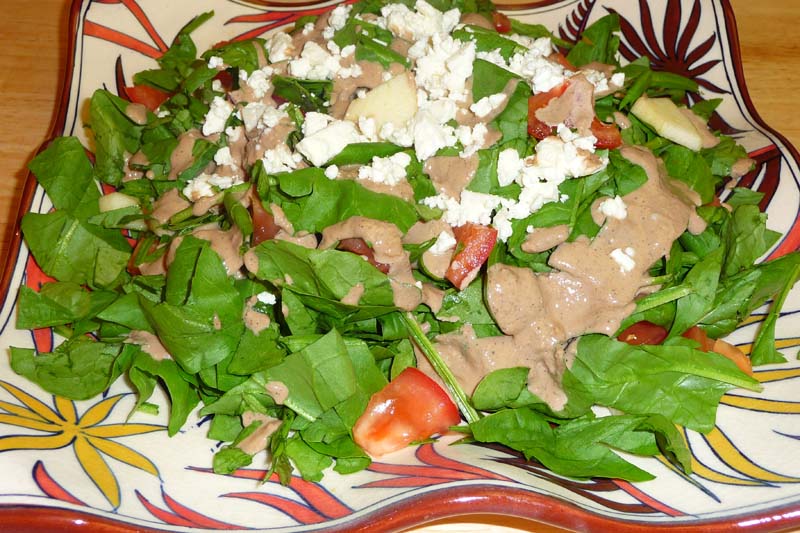
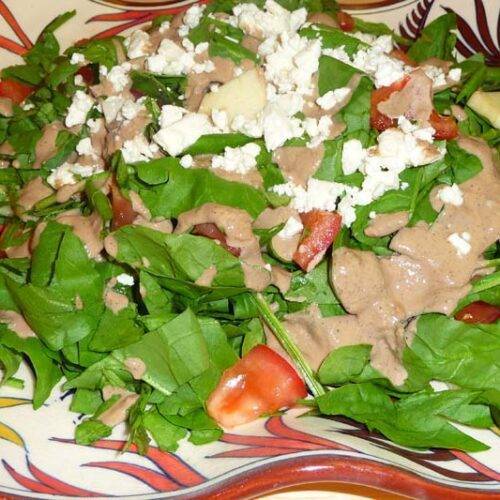
    This is a delicious quick & easy and refreshing spinach and tomato salad. Adding walnuts and ginger dressing provides a creamy and tangy flavor.
    5 from 1 vote
    Course Salad
    Cuisine Indian
    Servings 4 people

    Ingredients
      

    • About 4 cup chopped spinach
    • 2 tomatoes
    • 1 apple
    • 1/4 cup  feta cheese (optional)
    • 1/4 cup  walnuts
    • 2 tbsp olive oil
    • 2 tbsp balsamic vinegar
    • 1 tbsp lemon juice
    • 1 tbsp ginger juice
    • 1 tbsp salt
    • 1 tbsp sugar
    • 1/2 tbsp black pepper
    • About 2 tbsp water adjust as needed

    Instructions
     

    • Wash the spinach and pat dry and chop them coarsely. Keep aside.
    • Cut the tomatoes in halves and remove the seeds, cut them in about half inch pieces.
    • Next peel and cut the apples in small pieces.
    • In a salad bowl toss the spinach, tomatoes and apples together. Keep aside.

    Notes

    Dressing:
    1. Shred about 1 inch piece of ginger on fine side of shredder. Squeeze the shredded ginger between your fingers to make ginger juice.
    2. Next blend all the dressing ingredients together. Add the water as needed otherwise dressing will be too thick.
    3. Pour the dressing over salad, and sprinkle with feta cheese. Enjoy!
     
    Suggested Variations:
    1. Tomatoes can be replaced with strawberries.
    2. Walnuts can be replaced with roasted peanuts
    Keyword Healthy Salad
    Tried this recipe?Let us know how it was!
  • Aloo Palak

    Aloo Palak

    A dish of Aloo Palak, featuring potatoes and spinach cooked with spices

    Aloo Palak (Spinach with Potatoes)

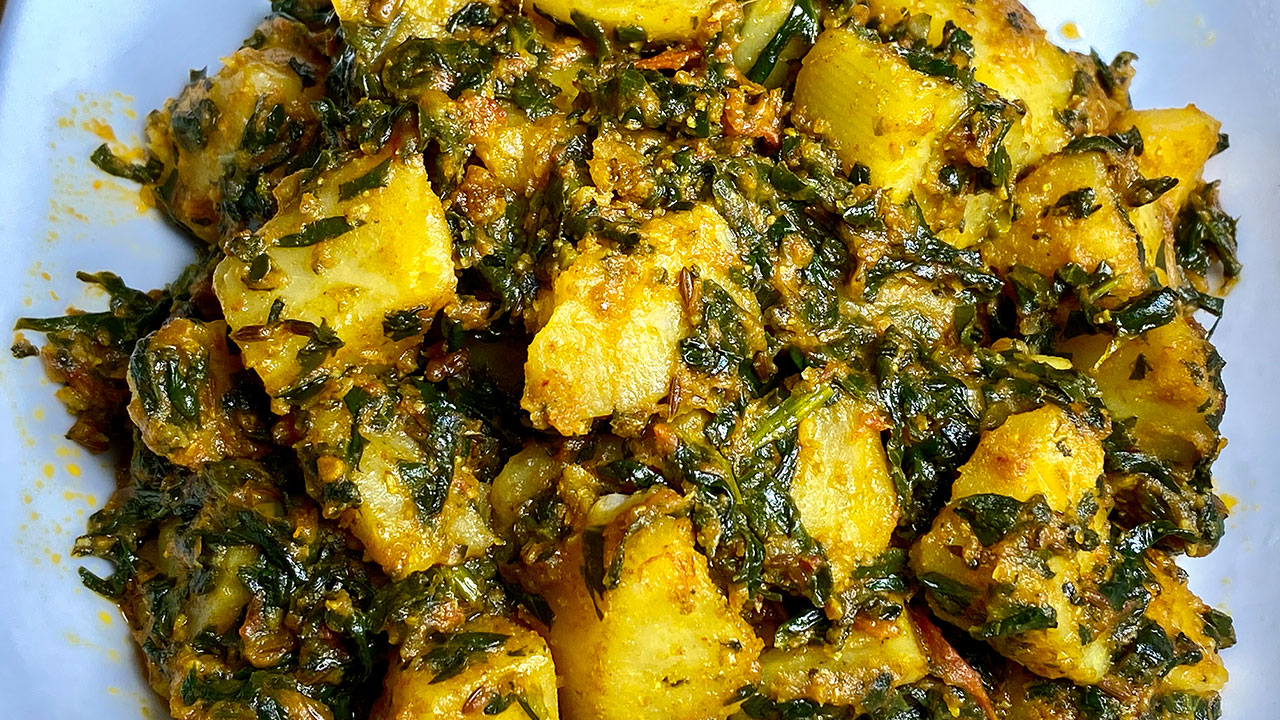
    Aloo Palak is a versatile side dish that is a great complement to any meal. Aloo (potatoes) and Palak (spinach) are two vegetables I always have in my kitchen. Potatoes we all know are used in so many ways and have endless recipes. I also use spinach in many dishes. I thought I had done this recipe a long time ago, but today I made this dish for my family after some time and they enjoyed it very much and asked me if I have done this video recipe. I was looking on my website and realized I have not done this recipe yet. This is a common recipe, but this is my version of Aloo Palak. Adding fenugreek seeds and besan (gram flour) kicks off the flavor to the dish. For me and Alex, this is a comfort dish. This recipe is also vegan and gluten free. I serve this as a side dish, or I enjoy rolling it in a Roti or Paratha to make a to-go lunch. Alex especially enjoys making grilled cheese sandwiches filled with leftover Aloo Palak.
    I have done many recipes for spinach:
    Palak Paneer, Saag, Spinach Crisps, Chole Palak, Palak Puri
    This recipe will serve 4.
    4.75 from 8 votes
    Prep Time 10 minutes
    Cook Time 20 minutes
    Total Time 30 minutes
    Course Main Course
    Cuisine Indian
    Servings 4 people

    Ingredients
      

    • 2 cup potatoes cut into small pieces I used 2 medium size potatoes
    • 4 cup spinach finely chopped, approx. 8oz
    • ½ cup tomato finely chopped
    • 4 Tbsp oil
    • 1 tsp cumin seed jeera
    • ¼ tsp fenugreek seeds methi optional
    • 1 Tbsp besan gram flour
    • 1 Tbsp coriander powder dhania
    • ½ tsp red chili powder adjust to taste
    • ¼ tsp turmeric haldi
    • 1 tsp salt
    • ½ tsp mango powder amchoor

    Instructions
     

    • Heat the oil in a saucepan. The oil should be moderately hot. Add the cumin seeds as they crack add besan, and fenugreek seeds. Stir for about one minute, besan will become aromatic and will be light golden brown.
    • Next add tomato, coriander, red chili powder, and turmeric.
    • Stir-fry spice mix until spice mix starts leaving the oil. It should take about 2 minutes.
    • Add potatoes, spinach, and 1/2 cup of water, cover the pan. Let it cook over medium heat. The potatoes should be very tender but not mushy and should be covered with spinach.

    Notes

    Do stir in between besan can stick to the bottom of the pan. I did stir once in between. If needed, add a little more water.
    Aloo Palak should not be very dry, it should be moist. Add mango powder and stir, turn off the heat. Aloo Palak is ready.
    Tried this recipe?Let us know how it was!
  • Vegetable Cheela Rolls

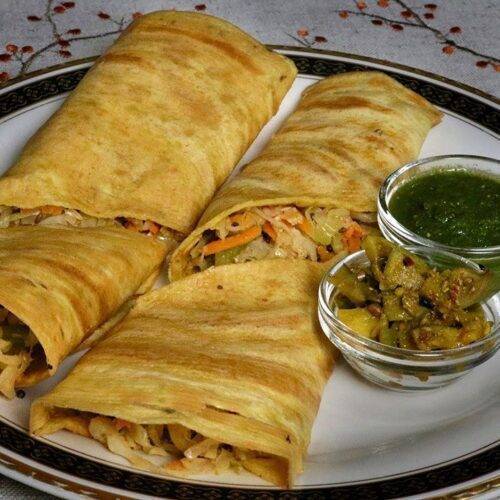
    Vegetable Cheela Rolls

    Vegetable Cheela Rolls recipe by Manjula

    Vegetable Cheela Rolls

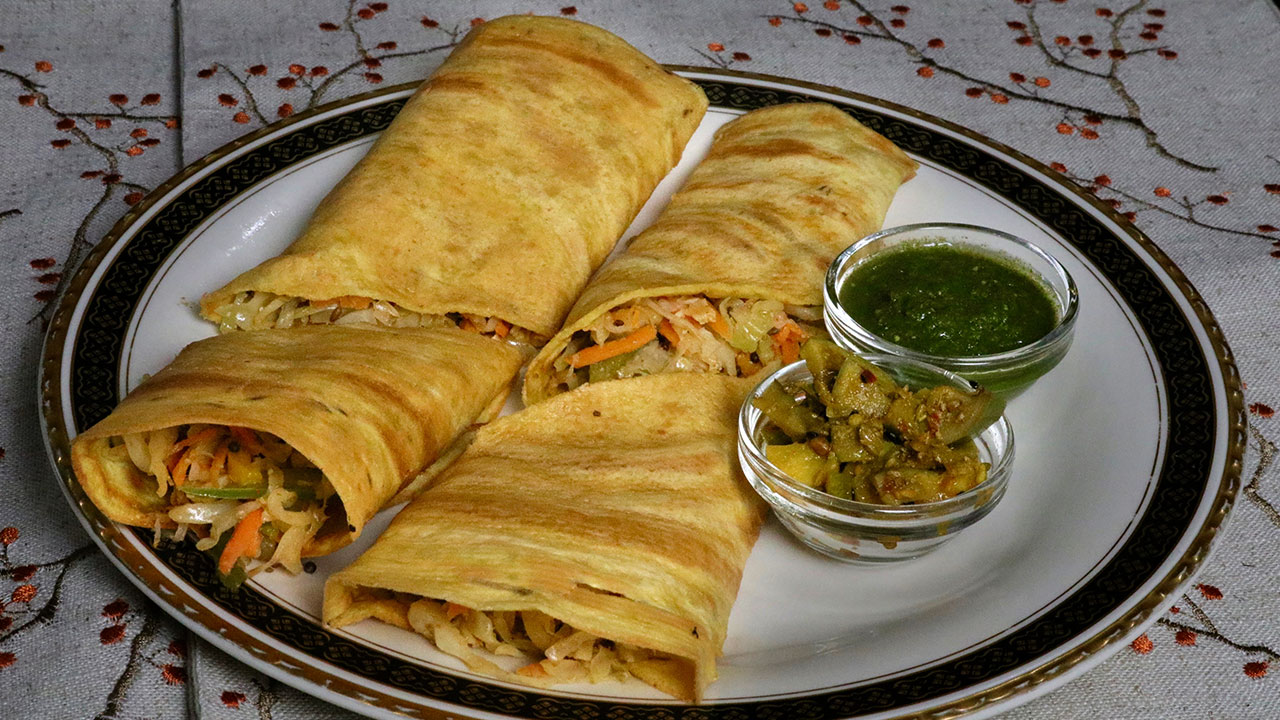
    Vegetable Cheela Rolls is a healthy and delicious any-time meal. Cheela Rolls is a treat for people who are vegan and gluten free. Cheela is like a besan dosa, and can be used as a wrap and this cheela wrap with vegetables makes a wholesome meal. Cheela Rolls can be used as a snack and also for good a lunch box meal.
    4.41 from 5 votes
    Prep Time 10 minutes
    Cook Time 20 minutes
    Total Time 30 minutes
    Course Appetizer, Snack
    Cuisine Indian
    Servings 2 people

    Ingredients
      

    For Cheela

    • 1 cup besan Gram flour
    • 2 Tbsp rice flour
    • 1 tsp salt
    • 1/2 tsp cumin seeds jeera
    • 3/4 cup water to make batter
    • 4 tsp oil

    For Filling

    • 3 cup cabbage thinly sliced
    • 1/2 cup carrots shredded
    • 1/2 cup bell pepper thinly sliced
    • 2 tsp oil Canola or vegetable oil
    • 1/2 tsp cumin seeds jeera
    • 1/2 tsp mustard seeds rai
    • 2 tsp coriander powder dhania
    • 1/4 tsp chili powder
    • 1/2 tsp salt
    • 1/2 tsp sugar
    • 1 tsp lemon juice

    Instructions
     

    • Mix all the dry ingredients together, besan, rice flour, cumin seeds, and salt. Add the water slowly to make a smooth batter, consistency of Dosa batter. Set aside.
    • To make the filling: Heat the oil in frying pan over medium high heat. Oil should be moderately hot, add cumin seeds and mustard seeds, as the seeds crack. Add cabbage, carrots, and bell pepper. Stir-fry for about one minutes add all the other ingredients, coriander powder, chili powder, salt, sugar and lemon juice. Stir- fry for about three to four minutes, vegetables should be still crisp. Turn off the heat.
    • To make the Cheele: Use a heavy skillet and place on medium-high heat. Test by sprinkling a few drops of water on it. Water should sizzle right away.
    • Pour about 1/4 cup of the batter into the skillet and spread evenly with a back of spoon. Starting from the center, spiral the batter outward evenly to form a circle.
    • When batter starts to dry, gently spread one teaspoon of oil over it. Wait about 30 seconds; flip the cheela using a flat spatula.
    • Press the cheela lightly all around with the spatula to make cheela cook evenly. Turn the cheela and in the center of the cheele put about ½ cup of stir-fry diagonally and roll it.
    • Vegetable Cheela Roll is ready to serve. I like to serve this with Mango Pickle or Cilantro Chutney.
    • Enjoy!

    Notes

    In the ingredients, we need about 4 cups total of sliced vegetable (this includes the cabbage, bell pepper, and carrots)
    Suggestions
    Use or preferred vegetables and also works good with any leftover vegetables.
    Tried this recipe?Let us know how it was!

    A Comprehensive Guide to Besan Cheela Recipe with Vegetables

    Welcome to Manjula’s Kitchen, your ultimate destination for authentic Indian recipes and culinary inspiration. Today, we embark on a flavorful journey to explore the delightful world of Vegetable Cheela Rolls, a versatile and nutritious dish that is perfect for any meal of the day. Made with besan (gram flour) and a colorful assortment of vegetables, these cheelas are not only delicious but also packed with vitamins, minerals, and fibre. 

    Join us as we unravel the secrets to creating the perfect Besan Cheela Recipe with Vegetables, along with tips, variations, benefits, and answers to frequently asked questions. Vegetable cheela is a delectable gluten-free and vegan snack, perfect for appetizers or as a bread alternative, offering a flavorful option for those seeking tasty and wholesome options.

    Preparing the Batter for Vegetable Cheela 

    • Begin by preparing the batter for the besan Vegetable Cheela, the foundation of this delectable dish. In a mixing bowl, combine besan (gram flour) with water to create a smooth and lump-free batter. Add finely chopped vegetables such as carrots, bell peppers, spinach, and green chilies to the batter, along with spices like turmeric powder, cumin powder, and salt. Mix well to ensure that the vegetables are evenly distributed throughout the batter, imparting their vibrant colors and flavors.

    Cooking the Vegetable Cheela 

    • Once the batter is ready, it’s time to cook the Vegetable Cheela to perfection. Heat a non-stick skillet or tawa over medium heat and lightly grease it with oil or ghee. Pour a ladleful of the batter onto the skillet and spread it evenly in a circular motion to form a thin layer. Cook the cheela for a few minutes until the edges start to crisp up and bubbles appear on the surface. Flip the cheela using a spatula and cook the other side until golden brown and crisp. Repeat the process with the remaining batter, adjusting the heat as needed to ensure even cooking.

    Assembling the Vegetable Cheela Rolls 

    • Once all the cheelas are cooked, it’s time to assemble the besan Vegetable Cheela Rolls, adding an extra layer of flavor and texture. Place a cooked cheela on a clean surface and spread a generous layer of mint chutney or yogurt sauce over it. Add a filling of thinly sliced cucumber, tomatoes and fresh coriander leaves on one side of the cheela. Roll the cheela tightly into a cylindrical shape, securing the filling inside. Repeat the process with the remaining cheelas to create a batch of delicious besan Vegetable Cheela Rolls.
    • Tips for Perfect Vegetable Cheela Rolls Every Time 

    • Use a non-stick skillet or tawa to cook the cheelas to prevent sticking and ensure easy flipping.
    • Add a pinch of baking soda to the batter to make the cheelas light and fluffy.
    • Experiment with different vegetables and spices to customize the flavor of your cheelas according to your taste preferences.
    • Serve the besan Vegetable Cheela Rolls hot with a side of green chutney or ketchup for dipping.

    Variations of Besan Cheela Recipe with Vegetables 

    • Paneer Cheela: Add crumbled paneer (Indian cottage cheese) to the vegetable filling for added protein and richness.
    • Masala Cheela: Sprinkle chaat masala or garam masala over the cooked cheelas for an extra burst of flavor.
    • Cheese Cheela: Grate some cheese over the filling before rolling the cheelas for a gooey and indulgent twist.

    Health Benefits of Vegetable Cheela Rolls: 

    Vegetable Cheela Rolls are not only delicious but also nutritious, offering a range of health benefits:

    • Besan (gram flour) is rich in protein, fiber, and essential nutrients, making it a healthy alternative to refined flour.
    • Vegetables add vitamins, minerals, and antioxidants to the dish, promoting overall health and well-being.
    • Cheelas are low in calories and high in satiety, making them a filling and satisfying option for weight management.

    Frequently Asked Questions (FAQs) About Vegetable Cheela Rolls 

    Q: Can I make the batter for Vegetable Cheela in advance?

    A: Yes, you can prepare the batter in advance and store it in the refrigerator for up to 24 hours. Just give it a quick stir before cooking the cheelas.

    Q: Can I freeze Vegetable Cheela Rolls for later use?

    A: While it’s best to enjoy besan Vegetable Cheela Rolls fresh, you can freeze them for up to 1 month. Wrap them individually in plastic wrap or foil and store them in an airtight container. Thaw and reheat in a skillet or microwave before serving.

    Q: What other fillings can I use for Vegetable Cheela Rolls?

    A: You can get creative with the fillings for Vegetable Cheela Rolls. Try adding cooked beans, grated cheese, or leftover cooked vegetables for added flavor and variety.

    Congratulations! You have now mastered the art of making besan Vegetable Cheela Rolls, a wholesome and delicious dish that is sure to impress your family and friends. Whether enjoyed as a snack, appetizer, or light meal, these flavorful rolls are a testament to the rich culinary heritage of India. Explore more recipes and culinary inspirations on Manjula’s Kitchen and continue your culinary adventures with confidence and creativity.

    If you liked the recipe here are some other recipes that you may like too 

    Vegetable Cheela: A savory Indian pancake made with mixed vegetables and chickpea flour.

    Palak (Spinach) Paneer: A classic North Indian dish made with spinach and paneer cheese cooked in a creamy tomato-based sauce.

    Shahi Pulao (Vegetable Pulao): A flavorful rice dish made with spiced basmati rice and vegetables.

    Gobi (Cauliflower) Manchurian: Crispy cauliflower florets tossed in a tangy and spicy Indo-Chinese sauce.

    Aloo (Potato) Paratha: Whole wheat flatbread stuffed with spiced mashed potatoes and cooked on a griddle.

    Mango Lassi: A refreshing yogurt-based drink flavored with ripe mangoes and a hint of cardamom.

    Besan Ladoo: Traditional Indian sweet made with roasted chickpea flour, ghee, and sugar.

  • Rava Uttapam (Instant Sooji Uttapam)

    Rava Uttapam (Instant Sooji Uttapam)

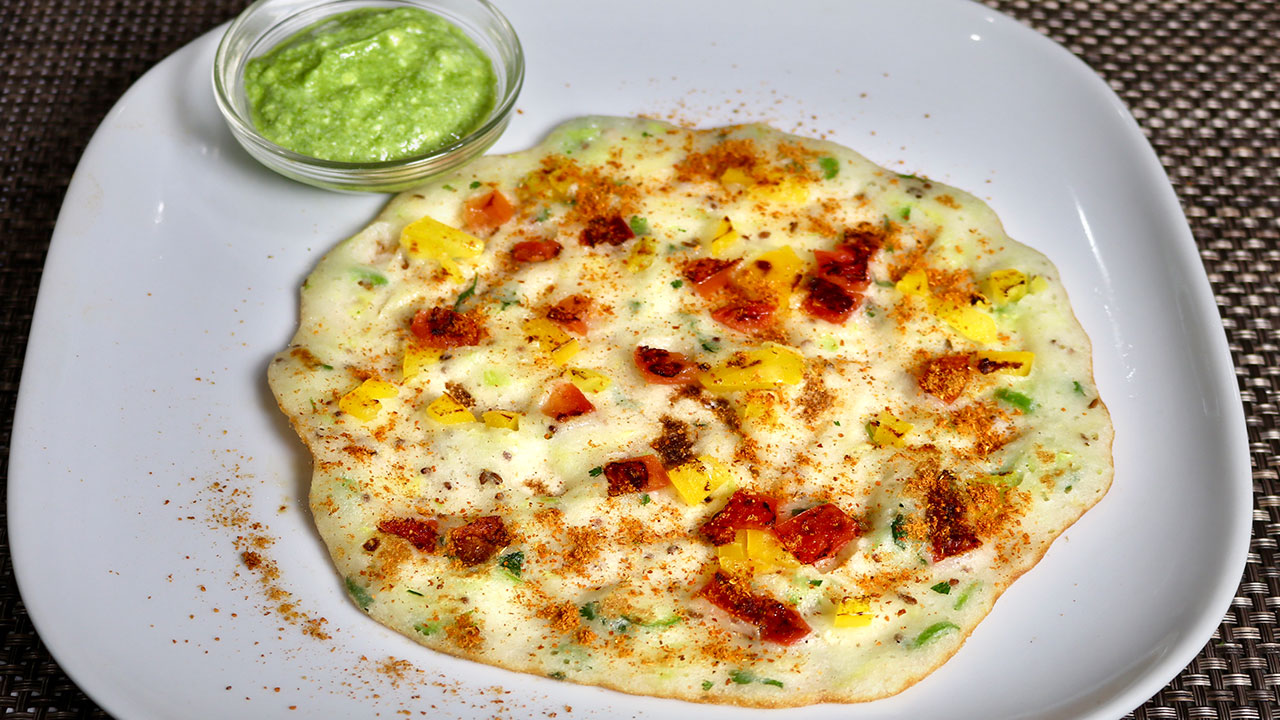
    Rava Uttapam served with green chutney on a white plate

    Rava Uttapam (Instant Sooji Uttapam)

    I have been wanting to do a video it should be easy and more versatile, ingredients maybe you have in your pantry. Utttapam a South Indian popular dish. Traditionally Uttapam is made with rice and lentil batter, which can be a long process, soaking, grinding then fermenting the batter. Rava Uttappam, on the other hand is instant and easy to make, with a variety of vegetables of your choice. It tastes delicious also can be served for breakfast, as a snack or for dinner. Rava Uttapam will be enjoyed by all ages.
    Uttapam is like a thick Dosa or Spicy pancake topped with vegetables. If you are serving this as a traditional Uttapam serve this with sambar and coconut chutney. But Rava Uttapam can be served with any chutney or condiment. Many times, I prefer this as a light dinner and enjoy with sprinkling samber powder, giving a traditional touch. The other reason I wanted to do this recipe as I said before I wanted to do the recipe more versatile you can use this batter for making Idli, because Rava Idli can be used for making so many recipes.
    I have many related recipes on my website like Masala Idli, Idli Manchurian.
    This recipe will serve 4.
    5 from 1 vote
    Prep Time 20 minutes
    Cook Time 10 minutes
    Course Breakfast, Snack
    Cuisine Indian
    Servings 4 people

    Ingredients
      

    • 1 cup sooji coarse, semolina
    • ½ cup yogurt curd, dahai
    • ½ cup cabbage finely chopped
    • 1 cup bell pepper finely chopped (capsicum, shimala mirch)
    • 1 cup tomatoes finely chopped, remove the seeds
    • 1 Tbsp cilantro finely chopped
    • 1 Tbsp green chili finely chopped
    • 2 tsp ginger shredded, adrak
    • 1 tsp salt
    • 1 tsp ENO fruit salt

    For Seasoning

    • 1 Tbsp oil
    • ¼ tsp cumin seeds jeera
    • ¼ tsp mustard seeds rai

    Also need

    • 2 Tbsp oil to cooking

    Instructions
     

    • In a bowl mix sooji, salt, green chili, ginger, cilantro, cabbage, yogurt, and add water as needed batter should be little thicker than dosa batter.
    • In a small bowl heat the oil over medium heat, oil should be moderately hot, add cumin seeds and mustard seeds as seeds crack add to the batter, mix it well. Let the batter set aside for at least 15 minutes.
    • Add Eno Fruit Salt to the batter just before you are ready to make Uttapam and mix well. The mixture will begin light and foaming.
    • Heat the skillet over medium heat and lightly grease the skillet. Pour about 2 large spoons of batter and spread consistency should be of thick then dosa. Sprinkle about 2 tablespoons of bell pepper and tomatoes press it lightly into the batter.
    • Pour about 1 teaspoon of oil around uttapam and cover it and let it cook for about 2 minutes and turn them over, uttapam should be golden brown from bottom making crisper, and top should be cooked well but not brown. Uttapam should be cooked over low medium heat.
    • Uttapam is ready to serve. I like to sprinkle lightly samber powder to add extra flavor.

    Notes

    Serving suggestions
    • You can serve the Rava Uttapam with sambar, coconut chutney or your choice of condiment.
    Additional Notes
    • Adding tomatoes and bell pepper gives a traditional look to Uttapam.
    • I add green chilies and cilantro in the batter to keep the colors better.
    • You can choose your choice of vegetables like shredded carrots, finely chopped green beans, corn, finely chopped spinach (these are the veggies I have tried).
    • Do not cook on high heat, uttapam will not cook through.
    • If I am making Uttapam to serve as a starter I make the uttapam in small sizes, otherwise make it in about 7-inch diameter. What size you want to make it is your choice.
    Keyword Appetizers, Bhartia Khana, Bread Uttapam, Coconut Chutney, Halwa, Healthy, Homemade, Idli, Jain Food, Mandir Food, No Garlic, No Onion, Quick And Easy, Rava Dosa, Samber, Savory Pancake, Sheera, Snack, South Indian Cuisine, Swami Narayan, Vegetarian, Video Recipe
    Tried this recipe?Let us know how it was!

    Introduction to Rava Uttapam Recipe

    Rava Uttapam is a delightful quick & easy south indian bread that makes for a wholesome breakfast or a light meal. Made from semolina (rava or sooji), this dish is not only delicious but also easy to prepare. In this rava uttapam recipe, we’ll walk through the steps to create this flavorful snack. Whether you’re a beginner or a seasoned cook, how to make rava uttapam will become a breeze with this simple yet detailed recipe.

    Ingredients Preparation for Rava Uttapam

    Before we dive into the cooking process, it’s essential to gather and prepare all the necessary ingredients. For this recipe for rava uttapam, you’ll need semolina, yogurt, water, salt, asafoetida (hing), ginger, green chilies, cilantro, and vegetables like bell peppers, tomatoes.

    Tips for Ingredients Preparation:

    • Ensure the semolina is fresh for the best texture.
    • Use thick yogurt for better consistency.
    • Chop vegetables finely for even distribution.

    Making the Batter for Rava Uttapam

    To start making rava uttapam batter, take a mixing bowl and add semolina and yogurt. Gradually pour water and whisk the mixture to form a smooth batter. The batter should have a pouring consistency, neither too thick nor too thin. Add salt, asafoetida, finely chopped ginger, green chilies, and cilantro to enhance the flavor.

    Tips for Making the Batter:

    • Let the batter rest for at least 10-15 minutes to allow semolina to absorb moisture.
    • Adjust water quantity as needed to achieve the desired consistency.

    Variations for Rava Uttapam Batter:

    • For a healthier option, you can add grated carrots, spinach, or grated zucchini to the batter.
    • Experiment with spices like cumin seeds or mustard seeds for added flavor.

    Cooking Rava Uttapam on the Griddle

    Heat a non-stick skillet or griddle on medium heat and lightly grease it with oil. Once the griddle is hot, pour a ladleful of batter onto it and spread it evenly to form a small circle. Sprinkle chopped vegetables like bell peppers, tomatoes, on top of the uttapam.

    Tips for Cooking Rava Uttapam:

    • Cook on low to medium heat to ensure even cooking without burning.
    • Cover the uttapam with a lid to cook the top layer thoroughly.
    • Drizzle oil around the edges to make them crispier.

    Variations in Toppings for Rava Uttapam:

    • You can customize the toppings according to your preference. Try adding grated cheese or paneer for a richer taste.
    • For a spicy kick, sprinkle some red chili flakes or chaat masala on top.

    Serving and Presentation of Rava Uttapam

    Once the rava uttapam is cooked to perfection and turns golden brown on both sides, transfer it to a plate. Serve hot with coconut chutney, tomato chutney, or sambar for a complete South Indian breakfast experience.

    Benefits of Rava Uttapam:

    • Rava Uttapam is a nutritious breakfast option as it is made from semolina, which is rich in carbohydrates and protein.
    • It’s light on the stomach and easy to digest, making it suitable for all age groups.
    • The addition of vegetables makes it a wholesome meal, providing essential vitamins and minerals.

    FAQs (Frequently Asked Questions) about Rava Uttapam:

            Explore more appetizer recipes on Manjula’s Kitchen: Vegetable Samosas, Paneer Tikka, Crispy Spinach PakorasMango Lassi, Masala Chai, Gulab Jamun, Kheer (Rice Pudding)

          • Avocado Paratha

            Avocado Paratha

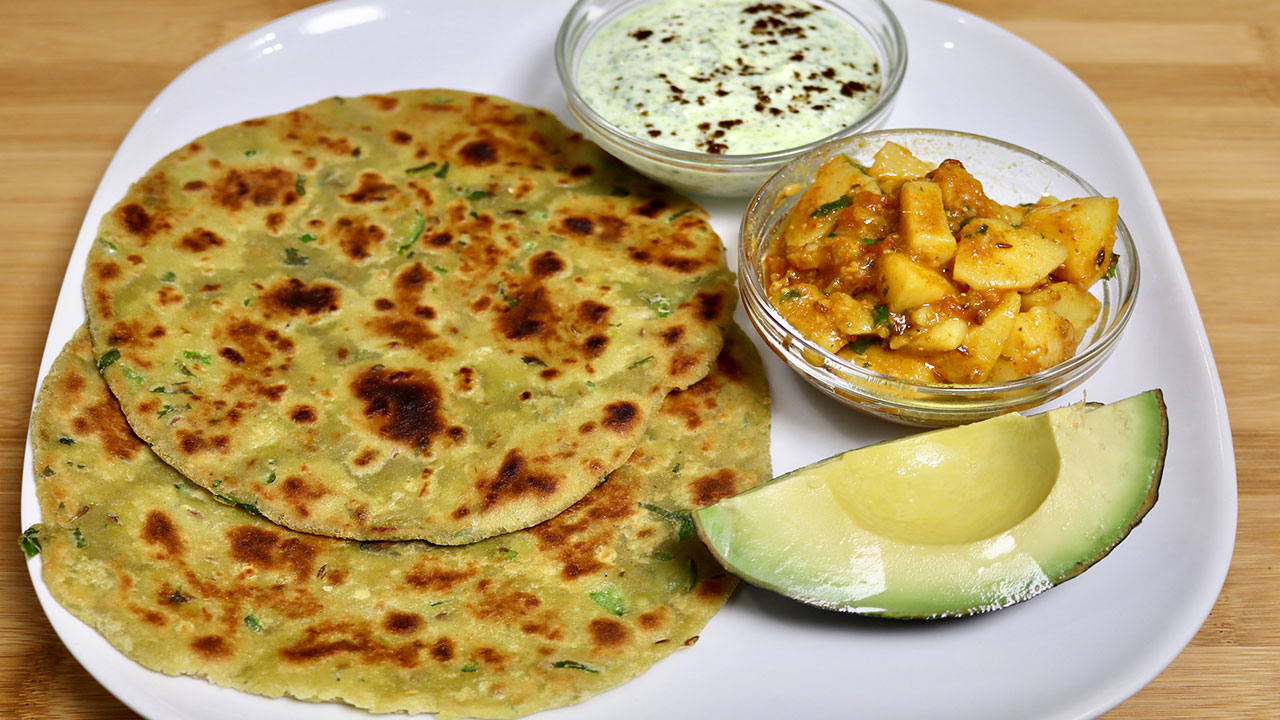
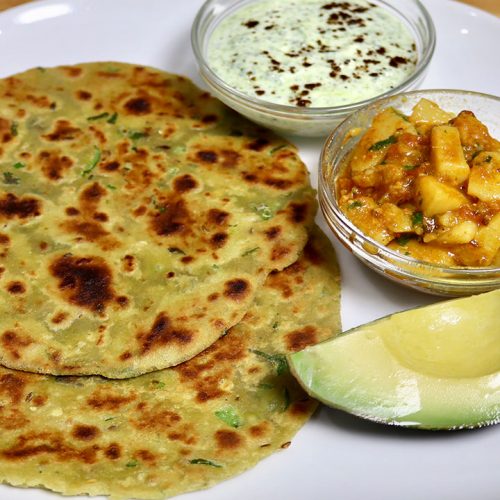
            Avocado Paratha served with potato curry, yogurt sauce, and avocado slice on a white plate

            Avocado Paratha

            Avocado Paratha, these days I'm spending a lot of time at home, so I decided to experiment in the kitchen. I had one extra avocado left after making some guacamole dip. Avocados seem to be very popular these days most often served as "Avocado Toast". I decided to put an Indian twist and use the extra avocado in delicious flavorful parathas. It actually turned out great and I enjoyed, but I think it needed a few tweaks. I added some extra spices and it turned out even better.
            Avocados have many health benefits, including being a "healthy" fat and they taste great! I like to serve Avocado Parathas as a snack with tea. It can also be served with any gravy-based dish; however, I think its complemented perfectly with "Aloo Tamatar" or "Spinach Raita". This is also a satisfying lunch box meal.
            This recipe will serve 3.
            4.67 from 6 votes
            Prep Time 10 minutes
            Cook Time 15 minutes
            Total Time 25 minutes
            Course Breakfast
            Cuisine Indian
            Servings 3 people

            Ingredients
              

            • 1 large ripe avocado
            • 1 ¼ cup whole wheat flour use as needed
            • ½ tsp salt
            • ½ tsp cumin seeds jeera
            • tsp asafoetida hing
            • 1 Tbsp green chili finely chopped
            • 1 Tbsp cilantro finely chopped
            • 1 tsp ginger finely shredded
            • ½ tsp lemon juice

            Also, need

            • ¼ cup whole wheat flour for rolling the paratha
            • 3 Tbsp oil for cooking the parathas

            Instructions
             

            • Slice avocado in half, remove the pit and skins and scoop them into a mixing bowl. Then use a fork to gently mash, (avocado should be ripe). Add green chili, salt, asafetida, cumin seeds, lemon juice, cilantro and salt, mash all the ingredients together (Lemon juice is added to prevent oxidizing of the Avocados)
            • Add the whole wheat flour gradually, how much flour you will need depends on the avocado, knead all the ingredients together and make a smooth but firm dough. Do not add any water. Grease your palm and roll the dough between your palms basically you are kneading the dough between you palms. Let the dough sit for 10 minutes before making the parathas.
            • Divide the dough into 6 equal parts and roll them into smooth balls. Flatten them with the palm of your hand and roll them in dry flour. Roll the paratha into about 6-inch diameter. Note: if paratha is sticking while rolling sprinkle little more flour this will help rolling.
            • Heat the flat skillet over medium heat. Note: heavy skillet works best. To check if the skillet is ready, put few drops of water on it. If the water sizzles right away, the skillet is ready.
            • Place the Paratha over the skillet. When you see the color change and the paratha will puff in different places. Turn the paratha over.
            • Paratha should have golden-brown spots. Wait a few seconds and put about 1 teaspoon of oil and spread with a spatula. Flip the paratha and put again half teaspoon of oil. Lightly press the paratha with a spatula.
            • Flip again and press with a spatula making sure the paratha is golden-brown on both sides. Repeat for the remaining parathas.
            • Parathas are best served hot and crispy.

            Notes

            Serve them as a snack with cup of chai, or with a meal I like to serve with Aloo Tamatar and Spinach Raita.
            Keyword Avocado Pancake, Avocado Roti, Bread, Chapati, delicious, Easy Cooking, Guacamole Bread, Healthy, Homemade, Jain Food, Lunch Box, Main Meal, Onion Garlic Free Cooking, Roti, Side Dish, Swaminarayan, Teatime Snack, Unleavened Bread, Vegan, Vegetarian, Veshno Cooking, Video Recipe
            Tried this recipe?Let us know how it was!
          • Crispy Vegetable Pakoras

            Crispy Vegetable Pakoras

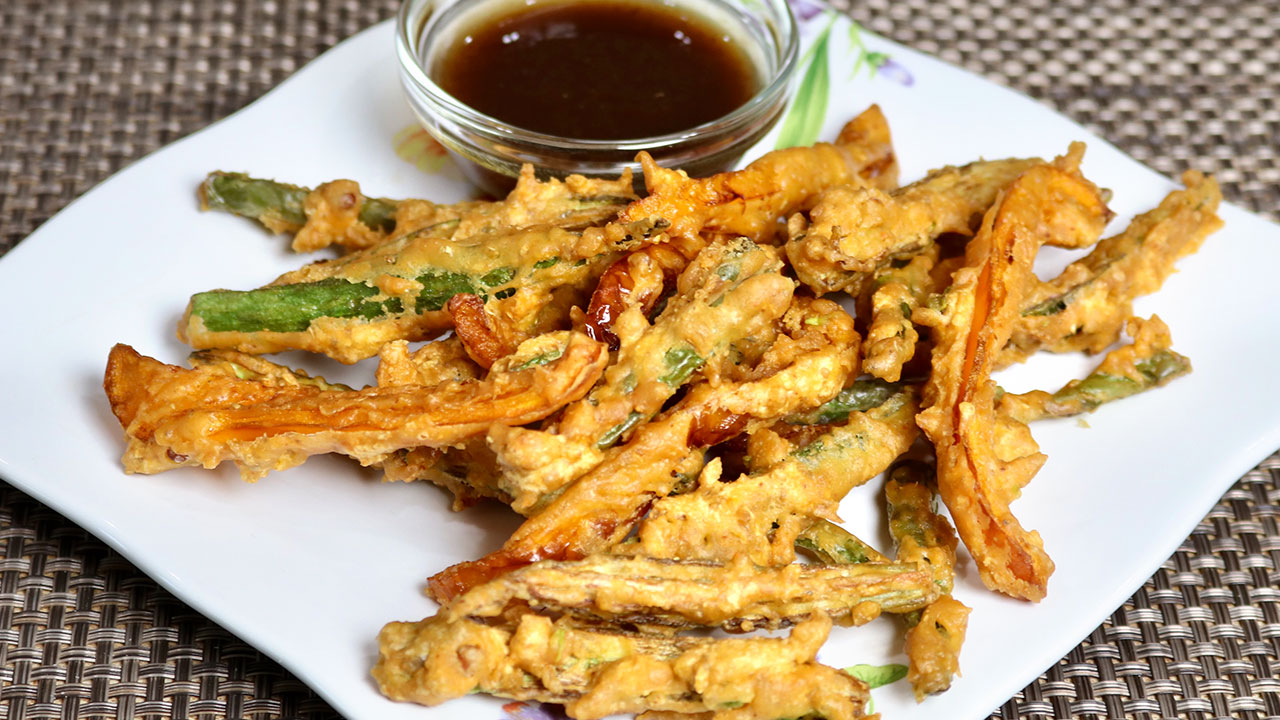
            A plate of crispy vegetable pakoras served with a bowl of tamarind chutney.

            Crispy Vegetable Pakoras

            Crispy Vegetable Pakoras are probably my all-time favorite and satisfying appetizer. They are perfect for any occasion, not to mention they are a favorite with all –young or old! These bite-sized snacks are fried to crispy golden-brown perfection. I serve pakoras with tamarind or cilantro chutney. When cooked right they are crispy on the outside and soft on the inside. These pakoras also have the added benefits of being vegan and gluten-free.
            I have many fond memories of my mother cooking pakoras when I was a child. There was no special occasion that warranted her whipping up a batch of pakoras. Sometimes she would just come up with an excuse – be it the weather (especially if it was cold & rainy!) or if she simply wanted something savory and spicy. Pakoras were also a staple in our household when guests would unexpectedly show up at our house.
            Vegetable Pakoras are easy and quick to make, not to mention you can use a variety of vegetables to make them. I can tell you from personal experience that these pakoras are extremely addicting! Try pairing these pakoras with your afternoon tea or as a spicy delicious snack!
            This recipe will serve 4.
            5 from 1 vote
            Prep Time 10 minutes
            Cook Time 15 minutes
            Total Time 25 minutes
            Course Appetizer, Snack
            Cuisine Indian
            Servings 4 people

            Ingredients
              

            • 4 okras cut vertically into 4 slices
            • 12 green beans cut into half then cut them vertically
            • ½ red bell pepper sliced into about quarter inch thick
            • cup besan Bengal gram flour
            • 2 Tbsp corn starch arrow root
            • 2 Tbsp rice flour
            • 2 tsp coriander powder dhania
            • ¼ tsp mango powder amchoor
            • ¼ tsp red chili powder
            • tsp baking soda
            • ½ tsp salt

            Instructions
             

            • First prepare the vegetables: okras, wash and pat dry, cut off the tops and bottom. Then cut the okras vertically into four slices. Bell pepper slice into about quarter inch thick, making julienne, and cut the green beans into half then cut them vertically.
            • Next! Prepare pakora mix, mix all the dry ingredients together, besan, corn starch rice flour, and baking soda, mix them well. Rice flour, corn starch and baking soda will add the extra crispness to pakoras.
            • Now add the other spices, coriander powder, mango powder, red chili powder and salt. Mix all the ingredients well.
            • Sprinkle the dry mix over vegetables mix them well add water little at a time as needed to coat the vegetables nicely with besan spice mix, vegetables should be coated well. I added about 1/4th cup of water.
            • Heat at least one inch of oil in a frying pan over medium high heat. To test, put one drop of batter in the oil. The batter should come up slowly. Drop the pakoas slowly one at a time. Put few pakoras at a time don’t overlap the pakoras.
            • Fry the pakoras until they turn golden brown, turning them occasionally. This should take about 6 minutes.
            • Take them out over paper towel to absorb the extra oil.
            • Fry all the pakoras same way.

            Notes

            Also check out the recipe for Chai Masala Tea. Gulab Jamun, Vegetable Kathi Roll
            Keyword Appetizer, Balushahi, Bhartia Khana, Burfi, Cooking Video, Crispy, Crusty, Delightful, Homemade, Indian Vegetarian, Jain Food, Mandir Food, North Indian Recipes, Onion Garlic Free Cooking, Punjabi Cuisine, Snack, Street Food, Veshno Cooking
            Tried this recipe?Let us know how it was!
          • Mooli Ka Paratha (Punjabi Mooli Flat Bread)

            Mooli Ka Paratha (Punjabi Mooli Flat Bread)

            Mooli ka Paratha

            Mooli Ka Paratha (Punjabi Mooli Flat Bread)

            Mooli is a white radish or daikon. This is an exotic flat bread filled with mooli. Mooli ka paratha is a popular north Indian breakfast treat with cup of hot chai.
            No ratings yet
            Course Bread
            Cuisine Indian
            Servings 4 parathas

            Ingredients
              

            Dough

            • 1 cup whole wheat flour, atta
            • ½ teaspoon salt
            • 1 tablespoon oil
            • ½ cup water

            For Filling

            • 2 cups white radish/mooli shredded
            • ½ tablespoon salt
            • ½ teaspoon carom seeds / ajwain
            • 2 teaspoons green chili finely chopped
            • 2 tablespoons cilantro / hara dhania finely chopped
            • Also need about ¼ cup whole wheat flour for rolling and 5 teaspoon oil for cooking paratha

            Instructions
             

            Making the Dough

            • Mix flour, salt, and oil in a bowl add the water as needed to make soft dough. Knead the dough for about one minutes on a lightly greased surface to make soft, and pliable dough.
            • Set the dough aside for at least ten minutes.

            Making the Filling

            • Shred the mooli / white radish, add the salt to shredded mooli mix it well let it sit for about 2-3 minutes. Squeeze the water as much possible from mooli. Add all filling ingredients together, carom seeds, chili and cilantro mix it well. Do this processes just before you are ready to make parathas.

            Making of paratha

            • Divide the dough into four equal parts.
            • Take one part of the dough and with your fingers flatten the edges to form a three-inch circle, leaving the center a little thicker than the edges.
            • Mold the dough into a cup and place the filling in the center, filling should be little less then dough. Pull the edges of the dough to wrap the filling.
            • Heat an iron skillet or heavy skillet on medium high heat. Test by sprinkling it with a couple of drops of water. If the water sizzles right away, the skillet is ready.
            • Press the filled ball lightly on dry whole wheat flour from both sides.
            • Using a rolling pin, roll the balls lightly to make six-inch circles, keeping the sealed side of the balls on top. If the dough sticks to the rolling pin or rolling surface, lightly dust the parathas with dry flour.
            • Place the paratha on the skillet. When the paratha start to change color flip it over. You will notice some golden-brown spots.
            • After a few seconds, drizzle one teaspoon of oil over the paratha. Flip the paratha again and lightly press the paratha on the sides with a spatula, to help paratha cook through evenly.
            • Flip again and press with a spatula making sure the paratha is golden-brown on both sides. Repeat for the remaining parathas.
            • Paratha are best served hot and crispy. They will be soft if not served hot. If you are not going to serve them right away, cool them on a wire rack to keep them from getting soggy.
            • Parathas can be kept unrefrigerated for up to two days wrapped in aluminum foil or in a covered container. For later use, parathas can be refrigerated four to five days or frozen for up to a month.  Re-heat using a skillet or oven.
            Tried this recipe?Let us know how it was!

          • Eggless Omelet (Vegan)

            Eggless Omelet (Vegan)

            Eggless Omelet

            Eggless Omelet (Vegan)

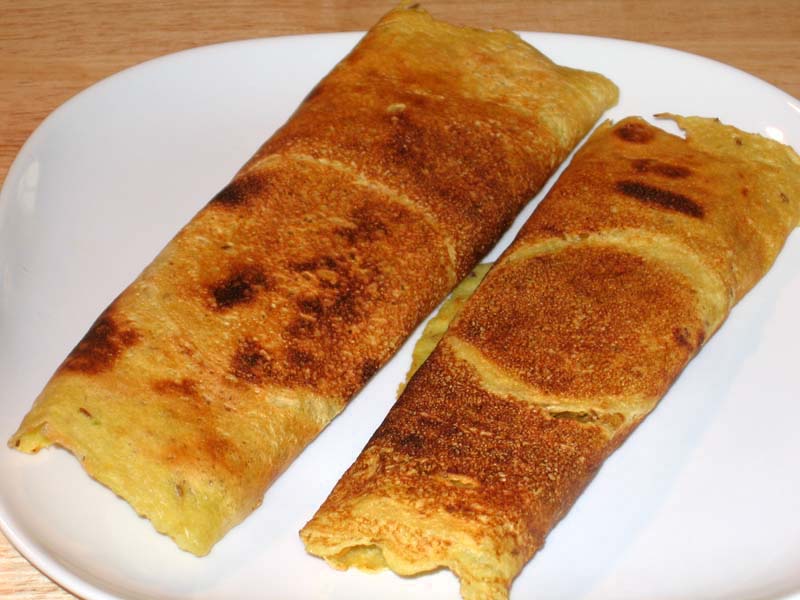
            This Eggless Omelet is similar to a variation of besan chila. I combine lots of vegetables including bell pepper, spinach, and tomatoes and then add in some light spices. Now you have a healthy and delicious choice for breakfast or light lunch. It is also vegan and gluten free!
            5 from 1 vote
            Prep Time 15 minutes
            Cook Time 15 minutes
            Course Bread
            Cuisine Indian
            Servings 2 people

            Ingredients
              

            • 3/4 cup besan (gram flour) available in Indian grocery stores
            • 1/2 teaspoon salt
            • 1/2 teaspoon cumin seeds (jeera)
            • 1/8 teaspoon black pepper
            • 1 green chili finely chopped, optional
            • 1/2 cup tomato seeded and finely chopped
            • 1/2 cup finely chopped spinach
            • 1/2 cup finely chopped bell pepper
            • 1/2 cup water to make batter
            • 2 tablespoons oil

            Use vegetables quantity as a guide line, it can be little more or less, also change the vegetables to your choice.

            Instructions
             

            • Mix all the dry ingredients together: besan, cumin seeds, black pepper and salt. Add the water slowly to make a smooth batter, the consistency of pancake batter or Dosa batter. Add the green chilies, tomato, spinach, and bell pepper. Mix well.
            • Heat the skillet on medium heat (Use a non-stick skillet) skillet should be moderately hot. Test by sprinkling a few drops of water on it. Water should sizzle right away.
            • Pour approx. 1/2cup of the batter mixture into the skillet and spread evenly with the back of a spoon. Starting from the center, spiral the batter outward evenly to form a circle about 7” in diameter.
            • When the batter starts to dry, gently spread about two teaspoons of oil over it. Wait about 30 seconds; flip the omelet using a flat spatula.
            • Press the omelet lightly all around with the spatula to make the omelet cook evenly. Turn the omelet three or four times, until cook well and golden brown on both sides.
            • Repeat for the remaining omelet.

            Notes

            Serve this with mint chutney
            Tried this recipe?Let us know how it was!

          • Kuttu ki Puri (Buckwheat Flatbread)

            Kuttu ki Puri (Buckwheat Flatbread)


            Kuttu ki Puri (Buckwheat Flatbread)

            Kuttu ki Puri (Buckwheat Flatbread)

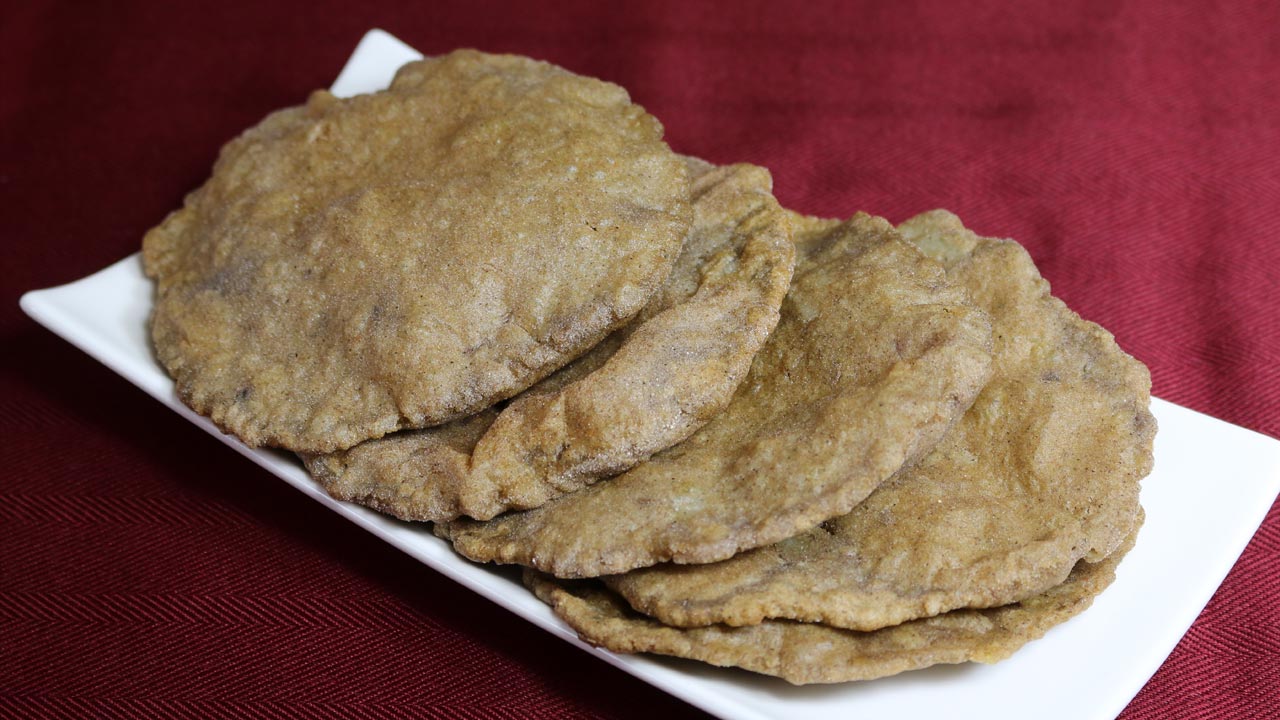
            Kuttu ki Puri is a gluten free Buckwheat flatbread. It is a quick & easy recipe to make. This is a Falihar, a food eaten on days of fast as grains are not eaten. Some upcoming Hindu festivals include Navaratri and Janmashtami where as a part of a fast kuttu puris are eaten or any other days when you want to try something different. The puris are made with buckwheat flour and potatoes, and mostly accompanied with potato curry or Arbi (taro root) Stir-Fry.
            No ratings yet
            Prep Time 10 minutes
            Cook Time 19 minutes
            Course Bread
            Cuisine Indian
            Servings 8 Kuttu ki Puri

            Ingredients
              

            Ingredients:

            • 1 cup buckwheat flour (kuttu)
            • 1/2 cup potato boiled and mashed
            • 1/2 teaspoon salt
            • 1/2 teaspoon cumin seeds (jeera)
            • 1/8 teaspoon of red pepper
            • Approx. 1/3 cup water lukewarm use as needed

            Also need

            • 1/4 cup buckwheat flour need for rolling the puries
            • Oil to fry 

            Instructions
             

            Method

            • Mix buckwheat flour, cumin seeds, pepper, and salt well, add potatoes, mix it well. Add warm water as need to make smooth and pliable dough. Set aside for five minutes.
            • Divide the dough in 8 equal parts, oil your palms and roll them into smooth patties.
            • Before rolling the puris, press the patties both sides on the dry flour, this will make them easy to roll.
            • Roll them into six inch circle, while rolling if puri start sticking to rolling pin or rolling surface sprinkle more flour as needed.
            • Heat at least one inch of oil in a frying pan over medium high heat.  To check if oil is ready drop a small piece of dough into the oil this should come up slowly.
            • Place one puri at a time in the frying pan and press it with a skimmer. The puris should puff up slowly. Turn the puris over. Puri should be light brownish gray from both sides.
            • Take the puris out and place them on paper towels to absorb the excess oil.
            • Serve puris hot or store in covered container after they cool to room temperature.
            Tried this recipe?Let us know how it was!


          • Dal Pakwan (Sindhi Breakfast)

            Dal Pakwan (Sindhi Breakfast)

            Dal Pakwan

            Dal Pakwan (Sindhi Breakfast)

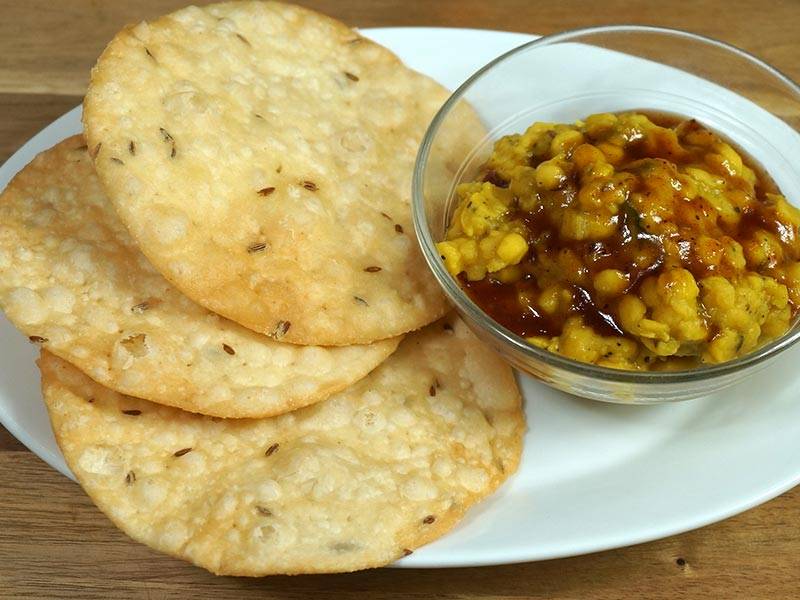
            Dal Pakwan is an authentic breakfast delicacy in Sindhi homes. Crisp flavored puries known as Pakwan served with spicy dal topped with chutney.
            5 from 1 vote
            Course snacks
            Cuisine Indian
            Servings 4 people

            Ingredients
              

            Ingredients

            • 1 cup chana dal (Bengal gram)
            • 1 teaspoon salt
            • 1/2  turmeric (haldi)
            • 1 tablespoon ginger finely chopped
            • 1 green chili chopped
            • 1/4 teaspoon black pepper
            • 1/4 teaspoon  garam masala
            • 1/2 teaspoon mango powder (amchoor)

            Seasoning

            • 2 tablespoons oil
            • 1 teaspoon cumin seeds (jeera)
            • 6-7 curry leaves

            Pakwan (Crisp Puries known as Pakwan):

            • 1 cup all purpose flour (maida/plain flour)
            • 1/4 cup semolina (sooji)
            • 1/4 teaspoon of salt
            • 1/2 teaspoon cumin seeds (jeera)
            • 2 tablespoon oil
            • Approx. 1/3 cup of water
            • Oil to fry

            Also need tamarind chutney for serving, check the recipe on my website

            Instructions
             

            Cooking Dal:

            • Wash and soak chana dal for at least 2 hours in 3 cups of water.
            • Drain the water and in pressure cooker add dal, 2-1/2 cups of water, salt, turmeric, green chili, and ginger, close the cooker and cook over medium high heat.
            • As the pressure cooker starts steaming turn the heat down to medium and cook for about 4 minutes.
            • Turn off the heat and wait until steam has stopped before opening the pressure cooker.
            • Dal should be soft well-cooked but not mushy. Add black pepper, mango powder and garam masala, mix it well. Dal should be thick in consistency.

            Seasoning

            • Heat the oil in a saucepan. Test the heat by adding one cumin seed to the oil; if seed cracks right away oil is ready.
            • Add cumin seeds, after seeds crack add curry leaves stir for few seconds and pour over dal mix it well and set aside. Curry leaves splatter be careful.

            Pakwan

            • Crisp Puries known as Pakwan: Mix flour, sooji, salt, cumin seeds, and oil. Add enough water to make firm dough. Knead the dough well.
            • Set the dough aside and let it sit for at least 15 minutes or longer.
            • Divide the dough in 10 equal parts, Roll the dough into about 5-inch diameter. If the dough is sticking to the rolling pin or rolling surface, put couple of drops of oil on the rolling pin and a couple of drops of oil on the surface.
            • Prick the rolled dough all over with a fork. This will limit puries from puffing and make them crisp.
            • Heat the oil in a frying pan over medium heat. The frying pan should have at about 1 inch of oil. To check if the oil is ready, put a small piece of dough in the oil. The dough should sizzle and come up slowly.
            • Fry 2-3 puries at time until both sides are a light golden-brown.
            • Transfer puries over paper towel, it will absorb the extra oil.
            • After the puries cool to room temperature they should be crisp. Puries can be stored in airtight container for 1 month.

            Notes

            Serve Pakwan with hot dal with drizzle of tamarind chutney.
            Tried this recipe?Let us know how it was!

          • Moong Dal Dosa

            Moong Dal Dosa

            Moong Dal Dosa

            Moong Dal Dosa, Cheela

            Moong Dal Dosa, also known as “cheela” or “puda, is a thin, crisp pancake made from any one of a variety of batters. Moong dal dosa is a convenient substitute, quick & easy to prepare than the traditional dosa. Traditional dosas are made with fermented urad dal and rice.
            No ratings yet
            Prep Time 20 minutes
            Cook Time 20 minutes
            soaking dal 4 hours
            Total Time 40 minutes
            Course Main Course
            Cuisine Indian
            Servings 3 people

            Ingredients
              

            • 1 cup washed moong dal
            • 1 chopped green chili
            • 1/4 inch piece of ginger chopped
            • 1/2 tsp cumin seeds
            • 1/2 tsp salt
            • 6 tbsp oil

            Instructions
             

            • Wash the dal, changing the water several times until it appears clear. Soak dal in four cups of water for at least four hours.
            • Drain the water. Blend the dal with green chile and ginger, adding water slowly as needed to make a smooth batter. Note: The less water, the smoother the batter.
            • Mix the salt and cumin seeds into the batter. Add water as needed. The total water added will be about ½ cup, just enough to achieve the consistency of pancake batter.
            • Place a non-stick- skillet over medium-high heat. Test by sprinkling a few drops of water on it. The water should sizzle right away.
            • Pour ½ cup of the batter mixture into the skillet and spread evenly with the back of a spoon. Starting from the center, spiral outward until evenly spread, about seven inches in diameter.
            • When the batter begins to dry, gently spread one teaspoon of oil over it. Wait about 30 seconds, then flip the puda using a flat spatula.
            • Press the dosa lightly with the spatula all around to assure even cooking, turning them two to three times. Dosa should be crisp and golden brown on both sides.Repeat for the remaining dosas.

            Notes

            Serving suggestion:  Serve dosa folded with Aloo Masala For Dosa or  Jeera Aloo you can fold with your favorite cheese. You can also serve with Samber  or with yogurt.
            Tried this recipe?Let us know how it was!

            Learn How To Make Moong Dal Dosa With Moong Dal – Manjula’s Kitchen 

            Dosa is a popular south indian delicacy which looks like a crepe. It’s like a crisp and thin pancake made of rice and urad dal batter. Traditionally Dosa is served with sambar, aloo masala and coconut chutney. It is an Indian crepe made usually through rice batter, but here we have experimented and made many alternative dosa such as Oat Dosa, Besan Dosa, Rava Dosa, Sorghum Dosa, whole wheat dosa. This preparation is using moong dal and is a bread based gluten free breakfast recipe that is vegan. The preparation entails skillfully combining pan techniques and manual dexterity to achieve the perfect bread cooked on non-stick skillets.

            Preparing Moong Dal:

            Embarking on the enticing journey of crafting moong dal dosa, initiate by meticulously washing the moong dal, repeating the water-changing ritual to ensure absolute clarity. Immerse the dal in four cups of water, allowing it to soak for a minimum of four hours, cultivating a soft and pliable texture essential for the success of this revered moong dal dosa recipe. The thorough soaking not only aids in the dosa’s consistency but also serves as a testament to the meticulousness ingrained in the recipes of moong dal dosa.

            Blending Moong Dal Batter: 

            Upon draining the soaked moong dal, transition to the blending phase, where precision is key. Combine the dal with green chile and ginger, gradually introducing water to achieve a seamlessly smooth batter. Be mindful that the proportion of water directly impacts the final texture, a crucial detail in the nuanced art of dosa recipe with moong dal. This harmonious blending process transforms the moong dal into a versatile canvas, ready to absorb the flavours and nuances that define this iconic dish.

            Seasoning the Batter: 

            Elevate the moong dal batter to a symphony of flavours by introducing salt and cumin seeds. Adjust the water content with care, ensuring the batter attains the consistency reminiscent of pancake batter, a vital characteristic in the sought-after recipes of moong dal dosa. This seasoning process not only imparts depth to the batter but also plays a pivotal role in shaping the distinct taste profile that defines moong dal dosa recipe.

            Heating the Skillet: 

            Transitioning to the cooking phase, heat a non-stick skillet over medium-high heat, a critical step in the dosa-making process. The sizzle of water droplets confirms the skillet’s readiness, setting the stage for the dosa’s journey from batter to a crisp delicacy. This well-calibrated heat not only ensures the dosa’s optimum texture but also encapsulates the essence of precision embedded in the moong dal dosa recipe.

            Pouring and Spreading the Batter: 

            With the skillet primed, gracefully pour ½ cup of the moong dal batter onto the heated surface. Employing the back of a spoon, skillfully spread the batter in a spiral motion, originating from the centre and expanding to a symmetrical seven-inch diameter. This meticulous spreading ritual is not merely a technicality but an artful dance that defines the visual appeal and thickness of the moong dal dosa, showcasing the intricacies of dosa recipe with moong dal.

            Cooking and Flipping the Dosa:

            As the batter begins to dry, introduce a teaspoon of oil, spreading it delicately over the dosa’s surface. After a brief interlude, execute a precise flip using a flat spatula, revealing the golden-brown underside. Gently press the dosa to ensure uniform cooking, turning it two to three times. This vigilant cooking process guarantees a crisp finish and a tantalising aroma, embodying the essence of moong dal dosa recipe.

            Repeating the Dosa-Making Ritual: 

            The final act involves replicating the dosa-making ritual for the remaining batter, ensuring a consistent outcome. Reiterate the process of pouring, spreading, cooking, and flipping until each moong dal dosa mirrors the perfection achieved in the initial creation. This dedicated repetition encapsulates the spirit of tradition and craftsmanship ingrained in the recipes of moong dal dosa, culminating in a batch of savoury, golden delights awaiting appreciation in all their flavorful glory.