Tag: Quick Dessert Recipes

Quick Dessert Recipes for Satisfying Your Sweet Cravings
In today’s fast-paced world, finding time to prepare elaborate desserts can be challenging. However, satisfying your sweet cravings doesn’t have to take hours in the kitchen. With these quick dessert recipes, you can whip up delicious treats in no time. Here we go beyond Indian desserts and explore various other recipes available to try. 

Perfect for unexpected guests, last-minute gatherings, or just a spontaneous sweet tooth, these quick easy dessert recipes are here to save the day. Let’s dive into some of the best quick dessert recipes that are not only easy to make but also incredibly delicious.
Benefits of Quick Dessert Recipes

Time-Saving: Perfect for those with busy schedules.
Convenience: Minimal ingredients and steps involved.
Versatility: Suitable for various occasions, from everyday treats to festive celebrations.
Satisfaction: Quick solutions to sweet cravings.

Easy Quick Dessert Recipes
1. Mug Cakes
Mug cakes have taken the dessert world by storm. They are quick and easy dessert recipes that you can prepare in under five minutes. Simply mix the ingredients in a mug and microwave for a quick, single-serving dessert. Whether it’s chocolate, vanilla, or red velvet, mug cakes are a hit for their convenience and taste.
2. No-Bake Cookies
No-bake cookies are another excellent option for quick dessert recipes. Combining ingredients like oats, peanut butter, and cocoa, these cookies require no baking time. Just mix, chill, and enjoy. They are perfect fun summer recipes when you want a sweet treat without turning on the oven.
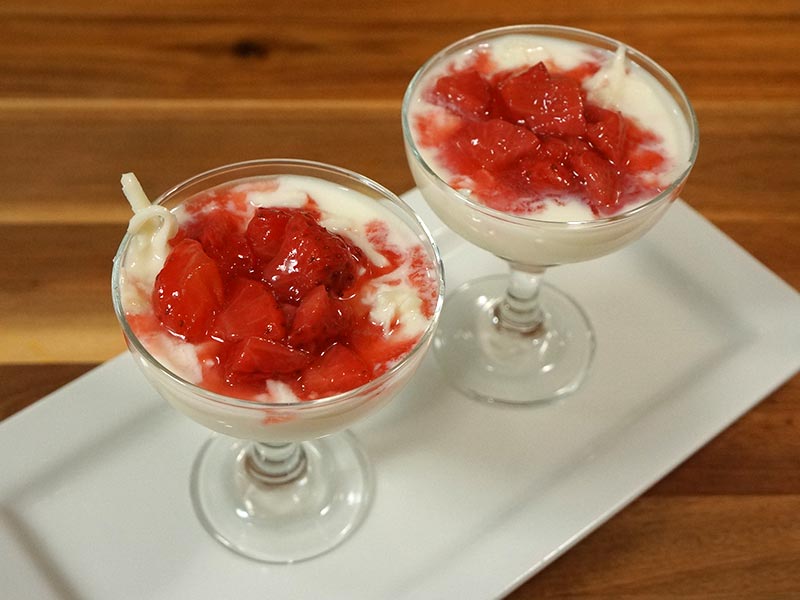
3. Fruit Parfaits
Fruit parfaits are light, refreshing, and can be assembled in minutes. Layer yogurt, granola, and your favorite fruits in a glass for a visually appealing and tasty dessert. This is one of the best quick dessert recipes for health-conscious individuals who still want to indulge.
Quick and Easy Dessert Recipes for Special Occasions
1. Chocolate-Dipped Strawberries
Chocolate-dipped strawberries are elegant and incredibly easy to make. Melt some chocolate, dip the strawberries, and let them set. These treats are perfect for christmas recipes, parties, or simply as a delightful snack.
2. Ice Cream Sundaes
Ice cream sundaes are a classic favorite that never goes out of style. Simply scoop your favorite ice cream, top with sauces, nuts, and fruits, and you have a quick and easy dessert recipe that everyone loves. Customize with your favorite toppings for added fun.
3. Mini Cheesecakes
Mini cheesecakes are quick to prepare and perfect for individual servings. Use a pre-made crust or make a simple one from crushed cookies and butter. Fill with a cream cheese mixture and chill. These cheesecakes can be ready in less than an hour and are great for any occasion.
Best Quick Dessert Recipes for Kids
1. Banana Bites
Banana bites are a fun and healthy treat that kids will love. Slice bananas, dip them in yogurt, and freeze. You can also roll them in crushed nuts or chocolate chips for added flavor. These quick easy dessert recipes are a hit with children and parents alike.
2. Apple Nachos
Apple nachos are a creative and nutritious dessert. Slice apples and drizzle with peanut butter or caramel sauce. Sprinkle it with granola, chocolate chips, or coconut flakes. This quick recipe dessert is a great easy party foods to get kids to eat more fruit while enjoying a sweet treat.
3. Pudding Cups
Pudding cups are simple yet satisfying. Layer instant pudding with whipped cream and crushed cookies in a cup. You can prepare these in advance and refrigerate until needed. They are perfect for after-school snacks or as a quick dessert.
FAQs
Q: What is the simplest type of dessert? 
A: The simplest type of dessert is often a no-bake option, such as no-bake cookies, fruit parfaits, or chocolate-dipped strawberries. These require minimal ingredients and preparation time.
Q: What is dessert easy? 
A: Easy desserts are those that require few ingredients and minimal cooking or baking time. Examples include mug cakes, ice cream sundaes, and pudding cups.
Conclusion
Quick dessert recipes are a lifesaver for anyone who loves sweets but doesn’t have the time or energy to spend hours in the kitchen. From quick and easy dessert recipes like no-bake cookies and mug cakes to easy quick dessert recipes for kids and special occasions, there’s something for everyone. 

These recipes prove that you don’t need to compromise on taste or presentation just because you’re short on time. So, next time you have a sweet craving or need a last-minute dessert, try one of these best quick dessert recipes and enjoy a delightful treat in no time.

Find vegetarian recipes on Manjula’s Kitchen and discover the joy of cooking nutritious and delicious food.

  • Carrot Kheer

    Carrot Kheer

    Carrot Kheer

    Kheer is one of the most traditional and loved sweets found all over India. Over the years, I’ve made videos on many variations of kheer, each with its own unique charm, although Rice Kheer remains the most traditional. Once, my friends served me Carrot Kheer. While it was delicious, I felt something was missing—a certain balance of flavors that I couldn’t quite pinpoint. After experimenting a few times, I finally developed a simple yet delicious version of Carrot Kheer that I’m happy with.
    Some of my younger friends, who usually avoid kheer, were pleasantly surprised when I served it to them as pudding. They loved it!
    What I love most about Carrot kheer is that it can be made with just a few simple ingredients, yet the result is always rich and flavorful. This version, in particular, is delightful with its creamy texture and subtle sweetness.
    4 from 2 votes
    Prep Time 10 minutes
    Cook Time 30 minutes
    Course Dessert
    Cuisine Indian
    Servings 4 people

    Ingredients
      

    • 3 cups shredded carrots, divided
    • 4 cups milk, divided
    • cup sugar
    • ¼ tsp crushed green cardamom
    • 2 tbsp sliced almonds

    Instructions
     

    • Before shredding the carrot, it should be washed and peel, peeling is an important of preparation. Blend 1 cup of shredded carrots with 1 cup of milk into a fine paste.
    • Bring the remaining milk to a boil over low to medium heat in a saucepan. To prevent the milk from sticking, wet the pan with a little water before adding the milk.
    • Once the milk boils, add the shredded carrots and carrot paste. Continue boiling for about 15 minutes over low to medium heat, stirring occasionally. Scrape the sides of the pan to prevent sticking and browning.
    • Cook until the carrots are tender, and the milk has reduced by about half, becoming creamy. Stir often to avoid burning.
    • Add sugar, cardamom, almonds, and cashews, and let the mixture simmer for a few more minutes.
    • Turn off the heat.
    • As the kheer cools, it will thicken in texture.

    Notes

    Enjoy! To serve as a pudding, you should cook the kheer for 2 to 3 more minutes to thicken it, bringing it to a pudding-like texture.
    Keyword Dessert
    Tried this recipe?Let us know how it was!

    Carrot Kheer (Carrot Paayasam): A Delicious Twist on a Timeless Indian Sweet | Manjula’s Kitchen

    Introduction to Carrot Kheer

    Kheer is one of the most cherished and traditional sweets in Indian cuisine, with its creamy, sweet, and flavorful profile making it a favorite during festivals and special occasions. Carrot Kheer, also known as Carrot Payasam, offers a delightful twist to the traditional rice-based kheer, adding a unique layer of flavor and texture with shredded carrots. Over the years, kheer has seen many variations, and this version brings the earthy sweetness of carrots into the creamy goodness of milk and sugar. With just a few simple ingredients, this Carrot Kheer delivers a rich and flavorful dessert that’s perfect for any occasion.

    Cultural and Traditional Importance

    Kheer holds a special place in Indian households, especially during festivals such as Diwali, Holi, and Raksha Bandhan. It is often served as an offering to deities and enjoyed as a dessert after meals. While Rice Kheer is the most traditional form, Carrot Kheer adds a refreshing twist by incorporating a vegetable into the dessert, making it both nutritious and flavorful. The vibrant color of the carrots combined with the rich texture of milk creates an aesthetically pleasing and indulgent treat that is sure to impress your family and friends.

    Although Carrot Kheer may not be as well-known as its rice counterpart, it is quickly gaining popularity for its unique taste and simplicity. This version strikes the perfect balance of sweetness and creaminess, making it a must-try for those looking to experiment with traditional Indian sweets.

    Recipe Variations from Manjula’s Kitchen

    While Carrot Kheer is a delightful dessert on its own, you can explore other variations of kheer or similar milk-based sweets from Manjula’s Kitchen:

    • Rice Kheer: The classic, most traditional form of kheer made with rice, milk, and sugar.
    • Sabudana Kheer: A delicious variation using tapioca pearls, commonly served during fasting periods.
    • Vermicelli Kheer (Seviyan Kheer): Made with thin vermicelli noodles, this version offers a unique texture to the traditional kheer.
    • Badam Burfi (Almond Candy): Rich and creamy, this version uses almonds to create a decadent dessert that’s both healthy and delicious.

    Health Benefits and Dietary Considerations

    Carrot Kheer offers a nutritious alternative to traditional kheer, with the inclusion of carrots providing a good source of vitamins, fiber, and antioxidants. Carrots are rich in vitamin A, which promotes eye health and boosts immunity, making this kheer not only delicious but also beneficial for overall wellness. Additionally, milk provides calcium and protein, while the nuts add healthy fats, making this dessert a well-rounded treat.

    This kheer can be easily adjusted for various dietary preferences. For a vegan option, you can substitute dairy milk with almond or coconut milk. The natural sweetness of the carrots also allows for a reduction in added sugar if you prefer a lighter dessert.

    Serving Suggestions

    Carrot Kheer can be served warm or chilled, depending on your preference. Its vibrant color and rich flavor make it an attractive addition to any festive meal. For an even more indulgent experience, you can serve Carrot Kheer with a sprinkle of extra chopped nuts, such as almonds or pistachios, for added crunch and richness.

    If you want to serve Carrot Kheer as a pudding, cook it for a few more minutes to achieve a thicker, more pudding-like consistency. This version pairs wonderfully with Gulab Jamun or Rasgulla for a complete Indian dessert platter.

    Conclusion

    Carrot Kheer is a simple yet luxurious dessert that offers a modern twist on the traditional Indian sweet. With its creamy texture, vibrant color, and subtle sweetness, this dessert is sure to become a favorite at your dinner table. Whether you’re celebrating a festival or simply want to treat yourself to something special, this Carrot Kheer recipe is a must-try. Explore the other kheer variations on Manjula’s Kitchen to discover even more delicious ways to enjoy this timeless dessert.

    Frequently Asked Questions (FAQs)

    • What is the difference between Carrot Kheer and Rice Kheer?
      • Carrot Kheer uses shredded carrots as the main ingredient, while Rice Kheer is made with rice. Both versions are cooked in milk and flavored with sugar and cardamom, but Carrot Kheer offers a more vibrant color and slightly different texture.
    • Can I make Carrot Kheer vegan?
      • Yes, you can easily make Carrot Kheer vegan by using plant-based milk like almond or coconut milk instead of dairy milk.
    • What are some other variations of kheer I can try?
      • You can try Rice Kheer, Sabudana Kheer, Vermicelli Kheer, or Badam Kheer, each offering unique flavors and textures while still being deliciously creamy and satisfying.
    • How do I serve Carrot Kheer as a pudding?
      • To serve Carrot Kheer as a pudding, cook it for 2-3 extra minutes to achieve a thicker consistency, similar to a pudding. You can serve it warm or chilled
    • How long can I store Carrot Kheer?
      • Carrot Kheer can be stored in an airtight container in the refrigerator for up to 2-3 days. Reheat it gently before serving if you prefer it warm.

  • Pineapple Coconut Ladoo

    Pineapple Coconut Ladoo

    Pineapple Coconut Ladoo

    Pineapple coconut ladoo is one of simple Indian vegetarian recipes quick and easy snack that can be served as an Indian dessert. These delicious treats are made with pineapple, coconut, and condensed milk, giving them a soft and chewy texture with tropical flavours. Explore more recipes at Manjula's Kitchen official website. They are perfect for festive occasions and also make great gifts to share with your friends and family.
    This recipe makes 20 ladoos. Prep time is 5 minutes. Cooking time is 20 minutes.
    3.75 from 8 votes
    Prep Time 5 minutes
    Cook Time 20 minutes
    Course Dessert
    Cuisine Indian

    Ingredients
      

    • 1 cup unsweetened crushed pineapple
    • ½ cup condensed milk
    • ½ cup coconut powder
    • 1 cup milk powder
    • 1 tbsp ghee
    • 1 tsp raisins
    • 1 tbsp sliced almonds
    • ½ tsp cardamom powder

    Instructions
     

    • In a pan, heat ghee over low-medium heat and add the grated coconut. Roast for one minute until it just begins to change colour, being careful not to over-roast.
    • Add condensed milk, crushed pineapple, milk powder, almonds, raisins, and cardamom powder. Mix well and cook, stirring continuously, until it forms a soft dough-like texture. Keep scraping the sides.
    • Remove the mixture from the heat and let it cool.
    • Once the mixture reaches room temperature, shape it into small ladoos.
    • Allow the ladoos to cool completely before serving or storing. Enjoy!

    Notes

    Tips:
    Make sure to roast the grated coconut on low heat to avoid burning.
    Keyword coconut Ladoo, ladoo, milk, pineapple
    Tried this recipe?Let us know how it was!

    What is Pineapple Coconut Ladoo ?

    Pineapple Coconut Ladoo is a delightful Indian dessert that combines the tropical flavours of pineapple and coconut into a rich, flavorful treat. The ladoo is a spherical confectionery typically made by blending grated coconut and pineapple with sugar, often enhanced with cardamom for an added aromatic touch. 

    Pineapple Coconut Ladoo, while a more contemporary twist, builds on this traditional foundation by incorporating the tropical fruit flavours of pineapple, which are not native to traditional ladoo recipes. This fusion showcases the adaptability and innovation within Indian sweets, blending classic techniques with new ingredients. Explore more authentic & traditional indian recipes on our website.

    Popularity: Pineapple Coconut Ladoo has gained popularity for several reasons:

    Fusion of Flavors: The combination of pineapple and coconut creates a unique and refreshing flavor profile that appeals to those looking for something different from the traditional ladoos.

    Texture and Taste: The sweet, tangy pineapple pairs beautifully with the creamy, nutty coconut, offering a delightful contrast in texture and taste.

    Visual Appeal: These ladoos are often visually appealing with their bright, inviting color, making them a popular choice for festive platters and special events.

    Cultural Significance: As with many Indian sweets, Pineapple Coconut Ladoo holds cultural significance and is often associated with joy and celebration, contributing to its popularity during festivals and family gatherings.

    Adaptability: The recipe is versatile and can be adapted to include various regional ingredients and techniques, making it a favourite across different parts of India and among the Indian diaspora worldwide.

    Overall, Pineapple Coconut Ladoo exemplifies the rich culinary heritage of India while embracing modern tastes and ingredients, making it a beloved sweet treat.

    Here are some variations of Ladoo recipes available on Manjula’s Kitchen:

    Besan Ladoo: Traditional Indian sweet, besan ladoo made from roasted gram flour, ghee, and sugar, often flavored with cardamom and garnished with nuts.

    Coconut Ladoo: A quick and easy recipe using grated coconut, condensed milk, and cardamom, sometimes garnished with chopped nuts or dried fruits.

    Boondi Ladoo: Made from tiny fried droplets of gram flour batter soaked in sugar syrup and formed into delicious balls, boondi ladoo is commonly prepared during festivals.

    Rava (Sooji) Ladoo: Made with semolina (sooji), ghee, sugar, and flavored with cardamom. These ladoos are soft and melt in the mouth.

    Til (Sesame) Ladoo: Made with roasted sesame seeds and jaggery, this version is not only tasty but also nutritious, til ladoo is very popular during Makar Sankranti.

    Atta (Wheat) Ladoo: Made from whole wheat flour, ghee, and sugar, this version is wholesome and often garnished with nuts and raisins.

    Dates and Nuts Ladoo: A healthy and delicious option made with dates, assorted nuts, and dates and nuts ladoo are often with the addition of desiccated coconut.

    These some variations that offer a diverse range of flavours and ingredients, showcasing the versatility of Ladoo in Indian cuisine.

    FAQ for Pineapple Coconut Ladoo

    Q: What ingredients are needed to make Pineapple Coconut Ladoo?

    A: You will need fresh pineapple, grated coconut, sugar, ghee, and cardamom powder. Optional ingredients include nuts and dried fruits for garnishing.

    Q: How long do Pineapple Coconut Ladoos last?

    A: Pineapple Coconut Ladoos can last up to 5-7 days when stored in an airtight container in the refrigerator.

    Q: Can I make Pineapple Coconut Ladoo without ghee?

    A: While ghee adds a rich flavor, you can substitute it with coconut oil for a vegan version. However, the taste and texture may slightly differ.

    Q: How can I make Pineapple Coconut Ladoo healthier?

    A: To make a healthier version, you can reduce the sugar quantity or use natural sweeteners like jaggery or honey. Additionally, you can add finely chopped nuts for added nutrition.

    Q: Can I add other fruits to the Ladoo mixture?

    A: Yes, you can experiment by adding other dried fruits like mango or berries. Ensure they are finely chopped and have minimal moisture to maintain the texture of the ladoos.

    Q: How can I enhance the flavor of Pineapple Coconut Ladoos?

    A: You can enhance the flavor by adding a pinch of saffron strands soaked in warm milk or a few drops of pineapple essence. Toasted nuts and dried fruits also add a delightful crunch and flavor.

  • Mango Pineapple Cobbler

    Mango Pineapple Cobbler

    Mango Pineapple Cobbler

    Mango Pineapple Cobbler

    Mango pineapple cobbler is a wonderful choice for a sweet and homemade dessert. The combination of mango and pineapple brings a tropical twist to the classic cobbler, creating a flavorful and refreshing snack.
    5 from 2 votes

    Ingredients
      

    • 2 1/2 cups cubed mangoes use frozen mangoes
    • 1 1/4 cups unsweetened crushed canned pineapple
    • 1 tbsp corn starch
    • 1 tsp lemon juice
    • 4 tbsp sugar
    • 1 cup vanilla cake mix
    • 5 tbsp cold unsalted butter

    Instructions
     

    • Preheat the oven to 350°F.
    • The recipe is very simple. We need a baking dish; I am using an 8-inch x 6-inch Pyrex dish.
    • In a baking dish, combine the mangoes, crushed pineapple, sugar, lemon juice, and cornstarch. Mix well.
    • Sprinkle the cake mix evenly over the fruits.
    • Spread the sliced butter evenly over the cake mix.
    • Bake until the topping is lightly brown and looks crispy, and the filling is bubbly for about 35-40 minutes.
    • For the best taste, serve warm. If desired, serve with a scoop of ice cream, or whipping cream.
    • To Make Ahead: Mango pineapple cobbler is best served immediately, but it can be kept covered in the fridge for up to 5-6 days. Before serving, heat the cobbler in the microwave.

    Notes

    If you like the recipe share my video recipe with your friends. 
    Enjoy!
    Tried this recipe?Let us know how it was!

    Mango Pineapple Cobbler : A delightful dessert

    Mango pineapple cobbler presents itself as a delightful choice for those seeking a homemade dessert infused with tropical flavors.

    The marriage of mango and pineapple in this classic cobbler recipe introduces a refreshing twist, offering a burst of flavor that tantalizes the taste buds.

    Perfect for moments when the craving for something sweet beckons as this dessert embodies simplicity, deliciousness, and a touch of indulgence.

    Crafting this sweet and tender cake requires just a handful of ingredients, making it an accessible option for any home cook.

    With a yield serving of 4, you can share the joy of this delightful treat with loved ones or savor it all for yourself.

    Other Variatiants of Cakes:

    Eggless Pineapple Cake: Eggless Pineapple Cake is an easy and delicious eggless cake recipe and this can be served any time of the day, and for any occasion.

    Milk Cake: Milk Cake is a delicious, mouthwatering dessert. This is a unique “cake” made with just a few ingredients, primarily milk and sugar and has a touch of sourness to it.

    Eggless Chocolate Cake: Chocolate lovers can indulge in the rich and decadent flavors of Chocolate Eggless Cake. Add cocoa powder to the cake batter and chocolate shavings to the whipped cream for a delightful chocolate twist on this classic dessert.

    Mango Cheese Cake: Fresh ripe mangoes are used to make this light and refreshing cheesecake. It makes for an amazing presentation and tastes just as exotic as it looks. The egg-less recipe is delightfully delicious and can be enjoyed by just about everyone.

    FAQs: Frequently Asked Questions

    What is Mango Pineapple Cobbler?

    Mango Pineapple Cobbler is a delicious dessert featuring a juicy filling of mangoes and pineapples topped with a buttery biscuit or cake-like topping. It’s a perfect way to enjoy the sweet and tropical flavors of these fruits.

    How can I tell if my mangoes are ripe?

    A ripe mango will have a slight give when pressed gently near the stem. The skin color can vary depending on the variety, but it should not be completely green. You should also be able to smell a sweet mango fragrance.

    Q: Can I use fresh mangoes instead of frozen?

    A: Yes, fresh mangoes can be used in this recipe. Simply peel and cube the mangoes before proceeding with the recipe.

    Q: Can I use canned mangoes instead of frozen?

    A: While fresh or frozen mangoes are preferred for optimal flavor, canned mangoes can be used as a substitute if fresh or frozen mangoes are not available. Just be sure to drain any excess liquid before using.

    Q: Can I use a different type of cake mix?

    A: Yes, you can experiment with different flavors of cake mix to customize the cobbler to your taste preferences. For example, you could try using a lemon cake mix for a tangy twist or a coconut cake mix for added tropical flavor.

  • Paneer Kheer with Strawberry

    Paneer Kheer with Strawberry

    Paneer Kheer with Strawberry

    Paneer Kheer with Strawberry

    Manjula Jain
    Paneer Kheer with Strawberry is a delightful dessert. This Paneer and strawberry dessert is a sure winner especially when you want to serve a unique paneer delicacy.
    5 from 1 vote
    Course Dessert
    Cuisine Indian
    Servings 6 people

    Ingredients
      

    •  2-1/4 cup whole milk
    • 1-1/2 cup shredded paneer
    • 1/4 cup sugar
    • 1 tbsp corn starch arrowroot

    Instructions
     

    • In a small bowl mix the corn starch with 1/4 cup of milk and set aside.
    • In a heavy bottom pan boil 2 cups of milk over medium high heat. Wet inside of the pan with water and put about 2 tablespoons of water before pouring the milk in a pan this prevents the burning of the milk in bottom of the pan. Stir the milk occasionally.
    • After milk comes to boil reduce the heat to medium and let it boil for about 10-12 minutes.
    • Add the corn starch and mix it well, there should no lumps, after milk comes to boil let it boil for additional 2-3 minutes
    • Add the sugar and shredded paneer stir and let it boil for 4-5 minutes, stir occasionally.
    • Paneer Kheer should have consistency of a thick batter. This should be chilled before serving.

    Notes

    Strawberry Topping for Garnishing
    • 1 cup chopped strawberry
    • 2 tablespoons sugar
    • 1 teaspoon corn starch (arrowroot)
    • Few drops of  lemon juice
     
     Strawberry Topping
    1. In a small bowl mix corn starch with about 1 tablespoons of water and set aside.
    2. In a small pan cook strawberry and sugar together mix it and let it come to boil. Add corn starch; mix it well after it comes to boil turn off the heat. Strawberry topping is ready. This also should be chilled before using.
     
     For Serving
    In an individual serving bowl put about ¼ cup Paneer Kheer and top it with strawberry.
    Suggestions
    You can serve this just as Paneer Kheer, while cooking don’t use corn starch and don’t garnish with strawberries. To flavor the Kheer add 1/8 teaspoon of cardamom powder and few sliced of almonds and or pistachios. Serve chilled.
    Keyword 2 Minutes Dessert
    Tried this recipe?Let us know how it was!

    Paneer Strawberry Kheer: A delightful fusion

    Paneer kheer with strawberry is a delightful fusion dessert that combines the rich, creamy texture of paneer kheer with the fresh, tangy sweetness of strawberries. This unique dessert offers a refreshing twist on traditional Indian sweets, making it perfect for special occasions and festive celebrations be it Holi, Diwali or even for party occasions. In this article, we will delve into the various aspects of paneer kheer strawberry, its benefits, and how it stands out as a dessert choice.

    What is Paneer Kheer with Strawberry?

    Paneer kheer with strawberry is a variation of the classic Indian dessert, paneer kheer, which is made from paneer (Indian cottage cheese) cooked in sweetened milk. Adding strawberries to the mix enhances the flavor and adds a burst of freshness to the dessert.

    Health Benefits of Paneer Kheer Strawberry

    Paneer is a rich source of protein and calcium, while strawberries are packed with vitamins, antioxidants, and fiber. Combining these two ingredients in paneer kheer strawberry offers a nutritious treat that is both delicious and beneficial for health.

    The Popularity of Strawberry Paneer Kheer

    Strawberry paneer kheer has gained popularity due to its unique flavor profile and appealing presentation. The combination of creamy paneer and vibrant strawberries makes it a favorite among dessert lovers.

    Making Paneer Kheer Strawberry for Festive Occasions

    Strawberry with paneer kheer is an excellent choice for festive occasions and celebrations. Its unique taste and attractive appearance make it a standout dessert that can impress guests and add a special touch to any event.

    Easy Preparation of Paneer Kheer with Strawberry

    Despite its sophisticated flavor, paneer kheer strawberry is relatively easy to prepare. With a few simple ingredients and straightforward steps, you can create this delightful dessert at home.

    Serving Suggestions for Paneer Kheer Strawberry

    Paneer kheer strawberry can be served in various ways to enhance its appeal. You can garnish it with chopped nuts, saffron strands, or a drizzle of strawberry syrup to make it even more enticing.

    Storing and Reheating Paneer Kheer with Strawberry

    Strawberry paneer kheer can be stored in the refrigerator for a couple of days. When ready to serve, it can be gently reheated or enjoyed chilled, depending on your preference.

    Similar Dessert Recipes from Manjula’s Kitchen

    Ras Malai: Rasmalai is a delightful Bengali dessert featuring soft paneer balls immersed in chilled, creamy milk. Similar to Rasgullas, Rasmalai is made from homemade cheese, known as “paneer” or “chana.”

    Gulab Jamun:  Gulab Jamun is a delicious Indian version of donuts immersed in warm sweet syrup. As India’s most popular dessert, Gulab jamun is a staple in most parts of the country. Gulab jamuns are served for almost every celebrations.

    Paneer Burfi: Paneer Burfi is a delectable Indian sweet made from fresh paneer, sugar, and a hint of cardamom. This rich and creamy dessert is perfect for festive occasions and special celebrations. The process involves cooking paneer with sugar until it thickens and forms a fudgy consistency, then adding aromatic cardamom for flavor.

    Mawa Paneer Thandai Balls: Mawa Paneer Thandai Balls are a unique and delectable Indian dessert, combining the richness of mawa (khoya) and paneer with the exotic flavors of thandai. This delightful treat is perfect for festive occasions and special celebrations.

    Coconut Burfi: Coconut Burfi is a traditional Indian sweet made from fresh coconut, sugar, and a touch of cardamom. This delicious and aromatic dessert is popular during festivals and special occasions.

    The Perfect Dessert for All Ages

    The creamy texture of paneer kheer combined with the fruity freshness of strawberries makes paneer kheer with strawberry a dessert that appeals to all age groups, from kids to adults.

    Tips for Making the Best Paneer Kheer Strawberry

    To make the best paneer kheer strawberry, ensure the paneer is fresh and the strawberries are ripe. Using high-quality milk and a touch of cardamom can also enhance the flavor of the dessert.

    Incorporating Paneer Kheer Strawberry into Your Diet

    Strawberry with paneer kheer can be a delightful addition to your diet as an occasional treat. It provides essential nutrients and a satisfying taste that can be enjoyed as a part of a balanced diet.

    FAQs Frequently Asked Questions

    Can paneer kheer strawberry be made vegan?

    Yes, you can use plant-based milk and tofu instead of paneer to make a vegan version of paneer kheer strawberry.

    What can I use as a sweetener in paneer kheer with strawberry?

    You can use sugar, honey, or natural sweeteners like stevia to sweeten paneer kheer strawberry.

    How long does it take to prepare paneer kheer strawberry?

    Preparing paneer kheer with strawberry typically takes around 30-45 minutes, depending on the recipe.

    Can I use frozen strawberries for paneer kheer strawberry?

    Yes, frozen strawberries can be used, but fresh strawberries are recommended for the best flavor and texture in strawberry paneer kheer.

    What is the best way to serve paneer kheer strawberry?

    Paneer kheer with strawberry can be served chilled or at room temperature, garnished with fresh strawberries and nuts.

    Is paneer kheer with strawberry gluten-free?

    Yes, paneer kheer strawberry is naturally gluten-free, making it a great dessert option for those with gluten intolerance.

    Paneer kheer with strawberry is a delicious and nutritious dessert that offers a unique twist on traditional Indian sweets. Its combination of creamy paneer and fresh strawberries creates a delightful flavor that can be enjoyed on any special occasion. By following simple preparation steps and using quality ingredients, you can create this dessert at home and enjoy its rich, satisfying taste. 

  • Coconut Dream Dessert

    Coconut Dream Dessert

    Coconut Dream Dessert

    Coconut Dream Dessert

    Coconut Dream is a vegan delight, it is flavored with cardamom and saffron, very soothing and refreshing. Adding Agar-agar sets this dessert like jelly. It is super easy to make and taste great. I like to serve Coconut Dream chilled.
    5 from 1 vote
    Course Dessert
    Cuisine Indian
    Servings 8

    Ingredients
      

    • 1 cup coconut milk
    • 2 cup soy milk
    • ¾ cup sugar
    • 2 tbsp agar-agar powder, available in Indian and Asian grocery stores
    • ¼ tbsp cardamom crushed
    • ¼ cup coconut shredded
    • Approx. 20 crushed pistachios
    • Pinch of saffron crushed

    Instructions
     

    • Boil coconut milk, soy milk, coconut, pistachios, and sugar over medium high heat. After milk comes to boil let it boil for about 7-8 minutes, stir occasionally.
    • Mix agar-agar, saffron, and cardamom powder with ¼ cup of lukewarm water making sure agar-agar is dissolved.
    • Add the agar-agar mixture to the milk and mix it well, let it boil for 3-4 minutes. Stir occasionally otherwise agar-agar can become lumpy. Turn off the heat.
    • Pour it into either flat dish or molds, while it is still hot. Note: As milk mixture will cool it will start getting firm.
    • Refrigerate for about 2-3 hours or until set. Serve chill.

    Notes

    Notes
    Agar-agar is a vegetarian gelatin substitute made from seaweed vegetation. This works as a stabilizing and thickening agent for many recipes like custard and pudding. As this comes to room temperature it starts solidifying. Coconut Dream can be served at room temperature as it maintains its shape. But it taste best when it is served chilled.
    Tried this recipe?Let us know how it was!

    Indulge in Tropical Bliss with Our Creamy Coconut Dream Dessert Recipe

    Indulge in the tropical bliss of Coconut Dream Dessert, a heavenly creation that combines the rich, creamy texture of coconut with the delightful flavors that transport you to a paradise of taste. This dessert is perfect for any occasion, whether you’re hosting a dinner party or simply satisfying your sweet tooth. The Coconut Dream Dessert Recipe is easy to follow and promises to deliver a treat that is both refreshing and indulgent.

    The Essence of Coconut Dream Dessert

    The star of this dessert is the coconut, a versatile ingredient that lends a rich, creamy texture and a naturally sweet flavor. The Coconut Cream Lush is a layered dessert that combines different textures and flavors, making every bite an exciting experience. The base is typically made from a buttery crust, followed by a luscious coconut cream layer, and topped with whipped cream and toasted coconut flakes for an added crunch.

    Origin and Popularity

    Coconut-based desserts have been enjoyed for centuries in tropical regions where coconuts are abundant. The Coconut Dream Dessert draws inspiration from these traditional recipes, adding a modern twist to create a dessert that is both timeless and contemporary. Its popularity has spread globally, loved by those who appreciate the unique flavor of coconut and the creamy, dreamy texture that this dessert offers.

    Why You’ll Love This Recipe

    • Easy to Make: The recipe is straightforward, making it perfect for both novice and experienced bakers.
    • Flavorful and Creamy: The combination of coconut and cream creates a rich, indulgent flavor.
    • Versatile: Can be adapted to suit different dietary needs by using plant-based alternatives.
    • Impressive Presentation: The layered look of the dessert makes it a show-stopper at any gathering.

    How to Make Coconut Dream Dessert

    The Coconut Dream Dessert Recipe involves a few simple steps to create a multi-layered delight. Here’s a basic outline of the process:

    1. Prepare the Crust: Combine crushed biscuits or graham crackers with melted butter to form the base. Press this mixture into the bottom of your serving dish and refrigerate to set.
    2. Coconut Cream Layer: Mix coconut milk with a thickening agent like cornstarch or agar-agar to create a creamy filling. Sweeten with sugar or a natural sweetener, and add a touch of vanilla extract for extra flavor. Pour this mixture over the set crust and refrigerate until firm.
    3. Whipped Topping: Top the set coconut cream layer with whipped cream. For a lighter option, use whipped coconut cream.
    4. Garnish: Sprinkle toasted coconut flakes over the top for a crunchy finish.

    Variations of Coconut Recipes

    Exploring Manjula’s Kitchen reveals a treasure trove of other delicious recipes that you might enjoy. Here are some related coconut-based desserts that you might find interesting:

    1. Coconut Ladoo: These sweet coconut balls are made with condensed milk and shredded coconut, offering a quick and delicious treat.
    2. Coconut Barfi: A traditional Indian sweet made with coconut and condensed milk, perfect for festive occasions.
    3. Coconut Chutney: Coconut chutney is a typical condiment that is served with South Indian dishes, especially Idlis and Dosas. It has great texture and a unique taste that compliments many dishes..
    4. Coconut Pancakes: These fluffy pancakes are made with coconut milk and shredded coconut, perfect for a tropical breakfast.
    5. Sweet Coconut Rice: Nariyal Bhat is a traditional Maharashtrian recipe cooked on Raksha Bandhan.

    Serving Suggestions

    The Coconut Dream Dessert can be served in various ways to enhance your dining experience:

    • As a Standalone Dessert: Serve chilled, straight from the refrigerator.
    • With Fresh Fruits: Pair with tropical fruits like mango, pineapple, or papaya for an extra burst of flavor.
    • As Part of a Dessert Platter: Combine with other small desserts for a delightful tasting experience.

    Tips and Tricks

    To perfect your Coconut Dream Dessert, consider these helpful tips:

    • Use Fresh Coconut: Freshly grated coconut can enhance the flavor and texture of your dessert.
    • Chill Properly: Ensure each layer is properly set before adding the next to maintain the structure of the dessert.
    • Toast the Coconut: Toasting the coconut flakes for the garnish adds a delicious crunch and enhances the coconut flavor.

    FAQs Frequently Asked Queries

    Is Coconut Dream Dessert Vegan?

    Yes, it can be made vegan by using plant-based alternatives for butter and whipped cream.

    Can I Make It Ahead of Time?

    Yes, this dessert can be made ahead of time. It actually tastes better when it has had time to chill and the flavors meld together.

    What Can I Serve with This Dessert?

    This dessert pairs well with fresh fruits or a light, refreshing drink like coconut water.

    How Long Does It Take to Make?

    The preparation time is about 30 minutes, but you will need additional time for chilling each layer.

  • Mango Ice Cream

    Mango Ice Cream

    Mango Ice Cream

    Mango Ice Cream is a delightful tropical dessert with a refreshing, rich and fruity flavor. Mango Ice Cream is an quick and easy recipe needing few ingredients. This is sure to be a crowd pleaser. I like to make this ice cream using fresh mangoes.
    No ratings yet
    Course Dessert
    Cuisine Indian
    Servings 6 people

    Ingredients
      

    • 1 cup fresh mango pulp
    • 1 tbsp lime zest
    • 1 tbsp lime juice
    • 3/4 cup sugar
    • 1 cup heavy cream
    • 1 tbsp corn starch (arrowroot)

    Instructions
     

    • Peel and slice the mango and scrape out the pulp from the seed.
    • Mix cornstarch with 2 tablespoons of water.
    • Boil heavy cream, cornstarch mix, and sugar over medium-high heat. Stir continuously otherwise cornstarch will become lumpy.
    • After cream mix comes to a boil, reduce the heat to medium low, and then cook for an addition 2 minutes.
    • Let it cool.
    • Mix in mango pulp, lime juice, and lime zest to the cream mix.
    • Transfer the mixture into a bowl or container to freeze; the container shouldn’t be very deep. I like using a glass bowl with a lid.
    • After about 2 hours remove the ice cream from the freezer and mix it until its smooth, this will give it a creamy texture.
    • At this point you can choose to freeze the ice cream in the same bowl or freeze the ice cream in individual serving cups.
    • Ice cream will take 6 to 8 hours to freeze.

    Notes

    Serving Suggestion
    Serve ice cream with slice of freshly sliced mangoes and few pieces of sliced almonds.
    Keyword 2 Minutes Dessert
    Tried this recipe?Let us know how it was!

  • Mango Cheese Cake

    Mango Cheese Cake

    Mango Cheese Cake (Egg Less)

    Fresh ripe mangoes are used to make this light and refreshing cheesecake. It makes for an amazing presentation and tastes just as exotic as it looks. The egg-less recipe is delightfully delicious dessert and can be enjoyed by just about everyone. Its a quick and easy recipe
    4.50 from 2 votes
    Course Dessert
    Cuisine Indian
    Servings 8 people

    Ingredients
      

    • 16 graham cracker squares, crushed (approx. 1 cup of crumbs)
    • ¼ cup sugar
    • 1/3 cup melted unsalted butter
    • 12 oz cream cheese at room temperature
    • 2 tbsp cornstarch
    • 3/4 cup sugar
    • 1 large ripe mango
    • 8 thin mango slices
    • 2 strawberries cut into 4 pieces each
    • Few mint leaves

    Instructions
     

    • Crust
    • Preheat oven to 350 degree F.
    • Add broken graham crackers, sugar and butter to a food processor. Mix well until looks nicely crumbled, takes approx. 30 seconds.
    • Place graham cracker mix into a 9” pie plate, spread evenly and press down firmly.
    • Bake at 350 degrees for 6 minutes, on the medium rack.
    • Filling
    • Prepare mango by peeling and chopping into chunks.
    • Add mango chunks, cream cheese, sugar, and cornstarch to the food processor. Mix for 20 seconds, until it is smooth in texture. Do not mix for too long.
    • Pour the mixture over the pie crust and bake for 35 minutes at 350 degrees F. The surface should look dry and cooked.
    • Let the cheesecake cool and then refrigerate for at least 2 hours before serving.
    • Garnish the cheesecake with mango slices, strawberries and mint leaves.
    Keyword 2 Minutes Dessert
    Tried this recipe?Let us know how it was!

  • Chum Chum

    Chum Chum

    Chum Chum

    Chum Chum – Bengali Dessert

    Chum Chum is a popular Bengali (East Indian) sweet dessert that is made with Paneer, (home-made cheese). It is a versatile dish that can be served in many different variations. Here I will show you 3 different ways to serve Chum Chum, either with Pistachios, or with Coconuts or with Malai (cream).
    5 from 1 vote
    Prep Time 5 minutes
    Cook Time 12 minutes
    Making Paneer 25 minutes
    Total Time 17 minutes
    Course Dessert
    Cuisine Indian
    Servings 4 people

    Ingredients
      

    • 4 cups whole milk, paneer
    • 2 cups sugar
    • 5 cups water
    • 1/8 tsp cardamom powder

    Ingredients for different For Different Garnishing

    • 1 tbs pistachio
    • 1 tbs coconut powder
    • 2 tbsp cream

    Instructions
     

    • Prepare paneer according to recipe “How to Make Paneer”. To test if sufficient water has been removed out of the paneer, take a little piece of paneer in your palm and rub with your fingers. You should be able to make a firm but smooth ball, after 15-20 seconds of rubbing.
    • Place the drained paneer on a dry, clean surface and knead it for 3 to 4 minutes until it rolls into smooth soft dough. If the paneer is too crumbly, add a teaspoon of water.
    • Divide the paneer dough into 8 equal parts and roll each one into a smooth oval shaped ball.
    • For the syrup: In a wide saucepan, bring 5 cups of water to a boil. Add sugar and stir to dissolve completely. Use a large pan as the Chum Chums will double in volume while cooking in the syrup.
    • Add the paneer balls to the syrup and bring it back to a boil. Then turn down the heat to medium and cover the pot. Cook for 10 minutes.
    • Open the pot cover, turn the chum chums over and cook for another 15 minutes. Check to see if the chum chums appear firm but sponge-like (with little holes on the surface). Turn off the heat and let sit for 10 more minutes.
    • Remove the chum chums from the syrup. Serve chill!
    • Serving With Pistachios: Cover every Chum Chum with a few pieces of sliced pistachios
    • Serving with Coconut Powder: Roll the chum chums in dry coconut
    • Serving with Malai (cream): Boil the milk over medium heat until it reduces to ½ its volume. Stir the milk continuously so it doesn’t burn on the bottom of the pot. Add sugar, and cardamom powder. Stir for 2 minutes, and then turn off the heat. While milk is still warm pour 1 tablespoon over every Chum Chum and top with a few pieces of pistachios.
    Keyword Bengali Dessert, Paneer Dessert
    Tried this recipe?Let us know how it was!

    How to make Chum Chum Recipe: Chum Chum Sweet

    Chum Chum is a popular Indian sweet delicacy that originates from the state of West Bengal. This soft and spongy dessert is made from paneer (Indian cottage cheese) and soaked in a sugar syrup flavored with saffron and cardamom. 

    Chum Chum is known for its delicate texture, subtle sweetness, and vibrant colors, making it a delightful treat for special occasions and celebrations. 

    Chum Chum are like a luxurious and bigger version of rasgulla although made with richer ingredients such as pistachio and other dry fruits along with garnishing done using cream. 

    Other Dessert Variations:

    1. Ras Malai: Rasmalai is a Bengali dessert consisting of soft paneer balls immersed in chilled creamy milk. Like Rasgullas, Rasmalai is also made with homemade cheese known as “paneer” or “chana”. Instead of being soaked in sugar syrup like Rasgullas, Rasmalai is soaked in sweet, flavored milk.
    1. Kala Jamun: Kala Jamun is a delicious dessert very similar to Gulab Jamun. Kala jamun is an exotic sweet dish served on special occasions. Kala Jamuns have a very unique texture as they are chewy outside and grainy inside.
    1. Bengali Rasgulla: Bengali Rasgullas are homemade paneer (Cottage cheese) sweet dish, round paneer balls soaked in sugar syrup. This is a delicacy from the state of Bengal, these are very light and delicious, you can never go wrong with Bangali Rasgulla.
    1. Jalebi: Jalebi is a warm, crispy, delicious treat. It can best be described as funnel cake. In many places jalebi is still served as a breakfast treat like pancakes. It is a treat to have jalebi and kachori for a hearty breakfast.

    Tips for Making Perfect Chum Chum:

    Use Fresh Paneer: Use fresh and homemade paneer for the best texture and flavor in your Chum Chum. Homemade paneer is softer and creamier than store-bought varieties and yields a more delicate and spongy dessert.

    Knead the Paneer Well: Knead the paneer dough thoroughly to ensure a smooth and uniform texture. Proper kneading helps to remove excess moisture from the paneer and creates a soft and pliable dough that’s easy to shape into rolls.

    Soak in Sugar Syrup: Allow the paneer rolls to soak in the sugar syrup for at least 4-6 hours or overnight for maximum flavor absorption. The longer the Chum Chum sits in the syrup, the softer and more flavorful it will become.

    Garnish Creatively: Get creative with your garnishes and decorations. Sprinkle chopped nuts, edible silver leaf (varak), or dried rose petals on top of your Chum Chum for an elegant and festive presentation.

    FAQs about Chum Chum:

    Can I make Chum Chum without paneer? 

    While paneer is the traditional main ingredient in Chum Chum, you can experiment with alternative fillings such as khoya (reduced milk solids) or ricotta cheese for a different texture and flavor profile.

    How long does Chum Chum stay fresh? 

    Chum Chum can be stored in the refrigerator for up to 3-4 days in an airtight container. However, it’s best enjoyed fresh within the first day or two for optimal taste and texture.

    Can I freeze Chum Chum? 

    While Chum Chum can be frozen, its texture may change slightly upon thawing. If freezing, wrap the Chum Chum tightly in plastic wrap or foil and store them in a freezer-safe container for up to 1-2 months. Thaw the Chum Chum in the refrigerator before serving.

    Is Chum Chum gluten-free? 

    Yes, Chum Chum is gluten-free as it does not contain any wheat or gluten-containing ingredients. However, be cautious of cross-contamination if you have a severe gluten allergy or celiac disease.

    How did Chum Chum got its name?

    The name chum chum comes from Bengal, where it originated as a sweet treat. The name mimics the sound “nom nom,” which is fitting because the sweet is soft and fluffy, and you might munch on it like that.

    Chum Chum is a delightful and versatile Indian dessert that’s perfect for celebrating special occasions or indulging in a sweet treat. With its soft and spongy texture, subtle sweetness, and endless variations, Chum Chum is sure to captivate your taste buds and leave you craving for more. 

    Whether enjoyed as a festive dessert or as a comforting indulgence, Chum Chum is a beloved sweet delicacy that’s cherished by people of all ages.

  • Baklava Rolls

    Baklava Rolls

    Baklava Rolls

    Baklava Rolls

    Baklava is a Middle Eastern specialty dessert. Baklava is made in many shapes I decided to make them in rolls. Instead of honey I used sugar to glaze and flavored with cardamom. Its a nice sugary snack that is popular among many people for its consistency, texture, taste and flavor.
    3.43 from 7 votes
    Prep Time 15 minutes
    Cook Time 40 minutes
    Total Time 55 minutes
    Course Dessert
    Cuisine Fusion
    Servings 8 people

    Ingredients
      

    • 6 sheets phyllo dough (one package weigh 1 pound and have 18 14 x 18 inches sheets)
    • 1/2 cup clarified butter
    • 1/2 cup ground almond
    • 1/2 cup ground walnuts
    • 1/4 cup coconut powder
    • 1/2 tsp cardamom powder
    • 1/3 cup sugar

    For Syrup and Garnishing

    • 3/4 cup sugar
    • 1/2 cup water
    • 1 tsp lemon juice
    • 1 tbsp pistachios sliced

    For baking I am using 8×8 baking pan.

    Instructions
     

    For Filling

    • Combine all the dry ingredients, ground almonds, walnuts, coconut, sugar, and cardamom.

    Making the Pastry

    • Preheat the oven 350 degree F.
    • Work on a clean, dry, flat surface, Open the phyllo dough and take 1 sheet spread over the working surface and fold it making it double in length wise. Lightly brush the butter covering the whole sheet. You will be working with the short side.
    • Leave about half inch of sheet across the short side and sprinkle 2 tablespoons of the filling from edge to edge evenly. Roll it like a jelly roll twice and brush lightly with butter, only the rolled part. Sprinkling again 2 tablespoons of the filling from edge to edge evenly.
    • Roll it up carefully, after every roll brush it with butter, and place seam side down in the baking tray. Repeat the process until you finish rolling all six sheets.
    • The pieces should fit snugly, but not squashed. With a very sharp knife, cut the roll into 3 equal pieces in length, total of 18 pieces. Lightly brush the butter over each piece.
    • Bake the baklava for about 25 to 30 minutes until they are light golden brown in color.

    Making Syrup and Finishing

    • Boil the sugar and water together until syrup is 220 degrees on candy thermometer or ½ thread. Add the lemon juice and cardamom powder and turn off the heat. Lemon juice keeps the syrup from crystallizing.
    • Carefully pour the hot (but not boiling) syrup evenly over all the baklava pieces. Sprinkle few pieces of the sliced pistachios over baklava. Allow the baklava to cool before serving. Enjoy!

    Notes

    Baklava is a Middle Eastern specialty. Baklava is made in many shapes I decided to make them in rolls. Instead of honey I used sugar to glaze and flavored with cardamom.
    Baklava is made using phyllo dough; it is available in frozen section in supermarkets.
    Be sure to thaw the phyllo dough using the instruction from the package, phyllo dough should be at room temperature before using. Do not open the package until you are ready to use. Unused sheets roll them in clear plastic wrap and refrigerate for next time but do need to be used within 3 to 4 days.
    You will also enjoy Mango panna cottaMango Mousse
    Keyword Delicacy, Gift Box, Middle Eastern Cuisine
    Tried this recipe?Let us know how it was!

  • Peach Phirni

    Peach Phirni

    Peach Phirni (Rice Pudding)

    Peach phirni is a delicious dessert which is a creamy eggless pudding. Traditionally phirni is made with rice, milk and sugar. Adding peach gives a wonderful creamy smooth texture.
    5 from 1 vote
    Course Dessert
    Cuisine Indian
    Servings 8 people

    Ingredients
      

    • 1/4 cup rice
    • 3 cup milk
    • 3/4  cup sugar
    • 1 15 oz can of unsweetened sliced peaches
    • 1/2 tbsp corn starch
    • 1/8 tbsp cardamom powder
    • 1 tbsp sliced almonds
    • Few slices of canned peaches
    • Few mint leaves

    Instructions
     

    • Wash rice and soaks it for fifteen minutes or more.
    • Drain the water and blend rice to a fine texture, adding just enough milk as needed to blend. Keep aside.
    • Drain the syrup from can peaches. Keep 4 slices of peach aside for garnish.
    • Puree the remaining peaches with corn starch. Keep aside.
    • Boil the milk on medium high heat and let it simmer until milk reduces to about 2 cups. After milk comes to boil it should take about 8 minutes.
    • Take about 1/4 cup of hot milk and mix it with rice paste.
    • Add rice solution to the boiling milk slowly and keep stirring continuously, making sure rice does not become in lumps and milk does not burn on the bottom of the pen.
    • Cook until milk has reduced to about half in volume and rice is cooked.
    • Next add the sugar and cardamom powder, cook for about 4 minutes on low medium heat. Turn off the heat.
    • just after turning off the heat add the peach puree gently with cooked rice.
    • Shift the phirni to the serving bowl and garnish with almond, and peach slices.
    • Let it sit in refrigerator for few hours. Serve chill

    Notes

    Variations
    There are so many delicious variations to this dish! Instead of peaches try making this dish using fresh mango, guava, passion fruit puree.
    Tried this recipe?Let us know how it was!

  • Shrikhand

    Shrikhand

    Shrikhand

    Shrikhand – Sweet Flavorful Yogurt

    Shrikhand is a classic dessert of Western India. Plain yogurt is transformed into an aromatic delicacy flavored with saffron and cardamom.
    No ratings yet
    Course Dessert
    Cuisine Indian
    Servings 4 people

    Ingredients
      

    • 4 cup yogurt
    • ¾ cup sugar as needed
    • Few strands of saffron
    • tbsp warm milk
    • ¼ tbsp crushed cardamom
    • 1 tbsp sliced almonds
    • 1 tbsp sliced pistachios

    Instructions
     

    • Drain the yogurt – Put a muslin or cheese cloth over a strainer. Now pour the yogurt over muslin cloth to drain. Place a bowl underneath the strainer to collect the excess water.
    • Next gently squeeze the excess water from yogurt. Make sure not to squeeze out the yogurt.
    • Move the yogurt with strainer and bowl into the refrigerator for at least six hours to drain excess water.
    • Yogurt will become thick in consistency.
    • Dissolve the saffron in warm milk. Milk will take on the saffron color, yellowish orange.
    • Add sugar, cardamom powder, and saffron milk to yogurt and beat well till sugar dissolves. You may use a mixer.
    • Mix in most of the almonds and pistachios to the yogurt mix and the remaining nuts will be used for garnish.
    • Chill the shrikhand before serving.
    • Traditionally shrikhand is served with puri (fried flat bread).

    Notes

    Notes
    When the water is draining from the yogurt, it’s suggested to keep the yogurt in the refrigerator in order to keep the yogurt from becoming more sour.
    Keyword Shrikhand, Sweet Flavorful Yogurt
    Tried this recipe?Let us know how it was!

  • Lauki Kheer

    Lauki Kheer


    Lauki Kheer

    Laucki Kheer (Bottle Gourd Pudding)

    Lauki Kheer is a healthy and very refreshing dessert made with bottle gourd.
    No ratings yet
    Prep Time 10 minutes
    Cook Time 45 minutes
    Course Dessert
    Cuisine Indian
    Servings 6 people

    Ingredients
      

    • 1 medium size bottle gourd (loki, doodhi, ghyia)
    • 1 tbsp butter or ghee
    • 5 cup milk
    • 1/2 cup sugar
    • 1/2 tbsp coarsely ground cardamom powder

    Instructions
     

    • Lightly peel the bottle gourd leaving shades of light green.
    • Cut it half length wise and take out the seeds from center of the bottle gourd.
    • Shred the bottle gourd and squeeze-out the water. After squeezing the water, shredded bottle gourd should be about 3 cups.
    • Heat butter in frying pan on medium high heat as it melts add the shredded bottle gourd and stir-fry for about 4 minutes.
    • Turn off the heat and transfer the stir-fry bottle gourd in to the bowl.
    • Boil the milk in wide frying pan on medium high heat. Cook until the milk is reduced to about four cups. Stir often to ensure the milk does not burn in the bottom of the pan.
    • Add the stir-fry bottle gourd to the milk and cook for another 10 minutes until the milk is creamy again make sure you stir the kheer often to ensure the milk does not burn in the bottom of the pan.
    • Next reduce the heat to medium and add the sugar and cardamom powder. Cook for another about 2 minutes and turn off the heat.
    • kheer is ready this can be served warm, at room temperature or cold.

    Notes

    Serving Suggestion
    Lauki Kheer tastes the best when it is served very chilled just when it start forming ice crystal.
    Keyword Kheer, Laucki Kheer
    Tried this recipe?Let us know how it was!
  • Apple Jalebi

    Apple Jalebi

    Apple Jalebi

    Apple Jalebi (Apple Fritters)

    Apple Jalebis can be best described as apple wafers dipped in the flavorful sugar syrup. This is a modified version of Jalebis. They taste best when served hot. A unique dessert with a fusion.
    5 from 1 vote
    Course Dessert
    Cuisine Indian

    Ingredients
      

    • 2 apples peeled and sliced them in thin rings
    • 3/4 cup  all purpose flour (plain flour, maida)
    • 1/2 tbsp dry yeast
    • 1/2 tbsp sugar
    • 1 tbsp oil
    • Oil to fry
    • 1 1/4  cup sugar
    • 1 cup water
    • 1/4 tbsp lemon juice
    • 1/4 tbsp cardamom powder
    • 1 tbsp blenched and sliced pistachios

    Instructions
     

    • Dissolve the yeast and sugar in ¼ cup warm water, and let it sit for about 5 minutes.
    • Mix the flour and oil together.
    • Add the yeast solution to the flour and mix. Make a smooth batter. Add water as needed. Consistency should be like pancake mix.
    • Set the batter aside and let it sit in a warm place for half hour.
    • Make sure the batter is fermented, but do not over ferment. After fermenting batter will be little lacy.

    Notes

    Syrup:
    Boil the sugar and water together. Add the lemon juice, and cardamom boil for about 8 minutes until syrup is about ½ thread. Lemon juice keeps the mixture from crystallizing
     
    Making the jalebis:
    1. Heat the oil in a frying pan about 1 inch deep. To check if the oil is ready, put one drop of batter in the oil. The batter should sizzle and come up without changing in color right away.
    2. Dip the apple slices into the batter one at a time, making sure the slice is covered with the batter. Then, slowly drop the slices into the frying pan.
    3. Fry the jalebi in small batches. The jalebi will take about 4 to 5 minutes to cook.
    4. Turn them occasionally. Fry the jalebi until both sides are golden-brown.
    5. Transfer them into the warm syrup.
    6. Let jalebi soak in the hot syrup for a few seconds and take out over wire rack so excess syrup can be dripped from jalebi.
    7. Garnish with sliced pistachios.
    8. Serve hot.
     
    Variations:
    Try sprinkling cinnamon powder or drizzle melted chocolate over the Jalebis for a creative touch.
    Keyword Apple, jalebi
    Tried this recipe?Let us know how it was!
  • Kalakand

    Kalakand

    Kalakand

    Kalakand, Traditional Milk Dessert

    Kalakand is a tasty sugary snack which is very traditional and a delicious dessert, made with whole milk, variation of burfi, and is soft and grainy in texture.
    5 from 1 vote
    Prep Time 10 minutes
    Cook Time 40 minutes
    Total Time 50 minutes
    Course Dessert
    Cuisine Indian
    Servings 8 people

    Ingredients
      

    • 8 cups or 2 quart milk
    • 1/2 cup sugar
    • 3 tbsp lemon juice (for making paneer)
    • 1 tbsp sliced almonds for garnishing

    Instructions
     

    Making Paneer

    • Mix lemon juice in 1/4 cup of hot water and put aside.
      Boil the 4 cups of milk in a heavy bottomed pan over medium heat, stirring occasionally, making sure not to burn milk. As the milk comes to  boil, add the lemon juice gradually and stir the milk gently. The curd will start separating from the whey, turn off the heat.
      Once the milk fat has separated from the whey, drain the whey using a strainer line with cheesecloth, or muslin cloth.
      Wrap the curds in a muslin cloth, rinse under cold water, and squeeze well. This process takes out the sourness from the lemon.
      To take out the excess water, squeeze the wrapped paneer. Do not knead the paneer.

    Making Kalakand

    • Boil remaining 4 cup of the milk in a heavy bottom frying pan on medium high heat until the milk reduces to about two cups. Make sure to frequently stir the milk as the milk burns easily in bottom of the pan.
    • Add the paneer in the milk and keep stirring till the mixture thickness and form a soft dough consistency.
    • Add the sugar and continue to cook and stirring until the mixture become soft lump and start leaving the pan from sides.
    • Pour it over greased plate keeping about half inch thick. Let it cool for about one hour. Cut the kalakand in squares.

    Notes

    Tips: Make sure to wet the pan inside and put few spoons of water in pot before putting milk reduces burning the milk bottom of the pan.
    If kalakand is too soft put the plate in microwave oven (plate should be microwave safe) for 2 to 3 minutes. Making sure kalakand don’t become dry.
    you may also enjoy Chum chum, Besan ki Burfi
    Tried this recipe?Let us know how it was!

  • Eggless Pineapple Cake

    Eggless Pineapple Cake

    Eggless Pineapple Cake

    Eggless Pineapple Cake

    Eggless Pineapple Cake is an easy and delicious dessert recipe and this can be served any time of the day, and for any party occasion.
    3.28 from 22 votes
    Prep Time 10 minutes
    Cook Time 25 minutes
    Total Time 35 minutes
    Course Dessert
    Cuisine Fusion
    Servings 6 people

    Ingredients
      

    • 1-1/4 cups all purpose flour plain flour, maida
    • 1/2 can (7oz) sweetened condense milk
    • 1 tsp baking powder
    • 1/2 tsp baking soda
    • 1/4 tsp cardamom powder
    • 1/4 tsp salt
    • 1/2 cup melted butter
    • 1 can 20oz crushed pineapple

    Instructions
     

    • Preheat the oven at 325 degrees (F).
    • Grease 8×8 inches cake pan
    • Drain pineapple using strainer let the juice dripped through without squeezing. Note: we will use juice and pineapple both.
    • Sift together flour, baking powder, baking soda, cardamom and salt in a bowl.
    • In center part of the flour mix, add ½ cup pineapple juice, ½ cup pineapple chunks, butter, and condense milk. Gently fold every thing together.
    • Pour the mixture in greased cake pan.
    • Bake for about 25 minutes, or until cake starts leaving the pan from sides and an insert knife in the center of the cake come out clean.
    • Remove the cake from the oven and let it cool off for few minutes only.
    • Run a knife around the edges to loosen the cake and place a flat plate over the cake pan and turn it over to transfer the cake on to the plate.
    • Prick the cake several places with a fork. Brush the top of the cake generously with the leftover pineapple juice while still hot.
    • Let cake cool before slicing the cake..
    Tried this recipe?Let us know how it was!