Tag: Healthy Sweet Snacks

Discovering the Best Healthy Sweet Snacks
Finding healthy sweet snacks that satisfy your cravings while keeping your diet on track can be a rewarding experience. In this article, we’ll explore a variety of sweet healthy Indian snacks that are both delicious and nutritious. Whether you’re looking for a quick bite or a more elaborate treat, these best healthy sweet snacks are sure to please your taste buds.
Why Choose Healthy Sweet Snacks?
Choosing healthy sweet snacks doesn’t mean compromising on taste. These snacks offer the sweetness you crave while providing essential nutrients and keeping your calorie intake in check. But what is the healthiest sweet snack? Generally, snacks made with natural ingredients like fruits, nuts, and whole grains are considered the healthiest.
Benefits of Sweet Healthy Snacks
Nutrient-Rich: Healthy sweet snacks are often packed with vitamins, minerals, and antioxidants that contribute to overall well-being.

Energy Boost: These snacks provide a quick source of energy, making them perfect for an afternoon pick-me-up or a post-workout treat.

Satisfying Cravings: Sweet snacks healthy options can satisfy your sweet tooth without the added sugars and unhealthy fats found in traditional sweets.

Indian desserts or Indian sweet snacks are a great source of comfort, joy and happiness which are savory and make every festive moment an enjoyable time due to its sweetness, texture and taste. 
What Sweets Are the Healthiest?
When searching for healthy sweet snacks, it’s important to choose options that are low in added sugars and high in natural ingredients. Here are some of the best healthy sweet snacks:

Here are some healthy Indian sweet snacks with detailed descriptions which are easy indian recipes:
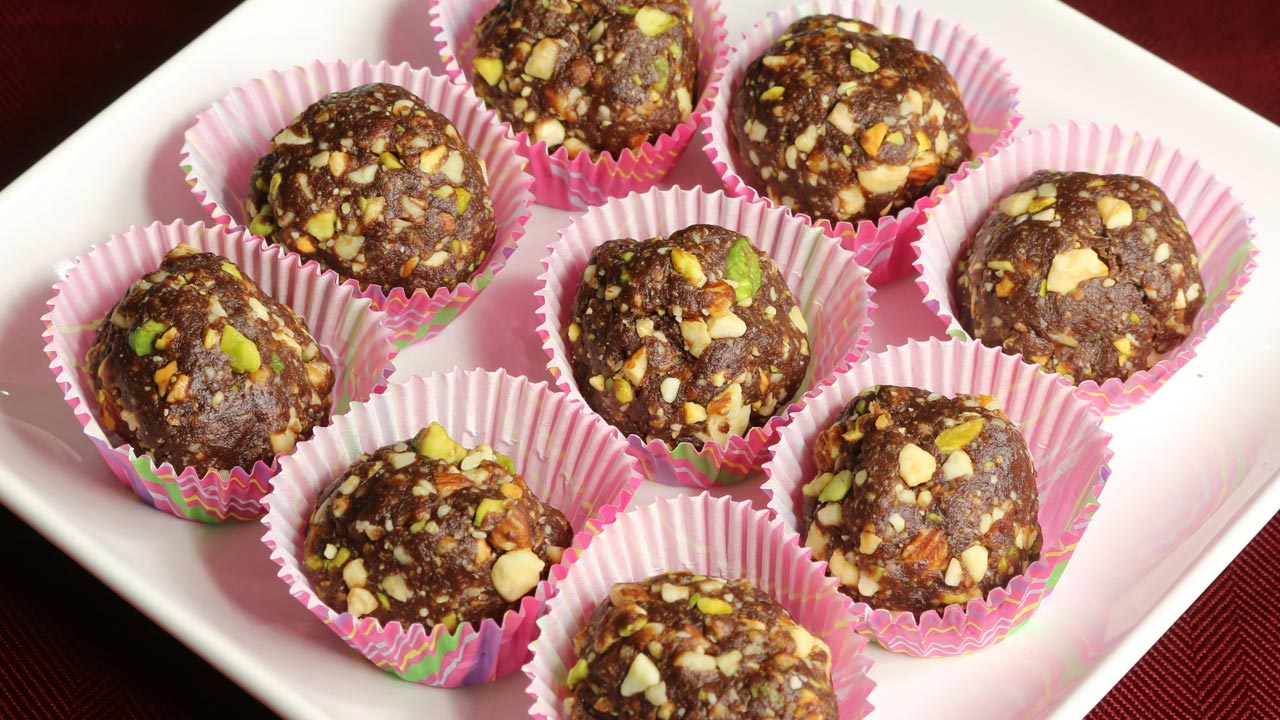
Dates and Nuts Ladoo
Description: Dates and nuts ladoo energy-boosting ladoos are made with dates and a mix of nuts like almonds, cashews, and walnuts. Dates provide natural sweetness, while nuts add healthy fats and proteins.

Benefits: Rich in fiber, antioxidants, and healthy fats, they offer a nutritious and satisfying snack option without added sugar.
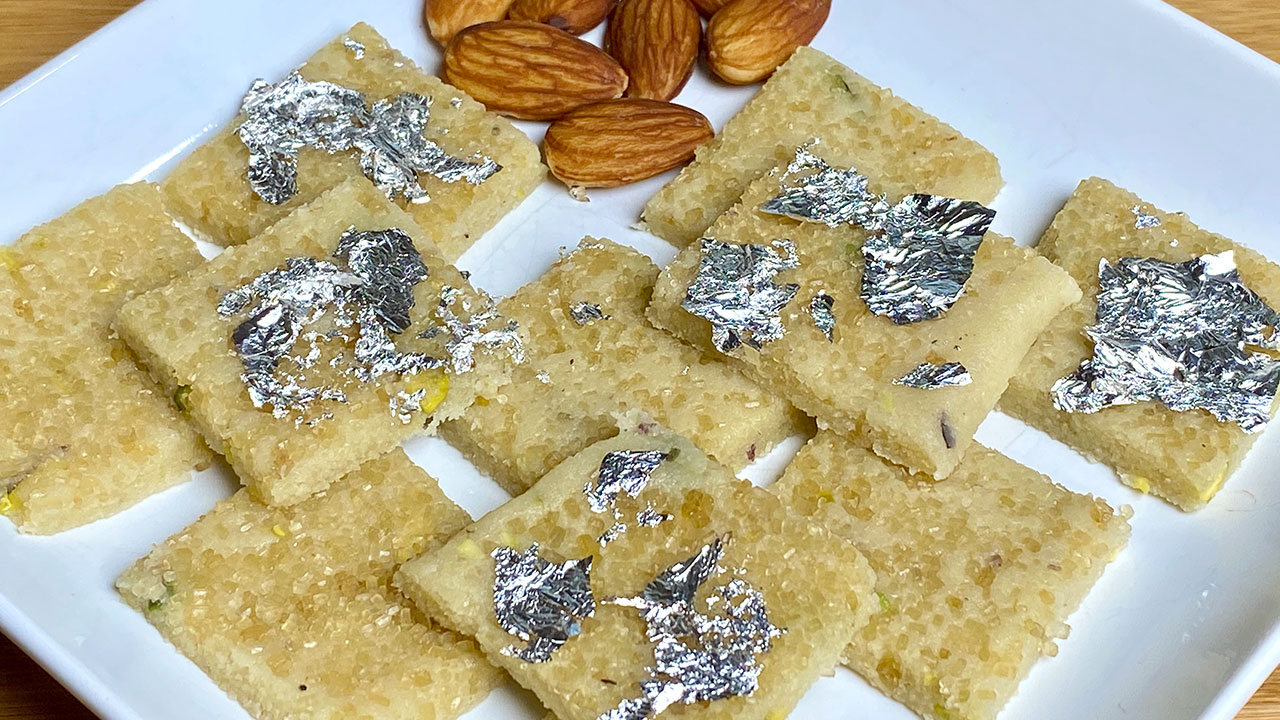
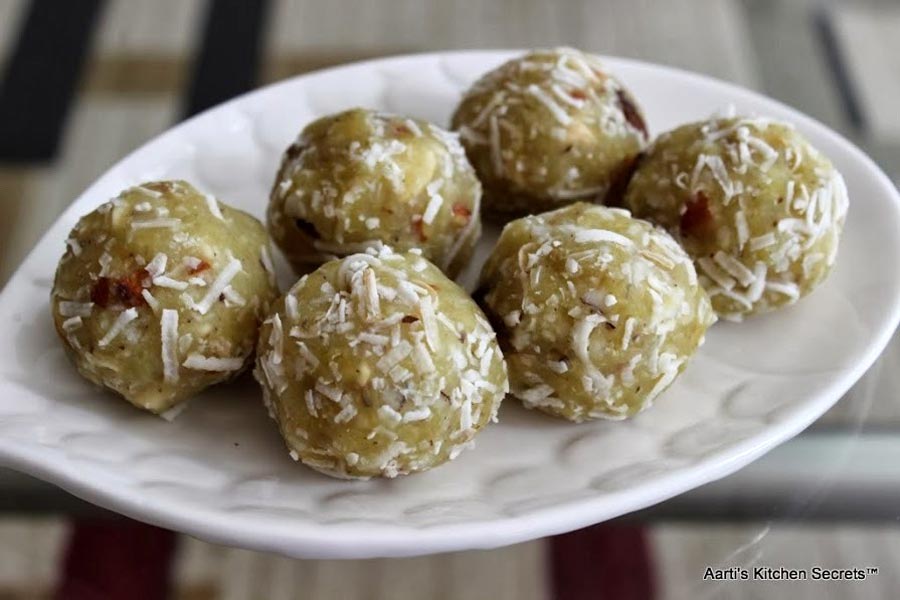
Coconut Barfi
Description: Coconut barfi made with fresh or desiccated coconut and sweetened with jaggery or a small amount of coconut sugar. The mixture is cooked until it thickens and is then set into barfi pieces.

Benefits: Coconut is a good source of healthy fats and fiber. Using jaggery instead of refined sugar adds minerals like iron and magnesium.
Besan Ladoo
Description: Besan ladoo are made from roasted chickpea flour (besan), sweetened with jaggery, and flavored with cardamom. Ghee is typically used, but for a healthier version, you can use coconut oil. Its made in most festive seasons as a diwali food

Benefits: Besan is high protein and fiber, and jaggery is a healthier alternative to white sugar.
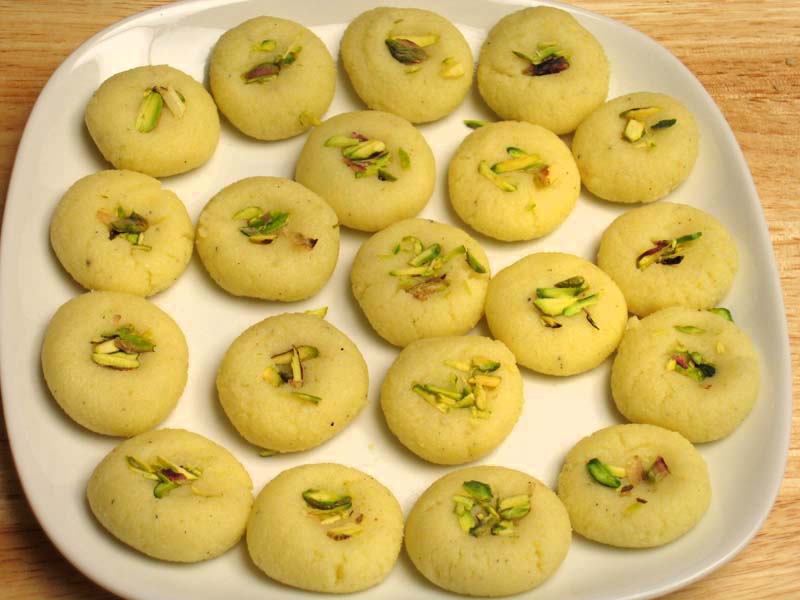
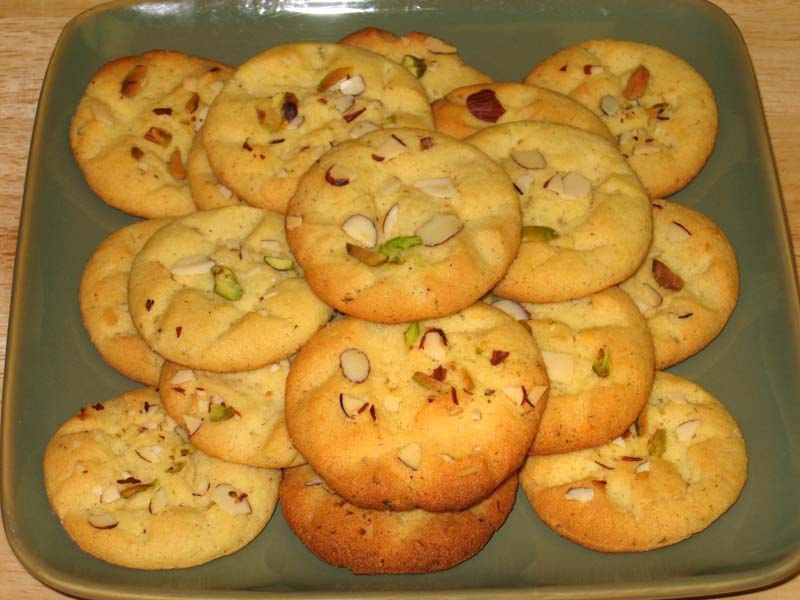
Kaju Katli
Description: Kaju katli is a popular sweet made from ground cashews, sweetened with a small amount of sugar, and often flavored with cardamom. The mixture is rolled out and cut into diamond shapes.

Benefits: Cashews are rich in healthy fats, protein, and essential minerals like magnesium and zinc. Moderation is key to keeping this treat healthy.
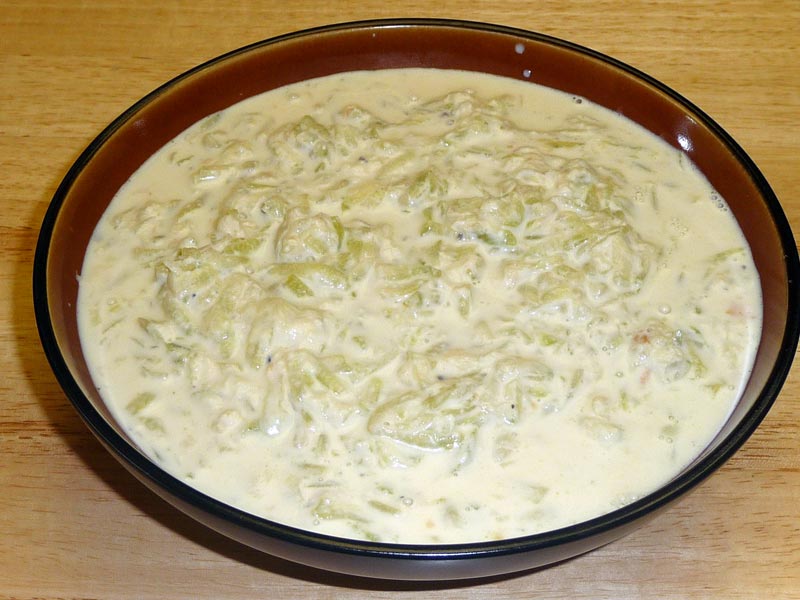
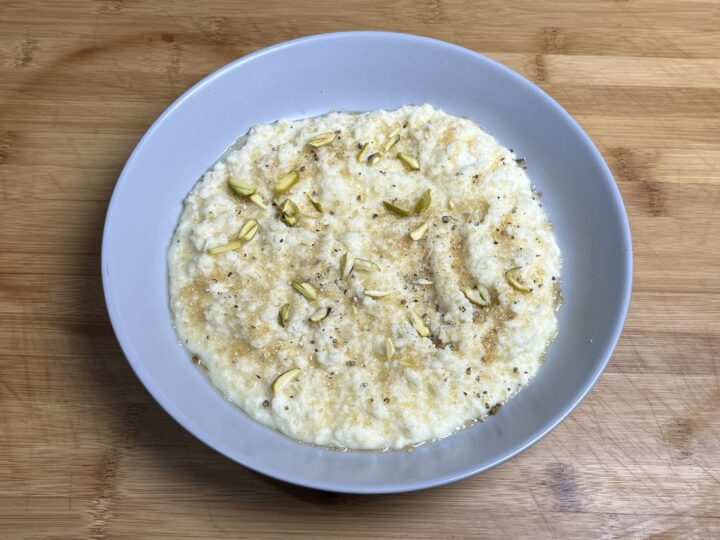
Ragi Halwa
Description: This halwa is made from ragi (finger millet) flour, sweetened with jaggery, and cooked in water or milk (or a plant-based milk for a vegan version). Ghee or coconut oil is used for cooking.

Benefits: Ragi is a super grain rich in calcium, iron, and fiber, making this halwa a nutritious dessert option.
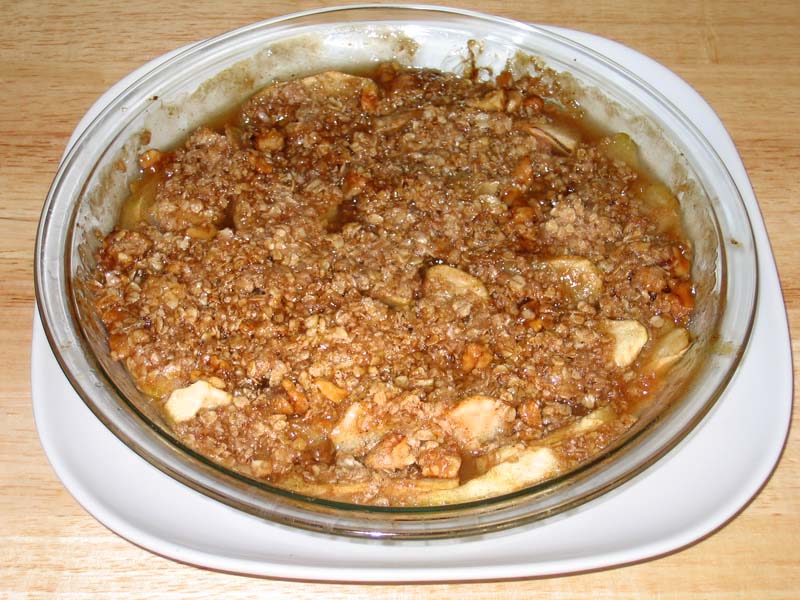
Fruit Chaat
Description: Fruit chaat is a fresh and colorful mix of seasonal fruits like apples, bananas, pomegranates, and oranges, sprinkled with a dash of chaat masala and a squeeze of lemon juice.

Benefits: Packed with vitamins, minerals, and antioxidants from the fruits, this chaat is a refreshing and naturally sweet snack.
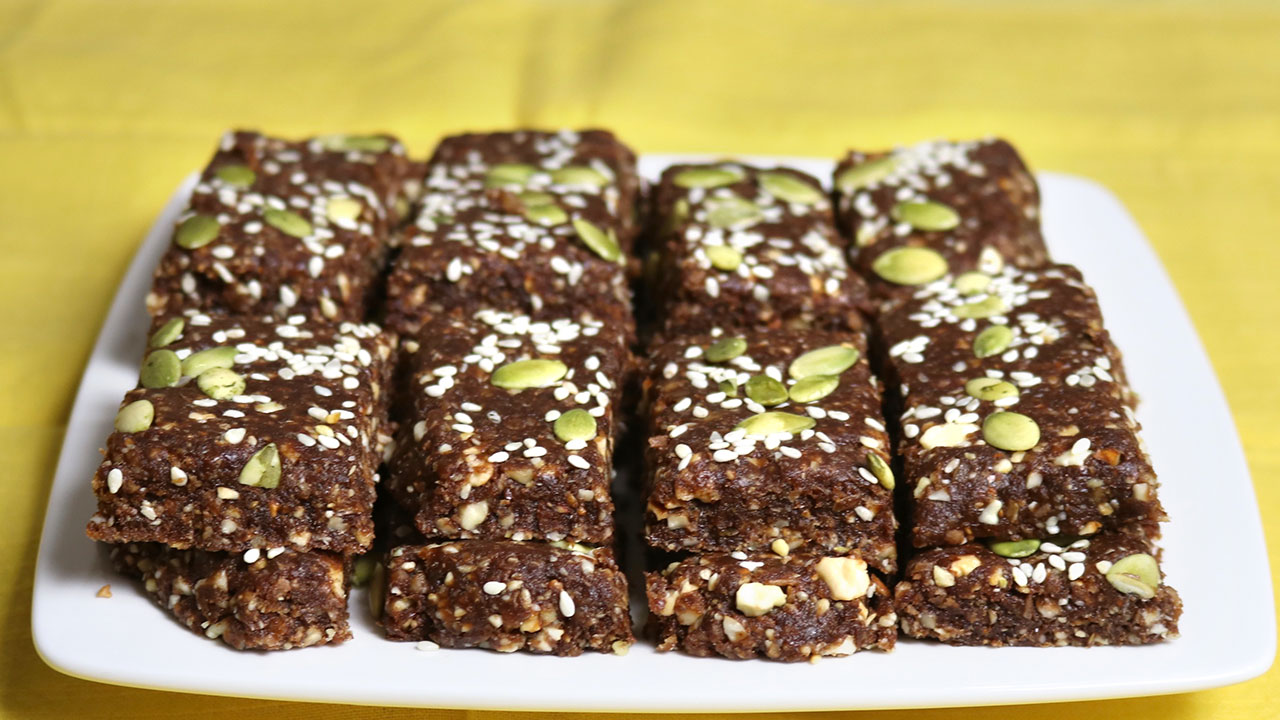
Oats and Nuts Chikki
Description: A healthier twist on traditional chikki, made with oats, mixed nuts, and sweetened with jaggery. The mixture is cooked until it binds together and then set into bars.

Benefits: Oats are high in fiber and have a low glycemic index, while nuts provide healthy fats and protein.
Sweet Potato Chaat
Description: Boiled and cubed sweet potatoes tossed with chaat masala, lemon juice, and a bit of jaggery for sweetness. Garnished with fresh coriander leaves.

Benefits: Sweet potatoes chaat are rich in fiber, vitamins A and C, and have a natural sweetness that reduces the need for added sugars.
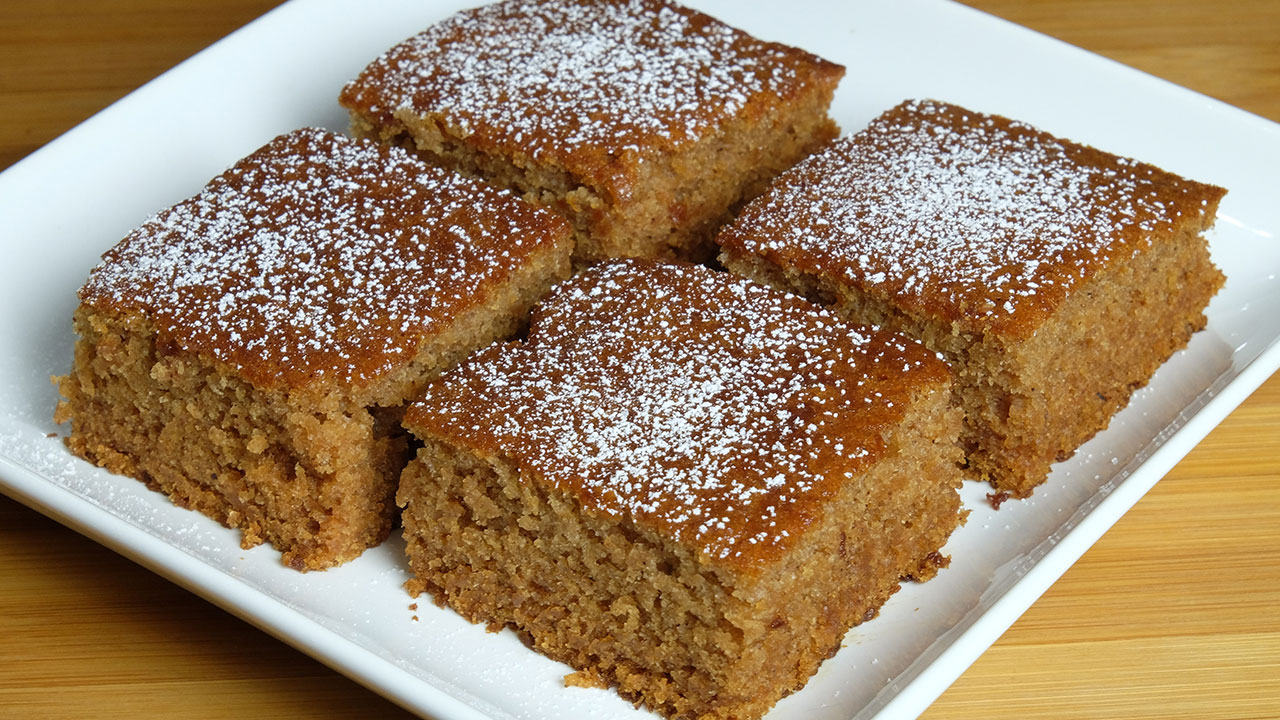
Gur Papdi
Description: Also known as Sukhdi, this sweet is made from whole wheat flour, jaggery, and ghee. The ingredients are cooked together until they form a thick mixture, then set and cut into pieces.

Benefits: Whole wheat flour provides fiber and nutrients, while jaggery adds minerals like iron. Ghee, in moderation, offers healthy fats.
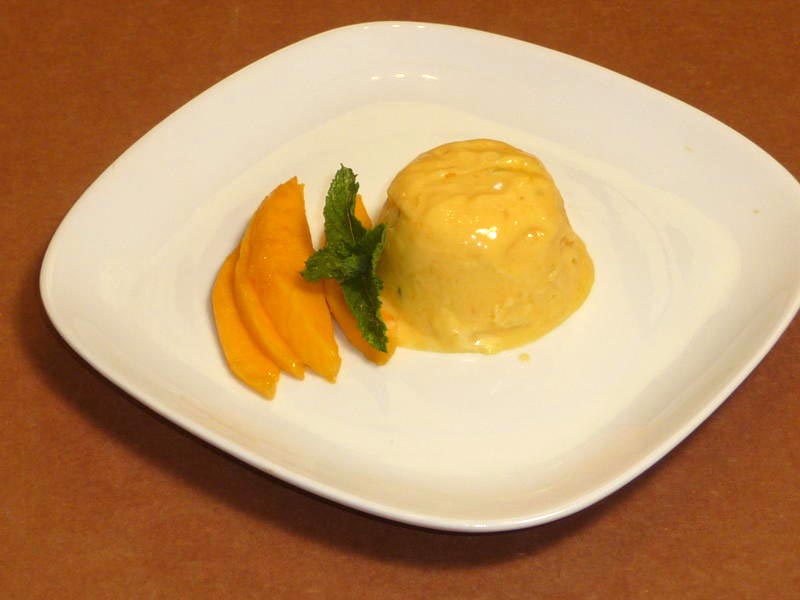
Apple Kheer
Description: A light and refreshing kheer made with grated apples, milk (or plant-based milk), and sweetened with a small amount of jaggery or honey. Flavored with cardamom and garnished with nuts.

Benefits: Apples add fiber and natural sweetness, while using milk or plant-based milk makes it creamy and nutritious without needing much-added sugar.

These healthy sweet snacks not only satisfy your sweet tooth but also provide essential nutrients and energy, making them perfect for a balanced diet
Tips for Creating Your Own Healthy Sweet Snacks

Use Natural Sweeteners: When making healthy sweet snacks, opt for natural sweeteners like honey, maple syrup, or dates instead of refined sugars.
Incorporate Whole Foods: Focus on whole foods like fruits, nuts, seeds, and whole grains. These ingredients provide essential nutrients and help keep you full longer.
Control Portions: Even healthy snacks can contribute to weight gain if consumed in large quantities. Be mindful of portion sizes to enjoy your snacks without overindulging.

FAQ’s

What is the healthiest sweet snack?

The healthiest sweet snack is typically made from natural ingredients like fruits, nuts, and whole grains. Examples include fruit and nut bars, Greek yogurt with honey and berries, and dark chocolate-covered almonds.

What sweets are the healthiest?

The healthiest sweets are those that are low in added sugars and high in natural ingredients. Options like apple slices with almond butter, chia seed pudding, and frozen grapes are excellent choices.

What is a healthy but nice snack?

A healthy but nice snack is one that satisfies your cravings while providing essential nutrients. Examples include fruit and nut bars, Greek yogurt with honey and berries, and dark chocolate-covered almonds.

How can I make my sweet snacks healthier?

To make your sweet snacks healthier, use natural sweeteners like honey or maple syrup, incorporate whole foods like fruits and nuts, and be mindful of portion sizes.

Are there easy healthy sweet snacks recipes?

Yes, there are many easy healthy sweet snack recipes, such as fruit and nut bars, chia seed pudding, and frozen grapes, that are quick to prepare and delicious. Explore more recipes on Manjula’s Kitchen and discover the joy of cooking nutritious and delicious food.
Conclusion
Incorporating healthy sweet snacks into your diet can help you enjoy the sweetness you crave while maintaining a balanced and nutritious diet. From fruit and nut bars to chia seed pudding, there are plenty of delicious options to explore. By focusing on natural ingredients and mindful portion sizes, you can enjoy these sweet healthy snacks guilt-free. Start experimenting with these ideas and discover your favorite healthy sweet snacks today!

  • Kalakand

    Kalakand

    Kalakand – A Delicious Festive Sweet

    Kalakand is a simple yet delightful, sweet that's perfect for any holiday celebration or festive occasion. Known for its moist and grainy texture, this milk-based dessert is delicately flavored with cardamom, making it irresistible.
    Traditionally, Kalakand is made with just three ingredients—milk, sugar, and cardamom. While most Indian sweets, such as burfi, have a fudge-like consistency, Kalakand stands out with its moistness. Although it doesn't typically require garnishing, I decided to add pistachios for a touch of color and presentation. I also used ricotta cheese to make it simple and the results were just as delicious.
    Kalakand is a must-try treat, whether you're celebrating a festival or simply want to enjoy something sweet!
    5 from 1 vote
    Prep Time 5 minutes
    Cook Time 30 minutes
    Servings 8 people

    Ingredients
      

    • 3 cups full fat milk
    • cups ricotta cheese
    • ¼ cup sugar
    • ¼ tsp cardamom powder
    • tbs crystal sugar, for garnishing
    • ¼ tsp crushed cardamom for garnishing
    • 1 tbs sliced pistachio for garnishing

    Instructions
     

    • Boil the milk over low to medium heat. Before adding the milk, wet the pan with water to prevent it from sticking to the surface.
    • Boil the milk for about fifteen minutes, allowing it to reduce to almost half its original quantity. Stir the milk occasionally and scrape the sides to prevent the milk from sticking and browning.
    • Add the ricotta cheese and sugar mix well. Keep stirring and scraping the sides of the pan until the mixture is very soft but it has come together, I do not want to cut them into pieces. Then, add the cardamom powder and mix it in before turning off the heat.
    • As the Kalakand cools to room temperature, it will thicken slightly. I prefer to keep it soft so that it can be served with a spoon, similar to thick yogurt. Kalakand should be moist and have a grainy texture.
    • Before serving, garnish with crystal sugar, crushed cardamom, and, if desired, sliced pistachios. I used slightly less sugar in the Kalakand, and sprinkling crystal sugar adds a pleasant mild crunch, while the crushed cardamom enhances the flavor.

    Notes

    Kalakand is ready, can’t wait to try
    Enjoy!
    Tried this recipe?Let us know how it was!

    Introduction to Kalakand

    Kalakand is a beloved Indian sweet that is often enjoyed during festivals, special occasions, or anytime you want to indulge in something rich and satisfying. Known for its moist and grainy texture, this milk-based dessert is delicately flavored with cardamom and garnished with pistachios for a touch of elegance. Unlike other Indian sweets such as burfi, which have a fudge-like consistency, Kalakand stands out because of its soft, creamy texture. This delightful sweet is easy to make and irresistibly delicious, making it a perfect addition to your festive celebrations.

    Cultural and Traditional Importance

    Kalakand holds a special place in Indian households during festivals like Diwali, Holi, and Raksha Bandhan. It is one of those sweets that brings a sense of joy and celebration. Traditionally, Kalakand is made with just a few simple ingredients—milk, sugar, and cardamom—but its slow-cooking process brings out rich flavors that make it unique. In many Indian homes, making Kalakand is not only about the sweet itself, but also about the shared moments of celebration with family and friends.

    Though Kalakand doesn’t require garnishing, I like to add sliced pistachios for a burst of color and texture, enhancing both its presentation and taste. It’s a treat that brings back nostalgic memories of festive occasions, and now, with this simplified version using ricotta cheese, you can enjoy it with minimal effort.

    Recipe Variations from Manjula’s Kitchen

    While Kalakand is a delightful dessert on its own, you can explore other similar milk-based sweets from Manjula’s Kitchen that offer unique flavors and textures:

    • Burfi: A classic fudge-like sweet made with condensed milk and nuts like cashews or almonds.
    • Rasgulla: A spongy, syrup-soaked dessert made from paneer, offering a light and juicy contrast to Kalakand.
    • Rasmalai: Soft paneer dumplings soaked in sweetened, flavored milk, with cardamom and saffron.
    • Peda: A simple and elegant sweet made from condensed milk and flavored with cardamom.

    Health Benefits and Dietary Considerations

    Kalakand is a rich, indulgent dessert, but it also offers some nutritional benefits due to its milk base. Full-fat milk is a good source of calcium, protein, and essential vitamins. Using ricotta cheese in this recipe simplifies the cooking process while keeping the dessert creamy and delicious. If you’re looking for a lighter version, you can reduce the sugar or substitute it with a natural sweetener like honey.

    This version of Kalakand is naturally gluten-free, making it suitable for those with gluten sensitivities. For a vegan alternative, you can experiment with plant-based milks and vegan ricotta, though it may slightly alter the texture.

    Serving Suggestions

    Kalakand is best served at room temperature, allowing its soft, grainy texture to shine. Garnish it with crushed cardamom, crystal sugar, and sliced pistachios for added flavor and visual appeal. This sweet treat can be enjoyed on its own or as part of a larger dessert spread during festivals or family gatherings.

    For a more complete festive meal, consider serving Kalakand alongside other Indian sweets like Gulab Jamun or Jalebi to create a dessert platter that showcases a variety of textures and flavors.

    Conclusion Kalakand is a simple yet irresistible sweet that’s perfect for celebrating any special occasion. Its creamy, moist texture combined with the subtle flavor of cardamom makes it a dessert that everyone will love. With this easy-to-follow recipe using ricotta cheese, you can recreate the traditional taste of Kalakand in less time, making it an ideal treat for festivals, parties, or even as a special indulgence after dinner. Try this recipe today and enjoy the rich flavors of Kalakand with your loved ones.

    Frequently Asked Questions (FAQs)

    1. What is Kalakand made of?
      • Traditionally, Kalakand is made with milk, sugar, and cardamom. In this simplified version, ricotta cheese is used to reduce the cooking time while maintaining the rich texture.
    2. How is Kalakand different from Burfi?
      • Kalakand has a moist and grainy texture, while Burfi is firmer and more fudge-like. Both are milk-based sweets, but Kalakand is known for its soft, melt-in-your-mouth consistency.
    3. Can I make Kalakand vegan?
      • While this recipe uses full-fat milk and ricotta cheese, you can experiment with plant-based milks and vegan ricotta to make a vegan version. However, the texture may differ slightly.
    4. What are some similar desserts to Kalakand?
      • Similar milk-based sweets include Burfi, Rasgulla, Rasmalai, and Peda.
    5. How should I serve Kalakand?
      • Serve Kalakand at room temperature, garnished with crystal sugar, crushed cardamom, and pistachios for added flavor and texture.
  • Mango Ice Cream

    Mango Ice Cream

    Mango Ice Cream

    Mango Ice Cream is a delightful tropical dessert with a refreshing, rich and fruity flavor. Mango Ice Cream is an quick and easy recipe needing few ingredients. This is sure to be a crowd pleaser. I like to make this ice cream using fresh mangoes.
    No ratings yet
    Course Dessert
    Cuisine Indian
    Servings 6 people

    Ingredients
      

    • 1 cup fresh mango pulp
    • 1 tbsp lime zest
    • 1 tbsp lime juice
    • 3/4 cup sugar
    • 1 cup heavy cream
    • 1 tbsp corn starch (arrowroot)

    Instructions
     

    • Peel and slice the mango and scrape out the pulp from the seed.
    • Mix cornstarch with 2 tablespoons of water.
    • Boil heavy cream, cornstarch mix, and sugar over medium-high heat. Stir continuously otherwise cornstarch will become lumpy.
    • After cream mix comes to a boil, reduce the heat to medium low, and then cook for an addition 2 minutes.
    • Let it cool.
    • Mix in mango pulp, lime juice, and lime zest to the cream mix.
    • Transfer the mixture into a bowl or container to freeze; the container shouldn’t be very deep. I like using a glass bowl with a lid.
    • After about 2 hours remove the ice cream from the freezer and mix it until its smooth, this will give it a creamy texture.
    • At this point you can choose to freeze the ice cream in the same bowl or freeze the ice cream in individual serving cups.
    • Ice cream will take 6 to 8 hours to freeze.

    Notes

    Serving Suggestion
    Serve ice cream with slice of freshly sliced mangoes and few pieces of sliced almonds.
    Keyword 2 Minutes Dessert
    Tried this recipe?Let us know how it was!

  • Lauki Kheer

    Lauki Kheer


    Lauki Kheer

    Laucki Kheer (Bottle Gourd Pudding)

    Lauki Kheer is a healthy and very refreshing dessert made with bottle gourd.
    No ratings yet
    Prep Time 10 minutes
    Cook Time 45 minutes
    Course Dessert
    Cuisine Indian
    Servings 6 people

    Ingredients
      

    • 1 medium size bottle gourd (loki, doodhi, ghyia)
    • 1 tbsp butter or ghee
    • 5 cup milk
    • 1/2 cup sugar
    • 1/2 tbsp coarsely ground cardamom powder

    Instructions
     

    • Lightly peel the bottle gourd leaving shades of light green.
    • Cut it half length wise and take out the seeds from center of the bottle gourd.
    • Shred the bottle gourd and squeeze-out the water. After squeezing the water, shredded bottle gourd should be about 3 cups.
    • Heat butter in frying pan on medium high heat as it melts add the shredded bottle gourd and stir-fry for about 4 minutes.
    • Turn off the heat and transfer the stir-fry bottle gourd in to the bowl.
    • Boil the milk in wide frying pan on medium high heat. Cook until the milk is reduced to about four cups. Stir often to ensure the milk does not burn in the bottom of the pan.
    • Add the stir-fry bottle gourd to the milk and cook for another 10 minutes until the milk is creamy again make sure you stir the kheer often to ensure the milk does not burn in the bottom of the pan.
    • Next reduce the heat to medium and add the sugar and cardamom powder. Cook for another about 2 minutes and turn off the heat.
    • kheer is ready this can be served warm, at room temperature or cold.

    Notes

    Serving Suggestion
    Lauki Kheer tastes the best when it is served very chilled just when it start forming ice crystal.
    Keyword Kheer, Laucki Kheer
    Tried this recipe?Let us know how it was!
  • Peda

    Peda


    Peda (Indian Sweet)

    Peda, Milk Fudge

    Pedas are an all-time favorite sweet snack. Pedas are like soft milk fudge. Pedas are grainy texture made with milk and sugar, flavored with cardamom. Peda can be served as a candy or as a dessert.
    5 from 3 votes
    Prep Time 5 minutes
    Cook Time 15 minutes
    Making Paneer 20 minutes
    Total Time 20 minutes
    Course Dessert
    Cuisine Indian
    Servings 10 people

    Ingredients
      

    • 4 cupa paneer home made
    • 1/3 cup milk powder
    • 1/2 cup sugar
    • 3 tbsp unsalted butter or ghee
    • 1/4 tsp cardamom powder ilachi

    For Garnishing

    • 1 tbsp sliced pistachios

    Instructions
     

    • Check the recipe for paneer and make the paneer with whole milk. For this recipe use 4 cups of milk.
    • Heat the frying pan on medium. Add butter and let it melt. Next add milk, milk powder, and paneer. Mix it well.
    • Cook mixture on medium heat stirring continuously until mixture starts leaving the sides of the frying pan and becomes like dough. This should take about 12 minutes. Now this is known as khoya.
    • Transfer the khoya into a bowl and let it cool off until khoya becomes just lukewarm.
    • Mix the sugar and cardamom powder into the khoya and knead it for about a minute until every thing blends together and become soft dough. Note: if you mix the sugar while khoya is hot that will make pedas soft.
    • Divide the mix into about 20 equal parts and roll them into round balls. Lightly press it down so it looks like small patty. Put few pieces of sliced pistachios on every peda.
    • Pedas should be served at room temperature.

    Notes

    Pedas can be kept for few days at room temperature and about a month refrigerated.
    Keyword Gluten Free, Offering To God, Parsad, Peda
    Tried this recipe?Let us know how it was!

    Indian Peda Sweet Recipes – Manjula’s Kitchen 

    Peda sweet, an exquisite Indian dessert, holds a special place in the hearts of many dessert enthusiasts. The good news is, crafting this delightful treat at home is easier than you might think, especially if you’ve got some whole milk in your kitchen. Now, let’s go step-by-step process on how to make these mouthwatering peda mithai.

    Prepare the Paneer: 

    Start by making paneer by adding lemon juice to half a cup of hot water. Boil milk on medium heat, stirring to prevent burning. When it boils, gradually add lemon juice, stirring gently. Turn off the heat when curds separate from whey. Drain using a cheesecloth-lined strainer, rinse with cold water, and squeeze out excess water. Press wrapped paneer under a heavy pan for 1 hour to remove excess water.

    Get Cooking

    Begin by heating a frying pan on medium heat. Once the pan is warm, add a small amount of butter and let it melt until it becomes a golden liquid. Following this, introduce the whole milk into the pan. Sprinkle in a moderate amount of milk powder and incorporate the paneer into the mixture. Thoroughly mix these ingredients together in the pan, ensuring an even distribution. This step helps in the creation of a cohesive and flavorful mixture that will later contribute to the overall texture and taste of the dish.

    Stir, Stir, Stir

    Cook the mixture over medium heat, and the key is to keep stirring consistently. Don’t take a break! Keep at it until you notice the mixture changing – it will start to pull away from the sides of the pan, transforming into a dough-like texture. This process usually takes about 12 minutes. When that happens, you’ve successfully created khoya, the essential foundation for making our delicious peda indian sweet.

    Cool Off

    Transfer the khoya mixture that you’ve made into a bowl. Let it cool down until it reaches a lukewarm temperature. It’s important not to use it while it’s still hot for the next step in the recipe. Allowing it to cool ensures that the khoya’s texture and consistency are just right for the following stages of the cooking process. This cooling step is crucial to achieve the desired results in your final dish.

    Sweet Blending

    Now comes the sweet part! Once the khoya is lukewarm, add in the sugar and cardamom powder. Give it a good mix and start kneading for about a minute until everything blends into a soft dough. A little tip: if you mix the sugar while the khoya is still hot, your Peda indian sweet could turn out a bit too soft. So, let the khoya cool a bit before adding the sweetness!

    Shape It Up

    After preparing the khoya mix, divide it into roughly 20 equal portions. Take each portion and shape it into a round ball. Once you have your little balls, gently press them down to create a small, flat patty shape. If you want to enhance the appearance, consider placing a few slices of pistachios on top of each pera sweet. This simple step adds a touch of elegance to your homemade peda sweet, making them not only delicious but also visually appealing.

    Serve at Room Temperature

    Your pera sweet are almost ready to be savored! To enhance their delicious taste, allow them to sit at room temperature. This simple step allows the flavors to fully develop, resulting in a more rich and satisfying indulgence. When you’re ready to treat yourself, serve up these delightful indian sweet pedas. You’ll likely find that they disappear swiftly, a testament to their irresistible appeal.

    Storage Notes:

    Amongst all the indian sweet recipes the Indian sweet peda is one of the most versatile sweets that can last for a few days at room temperature. If you want to savor the sweetness for a more extended period, refrigerate them for about a month.

    In summary, making pera sweets at home is a rewarding and surprisingly simple process. From preparing the paneer to shaping the pera indian sweet, every step contributes to the rich flavor and texture of this delightful treat. So, gather your ingredients, follow these easy steps, and indulge in the joy of homemade peda mithai. Enjoy the sweetness!

    To experiment more with indian sweet recipes you can try Modak, Pineapple Sandesh & Moong Dal Ladoo

  • Apple Crumb Pie

    Apple Crumb Pie

    Apple Crumb Pie

    Apple Crumb Pie

    Apple Crumb Pie is simple, delicious, and easy to make. This dessert is perfect for fall and winter months. Hot apple crumb, topped with vanilla ice cream – my kind of a dessert, and popular with my family.
    Recipe will serve 4 to 6.
    No ratings yet
    Prep Time 10 minutes
    Cook Time 35 minutes
    Total Time 45 minutes
    Course Dessert
    Cuisine American
    Servings 6 people

    Ingredients
      

    • 3 green Granny Smith Apples peeled, cored and sliced
    • 2 Tbsp water
    • ¾ cup oatmeal
    • ¼ cup walnut crushed
    • ¾ cup sugar
    • 1 tsp ground cinnamon
    • ¼ tsp nutmeg
    • ½ cup butter

    Instructions
     

    • Preheat the oven 370 degree F.
    • In a bowl mix oatmeal, walnut, cinnamon, nutmeg, sugar, and butter. Set aside.
    • Spread the sliced apple evenly in the 9-inch pie pan.
    • Sprinkle the water evenly over the apple.
    • Spread the oatmeal mix evenly over apple.
    • Put the pie plate over the center rack of oven.
    • Let it bake for 20 minutes.
    • Take it out from oven. Tilt the pie plate a little and use a spoon to move some of the apple juice; put it over pie evenly.
    • Put the pie plate again back in oven and bake for 10 more minutes.

    Notes

    • Putting the juice over the top of the pie keeps the crumbs moist and crunchy.
    Serving Suggestion
    • Serve hot.
    • Tastes great topped with scoop of vanilla ice cream!
    Keyword Apple, Crumb, Dessert, Granny Smith, hot, Ice Cream, oatmeal, pie, vanilla, walnut
    Tried this recipe?Let us know how it was!
  • Nan Khatai

    Nan Khatai

    Nan Khatai

    Nan khatai

    Nan khatai is an egg-less light and crispy biscuit snack that's perfect to serve with tea or coffee.
    4.25 from 4 votes
    Prep Time 15 minutes
    Cook Time 15 minutes
    Total Time 30 minutes
    Course Dessert
    Cuisine Indian
    Servings 6 people

    Ingredients
      

    • 1/3 cup all purpose flour plain flour or maida
    • 1/3 cup fine sooji samolina
    • 1/8 tsp baking soda
    • 1/4 tsp cardamom coarsely ground ilaichi
    • 1/2 cup unsalted butter
    • 2/3 cup sugar
    • 1 tbsp almond sliced
    • 1 tbsp pistachio sliced

    Instructions
     

    • Pre heat the oven to 375 degree.
    • In a bowl, mix the all-purpose flour, gram flour, sooji, baking soda and cardamom powder and set aside.
    • Let the butter come to the room temperature (butter should be soft not melted)
    • Add butter and sugar in a mixing bowl and beat for two to three minutes until light and fluffy.
    • Add the flour mix to butter and sugar mixture and knead them together to make smooth dough. Divide the dough into about 24 equal parts and make them into balls. Press each ball between your palms lightly; every piece should be about 3/4″ in thickness.
    • With a sharp knife softly draw a tic-tac-toe design on the top and put few pieces of almonds and pistachios and press them into the dough gently.
    • Put Nan khatai on a lightly greased cookie sheet and bake at 375 degrees for about 13 to 15 minutes or until Nan khatai are lightly gold brown.
    • After they are lightly golden brown remove the cookie sheet from the oven. Let the Nan Khatais cool down for two to three minutes before taking them off the cookie sheet.

    Notes

    Nan khatai make a great homemade gift for holidays. Your friends and relatives will love it.
    Serve them with hot cup of chai.
    Enjoy!
    Keyword Biscuit, Cookies, Eggless, Kid Friendly, Tea Time Snack
    Tried this recipe?Let us know how it was!

  • Instant Badam Burfi

    Instant Badam Burfi

    A plate of Instant Badam Burfi garnished with edible silver foil and almonds

    Instant Badam Burfi

    Instant Badam Burfi, or Almond Candy is a quick and easy recipe that will satisfy the entire family! The best part of this recipe is that involves absolutely no cooking. This is the time of the year when we are all busy celebrating the holidays.
    Of course, this year will look a little different, but we can always make the best of this situation.
    Since we are all busy with work and family responsibilities, I wanted to make a quick and easy dessert that is both delicious and sweet. Badam Burfi is just that.
    All you need is less than 10 minutes to make this delicious Burfi. After trying this recipe a few times, I was surprisingly satisfied with the way it turned out! I wish I had thought of this recipe before. During the holidays, homemade sweets make the best holiday gift for family and friends. The main ingredients are almond flour and condensed milk. Enjoy!
    5 from 1 vote
    Course Dessert
    Cuisine Indian
    Servings 0

    Ingredients
      

    • 1 cup almond flour badam
    • 3 Tbsp condense milk sweetened
    • tsp cardamom powder
    • 1 Tbsp grainy sugar
    • 1 Tbsp sliced pistachios pista

    Instructions
     

    • In a bowl mix almond flour pistachios and cardamom powder. Add condensed milk mix it with a spoon then lightly oil your finger and make it smooth like dough.
    • I am using Ziplock to roll the Burfi. Cut the Ziplock bag in two, put the almond dough in the center of one piece and cover it with another piece.
    • With your palm press it to make a Pattie then roll it into quarter-inch thick. Note: try to keep in rectangle shape because we are going to cut them in the square.
    • Remove the top wrap and spread evenly sugar and cover it again and lightly roll t again. Note: this will make sugar stick to burfi.
    • Cut them into your preferred size. Wait for about fifteen minutes and then remove it. Almond burfi is ready.

    Notes

    Adding grainy sugar gives nice texture to burfi and add little needed sweetness.
    Tried this recipe?Let us know how it was!
  • Dates and Nuts Bar

    Dates and Nuts Bar

    A platter of homemade Dates and Nuts Energy Bars, topped with sesame seeds and pumpkin seeds, arranged neatly on a white plate with a yellow background.

    Dates and Nuts Energy Bar, Healthy Bar, All-Natural Nutritional Bar

    2020 is the start of a new decade and like most people I’m sure you have thought about eating clean and healthy. My next recipe is for any new year resolutions and is called “Dates and Nuts Bar”. This healthy gluten-free energy bar is also vegan and sugar-free. The bars have a great nutty texture that tastes so delicious. This yummy treat is so satisfying for any sweet cravings!
    Because we all live busy lives, these bars make great snacks because they are so easy to take on the go. You can even give them to your kids as an after -school snack.
    Because dates are so sweet, they provide the perfect natural alternative to added sugars. They are sure to be a hit with friends who are avoiding sugar but still crave something sweet.
    Try these bars as a healthy alternative to cookies and other sweet treats. You will feel amazing.
    3.34 from 6 votes
    Prep Time 10 minutes
    Cook Time 10 minutes
    Total Time 20 minutes
    Course Snack
    Servings 16 pieces

    Ingredients
      

    • 1 ½ cup pitted dates cut into small pieces
    • 2 Tbsp cocoa powder
    • cup coconut powder
    • cup flax seed meal
    • tsp sea salt
    • ½ cup roasted Walnuts roughly chopped
    • ½ cup roasted Almond roughly chopped
    • ½ cup roasted Cashews roughly chopped
    • 2 tsp sesame seeds
    • 2 tsp pumpkin seeds

    Instructions
     

    • Soften the chopped dates in microwave for 30 seconds, doing this makes dates soft and easy to work.
    • Blend the dates in the food processor until they become to the paste, this should take about 15 seconds. Add flex seed meal, and cocoa powder and salt to the food processor and blend it until all the ingredients incorporated. This should take about 15 second.
    • Add the roasted and chopped nuts walnuts, almonds, and cashew nuts. Blended it until all the ingredients incorporated, but nuts should be still chunky this should take about 20 seconds of blending.
    • Remove the mix from food processor, and make it into 2 balls, roll it into about 1/4-inch-thick, sprinkle the sesame seeds and pumpkin seeds to the rolled bar and lightly press the seeds, so they stay into the bars. Cut them into your desire shape. I decided to cut them in bars.

    Notes

    These are some more healthy choice you would like to know Quinoa salad, Stuffed karela, Lentil Vegetable soup, Mango panna cotta
    Keyword All Natural, Almonds, Badam Burfi, Besan ki barfi, Candy, Cocoa Powder, Coconut, coconut Ladoo, Cooking Video, Dates Bar, Delightful, Diabetic, Flax Seed Burfi, Flax Seeds, Gluten Free, Gourmet food, Homemade, Jain Food, Kid Friendly, Lunch Box, Natural Alternative, Nutritional Bar, Nutty, Quick And Easy, Sattvik Food, Snack, Sugar Free, Swaminarayan, Sweet, Vegan, Walnuts
    Tried this recipe?Let us know how it was!
  • Chocolate Almond Candy

    Chocolate Almond Candy

    Chocolate Almond Candy

    Chocolate Almond Candy

    This is a quick, yummy homemade candy dessert. This is a very simple quick and easy recipe with few ingredients. These candies will be loved by kids and adults alike.
    No ratings yet
    Course Dessert
    Cuisine Indian
    Servings 0

    Ingredients
      

    • 1 cup almonds coarsely ground
    • 1-1/4 cup baking chocolate semi-sweet, chopped in small pieces
    • 3 tbsp condense milk sweetened

    Instructions
     

    • Grease a 12 inch flat plate or wax paper and set aside.
    • I am using microwave to melt the chocolate this is easy and quick way to melt, but be careful and, don’t over cook the chocolate. Make sure every utensil you are using to melt the chocolate is dry. If any water comes in contact with the chocolate, it will become grainy and unusable
    • Use microwaveable bowl that doesn't retain too much heat.
    • Microwave chocolate at 30 seconds interval, three times and mix it every time with spoon. If you are able to mix most of the chocolate smoothly, don’t heat any more, keep mixing till all the chocolate melts.
    • In a bowl add almonds, condense milk and 1 tablespoons of melted chocolate.
    • Grease your palms and make the mix into dough. Divide it into 16 equal parts or your preferred size. Roll them into balls.
    • Dip one almond ball into the chocolate, pick using a fork making sure it is coated all around, tip it lightly to drip the extra chocolate and put it over a greased plate. Repeat the same process with remaining balls.
    • Set aside it takes 7-8 hours before chocolate is completely dry.
    Tried this recipe?Let us know how it was!

  • Apple Vegan Cake

    Apple Vegan Cake

    Apple Vegan Cake

    Apple vegan cake

    Apple vegan cake is a delicious, egg-less and dairy-free cake. Apple Vegan Cake is easy and basic. Cake has a soft and moist texture. It is hard to believe that this is vegan.
    4.65 from 14 votes
    Prep Time 10 minutes
    Cook Time 30 minutes
    Total Time 40 minutes
    Course Dessert
    Servings 8 people

    Ingredients
      

    • 1 cup all-purpose flour maida, plain flour
    • 1-1/2 Tbsp corn starch corn flour
    • 1 tsp baking soda
    • 1/8 tsp salt
    • 1/2 tsp cinnamon powder
    • 1/4 tsp nutmeg
    • 1/3 cup oil canola or any vegetable oil
    • 3/4 cup sugar
    • 1-1/2 cups apple sauce
    • 1 tsp vanilla extract
    • 1 Tbsp powdered sugar for garnishing

    Instructions
     

    • Pre heat the oven to 350°F
    • Square 8- inch cake pan, line with parchment paper and grease bottom and sides of the pan.
    • Mix the dry ingredients together except sugar, flour, corn starch, baking soda, nutmeg, cinnamon, and salt.
    • In a different bowl whisk oil and sugar together for about 2 minutes add apple sauce and vanilla extract mix it well.
    • Add the dry ingredients to apple mix and mix it together gently making sure all the ingredients mix together well.
    • Pour the mixture to cake pan and bake around 28 minutes, until cake begins to pull away from sides and/or toothpick inserted in the center pulls out clean.
    • Let it sit for about 20 minutes bring to room temperature and slice the cake into 16 square pieces.
    • Before serving lightly dust with powder sugar.
    Tried this recipe?Let us know how it was!

  • Date and Nut Ladoo

    Date and Nut Ladoo

    Date and Nut Ladoo (Healthy Indian Candy) Recipe by Manjula

    Date and Nut Ladoo

    This recipe is for Date and Nut Ladoo, or Candy as we call them at home. For my grand kids they are like candy and they love it. Adapted from my friend Renu’s recipe, when I tried this ladoo for the first time, I said WOW. I could not believe the main ingredient was only dates. That surprised me because I am not very fond of dates. This was the first time I have tasted date ladoos flavored with coco powder. This is a quick and easy recipe. Like me if you are using roasted nuts then there is a little or no cooking involved? This is a guilt free healthy snack (no sugar or butter added). Date ladoos are also vegan and gluten free. It's hard to eat just one!
    5 from 2 votes
    Prep Time 5 minutes
    Cook Time 10 minutes
    Course Dessert
    Cuisine Indian
    Servings 18 ladoos

    Ingredients
      

    • 1 cup dates pitted and chopped (khajoor)
    • 1-1/2 cups mixed nuts roasted and roughly chopped, I am using almonds, pistachios, cashews, and pecans
    • 2 tablespoons coco powder
    • 1/2 teaspoon instant coffee
    • Pinch of salt
    • 1/4 teaspoon oil to oil your palms

    Instructions
     

    • Soften the chopped dates in microwave for 30 seconds.
    • Blend the dates in the food processor until they become to the paste, this should take about 10 seconds, add coffee, coco, and salt blend it again until all the ingredients nicely incorporated about 10 seconds. Add the nuts to the food processor and blend it for about 15 seconds. Nuts should be still chunky.
    • Remove from food processor, oil your palm and knead the mix into dough, and divide them into 18 equal parts and roll them into ladoos.
    • Dates and nuts ladoos can be stored in air tight container for a month or more.

    Notes

    Notes: if you do not have roasted nuts dry roast them individually for about 3 minutes on medium heat and use your choice of nuts.
    Tried this recipe?Let us know how it was!