Tag: Diabetic Snacks

Delicious and Healthy Diabetic Snacks: Indian Vegetarian Edition
For individuals managing diabetes, finding the right snacks that are both tasty and diabetic-friendly can be challenging. Indian vegetarian recipes offer a variety of options that are nutritious and delicious, without compromising on taste. This guide will explore a range of diabetic snacks that are perfect for those seeking to maintain stable blood sugar levels while enjoying their food.
Why Choose Diabetic Snacks?

Blood Sugar Management: Diabetic snacks help maintain stable blood sugar levels, preventing spikes and crashes.
Nutrient-Rich: These snacks are often packed with essential nutrients that support overall health.
Flavorful Options: Indian vegetarian cuisine provides a plethora of flavorful and satisfying diabetic friendly snacks.

Finding the Best Diabetic Snacks
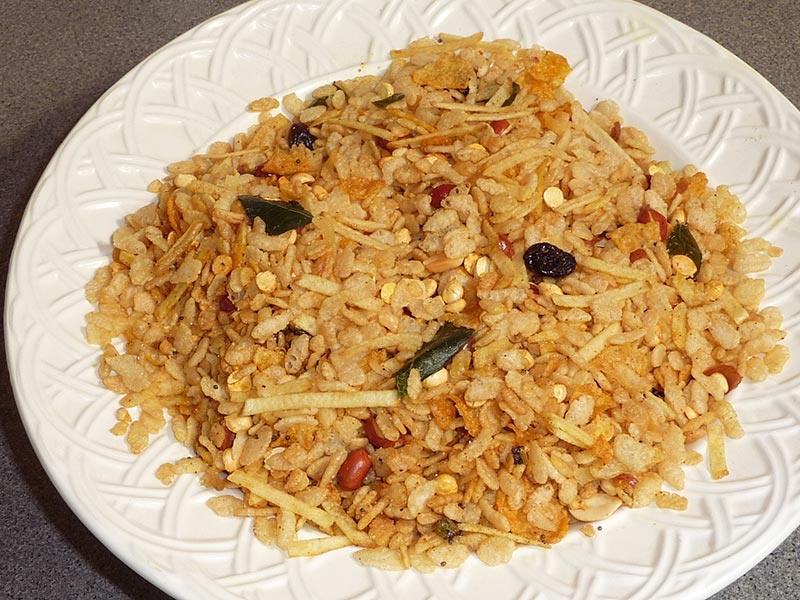
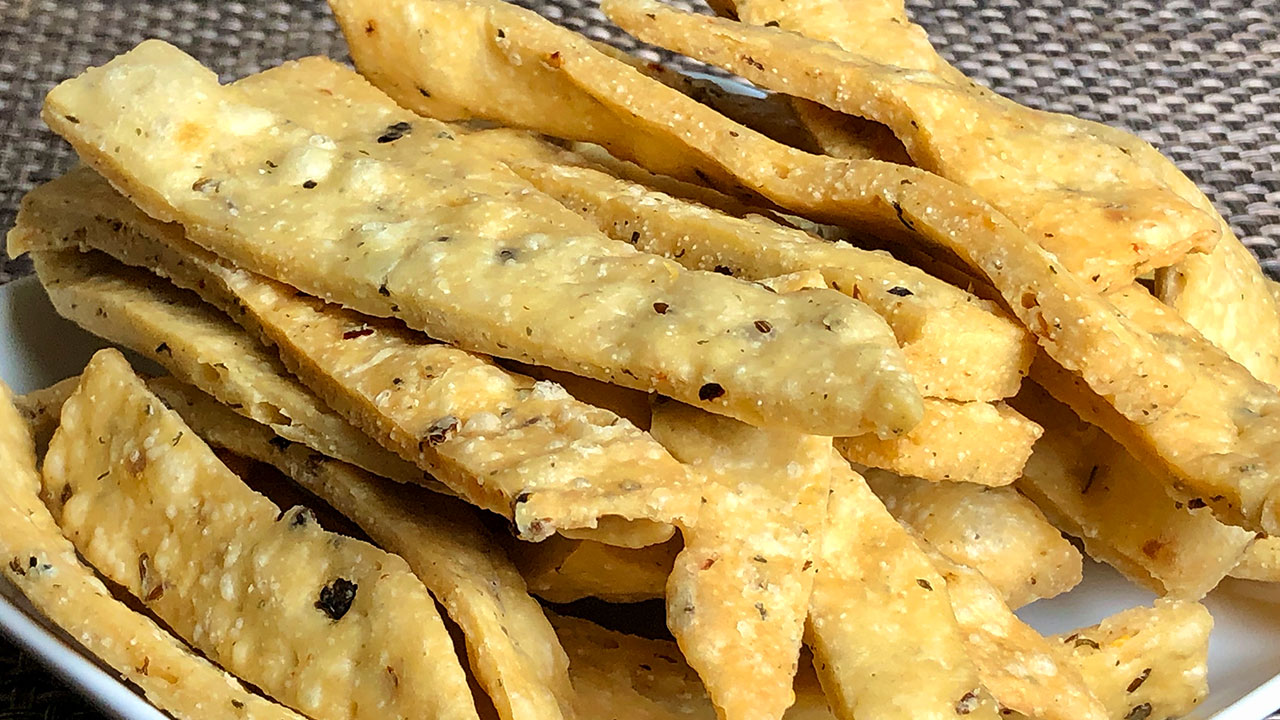
1. Quick and Easy Diabetic Snacks
When you’re in a hurry, having a list of quick and diabetic friendly snacks can make managing diabetes easier. Here are some easy Indian recipes.
Popular Quick Diabetic Snacks:

Sprouted Moong Salad: Sprouted moong beans mixed with tomatoes, cucumbers, and a dash of lemon juice make for a refreshing and nutritious snack. An easy daal recipe to follow. 
Roasted Chickpeas: Chickpeas roasted with a blend of spices provide a crunchy and protein-rich snack.
Cucumber and Hummus: Sliced cucumbers paired with homemade hummus made from chickpeas and tahini offer a satisfying snack.

2. Best Diabetic Snacks for Parties
Hosting or attending a party doesn’t mean you have to compromise on your dietary needs. These best diabetic snacks are perfect for sharing and enjoying with others.
Top Diabetic Snacks for Parties:

Paneer Tikka: Paneer Tikka is a perfect dish in paneer recipes which is a marinated paneer cubes grilled to perfection, served with mint chutney, are both delicious and diabetic-friendly.
Stuffed Bell Peppers: Bell peppers filled with a mixture of vegetables, paneer, and spices, baked until tender.
Vegetable Kebabs: Skewers of mixed vegetables seasoned with Indian spices and grilled for a tasty and nutritious snack.

Exploring New Flavors
1. Traditional Indian Diabetic Snacks
Traditional Indian snacks can be modified to fit a diabetic-friendly diet without losing their authentic flavors.
Delicious Traditional Indian Diabetic Snacks:

Dhokla: A steamed savory cake made from fermented rice and chickpea batter, often garnished with mustard seeds and coriander.
Upma: A savory dish made from semolina and vegetables, lightly seasoned with mustard seeds and curry leaves.
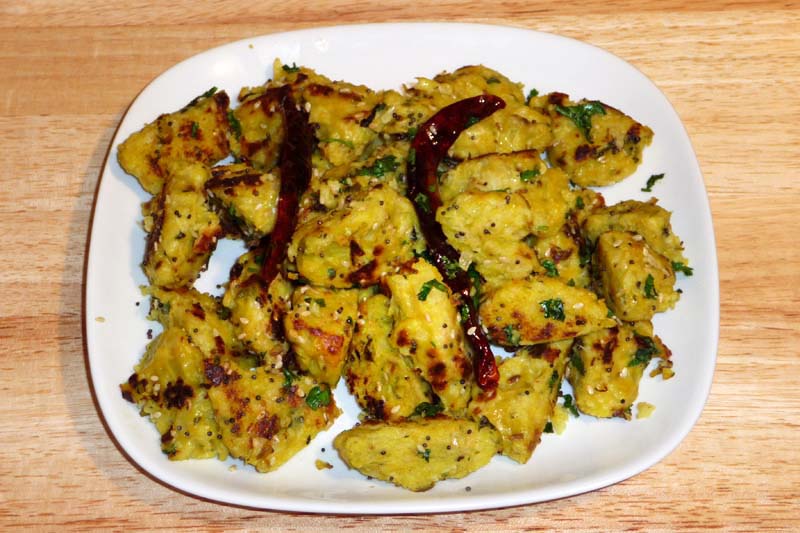
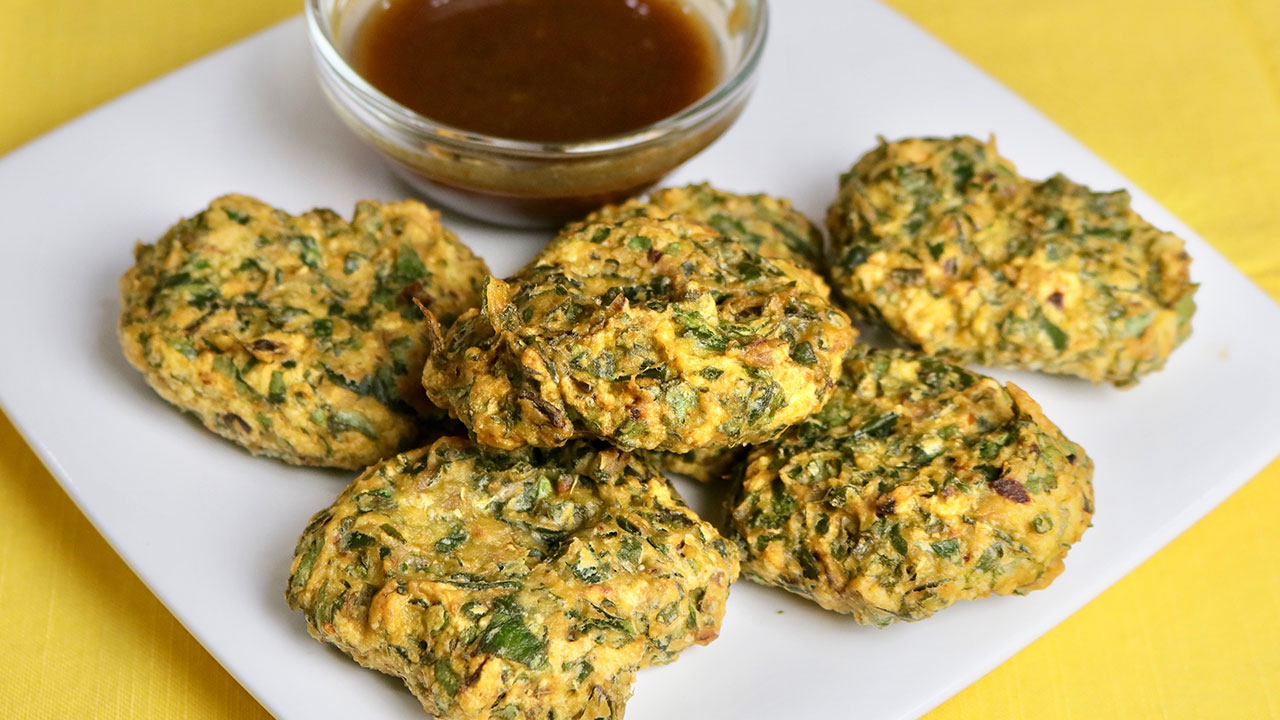
Besan Chilla: A pancake made from gram flour, mixed with finely chopped vegetables and spices.

2. Modern Indian Diabetic Snacks
Modern twists on traditional recipes can add variety and excitement to your snack options.
Innovative Modern Indian Diabetic Snacks:

Quinoa Salad: A nutritious salad made with quinoa, mixed vegetables, and a tangy lemon dressing.
Cauliflower Tikkis: Patties made from grated cauliflower, paneer, and spices, shallow-fried for a crispy texture.
Chia Pudding: A dessert-like snack made with chia seeds soaked in almond milk, sweetened with a touch of stevia, and topped with fresh berries.

Tips for Finding the Best Diabetic Snacks

Use Recipe Websites and Apps: Websites like AllRecipes, Yummly, and Tasty offer extensive collections of diabetic friendly snacks.
Cookbooks and Blogs: Invest in a good diabetic cookbook or follow blogs that focus on diabetic-friendly recipes.
Social Media: Platforms like Instagram and Pinterest are excellent for discovering new diabetic snacks ideas. Follow food influencers who specialize in diabetic diets.

Cooking Diabetic Snacks at Home
Cooking at home allows you to control the ingredients and ensure your snacks are truly diabetic-friendly.
1. Stock Up on Essentials
Keep your pantry stocked with essential ingredients to make preparing snacks easier:

Whole Grains: Quinoa, brown rice, and oats are great for making nutrient-rich snacks.
Legumes: Chickpeas, lentils, and beans are high in protein and fiber.
Vegetables: Fresh and seasonal vegetables add flavor and nutrition to your snacks.
Spices: Indian spices like turmeric, cumin, and coriander not only add flavor but also have health benefits.

2. Meal Planning
Planning your snacks in advance ensures you have healthy options available throughout the week.

Weekly Menu: Create a weekly menu featuring different diabetic snacks for each day.
Prep Ahead: Prepare ingredients like chopping vegetables or cooking grains in advance to save time.

Benefits of Diabetic Snacks
Choosing the right snacks can offer numerous benefits, including:

Blood Sugar Control: Snacking on diabetic-friendly foods helps maintain stable blood sugar levels.
Nutrient Intake: These snacks are often rich in vitamins, minerals, and fiber, supporting overall health.
Satisfaction: Healthy snacks can keep you feeling full and satisfied between meals, reducing the temptation to reach for unhealthy options.

FAQs About Diabetic Snacks
Q: What kind of snacks can a diabetic eat? 
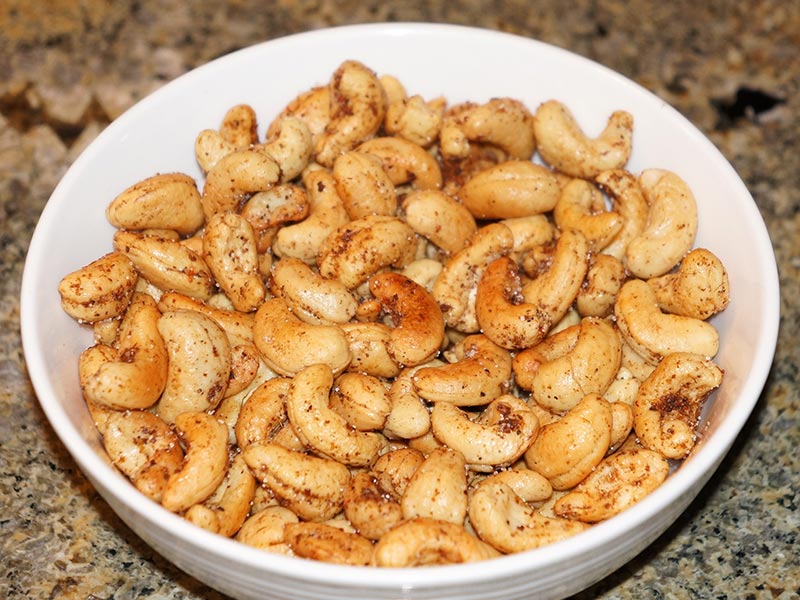
Diabetics can enjoy a variety of snacks that are low in sugar and high in fiber and protein. Some great options include nuts, seeds, yogurt, and fresh vegetables.
Q: How can I find the best diabetic snacks? 
To find the best diabetic recipes, explore recipe websites, cookbooks, and social media for ideas. Look for snacks that are low in carbohydrates and high in fiber and protein.
Q: What are some quick and easy diabetic snacks? 
Some quick and easy diabetic snacks include celery sticks with peanut butter, a handful of almonds, or a small bowl of Greek yogurt with berries.
Q: Are there any traditional Indian snacks that are diabetic-friendly?
A: Yes, traditional Indian snacks like dhokla, upma, and besan chilla can be made diabetic-friendly by using whole grains and reducing the amount of oil and sugar.
Q: Can I enjoy snacks at a party if I have diabetes? 
Absolutely! Opt for diabetic friendly snacks like paneer tikka, vegetable kebabs, and stuffed bell peppers, which are delicious and suitable for sharing.
Conclusion
Finding and enjoying diabetic snacks does not have to be a daunting task. With a little creativity and the right ingredients, you can prepare a variety of delicious and healthy snacks that fit your dietary needs. 

From traditional Indian recipes to modern twists, there are plenty of options to explore and enjoy. 

So, embrace the rich flavors of Indian vegetarian cuisine and delight in the satisfaction of eating well while managing your diabetes. 

Explore more recipes on Manjula’s Kitchen and discover the joy of cooking nutritious and delicious food.

  • Spicy Cashews

    Spicy Cashews

    Spicy Cashews

    Spicy cashews are great as a holiday party snack or simply to munch on anytime. Spicy cashews can be quite addicting – they are that good. This simple and delicious recipe will make a great holiday gift too!
    No ratings yet
    Course Appetizer
    Cuisine Indian
    Servings 0

    Ingredients
      

    • 2 cups raw cashew nuts
    • 2 tbsp oil
    • 1 tbsp salt
    • 1/4 tbsp black salt
    • 1/8 tbsp black pepper
    • 1/4 tbsp red pepper
    • 1 tbsp roasted ground cumin seeds powder
    • 1/2 tbsp mango powder

    Instructions
     

    • In a large skillet, roast the cashew nuts in oil over low to medium heat, stirring continuously, until golden brown (seven to eight minutes).
    • Transfer the cashews to a bowl and let them cool until they are warm (not room temperature, or the spices will not coat cashews).
    • Mix all the spices in a small bowl. Sprinkle over the warm cashews and toss to coat them evenly.
    • Store  the cashews in an airtight container once they cool to room temperature.

    Notes

    Note: These cashews can be stored up to a month.
    Variation
    Substitute peanuts for cashews in the above recipe.
    Tried this recipe?Let us know how it was!

    Spicy Cashew A Perfect flavorful Snack 

    Spicy Cashews are the perfect snack for those who crave a little heat and crunch. These spicy roasted cashews are coated in a delicious blend of spices, making them a flavorful and addictive treat. Whether you’re looking for a healthy snack or a tasty addition to your dishes, this spicy cashew recipe is quick & easy to follow and sure to satisfy your taste buds.

    The Essence of Spicy Cashews

    The key to making the best spicy cashew nuts lies in the right combination of spices. By roasting the cashews, you enhance their natural flavor and crunch, while the spices add a kick that makes them irresistible. This recipe is versatile and can be adjusted to suit your spice tolerance.

    Origin and Popularity

    Nuts have been a staple in many cuisines around the world, valued for their nutritional benefits and versatility. Spicy roasted cashews have gained popularity as a healthy snack option that combines the rich, buttery flavor of cashews with the boldness of spices. This snack is perfect for parties, movie nights, or even as a quick, nutritious snack on the go.

    Why You’ll Love This Recipe

    • Healthy Snack: Cashews are packed with nutrients, including healthy fats, protein, and vitamins.
    • Easy to Make: This recipe is simple and quick, perfect for busy schedules.
    • Flavorful: The blend of spices creates a deliciously bold flavor that complements the natural taste of cashews.
    • Versatile: Can be enjoyed on their own or added to various dishes for an extra kick.

    How to Make Spicy Cashews

    Here’s a step-by-step guide on how to make spicy cashews:

    1. Prepare the Cashews: Start with raw, unsalted cashews for the best results. Preheat your oven to 350°F (175°C).
    2. Mix the Spices: In a bowl, combine spices such as cayenne pepper, paprika, garlic powder, salt, and a touch of sugar. Adjust the quantities based on your spice preference.
    3. Coat the Cashews: Add the cashews to the spice mixture and toss to coat evenly. You can use a bit of olive oil or melted butter to help the spices stick to the nuts.
    4. Roast the Cashews: Spread the coated cashews on a baking sheet in a single layer. Roast in the preheated oven for about 15-20 minutes, stirring occasionally to ensure even roasting.
    5. Cool and Store: Once golden and fragrant, remove the cashews from the oven and let them cool completely. Store in an airtight container to keep them fresh and crunchy.

    Variations of the Recipe

    Exploring Manjula’s Kitchen reveals a treasure trove of other delicious snack recipes that you might enjoy. Here are some related variations that you might find interesting:

    1. Masala Peanuts: A spicy and crunchy snack made with roasted peanuts coated in a blend of Indian spices.
    2. Roasted Chickpeas: A healthy and crunchy snack made with chickpeas tossed in spices and roasted until crispy.
    3. Methi Mathri: A crispy and savory Indian snack made with fenugreek leaves and spices.
    4. Aloo Bhujia: A spicy and crispy potato-based snack that is perfect for munching.
    5. Spicy Bhel Puri: A flavorful and spicy mixture of puffed rice, vegetables, and chutneys.

    Serving Suggestions

    Spicy cashew nuts can be enjoyed in various ways:

    • As a Snack: Perfect for a quick and healthy snack on the go.
    • With Drinks: Serve as a spicy accompaniment to your favorite beverages.
    • In Salads: Add a handful of spicy roasted cashews to your salads for an extra crunch and flavor.
    • In Stir-Fries: Toss them into stir-fries for a spicy twist.

    Tips and Tricks

    To perfect your spicy cashew recipe, consider these helpful tips:

    • Use Fresh Spices: Fresh spices will enhance the flavor of your cashews.
    • Roast Evenly: Stir the cashews occasionally while roasting to ensure they are evenly cooked.
    • Adjust Spice Level: Tailor the spice level to your preference by adjusting the amount of cayenne pepper and other spices.

    FAQs

    Are Spicy Cashews Vegan?

    Yes, they can be made vegan by using olive oil or another plant-based oil instead of butter.

    Can I Make It Ahead of Time?

    Yes, these cashews can be made ahead of time and stored in an airtight container for up to two weeks.

    What Can I Serve with These Cashews?

    They can be served with a variety of dishes, including salads, stir-fries, or as a standalone snack.

    How Long Does It Take to Make?

    The preparation and cooking time for this recipe is about 30 minutes.

  • Cereal Chivda (Snack)

    Cereal Chivda (Snack)

    Cereal Chivda (Snack)

    Cereal Chivda is a great substitute for original chivda. This is a quick and easy recipe to make. Mix of different cereals, mildly spiced makes an enjoyable crunchy snack.
    5 from 1 vote
    Course Snack
    Cuisine Indian
    Servings 0

    Ingredients
      

    • 4 cups rice crispy cereal
    • 1/2 cup  corn flakes
    • 1/2 cup  fine potato sticks
    • 1 tbsp tablespoon raisins
    • 1/2  cup roasted peanuts
    • 1/2 cup  roasted chana dal
    • 3 tbsp oil
    • 1/2 tbsp mustard seeds (rai)
    • Pinch of asafetida (hing)
    • 1 green chili chopped adjust to taste
    • About 10 curry leaves
    • 1/2  tbsp fennel seeds (saunf)
    • 1/4 tbsp turmeric (haldi)
    • 1/4  spoon red chili powder adjust to taste
    • 1/2 tbsp salt adjust to taste
    • 1/4 tbsp mango powder (amchoor)

    Instructions
     

    • Heat the oil in a wide saucepan over medium high heat. After oil is moderately hot add mustard seeds.
    • As mustard seeds crack add asafetida, green chili, and curry leaves. As precaution cover the pan immediately for few seconds because as you add curry leaves to oil it will splatter.
    • Lower the heat to medium low, stir-fry for about 30 seconds; add raisins, peanuts and chana dal, stir-fry for one minute.
    • Add fennel seeds, chili powder, turmeric, and salt mix it well.
    • Add rice crispy cereal and corn flakes (crush the corn flakes before adding to the mix) stir the mixture gently, add potato sticks mix it well quick and turn off the heat. Chivda is ready.
    • Let the cereal chivda cool of to room temperature before serving.
    • Cereal chivda can be kept for several days in airtight container.
    Tried this recipe?Let us know how it was!

    A Delightful Crunch: Exploring the Versatility of Cereal Chivda

    Cereal Chivda is a delightful, crispy snack that combines the crunch of cereals with the flavors of traditional Indian spices. This cereal chivda recipe is perfect for those looking for a diet-friendly snack that doesn’t compromise on taste. Whether you’re enjoying it with your afternoon tea or packing it for a quick snack on the go, this homemade chivda cereal snack is sure to satisfy your cravings.

    The Essence of Cereal Chivda

    Cereal Chivda is a modern twist on the traditional Indian chivda, a savory snack mix. By incorporating cereals, this snack becomes lighter and perfect for those watching their calorie intake. The blend of spices, nuts, and dried fruits adds layers of flavor and texture, making it a versatile snack that can be enjoyed any time of the day.

    Origin and Popularity

    Chivda has been a popular snack in Indian households for generations. Traditionally made with flattened rice (poha), it has evolved to include a variety of ingredients, such as cereals, to cater to modern dietary preferences. This diet chivda with cereal is a testament to its adaptability, offering a healthier option without losing its deliciousness.

    Why You’ll Love This Recipe

    • Healthy Snack: Made with wholesome cereals, nuts, and spices, this chivda is both nutritious and delicious.
    • Easy to Make: Simple steps and readily available ingredients make this recipe easy to follow.
    • Flavorful: A perfect balance of spices and textures ensures every bite is packed with flavor.
    • Versatile: Can be enjoyed on its own or paired with other dishes.

    How to Make Cereal Chivda

    Here’s a step-by-step guide on making cereal chivda:

    1. Prepare the Ingredients: Gather your choice of cereals (cornflakes, puffed rice, or any diet-friendly cereal), nuts (peanuts, cashews), curry leaves, and spices (turmeric, mustard seeds, green chilies, and salt).
    2. Roast the Nuts: In a large pan, dry roast the peanuts and cashews until they are golden brown. Remove and set aside.
    3. Toast the Cereals: In the same pan, add the cereals and toast them lightly until they become crispy. Remove and set aside.
    4. Prepare the Spice Mix: Heat a small amount of oil in the pan. Add mustard seeds and allow them to splutter. Then add curry leaves, finely chopped green chilies, and turmeric powder. Sauté until the curry leaves are crispy.
    5. Combine and Mix: Add the roasted nuts and toasted cereals back into the pan. Sprinkle salt and mix everything well, ensuring the cereals and nuts are evenly coated with the spice mix.
    6. Cool and Store: Let the mixture cool completely before transferring it to an airtight container. This ensures the chivda remains crispy.

    Variations of the Recipe

    Exploring Manjula’s Kitchen reveals a treasure trove of other delicious snack recipes that you might enjoy. Here are some related variations that you might find interesting:

    1. Spicy Chivda: Spicy chivda crunchy savory snack is quick and easy to make. Chivda, also known as poha, is flattened rice that is flavored with spices.
    2. Masala Peanuts: Spicy and crunchy peanuts that make for a perfect snack.
    3. Spicy Sev: Thin, crispy strands made from chickpea flour and spices, perfect for munching.
    4. Roasted Chickpeas: A healthy and crunchy snack made with chickpeas tossed in spices and roasted until crispy.
    5. Methi Mathri: Crispy, savory crackers made with fenugreek leaves and spices.

    Serving Suggestions

    Cereal chivda can be enjoyed in various ways:

    • As a Snack: Enjoy it as a standalone snack during tea time or as a healthy mid-day treat.
    • With Yogurt: Pair it with a bowl of yogurt for a delicious and satisfying snack.
    • As a Topping: Use it as a crunchy topping for salads or soups.
    • For Travel: Pack it as a travel-friendly snack for road trips or flights.

    Tips and Tricks

    To perfect your chivda cereal recipe, consider these helpful tips:

    • Use Fresh Ingredients: Fresh nuts and cereals will enhance the flavor and crunchiness of your chivda.
    • Adjust Spices: Tailor the amount of green chilies and turmeric to your spice preference.
    • Store Properly: Ensure the chivda is completely cool before storing to maintain its crispiness.

    FAQs

    Is Cereal Chivda Vegan? 

    Yes, this recipe is vegan as it uses plant-based ingredients.

    Can I Make It Ahead of Time? 

    Yes, this chivda can be made ahead of time and stored in an airtight container for up to two weeks.

    What Can I Serve with This Chivda? 

    This chivda pairs well with yogurt, can be used as a topping for salads, or enjoyed on its own as a snack.

    How Long Does It Take to Make? 

    The preparation and cooking time for this chivda is about 30 minutes.

  • Muthia

    Muthia

    Muthia (Steamed Dumpling)

    Muthia (Steamed Dumpling)

    Muthias are steamed spiced dumplings, made with gram flour (besan), cabbage, and spices. They make a tasty appetizer or snack.
    Serves 4.
    3.67 from 3 votes
    Course Appetizer
    Cuisine Indian
    Servings 4 people

    Ingredients
      

    For Muthia

    • ½ tsp sugar
    • â…› tsp citric acid
    • 4 cup cabbage very fine shredded
    • 1 cup gram flour basen (available in Indian grocery stores)
    • 2 Tbsp whole wheat flour
    • 2 Tbsp chopped fenugreek leaves can be substitute with 2 tablespoons of dry fenugreek leaves or kastoori mathi fenugreek can also be replaced with chopped cilantro (hara dhania)
    • 2 chopped green chili adjust to taste
    • 1 tsp cumin seed jeera
    • ½ tsp turmeric haldi
    • 1 tsp salt adjust to taste
    • 2 Tbsp oil

    For Seasoning and Garnish

    • 2 Tbsp oil
    • ½ tsp mustard seeds
    • 1 Tbsp sesame seeds til
    • 4 whole red chili
    • 2 Tbsp chopped cilantro hara dhania

    Instructions
     

    • Combine gram flour, whole wheat flour, fenugreek, cumin seed, turmeric, green chili, sugar, citric acid, oil, and salt in a bowl.
    • Add the cabbage to the flour mixture and mix well to make soft dough. Add water if needed .
    • Grease your fingers and divide the mixture into 14 pieces. Drop slowly onto the steamer and steam, covered, 18 to 20 minutes. Test by inserting a knife; blade should come out clean.
    • Let the muthias cool. Cut each one into two pieces off and then slice them in two pieces.

    Making Seasoning

    • Heat the oil in the frying pan over medium high heat. Add the mustard seeds. Once they crack, add the sesame seeds and red chili and stir-fry the mixture a few seconds.
    • Add muthias and stir-fry them for three to four minutes until they are light brown.Garnish them with chopped cilantro.
    • Serve them hot or at room temperature.

    Notes

    Additional Notes
    • Steam immediately after preparing the mixture. If you allow it to sit, it will be too soft. If you have more than one batch, hold the salt and add it one batch at a time or it will be too soft.
    • Muthias can be refrigerated for 3 to 4 days.
    • Muthias can be frozen before seasoning. When ready to serve, thaw the frozen muthias and season them.
    Variation
    You can substitute zucchini or bottled gourd (also known as doodhi, loki or ghia) for the cabbage. Because theses vegetables have more water content, after shredding lightly squeeze them between your palms to remove the excess water before making the mixture.
    Serving suggestions
    • Muthias are great with cilantro chutney.
    • Muthias can be served just after steaming, but before seasoning, with cilantro chutney.
    Keyword Cabbage, Cabbage Dumpling, Healthy, Muthia, Muthiya, Steamed, Vegan
    Tried this recipe?Let us know how it was!
  • Namak Paare

    Namak Paare

    Namak Paare

    Namak paare

    Namak paare is pastry like crunchy snack lightly seasoned with carom seed. This is great snack with cup of tea. I like them with spiced mango or lemon pickle.
    5 from 1 vote
    Course Appetizer, Snack
    Cuisine Indian
    Servings 4 people

    Ingredients
      

    • ½ cup All purpose flour plain flour or maida
    • ½ cup whole wheat flour
    • 2 Tbsp Sooji fine semolina flour
    • ¾ tsp Salt
    • ¼ tsp Carom seeds ajwain
    • 2 Tbsp oil
    • â…“ cup water adjust as needed
    • Oil to fry

    Instructions
     

    • Mix flour, sooji, salt, carom seeds, and oil, and mix it with fingertips to get consistency of breadcrumb.
    • Add water as needed to make firm but smooth dough. Cover with damp cloth and set aside at least for ten minutes.
    • Knead the dough for another minute and divide in two equal parts.
    • Take each part of the dough and make a flat ball shape. Roll them into 9-inch circles and thickness of salted crackers.
    • Prick them with a fork all over the rolled dough, so the paras do not puff when frying.
    • Cut each of the rolled dough into about half inch wide and 2 inch long pieces. Note: you can cut them in your desire shape.
    • Heat the oil in a frying pan on medium heat.
    • The frying pan should have at least 1 ½ inch of oil. To check if the oil is ready, put a small piece of dough in the oil. The dough should make the oil sizzle and come up slowly.
    • Make sure to place just enough namak paras so you can turn them over easily when frying. Fry the namak paras until both sides are light golden-brown.
    • After namak paras come to room temperature they should become crisp.

    Notes

    • Namak paras can be stored for one month in airtight containers.
    • If the Namak paras are cooked on high heat, they will be soft.
    Keyword carom seed, mango, Namak Para, Pickle, Vegan
    Tried this recipe?Let us know how it was!
  • Cabbage Pizza

    Cabbage Pizza

    Cabbage Pizza

    Cabbage Pizza

    Cabbage Pizza is a nice twist to traditional pizza with touch of Indian spices as a fusion. Makes 2 medium pizzas. Pizzas are generally a favorite snack of all and is a nice appetizer
    5 from 1 vote
    Course Main Course
    Cuisine Fusion, Indian
    Servings 2 Medium Pizza

    Ingredients
      

    for the Dough:

    • 2 ¾ cup All Purpose flour Plain flour or Maida
    • 1 cup lukewarm water
    • 1 Tbsp dry active yeast
    • 3 Tbsp olive oil
    • 1 tsp salt
    • ½ tsp sugar

    for the White Sauce:

    • 2 Tbsp olive oil
    • 2 ½ Tbsp All Purpose flour Plain flour or Maida
    • ¾ cup milk
    • 1 tsp salt
    • ½ tsp black pepper

    for Cabbage Topping:

    • 3 cup sliced cabbage
    • ½ thinly sliced red bell pepper
    • 2 Tbsp chopped cilantro Green coriander
    • 2 chopped green chilies

    Instructions
     

    Making the Dough:

    • Dissolve yeast in lukewarm water and let it sit for about 20 minutes or until the yeast becomes frothy.
    • Add sugar, salt and oil to the flour and mix well.
    • Add the yeast water and make into a dough. The dough should be soft and a little sticky. Add more water if needed.
    • Cover the dough and let it sit for about four hours. The dough should be double in volume.
    • Knead the dough well using a little dry flour.

    Making White Sauce:

    • Heat the oil in a small heavy saucepan over low-medium heat.
    • Add the flour and cook until the flour changes into a light brown color.
    • Slowly add the milk, stirring constantly. Continue cooking slowly until it is smooth and thick. Add the salt and black pepper.
    • Making Cabbage Topping:
    • Mix the cabbage, bell pepper, cilantro, and green chilies with the white sauce.

    Making the Pizza:

    • Pre-heat the oven to 500 degrees, placing a pizza stone inside for about 30 minutes so the pizza stone will be hot.
    • Divide the dough in to two equal parts and roll into two 8 inch diameter pizzas.
    • Place over greased cookie sheets. Put about a half teaspoon of olive oil over the pizza. Evenly spread the cabbage mixture onto the pizza.
    • Slide the cookie sheet on the pizza stone and let it cook for about five minutes.
    • To make a crispy pizza crust, remove the pizza from the cookie sheet and place over the pizza stone.
    • Let it cook for about 7 minutes, or until the edges are golden-brown.
    Keyword Cabbage, Cheeseless, Flour, Fusion, Maida, Pizza
    Tried this recipe?Let us know how it was!
  • Spicy Namak Para

    Spicy Namak Para

    A plate of crispy Namak Para (savory fried snacks)

    Spicy Namak Para (Masala Paras)

    Spicy Namak Para is a crispy and savory snack that's perfect for the holiday season. Not only is this a popular snack, but it is also easy to make. This particular recipe is a twist on traditional Namak Paras with added spices to make it even more flavorful. You can always experiment with different variations by adding your choice of flavors! Spicy Namak Para taste especially delicious with a hot cup of chai. They also make for a simple but special homemade gift. It's also an easy road trip snack when traveling with your family! Hope you enjoy this recipe! This recipe is good for 10 people.
    3.50 from 4 votes
    Course Appetizer
    Cuisine Indian
    Servings 10 people

    Ingredients
      

    • 2 cup All Purpose Flour Maida
    • ¼ cup fine semolina sooji
    • 1 tsp salt
    • 1 tsp black pepper crushed, kali mirch
    • 1 tsp chili flakes lal mirch
    • 1 tsp cumin seeds jeera
    • 1 Tbsp dried fenugreek leaves Kasuri Methi
    • 4 Tbsp oil
    • ¾ cup chilled water approx

    Instructions
     

    • In a bowl mix all the dry ingredients well, all-purpose flour, sooji, salt, black pepper, red pepper, cumin seeds, and methi. Next add the oil mix it well.
    • Add the chilled water slowly, mixing with your fingers as you pour. Do not knead the dough. The dough should be soft. Cover the dough and let it sit for at least fifteen minutes.
    • Knead the dough and divide into two equal parts. Take each part of the dough and make a flat ball shape. Roll them into about 10-inch circles, it should not be very thin.
    • Prick them with a fork all over the rolled dough, on both sides. This helps paras not to puff while frying.
    • Cut each of the rolled dough into about 1/2-inch-wide and 3-inch-long pieces. Note: you can cut them in your desire shape.
    • Heat the oil in a frying pan on medium heat.
    • The frying pan should have at least 1-1/2 inch of oil. To check if the oil is ready, put a small piece of dough in the oil. The dough should make the oil sizzle and come up slowly.
    • Make sure to place just enough paras so you can turn them over easily when frying. Fry the paras until both sides are light golden brown. This should take about 8 minutes.
    • After Spicy Namak Paras come to room temperature they should become crisp.

    Notes

    Experimenting and making the recipes to your taste is the best part of cooking.
    Try different variations by adding your choice of flavors.
    Tried this recipe?Let us know how it was!
  • Palak Pakora

    Palak Pakora

    Six palak pakoras served with a bowl of tamarind chutney on a white plate.

    Palak Pakora (Crispy Spinach Fritters)

    Palak Pakoras are a crispy and flavorful snack, and quite possibly the tastiest compliment for your afternoon tea.
    Warning: These pakoras are highly addicting! Eat at your own risk!
    This recipe will serve 4.
    5 from 2 votes
    Prep Time 10 minutes
    Cook Time 10 minutes
    Course Appetizer, Snack
    Cuisine Indian
    Servings 4 people

    Ingredients
      

    • 2 cup packed spinach roughly chopped
    • 1 cup besan gram flour
    • 2 Tbsp corn starch
    • 2 tsp chili flakes adjust to taste
    • 2 tsp coriander crushed dhania
    • ½ tsp mango powder amchoor
    • ½ tsp cumin seeds jeera
    • ½ tsp salt
    • â…› tsp asafetida hing
    • 1 tsp oil

    Instructions
     

    • Combine all the dry ingredients, with spinach, besan, corn starch, coriander, cumin seeds, chili flakes, salt, mango powder, and asafetida in a bowl. Mix it well.
    • Add water as needed to make sticky dough.
    • Heat at least one inch of oil in a frying pan over medium high heat. To test, put one drop of batter in the oil. The batter should come up slowly.
    • Oil your palm lightly, take about 2 tablespoons of dough and roll them in patties, but not very thin. Make all the patties and put them over greased plate.
    • Drop the patties slowly in oil, do not overlap the pakoras. Fry the pakoras this will take three to four minutes per batch. Fry the pakoras, turning occasionally, until both sides are golden brown.
    • Repeat this process for the remaining batches.

    Notes

    They taste best when they are served hot. Palak Pakoras taste delicious specially when they are served with sweet and sour tamarind chutney, and hot cup of chai. You can also serve them as a chaat drizzling whipped yogurt, tamarind chutney and cilantro chutney. 
    If you have prepared them before, the best way to heat the pakoras fry them again or heat them in oven at 350 for about 10 minutes.
    Enjoy! And thank you
    Keyword Appetizer, Gluten Free, Homemade, Jain Food, No Garlic, No Onion, Sattvik Food, Snack, Spinach Fritters, Tasty, Tea Time Snack, Vegan
    Tried this recipe?Let us know how it was!