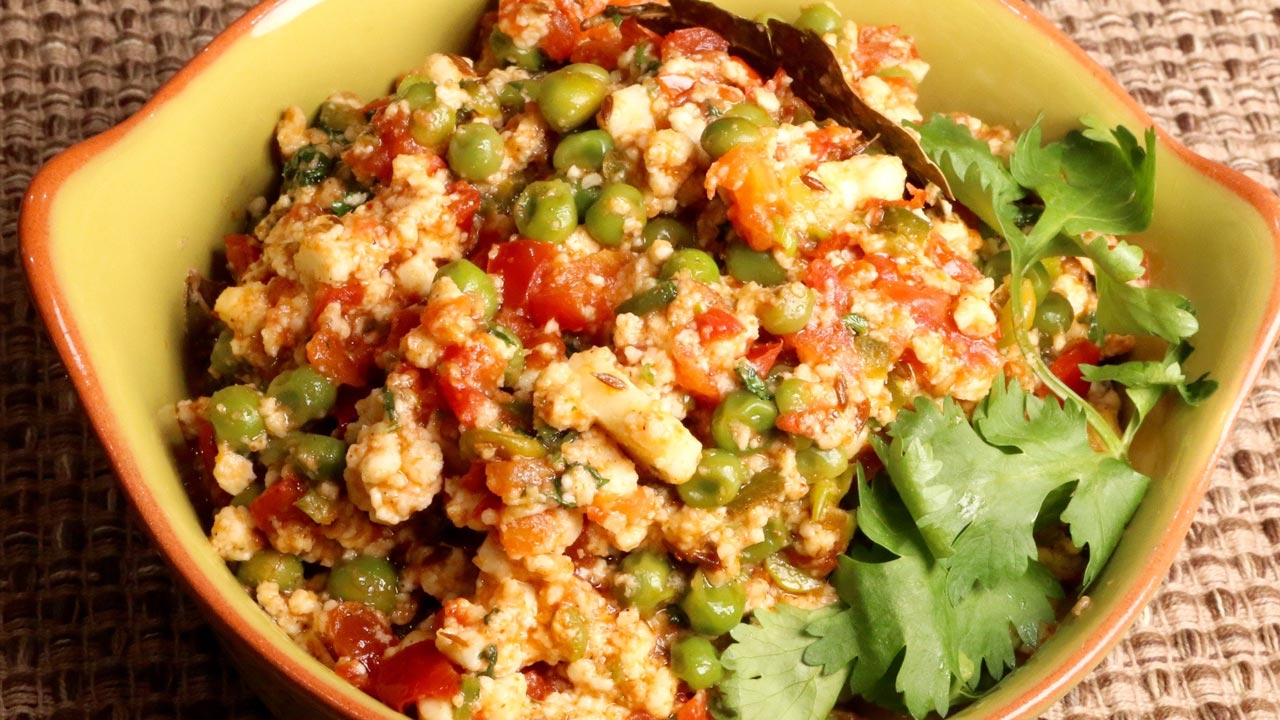
Search results for: “dal”

  • Paneer Bhurji

    Paneer Bhurji

    Paneer Bhurji

    Paneer Bhurji

    Paneer bhurji is a delightful and spicy paneer dish. Paneer bhurji is a quick and easy recipe to make, made from crumbled paneer simmered in spicy tomato gravy. Paneer bhurji tastes great with roti, paratha, or even with regular bread! This is also makes a good stuffing for dosas or vegetable Frankie rolls.
    5 from 1 vote
    Course paneer
    Cuisine Indian
    Servings 2 people

    Ingredients
      

    • 1 cup paneer cut in small pieces
    • 1 cup tomatoes chopped
    • 1/2 cup green peas, I am using frozen green peas
    • 2 tablespoons oil
    • 1/2 tsp cumin seeds (jeera)
    • 2 bay leaves
    • 1 tablespoon finely chopped green chilies
    • 2 teaspoon coriander powder (dhania)
    • 1/2 tsp chili powder
    • 1 teaspoon salt
    • 1/2 teaspoon sugar
    • 1/4 teaspoon garam masala
    • 2 tablespoons finely chopped coriander (dhania)

    Instructions
     

    • Soak the paneer in hot water with 1/4 teaspoon of salt for five minutes. Drain the water and crumbled the paneer. This process will make the paneer soft, if you are using the fresh paneer skip this step. Set aside.
    • Heat the oil in sauce pan over medium heat; after oil is moderately hot add cumin seeds.
    • After the seeds crack add green peas, and green chili stir for about one minute. Add tomatoes, coriander, salt, sugar and red chili powder, stir and mix well. Cover the pan and cook for 3-4 minutes till the tomatoes and peas becomes soft.
    • Add paneer stir and cook for 1-2 minutes. Don’t cook the paneer for a long time as paneer will lose the softness. If it is too dry add few spoons of water. Lastly add chopped coriander leaves to paneer bhurji and mix.
    • Serve paneer bhurji with rotis, plain parathas or with a toast.

    Notes

    Notes, if you are using the paneer bhurji for stuffing then don’t the water, bhurji should be dry in texture.
    Tried this recipe?Let us know how it was!

    Paneer Bhurji Recipe: Crafting the Perfect Indian-Style Dish

    Indulge in the savory goodness of vegetables sauteed paneer Bhurji, a quick & easy party recipe. This delightful, spicy dish features crumbled paneer simmered in a flavorful, gluten-free tomato gravy. Elevate your dining experience with this quick and easy paneer delight!

    Step 1: Soaking and Crumbling Paneer for Paneer Bhurji

    In the first phase of understanding how to make Paneer Bhurji, immerse the paneer in hot water with a quarter teaspoon of salt for five minutes. This crucial soaking process contributes to the softness of the paneer, a key aspect of the authentic paneer bhurji Indian style. Following this, carefully drain the water and proceed to crumble the paneer, enhancing the overall texture of the dish.

    Step 2: Sautéing Cumin Seeds and Building Flavor in Paneer Bhurji Recipe

    As you embark on the journey of preparing this delectable paneer bhurji Indian style, heat oil in a saucepan over medium heat. Once the oil reaches the desired temperature, introduce cumin seeds, infusing the dish with a distinct aroma. Let the seeds crackle, then add green peas and green chili, stirring for about a minute. This process forms the flavorful foundation of the paneer bhurji recipe.

    Step 3: Cooking Tomatoes, Spices, and Peas for Paneer Bhurji

    Continuing the exploration of how to make paneer bhurji, incorporate tomatoes, coriander, salt, sugar, and red chili powder into the pan. Thoroughly mix these ingredients to coat the vegetables, creating a harmonious blend of spices in your paneer bhurji Indian style. Cover the pan and allow the mixture to cook for 3-4 minutes, ensuring the tomatoes and peas reach a soft, succulent state.

    Step 4: Incorporating Paneer and Finalizing Paneer Bhurji Recipe

    Now, in the heart of the paneer bhurji recipe, gently introduce the crumbled paneer into the aromatic mixture. Stir it delicately, ensuring an even distribution throughout the dish. Cook for a brief 1-2 minutes, being mindful not to overcook the paneer as it might compromise its softness. If needed, add a few spoons of water to maintain the desired consistency. For the finishing touch, generously sprinkle chopped coriander leaves into the paneer bhurji Indian style, elevating the flavors to perfection.

    Step 5: Serving the Versatile Paneer Bhurji

    As you present your culinary creation, serve the paneer bhurji with rotis, plain parathas, or toast. The adaptability of this dish makes it a delightful addition to any meal. Whether enjoyed on its own or used as a stuffing, it is recommended to maintain a dry texture if you plan to utilize the paneer bhurji Indian style for stuffing purposes.

    If you liked the recipe of Paneer Bhurji you may also try: Spinach Kofta Curry, Urad Dal Kachori, Hara Bhara Kabab, Cocktail Green Peas Samosa & Paneer Makhani

  • Oat Dosa (Spicy Pancake)

    Oat Dosa (Spicy Pancake)

    Instant Oat Dosa

    (Spicy Pancake)

    Instant Oat dosa is an easy recipe that is perfect for busy families. Sometimes you want to make something that is easy and hassle-free and of course healthy.  Oat dosas are instant dosas and make a great breakfast or anytime snack. This gluten-free dish is made with oats, rice flour, yogurt, and a few spices. I am also adding cabbage and carrots for texture.  This will be a staple in my house.
    No ratings yet
    Course Bread
    Cuisine Indian
    Servings 2 people

    Ingredients
      

    • 1 cup quick oats
    • 1/2 cup rice flour
    • 1/2 cup yogurt whipped
    • 1/8 teaspoon asafetida
    • 1/2 teaspoon cumin seeds
    • 1 green chili finely chopped
    • 2 tablespoons cilantro finely chopped
    • 1 teaspoon ginger finely shredded
    • 1/3 cup cabbage shredded
    • 1/3 cup carrot shredded
    • 1/2 teaspoon salt
    • 1 cup water
    • 1-1/2 teaspoon ENO
    • 1-1/2 tablespoons oil

    Instructions
     

    • Grind oats to make fine powder. Add all the dry ingredients except ENO rice flour, asafetida, salt, and cumin seeds and mix it well. Notes: ENO is added just before making dosa.
    • Add yogurt mix, add water as needed to make batter consistency of dosa or pancake mix. Set aside for about fifteen minutes.
    • Add green chilies, cilantro, cabbage, and carrots mix it well.
    • Place a non-stick skillet over medium-high heat. Grease the skillet lightly. Test by sprinkling a few drops of water on it. The water should sizzle right away.
    • In a small bowl take about ½ cup of batter and add ¼ teaspoon of ENO mix it well batter will become a little frothy.
    • Pour the batter mixture into the skillet and spread evenly with the back of a spoon, about seven inches in diameter.
    • When the batter begins to dry, gently spread one teaspoon of oil over it. Wait about 30 seconds, then flip the dosa using a flat spatula.
    • Press the dosa lightly with the spatula all around to ensure even cooking, turning two to three times. The dosa should be golden brown on both sides.
    • Repeat for the remaining dosas.
    • Serve oat dosa with your choice of chutney, I like it with tomato chutney.
    Tried this recipe?Let us know how it was!

    Oats Dosa Recipe: Crispy and Healthy Dosas with a Nutritious Oats Twist 

    Dosa is a popular south Indian delicacy that looks like a crepe. It’s like a crisp and thin pancake made of rice and urad dal batter. Traditionally Dosa is served with sambar, aloo masala, and coconut chutney. It is an Indian crepe made usually through rice batter, but here we have experimented and made many alternative dosa such as Oat Dosa, Besan Dosa, Rava Dosa, Sorghand um Dosa. This preparation uses oats dosa and is a bread-based breakfast recipe that is vegan. The preparation entails skillfully combining pan techniques and manual dexterity to achieve the perfect bread cooked on non-stick skillets.

    1. Grind Oats to Make Fine Powder: Elevating Texture with Oats Dosa 

    Start the oats dosa preparation by grinding oats into a fine powder. This step not only enhances the nutritional profile but also contributes to the unique texture of the dosa. The combination of finely ground oats with other dry ingredients, excluding ENO, rice flour, asafetida, salt, and cumin seeds, ensure a harmonious blend of flavors. It’s essential to note that ENO is introduced just before making the dosa, adding a special touch to the preparation.

    1. Create the Dosa Batter: Blending Nutrients and Flavors with Oats 

    Building on the groundwork laid in the first step, proceed to create the dosa batter. Integrate yogurt into the dry mixture, adjusting the consistency with water to achieve a batter reminiscent of dosa or pancake mix. Allowing the batter to rest for fifteen minutes is a crucial step in enhancing the overall flavor profile. This brief resting period ensures that the oats absorb the flavors, resulting in a more palatable and delicious end product.

    1. Enhance with Vegetables: Burst of Colors and Nutrients in Oats Dosa 

    Take your oats dosa to the next level by introducing a medley of vegetables. Finely chopped green chilies, cilantro, cabbage, and carrots bring not only vibrant colors but also a variety of nutrients to the dosa. This step adds a delightful crunch and freshness, transforming the oats dosa into a visually appealing and nutrition-packed dish that is as wholesome as it is flavorful.

    1. Heat the Skillet: Perfecting the Cooking Surface for Oats Dosas 

    Achieving the ideal dosa requires a properly heated skillet. Place a non-stick skillet over medium-high heat and lightly grease it. To test readiness, sprinkle a few drops of water on the skillet – the water should sizzle right away. This ensures that the dosa cooks evenly and attains the desired crispiness while preventing sticking to the surface.

    1. Prepare the Frothy Batter: Enhancing Texture for Irresistible Oats Dosas 

    Before pouring the batter onto the skillet, take a small portion (about ½ cup) and introduce ¼ teaspoon of ENO. Mixing this well creates a frothy consistency in the batter, adding a light and airy texture to the dosa. This step is crucial for achieving the perfect balance between softness and crispiness in each bite.

    1. Spread the Batter: Crafting Perfectly Shaped Oats Dosas 

    Once the skillet is ready, pour the batter onto it, spreading it evenly with the back of a spoon to form a dosa of about seven inches in diameter. This step requires a bit of finesse to ensure an even thickness throughout the dosa, contributing to the overall enjoyable texture.

    1. Flip and Oil: Locking in Flavor with Precision 

    As the batter begins to dry, delicately spread one teaspoon of oil over the dosa. Waiting for about 30 seconds before flipping with a flat spatula ensures that the dosa achieves a golden brown hue on both sides. This careful process locks in the flavors and adds a subtle yet essential touch of crispiness.

    1. Ensure Even Cooking: Perfecting the Golden Brown Finish 

    To guarantee even cooking, lightly press the dosa with the spatula all around, turning it two to three times. This step is vital in achieving the desired golden brown color, indicating that the dosa is cooked to perfection. The interplay of textures, from the soft interior to the crispy edges, creates a delightful culinary experience.

    1. Repeat for More Dosas: Scaling Up the Oats Dosa Feast 

    The joy of oats dosa doesn’t end with just one. Repeat the cooking process for the remaining batter, creating a batch of these tasty dosas. This step allows you to share the wholesome goodness and unique flavors with family and friends, turning the dosa-making experience into a communal celebration of culinary delight.

    1. Serve with Chutney: Pairing Oats Dosa with Flavorful Companions 

    Finally, elevate your oats dosa experience by serving it with your choice of chutney. The versatility of oats dosa makes it a perfect companion for various chutney options. Whether you prefer the tanginess of tomato chutney or the spiciness of coconut chutney, the pairing enhances the overall dining experience, making each bite a harmonious blend of flavors. Enjoy this nutritious twist on a classic dish, savoring the delicious combination of oats dosa and flavorful chutneys.

  • Menu Suggestions for Lunch/Dinner

    What’s for lunch/dinner?

    This is a question most of us struggle with on a daily basis. When I ask my husband Alex what I should cook for our meals, his answer has been the same for the past 45 years! It’s that I should give him some choices and he will then select his preference. So I have decided to come up with some great, easy, and healthy choices for lunch and dinner. It’s a long time overdue and no more excuses! I would love to get your thoughts on these suggestions and if you find them helpful.
    Check out the below menu for one week’s worth of lunches/dinners. I have also provided some tips and suggestions to make it easy. It may be helpful to read the entire menu before and make a shopping list for the ingredients you need. Plan to do your shopping the day before you cook.

    Lunch Menu:
    These are great at home or pack in a lunchbox for the office.

    1. Chickpea Pulav with yogurt
    2. Yogurt Rice (this recipe is also good using leftover white rice)
    3. Vegetable Frankie (you may use the ready made tortillas and they taste good warm or cold.)
    4. Carrot Moong Dal Salad and Tomato Soup
    5. Quinoa Vegetable Pilaf

    For an informal lunch with friends:

    1. Aloo Paratha, Tomato Chutney, Matar Paneer, and Yogurt (it is easy to use the store bought paneer)
    2. You can also serve a simple salad sliced tomatoes and cucumber sprinkle with salt, black pepper, and lemon juice
    3. Lemonade will be great for summer

    Dinner:
    These are great everyday options for home.

    1. Vegetable Curry with plain rice and or Roti
    2. Spinach Pasta and Vegetable Soup
    3. Mixed Dal, Gajar Mattar, or Aloo Methi, Plain rice and Roti or Paratha
    4. Rajma and plain rice.
    5. Besan Puda (This is a super simple recipe that is good for breakfast, lunch or dinner)

    For a special get together, try the below:

    1. Appetizer: Papdi Chaat (You can make the Papdi in advance and it lasts for weeks, or you can fry uncooked tortillas cut in the Papdi shape. Remember, chutneys and yogurt should be always in fridge!)
    2. Masala Papad (You can grill the papads in advance and keep them in air tight container.)
    3. Drink: Mango Lassi
    4. Main Meal: Cabbage Kofta, Green Beans and Peas, Spinach Raita, rice, roti or Paratha (Kofta can be made in advance as they freeze well and can be stored for about a month. When you are ready to cook them, make the gravy, defrost the kofta and prepare like the recipe suggest.) (You can make extra Green Beans and peas as they make great sandwiches and Wrap with the leftovers)
    5. Dessert: Refreshing Fruit Cream is great for a summer dessert. Finish up with a hot cup of Chai Masala Tea.

    Additional Suggestions

    1. If you have chutneys ready in fridge, it is easy to plan some of the appetizers. I always have Tamarind and Hari Cilantro Chutneys in my fridge.
    2. I also have some condiments on hand to spice up my meals. Check out the list under chutneys / pickles as they have a longer shelf life and are easy to make.
    3. Plain Yogurt
    4. It is helpful to have some frozen vegetables in your freezer such as green peas, green beans, chopped spinach. I also freeze small cut pieces of paneer. Before using, put them in hot water.
    5. I like to have canned chickpeas and kidney beans on hand or you can boil a big batch of them and freeze them in small portions.
  • Bread Uttapam, South Indian Snack

    Bread Uttapam, South Indian Snack

    Bread Uttapam

    Bread Uttapam

    Uttapam is a popular South Indian dish. Traditionally uttapam is made with rice and lentil batter, which can be a long process. Bread Uttapam, on the other hand, is instant and easy to make. Not to mention it tastes delicious. Uttapam is a thick dosa, or pancake, with vegetables cooked over skillet. It tastes divine served hot and with a side of coconut chutney.
    No ratings yet
    Prep Time 15 minutes
    Cook Time 6 minutes
    Total Time 21 minutes
    Course Breakfast
    Cuisine Indian
    Servings 3 people

    Ingredients
      

    • 3 slice white bread
    • 3 tbsp sooji coarse samolina
    • 3 tbsp all-purpose flour maida, plain flour
    • 1/4 cup yogurt curd, dahai
    • 1 tsp salt
    • 1/4 tsp cumin seeds jeera
    • 1/4 cup bell pepper, finely chopped capsicum
    • 1/4 cup tomatoes finely chopped remove the seeds
    • 1 green chili finely chopped
    • 2 tsp ginger shredded adrak
    • 2 tbsp cilantro finely chopped hara dhania
    • 2 tbsp oil to cook

    Instructions
     

    • Remove the crest from bread and cut them in small pieces.
    • In a blender add bread, sooji, all-purpose flour, salt, yogurt, and water, and blend to a thick and smooth paste.
    • Take out the batter in a bowl and add the remaining ingredients, cumin seeds, bell pepper, tomatoes, ginger, green chili, and cilantro, mix it well. Batter should be thick in consistency add more water if needed, batter should not be too thick but should not be runny.
    • Heat the skillet over medium heat and lightly grease the skillet. Pour about 2 tablespoons of batter and spread consistency should be of thick pancake.
    • Pour little oil around uttapam. Let it cook for about 2 minutes and turn them over, bread uttapam should be golden brown from both sides and this should take about four minutes. Notes: do not cook on high heat, uttapam will not cook through.

    Notes

    Serve bread uttapam with your choice of chutney, I like to serve with coconut chutney or green cilantro chutney.
    Keyword Healthy Breakfast, South Indian Cuisine
    Tried this recipe?Let us know how it was!

  • Chakli (Crispy Rice Snack)

    Chakli (Crispy Rice Snack)

    Crispy Chakli

    Chakli (Crispy Rice Snack)

    Chakli a popular snack all throughout India. Chakli is a crispy and delicious snack that is prepared for holidays. It is perfect with a hot cup of Chai. In my opinion, chakli is a must-have munchie! Chakli is prepared many different ways using different pulses with rice.  I plan on making Chakli with rice flour and moong dal.
    No ratings yet
    Prep Time 20 minutes
    Cook Time 24 minutes
    Course snacks
    Cuisine Indian
    Servings 6 people

    Ingredients
      

    • 1 cup rice flour
    • 1/4 cup washed yellow moong dal
    • 1/4 cup all-purpose flour (maida, plain flour)
    • 2 tablespoons sesame seeds (til)
    • 1/2 teaspoon red chili powder
    • 1/4 teaspoon black papper
    • 1/2 teaspoon cumin seeds (jeere)
    • 1/8 teaspoon asafetida (hing)
    • 1/4 teaspoon turmeric (haldi)
    • 1 teaspoon salt
    • 1 teaspoon lemon juice
    • 2 tablespoons hot oil
    • Approx., 1/4 cup hot water use as needed
    • Oil to fry

    Also need chakli maker, available in Indian grocery stores

    Instructions
     

    • Mix all the dry ingredients in a bowl rice flour, all-purpose, sesame seeds, chili powder, black pepper, cumin seeds, asafetida, turmeric, and salt. Set aside.
    • Cook the moong dal with 2 cups of water over medium high heat till it is very soft, and mushy, if needed add more water.
    • Add hot dal to rice flour mix and mix with spoon, add lemon juice, and hot oil, and mix it well. First use the spoon to mix because mix will be quite hot.
    • Add hot water as needed to make soft and firm dough. Cover the dough and set aside for five minutes.
    • Knead the dough well. Divide the dough into 3 parts and roll them into long rolls. Put one of the roll into chakli maker, and close.  Press the chakli maker, making the chackli into spiral’s (roll them 3 to 4 times) over flat plate.
    • Heat the oil in a frying pan over medium heat, frying pan should have about one inch of oil. Oil should be moderately hot. Put few chaklies at a time just enough to cover the surface of the oil.
    • Fry them both sides until they are light brown, this should take 4 to 5 minutes.
    • Serve them after they cool off so chaklies are nice and crispy. Or store them in air tight container for later use.

    Notes

    Notes
    1. If dough is too soft add little more rice flour.
    2. If they are braking it is ok don’t worry still it will taste great, need some practice.
    Tried this recipe?Let us know how it was!

  • Diwali Menu

    Deciding on the perfect menu for the upcoming holiday of Diwali can be challenging! I have been trying to decide the menu for a Diwali party I am hosting for the last couple of days. It’s the time of year to indulge in delicious and tasty food, without a regard for calories! This year I am leaning towards a very traditional menu. I would love to hear your thoughts and suggestions about this menu.

    To start out the evening, I would like to serve:

    • Crispy Spinach Pakoras
    • Dhokla with Hari Cilantro chutneys
    • Dahi Vadas


    My main courses will include:

    • Urad Dal Puri, with Spicy Squash
    • Potato Curry with Yogurt Gravy
    • Bhindi Masala
    • Raita
    • Methi Chutney


    Finally, for dessert, I would like to serve:

    •  Ras Malai
    • Moong Dal Halwa


    I know this is a very big menu so I need to start making some preparations now!

    Let me know what you think? Does this traditional menu sound good to you, or do you think I should incorporate some non-traditional items as well?


  • Contest 2014 September Winners

    There were many many sandwich recipes received and it was definitely a tough decision to make. I went through all of them and these are the five most complete and best recipes. Below are the winners this month and the top five entries. Congratulations to all participants:

    1st Place: Coconut Sandwiches by Sudha

    2nd Place: Baked Chickpea Cutlet and Curried Cream Cheese Sandwiches by Adelina Srinivasan

    Congratulations to both of you!!

    Coconut Sandwiches Recipe by Sudha by Sudha

    Baked Chickpea Cutlet Sandwich by Adelina Srinivasan

    Surprise Door Sandwich by Kanwaljeet Chhabra

    Pita Sandwich by Sonal

    Open-faced Grilled Feta Sandwich by Priscilla

    Thank you to everyone else that also participated in the contest:
    • Hillary Condon
    • Linsy Patel
    • Ruchi x
    • saira rashid
    • VINITA CHAWLA
    • Flora Sharma
    • Briana
    • Manjula Bharath
    • Sonal
    • SONAL GAKHAR
    • Swetha
    • Pratima
    • Clarida James
    • Pallavi Mitul Dalwadi
    • Mayuri Bhanushali
    • Najla Sabir
    • Shilpi
    • Hidemi Walsh
    • Umayal Venkatachalam
    • amulya
    • Gurpreet Kharay
    • Ramya
    • Hema Rao
    • swathi amarendra
    • Gopal R. Rao
    • Indira
    • Shruti J
    • Jodi Taffel
    • Sowmya Madhavan
    • Kalpa krishnan
    • Kanwaljeet Chhabra
    • Jagruti Vyas
    • KANIKA KHANNA
    • Sabrin Osman Sattar
    • Sudha
    • Namratha
    • Geeta Bafna
    • Jayshree Navik
    • Shruti B Parekh
    • Shilpi Srivastav
    • Wardah
    • Adelina Srinivasan
    • Jyothi Gullapalli
    • Savithri
    • Dimpi Jain
    • Sonakshi srivastava
    • Priscilla
    • Carly Brown
    • Shreetanvi
    • Tanu Srivastava
    • Manjusha Praveen
    • Neeta Pai
    • Deepaviji
    • Priyadarshini Behera
    • Shubha
    • Nisha
    • Vani Lohit
    • Mahima Arampady
    • Krisha Parikh
    • Shilpi
    • SONALI BIRLA
    • hafsah haleem
    • Mifra Haleem
    • Neeru Goel
    • Sunita Raghav
    • Rameshwari Bansod
    • poulomee sinha
    • Julie DeMatteo
    • J. Emanuel
    • Divya Ravindran
    • Anita Kataria
    • Anu Kollon
    • Rajesh Karthikeyan
    • Kinjal Shah
    • R. Smriti Iyer
    • Rehana Khambaty
    • BALA JYOTHI R
    • Praveena
    • Muthu shanmuga sundari.R
    • karmafreechewy
    • Roshni kushalani
    • Bhavesh Jaglan
    • Archana
    • Paula Arnas
    • Gia
    • Sandhya Dinesh Tharayil
    • Nithin Shanbhogue
  • Bread Dahi Vada

    Bread Dahi Vada


    Bread Dahi Vada

    Bread Dahi Vada

    Bread dahi vada is a quick and delicious version of the original dal lentil vadas.  There is no soaking of lentil required, no grinding and no frying required; this is an instant version of dahi vada. This can be served as a snack or appetizer.
    5 from 1 vote
    Prep Time 15 minutes
    Cook Time 20 minutes
    Course Appetizer
    Cuisine Indian
    Servings 4 people

    Ingredients
      

    • 8 slices of white bread
    • 2 tablespoon oil

    For Filling

    • 3 tablespoons shredded coconut; I am using frozen shredded coconut, available in Indian grocery stores
    • 1/4 teaspoon salt
    • 2 teaspoons ginger finely chopped
    • 2 teaspoons green chili finely chopped
    • 2 teaspoons sliced almonds

    For Serving

    • 1-1/2 cups yogurt (curd, Dahi)
    • 1/4 cup tamarind chutney check the recipe on my website
    • 1/2 teaspoon salt
    • 1/2 teaspoon red chili powder 

    Instructions
     

    • Mix all the ingredients for filling coconut, salt, ginger, green chili, and almonds, set aside.
    • Cut bread slices into rounds, I am using 3” cookie cutter.
    • Lightly wet one side of the bread and put 2 teaspoons of filling in center and fold the bread in half, forming semi-circle. Press the edges together with your fingers. Make sure the edges are sealed.
    • Continue filling rest of the vadas in the same manner.
    • Brush the vadas both side lightly with oil, and toast them in toaster oven just enough that bread has become light golden brown. You can also bake them in oven.
    • Serving the vadas
    • Whip the yogurt until smooth. Add a little milk as needed to make the consistency similar to pancake batter or lassi. Add the salt, adjust to your taste.
    • When ready to serve soak them in water for one minute and squeeze the vadas lightly between your both palms.
    • Dip them in yogurt one at a time and arrange them in serving plate, sprinkle the red chili powder to your taste, it is optional, drizzle the tamarind chutney and few pieces of cilantro, and gives a nice color.
    • Bread dahi vadas are ready to serve.
    Tried this recipe?Let us know how it was!

    Bread Dahi Vada Recipe

    Bread Dahi Vada is a delightful twist to the traditional dahi vada, offering a quicker and simpler way to enjoy this beloved Indian snack. Bread dahi vada is perfect for those who crave the flavors of dahi vada but prefer a hassle-free preparation method. This recipe is a fusion of textures and flavors, combining the softness of bread with the tanginess of yogurt and the spiciness of chutneys. Here’s how to make bread dahi vada at home.

    Step 1: Preparing the Bread

    To begin making bread dahi vada, start by preparing the bread slices. Trim the edges of the bread slices and then cut them into desired shapes. You can cut them into squares, rectangles, or use cookie cutters to create fun shapes like stars or hearts. This step ensures that the bread absorbs the yogurt mixture well, resulting in soft and flavorful vadas.

    Step 2: Soaking the Bread

    Once you’ve cut the bread into desired shapes, soak them in lukewarm water for a few seconds. Ensure that the bread slices are fully submerged in water to soften them. This step is crucial as it allows the bread to absorb moisture, making it easier to shape into vadas later. Squeeze out excess water from the soaked bread slices gently, being careful not to break them.

    Step 3: Preparing the Yogurt Mixture

    The next step in making bread dahi vada is to prepare the yogurt mixture. In a bowl, whisk fresh yogurt until smooth and creamy. Add a pinch of salt and sugar to the yogurt and mix well. The yogurt should have a balanced flavor, with a hint of sweetness to complement the savory elements of the dish. You can adjust the seasoning according to your taste preferences.

    Step 4: Assembling the Bread Dahi Vada

    Now it’s time to assemble the bread dahi vada. Take each soaked bread slice and gently squeeze out any remaining water. Place the squeezed bread slice on a serving plate or platter. Spoon a generous amount of the prepared yogurt mixture over the bread slice, covering it completely. Ensure that the yogurt coats the bread evenly, imparting its tangy flavor to every bite.

    Step 5: Garnishing the Bread Dahi Vada

    After assembling the bread dahi vada, it’s time to garnish it with various toppings and chutneys. Drizzle sweet tamarind chutney and spicy green chutney over the vadas, adding layers of flavor and heat. Sprinkle a pinch of chaat masala and roasted cumin powder on top for an extra burst of taste. Garnish with finely chopped cilantro leaves and pomegranate seeds for a vibrant and refreshing touch.

    Tips for Making Perfect Bread Dahi Vada:

    • Use Fresh Bread: Opt for fresh bread slices as they absorb moisture better, resulting in softer vadas.
    • Soak Bread Just Right: Ensure that you soak the bread slices for the right amount of time. Over-soaking can make them mushy, while under-soaking can make them dry.
    • Adjust Seasonings: Taste the yogurt mixture before assembling the vadas and adjust the seasonings according to your preference. You can add more salt or sugar as needed.

    Variations of Bread Dahi Vada:

    • Stuffed Bread Dahi Vada: For a flavorful twist, you can stuff the soaked bread slices with a mixture of chopped nuts, raisins, and spices before coating them with yogurt.
    • Bread Dahi Vada Chaat: Turn bread dahi vada into a delightful chaat by adding tomatoes, sev, and a drizzle of mint chutney on top.

    Benefits of Bread Dahi Vada:

    • Quick and Easy: Bread dahi vada is a quick and easy recipe that can be prepared in minutes, making it perfect for busy days or sudden cravings.
    • Lighter Option: Unlike traditional dahi vada made with lentils, bread dahi vada is lighter on the stomach, making it suitable for those looking for a lighter snack option.

    FAQs (Frequently Asked Questions) about Bread Dahi Vada:

    Can I use whole wheat bread for this recipe?

    • Yes, you can use whole wheat bread instead of white bread for a healthier twist. However, keep in mind that whole wheat bread may have a denser texture.


    Can I prepare bread dahi vada in advance? (H2) 

    • While it’s best to assemble bread dahi vada just before serving to maintain the texture of the bread, you can prepare the components in advance and assemble them when ready to serve.

    For more delightful Indian recipes, more Indian recipes, appetizers, beverages, and desserts, be sure to check out the following links on Manjula’s Kitchen. Here are some links to recipes on Manjula’s Kitchen official website:

    Paneer Tikka Masala Recipe

    Chana Chaat (Spicy Chickpea Salad) Recipe

    Pav Bhaji (Spicy Vegetable Hash with Buns) Recipe

    Raj Kachori (Crunchy Chaat) Recipe

    Vegetable Biryani Recipe

    These recipes should offer you a flavorful experience straight from Manjula’s Kitchen.

  • Contest 2014 August Winners

    I know it was tough not using any grains for the contest, but despite that, there were many good recipes submitted. I went through all of them and these are the five most complete and best recipes. Below are the winners this month and the top five entries. Congratulations to all participants:

    1st Place: Nariyal Mewa Paak (Dry Fruit Delight) by Sonika Maheshwari

    2nd Place: Purple Cabbage, Eggplant and Shiitake Mushroom dumplings by Cecilia

    Congratulations to both of you!!

    Nariyal Mewa Paak (Dry Fruit Delight) by Sonika Maheshwari

    Purple cabbage, eggplant and shiitake mushroom dumplings by Cecilia

    Sweet Potato Laddu by Aarti Sharma

    Sago Vadas by Nandhini

    Pineapple Berry Kulfi Duo by Namratha

    Thank you to everyone else that also participated in the contest:
    • Nisha Sharma
    • Sushmasinha
    • Vanisree
    • Neha Naithani Raturi
    • Ramyasri Kapuganti
    • Jhalak Maratha
    • Gayathri Vikkraman
    • Navita Mehra Jassal
    • Soma Mandal
    • Mifra Haleem
    • Anu Kollon
    • Manjaree Banerjee
    • Hidemi Walsh
    • Shruti J
    • (http://cookingwithsj.com)
    • AFREEN SAJID
    • Mahesh Babu Jonnavittula
    • prince soni
    • Aishwarya
    • Jagruti Vyas
    • Meera Patwari
    • Urvi Sharma
    • Radhika Paranjape
    • Anu Saxena
    • Melanie Booth
    • Priyamvada
    • Supriya
    • Dimple Mota
    • Harini
    • Jessica M.
    • Ranjani Vijayakumar
    • Shital
    • Vidya
    • Divya Ravindran
    • Kaleena Soorma
    • RAZIYA BANU M. LOHANI
    • Srividhya Gopalakrishnan
    • Kanu
    • Nisha
    • Ankita Agarwal
    • Manisha Chhabra
    • Swathi Mudigonda
    • Tanvi’s Kitchen
    • Fhami
    • Sonakshi Srivastava
    • Nidhi Saxena
    • Priyanka Lodha Patwari
    • Sindhu Umashankar
    • Wai Leng Loke (Kelly)
    • Priya Sayeesh
    • Sahaana
    • Adelina Srinivasan
    • Ritika Tayal
    • Manju Agarwal
    • Edward Higgins
    • Mahima Arampady
    • Kritika Aggarwal
    • Asha
    • Vemala
    • Shanmugadevi A
    • Rangadevi
    • Kiran Randhawa
    • Saurabh Aggarwal
    • Nibedita
    • Meghna Doijode
    • Sujatha S
    • Shruti Soumya Panigrahi
  • Kulcha (Punjabi Flatbread)

    Kulcha (Punjabi Flatbread)

    Kulcha - Punjabi Flatbread

    Kulcha (Punjabi Flatbread)

    Kulcha is a soft textured flatbread; this is very popular in North Indian recipe. They can be made in a tandoor (clay oven) or on a skillet. I am using a skillet. Traditionally kulchas are served with spicy chole (chick peas). This delicious combination is known as "Chole kulcha".  This is also another popular street food.
    5 from 1 vote
    Course Bread
    Cuisine Indian
    Servings 2 people

    Ingredients
      

    • 1 cup of all purpose flour (plain flour or maida)
    • 1/2 teaspoon baking powder
    • 1/4 teaspoon baking soda
    • 1/2 teaspoon salt
    • 1/2 teaspoon sugar
    • 1 tablespoon oil
    • 2 tablespoon yogurt (curd or dahi)
    • Approx. 1/4 cup milk use as needed

    Also need

    • 1/4 cup of all purpose flour for rolling
    • 1/2 teaspoon nigella seeds (kalaunji)
    • 1 tablespoon cilantro chopped (hara dhania)
    • 1 tablespoon clarified butter, ghee

    Instructions
     

    • In a bowl mix all the dry ingredients, flour, baking powder, baking soda, salt, and sugar, and sieve the flour to make sure even mixing.
    • Add oil and yogurt to the flour and mix it well, add milk as needed to make soft dough. Dough should be soft but not sticking to hand. Knead the dough to make smooth and pliable.
    • Cover the dough and let it sit for about 2 hours.
    • Knead the dough for few seconds and divide into four equal parts, roll them into patties. Take one patty press it in dry flour from both sides and roll in about 6” circle, if dough  start sticking to the rolling pin or rolling surface dust little more dry flour.
    • Heat the skillet (iron skillet works the best) on medium heat. Skillet should be moderately hot. Wipe the skillet with few drops of oil.
    • Place the kulcha over skillet. Sprinkle few drops of water. Sprinkle few nigella seeds and little cilantro over the kulcha while kulcha is still wet, and press it with the spatula.
    • When the kulcha start to change color and start bubbling flip it over. There will be some golden brown spots. Wait about a minute and flip it over again.
    • Kulcha should have golden brown spots from both sides. Kulcha should not be cooked on high heat otherwise it will not cook through.
    • Kulcha is ready, butter the kulcha before serving.

    Notes

    Serving Suggestions
    Traditionally kulchas are served with punjabi chole or serve with any rich gravy based side dish like palak paneer or dal makhani.
    Tried this recipe?Let us know how it was!

  • Handvo – Baked Spicy Lentil Cake

    Handvo – Baked Spicy Lentil Cake

    Handvo Baked Spicy Lentil Cake

    Handvo – Baked Spicy Lentil Cake

    Handvo is a popular Gujrati snack. This is a baked, spicy lentil cake made with rice and different lentils fermented batter mixed with spices. This is served with chutney. Handvo is crisp outside and soft inside.
    I have many requests for this recipe and decided to give a try. Finely after trying few times I was happy with my last trial. Now it is the time for me to try out this recipe with friends including friends from Gujrat as they were asking for the recipe. I said wow, so here is the recipe. This is a healthier option to other fried and oily snacks and its a north indian recipe that would be loved by all.
    No ratings yet
    Course snacks
    Cuisine Indian
    Servings 8 people

    Ingredients
      

    • 1 cup rice
    • 1/4 cup chana dal
    • 1/4 cup curad dal split with skin
    • 1/4 cup toor dal
    • 1 teaspoon turmeric
    • About 1 inch piece ginger chopped
    • 1-2 green chili adjust to taste
    • 1-3/4 teaspoon salt
    • 2 teaspoon sugar
    • 1/8 teaspoon asafetida
    • 1/2 cup yogurt
    • 2 teaspoon oil
    • 1 cup laucki shredded (opo squash, bottlegourd, doodhi)
    • 1 teaspoon lemon juice
    • 1 teaspoon Eno fruit salt

    For Seasoning

    • 1 tablespoon oil 1 teaspoon
    • 1 teaspoon mustard seeds
    • 1/8 teaspoon asafetida
    • 1 tablespoon sesame seeds

    Also need

    • 2 teaspoon oil to grease the baking pan
    • 8×8 baking pan, for this recipe I prefer glass baking pan

    Instructions
     

    • Wash and soak rice, chana dal, toor dal, and urad dal in about four cups of water for at least four hours.
    • Drain the water and blend soaked rice, lentil, ginger, green chili lightly coarse texture, (try not to use any water). I prefer to use food processor, add yogurt, turmeric, salt, sugar and asafetida, blend it again for few more seconds. Transfer the dal mix into a bowl and let the mix ferment for about 10 to 12 hours.
    • Add the opo squash, 2 tablespoons of oil, lemon juice to the fermented dal mix and mix it well. Add ENO to the mixture and mix, this will make the handvo mix light and fluffy.
    • Grease the 8×8 baking pan generously and pour the handvo mix into the greased pan. Tap the pan; it will help spreading the mix evenly.
    • Sprinkle the sesame seeds over the handvo batter.
    • Heat the oil for seasoning in a small pen over medium heat, after oil is moderately hot add the mustard seeds and asafetida as mustard seeds crack, turn off the heat.
    • Drizzle the seasoning over the top of the sesame seeds.
    • Cover the pan with aluminum foil and place the pan on middle oven rack and bake at 350 degree F, preheated oven for 20 minutes.
    • Remove the foil and bake for another 20 minutes until top of the handvo is light golden brown or until knife inserted in center of the cake comes out clean.
    • Let the handvo cool off for about 15 minutes. Cut them in sixteen pieces. Handvo is ready to serve.
    Tried this recipe?Let us know how it was!

  • Dabeli Spicy Potato Sandwich

    Dabeli Spicy Potato Sandwich

    Dabeli Spicy Potato Sandwich

    Dabeli Spicy Potato Sandwich

    Dabeli is a popular snack on the go, with street vendor in Mumbai. Pav (small burger buns) filled with spicy potatoes and topped with peanuts, chutney, fine sev and pomegranate. Enjoy this delicious sandwich;
    No ratings yet
    Course sandwich
    Cuisine Indian
    Servings 4 people

    Ingredients
      

    Spice Mix

    • 1 red chili dry
    • 1 teaspoon coriander (dhania) seeds
    • 2 cloves (laung / lavang)
    • 1/2 inch cinnamon (dalchini)
    • 1/2 teaspoon cumin (jeera) seeds
    • 4 black pepper

    Filling

    • 1 cup potato boiled and mashed (aloo)
    • 2 tablespoons oil
    • 1/2 teaspoon cumin (jeera) seeds
    • 1/2 teaspoon salt
    • Spice mix which we prepared that should be about 1 tablespoon
    • 1 tablespoon tamarind paste (imli)
    • 3 teaspoons sugar
    • 1/2 cup water

    Also Need

    • 4 buns
    • 2 tablespoons butter for cooking

    To Serve

    • 1/4 cup roasted and crushed peanuts
    • 1/4 cup fine sev available in Indian grocery stores
    • 1/4 cup pomegranate (anar) seeds, if not available red or green grapes cut into small pieces
    • 3 tablespoons cilantro chutney (dhania chutney)

    Instructions
     

    • For Dabeli Masala: roast all the ingredients red chili, coriander, cloves, cumin seeds, cinnamon and black pepper, in a small pan on the medium heat for two minutes, spices will become very aromatic. Grind the spices to fine powder. This should make about one tablespoon.
    • For Filling: heat the oil in pan on medium heat moderately. Add cumin seeds when seeds crack add potatoes spice mix, salt and tamarind paste, mix it well.
    • Add about half cup of water mix it and bring to boil, cook on low heat for about two minutes. Mix should be consistency of thick paste. Set aside.

     How to Proceed

    • Slice the buns into halves and toast the buns over skillet on medium heat using little butter both sides.
    • Over one half of the bun put about ¼ cup of the filling, top it with chutney, pomegranate, peanuts and fine sev (you can find in Indian grocery stores), sandwich with the other half of the bun.
    Tried this recipe?Let us know how it was!

    Dabeli Recipe: A Spicy Potato Sandwich 

    Dabeli is a beloved Indian street food that tantalizes taste buds with its spicy, sweet, and tangy flavors. Originating from the state of Gujarat, dabeli has gained popularity across the country for its unique taste and satisfying texture. This dabeli recipe offers a delightful culinary journey, combining aromatic spices, creamy potatoes, crunchy peanuts, and a medley of chutneys sandwiched between soft buns. Let’s delve into the art of making this irresistible dabeli.

    Step 1: Making the Dabeli Masala 

    To begin, let’s prepare the dabeli masala. In a dry skillet over medium heat, roast the coriander seeds, cumin seeds, cloves, cinnamon stick, dried red chilies, fennel seeds, and peppercorns until fragrant. Allow the spices to cool, then grind them into a fine powder using a spice grinder or mortar and pestle. This aromatic dabeli masala forms the heart of the dabeli’s flavorful filling.

    Step 2: Preparing the Potato Filling 

    Next, let’s create the savory potato filling. Heat oil in a pan over medium heat and add mustard seeds. Once the mustard seeds splutter. Now, incorporate the mashed potatoes into the pan along with the prepared dabeli masala. Mix well to ensure the potatoes are evenly coated with the spices. Drizzle in the tamarind chutney for a hint of tanginess and season with salt to taste. Allow the filling to cook for a few minutes until the flavors meld together beautifully.

    Step 3: Assembling the Dabeli 

    Now comes the exciting part – assembling the dabeli sandwiches! Slice the burger buns in half and lightly toast them with a smear of butter on a hot griddle until golden brown. Spread a generous layer of the prepared potato filling onto the bottom half of each bun. Sprinkle roasted peanuts, pomegranate seeds, and chopped coriander leaves on top for added crunch and freshness. Drizzle a little more tamarind chutney over the filling for an extra burst of flavor. Finally, cover the sandwiches with the remaining bun halves and press gently to secure the layers.

    Step 4: Serving and Enjoying 

    Once assembled, dabeli sandwiches are ready to be served and savored! For the authentic street food experience, garnish each sandwich with a generous sprinkle of sev – crispy chickpea flour noodles that add a delightful crunch. Serve dabeli sandwiches hot with extra chutneys on the side for dipping, if desired. These irresistible treats are perfect for picnics, parties, or simply as a satisfying snack any time of day.

    Variations and Tips: 

    • For a twist on the classic recipe, try substituting the potato filling with paneer (Indian cottage cheese) or mixed vegetables for a vegetarian option.
    • Experiment with different types of chutneys, such as mint chutney or to customize the flavor profile according to your preference.
    • To make dabeli spicier, add chopped green chilies or a dash of chili powder to the potato filling.
    • For a richer taste, spread a layer of butter on the toasted buns before assembling the sandwiches.

    Benefits of Dabeli: 

    • Dabeli is a wholesome snack that provides energy and satisfies hunger cravings, making it ideal for a quick meal or on-the-go snack.
    • Potatoes, the main ingredient in dabeli, are a good source of carbohydrates, fiber, and essential nutrients like vitamin C and potassium.
    • The combination of spices in dabeli masala not only enhances the flavor of the dish but also offers various health benefits, including aiding digestion and boosting metabolism.

    FAQs (Frequently Asked Questions):

    Q: Can I make dabeli masala in advance?

    A: Yes, you can prepare dabeli masala in large batches and store it in an airtight container for future use. This allows for quick and convenient assembly whenever the craving strikes.

    Q: Can I adjust the spice level of dabeli according to my taste preferences?

    A: Absolutely! Feel free to adjust the amount of dabeli masala or add more/less chili powder to suit your preferred spice level. You can also control the heat by choosing mild or spicy chutneys.

    Other Recipes on Manjula’s Kitchen (H2)

    If you’re looking to explore more Indian recipes, appetizers, beverages, and desserts, be sure to check out the following links on Manjula’s Kitchen. Here are some links to recipes on Manjula’s Kitchen official website:

    Paneer Tikka Masala Recipe

    Chana Chaat (Spicy Chickpea Salad) Recipe

    Pav Bhaji (Spicy Vegetable Hash with Buns) Recipe

    Raj Kachori (Crunchy Chaat) Recipe

    Vegetable Biryani Recipe

    These recipes should offer you a flavorful experience straight from Manjula’s Kitchen.

  • Tomato Rice (Pulao)

    Tomato Rice (Pulao)

    Tomato Rice (Pulao)

    Tomato Rice (Pulao)

    Tomato rice or pulao has a South Indian flair as I have used sambar powder in this recipe. Samber powder is a spice mix used in many South Indian dishes. It has a spicy and tangy flavor. This flavor combined with tomato and rice taste great! This dish will also make a nice lunch box meal.
    5 from 1 vote
    Course rice
    Cuisine Indian
    Servings 3 people

    Ingredients
      

    • 1 cup rice
    • 3 tomatoes chopped, will make 1-1/2 cup chopped tomatoes
    • 3 tablespoons oil
    • 1/4 cup raw shelled peanuts
    • 1 teaspoon mustard seeds
    • 1 green chili chopped
    • 1/4 teaspoon turmeric
    • 3 teaspoons samber powder, available in Indian grocery store
    • 1-1/2 teaspoo n salt 
    • 1/4 cup cilantro (hara dhania) chopped
    • 2 cups of water

    Instructions
     

    • Wash and soak the rice in about 3 cups of water for at least 15 minutes. Drain the water and set aside.
    • Heat the oil in a saucepan over medium heat. When moderately hot, add mustard seeds.
    • When the seeds cracks add peanuts and stir fry for one minute until peanuts are lightly golden brown.
    • Add about 1 cup chopped tomatoes, green chili, turmeric, sambar powder, salt and cilantro, cook until tomatoes are tender. This should take about 2 minutes.
    • Add rice and 2 cups of water mix and bring it to boil, lower the heat to low and cover the pen. Let it cook for about 18-20 minutes. Cook until rice is soft and water has evaporated.
    • Stir the rice gently and add the remaining tomatoes stir gently, cover the pan and let it cook for 2 more minutes.
    • Serve rice by it self or with yogurt.
    Tried this recipe?Let us know how it was!

    Delicious Tomato Pulao Recipe: How to Make Tomato Pulao 

    Tomato pulao is a gluten free, flavorful, kid friendly and aromatic rice dish originating from Indian cuisine. It is made by cooking rice with a mixture of tomatoes, spices, and other ingredients. Typically, the dish begins by tempering mustard seeds and peanuts in hot oil, followed by adding chopped tomatoes, green chilies, turmeric, sambar powder, salt, and cilantro.

    1. Soaking Rice for Flavorful Tomato Rice Dish 

    Embark on the journey of making tomato pulao by ensuring that the rice is clean and ready for cooking. Begin by thoroughly washing the rice to remove any impurities, ensuring a clean and pristine base for your dish. Once washed, soak the rice in about 3 cups of water for at least 15 minutes. This crucial step helps to soften the rice grains, allowing them to cook evenly and absorb the rich flavors of the tomato pulao recipe. After soaking, drain the water and set the rice aside, eagerly awaiting its transformation into a delicious and aromatic dish of tomato pulao rice.

    1. Tempering Oil and Stir-Frying: Enhancing Flavor in Tomato Pulao Rice

    In a saucepan heated over medium heat, initiate the flavor infusion process by adding oil and mustard seeds. Allow the oil to heat up to a moderate temperature, then add the mustard seeds and let them crackle, releasing their aromatic essence. Once the mustard seeds crackle, introduce peanuts to the pan and stir-fry for about a minute until they turn lightly golden brown. This step adds a delightful crunch and nutty flavor to the tomato pulao, elevating its overall taste and texture to new heights.

    1. Cooking Tomato Mixture: Infusing Flavors into Tomato Pulao Recipe 

    The heart of any tomato pulao recipe lies in its flavorful base. To create this base, add chopped tomatoes, green chili, turmeric, sambar powder, salt, and cilantro to the saucepan. Allow the mixture to cook until the tomatoes are tender, typically taking about 2 minutes. These flavorful ingredients work in harmony to infuse the rice with a burst of deliciousness, setting the stage for a mouthwatering tomato pulao experience that will tantalize your taste buds and leave you craving for more.

    1. Simmering Rice: Perfecting Tomato Rice Pulao 

    Once the tomato mixture has cooked to perfection, it’s time to introduce the star ingredient – the soaked and drained rice. Add the rice to the saucepan along with 2 cups of water, ensuring that everything is mixed well to distribute the flavors evenly. Bring the mixture to a gentle boil, then reduce the heat to low, cover the pan, and let the rice simmer for about 18-20 minutes, or until it becomes soft and the water has evaporated. After cooking, gently stir the rice and add the remaining tomatoes, incorporating them into the dish with care. Cover the pan once again and let it cook for an additional 2 minutes to ensure that all the flavors meld together perfectly, creating a harmonious symphony of taste and aroma.

    1. Serving Tomato Rice Pulao: Enjoying the Flavorful Rice Dish 

    With the tomato pulao cooked to perfection, it’s time to indulge in its flavorful goodness. Serve the dish by itself as a main course or pair it with yogurt for a satisfying and wholesome meal that will leave you feeling nourished and satisfied. Whether enjoyed as a standalone dish or as a side, tomato pulao is sure to impress with its vibrant flavors, aromatic spices, and irresistible appeal. So gather your loved ones, sit back, and savor every mouthful of this delightful and comforting tomato rice pulao.

    If you loved how to make tomato pulao recipe then you must also check out other variants of Rice: Vegetable Biryani, Masala Khichdi, Chhole Biryani, Quinoa Vegetable Pilaf and Lemon Rice.

  • Contest 2014 March Winners

    I received a lot of entries for march – it was great to see many newcomers. There were many good snack ideas and I enjoyed reviewing all the entries. Here are the winners this month and the top five entries. Congratulations to the winners and all participants:

    1st Place: Moong Dal Fingers by Jyoti

    2nd Place: Broccoli Pakora by Anandhi Ram

    Congratulations to both of you!!

    Thank you to everyone else that also participated in the contest:

    • Sushma K
    • Shruti Soumya Panigrahi
    • Rani Acharyulu
    • Rachna Jaiswal
    • Mrs. Home Maker
    • Anubhav Rastogi
    • Carol Gomes
    • Aayushi
    • Robbie
    • Hidemi Walsh
    • Donna Windham
    • Saijusadanandan
    • Lislawren
    • Sagarika Sadhukhan
    • Shikta Mishra
    • Laxmi Cirisanagandla
    • Asheera ershad
    • Zanobiya
    • Swathi
    • Priya Ramesh
    • Sriya Saha
    • Bhagyashree
    • Vidhya
    • Sana Hurzuk
    • Vrinda Mahesh
    • Bhama Narayanan
    • Kajal Nagpal
    • Andrea Taylor
    • Melanie Booth
    • Manoj Kumar Pal
    • Pooja Srivastava
    • Kalpana Patnaik
    • Palak Panchal
    • Babitha
    • Rameshwari Bansod
    • Rehana Khambaty
    • Barbara Baseggio
    • Saranya Anand
    • Durga R
    • Bishnupriya
    • Rozy Jain
    • Amrita Sasane
    • Sonika Maheshwari
    • Priyanka Jain
    • Sahaana Chandran
    • Akshata Ghatikar
    • Prachi Agarwal
    • Jaya Chaubey
    • Priscilla
    • Vaishali Agte
    • Shweta Soni
    • Bhavani madhu
    • Sumees Culinary
    • Padmini Pappu
    • Pallavi Nahata
    • Chitra
    • Sandeep
    • Rakhee M
    • Piyusha Pilania
    • Vinita Dhaka
    • Shilpa Kanthalia
    • Sapna Mehta
    • Mitoshi Saha
    • Swathi Poondla
    • Aarti Sharma
    • Teena
    • Suresh Choudhary
    • Amit