Search results for: “eggless “

  • Avocado Chickpea Toast

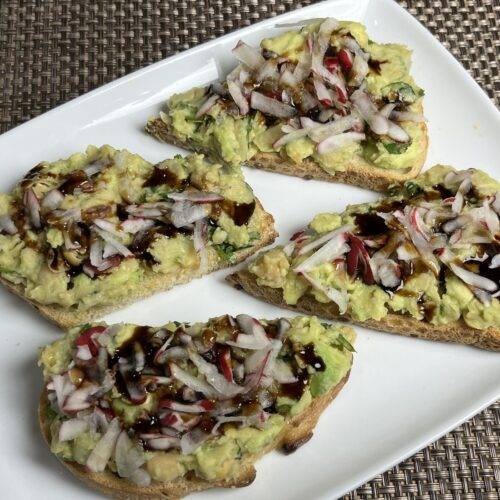
    Avocado Chickpea Toast

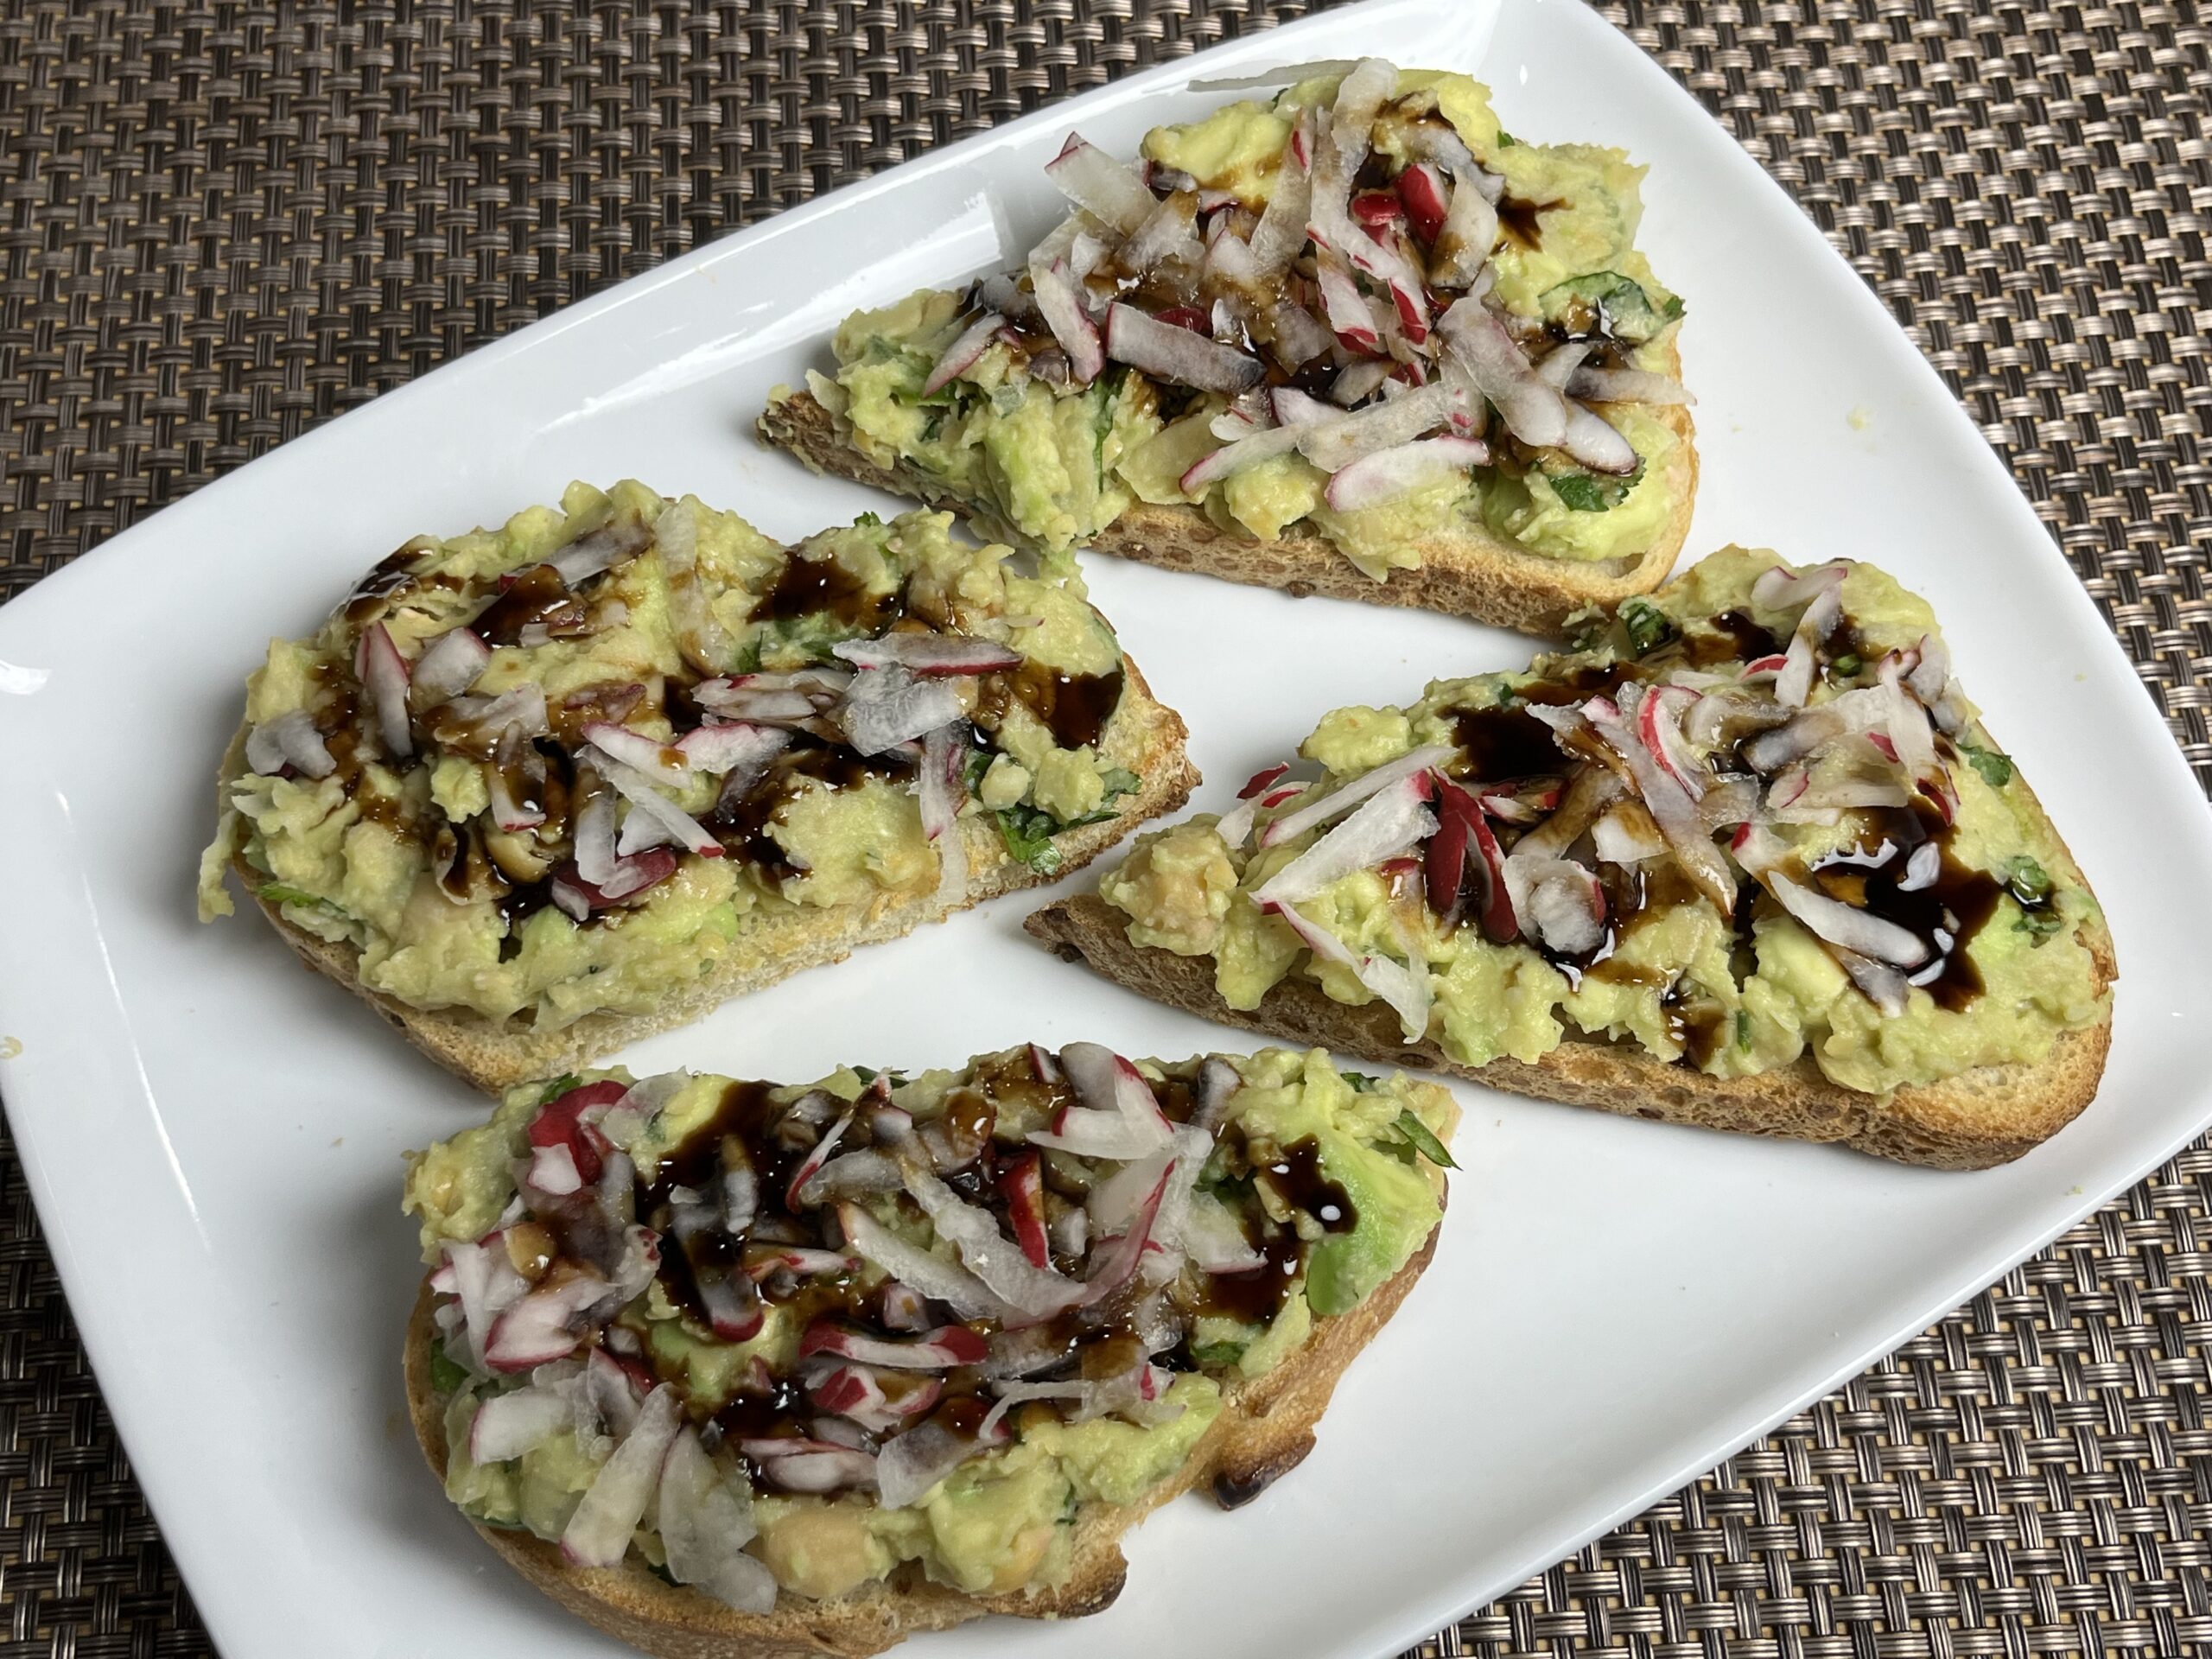
    A slice of toast topped with mashed avocado and chickpeas, garnished with herbs

    Avocado Chickpea Toast

    Avocado chickpea toast, a flavorful and healthy option for toast. Easy to make for a perfect lunch, it's packed with healthy fats from avocado and protein from chickpeas. Simple and quick recipes to follow.
    I was inspired by this toast the other day when I had avocado and corn dip with tortilla chips with a friend.
    Avocado won't retain its green color for more than an hour, but it will still taste good for a day. To prevent losing its green color, I'll prepare everything in advance, mixing mashed chickpeas with other ingredients and mashing the avocado with the chickpea mix when ready to serve.
    This easy avocado and chickpea spread can be enjoyed also as a sandwich or served as a dip with corn tortilla crackers or veggies!
    The avocado and chickpea toast are my all-time favorites. Chickpeas and avocado together create the most amazing toast. It's easy, healthy, fresh, and delicious! Even my grandkids like it, and they're ready to help me make it.
    5 from 1 vote
    Course snacks
    Cuisine Indian
    Servings 4 people

    Ingredients
      

    Ingredients:

    • 4 slices of bread to your choice (French bread preferred)
    • 1 1/2 cups boiled chickpeas
    • 1 large or 2 small avocados
    • 1 tbsp finely sliced green chilies
    • 1 1/2 tsp salt
    • 2 tbsp lime juice
    • 2 tbsp finely chopped cilantro
    • 2 tbsp balsamic glaze or balsamic vinegar
    • 1/4 cup shredded radish

    Instructions
     

    Instructions:

    • In a bowl mash the chickpeas with fork or potato masher, until all the chickpeas are broken. Add the lemon juice, salt, green chilies, and cilantro. Mash the avocado, mix it well, add more salt, lemon juice and cilantro to adjust your taste.
    • Toast the bread, spread the chickpea avocado spread over bread garnish with drizzling balsamic glaze and radish. Serve, and enjoy!

    Notes

    Serving Suggestions:
    • I love this avocado, and chickpea spread because you can serve it in many ways. I like to add shredded radish on top for a nice color and crunch.
    • You can also serve this avocado and chickpea sandwich. Making a sandwich, you may add spinach leaves and thinly sliced tomatoes.
    • You can also use it as a dip; that’s how I first tasted it. Instead of chickpeas, you can add white corn.
    • If you like the recipe, share the video with your friends. If you haven’t subscribed to my YouTube channel, please do so. Also, click the bell icon, and very importantly, leave a comment and suggestions.
    Thank you!
    Tried this recipe?Let us know how it was!

    Explore  Delectable Avocado Chickpea Toast

    Savor the delightful fusion of flavors and nutrition with avocado chickpea toast—a culinary masterpiece that tantalizes the taste buds and nourishes the body. This nutritious option is a versatile treat suitable for any meal occasion, be it a quick lunch, a hearty breakfast, or a satisfying snack. By combining the creamy richness of avocado with the protein-packed goodness of chickpeas, this toast emerges as a nutrient powerhouse that fuels you with energy throughout the day.

    Unveiling the Health Benefits

    Heart-Healthy Monounsaturated Fats

    By incorporating avocado into your diet, you not only indulge in its sumptuous flavor but also prioritize your cardiovascular health. Unlike other toasts such as Veggie Cheese Toast or if you are going for sweeter variants of toasts like Shahi Toast (Eggless Bread Pudding), Avocado chickpea toast is a rich source of mono unsaturated fats.

    Plant-Based Protein from Chickpeas

    Meanwhile, chickpeas offer a robust source of plant-based protein, essential for muscle growth and repair. This protein punch not only satisfies hunger but also supports overall health and vitality. By harnessing the power of chickpeas, avocado chickpea toast emerges as a satiating and nourishing meal option.

    Fiber-Rich Goodness

    Both avocado and chickpeas are rich in dietary fiber, promoting better digestion, regulating blood sugar levels, and supporting gut health. The fiber content of this toast contributes to a feeling of fullness and aids in maintaining a healthy weight. By incorporating fiber-rich ingredients into your diet, you foster optimal digestive function and overall well-being.

    Essential Vitamins, Minerals, and Antioxidants

    Moreover, avocados and chickpeas boast an array of essential vitamins, minerals, and antioxidants, offering protection against cell damage and chronic diseases. These nutrient powerhouses contribute to overall health and vitality, ensuring that every bite of avocado chickpea toast nourishes your body from within.

    Variations to Avocado Chickpea Toast

    Avocado Chickpea Sandwich

    Transform the avocado chickpea spread into a delectable sandwich filling by layering it between slices of bread. Enhance the flavor profile by adding spinach leaves, tomatoes, or your preferred sandwich toppings. This variation offers a convenient and satisfying meal option for on-the-go enjoyment. 

    Avocado Chickpea Dip

    Blend the avocado chickpea spread until smooth to create a creamy dip, perfect for pairing with vegetable sticks, pita chips, or crackers. This versatile dip option adds a burst of flavor and nutrition to your snacking experience, making it a crowd-pleasing appetizer for any occasion.

    Customize with Different Toppings

    Experiment with a variety of toppings to create your unique avocado chickpea toast masterpiece. From roasted vegetables and olives to feta cheese and chili flakes, the possibilities are endless. Customize your toast according to your taste preferences and culinary creativity, elevating your dining experience with every bite. You can also incorporate avocado in form of paratha like Avocado Paratha

    Frequently Asked Questions:

    What is Avocado Chickpea Toast?

    Avocado Chickpea Toast is a delicious and nutritious dish consisting of mashed avocado and seasoned chickpeas spread on top of toasted bread.  

    What type of bread works best for Avocado Chickpea Toast?

    You can use any type of bread for Avocado Chickpea Toast depending on your preference. Popular choices include whole wheat bread, sourdough, multigrain, or gluten-free bread for those with dietary restrictions.

    Can I customize the toppings for Avocado Chickpea Toast?

    Absolutely! Avocado Chickpea Toast is highly customizable. You can add toppings like sliced tomatoes, red pepper flakes, crumbled feta cheese, sliced radishes, or a drizzle of hot sauce to suit your taste preferences.

    Is Avocado Chickpea Toast a healthy option?

    Yes, Avocado Chickpea Toast is a nutritious choice. Avocado provides healthy fats, while chickpeas offer plant-based protein and fiber. Additionally, whole grain bread adds complex carbohydrates and additional fiber to the dish.

    Is Avocado Chickpea Toast suitable for vegans?

    Yes, Avocado Chickpea Toast can easily be made vegan-friendly by choosing a vegan bread option and ensuring any additional toppings are also vegan.

    Can I make Avocado Chickpea Toast ahead of time?

    While it’s best to assemble Avocado Chickpea Toast just before serving to prevent the bread from becoming soggy, you can prepare the avocado mash and seasoned chickpeas in advance and store them separately in airtight containers in the refrigerator. Then, simply toast the bread and assemble when ready to eat. Its a great alternative to Veggie Cheese Toast

    How can I add more flavor to Avocado Chickpea Toast?

    Experiment with different seasonings and toppings to enhance the flavor of Avocado Chickpea Toast. Consider adding ingredients like lemon juice, fresh herbs, or a sprinkle of nutritional yeast for extra taste.

    Is Avocado Chickpea Toast suitable for people with gluten intolerance?

    Avocado Chickpea Toast can be made gluten-free by using gluten-free bread. Ensure all other ingredients and toppings are also gluten-free to accommodate individuals with gluten intolerance or celiac disease.

    Can I serve Avocado Chickpea Toast as a meal or a snack?

    Avocado Chickpea Toast can be enjoyed as a nutritious breakfast, a satisfying lunch, or a light dinner. It also makes a delicious and filling snack any time of day. You can serve it as a meal before Chocolate Ganache Toast

  • Mango Pineapple Cobbler

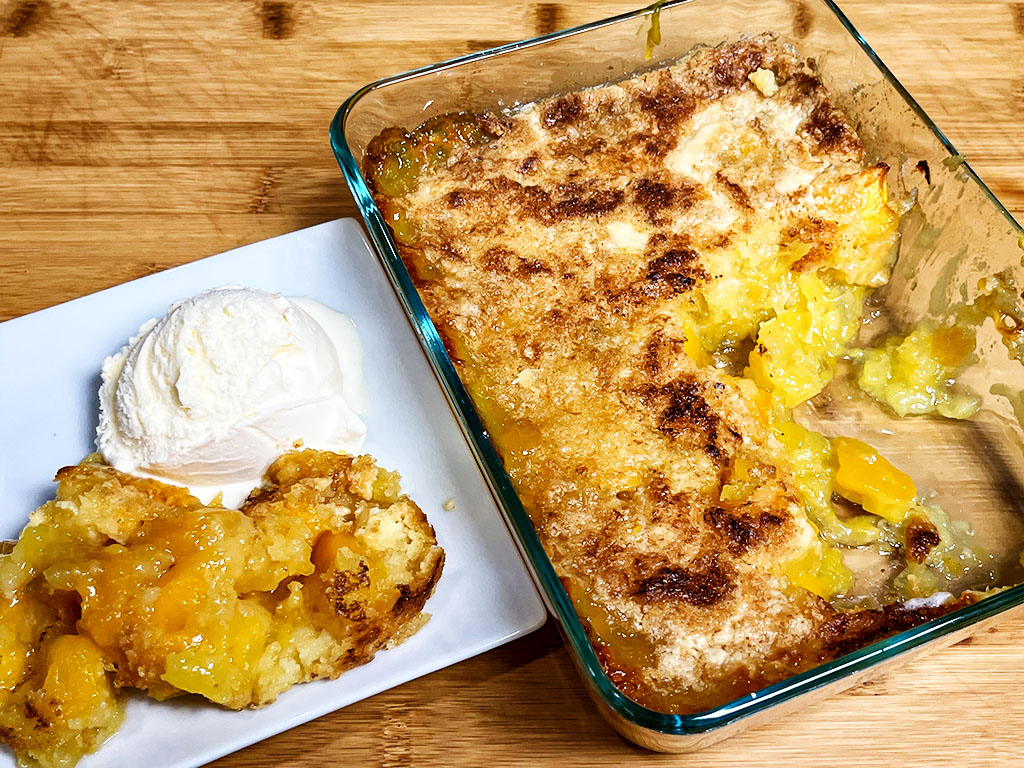
    Mango Pineapple Cobbler

    Mango Pineapple Cobbler

    Mango Pineapple Cobbler

    Mango pineapple cobbler is a wonderful choice for a sweet and homemade dessert. The combination of mango and pineapple brings a tropical twist to the classic cobbler, creating a flavorful and refreshing snack.
    5 from 2 votes

    Ingredients
      

    • 2 1/2 cups cubed mangoes use frozen mangoes
    • 1 1/4 cups unsweetened crushed canned pineapple
    • 1 tbsp corn starch
    • 1 tsp lemon juice
    • 4 tbsp sugar
    • 1 cup vanilla cake mix
    • 5 tbsp cold unsalted butter

    Instructions
     

    • Preheat the oven to 350°F.
    • The recipe is very simple. We need a baking dish; I am using an 8-inch x 6-inch Pyrex dish.
    • In a baking dish, combine the mangoes, crushed pineapple, sugar, lemon juice, and cornstarch. Mix well.
    • Sprinkle the cake mix evenly over the fruits.
    • Spread the sliced butter evenly over the cake mix.
    • Bake until the topping is lightly brown and looks crispy, and the filling is bubbly for about 35-40 minutes.
    • For the best taste, serve warm. If desired, serve with a scoop of ice cream, or whipping cream.
    • To Make Ahead: Mango pineapple cobbler is best served immediately, but it can be kept covered in the fridge for up to 5-6 days. Before serving, heat the cobbler in the microwave.

    Notes

    If you like the recipe share my video recipe with your friends. 
    Enjoy!
    Tried this recipe?Let us know how it was!

    Mango Pineapple Cobbler : A delightful dessert

    Mango pineapple cobbler presents itself as a delightful choice for those seeking a homemade dessert infused with tropical flavors.

    The marriage of mango and pineapple in this classic cobbler recipe introduces a refreshing twist, offering a burst of flavor that tantalizes the taste buds.

    Perfect for moments when the craving for something sweet beckons as this dessert embodies simplicity, deliciousness, and a touch of indulgence.

    Crafting this sweet and tender cake requires just a handful of ingredients, making it an accessible option for any home cook.

    With a yield serving of 4, you can share the joy of this delightful treat with loved ones or savor it all for yourself.

    Other Variatiants of Cakes:

    Eggless Pineapple Cake: Eggless Pineapple Cake is an easy and delicious eggless cake recipe and this can be served any time of the day, and for any occasion.

    Milk Cake: Milk Cake is a delicious, mouthwatering dessert. This is a unique “cake” made with just a few ingredients, primarily milk and sugar and has a touch of sourness to it.

    Eggless Chocolate Cake: Chocolate lovers can indulge in the rich and decadent flavors of Chocolate Eggless Cake. Add cocoa powder to the cake batter and chocolate shavings to the whipped cream for a delightful chocolate twist on this classic dessert.

    Mango Cheese Cake: Fresh ripe mangoes are used to make this light and refreshing cheesecake. It makes for an amazing presentation and tastes just as exotic as it looks. The egg-less recipe is delightfully delicious and can be enjoyed by just about everyone.

    FAQs: Frequently Asked Questions

    What is Mango Pineapple Cobbler?

    Mango Pineapple Cobbler is a delicious dessert featuring a juicy filling of mangoes and pineapples topped with a buttery biscuit or cake-like topping. It’s a perfect way to enjoy the sweet and tropical flavors of these fruits.

    How can I tell if my mangoes are ripe?

    A ripe mango will have a slight give when pressed gently near the stem. The skin color can vary depending on the variety, but it should not be completely green. You should also be able to smell a sweet mango fragrance.

    Q: Can I use fresh mangoes instead of frozen?

    A: Yes, fresh mangoes can be used in this recipe. Simply peel and cube the mangoes before proceeding with the recipe.

    Q: Can I use canned mangoes instead of frozen?

    A: While fresh or frozen mangoes are preferred for optimal flavor, canned mangoes can be used as a substitute if fresh or frozen mangoes are not available. Just be sure to drain any excess liquid before using.

    Q: Can I use a different type of cake mix?

    A: Yes, you can experiment with different flavors of cake mix to customize the cobbler to your taste preferences. For example, you could try using a lemon cake mix for a tangy twist or a coconut cake mix for added tropical flavor.

  • Rava Dosa

    Rava Dosa

    Rava Dosa

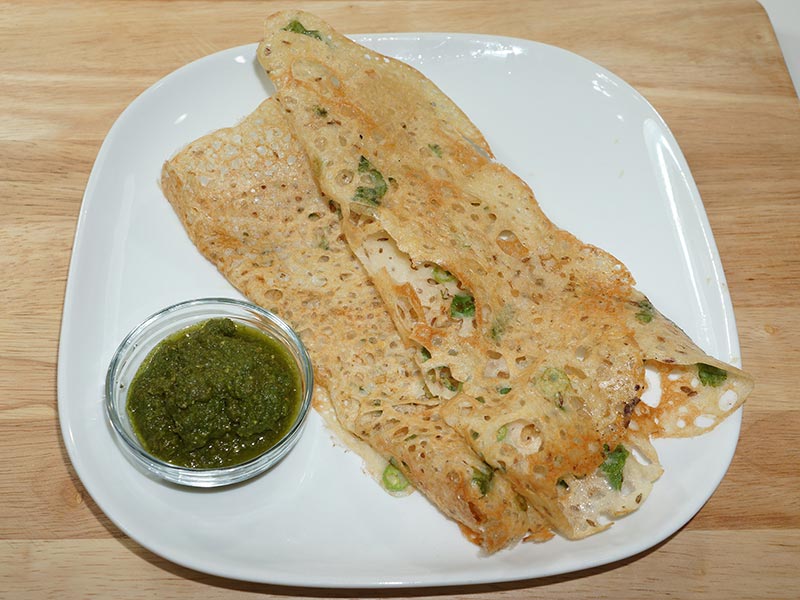
    Rava Dosa (South Indian Delicacy)

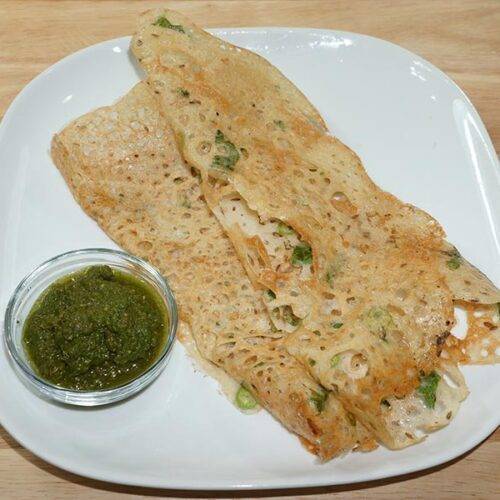
    Rava Dosa is a popular South Indian thin and crispy flat bread. It looks like thin crepes. This is a mouthwatering culinary delight. Rava Dosas are quick to make. They can be served as a snack or part of a main meal.
    4.67 from 3 votes
    Prep Time 10 minutes
    Cook Time 15 minutes
    Batter fermenting 30 minutes
    Total Time 25 minutes
    Course Main Course
    Cuisine Indian
    Servings 3 people

    Ingredients
      

    • 1/2 cup fine sooji samolina
    • 1/4 cup rice flour
    • 1/4 cup all-purpose-flour plain flour, maida
    • 1/2 tsp cumin seeds jeera
    • 1/2 tsp salt
    • 1/8 tsp asafetida hing
    • 1 tbsp cilantro chopped hara dhania
    • 1 green finely chopped
    • 2 cupa watwer approximately

    Instructions
     

    • Mix all three flours including semolina, rice flour and all-purpose flour. Make a thin batter using little water at a time and avoiding any lumps. Batter should have pouring consistency like buttermilk.
    • Add all other ingredients to the batter including cumin seeds, salt, asafetida, cilantro and green chili. Mix it well. Let the batter stand for about 30 minutes.
    • Heat the skillet on medium high. To check if skillet is ready sprinkle few drops of water over skillet water should sizzle. Wipe the skillet with few drops of oil.
    • Pour the batter with ladle on the skillet in a circular motion starting from the periphery to the center. Keep pouring the batter till it covers the whole skillet.
    • Note: pour the batter on the skillet from about 3 to 4 inches height. Don’t try to spread the batter otherwise the characteristic and appearance of Rava Dosa will not come. Rava Dosa should have holes like swiss cheese or have lacy look.
    • Sprinkle 1 teaspoon of oil around dosa.
    • Cook Dosa over medium heat for about 2 minutes or until Dosa becomes golden brown. Then turn the Dosa using spatula.
    • Let Dosa cook for about 1 minute from other side. Dosa will be golden brown on one side and light color on other side. Thin and crispy Rava Dosa is ready to serve.

    Notes

    Serving Suggestions
    Rava dosa is very flavorful. You may eat this snack with Hari Cilantro Chutney.
    Traditionally Rava Dosa is served with Sambar (lentil soup cooked with vegetables), and coconut chutney.
    I have the recipes for Sambar, Coconut Chutney, and Hari Cilantro Chutney on my web site.
    Tried this recipe?Let us know how it was!

    How to make Rava Dosa: Your Guide to the Perfect Crispy Delight 

    Dosa is a popular south indian delicacy which looks like a crepe. It’s like a crisp and thin pancake made of rice and urad dal batter. Traditionally Dosa is served with sambar, aloo masala and coconut chutney. It is an Indian crepe made usually through rice batter, but here we have experimented and made many alternative dosa such as Oat Dosa, Besan Dosa, Rava Dosa, Sorghum Dosa. What is Rava Dosa: This preparation is using rava and is a bread based breakfast recipe that is vegan. The preparation entails skillfully combining pan techniques and manual dexterity to achieve the perfect bread cooked on non-stick skillets.

    Mixing the Flours: Crafting the Perfect Rava Dosa Batter 

    Embark on your culinary journey to master the art of rava dosa by starting with the essential step of mixing the flours. In your quest to perfect the rava dosa recipe, combine three key flours – semolina, rice flour, and all-purpose flour. This trio forms the foundation of the batter, each contributing its unique texture and flavor.

    As you blend the flours, ensure a smooth consistency by gradually adding water to the mix, meticulously stirring to prevent the formation of lumps. Aim for a batter resembling buttermilk, with a fluidity that promises to spread effortlessly on the skillet. This foundational step lays the groundwork for the success of your dosa rava recipe, setting the stage for a culinary masterpiece.

    Flavorful Fusion: Adding the Finishing Touches to Your Dosa Rava Recipe 

    Elevate the rava dosa batter to new heights by infusing it with a harmonious medley of essential ingredients. Cumin seeds, salt, asafetida, cilantro, and green chilli converge to create a symphony of flavors that dance on the palate.

    With a thorough mix, allow the batter to rest for approximately 30 minutes—a crucial period that allows the ingredients to meld and intermingle, enhancing the overall taste and texture of your rava dosa.

    This resting period is a vital secret in the art of how to make rava dosa, imparting depth and complexity to the final dish. Embrace this moment of anticipation as the flavors marry and evolve, preparing to embark on a culinary adventure like no other.

    Sizzling Skillet: Setting the Stage for Rava Dosa Magic 

    Prepare your skillet on medium-high heat, the stage upon which the magic of rava dosa unfolds. A simple water test unveils the skillet’s readiness – when sprinkled on the surface, the water should sizzle and evaporate in an instant, signalling the perfect temperature for dosa-making.

    A touch of oil ensures a non-stick surface, laying the groundwork for the mesmerising dance of the rava dosa batter. With the skillet prepped and primed, you are poised to embark on a culinary journey filled with tantalizing aromas and mouthwatering flavors.

    Artful Pouring: Creating the Signature Look of Rava Dosa 

    With finesse and precision, pour the rava dosa batter onto the heated skillet, employing a circular motion from the edges towards the centre. The key lies in maintaining a height of 3 to 4 inches while pouring, resisting the urge to spread the batter thinly.

    This technique ensures the characteristic appearance of rava dosa – a delicate, lacy texture with enticing holes reminiscent of Swiss cheese. As the batter spreads and sizzles on the skillet, marvel at the artistry unfolding before your eyes, a testament to the skill and craftsmanship inherent in the rava dosa tradition.

    Crispy Transformation: Cooking Your Rava Dosa to Perfection 

    As the rava dosa graces the heated skillet, sprinkle a teaspoon of oil around its edges, allowing it to cook over medium heat for approximately 2 minutes until it achieves a golden brown hue. With practised precision, skillfully flip the dosa using a spatula, revealing its crispy underside to the world.

    Let it cook for an additional minute, ensuring that both sides are cooked to perfection. The end result is a thin and crispy rava dosa, a culinary masterpiece ready to tantalize your taste buds and transport you to culinary nirvana. With each bite, savor the symphony of flavors and textures that define the essence of this beloved Indian delicacy.

    In conclusion, the journey of crafting the perfect rava dosa is a culinary adventure filled with precision, skill, and a touch of artistry. From mixing the flours to savoring the crispy transformation on the skillet, each step in the process is imbued with tradition and flavor, culminating in a dish that delights the senses and nourishes the soul.

    So, gather your ingredients, fire up your skillet, and embark on a journey to discover the magic of rava dosa – a timeless classic that never fails to captivate and delight.

    Serving Suggestions: Enhancing the Rava Dosa Experience 

    Rava dosa’s aromatic profile pairs exceptionally well with Hari Cilantro Chutney. For a traditional touch, serve it alongside Sambar, a lentil soup enriched with vegetables, and coconut chutney. Explore these culinary companions to elevate your Rava Dosa feast to new heights.

  • Milk Cake

    Milk Cake

    Milk Cake

    Milk Cake

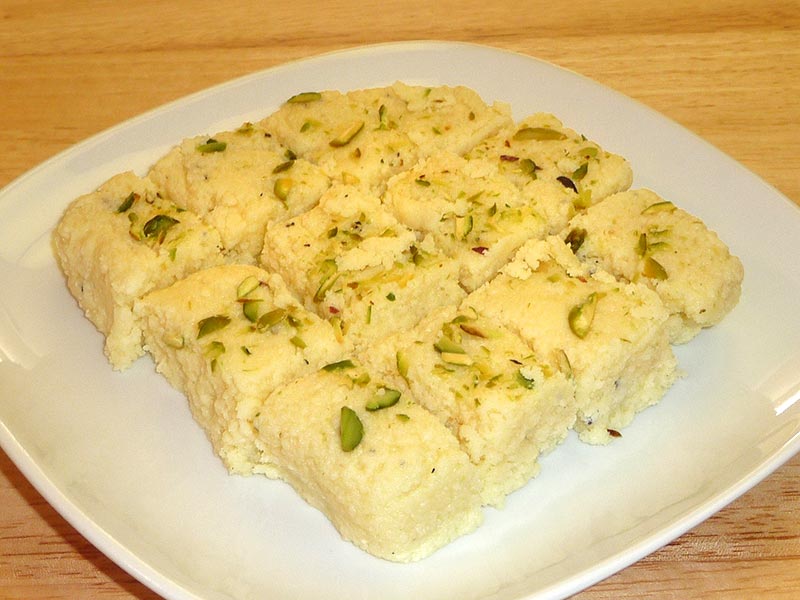
    Milk Cake is a delicious, mouthwatering dessert. This is a unique quick and easy “cake” made with just a few ingredients, primarily milk and sugar and has a touch of sourness to it.
    4.60 from 5 votes
    Prep Time 5 minutes
    Cook Time 35 minutes
    Total Time 40 minutes
    Course Dessert
    Cuisine Indian
    Servings 6 people

    Ingredients
      

    • 6 cups whole milk
    • 3 tbsps lemon juice, use as needed
    • 1/2 cup sugar
    • 1/8 tsp cardamom crushed
    • 2 tbsp clarified butter ghee
    • 1 tbsp pistachios sliced for garnishing

    Instructions
     

    • Grease a 6-inch plate and set aside.
    • In a large, wide and heavy saucepan bring the milk to a boil over medium high heat. And let it boil for 2-3 minutes. Add lemon juice to the milk, it will begin to curdle. Use minimum amount of lemon juice to just start the curdling process and prevent the whey (milky water) from completely separating immediately.
    • Boil for 5 minutes and remove approx. 1 ½ cups of the whey. This will help reduce the tartness from the cake.
    • Continue to cook and stir occasionally until the milk is a grainy consistency and the whey is evaporated. This will take an additional 15-20 minutes.
    • Add sugar and cardamom and keep stirring until the mixture starts coming together. This should take approximately 5 minutes. Lower the heat to medium and cook for another 4-5 minutes until mixture changes to a slightly golden brown color.
    • Transfer mixture to the greased plate and press firmly into a square shape, approximately 1 inch high. As an option, sprinkle sliced pistachios on top.
    • Let sit for at least an hour before slicing into individual pieces.

    Notes

    Tips
    this wonderful dessert can be prepared ahead of time and stored at room temperature for a few days.
    It is generally a few inches tall and has different shades of color throughout. However, this recipe will make an even colored cake that is approximately 1 inch thick. The taste of this Milk Cake is identical to what I have grown up enjoying as a delicacy in our home.
     
    Keyword Eggless Milk Cake, Gluten Free, Janmashtmi, Mithai, Sweet
    Tried this recipe?Let us know how it was!

    Milk Cake Recipe: How To Make Milk Cake

    Milk Cake, also known, is a traditional Indian sweet made from milk, sugar, and cardamom. This delectable dessert has a rich, creamy texture and a delightful sweetness that makes it a favorite during festivals such as Diwali, Holi and Janamasthami

    What is a Milk Cake: 

    It is a dense, fudge-like Indian sweet made by simmering milk and sugar for a long time until it thickens and reduces. It has a grainy texture and a caramelised milky flavour. Milk cake is often cut into squares and served at festivals and special occasions.

    Variations of Indian Desserts:

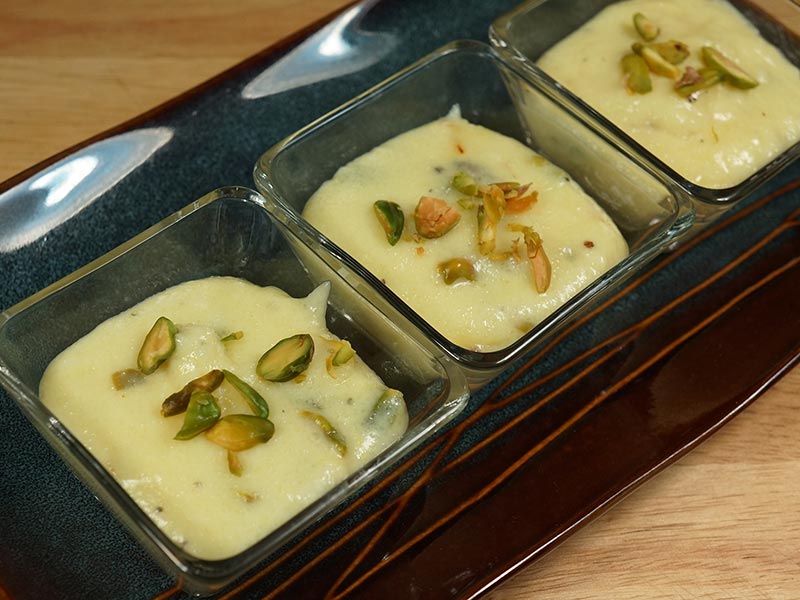
    • Paneer Kheer with Strawberry: Paneer Kheer with Strawberry is a delightful dessert. This Paneer and strawberry dessert is a sure winner when you want to serve a unique paneer delicacy.
    • Flax Seed Burfi: One can call Flax Seed Burfi to be even a health bar. As during winters it’s a great hit for it being high in protein and a good source of vegetarian omega 3. This Burfi is vegan, gluten free and tastes great.
    • Coconut Dream Dessert: Coconut Dream is a vegan delight, it is flavored with cardamom and saffron, very soothing and refreshing. Adding Agar-agar sets this dessert like jelly. It is super easy to make and taste great. I like to serve Coconut Dream chilled.
    • Chum Chum: Chum Chum is a popular Bengali (East Indian) sweet dish that is made with Paneer, (home-made cheese). It is a versatile dish that can be served in many different variations.

    Tips for Making Perfect Milk Cake:

    Use Full-Fat Milk: For the richest and creamiest Milk Cake, use full-fat milk or whole milk. The higher fat content contributes to a smoother texture and a more indulgent flavor. Avoid using skim or low-fat milk, as they may result in a less creamy consistency.

    Stir Constantly: When cooking the Milk Cake mixture, stir it constantly to prevent it from sticking to the bottom of the pan and burning. Use a heavy-bottomed pan to distribute the heat evenly and minimize the risk of scorching.

    Add Sugar Gradually: Add sugar to the Milk Cake mixture gradually, tasting as you go to achieve the desired level of sweetness. Some people prefer their Milk Cake less sweet, while others enjoy it more sugary. Adjust the amount of sugar according to your taste preferences.

    Let it Set Properly: Allow the cooked Milk Cake mixture to cool completely and set before cutting it into squares or slices. Refrigerate the Milk Cake for a few hours or overnight to firm up the texture and enhance the flavors.

    FAQs about Milk Cake:

    How long does Milk Cake last? 

    Milk Cake can be stored in an airtight container in the refrigerator for up to 3-4 days. However, it’s best enjoyed fresh within the first day or two for optimal taste and texture.

    Is Milk Cake Vegetarian?

    Yes, it is traditionally a vegetarian dish. As its is made from milk and uses vegetarian ingredients.

    Can I make Milk Cake without condensed milk? 

    While condensed milk is commonly used to make Milk Cake, you can make it from scratch using whole milk, sugar, and cardamom. Simmer the milk until it thickens and reduces, then sweeten it with sugar and flavor it with cardamom before setting it.

    Is Milk Cake gluten-free? 

    Yes, Milk Cake is naturally gluten-free, as it doesn’t contain any wheat flour or gluten-containing ingredients. However, be cautious of cross-contamination if using any pre-packaged ingredients or equipment that may come into contact with gluten.

    Milk Cake is a delightful dessert that’s cherished by all for its creamy texture, subtle sweetness, and comforting flavors. Whether enjoyed as a festive treat or a simple indulgence, 

    Milk Cake is sure to evoke feelings of joy and satisfaction and happiness with every bite. With its endless variations and simple preparation, Milk Cake is a timeless classic that’s beloved by dessert enthusiasts around the world. Milk Cake is an Indian dessert savoured by every person who has a sweet tooth as happiness is its deep root.

  • Peach Phirni

    Peach Phirni

    Peach Phirni (Rice Pudding)

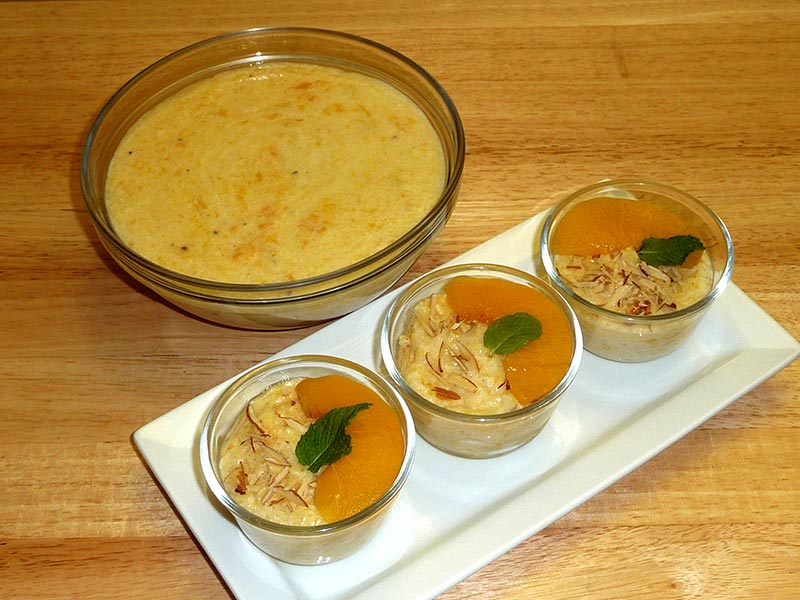
    Peach phirni is a delicious dessert which is a creamy eggless pudding. Traditionally phirni is made with rice, milk and sugar. Adding peach gives a wonderful creamy smooth texture.
    5 from 1 vote
    Course Dessert
    Cuisine Indian
    Servings 8 people

    Ingredients
      

    • 1/4 cup rice
    • 3 cup milk
    • 3/4  cup sugar
    • 1 15 oz can of unsweetened sliced peaches
    • 1/2 tbsp corn starch
    • 1/8 tbsp cardamom powder
    • 1 tbsp sliced almonds
    • Few slices of canned peaches
    • Few mint leaves

    Instructions
     

    • Wash rice and soaks it for fifteen minutes or more.
    • Drain the water and blend rice to a fine texture, adding just enough milk as needed to blend. Keep aside.
    • Drain the syrup from can peaches. Keep 4 slices of peach aside for garnish.
    • Puree the remaining peaches with corn starch. Keep aside.
    • Boil the milk on medium high heat and let it simmer until milk reduces to about 2 cups. After milk comes to boil it should take about 8 minutes.
    • Take about 1/4 cup of hot milk and mix it with rice paste.
    • Add rice solution to the boiling milk slowly and keep stirring continuously, making sure rice does not become in lumps and milk does not burn on the bottom of the pen.
    • Cook until milk has reduced to about half in volume and rice is cooked.
    • Next add the sugar and cardamom powder, cook for about 4 minutes on low medium heat. Turn off the heat.
    • just after turning off the heat add the peach puree gently with cooked rice.
    • Shift the phirni to the serving bowl and garnish with almond, and peach slices.
    • Let it sit in refrigerator for few hours. Serve chill

    Notes

    Variations
    There are so many delicious variations to this dish! Instead of peaches try making this dish using fresh mango, guava, passion fruit puree.
    Tried this recipe?Let us know how it was!
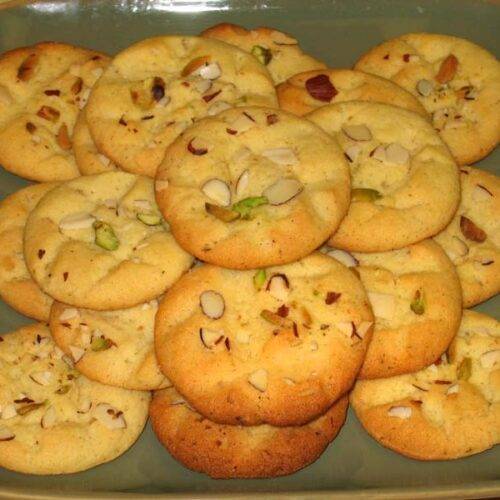
  • Nan Khatai

    Nan Khatai

    Nan Khatai

    Naan khatai

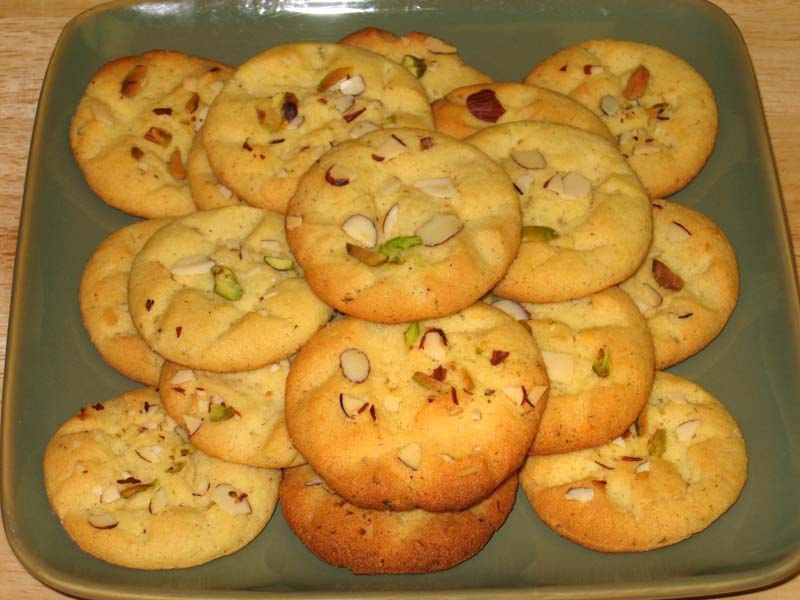
    Naan khatai is an egg-less light and crispy biscuit snack that's perfect to serve with tea or coffee.
    4.20 from 5 votes
    Prep Time 15 minutes
    Cook Time 15 minutes
    Total Time 30 minutes
    Course Dessert
    Cuisine Indian
    Servings 6 people

    Ingredients
      

    • 1/3 cup all purpose flour plain flour or maida
    • 1/3 cup fine sooji samolina
    • 1/8 tsp baking soda
    • 1/4 tsp cardamom coarsely ground ilaichi
    • 1/2 cup unsalted butter
    • 2/3 cup sugar
    • 1 tbsp almond sliced
    • 1 tbsp pistachio sliced

    Instructions
     

    • Pre heat the oven to 375 degree.
    • In a bowl, mix the all-purpose flour, gram flour, sooji, baking soda and cardamom powder and set aside.
    • Let the butter come to the room temperature (butter should be soft not melted)
    • Add butter and sugar in a mixing bowl and beat for two to three minutes until light and fluffy.
    • Add the flour mix to butter and sugar mixture and knead them together to make smooth dough. Divide the dough into about 24 equal parts and make them into balls. Press each ball between your palms lightly; every piece should be about 3/4″ in thickness.
    • With a sharp knife softly draw a tic-tac-toe design on the top and put few pieces of almonds and pistachios and press them into the dough gently.
    • Put Nan khatai on a lightly greased cookie sheet and bake at 375 degrees for about 13 to 15 minutes or until Nan khatai are lightly gold brown.
    • After they are lightly golden brown remove the cookie sheet from the oven. Let the Nan Khatais cool down for two to three minutes before taking them off the cookie sheet.

    Notes

    Nan khatai make a great homemade gift for holidays. Your friends and relatives will love it.
    Serve them with hot cup of chai.
    Enjoy!
    Keyword Biscuit, Cookies, Eggless, Kid Friendly, Tea Time Snack
    Tried this recipe?Let us know how it was!
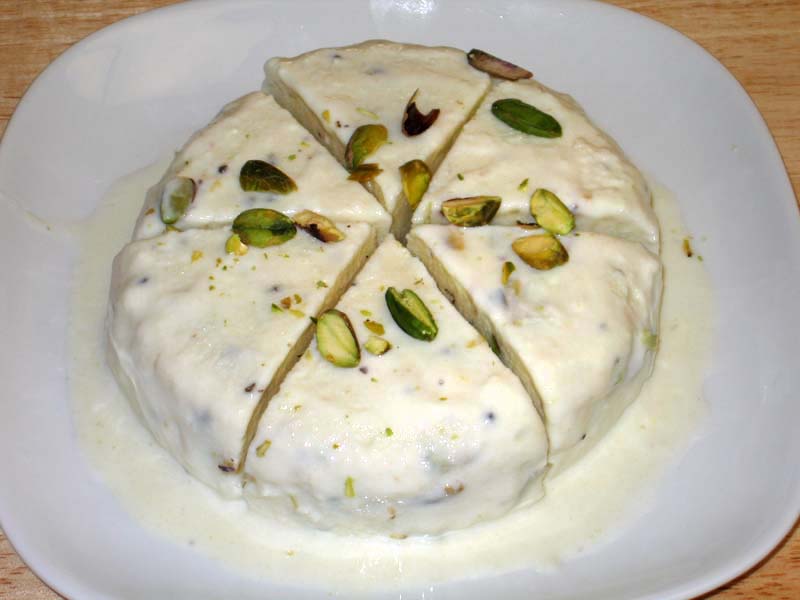
  • Pista Kulfi

    Pista Kulfi

    Pista Kulfi

    Pista Kulfi

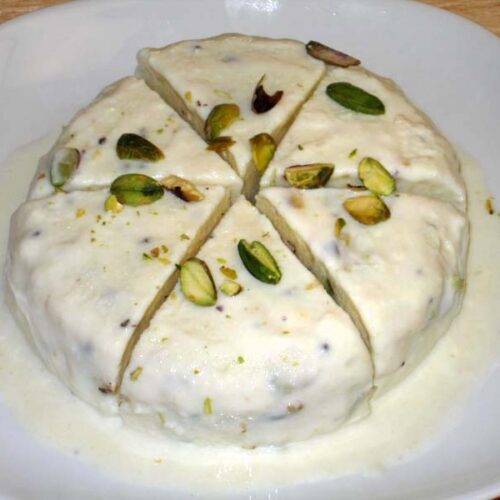
    Pista Kulfi is a very popular Indian ice cream. Kulfi comes in a variety of different flavors. Traditional kulfi is flavored with cardamom; this recipe is flavored with cardamom and pistachios. its like a summer favorite sweet snack or a dessert which is popular amongst all.
    5 from 1 vote
    Prep Time 10 minutes
    Cook Time 25 minutes
    Freezing time 1 minute
    Total Time 35 minutes
    Course Dessert
    Cuisine Indian
    Servings 6 people

    Ingredients
      

    • 4 cupa whole milk
    • 1 slice white bread
    • 1 tsp corn starch
    • 1/4 cup sugar
    • 1/2 tsp coarsely ground cardamom ilachi
    • 10 pistachios sliced

    Instructions
     

    • Remove the crust from all sides of the bread and cut the bread in small pieces.
    • Blend bread pieces, cornstarch, and a 1/2 cup of milk, making smooth paste and set aside.
    • Boil remaining milk (3.5 cups) in nonstick frying pan on medium high heat. Stir milk as needed to keep milk from burning on the bottom of the frying pan. Stir the sides of the pan to avoid scalding.
    • After milk comes to boil, let the milk boil for another 12 minutes. The goal is to boil the milk from 3 1/2 cups to 2 1/2 cups.
    • Add the bread mixture to the milk in frying the pan and cook for another 4 minutes, reducing the heat to medium. Bread and cornstarch are added to reduce the water crystallizing in kulfi during freezing.
    • Next add sugar and pistachios and cook for 2 more minutes. Turn off the heat and add cardamom powder.
    • Cool the milk to room temperature and pour into a bowl,
    • Take cellophane wrap and place it right over the milk covering it completely. Note: It is important that the cellophane wrap touches the milk.
    • Put it in freezer. It will take about 7 hours for the kulfi to be ready to serve.

    Notes

    Variations
    Replace pistachios with almond or coconut powder.
    Replace pistachios with finally chopped fruits like mangos or strawberries. Add fruits in the end after turning off the heat.
    Many people enjoy eating kulfi like a Popsicle.  Before freezing, pour the milk mixture in to a Popsicle mold.  If you don’t have Popsicle mold use small paper cups and place cellophane wrap on top of the milk and place a Popsicle stick in center of cup and freeze.
    Keyword Home made Ice Cream, Milk Ice Cream, Pista Ice Cream, Summer Dessert
    Tried this recipe?Let us know how it was!


    Delight in the Creamy Goodness of Pista Kulfi

    Pista Kulfi is a traditional Indian ice cream made with pistachios, milk, and aromatic spices. This pista kulfi recipe is perfect for cooling off on a hot day or enjoying a delightful dessert after a meal. The rich, creamy texture and the nutty flavour of pistachios make this dessert a favorite among many.

    The Essence of Pista Kulfi

    The essence of pista kulfi lies in its rich and creamy texture, achieved by slowly simmering milk until it thickens and reduces. The addition of pistachios and a touch of cardamom gives this kulfi its distinctive flavor. This pistachio ice cream is a traditional Indian dessert that brings a touch of authenticity to any occasion, making it a popular choice for festivals and celebrations.

    Origin and Popularity

    Kulfi, often referred to as Indian ice cream, has been a beloved dessert in India for centuries. Unlike regular ice cream, kulfi is denser and creamier due to the slow cooking process of the milk. Pista kulfi, with its rich pistachio flavor, has become one of the most popular variations of this dessert. It’s commonly enjoyed during hot summer months and is a staple in many Indian households.

    Why You’ll Love This Recipe

    • Rich and Creamy: The slow-simmered milk gives the kulfi a rich and creamy texture.
    • Nutty Flavor: The pistachios add a delightful nutty flavor that compliments the creamy base.
    • Easy to Make: Simple ingredients and straightforward steps make this recipe accessible.
    • Perfect for Any Occasion: Ideal for cooling off on a hot day or serving at festive occasions.

    Variations of Indian Ice Cream Recipes

    Exploring Manjula’s Kitchen reveals a treasure trove of other delicious Indian ice cream recipes that you might enjoy. Here are some related desserts that you might find interesting:

    1. Falooda Kulfi: Falooda Kulfi is a refreshing dessert. “Falooda” looks like rice noodles and they are made with cornstarch or arrowroot. “Kulfi” is an Indian ice cream. This is a delicacy with street vendors all over India. One has to experience this delightful dessert to appreciate it. You can also serve Falooda with any ice cream of your choice. Try this recipe to enjoy as one of my favorite summertime treats!
    2. Malai Kulfi: Kulfi is an eggless Indian ice cream. This is a simple and delicious dessert made with milk and sugar. Kulfi is very popular with street vendors, especially in summer. This is an easy recipe to make and Kulfi is an absolute treat for both young and old.
    3. Pineapple Kulfi: Kulfi, a popular summer dessert, is an Indian ice cream. Adding Pineapple here is a delicious twist to traditional kulfi. Pineapple kulfi simply melts in your mouth with its creamy texture and small chunks of pineapple.
    4. Paneer and Rose Kulfi: Paneer and Rose Kulfi is easy to make dessert. Instead of traditionally creamy texture, this is more like a grainy and enjoyable texture.
    5. Rose Kulfi: A fragrant kulfi flavored with rose water and garnished with rose petals.

    Serving Suggestions

    Pista kulfi can be enjoyed in various ways:

    • On a Stick: Serve in traditional kulfi molds or popsicle molds for a fun treat.
    • In a Bowl: Scoop into bowls and garnish with chopped pistachios and saffron strands.
    • With Falooda: Serve with falooda (vermicelli) and rose syrup for a classic combination.
    • As a Dessert: Enjoy as a refreshing dessert after a spicy meal.

    Tips and Tricks

    To perfect your pista kulfi recipe, consider these helpful tips:

    • Use Full-Fat Milk: Full-fat milk gives the kulfi a richer and creamier texture.
    • Simmer Slowly: Simmer the milk on low heat to avoid burning and to achieve the perfect consistency.
    • Grind Pistachios: Grind the pistachios finely for a smoother texture or coarsely for a crunchier bite.
    • Freeze Properly: Ensure the kulfi is frozen solid before serving for the best texture.

    FAQs

    Can I Use Condensed Milk? 

    Yes, you can use condensed milk to speed up the thickening process and add extra sweetness.

    How Long Does Pista Kulfi Last in the Freezer? 

    Pista kulfi can be stored in an airtight container in the freezer for up to 2 weeks.

    Is Pista Kulfi Gluten-Free? 

    Yes, this recipe is naturally gluten-free as it is made with milk, sugar, and pistachios.

    Can I Add Other Nuts? 

    Yes, you can add other nuts like almonds or cashews to enhance the flavor and texture.

    What If I Don’t Have Kulfi Molds? 

    You can use popsicle molds, small bowls, or even paper cups to freeze the kulfi.

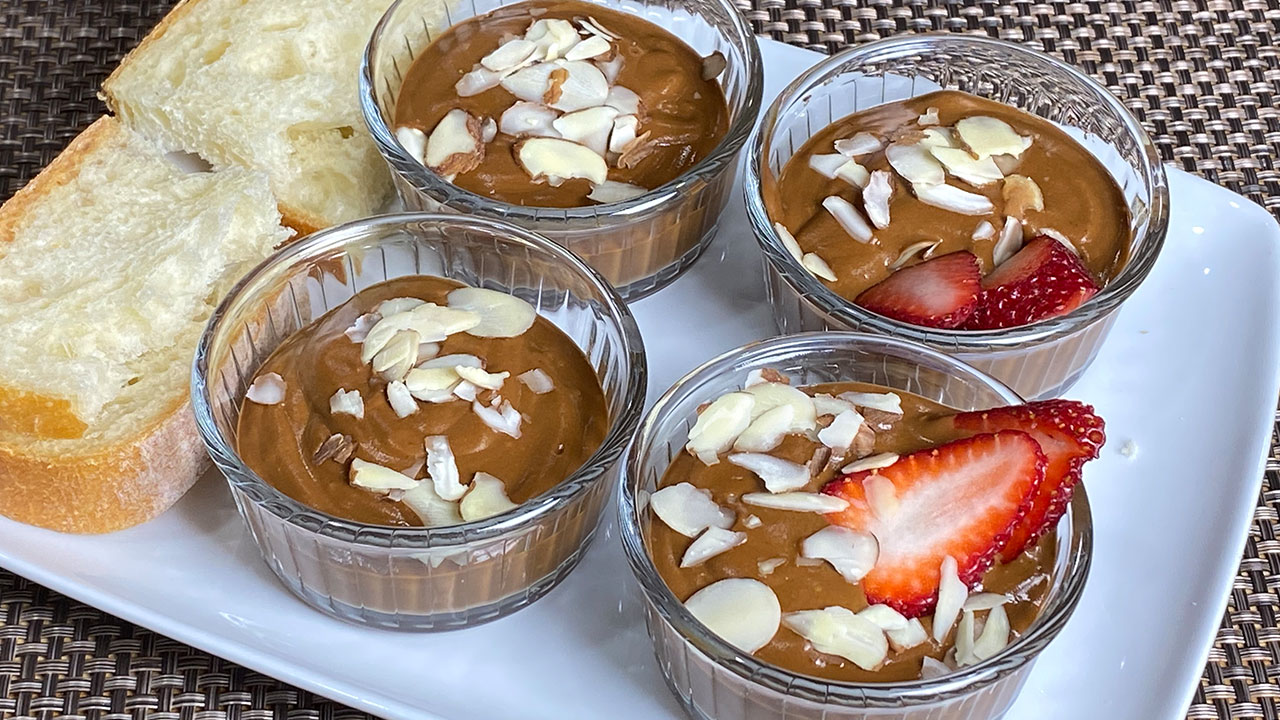
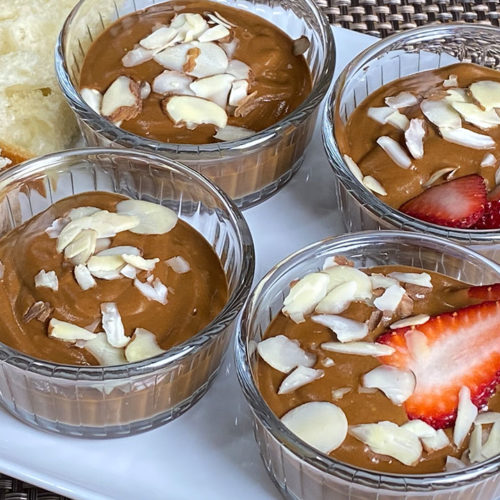
  • Chocolate Pudding

    Chocolate Pudding

    A bowl of creamy Chocolate Pudding garnished with chocolate shavings

    Chocolate Pudding

    Chocolate Pudding is a simple and delightful dessert. My son is on a vegan diet and one day he mentioned he was craving a dessert like a chocolate pudding or mousse. I think he was giving me a not-so-subtle hint that he wanted me to experiment with this! I decided to give a try and he was very happy with the results! Soon after that this became a favorite dessert with others in my family. It's funny because my family's favorites keep changing! This is a super simple and easy recipe to make. I can prepare this dessert on demand and with limited notice for my grandchildren, who love to request dishes last minute! This rich chocolatey dessert is vegan and gluten-free. Hope you enjoy!
    This recipe will serve 4
    5 from 2 votes
    Prep Time 5 minutes
    Cook Time 10 minutes
    Total Time 15 minutes
    Course Dessert
    Cuisine American
    Servings 4 people

    Ingredients
      

    • 1 ½ cup sweet potato peeled and sliced
    • ½ cup coconut milk full fat, chilled
    • 4 Tbsp cacao powder
    • 4 Tbsp sugar
    • 2 tsp vanilla extract
    • ¼ tsp cinnamon powder

    Instructions
     

    • Steam the sweet potato until soft.
    • Drain the water and wash with cold water, and pat dry them.
    • Place sweet potato, cacao, sugar, coconut milk, vanilla and cinnamon into blender and blend until smooth.
    • Take out the Chocolate Pudding into a covered bowl.
    • Refrigerate for at least an hour before serving.

    Notes

    Serving Suggestions
    When it is fully blended, scoop the Pudding into the individual serving bowls and refrigerate for an hour. Remove the Pudding from the refrigerator after it has chilled. Serve the Pudding with your choice of topping. I like to garnish with sliced almonds. You may top with fresh fruit, or seeds. Also, chocolate pudding tastes great as a dip or spread.
    Suggested Recipes
    Tried this recipe?Let us know how it was!
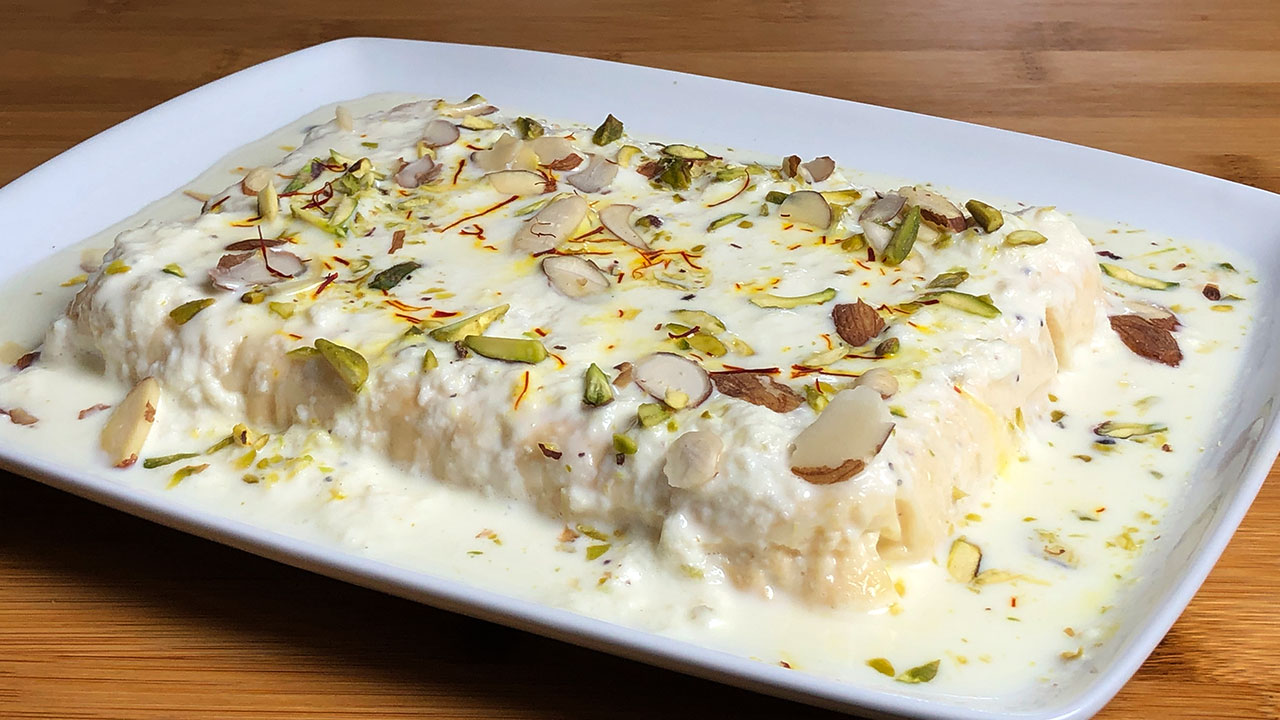
  • Ras Malai Cake

    Ras Malai Cake

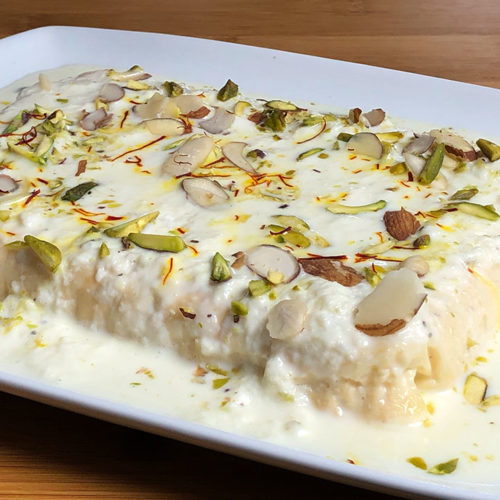
    A plate of Ras Malai Cake garnished with sliced almonds and pistachios

    Ras Malai Cake

    Ras Malai Cake is a twist on a very popular Bengali dessert "Ras Malai". Ras Malai is made with homemade cheese known as “paneer” or “chana”. It consists of soft paneer balls immersed in chilled creamy milk. Ras Malai has been always my favorite dessert for as long as I can remember. Back when I came to the U.S. many years ago, Indian cooking was a challenge as there were very few Indian ingredients available. Indian groceries weren't as plentiful back then. To top that off, I was also a new cook. I remember my friends and I would always experiment with different recipes for Indian food using whatever ingredients we could find. We knew we had to make do with what we had by being creative and learning to cook using the ingredients were available. One thing we discovered is using ricotta cheese as a substitute for paneer as it was the closest in consistency to paneer. We started using ricotta cheese to make many milk-based Indian desserts. It was then that I learned how to make Ras Malai. While it certainly was not the same as the "real thing", it was super simple to make and very tasty! Most importantly, I got to enjoy a little taste of home with my favorite Indian dessert! I have done one more recipe using Ricotta cheese Microwave Milk Cake. Enjoy!
    This recipe will serve 6.
    4.67 from 3 votes
    Prep Time 5 minutes
    Cook Time 40 minutes
    Course Dessert
    Cuisine Indian
    Servings 6 people

    Ingredients
      

    • 15 oz Ricotta Cheese whole milk
    • 2 Tbsp sugar
    • ¼ tsp cardamom powder

    Milk for Rasmalai

    • 2 cups whole milk
    • 1 ½ tbsp sugar
    • tsp crushed cardamom

    Garnishing

    • 1 tbsp sliced almonds
    • 1 tbsp sliced Pistachios
    • few strands of saffron

    Instructions
     

    • I am also using a 5×7 Pyrex pan for baking the cake, line the pan with parchment paper.
    • Mix the ricotta, sugar, cardamom, and saffron together well. Transfer the ricotta cheese mixture into a round Pyrex bowl. It should be around 1/2″ thickness. Bake it at 300 degrees F for 35 minutes.
    • After 10 minutes cover the cake with aluminum foil, which will prevent the cake browning from the top. Let it cool off to room temperature.
    • While baking the cake, prepared the milk. Boil the milk in a frying pan on medium heat until the milk reduces to about 1 cup (Make sure wet the frying pan before putting the milk to prevent milk not to burn). Stir the milk occasionally. Set aside.
    • Take the ricotta cake out into the serving plate, pour the milk over and garnish with almonds and pistachios. Keep it in the fridge for at least one hour, serve chill.
    Tried this recipe?Let us know how it was!
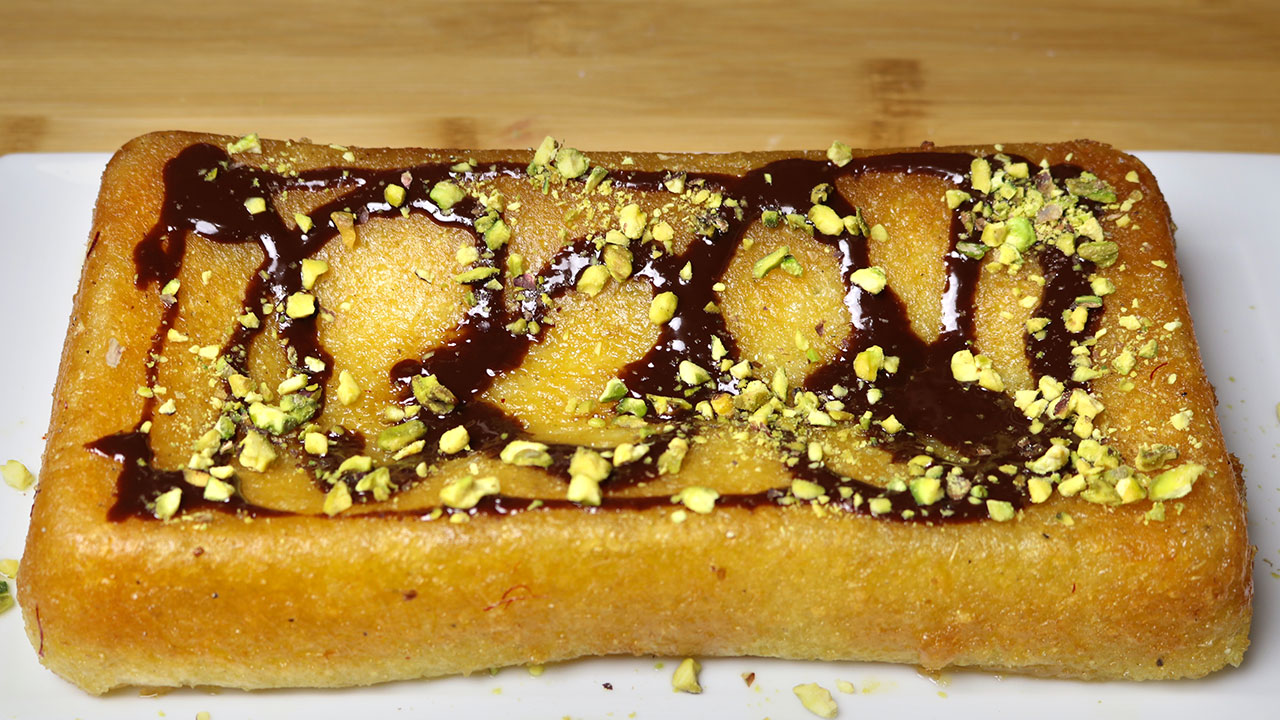
  • Gulab Jamun Cake

    Gulab Jamun Cake

    A rectangular Gulab Jamun Cake topped with a drizzle of chocolate syrup and garnished with crushed pistachios.

    Gulab Jamun Cake

    Gulab Jamun is one of the most well-liked and popular desserts in India. Gulab Jamun has a special place in my heart as it was my very first video showcased on my YouTube channel. I never thought I would be able to parlay my passion into doing something like "Manjula's Kitchen". Gulab Jamun also happens to be a family favorite so it is always a go-to dessert I prepare. My daughter-in-law, who also loves Gulab Jamun, wanted me to try out a variation of the traditional recipe. She saw a recipe online for a Gulab Jamun cake and asked me to try making my version of this recipe. She suggested that I bake the Gulab Jamun instead of frying them, but to also try and preserve the original taste.
    I decided to stick with all the original ingredients for this recipe. However, I did have to experiment with the measurements of the ingredients to maintain the cake texture. Because of the delicious cardamom flavor, another name for this recipe can be "Cardamom Cake". After experimenting with this recipe for some time, I was finally satisfied with the results. I serve the Gulab Jamun cake, adding a layer of chocolate ganache and sliced nuts. You can really experiment with this recipe and make it into a version you love. The cake tastes best if you let it sit for a few hours after baking as the texture improves the longer it sits. It also has a long shelf life when kept at room temperature for several days. Enjoy this variation on a classic dessert!
    This recipe will serve 8.
    No ratings yet
    Prep Time 10 minutes
    Cook Time 30 minutes
    Total Time 40 minutes
    Course Dessert
    Cuisine Indian
    Servings 8 people

    Equipment

    9 ½ by 5 ½ loaf pan

    Ingredients
      

    • 2 cup milk powder
    • ½ cup all-purpose flour – plain flour or maida
    • ½ tsp baking soda
    • ½ tsp baking powder
    • ½ tsp cardamom powder
    • 1 Tbsp sugar
    • 8 Tbsp unsalted butter
    • ¾ cup whole milk

    syrup

    • 1 ½ cup sugar
    • 1 cup water
    • ¼ tsp cardamom powder
    • ¼ tsp saffron thread
    • 1 tsp lemon juice

    For serving

    • 1 Tbsp pistachio sliced
    • ¼ cup chocolate gnash

    Also need

    • 9 ½ by 5 ½ loaf pan

    Instructions
     

    • To make Gulab Jamun Cake first mix all the dry ingredients together in a bowl. Milk powder, all-purpose flour, baking soda, baking powder, sugar and cardamom powder. Mix it well
    • In another bowl take butter, butter should be at room temperature not melted, whip the butter until it is fluffy. About 1 minute.
    • Now add the dry ingredients with butter and mix it well.
    • Slowly add the milk, milk should be at room temperature, mix it for about 2 minutes, batter consistency should be like cake mx.
    • Grease the loaf pan. Pour the Gulab Jamun batter in the pan.
    • Pre heated the oven at 300-degree Fahrenheit. Bake the cake for about 25-30 minutes,
    • Cake should be light brown the Gulab Jamun color, from the top and when you insert the knife in the center of cake should pulls out clean.
    • Keep the cake aside and now make the syrup add all the ingredients for syrup, sugar, water, lemon juice, cardamom, and saffron, in a saucepan. Bring it to a boil over medium-high heat. After syrup comes to boil lower the heat to medium and let it simmer for 2 about minutes.
    • Remove the pot from the heat.
    • Before poring the syrup over the cake, Poke holes in the cake with a fork, several places. Pour the syrup over the cake while it is still warm in the pan. Save about 1/2 cup of syrup. It will look like a lot of syrup, but the cake will soak it all up. Let the cake rest for 10 minutes, then invert it onto a plate.
    • You can garnish the Gulab Jamun Cake in a variety of different ways. I am garnishing with chocolate ganache I have done the chocolate Ganache recipe see the recipe for chocolate cake and sliced pistachios. This recipe has wonderful flavor and appeals to all ages.

    Notes

    It also has a long shelf life and can be kept at room temperature for several days.
    Butter and milk should be at room temperature.
    Extra syrup you can use if you like to serve the cake as Gulab Jamun with the syrup.
    Keyword bake gulab jamun, Balushahi, cake, cardamom, cardamom cake, Cooking Video, Delicacy, delicious, Dessert, diwali, Eggless, eggless cake, holi, Home Cooking, Homemade, indian donut, indian sweet, jalebi, Mithai, no frying, popular sweet, Quick And Easy, royal taste of india, saffron, Sweet, valentine
    Tried this recipe?Let us know how it was!
  • Pineapple Sheera

    Pineapple Sheera

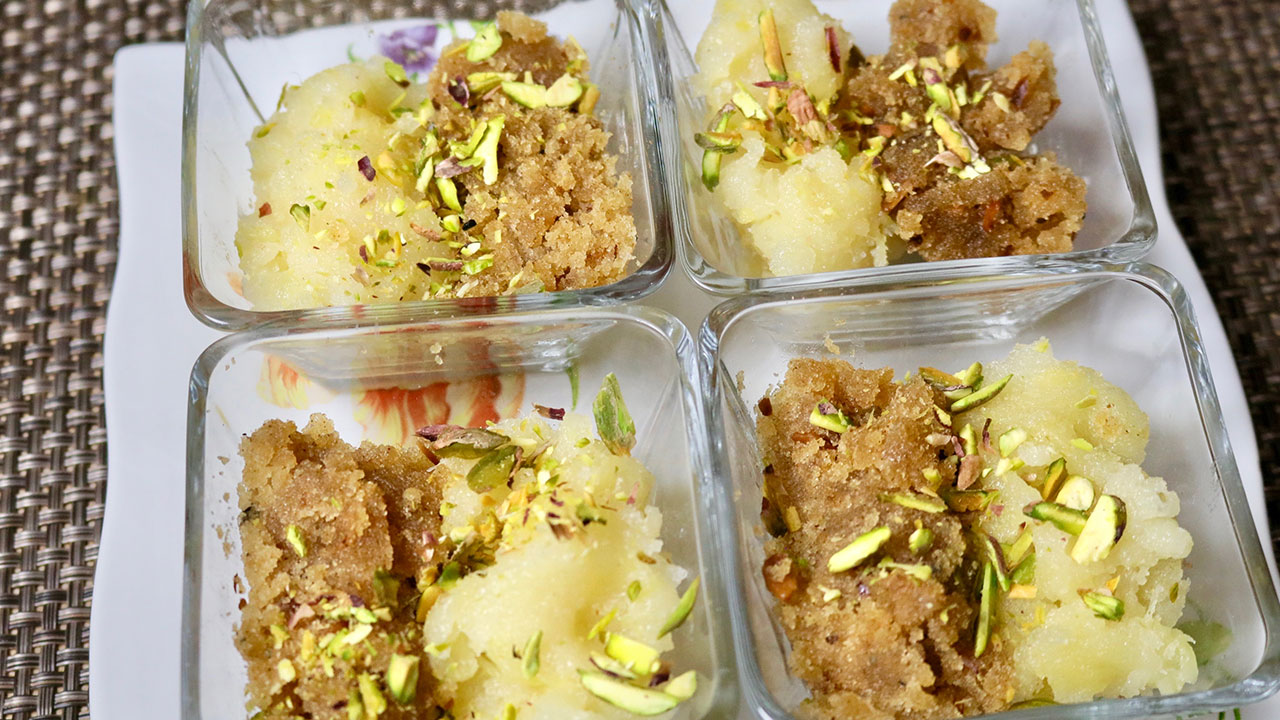
    Four glass bowls filled with pineapple sheera, garnished with chopped pistachios.

    Pineapple Sheera (Sooji ka Halwa)

    Delicious Pineapple Sheera or Halwa. This delicious combination of flavors is sure to please. Sweet and sour pineapple sheera really compliments Sooji halwa nicely to make a unique dish! Especially on holiday times I enjoy making one dessert which I can serve many ways. Sooji sheera and pineapple sheera I will serve combining both and top with ice cream, drizzle with chocolate ganache, forming them small bite size cake. You can also serve them individually with some garnishing. any way you decide to serve this will have wow factor with adults and kids. I will like you to share with some other serving ideas.
    5 from 3 votes
    Prep Time 10 minutes
    Cook Time 25 minutes
    Course Dessert
    Cuisine Indian
    Servings 6 people

    Ingredients
      

    Pineapple Sheera

    • ¼ cup fine sooji rava, semolina flour
    • 2 Tbsp ghee clarified butter
    • ½ cup pineapple crushed, unsweetened canned pineapple
    • ¼ cup sugar
    • ½ cup water
    • Sooji Sheera
    • ¼ cup fine sooji rava, semolina flour
    • 2 Tbsp ghee clarified butter
    • cup sugar
    • 1 cup water
    • tsp cardamom powder
    • 1 Tbsp almonds sliced

    For Garnishing

    • 1 Tbsp sliced pistachios

    Instructions
     

    Making Pineapple Sheera

    • Drain the water from pineapple and set aside, don’t discard the water, will be used later.
    • Melt the ghee in a frying pan on medium heat. Add sooji and roast stirring constantly this will take about 2-3 minutes. Sooji will have a light sweet aroma, do not brown the sooji. Add the pineapple, mix it well stir for 2-3 more minutes.
    • Add sugar mix well, add pineapple syrup and water mix it well. cook till the water evaporated. Sheera should be the consistency of soft sticky dough. After it will cool off sheera will become little more dry.

    Making Sooji ka Sheera

    • Melt the ghee in a frying pan on medium heat. Add sooji and roast to brown color; stirring constantly this will take about 5 to 8 minutes. After sooji is roasted half the way add almonds and roast with sooji. Sooji should be brown in color and will have a light sweet aroma.
    • Add the sugar, mix add the water slowly to sooji as water will splatter. Add cardamom, turn down the heat to medium low and let it cook for about 2-3 minutes. Sheera should be the consistency of thick batter. Note: as sheera will cool it will be thicker in consistency.

    Notes

    Serving: In an individual serving bowl serve both sheera side by side and garnish with pistachios. Make them in cupcake shape use about 3 oz cups or use the size you prefer. 
    Fill the cups half the way with pineapple sheera and level it, then fill the cup with sooji sheera and let it sit for about 10 minutes. 
    Over the plate take them out upside down, now you have pineapple sheere on the top, or you may keep sooji sheera on the top, garnish with pistachios. 
    I call them Sheera Cake Bites. You also enjoy Paneer Malai Ladoo, Moong Dal Ladoos, Apple vegan cake, Gujia
    Keyword Ananas Halwa, Eggless Dessert, Homemade, Pineapple Halwa, Quick And Easy, Sattvik Food, semolina, Sooji Halwa
    Tried this recipe?Let us know how it was!
  • Custard Toast Bites
    Custard Toast Bites
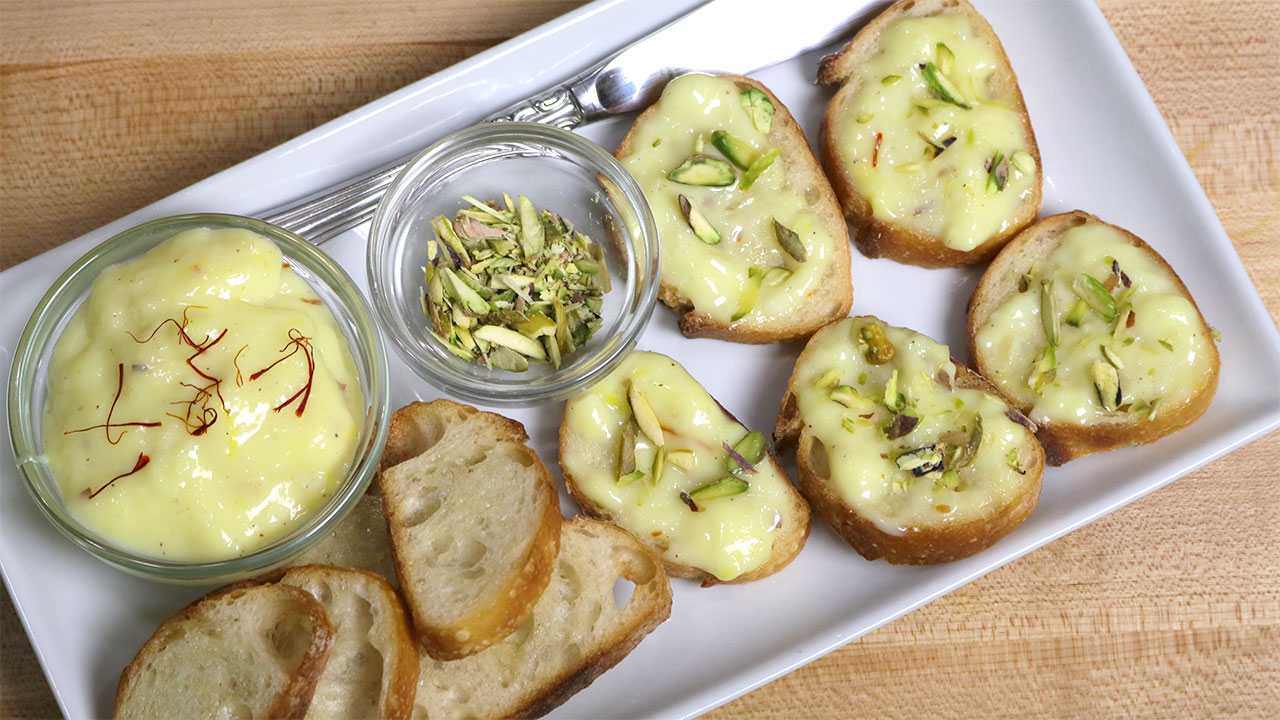
    Slices of toasted bread topped with custard and garnished with sliced pistachios, served with extra custard and a bowl of pistachios on the side.

    Custard Toast Bites
    Custard Toast Bites is custard flavored with saffron and cardamom and served over toasted bread. This recipe is definitely un-traditional but nonetheless a delicious approach. This is super easy to make and you can call this Custard Bruschetta. Custard Toast Bites can be served as a dessert or tea time snack.
    No ratings yet
    Course Appetizer
    Servings 4 people

    Ingredients


    • 12 thin slices of French bread bruschetta or use the regular size bread and cut them to size you will like
    • 2 Tbsp melted butter
    • 1 ¼ cup milk
    • ¼ cup heavy cream
    • ¼ cup sugar
    • 1 ½ Tbsp corn starch
    • Pinch saffron
    • tsp cardamom powder
    • 1 Tbsp sliced almond for garnishing
    • 1 Tbsp sliced pistachios for garnishing

    Instructions
     

    • In a heavy bottom pan; stir in the milk, cream, cornstarch, sugar, cardamom powder and saffron. Make sure the corn flour has dissolved completely, no lumps.
    • Turn the heat to medium and bring the milk mixture to a boil, stirring continuously. Turn the heat to low. Keep stirring until the mixture thickens. It is important to keep stirring continuously to avoid burning and the lumps.
    • Milk mixture should be consistency of thick batter. This should take about 3-4 minutes. Remember as custard will cool of it will become thicker. Turn off the heat and sliced almonds mix it well. The custard is ready.
    • Lightly butter the bread from both sides and toast to make them crisp.

    Notes

    For Serving
    Spread custard generously over toasted bread and garnish with pistachios.
    Keyword Bruschetta, Custard, Dessert, Eggless, Homemade, Quick And Easy, Saffron Custard, Snack, Vegetarian
    Tried this recipe?Let us know how it was!
  • Pistachio Phirni Recipe

    Pistachio Phirni Recipe

    Pistachio Phirni

    Pistachio Phirni (Rice Pudding)

    Pistachio Phirni is a popular North Indian dessert. This is a delicious creamy eggless pudding. Phirni is made with rice, milk and sugar, and has wonderful creamy texture. Ingredients are the same as Rice Kheer but the taste is very different. This is an easy recipe to make.
    No ratings yet
    Course Dessert
    Cuisine Indian
    Servings 6 people

    Ingredients
      

    • 1/4 cup rice
    • 3-1/4 cup of milk
    • 1/2 cup  sugar
    • Few strings of saffron
    • 6 cardamom pods shelled and crushed
    • 1/4 cup  pistachios

    Instructions
     

    • Wash rice and soak it for about half an hour.
    • Drain the water. Blend rice to a fine texture adding few spoons of milk as needed to blend. Add about ¼ cup of milk to make a runny batter. Keep aside.
    • Soak the pistachios in hot water for at least 10 minutes, while water is still warm drain the water and rub the pistachio with paper towel and remove the skin and dry them. Slice or crush the pistachios and keep aside.
    • Boil the milk on heavy bottom pan over medium high heat; wet the pan before adding the milk to avoid the milk burning in bottom of the pan.
    • After milk start to boil lower the heat to medium and let it simmer for about 12 minutes.
    • 6. Add rice to the boiling milk slowly and keep stirring continuously, making sure rice does not become lumpy, milk will become thick. Let it boil for about 3-4 minutes stirring continuously.
    • Next add the sugar, cardamom powder, saffron and pistachios save about 1 tablespoon of pistachios for garnishing.
    • Let it boil for another 4-5 minutes over low medium heat while stirring continuously, it will be consistency of thick batter. Turn off the heat.
    • Shift the Phirni to the serving bowl while it is still hot as Phirni start getting thick as it cools. Garnish with pistachios.
    • Serve chill!
    Keyword 2 Minutes Dessert
    Tried this recipe?Let us know how it was!

  • Healthy After School Snacks

    Healthy After School Snacks

    I wanted to share some quick and easy snacks I used to prepare for my two sons, Rakesh and Mukesh, and their friends.

    When the boys were young, I made sure to have tasty and healthy snacks readily available. They would often bring their friends, who loved coming to our house after school.  Our house was the place to be fed well with homecooked fresh food!  I would keep their snacks quick and easy to prepare. They also love helping me prepare snacks.

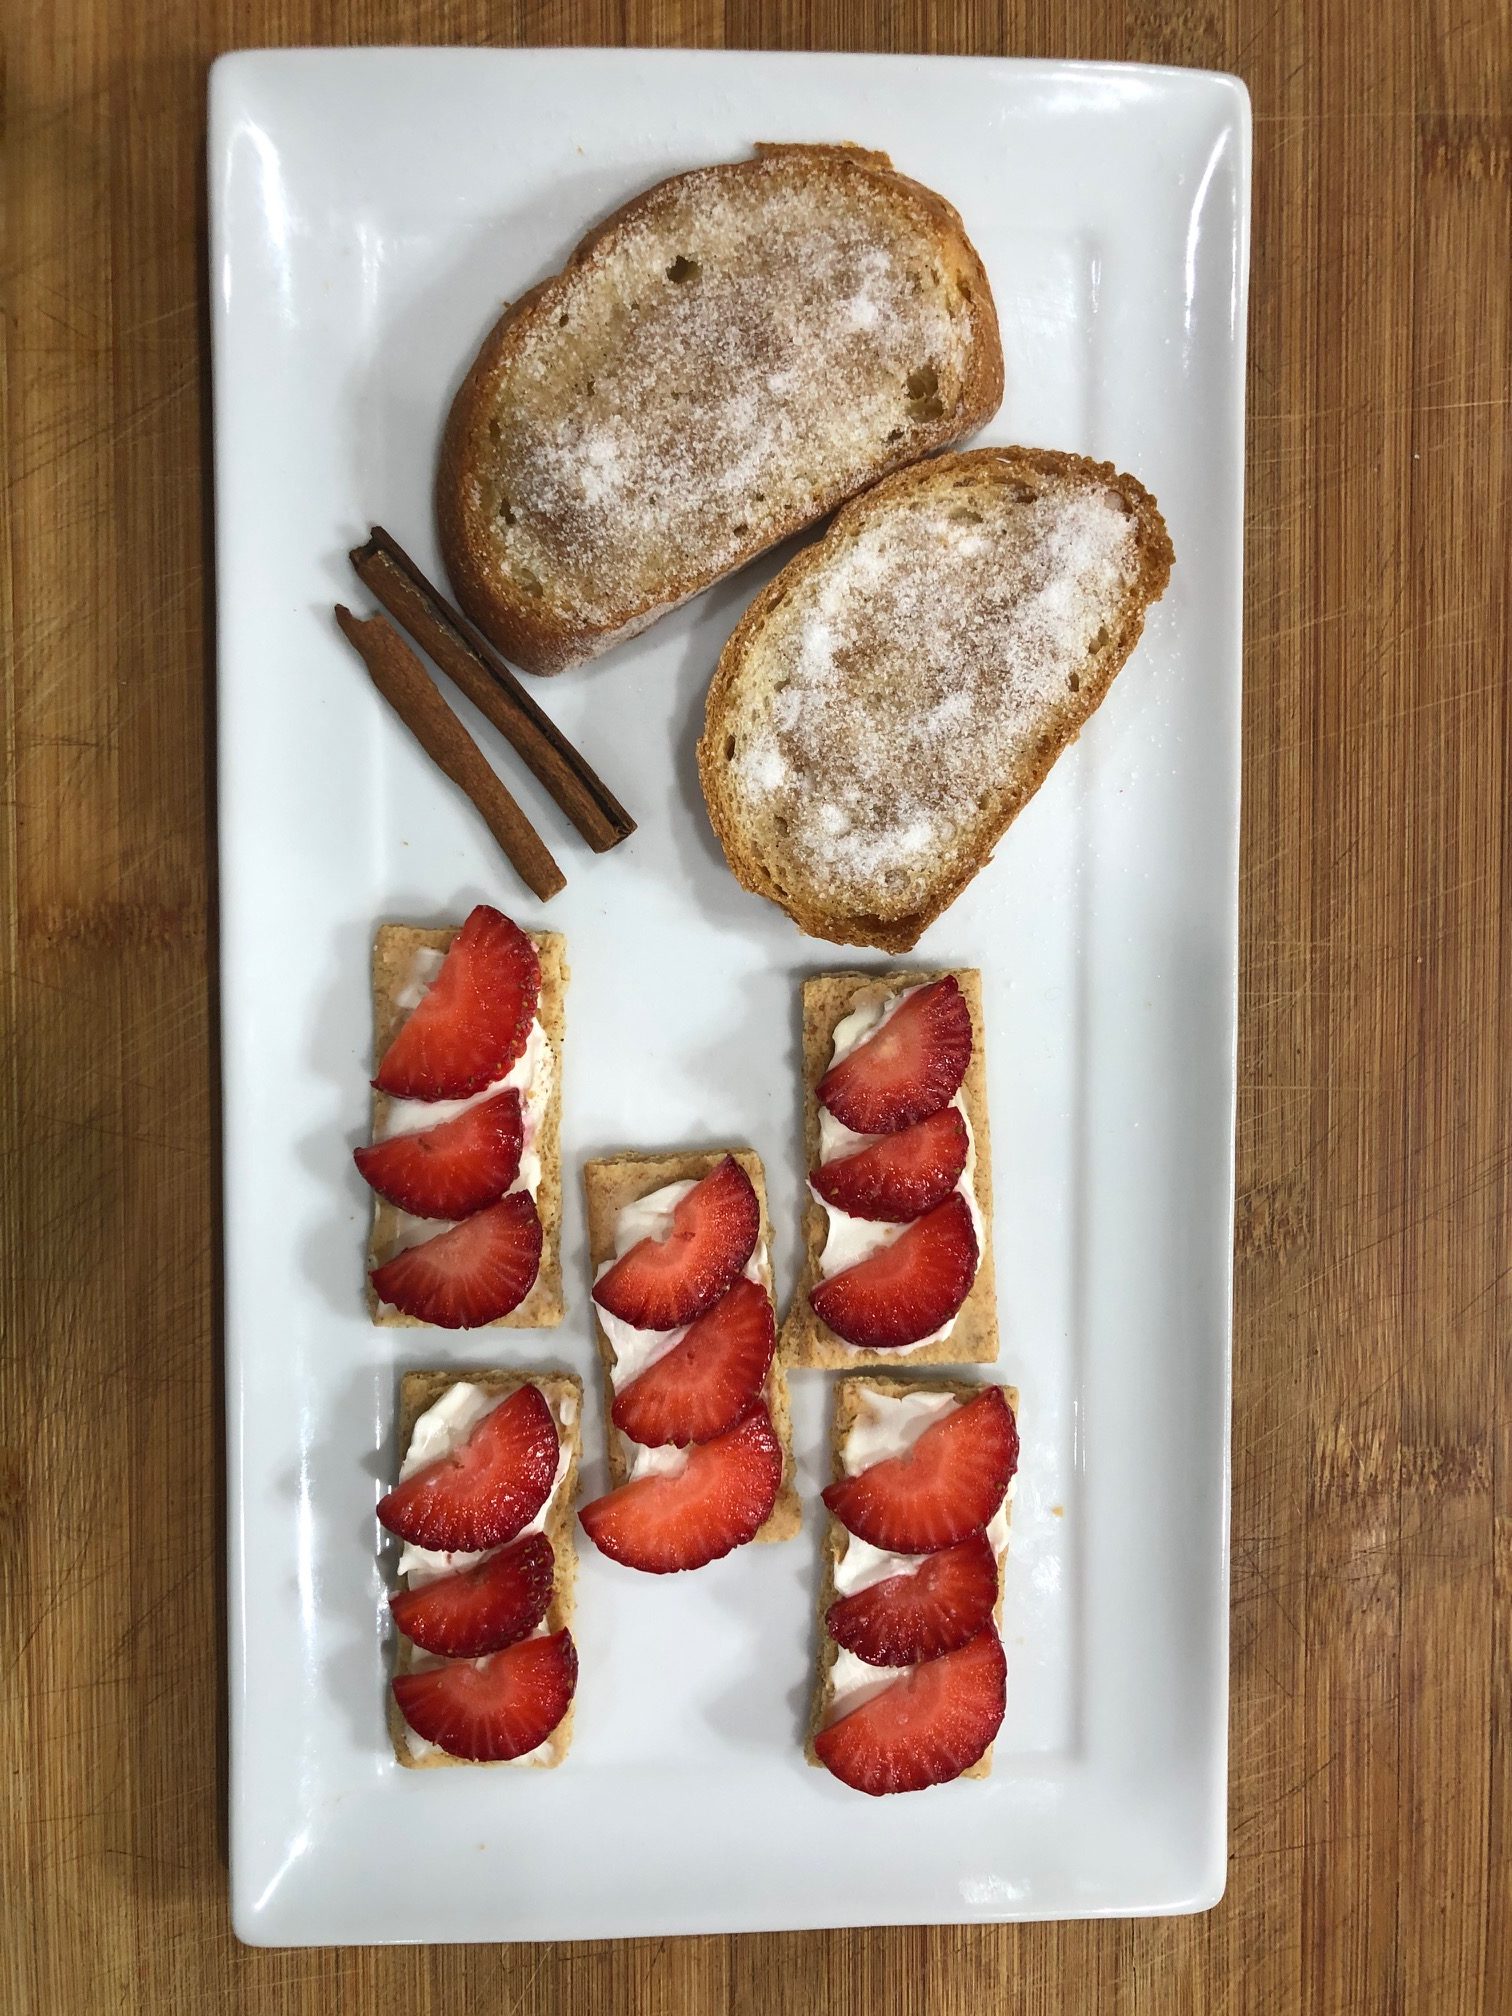
    Some of their favorite snacks included celery sticks and sliced cucumbers and cream cheese, carrots and peanut butter, potatoes with cheese, crisp toast with cinnamon and sugar sprinkled on top, and graham crackers with cream cheese topped with fresh fruit.

    celery sticks and sliced cucumbers and cream cheese, carrots and peanut butter, potatoes with cheese
    crisp toast with cinnamon and sugar sprinkled on top, and graham crackers with cream cheese topped with fresh fruit

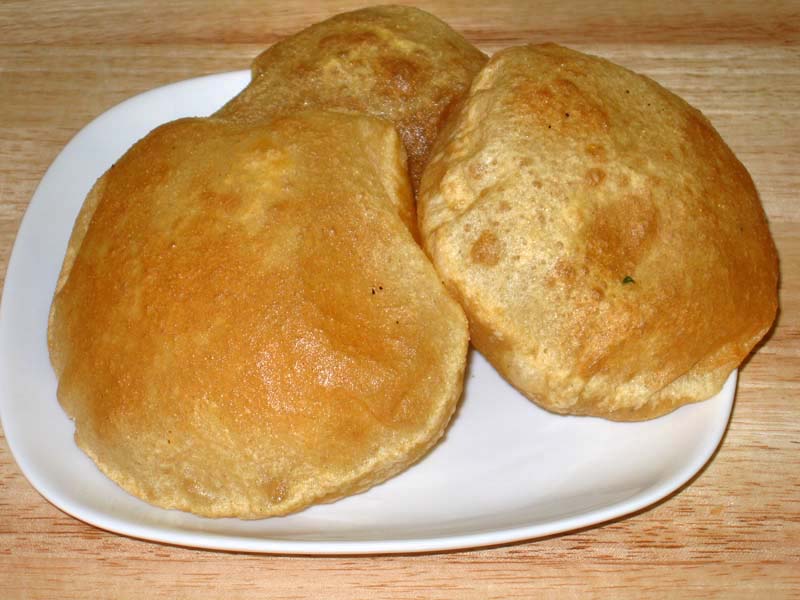
    The boys loved when I added Indian touches to their snacks.  One of their favorites was fresh hot puris.  All their friends loved watching me fry puris and were amazed to see how they would puff up.

    Puri (Flat Bread) Recipe by Manjula
    Puri (Puffed Flatbread)

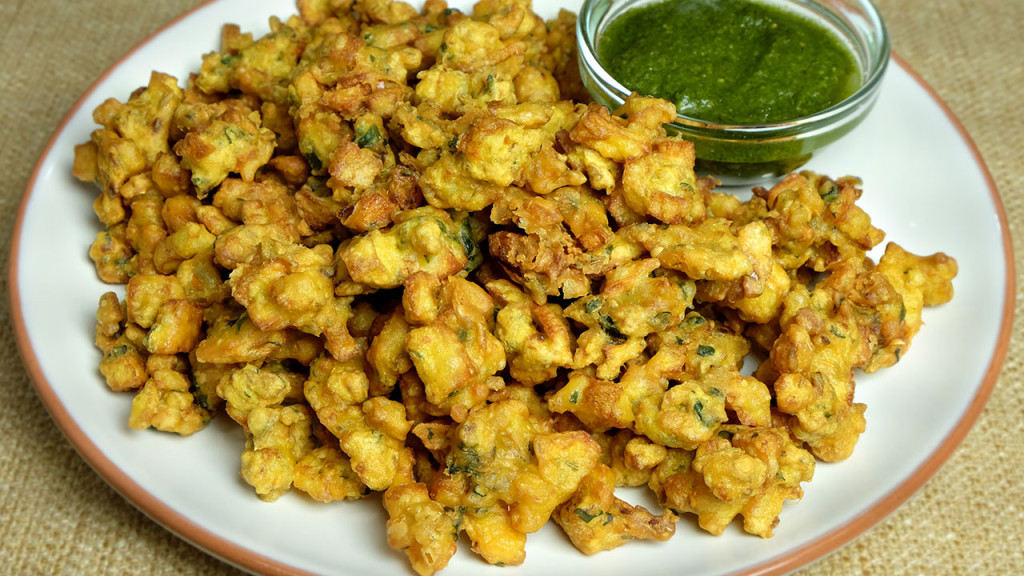
    They also enjoyed crispy aloo pakoras. They would devour these!  I could not keep up with how fast they ate them!

    Crispy Aloo Pakoras Recipe by Manjula
    Crispy Aloo Pakoras

    Here are some ideas you can find on my website for quick, easy and delicious snacks.  Now that we are spending a lot more time at home, try engaging with your kids and let them prepare their own snacks, such as: 

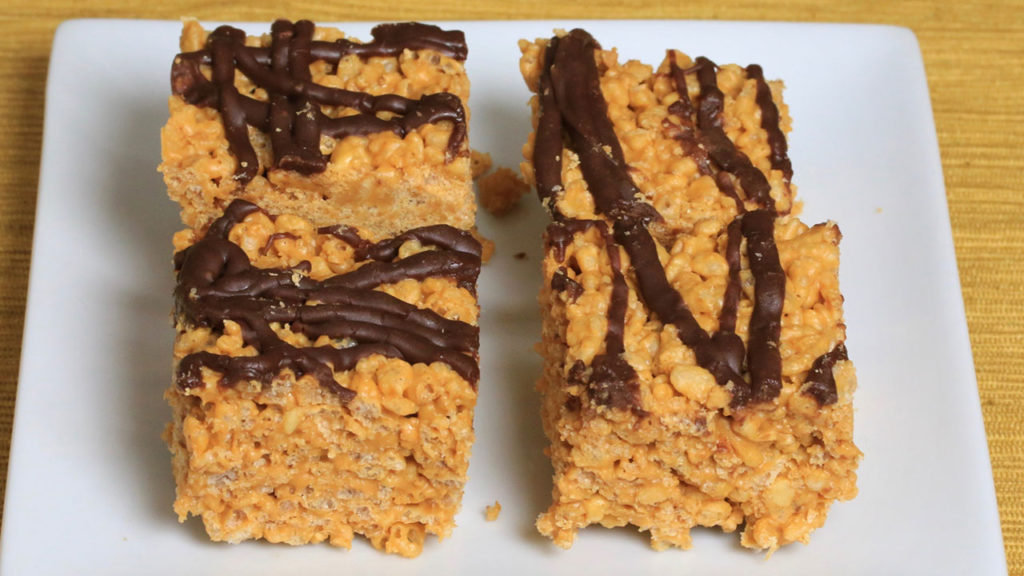
    Rice Krispies Treats

    Rice Krispies Treat Recipe by Manjula

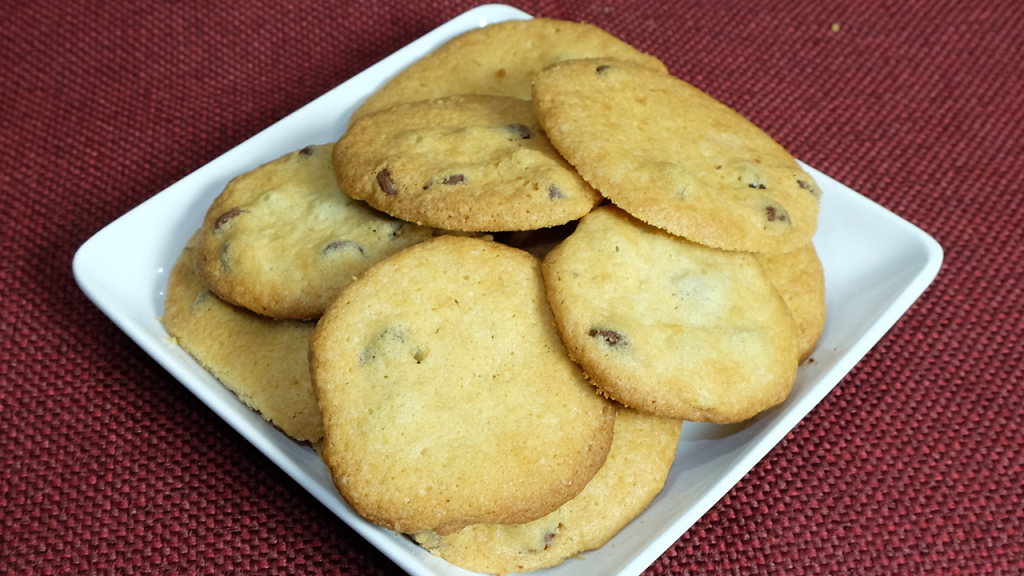
    Chocolate chip cookies

    Eggless Chocolate Chip Cookies Recipe by Manjula

    Chocolate Brownies

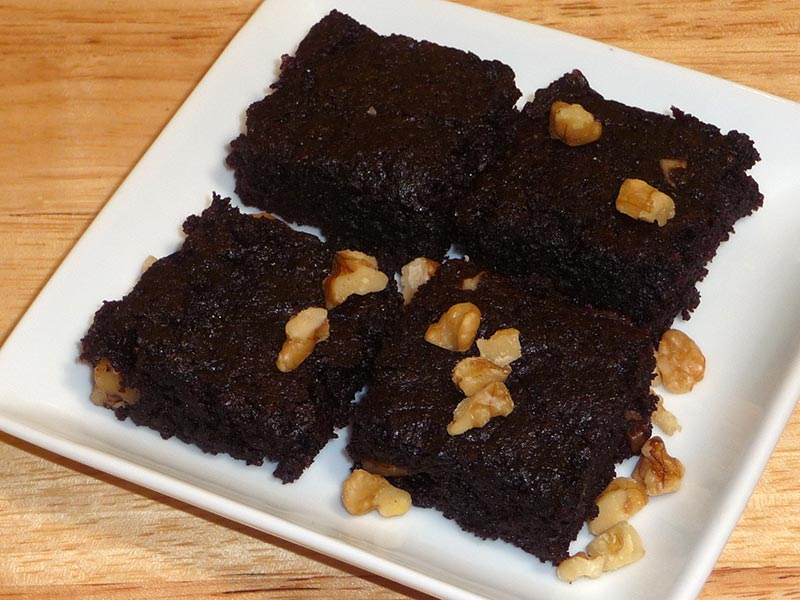
    Chocolate Brownie (eggless and vegan) by Manjula

    These are the few my grandkids really enjoy!

  • Sorghum Dosa (Jowar)

    Sorghum Dosa (Jowar)

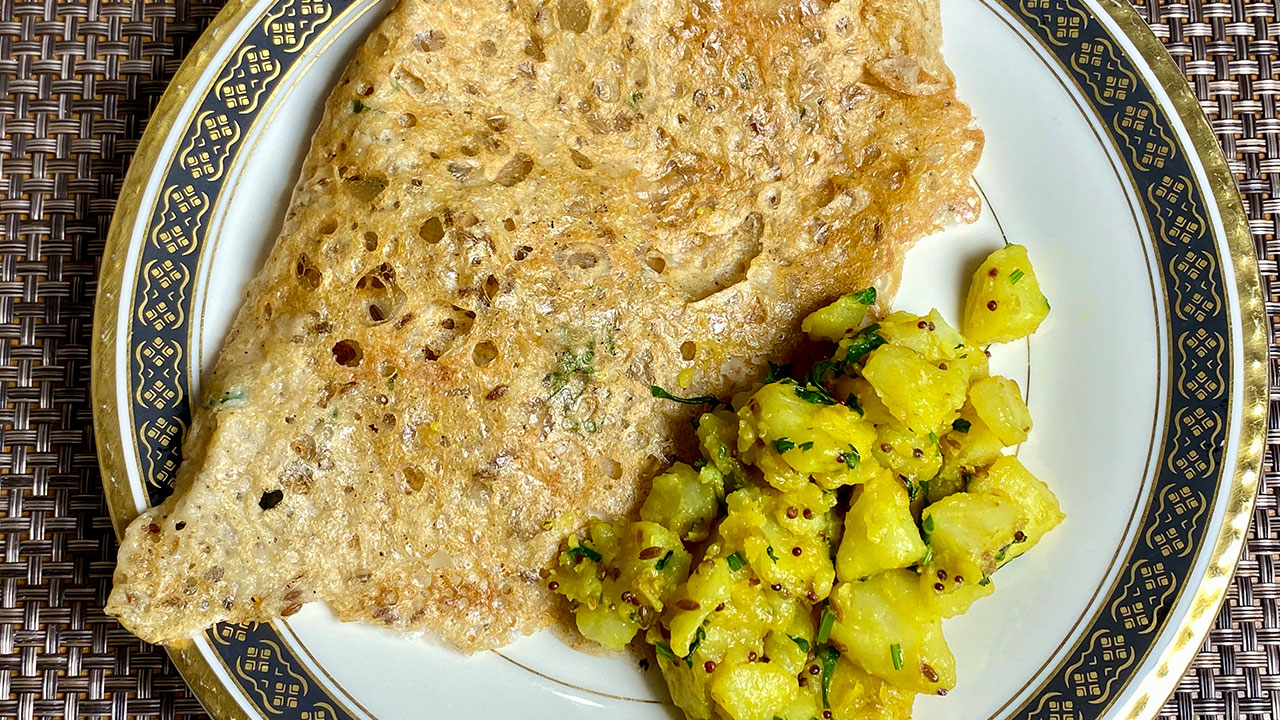
    A plate of crispy Sorghum Dosa served with spiced potato filling

    Sorghum Jowar Dosa

    Sorghum Jowar Dosa a tasty twist to Rava Dosa. Lately, I am trying gluten free recipes and exploring the grains I rarely used. Sorghum Dosa is one of those recipes. This is a good alternative to regular dosa it is quick and easy to make. Sorghum Dosa batter does not need to be fermented. Sorghum dosa also vegan and gluten free. It is crispy and has a lacy look like Rava Dosa. You can serve this with traditional Samber and coconut Chutney or serve for a snack with cilantro Chutney.This recipe will serve 3.
    4 from 1 vote

    Ingredients
      

    • ½ cup sorghum Jowar flour
    • ¼ cup rice flour Chawal ka atta
    • ½ tsp cumin seed jeera
    • tsp asafetida hing
    • ¼ tsp salt
    • tsp crushed black pepper
    • 1 Tbsp finely chopped cilantro hara dhania
    • 1 ½ cup water
    • 3 Tbsp of oil for cooking dosa

    Instructions
     

    • Mix all the dry ingredients together, sorghum flour ( Jowar), rice flour, cumin seeds, asafetida, salt, black pepper.
    • Add water slowly to make a thin batter and avoiding any lumps. Batter should have pouring consistency like buttermilk. Let the batter stand for about 30 minutes.
    • Before making dosa add cilantro. Mix it well.
    • Heat the skillet on medium high. To check if the skillet is ready sprinkle a few drops of water over the skillet water should sizzle. Wipe the skillet with few drops of oil.
    • Pour the batter with a ladle, keep the ladle about 4 inches high from the skillet in a circular motion starting from the center. Keep pouring the batter till it is the size you will like the dosa. Notes: dosa will no be perfectly round.
    • Do not try to spread the batter, Dosa should have holes like swiss cheese or have lacy look.
    • Drizzle 1 teaspoon of oil around dosa.
    • Cook Dosa over medium heat for about 2 minutes or until Dosa becomes golden brown. Turn the Dosa using spatula.
    • Let Dosa cook for about 1 minute from another side. Dosa will be golden brown on one side and light color on other side. Thin and crispy Sorghum Dosa is ready to serve.
    • Dosa has a look of Rava dosa but Sorghum Dosa is also gluten free and vegan.

    Notes

    Serving Suggestions
    Traditionally Rava Dosa is served with Sambar (lentil soup cooked with vegetables), and coconut chutney, or serve for snack with cilantro Chutney. I have the recipes for Sambar, Coconut Chutney, and Hari Cilantro Chutney on my web site.
    Tried this recipe?Let us know how it was!

    How to make Instant Sorghum Dosa by Manjula’s Kitchen

    Dosa is a popular south indian delicacy which looks like a crepe. It’s like a crisp and thin pancake made of rice and urad dal batter. Traditionally Dosa is served with sambar, aloo masala and coconut chutney. It is an Indian crepe made usually through rice batter, but here we have experimented and made many alternative dosa such as Oat Dosa, Besan Dosa, Rava Dosa, Sorghum Dosa. This preparation is using sorghum dosa and is a bread based breakfast recipe that is vegan. The preparation entails skillfully combining pan techniques and manual dexterity to achieve the perfect bread cooked on non-stick skillets.

    1. Mixing Dry Ingredients: Crafting the Base for Jowar Dosa

    Embark on the journey of creating an Instant Jowar Dosa by combining all the dry ingredients – sorghum flour (Jowar), rice flour, cumin seeds, asafetida, salt, and black pepper. This harmonious blend sets the foundation for a gluten-free and vegan dosa that promises a delightful culinary experience. Ensure the dry ingredients are well-integrated, setting the stage for the dosa batter.

    2. Creating the Dosa Batter: Achieving the Perfect Consistency

    Gradually add water to the dry mix, creating a thin batter with a pouring consistency akin to buttermilk. The key is to avoid any lumps, ensuring a smooth texture. Let the batter stand for approximately 30 minutes, allowing it to settle and develop optimal flavours. This patient step contributes to the success of your Jowar Dosa, enhancing its taste and texture.

    3. Adding Cilantro: Elevating the Flavor Profile of Jowar Dosa

    Before transforming the batter into dosas, introduce a burst of freshness by adding cilantro. This step not only enhances the flavor profile but also adds a visual appeal to your Jowar Dosa. Gently mix the cilantro into the batter, ensuring an even distribution of this aromatic herb.

    4. Pouring and Cooking Dosa: The Art of Creating Jowar Dosa

    Heat the skillet on medium-high, a crucial step before creating your Jowar Dosa. To test the skillet’s readiness, sprinkle a few drops of water – a sizzle should confirm its optimal temperature. Wipe the skillet with a few drops of oil, creating the perfect non-stick surface. With a ladle, pour the batter in a circular motion, starting from the centre, allowing the dosa to take shape naturally. Resist the urge to spread the batter, as Jowar Dosa is intended to have holes, resembling a swiss cheese or possessing a lacy appearance.

    5. Drizzling Oil and Flipping Dosa: Achieving the Perfect Golden Brown

    Enhance the crispiness and flavour by drizzling a teaspoon of oil around the dosa. Cook the Jowar Dosa over medium heat for about 2 minutes until it attains a golden brown hue. Using a spatula, gently flip the dosa, revealing a light colour on one side and the golden brown perfection on the other. This intricate dance of heat and ingredients results in a thin, crispy, and visually appealing Sorghum Dosa.

    6. Serving Your Gluten-Free Creation: Enjoying the Instant Jowar Dosa

    Your Instant Jowar Dosa, with its distinctive swiss cheese-like appearance, is now ready to grace your table. Savour the gluten-free and vegan goodness of this delectable creation. While reminiscent of Rava dosa in appearance, the uniqueness of Sorghum Dosa shines through. Thin, crispy, and utterly satisfying, this dosa promises a delightful culinary experience that caters to a diverse range of dietary preferences.