Search results for: “dal”

  • Battura

    Battura

    Battura (Fried Puffed Bread)

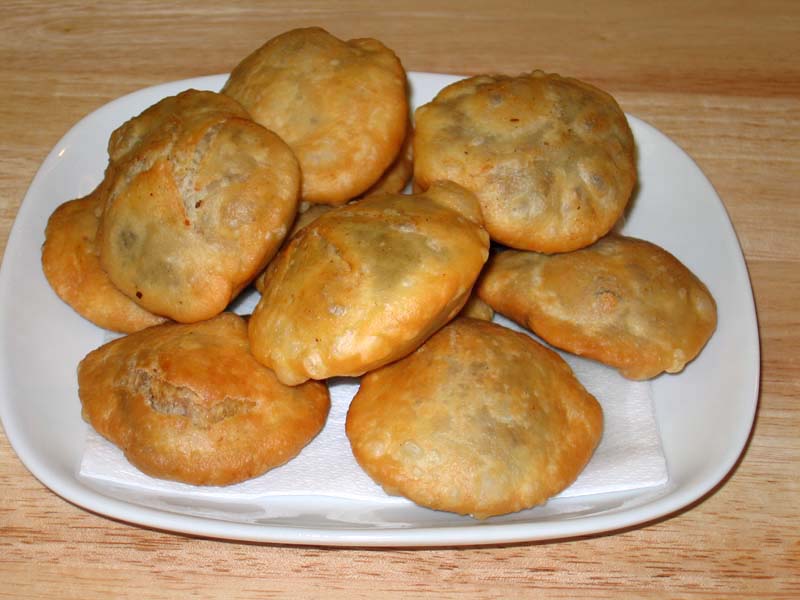
    Battura-(Chola Battura)

    Battura is fried puffed bread traditionally served with chola (chickpeas). The combination, called Chola Batura, is a popular snack from the state of Punjab. Chola Batura is a popular appetizer dish among youngsters.
    5 from 2 votes
    Prep Time 10 minutes
    Cook Time 15 minutes
    For Rising the dough 3 hours
    Total Time 25 minutes
    Course Main Course
    Cuisine Indian
    Servings 4 people

    Ingredients
      

    • 2 cups all-purpose flour plain flour or maida
    • 2 tbsp sooji semolina flour
    • 2 tbsp yeast
    • 1 tsp sugar
    • 1 tsp salt
    • 3 tbsp yogurt dahai, curd
    • 2 tbsp oil
    • 3/4 cup lukewarm water , use as needed

    Also need

    • 1/4 cup flour for rolling
    • oil to fry

    Instructions
     

    • Dissolve yeast in lukewarm water. Let it sit ten minutes or until the mixture becomes frothy.
    • Add sooji, sugar, and salt to the all-purpose flour and mix well. Add oil, yogurt, sugar and yeast water mix well. add water as needed to make soft pliable dough. 
    • Cover the dough and keep in a warm place three to four hours. The dough should nearly double in volume.
    • Knead the dough and divide into 8 equal parts. Shape dough into balls and roll into six- to seven circles. Dust lightly with dry flour to help with the rolling.
    • Heat  about 1″ of oil in a frying pan on high heat. Batura should be fried in very hot oil. To test, place a small piece of dough in the oil. The dough should float to the top and be light in color.
    • Place the one batura in the frying pan and press it with a skimmer it will puff up like a ball. Turn and cook until light creamy brown on both sides. Take the batura out and place them on paper towels to absorb the excess oil. Repeat for the remaining baturas.

    Notes

    Notes
    Be sure to fry baturas in hot oil. If the oil is not hot enough, the baturas will be greasy.
    Serving Suggestions
    I like to serve baturas with Punjabi Chola or Palak Paneer
    Keyword Chola Battura, Kid Friendly, Street Food
    Tried this recipe?Let us know how it was!

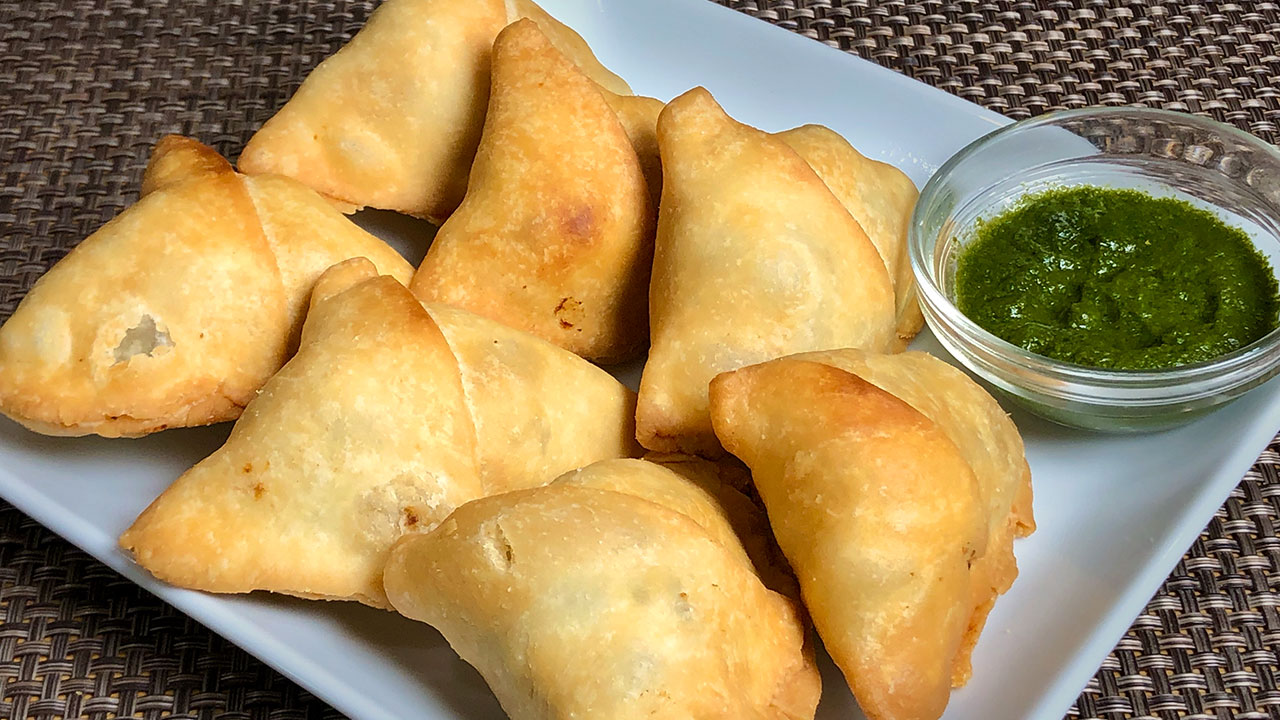
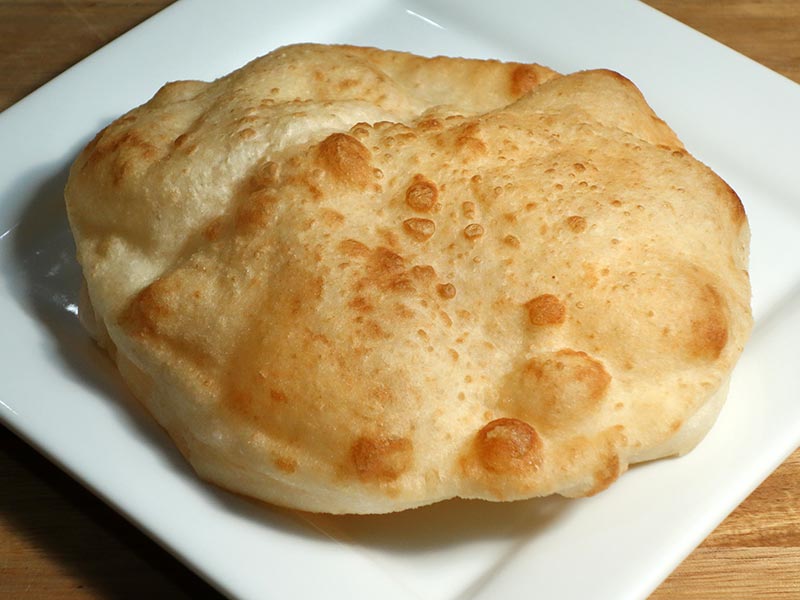
    Fluffy and Delicious Bhatura

    Bhatura is a fluffy and soft Indian fried bread that is often enjoyed with chole (spiced chickpeas). This bhatura recipe is easy to follow and results in perfectly puffed bread that is crispy on the outside and soft on the inside. Bhatura is a popular dish in North Indian cuisine and is often served for breakfast or as a hearty meal.

    The Essence of Bhatura

    The essence of bhatura lies in its fluffy texture and rich flavor. Made with a combination of all-purpose flour, yogurt, and a few simple ingredients, this bread is deep-fried to golden perfection. The yogurt helps in fermentation, giving the bhatura its characteristic softness and slight tanginess. This Indian fried bread is a delightful treat that pairs wonderfully with a variety of curries and dishes.

    Origin and Popularity

    Bhatura, also known as bhature, is a traditional bread from North India. It is especially popular in Punjab and Delhi, where it is often served as chole bhature – a combination of bhatura and spicy chickpeas. This dish is enjoyed for its rich flavors and satisfying texture, making it a favorite among both children and adults. The popularity of bhatura has spread across India and beyond, making it a beloved dish in many households.

    Why You’ll Love This Recipe

    • Fluffy and Soft: The perfect texture makes this bread irresistible.
    • Easy to Make: Simple ingredients and straightforward steps.
    • Versatile: Can be paired with a variety of dishes.
    • Perfect for Special Occasions: Ideal for breakfast, lunch, or festive meals.

    Variations of Vegetable Dry Recipes

    Exploring Manjula’s Kitchen reveals a treasure trove of other delicious vegetable dry recipes that you might enjoy with your fluffy bhatura. Here are some related dishes that you might find interesting:

    1. Rajma (Kidney Bean Curry): A hearty and comforting curry made with kidney beans, cooked in a flavorful tomato-based gravy.
    2. Masoor Dal: A simple and nutritious red lentil soup, seasoned with spices and perfect for a light meal.  
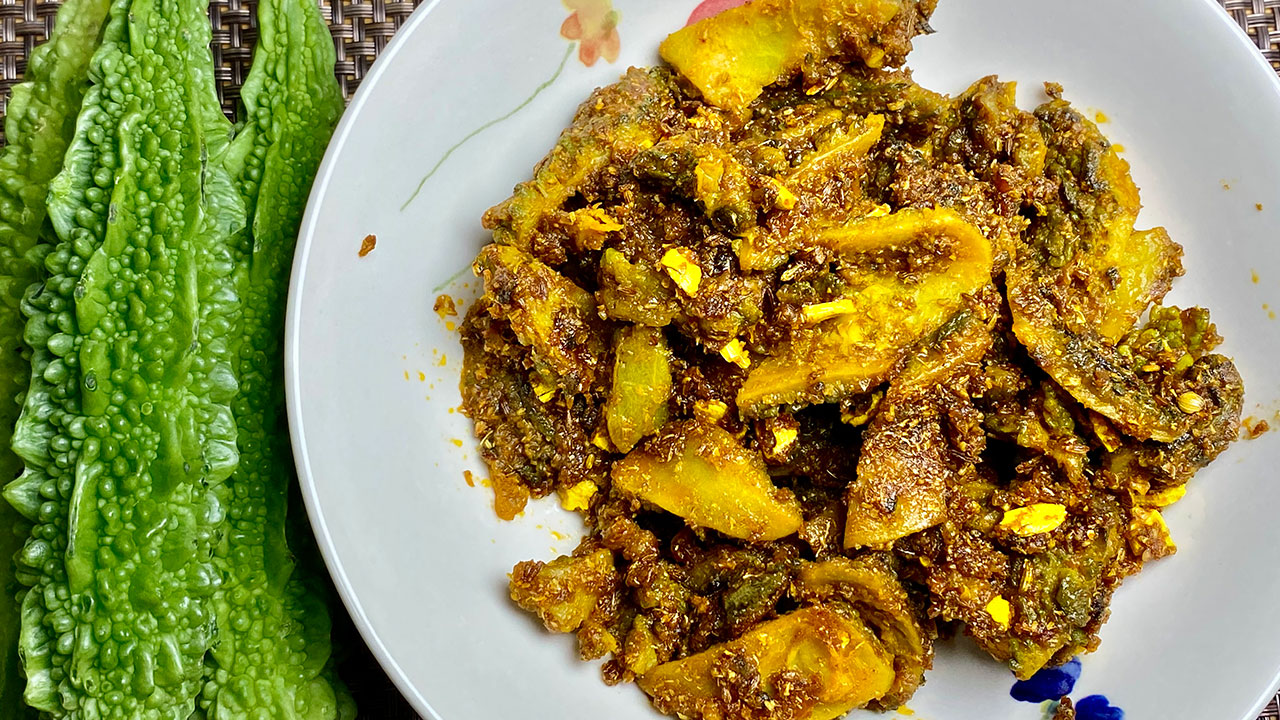
    3. Bhindi Masala: Spiced okra stir-fry, a quick and tasty dish that pairs well with roti or rice.
    4. Matar Paneer: Peas and cottage cheese cooked in a tomato-based gravy, a classic North Indian dish.
    5. Aloo Tikki: Spiced potato patties that are crispy on the outside and soft on the inside, perfect as a snack or appetiser. Recipe: 

    Serving Suggestions

    Bhatura can be enjoyed in various ways:

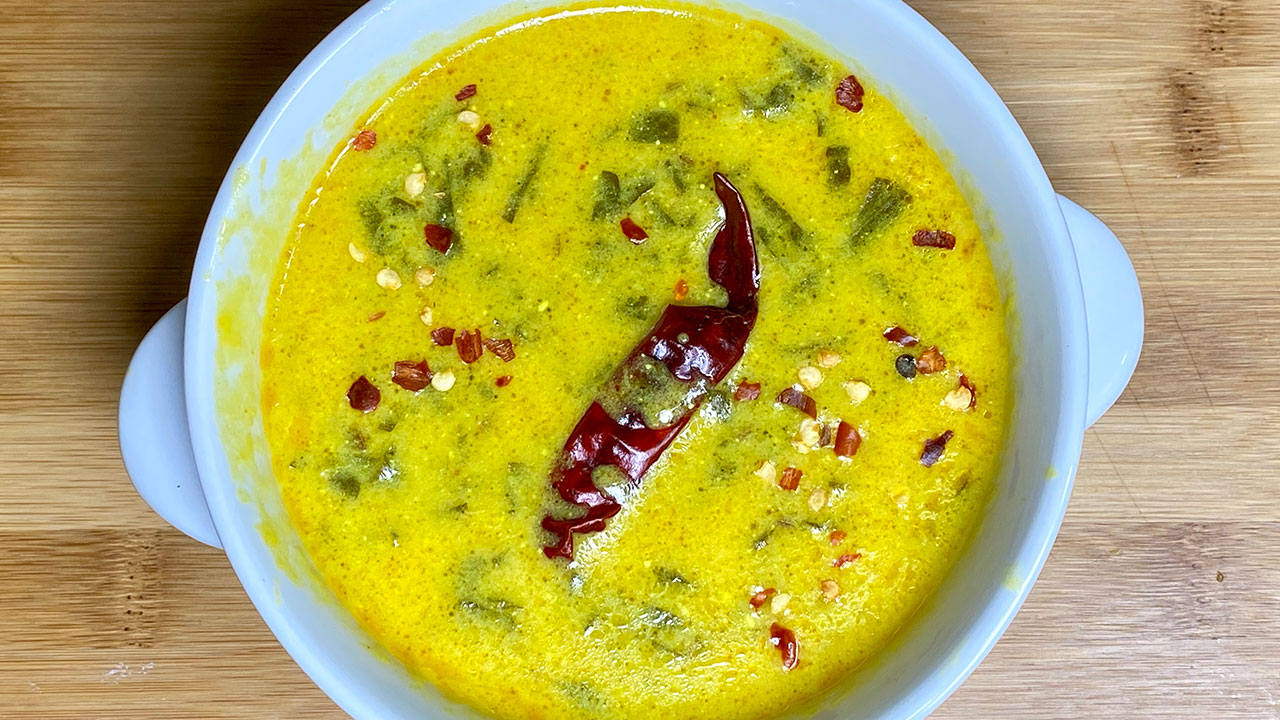
    • With Chole: The classic combination of bhature and spicy chickpeas.
    • With Curries: Pair with rich and flavorful curries like paneer butter masala or dal makhani.
    • As a Snack: Enjoy with a cup of chai and some pickles.
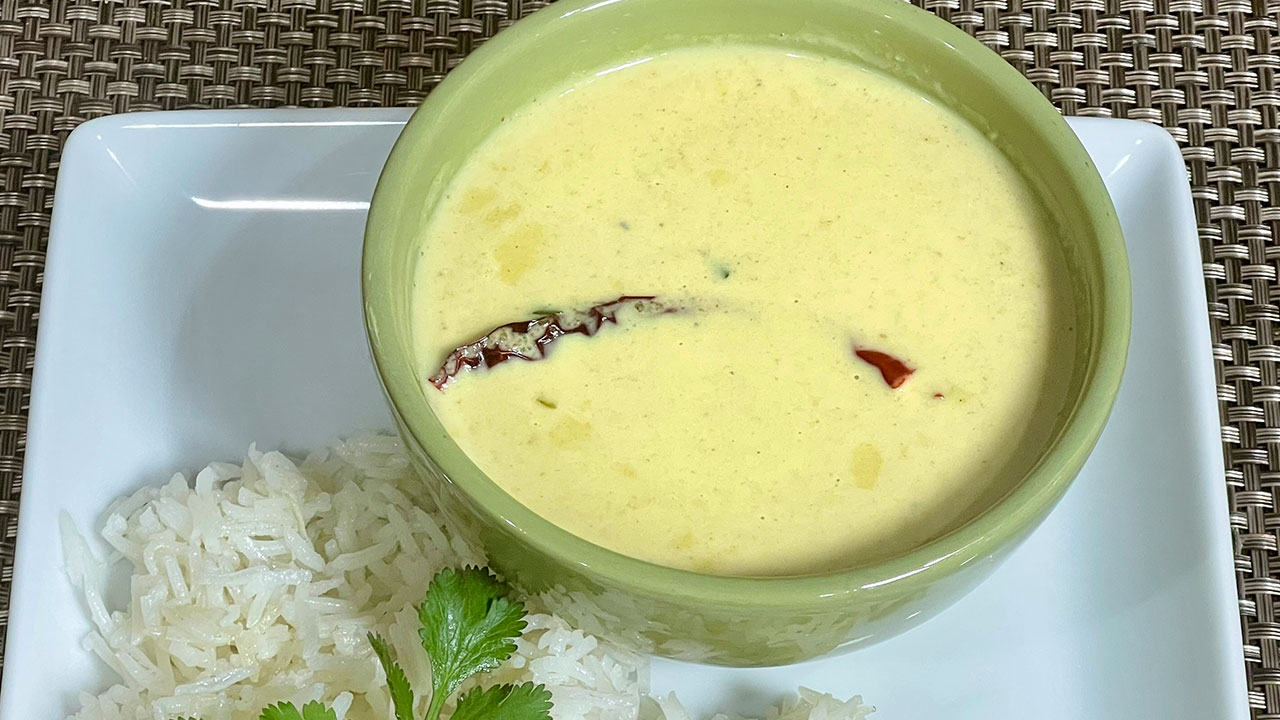
    • With Raita: Serve with a side of cool yogurt raita to balance the richness.

    Tips and Tricks

    To perfect your bhatura recipe, consider these helpful tips:

    • Use Fresh Ingredients: Fresh flour and yogurt will enhance the flavor and texture.
    • Knead Well: Knead the dough until it is smooth and elastic.
    • Rest the Dough: Let the dough rest for a few hours to help with fermentation.
    • Fry at the Right Temperature: Ensure the oil is hot enough to puff up the bhatura without burning.

    FAQs

    Can I Use Whole Wheat Flour Instead of All-Purpose Flour? 

    Yes, you can use whole wheat flour for a healthier version, but the texture will be slightly different.

    How Long Should I Let the Dough Rest? 

    Let the dough rest for at least 2-3 hours for better fermentation.

    Can I Bake Bhatura Instead of Frying? 

    Traditional bhatura is fried, but you can try baking them for a healthier option. However, they won’t have the same texture.

    How Do I Store Leftover Bhatura? 

    Store leftover bhatura in an airtight container at room temperature for up to 1 day. Reheat in a preheated oven or on a skillet before serving.

    What Can I Serve with Bhatura? 

    Bhatura pairs well with various curries, pickles, and raita. It is traditionally served with chole, but you can get creative with different accompaniments.

  • Khasta Kachori

    Khasta Kachori

    Khasta Kachori

    Khasta Kachori

    Khasta kachori is a delicious, spicy, fried puffed pastry. Khasta Kachori is filled with spicy moong dal mixture and then deep fried. Kachori is flakey from outside and hollow inside. Kachori should be fried on low heat so it can cook through to have a nice crunch. Khasta kachori is one of the dish you can eat for any meal! Serve them for breakfast with potato curry with yogurt. kachori makes a mouthwatering appetizer and can be served with, Green Chutney, and tamarind chutney. How about serving for dinner with Aloo Dum. This is one of those recipe you make when you want to impress someone. Kachories can also be stored in air tight container for a week.
    4.16 from 13 votes
    Prep Time 15 minutes
    Cook Time 40 minutes
    Total Time 55 minutes
    Course Appetizer
    Servings 4 people

    Ingredients
      

    Dough

    • 1 cup all purpose flour maida, plain flour
    • ¼ tsp salt
    • 2 Tbsp oil canola, or vegetable
    • ¼ cup cold water more or less as needed

    Filling

    • ¼ cup washed moong dal, yellow
    • 1 tsp fennel seeds coarsely ground saunf
    • 1 tsp red chilly flakes
    • ¼ tsp ginger powder saunth
    • ½ tsp mango powder amchoor
    • tsp asafetida hing
    • ½ tsp salt
    • 2 Tbsp water

    Instructions
     

    Making Dough

    • Mix the flour, salt and oil. Add the chilled water slowly, mixing with your fingers as you pour. Do not knead the dough. The dough should be soft. Cover the dough and let it sit for at least fifteen minutes.

    Filling

    • Grind the moong dal dry, almost to a powder.
    • Mix one tablespoon of oil to the ground dal in a frying pan and roast over medium heat for about two to three minutes or until dal changes color slightly. Stir continuously. Turn off the heat. Add all the spices mix well. Let the mixture cool off. Add two tablespoons of warm water and mix it well. Let it sit for ten minutes and cover with demp cloth.

    Making Kachories

    • Take the dough and knead it for a minutes. Divide the dough in twelve equal parts.
    • Take one part of the dough and with your fingers flatten the edges and make into 3-inch circle. Leaving center little thicker then edges. Mold the dough into a cup and place 1 teaspoon of filling in the center. Pull the edges of the dough to wrap the dal filling. Proceed to make all 12 balls.
    • Let the filled ball sit for three to four minutes before rolling.
    • Set the kachoris on a surface with the seams facing up. Using the base of your palm, slowly flatten them into about three inches in diameter.
    • Heat the oil in frying pan over medium heat frying pan should have about one inch of oil. To check if oil is ready put a little piece of dough in the oil. Dough should sizzle, and come up very slow.
    • Fry them on medium-low heat. After they start to puff, slowly turn them over. Fry until golden-brown on both sides. If the kachoris are fried on high heat, they will get soft and will not be crispy.
    • Kachories can be stored for at least a week in an airtight container

    Notes

    Additional Tips
    Don’t roll the kachoris with a rolling pin. Rolling pins can create small holes in the dough that let the oil seep into the kachoris, and they can also cause the kachoris to come out with one side thicker than the other.
    Variation
    Instead of using moong dal, you can use washed urad dal or chana dal. The rest of the recipe stays the same.
    Serving suggestions:
    Kachoris can be served plain, with Tamarind Chutneys, chola, or with Aloo Dum.  Serve them as a chat, pouring plain yogurt and chutney on top.
    Tried this recipe?Let us know how it was!

    Khasta Kachori Recipe: How to make Khasta Kachori

    Khasta Kachori, a popular Indian street food delicacy, is a deep-fried pastry filled with a spicy and flavorful stuffing. This crispy and indulgent snack is loved for its rich taste and satisfying crunch, making it a favorite among food enthusiasts.

    Khasta Kachori Recipe: 

    Rich Flavor Profile: Khasta Kachori is bursting with a medley of spices and aromatics, creating a symphony of flavors with every bite. The combination of ingredients like lentils, spices, and herbs provides a unique and indulgent taste experience.

    Satiating Snack: Despite its small size, Khasta Kachori is incredibly filling and satiating, making it an ideal snack option to curb hunger pangs between meals or as a satisfying accompaniment to tea or coffee.

    Versatile: While traditionally served as a snack, Khasta Kachori can also be enjoyed as a part of a larger meal. It pairs well with various chutneys, sauces, and accompaniments, allowing for endless culinary creativity.

    Convenience: Khasta Kachori can be prepared in advance and stored for later consumption, making it a convenient snack option for busy days or entertaining guests.

    Variations of Kachori:

    1. Mattar Ke Kachori: Mattar Kachori is a delicious, fried puff pastry filled with spicy green peas. This mouthwatering snack also can be served as part of any main meal.
    2. Raj Kachori: Raj Kachori is a spicy chaat bowl filled with delicious condiments. It has refreshing flavors and makes for a unique food experience. Guests will have fun filling their own Kachoris according to their taste palette. Served as a snack or appetizer, Raj Kachories make a beautiful presentation and are thoroughly enjoyed by just about everyone.
    3. Mawa Kachori: Mawa Kachori is an exotic dessert. This is a delicacy from the state of Rajasthan. Rajasthan is known for its rich food and culture. Pastry filled with an aromatic mixture of Mawa and nuts makes a very festive dessert.
    4. Urad Dal Kachori: Dal kachori is a delicacy from north India. Dal kachori is a spicy puffed pastry. Traditionally kachoris are sold at a sweet and snack shop. These mouthwatering Dal kachoris can be served as a snack, chaat or part of main meal, making the meal exotic.

    Tips for Making Perfect Khasta Kachori

    Prepare the Dough with Care: The key to crispy and flaky Khasta Kachori lies in the dough preparation. Use a combination of all-purpose flour (maida) and semolina (sooji) to achieve the desired texture. Ensure that the dough is firm yet pliable to prevent it from becoming too soft during frying.

    Fry at the Right Temperature: Fry the kachoris in hot oil over medium-high heat to ensure that they cook evenly and develop a golden-brown crust. Avoid overcrowding the frying pan to maintain the oil temperature and prevent the kachoris from absorbing too much oil.

    Seal the Edges Properly: To prevent the filling from leaking out during frying, seal the edges of the kachoris tightly before frying. Press the edges together firmly and ensure that there are no gaps or openings.

    Serve Fresh and Hot: Khasta Kachori is best enjoyed fresh and hot, straight out of the frying pan. Serve it with your favorite chutneys, sauces, or accompaniments for a delightful snacking experience.

    FAQs about Khasta Kachori:

    Can I make Khasta Kachori ahead of time? 

    While Khasta Kachori is best enjoyed fresh, you can prepare the dough and filling in advance and assemble the kachoris just before frying to save time.

    Can I bake Khasta Kachori instead of frying? 

    While traditional Khasta Kachori is deep-fried for that signature crispy texture, you can try baking them for a healthier alternative. However, the texture and taste may differ slightly.

    What are the best accompaniments for Khasta Kachori? 

    Khasta Kachori pairs well with a variety of chutneys such as tamarind chutney, mint chutney, or coriander chutney. It also tastes delicious with a dollop of yogurt and a sprinkle of chaat masala.

    Is Khasta Kachori suitable for vegetarians? 

    Yes, Khasta Kachori is a vegetarian dish as it contains no meat or animal products. It’s a popular choice among vegetarians and vegans alike.

    Khasta Kachori is not just a snack; it’s a culinary delight that excites your taste buds with its crispy exterior and flavorful filling. Whether enjoyed as a street food treat or homemade snack, its rich taste and versatility make it a beloved favorite in Indian cuisine. 

  • Sweet Saffron Rice

    Sweet Saffron Rice

    Sweet Saffron Rice

    Sweet Saffron Rice

    The look and smell of saffron rice is delicious and tempting. It makes a perfect dessert for lunch or any kind of get together. You can serve this dish cold or warm.
    Serves 4 to 6.
    3.50 from 2 votes
    Course Dessert
    Cuisine Indian

    Ingredients
      

    • 1 cup basmati rice or long grain rice
    • 2 Tbsp clarified butter ghee
    • 1 ¾ cup water
    • 2 Tbsp milk
    • ½ cup sugar
    • 1 piece of cinnamon stick dalchini
    • ¼ tsp saffron threads kaser
    • 4 whole cloves laung
    • ½ tsp cardamom seeds coarsely crushed, ilachi
    • Pinch of salt
    • 3 Tbsp pistachios and almonds sliced or crushed, pista, badam
    • 1 Tbsp raisins kishmish

    Instructions
     

    • Dry roast the almonds, pistachios and raisins in a pan on medium heat until the raisins puff and the nuts slightly change color. Set aside.
    • Put the rice, water, cinnamom stick, and salt in a sauce pan over medium high heat.
    • When the rice comes to boil, reduce the heat to low and cover.
    • Let the rice cook for about 15 minutes, or until the water has evaporated.
    • While rice is cooking, in a separate saucepan combine milk, butter, sugar, saffron, cloves and cardamom and bring to boil on medium heat, stir until the sugar has dissolved. Remove from the heat and set aside.
    • Add the nuts mixture and sugar syrup over the rice. Fold gently into the rice with a spoon gently to avoid mashing the rice.
    • Put the cover back over the rice and turn the heat on to very low. Let the rice simmer for 3 to 4 minutes. Turn the heat off and leave it covered for another few minutes before serving.
    Keyword Gluten Free, Rice, saffron, Sweet
    Tried this recipe?Let us know how it was!

    Savor the Aromatic Bliss: Sweet Saffron Rice – A Delightful Indian Treat

    Sweet saffron rice is a delectable, gluten free and aromatic dessert that originates from Indian cuisine. It features fragrant basmati rice cooked with saffron-infused syrup and a blend of spices, resulting in a rich and flavorful dessert or sweet treat. The saffron lends a vibrant golden hue and a distinct floral flavor to the dish, while the nuts and dried fruits add texture and depth. This delightful dessert is often served on special occasions, festivals, or as a comforting indulgence any time of the day.

    1. Nutty Roasting: Enhancing Flavor for Sweet Saffron Rice

    Begin your journey of crafting sweet saffron rice by imparting a rich nuttiness to the dish. In a pan over medium heat, dry roast the almonds, pistachios, and raisins until the raisins puff and the nuts undergo a slight color change. This step not only intensifies the flavors of the nuts but also adds a delightful crunch and texture to your saffron sweet rice, elevating its overall appeal.

    2. Indian Sweet Rice Recipe: Setting the Stage for Saffron Sweetness

    In a saucepan, combine rice, water, a cinnamon stick, and a pinch of salt over medium-high heat. As the ingredients come to a gentle boil, prepare the canvas for the infusion of saffron’s golden hue and aromatic essence into your Indian sweet rice recipe.

    3. Simmering Brilliance: Cooking the Rice to Perfection

    Once the rice mixture reaches a boil, reduce the heat to low and cover the saucepan. Allow the rice to simmer for approximately 15 minutes or until the water has evaporated, ensuring each grain is cooked to perfection. This crucial step lays the foundation for the sumptuous texture and delightful flavor profile of your saffron rice Indian delicacy.

    4. Saffron Infusion: Creating the Signature Sweetness

    While the rice undergoes its transformation, prepare the decadent saffron-infused syrup in a separate saucepan. Combine milk, butter, sugar, saffron strands, cloves, and cardamom over medium heat, stirring until the sugar dissolves and the aromatic spices release their essence. This fragrant mixture sets the stage for the indulgent sweetness that defines your kesar rice experience.

    5. Harmonious Fusion: Merging Nutty Goodness and Sweetness

    Once the rice and saffron syrup are ready, it’s time to bring together the elements of your sweet saffron rice. Gently fold the roasted nuts mixture and the fragrant saffron syrup into the cooked rice, using a spoon to ensure even distribution without mashing the grains. This harmonious fusion of flavors and textures creates a symphony of taste in every bite of your Indian sweet rice recipe.

    6. Final Simmer: Infusing Depth of Flavor

    Cover the saucepan once more and allow the saffron sweet rice to simmer over very low heat for an additional 3 to 4 minutes. This final step ensures that the flavors meld together seamlessly, infusing every grain of rice with the richness of saffron and the nutty crunch of almonds and pistachios.

    7. Culinary Crescendo: Serving Sweet Saffron Rice in All its Glory

    Turn off the heat and let the sweet saffron rice rest, covered, for a few more minutes before serving. This brief interlude allows the flavors to further develop, culminating in a dish that’s not just a treat for the taste buds but a celebration of the vibrant culinary heritage of India. Enjoy your saffron rice Indian delicacy or kesar rice as a delightful dessert or a comforting indulgence any time of the day.

    If you loved this indian sweet rice recipe then you must also check out other variants of Rice: Vegetable Biryani, Masala Khichdi, Chhole Biryani, Quinoa Vegetable Pilaf and Lemon Rice

  • Naan – Oven Baked Flat Bread

    Naan – Oven Baked Flat Bread

    Naan Bread

    Naan – Oven Baked Flat Bread

    Naan, the most popular Indian bread in the Western word. Naan can be the main attraction going to an Indian restaurant, naan directly coming from the clay oven “tandoor” taste heavenly. The texture and the earthen aroma from naan! Naan is so easy indian food recipes to just fall in love. My naan recipe uses a regular home oven and a clay pizza stone to give the naan same exposer as a clay oven.
    4.32 from 22 votes
    Prep Time 10 minutes
    Cook Time 10 minutes
    Total Time 20 minutes
    Course Main Course
    Cuisine Indian
    Servings 3 people

    Ingredients
      

    • 2 cups all-purpose flour plain flour, maida
    • 1 tsp active dry yeast
    • 1 tsp salt
    • 1 tsp sugar
    • tsp baking soda
    • 2 Tbsp oil canola, vegetable
    • 2 ½ Tbsp plain yogurt curd, dahi
    • ¾ cup lukewarm water use as needed

    Also needed

    • 1 tsp clarified butter (ghee) to butter the Naan
    • ¼ cup All Purpose flour for rolling

    Instructions
     

    • Dissolve yeast in lukewarm water and let it sit for 10 minutes or until the mixture becomes frothy.
    • Add sugar, salt and baking soda to the flour and mix well.
    • Add the oil and yogurt to make crumbly dough. Add the water/yeast mixture and additional water as needed to make into firm dough. Note: The dough will soften as it rises.
    • Knead the dough until smooth. Cover the dough and keep in a warm place three to four hours, until nearly double in volume.
    • Heat the oven to 500°F with pizza stone (baking stone) approx. thirty minutes, until stone is hot. Using a baking/pizza stone will help to give the naan close to same kind of heat as a clay tandoor. Next turn the oven to high broil.
    • Knead the dough for about one minute. Divide it into six equal parts. Roll each piece of dough, into eight ovals. Dust the surface lightly with dry flour to help with the rolling.
    • Lightly wet your hands and flip the rolled naan between your palms. Place two naan on your baking/pizza stone and put it into the oven.
    • Bake the naan two at a time. The naan will take two to three minutes to cook, depending upon your oven. The baked naan should be golden brown on top.
    • Take naan out of the oven and brush lightly with clear butter or ghee.
    • Wait two to three minutes before baking the next naan to give oven a chance to regain lost heat.

    Notes

    If pizza stone is not available, use baking sheet. If using baking sheet, once the top of the naan is cooked, turn them over to cook on the other side.
    Serve naan with popular dishes like Dal Makhani,  Palak Paneer or any vegetable dish.
    Keyword Popular Indian Bread, Resturant Bread, Tandoori Naan
    Tried this recipe?Let us know how it was!

    Making Naan Bread: Homemade Naan

    Indian Naan bread is a staple of Indian cuisine, known for its soft, pillowy texture and delicious flavor. Originating from the Indian subcontinent, naan has gained popularity worldwide and is enjoyed as a versatile accompaniment to various dishes or as a standalone snack. 

    Benefits of Naan Bread:

    1. Versatility: Naan bread is incredibly versatile and can be paired with a wide range of dishes, from rich and spicy curries such as Dal Makhni, Paneer Makhni, Dal Fry or even Paneer Pasanda. Its neutral flavor and soft texture complement both savory and sweet flavors, making it a versatile choice for any meal.
    1. Soft and Fluffy Texture: Naan bread is prized for its soft, fluffy texture, achieved through a combination of leavening agents such as yeast or baking powder and the use of yogurt or milk in the dough. This texture makes naan a delightful accompaniment to curries, as it can be used to scoop up sauces and mop up flavors.
    1. Simple Ingredients: The basic ingredients for naan bread include flour, yeast or baking powder, water, yogurt or milk, salt, and sometimes a little sugar or oil. These simple ingredients result in a delicious and satisfying bread that’s easy to make at home with minimal fuss.

    Variations of Bread:

    1. Roti/Chapati: Roti is also known as chapati. Roti is Indian flat bread made with whole-wheat flour. Roti are served with a variety of cooked vegetables, lentils, and yogurt.
    1. Dal Puri: Dal Puri (fried puffed bread), which consists of puris filled with mildly spiced moong dal. This delicacy is delicious and very festive. Dal Puri is an excellent option with any meal as it is sure to be a crowd-pleaser.
    1. Kulcha: Kulcha is a soft textured flatbread; this is very popular in northern states of India. They can be made in a tandoor (clay oven) or on a skillet. I am using a skillet. Traditionally kulchas are served with spicy chole (chickpeas). 
    1. Lacha Paratha: Lachha Paratha is whole wheat layered flat bread. Lachha Paratha is a treat with any meal and can be served with any gravy base dish of your choice.

    Tips for Making Perfect Naan Bread:

    1. Knead the Dough Thoroughly: Proper kneading is essential for developing gluten in the dough, which gives naan bread its soft and stretchy texture. Knead the dough for at least 5-10 minutes until it becomes smooth and elastic.
    2. Allow Sufficient Resting Time: After kneading, allow the dough to rest for at least 1-2 hours, or until it doubles in size. This resting period allows the yeast to ferment and the flavors to develop, resulting in a light and airy naan bread.
    3. Brush with Ghee or Butter: For added flavor and richness, brush the cooked naan with melted ghee or butter as soon as it comes off the heat. This gives the naan a glossy finish and enhances its aroma and taste.

    FAQs about Naan Bread:

    Can I freeze naan bread? 

    Yes, you can freeze naan bread for later use. Allow the naan to cool completely, then wrap it tightly in plastic wrap or aluminium foil and place it in a freezer-safe bag or container. To reheat, thaw the naan in the refrigerator overnight, then warm it in a hot oven or skillet until heated through.

    Can I make naan bread without yeast?

    Yes, you can make naan bread without yeast by using baking powder or baking soda as a leavening agent. While yeast provides a more traditional flavor and texture, baking powder or baking soda can be used for a quicker and easier alternative.

    Can I make naan bread without yogurt or milk? 

    Yes, you can make vegan naan bread by using plant-based yogurt or milk alternatives such as almond milk, soy milk, or coconut milk. These alternatives provide the necessary moisture and acidity to the dough, resulting in a soft and tender naan bread

    Can I make naan bread on a stovetop? 

    Yes, naan bread can be cooked on a stovetop using a cast-iron skillet or griddle. Simply heat the skillet over medium-high heat and cook the naan for 1-2 minutes on each side, or until puffed up and golden brown.

    Naan bread is a versatile and delicious staple of Indian cuisine that’s beloved for its soft texture and delightful flavor. Whether enjoyed with a hearty curry, as a base for pizza, or as a standalone snack, naan bread never fails to satisfy. 

    With its endless variations and simple preparation, naan bread is a culinary delight that’s sure to please food enthusiasts around the world.

  • Vegetable Pakoras

    Vegetable Pakoras

    Vegetable Pakoras

    Vegetable Pakora

    Pakoras are an all-time favorite snack in India. They are perfect for a rainy day, and delicious paired with a cup of hot spicy Indian chai. Pakoras are made with a variety of vegetables dipped in a spicy besan (gram flour) batter and deep-fried. This recipe uses potatoes, cauliflower and zucchini.
    4 from 4 votes
    Prep Time 10 minutes
    Cook Time 20 minutes
    Total Time 30 minutes
    Course Appetizer
    Cuisine Indian
    Servings 4 people

    Ingredients
      

    • 1 small potato, sliced thin
    • 8 cauliflower sliced
    • 1/2 zucchini, sliced thin
    • 1 cup besan gram flour
    • 3 tbsp rice flour optional
    • 1 tbsp coriander coarsely ground dhania
    • 1 tso cunin seeds jeera
    • 2 green chilies chopped
    • 2 tbsp cilantro chopped hara dhania
    • 1 tsp salt
    • 3/4 cup water, use as needed

    Instructions
     

    • Mix all the dry ingredients together: besan, rice flour, coriander powder, cumin seeds, and salt. Tip: rice flour adds to the crispness.
    • Add the water slowly to make a smooth batter (batter should be consistency of pancake batter or dosa batter).
    • Add the green chilies and cilantro. Mix well.
    • Heat at least one inch of oil in a frying pan over medium high heat. To test, put one drop of batter in the oil. The batter should form a small ball on the surface of the pan, but not change color right away.
    • Dip the vegetable slices into the batter one at a time, making sure each slice is completely covered by the batter. Then drop the slices slowly into oil in the frying pan.
    • Fry the pakoras in small batches, three to four minutes per batch. Fry the pakoras, turning occasionally, until both sides are golden brown. Repeat this process for the remaining batches.

    Notes

    Tips:  If oil is too hot the pakoras will not be crisp; if the oil is not hot enough, the pakoras will be very greasy, make sure when you are putting the pakora in oil, oil should sizzle and pakora slowly float. 
    Variations:  You can use almost any vegetable when making these pakoras, such as eggplant,  cabbage, bell pepper, and different kinds of chilies! Feel free to experiment!
    Serving Suggestions:  The vegetable pakoras are best dipped in a cilantro chutney, tamarind chutney, or sprinkled with chat masala.
    Pakoras taste best when they are served hot.
    You can make the pakoras one day in advance. Do not refrigerate. When ready to eat, place on a cookie sheet and heat in a 300°F oven.
    Leftover pakoras make good sandwiches.
    Tried this recipe?Let us know how it was!

    Crispy and Flavorful Vegetable Pakora

    Vegetable Pakora are crispy and flavorful Indian fritters made with a variety of vegetables coated in a spiced chickpea flour batter. This vegetable pakora recipe is perfect indian appetizers or even a side dish. These pakoras are quick to make and can be enjoyed with your favorite chutneys or sauces.

    The Essence of Vegetable Pakora

    The essence of vegetable pakora lies in their crispiness and the blend of spices used in the batter. A variety of vegetables can be used, making them a versatile and customizable indian snack. The chickpea flour (besan) batter is seasoned with spices such as cumin, coriander, and turmeric, adding to the rich flavor of these Indian vegetable fritters.

    Origin and Popularity

    Pakoras are a popular snack in Indian cuisine, enjoyed across the country in various forms. They are especially loved during the monsoon season, often paired with a cup of hot tea. These vegetable pakoras are a delightful way to enjoy a variety of vegetables, making them a favorite among both adults and children.

    Why You’ll Love This Recipe

    • Crispy and Delicious: The perfect combination of a crispy exterior and flavorful interior.
    • Easy to Make: Simple ingredients and quick preparation.
    • Versatile: Use your favorite vegetables to customize the pakoras.
    • Perfect for Any Occasion: Great as a snack, appetizer, or side dish.

    Variations of Vegetable Dry Recipes

    Exploring Manjula’s Kitchen reveals a treasure trove of other delicious vegetable dry recipes that you might enjoy. Here are some related dishes that you might find interesting:

    Variations of Recipes from Manjula’s Kitchen reveal a treasure trove of other delicious recipes that you might enjoy. Here are some related recipes that you might find interesting:

    1. Methi Thepla: Spiced flatbreads made with fenugreek leaves, ideal for breakfast or as a snack. Recipe: 
    2. Aloo Paratha: Stuffed whole wheat flatbreads filled with a spiced potato mixture, perfect for breakfast or lunch. Recipe: 
    3. Punjabi Kadhi: A tangy yogurt-based curry with gram flour dumplings, seasoned with aromatic spices. Recipe: 
    4. Vegetable Curry: Vegetable curry in color and taste compliment any meal. This is a simple recipe but delicious and filled with flavors. Good way to incorporate a variety of vegetables in your meal.
    5. Besan Puda: Savory gram flour pancakes spiced with herbs and spices, perfect for a nutritious breakfast. Recipe: 

    Explore more delicious recipes on Manjula’s Kitchen

    Serving Suggestions

    Vegetable pakora can be enjoyed in various ways:

    • With Chutneys: Serve with mint chutney, tamarind chutney, or yogurt for a burst of flavor.
    • As a Snack: Perfect for tea-time or as an evening snack.
    • As an Appetizer: Great for parties and gatherings.
    • With Indian Meals: Pair with rice, dal, or any curry for a complete meal.

    Tips and Tricks

    To perfect your vegetable pakora recipe, consider these helpful tips:

    • Use Fresh Vegetables: Fresh vegetables provide the best texture and flavor.
    • Consistent Batter: Ensure the batter is thick enough to coat the vegetables without being too runny.
    • Hot Oil: Fry the pakoras in hot oil to ensure they are crispy and golden brown.
    • Drain Excess Oil: Place the fried pakoras on paper towels to drain any excess oil.

    FAQs

    Can I Bake Pakoras Instead of Frying? 

    Yes, you can bake pakoras in a preheated oven at 375°F (190°C) for about 20-25 minutes, flipping halfway through.

    How Long Do Vegetable Pakoras Last? 

    Vegetable pakoras are best enjoyed fresh, but you can store them in an airtight container in the refrigerator for up to 2 days. Reheat in the oven or on a skillet before serving.

    Is Vegetable Pakora Gluten-Free? 

    Yes, this recipe is naturally gluten-free as it is made with chickpea flour.

    Can I Add Other Vegetables? 

    Yes, you can add any of your favorite vegetables like bell peppers, spinach, or eggplant to the batter.

    What Can I Serve with Vegetable Pakora? 

    Vegetable pakoras pair well with various chutneys, yogurt, or even as a side to a main meal like rice and curry.

  • Kokum Coconut Kadhi

    Kokum Coconut Kadhi

    A bowl of Kokum Coconut Kadhi garnished with fresh coriander leaves

    Kokum Coconut Kadhi

    To make Kokum Coconut Kadhi, we have to know what is Kokum. Kokum is a fruit used as a souring agent in many parts of India and it is mellow in taste compared to tamarind. For me, how it can be a kadhi without besan? So, this Kokum Coconut Kadhi is my twist, by adding a little roasted besan (gram flour). This is both delicious and very refreshing. You can serve this as a soup or with rice. My son who is a very picky eater thoroughly enjoyed it! This is a quick and easy recipe which you must give it a try. This Kadhi is also vegan and gluten free.
    This recipe will serve 2 to 3.
    5 from 1 vote
    Prep Time 5 minutes
    Cook Time 15 minutes
    Total Time 20 minutes
    Course Main Course, Soup
    Cuisine Indian
    Servings 3 people

    Ingredients
      

    • ¼ cup kokum
    • 1 Tbsp oil
    • 1 tsp cumin seeds- Jeera
    • tsp asafetida – Hing
    • ¼ tsp turmeric – Haldi
    • 2 Tbsp besan
    • 1 red dry red chili sabut lal mirch
    • 1 Tbsp green chili finely chopped
    • About 8 curry leaves chopped
    • 1 15 oz can coconut milk
    • ½ tsp salt
    • 1 Tbsp cilantro chopped
    • ½ cup water

    Instructions
     

    • Soak the kokum in ½ a cup of hot water for about 30 minutes.
    • Then squeeze the juice from kokum and keep aside.
    • Heat the oil in a saucepan. Test the heat by adding one cumin seed to the oil. If the cumin seeds crack right away, the oil is ready. Add cumin seeds and asafetida.
    • Next add besan and stir for about 30 seconds until besan is light golden in color.
    • Next add curry leaves, red chili, turmeric, and green chili, stir for few seconds.
    • Add squeezed kokum juice mix it well and bring kokum juice to boil.
    • Add coconut milk. make sure to keep flame on low-medium otherwise coconut milk might curdle. Mix well and add salt.
    • Cook the kadhi over low heat for 3-4 minutes, add chopped coriander leaves.
    • Serve kokum Coconut Kadhi as a soup or with plain rice.
    Tried this recipe?Let us know how it was!
  • Missa Paratha

    Missa Paratha

    Missa Paratha (Kala Chana Paratha Roti)

    Missa paratha is a traditional North Indian bread. At our house, this recipe was a staple. Adding spices to the dough makes these parathas very enjoyable. Missa Paratha is often mistaken by besan ka paratha. Missa atta (flour) is made with whole gram with the skin on and besan is made with split gram without skin. This makes a very noticeable difference in the flavor and texture of the paratha. This bread is healthy and a better substitute for people who are diabetic. I decided to use whole chana instead of buying the flour, which is not readily available. This also gives a better taste. You can also try spices of your choice. These parathas pair well with gravy-based dishes like Mixed Dal and Aloo Tamatar. Finish this great meal with Salted Mint Lassi, which is a good complement. I also enjoy these parathas with a simple cup of hot chai. This recipe will make 6 parathas.
    No ratings yet
    Prep Time 15 minutes
    Cook Time 15 minutes
    Course Bread
    Cuisine Indian
    Servings 6 parathas

    Ingredients
      

    • ½ cup black gram flour Kala chana
    • cup whole wheat flour roti ka atta, use as needed
    • ½ inch ginger chopped
    • 1 green chili chopped adjust to taste
    • ½ tsp salt
    • tsp asafetida hing
    • ½ tsp cumin seeds jeera
    • 3 tbsp oil for cooking

    Instructions
     

    • Soak chana for about 4 hours. Grind the chana with ginger and green chili to the paste using water as little possible. I used about 1/2 cup of water.
    • Mix all the ingredients for paratha together, whole wheat flour, cumin seeds, salt, and asafetida.
    • Make the dough mixing everything together if needed add more flour, knead the dough. Oil your both palm and roll the dough between your palms.
    • Dived the dough into 6 equal parts, oil your palm and roll them between your palms, to make them round petties.
    • Roll dough ball into a 3” circle. Spread about 2 drops of oil and pull the edges of the dough to wrap. Repeat to make all six balls.
    • Roll the patty in dry whole-wheat flour. Press it a little and start rolling on a clean surface to about 6 inches in diameter.
    • Place the Paratha over the skillet. When you see the color change and the paratha will puff in different places. Turn the paratha over.
    • The paratha should have golden-brown spots. Wait a few seconds and put about 1 teaspoon of oil and spread with a spatula.
    • Flip it again and lightly press it with a spatula. Flip again and press with the spatula making sure the paratha is golden-brown on both sides.
    • Repeat same process for the remaining.
    Tried this recipe?Let us know how it was!

    How To Make Missa Parantha Recipe – Manjula’s Kitchen

    Missa paratha is a traditional flatbread from North India. It’s made with wheat flour, spices, and leftover yellow dal tadka. Missa paratha is often confused with besan ka paratha, but the two are different. Missa atta (flour) is made from whole gram with the skin on, while besan is made from split gram without skin. Preparing Missa Paratha is a delightful process that involves a few simple steps. Let’s break it down in detail:

    Step 1: Soaking the Chana

    To begin, soak the chana (chickpeas) for about 4 hours. This soaking step is important as it softens the chana, making it easier to turn into a paste later on. Patience is key here, as giving the chana enough time to soak will make the entire process smoother. So, just let them soak and you’re on your way to making a fantastic dish!

    Step 2: Grinding the Chana Paste

    Once your chickpeas have soaked, grind them up with ginger and green chili. The key is to make a smooth paste, and try to use as little water as you can – about half a cup should do the trick. Grinding it all together will give your dish a tasty and smooth texture.

    Step 3: Mixing Missa Parantha Ingredients

    Alright, let’s get into making the delicious Missa Paratha. First, gather the simple ingredients: whole wheat flour, cumin seeds, salt, and a dash of asafetida. Now, mix them all up to create the foundation for your tasty Missa Paratha.

    Step 4: Creating the Dough

    Combine the mixed ingredients to make the dough. If necessary, add more flour to achieve the right consistency. Knead the dough thoroughly to ensure a uniform texture. To prevent sticking, oil your palms before rolling the dough between them.

    Step 5: Dividing and Shaping Dough

    Now, take the dough you’ve prepared and split it into 6 equal parts. To make things easier, put a bit of oil on your palms – it helps! With your oiled hands, roll each part between your palms, shaping them into round patties. This simple step ensures that all your portions are the same size, making the next part, where you roll them out, much simpler. So, oil up your hands, divide the dough, and roll those parts into neat, round patties – it’s the key to uniform and manageable dough balls!

    Step 6: Rolling the Paratha

    To shape each dough ball into a peda, start by rolling it into a circle about 3 inches in diameter. For an extra burst of flavor and a delightful texture, gently spread about 2 drops of oil onto the dough. Now, carefully pull the edges of the dough towards the center, wrapping it neatly to form a round peda. Repeat this process for all six dough balls, ensuring each one gets the same delicious treatment. This simple yet crucial step adds a lovely touch to your pedas, making them even more irresistible. Enjoy the process of crafting these delightful treats!

    Step 7: Coating in Flour and Rolling Further

    Roll each patty in dry whole-wheat flour. Press it lightly and start rolling on a clean surface until it reaches approximately 6 inches in diameter. This step adds a thin layer and enhances the texture of your Missa Paratha.

    Step 8: Cooking on Skillet

    Now, it’s time to cook. Place the paratha on a hot skillet. Watch for a change in color and puffiness in different places. When you observe these signs, it’s time to flip the paratha over. The aim is to achieve golden-brown spots on both sides.

    Step 9: Adding Oil and Pressing

    Once flipped, wait a few seconds, then add about 1 teaspoon of oil. Spread it evenly with a spatula. Flip it again and lightly press it with the spatula. The goal here is to ensure that the Missa Paratha is golden-brown on both sides. This process adds flavor and a delightful crispiness to your Missa Paratha.

    Step 10: Repeat the Process

    Keep the momentum going by repeating the same process for the rest of your dough balls. This step is crucial for maintaining a consistent flavor and texture in all your Missa Parathas. Just follow the same easy steps you did for the first batch – roll out the dough, add the delicious filling, and cook them up to perfection. This ensures that each parantha on your plate is as tasty and delightful as the last one, giving you a uniform and satisfying dining experience. So, keep at it, and soon you’ll have a batch of wonderfully consistent Missa Paranthas ready to be enjoyed!

    In conclusion, making Missa Paratha involves a series of straightforward yet crucial steps, from soaking and grinding the chana to crafting the perfect dough and achieving that golden-brown finish on the skillet. It’s a process that rewards attention to detail and patience, resulting in a delicious and satisfying Indian flat bread. Enjoy your homemade Missa Parathas!

    You might also like: Punjabi Aloo Paratha, Sooji Ka Halwa, Salted Mint Lassi, Mixed Dal

  • Banaras Tamatar Ki Chaat

    Banaras Tamatar Ki Chaat

    A bowl of Banaras Tamatar Ki Chaat garnished with fresh coriander and sev

    Banaras Tamatar ki Chaat

    Tamatar ki Chaat is a popular street chaat from Banaras. This vegan and gluten free tomato chaat is a unique dish that bursts with flavor. It is made with a delectable combination of tomatoes, potatoes, nuts, spices and drizzled with a spicy sugar syrup. I ate this chaat almost a decade ago while visiting Banaras and can remember the unique flavor till today! The unforgettable flavors of this chaat made me want to see if I could recreate it! After several tries, I feel like I came pretty close to making this dish how I remember it. I served it at a recent lunch with friends and was overwhelmed at the positive response. My friends raved about this chaat and insisted I do the video recipe for it as soon as possible. Make sure to try. Tamatar ki Chaat and tell me what you think!
    4.50 from 4 votes
    Prep Time 10 minutes
    Cook Time 15 minutes
    Total Time 25 minutes
    Course Chaat
    Cuisine Indian
    Servings 4 people

    Equipment

    Circulon Acclaim Hard Anodized Nonstick Stir Fry Wok Pan, 12 Inch, Black
    Rani Garam Masala Indian 11-Spice Blend

    Ingredients
      

    • 3 cup tomatoes chopped into small pieces
    • 1 cup potatoes boiled and roughly mashed
    • 3 Tbsp oil
    • 2 Tbsp cashew crushed
    • 1 Tbsp ginger chopped adrak
    • 1 Tbsp green chili finely chopped
    • ¼ tsp black pepper powder kaali mirch
    • ½ tsp red chili powder
    • ½ tsp roasted cumin seeds powder
    • 1 tsp salt
    • 1 tsp black salt
    • 1 tsp garam masala
    • 1 Tbsp sugar
    • ¼ cup cilantro chopped
    • 1 tsp lemon juice

    Spicy Sugar syrup

    • ½ cup water
    • ¼ cup sugar
    • ¼ tsp roasted cumin powder
    • ¼ tsp chili powder
    • ¼ tsp salt
    • ¼ tsp black salt

    For Garnishing

    • ¼ cup boondi

    Instructions
     

    Spicy Syrup

    • In a saucepan boil all the syrup ingredients water, sugar, salt, black salt, chili powder, lemon juice and cumin powder over medium heat. Mix well and boil for about 5 minutes or until syrup is sticky. Set aside, (we will use this later for garnishing)

    For making tamatar ki chaat

    • In a frying pan heat the oil over low medium heat. Add cashew powder, ginger, green chili, and red chili powder stir fry for about 30 seconds.
    • Next add tomato, salt, black salt, black pepper, cumin powder and stir for 2 minutes, add ½ cup of water and bring it to boil, boil over medium heat about for 3 minutes or until tomatoes soften slightly.
    • Now add potato mix gently cover the pan and let it cook for about 3 minutes until tomatoes are soft but not mushy, and oil starts to separate. Notes: Make sure do not mash tomatoes and potatoes completely, as we need to enjoy the bite of tomatoes and potatoes.
    • Add cilantro garam masala, lemon juice and sugar. mix well.
    • Tomato chaat is ready. Banarsi tamatar chaat tastes the best when sweetness and tanginess is well balanced. Taste and adjust salt sugar and lemon juice. Very aromatic
    • For servingtamatar chaat: in an individual serving bowl take about ¼ cup of tamatar ki chaat, top with about 2 tablespoons of syrup and boondi. Chaat without chutney, I am using spicy syrup instead of chutney.

    Notes

    • Make sure do not mash tomatoes and potatoes completely, as we need to enjoy the bite of tomato and potatoes
    • Banaras tamatar chaat tastes the best when sweetness and tanginess is well balanced.
    If you enjoy spicy snacks, you should also try sweet potato chaat,
    Tried this recipe?Let us know how it was!


    How to make Banarasi Tamatar Chaat Recipe – Manjula’s Kitchen


    Banarasi Tamatar Chaat is a flavorful and spicy vegan tomato-based chaat (savory snack) that originates from Banaras or Varanasi, a city in the northern part of India. It is a popular gluten free street food known for its distinctive taste and the unique combination of sweet, tangy, and spicy flavors. To prepare Banarasi Tamatar Chaat, follow this tamatar chaat recipe:

    Spicy Syrup:

    To create the syrup for our dish, start by gathering your ingredients. In a saucepan, combine water, sugar, salt, black salt, chili powder, lemon juice, and cumin powder. These elements will come together to form a flavorful and balanced syrup. Once all the ingredients are in the saucepan, place it over medium heat. The goal here is to allow the mixture to cook and meld, developing a harmonious blend of sweet, salty, spicy, and tangy flavors. Cooking it over medium heat ensures a gradual and even infusion of these elements. 

    As the saucepan warms up, keep a close eye on the mixture. Stir occasionally to help the sugar dissolve and to ensure that all the ingredients are well incorporated. The heat will play a crucial role in transforming these individual components into a cohesive syrup that will elevate the overall taste of our dish. Stir the ingredients well to ensure they are thoroughly mixed. Allow the mixture to come to a boil and then let it simmer for about 5 minutes. Keep a close eye on it to make sure the syrup reaches a sticky consistency. 

    Once the syrup achieves the desired stickiness, remove the saucepan from the heat. This syrup will be set aside and used later for garnishing. It adds a flavorful touch to our dish. Now that the syrup is ready, you can move on to the next steps of your recipe.

    Tamatar Ki Chaat:

    Let’s explore further as we create the delectable Banaras Tamatar Chaat, a delightful dish featuring the vibrant combination of tomatoes and aromatic spices. Follow these detailed steps to bring this tantalizing Tamatar ki Chaat to life.

    1. Heating the Oil:

    Begin by heating oil in a frying pan over low to medium heat. Allow it to warm up, setting the stage for the rich flavors to unfold.

    2. Adding Aromatic Ingredients:

    Once the oil reaches the right temperature, introduce cashew powder, ginger, green chili, and red chili powder. Stir-fry this aromatic mix for about 30 seconds, letting the spices infuse the oil with their essence.

    3. Incorporating Tomatoes and Spices:

    Add tomatoes to the pan, along with salt, black salt, black pepper, and cumin powder. Stir this flavorful combination for a duration of 2 minutes, allowing the spices to mingle with the tomatoes.

    4. Introducing Water and Simmering:

    Pour in half a cup of water to the pan. Bring it to a gentle boil and let it simmer over medium heat for 3 minutes or until the tomatoes slightly soften. This simmering process enhances the infusion of flavors.

    5. Adding Potatoes:

    Gently fold in the potatoes, ensuring they are coated with the aromatic tomato-spice mixture. Cover the pan and let it cook for approximately 3 minutes. Aim for the tomatoes to be soft but not mushy, and observe the oil starting to separate, a sign of the dish’s richness.

    6. Preserving Texture:

    As you stir, be mindful not to mash the tomatoes and potatoes completely. Preserving their texture is key to the appeal of Banarasi Tamatar Chaat.

    7. Final Touch:

    Elevate the flavors with a final touch. Add cilantro for freshness, garam masala for warmth, lemon juice for a zesty kick, and a hint of sugar to balance the savory notes. Mix everything thoroughly, allowing the ingredients to harmonize.

    8. Adjusting Sweetness and Tanginess:

    Before presenting your Banarasi Tamatar ki Chaat, take a moment to taste and adjust. Fine-tune the sweetness, tanginess, and salt levels to achieve a well-balanced and harmonious flavor profile.

    The Banaras Tamatar Chaat recipe is a symphony of textures and flavors. The careful combination of spices, the gentle simmering, and the final touch of freshness and warmth create a dish that captures the essence of Banaras (Varanasi), known for its rich culinary heritage. As you savor each bite of this Tamatar Chaat, you’ll experience the unique and delightful taste that defines this iconic recipe. Enjoy the journey of creating and relishing the Banarasi Tamatar ki Chaat in your own kitchen!

    If you enjoy spicy snacks, you should also try Sweet potato chaat, Khasta Kachori Besan, Crispy Vegetable Pakoras, Dahi Puri Chaat & Bread Dahi Vada

  • Sweet and Sour Spicy Karela

    Sweet and Sour Spicy Karela

    A dish of Sweet and Sour Spicy Karela garnished with sesame seeds

    Sweet and Sour Spicy Karela, Bitter Melon

    Karela, also known as bitter melon. Sweet and Sour Karela has a very unique taste. This dish is a combination of all the flavor in one, it is spicy, sweet, sour, and bitterness of the Karela. That is what make this recipe very unique. Karela, (Bitter melon) also is a healthy vegetable with many health benefits. This was one of my favorite side dish specially for school lunch box, Karela rolled up with left over Puri or Paratha from previous day, tasted delicious. We also enjoyed this sweet and sour karela as a side dish with Toor Dal and Rice. This is multi flavor healthy side dish this can also be serve as a condiment. Enjoy! This recipe will serve 4
    5 from 1 vote
    Prep Time 15 minutes
    Cook Time 15 minutes
    Total Time 30 minutes
    Course Chutney
    Cuisine Indian
    Servings 4 people

    Ingredients
      

    • 4 cup sliced bitter melon karela
    • 1 ½ tsp salt divided
    • ½ tsp turmeric haldi
    • 3 Tbsp oil
    • 1 tsp cumin seeds jeere
    • 2 ½ Tbsp coriander powder dhania
    • 1 Tbsp fennel seed powder saunf
    • 1 tsp red chili powder lal mirch
    • 1 ½ Tbsp mango powder amchoor
    • 2 Tbsp sugar
    • ½ cup water

    Instructions
     

    • Remove the top and bottom caps from karela. Slice them long ways and remove the seeds, save half the seeds, and discard other half. Slice them in thick pieces, I like to slice them in diagonal.
    • Cook the karela with 2 cups of water, with ½ teaspoon of salt and ½ teaspoon of turmeric over medium high heat. Cook for about 8 minutes until karela is soft and tender but not mushy.
    • Drain the water and wash the boil karela 2-3 times changing water and squeeze the karela.
    • In a frying pan heat the oil over medium high heat. Oil should be moderately hot add cumin seeds as cumin seeds crack add karela and sprinkle remaining 1 teaspoon of salt.
    • Stir fry for about 4 minutes over medium heat.
    • Add all the spices, coriander, fennel powder, red chili powder and mango powder stir for one minute. Add ½ cup of water mix and cover the pan and let it cook over low medium heat for about 4 minutes.
    • Add sugar and stir for about a minute sugar will be lightly caramelize.

    Notes

    boiling the bitter melon with salt and turmeric help taking out some bitterness from Karela (bitter melon). Also washing karela changing water also help taking out some more bitterness. Still karela will be bitter. Sweet and Sour Karela can be refrigerated for two weeks.
    Enjoy sweet and Sour Karela, with Paratha, Puri, Toor Dal, Rice, Sooji Ka Halwa
    Tried this recipe?Let us know how it was!


  • Punjabi Aloo Paratha

    Punjabi Aloo Paratha

    A plate of Aloo Paratha topped with a dollop of butter

    Punjabi Aloo Paratha

    Aloo Parathas make for the perfect lazy weekend brunch. Parathas can be made plain or with a variety of different fillings. A flavorful potato filling is by far the most popular. Aloo Parathas are very popular in North India, at any time of the day. In Punjab, Aloo Parathas are a staple for breakfast. Traditionally, Aloo Parathas are served with homemade butter and buttermilk known as chaas. I'm sure you are thinking that making these parathas is very time consuming. With our busy schedules and hectic mornings, how is possible to prepare these! Of course, parathas taste best when fresh off a hot skillet! An easy solution to this problem is to simply prepare part of the recipe in advance until you are ready to roll the parathas. You can prepare the dough and filling in advance and have the potato-mix filled balls ready to just start rolling. The prepared dough can be refrigerated for up to two days. Enjoy!
    This Recipe will make 4 parathas.
    4.75 from 4 votes
    Prep Time 15 minutes
    Cook Time 15 minutes
    Total Time 30 minutes
    Course Bread
    Cuisine Indian
    Servings 4 parathas

    Ingredients
      

    For the Dough

    • 1 cup whole wheat flour
    • 1 ½ tbsp oil
    • ¼ tsp salt
    • ½ cup cold water Use more as needed

    For the Potato Filling

    • 1 ½ cup potatoes mashed
    • ½ tsp salt
    • ¼ tsp red chili powder
    • ½ tsp cumin seeds Jeera
    • 2 tsp coriander powder dhania
    • tsp asafetida hing
    • ½ tsp mango powder amchoor
    • ¼ tsp garam masala
    • 1 Tbsp green chili chopped
    • 2 Tbsp cilantro chopped, dhania

    Also need.

    • ¼ cup whole wheat flour for rolling
    • 2 Tbsp oil to cook

    Instructions
     

    Making the Dough

    • Mix flour, salt, and oil, until oil is incorporated with flour well, add water slowly to make a soft dough (add water as needed).
    • Knead dough well on a lightly greased surface to make the dough soft, smooth, and pliable.
    • Set the dough aside and cover. Let the dough rest at least ten minutes.

    Filling

    • In a bowl take mash potatoes add green chilies, cilantro, cumin seeds, garam masala, mango powder, and salt, mix it well.

    Making paratha

    • Divide the dough into 4 equal parts and roll them into balls.
    • Then divide the potato filling into 4 parts and shape into balls. Potato balls should be about 1½ times larger than the dough balls.
    • Roll dough ball into a 3” circle. Place a filling ball in the center. Pull the edges of the dough to wrap it around the potato filling. Repeat to make all six balls. Let the filled balls settle three to four minutes.
    • Meanwhile heat heavy skillet on medium high heat until moderately hot. To test, sprinkle water on the skillet. If the water sizzles right away, the skillet is ready.
    • Press the filled ball lightly on dry whole wheat flour from both sides.
    • Using a rolling pin, roll the balls lightly to make six-inch circles, keeping the sealed side of the balls on top. If the dough sticks to the rolling pin or rolling surface, lightly dust the parathas with dry flour.
    • Oil the skillet and place the paratha on the skillet. When the paratha starts to change color and begins to puff up, flip it over. You will notice some olden-brown spots.
    • After a few seconds, drizzle one teaspoon of oil over the paratha, and spread with spatula. Flip the paratha again and lightly press the puffed areas with a spatula.
    • Flip again and press with a spatula making sure the paratha is golden-brown on both sides. Repeat for the remaining parathas.
    • Parathas are best served hot and crispy. They will be soft if not served hot. If you are not going to serve them right away, cool them on a wire rack to keep them from getting soggy.
    • Parathas can be kept unrefrigerated for up to two days wrapped in aluminum foil or in a covered container. For later use, parathas can be refrigerated three to four days or frozen for up to a month. Re-heat using a skillet or oven.

    Notes

    Variations
    Substitute chopped cilantro with ¼ cup finely chopped mint leaves, or experiment with your favorite herb. Be sure to pat the herbs dry before adding to the mixture.
    Serving Suggestions
    1. Parathas can be served with Tomato Chutney, Plain Yogurt, mattar Paneer, Green Chili pickle.
    2. Serve it like a Mexican quesadilla by topping it with cheese and sliced tomatoes, then folding it in half.
    Tried this recipe?Let us know how it was!
  • Zucchini Lentil Pakoras

    Zucchini Lentil Pakoras

    A plate of crispy Zucchini Lentil Pakoras served with chutney

    Zucchini Lentil Pakoras

    As pakoras are one of the most welcoming snacks all over India. It is a popular street food. Everyone has their own favorites and there are countless recipes. Pakoras are a very comforting snack especially when it is cold, and it is raining. Here, we are experiencing both and I am wishing for pakoras with a hot cup of chai, blanket and a good TV show or movie. In a particular magazine, I saw a fusion pakora recipe. Instead of using traditional beasn batter, the chef had used red lentil batter. Several times, I have used moong dal batter, but I never even thought about using red lentil. I was ready to give it a try with another pakora recipe using lentil batter. I made some changes and added chopped ginger that added a nice kick to the pakoras. They turned out to be mouthwatering appetizers: crispy on the outside and soft on the inside. These pakoras are addicting! These work as a tasty pairing with your afternoon tea or a spicy delicious snack before any meal. These pakoras have a different crispness but are very delightful. Give these pakoras a try and enjoy! These Pakoras are also vegan and gluten-free.
    This recipe will serve 4.
    5 from 1 vote
    Prep Time 10 minutes
    Cook Time 15 minutes
    Total Time 25 minutes
    Course Appetizer
    Cuisine Indian
    Servings 4 people

    Ingredients
      

    • 1 cup red lentils washed masoor dal
    • 1 zucchini medium sized, cut into thick rounds
    • 2 Tbsp green chili chopped
    • 2 Tbsp ginger finely chopped
    • 2 Tbsp cilantro chopped
    • 1 ½ tsp salt adjust to taste
    • ½ tsp red chili powder
    • Pinch of baking soda
    • 2 Tbsp corn starch

    Instructions
     

    • Soak red lentil at least for 1hours or more.
    • Pet dry zucchini slices and keep aside.
    • Blend dal to smooth batter, using just enough water needed to blend.
    • To make Pakora batter add corn starch, salt, chili powder and salt together, mix it well, whipping for few seconds. Add all the other ingredients to the batter, ginger, green chili, cilantro and mix all the ingredient well. Batter should be consistency of pancake mix, if needed add little water.
    • Heat the oil in a frying pan on medium-high heat. The frying pan should have about 1 inch of oil. To check if the oil is ready, put one drop of batter in the oil. The batter should come up but not change color right away.
    • Dip the zucchini slices into the batter one at a time, making sure it is covered by the batter completely. Then, slowly drop into the frying pan.
    • Fry the pakoras in small batches, not overlapping. The pakoras will take about 4-5 minutes to cook.
    • Turn them occasionally. Fry the pakoras until both sides are golden brown. If the oil is too hot, the pakoras will brown too fast and not get crispy.
    • Left over batter, place about one tablespoon of batter into the oil. Fry the pakoras in small batches until golden-brown.
    • The crispy, delicious pakoras are now ready to serve. I like to serve these both pakoras side by side.

    Notes

    Serving Suggestions
    Tried this recipe?Let us know how it was!
  • Palak Kadhi

    Palak Kadhi

    A bowl of creamy Palak Kadhi garnished with fresh spinach leaves

    Palak Kadhi, Spinach Ki Kadhi

    Palak Kadhi is a tasty side dish. It is spinach cooked with yogurt and besan (gram flour) and mildly spiced. I think Kadhi is one of the most enjoyed dishes all over India. Kadhi is made in so many ways in different parts of the country. One main ingredient remains the same: besan. At my house, kadhi was made thick and with dumplings. In Gujarat, Kadhi is made very watery and taste like sweet and sour soup. I enjoy the dishes which are made using besan. Palak Kadhi has become a comfort side dish for us. It is easy to make and can be served with any meal.
    This recipe will serve 2.
    4.43 from 7 votes
    Prep Time 5 minutes
    Cook Time 30 minutes
    Total Time 35 minutes
    Course Side Dish
    Cuisine Indian
    Servings 2 people

    Ingredients
      

    • 2 Tbsp besan gram flour
    • ½ cup yogurt curd or dahi
    • 1 cup spinach leaves finely chopped, palak
    • 2 Tbsp oil
    • 1 whole red chilies sabut lal mirch
    • ½ tsp cumin seeds jeera
    • ¼ tsp fenugreek seeds mathi dana
    • tsp asafetida hing
    • ¼ tsp turmeric haldi
    • ¼ tsp red chili powder lal mirch
    • ½ tsp salt namak

    Instructions
     

    • Mix besan, turmeric with yogurt until smooth, this should be lump free. Add 2 cups of water slowly and mix well.
    • Heat the oil in a saucepan. Test the heat by adding one cumin seed to the oil. If the cumin seeds crack right away, the oil is ready. Add cumin seeds and asafetida.
    • When the cumin seeds crack, turn off the heat and add fenugreek seeds, and whole red chili. Stir for a few seconds, add red chili powder. Add spinach and stir for a minute.
    • Add the yogurt mixture and turn the heat to medium. Keep stirring until the kadhi comes to a boil.
    • Add salt. Turn the heat to medium low. Let the kadhi cook for about 20-35 minutes, stir occasionally. If needed to adjust thickness, add more water. Kadhi should be a pourable consistency.

    Notes

    If you like Kadhi, you will enjoy other versions of Kadhi also:
    Tried this recipe?Let us know how it was!

    Palak Kadhi Recipe: A Nutritious Spinach Delight

    Palak Kadhi, also known as Palak Ki Kadhi or Spinach Kadhi, is a comforting and nutritious Indian dish that combines the goodness of spinach with the tanginess of yogurt. Palak kadhi is a gluten-free and vegan dish made with lentils (usually split pigeon peas, or toor dal) and spinach (palak) cooked in a flavorful curry or gravy. It is a high-protein dish suitable for parties and gatherings. 

    The lentils provide a good source of protein, while the spinach adds vitamins and minerals. The curry/gravy is typically made with spices, yogurt (or a dairy-free alternative), and sometimes besan (chickpea flour) to thicken the sauce. Palak kadhi is a popular North Indian dish known for its creamy texture and delicious flavor.

    This palak kadhi recipe offers a delightful blend of flavors and textures, making it a perfect accompaniment to steamed rice or roti. With its vibrant green color and rich taste, palak kadhi is sure to become a favorite in your household, especially for those looking to incorporate more greens into their diet.

    Step 1: Blending Spinach

    Begin by thoroughly washing fresh spinach leaves and removing any tough stems. Then, blanch the spinach in boiling water for a few minutes until wilted. Drain the spinach and immediately transfer it to a bowl of ice water to halt the cooking process and preserve its vibrant green color. Once cooled, blend the spinach into a smooth puree using a blender or food processor, ensuring there are no lumps.

    Step 2: Preparing Yogurt Mixture

    In a mixing bowl, whisk together yogurt and besan (gram flour) until smooth and creamy. This yogurt mixture forms the base of the kadhi, providing a creamy texture and tangy flavor to the dish. Ensure that the besan is well-incorporated into the yogurt to prevent any lumps from forming during the cooking process.

    Step 3: Tempering Spices

    In a deep saucepan or kadhai, heat oil or ghee over medium heat. Add mustard seeds, cumin seeds, fenugreek seeds, and dried red chilies to the hot oil, allowing them to splutter and release their aromatic flavors. The tempering of spices adds depth and complexity to the palak kadhi, infusing it with layers of flavor.

    Step 4: Cooking Aromatics

    Next, add finely chopped ginger to the tempered spices, sautéing. The combination of these aromatic ingredients forms the flavorful base of the palak kadhi, enhancing its taste and aroma. Stir the mixture occasionally to prevent it from sticking to the bottom of the pan.

    Step 5: Adding Spinach Puree

    Once tcooked add the blended spinach puree to the pan, stirring well to combine with the aromatics. Allow the spinach to simmer gently in the pan, infusing the kadhi with its vibrant green color and earthy flavor. Cook the spinach mixture for a few minutes until it thickens slightly and the raw flavor of the spinach is cooked out.

    Step 6: Incorporating Yogurt Mixture

    Gradually pour the prepared yogurt-besan mixture into the pan, stirring continuously to prevent any lumps from forming. Ensure that the yogurt mixture is well-incorporated into the spinach base, creating a smooth and creamy consistency. Allow the kadhi to simmer gently on low heat, allowing the flavors to meld together and the yogurt to thicken.

    Step 7: Seasoning and Garnishing

    Season the palak kadhi with salt, turmeric powder, and red chili powder to taste, adjusting the seasoning according to your preferences. Garnish the kadhi with fresh cilantro leaves and a sprinkle of garam masala for added flavor and aroma. Serve the palak kadhi hot alongside steamed rice or roti for a wholesome and satisfying meal.

    Tips for Perfect Palak Kadhi

    • Consistency Control: Adjust the amount of water added to the kadhi to achieve the desired consistency. For a thicker kadhi, simmer it for longer to allow the yogurt mixture to reduce and thicken.
    • Balancing Flavors: Taste the palak kadhi as it cooks and adjust the seasoning accordingly. You can add a squeeze of lemon juice for a tangy kick or a pinch of sugar to balance the flavors.
    • Texture Enhancement: For added texture and flavor, consider adding fried pakoras or chickpea flour dumplings to the palak kadhi before serving. These additions not only enhance the dish but also make it more filling and satisfying.
    • Freshness Factor: Use fresh spinach and yogurt for the best results. Fresh ingredients impart a vibrant color and flavor to the kadhi, elevating its taste to another level.
    •  

    Variations of Palak Kadhi

    • Punjabi Palak Kadhi: This variation of palak kadhi features a thicker consistency and a richer flavor profile, achieved by simmering the kadhi for a longer duration.
    • Gujarati Palak Kadhi: Gujarati-style palak kadhi is typically sweeter and tangier than its Punjabi counterpart, thanks to the addition of jaggery and kokum.
    • Paneer Palak Kadhi: Add cubes of paneer (Indian cottage cheese) to the palak kadhi for a protein-rich variation that’s sure to please both vegetarians and non-vegetarians alike.

    Health Benefits of Palak Kadhi

    • Rich in Iron and Vitamins: Spinach is a nutritional powerhouse, rich in iron, vitamins, and antioxidants that support overall health and well-being.
    • Probiotic Benefits: Yogurt, a key ingredient in palak kadhi, is rich in probiotics that promote gut health and aid in digestion.
    • Low in Calories: Palak kadhi is a low-calorie dish, making it a healthy option for those looking to manage their weight without compromising on taste.
    •  

    Frequently Asked Questions (FAQs)

    Can I use frozen spinach instead of fresh?

    • Yes, you can use frozen spinach as a convenient alternative. Thaw the spinach before blending it into a puree for the kadhi.
    •  

    Can I make palak kadhi ahead of time?

    • Yes, palak kadhi tastes even better when allowed to sit for a few hours or overnight, allowing the flavors to meld together. Reheat it gently before serving.
    •  

    Is palak kadhi gluten-free?

    • Yes, palak kadhi is inherently gluten-free as it contains no wheat or gluten-containing ingredients.

    Explore more delectable Indian recipes on Manjula’s Kitchen, such as Paneer Tikka Masala for another delightful culinary adventure.

  • Punjabi Samosa

    Punjabi Samosa

    Golden Brown Samosas with Green Chutney

    Punjabi Samosa

    Samosas are probably the most popular Indian snack, and street food. Samosas when paired with cilantro chutney are simply out of this world. I think they are universally loved and hard to resist. I have made variations and minor changes to my samosa recipe over the years. Check out my new and improved recipe for this family favorite!
    This recipe will serve 4.
    5 from 1 vote
    Prep Time 10 minutes
    Cook Time 30 minutes
    Total Time 40 minutes
    Course Appetizer
    Cuisine Indian
    Servings 4 people

    Ingredients
      

    For Crust

    • 1 cup all-purpose flour plain flour, maida
    • 1 Tbsp fine sooji samolina
    • ½ tsp salt
    • 1 ½ Tbsp oil
    • 2 drops of lemon juice
    • ¼ cup water Adjust as needed

    For the Filling

    • 3 medium size potatoes boiled, peeled and chopped into small pieces, will make about 2 cups
    • ½ cup green peas I am using frozen peas
    • 1 ½ Tbsp oil
    • 1 tsp cumin seeds jeera
    • 1 Tbsp coriander powder dhania
    • 1 Tbsp green chilies chopped
    • 2 Tbsp cilantro chopped, hara dhania
    • ¼ tsp red chili powder
    • ½ tsp garam masala
    • 1 tsp mango powder amchoor
    • 1 tsp salt

    Instructions
     

    Making the Dough

    • Mix the flour, sooji, salt, oil and 2 drops pf lemon juice, mix it well rubbing with your fingers. Note: lemon juice should be just 2 drops, we are not adding to flavor, lemon is added to give the crispness. Add the water slowly, to make stiff dough and knead well. Cover the dough and let it sit for at least fifteen minutes.

    Making the Filling

    • Heat the oil in a frying pan on medium high heat. Test the heat by adding one cumin seed to the oil; if it cracks right away oil is ready. Add cumin seeds as cumin seeds crack, add green peas, and turn heat to medium and stir until tender.
    • Add all the spices coriander powder, green chilies, mango powder, garam masala, cilantro and salt mix it well. Add the potatoes and stir-fry for about 4 minutes. Potato mix should not be very dry. Add more salt or amchur according to taste.
    • Let the filling cool to room temperature.

    Making Samosa

    • Take 2 Tbsps of water and keep aside.
    • Knead the dough again well. Divide the dough into 5 equal parts and make into balls. Roll each ball into 6-inch diameter circles, circle will not be very clean, that is fine. Cut each circle in half.
    • Spread the water lightly all along the edge of one semicircle. Pick this semicircle up with both hands and fold it into a cone shape. Pinch the side of this cone so that it is completely sealed.
    • Fill the cone with about 2 Tbsps of filling, do not over fill. Press this filling down with your fingers. Now close the top of this cone into a triangle shape, pinching the top edge so that it is completely sealed. Continue filling the rest of the samosas.
    • Heat about 1 inch of the oil in a frying pan on low medium heat. To check if oil is hot enough place a small piece of dough in oil and dough should sizzle and come to the surface slowly.
    • Place the samosas in the frying pan a few at a time. After samosas are floating on top of the oil turn them slowly. Fry the samosas until the samosas turn a light golden-brown color on all sides, this should take about 10 to 12 minutes. If you use a high heat, the samosa crust will be soft and not crispy.

    Notes

    Tips
    • Do not over boil the potatoes.
    • Be careful not to poke the potatoes multiple times while they are cooking, as they will absorb the water.
    • Drain immediately and keep aside until cool off.
    • If the filled samosas sit for too long, they will dry. To avoid this, cover with a damp cloth.
    You will also enjoy Gulab Jamun, Jalebi, Aloo Tikki, Khasta Kachori
    Suggestions
    • Samosa can be prepared ahead of time and can be freeze for a month.
    • Before freezing, fry them enough until samosa changes the color to light gold brown.
    • After samosas are on room temperature bag them in zip lock bags and freeze them.
    • To use frozen samosas, take out as many you need and fry them on medium heat, make sure do not defrost the samosa before frying.
    Keyword Chaat, Cilantro Chutney, Cocktail Samosa, Cooking Video, delicious, Delicious Aloo Samosa, Gulab Jamuns, Homemade, Jain Food, jalebi, Khana, Kid Friendly, No Garlic, No Onion, Popular Snack, Potato Pastry, Potato Pattie, Punjabi Style, Puri, Satvik, Street Food, Stuffed Puri, Swaminarayan, Tamarind Chutney, Vegan, Veshno Cooking, Yogurt
    Tried this recipe?Let us know how it was!
  • Sweet and Sour Guava Curry

    Sweet and Sour Guava Curry

    A bowl of vibrant yellow Sweet and Sour Guava Curry, garnished with fresh herbs, with whole guavas placed beside the bowl on a patterned tablecloth.

    Amrood Ki khati Methi Sabji (Sweet and Sour Guava Curry)

    Guavas, or "amrood" in Hindi, are simply delicious and probably one of my favorite fruits! This year I have an abundance of guavas growing in my backyard. I like to sprinkle chaat masala on guavas. The spiciness really brings out its flavor. Since I have so many delicious guavas, I decided it was time for me to make Guava Sweet and Sour Curry (Amrood Ki khati Methi Sabji). In case you are not familiar, this is a popular North Indian dish which I believe tastes best with fresh hot puris or parathas.

    This was a staple sabji when I was a child growing up in India, provided guavas were in season. My brother especially enjoyed this dish. He simply relished this sabji and could enjoy eating it every day. However, there was catch – he would only eat this dish with puris! Rotis or parathas simply did not do this dish justice! My brother would pretend to read a book while eating so no one would disturb him so he could truly enjoy eating in peace! Whenever I make this recipe, I remember our sweet, innocent childhood memories. Guava Sweet and Sour Curry has the best flavors – spicy, sweet and sour – all in one dish!

    This recipe will serve 2.
    5 from 1 vote
    Prep Time 5 minutes
    Cook Time 15 minutes
    Total Time 20 minutes
    Course Main Course
    Cuisine Indian
    Servings 2 people

    Ingredients
      

    • 2 cups guavas amrood, cut into bite size pieces
    • 2 Tbsp oil
    • ½ tsp cumin seeds jeera
    • ¼ tsp fenugreek seeds mathi dana
    • tsp asafetida hing
    • 2 tsp coriander powder dhania
    • 1 tsp fennel seed powder saunf
    • ¼ tsp turmeric haldi
    • ½ tsp red chili powder
    • ½ tsp salt
    • 1 Tbsp ginger adrak, thinly sliced
    • ½ tsp mango powder amchor
    • 1 tsp lemon juice
    • 2 Tbsp sugar adjust to the taste
    • 2 Tbsp chopped cilantro hara dhania

    Instructions
     

    • Heat the oil in a saucepan. Oil should be moderately hot. Test the heat by adding one cumin seed to the oil. If the cumin seed cracks right away, the oil is ready.
    • Add the cumin seeds, asafetida, fenugreek seeds, fennel seeds powder, coriander powder, turmeric, and red chili powder stir for few seconds. Add ginger and guava mix it well add 1 cup of water and cover the pan.
    • Lower the heat and cover the pan cook for about 5-8 minutes until guavas are tender. Add mango powder, lemon juice and sugar stir and add cilantro. Turn off the heat and cover the pan for few minutes.
    • Amrood Ki khati Methi Sabji is ready to serve.

    Notes

    If Guava seeds are hard then remove them, adjust the sugar to taste depends how sweet are guava.
    Keyword Amrood, cooking shows, Gourmet food, Guava Fruit, Home Cooking, Homemade, Indian food, Jain Food, Kadoo Ki Subji, Khatta Meetha, Main Dish, Mandir Food, No Garlic, No lahsun, No Onion, No Pyaj, North Indian Recipes, Recipe videos, Sattvik Food, Spicy, Swaminarayan, Tropical Fruit, Vegetarian, Veshno Cooking
    Tried this recipe?Let us know how it was!
  • Pineapple Sheera

    Pineapple Sheera

    Four glass bowls filled with pineapple sheera, garnished with chopped pistachios.

    Pineapple Sheera (Sooji ka Halwa)

    Delicious Pineapple Sheera or Halwa. This delicious combination of flavors is sure to please. Sweet and sour pineapple sheera really compliments Sooji halwa nicely to make a unique dish! Especially on holiday times I enjoy making one dessert which I can serve many ways. Sooji sheera and pineapple sheera I will serve combining both and top with ice cream, drizzle with chocolate ganache, forming them small bite size cake. You can also serve them individually with some garnishing. any way you decide to serve this will have wow factor with adults and kids. I will like you to share with some other serving ideas.
    5 from 3 votes
    Prep Time 10 minutes
    Cook Time 25 minutes
    Course Dessert
    Cuisine Indian
    Servings 6 people

    Ingredients
      

    Pineapple Sheera

    • ¼ cup fine sooji rava, semolina flour
    • 2 Tbsp ghee clarified butter
    • ½ cup pineapple crushed, unsweetened canned pineapple
    • ¼ cup sugar
    • ½ cup water
    • Sooji Sheera
    • ¼ cup fine sooji rava, semolina flour
    • 2 Tbsp ghee clarified butter
    • cup sugar
    • 1 cup water
    • tsp cardamom powder
    • 1 Tbsp almonds sliced

    For Garnishing

    • 1 Tbsp sliced pistachios

    Instructions
     

    Making Pineapple Sheera

    • Drain the water from pineapple and set aside, don’t discard the water, will be used later.
    • Melt the ghee in a frying pan on medium heat. Add sooji and roast stirring constantly this will take about 2-3 minutes. Sooji will have a light sweet aroma, do not brown the sooji. Add the pineapple, mix it well stir for 2-3 more minutes.
    • Add sugar mix well, add pineapple syrup and water mix it well. cook till the water evaporated. Sheera should be the consistency of soft sticky dough. After it will cool off sheera will become little more dry.

    Making Sooji ka Sheera

    • Melt the ghee in a frying pan on medium heat. Add sooji and roast to brown color; stirring constantly this will take about 5 to 8 minutes. After sooji is roasted half the way add almonds and roast with sooji. Sooji should be brown in color and will have a light sweet aroma.
    • Add the sugar, mix add the water slowly to sooji as water will splatter. Add cardamom, turn down the heat to medium low and let it cook for about 2-3 minutes. Sheera should be the consistency of thick batter. Note: as sheera will cool it will be thicker in consistency.

    Notes

    Serving: In an individual serving bowl serve both sheera side by side and garnish with pistachios. Make them in cupcake shape use about 3 oz cups or use the size you prefer. 
    Fill the cups half the way with pineapple sheera and level it, then fill the cup with sooji sheera and let it sit for about 10 minutes. 
    Over the plate take them out upside down, now you have pineapple sheere on the top, or you may keep sooji sheera on the top, garnish with pistachios. 
    I call them Sheera Cake Bites. You also enjoy Paneer Malai Ladoo, Moong Dal Ladoos, Apple vegan cake, Gujia
    Keyword Ananas Halwa, Eggless Dessert, Homemade, Pineapple Halwa, Quick And Easy, Sattvik Food, semolina, Sooji Halwa
    Tried this recipe?Let us know how it was!