Traditional Indian Food: Authentic and Delicious Recipes
Indian cuisine is known for its rich flavors and diverse ingredients. Traditional Indian food offers a wide variety of dishes that are both delicious and culturally significant. Whether you’re looking for traditional Indian food, Indian traditional food, or specific traditional Indian food recipes, Manjula’s Kitchen provides an extensive collection of dishes to suit every palate.
Classic Traditional Indian Food
Aloo Methi
Aloo Methi is a classic North Indian dish made with potatoes and fenugreek leaves. This dish is a staple in many Indian households and is a perfect example of traditional Indian food. The combination of earthy potatoes and the slightly bitter taste of fenugreek leaves, cooked with mild spices, makes this dish flavorful and nutritious.
Paneer Tikka
Paneer Tikka is a popular dish made with marinated paneer cubes grilled to perfection. This dish is a favorite among those who enjoy Indian traditional food. The marinated paneer is cooked with spices and herbs, making it a delicious and satisfying option for any meal. Serve it with a side of mint chutney for an added burst of flavor. Its a popular dish from paneer recipes.
Traditional Indian Food Recipes for Main Course
Dal Tadka
Indian Dal Tadka is a simple yet flavorful lentil dish made with yellow lentils and tempered with cumin, mustard seeds, and red chilies. This dish is a staple in traditional Indian food recipes and is enjoyed with rice or roti. The rich and comforting flavor of the lentils makes it a beloved dish in many Indian households.
Baingan Bharta
Baingan Bharta is a smoky and flavorful eggplant dish that is perfect for any meal. The eggplants are roasted until soft, then mashed and cooked with tomatoes and mild spices. This dish is a delightful addition to your collection of Indian traditional food and pairs well with roti or rice. It a famous dish coming from north indian recipes
Traditional Indian Food List: Snacks and Appetizers
Samosas
Samosas are crispy pastries filled with spiced potatoes and peas. This snack is a classic part of traditional Indian food recipes and is enjoyed by people of all ages. Samosas are perfect for any occasion and can be served with tamarind or mint chutney.
Pakoras
Pakoras are deep-fried fritters made with vegetables like spinach, potatoes, and cauliflower. This snack is a popular item on the traditional Indian food list and is perfect for tea-time or as an indian veg appetizers. Serve pakoras with a side of green chutney for a delicious treat.
Traditional Indian Food Recipes for Rice Dishes
Lemon Rice
Lemon Rice is a tangy and flavorful rice dish made with cooked rice, lemon juice, peanuts, and mild spices. This dish is a staple in South Indian cuisine and is a perfect example of traditional Indian food. It’s light, refreshing, and easy to prepare, making it a great choice for any meal.
Jeera Rice
Jeera Rice is a simple and aromatic rice dish made with cumin seeds and basmati rice. This dish is a versatile item on the traditional Indian food list and pairs well with various curries and dals. The subtle flavor of cumin enhances the taste of the rice, making it a favorite in many households.
Traditional Indian Desserts
Gulab Jamun
Gulab Jamun are soft, deep-fried balls made from khoya (dried milk) soaked in a sweet syrup flavored with cardamom and rose water. This dessert is a staple in traditional Indian food recipes and is often served during festivals and special occasions. The melt-in-your-mouth texture and sweet flavor make it a favorite among many.
Kheer
Kheer is a creamy rice pudding flavored with cardamom and garnished with nuts and raisins. This dessert is a classic in traditional Indian food and is easy to prepare. Kheer is a perfect ending to any meal and is often enjoyed during celebrations.
Elevating Your Traditional Indian Food Menu
To enhance your traditional Indian food menu, consider incorporating dishes from various categories that complement these classic recipes. Indian snacks like samosas and pakoras can introduce a delightful variety of flavors and textures.
For a sweet ending, explore Indian desserts such as gulab jamun and kheer. Offering healthy options like dal tadka and baingan bharta can provide lighter meal choices.
Planning a large gathering? The popular party food ideas are filled with dishes that are sure to impress your guests and make your celebration memorable. Including North Indian recipes like aloo methi or lemon rice can bring an authentic touch to your meal.
Frequently Asked Questions (FAQs)
Q: What are some popular traditional Indian food recipes?
A: Some popular traditional Indian food recipes include Aloo Methi, Paneer Tikka, Dal Tadka, Baingan Bharta, Samosas, Pakoras, Lemon Rice, Jeera Rice, Gulab Jamun, and Kheer. These dishes are flavorful, nutritious, and perfect for any occasion..
Q: What are some traditional Indian food recipes for a vegetarian diet?
A: Some vegetarian traditional Indian food recipes include Paneer Tikka, Dal Tadka, Baingan Bharta, Samosas, Pakoras, Lemon Rice, and Jeera Rice. These dishes are nutritious, delicious, and perfect for a vegetarian diet.
Q: Can I prepare traditional Indian food recipes in advance?
A: Yes, many traditional Indian food recipes can be prepared in advance and stored. Dishes like Dal Tadka and Baingan Bharta can be made ahead of time and refrigerated, while snacks like Samosas and Pakoras can be prepped and frozen.
Q: What are some traditional Indian desserts for special occasions?
A: Some traditional Indian desserts for special occasions include Gulab Jamun and Kheer. These desserts are classic, easy to prepare, and perfect for celebrations.
Conclusion
Traditional Indian food is a celebration of diverse flavors and rich cultural heritage. Whether you’re looking for Indian traditional food, specific traditional Indian food recipes, or a comprehensive traditional Indian food list, these dishes will bring variety and flavor to your meals. So, gather your ingredients, try out these recipes, and enjoy the rich and diverse world of traditional Indian cuisine. Happy cooking and happy eating!
By incorporating these dishes into your menu, you’ll be able to enjoy a wide variety of delicious and nutritious foods. Whether you’re looking for snacks, main courses, or desserts, there’s a traditional Indian food recipe to suit every taste. Don’t forget to check out Manjula’s Kitchen for more inspiration and culinary delights. Happy cooking and happy eating!
Steamed gram-flour dumplings cooked in spicy gravy is a popular North Indian dish from the Indian state of Rajasthan. This mouth-watering dish will surely tantalize your taste buds with its rich, spicy flavors and delightful texture. Ideal for those who crave a hearty and flavorful meal, this Rajasthani delicacy is both satisfying and memorable. Enjoy the authentic taste of Rajasthan with every bite!
1 1/4 cups besan (gram flour) (available in Indian grocery stores)
1/2 teaspoon chili powder adjust to taste
1/2 teaspoon salt
1/8 teaspoon turmeric (haldi)
3 tablespoons yogurt (dahi)
3 tablespoons oil
For the kadhi
1 cup yogurt (dahi)
1 tablespoon besan (gram flour)
1/4 teaspoon turmeric powder (haldi)
1/4 teaspoon chili powder adjust to taste
1 tablespoon coriander powder (dhania)
1 teaspoon salt adjust to taste
2 tablespoons oil
1 teaspoon cumin seeds (jeera)
1/2 teaspoon mustard seeds (rai)
1/8 teaspoon asafetida (hing)
4 whole red chilies
1 bay leaf (tejpat)
1 black cardamom optional
1/2 teaspoon paprika (dagi mirch)
For Garnish
2 tablespoons chopped cilantro
Instructions
For Gattes
Mix all the ingredients in a mixing bowl and gather into a soft dough, adding a little water if needed. At this point the dough will be a bit sticky; wetting your fingers with oil or water will help.
Divide the dough into four or five parts. Roll each one between your palms into a long, smooth log, approx. five” in length and ¾” in diameter. You will need to oil your palms to prevent the dough from sticking.
Bring three cups of water to a boil in a pot. Gently drop the gatte logs into the boiling water and cook for four to five minutes, or until they begin to float up to the surface.
Remove the cooked Gatte logs from the water and let them cool.
Slice the logs into approx. ¾ inch pieces. Set the Gatte aside.
For The Kadhi
Mix yogurt and gram flour into a smooth paste. Add turmeric, chili powder, and coriander powder to the yogurt paste.
Pour the oil into a saucepan over medium heat. Test the heat by adding one cumin seed to the oil. If the cumin seed cracks immediately, the oil is ready. Add the cumin seeds, mustard seeds, and asafetida.
When seeds crack add the whole red chilies, bay leaf, cardamom, and paprika. Stir for a few seconds.
Pour in the yogurt paste and stir for two minutes. Add three cups of water and stir until the gravy comes to a boil. Add salt to taste.
Add the gatte to the gravy. Cover and cook over low-to-medium heat for 20 minutes or longer. Turn off the heat.
Add cilantro and cover the pot for a few more minutes.
Now you are ready to serve!
Notes
Other Suggestions
A slice of gatte can be cooked in advance and added to the gravy later. Gatte can be frozen for up to a month or refrigerated for a few days.
Slices of gatte are used to make a wide variety of dishes, including subji (cooked dry vegetables), rice pulao, etc.
A slice of gatte can be fried and served as a snack.
A slice of gatte can be used to make raita (mixed with yogurt).
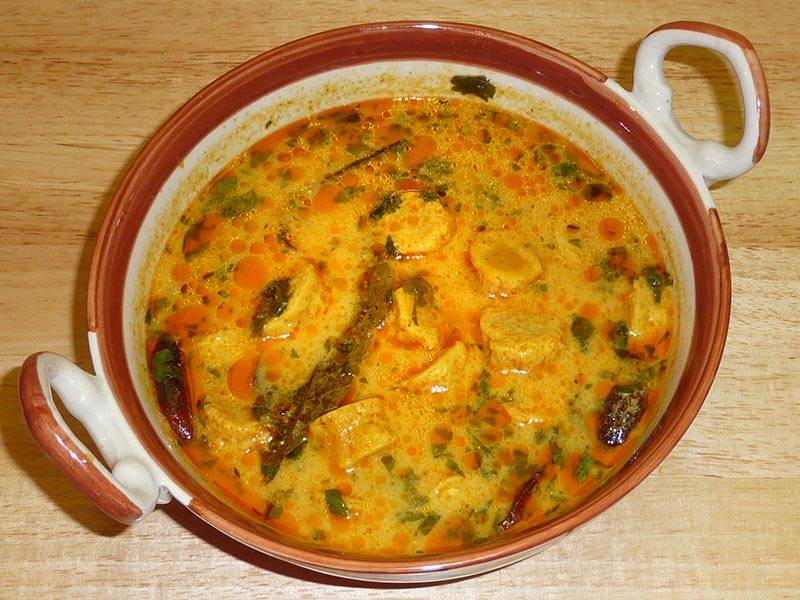
Gatte Ke Kadhi is a traditional North Indian dish made primarily with chickpea flour (besan) dumplings cooked in a tangy yogurt-based curry/gravy. The dish is gluten-free and suitable for individuals observing a gluten-free diet. It is often prepared during festive occasions like Karwa Chauth, a Hindu festival where married women fast for the well-being and longevity of their husbands. The addition of lentils (Dal) and vegetables enhances the nutritional value of the dish, making it a wholesome and flavorful option for a vegetarian meal.
Gatte ki kadhi, also known as gatta kadhi or gatte ki sabji, is a traditional Rajasthani dish that combines chickpea flour dumplings (gatte) with a tangy yogurt-based curry (kadhi). This hearty and flavorful dish is a staple in Rajasthani cuisine and is often enjoyed with rice or roti. In this recipe, we’ll show you how to make Rajasthani gatte ki kadhi from scratch, so you can enjoy the authentic flavors of Rajasthan in the comfort of your own home.
Step 1: Preparing the Gatte:
To start, we’ll prepare the gatte, which are the chickpea flour dumplings that give this dish its unique texture. In a mixing bowl, combine chickpea flour (besan), yogurt, salt, red chili powder, turmeric, and a pinch of asafoetida (hing). Knead the mixture into a smooth dough, adding water as needed to achieve the right consistency. Divide the dough into small portions and shape them into cylindrical dumplings.
Step 2: Boiling the Gatte:
Next, we’ll boil the gatte to cook them through before adding them to the kadhi. Bring a pot of water to a boil and gently add the gatte to the boiling water. Let them cook for about 10-12 minutes, or until they float to the surface and are cooked through. Once cooked, remove the gatte from the water and set them aside to cool slightly.
Step 3: Preparing the Kadhi Base:
While the gatte are boiling, we’ll prepare the kadhi base. In a separate bowl, whisk together yogurt, chickpea flour, turmeric, red chili powder, and salt until smooth. This mixture will form the base of the kadhi and give it its creamy texture. Be sure to whisk out any lumps to ensure a smooth consistency.
Step 4: Tempering the Kadhi:
In a large pan, heat oil and add mustard seeds, cumin seeds, fenugreek seeds, and dried red chilies. Let the seeds splutter and release their aroma, infusing the oil with flavor. This tempering adds depth and complexity to the kadhi, enhancing its overall flavor.
Step 5: Cooking the Kadhi:
Once the tempering is ready, pour in the yogurt-chickpea flour mixture and stir well to combine. Add water to adjust the consistency of the kadhi and bring it to a gentle simmer. Let the kadhi cook for about 10-15 minutes, stirring occasionally, until it thickens slightly and the raw taste of the chickpea flour is cooked out.
Step 6: Adding the Gatte:
Once the kadhi is cooked to perfection, it’s time to add the boiled gatte to the curry. Carefully slice the gatte into bite-sized pieces and add them to the kadhi. Let them simmer in the kadhi for a few minutes to absorb the flavors of the curry and heat through.
Step 7: Finishing Touches:
Before serving, garnish the gatte ki kadhi with freshly chopped cilantro leaves for a pop of color and freshness. You can also sprinkle some roasted cumin powder on top for extra flavor. Serve the kadhi hot with steamed rice or roti for a comforting and satisfying meal.
Tips for Making Perfect Gatte Ki Kadhi:
Ensure the Gatte are Firm: Make sure the gatte dough is kneaded well to avoid any cracks or breakage while boiling.
Adjust the Consistency: If the kadhi is too thick, add more water to thin it out. If it’s too thin, let it simmer for longer to thicken.
Taste and Adjust Seasoning: Taste the kadhi before adding the gatte and adjust the seasoning as needed with salt, red chili powder, or other spices.
Variations of Gatte Ki Kadhi:
Vegetable Gatte Ki Kadhi: Add diced vegetables such as carrots, peas, and potatoes to the kadhi for added texture and nutrition.
Paneer Gatte Ki Kadhi: Substitute paneer cubes for the gatte to create a rich and creamy variation of the dish.
Spinach Gatte Ki Kadhi: Stir in chopped spinach leaves to the kadhi for a vibrant green color and earthy flavor.
Benefits of Including Gatte Ki Kadhi in Your Diet:
Rich in Protein: The combination of chickpea flour and yogurt in gatte ki kadhi provides a good amount of protein, essential for muscle repair and growth.
Probiotic Benefits: Yogurt used in the kadhi is rich in probiotics, which promote a healthy gut microbiome and aid digestion.
Nutrient-Dense: Gatte ki kadhi is packed with vitamins, minerals, and antioxidants from the spices and ingredients used, contributing to overall health and well-being.
Frequently Asked Questions (FAQs) about Gatte Ki Kadhi:
Q: Can I make gatte ki kadhi in advance?
A: Yes, you can make the kadhi base in advance and store it in the refrigerator for up to 2 days. Add the gatte and simmer just before serving.
Q: Can I freeze gatte ki kadhi?
A: While you can freeze gatte ki kadhi, the texture of the gatte may change slightly upon thawing. It’s best enjoyed fresh or stored in the refrigerator for a few days.
Q: Can I adjust the spice level of gatte ki kadhi?
A: Yes, you can adjust the amount of red chili powder and green chilies according to your taste preferences. If you prefer a milder kadhi, reduce the amount of spice used.
For more delicious Rajasthani recipes, visit Manjula’s Kitchen. Explore a variety of traditional dishes from Rajasthan, including dal bati churma, laal maas, and more, to experience the rich flavors and culinary heritage of the region.
I bought a new small Indoor Electric grill (George Foreman grill) this summer and have tried several grilling recipes – the most hit was the Pineapple grilled with Honey sauce – which was actually my own accidental invention. So I have used it for the eggplant-tomato-green peppers filling. The dressing is the sauce filtered out from the grill machine spread over the tortilla before putting the filling! The wrap is filled with fresh romaine lettuce and pepper jack cheese! Hope you will like this appetizer or snack recipe.
1 1/2 tablespoon fresh pineapple juice (you can substitute with lemon juice – I consume a lot of fresh pineapple juice almost everyday so I have it handy!!!)
2 teaspoon garlic paste
2 teaspoon ginger paste
1/4 teaspoon red cayenne pepper (you can add adjust for hotness)
1/4 teaspoon sea salt (adjust per taste)
1/4 teaspoon ajwain seeds
1/2 teaspoon dried parsley leaves
For the tortilla wrap filling:
1/2 inch thick Round Eggplant slices – 3
2 medium tomatoes – cubed
1/4 cup finely chopped green peppers
1/2 cup fresh romaine lettuce
1/4 cup shredded cheese (I used Weight watchers Pepper Jack cheese)
Instructions
For Tortilla:
Turn on the tortilla maker on medium-high setting – Optionally you can also cook these on the tawa/griddle like roti/parathas.
Take the flour in a bowl big enough to knead the dough. Add salt and olive oil- mix well. Add sprouted moong and mix well. Add 1 tablespoon water at a time and bind into firm and smooth dough – firm enough to not use extra dry flour while rolling – this will avoid brushing more oil while making the tortilla.
Divide the dough into two pieces.
Roll the dough into 7 inch diameter circles and place on the tortilla maker – do not close the top. Once you see few areas bubbled up on the roti – after 1-2 minutes. Flip over the tortilla-roti and cook the other side similarly. Then turn back-over and press the top side of the tortilla maker to press it well – just 1-2 seconds. Flip back over and do the same for 1-2 seconds. Take out the tortilla and place covered in paper napkin in a roti casserole bowl to avoid from being dry and firm.
For the dressing and grill marinate:
Add well the ingredients as listed above in a wide bowl and keep aside.
For the filling:
Turn on the grill (or just do the entire process on the tawa/griddle on stove)
Roll the eggplant pieces in the prepared dressing and leave it in the bowl until the grill is ready
Put the eggplant pieces on the grill and let stand for 30 seconds. Then cover and grill for 2-3 minutes.
Meanwhile add the chopped tomatoes and peppers into the remaining dressing/marinate mix and keep it aside
Flip over the eggplant pieces and continue grilling for another 2 minutes. Then remove and keep aside
Now add the tomato-pepper mixture on the grill and add all the remaining sauce over it.
Grill similarly for 2-3 minutes on each side. While flipping over take some of the collected sauce out of the grill and pour it back on the grill.
Save the collected-drained sauce while grilling to apply on the tortilla as dressing!
Notes
Serving Instructions:
Take the tortilla roti and apply the drained dressing sauce all over. Then spread with shredded cheese and lettuce. Chop the eggplant pieces and place over the lettuce with the tomato-pepper mixture. Wrap the tortilla and “pin-up” using the tooth-pick.
Use the remaining tomato-pepper mixture and the drained sauce mixture combined as “salsa on the side”. ENJOY!!!!
Variations to prepare the sauce without the grill:
Heat the ingredients of the dressing sauce in microwave or on medium heat on stove in double-sized bowl for 4 minutes – checking not to spill it over and stirring every minute.
Grill the eggplant and tomato-pepper on the hot griddle/tawa once rolled in the dressing sauce or on gas grill pan.
Aloo Dum is an exotic delicious main course dish. Just the smell of aloo dum can make you hungry! To make this dish, potatoes are fried and then soaked in the spicy aromatic gravy. This is a perfect dish for any dinnerparty.
Heat the oil in a frying pan over medium high heat.
Frying pan should have at least 1 inch of oil. To check if the oil is ready, put one piece of potato in the oil. The potato should sizzle right away. If potatoes are fried on low heat, they will be very oily.
Fry the potatoes till they are cooked through; turn the potatoes a few times while frying. Take out potatoes with a slotted spoon (this allows excess oil to drip back into the frying pan) and place on a paper towel. Keep it aside.
Heat the pan on medium heat and stir-fry the sesame seeds for about a minute until seeds lightly change color. Take them out and keep aside.
Blend sesame seeds, coconut, ginger, green chili, and make it into a paste. Use water as needed to blend into paste.
In a small bowl mix, sesame paste, yogurt, ginger, green chili, coriander powder, funnels seed powder, paprika, red chili powder, and turmeric into a paste. Keep it aside.
Heat the oil in a saucepan. Test the heat by adding one cumin seed to the oil; if seed cracks right away oil is ready. Add the cumin asafetida and cumin seeds. After the cumin seeds crack, add whole red chili and besan (gram flour). Stir-fry for about half a minute until the besan (gram flour) is golden-brown.
Add the spice paste and stir-fry for about 2 minutes on medium heat until the spices start to separate from the oil.
Add the potatoes, mix it well and add about 1cup of water. After the gravy boils, let it cook on low-medium heat for 8 to 10 minutes. Adjust the gravy to your liking.
Add the cilantro and garam masala, cover the pan, and turn off the heat. Let it sit for a few minutes before taking off the cover. This helps bring the color to the top of the dish.
Keyword Exotic, Party Food, Side Dish, Spicy Potatoes
Peel and cut the squash into cubes. Save about ¼ of the squash peel and chop them.
In a small bowl, mix the shredded ginger, coriander powder, funnel, red chili powder, paprika, turmeric, and ¼ cup of water to make a paste.
Heat the oil in a pan. Test the heat by adding one cumin seed to the oil; if seed cracks right away oil is ready. Add cumin seeds and asafetida after seeds crack add fenugreek seeds and red chilies and stir for a few seconds.
Add the spice paste and stir-fry for a minute until spices start leaving the oil.
Add the squash, squash peels, salt, and ¼ cup of water. Mix well. Cover the pan and let it cook on medium heat until the vegetables are tender. Squash will be semi mushy.
Make sure to stir gently every 3 to 4 minutes. Check if more water is needed.
Lastly, add the mango powder, sugar and chopped cilantro. Mix everything and cover for a minute. Adjust the salt to your taste.
Notes
Tips: I have used acorn squash but any squash can be used whatever is available for example banana squash, butternut squash, buttercup squash etc. The only one I know does not work is spaghetti squash and pumpkin.Suggestion: The recipe is with many blends of spices and great aroma makes a great dish to serve with plain rice. Just make the dish with extra gravy by adding more water on step 9. Serve with Puri, in North India Spicy Squash served with Urad Dal Puri.
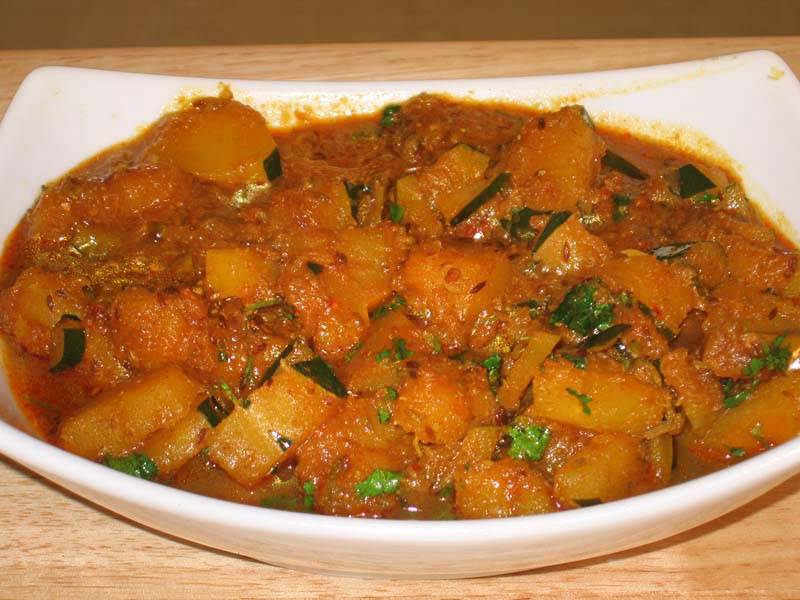
Indian Squash Recipe | Butternut Squash Indian Recipes | Manjula’s Kitchen
Indian cuisine is renowned for its rich and diverse flavors, one such delightful gluten-free vegetable curry-based Indian Squash Recipe is spicy squash Indian curry a dish that embraces the vibrant colors and aromatic spices synonymous with Indian cooking. To start select a fresh squash, preferably Butternut or Acorn Squash, though other options like banana squash or buttercup squash can also be employed. It’s worth noting that spaghetti squash and pumpkin are not recommended for this particular squash recipe Indian.
The first step involves the preparation of the squash, a crucial task to ensure the perfect texture in the final dish. Peel and cut the squash into cubes, reserving about ¼ of the squash peel for later use. This unique touch adds both texture and visual appeal to the Butternut Squash Sabzi.
The heart of the dish lies in the aromatic spice blend that brings the Indian flavors to life. In a small bowl, combine shredded ginger, coriander powder, funnel, red chili powder, paprika, turmeric, and water to create a flavorful paste. This amalgamation of spices forms the base, infusing the squash with a medley of tastes that are quintessentially Indian.
As the pan sizzles with anticipation, heat the oil to the right temperature. A simple test with cumin seeds determines the readiness of the oil; a crackling cumin seed indicates the perfect moment. Add cumin seeds, asafetida, fenugreek seeds, and red chilies to the hot oil. The ensuing aroma is a testament to the robust flavors that will unfold.
The spice paste takes center stage as it sizzles in the pan. Stir-fry for a minute until the spices release their essence into the oil, creating a tantalizing blend. Now, it’s time for the star of the show – the cubed squash, along with the reserved squash peels. Sprinkle salt, add water, and cover the pan, allowing the vegetables to simmer and tenderize. The squash transforms into a semi-mushy consistency, absorbing the myriad spices infused in the dish.
A gentle stir every few minutes ensures even cooking, and periodic checks determine if more water is needed to maintain the desired texture. The Butternut Squash Sabzi takes shape, with the kitchen filled with the heady aroma of Indian spices.x
In the final act, add mango powder, sugar, and chopped cilantro, elevating the dish with a burst of tanginess and freshness. The amalgamation of flavors is perfected as everything melds together under the lid for a minute. A final adjustment of salt ensures the dish is tailored to individual taste preferences.
As the Butternut Squash Sabzi graces the dining table, it presents a feast for the senses. The blend of spices, the semi-mushy texture of the squash, and the infusion of mango powder create a symphony of flavors that captivate the palate. This Indian squash recipe is not just a dish; it’s a celebration of culinary prowess and cultural richness amongst all other butternut squash Indian recipes.
For those seeking variety in acorn squash recipes, this recipe seamlessly transitions to accommodate Acorn Squash. The versatility of this Indian squash recipe allows for a delightful twist using acorn squash, offering a slightly different flavor profile while still capturing the essence of Indian cuisine. Acorn squash recipes in Indian households often mirror the steps of this Butternut Squash Sabzi, proving that the charm of this dish transcends the specific type of squash used.
In the realm of squash recipes Indian cuisine has a lot to offer, this Butternut Squash Sabzi stands out as a testament to the creativity and depth of flavor inherent in Indian cooking. Its adaptability with various types of squash ensures that households can explore the rich tapestry of Indian cuisine, savoring the distinctive tastes and aromas that make every bite a culinary adventure. Whether served with plain rice or accompanied by Urad DalPuriin North India, this spicy squash dish is a gastronomic delight that bridges the gap between tradition and innovation in the realm of Indian cooking.
2 tablespoons chana dal, pre-soaked in water for at least half an hour
1/4 cup unsalted roasted peanuts
1 teaspoon salt adjust to taste
1/4 cup lemon juice
Instructions
Method
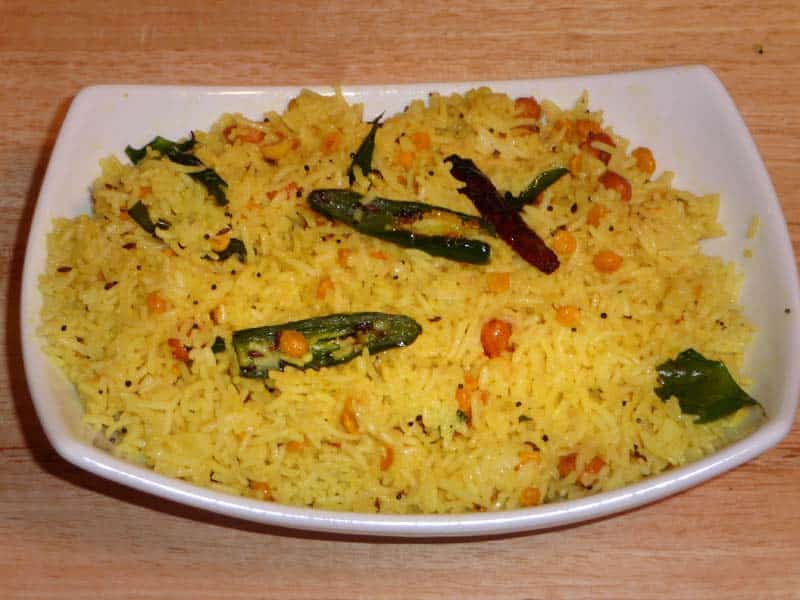
Wash rice gently changing water several times until the water appears clear.
For fluffier rice, the rice should be soaked for at least 15 minutes prior to cooking.
Drain the rice and put it into the saucepan. Add water, oil, and salt, and bring to a boil. Once the water is boiling reduce the heat to low and cover the pan.
Cook about 15 minutes, or until the rice is tender and the water has evaporated. Turn off the heat and fluff the rice with a fork.
Preparing The Seasoning:
Heat the oil in a frying pan on medium heat; stir-fry the peanuts for about 2 minutes until peanuts changes the color to light brown.
Take out the peanuts from oil and use the same oil for rest of the seasoning.
Add cumin seeds and mustard seeds after seeds crack add red chili, curry leaves, and green chilies, and stir for a few seconds.
Add the chana dal, stir-fry for about a minute.
Add turmeric and mix it well.
Add the pre-cooked rice, peanuts and sprinkle salt and lemon juice over the rice.
Mix gently, making sure do not break the rice and stir-fry for about 2 minutes. Rice is ready, Enjoy!
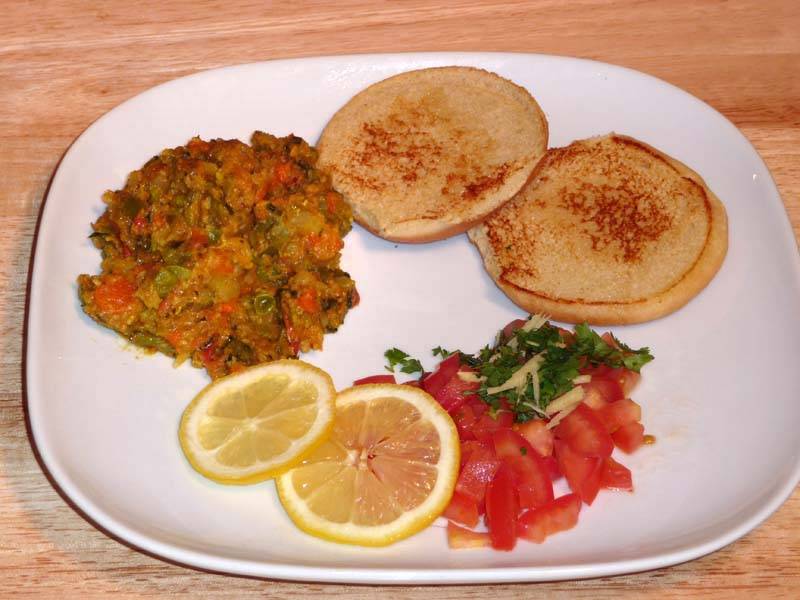
Pav Bhaji is a favorite fast food dish in India. Pav is buns and bhaji is the mixed spicyvegetables. This is a very popular street food with roadside vendors.
Boil all the vegetables potatoes, cauliflower, beans, peas, and beans in about 1 ½ cup of water. Don't add too much water, just enough to cook.
After the vegetables are soft and tender, drain the excess water and mash them coarsely with a fork or potato masher.
Heat the oil in a frying pan over medium heat.
Add tomatoes, green chilies, cilantro, and ginger and sauté for 2-3 minutes until pasty.
Next add the red chili powder, fennel seed and turmeric, mix it well.
Add mashed vegetables.
Using a spatula, simultaneously mash and stir all the vegetables for 5 minutes.Using a spatula, simultaneously mash and stir all the vegetables for 5 minutes.
Add salt and two tablespoons of ghee, stir-fry for another minute.
Add about ¼ cup of water or as needed, and let it cook for a minute.
Turn off the heat.
Add garam masala, and lemon juice, mix it well
Toast the halves bun over a skillet using butter over medium heat until buns are golden brown from both sides.
Serve toasted buns with bhaji (mixed vegetables), garnish with chopped tomatoes and sliced lemon.
Notes
Variations:
You can use almost any vegetables to make the bhaji, but keep the potato base. You can also try vegetables such as cabbage, bell pepper, and eggplant.
If you don’t eat potatoes, use green bananas for the base.
Drain the whey using a strainer line with cheesecloth, or muslin cloth. Wrap the curds in a muslin cloth, rinse under cold water, and squeeze well.
Once the paneer is drained, place on a dry, clean surface and knead the paneer until the paneer is almost rolls into smooth soft dough.
Add the sugar and cardamom into the paneer and knead the paneer again until sugar is mixed well.
Next on low heat cook the paneer mixture stirring continuously until paneer starts coming together as soft dough. This should take about 6 to 7 minutes.
Turn off the heat and keep mixing the paneer like you are making dough. This is most important step to this dish; you are just cooking paneer enough to take out the rawness. If you over cook the paneer it will become crumbly.
Mix the saffron thread in 1 teaspoon of warm milk and mix it well. Keep aside.
Divide the paneer in 24 equal parts and roll them giving a ball shape.
Garnish with crushed pineapple, or garnish them with a drop of saffron paste putting sliced pistachio over.
Refrigerate them for few hours before serving. Serve them chilled!
Notes
NotesImportant step to this dish; you are just cooking paneer enough to take out the rawness. If you over cook the paneer it will become crumbly.Sandesh can be refrigerated for a week.You will also enjoy to Rasgulla and Chumchum
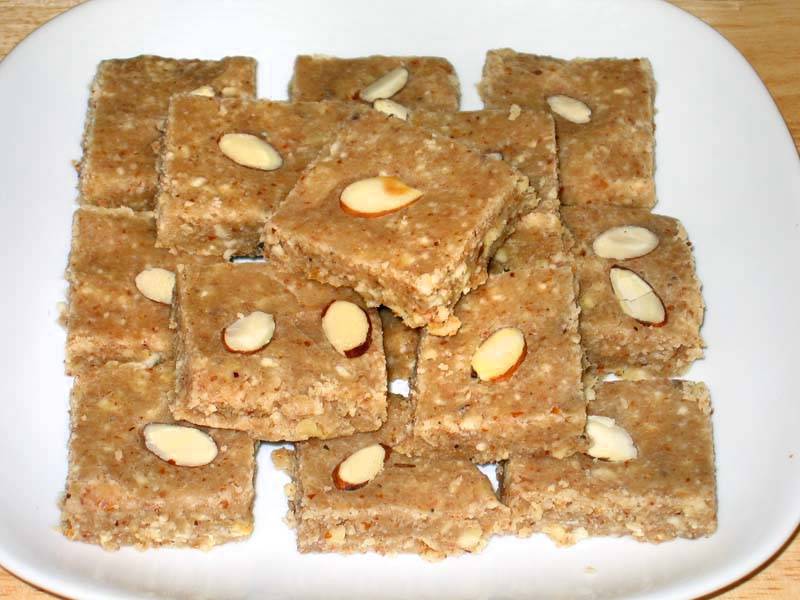
Almond Walnut Cashew Burfi is a healthy, quality substitute for candy that your entire family will enjoy. Its a nice sweet snack that is popular in north India. Recipe will make 24 pieces.
Dry grind the walnuts, cashews and almonds in a food processor.
Dry roast the groundnuts in a frying pan on low medium heat.
Roast them just enough so that the nuts start to give off an aroma. It will take about 4 to 5 minutes. Remove from heat and set aside.
Put the sugar and water together in a saucepan on medium heat. Bring to a boil to make the 1 thread syrup or on the candy thermometer it should reach 230 degrees F.
Turn off the heat and stir in the cardamom powder.
Add the nuts to the syrup and mix, and then spread over a greased 8-inch plate. Note: don’t let the syrup cool off. It must be spread while still hot.
Wait a few minutes until burfi is set but still soft.
Then cut the burfi into any shape you like (such as square, diamond, triangle).
Garnish each piece of burfi with sliced almonds while the burfi is still soft.
Allow the burfi to cool for about an hour to dry and hold its shape. Now you can remove the burfi from the plate.
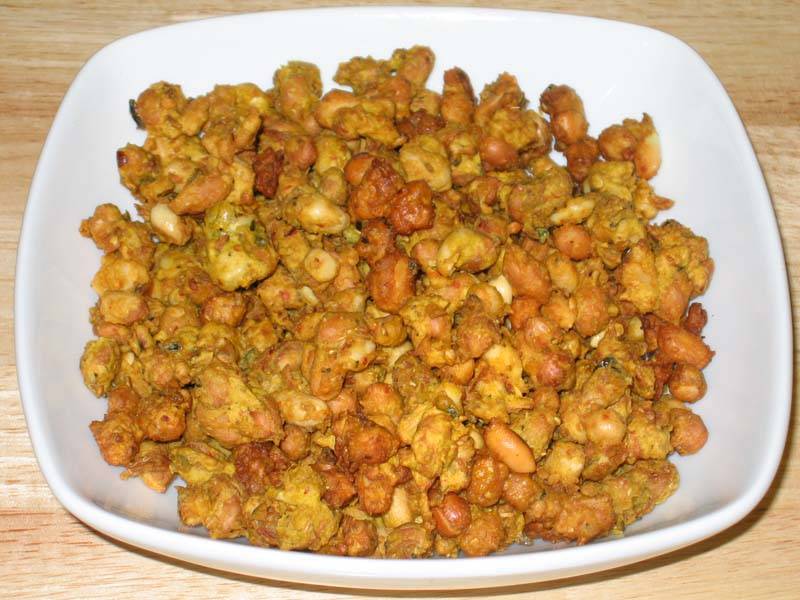
Hot and spicy peanuts fried with delicious mix of spices. This makes a great snacks for sitting around watching TV or playing games with family and friends. Recipe serves 6.
In a frying pan roast the dry peanuts on medium heat for 3-4 minutes and let it cool for few minutes.
Mix all the ingredients together in a large bowl.
Add water as needed making sure the spices and flour stick to the peanuts uniformly.
Heat the oil in a frying pan on medium heat.
The frying pan should have at least 1 inch of oil. To check if the oil is ready, put one drop of batter in the oil. The batter should raise to the top but not change color right away.
put few drops of oil in your hand it helps droping the penuts before putting peanuts on the oil.
While putting the peanuts into oil, loosen them with your fingers to make sure the peanuts are separated and do not form lumps. Peanuts should be separated while frying.
Fry the peanuts until they turn light brown, turning them occasionally.
When they are done cooking, take them out of the oil with a slotted spoon. Place them on a paper towel to absorb the extra oil.
After cooling to room temperature, the peanuts should be crispy.
Notes
Masala Peanuts can be stored for a month in an airtight container.
Also see my recipe for Spicy Cashew, Almond brittle.
These make a delicious homemade gift – pack it in a jar or candy bag.
Masala Peanuts are delightful appetizers perfect for holidays and festivals, offering a crunchy, gluten-free snack option that satisfies both vegan and non-vegan palates alike. Peanut masala recipe is a beloved snack across India, offering a delightful combination of crunchy peanuts and aromatic spices. This masala peanuts recipe is a favorite among snack enthusiasts for its bold flavors and addictive crunch. Whether you’re hosting a gathering or simply craving a savory treat, learning how to make masala peanuts recipe at home is both rewarding and satisfying.
How to Make Masala Peanuts Recipe: Step-by-Step Guide
Step 1: Prepare the Peanuts
Start by selecting fresh, raw peanuts for the best results. Rinse them thoroughly under cold water to remove any dirt or debris. Then, pat them dry using a clean kitchen towel or paper towels.
Step 2: Dry Roast the Peanuts
Heat a non-stick pan over medium heat. Once the pan is hot, add the peanuts in a single layer. Dry roast them, stirring occasionally, until they turn golden brown and emit a nutty aroma. This process typically takes about 8 to 10 minutes. Keep a close eye on them to prevent burning.
Step 3: Prepare the Spice Mixture
While the peanuts are roasting, prepare the spice mixture. In a small bowl, combine masala peanuts recipe spices such as red chili powder, turmeric powder, cumin powder, chaat masala, and salt according to your taste preferences. Adjust the spice levels to suit your palate.
Step 4: Coat the Peanuts with Spices
Once the peanuts are roasted to perfection, transfer them to a large mixing bowl. While they are still warm, sprinkle the prepared spice mixture over the peanuts. Toss them gently to ensure that each peanut is evenly coated with the spices. Allow the peanuts to cool completely before serving.
Step 5: Serve and Enjoy
Your homemade masala peanuts are now ready to be enjoyed! Serve them as a standalone snack or pair them with your favorite beverages. Store any leftovers in an airtight container to maintain their freshness and crunchiness.
Tips for Making Perfect Masala Peanuts
Experiment with different spice blends to customize the flavor according to your preferences.
You can add ingredients like amchur powder for tanginess or garam masala for extra warmth.
For an extra layer of flavor, consider adding roasted garlic or curry leaves to the spice mixture.
Make sure to roast the peanuts evenly to achieve a uniform golden brown color and prevent any burnt spots.
Allow the peanuts to cool completely before storing them to maintain their crispiness.
Variations of Masala Peanuts
Sweet and Spicy: Add a touch of sweetness to your masala peanuts by incorporating a bit of powdered sugar or jaggery along with the spices.
Herb Infused: Experiment with fresh herbs like cilantro, mint, or curry leaves to add a refreshing twist to your masala peanuts.
Nutty Crunch: Enhance the texture of your masala peanuts by tossing them with a handful of toasted cashews, almonds, or pistachios.
Benefits of Masala Peanuts
Rich in Protein: Peanuts are an excellent source of plant-based protein, making masala peanuts a nutritious snack option.
Good Source of Healthy Fats: Peanuts are high in monounsaturated fats, which are beneficial for heart health when consumed in moderation.
Packed with Essential Nutrients: Peanuts are rich in essential nutrients like vitamins, minerals, and antioxidants, contributing to overall well-being.
FAQs about Masala Peanuts
Can I use pre-roasted peanuts for this recipe?
While you can use pre-roasted peanuts, roasting them yourself allows you to control the level of crunchiness and ensures that they are freshly toasted.
How long do homemade masala peanuts stay fresh?
When stored in an airtight container at room temperature, homemade masala peanuts can stay fresh for up to two weeks. However, they are best enjoyed within the first few days to maintain their crispiness.
Can I make masala peanuts without oil?
Yes, you can skip the oil and dry roast the peanuts directly in a pan for a healthier alternative. However, using a small amount of oil helps the spices adhere to the peanuts more effectively.
For more delightful Indian recipes, explore Manjula’s Kitchen, where you’ll find a treasure trove of culinary inspiration ranging from traditional dishes to modern twists on classic favorites. Be sure to check out recipes like Aloo Gobi, Palak Paneer, and Chana Masala for a taste of authentic Indian cuisine.
Gujia is a fried pastry filled with an aromatic nuts mixture. In India, Gujia is traditionally made for the holidays like Diwali and Holi and is a must have treat.
Mix flour, sooji, and oil in a bowl, make a soft dough adding water slowley as needed. Knead the dough until the dough becomes soft and pliable.
Set the dough aside and cover it with a damp cloth. Let the dough sit for at least ten minutes.
Filling:
Mix the cream and milk powder in a frying pan. Cook on medium heat until mixture starts leaving the sides of the frying pan and becomes soft runny dough. Stir continuously so the mixture does not burn on the bottom of the pan.
Turn off the heat and add coconut, almonds, melon seeds, sugar, and cardamom powder. Mix together well. After cooling, the mixture will be lightly moist. Keep aside.
Making the Gujias:
Mix 2 tablespoons of water with 1 tablespoon of flour to make a paste. Set aside.
Knead the dough again for a minute. Divide the dough into about 20 equal parts and roll into balls with the palms of your hands.
Roll each ball into about 4-inch diameter (like a roti or chappati).
Dip your finger in the flour paste and spread it around the rim of the rolled dough, but just on the half the circle.
Take the rolled dough in your palm and put about 1-1/2 tablespoons of the filling mixture in the center and fold it into a semi-circle. Now press the edges together with your fingers. Make sure the edges are completely sealed otherwise they will open while frying and oil will get in and filling will come out. Continue filling the rest of the gujia in the same manner.
Heat about 1 inches of oil in a frying pan on medium heat. To test if the oil is hot enough, drop a small piece of dough into the oil. It should sizzle right away but come to the surface slowly.
Place the gujia in the frying pan few at a time.
After gujhias are floating on top of the oil, turn them slowly. Fry the gujias until they turn light golden-brown color on all sides. Don’t fry on high heat; the gujia crust will be too soft and not crispy.
When they are done cooking, lift them out of the oil with a slotted spoon.
Garnishing:
Boil the sugar and water on medium heat until syrup is about one thread or 230 degrees (Fahrenheit) on a candy thermometer.
Dip the gujias into the syrup making sure they are coated with syrup all around. Place the gujias on a wire rack to allow the extra syrup drain.
Garnish the gujias with sliced almonds and pistachios while the gujhias are still moist with syrup.
Gujias will be dry in an hour.
Notes
Gujia can be stored in airtight container up to a month.Gujia makes great gift idea for Holidays you may also like Besan Ladoo, Spicy Cashew, Baklava, Besan Mathri
Keyword Ghugra, Holiday Dessert, Holiday Gift, Karangi, Special Occasion
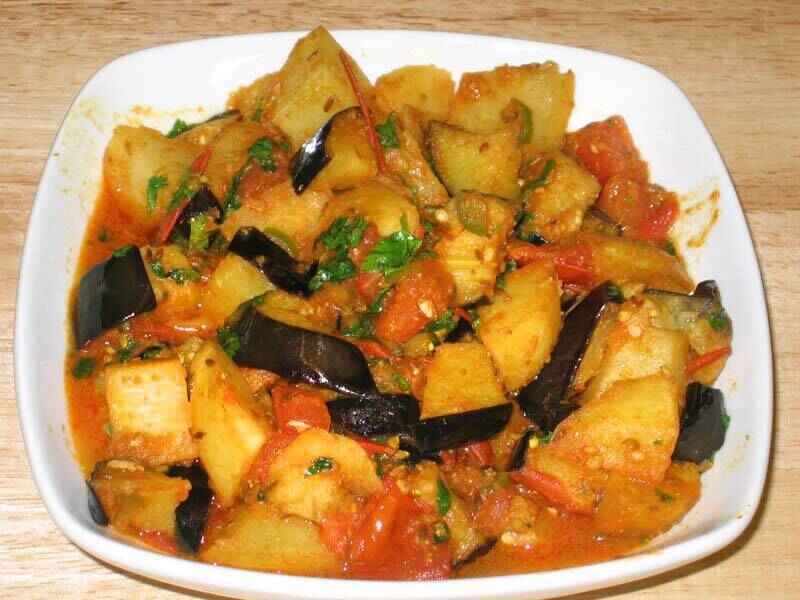
1medium purple eggplantbaingan, un-peeled, cut into 1/2″ cubes
2medium russet potatoesaloo, peeled and cut into 1/2″ cubes
4medium tomatoestamatar cut into 1/2″ cubes
2Tbspcilantrochopped, hara dhania
1Tbspoil
Pinchof asafetidahing
1tspcumin seed
1green chilichopped, adjust to taste
1tspginger pasteadrek
1Tbspcoriander powderdhania powder
½tspturmerichaldi
½tsppaprikadagi mirch
1tspsaltadjust to taste
2Tbspwater
Also needed
Oil to fry
Instructions
Heat the oil in a frying pan over medium high heat.
Frying pan should have at least 1 ½ inch of oil. To check if the oil is ready, put one piece of potato in the oil. The potato should sizzle right away. If vegetables are fried in low heat they will be very oily.
Fry the potatoes till they are cooked through, turn the potatoes few times while frying. Take out potatoes with a slotted spoon (this allows excess oil to drip back into the frying pan) and place on a paper towel.
Test the oil again with a piece of eggplant. Fry the eggplant pieces same way.
In a small bowl, mix the shredded ginger, green pepper, coriander powder, paprika, turmeric, and 2 tablespoons of water to make a paste.
Heat the 1 tablespoon of oil in a pan. Test the heat by adding one cumin seed to the oil; if seed cracks right away oil is ready.
Add cumin seeds and asafetida after seeds crack add the spice mixture and stir-fry for a minute until you see the oil start to separate from the spice mixture.
Add chopped tomatoes stir-fry for a minute.
Add fried potatoes and eggplant mix it gently, let it simmer for three to four minute on medium low heat.
Subji should be not very dry if needed add three to four spoons of water.
Turn off the heat and add chopped cilantro mix it well.
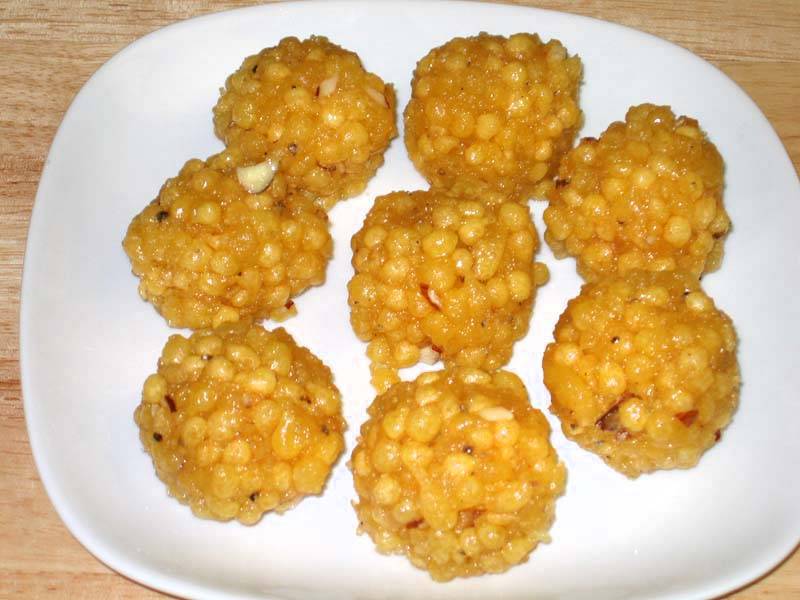
Boondi Ladoo is a popular mouthwatering dessert and must to have at all special occasions all over India. Boondis are very small, round deep-fried balls that have been soaked in fragrant sugar syrup. After soaking, the syrup is drained, and the syrup infused boondi are formed into balls (ladoos). It is a popular sweet delicacy made during festivals like Diwali or Holi.
Perforated Spoon, Skimmer, or Ladle: to make Boondi
The critical part of boondi making is to use the right kind of utensil for the batter to drop through the holes into the hot oil to form the little pearl shaped fried balls. To accomplish this you need to use a flat skimmer, strainer or perforated ladle that has several round holes on the surface, each about the size of a whole black peppercorn.
Instructions
Crack open the cardamom pods and remove the seeds. Crush the seeds and keep aside.
Put the water and sugar in a saucepan and bring to a boil on medium-high heat. When the syrup comes to a boil, turn the heat down to medium and stir to dissolve the sugar. Let it simmer until the syrup is about half thread consistency or 220 degrees on the candy thermometer.
Mix the gram flour with water to make a smooth pancake-like batter or slightly thicker than dosa batter.
Heat the oil in a frying pan on medium high heat. The frying pan should have at least 1 1/2 inches of oil. Tip: To test if the oil is the right temperature, drop a pinch of batter into the oil; if it rises immediately without changing color then the oil is ready to start frying the
Hold the skimmer about 1 to 1 1/2 inches above the oil over the center of the frying pan with one hand. With your other hand pour some of the batter onto the skimmer to cover all of the holes without spilling over the edge of the skimmer. Tip: if you hold the skimmer higher than 11/2 inches above the oil boondi will not be round.
The batter will start dropping through the holes into the oil. If the batter doesn’t drop right away through the holes, pour the batter on the skimmer back into the batter bowl, mix a little more water to the batter and start again. Drop enough boondi into the oil so they just cover the surface of the oil in frying pan in a single layer
Fry them until the sound of sizzling stops and boondis are light gold in color but not crispy! Lift the boondi out of the oil with a slotted spoon (this allows excess oil to drip back into the frying pan) and put them directly into the warm syrup and mix.*
Before making the next batch of boondi, wipe clean the skimmer. This helps to keep the boondi round.
Repeat the process of making boondi and adding to the syrup with rest of the batter. You may have to adjust the heat in between making boondis.
When finished frying the boondi, let them soak in the syrup for few minutes. Add the crushed cardamom seeds and sliced almonds to the syrup. Now drain off the excess syrup.
If the boondis are still hot, let them sit only until they are warm enough to handle – don’t let them to cool off. If the boondis become cold you will not be able to form them into ladoos.
To make the ladoos, scoop up some of the boondi mixture into your palm with a spoon. Gently squeeze the mixture between both palms to shape into a round ball about the size of a golf ball. As you are squeezing some of the syrup will come out. You can make the ladoo larger or smaller if you have a preference.
As you finish making each ladoo, put it on a plate and continue on to make the next ladoo.
As the Ladoos cool to room temperature they will become firm but they should still be moist.
Notes
Shelf LifeLadoos will keep at room temperature in a covered container for up to 10 days and for one month in the refrigerator.TipsIf the syrup is not of the right temperature, you will not be able to form the ladoos.If the boondis cool down to room temperature before being shaped into balls, the sugar will crystallize.If you are not able to make ladoos, don’t worry. You can still enjoy them as “meethi boondi” or sweet boondi.*If you like the boondi for raita or making some other salty snack don’t add to the syrup.
Keyword Festival Special, Kid Friendly, Popular Dessert
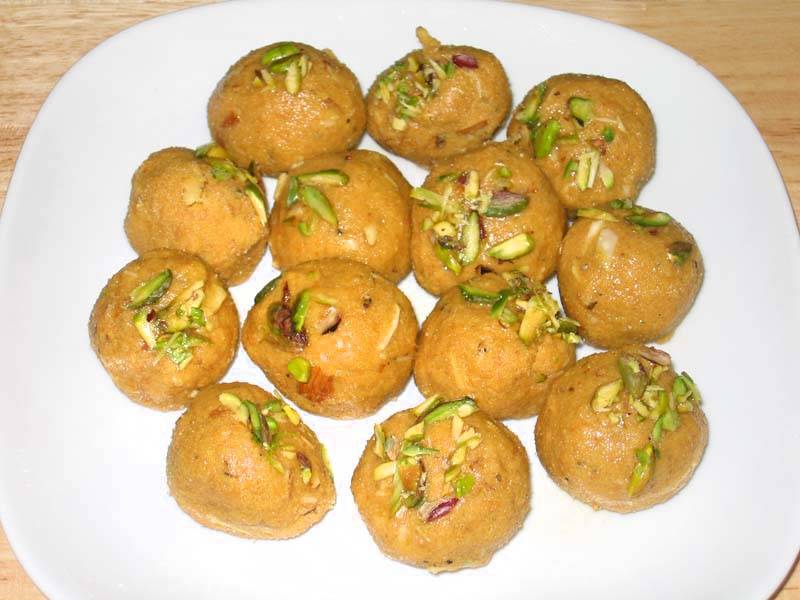
Besan ladoos are rich, sweet dessert–snack made from gently roasted gram flour (besan). Ladoos can be served any time of the day. Traditionally in Indian households ladoos and burfis are served as cookies and chocolate during festive seasons like Navratri, Diwali, Holi.
Put the besan (gram flour), sooji, and melted butter in a large frying pan and mix.
Turn the stove on to medium heat and begin to roast the basen mixture until basen becomes light golden brown in color. Stir the mixture continuously with a spatula to prevent burning. Cooking on high heat will not allow the mixture to fully cook.
When the color has changed you will also start to smell the sweetness of roasted besan. This should take about 7 to 10 minutes. Remove the pan from the heat and let the basen cool to a warm temperature. don’t let it become to room temperature.
While the mixture is warm add and mix cardamom seeds, almonds, and sugar.
To make the ladoos, take about 2 tablespoons of warm basen mixture into your palm. Gently press the mixture between your palms to form a smooth, round ball. The ladoos are usually about the size of a ping-pong ball, but you can adjust the as you prefer.
When you have finished making all of the ladoos, take one ladoo at a time and dip the ladoo a quarter inch into melted butter or ghee. Then lightly touch the part of the ladoo with the butter into the sliced pistachios just enough so some pistachios stick to the ladoo.
Put ladoos back on the plate with the pistachio side facing the top.
Leave the ladoos on a plate to cool to room temperature before putting into a covered container. The ladoos can be stored in an airtight container for 2 to 3 weeks.
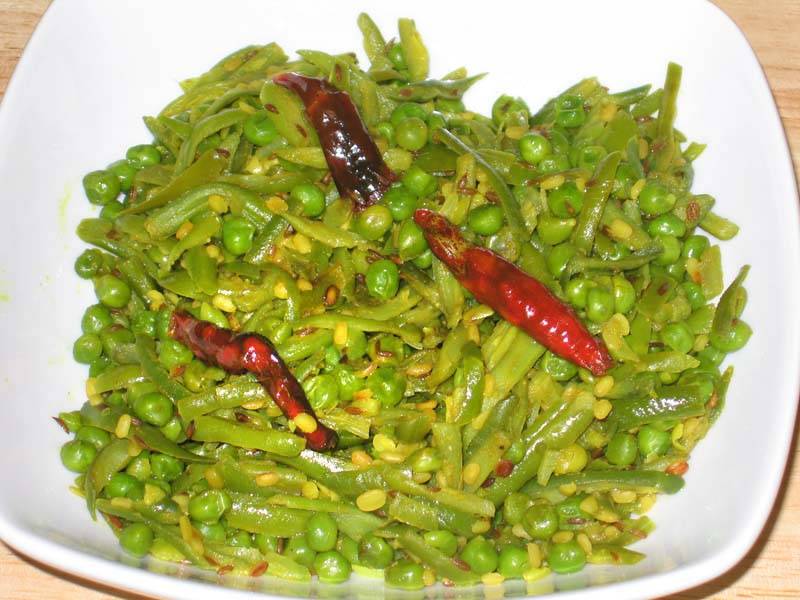
Heat the oil in a saucepan on medium-high heat. Test the heat by adding one cumin seed to the oil. If the cumin seed cracks right away, the oil is ready.
When the cumin seeds crack, add hing, red chilies and urad dal.
Stir-fry for half a minute, stop if the urad dal changes color.
Add green beans and peas, mix it well, and cover the pan. Turn down the heat to medium.
Let it cook for five to six minutes until the peas and beans are lightly tender. Do stir once in between.
Remove the cover and add the coriander powder, salt, and turmeric.
Let beans and peas cook without cover to allow the water to evaporate, this way the beans don’t become mushy. Stir the beans occasionally. Beans and peas should be lightly moist.
After turning of the heat add lemon juice.
Notes
Suggestions
Urad dal can be replaced with washed moong or chana dal.