Traditional Diwali Food Recipes: A Feast of Flavors and Festivities
Diwali, also known as the Festival of Lights, is one of the most significant and widely celebrated festivals in India. It marks the triumph of light over darkness and good over evil. A key part of the Diwali celebration is the array of diwali recipes that brings families and friends together. These festive dishes, ranging from savory snacks to sweet treats, reflect the rich culinary heritage of India. Let’s explore some of the most beloved traditional Diwali foods that add flavor and joy to the festivities.
Samosas are a staple in diwali food recipes. These crispy, triangular pastries are filled with a spiced mixture of potatoes and peas, making them a perfect snack for the festive season. Samosas are often served with tangy chutneys, adding a burst of flavor to your Diwali spread. They are also a popular item in Indian snacks and can be enjoyed by people of all ages.
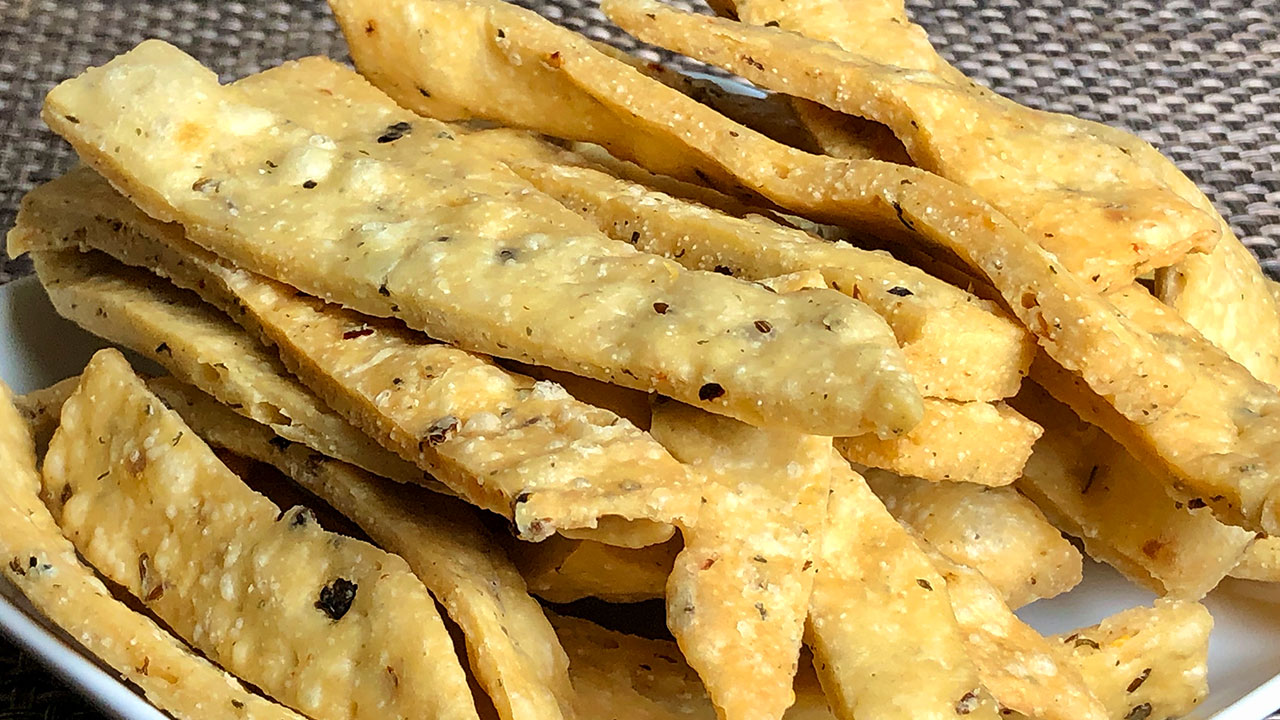
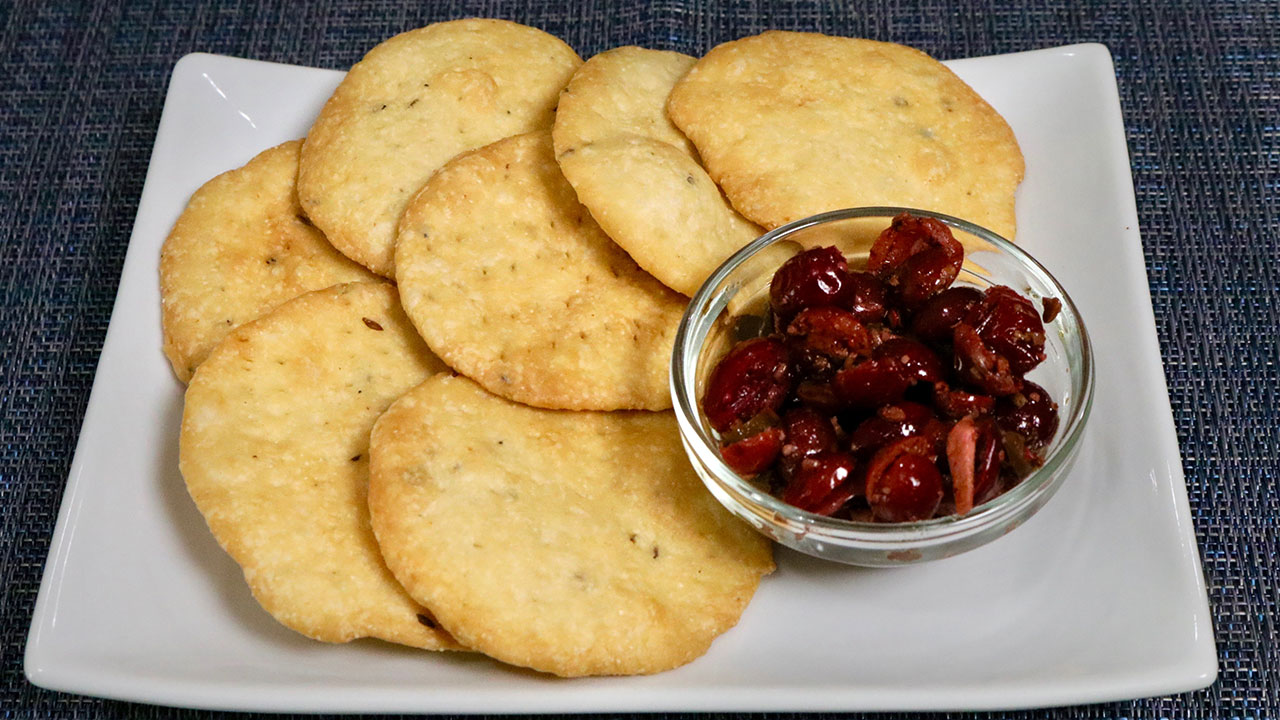
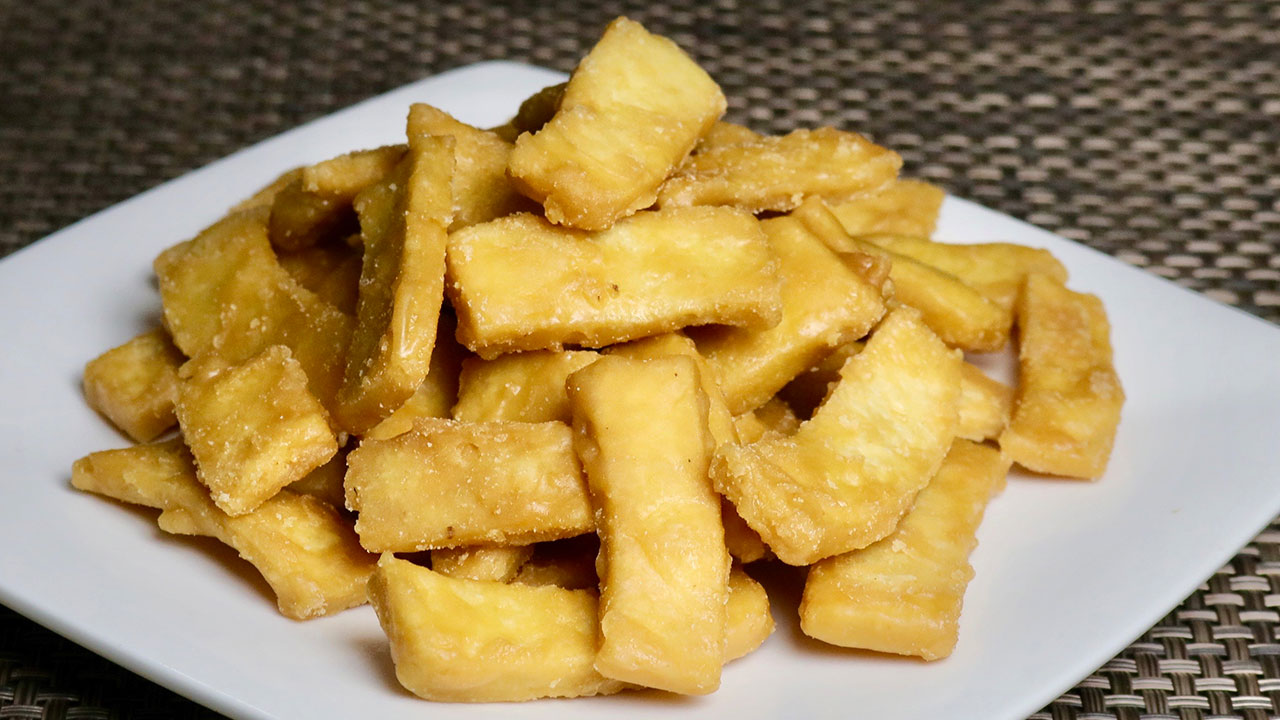
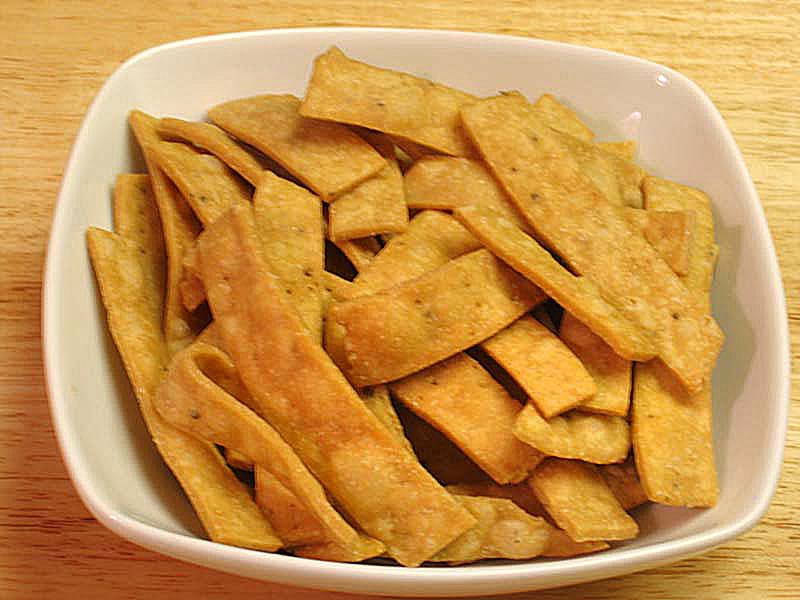
Murukku
Murukku is a traditional South Indian snack made from rice flour and urad dal flour, seasoned with sesame seeds and cumin. This crunchy snack is often prepared during Diwali and is loved for its savory taste and unique texture. Murukku is an excellent addition to your Diwali snacks collection and is perfect for sharing with family and friends.
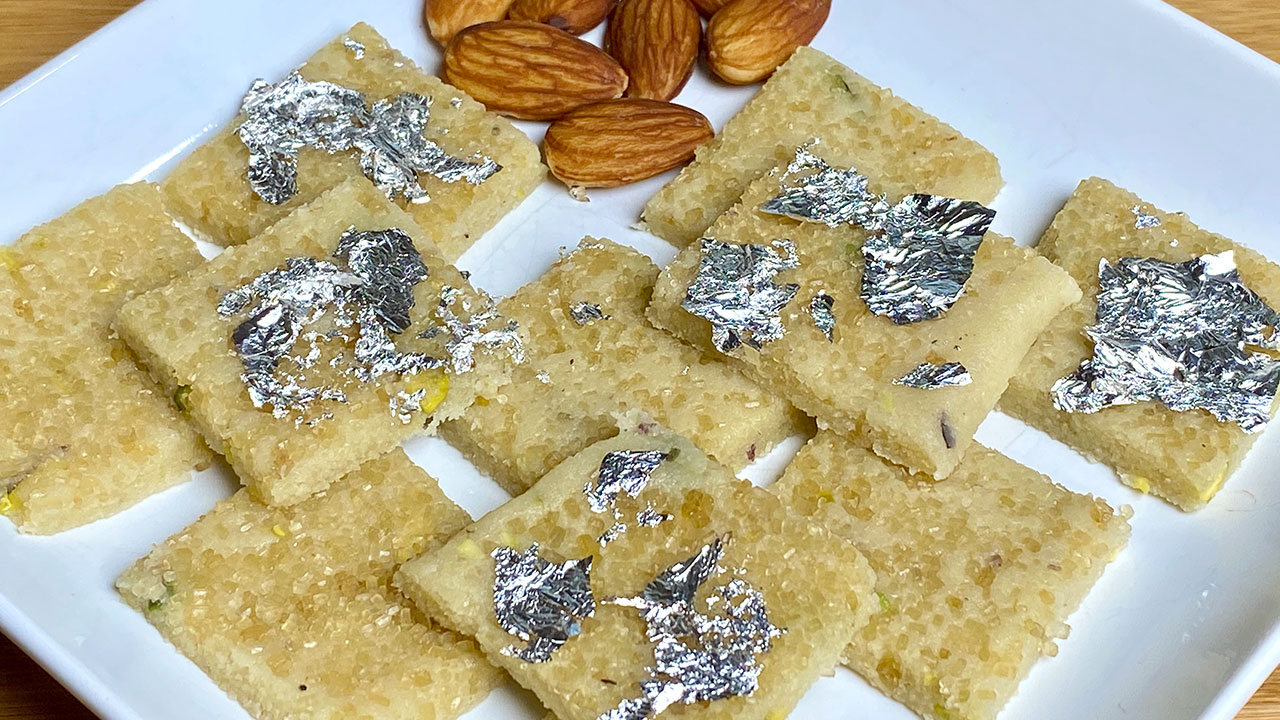
Kaju Katli
Kaju Katli is a classic Indian sweet made from cashew nuts and sugar, flavored with cardamom and sometimes garnished with silver leaf. This delicate and melt-in-the-mouth sweet is a favorite during Diwali. Kaju Katli is a must-have in diwali sweet recipes as it symbolizes prosperity and happiness. It is also a popular choice in Indian desserts recipes.
Chole Bhature
Chole Bhature is a hearty North Indian dish that is often enjoyed during festivals like Diwali. It consists of spicy chickpea curry (chole) served with deep-fried bread (bhature). This dish is rich and flavorful, making it a festive favorite. Chole Bhature can be included in your traditional Diwali food menu for a satisfying meal. It is also a hit in Indian dinner recipes.
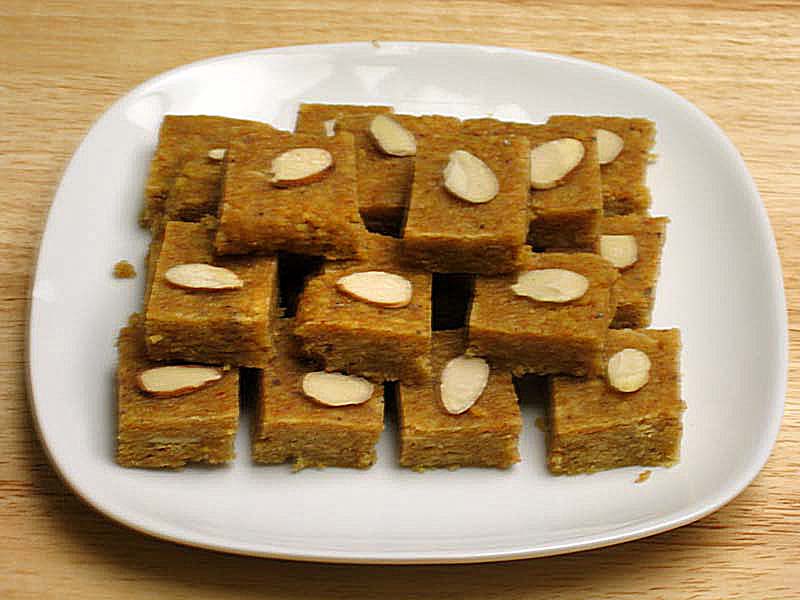
Besan Ladoo
Besan Ladoo is a traditional Indian sweet made from gram flour, ghee, and sugar, flavored with cardamom and garnished with nuts. These round, golden ladoos are a quintessential part of diwali sweet recipes. Besan Ladoo is easy to make and is loved for its rich taste and texture. It is a perfect addition to your Indian desserts collection.
Enhancing Your Diwali Feast
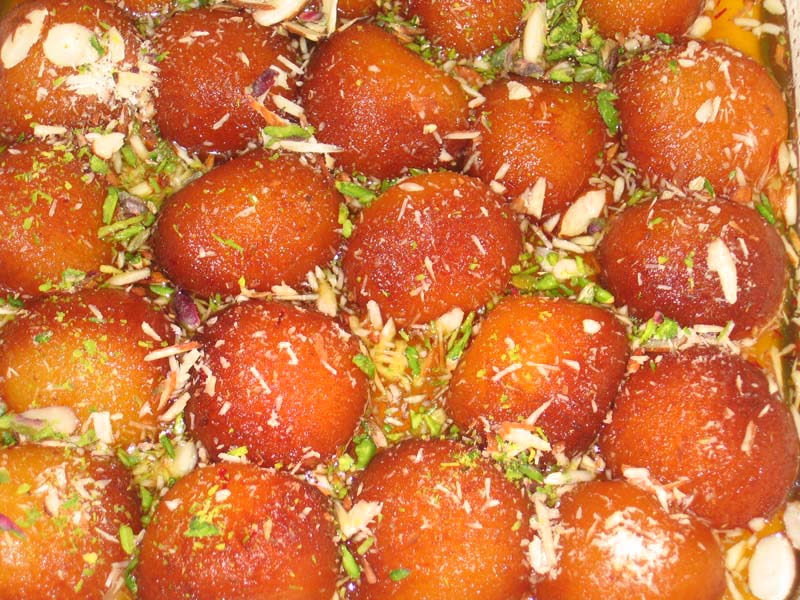
To make your Diwali feast even more delightful, consider exploring related categories that complement these traditional Diwali foods. Adding Indian snacks like pakoras and chakli can provide a variety of flavors and textures. For a sweet ending, explore Indian desserts such as gulab jamun and jalebi. Incorporating healthy sweet snacks like roasted nuts and fruit chaat can offer lighter options for your guests. Hosting a large gathering? The popular party recipe category is filled with dishes that are sure to impress your guests and make your celebration memorable. Including fusion dishes like Indo-Chinese spring rolls can add a unique twist to your Diwali spread.
Frequently Asked Questions (FAQs)
Q: What are some popular diwali recipes?
A: Some popular diwali food recipes include Samosas, Murukku, Kaju Katli, Chole Bhature, and Besan Ladoo.
Q: What makes traditional Diwali food unique?
A: Diwali recipes are unique due to its use of aromatic spices, rich flavors, and festive ingredients. These dishes are often prepared with great care and shared with loved ones, symbolizing the joy and togetherness of the festival.
Q: How can I create a Diwali feast with traditional Indian dishes?
A: To create a Diwali feast with traditional Indian dishes, you can include recipes like Samosas, Murukku, Kaju Katli, Chole Bhature, and Besan Ladoo. Complement these main dishes with Indian snacks and desserts for a complete festive meal.
Q: Are traditional Diwali foods suitable for vegetarians?
A: Yes, most diwali recipes are vegetarian. From savory snacks like Samosas and Murukku to sweet treats like Kaju Katli and Besan Ladoo, there are plenty of vegetarian options to enjoy during Diwali.
Q: Can I prepare these traditional Diwali dishes in advance?
A: Yes, many traditional Diwali dishes can be prepared in advance. For example, Samosas can be prepped and frozen, then fried fresh on the day of the festival. Sweets like Kaju Katli and Besan Ladoo can be made a few days ahead and stored in airtight containers.
Q: What are some traditional Indian desserts for Diwali?
A: Traditional Indian desserts for Diwali include Kaju Katli, Besan Ladoo, Gulab Jamun, and Jalebi. These sweets add a festive touch to your celebrations and are enjoyed by all.
Conclusion
Diwali food recipes are a delightful way to add flavor and joy to your festive celebrations. Whether you’re hosting a Diwali party or simply looking to try something new, these dishes will bring warmth and happiness to your table. So, gather your ingredients, try out these recipes, and create unforgettable memories with your loved ones. Don’t forget to explore related categories for more delightful recipes from Manjula’s Kitchen!
By incorporating these dishes into your Diwali celebrations, you’ll be able to enjoy a wide variety of delicious and traditional foods. Whether you’re looking for easy Indian recipes, a hearty meal, or a sweet treat, there’s a traditional Diwali food to suit every occasion. Happy cooking and happy Diwali!
Namak paare is pastry like crunchy snack lightly seasoned with carom seed. This is great snack with cup of tea. I like them with spiced mango or lemon pickle.
Mix flour, sooji, salt, carom seeds, and oil, and mix it with fingertips to get consistency of breadcrumb.
Add water as needed to make firm but smooth dough. Cover with damp cloth and set aside at least for ten minutes.
Knead the dough for another minute and divide in two equal parts.
Take each part of the dough and make a flat ball shape. Roll them into 9-inch circles and thickness of salted crackers.
Prick them with a fork all over the rolled dough, so the paras do not puff when frying.
Cut each of the rolled dough into about half inch wide and 2 inch long pieces. Note: you can cut them in your desire shape.
Heat the oil in a frying pan on medium heat.
The frying pan should have at least 1 ½ inch of oil. To check if the oil is ready, put a small piece of dough in the oil. The dough should make the oil sizzle and come up slowly.
Make sure to place just enough namak paras so you can turn them over easily when frying. Fry the namak paras until both sides are light golden-brown.
After namak paras come to room temperature they should become crisp.
Notes
Namak paras can be stored for one month in airtight containers.
If the Namak paras are cooked on high heat, they will be soft.
Mohan Thal is like a gram flour fudge with a touch of cardamom flavor and topped with sliced almonds. Mohan Thal can be served as a dessert or served with a cup of chai tea. This fudge looking candy is irresistible.
Melt the butter and mix with gram flour by rubbing between both palms. Texture will become like a lightly rough powder. Keep aside for at least fifteen minutes.
Add the milk. Milk should be warm and rub the mixture again between your both palms.
Next put the cream and milk powder in a frying pan and cook on medium heat. String continuously until mixture comes together and looks like soft dough. Remove from heat and keep aside.
Mix the milk dough with gram flour mixture together and stir fry on medium heat until it becomes light brown in color and start giving off a sweet aroma. Tips: stir fry continuously making sure it stays powdery.
Let it cool and add cardamom powder mix it well.
In a saucepan, boil the sugar and water together on medium heat until syrup is 2 threads or 225 degrees F on a candy thermometer.
Mix the syrup with flour mixture mix well and pour on a 8 inch greased plate. Do this quickly before syrup cools down.
Mohanthal should be about ½ inch thick and shape it into a square shape on the plate. While it is still hot spread the sliced almonds evenly over the top to garnish.
Cut the mohanthal into 1-inch square shapes while it is still warm. Serve at room temperature.
Notes
Notes: Mmohanthal can be kept for 2 weeks or refrigerate for a month. You May also like Gulab Jamuns, Badam Ki Burfi
Mohan Thal, also known as Besan Barfi, is a traditional Indian dessert that hails from the state of Gujarat. This rich and decadent fudge is made from gram flour (besan), ghee (clarified butter), sugar, and flavored with cardamom and nuts.
Mohan Thal is loved for its melt-in-your-mouth texture, aromatic flavor, and irresistible sweetness, making it a favourite treat during festivals, such as Diwali, Ganesh Chaturthi, Holi or Makar Sankranti.
Why make Mohan Thal Burfi
Fun & Savoury: Mohan Thal is a fun and savoury dish that can be enjoyed by everyone and is revered for its sweetness that has a long lasting after taste even even after consuming it 2 hours before.
Rich Flavor Profile: Mohan Thal is infused with the warm and aromatic flavors of cardamom, saffron, and nuts, giving it a rich and complex flavor profile. The combination of sweet, nutty, and spicy notes makes Mohan Thal a truly indulgent and satisfying dessert experience.
Easy to Make: Despite its luxurious taste and appearance, Mohan Thal is surprisingly easy to make at home with just a few simple ingredients. With a bit of patience and practice, you can recreate this traditional Indian sweet in your own kitchen and impress your family and friends.
Other Variations of Burfi:
Til ki Burfi: It’s a burfi that incorporates sesame seeds or til and is a winter favourite for all
Carrot Burfi: Carrot Burfi or carrot fudge is a classic Indian dessert made with carrot and milk. This burfi is packed with all the goodness of carrots.
Badam Burfi: Badam (almond) Burfi is a healthy substitute for candy but is rich in flavor. Almond burfi can be served as dessert or snack.
Coconut Burfi: Coconut Burfi is made with coconut powder combined with a cardamom flavored sugar syrup. It’s a scrumptious dessert.
Tips for Making Perfect Mohan Thal (Gram Flour Fudge):
Use Good Quality Ghee: Use high-quality ghee made from pure cow’s milk for the best flavor and texture in Mohan Thal. Ghee adds richness and depth to the fudge and enhances its overall taste and aroma.
Cook on Medium Heat: Cook the gram flour mixture on Medium heat to prevent it from burning while ensuring an even cooking. Stir the mixture constantly to prevent lumps from forming and to achieve a smooth and creamy texture.
Cut into Uniform Pieces: Once the gram flour mixture has set, cut it into uniform pieces using a sharp knife for a neat and professional presentation. Garnish each piece with a sliver of almond or pistachio for an elegant finishing touch.
FAQs about Mohan Thal (Gram Flour Fudge):
How long does Mohan Thal stay fresh?
Mohan Thal can be stored in an airtight container at room temperature for up to 1-2 weeks. For longer storage, refrigerate the fudge in the refrigerator for up to 3-4 weeks or freeze it for up to 2-3 months.
Can I make MohanThal with nuts?
Yes, you can add nuts or substitute them with seeds such as melon seeds or pumpkin seeds if you have nut allergies or prefer a nut-free version of Mohan Thal.
Can I reduce the amount of sugar in Mohan Thal?
Yes, you can reduce the amount of sugar in MohanThal to suit your taste preferences. However, keep in mind that sugar plays a crucial role in the texture and sweetness of the fudge, so adjust the sugar quantity accordingly.
Mohan Thal (Gram Flour Fudge) is an elegant luxurious Indian sweet that’s perfect for celebrating special occasions or satisfying your sweet cravings.
With its rich flavor, melt-in-your-mouth texture, and endless variations, Mohan Thal is sure to become a favorite treat in your household. Whether enjoyed on its own or paired with a cup of chai, Mohan Thal is a timeless classic that’s cherished by sweet enthusiasts everywhere.
Stay tuned for our next exploration into the world of culinary delights!
In a bowl, mix the all-purpose flour, gram flour, sooji, baking soda and cardamom powder and set aside.
Let the butter come to the room temperature (butter should be soft not melted)
Add butter and sugar in a mixing bowl and beat for two to three minutes until light and fluffy.
Add the flour mix to butter and sugar mixture and knead them together to make smooth dough. Divide the dough into about 24 equal parts and make them into balls. Press each ball between your palms lightly; every piece should be about 3/4″ in thickness.
With a sharp knife softly draw a tic-tac-toe design on the top and put few pieces of almonds and pistachios and press them into the dough gently.
Put Nan khatai on a lightly greased cookie sheet and bake at 375 degrees for about 13 to 15 minutes or until Nan khatai are lightly gold brown.
After they are lightly golden brown remove the cookie sheet from the oven. Let the Nan Khatais cool down for two to three minutes before taking them off the cookie sheet.
Notes
Nan khatai make a great homemade gift for holidays. Your friends and relatives will love it.Serve them with hot cup of chai.Enjoy!
Keyword Biscuit, Cookies, Eggless, Kid Friendly, Tea Time Snack
The look and smell of saffron rice is delicious and tempting. It makes a perfect dessert for lunch or any kind of get together. You can serve this dish cold or warm.Serves 4 to 6.
3Tbsppistachios and almondssliced or crushed, pista, badam
1Tbspraisinskishmish
Instructions
Dry roast the almonds, pistachios and raisins in a pan on medium heat until the raisins puff and the nuts slightly change color. Set aside.
Put the rice, water, cinnamom stick, and salt in a sauce pan over medium high heat.
When the rice comes to boil, reduce the heat to low and cover.
Let the rice cook for about 15 minutes, or until the water has evaporated.
While rice is cooking, in a separate saucepan combine milk, butter, sugar, saffron, cloves and cardamom and bring to boil on medium heat, stir until the sugar has dissolved. Remove from the heat and set aside.
Add the nuts mixture and sugar syrup over the rice. Fold gently into the rice with a spoon gently to avoid mashing the rice.
Put the cover back over the rice and turn the heat on to very low. Let the rice simmer for 3 to 4 minutes. Turn the heat off and leave it covered for another few minutes before serving.
Savor the Aromatic Bliss: Sweet Saffron Rice – A Delightful Indian Treat
Sweet saffron rice is a delectable, gluten free and aromatic dessert that originates from Indian cuisine. It features fragrant basmati rice cooked with saffron-infused syrup and a blend of spices, resulting in a rich and flavorful dessert or sweet treat. The saffron lends a vibrant golden hue and a distinct floral flavor to the dish, while the nuts and dried fruits add texture and depth. This delightful dessert is often served on special occasions, festivals, or as a comforting indulgence any time of the day.
1. Nutty Roasting: Enhancing Flavor for Sweet Saffron Rice
Begin your journey of crafting sweet saffron rice by imparting a rich nuttiness to the dish. In a pan over medium heat, dry roast the almonds, pistachios, and raisins until the raisins puff and the nuts undergo a slight color change. This step not only intensifies the flavors of the nuts but also adds a delightful crunch and texture to your saffron sweet rice, elevating its overall appeal.
2. Indian Sweet Rice Recipe: Setting the Stage for Saffron Sweetness
In a saucepan, combine rice, water, a cinnamon stick, and a pinch of salt over medium-high heat. As the ingredients come to a gentle boil, prepare the canvas for the infusion of saffron’s golden hue and aromatic essence into your Indian sweet rice recipe.
3. Simmering Brilliance: Cooking the Rice to Perfection
Once the rice mixture reaches a boil, reduce the heat to low and cover the saucepan. Allow the rice to simmer for approximately 15 minutes or until the water has evaporated, ensuring each grain is cooked to perfection. This crucial step lays the foundation for the sumptuous texture and delightful flavor profile of your saffron rice Indian delicacy.
4. Saffron Infusion: Creating the Signature Sweetness
While the rice undergoes its transformation, prepare the decadent saffron-infused syrup in a separate saucepan. Combine milk, butter, sugar, saffron strands, cloves, and cardamom over medium heat, stirring until the sugar dissolves and the aromatic spices release their essence. This fragrant mixture sets the stage for the indulgent sweetness that defines your kesar rice experience.
5. Harmonious Fusion: Merging Nutty Goodness and Sweetness
Once the rice and saffron syrup are ready, it’s time to bring together the elements of your sweet saffron rice. Gently fold the roasted nuts mixture and the fragrant saffron syrup into the cooked rice, using a spoon to ensure even distribution without mashing the grains. This harmonious fusion of flavors and textures creates a symphony of taste in every bite of your Indian sweet rice recipe.
6. Final Simmer: Infusing Depth of Flavor
Cover the saucepan once more and allow the saffron sweet rice to simmer over very low heat for an additional 3 to 4 minutes. This final step ensures that the flavors meld together seamlessly, infusing every grain of rice with the richness of saffron and the nutty crunch of almonds and pistachios.
7. Culinary Crescendo: Serving Sweet Saffron Rice in All its Glory
Turn off the heat and let the sweet saffron rice rest, covered, for a few more minutes before serving. This brief interlude allows the flavors to further develop, culminating in a dish that’s not just a treat for the taste buds but a celebration of the vibrant culinary heritage of India. Enjoy your saffron rice Indian delicacy or kesar rice as a delightful dessert or a comforting indulgence any time of the day.
Many sweets are made using paneer, which is freshly made homemade Indian cheese. Paneer Pethe Ka Ladoo is delicious and easy to make. This recipe was suggested by my friend Usha, who lives in Jaipur. I must say I really enjoy paneer-based sweets, which include Rasgullas, Ras Malai, Sandesh and many more! I decided I would give a paneer-based dessert a try, Paneer Petha Ladoo. Paneer desserts are considered very classy and for a sophisticated palate. They also are typically very refreshing, delicious, and easy to make. Another reason I like to make paneer sweets is because it is very difficult to mess up the recipe! You can start with one recipe for a paneer dessert and then if it doesn't turn out right, it is very easy to fix and come up with a new recipe! Another favorite dessert of mine is Petha, which is a famous sweet from Agra (India). Petha is made from white pumpkin and sugar. These ingredients together are simply delicious. Enjoy!Recipe will make about 12 Ladoo.
Drin the whey from paneer well and knead the paneer until the paneer is almost rolls into smooth soft dough.
In a flat frying pan add paneer, petha and cardamom mix it. Turn the heat to low and cook the paneer mixture stirring and pressing continuously until paneer starts coming together as soft dough. This should take about 4-5 minutes.
Turn off the heat and keep mixing the paneer like you are making dough. This is most important step to this dish; you are just cooking paneer enough to take out the rawness. If you over cook the paneer it will become crumbly.
Turn off the heat and transfer the mixture to the plate, let the mix sit for about 5 minutes, then divide into 12 equal parts or make the size of ladoo you prefer. Roll them between you palm and shape them in round balls. Garnish with pistachios.
Notes
I am using homemade paneer, you can refer to my video how to make the paneer which I have done earlier. I am also using dry petha sweet which is available in Indian grocery store, you can also use canned Petha sweet. If you are using canned petha, drain the syrup, and lightly pat dry.
Kheer is a very traditional Indian dessert and is enjoyed by people of all ages. Kheer is made in many different ways using rice, different nuts, and vegetables but milk is the main ingredient to make kheer. I have been wanting to make rice kheer for my son who happens to be vegan and loves kheer. This is my version of vegan kheer: instead of milk, I used almond and coconut milk. After trying many different dairy free milk, this was the best combination I enjoyed. This recipe is also quick and easy to make and is delicious. You don’t have to be vegan to enjoy this kheer.This recipe will serve 4.
Use heavy bottom pan to make kheer. Put all the ingredients except saffron, in the pan, rice, coconut milk, almond milk, sugar, almonds, pistachios, raisins, and cardamom powder.
Mix it well and bring it to boil on medium high heat.
After the kheer is boiling, lower the heat to low-medium and let it cook for about 20 minutes. Do stir the kheer a few times in between to scrapes the sides of the pan.
I prefer the thicker consistency of kheer just like porridge consistency, but you can adjust the consistency of the kheer to your taste. Turn off the heat. The kheer is now ready,
Add a few strands of saffron on the top. You can serve this vegan rice kheer warm or chilled.
Notes
Please check out my other vegan dessert recipes namely:
Spicy Namak Para is a crispy and savory snack that's perfect for the holiday season. Not only is this a popular snack, but it is also easy to make. This particular recipe is a twist on traditional Namak Paras with added spices to make it even more flavorful. You can always experiment with different variations by adding your choice of flavors! Spicy Namak Para taste especially delicious with a hot cup of chai. They also make for a simple but special homemade gift. It's also an easy road trip snack when traveling with your family! Hope you enjoy this recipe! This recipe is good for 10 people.
In a bowl mix all the dry ingredients well, all-purpose flour, sooji, salt, black pepper, red pepper, cumin seeds, and methi. Next add the oil mix it well.
Add the chilled water slowly, mixing with your fingers as you pour. Do not knead the dough. The dough should be soft. Cover the dough and let it sit for at least fifteen minutes.
Knead the dough and divide into two equal parts. Take each part of the dough and make a flat ball shape. Roll them into about 10-inch circles, it should not be very thin.
Prick them with a fork all over the rolled dough, on both sides. This helps paras not to puff while frying.
Cut each of the rolled dough into about 1/2-inch-wide and 3-inch-long pieces. Note: you can cut them in your desire shape.
Heat the oil in a frying pan on medium heat.
The frying pan should have at least 1-1/2 inch of oil. To check if the oil is ready, put a small piece of dough in the oil. The dough should make the oil sizzle and come up slowly.
Make sure to place just enough paras so you can turn them over easily when frying. Fry the paras until both sides are light golden brown. This should take about 8 minutes.
After Spicy Namak Paras come to room temperature they should become crisp.
Notes
Experimenting and making the recipes to your taste is the best part of cooking.Try different variations by adding your choice of flavors.
Instant Badam Burfi, or Almond Candy is a quick and easy recipe that will satisfy the entire family! The best part of this recipe is that involves absolutely no cooking. This is the time of the year when we are all busy celebrating the holidays. Of course, this year will look a little different, but we can always make the best of this situation.Since we are all busy with work and family responsibilities, I wanted to make a quick and easy dessert that is both delicious and sweet. Badam Burfi is just that. All you need is less than 10 minutes to make this delicious Burfi. After trying this recipe a few times, I was surprisingly satisfied with the way it turned out! I wish I had thought of this recipe before. During the holidays, homemade sweets make the best holiday gift for family and friends. The main ingredients are almond flour and condensed milk. Enjoy!
In a bowl mix almond flour pistachios and cardamom powder. Add condensed milk mix it with a spoon then lightly oil your finger and make it smooth like dough.
I am using Ziplock to roll the Burfi. Cut the Ziplock bag in two, put the almond dough in the center of one piece and cover it with another piece.
With your palm press it to make a Pattie then roll it into quarter-inch thick. Note: try to keep in rectangle shape because we are going to cut them in the square.
Remove the top wrap and spread evenly sugar and cover it again and lightly roll t again. Note: this will make sugar stick to burfi.
Cut them into your preferred size. Wait for about fifteen minutes and then remove it. Almond burfi is ready.
Notes
Adding grainy sugar gives nice texture to burfi and add little needed sweetness.
Gulab Jamun is one of the most well-liked and popular desserts in India. Gulab Jamun has a special place in my heart as it was my very first video showcased on my YouTube channel. I never thought I would be able to parlay my passion into doing something like "Manjula's Kitchen". Gulab Jamun also happens to be a family favorite so it is always a go-to dessert I prepare. My daughter-in-law, who also loves Gulab Jamun, wanted me to try out a variation of the traditional recipe. She saw a recipe online for a Gulab Jamun cake and asked me to try making my version of this recipe. She suggested that I bake the Gulab Jamun instead of frying them, but to also try and preserve the original taste. I decided to stick with all the original ingredients for this recipe. However, I did have to experiment with the measurements of the ingredients to maintain the cake texture. Because of the delicious cardamom flavor, another name for this recipe can be "Cardamom Cake". After experimenting with this recipe for some time, I was finally satisfied with the results. I serve the Gulab Jamun cake, adding a layer of chocolate ganache and sliced nuts. You can really experiment with this recipe and make it into a version you love. The cake tastes best if you let it sit for a few hours after baking as the texture improves the longer it sits. It also has a long shelf life when kept at room temperature for several days. Enjoy this variation on a classic dessert! This recipe will serve 8.
To make Gulab Jamun Cake first mix all the dry ingredients together in a bowl. Milk powder, all-purpose flour, baking soda, baking powder, sugar and cardamom powder. Mix it well
In another bowl take butter, butter should be at room temperature not melted, whip the butter until it is fluffy. About 1 minute.
Now add the dry ingredients with butter and mix it well.
Slowly add the milk, milk should be at room temperature, mix it for about 2 minutes, batter consistency should be like cake mx.
Grease the loaf pan. Pour the Gulab Jamun batter in the pan.
Pre heated the oven at 300-degree Fahrenheit. Bake the cake for about 25-30 minutes,
Cake should be light brown the Gulab Jamun color, from the top and when you insert the knife in the center of cake should pulls out clean.
Keep the cake aside and now make the syrup add all the ingredients for syrup, sugar, water, lemon juice, cardamom, and saffron, in a saucepan. Bring it to a boil over medium-high heat. After syrup comes to boil lower the heat to medium and let it simmer for 2 about minutes.
Remove the pot from the heat.
Before poring the syrup over the cake, Poke holes in the cake with a fork, several places. Pour the syrup over the cake while it is still warm in the pan. Save about 1/2 cup of syrup. It will look like a lot of syrup, but the cake will soak it all up. Let the cake rest for 10 minutes, then invert it onto a plate.
You can garnish the Gulab Jamun Cake in a variety of different ways. I am garnishing with chocolate ganache I have done the chocolate Ganache recipe see the recipe for chocolate cake and sliced pistachios. This recipe has wonderful flavor and appeals to all ages.
Notes
It also has a long shelf life and can be kept at room temperature for several days. Butter and milk should be at room temperature.Extra syrup you can use if you like to serve the cake as Gulab Jamun with the syrup.
Keyword bake gulab jamun, Balushahi, cake, cardamom, cardamom cake, Cooking Video, Delicacy, delicious, Dessert, diwali, Eggless, eggless cake, holi, Home Cooking, Homemade, indian donut, indian sweet, jalebi, Mithai, no frying, popular sweet, Quick And Easy, royal taste of india, saffron, Sweet, valentine
Delicious Pineapple Sheera or Halwa. This delicious combination of flavors is sure to please. Sweet and sour pineapple sheera really compliments Sooji halwa nicely to make a unique dish! Especially on holiday times I enjoy making one dessert which I can serve many ways. Sooji sheera and pineapple sheera I will serve combining both and top with ice cream, drizzle with chocolate ganache, forming them small bite size cake. You can also serve them individually with some garnishing. any way you decide to serve this will have wow factor with adults and kids. I will like you to share with some other serving ideas.
Drain the water from pineapple and set aside, don’t discard the water, will be used later.
Melt the ghee in a frying pan on medium heat. Add sooji and roast stirring constantly this will take about 2-3 minutes. Sooji will have a light sweet aroma, do not brown the sooji. Add the pineapple, mix it well stir for 2-3 more minutes.
Add sugar mix well, add pineapple syrup and water mix it well. cook till the water evaporated. Sheera should be the consistency of soft sticky dough. After it will cool off sheera will become little more dry.
Making Sooji ka Sheera
Melt the ghee in a frying pan on medium heat. Add sooji and roast to brown color; stirring constantly this will take about 5 to 8 minutes. After sooji is roasted half the way add almonds and roast with sooji. Sooji should be brown in color and will have a light sweet aroma.
Add the sugar, mix add the water slowly to sooji as water will splatter. Add cardamom, turn down the heat to medium low and let it cook for about 2-3 minutes. Sheera should be the consistency of thick batter. Note: as sheera will cool it will be thicker in consistency.
Notes
Serving: In an individual serving bowl serve both sheera side by side and garnish with pistachios. Make them in cupcake shape use about 3 oz cups or use the size you prefer. Fill the cups half the way with pineapple sheera and level it, then fill the cup with sooji sheera and let it sit for about 10 minutes. Over the plate take them out upside down, now you have pineapple sheere on the top, or you may keep sooji sheera on the top, garnish with pistachios. I call them Sheera Cake Bites. You also enjoy Paneer Malai Ladoo, Moong Dal Ladoos, Apple vegan cake, Gujia
Khasta Mathri is a popular, classic savory snack. You can serve these Mathries with pickle at tea time or you can enjoy as is! For all the upcoming holidays, Mathries make a good snack to have around to serve to all guests. They also make for a simple but special homemade gift.
Mix the flour, sooji, salt, black pepper, cumin seeds, lemon drops and oil. Note lemon should be just 2-3 drops, we are not adding this to flavor, lemon is added to give the crispness, also Mathries will absorbed less oil.
Add the chilled water slowly, mixing with your fingers as you pour. Do not knead the dough. The dough should be soft.
Cover the dough and let it sit for at least fifteen minutes. Divide the dough into about 20 equal parts, I decided to make 14.
Take each part of the dough and make a flat ball shape. Roll them into 2-inch circles. Prick each mathri with a fork about 6-8 places, both sides each, to prevent puffing the mathri when frying.
Heat the oil in a frying pan on low medium heat. The frying pan should have at least 1 inch of oil. To check if the oil is ready, put a small piece of dough in the oil. The dough should make the oil sizzle and come up slowly.
Fry mathri in batches, making sure to place just enough mathri to cover the frying oil. Fry them until both sides are a light golden-brown. This should take about 5-7 minutes. Take them out over paper towel, which will absorb the extra oil
Notes
SuggestionsServe the Khasta Mathri with cranberry pickle, or Chatpata AlooKhasta Mathris can be stored for a couple of months in airtight containers.If the mathris are cooked on high heat, they will be soft.
Khasta Mathri is a popular Indian savory snack enjoyed across India, particularly during festivals, tea-time, or as a crunchy accompaniment to meals.
These golden-brown, flaky crackers are known for their irresistible crispiness and rich flavour, making them a favorite among snack lovers of all ages.
Made from a simple dough of all-purpose flour, ghee (clarified butter), and spices, Khasta Mathri is deep-fried to perfection, resulting in a crunchy texture and aromatic taste.
Khasta Mathri for Festive Season
Crunchy Texture: Khasta Mathri’s signature feature is the crunchy and flaky texture, which provides a delightful snacking experience with every bite. The layers of dough create a light and airy interior, while the deep-frying process gives the crackers a golden-brown exterior that’s irresistibly crispy.
Rich Flavor: Despite its simple ingredients, Khasta Mathri is packed with flavor, thanks to the addition of aromatic spices such as ajwain (carom seeds), black pepper, and cumin seeds. These spices lend a warm and fragrant aroma to the crackers, enhancing their overall taste and appeal.
Long Shelf Life: Khasta Mathri has a long shelf life and can be stored in an airtight container for several weeks without losing its crispiness or flavor. This makes Khasta Mathri an ideal snack for travel, picnics, and gatherings, as it can be prepared in advance and enjoyed on-the-go.
Versatile Snack: Khasta Mathri is a versatile snack that can be enjoyed on its own or paired with various accompaniments. Serve Khasta Mathri with a cup of hot tea or chai for a classic tea-time snack, or pair it with chutney, pickle, or yogurt for added flavor and contrast.
Other Variations of Mathri:
Namkeen Mathri: Mathri (Salted Crackers) are similar to salted crisp crackers and are a very popular afternoon snack. Traditionally, mathris are served with spicy pickles.
Aachari Mathri: Achari Mathries, is a traditional staple snack in North India. They are usually served with spicy pickles, but in this recipe we have added mango pickle spices in the dough instead to add a tangy flavor to the mathri itself.
Masala Mathri: Enhance the flavor of Mathri by adding a blend of spices and herbs such as garam masala, turmeric, and coriander powder to the dough. Masala Mathri has a complex and aromatic taste that’s sure to impress your taste buds.
Tips for Making Perfect Khasta Mathri:
Rest the Dough: Allow the Khasta Mathri dough to rest for at least 15 minutes before rolling and shaping to relax the gluten and improve the texture of the crackers. Resting the dough allows the flavors to meld together, resulting in a more flavorful Khasta Mathri.
Roll Evenly: Roll out the Khasta Mathri dough into thin, even discs to ensure uniform cooking and crispiness. Use a rolling pin and a dusting of flour to prevent sticking and achieve the desired thickness.
Fry at the Right Temperature: Fry the Khasta Mathri in hot oil at the correct temperature to ensure that they cook evenly and become golden brown and crispy. Avoid overcrowding the frying pan or kadai to maintain the temperature of the oil.
FAQs about Khasta Mathri:
How do I store Khasta Mathri?
Store Khasta Mathri in an airtight container at room temperature for up to 2-3 weeks. Line the container with parchment paper or tissue paper to absorb any excess moisture and maintain the crispiness of the crackers.
Can I freeze Khasta Mathri dough?
Yes, you can freeze Khasta Mathri dough for future use. Shape the dough into a ball, wrap it tightly in plastic wrap or aluminium foil, and store it in an airtight container or freezer bag. Thaw the dough in the refrigerator overnight before rolling and shaping.
What can I serve with Khasta Mathri?
Khasta Mathri pairs well with a variety of accompaniments such as chutney, pickle, yogurt, or tea. Serve Khasta Mathri alongside your favorite dipping sauces or enjoy them on their own as a crunchy and flavorful snack.
Khasta Mathri is a delicious and versatile snack that’s perfect for any occasion. Whether enjoyed as a tea-time treat, party snack, or crunchy accompaniment to meals, Khasta Mathri offers a delightful combination of crispy texture and bold flavors. With its customizable variations, long shelf life, and simple preparation, Khasta Mathri is sure to become a favorite in your snack preparation.
Seviyan in English known as Vermicelli they are like thin spaghetti and used many different ways, making sweet and savory snack. Meethi Seviyan is a delicious and quickdessert. This is made for many festive occasions, also can be served for breakfast.
Melt the butter in a heavy bottom pan over medium heat. Add vermicelli and stir fry until golden brown this should take about 3-4 minutes.
Add water and salt. Increase the heat to medium high and bring it to boil. After watering is boiling reduce the heat to low medium and cover the pan
Cook till vermicelli’s are soft and the water is absorbed but not dry. If vermicelli gets dry it will become hard after adding sugar, add 1-2 spoons of water before adding the sugar.
Add sugar, raisins, cardamoms, crushed saffron, almonds and pistachios (save some almonds and pistachios for garnishing). Mix it well and cook for 3-4 minutes over medium heat. Turn off the heat, cover the pan and let it sit for at least 10 minutes before serving.
Serve Meethi Seviyan warm, garnish with pistachios and almonds.
Meethi Seviyan Recipe: Meethi Seviyan without milk
Meethi Seviyan, also known as Sweet Vermicelli, is a traditional Indian dessert that’s enjoyed across the country, especially during festive occasions and celebrations such as Navratri, Yugadi and Makar Sankranti. This sweet and aromatic dish is made from roasted vermicelli cooked in ghee (clarified butter) and flavored with sugar, cardamom, and dry fruits.
Why Meethi Seviyan is such a popular dish
Quick and Easy to Prepare:
Meethi Seviyan is a quick and easy dessert to prepare, making it perfect for busy days or last-minute sweet cravings. With just a few simple ingredients and minimal preparation time, you can whip up a delicious batch of Meethi Seviyan in no time.
Versatile Dessert Option:
Meethi Seviyan can be served as a dessert or as a sweet snack at any time of the day. Whether enjoyed warm or at room temperature, Meethi Seviyan is a versatile dessert option that’s suitable for any occasion or celebration.
Customizable Ingredients:
You can easily customise Meethi Seviyan to suit your taste preferences and dietary restrictions. Add your favorite dry fruits such as almonds, cashews, or raisins, or experiment with different flavors and spices to create your unique variation of this classic dessert.
Other Variations of Indian Desserts:
Malpua: Malpua, or sometimes shortened to pua, is a sweetened breakfast served with morning tea or as a snack with afternoon tea or as a dessert.
Kesar Peda: Kesar Peda is a classic sweet made for festive occasions. They are delicious and made with very few ingredients, milk and sugar, flavored with cardamom and saffron. It is an easy recipe to make.
Falooda: Falooda is best described as a dessert beverage which is really corn vermicelli. This is a delicious combination of layered Falooda with milk, sweet basil and vanilla ice-cream.
Seviyan Kheer: Seviyan is a delicious and an easy recipe to make. Basic seviyan is made with milk, seviyan and sugar, and then flavored with cardamom.
Tips for Making Perfect Meethi Seviyan (Sweet Vermicelli):
Roast the Vermicelli Well: Roast the vermicelli in ghee until it turns golden brown and fragrant. Properly roasting the vermicelli adds depth of flavor and ensures that it cooks evenly and absorbs the sugar syrup well.
Use Saffron and Cardamom: Use saffron and cardamom generously to flavor the Meethi Seviyan. Saffron adds a rich golden color and a subtle floral aroma, while cardamom adds a warm and aromatic flavor that compliments the sweetness of the dessert.
Soak the Dry Fruits: Soak the dry fruits such as almonds, cashews, and raisins in warm water for 15-20 minutes before adding them to the Meethi Seviyan. This helps to soften the dry fruits and enhances their texture and flavor in the dessert.
Adjust Sweetness: Taste the Meethi Seviyan before serving and adjust the sweetness level according to your taste preferences. Add more sugar or condensed milk if you prefer a sweeter dessert, or reduce the amount of sugar for a less sweet option.
FAQs about Meethi Seviyan (Sweet Vermicelli):
Can I make Meethi Seviyan ahead of time?
Yes, Meethi Seviyan can be made ahead of time and stored in the refrigerator for up to 2-3 days. Reheat the Meethi Seviyan gently on the stovetop or in the microwave before serving, adding a splash of milk if needed to restore the moisture.
Can I freeze Meethi Seviyan?
No, it is recommended that Meethi Seviyan is made fresh and enjoyed in its freshness or else when frozen it loses its texture, flavour and quality.
Is Meethi Seviyan vegan-friendly?
Traditional Meethi Seviyan is made with ghee (clarified butter), which is not vegan. However, you can make a vegan version of Meethi Seviyan by using plant-based ghee or oil instead of dairy ghee.
Can I use whole wheat vermicelli for Meethi Seviyan?
Yes, you can use whole wheat vermicelli for Meethi Seviyan for a healthier option. Whole wheat vermicelli provides additional fibre and nutrients compared to regular vermicelli and adds a nutty flavor to the dessert.
Meethi Seviyan is a delicious Indian dessert that’s perfect for celebrating special occasions or satisfying your sweet cravings. Meethi Seviyan is sure to become a favorite dessert in your household.
Sweet Paratha is whole wheat flat bread. This Paratha is filled with a delicious combination of nuts, cinnamon and sugar. It makes a great and easy breakfast or a snack with cup of tea or coffee!
Approx. 1-1/2tablespoons oil for cooking the Paratha
Instructions
In a bowl mix the flour, salt, and oil. Add about 1/3 cup of water to make dough add remaining water as needed to make smooth and pliable dough. Knead the dough on a lightly greased surface. Cover the dough and keep it aside for at least 15 minutes.
For the filling mix the almonds, walnuts coconut, cinnamon, and sugar, set aside.
Knead the dough again and divide into 4 equal parts.
Roll the dough into 3-inch diameter circles. Place about 3 tablespoons filling mix in the center. Seal by pulling the edges of the rolled dough together to make a ball. Proceed to make all four balls.
Let them settle for 3 to 4 minutes before rolling.
Heat the skillet on medium high. Note: An iron skillet works best. To check if the skillet is hot enough, sprinkle a couple of drops of water on it. When the water sizzles right away, the skillet is ready.
First lightly roll the filled ball in dry whole-wheat flour.
Lightly press the ball on the sealed side and keep it on the topside when rolling. Roll the ball lightly into about 7-inch circles. Whenever the dough sticks to the rolling pin or rolling surface, lightly sprinkle dry whole-wheat flour on both sides of the semi-rolled Paratha.
Place the Paratha over the skillet. After a few seconds you will see the Paratha change color and puff in different places.
10. At this point flip the Paratha over. You should see some golden-brown spots on the topside. After a few seconds, spread about 1 teaspoon of oil on the Paratha. Again, flip the Paratha and lightly press the puffed areas with a spatula.
Flip again and press with the spatula making sure the Paratha is golden-brown on both sides.
Sweet Paratha can be served hot or at room temperature. Paratha can be kept at room temperature for about week.
Sweet Paratha is a delightful and indulgent Indian dessert that combines the savoury goodness of paratha with the sweetness of sugar, jaggery, or other sweet fillings.
This versatile dish can be enjoyed as a treat on its own or paired with a dollop of yogurt, a drizzle of honey, or a sprinkle of powdered sugar.
Sweet Paratha is loved for its crispy exterior, soft interior, and irresistible sweetness, making it a favorite among both children and adults.
Benefits of Sweet Paratha:
Energy Boost: Sweet Paratha is a rich source of carbohydrates, which provide a quick and sustained source of energy. Whether enjoyed as a breakfast dish or a midday snack, Sweet Paratha can help fuel your body and keep you feeling energized throughout the day.
Comfort Food: The warm and comforting flavors of Sweet Paratha make it the perfect indulgence for chilly mornings or cozy evenings. The combination of sweet fillings and savory dough creates a satisfying and heartwarming dish that’s sure to lift your spirits and tantalize your taste buds.
Customizable: Sweet Paratha is incredibly versatile and can be customized to suit individual taste preferences. From traditional fillings like sugar and jaggery to more exotic options like chocolate, fruit compote, or nut butter, the possibilities for creating unique and delicious Sweet Paratha variations are endless.
Variations of Paratha:
Paneer Paratha: Paneer Paratha is whole-wheat flat bread filled with mildly spiced paneer Indian Cheese). This is a good breakfast option. Paneer paratha can be served by itself or enjoyed with any gravy-based dish.
Pizza Paratha : Pizza has become a universal food enjoyed by all. Pizza paratha is perfect for the times when you want to enjoy homemade pizza.
Masala Paratha: This paratha is a combination of whole wheat flour and besan with a mix of delicious spices. Masala Paratha is a great breakfast treat and also a great lunch box option.
Matar Ka Paratha: Matar Ka Paratha is stuffed paratha with spicy green peas and is a delicacy. Matar Ka Paratha can be part of any main meal, making it a special treat.
Tips for Making Perfect Sweet Paratha:
Knead the Dough Well: Properly kneaded dough is the key to soft and pliable parathas. Ensure that the dough is smooth, elastic, and free of lumps to achieve the perfect texture in your Sweet Paratha.
Roll Out Evenly: Roll out the dough into thin, even circles to ensure that the Sweet Parathas cook evenly and develop a crispy exterior. Use a rolling pin and a dusting of flour to prevent sticking and achieve uniform thickness.
Seal the Edges: Seal the edges of the rolled-out dough tightly to prevent the filling from spilling out during cooking. Press the edges firmly together and pinch them closed to create a secure seal.
FAQs about Sweet Paratha:
Can I make Sweet Paratha ahead of time?
Yes, you can prepare the dough and filling for Sweet Paratha in advance and store them separately in the refrigerator. When ready to cook, simply assemble the parathas and cook them fresh for the best taste and texture.
Is Sweet Paratha suitable for vegetarians?
Yes, Sweet Paratha is vegetarian-friendly as it does not contain any meat, poultry, or fish. However, be mindful of the ingredients used in the filling, especially if using commercial products like chocolate spread that may contain animal-derived ingredients.
Can I make Sweet Paratha without sugar?
Yes, you can adjust the sweetness of Sweet Paratha according to your taste preferences or dietary restrictions. Substitute sugar with natural sweeteners like honey, maple syrup, or date syrup, or omit the sweet filling altogether for a less sweet version of the dish.
Sweet Paratha is a delectable and versatile dessert that offers a perfect balance of sweetness and indulgence. Whether enjoyed on its own or paired with your favorite accompaniments, Sweet Paratha is sure to delight your taste buds and satisfy your cravings for something sweet.
With its simple preparation, customizable fillings, and irresistible flavor, Sweet Paratha is a must-try dish for anyone looking to explore the rich and diverse world of Indian cuisine.
Gulab Jamun is a delicious Indian version of donuts immersed in warm sweet syrup. As India’s most popular dessert, gulab jamun is a staple in most parts of the country. Gulab jamuns are served for almost every celeberations. Gulab jamuns can be served warm or at room temperature. Gulab jamun is one of the desserts I make the more often, because this is an easy recipe to make and in my family everyone like them especially my grandkids.
In a large pan, combine the water, sugar, and ground cardamom seeds and bring to a boil. Let the syrup boil for another minute to completely dissolve the sugar. Turn off the heat.
Set the syrup aside.
Gulab Jamun
In a bowl, mix the milk powder, flour and baking soda.
Add the butter and mix well.
Add milk to make soft dough. The dough will be sticky. The milk powder will absorb the extra milk.
If the dough is dry, add more milk to make it soft. Let the dough sit for a few minutes.
Grease your palms with butter and knead the dough.
Divide the dough into about ten equal parts and roll them into round balls.
Heat at least one inch of oil in a frying pan over medium heat. To test, place a small piece of dough into the oil; the oil should sizzle and the dough should take a minute to rise. If the dough rises faster, the oil is too hot; if oil does not sizzle, it is not hot enough.
Place the gulab jamuns in the frying pan. Do not crowd them, as the gulab jamuns will expand to about double their original volume.
Fry the gulab jamuns on medium heat for about seven minutes, rolling them around for even browning until dark brown.
Let the gulab jamuns cool a few minutes before placing into the hot (not boiling) syrup.
Let the gulab jamuns sit in the syrup for at least 20 minutes prior to serving.
Notes
Gulab jamuns can be kept at room temperature for about a week and up to one month when refrigerated. They can be frozen for months.TipsIf the gulab jamuns are fried on high heat, they will be hard inside and not fully cooked.Too much baking soda will make the gulab jamuns too soft or cause them to break when frying.Don’t place the gulab jamuns in the syrup immediately after frying, or they will lose their shape and be chewy.Serving suggestionsGulab jamuns can be served warm or at room temperature. They can also be served with ice cream.You may also like Balushai and Jalebi
Palak Paneer is likely the most popular paneer dish from North India. Creamy spinach with tasty paneer makes a delicious main dish. This recipe was one of my favorite. After so many years of cooking, my family has decided my cooking skills have improved! I wanted to do this recipe again as with modified cooking method. Also I will like to thank you to all of my viewers who have encouraged me over the years. You guys truly inspire me!
10ozspinachwashed and clean, about 6 cups packed spinach
1-1/2cupspaneercubed into bite size, about 1/3 pound of paneer
1tomatofinely chopped, this will make 3/4 of chopped tomato
1green chilichopped
1Tbspgingerchopped
1Tbspoil
1/2tspcumin seedsjeera
1/8tspasafetidahing
1tspcoriander powderdhania
1/4tspturmerichaldi
1/2tspred chili powder
1/2tspsaltadjust to taste
1/2tspsugar
1Tbspwhole wheat flour
1/3cupheavy cream
Instructions
First blanch the spinach, this helps to keep the spinach color bright. To blanch the spinach, boil about 6 cups of water in a saucepan, and let the spinach boil for one minutes. Drain the water and put the spinach in ice cold water for about two minutes. Drain the water.
Blend the spinach, ginger and green chili. Spinach should be creamy but not pasty.
Soak the cubed paneer in about three cups of hot water, for about 5 minutes or more. This helps to give the paneer soft texture. Set aside.
While cooking, spinach can splatter, use larger sauce pan. Heat the oil in a sauce pan, over medium high heat. Test the heat by adding one cumin seed to the oil; if it cracks right away it is ready.
Add cumin seed, and asafetida. After cumin seeds crack, add the tomatoes and stir fry for 1-2 minutes. Tomatoes should be tender not mushy. Add coriander, turmeric, red chili powder, salt, and sugar, stir and add the spinach.
After spinach comes to boil lower the heat to low, and let the spinach cook for about 5-6 minutes do not cover the pot. This helps keeping the green color of spinach.
Mix the flour to 1/2 cup of water and add to the spinach, also add the cream. Mix it well and let it cook for five minutes. If needed add little more water.
Drain the paneer and fold it gently with spinach and let it simmer for about five minutes.